Preparatory stage
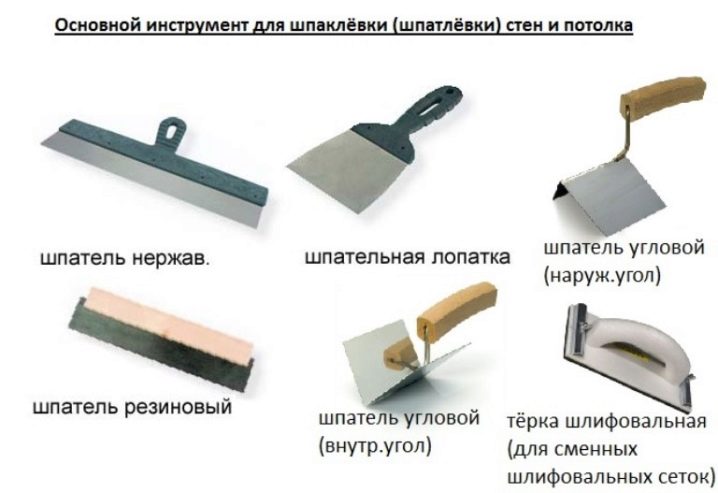
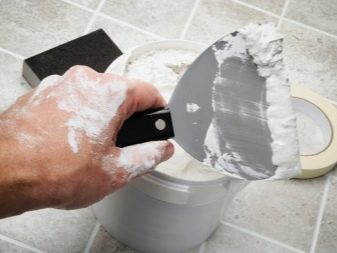
Tools required for putty
Tools and materials
In the process of puttying you will need:
- dry putty mixture;
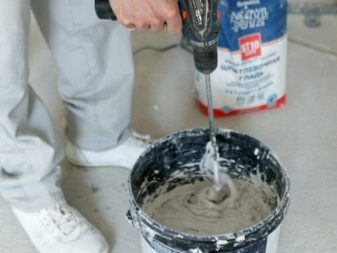
- mixing container;
- construction mixer;
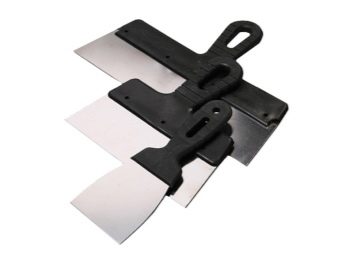
- metal spatulas;
- roller or brush for priming;
- sandpaper;
- deep penetration primer.
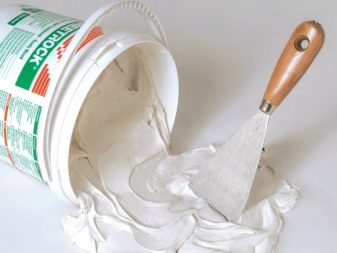
Putty
There are enough spatulas and two - wide (400-500 mm) and narrow (70-100 mm), but it is good if there is an additional corner, which is convenient to putty the seams between the ceiling and walls. It is recommended to buy a dry mixture with a small margin in order to correct possible defects if necessary.
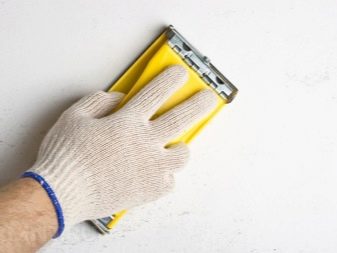
Ceiling preparation
Cleaning the ceiling with a sander
Putty must be applied to a dry and cleaned surface, and therefore everything is removed from the ceiling to the very base. You can remove wallpaper and old layers of plaster with water: the ceiling is abundantly moistened and left for 10-15 minutes. After that, pry the edge of the coating with a spatula and remove it without much effort. The paint is more difficult to remove; this requires a punch. If the ceiling has been painted recently, and the paint is very strong, you can leave this layer on, but simply sand the visible irregularities with sandpaper.
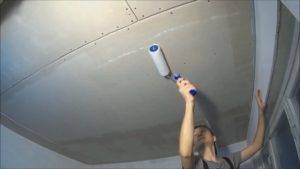
Ceiling primer
After removing the coating, the ceiling must be wiped with a clean rag, and then primed well, paying the greatest attention to the corners and joints. The primer will not only prevent the development of mold, but also increase the adhesion of the putty layer to the base
If there are through cracks or cracks in the ceilings, as well as deep recesses, they must be sealed with mortar before processing the ceiling with a primer.
Sealing ceiling joints before puttingty Using a spatula, the mesh must be smoothed along the seam, pressing slightly so that the putty passes through the holes
This is interesting: Glass wallpaper on the ceiling - how to glue for painting, video and photo examples
Ceiling plaster technology
You can check the required degree of density of the mixture as follows: take a little mixture on the spatula and turn it over. If the mixture is too thin, it will quickly drain off the spatula, and if it is too thick, it will simply remain on the inverted spatula.
If the resulting solution smoothly slides down from the spatula, it means that we have achieved the correct consistency, you can proceed to the putty.
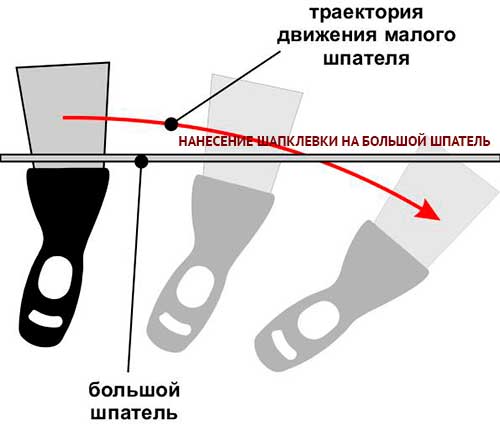
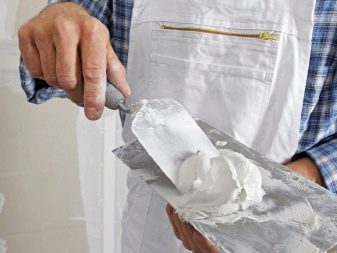
- We collect our mixture with a small spatula and put it on a large spatula.
- Next, we put a large spatula to the joint of the surface at a slight angle and slide it along the ceiling with a sliding motion until all the mixture from the spatula is on the ceiling. The thickness of the layer for the starting putty should not exceed 4 mm, for the finishing putty - 2 mm.
- We repeat the previous steps again: we collect the putty and smear it on the ceiling. Make sure that all layers are applied equally, and there are no streaks from the trowel. They must be wiped off immediately so that the ceiling covering is solid.
Tips for plastering the ceiling
Work should start from the corner of the room or from the wall, not from the middle. If you are trying to putty the ceiling on your own for the first time, then the initial section of a couple of meters will become a training section for you. Then you "fill" your hand, and the work will go faster.
When filling, you will need to use a stepladder to reach up to the ceiling. But a table will do too. For a beginner, the table is even more convenient: you can walk on it and place the materials at hand (mixture, spatulas) in the same place.
After you have applied the mixture to the entire surface of the ceiling, it is left to dry. The manufacturer also writes on the packaging the drying time of the mixtures, usually about 24 hours.
After the mixture has dried, the surface is checked for irregularities and "blemishes" using a portable lamp. We just send extra light onto the surface and see how it works. If everything suits us, we proceed to sanding. If not, smooth the surface with the mixture again.
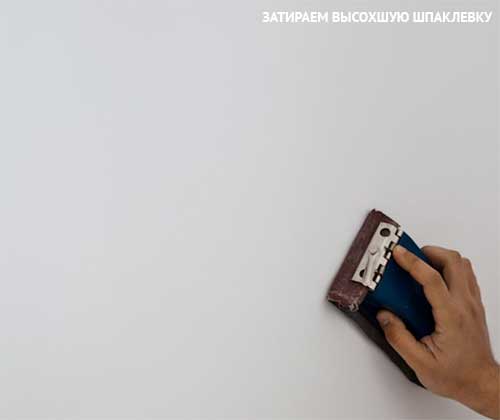
How to sand the ceiling after putty
The ceiling must be sanded after the putty. Even if you have plasterboard ceilings. Or if the work was done by a professional, the ceiling will not look solid and smooth without sanding.
Sanding the starting layer of the putty is carried out using a special device in the form of a trowel and sandpaper. Sanding is carried out in smooth circular movements, without strong pressure, so as not to leave unnecessary chips and stripes. Do not forget to protect your hair with a scarf or cap, your eyes with goggles, and your respiratory tract with a respirator (a pharmacy mask is also suitable).
Now you can start applying the finishing layer of putty to the ceiling.
How to apply ceiling finishing coat
- To do this, you first need to prime the sanded layer of the starter putty again.
- Next, we dilute our finishing mixture (according to the instructions on the package).
- The technique of applying the finishing putty to the ceiling is the same as when applying the starting one. The whole procedure is repeated: we apply the mixture to the ceiling, wait for it to dry, check it with a lamp.
If everything is ok, we grind the ceiling, and you can proceed with the final finishing or painting.
Putty for metal for outdoor use
Metal products are often used outdoors, external use regularly leads to the appearance of flaws, cracks, dents on the surface. Puttying a metal surface makes it possible to remove all existing dents. If the process is carried out correctly, then an updated product is obtained without irregularities. After the material has dried, the surface is painted, or varnish is applied.
 Puttying a metal surface makes it possible to remove all existing dents.
What are its features
You can get an acceptable result only by using a high-quality putty for metal. There are a number of characteristics that a product like this should distinguish. These include:
- Fast drying property;
- Possessing high rates of adhesion to metal material;
- High degree of elasticity, which remains even after the completion of the curing process;
- Lay down evenly on the surface;
- The minimum level of shrinkage;
- Convenience and ease of application;
- Since metal putty is often used for painting, it is necessary that it be combined with the paint.
 Since metal putty is often used for painting, it is necessary that it be combined with the paint.
Why putty metal
Before deciding what to putty the metal, you need to figure out why you should do this. There may be several reasons for using putty:
- When car parts have been scratched, broken, beaten, in order to return their functionality and extend their service life, they are treated with a putty;
- In order to protect metal surfaces from rust formation. The putty layer provides excellent protection against the harmful effects of water;
- To create a stronger and thicker layer of metal, putty mixtures can strengthen the surface and make it more reliable.
 When the car parts are scratched, broken, beaten, in order to return their functionality and extend their service life, they are treated with a putty.
We proceed to puttying the walls
In the process of leveling the walls, the resulting working composition should in no case be corrected by adding water or adding dry material. Therefore, it is better if you pour a little more water while kneading - the lack of moisture worsens the strength of the finished layer.The putty is kneaded in small portions, the volume of which depends on the speed of drying of the composition (carefully read the instructions on the package).
Step 1: With a medium spatula, putty is applied to the blade of a large one, a roller is formed along the edge - a "bed".
The assembled putty must be applied to the wall with one stroke.
Then the relief is leveled - it is important to remove the bumps and level the depressions. This work is carried out with a wide or medium spatula (depending on the size of the cavities) in cross movements
The trowel blade should be held at a comfortable angle to the wall in order to form the filler layer flush with it, without scoring. It is important to work with quick strokes so that the putty disperses properly.
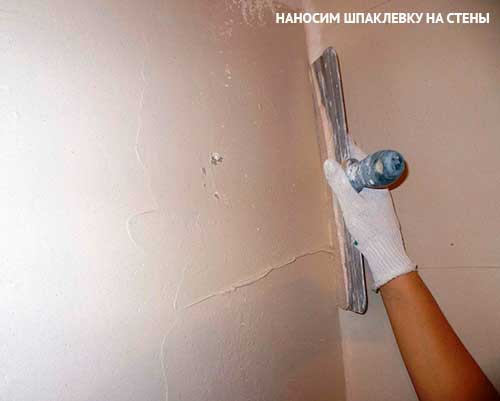
The corners are putty last: the easiest way to do this work is with special corner spatulas.

Step 2: The next step is drying. Here, you need to avoid drafts, direct sunlight, warm air currents from heating devices - rapid evaporation of moisture can lead to cracks and peeling of the putty layer. Only the inner door can be opened for ventilation. Drying time of the putty is from 10 to 16 hours, but it is recommended to start sanding after a day.

Step 3: Grind the wall surface with a grater with a P80 - P100 mesh, in a circular motion. After sanding, using a rule and a beam of light from a flashlight, check the evenness of the wall - clean the bulges with a float, cover the holes with putty. Check again after re-drying. Depending on the skills of the master, 2 to 5 approaches are required to bring the wall to zero.
Step 4: After final drying, a thin layer of special durable finishing plaster is applied to the wall, which is being prepared for painting. A perfectly flat wall is well dried, then sanded with a float with P150 abrasive - in circular motions and whipping around - to remove circular marks. Then the plane is checked again and, if necessary, corrected.
Attention: under the glossy enamel, it is recommended to additionally polish the surface with a grinding trowel with a suede cover (always new!). Video:
Video:
Features of grinding
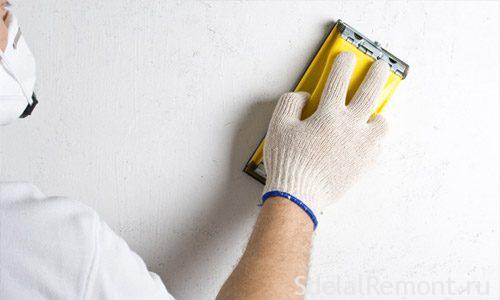
The main rule of sanding is to work with a perfectly dry surface before priming it. The secret is using a wide trowel when applying putty and using light when sanding. Details about the method of grinding the walls.
First of all, you need to decide what is the best way to sand the walls after putty - the choice of tool will depend on the type of material (starting or finishing), as well as the type of surface. Based on the area of the wall, one of the following tools is selected:
- a wooden block with sandpaper - for small areas that are easy to handle by hand;
- electric sander - for large surfaces, while it should be borne in mind that the joints of the walls in any case will have to be processed by hand;
- if there are protrusions, bas-reliefs and other areas with complex geometry on the wall, a machine with an eccentric will do.
Purchased tools
If the wooden block seems too uncomfortable, for manual work, you can use a special device with a handle and clamps, which allows you to quickly change worn out sandpaper. An abrasive mesh can be used instead of paper.
The mesh is preferable due to the fact that, unlike paper, it is not clogged with dust and wears out more slowly; however, it is more expensive. The difference in price is offset by the amount of paper required - in order to get perfect walls for painting, many sheets are needed. To save money, you should not buy cut paper - it is not difficult to cut it yourself, and at the same time sharpen the scissors.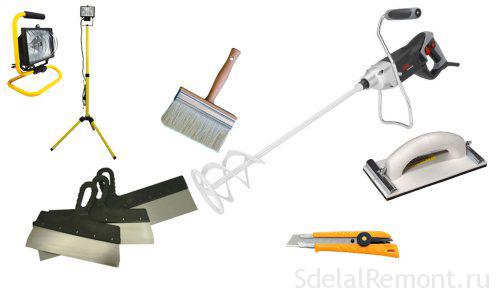
The grain size of the sanding stone depends on the type of finish: for a starting putty, a mesh size of 120 is suitable, for a finishing putty - 80 or 60.Most likely, you will have to try several options for grain - start with a rough one, removing the most noticeable surface flaws, then use everything finer until the shadows stop appearing when the wall is illuminated.
The grinder is more convenient to use and allows you to finish repairs faster; in addition, with its help you can get a really flawless surface. However, purchasing a power tool for processing a small area is not always cost-effective.
Homemade grinding devices
You will have to make a device with your own hands if you need to sand the walls for painting in hard-to-reach, small areas that cannot be reached with a bulky bar. A homemade tool is made as follows:
- a piece of plastic profile is cut in such a way that a strip is obtained with a width of about 70 mm;
- on one side, sandpaper is glued to the profile using double-sided tape;
- the end of the line is trimmed at an arrow-shaped angle.
If desired, you can cut and glue several strips of paper with different grain sizes. You need to work with an angle, and cut it off as the sandpaper abrades - the principle is the same as when sharpening a pencil.
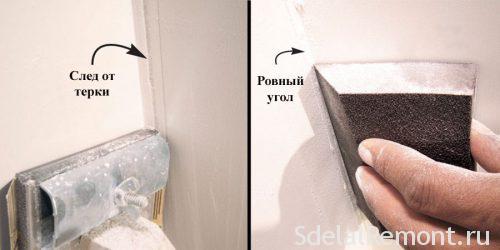 Cleaning the corners is an important step in the preparation of the wall.
Work rules
Before starting sanding, you need to protect the room from dust - furniture, window and door openings, decorative flooring are covered with polyethylene film. You need to work in a protective suit, mask and always with a respirator.
Sanding starts from the corner of the wall, then you should move downward, processing a strip about a meter wide. In this case, you need to make movements in a spiral, slightly pressing on the tool. You should not press too hard, since in this case it will not work perfectly to align the walls - the top layer of putty will simply be erased.
If in the process some kind of recess is found, the work should be completed, and then the defect should be repaired with putty. All work should be done with single-grit sandpaper or mesh - this can be changed when the entire wall is finished.
Thus, the technology of filling walls for painting is not difficult - the main thing is to observe all stages of work and choose the right materials
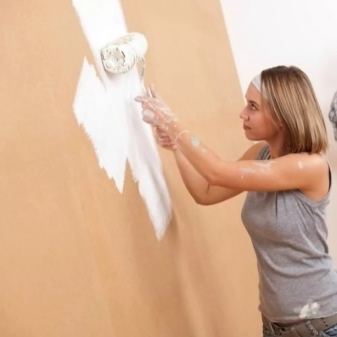
To achieve a flawless finish, it is also important to paint the smooth prepared wall correctly - for this you need to choose the appropriate hairiness of the roller. The rule is simple - the less the surface roughness, the shorter the pile.
So, if the filling is carried out correctly, the pile will be minimal, because the wall will turn out to be perfectly smooth. And how to paint without streaks, that's in the next article.
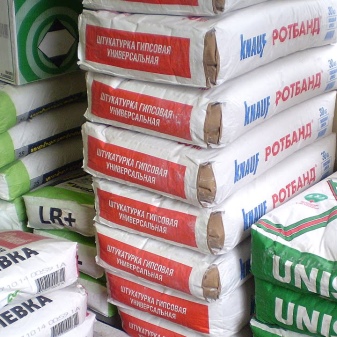
Which one to choose?
Preparing a room for painting means priming and filling the surface of the walls, purchasing the necessary building materials for the interior decoration of the room. The putty can be purchased in the form of a ready-made solution or in the form of dry mixes. You will also need special tools - spatulas of various sizes and shapes, brushes, trowels.
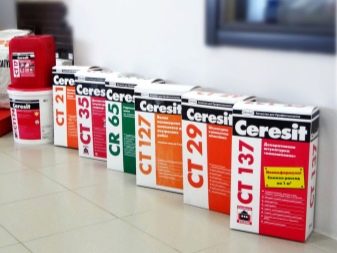
Manufacturers in the manufacture of mixtures use glue bases, chalk, gypsum, building materials and other components to make the finish more durable, reliable and durable.
You can choose the right putty yourself, just a little knowledge of where and what type of this building material is better to use:
- Cement mixture resistant to high humidity. It is best used for finishing rooms with high humidity. This type of putty mixture is more suitable for the starting layer - the unsightly gray color of the coating is very difficult to hide with paint and even under the wallpaper.
- For interior decoration of dry rooms, bedrooms, living rooms, powder gypsum plaster is quite suitable. This type of building mixture is absolutely not resistant to high humidity. The surface after treatment with gypsum filler mortar and drying is smooth and white.
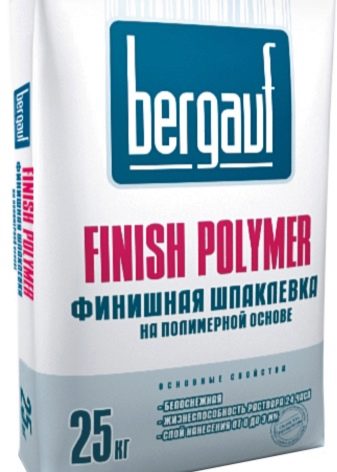
- Ideal for the finishing layer in finishing works, textured polymer putty. Expensive, high-quality, modern material dries for a long time, but the end result will exceed all expectations. The surface of the wall is perfectly flat without flaws, the paint on such a coating is easy to apply without forming sags.
The building materials market represents a wide range of various compositions. A distinctive feature of each such material is its properties, structure, technical characteristics.
Before buying, it is very important to decide whether putty is needed for interior or exterior decoration
Then, relying on physical and technical parameters, choose the appropriate filler mixture for each stage of finishing work:
- The putty mixture for the starting layer is a substance with large mineral particles. Ideal for filling large and very pronounced imperfections in the coating. The thickness of the starting layer of putty applied to the surface should be no more than 20 mm;
- Putty mixture for the finishing layer. The structure of this composition is fine-grained, after the last layer of putty has completely dried, the wall surface is fully prepared for painting. It is possible to apply such a composition to a non-putty wall that has been treated and cleaned of old plaster;
- Universal grout. It goes on sale in the form of a ready-made thick, finely dispersed solution on a polymer base with mineral additives for improved layer elasticity. It is water resistant and therefore suitable for the bathroom.
In addition to a high-quality putty composition, it is necessary to purchase special tools for finishing work. The quality of the finish depends on the right tools.
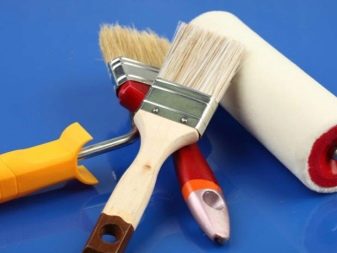
For interior decoration you will need:
- To make it more convenient to apply the primer to the surface of the walls, you should purchase a wide roller. In places inaccessible for priming with a roller, you can use an ordinary brush.
- To prepare your own solution in containers, it is better to use a construction mixer. In the absence of this tool, it is quite possible to use a conventional electric drill with attachments.
- Carrying out work on surface filling is impossible without spatulas of various sizes and shapes. The widest is 50-60 cm, required for large surfaces. This will help you apply the finishing mortar much smoother and faster. Medium trowel - about 25 cm wide, very handy for surface treatment in the corners of a room. Small - about 10 cm in size, ideal for finishing hard-to-reach places and putting up visible imperfections on the wall surface. To putty the corners of the room, it is more advisable to use an angled spatula.
- After the last putty layer has dried, the surface of the wall is rubbed with a special mesh. The coating will be even and smooth. Therefore, it is necessary to stock up on a fine-grained trowel mesh.
How to putty the ceiling?
With any repair, especially in new buildings, the owner is faced with the process of leveling the ceilings with putty. However, not many people can imagine how this is done.
The complexity of the work lies in the fact that the master is in constant tension. During the putty, you need to constantly keep your hands up, and this is not at all easy.
It is necessary to apply the putty to the ceiling in step-by-step uniform layers, up to the application of the finishing layer.
How to properly putty the ceiling?
Ceiling putty is carried out during the repair of any new building, and can also be carried out during major repairs in the premises of old houses.
Before applying the first, starting layer, it is necessary to prime the surface. Primer is applied with a roller or a wide brush.
If putty is done in a new building, then initially it is necessary to close up the joints of the floor panels, after that - apply a starting putty.It is executed as a draft layer.
The technology for applying the putty itself is simple:
- We knead the putty in a bucket by adding water and mixing the mixture with a construction mixer with a drill;
- The finished mixture must be collected on a narrow spatula and applied to a wider one, which will be used for filling, evenly along the entire length of the working surface of the spatula;
- Then you need to put the putty knife to the wall and with a smooth motion at an angle, pull it along the wall at about 300 until the putty is smoothed out;
- Grooves that appear after application are best removed immediately by re-moving with a spatula. Before re-moving, the excess putty from the spatula can be removed back into the bucket;
- With such movements, you need to continue to apply the putty until the entire ceiling is closed.
After applying and drying the starting layer, you can level the ceiling with a finishing putty mass. For this, it is best to use a ready-made mixture.
What kind of spatula to putty the ceiling?
To carry out puttying work, it is necessary to prepare special tools. These tools are, first of all, a spatula of different sizes. You need to choose high-quality spatulas so that the working surface is not curved, otherwise the quality of the putty will be low.
Required spatulas:
- One large trowel, 47 or 60 cm wide, for direct work on the ceiling;
- One smaller trowel, 10 or 12 cm wide, for applying putty on a wide working trowel;
- One narrow spatula, 4 or 6 cm wide, for work behind pipes, batteries, narrow inaccessible places;
- Electric drill with a mixer for mixing the putty mass;
- Several buckets: one with water for washing the mixer and tools, one for mixing the putty, one for pouring water into the dry mixture;
- Several rags, a respirator and construction goggles.
The process of plastering ceilings is quite laborious. But you can easily do it by filling your hand on the first squares of the square.
How to sand the ceiling after putty?
When plastering the ceiling, there may be times when the layer of putty may be small. If the putty process has already begun, and you see that you have already applied a thick layer, but you are not pulling the level, it is best to finish the putty and go to the plaster.
For this, ordinary cement-sand mortar is no longer suitable. You need to buy ready-made dry plaster and dilute it with water.
It is advisable to choose a white or light shade of plaster, then it can approximately be in the same substance and color with the putty. In addition, the finished plaster adheres very well to the putty.
In order not to peel off one or another material, then before switching to another type of finishing material, the previous one must be pasted over with a mounting mesh, and then plastering.
Also see:
Plaster can be applied immediately in large layers from 5 mm to several centimeters, unlike putty. When the plaster is dry, you need to look at the level. If it is flat enough, you can immediately level it with a finishing putty.
Also watch a detailed video instruction on how to putty the ceiling
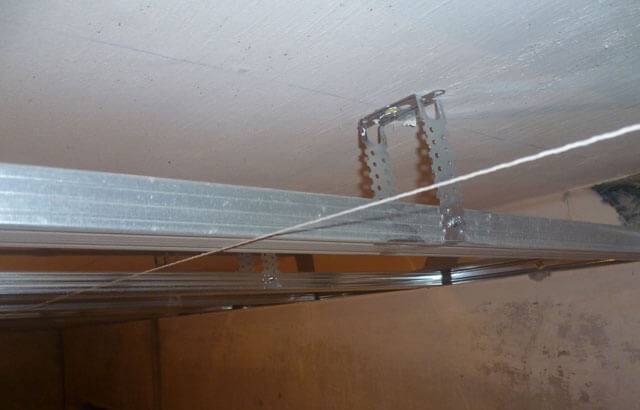
Installing the frame
The algorithm for assembling a frame for a plasterboard ceiling includes the following steps:
- First, you need to set the UD profiles around the perimeter of the room at the desired level. After that, suspensions are attached to the ceiling surface in accordance with the markings. After mounting the CD-profiles, the edges of the hangers will be bent to fix the jumpers.
- The connection of individual parts of the frame is carried out using a "crab" fastener. To connect the parts along the length, you can use both such a fastening and the usual joining - the profiles simply overlap each other with an overlap of about 10 cm and are connected with self-tapping screws.
Cleaning the ceiling
Before the very filling and painting of the ceiling, it is necessary to prepare its surface, for this it is necessary to get rid of the remnants of old paint, plaster, especially for old houses. Ceiling surface preparation takes place in several stages, first of all, it is necessary to moisten the ceiling surface with water using a roller or spray.
In this case, all elements of furniture in the room are taken out to another room or protected with foil. After that, with the help of a metal staple, it is necessary to get rid of old plaster or paint, as well as all surfaces infected with mold or fungus. In the future, before filling and painting, the ceiling is primed.
This is done so that the polymer layer of the primer covering the ceiling protects it from temperature changes in the future, and also improves the adhesion of the putty and paint to the ceiling. Also, the use of a primer reduces paint consumption, which, given the cost of paint and primer, is justified.
Priming the ceiling surface in places of obvious defects is carried out only with a brush. Since the roller will not be able to carry out high-quality processing of uneven ceiling surfaces. If there are places on the ceiling affected by mold or fungus, they are pre-treated with an antiseptic primer. This will help to avoid its further appearance in the future.
In the absence of an antiseptic primer, any other liquid with a high chlorine content can be used. For this, the usual whiteness in the base, which is sodium hypochlorite, is suitable, this will be a good and economical option for a primer, but this method is unsuitable for long-term protection against the appearance of fungus.
Choosing the right material
It is necessary to choose the material, the characteristics of which are best suited to the particular room and conditions of its use.
For people who have little experience in applying putty materials with their own hands or for beginners who are starting repairs for the first time, it is usually difficult to immediately choose the best option. To facilitate the task, you should understand the features of specific types of plaster. When deciding on a choice, take into account the following nuances:
There are many filler materials on the market that are designed for specific surfaces. Many packages indicate: for concrete, for drywall, and so on.
If you cannot independently determine the type and amount of material, contact the consultants in the store for help. Some do not take into account that the putty is a finishing and starting compound, and only use the same type of compounds. It is not recommended to do this, otherwise the coating will turn out to be of poor quality and short-lived.