Primary drying
This concept depends on many factors that directly affect the rate of surface hardening.
This value is especially important in cases where the solution is applied in several layers, and it is necessary to maintain certain periods between applications.
Base type
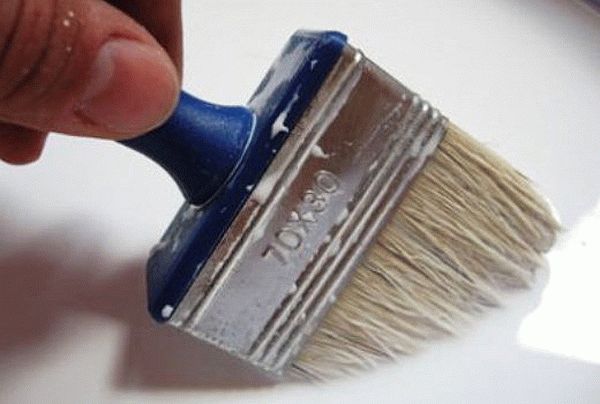
One of the fundamental criteria that directly affects the rate of hardening of the mixture. According to the norms of SNiP, the moisture content of the base before starting work should not exceed 8%. Of course, it is impossible to determine the exact value by eye, but there should be no wet spots on the surface, otherwise the solution will dry several times longer.
So, how long does the plaster dry on various materials:
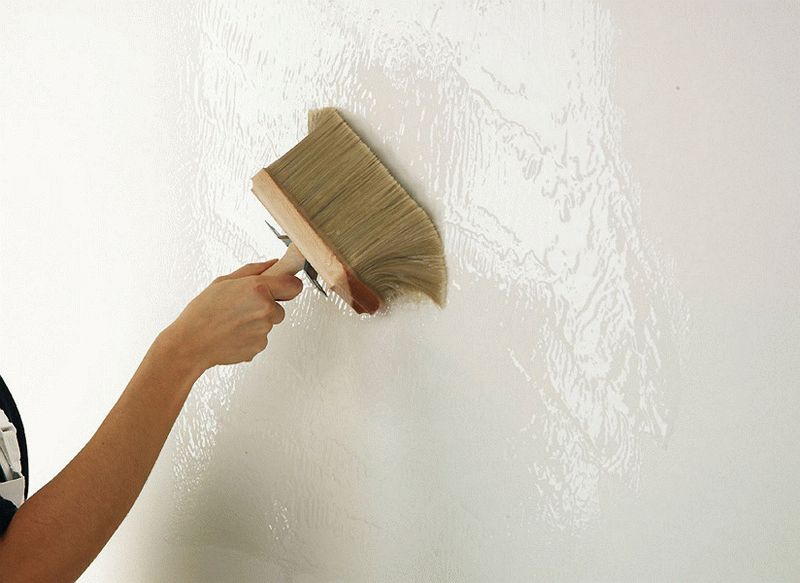
- Concrete surfaces should be dry and clean, while the optimum air humidity should be about 75%, and the temperature should be from 15 to 25 degrees above zero. In such conditions, the primary drying of a layer of no more than 2 centimeters occurs within 24 hours. After that, you can apply the next layer of plaster, also remember that increasing the layer significantly lengthens the drying time.
- Wooden bases are distinguished by the fact that this material has its own characteristics: it allows moisture to pass through well and releases it into the atmosphere, due to which a layer of 2 centimeters is reliably seized within 14 hours. At the same time, an increase in the layer twice extends the surface hardening period by only 50%. But the tree should be especially carefully checked for moisture, since the material absorbs water quite strongly.
The wooden surface allows the composition to dry much faster
- Brick walls in their characteristics are close to concrete, therefore all drying times are approximately the same.
- Aerated concrete and expanded clay cement blocks are an excellent base, but here the hardening period depends on the moisture content of the material especially strongly. And if a second layer can be applied on a dry material after 6 hours, then with high humidity you will have to wait a day, or even two.
Solution type
A very important factor, since the drying times adopted for certain bases are more related to cement mortars, but currently several main types are used:
Clay-cement mixtures, due to the dense structure and moisture resistance of the material, dry the longest: from 2 to 4 days, depending on the layer and base. Such compositions are used for finishing stoves and fireplaces - only they are able to withstand high temperatures.

The clay-cement composition dries for a long time, but it is able to withstand loads that are not subject to other solutions
- Cement-based plaster is used most often: before laying tiles, and before puttingty, and before gluing wallpaper. The formulations are popular due to their high performance and ease of application. The answer to the question of how much cement plaster dries on the walls is disclosed above, all norms and terms are determined specifically for this type of composition.
- Fast-drying gypsum-based plaster has been widely used in recent decades, this composition is distinguished by the fact that the time between coats is minimal. How long does gypsum plaster dry on walls? The time between application of layers is from 30 minutes to 2 hours, which, you see, is much faster than other options, but due to the properties of the material, it cannot be used for exterior decoration of the house.
In the photo: the gypsum, which is part of the composition, provides the shortest curing time
Lime compositions are highly plastic, the next layer can be applied after 6-7 hours. In this case, the surface is very strong and durable.This type is quite old, but the low price and ease of working with your own hands make it popular.
What affects the drying time
The primer is a unique building mixture that is actively used to improve adhesion, base structure and other indicators. A distinctive advantage of the mixture lies in its binding properties, which can significantly reduce the consumption of paint, glue and other materials. A good primer boasts antiseptic properties. You can glue wallpaper on walls treated with a high-quality primer without fear of mold and mildew in the future.
The drying time of the soil depends, first of all, on its variety. There are several types of primers on the market today:
- acrylic primers, which are considered versatile and can be used on all surfaces. After using such a product, the base absorbs less moisture and becomes more rough;
- alkyd - are the ideal choice for processing metal and wood surfaces;
- glyphthalic, can be used for various types of substrates and wallpapering.
So, what exactly does the drying time of the primer solution depend on? After the primer has already been applied to the wall, you will need to wait a certain amount of time before gluing the wallpaper. It is usually indicated on the packaging by the manufacturer, but it can vary depending on the type of base and other points. If the base is dry and porous, then further work after applying the primer can be carried out in a fairly short time.
Among the other criteria that can affect the drying rate of the primer before gluing the wallpaper, the following can be distinguished:
- room temperature - too high or low temperature leads to slow drying of the primer mixture;
- the layer of the applied product - the thicker it is, the longer it will take;
- the basis of the mixture - impregnations usually contain easily volatile compounds;
- structural integrity of the substrate - the deeper the primer penetrates, the longer it will take to dry.
How long do you need to wait before gluing the wallpaper
Before gluing the wallpaper, you need to pay special attention to the question - how long the primer dries. After finishing all the priming work, the treated base needs some time to dry, only after that the wallpaper can be glued
In order to determine the drying time of the solution, you need to look at the packaging. In most cases, manufacturers list primer mix information there, including approximate drying times.
The drying speed, first of all, depends on the type of soil:
- acrylic options dry five hours after application;
- alkyd primers can dry after 20 hours. It all depends on the air temperature;
- it will take about a day to completely dry the glyphthal primer at room temperature.
 On a wall treated with a primer, wallpaper can only be glued after the primer solution has completely dried
In terms of drying speed, the first place is taken by water-based primers, you can glue the wallpaper after processing with such primers in 20 minutes. Such primers are used especially actively before gluing wallpaper to a concrete base.
The most important thing in the drying process of the primer is to follow a few rules:
- avoid any temperature extremes;
- the presence of drafts can cause uneven strengthening of the layer;
- acceleration of drying by artificial drying is not allowed.
After the primer mixture has dried, you must immediately begin preparations for the rest of the finishing steps, including wallpapering.
How long to wait before applying putty
An experienced craftsman knows that it is necessary to start puttingty work only after the surface has been treated with a primer. If a large surface is being processed, then you do not need to calculate the exact drying time, because by the time you reach the end of the wall, the beginning will already dry up to the point where the putty can be applied. In any case, with the correct selection of the primer mixture and the creation of certain conditions, it should dry no more than five hours.
Plaster of plasterboard walls and ceilings
Sometimes people do not understand how important the putty process is during the renovation. However, if you decide to make a high-quality repair, as a result of which the surfaces of the walls and ceilings will become perfectly flat, then the putty should become a serious stage in the repair work.

So, if you decide to transform the space using drywall, then the filling technology will be as follows:
- Before proceeding directly to puttying, you should process the joints of the sheets. Cover the seams with a mesh (serpyanka).
- Continue sewing. Paste the joints especially carefully to even out small gaps.
- Now you can start processing the wall. Since we apply the solution to the prepared surface, the starting putty can be omitted. Take the finish and spread it over the area of the walls and ceiling with a spatula.
- When the putty layer is dry, sand the surfaces with sanding paper or mesh if necessary.
Working with drywall won't be a hassle! Be careful and careful, and your walls and ceiling will be ready for any kind of decoration!
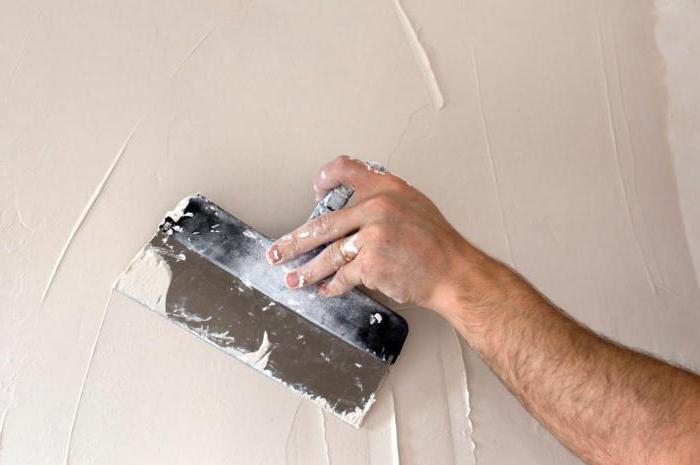
On what circumstances does the drying time of the putty depend?
Any type of putty is a water-based mortar. It is the liquid consistency that makes this material so convenient for construction and repair work. When the liquid evaporates during drying, the putty manifests itself in full - it hardens and becomes strong. The conditions of the environment in which the leveling compound is used have a direct influence on the drying time.
Manufacturers do not recommend going beyond a certain temperature range and humidity corridor.
There are such standards for the use of putty:
- It is better for the substance to dry within the temperature range from 5 to 25 degrees above zero;
- If this temperature cannot be maintained, the strength characteristics of the putty after drying will be unsatisfactory. For harsh climatic conditions, special frost-resistant additives are used;
- If drying occurs in extreme heat, it will be very quick but uneven and the finish will likely suffer.
Never expose the drying material to direct and intense sunlight. If conditions do not allow the putty to be safe, a top coat can be used. It is also used before wallpapering.
The moisture level optimal for normal drying of the material should not exceed 50%. Drying will be extremely slow at higher (up to 80%) humidity values.
In order for the putty to dry as quickly as possible, it is also recommended to provide ventilation of the room, but at the same time it is necessary to exclude drafts, especially if the weather is windy.
The speed of drying of the material on the treated walls also depends on other factors:
- Layer thickness. The thicker it is, the longer it will dry. If you want the coating to come out of high quality, it is better to put the putty in thin layers, which will overlap each other as it dries. This technique takes more time, but it is fully justified by the high quality.
- Absorbent capacity of the prepared surface. The more porous the wall is, the better it will “draw in” the moisture of the material. This will provide faster drying, but this may not be desirable.In order not to accelerate drying in this way, it is recommended to use a primer.
Always pay attention to the instructions from the putty manufacturer. There are indicated not only the rules for application, but also the drying time of the material.
Most often, the manufacturer recommends applying the material to a perfectly dry substrate with a layer of up to 2 mm. This layer will dry for about a day. If thick layers are required, drying time can take up to a week.
What is the finishing putty used for?
Start and finish have significant differences from each other. This is not only the cost (starting is cheaper), but also the structure and scope of use. The finishing layer always comes after the starting layer. What is the start for? Walls require careful preparation before applying the decorative layer. And it is quite difficult to find a perfectly flat surface without defects. Therefore, the starting putty plays the role of the main layer, which hides all surface imperfections. The thickness of the layer can reach from 5 to 13 mm, it all depends on the quality of the wall. Cracks, chips, irregularities - all this is eliminated by the starting layer. The output is a flat surface, slightly rough and rough. Naturally, it is not suitable for painting or wallpapering.
This is where you need a finishing putty for wallpapering or painting. The structure of the mixture is not so coarse and has a finer grain size. The putty is plastic, soft, elastic and homogeneous. There are no impurities in it. The output is a perfectly flat wall with a smooth surface, protected from moisture, mechanical stress, fungus, mold and ultraviolet radiation. The wall will not so actively absorb liquid from paint or decorative plaster, which is used for the final decoration. The thickness of the finishing layer is 1 to 2 mm. This complicates the process of work, it requires accuracy and a little skill. The mixture seems to be stretched over the surface. The putty fulfills the following purposes:
- It finally smoothes the surface and hides defects from the starting layer.
- Extends the service life of both the finishing material and the walls themselves.
- Protects the main layer of the putty from destruction.
- The finishing touch. The wall gets a complete look.
Features of topcoats:
- the composition is filled with fine granules. Thanks to this, after application, the layer is smooth and suitable for finishing work;
- has high qualities of adhesion to the surface (adhesion);
- After drying, the finished finishing putty takes on a white, even snow-white color. This allows you to apply paint of any color to the surface, the base will not interrupt it;
- due to its plasticity and elasticity, it is quite easy to apply the composition;
- the consistency allows you to create a smooth plane on the wall with a thin layer;
- does not shrink after application and does not drip from the surface during application;
- if you adhere to the application technology, then after drying, the finishing putty will not crack and deteriorate.
This is why a finishing putty is needed. Without it, subsequent work cannot be performed, especially when it comes to drywall, brick, concrete or blocks.
Application when painting
Basically, the physics is the same as with cement. Only with paint everything is a little different, but, again, diffusion, erosion, capillary properties of materials play a role in the matter. And besides that, the effect of photons, ultraviolet radiation, temperature, fungus and humidity also comes into play.
When carrying out work on painting surfaces, we pursue the following goals:
- to give the surface a finished look, that is, color or texture;
- provide the surface with a protective layer;
- impart waterproof characteristics;
- give resistance to ultraviolet light;
- get a durable coating.
Some of the above depends on the choice of paint.And everything related to durability and quality already depends on how effective the diffusion of paint and walls will be, that is, on the ability of substances to penetrate into each other's structure.
For example, if before painting with water-based paint you do not apply primer to the putty surface, then, firstly, its consumption will increase by 30%. Secondly, gypsum dust on the surface of the wall will roll into a fine granular fraction and spoil your aesthetic characteristics. Well, in the end, the pigment contained in the paint will partially absorb into the thickness of the wall, lose all its concentration and will not look properly. And I'm not talking about durability.
If we talk about how to prime such surfaces as gypsum putty, drywall, acrylic putty and the like, then this is not necessarily a deep penetration primer. This common primer is best suited for bonding layers of putty or plaster, and when it comes to painting, the best will be one that is identical to the paint on the base.
That is, if we paint with alkyd paint, then the primer should be taken on an alkyd basis. If we work with acrylic, then the soil must be appropriate. In this situation, the highest quality surfaces will be obtained. But if you do not have such substances, then, of course, the usual deep penetration will do. Still, it's better than nothing, and the quality is not so critical.
And one more important remark. The primer in terms of painting is not butter in porridge! Remember it once and for all. If you think how many times to primer, then the answer here is unambiguous and non-negotiable - one. And all because it is not intended to contact with itself, it should become a connection for the wall and paint, and there should not be an extra gasket in the form of another layer.
Before re-painting - yes, you need to process it, since it will also hold the layers of paint well, but in no case itself. And here's another thing, about overdoing it. How many times have I seen streaks on a newly painted wall and perplexed glances from the owners who asked me to paint such a "leaked" wall.
Why did it flow? Yes, all because that handy fellow who primed it did not squeeze the roller. And drops of soil dripped down the wall, leaving behind an excellent greasy layer, which is different from the general one. You will never paint over such a smudge, you have to clean off the paint along with the putty and redo everything from scratch. Be careful and don't overdo it.
And one more interesting point. I'll tell you with an example. I, of course, like everyone else, greedy and want to save money. I had an apartment with an open loggia, which I did not want to block with windows, because I like to sit in the open air. So I decided to just paint it beautifully. It was decided to do it "zebra" - alternating stripes of red, black and white. So, for a liter of water-based paint, in order to achieve a beautiful bright color, I spent - you will not believe - a liter, a liter of color! Which cost quite a lot. Here I painted it, I was happy for six months and that's it. As soon as summer was over, the color from a beautiful poisonous red turned to a faint pink. And the next year I repeated everything, but this time I blew out the entire surface with a light-resistant primer. And the pigment is no longer lost. And again, it turns out that the miser pays twice.
Putty on paint
Can I apply a finishing putty to paint? This option for finishing work is permissible, however, you should adhere to these recommendations:
When preparing the surface for puttying, it is necessary to clean the wall from dirt and dust, as well as sand the surface that could not be cleaned of paint.
The thickness of the layers of the putty to be applied should be minimal.
This is also indicated by the manufacturer on the label.
It is recommended to apply a layer of primer before the putty.
If in some place it began to lag behind the paint, this means either a poorly prepared surface or a too thick layer of the applied material.
It is important to pay sufficient attention to drying the mixture before proceeding with the finishing work.
At the end of the puttying, you need to cover the surface with a primer again. Often a concrete contact is used for this purpose.
This is the name of the building material
which contains large particles, as well as substances that bind them. This type of putty adheres firmly to the wall for many years, and also does not absorb moisture. Many people who decided to carry out repairs on their own are interested in the question: is it possible to put putty on the paint? Answer: you can, if you follow the recommendations above
Often a concrete contact is used for these purposes. This is the name of the building material. which contains large particles, as well as substances that bind them. This type of putty adheres firmly to the wall for many years, and also does not absorb moisture. Many people who decided to carry out repairs on their own are interested in the question: is it possible to put putty on the paint? Answer: you can, if you follow the recommendations above.
Drywall primer before putty: why is it needed and how to do it
Therefore, we can safely say that priming drywall for putty is a necessary and effective process. Ignoring this work or a desire to save money on it can lead to the fact that the putty will lie unevenly, will crumble immediately after drying or after the subsequent finishing. The second method is simpler, and it takes much less time than the first, however, in terms of quality the coverage will be decently inferior to the one that we did before.
When filling drywall, special attention is paid to the joints of two sheets and the grooves left after screwing in the screws. This coating will not be able to hide even small flaws, and in some cases even emphasize them.
Therefore, the correct plastering of drywall is the key to high-quality painting of the walls.
- A little more primer than is required for the treated area. The required amount depends on the type of primer and is indicated by the manufacturer on the label.
- Water. When using a water-dispersion acrylic primer, water will come in handy if the primer turns out to be thick.
- Roller for basic drywall processing.
- Paint brush for seams, corners and fasteners.
- Paint container with a grooved bottom.
If the surface has been evenly primed, but when drying out, areas that clearly dry unevenly are noticeable, then it would be better after complete drying to apply the primer again and dry again. This will provide better adhesion to the drywall surface.
What to put first and where to start gluing wallpaper in the room
If the renovation is in full swing, and you still do not know what to do first - to lay the floor or glue the wallpaper? Professionals advise you to do what leaves more trash first. Laying linoleum is unlikely, but laying laminate is perhaps better at the beginning.
In the room where the repair is being carried out, all work is completed first, after which more garbage remains
If you glue the wallpaper first and then lay the laminate:
- Some types of laminate are already very sensitive to wallpaper glue, because the coating may deteriorate, which means that everything is correct, first gluing;
- Debris can theoretically damage laminate flooring too;
- If the laminate is already laid, protect it with a special film from the work being done.
In the case of linoleum, wallpaper is usually glued, and then linoleum is directly laid. But still, do everything with an eye on the individual characteristics of the repair. And on how it is more pleasant and more accustomed to act for you. Adjust for yourself, there are no strict rules.
Types of compounds and how long they dry
There are many different types of primers. Also, each manufacturer has its own composition. These factors also affect the drying time of the primer. Different types of food can dry out at different times, and sometimes the interval is several hours or more.
For example, the following types of product are distinguished:
- Quartz or contact. The mixture contains quartz sand. This component can significantly improve the adhesion characteristics of the surface. Quartz also strengthens the base well. Such a product is penetrating, which means that it penetrates 3 mm deep into the surface. This effect helps the material to stay flat and not fall off over time. As a rule, the duration of complete drying of one row can take 1-5 hours. It depends on its thickness.
- Penetrating acrylic. This type of material is used to significantly increase the strength of walls and other surfaces. This mixture is made from mineral material. This type penetrates the surface by 3 mm. Acrylic dries completely in 12-24 hours. Basically, it is recommended to leave it for a day.
- Alkyd. This type of material is required for processing wood and metal planes. The product protects the treated walls from mold, excess moisture and rust. It takes from 12 hours to completely dry. It is recommended to wait until it is completely dry before painting, otherwise paint consumption may increase or application will occur in uneven layers.
- Shellac. The composition contains components with the addition of alcohol. Due to this, the solvents in the material quickly evaporate and the rows dry out in a short period of time. Basically, it takes about 8 hours for the layer to dry completely.
- Mineral. This type of building material differs from others in its fast absorption and adhesion. Quite often used for processing concrete and brick walls. Dries up in 5-8 hours.
- Fast drying primer. This product is specially designed for quick repairs. It dries quickly. Enough and 10 minutes after applying the layer to proceed to further surface finishing. When applying multiple coats, it may take about 6 hours, this includes the drying time of each row and the time it is applied. It is required to paint walls and other surfaces after priming only after complete drying.
- Oil. Oily soil dries a little longer than other types. Thus, it takes at least a day to dry one layer.
- Water based. It is used for the treatment of concrete surfaces. After applying the layer, it is required to wait about 2 hours before the next work. Can be used just before painting.
This is interesting: Paint consumption per 1 sq. m wall surface - the subtleties of the calculation
Drying time criteria
There are several key criteria that directly determine what specific drying time a particular type of wallpaper will have.
- The first criterion is material. Vinyl wallpapers have different base types and therefore behave differently. After all, it is strange to expect that a coating on a non-woven base will dry as long as a coating on a paper base. The latter dries much faster, while the non-woven will keep moisture for a longer time.
- Thickness is also important. It is logical that thinner wallpapers will have a minimal drying time, while thicker ones will have to wait longer.
- Another significant difference is the quality of the glue. Usually, you can get acquainted with the information on which brands of glue exactly how much dry, you can either in the instructions for the use of such glue, or on the official websites of manufacturers of glue or wallpaper. Often, the drying time will also depend on how much the prepared composition is aged, what are the proportions of its mixing with water - in a word, each situation is individual.Naturally, the more glue is applied, the longer the wallpaper will dry. And, of course, do not try to make glue with your own hands, for such heavy wallpapers as vinyl, this is not the best approach.
- Finally, the indoor climate can also significantly affect drying. The lower the temperature and humidity, the longer the wall covering will take to its optimum condition. It is believed that the interval between 15 and 30 degrees Celsius at 60% humidity (preferably not more) is the best conditions, the time for vinyl wallpaper to dry in this case is minimal.
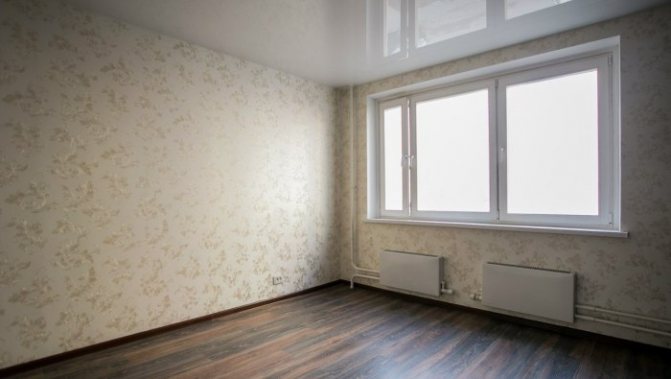
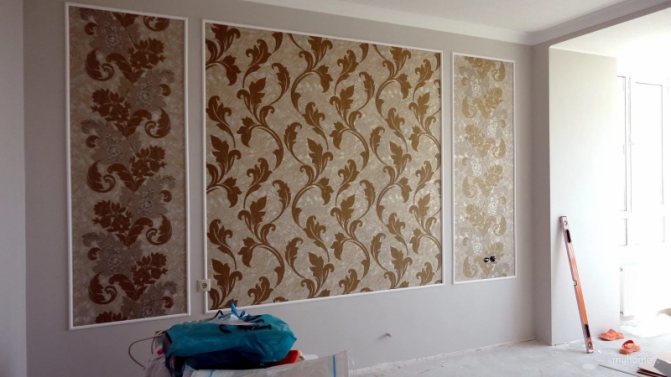
The spacious living room is covered with light wallpaper
Type of putty
The wide range of application of leveling compounds determines a huge range of products.
Putties have different binding bases, fillers, purpose, ability to lose moisture. Accordingly, they have different conditions of use.
 Kneading the mixture
Cement-lime mixtures form a durable coating, do not reduce the mechanical properties of the structure. They dry for a long time. With a layer of 2-4 mm and favorable conditions, drying will take at least a day
Complete drying is extremely important due to the tendency of cementitious compositions to shrink. Their use is justified and necessary:
- when sealing seams, joints, large cracks;
- during facade work and in rooms with high humidity;
- with decorative facing of the base with massive building materials;
- with a small or deficit budget of work performed.
The filling technique consists of two stages: starting and finishing. Starting putties take on the leveling function. The layer of such a coating is thicker (up to 6 mm) than the finishing one.
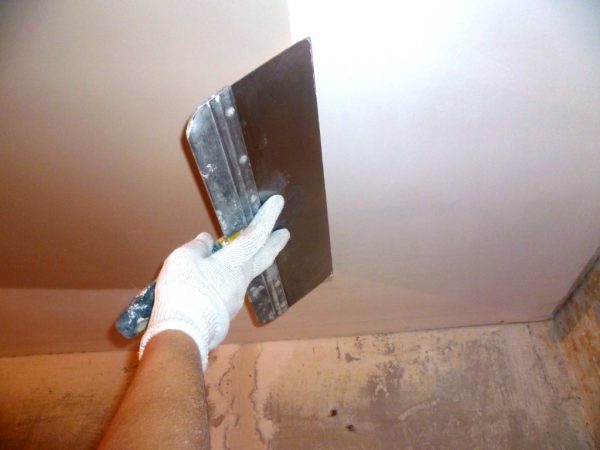 Ceiling filling
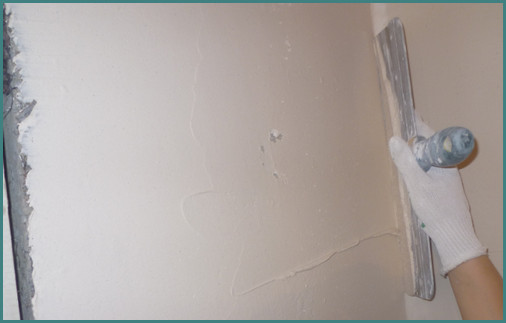 Wall putty
Acrylic, alkyd and latex mixtures are versatile, environmentally friendly, moisture resistant and dry quickly. They are preferred for finishing coatings. The technical characteristics of the formulations help to apply an extra thin leveling layer (up to 1 mm) to achieve an ideal base for decorative finishing. The ceiling and walls of the interior with such a coating can be safely painted and pasted over with wallpaper.
The drying time of polymer putties is influenced by:
- fillers and additives;
- layer thickness.
The average parameters of the curing time of one layer are within 2-4 hours.
The main types of filler materials
Leveling mortar compositions have different binding additives. The most common types of plaster for walls and ceilings are gypsum, cement, universal, as well as polymer (acrylic and latex).
What are gypsum mixes?
Gypsum putty can only be used in conditions of low humidity and only for interior decoration. Due to its increased hygroscopicity - the ability to "pull" moisture from any media with which it interacts, gypsum will simply fall off the surface if the air is not dry enough.
Gypsum leveling material is appreciated for its easy and quick application, the ability to adhere perfectly to the substrate and the inability to shrink. Plaster based putty dries faster than all other types of leveling materials. A layer that is not too thick dries and becomes hard after 3-6 hours. It is recommended to apply the plaster mix in several coats for perfect results.
When using a gypsum-based leveling material, you need to remember that the prepared mortar should be used as soon as possible due to the short hardening time. This can be difficult as there are many portions to cook.
How do cement putties behave?
The cement-based material will dry for a whole day. The recommended thickness of one layer when leveling walls or other surfaces is up to 4 mm. Despite the too long drying time, cement mixes are quite affordable.
A cement leveling mixture is used if:
- you need to get a solid, sufficiently hard surface for the finish of porcelain stoneware, tiles or masonry;
- facade work is in progress;
- finishing work is carried out in conditions of high humidity and strong temperature fluctuations (here cement will be an ideal choice);
- cracks, large gaps or tile joints must be repaired.
Despite the long period of complete drying, cement mixes are excellent for many types of work, and for some they are simply irreplaceable. They are widely represented on the market and do not require significant financial investments.
Polymer putty
Leveling compounds, which contain acrylic or latex, tolerate conditions with high humidity. That is why they are suitable for both indoor and outdoor renovation and construction work.
Despite the indicated advantages, such materials have a significant disadvantage - a high price. For this reason, they are only used where only final work is needed.
The main advantage of polymer mixtures is their high elasticity. Due to it, during drying and hardening, the coating is not damaged or deformed. They are easy to apply in very small layers, the thickness of which rarely exceeds 1 mm.
This type of leveling compound dries very quickly, which is also an undoubted advantage. As a rule, it is enough to wait up to 4 hours to proceed with the final gluing or painting.
Types of adhesive primers
Adhesives for surface preparation produced by the industry are the easiest to use. The formulations are ready to work or sometimes require only dilution to the desired consistency.
Adhesive primers are free of organic solvents and oils that can stain the wallpaper during or after gluing.
In the segment of adhesive mixtures, Vetonit, Knauf, Prospectors, Glims stand out.
You can divide the compositions according to the basis:
- Acrylic - suitable for wood, brick, plastered surfaces. The composition holds surfaces together, dries quickly, is almost odorless, and is environmentally friendly.
- Alkyd is suitable for wooden walls, chipboard, fiberboard, oriented strand boards. It is not used for processing concrete and drywall.
- Latex can be used on all surfaces, fast drying.
- Mineral compositions based on gypsum, cement or lime are suitable for priming bricks, concrete, cement plaster.
- PVA glue-containing are the most common and inexpensive options for universal primers.
The choice depends on the condition of the surface, the material and the type of wallpaper used.