6.1 Arrangement of partitions and facings
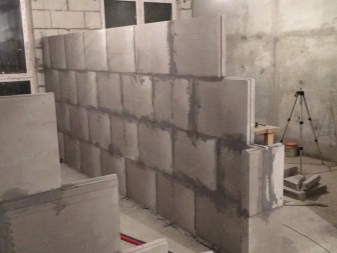
6.1.1 It is recommended to install partitions during the production process.
finishing works. Wall cladding works are also carried out in the process
finishing work, when the wiring of electrical and
sanitary systems.
6.1.2 Before the installation of partitions and claddings, all construction work related to
"Wet" processes must be completed. Installation must be carried out in
conditions of dry or normal humidity conditions at an air temperature in
a room not lower than +5 ° С to the device of a clean floor.
6.1.3 Before installation, the gypsum tongue-and-groove plates must be kept at
temperature not lower than +5 ° С for 4 hours.
6.1.4 Before starting work on the installation of partitions and facings, it is necessary
remove dust and dirt from the base floor, walls and ceiling.
6.1.5 In accordance with the project, it is necessary to mark the position
partitions or cladding on the floor and using a plumb line to transfer it to the walls and
ceiling. The position of the openings should also be marked on the floor.
6.1.6 If the floor surface is uneven, they must be eliminated.
a leveling layer of cement-sand mortar of grade not lower than 50.
6.1.7 With elastic mating of the partition or cladding with the enclosing
structures to the latter in the places of abutment with assembly glue is glued
elastic pad. In this case, it is necessary to ensure a horizontal position
the gasket on which the bottom row of plates is to be installed. Proceed to
installation of the boards should be done after the glue has set.
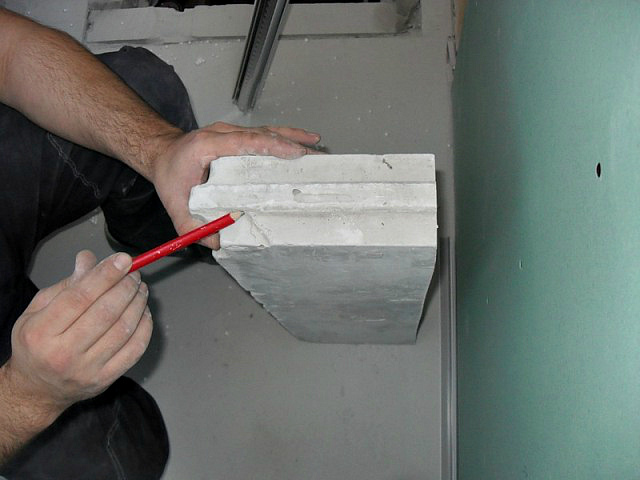
6.1.8 In the case of laying the slabs with the groove upwards, all the slabs of the first row must
remove the comb with a roughing plane.
6.1.9 When installing the plates of the lower row, their position corresponds to the design
should be controlled by rule and level.
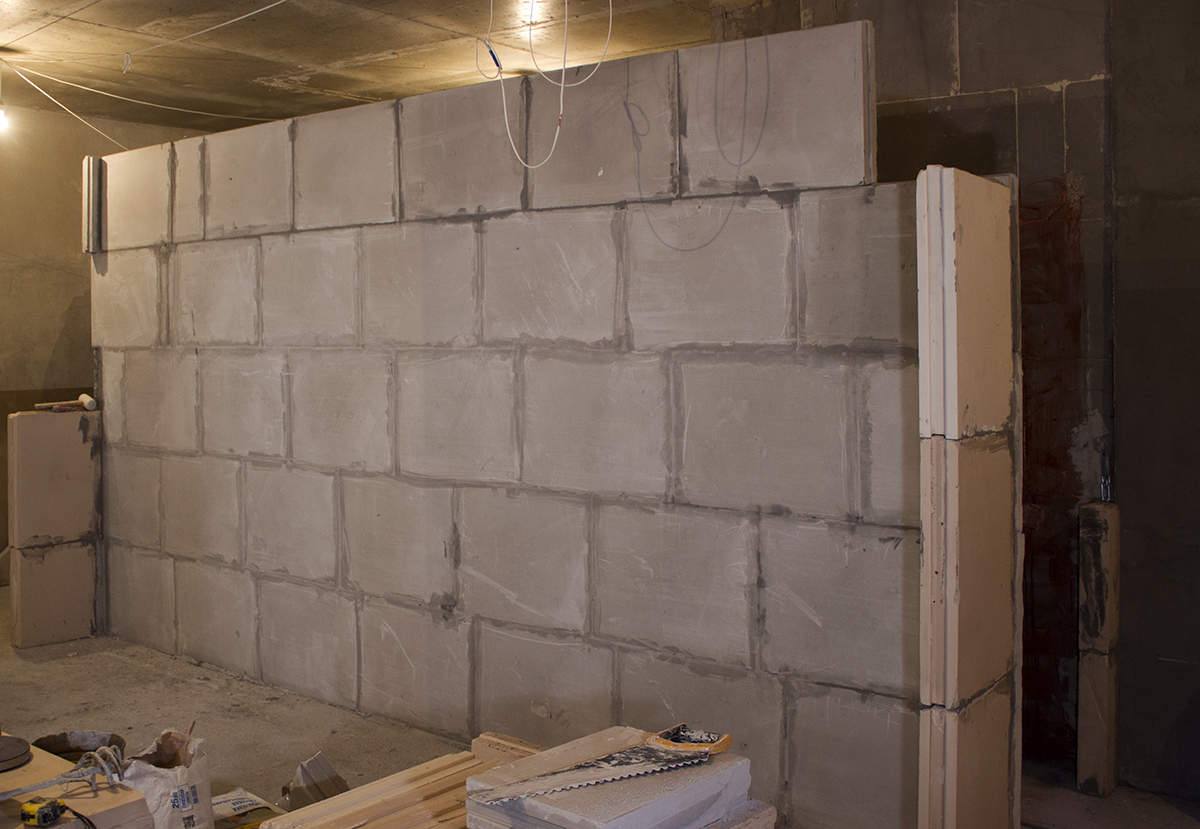
6.1.10 When laying subsequent rows in the groove bottom row of slabs and in vertical
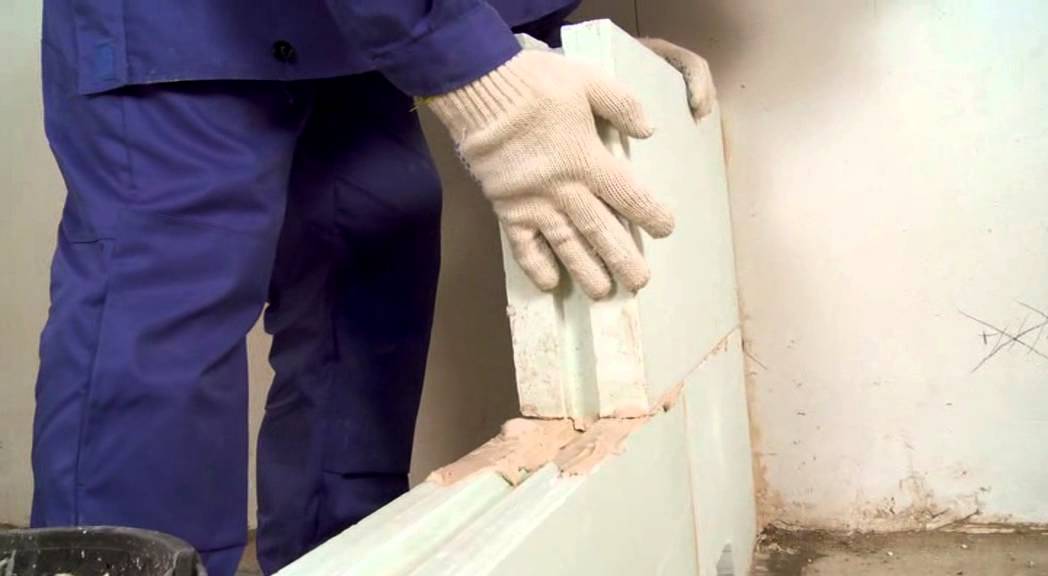
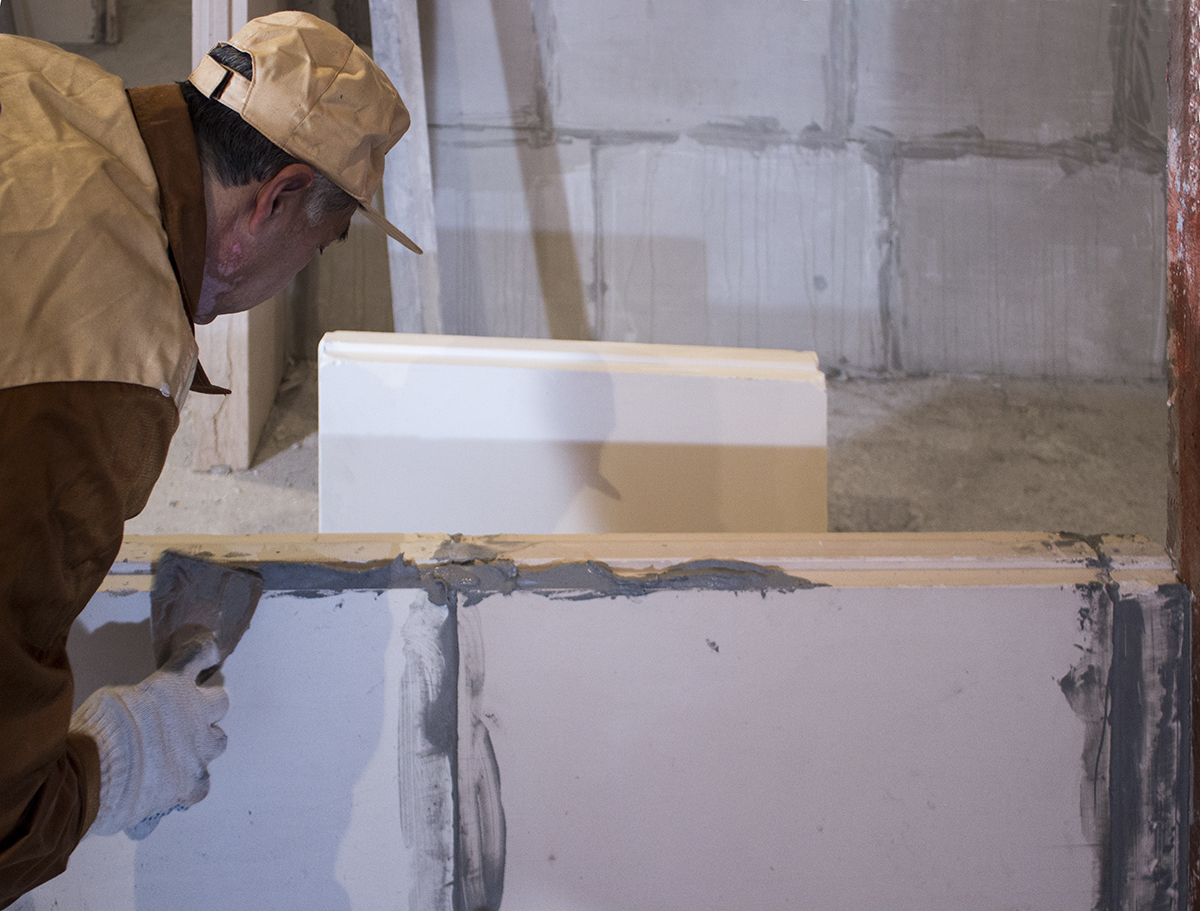
mounting glue is applied to the end groove of the plates to be installed and each plate is upset with
rubber hammer. Any excess adhesive that has escaped is immediately removed and
used in the future.
6.1.11 In the process of laying the slabs, it is necessary to control the thickness of the vertical and
horizontal seams, which should not exceed 2 mm, and using the rule and
level to check the flatness of the wall.
6.1.12 When laying slabs apart, additional elements are used, obtained
by cutting standard plates into specified dimensions with a hand hacksaw with a wide
blade and coarse teeth or a special power tool.
6.1.13 For the last row, slabs with beveled edges should be used, and
if necessary, they must be cut to fit the surface configuration
ceiling.
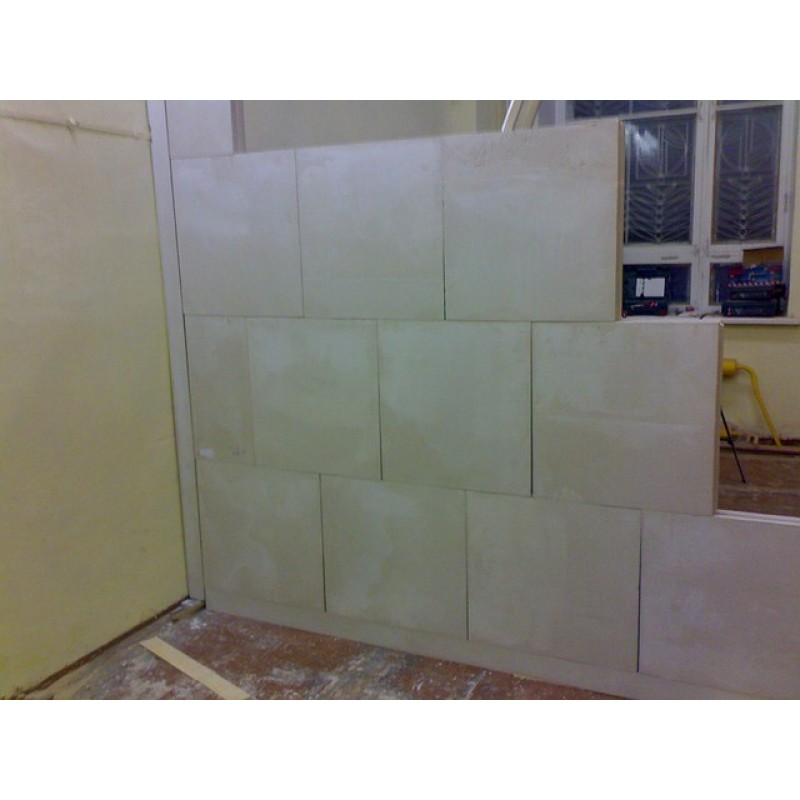
6.1.14 Top row slabs should generally be laid on top of the previous row.
long side, but to reduce waste, they can be stacked and short
side with the obligatory observance of the gap of the end joints.
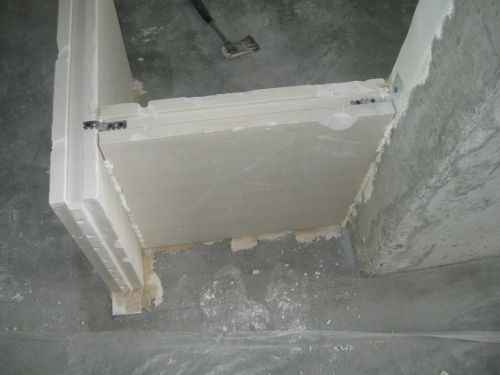
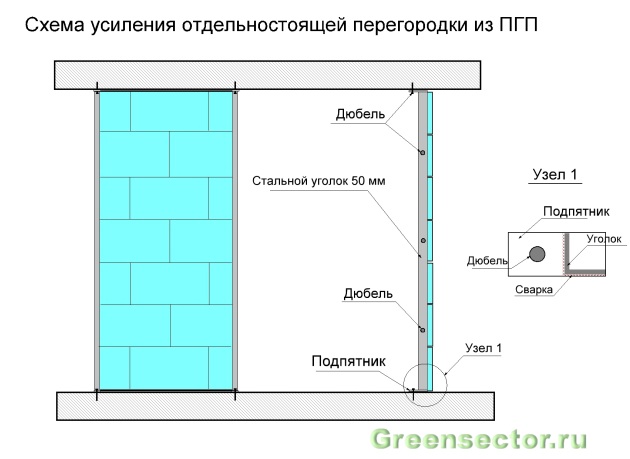
6.1.15 When elastic mating of a partition or cladding with adjoining
structures, the fastening bracket is installed in the groove of the plate and fixed to it
self-tapping screws, and to the enclosing structures - anchor dowels.
6.1.16 Openings no more than 1 /4 the height of the partition and
whose area does not exceed 1 /10 partition area,
it is allowed to be cut out in the mounted partition. Large openings
sizes are recommended to be carried out during the installation of the partition. When opening
up to 800 mm wide, if only one row of slabs is placed above it, above the opening
the mounting structure is fixed, ensuring the design position of the slabs up to
glue seizure at the joints (figure). With more
the width of the opening above it should provide for the installation of a lintel with a depth
support not less than 500 mm.
6.1.17 Door
the boxes should be fixed in the partition opening using self-tapping
(drilling) screws according to figures and.
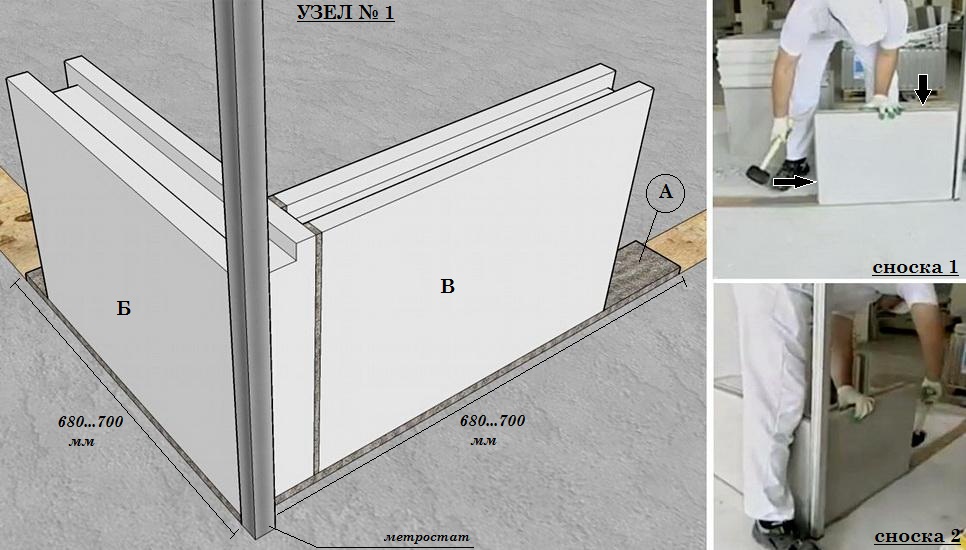
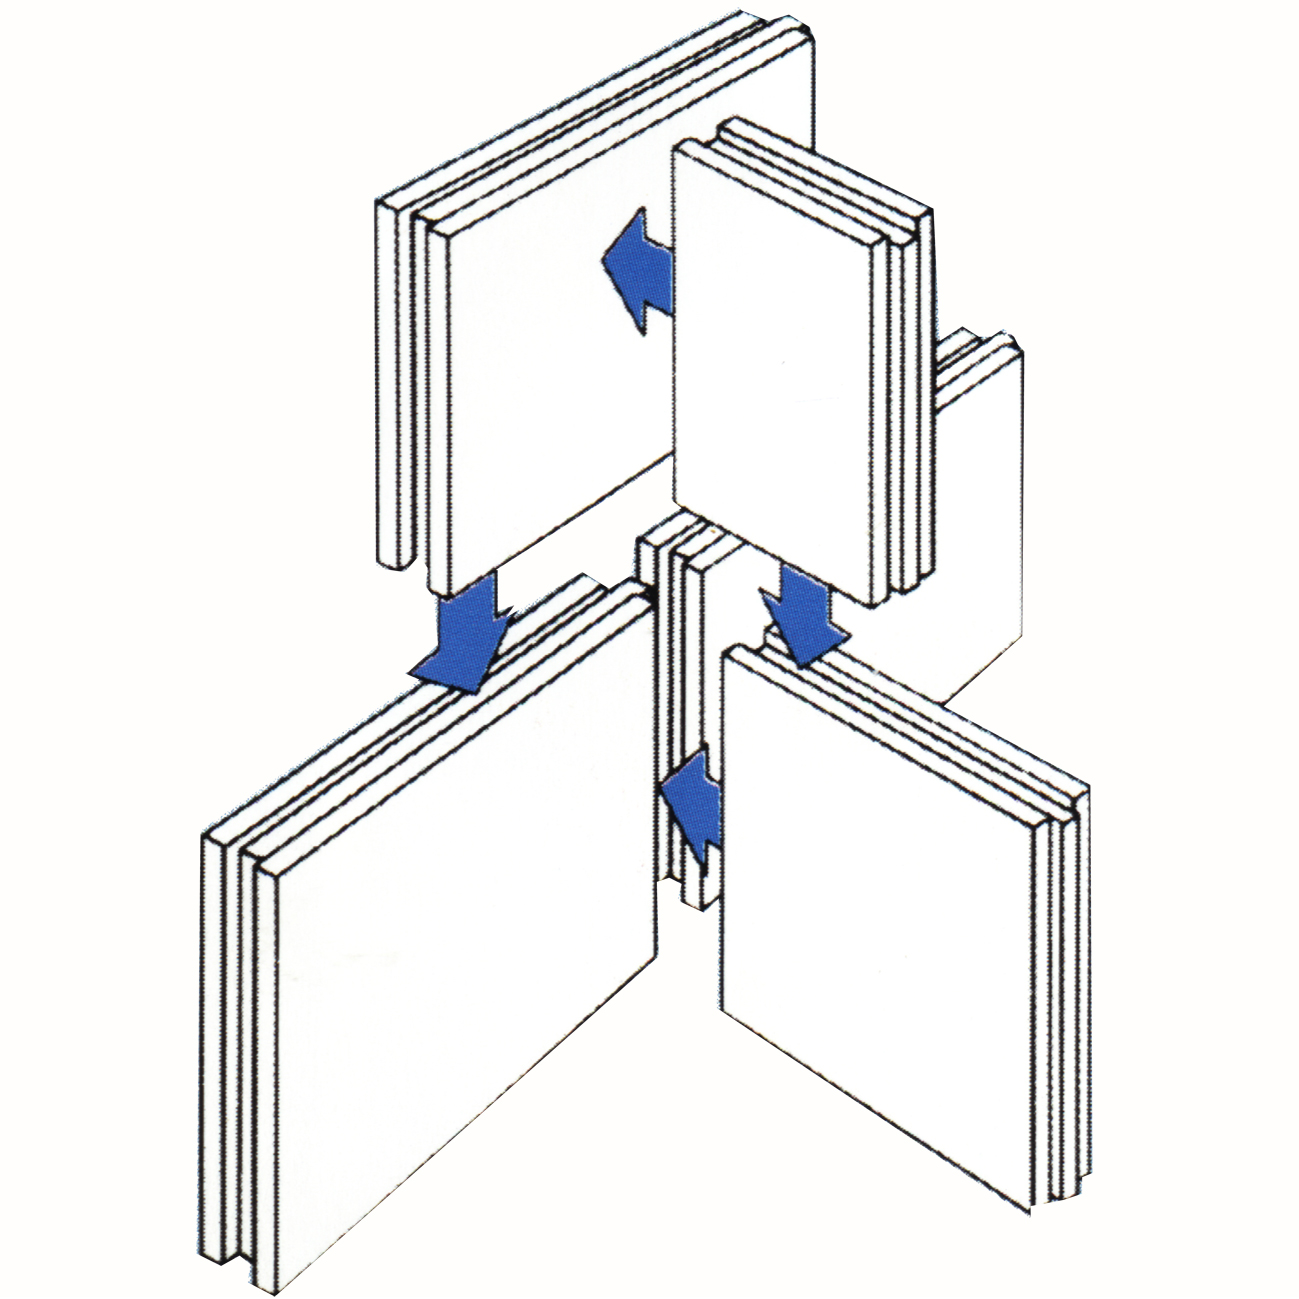
6.1.18 At
the formation of an angle and at the intersection of partitions or facings with each other
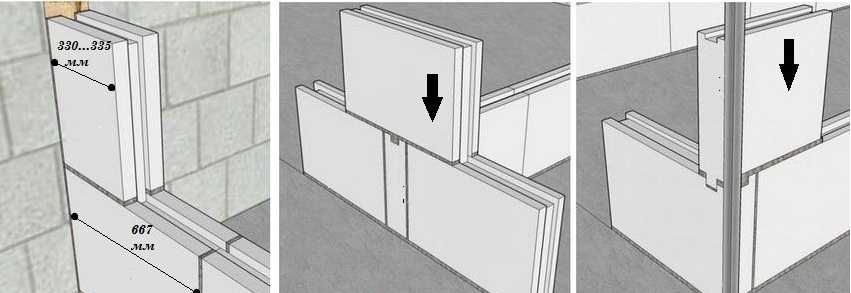
slabs should be laid with overlapping joints below the row located (figure
).
6.1.19 To protect against
mechanical damage to the outer corners of the partitions, a corner protection
profile PU 31/31, which, when installed, is pressed into the previously applied
a layer of glue, after which a wide spatula or a spatula for outer corners is applied
leveling layer.
6.1.20 Internal
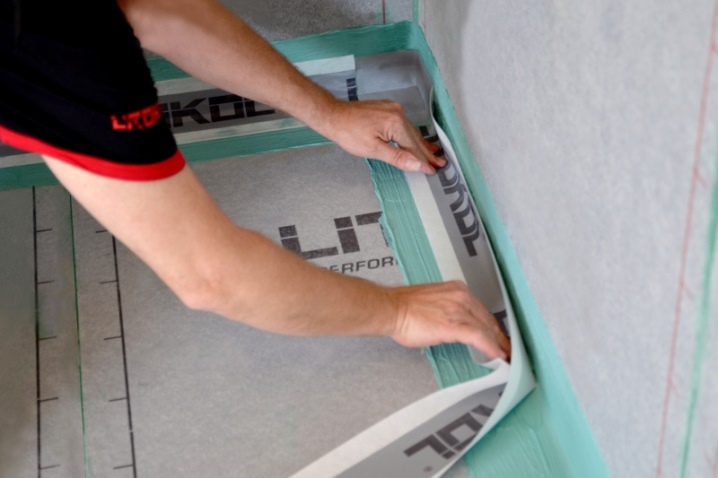
corners should be reinforced using a reinforcing tape, which is recessed into
a layer of glue, and then apply a leveling layer on top with a spatula to
inner corners.
Figure 11
— Installation diagram of the mounting structure with the device
doorway
6.1.21 To prepare for finishing, the joints of the slabs are putty using
a wide spatula, and after drying is treated with a hand grinding
device.
What is this material and its types
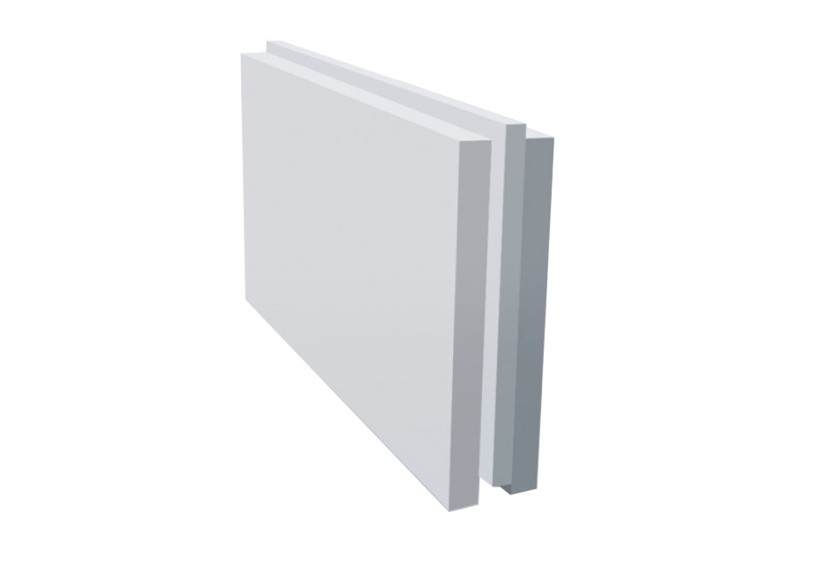
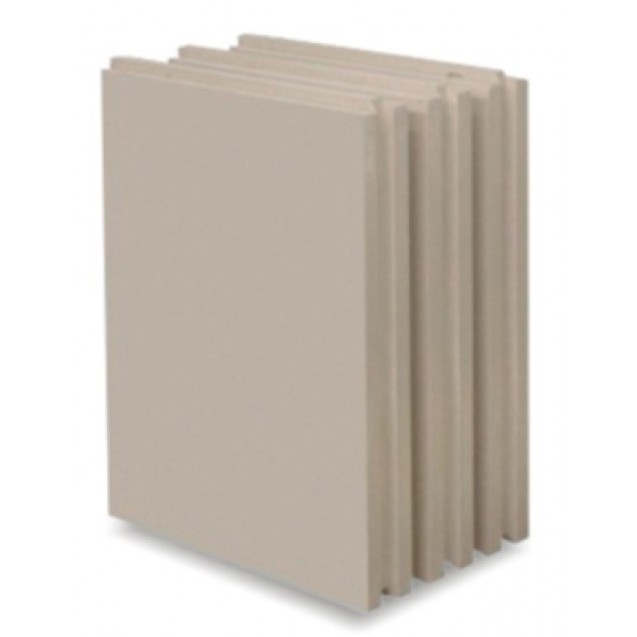
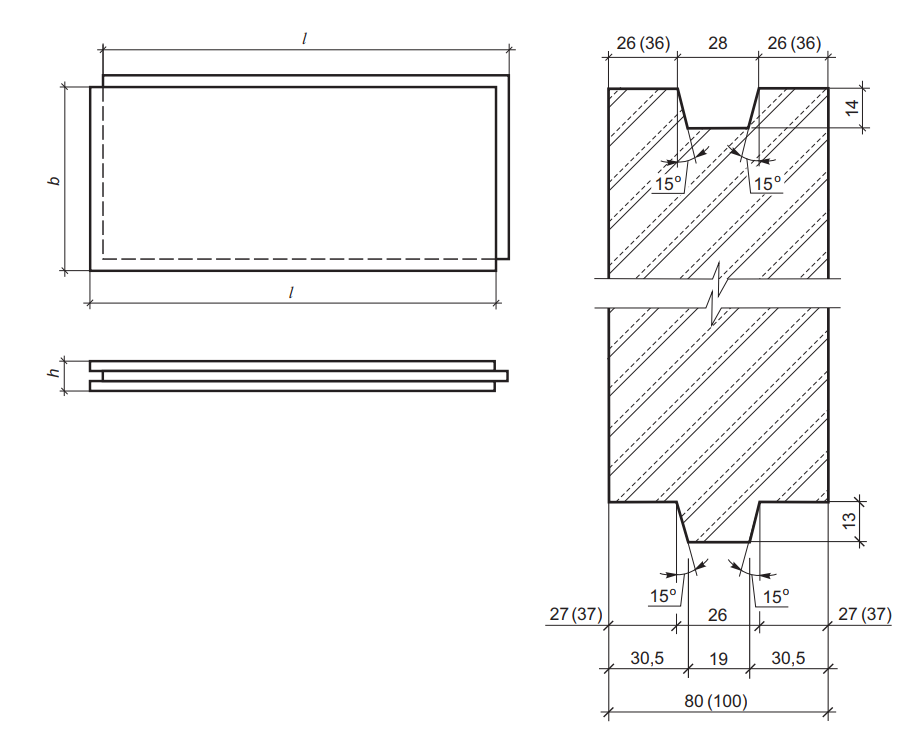
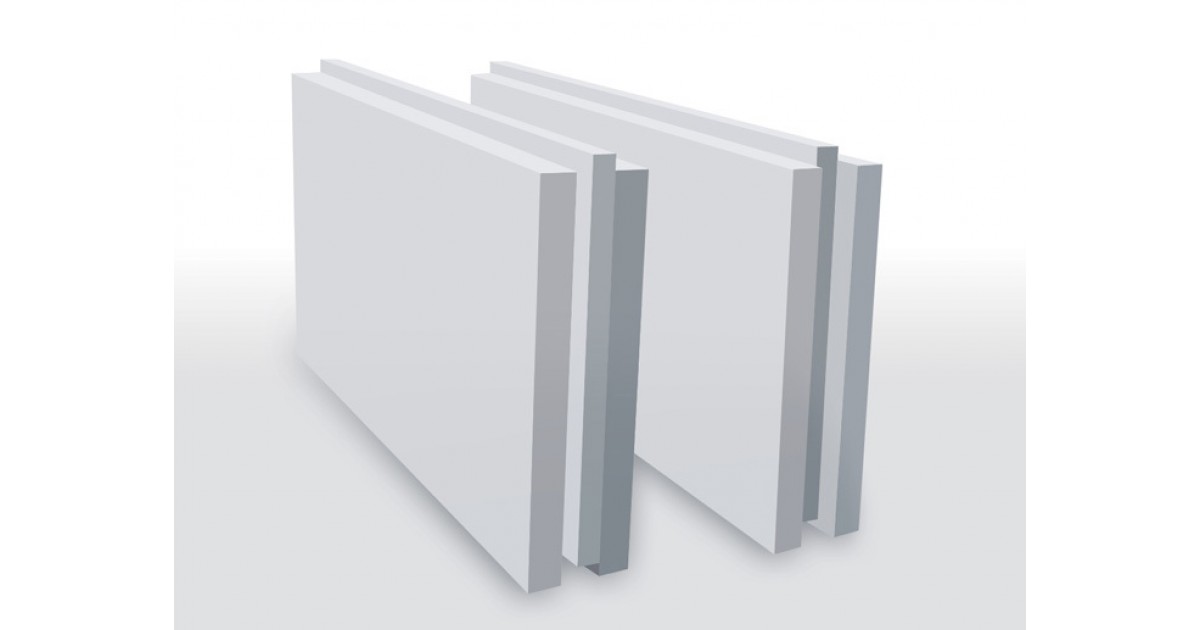
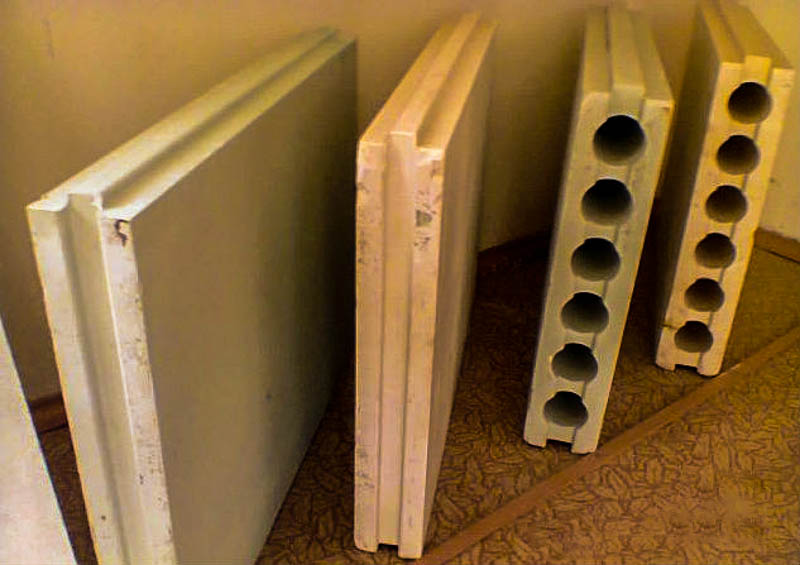
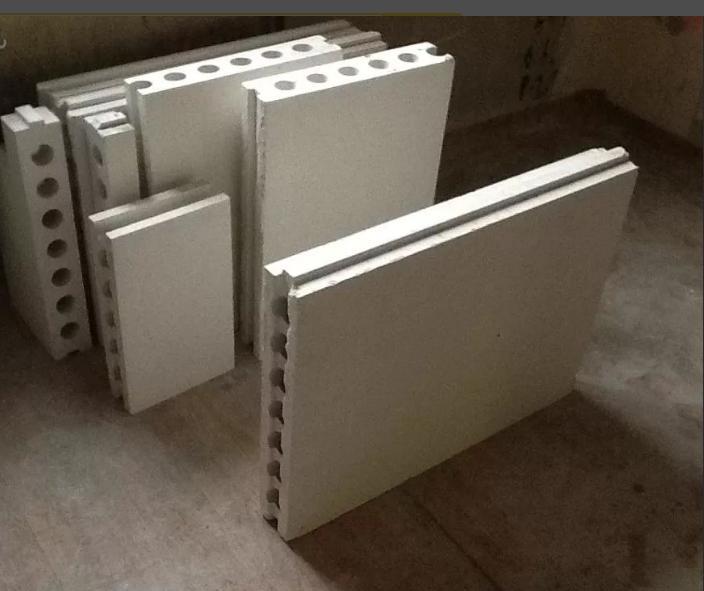
Tongue slabs (abbreviated as PGP) or blocks are large-format building material for erecting partitions in the form of a slab, at the ends of which a ridge (spike) and a groove are formed. Hence this name - tongue-and-groove slabs. They are:
- gypsum-based (cast gypsum);
-
from sand and quicklime, pressed under a certain pressure and steam-treated in an autoclave (silicate).
Plasticizers and hydrophobic (water-repellent) additives are added to the solution to improve the properties. Gypsum GWPs have another name - gypsum boards. It is understandable: the gypsum solution is poured into molds. Here is the "source" of this variant of the name.
Moisture resistance and voidness
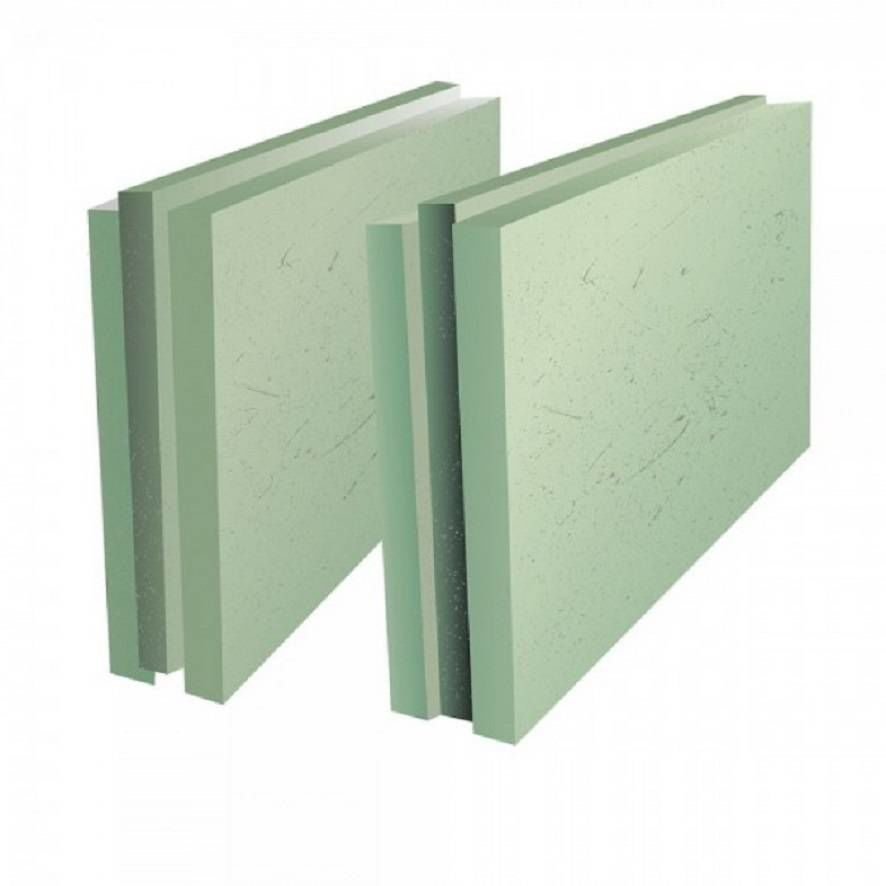
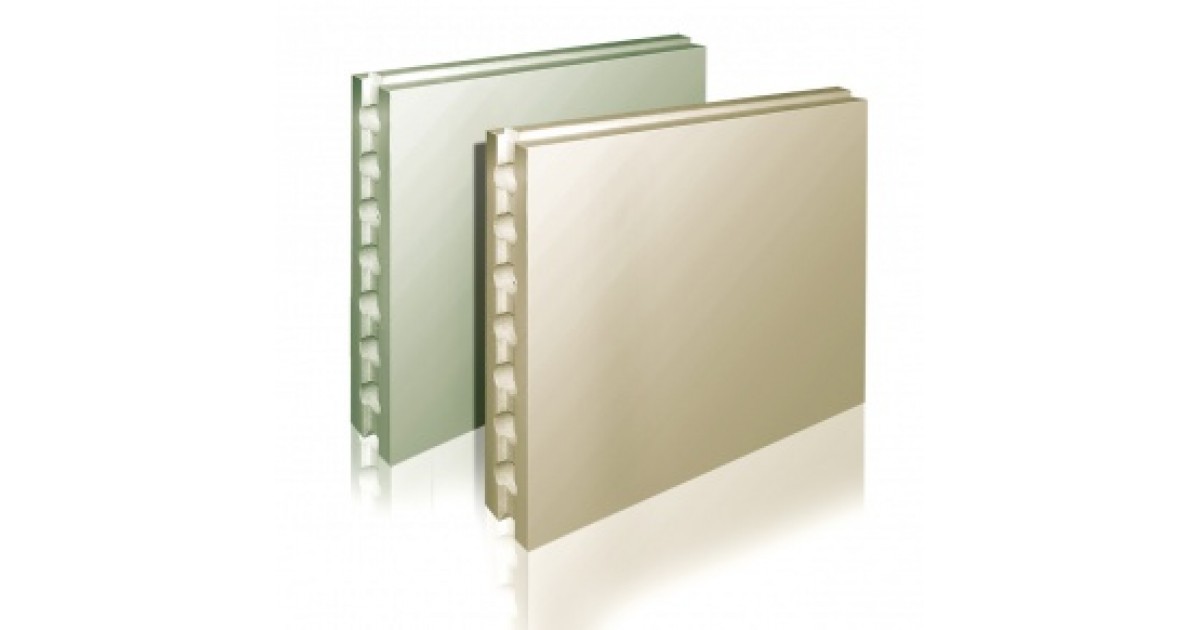
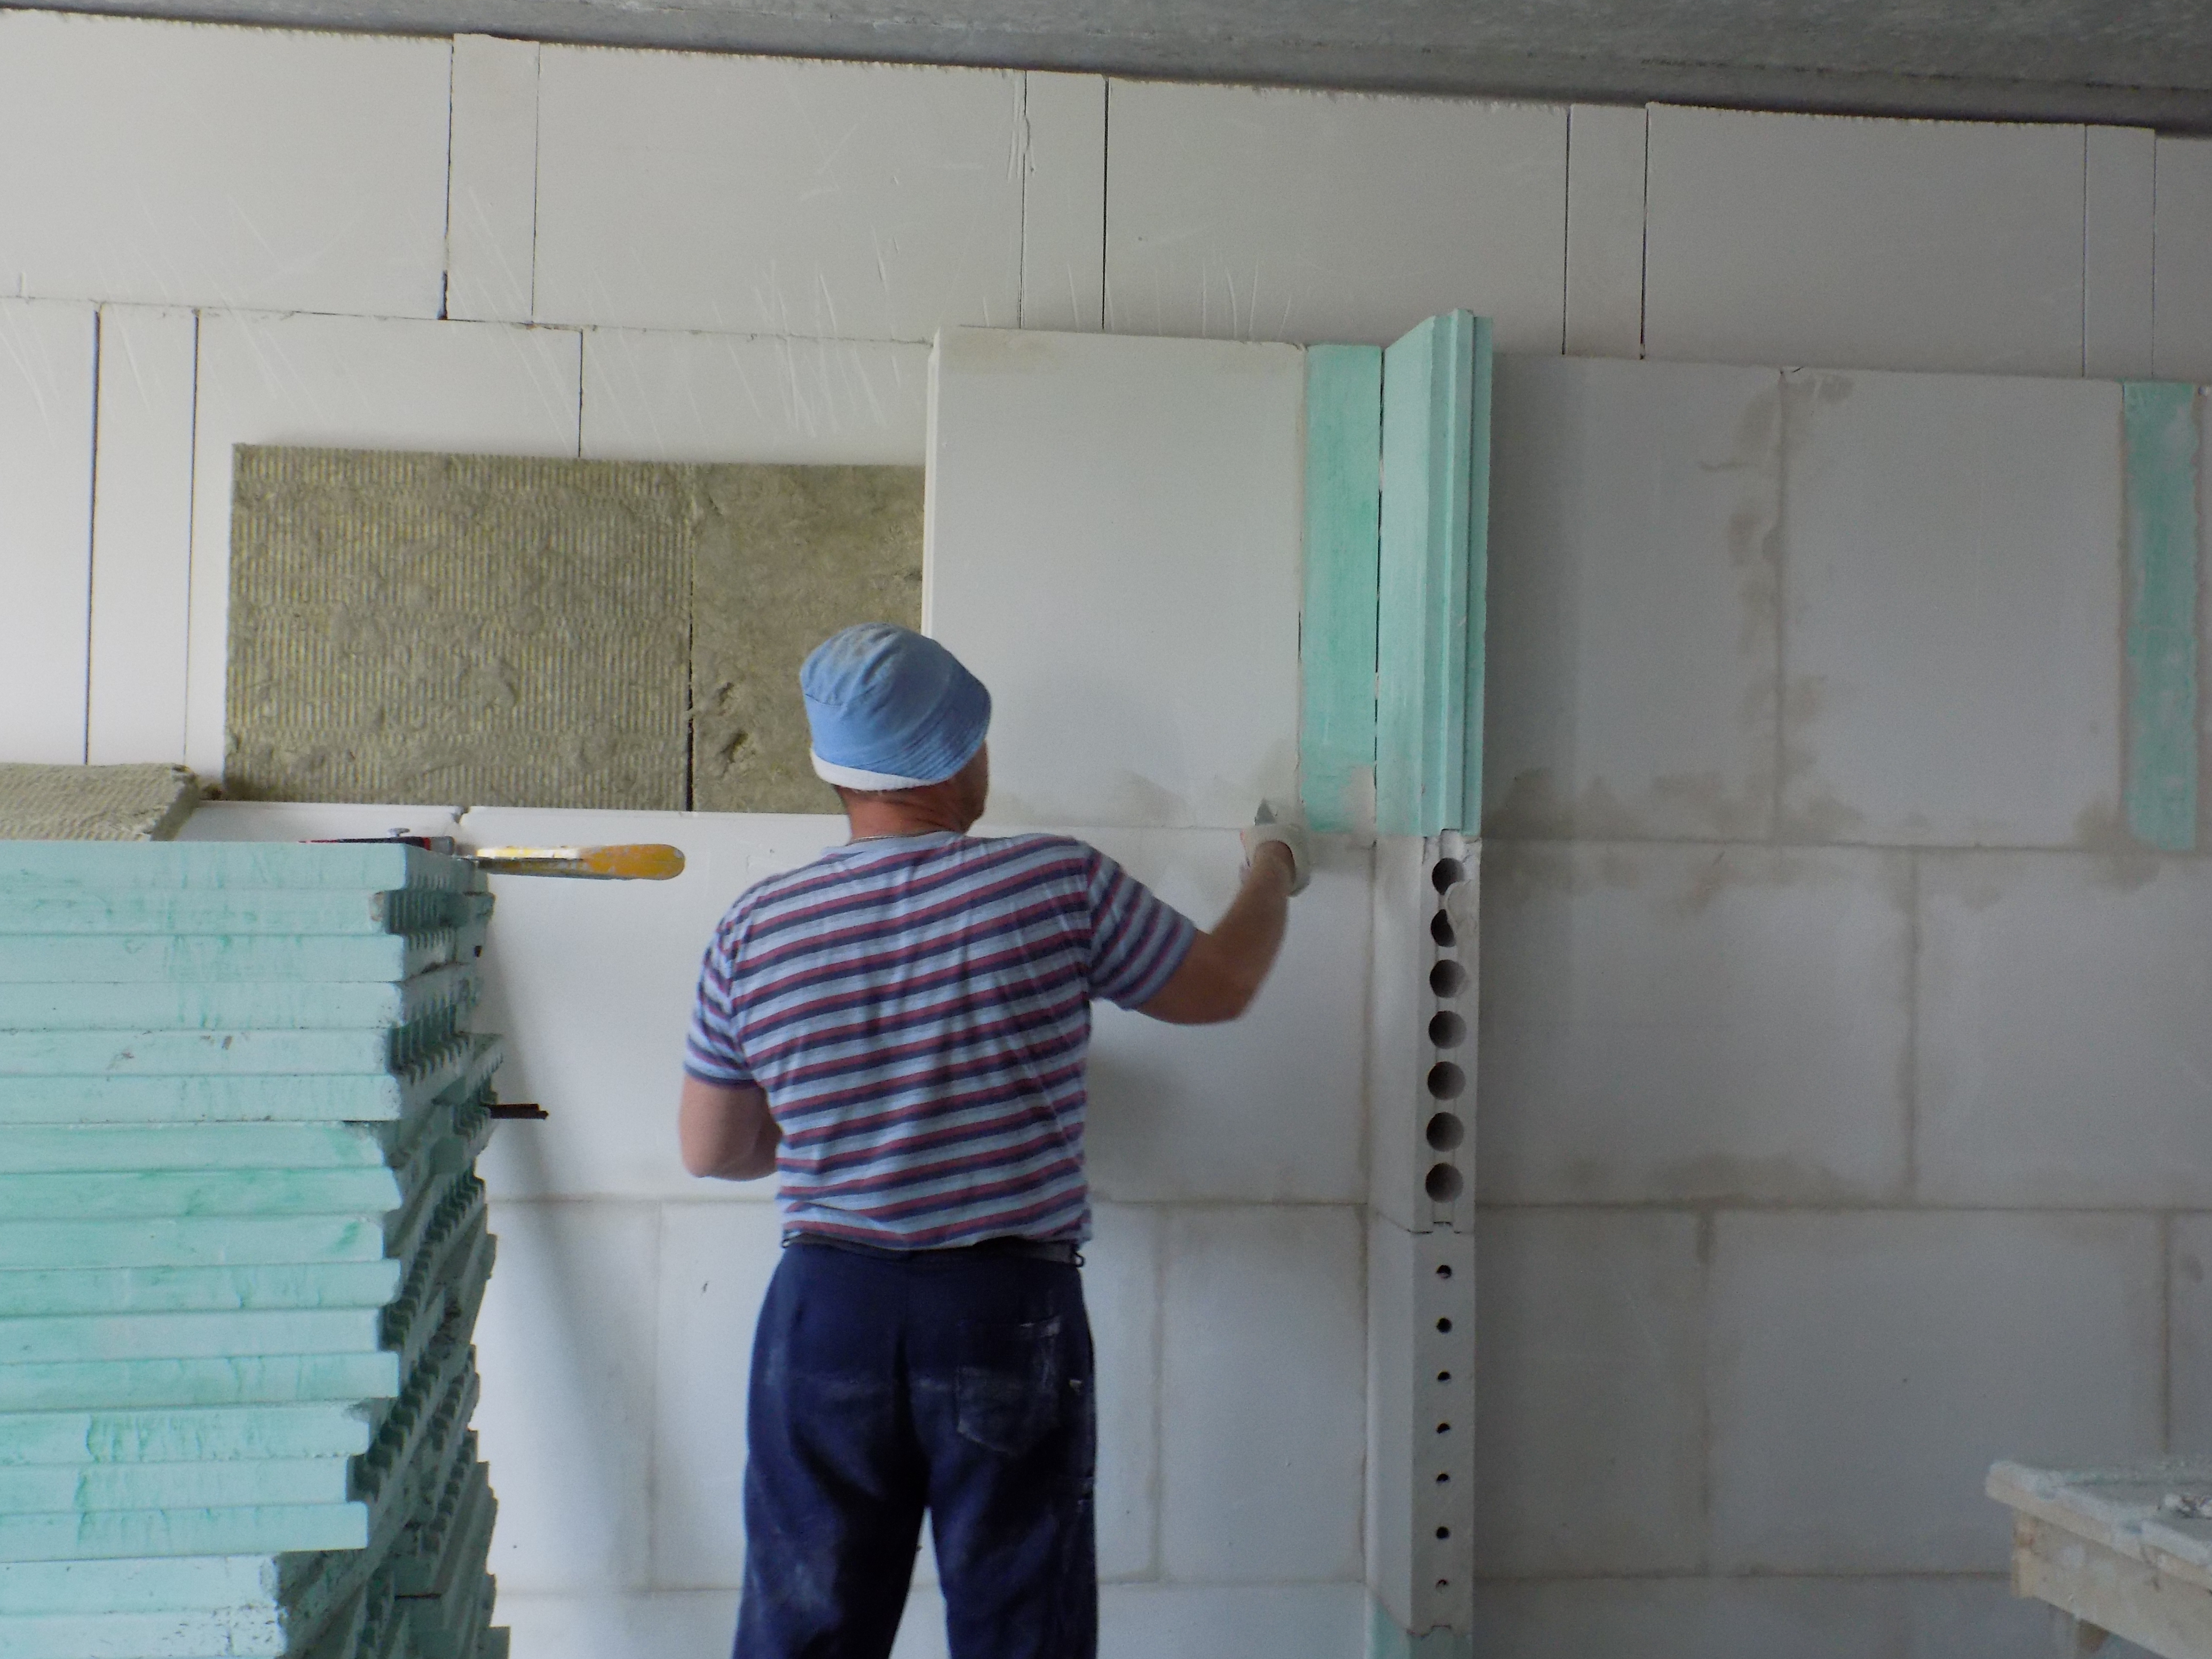
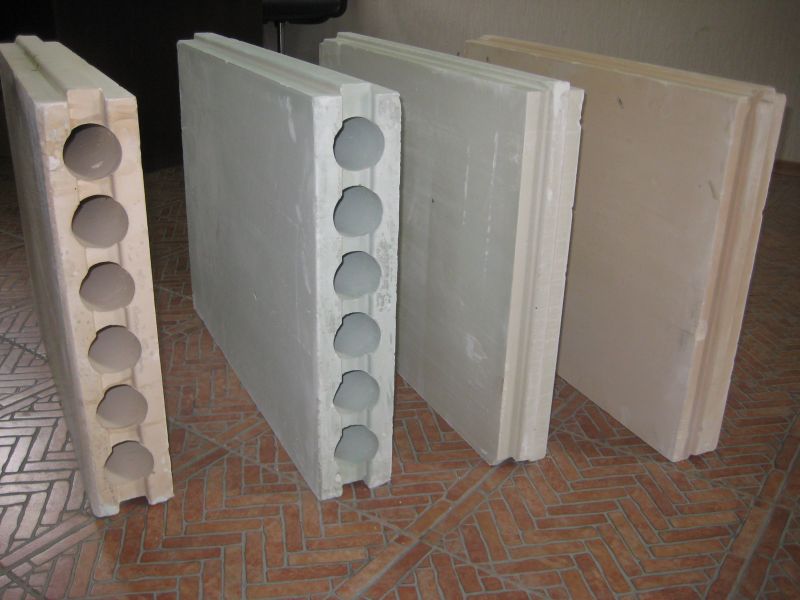
According to the area of use, tongue-and-groove plates can be designed for normal operating conditions (normal, standard) or for damp rooms (moisture resistant). Moisture resistant for better identification tinted greenish.
Solid and hollow differ in weight and strength
Both gypsum and silicate tongue-and-groove slabs are solid and hollow. Full-bodied, more durable, hollow due to lower weight, create less load on the floors. The choice between corpulent and hollow must be made based on several factors:
- Soundproofing characteristics. A monolithic material without voids conducts sounds better, so it is used if sound insulation will be made in a separate layer (the best option) or if it is not so important.
- Partition loads. If you need to hang shelves, furniture on the walls, fix some heavy objects, it is better to use a monolith.
- Floor or floor loading. It is better to place less heavy (hollow) blocks on wooden floors or old wooden floors.
Considering several factors, sound insulation is the last thing to consider. It is possible to increase noise protection using a special mounting technology (on vibration damping pads), as well as by making an additional layer of soundproof materials.
Specifications
If we compare ordinary and moisture-resistant tongue-and-groove plates, the differences in characteristics are only in water absorption and strength. Moisture resistant, due to the large amount of hydrophobic additives, they almost do not absorb moisture. Because of the large number of these additives, they are more expensive, since these additives are expensive. At the same time, they increase the strength (M50 compared to M35).
By the way, you can check "without leaving the checkout" if you really have moisture-resistant GWP or just standard green-colored ones. Just pour some water on the surface. Standard plates will quickly absorb it, and on water-repellent plates it will stand for a long time in a puddle.
Main technical characteristics of gypsum and silicate PPGs
If we compare gypsum and silicate partition blocks, the increased strength of the latter immediately catches the eye - M150 compared to M50 and M35. That is, the strength of silicate slabs is comparable to concrete of not the worst grade. If you are going to hang something very heavy on the partition, it is better to use silicate. Manufacturers also produce blocks with a thickness of 115 mm, which are called inter-apartment blocks.
Technical characteristics of tongue-and-groove gypsum partition blocks
How else do silicate boards differ from gypsum counterparts? The fact that in the standard version they do not have such a high absorbency. It is not as low as that of moisture-resistant blocks, but this material can be used without problems in any damp room (13% versus 26-32%). The disadvantages of this material are more weight (with equal dimensions) and lower thermal insulation characteristics.
Technical characteristics of tongue-and-groove plates
Before making the final choice between a gypsum and silicate partition, it is necessary to assess the intended operating conditions, to determine the value and intensity of mechanical effects on the partition. The technical parameters of the various tongue-and-groove panels are given in the respective tables.
Technical characteristics of gypsum GWP:
|
Name |
Unit rev. |
Conventional GWP |
Moisture resistant GWP |
|
Specific gravity |
Kg / m3 |
1400 |
1100 |
|
Water absorption capacity |
% |
27 — 33 |
5 |
|
Brand |
M 35 |
M 50 |
|
|
dimensions |
mm |
668x500x80 |
668x500x80 |
Technical characteristics of silicate GWP:
|
Name |
Unit rev. |
Meaning |
|
Brand |
M 150 |
|
|
Water absorption capacity |
% |
13,7 |
|
Specific gravity |
kg / m3 |
1226 — 1875 |
Mechanical characteristics of gypsum GWP:
|
Options |
Unit rev. |
Conventional GWP |
Moisture resistant GWP |
|
Material |
Gypsum construction G-5 |
Gypsum construction G-5 |
|
|
dimensions |
mm |
665x500x80 |
665x500x80 |
|
Color spectrum |
White |
Light green |
|
|
Weight of one block |
Kg |
28 |
28 |
|
Baffle weight |
kg / m2 |
83 |
83 |
|
Specific gravity |
Kg / m3 |
1000 |
1000 |
|
Compressive strength |
MPa |
4,6 |
4,6 |
|
Flexural strength |
MPa |
2,2 |
2,2 |
|
Water absorption |
% |
25 — 27 |
5 |
|
Fire resistance |
hours |
Not less than 2.6 |
Not less than 2.6 |
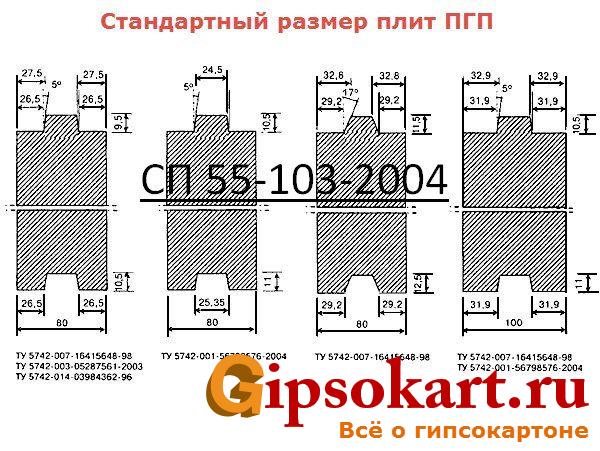
Sizes of tongue-and-groove plates according to GOST and TU:
|
Name and TU |
Number of slabs in 1 m2 |
Weight, kg |
|||
|
Length, mm |
Width, mm |
Thickness, mm |
|||
|
Common GOST 6428 - 83 |
600 |
300 |
80 |
5,6 |
15 |
|
Common GOST 6428 - 83 |
100 |
20 |
|||
|
Moisture resistant TU 574200352983495 - 2012 |
80 |
15 |
|||
|
Moisture resistant TU 574200352983495 - 2012 |
100 |
20 |
Do-it-yourself installation of a tongue-and-groove plate - step by step
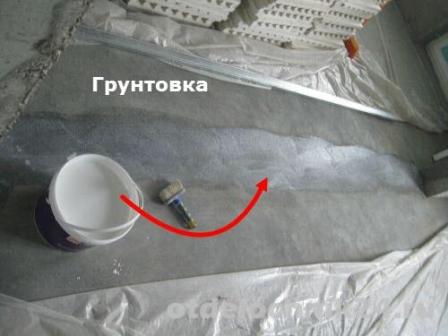
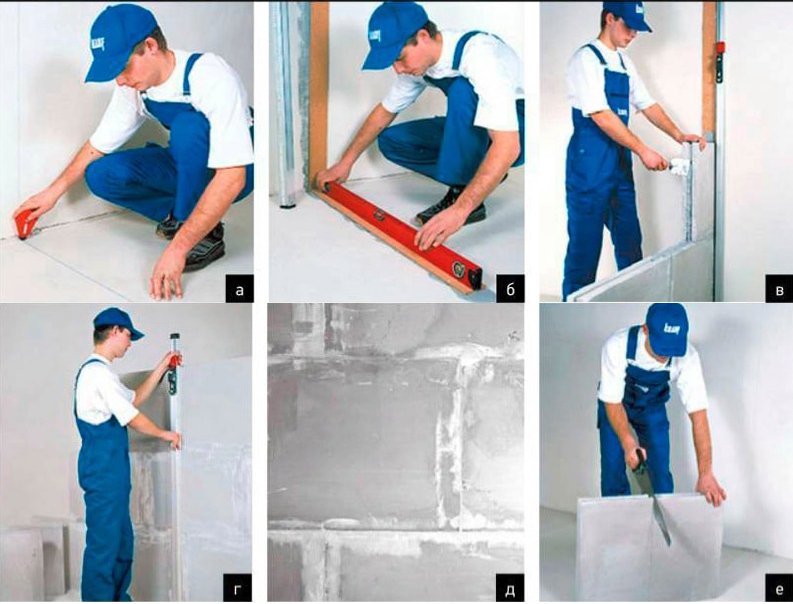
- The base of the partition must be horizontally level. If the slope of the base is visible when measuring, it is leveled with cement mortar. After the solution has dried, it is primed.
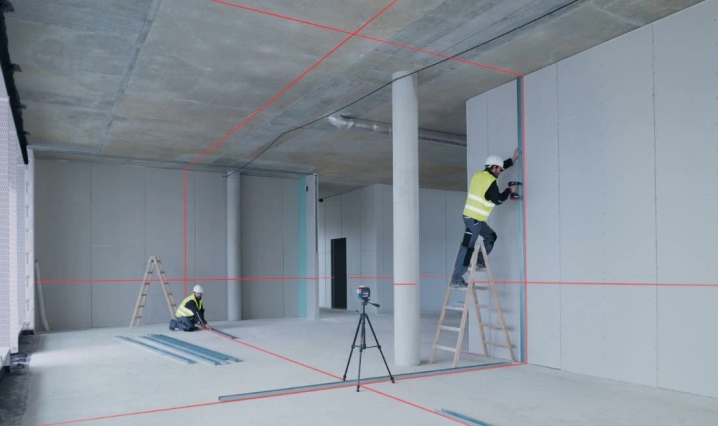
- Mark the partition along the floor, walls, and ceiling. Use a plumb line or laser level for marking.
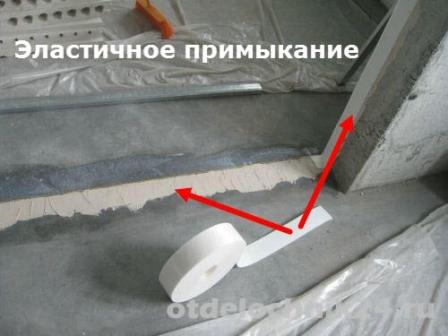
- In case of elastic (sound-proof) abutment of the partition to the floor, a sound-proof strip is glued to the installation site of the partition on the mounting glue.
GWP plates can be installed both with a groove up and a groove down. However, for a secure grip, installation with the groove up is recommended.

- Therefore, at the slabs of the first row, you need to cut off the ridge with a saw. Do not use power tools for cutting, the amount of gypsum dust will be unreasonably large.
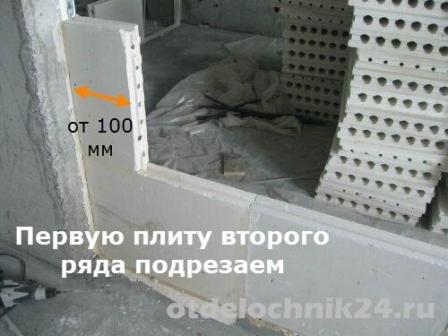
- The cut slabs in the partition row should not be narrower than 100 mm. Therefore, before installation, do dry installation and try on the boards on site. If the last board in the row is less than 100 mm, trim the first board in the row.
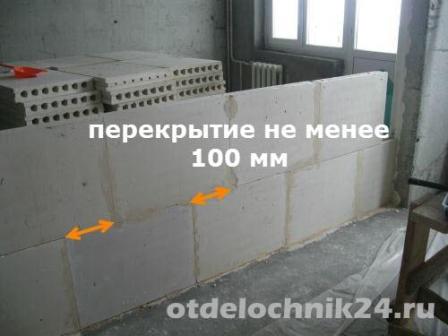
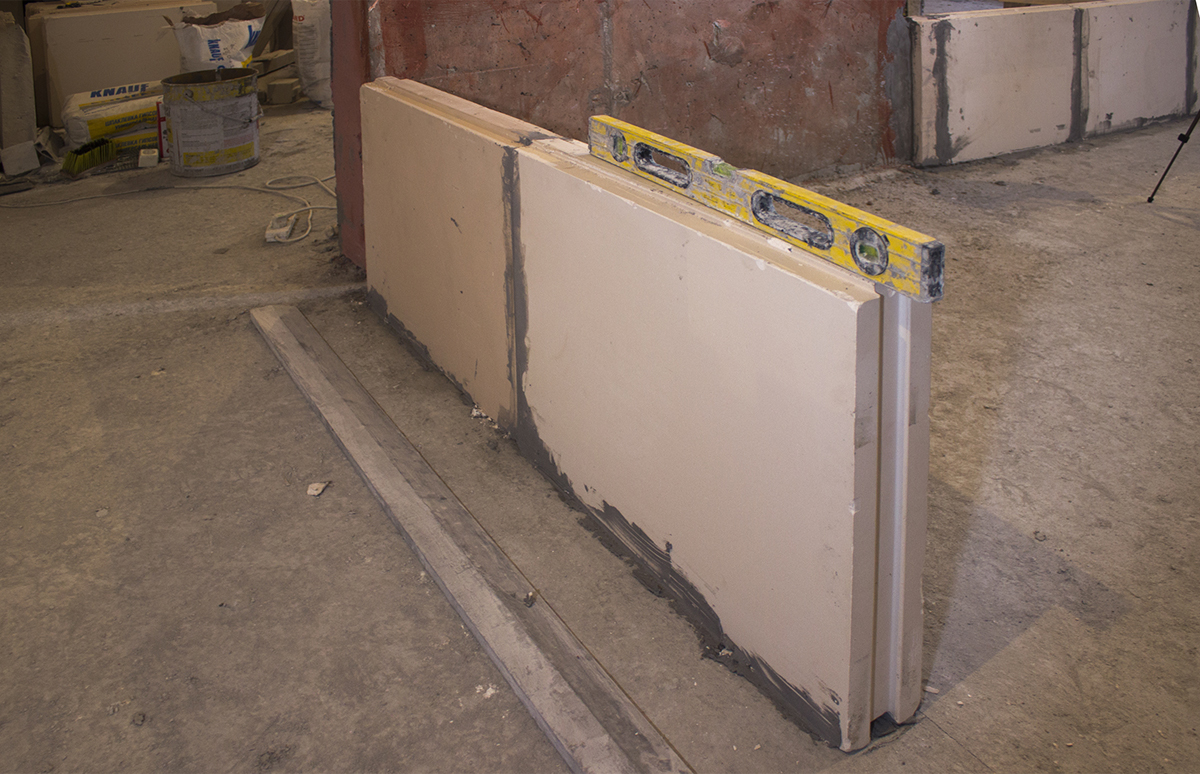
Install the first row of boards with glue. The quality of the entire partition depends on the horizontality and verticality of the first and two subsequent rows, therefore, we actively use the building level to control the laying.

Starting from the first row, with an elastic abutment, place reinforcing corners. The corners are attached to the PGP with standard self-tapping screws. To fix the corner to the walls, we use dowels with screws.
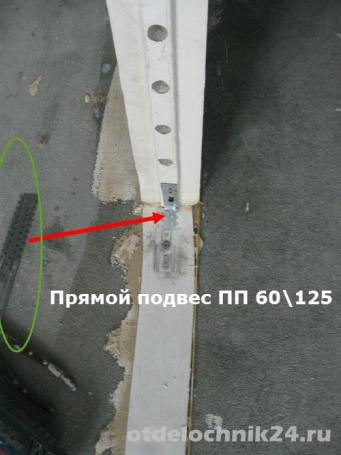
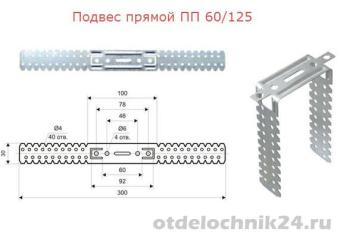
- The number of staples on one side of the partition must not be less than 3. That is, in an apartment with ceilings of 2700, we put the brackets after the first, third and fifth rows.
- We look at the photo, how the assembly glue fits into the groove of the bottom row.
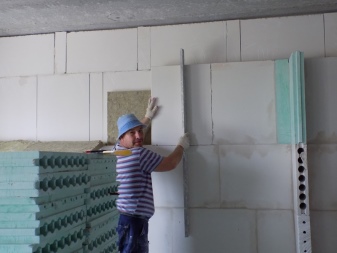
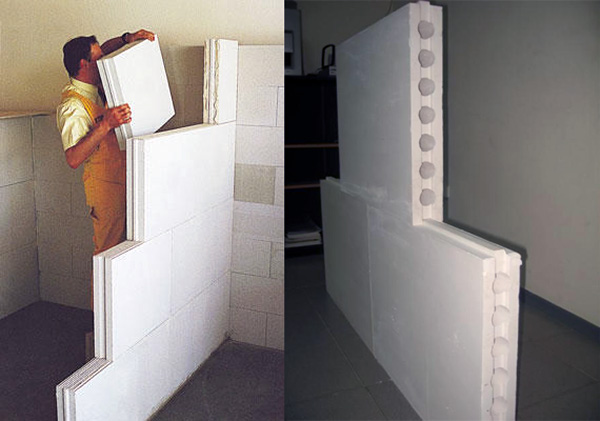
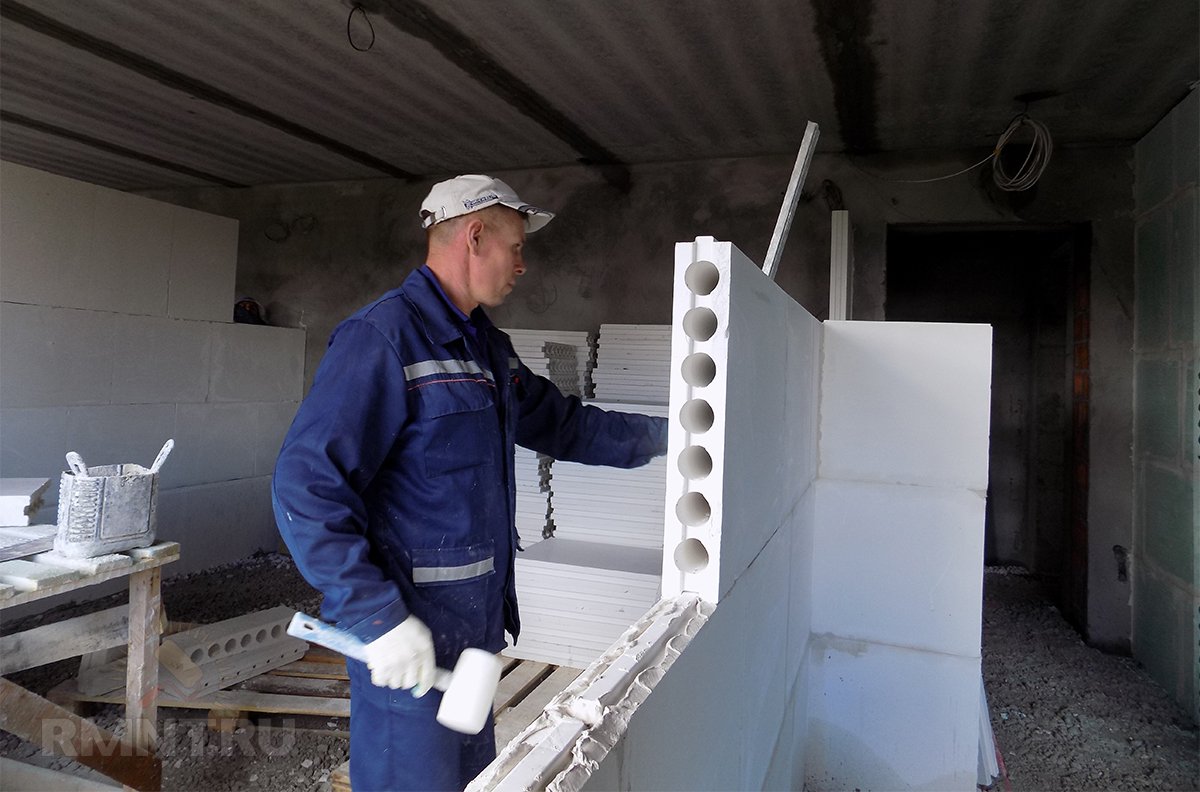
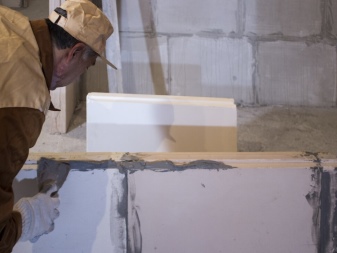
- Plates are installed with a spike in a groove with glue. We plant the plate with a rubber hammer. Remove excess glue squeezed out by the top plate with a spatula.
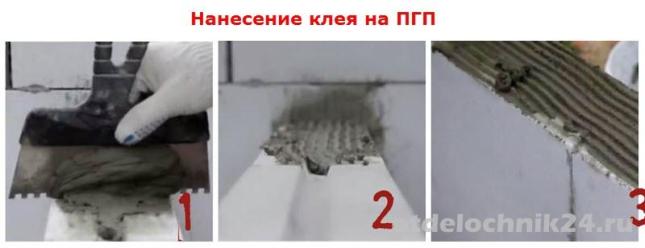
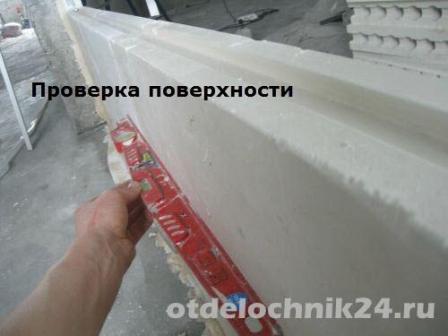
We constantly control the horizontal rows and verticality of the partition.
Laying technology
Installation of GWP is not particularly difficult, but it should also be performed in strict accordance with the instructions, if you want the wall to be durable and safe for household members. The recommendations are simple, but you should not ignore them, so let's take a closer look at them.
Please note that, due to their relative fragility, tongue-and-groove slabs are not used to erect too large-scale structures. Experts point out that even in the case of Knauf products, it is not worth designing walls whose height would be more than 3 meters, and the width would be more than 6
For a small redevelopment in an apartment, this should be enough with a margin, but in a private house once again think about whether your project goes beyond what is permitted.

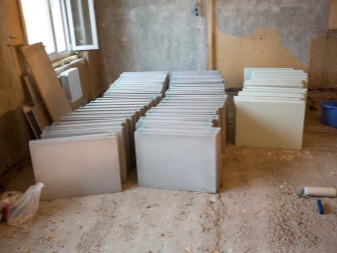
It all starts with the preparation of those areas on the floor and ceiling, which will become the points of connection with the future wall. Our motto is cleaning and cleaning again, because by leaving any stains of moisture, oil or even old paint here, you run the risk of providing the wall with a backlash in a place that is difficult to repair. If you do not want the wall to literally dangle on the brackets in the future, achieve perfect base cleanliness.
Before fixing anything to the floor and ceiling, mark the place of future fixings. Do not be lazy to double-check everything several times, using a plumb line and level, because any mistake is a skewed wall, damaged floor and ceiling.
The slabs are assembled into a single structure using grooves and ridges, but this is only among themselves - no one, of course, will drill grooves for them in the floor and ceiling. Accordingly, at the point of contact with the floor and ceiling, the protruding narrow ridges must be removed, otherwise they will interfere. When working on removing the ridge, make sure that the edge of the board remains as flat as possible - it depends on whether you have to putty the joints and to what extent.
By connecting individual blocks with each other, you can not check whether they fit together correctly, forming a perfectly flat surface - that's why Knauf is considered a world-famous brand so that its products do not have obvious jambs. However, during the installation process, you simply must, after each step you take to install a new unit, check whether your structure is vertical with an angle of 90 degrees in relation to the floor, ceiling, adjacent walls. Better to check now than to redo it later.
How exactly to attach the slabs to the capital foundations depends on what you will do with the erected wall further. The key advantage of Knauf GWPs is that they do not need to be plastered. Therefore, the method of fastening seems obvious - they are glued, starting from the floor, and the possible gap from the upper edge to the ceiling, if it is small, is sealed with polyurethane foam. If the room is completely bare, and plastering looks like an absolutely inevitable procedure, it is wiser to use braces, which are often more reliable. However, even in this case, the connection between the individual fragments of the prefabricated structure will be provided by the glue, for which the Fugen putty is suitable.
Please note that when gluing two tongue-and-groove plates, it is necessary to coat the grooves with glue, and not the thorns, otherwise you run the risk of allowing smudges over the entire surface of the future wall. Although the glue (or putty) takes much less time to solidify than cement mortar for bricks, this construction time must still be given before sealing the joint seams.
The accuracy of the grouting directly affects whether you have to do additional plastering to level the surface.At the same time, some types of finishes, such as decorative plaster or wallpaper with a textured texture, allow you to hide minor irregularities.
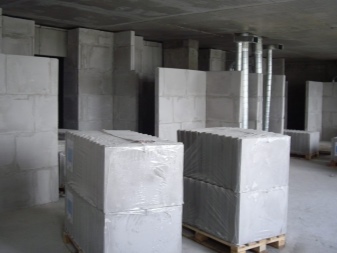

The following video describes the installation of tongue-and-groove slabs.
Installation features
Installation of partitions from GWP is performed after the completion of the installation of any supporting or enclosing structures. Work is carried out in dry or normal humidity conditions when the air in the room is heated at least + 5 degrees. When carrying out construction work in winter, a heating connection is required.
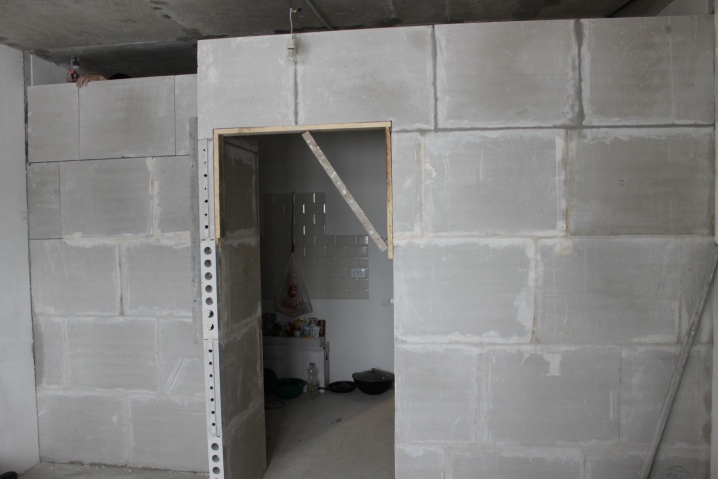
First you need to remove all dirt and construction dust from the base walls, as well as the surface of the ceiling and floor. After that, you need to mark the location of the future partition on the floor, and then, using a plumb line, carefully transfer this markup to the walls and ceiling, fix the areas for window and door openings. If the base is curved and has noticeable irregularities, then a leveling screed should be performed so that the horizontal surface becomes level.
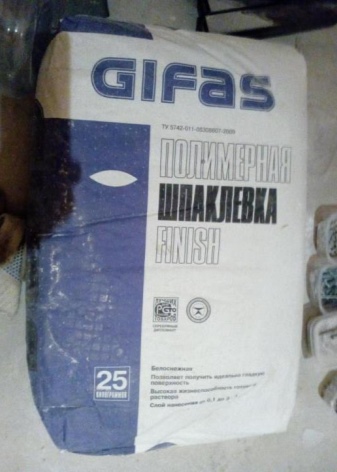
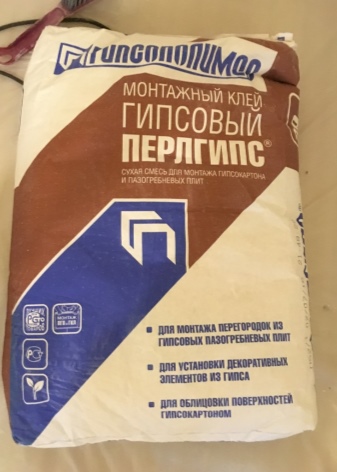
Gypsum boards are laid using assembly glue, the most effective is "GIFAS Gypsum Glue" or "GIFAS Gypsum Putty". When working with moisture-resistant compounds, hydrophobic compounds give the best adhesion. In order to increase the sound insulation characteristics of tongue-and-groove slabs when fixing them to the enclosing structures, you can use an elastic gasket, most often a cork with a density of 50 kg / m³ or bituminous felt with a density of 250-300 kg / m³, alternatively, you can fix low-density fiberboard.
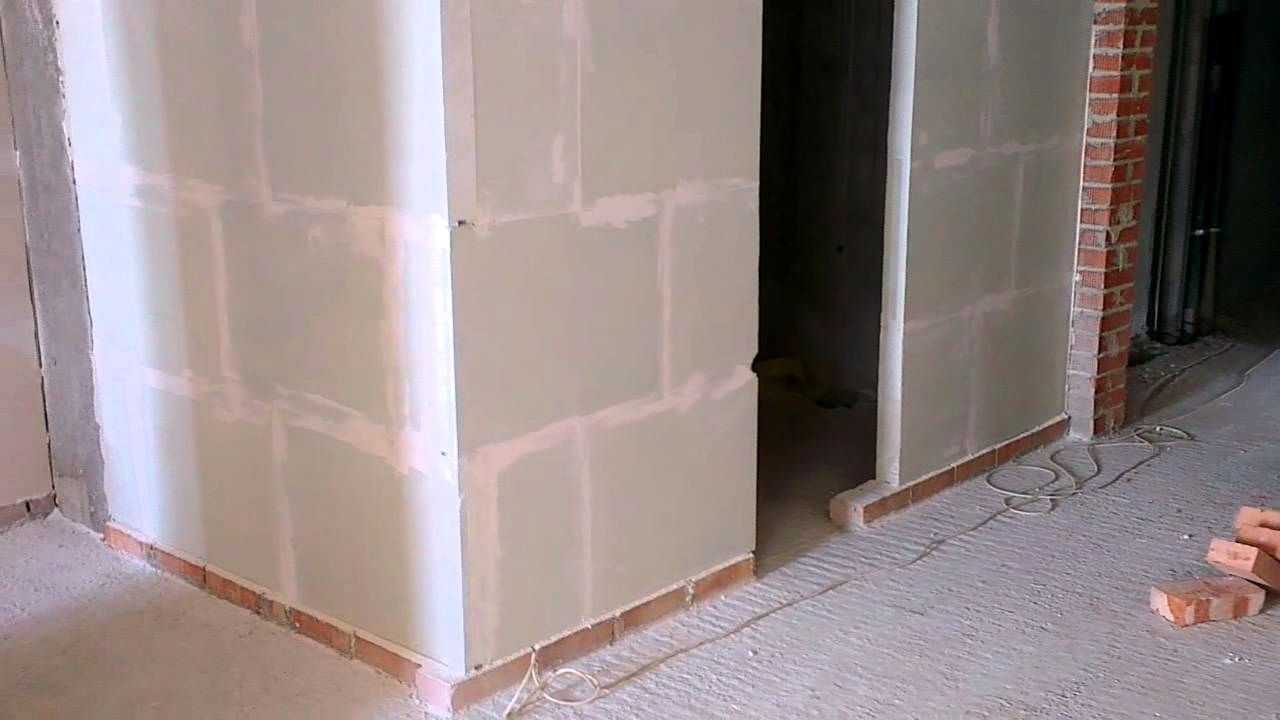
Depending on the specifics of the production, gypsum boards can be placed either with a puzzle down or with a puzzle up. Experts recommend using the puzzle upwards, because then the glue will be better redistributed in the slab space. To do this, for all GWPs located in the first row, you need to remove the comb. The plates are fixed apart, due to this, the greatest rigidity of the structure is ensured. The slabs of the very last row should have slightly beveled edges in the area of abutment to the floor. The space between the ceiling and the slab of the last row (approximately 2-3 cm) is filled with gypsum glue throughout the entire volume.
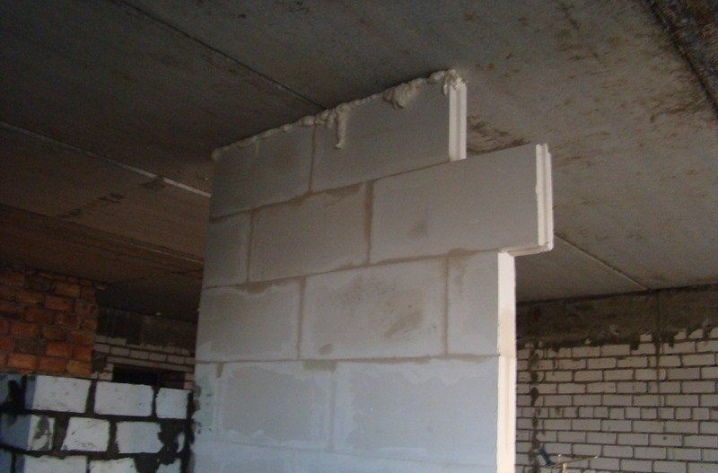
Openings are inserted into the partitions for installing windows or doors in them. If the width of the opening is not more than 800 mm and only one row of panels is located on it, then there is no need to put the lintel beam, in this case you can put a regular door frame. If the width of the opening exceeds 800 mm, then the installation of the lintel beam is necessary, it will relieve the load from the upper rows of blocks. The embedment size is approximately 500 mm on each side. Door frames are fixed with special dowels or screws. The vertical joints of the slabs located next to the openings should be at least 20 cm apart.

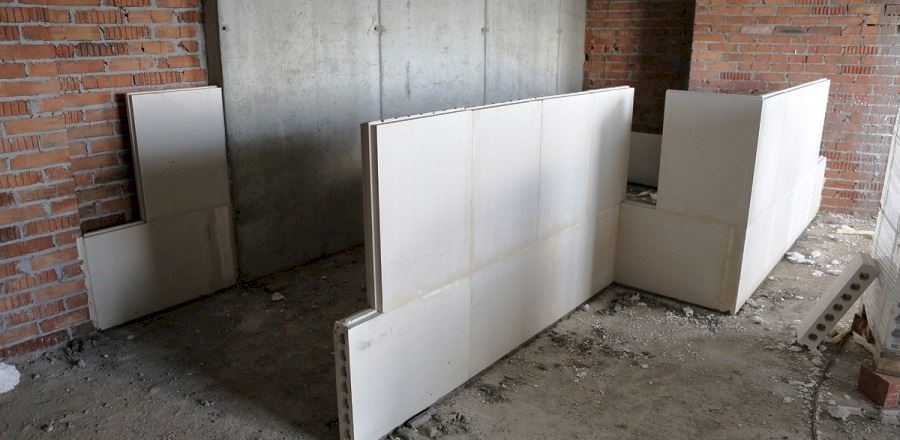
In the corners, as well as in the areas of intersection of partitions with each other, GWP should be laid in such a way that they in turn close the joints
At the same time, it is important to try not to allow vertical joints to turn out to be through. The upper corners are additionally fixed with a perforated metal profile
Reinforcement tape is used to process the inner corners. The internal joints of partitions made of hydro-resistant PHB must additionally be covered with a waterproofing tape, it plays the role of a sealant.
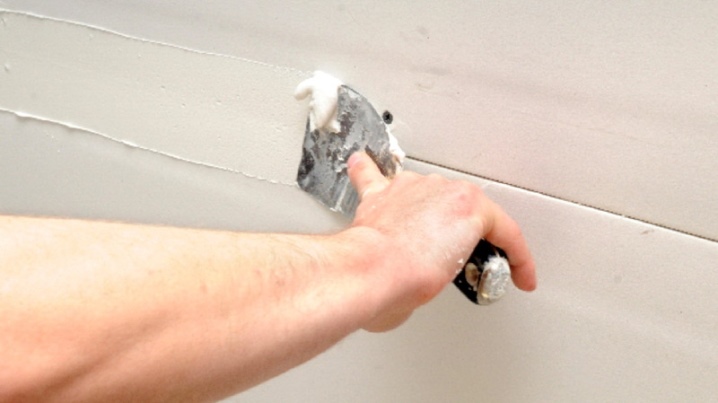
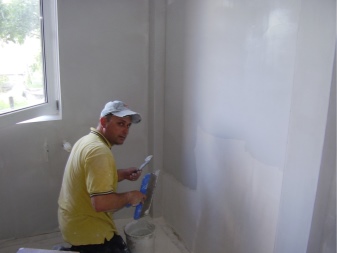
After the putty or glue dries, the surface of the walls is carefully sanded. The gypsum polymer partition is ready - all that remains is to complete the finishing, usually the GWP is painted with interior paint or pasted over with wallpaper. We hope our recommendations will help you make the right choice of tongue-and-groove gypsum board and perform all installation work on your own.
For everything you need to know about gypsum tongue-and-groove slabs, see the following video.
Advantages and disadvantages of tongue-and-groove blocks
The main advantages of products with a tongue-and-groove connection:
- have a high level of vapor and gas permeability;
- can be operated in areas with any climatic conditions;
- the speed of work is increased due to the fixed dimensions of the material;
- are fire-resistant material (they can withstand temperatures of 1100 ° C for 3 hours without losing their bearing capacity);
- are odorless and do not emit toxic gases;
- environmentally friendly;
- not subject to decay;
- do not conduct electric current;
- they are easy to install (dimensions and weight allow, no need to use special equipment);
- there is no need to make finishing plastering of surfaces;
- any kind of finishing is possible;
- have good strength characteristics (tongue-and-groove partitions can withstand furniture weighing up to 220 kg).
The only drawback of these products is the relatively high cost, but the cost of building materials is more than offset by the lack of the need for finishing the walls.
What is better to choose: foam blocks, expanded clay concrete blocks or tongue-and-groove blocks? Decide for yourself, guided by the technical characteristics of each type of product.
Features of plastering work on GWP
Any gypsum surface, including GWP, perfectly absorbs water. Therefore, if you do not process them before plastering GWP, it will take moisture from the solution and dramatically reduce its strength.
Therefore, before plastering the tongue-and-groove plates, they must be abundantly covered with a deep penetration primer with complete drying of the first layer before the second.
The rest of the plastering work on GWP does not differ from the standard plastering work on beacons. Several standard steps:
- Primer in two layers;
- Installation of beacons;
- Plaster in one layer. Spraying is optional for gypsum mixes;
- Undercutting the surface. It is carried out with the reverse side of the rule 40-45 minutes after applying the main layer;
- Smoothing gypsum plaster. Allows you to avoid or minimize the stage of subsequent puttying;
- It is better to remove metal beacons from the wall after cutting.
4.2 Component materials and products
4.2.1For fastening partitions
and cladding to enclosing structures with elastic abutment, as well as
fastening to the partitions of door frames, it is recommended to use brackets,
the nomenclature of which is given in the table.
4.2.2For fastening
It is recommended to use self-tapping screws with a length of
35 mm countersunk head and sharp end, made of steel grade 10,
10KP, 15, 15KP, 20 and 20KP in accordance with GOST 10702, and for attaching them to the enclosing structures -
expanding anchor dowels, the nomenclature of which is given in the table.
Table 4.3
Product and material designation
Appointment
Staple C-1
For fastening partitions with elastic
adjoining
Staple C-2
For fixing the door frame to the partition
Corner protection profile for external finishing
corners of partitions
Table 4.4
Name
Length, mm
Diameter, mm
Self-tapping screw
countersunk head and pointed end (screw)
35
3,5
Dowel
anchor plastic
35
6,0
40
55
8,0
60
10,0
65
Dowel
anchor metal
70
75
12,0
4.2.3 With the elastic connection of partitions with other fencing
structures, it is recommended to use an elastic cork gasket with a density
not less than 250 kg / m3 or bituminized felt with a density not less than
300 kg / m3. The width of the spacers must be at least 75 mm with slabs
80 mm thick and not less than 95 mm for slabs 100 mm thick.
4.2.4 When laying gypsum tongue-and-groove plates, as well as for fastening
elastic gaskets it is recommended to use glue from
dry putty mixture based on gypsum binder "KNAUF-Fugen-Fuller"
TU 5745-011-04001508-97 and TU 5745-021-03984362-2001. When laying
hydrophobized (moisture-resistant) gypsum boards are recommended to be used
putty mixture "KNAUF-Fugenfueller hydro" according to TU 5745-021-03984362-2001.
4.2.5 For the protection of interior corners in partitions and plasterboard claddings
tongue-and-groove slabs should use a reinforcing tape (serpyanka), and for
outside corner protection - profile
corner protection PU 31/31 according to TU 1121-004-04001508-2003 (table).
4.2.6 For the device of a heat and sound insulation layer in partitions,
apply the materials provided for in the design documentation for a specific
building.
4.2.7 For surface preparation of partitions and gypsum facings
tongue-and-groove plates for finishing it is recommended to use a primer
"KNAUF-Tiefengrund", supplied by the enterprises of the KNAUF group.
4.2.8 For surface preparation of partitions and gypsum facings
tongue-and-groove plates for high-quality painting are recommended to be used
putty composition "KNAUF-Finishpasta" supplied by the enterprises of the group
KNAUF.
4.2.9 In rooms where the surfaces of structures made of gypsum tongue-and-groove
boards are directly exposed to moisture, they must be protected
waterproofing mastic "KNAUF-Flechendicht", and at the junctions
structures made of gypsum boards between themselves and with the floor are recommended to be used
self-adhesive sealing waterproofing tape "KNAUF-Flechendichtband",
supplied by the enterprises of the KNAUF group.
5 TECHNICAL SOLUTIONS FOR CONSTRUCTIONS FROM GYPSUM GROOVES
PLATE
Varieties and sizes
Tongue gypsum polymers are available in two versions, such as:
- ordinary panels are made of gypsum with the addition of plasticized impurities, such panels have a gray tint;
- moisture resistant boards, in addition to gypsum, also contain cement and granulated blast furnace slag; such slabs are painted green.
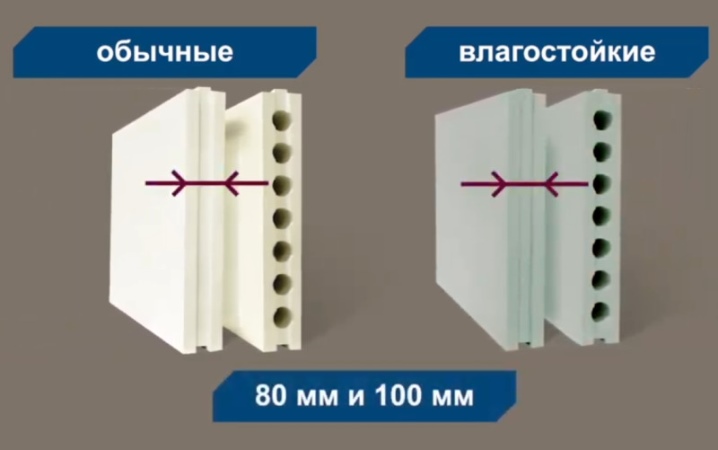
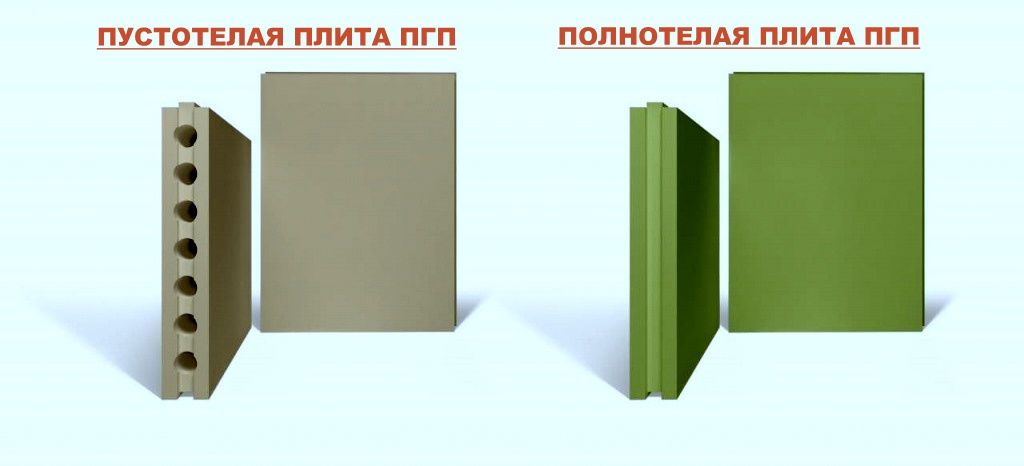
Gypsum blocks can also be made hollow and solid.
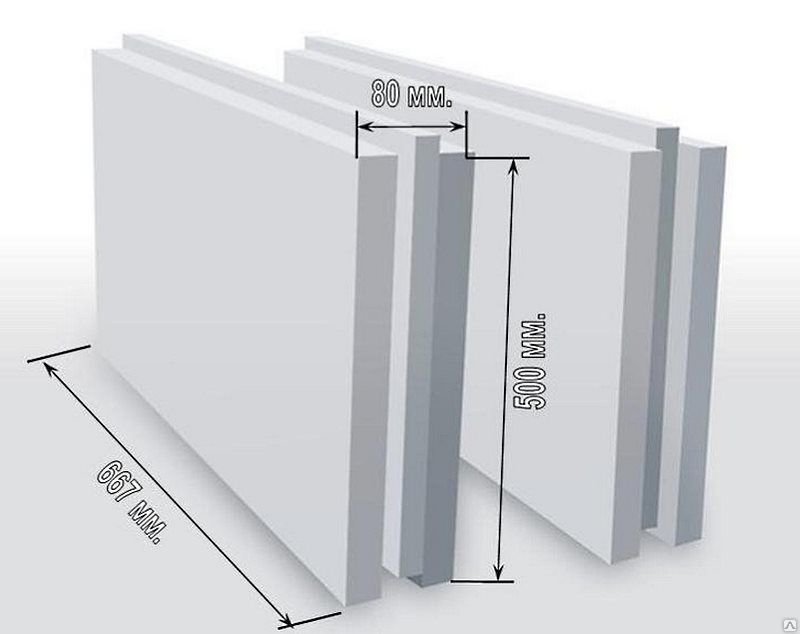
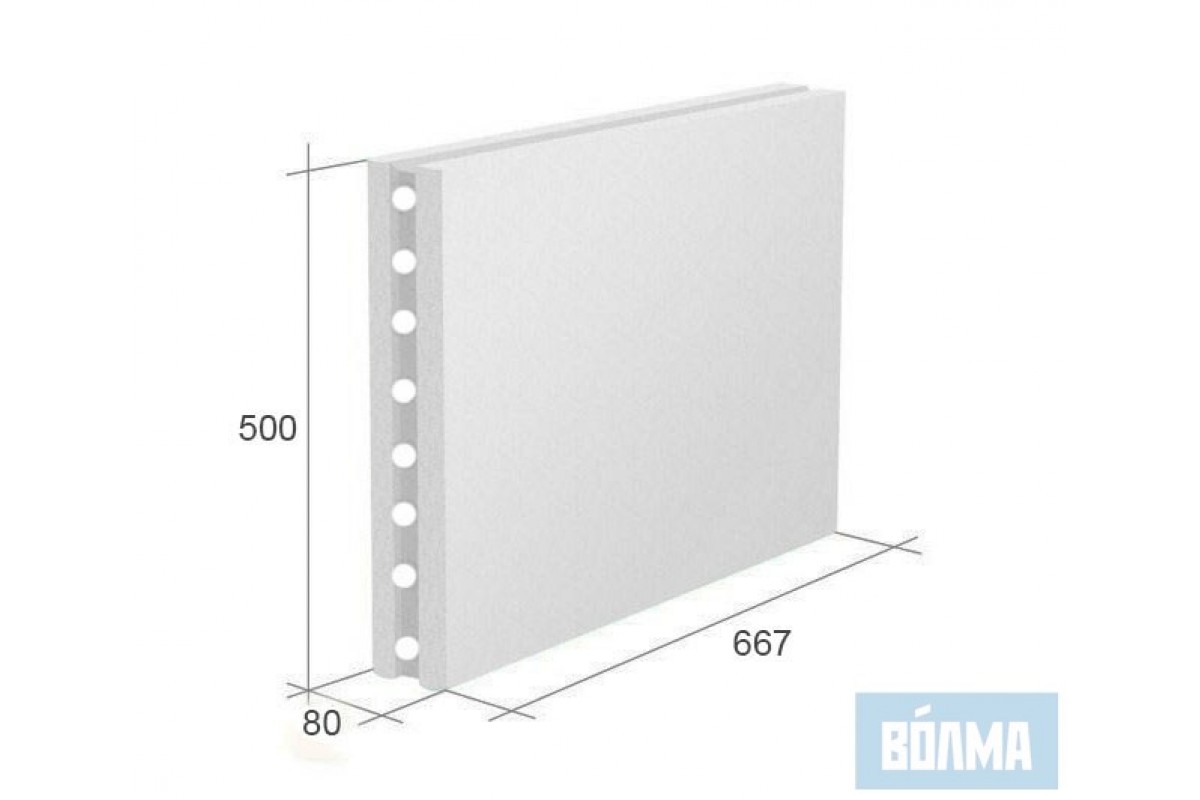
- Solid slabs are characterized by a monolithic one-piece structure. They are quite strong, it is impossible to break such a partition, even if you kick it with an effort. Plates are produced in dimensions 667x500x80 mm, block weight - 32 kg.
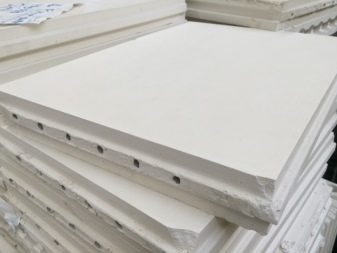
- Hollow modules have uniform longitudinal holes throughout the entire area. Thanks to this feature, the blocks are much lighter - due to this, the load on the supporting frame of the partition is significantly reduced. Plates of the same length and width with a thickness of 80 mm already weigh 24 kg.

Hollow slabs are in demand when performing construction work, which is explained by their following undoubted advantages:
- reducing the total cost of repair and construction work by reducing transportation costs, as well as increasing the speed of installation work;
- during technical operation, hollow core slabs successfully withstand any household loads;
- the air gap increases the ability of partitions and walls made of hollow blocks to retain heat in the room; Thus, the installation of hollow core slabs assumes the most economical approach to organizing construction work and reducing overall costs.
