Fiberglass
Just a couple of words can be said about the laying of fiberglass. As in previous cases, the abutting surfaces are cleaned of dust, various contaminants and primed. But they, too, are treated with an adhesive composition using a paint roller. The straightened fiberglass canvases are immediately applied to the wall or ceiling, overlooking each other by at least 5-7 cm. The reinforcing material is pressed to the base using the same roller with which the glue was previously applied.
The enclosing structures are left to dry completely. The term, as a rule, is indicated by the manufacturer on the packaging of the adhesive. The finished surface is processed with putty in 2-3 passes, depending on the technological requirements and the option of further finishing. The cycle of leveling the reinforced layer ends with final grinding. This is followed by the finishing of the premises.
at 00:03
Seam sealing process
The chamfer on the edges of the plasterboard sheet is made on purpose, thereby expanding the joint. So this groove must first be primed. This is done in order to strengthen the exposed plaster layer, plus increase the adhesion of the edge surface.
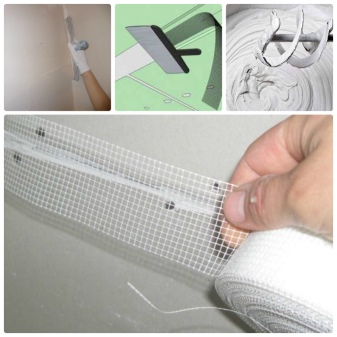
After drying, the joint is filled with putty to the brim. Serpyanka tape is installed immediately. In fact, serpyanka is a reinforcing frame. It looks like a medical bandage, but is made of polymer.
To glue the serpyanka on drywall, it must be laid on a wet putty mortar. It is mounted exactly in the middle, evenly covering the edges of two adjoining sheets of gypsum board. After that, it is necessary to give time for the putty layer to dry well. Next, another layer of putty is applied.
After it dries, the treated areas are polished with sandpaper. And the last stage is the primer. On this we can assume that the putty of the drywall joints is finished.
So, in this article we tried to answer a few questions: how and with what to putty the joints of drywall? This process is simple, you yourself could see for yourself by reading the article and watching the video. We propose to have a little discussion on this topic. We are very interested in your comments.
Serpyanka is a tape sewn from fiberglass (usually lavsan), one side of which is sometimes covered with an adhesive layer. It is often self-adhesive tape that is so easy to use that even a child can handle it.
It is used as a reinforcing mesh for filling cracks, seams, joints and slopes. The tape is easy to use, easy to cut and adheres well to any surface. The structure prevents bloating and bumps. Considering the minimum cost and high efficiency of the material, one should not ignore its application.
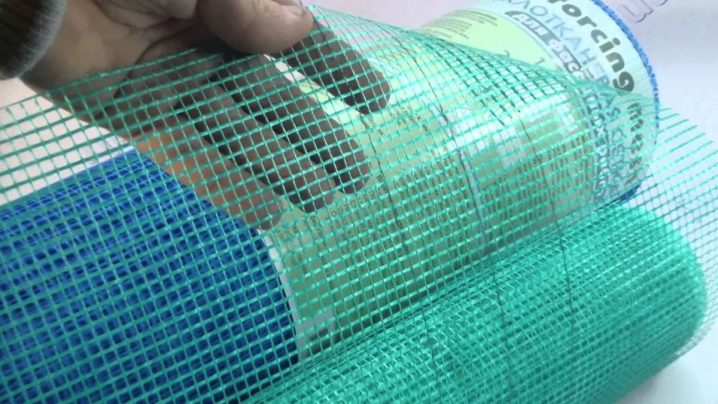
Types and features of painting nets
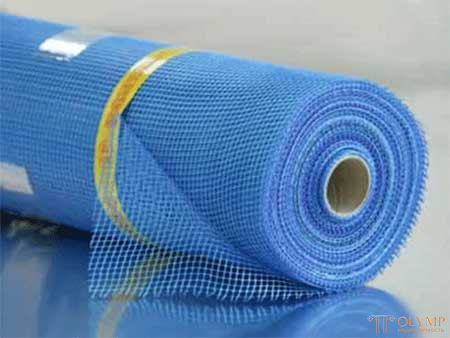
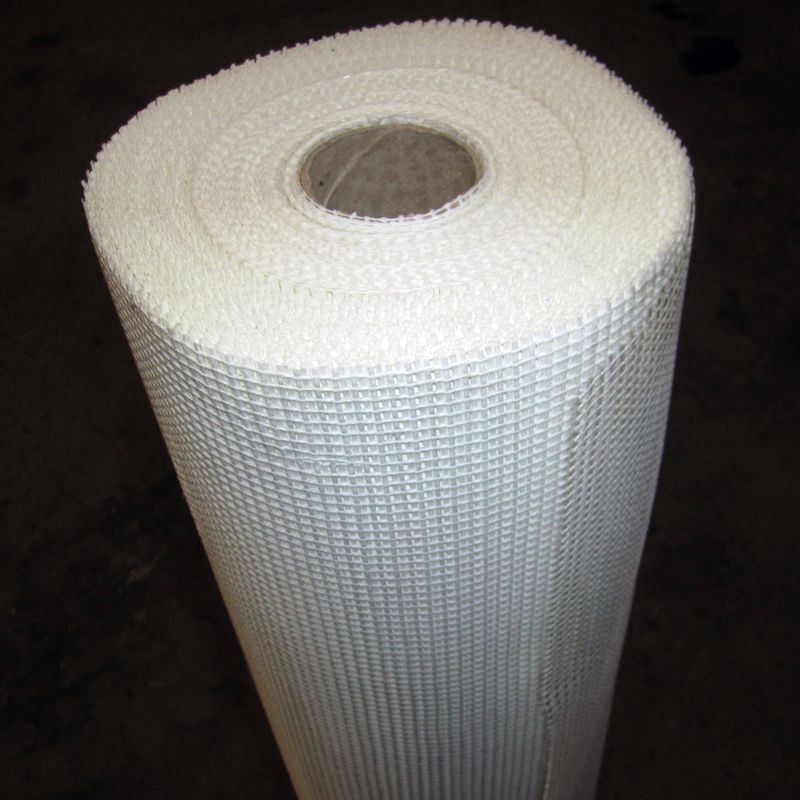
For puttying, a fiberglass mesh with a cell of 2 mm by 2 mm is most often used. The fiberglass mesh is resistant to alkalis, does not rust, is durable, has a low weight, and at the same time significantly improves the mechanical strength of the putty layer. The mesh absorbs the loads caused by abrupt and repeated changes in temperature and humidity in the room.
Painting net in wide rolls (usually 1 m) is most often used for:
- performing reinforcement of the putty layer during finishing work;
- protecting the entire surface of walls and ceilings from cracks before painting and wallpapering;
- imparting impact-resistant properties to the wall surface, for example, in public places;
- reinforcement of the waterproofing layer.
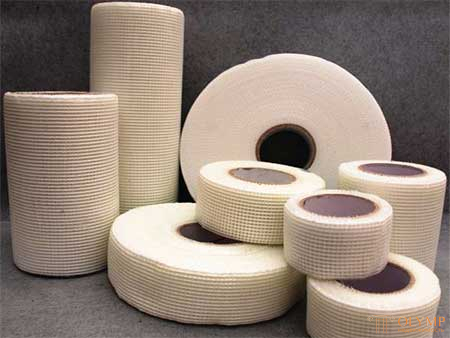
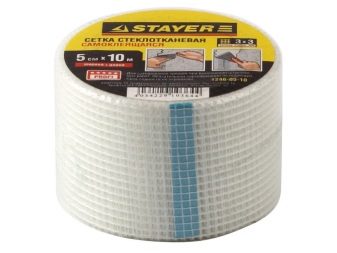
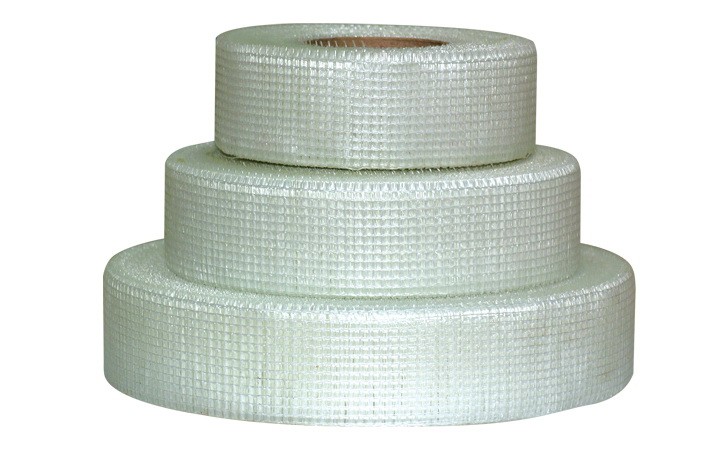
Serpyanka is the same painting glass mesh for putty with a square cell, only in the form of a narrow strip and often with an adhesive applied.It is produced in small rolls with a width of 45 mm to 250 mm and a length of up to 200 m.Serpyanka is most often used for:
- reinforcement of joints of sheets of gypsum board, fiberboard, chipboard, particle board and similar sheet materials;
- reinforcement putty on the inner and outer corners;
- strengthening of door and window slopes;
- sealing cracks on walls, ceilings;
- local leveling of the surface of ceilings, plaster on the walls.
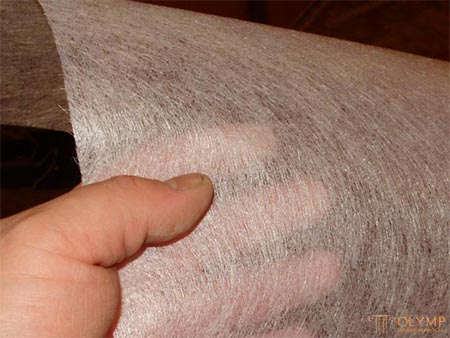
Painting fiberglass or cobweb mesh is a non-woven material obtained by pressing randomly arranged thin glass fibers. The small thickness and loose structure of the fiberglass allows for reinforcement where a relatively thick paint net is not applicable.
For example, when leveling ceilings with a vapor-permeable gypsum putty, the adhesion of which to reinforced concrete slabs is rather weak. The fiberglass is glued to the surface of the boards and increases the adhesion of the gypsum filler due to its uneven surface. In addition, it is convenient for finishing large volumes, as it is supplied in large rolls.
Peculiarities
Puttying is the last stage of finishing work before applying paints and varnishes. The quality of the work performed determines how long the repair will last, whether the walls will have an attractive appearance, as well as the strength and strength of the foundations. First of all, puttying is done to make walls and ceilings even and smooth, to seal cracks. The main role in this is played by the masking net. It is designed to hold the finish and prevent it from flaking. The mesh also protects against deformation and has a shockproof effect.


Reinforcing mesh has the following properties:
- fire resistance;
- moisture resistance;
- tolerates temperature changes well;
- non-toxicity;
- a wide range of applications (concrete, fiberboard, chipboard, brick and other materials).
Tensile strength depends on material thickness and mesh size. The more stable it is, the higher the quality of the material. Modern meshes are produced already impregnated with polyacrylic composition.
This is done in order to:
- maintain the strength of the material;
- do not perceive the effects of alkalis;
- increase the adhesion of the web to the surface;
- do not get hurt.
Fiberglass putty. Material features

Grid for wall filler
Fiberglass putty involves the use of a special woven material that looks like a mesh. It is sold both in large rolls to cover large areas and as tape for small damaged areas.
Such material is widely used not only for the restoration of damaged surfaces, but also in the manufacture of window slopes and when working with drywall sheets. This "fabric" allows you to create strong corners, as well as close up seams and joints.
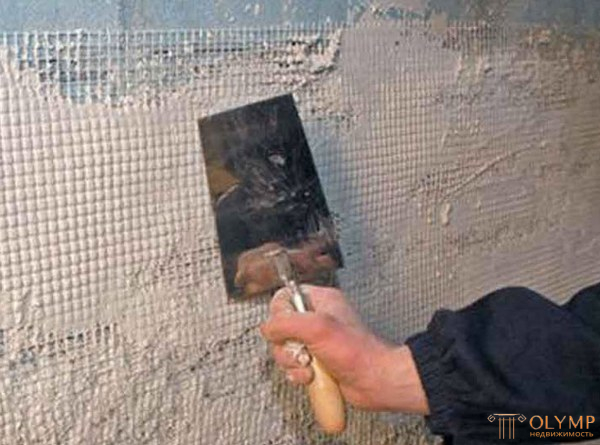
During the work on laying the reinforcement on the surface, it is fixed with mounting glue, then the solution is applied so that it fills all the squares, and the required layer density is selected.
Following the advice of “experienced” craftsmen, in order to achieve the most monolithic structure, it is necessary to cover the wall with putty, “glue” the mesh onto it, and then apply a layer of mortar again. But, this opinion is erroneous, because fiberglass does not contact directly with the wall surface, as a result of which the material will not be able to perform its direct functions.
In the course of all work, you need to monitor the level of adhesion of the main coating to the wall. After all, if this indicator is too low, after a short time such a putty will fall off the wall along with the mesh. Therefore, do not experiment - the use of the mesh should be strictly for the intended purpose!
Main types of material
There are several varieties of painting nets on the modern construction market. They all differ both in the size of the cells themselves and in appearance. Let's consider each subspecies in more detail.
Wide fiberglass mesh
For the purpose of puttying, a glass-cloth lattice with a mesh size of 2x2 mm is often used. The fiberglass network is not susceptible to alkalis, does not rust, has a long service life, is lightweight, and also increases the resistance of the putty layer to mechanical stress. Painting netting for building filler will take away potential deformational transformations due to temperature fluctuations or an increase in the level of humidity in the room.
Target use of wide paint nets (common width - 1 m):
- the process of reinforcing the putty layer during the finishing of walls and ceilings;
- prevention of the appearance of cracks on surfaces (with subsequent painting or wallpapering);
- adding impact resistance to walls (current property in public places);
- reinforcement of the waterproofing layer.
Serpyanka mesh
A popular type of material is presented on the market - serpyanka. The product is the same fiberglass lattice for the putty layer, the cells are square, the only difference is in the width: the serpyanka is narrow and often implies the application of an adhesive mass. The width in rolls is 4.5-25 cm, the length is up to 20,000 cm. The most common purposes of the serpyanka are:
- Reinforcement of joining edges of gypsum board, gypsum fiber sheets, cement particle boards, chipboard and fiberboard, and other materials of similar standard performance;
- Reinforcement of the putty on the outside and inside corners;
- Masking cracks on the surfaces of premises;
- Strengthening the slopes on doors and windows;
- Territorial alignment of ceilings and plaster layer on the walls of the building.
Fiberglass cobweb
Cobweb mesh (alternative name - painting glass cloth) is an enlightened non-woven mesh that reaches its final appearance as a result of pressing the finest glass fibers located in a chaotic order. The cobweb is more graceful, which opens up the possibility of using fiberglass for reinforcement in areas where a wide reinforcing mesh for putty, which is relatively thick, is not ideal for use.

For example, when filling the ceiling with vapor-permeable gypsum material, it is desirable to compensate for the low absorbency of the mixture into reinforced concrete slabs. The cobweb is glued to the board, thus increasing the roughness of the adhesion of the plaster. The convenience of the material is also in its considerable width in a roll, which simplifies the finishing of large areas.
In the video: how to use a paint net correctly.
Working with polyester mass
 Separately, I would like to talk about the quality of the putty, because the further decoration of the walls depends on this indicator. Polyester mass, which is sold ready-made, has proven itself well. It contains polymers that extend the life of the coating, but the price for such a material is much higher than for ordinary putty.
Polyester mass is used by professionals for:
- finishing;
- as a leveling layer and crack bridging;
- achieving smoothness and evenness of the walls.
Among polymer finishes, the following are popular:
- universal;
- finishing;
- fiberglass based;
- aluminum;
- pneumatic spray, etc.
As a coating for a rough finish, they are suitable from No. 40 to No. 80, for finishing - from No. 100 to No. 180. Large numbers are used very rarely when it is necessary to prepare the surface for glossy paint. For more information on how to putty with a mesh, see this video:
Classification of reinforcement materials
| Type of material | Marking | Variety of works |
|---|---|---|
| Rough | Used for grouting with coarse fragments and dry mix based on filler | |
| Average roughness | 120-160-180 | Used for grouting starting compounds before applying finishing |
| Soft | 200-240-280 | Applied only for finishing |
Using a masking net for filling, you can create a high quality frame that can withstand heavy loads during operation.
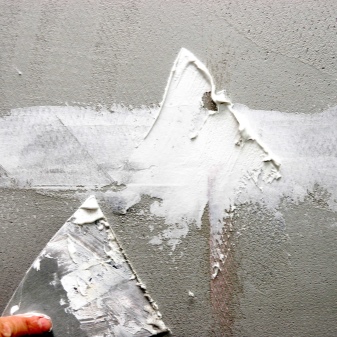
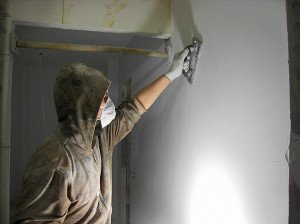
Application of finishing putty and sanding of walls
The finishing putty must be prepared in full accordance with the instructions. To do this, you will also need: a clean container, water and a drill with a nozzle. For particularly delicate works, it is recommended to buy ready-to-use putties, for example, acrylic. To apply the ready-made solution to the wall, we use the same spatulas as for the starting putty. Apply the finishing putty over the entire surface with a thin layer (1–2 mm). Then we leave the wall alone to allow the solution to dry.

The last stage before painting is sanding the walls with fine sandpaper (no less than 240). In addition to the abrasive itself, arm yourself with good spot lighting, such as a boom floodlight or a powerful hanging light. The light source must be directed to the wall at an angle, so that all the irregularities will be clearly visible to you.
After sanding, you need to remove all dust from the walls and floor so that the room is completely clean. Then we prime the walls again. To do this, select the soil depending on your goals. The more correctly the composition is selected, the stronger the topcoat will hold. The primer is applied gently so as not to leave streaks. Once the walls are dry, they can be painted in any color that suits you.
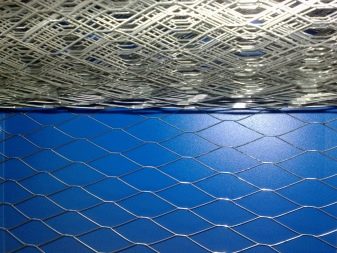
Painting net is a reinforcing material consisting of cells of various sizes. It is made by pulling molten quartz glass and used for finishing work. Without a painting net, it will not be possible to make a high-quality repair, since it provides reliable fixation of joints and plaster.
Do you need a mesh for plastering?
The reason for using the mesh is simple: it strengthens the plaster layer, prevents cracks, and also prevents the heavy layer of dried mortar from peeling off the wall.
When plaster reinforcement is necessary:
- Cracks in the base. If cracks are visible when examining the wall before plastering, then reinforcement is definitely needed.
-
Joints of different materials, corners. Cracking in these areas is also probably best done using mesh plastering. For internal and external corners, there are painting corners with a net on sale, with them the joint of two planes will be excellent.
- A large layer of plaster. When leveling, gypsum and cement coatings should not exceed a certain thickness recommended by the material manufacturer. For example, "Rotband" can be laid at a time up to 5 cm without reinforcement, provided a solid foundation.
- Insulation plastering. Fiberglass is attached to expanded polystyrene and mineral wool, pressing it into the glue layer. Without such reinforcement, it is impossible to create a hard surface for further decorative finishing.
- There is no certainty about the quality of the material (different batches). It happens that mixtures from different batches, and even more so from different manufacturers, have unequal characteristics in terms of strength, adhesion, drying time, etc. If you use such mixtures on one surface, then it is worth protecting yourself from cracks and reinforcing the plaster with a mesh.
- Uneven walls - brickwork, wood. Bricks are usually plastered with a cement-sand mortar, which has a high density. Without a mesh, not only cracks, but also delamination are possible. With a tree, everything is clear - its adhesion is weak, the plaster itself will not hold (more about it here).
As you can see, there are quite a few cases of using a grid. Below we will consider which type of reinforcement to choose for a particular job.
Benefits of subsequent work
One of the main advantages is mortar overlay. And if the gypsum mixture fits well on the base, then it is difficult to work with cement material. It is the mesh with its cells that retains it on the surface until it solidifies and does not give strong shrinkage.
 After the material has hardened, the plastered wall can be putty without fear. It can be painted and covered with decorative plaster. There is no threat that will appear crack in the middle of the wall- for the shrinkage of the house.
Laying tiles is also possible on a reinforced wall. The application of the mesh gives the surface rigidity for a long time.
Reinforced mesh should be used for plastering work. Each material - metal cells, polymer, has a specific application. Correctly fixing the mesh and plastering the wall or ceiling, the surface will be in its original form for up to 20 years.
Reinforcing mesh: when it becomes necessary to use it
Reinforcement of all kinds of solutions is used only in two cases - when its high mechanical strength is needed and when it becomes necessary to connect an unconnected one (for example, lay plaster on a metal surface). It sounds crazy, but sometimes the need for such operations arises.
If we deal in detail with all the cases in which a mesh is used for reinforcement, then the following main technological processes can be distinguished.
-
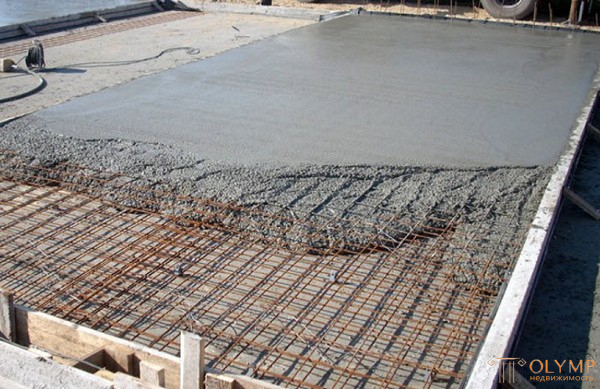
Floor screed. Reinforcement of this product is never superfluous - the reinforcing mesh for the screed, in addition to increasing the strength characteristics, additionally prevents its premature cracking. And if we are talking about a foam-insulated screed, then here the mesh justifies its need for one hundred percent - without it, no matter how strong and high-quality the solution is, the screed will crumble in the next month of operation.
Reinforcing mesh for floor screed photo
-
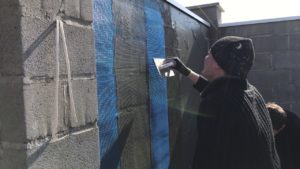
Plastering surfaces. In this process, mesh reinforcement is used to improve the bond between the base and the plaster itself. It is used in two cases - when a thick layer of plaster is applied (more than 20 mm) and when the plaster is applied to surfaces with poor adhesion. As mentioned above, this type of mesh is used for plastering metal, painted walls, foam, wooden surfaces, etc.
Mesh reinforcing facade photo
- Facing surfaces. Reinforcing mesh is used in facing processes solely for the same reasons as in plastering: obviously thick layers of glue and facing surfaces with poor adhesion. In fact, the mesh attached to any surface is a kind of connecting link between the wall and the cladding, which prevents them from parting with each other.
4. Foam plaster. This is a special case in which a plaster reinforcing mesh is simply indispensable. Cracks are the result of the lack of reinforcement. It is quite easy to make sure of this - cracks appear immediately after the glue dries.
Reinforcing mesh for plaster photo
-
plastering (filling) of dissimilar surfaces
Cracks always form in plaster applied to dissimilar surfaces. They are formed because the plaster dries faster on some surfaces and slower on others. To avoid this, the joints and seams of dissimilar surfaces are always tightened with a mesh before plastering them.
The mesh is used with mesh sizes from 10 X 10 to 30 X 30 mm and cut into strips 10-20 cm wide. The mesh is cut with roofing scissors.
6. Plastering of wooden surfaces. wooden shingles are used. in special cases, it is possible to replace it with a metal mesh as a workbench
Sometimes, instead of chipping, a metal mesh with cells of various sections, but not larger than 40X40 mm, is stuffed onto the plastering wooden surfaces. The protruding parts of architectural details (cornices, belts, platbands) on concrete, reinforced concrete, brick and wooden surfaces are also tightened with a mesh, but provided that the plaster applied to them will have a thickness of more than 25 mm. The taut and secured net should not sag.
For these purposes, both woven and woven mesh can be used. It is better to use a woven mesh, since it forms voids on the surface to be plastered, which do not require additional surface preparation. The woven mesh is placed close to the surface and does not form the required roughness. Therefore, under such a grid, you should first fill a thick (not thinner than 3 mm) simple shit and nail the grid over it. Then the necessary voids are formed between the woven mesh and the surface.
It is much better when, instead of shredding, cut slats 5-6 mm thick or willow rods are stuffed, which form larger voids than stuffed shreds.
The mesh intended for stuffing is cut into pieces of the required size; one end of the net is nailed and pulled tight. The stretched mesh is nailed by placing the nails in a square or staggered pattern at a distance of 10 cm from each other.
Nails are taken with a length of 50-70 mm, but they are not hammered to the full length, but only half or two-thirds. Non-hammered parts of the nails are bent, due to which the mesh is tightly pressed against the pancakes or slats.
If plastering is carried out with lime or lime-gypsum mortar, the mesh must be painted with oil paint, cement milk (which will greatly reduce the cost of work) or Kuzbass varnish. After that, the mesh is well dried.
You can stretch and nail the net in any direction.
Reinforcement mesh: varieties and features of each type
If you deal with the types of reinforcing meshes, then for a start, you can distinguish two of their main types - fiberglass and metal reinforcing mesh. Now in more detail about each of them.
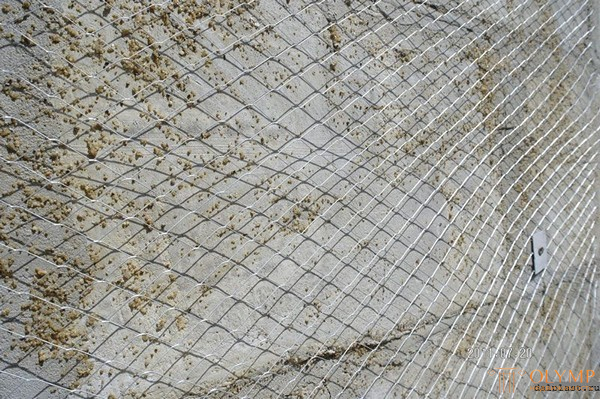
- Fiberglass mesh for reinforcement. This type of reinforcing material has quite interesting properties - among them high tensile and tensile strength can be distinguished, it is practically unaffected by temperature changes and is easy to use. Thanks to these properties, fiberglass mesh has found wide application for both indoor and outdoor use. Even an unskilled craftsman can handle the installation of such a grid. First, a thin layer of plaster or starting putty is applied to the surface of the wall, then, while the solution is not dry, the mesh is pressed into it, and the excess glue is removed with a spatula. Such reinforcement is popularly called bandage. A similar mesh is used mainly for plastering in thin layers or to improve surface adhesion - if we talk about a reinforcing facade mesh, then this is exactly the type of reinforcing material that is needed.
Reinforcing mesh photo
- Metal mesh for reinforcement. This type of mesh can be divided into two subspecies - a reinforcing mesh for plaster and screed. What are the differences between them? In the size of the cell and the thickness of the wire used for their manufacture. For plastering work, a mesh with a mesh of up to 30 mm and a wire thickness of up to 1.5 mm is used, and for a screed, a mesh with a larger mesh (100 x 100 mm or more) and a thick wire of 2.5 mm is used. This approach to business is associated with the loads that are imposed on the lined surface - the higher it is, the more serious reinforcement is needed. As you know, the load on the screed or concrete pad is higher, which means that the meshes are used "serious".

Reinforcing mesh photo
In addition, all metal reinforcing mesh can be divided into roll and sectional. By the way, on this basis, you can distinguish a mesh for plaster from a similar product for a screed - as a rule, all plaster grids are produced in rolls, and screed in the form of separate elements. This is due to the convenience in work - you must admit that it is easier to lay separate nets under the screed than to roll out rolled material.
Reinforcing metal mesh photo
Now a few words about fastening a metal reinforcing mesh - depending on the surface, the technology of its installation may differ.Take, for example, metal - the mesh is simply welded to such a surface using a welding machine. It is more convenient to attach a thin reinforcing mesh to wooden surfaces with a stapler loaded with large staples. And a thicker mesh can be screwed on with self-tapping screws or nailed. Meshes are attached to concrete and brick surfaces with dowels and washers. As for the screed mesh, it is not attached at all, the only condition for its installation is the distance from the floor. The grid simply must be inside the screed, and to achieve the required location, either pebbles or bars are placed under it.
Varieties of reinforcing mesh
Also, all metal plaster nets are divided according to the size of the cells. Here the principle is simple - a stronger surface requires more thorough reinforcement. As for the screed, for a high-strength product of this type, you will need a mesh with a cell of 50 by 50 mm. When it comes to slightly reinforcing or preventing screed cracking, a large mesh can also be used.
Well, in conclusion, I would like to talk about an alternative, which in some cases can provide more significant, and most importantly, simple help in solving the question of how to improve surface adhesion. This method is not a panacea and is used exclusively for plastering walls and ceilings. We are talking about the notorious "Betonokontakt" primer. In fact, it is a strong glue that includes quartz sand. It is thanks to him that the surface roughness increases. With this primer, it is possible to adhere tiles with regular tile adhesive even to smooth surfaces such as glass.
That's all there is to know about how and where reinforcing mesh is applied. Do not forget that in many respects the quality and characteristics of the surface finished with its help depend on the thoroughness of the mesh fastening.

SNiP 3.04.01-87 "Insulation and finishing coatings" states that after the plastering work, the depth of unevenness of the plastered surface when checking with a two-meter rule should not exceed: 5 mm for simple, 3 mm for improved and 2 mm for high-quality plaster.