How to glue polystyrene foam boards to the ceiling
Consider the process of installing extruded polystyrene insulation boards on the ceiling using the example of using the specialized Penoplex FASTFIX glue.
The order of work is as follows:
- Surface preparation. The work surface should be cleaned of any dirt. To improve adhesion, a slight moistening of the base is allowed;
- Preparing the glue. The cylinder should be positioned with the valve upwards and screw the assembly gun onto it. This should be done by holding the pistol handle with one hand, while screwing the cylinder with the other. During the screwing process, make sure that there are no people and animals to the side where the pistol barrel is directed. After securely fixing the cylinder in the pistol, shake it vigorously and place it upside down;
- Glue application. Penoplex FASTFIX glue is applied directly to the insulation board in thin strips parallel to the edges, departing from each edge by 2-3 centimeters. One strip of glue is applied in the middle of the board, parallel to its long side. The amount of foam coming out of the cylinder and the intensity of its output should be regulated by the trigger of the pistol;
- Bonding a slab of insulation to the ceiling. After applying the foam to the heat-insulating panel, wait for a technological pause (about 2-3 minutes), then press the plate against the ceiling surface and fix it for 15-20 seconds. During the first 5 minutes, the position of the attached EPS boards can be adjusted.
- Plates must be mounted close to each other with a gap in the seams. The gap between the panels should not exceed two millimeters. For greater reliability of installation, it is recommended to use additional fixing accessories (dowels). Excess foam after it has completely dried is cut off with a sharp knife.
In the cold season, before applying the glue, it is recommended to warm the balloon in a bucket of warm water (25-30 degrees) or keeping it indoors for several hours at room temperature.
VIDEO REVIEW
As for the consumption of glue for expanded polystyrene, one Penoplex FASTFIX cylinder (costs about 350 rubles) is enough to insulate 6-10 square meters of walls.
Polymer adhesives
Is it possible to fix penoplex with adhesives in small cans? Usually polymer adhesives are sold in such containers; they are ready for use on any surfaces. Gluing with this method is practiced if it is necessary to fix the penoplex to the metal. It is better for beginners not to buy such compositions - they seize instantly, it will be impossible to correct defects.
A good tool for slabs is Moment glue. It is resistant to humidity, temperature extremes, and is produced in convenient packaging for 0.25-1 liters. The consumption is low, even a small pack is enough for 4-5 sq. m. Another tool - "Emfikol 225", its technical characteristics are similar. After application, the room should be well ventilated for 2-3 days, but it is ideal to work with it in the air.
Installation methods
They are selected taking into account the place of installation of the slab (from the outside or inside of the building), the degree of load of the heat insulator, and the quality of the monolith surface. If it is planned to subsequently plaster the layer of thermal insulation, the simultaneous use of two methods of fixation will be required.
There are 3 ways to fix the insulation on a concrete wall:
- Adhesive composition. You need to choose the right astringent. Cement dry mixes, bituminous and polymer mastics, liquid formulations, polyurethane glue are used - it adheres well not only penoplex, but also polystyrene.
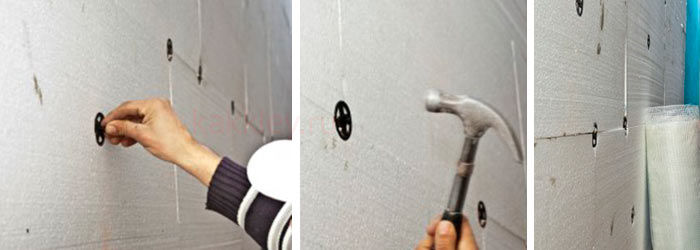
- Hardware.Dowels with wide caps are used for external thermal insulation of walls. The process is laborious, the plate is nailed in the corners and in the center.
-
In a combined way. The previous methods are combined, thereby increasing the quality and reliability of fasteners. The glue insulates the surfaces from the external environment, and the hardware takes on the load from the impact on the plates.
Each of the methods has strengths and weaknesses, but the general stage for their application is to prepare the surface to be covered. The wall is cleaned of dirt, peeling, places where mold appears are eliminated with a metal brush and treated with an antiseptic - copper sulfate. Irregularities and cracks are sealed with a putty, covered with a primer.
Penoplex surfaces are smooth. To make the insulation better glued, the contact side is rolled with a needle roller or scratched on it with a hacksaw. The installation is completed by applying a protective or decorating layer to the insulation.
Peculiarities
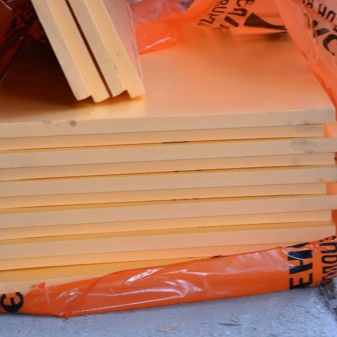
Penoplex is a foamed polystyrene with a homogeneous structure of small air cells. At the moment, there are only two types of foam with different densities on sale: 35 and 45 kg / m³.
The difference between the two materials is significant, ranging from properties and technological qualities to their purpose:
- Penoplex 35 kg / m³ is designed for thermal insulation in industrial and residential buildings;
- Penoplex 45 kg / m³ is used in the construction of highways, gas and oil pipelines, in railway construction.
In addition, the material is used to insulate facades, roofs, foundations and internal walls of buildings.
Penoplex technical characteristics:
- strength;
- high resistance to moisture;
- low level of thermal conductivity;
- resistance to mechanical stress;
- ease of installation and processing;
- weak chemical activity;
- difficult to burn;
- environmental friendliness;
- durability;
- affordable cost.
Installation of this insulation is carried out using a special glue, the choice of which determines not only the duration of the material's operation, but also the health of people living in the house.
Protective covering
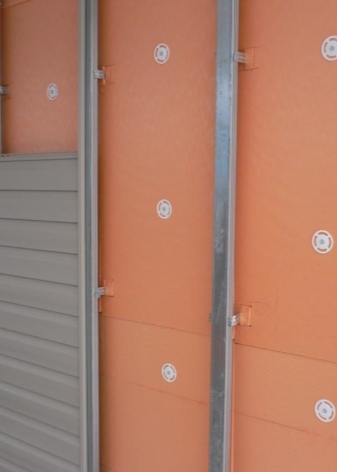
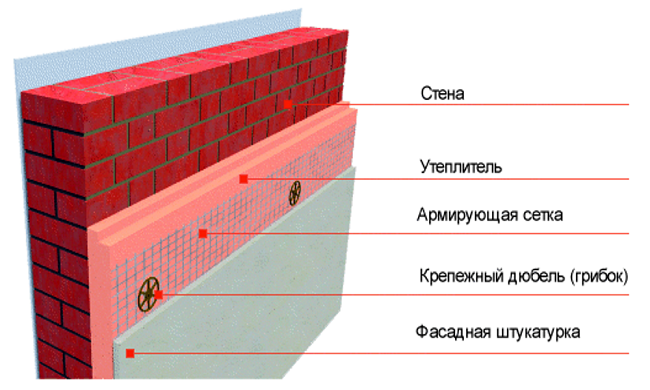 The scheme of attaching the penoplex to a brick or concrete wall
In order for the surface of the insulation to look beautiful and be durable, it must be protected. The simplest and cheapest way to protect insulation is plastering, which is carried out in stages.
- The choice of plaster mortar.
- The choice of reinforcing mesh for plaster mortar.
- Fastening of the reinforcing mesh using a specific technology.
- Laying the mortar, leveling the surface, grouting with a plastic trowel.
- Priming the surface under the finishing layer.
- Finishing plaster. After drying, painting is done or a transparent protective layer is applied.
Video instruction:
In general, fixing the foam on concrete and brick walls, as well as insulating the building's foundation, is not a big deal. It is enough to follow the installation technology and carefully carry out the work so that the insulation is attractive and durable.
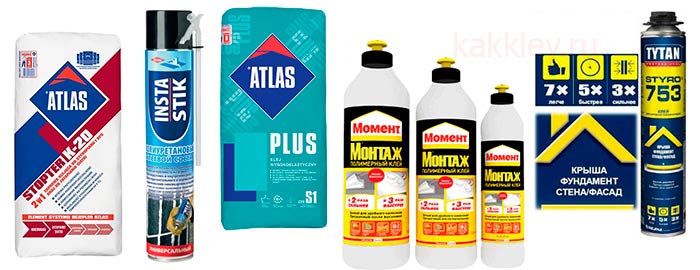
Review of the best manufacturers
The presented manufacturers of adhesives for penoplex are most popular with builders. At the same time, for fastening the insulation, you can take products of other brands.
Tytan
This Polish brand is distinguished by its high quality and relatively low price. Both factors contribute to the growing popularity of Tytan adhesives among installers. This product belongs to the universal group. At the same time, it is recommended to take glue from the Professional Styro series to fix the penoplex. Products representing the specified line are characterized by resistance to temperature extremes, moisture and precipitation.

Ceresit
To fix the penoplex, it is recommended to take the following adhesives:
- Ceresit CT The material, which is notable for its affordable price and good quality, is used for fixing insulation on the facades of buildings.The glue can withstand temperature extremes ranging from -10 to +40 degrees. The composition hardens after application for two or three hours. Apply CT 84 with a nailer.
- Ceresit CT Mineral adhesive characterized by a long drying time. It takes up to three days for the material to fully harden, provided the air temperature is above zero. One square meter will require up to six kilograms of this composition. This glue is forbidden to be used at subzero temperatures.
- Ceresit CT Glue is recommended for fixing foam, on which reinforcing material is then applied. This composition is allowed to be applied at positive temperatures. Due to the fact that the glue dries quickly (within two hours), apply the mixture of material immediately after mixing.
The Ceresit brand is one of the best manufacturers of adhesives for construction work.
Moment
Under the Moment brand, universal adhesives and liquid nails are produced. The products of this manufacturer are distinguished by the following characteristics:
- increased level of adhesion (adhesion);
- frost resistance;
- moisture resistance;
- elasticity.
Moment glue tolerates temperature changes well and does not need to shrink.
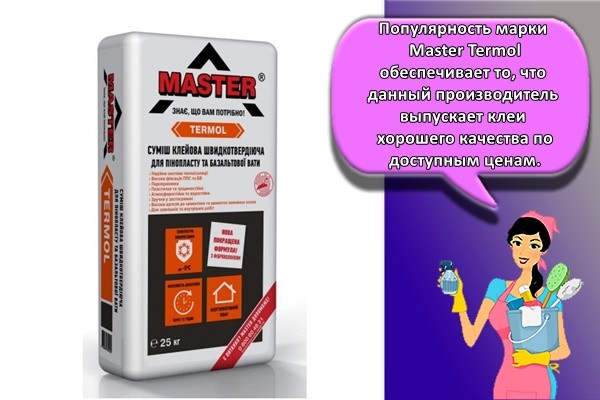
Master Termol
The adhesive composition of this brand, in comparison with the previous ones, has several pronounced advantages. Master Termol is optimal for fixing foam sheets on cement and lime substrates. Also, the glue fixes well on expanded polystyrene. At the same time, Master Termol tolerates temperature changes well, and is resistant to frost. In addition, the material is characterized by increased elasticity and environmental friendliness. The popularity of the Master Termol brand ensures that this manufacturer produces adhesives of good quality at affordable prices.
ProfLine ZK-4
ProfLine ZK-4 glue is used to fix foam sheets on the following surfaces:
- plastered;
- concrete;
- cement.
This product contains components that strengthen the adhesion of the foam to the prepared surface. It is recommended to apply the material at positive temperatures. After hardening, the adhesive composition tolerates frost well, is moisture resistant and can withstand the effects of external factors.
Penoplex Fastfix
Penoplex Fastfix is a durable adhesive designed for fixing foam sheets to bricks, concrete, ceramic blocks or aerated concrete. This composition has a good degree of adhesion. Penoplex Fastfix cures quickly, which speeds up home finishing.
How to glue at home
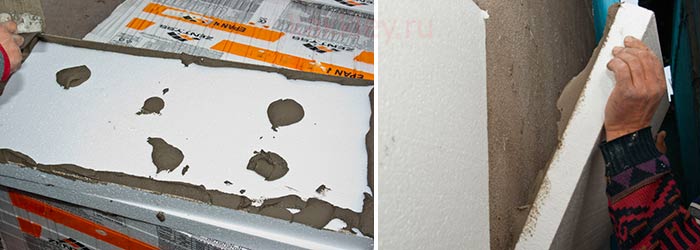
The general procedure for gluing foam sheets is as follows:
- The working surface is cleaned of paint and other materials, and then degreased.
- A primer is applied to the walls, which will prevent the formation of fungus.
- The glue is prepared according to the attached instructions. Then the material is applied with a layer of 2-3 millimeters on the surface to be treated and the foam sheet.
- Penoplex sheets are stacked. If the installation is carried out on the walls, then you need to press it from the bottom up; if on the floor or ceiling - from left to right.
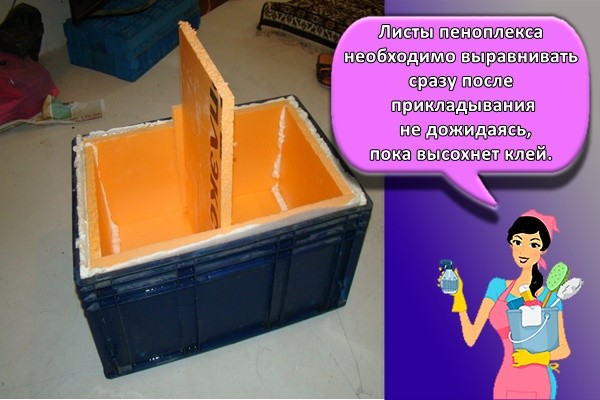
Penoplex sheets must be leveled immediately after being applied to the wall, without waiting for the glue to dry.
The ways
Penoplex sheets can be glued using a point, solid or boundary method.
Point
The point method involves applying dense drops of glue to the wall material at a distance of 30 centimeters. If a liquid composition is used, then the latter is leveled with a spatula. The result should be strips 100 millimeters wide.
Solid
To glue the sheets of foam in this way, it is necessary to apply the material with L-shaped stripes in the corners and two in the center.
Borderline
This option is suitable for those cases when you need to fix the sheets on the outside of the walls. According to this method, the glue is applied along the perimeter in a continuous strip, with an indent from the edge by 3-4 centimeters.
Consumption
The consumption of glue is indicated on the package. The most economical in this regard are materials produced in cylinders (polyurethane, liquid nails). In this case, one package is enough to glue 10 square meters of sheets.
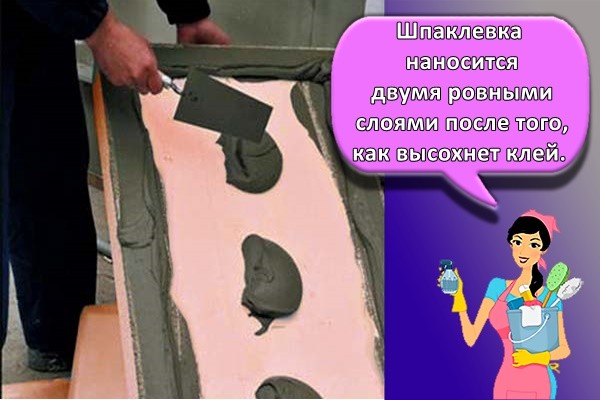
Puttying
The putty is applied in two even layers after the glue has dried. The thickness of the first does not exceed one centimeter. Then a reinforcing metal or plastic mesh is fixed on the penoplex. After that, a second (if necessary, third) layer of lesser thickness is applied.
Outdoor protection
If foam sheets are attached outside, then for this case it is recommended to buy specialized adhesives: Giprok, Cerezit, Polimin or Master. The first option is considered the most preferable, since this material is characterized by increased resistance to external factors.
After the glue under the insulation has dried, finishing materials made of wood, stone or OSB can be applied to the penoplex. Also, ceramic tiles are often attached to the sheets. In this case, 2 layers of plaster with a reinforcing mesh must be applied. Finishing materials are attached with tile glue.
How to choose for different surfaces?
For outdoor work, it is better to use bulk mixtures that have good adhesion to stone, brickwork and plaster
It is important that the purchased packaging is intact. If it is leaky, the quality of the dry mix is impaired.
To waterproof the surface or seams, bituminous or polymer compounds are used.
For wood and reinforced concrete substrates, choose polyurethane adhesives.
Penoplex can be glued to a metal base with liquid nails, polyurethane foam or silicone sealants
Sticking on ordinary PVA will be inexpensive. It is first applied to burlap, which is attached to the metal, and then penoplex is attached.
Insulating material can be attached to plastic, corrugated board or chipboard with liquid nails.
If both the ceiling and walls are insulated, it is better to use polymer compounds.
For thermal insulation of the floor and for interior work, it is better to use polyurethane mixtures, and for exterior decoration - mineral mixtures.
Foam adhesive is a universal product for all surfaces and rooms.
The choice of the optimal adhesive depends on the type of surface.
Dry compounds are suitable for outdoor insulation. Adheres well to stone and brick substrates, as well as plaster
When choosing dry mixes, you should pay attention to the release date and the integrity of the package - it must be hermetically sealed. Otherwise, the quality of the composition may suffer.
Polymer and bitumen mixtures are used in waterproofing works.
There are special polyurethane adhesives for reinforced concrete surfaces
And also such compositions can be used for wood bases.
For metal work, liquid nails, silicone sealants, and polyurethane foam are suitable.
Liquid nails are used when laying foam on plywood, corrugated board, plastic.
If you plan to install thermal insulation on the walls and ceiling, then it is better to use polymer mixtures. Mineral adhesives are intended for outdoor use, but for indoor use it is better to choose polyurethane. The latter are especially effective for arranging floor insulation.
If the work is planned to be carried out on a dry surface, then high-quality gluing is given by compositions based on gypsum and cement. The only drawback is that almost immediately after mixing, they begin to harden, so the work must be carried out quickly. This creates some inconvenience in the work. Therefore, it is better to knead the composition in small portions.
The speed of drying of the glue creates certain conditions during internal work. In addition, almost all adhesives for penoplex have an unpleasant odor, which subsequently is difficult to erode.
There is a universal composition suitable for almost any surface - glue-foam. Suitable for interior and facade work, floor and ceiling insulation. For a strong "setting" of the material with the base will be enough only 15 minutes, and you can work even at sub-zero temperatures.
Types of adhesives
What is the composition to glue the penoplex to the surface of the wall, ceiling? There are many options, but the selection must be careful. Such glue will hold not only the material itself, but also the entire insulation structure. If the quality of the adhesive is poor, it will not hold the insulation.
There are several types of adhesives, depending on the composition:
- mineral;
- polyurethane;
- polymeric;
- waterproofing.
The first type is used to work with a dry surface, because at high humidity the mineral components immediately harden. It is better to read the adhesives of the adhesive manufacturer carefully before purchasing. This will allow you to choose the right composition. It should be free of caustic, aggressive components, because penoplex is a capricious material, its structure is easy to destroy.
Insulation gluing instructions
Before gluing the penoplex with the selected composition, you should carefully study the instructions for use and adhere to the manufacturer's recommendations. In addition, there are a number of general tips that should be considered when installing extruded polystyrene foam, so that the result of insulation is effective.
Surface preparation for installation
In order for the fixation of the penoplex to be strong and reliable, the base should be carefully processed, since the fixing is carried out on a flat surface without defects. The preparatory stage includes the following procedures:
- Removing the remnants of the old coating, cleaning the base with a metal brush.
- Treatment of places affected by mold or fungus with a special mixture of copper sulfate.
- Uneven places are plastered or covered with linings or an additional layer of plates during installation.
- Metal surfaces are coated with an anti-corrosion compound.
- Fasten additional elements, if provided, for example, brackets for attaching an air conditioner, etc.
A primer is applied to the leveled surface with a uniform layer. This improves adhesion and reduces the consumption of the adhesive mixture.
How to properly fix penoplex to concrete
Stripe means applying the mixture in even stripes around the perimeter
When fastening, it is important to press the plates tightly in order to exclude the appearance of spaces filled with air.
The beacon method consists in glueing the perimeter of the foam sheet, as well as partially filling the center.
The solid method requires the entire sheet to be processed. The mixture is applied evenly with a notched trowel.
It is important to check the level of the evenness of the location of the penoplex. During installation, it is important to monitor the strength of the fastening of the plates to each other in order to avoid heat leakage through the seams.
Glue consumption
Knowing the consumption of the glue mixture, you can calculate the amount of glue required for insulation. This will avoid unnecessary waste. The average consumption is usually indicated on the packaging by the manufacturer. The figure may vary slightly when applied. Ready-made adhesives in tubes are consumed more economically, since the use of a gun allows you to rationally dose the mixture, therefore, to reduce consumption.
Types of glue for penoplex
Mounting adhesives for penoplex according to the characteristics of the composition are divided into four groups.
- Polyurethane.
- Mineral, cement.
- Polymeric.
- Waterproofing.
It is not recommended to use adhesives from the fourth group for interior work. They contain various solvents and petroleum derivatives that are very harmful to humans.
Penoplex adhesive for outdoor use.
To insulate the walls from the outside, cement-mineral compositions should be used. They are distinguished by a high adhesion (adhesion, adhesion) to concrete surfaces.
For styrofoam for interior use.
Installation of insulation on the ceiling and walls inside the building is carried out using glue from the group of polyurethane or polymer. This is due to their technical characteristics and safety for humans.
The most common adhesives for penoplex
Atlas Stopter K-20. Specifications:
- for outdoor work, including for facade insulation;
- sold in containers of 25 kg;
- consumption 4 kg per 1 m2;
- mixture preparation time - at least 4 hours.
Insta-stik. Specifications:
- ready mix;
- sells in a 750 ml bottle;
- there is a special nozzle for application;
- consumption - one bottle per 2 m2.
Atlas Plus. Specifications:
- versatility;
- good adhesion and elasticity;
- suitable for wet surfaces;
- sold in bags of 5, 10 and 25 kg;
- consumption - 1.5 kg per 1 m2.
"Moment". Specifications:
- from the group of polymer adhesives;
- drying time - a day;
- resistance to humidity and low temperature;
- supplied in cans of 250, 500 and 1000 ml;
- consumption - 250 ml per 5 m2.
"Titanium". Specifications:
- suitable for indoor and outdoor use;
- supplied in aerosol form;
- prevents the appearance and spread of the fungus;
- no pronounced odor, safe to use;
- consumption - one cylinder per 10 m2.
Price rangeglue zones
| Name | Volume | Packaging | Average cost, rub |
| AtlasStopterK-20 | 25 Kg | Bag | 320 |
| Insta-stik | 750 ml | Balloon | 550 |
| AtlasPlus | 25 Kg | Bag | 600 |
| CeresitST83 | 25 Kg | Bag | 400 |
| Titanium | 750 ml | Balloon | 270 |
| Moment | 1000 ml | Jar | 300 |
How to glue penoplex - instructions
Before starting work, prepare the necessary tools and materials:
- foam plates;
- primer;
- roller or brush;
- degreaser;
- spray;
Follow the step-by-step instructions for gluing insulation.
- Clean the working surface of paints and varnishes, primer, dirt. Degrease the surface using a spray gun.
- Apply an even layer of primer to walls / floor / ceiling and allow to dry completely.
- Prepare the glue if required by the instructions. Apply it to the surface as well as the insulation board.
- Apply the penoplex to the surface: from bottom to top if it is a wall, or from left to right if it is a floor or ceiling. Hold the stove as long as it does not lag randomly from the work surface.
- Proceed with gluing the next board.

Methods for applying glue, depending on the nature of the work:
- Point. Dense drops at a distance of 30 cm from each other.
- Stripes. Four L-shaped stripes in the corners and two long ones in the center.
- Solid. Evenly over the entire area of the slab, stepping back from the edges by 3-4 cm.
Pay attention to important tips:
- when performing these works, you will need an assistant;
- read the manufacturer's instructions and glue consumption;
- if you are installing penoplex for the first time, use aerosol glue;
- treat the surface with a primer to prevent the appearance of fungus;
- apply glue evenly over the entire surface with a layer of no more than 2-3 mm;
- level the slabs immediately after touching the work surface;
- remember about security measures.
A common question is how to glue penoplex to concrete
There are three ways to mount this insulation to concrete surfaces:
- liquid Nails;
- special foam;
- glue.
There is no consensus on which of these formulations is better. It should be chosen based on the nature of the work. Nevertheless, many experts prefer the glue, which was created specifically for working with penoplex.
VISIBLE INSTRUCTION
Liquid nails can only be used if the insulation is glued to the floor. The foam is suitable for filling joints between slabs.
Questions and answers
There are a number of questions of concern to users regarding the use of penoplex.
How to glue penoplex with penoplex?
There is no difference between how to glue two sections of foam and this material with other surfaces.But experienced builders say that when bonding the plates to each other, it is better to use a continuous method of applying glue, and you can do without a primer. Dowel-nails in this case are not required, and any of the above glue will do.
Can the material be glued to polyurethane foam?
It is possible to glue the penoplex onto the foam, the adhesion will be strong. On the floor, this type of work is carried out on a self-leveling concrete screed. But it is very expensive to glue on polyurethane foam. It also tends to expand, you will have to constantly press it until the process is complete.
Can Penoplex be glued to liquid nails?
You can use liquid nails, it is not very convenient. It should take up to 7 minutes before the plate is put in place, otherwise the glue will not set. In addition, the price of the work will increase dramatically.
Does air temperature matter?
It depends on the type of adhesive. Some lose their properties at low temperatures. Others allow work in the cold. All data must be specified in the instructions.
Surface preparation for installation
Penoplex panels are attached only to treated and flat surfaces.
The preparatory stage includes the following operations:
-
The surface is carefully examined, after which all dirt, remnants of the old destroyed coating, delamination that will not withstand the load of the insulation are removed.
Particular attention is paid to surface lesions by mold and fungus. The damaged area is cleaned with a stiff brush, and then treated with a special compound, which is made at home on the basis of copper sulfate or purchased in the retail network.
- To eliminate irregularities, a map of problem areas is drawn up. After that, alignment is performed in any of the following ways:
plastering is a simple and reliable way. The solution is selected individually for the surface material. The insulation can be fixed when the plaster is dry;
laying slabs of different thicknesses is a time consuming method that requires accurate identification of irregularities. Penoplex brand depends on its thickness. When buying, plates of different thicknesses are selected, but of the same brand;
the use of shims is a technique that only experienced installers use. Pieces of foam or plastic are used as linings.
-
The metal parts that are planned to be covered with plates are treated with anti-corrosion compounds.
- Brackets are mounted for equipment that will be hung in the future, for example, an air conditioner.
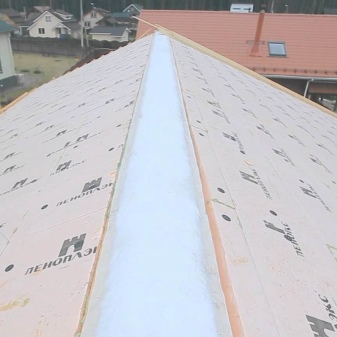
Features of installation of insulation on the foundation
As a rule, the foundation needs to be insulated in the same way as the walls. Various methods of foam insulation of the base of the building are used.
- Vertical way.
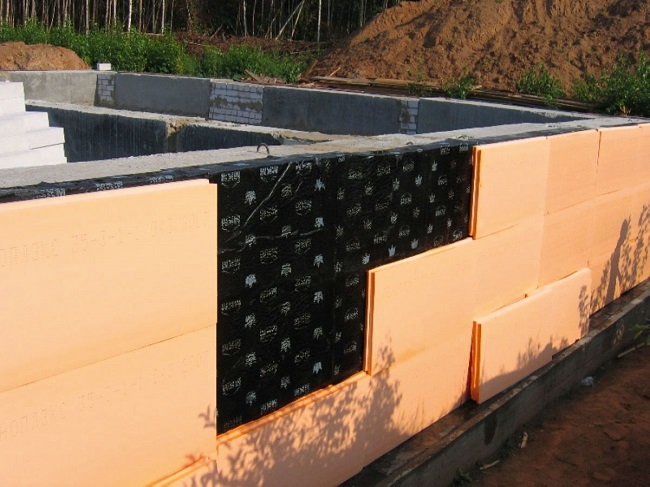
Along the entire foundation, a lower level is marked for laying insulation.
The slab is covered with an adhesive and pressed in the right place.
The entire foundation is pasted over with the same method. An exception may be places that are in the ground. The slabs in this place are tightly pressed against the foundation with soil.
- Horizontal way.
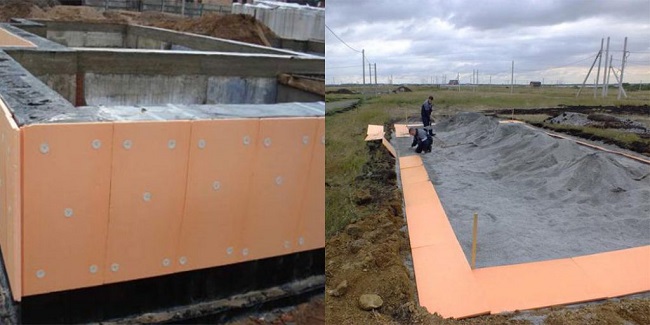
In this way, the foundation from below is protected from freezing. Work is carried out at the initial stage of construction, when the foundation is just being laid.
The slabs are tightly positioned on the concrete base of the formwork.
Waterproofing is laid on the insulation, and then the foundation is poured and reinforced.
After removing the formwork, the sides of the foundation are insulated.
- Heat protection around the house.
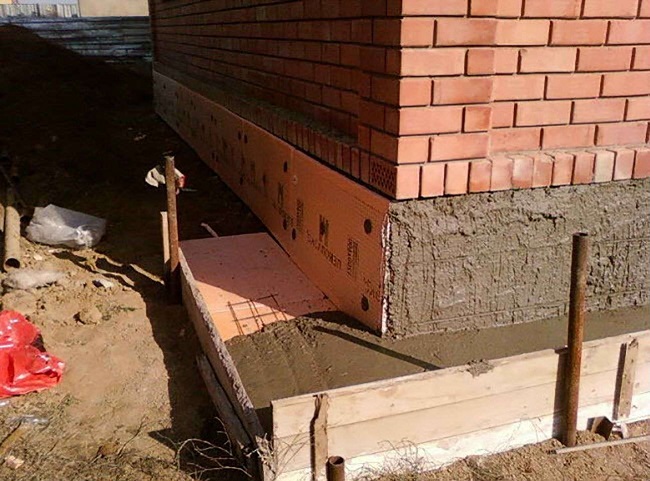
In this case, the foundation and the adjacent territory are simultaneously insulated.
First of all, the foundation is insulated in a vertical way.
Then formwork is made around the foundations with an indent of 100 mm, and the blind area is being prepared.
Insulation is placed on the tamped surface between the foundation and the formwork in a dense layer.
On top of the insulation, a waterproofing film is mounted with an overlap on the foundation, after which the formwork is poured with concrete.