Wall plastering: basic steps
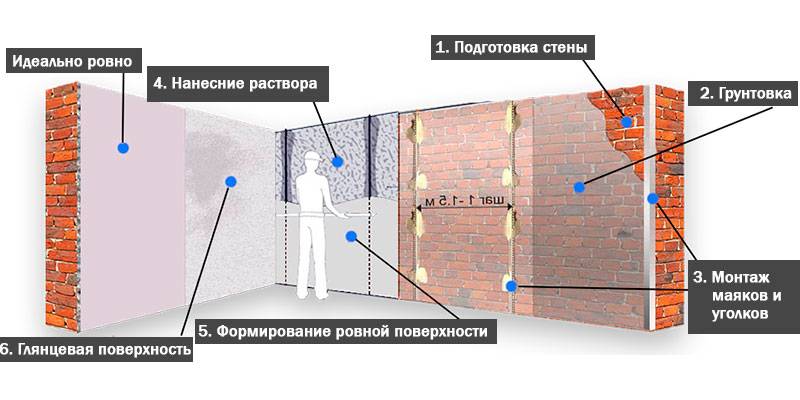
Strictly speaking, the technology of plastering walls on lighthouses includes three main stages, the correct observance of which allows you to achieve the desired result in a short time:
- Wall preparation;
- Installation of beacons;
- Actually, the very application of plaster.
If you are attracted to plastering walls with your own hands, and you want to cope with this task no worse than professionals, then following the steps presented will save you money and effort, and the result will not keep you waiting.
Preparing the walls
The very first and most important stage in the process of plastering surfaces. Depending on the state of the base, the further fate of the leveled surface will be determined. That is why, when preparing the walls, you must perform the following steps:
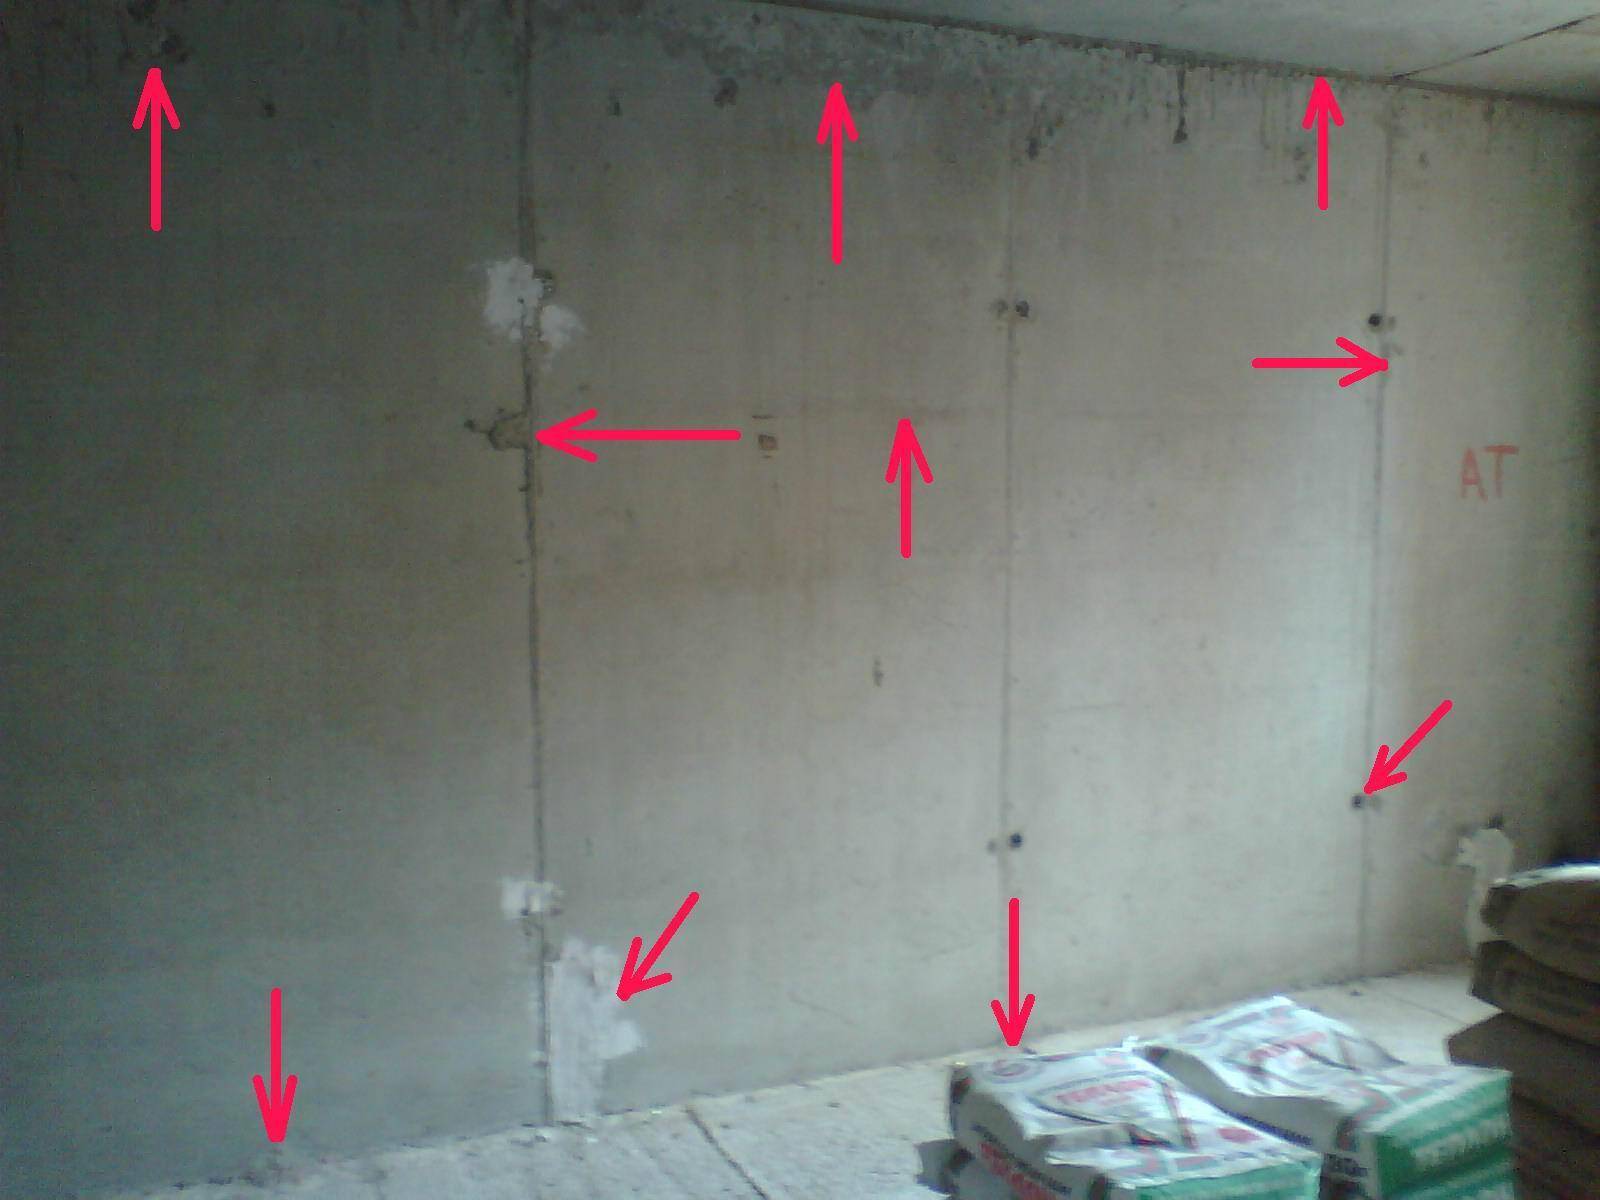
- Visually mark the state of the wall, mark irregularities, if necessary - use a level;
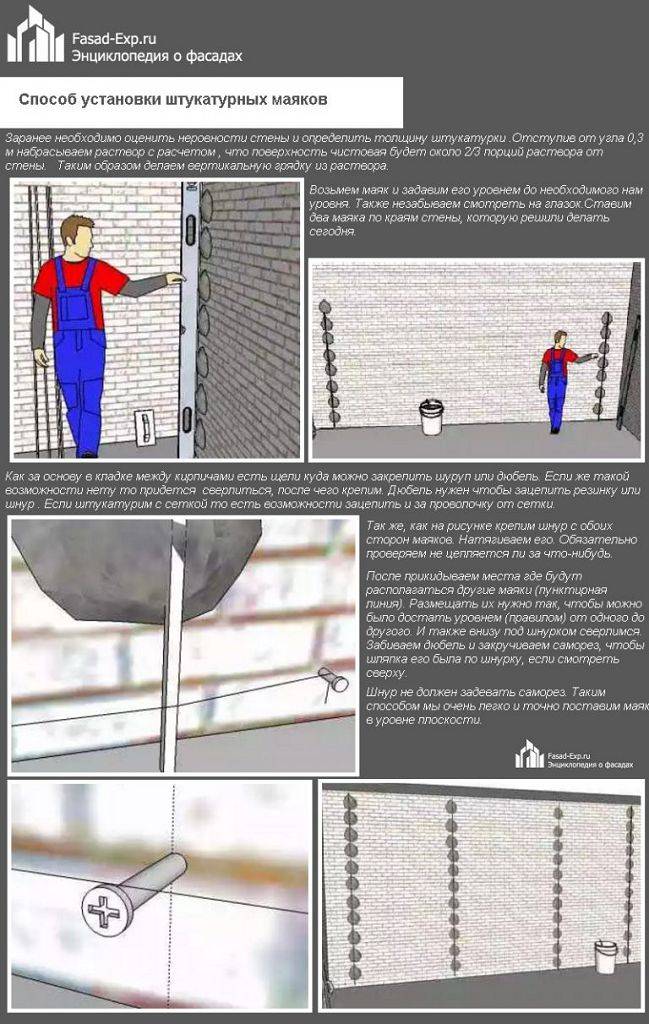
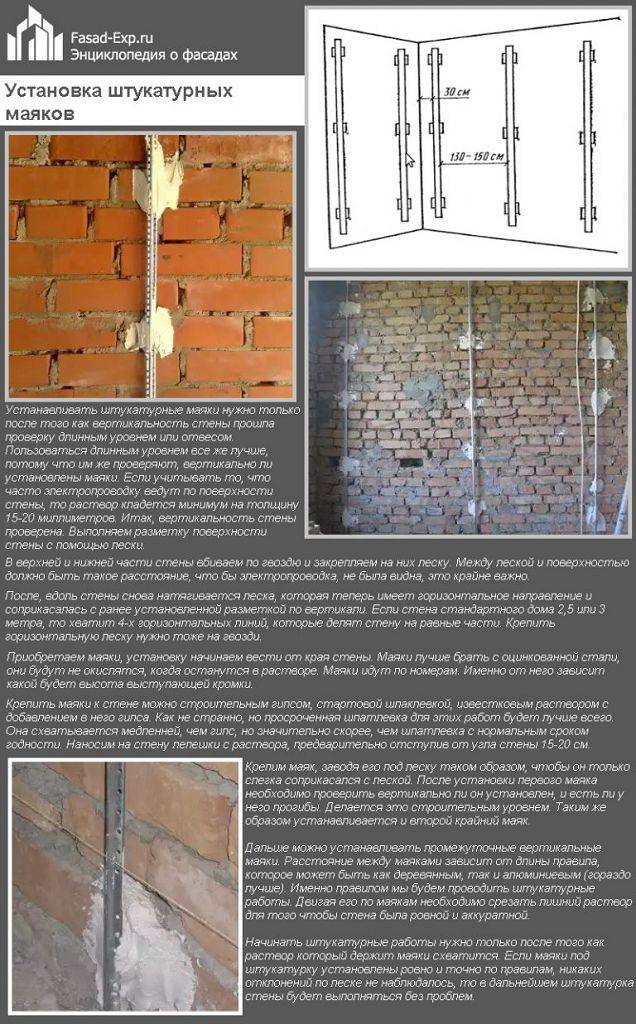
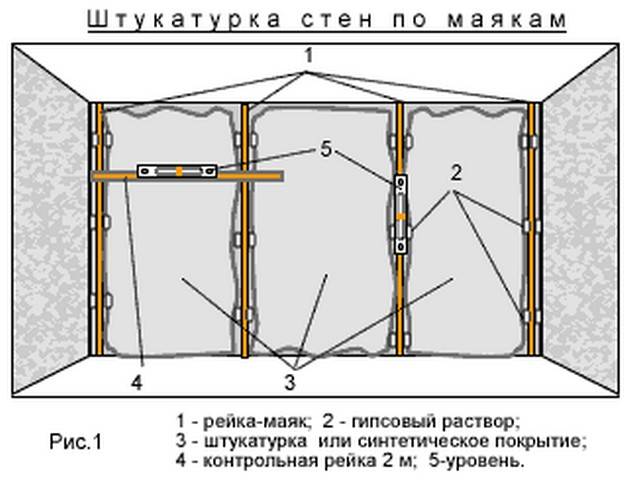
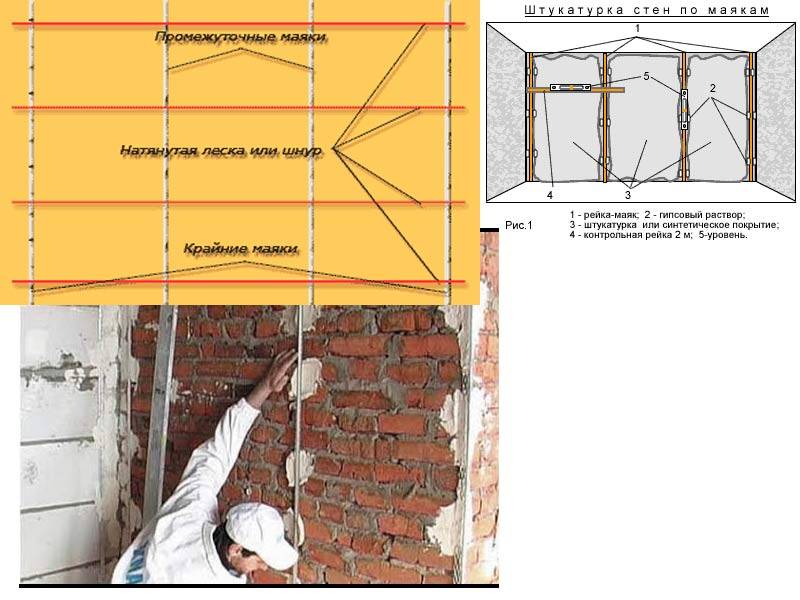
- Mark the places of attachment of the beacons - at a distance of 30 cm to the corners and slopes. Divide the rest of the wall into equal parts and also mark the fixings. To determine the horizontal axis of the attachment, retreat 18-20 cm from the ceiling and floor;
- Prime the surface of the walls. The primer will provide better adhesion to the mortar and get rid of excess construction debris.
After the walls are ready, you can proceed directly to the very placement of the beacons.
Installing beacons
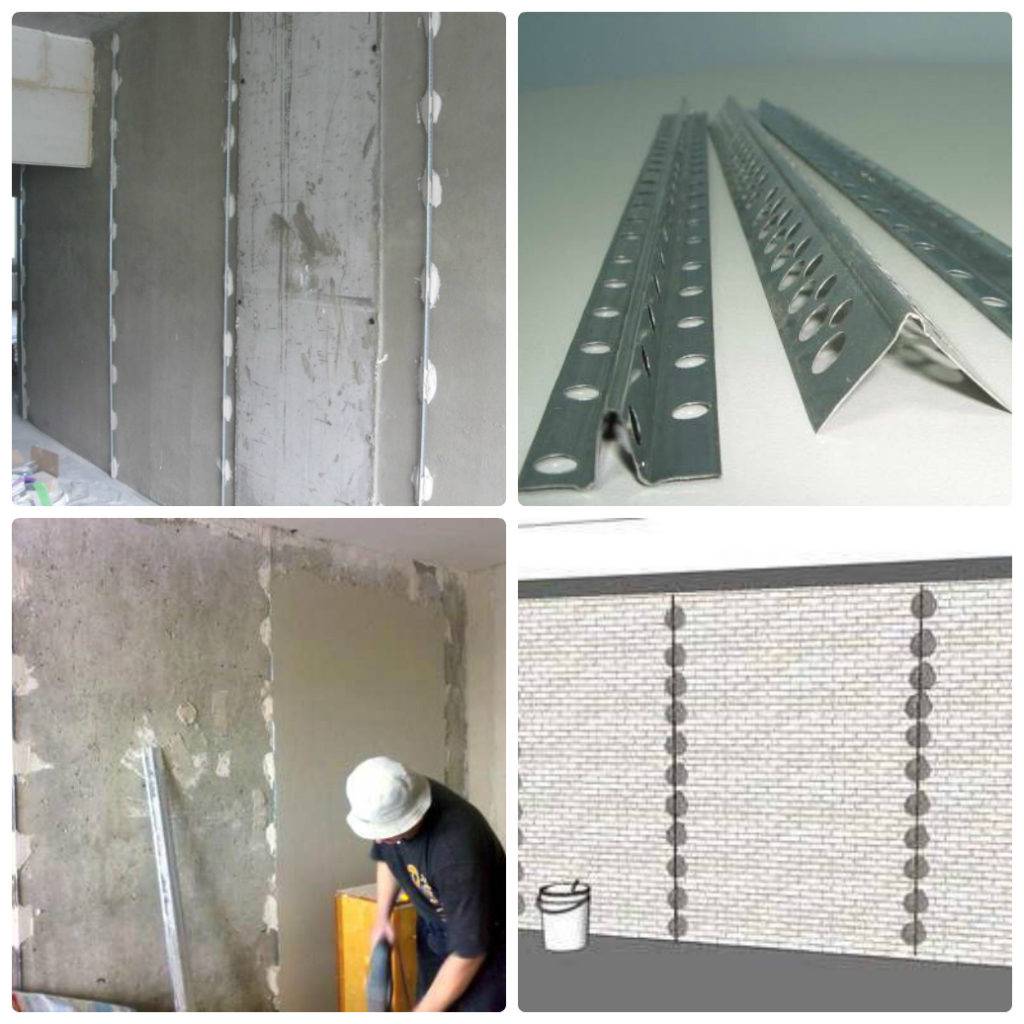
There are two types of fastening construction beacons to the wall surface: mortar or fasteners.
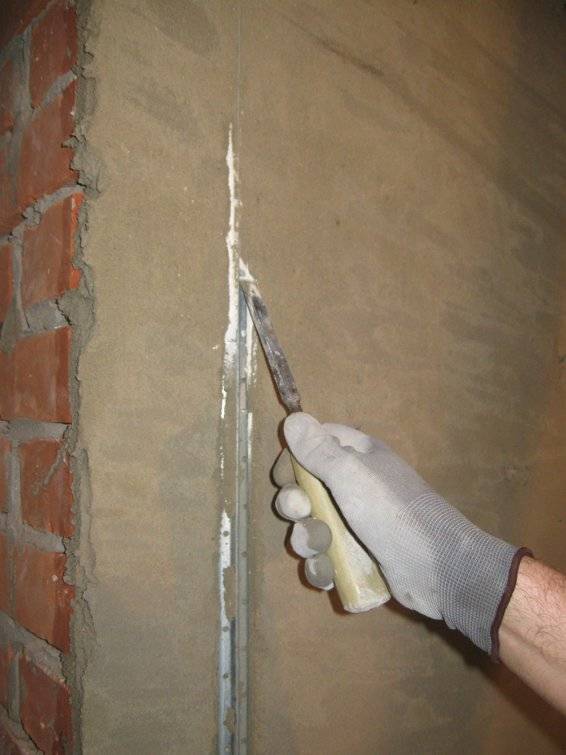
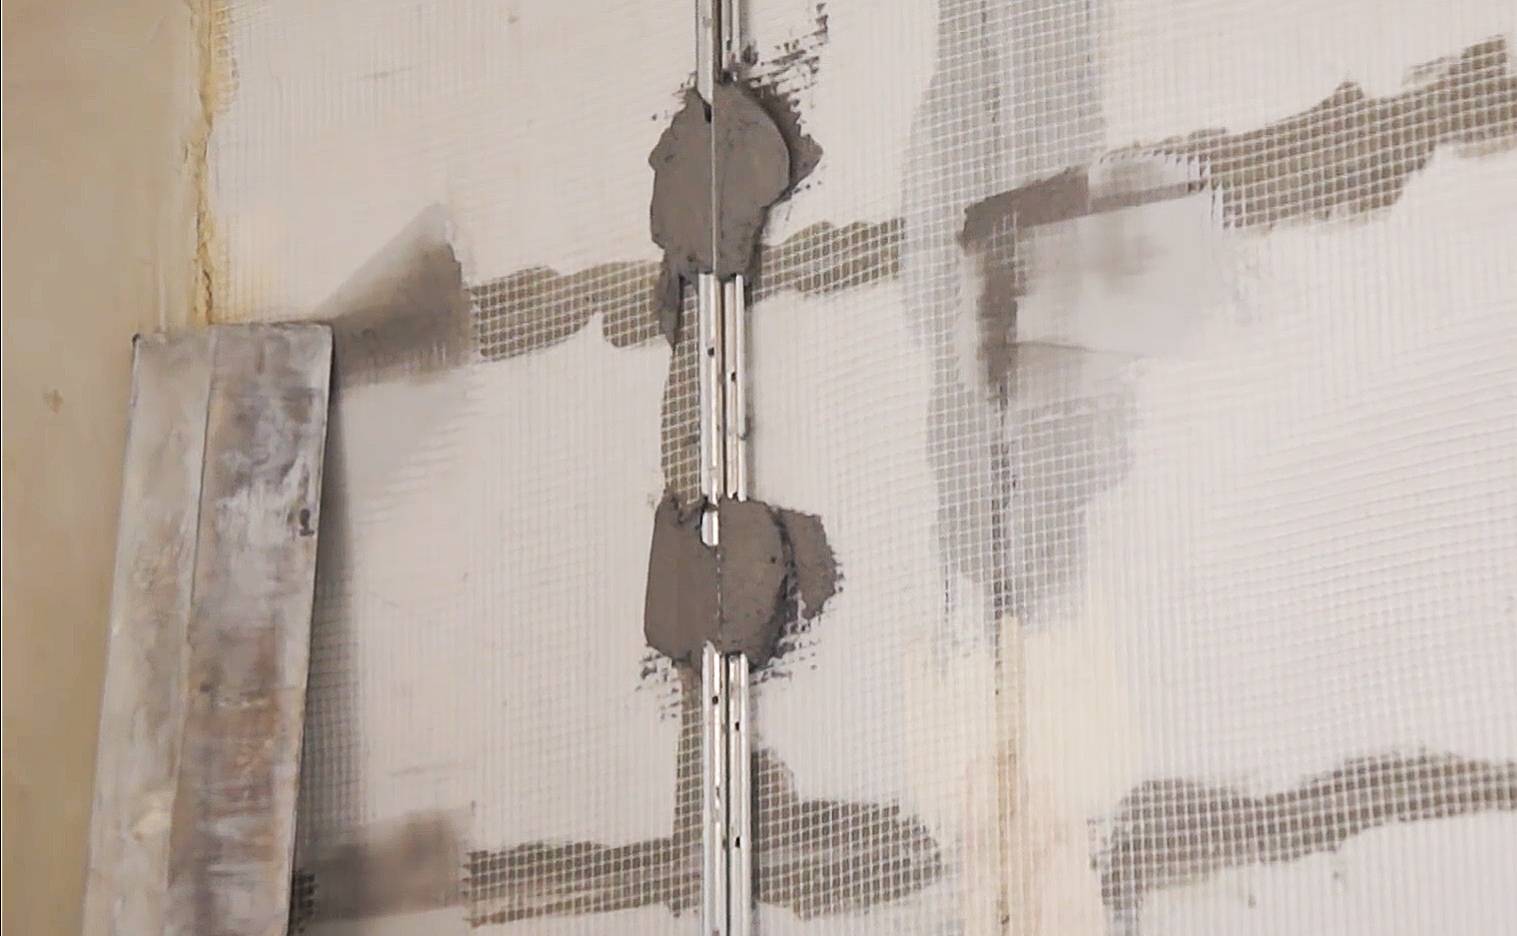
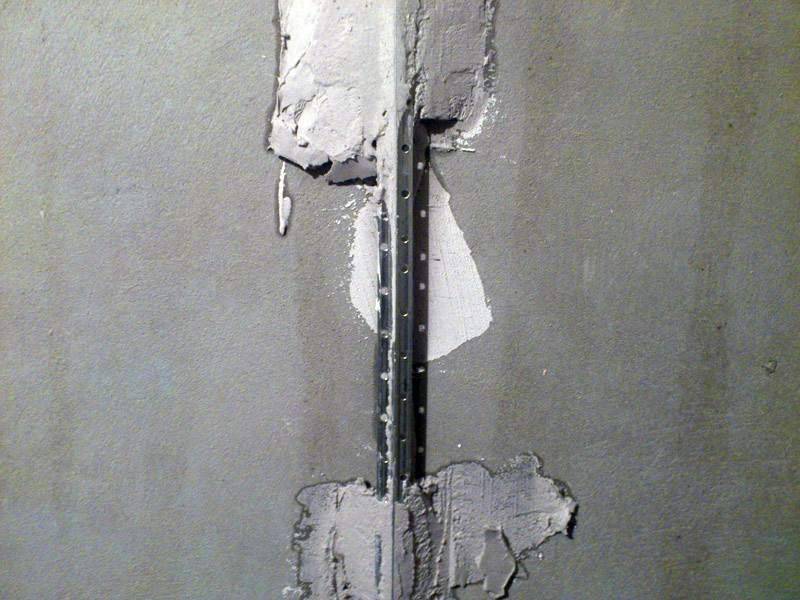
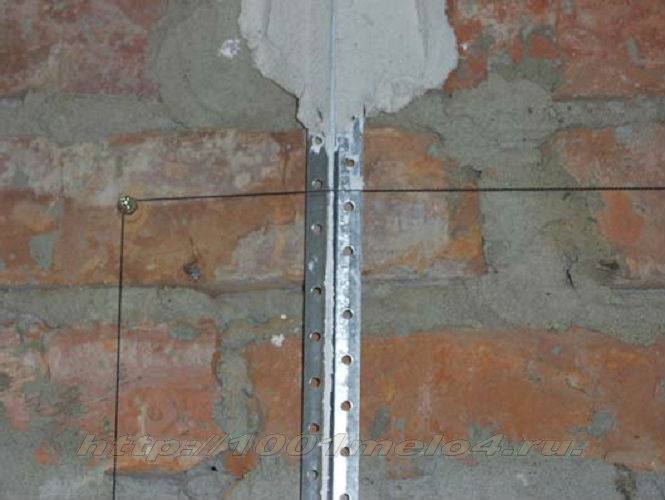
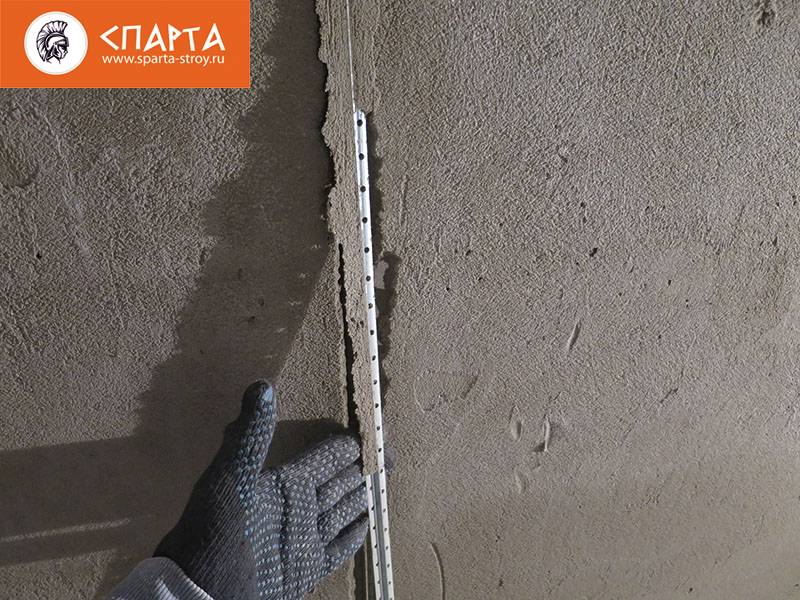
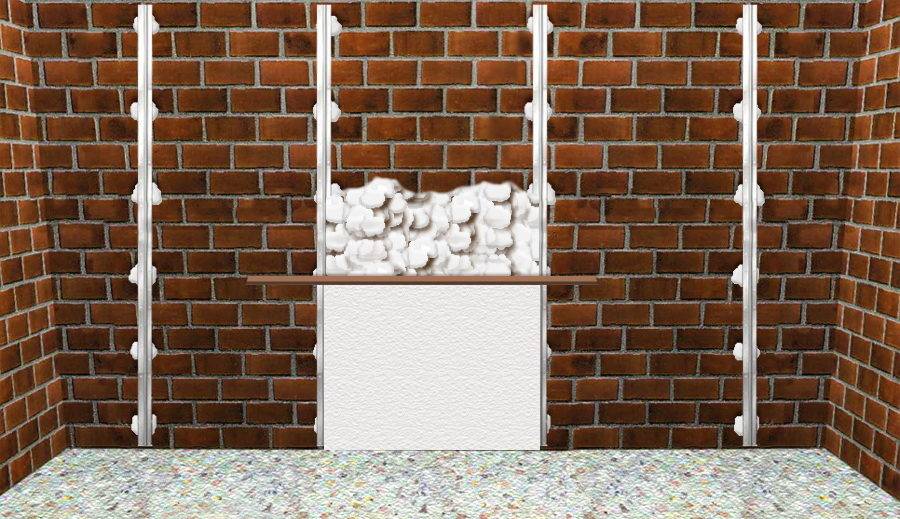
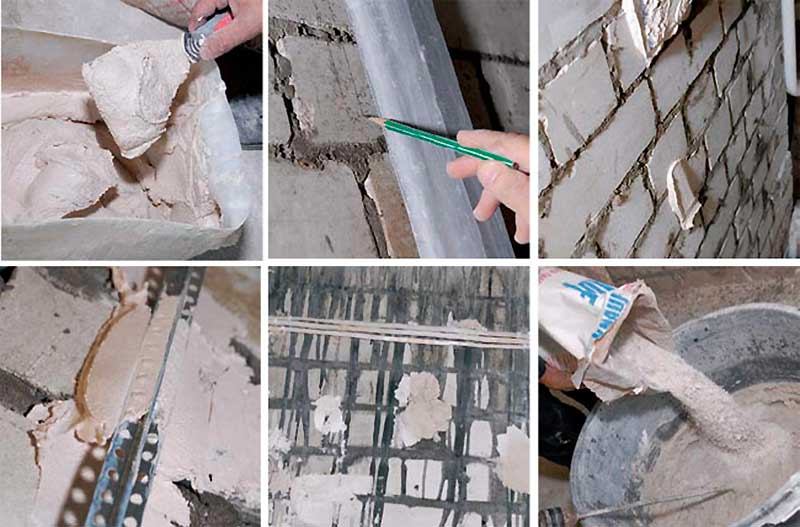
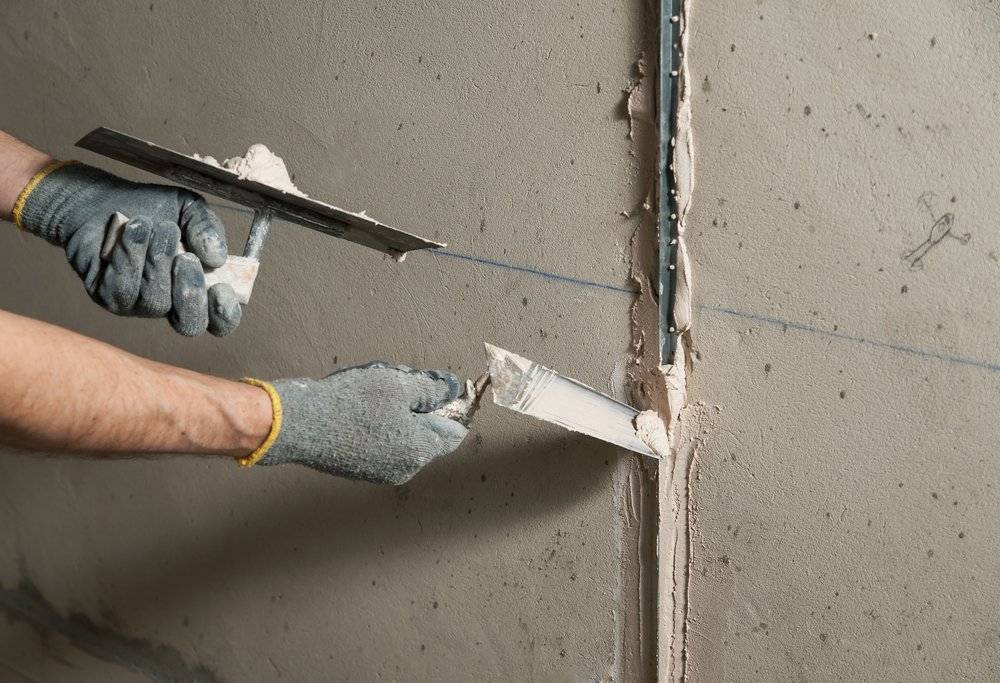
If you decide to place the profiles on the mortar, then you will need a composition with a high cement content. The pre-prepared mixture should be thrown onto the wall at the intersection of the indicated horizontal and vertical axes, but so that the layer thickness does not exceed the thickness of the beacon. Then attach the beacon and press it hard into the solution. You can strengthen the base using the rule, using it on the sides of the profile.

If you prefer the strength of the fasteners, then you will have to place self-tapping screws at the intersection of the axes. Make sure that their caps are on the same level, then you will not need to align the placement of the profiles for a long time.
When you're done placing the beacons on the walls, it's time to apply the mortar. To do this, you first need to prepare a plaster mixture.
Pay attention to the instructions on the package with the mixture. Only the correct adherence to all the points will allow you to create a high-quality composition that allows you to perform the correct plastering of surfaces.
Plastering
So we approached the final and most important stage of the whole process - the application of plaster mortar. The application procedure is as follows:
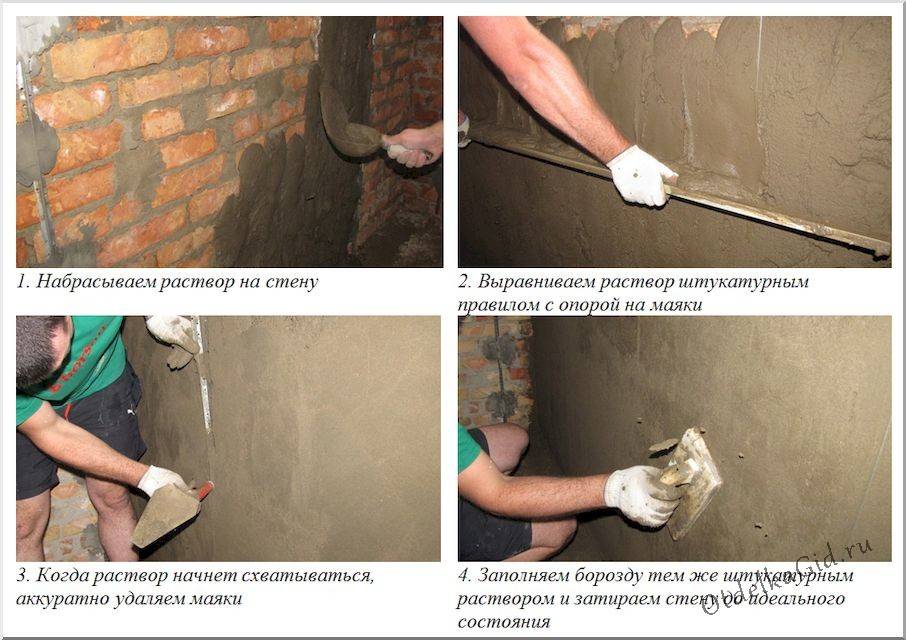
- Take a small amount of the mixture with a wide spatula;
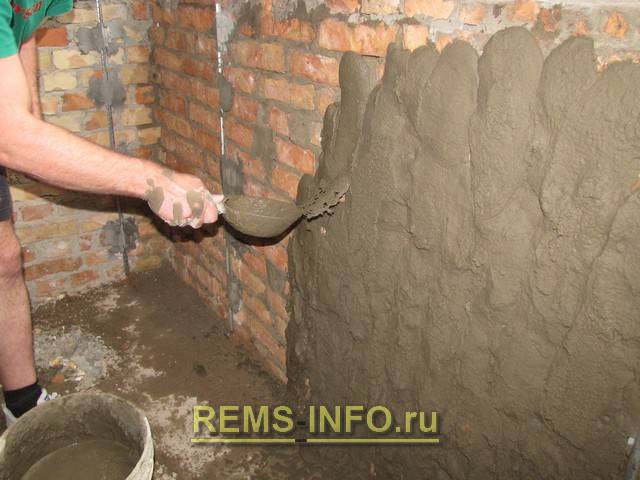
- Throw this solution in between the beacons, filling all the free space;
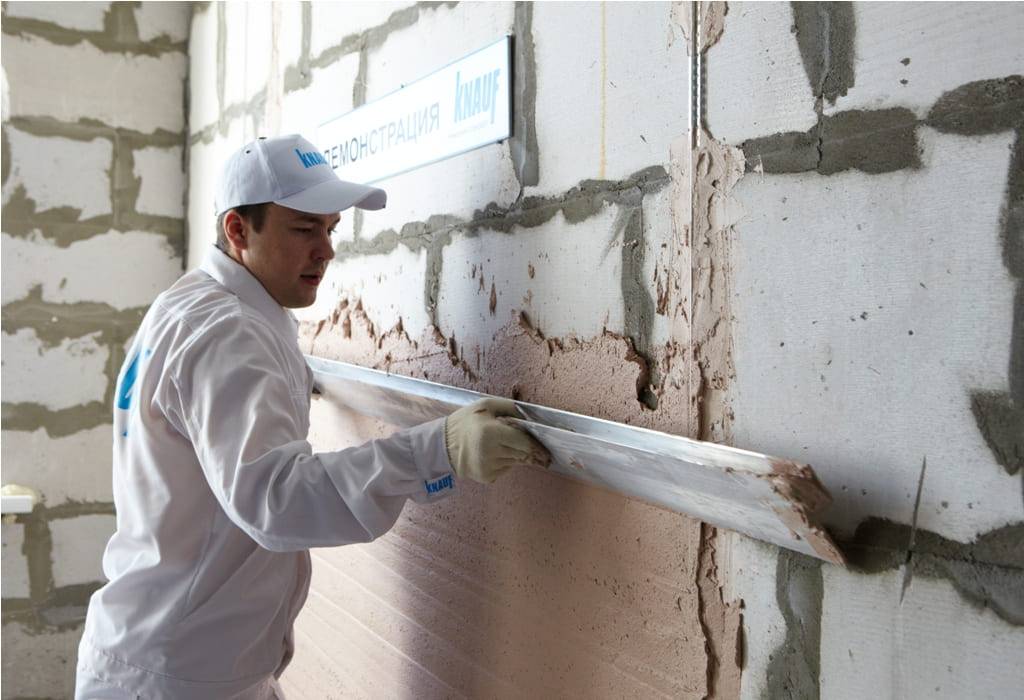
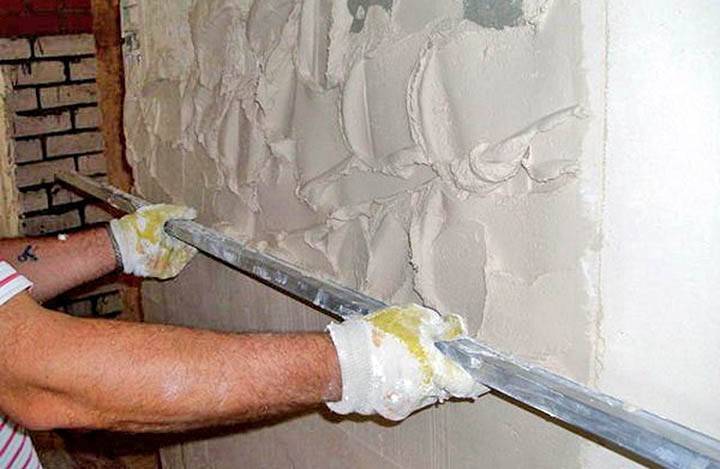
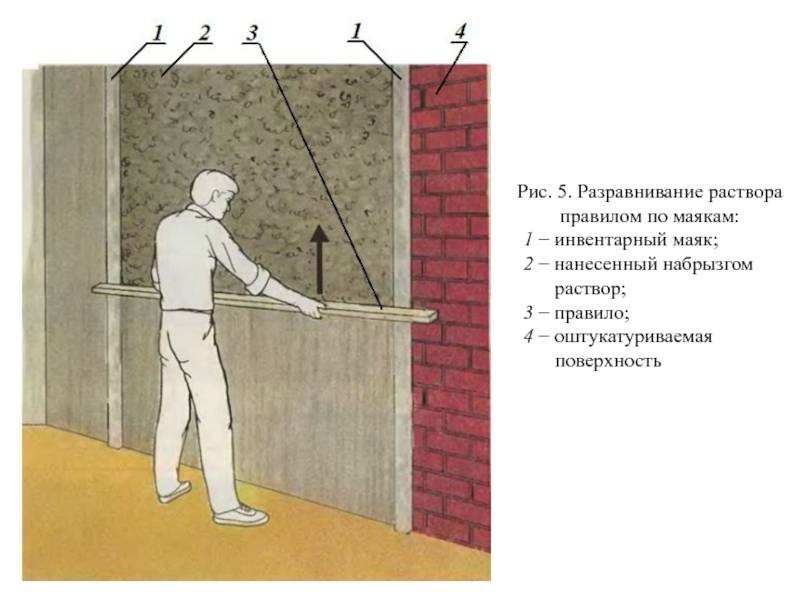
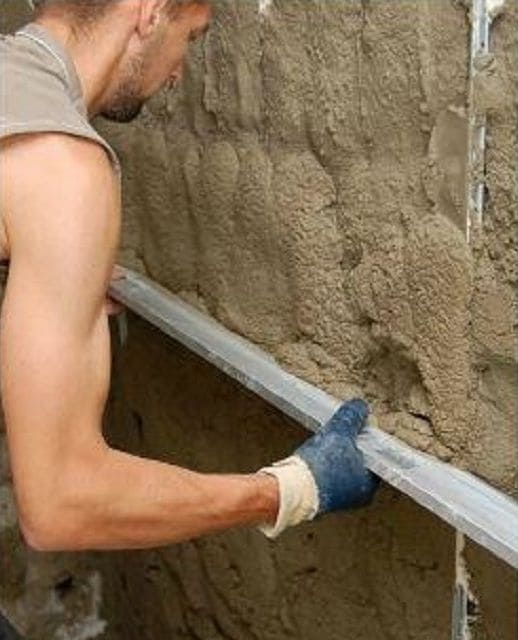
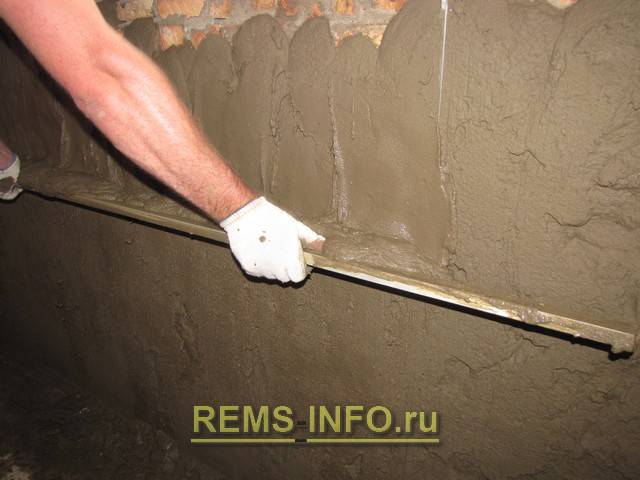
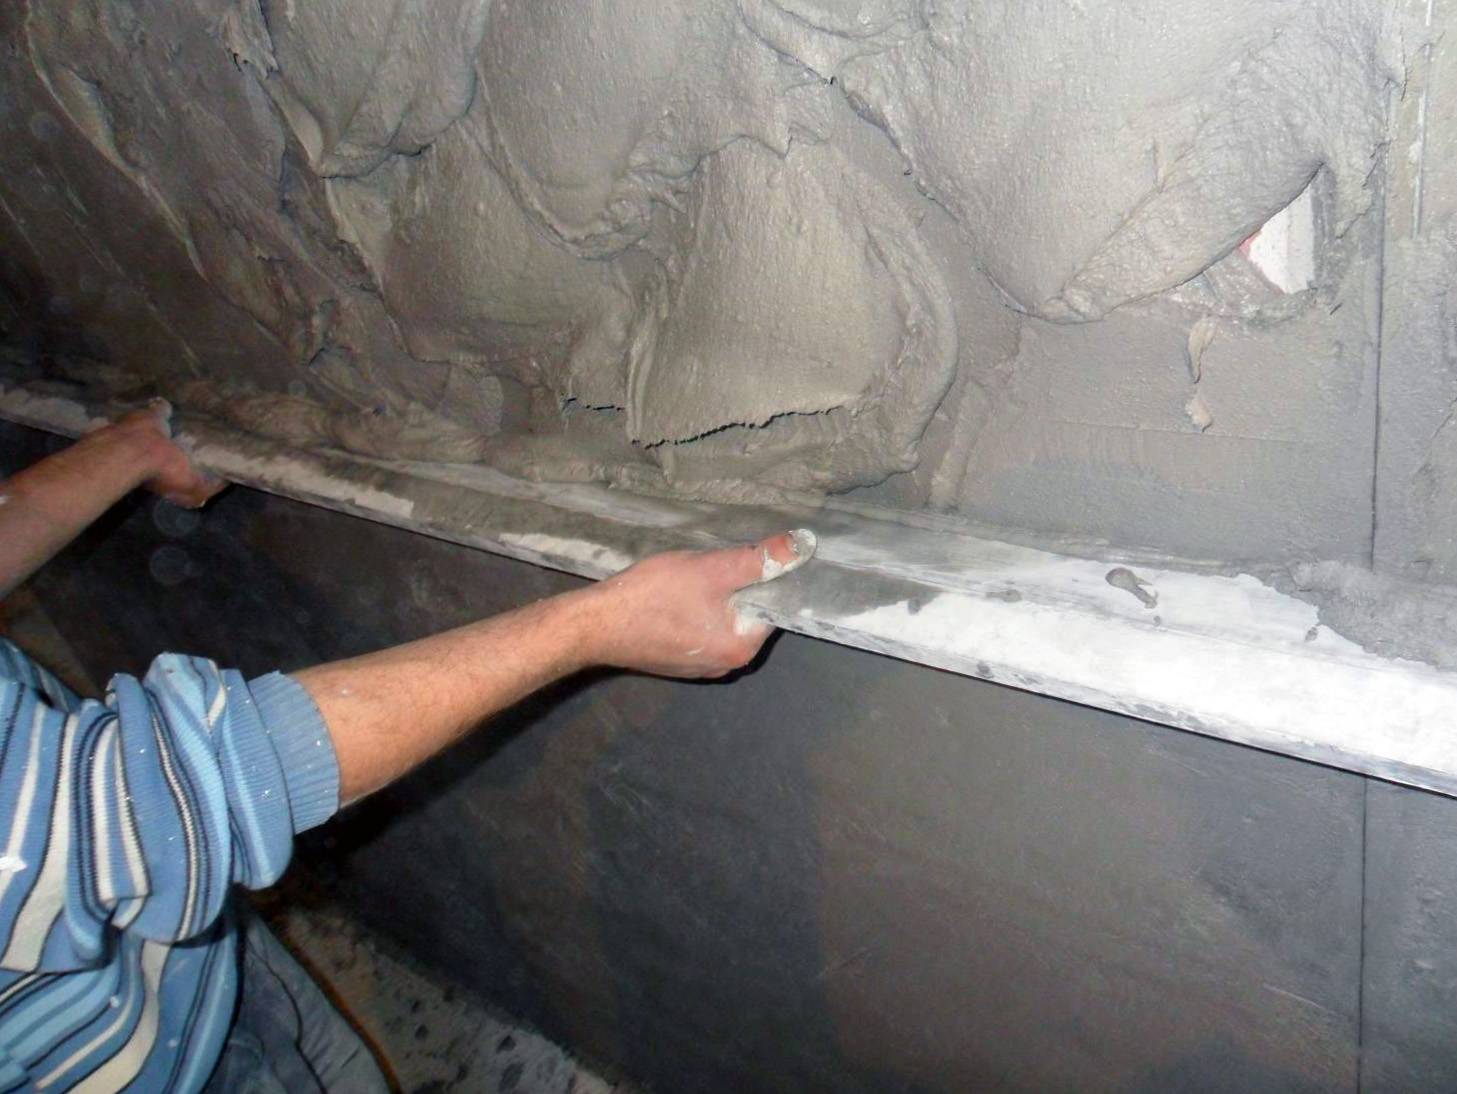
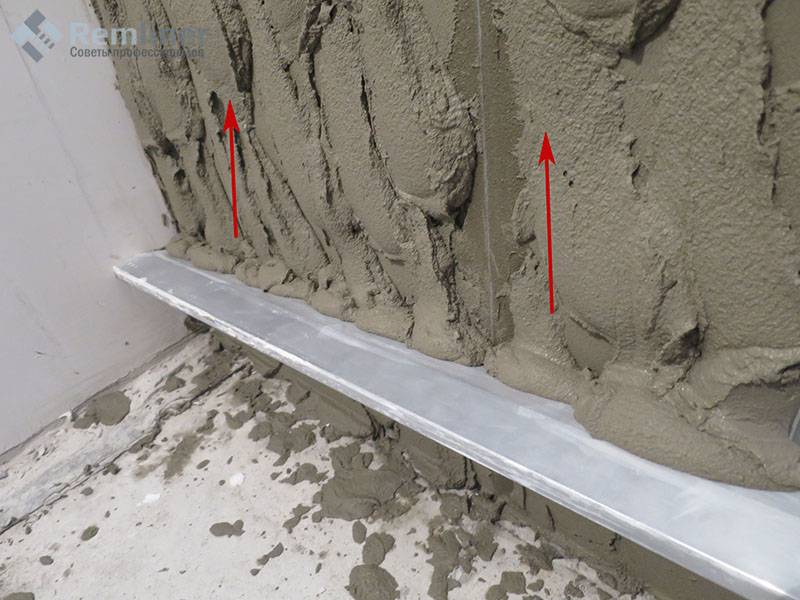
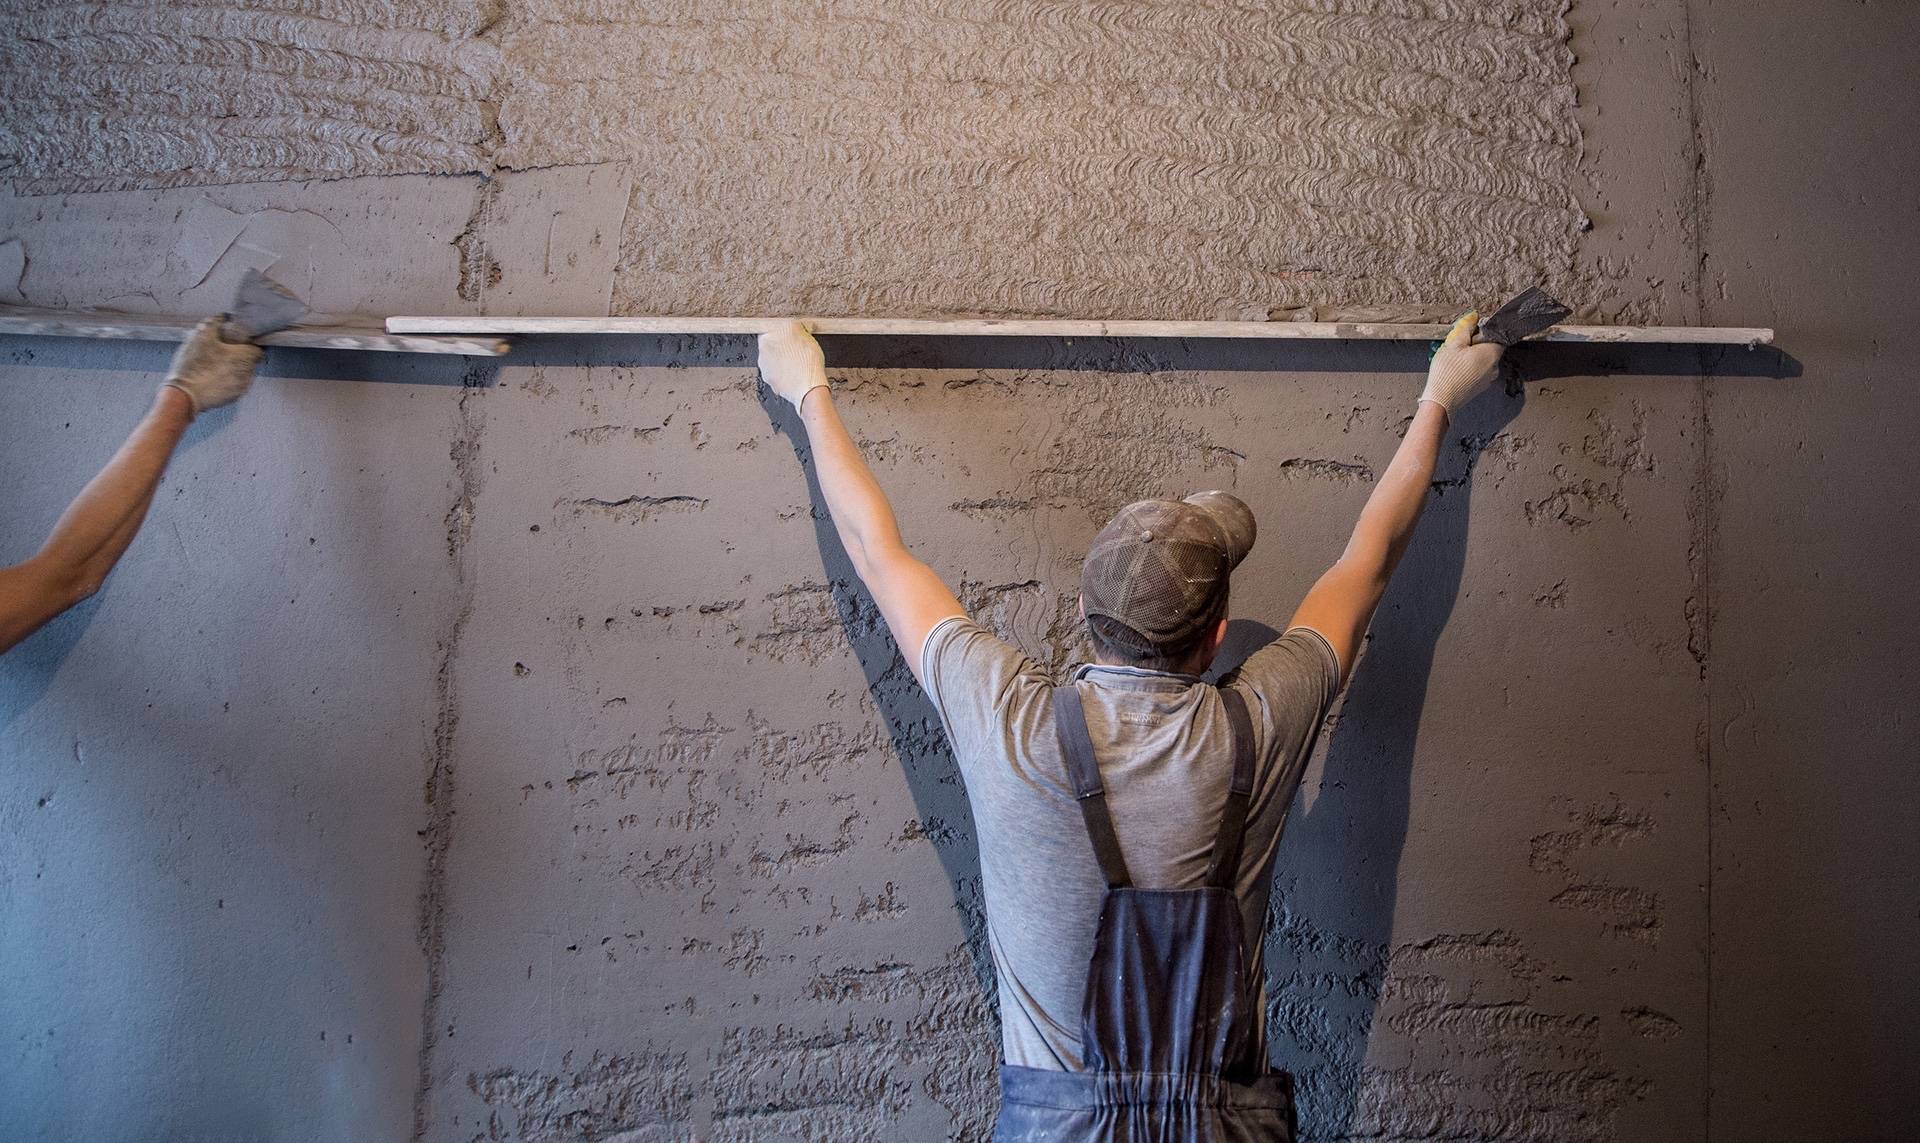
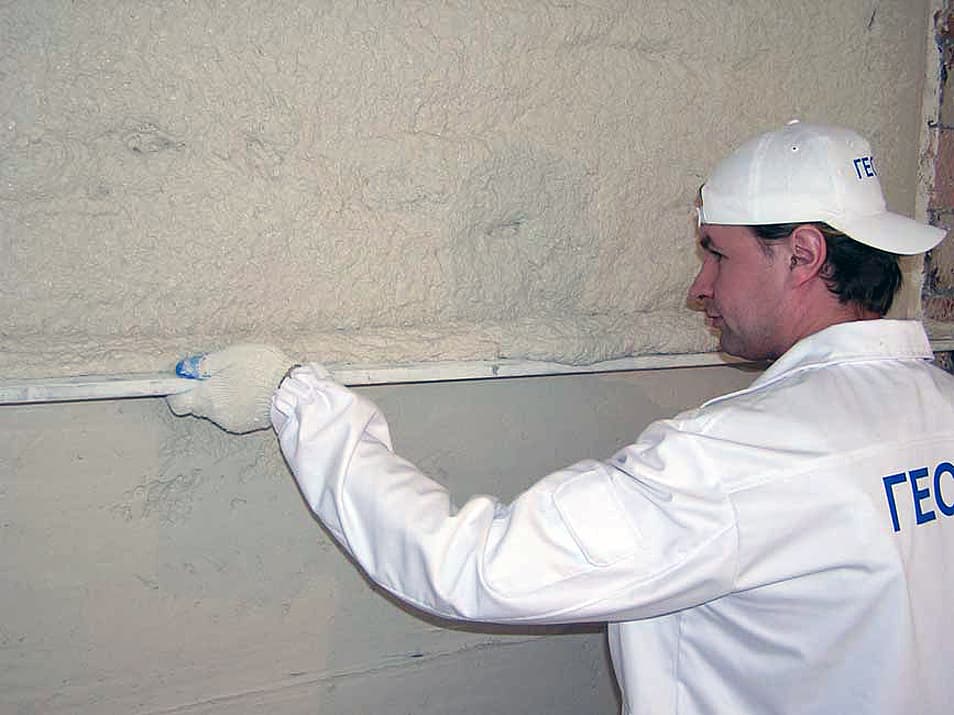
- Using the rule, which must be moved perpendicularly with the beacons from top to bottom, remove excess solution.
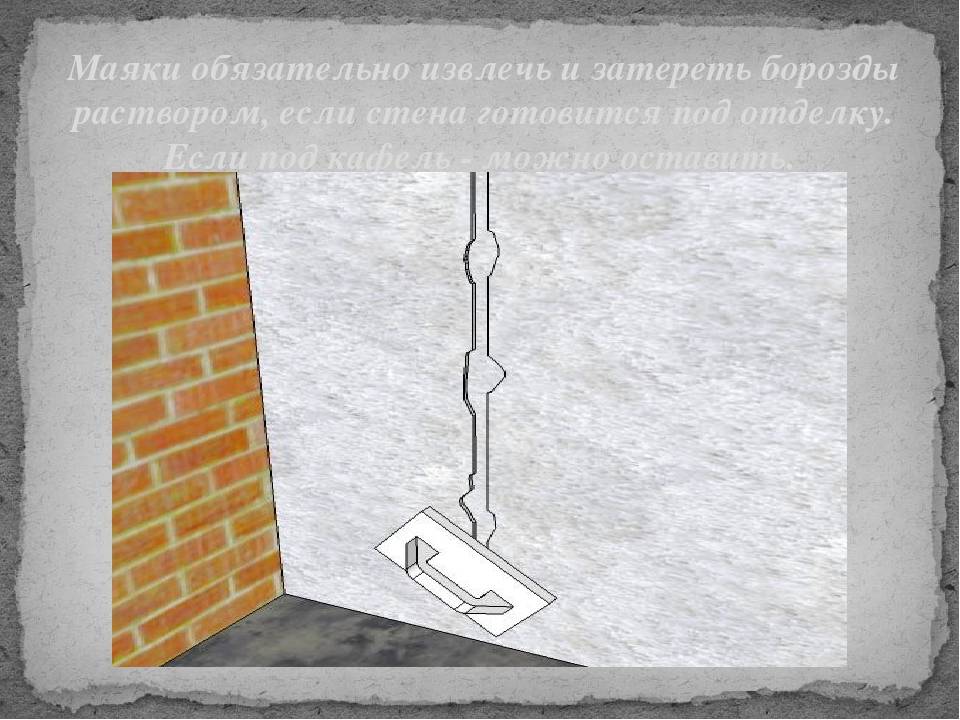
After the solution finally hardens, a perfectly flat surface will be waiting for you. If necessary, the beacons can be removed, but most often they are left.
When you can do without lighthouses
Align the walls with plaster so that the surface does not deviate from the vertical over the entire area, and the corners are straight, it is very difficult without the use of beacons. The time to install the guide profiles is more than paid off by the speed of the subsequent plastering and the quality of work. But this is not always necessary.
No lighthouses required:
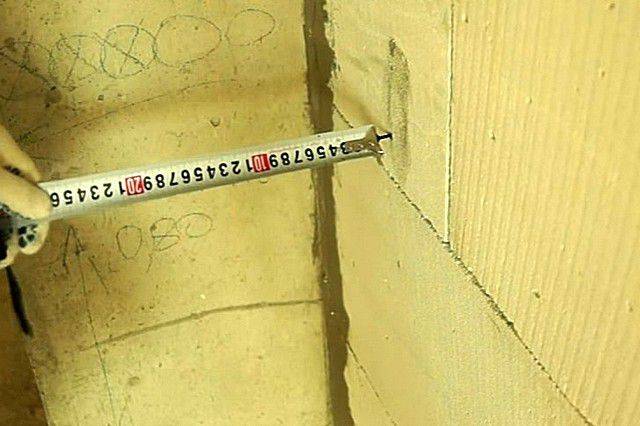
- If the wall is relatively flat and the deviations from the vertical do not exceed 3-4 mm, i.e.the plaster layer will not exceed these values. For example, when the house has a flat masonry of aerated concrete, and you only need to hide the joints of the blocks and the rough surface.
- If plastering is carried out in a utility room, garage, etc., when perfect evenness and flatness are not required.

Beacons are indispensable:
- When the walls "move in waves", i.e. have large vertical or horizontal differences, it will not work to align them without beacons.
- When the angles are curved: not 90 degrees over the entire height.
- When a perfectly flat surface is required to maintain the quality of the finish (tiles, wallpaper, paint, etc.).
Application of the solution
First layer of solution
For better adhesion of the mortar to the wall, be sure to moisten it with water.
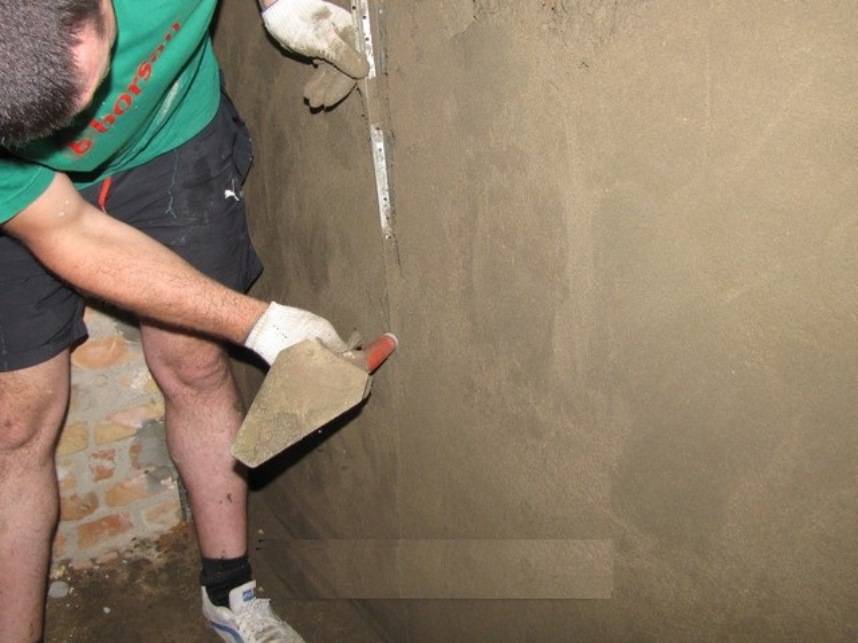
With a construction bucket or trowel (whichever is more convenient), we throw the mortar onto a section of the wall about 1 square meter. We level the mortar over the surface with a construction float, the thickness of the mortar should be about 5-7 mm. Choose a grater long enough for work (40-50 cm), then the layer of solution will lay down more evenly. We drive with a float in different directions, from bottom to top, from left to right, in an arc, etc.
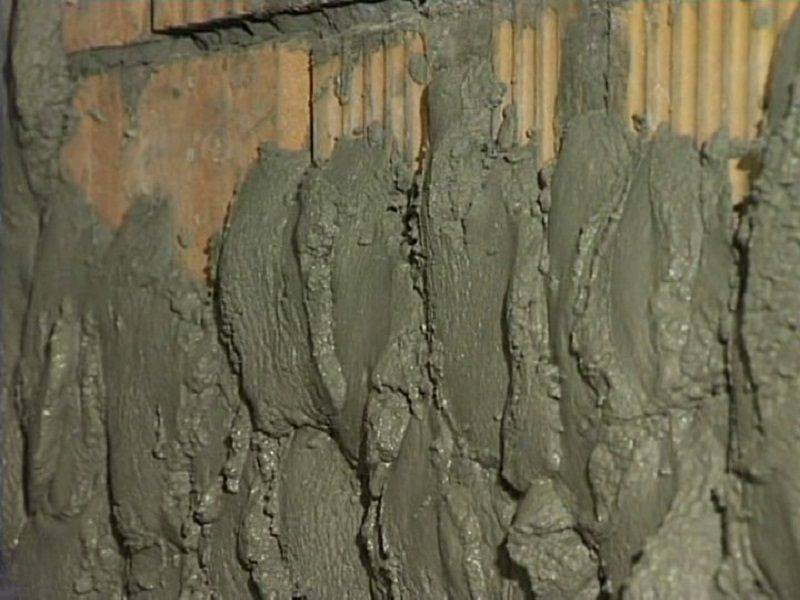 We throw the solution on the wall
We throw in the next meter of mortar and thus gradually plaster the entire wall. You should work from the bottom of the wall upwards. There is no need to try to level the mortar completely, the roughness will be useful for adhesion to the second layer of plaster.
Leave the wall to dry for about 2 hours.
Second layer of solution
After the first layer has dried, we go through the entire wall with the rule. This tool will remove large build-ups of plaster. The rule is to put it close to the wall and drive it in different directions so that excess protruding particles move away from the wall.
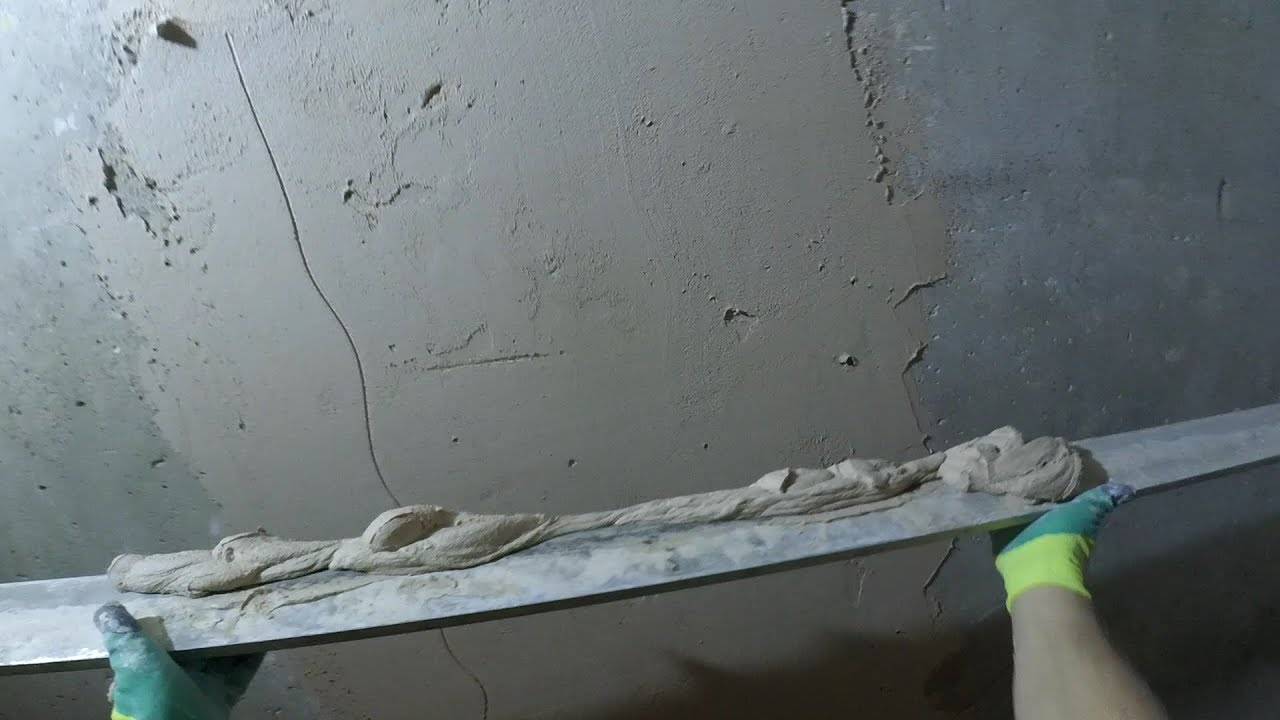
Then we apply the second layer of the solution. This time the plaster should be smoothed harder. We do not put the second layer on the wall, but put it on the grater with a spatula and level the surface with it. Movement also in all directions.
Give the mortar a little setting time. When the top layer is slightly crusty, you can check the wall for evenness. Apply the rule to the wall and look for depressions and bumps. We remove the bumps with a construction float, it should be driven in a circular motion, removing excess mortar. Periodically moisten the tool with water, then the solution will slightly soak and it is better to withdraw in a thin layer. We rub the cavities with a small amount of solution.
 We rub the irregularities with a construction float
Apply the rule periodically and level the wall. Large defects should not remain at this stage.
Now let the plaster dry for another 3 hours.
Third layer of solution
This is the thinnest layer of plaster needed to make your plaster smooth.
Add water to the solution, it should become very liquid. With a construction bucket, starting from the top of the wall, pour a square meter of the surface with this solution. Smooth the plaster in a circular motion with a float. We achieve a smooth surface.
 Checking plaster defects with a level or rule
Leave this layer to dry for 5-8 hours.
Mount beacons
Aligning the walls with lighthouses requires their correct installation, the final result will depend on this. Therefore, adherence to all stages and extreme concentration will be required to avoid rework.
Fixation of the metal profile-rail
Such bars can be set in two ways, which are selected based on the specific situation.
Using dowels
It is carried out according to the following scheme:
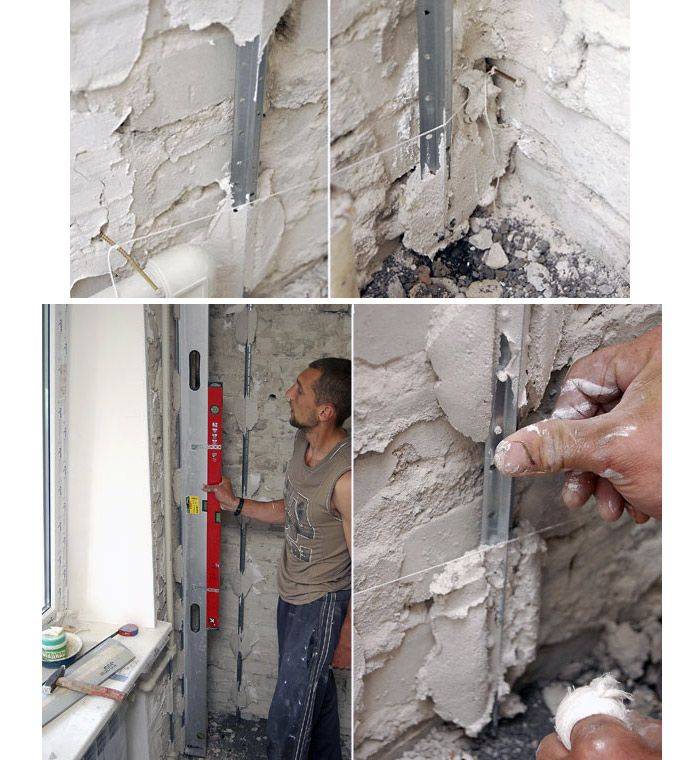
- The markup is being done. The lines are drawn strictly vertically in increments of 80 to 100 cm. It should be borne in mind that the first part will be located at a distance of 20 cm from the wall. To achieve the required evenness, a plumb line is used.
- Holes are drilled exactly along the lines. They are positioned in 30 centimeters increments. The minimum depth should be 8 millimeters.
- Dowels are driven in.If they are not there, then you can use the proven method - chopiki.
- A self-tapping screw is screwed into the dowel, after putting on the fixing rails "eared" on it.
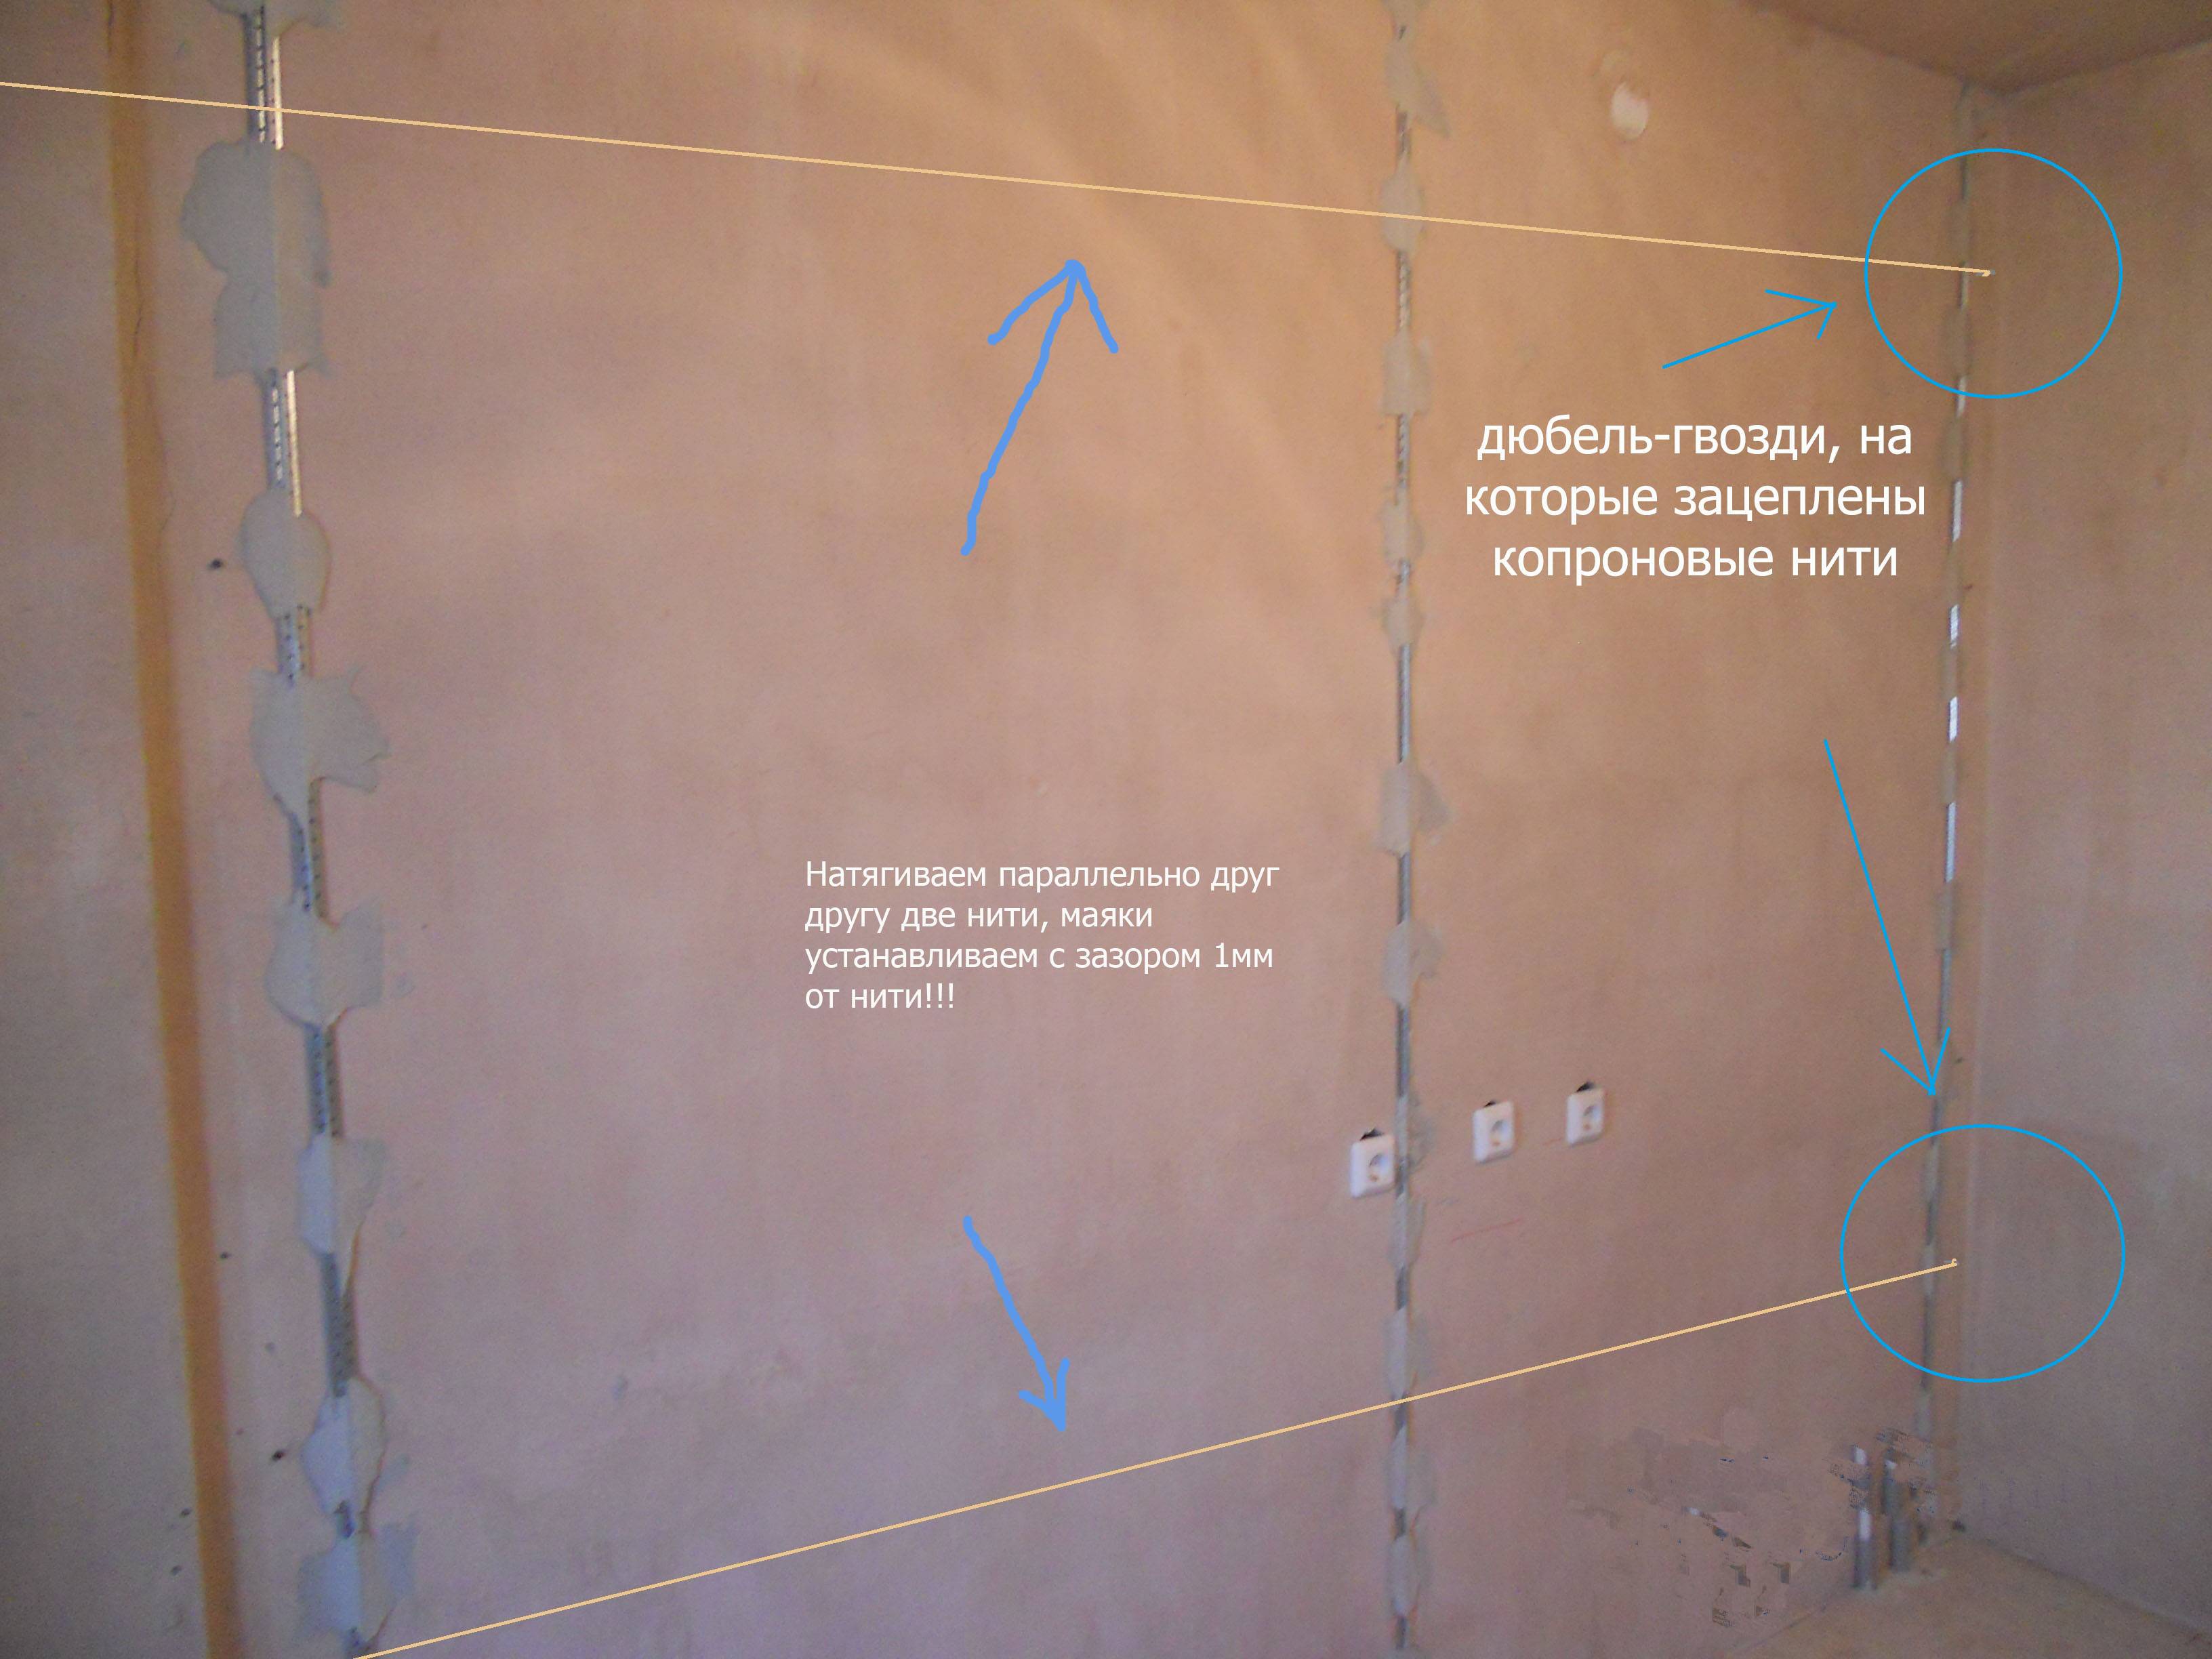
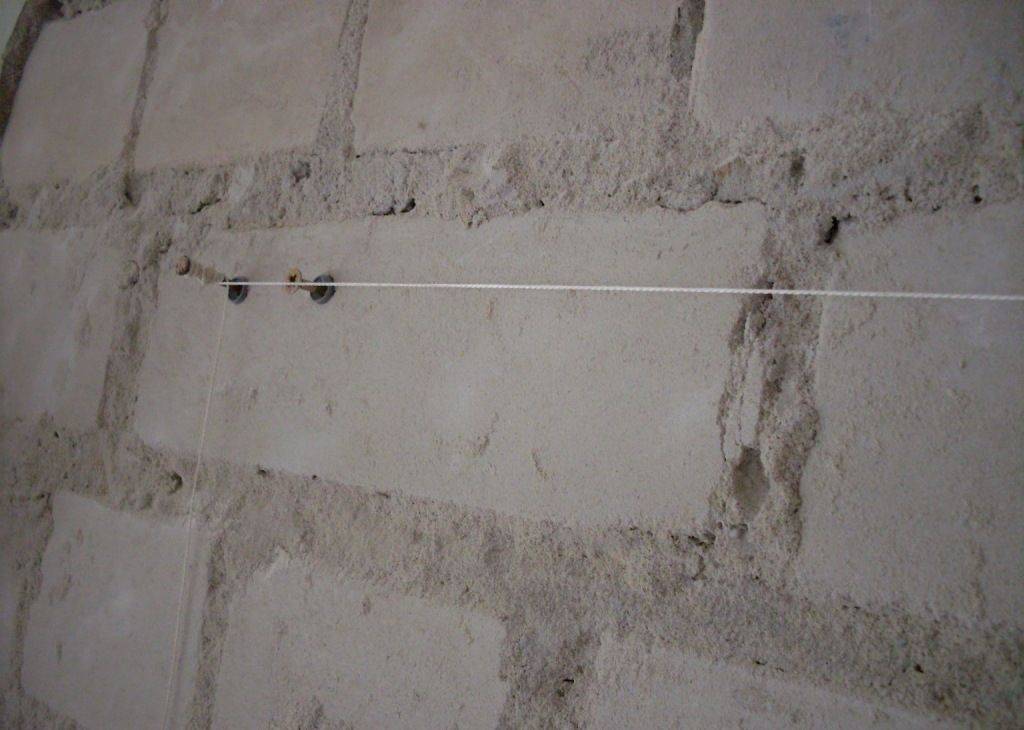
- First, two profiles are attached and aligned, located along the edges of the wall. A cord is pulled between them, along which the remaining elements are exposed.
This option allows you to clad the walls on the lighthouses with your own hands by adjusting the thickness of the plaster layer.
VIDEO: a quick way to install beacons
Application of plaster mix
How to set up beacons with a solution? This will require a mixture of plaster, cement and sand, metal slats, a level and a long, even slat. Installation technology: marking is performed, as in the previous version, the required amount of solution is kneaded, the mixture is dotted along the entire length of the line and beacons are immediately installed. Each exposed element is checked by level. Final fixation is achieved by placing another layer of mortar.
The process seems simple, but it requires some experience.
Installation of cement and plaster beacons
This process will take more time. Fixation occurs according to the following algorithm:
- 30 cm recede from the ceiling, the same distance is measured from the wall. A nail is driven into the resulting point or a self-tapping screw is screwed in.
- A plumb line is lowered to the floor. Another self-tapping screw is screwed in at a height of 20 cm from the floor.
- The procedure is repeated on the other side.
- A cord is pulled between the screws so that it does not come into contact with the surface. Several more self-tapping screws are installed along the line of the rope.
- A solution is applied to each screw, a rule is placed between the upper and lower, the space under it is filled with a mixture. This is done with all the elements.
That is, smooth bumps of plaster are obtained, which will play the role of beacons.
Concrete wall
A quartz-speckled primer is used if the surface has a smooth texture. They will give a little roughness, they also add gypsum powder to the solution. This component helps to enhance the adhesion of the mixture to the surface.
It is important to be familiar with the instructions for decorating walls with plaster. If a solution of lime and gypsum is used, then it is necessary to adhere to the proportions of 3 parts of lime and 1 part is gypsum

It is necessary to prepare the mixture by kneading the gypsum with water. In this case, the mass should not be too thick. Then lime is poured into it, kneading the mixture until it becomes a homogeneous mass.

Experts advise to impregnate its surface with "Concrete Contact" before the process of applying the plaster. This primer penetrates deeply into the surface, creating the desired effect.


Knowledge of this kind will undoubtedly be useful to both the owners of a private house and an apartment. After all, the walls often need alignment, additional work.
Ceiling plastering
Now that the plaster is plastering
the solution is prepared, you can proceed to the plastering of the ceiling itself. It is relative
a simple process, but it takes patience. The essence of the process is
applying mortar to the ceiling and leveling using a rule.
The mortar should not be as thick as in the case of plastering the walls. Too thick mortar does not adhere well to the ceiling, plaster may sag.
You should start applying the plaster from the central stripes, and only then move on to the side strips.
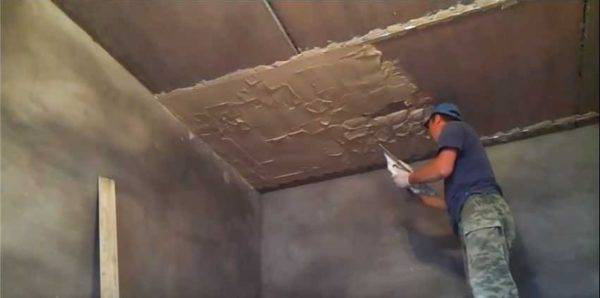 Ceiling plastering
Ceiling plaster tools
The minimum set of tools for plastering the ceiling should include:
- building bucket with a volume of 15-19 liters. It is recommended to use a square / rectangular bucket for the convenience of pouring the solution onto the instrument;
- spatulas of various sizes;
- Master OK;
- building rule;
- roller and paint bath;
- laser and bubble level;
- sandpaper of various sizes;
- drills with a mixer attachment;
- plastic mesh for reinforcement;
- goats, forests, stepladder; glasses, mask, respirator, rubber gloves.
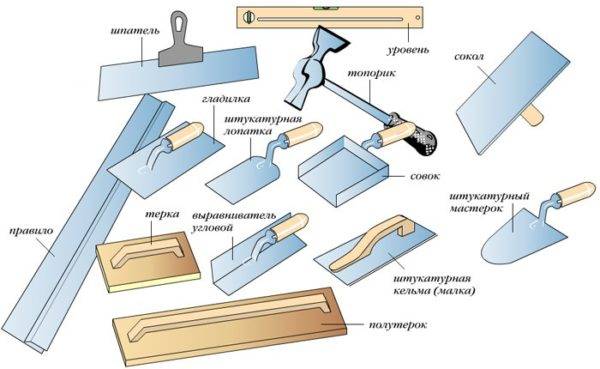 Basic plastering tools
The procedure for applying plaster to the ceiling
The following describes the plastering steps for one section between the beacons.
1. Add a small
the amount of solution on the edge of the instrument, then with gentle movements
distribute the solution over the ceiling, smoothing the solution with smooth movements.
You should get a thin contact layer of plaster.
2. In the second step, a thicker layer of plaster is applied so that it protrudes slightly beyond the installed beacons.
3. Using the rule, the plaster mixture is distributed and leveled. The rule moves along a zigzag path, relying on adjacent beacons.
 Leveling the mixture with the rule
4. After alignment as
usually voids and cavities are formed that need to be filled by workers
material. To do this, the remains of the solution are removed from the rule and applied to
"Problem areas".
5. It is necessary to repeat the points
"3" and "4" until you get a flat horizontal surface.
6. Wait until
the plaster mixture will dry out (about an hour).
7. Grouting is carried out to create a smooth surface. To do this, the surface of the plaster is moistened, then using a construction float or emery paper, the surface is polished in a circular motion, with the application of a small clamping force.
8. If minor defects are found, they are immediately corrected. Small irregularities are rubbed with sandpaper. If there is not enough solution in places, the required amount is applied.
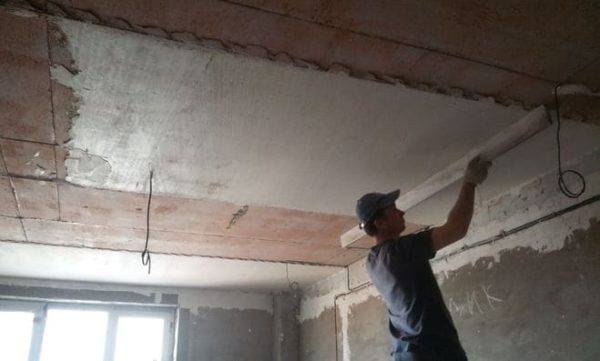 Plastering section between beacons
Work for adjacent sections is carried out in a similar manner. If the master is experienced enough, it is possible to carry out work in parallel, for several sections at the same time.
The final stage of plastering the ceiling
After plastering
the mixture is applied to the entire ceiling, and the plaster is completely dry, it is necessary to remove
lighthouses. If the beacons are not removed, rust will appear on the ceiling in the future, and along
lighthouses will crack.
To remove the lighthouse, you need to pry under it with a spatula, and carefully remove it from the plaster layer. The cavity remaining after the lighthouses is cleaned of protruding irregularities, and with a spatula it is filled with plaster mortar.
After the mortar has set, grouting is also carried out using a construction float, having previously moistened the surface with a damp sponge. Thus, an even and uniform plaster surface is obtained, without any irregularities and differences.
 Grouting plaster on the ceiling
Required tools and material
Before starting work, to ensure safety and high speed of application, make sure that you have all the necessary tools and materials. It will take a few minutes, but it will save you tons of time later.
Selected plaster mix
The main component, without which further work is impossible. To forget about it is problematic, but problems can arise with:
- improperly selected composition;
- volume of harvested material.
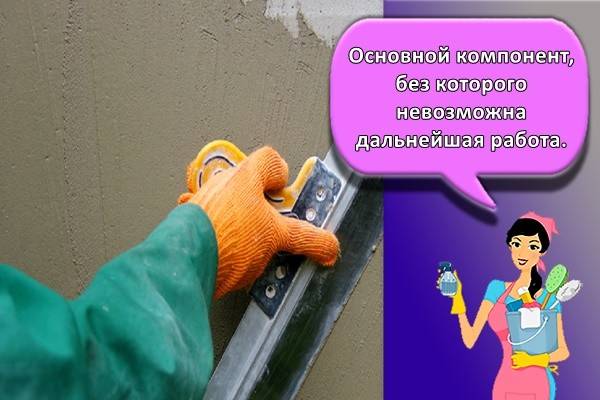
Make sure everything is done correctly before you start plastering the walls.
Drill with a mixer attachment (hammer drill with a drill)
This tool will significantly increase the speed of preparation of the solution and its quality. You can also stir it by hand, but it is very dreary. In addition, the manual method does not give the same quality of the mixture that is achieved with the use of a drill. A puncher is needed to drill holes for beacons.
Hammer
A universal tool, without which no repair is complete. With its help, you can beat off a dried piece of old plaster or knock out a strongly protruding beacon, drowning it deeper.
Dowel
They are driven into the holes prepared by the puncher. They are used to prepare the markings with which the beacons will be installed on the wall.
Self-tapping screws
Used to create markings on the wall to facilitate further installation of beacons. Without them, it will not be possible to fix the cord in order to get an even, high-quality wall finish.
Level
Required for leveling walls. Obligatory to purchase, otherwise you will have to live in a room with curved walls. Do not hope to level the wall by eye, as this can only be achieved by very experienced craftsmen.
Gon
Plastering corners is considered one of the most difficult stages of work, the implementation of which requires increased attention and auxiliary tools. The square will allow you to check the quality of the applied layer, indicating irregularities and imperfections.

Container for mixing the mixture and primer
Mix for plaster and primer are mixed in a separate container, which must be prepared in advance. The size of the container depends on the amount of plaster required for preparation.
Primer
A primer is necessary for the primary treatment of the working surface in order to:
- increasing the adhesion of the treated surface with a coating, which is played by plaster;
- evens out the absorbency of the processed material, which also affects the quality of adhesion.
Brush
With its help, the primer is applied to the wall. It is advisable to prepare tools with a wide and narrow brush. A wide brush will speed up the overall processing speed, while a narrow brush will help to gently apply the primer to hard-to-reach areas.
Putty knife
The basic tool for applying and leveling a layer of putty. You can't do without it, so make sure to buy it in advance. It is not expensive, but it brings a lot of benefits.
Gloves
The putty has a negative effect on the skin, drying out and damaging it. Consider protection by wearing heavy gloves on your hands. It is not recommended to work without them, especially if a large amount of work is planned.
Protective glasses
The putty has the unpleasant property of scattering all over the area, getting to the most unexpected places. It is easy to smudge her eyes, which will be extremely traumatic. Take the time to find safety glasses or borrow them from friends.

Protective mask
Not a must, but not a superfluous wardrobe item if you have to work with putty. It's up to you to wear it or not, but experts advise not to neglect such protective ammunition. It is not expensive, but it gives a lot of benefits.
Work clothes
The putty quickly and deeply penetrates the fibers of the fabric, after which it will be quite problematic to remove it. You should not wear good clothes during facing work, since even the most neat owners will not be able to protect them from dirt.
Instructions: how to plaster with your own hands
Before moving on to the sequence of plastering work, it is worth mentioning how much plaster is needed and how to calculate the consumption. It depends on how much material you need to buy for the rough finishing of the room. I described a simple calculation using Knauf Rotband as an example.
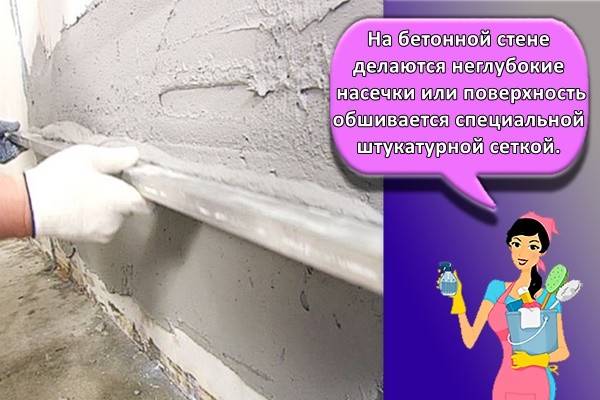
Surface preparation. Old coatings are removed from the wall: tiles, wallpaper, paint, plaster. Dust removal is carried out, oil stains and other contaminants are erased. Notches are made on the concrete walls under the cement plaster to ensure better adhesion.
Primer. Depending on the type of wall, a suitable mortar is selected and applied. There are two main types: deep penetration and adhesive concrete contact.
Installation of beacons. To create a single plane, plaster beacons are placed. The most common type is metal profiles with a thickness of 6 or 10 mm, which are attached to the hay with plaster or fasteners. They serve as an emphasis in the subsequent leveling of the mortar with the rule. Above, I left a link to detailed instructions on the types and work with lighthouses.
Preparation of the solution. Water is poured into a suitable container and dry plaster mixture is added.The components are mixed to a homogeneous consistency using an electric drill with a nozzle or a construction mixer
Expert opinion
Sergey Shablovsky
Plasterer
Important: When mixing the plaster for the first time, you must follow the instructions on the package, because different manufacturers may have slightly different proportions of water / dry mixture
I use a 20L plastic bucket to make the mix from half a bag and a 45L rectangular bowl when I mix the mix bag.
Plastering. This can be done in different ways. For example, plaster is thrown onto the wall with a spatula. When working with cement plaster, spraying is used (aka spraying, basting) - a solution of a more liquid consistency in comparison with the leveling layer is thrown onto the wall with a bucket. Another method of application: material is put on a rectangular trowel from a bucket with a spatula, then spread on the wall and slightly leveled. The most time consuming is to plaster the ceiling.
Alignment. After applying the layer of solution required in terms of power, it is leveled with a rule. The tool is abutted against the beacons and moved from the bottom up along a zigzag path. The excess solution is removed with a spatula and thrown into the container from where it was taken. The resulting small voids are filled with a mixture and re-leveled.
Pruning. After the mortar has set, small nodules and irregularities are removed by the rule.
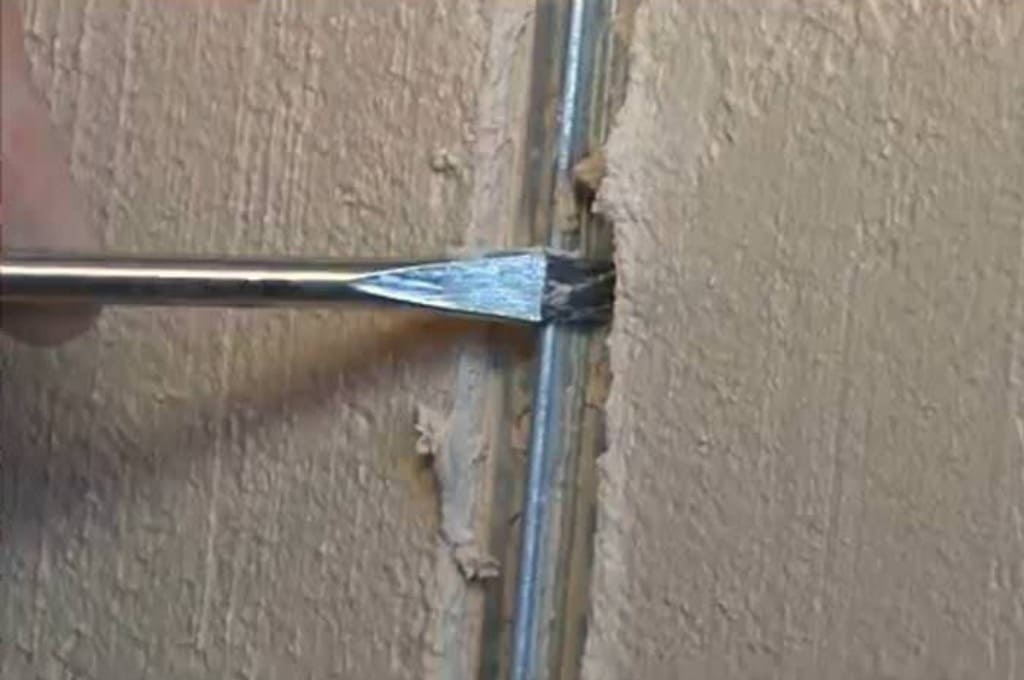
Removing beacons. The guides are removed after a few hours. In this case, a spatula is carried out on both sides of the profile, as if undercutting the plaster. Beacons pick up and take out. The newly formed voids are filled with the same plaster solution and leveled.
Grout. After the surface is completely dry, the plaster is treated with an abrasive cloth or glossy so that small irregularities can be leveled out, but not large beads.
This is where the rough plastering of curved (and not so) walls ends. This is enough for leveling under wallpaper, tiles, textured decorative plaster. For painting or Venetian plaster, the walls are additionally putty to perfect smoothness.
Lighthouses under the ceiling plaster
Plastering on beacons is done in cases where it is necessary to obtain a perfectly flat horizontal surface of the ceiling. If you use beacons, you can determine with the naked eye where the solution is applied in excess and where it is not enough.
Metallic "T" -shaped profiles are mainly used as beacons. Less common options for lighthouses made of wooden slats and from plaster mortar. In the future, we will consider the procedure for applying plaster using metal beacons.
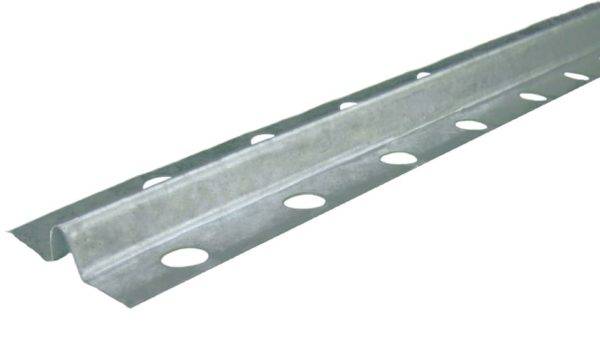 Beacon profile
Principles of installing beacons
Lighthouses are installed just before plastering. Beacons are attached to the ceiling using plaster mortar. Usually beacons are designed for plastering up to 1 cm thick. If you plan to plaster with a thicker layer, it is enough to put an additional amount of mortar under the beacons.
On the ceiling, the lighthouses are fixed in such a way that the lower points of the lighthouses lie in the same plane. The step between the beacons is taken 10-15 cm less than the length of the rule. For example, if the length of the rule is 150 cm, the step between the beacons should be no more than 140 cm.
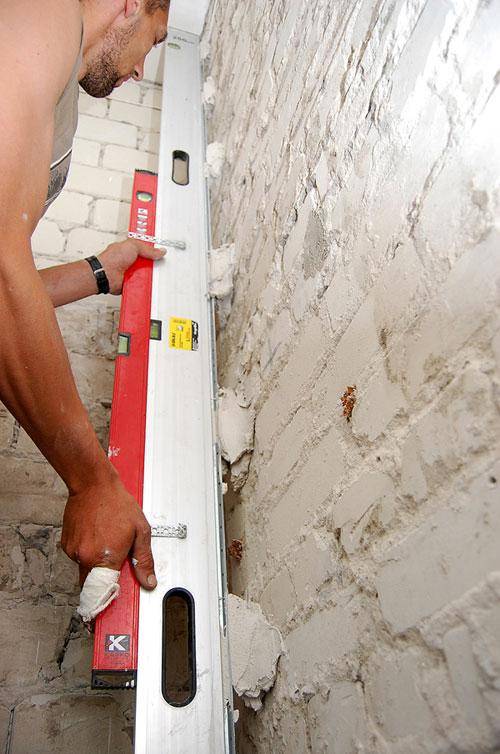
 Checking the plane of the beacons using a level
It is necessary to start the installation of beacons from the wall in such a way that when leveling the mixture, the rule with its end rested against the wall, while the rule should lie on two beacons at the same time. For the convenience of work, we recommend placing the extreme beacons at a distance of at least 25-30 cm from the walls.
The following illustration shows, as an example, layouts of beacons in a 3x4 m room, for a rule with a length of 2 and 2.5 m.
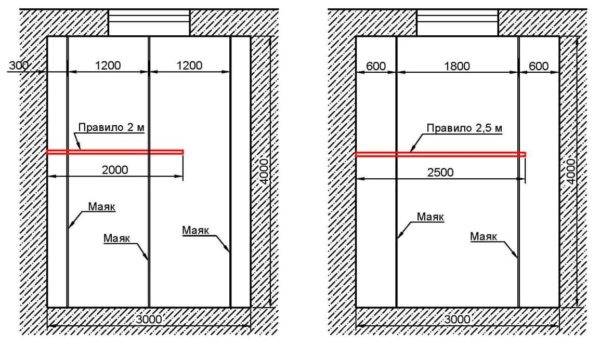 Beacon placement schemes: 2 m rule (left), 2.5 m rule (right). Dimensions are in millimeters.
The distance between the beacons should not be too great so that the master has time to plaster the entire section.For beginners, the recommended width between the beacons is 1-1.2 m.
Beacon installation procedure
The following is a detailed instruction on how to put the beacons under the plaster on the ceiling:
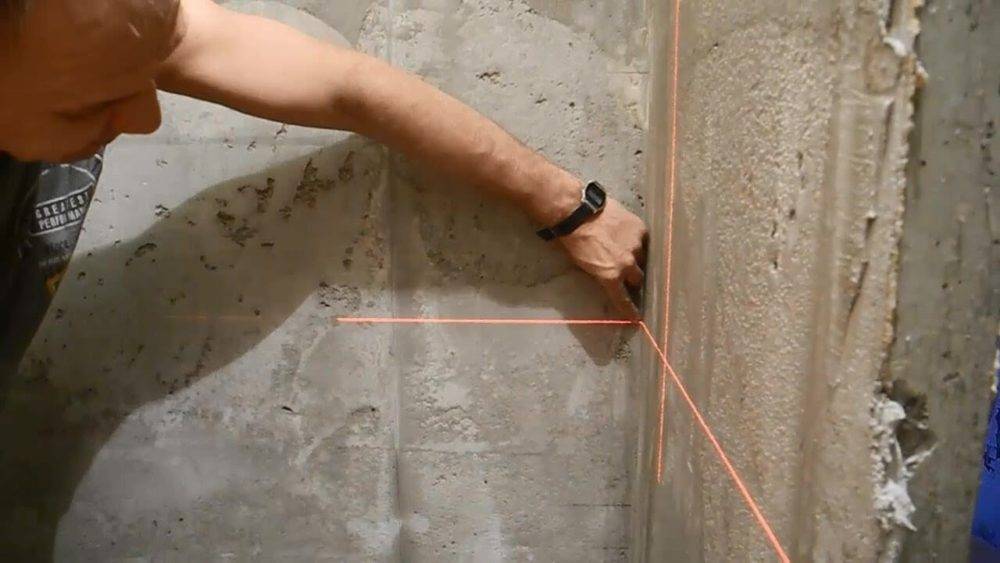
1. The lowest point on the ceiling is determined. To do this, horizontal markings are made on the walls using a laser or long bubble level. If in some place the mark rests against the ceiling, you should step back 5 mm down and repeat the procedure, marking the horizontal lines at the lowered mark. The place where the mark is as close as possible to the ceiling is the lowest point of the ceiling.
2. From the obtained lowest point, 5-10 mm are deposited, after which a horizontal mark is placed on the wall using a laser or water level. The resulting elevation is called the zero level of the ceiling, it corresponds to the lowest point of the future beacons.
3. Using a laser or long bubble level, create a closed zero level line on the rest of the walls. Thus, a plane is formed for placing beacons.
 Formation of a horizontal plane by a laser level
4. Pencil markings are applied for future beacons. The pitch of the lighthouses and the indentation from the walls are assigned in accordance with the above principles for installing the lighthouses.
5. Tighten the ropes between the walls at the zero level of the ceiling. Having created a horizontal plane, the ropes will serve as a guide when adjusting the height position of the beacons. The ropes are stretched across the future beacons, at the beginning and at the end of the room, as well as diagonally from corner to corner. Ropes are attached to the ceiling between the lighthouse and the wall, using dowel-nails or self-tapping screws.
 Pulling ropes between walls
6. Preparing the solution for the lighthouses. The material of the future plaster is used as a solution. The ready-made solution is applied with "cakes" along the lines of the lighthouses in increments of 25-30 cm.
7. Beacon profiles are pressed into the "cakes" from the solution, focusing on the plane formed by the stretched ropes. Immediately after the installation of the lighthouses, the correctness of their installation is checked using a bubble level. If necessary, corrective edits are made to the position of the beacons until the solution has frozen: if the beacon pulls the thread down, you should press it harder into the solution; if the beacon is too deeply immersed in the solution, more solution must be added under it.
8. After we have made sure that the tops of the beacons lie in the same plane, it is necessary to wait until the solution is completely set. This process lasts about 12 hours, for reliability it is better to wait a day, after which you can proceed directly to applying the plaster.
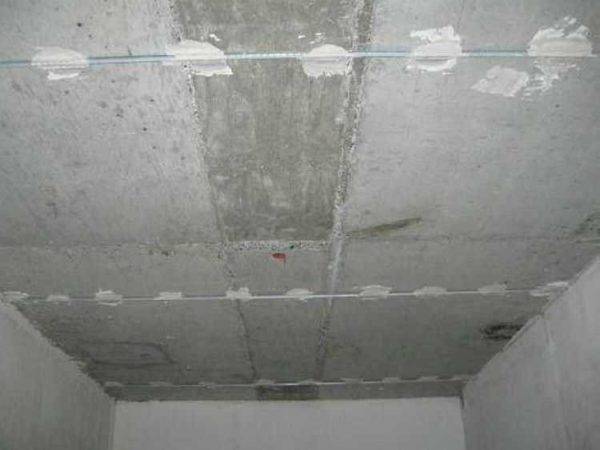 Installed beacons for plastering
How is the decoration of the walls with plaster carried out
So, the paths for the rule are laid, the ground covers every centimeter of the surface that we want to make even and smooth, it remains only to roll up our sleeves and get to work.
Many beginners are wondering how to properly level the walls with plaster and do not get a definite answer from experienced craftsmen. Although it is not difficult to list all the steps. Let's be consistent and consider the whole process in great detail.

We take a spatula or trowel, whichever is more convenient, scoop up a small amount of the mixture and throw it into the wall with a biting motion, as if trying to break through it with this lump.
The harder the captured portion hits the wall, the better it will adhere to the smallest irregularities on the surface. We fill all the space between the beacons soundly, without trying to level the composition. This technique of plastering walls is called spraying.
In principle, the first layer can become the last, if the irregularities are small and the beacons are not used too high.
But if the sketched coating was not enough to make it equal to the profiles, we repeat the procedure after the soil has set.I must say that when the base is covered with a leveling compound, the technology of plastering brick walls does not differ from working with a concrete base. As a result, you should go to the finish plane when the mixture almost completely hides the lighthouse bars.
When there is a lot of finishing compound on the wall, we wait for a while until it starts to dry out.
Then we take the rule, tightly attach it with an edge to the lower part of two neighboring beacons and move it upwards like a sled. At this stage, decorating the walls with plaster with your own hands is carried out with the greatest expenditure of effort. When the edges of the lighthouses appear from under the mixture, the coating should be completely leveled.

It is advisable to use a long rule to capture a couple of rows between the profiles at once. More is unlikely to work, since there will be too much difference in the degree of drying of the composition at opposite ends of the site. When all the walls take their proper form, we are waiting for the composition to set thoroughly.
But now everything has hardened, albeit not quite, but some strength is already there. Let's remember what to do after plastering the walls. It's time to get rid of the profiles embedded in the coating, unless, of course, you intend to leave them there forever.
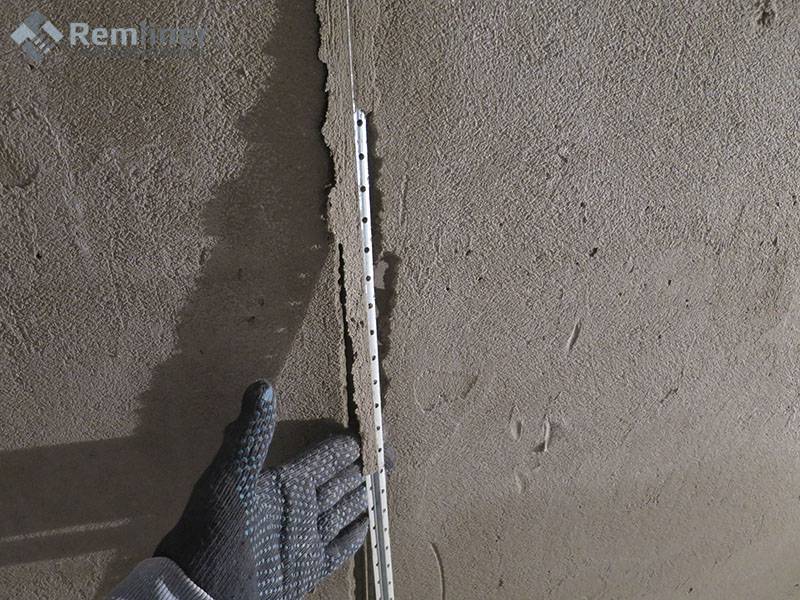
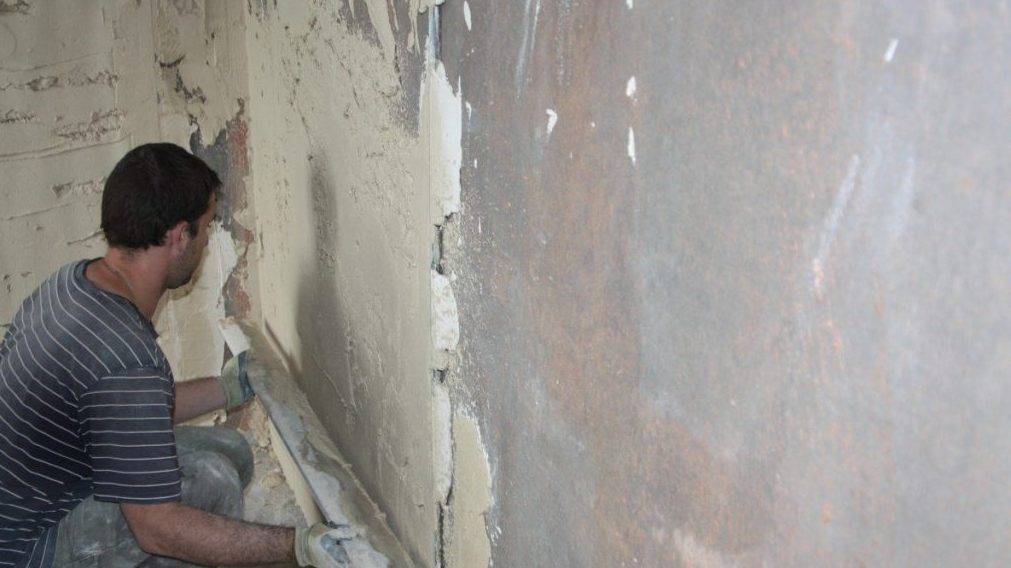
The fact is that plaster absorbs moisture well from the air, and metal tends to rust, and sooner or later corrosion appears on the surface, be it wallpaper or "Venetian". Therefore, we boldly cut the coating along the lighthouses with a spatula and, slightly tapping them with something weighty, we extract the "rails" that have served us so well for the rule. We cover the resulting gaps with the previously used composition with a spatula or trowel.
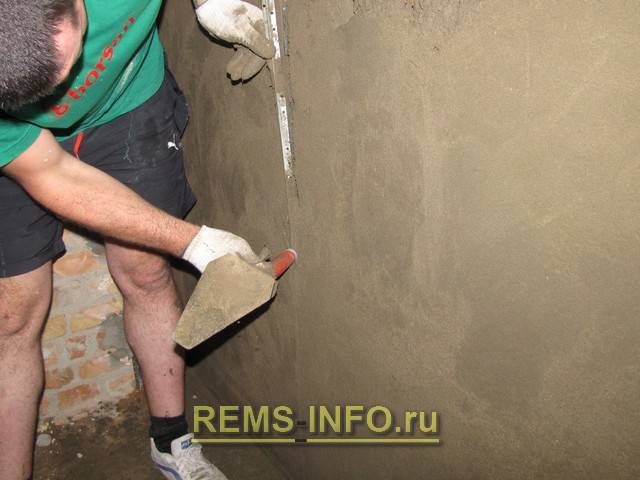
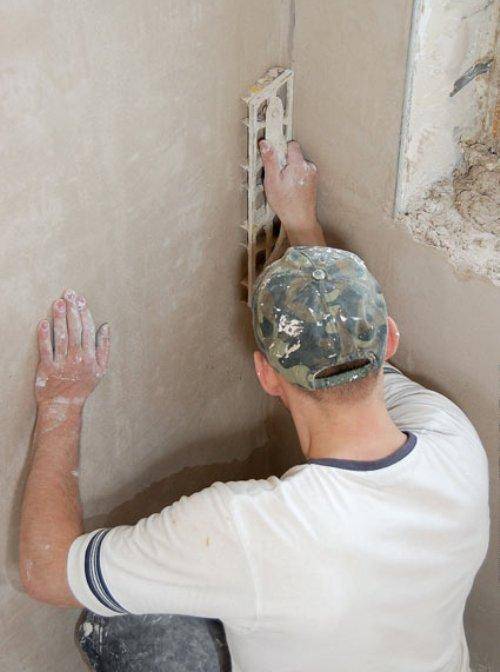
Now we take a grater, and, regularly moistening the surface of the walls, gently, in a circular motion, smooth out all the observed defects, which should not be so many. You don't need to press hard, your main goal is for all the irregularities left by the rule to disappear. Actually, on this the master class on wall plastering came to an end, then you can proceed to pasting wallpaper or painting.
Undercutting plaster
A very important and necessary stage that cannot be ignored! As stated above, the freshly applied mixture protrudes slightly out of the plane - at first glance, quite a bit.
However, if you substitute a 2-meter rule on a dry wall, then the differences are 5 mm. will turn out to be commonplace
Therefore, it is so important to undercut the setting layer.
It is difficult to say at a glance how long it takes to trim the plaster - the brand of the mixture, the humidity of the room and the water absorption of the base affect
That is why it is so important
determine this time yourself. Approximately how long you need to focus on - 30-50 minutes after application.
The appropriate moment is determined as follows: the gypsum mixture has lost its mobility and does not change from light touches, but it is easily squeezed through with fingers.
During the run, as a rule, the bulk is not smeared, but protruding sections are cut off with some effort.
For pruning, you also need to keep the rule at right angles to the plane and make passes from top to bottom and bottom to top several times. You can press harder on the rule,
rather than when leveling a liquid mixture.

In addition to vertical rule movements, it will be very useful to work them obliquely. If the mixture is strong enough, then you can put the rule vertically, without leaning on
lighthouses. In a good version, there should be no deviations from the ideal plane for any position of the rule (vertical, horizontal and
obliquely), the gaps should be no more than 1 mm. (and this is even a lot, ideally).


