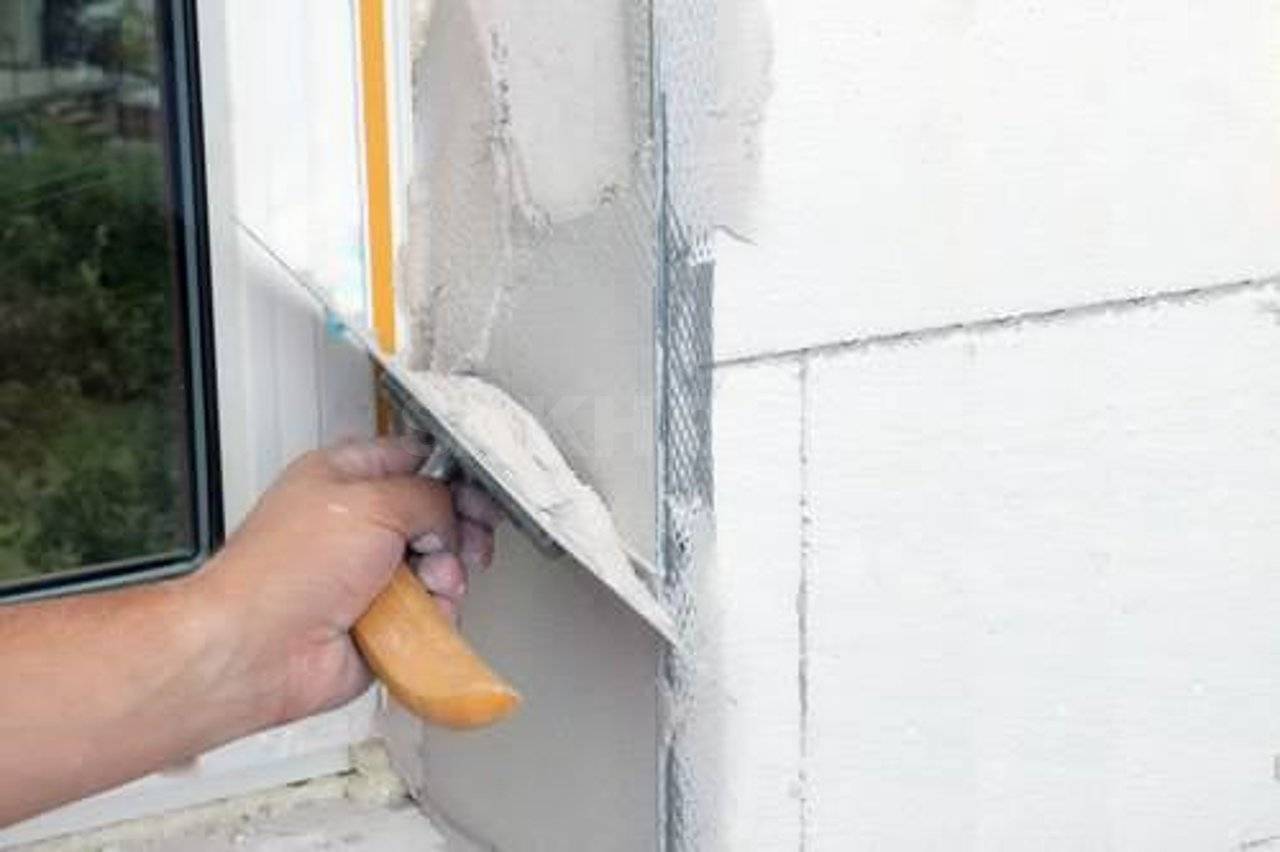
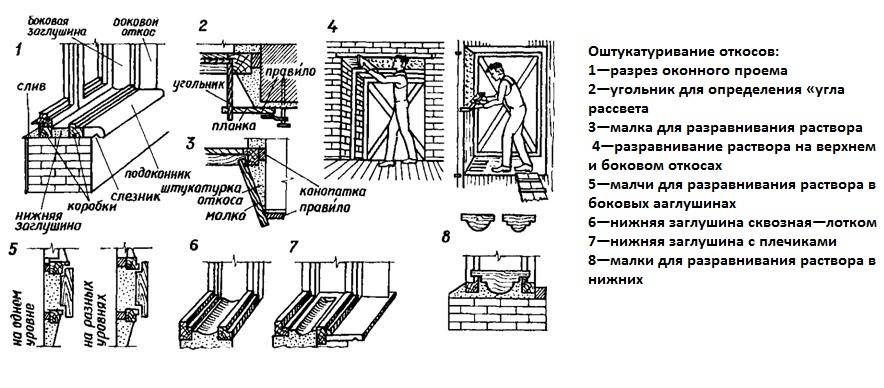
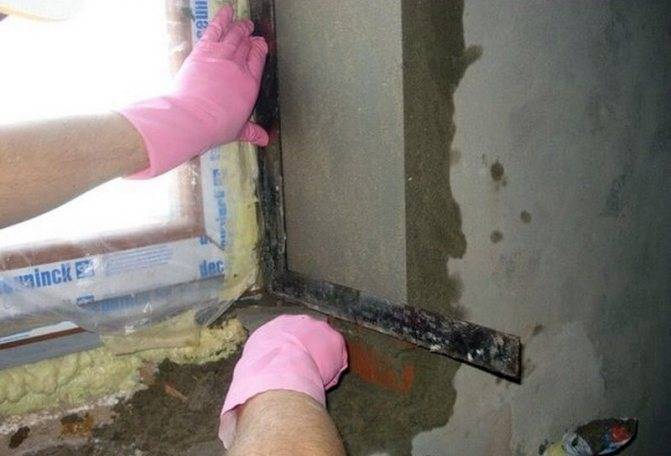
Required materials and tools
For a job to be successful, it is important to have the right toolkit to get it done. We will figure out what is required for plastering slopes with our own hands and how to choose the right tool
First of all, you need to prepare the level. It is better if there are at least 2 ampoules on it. When choosing a length, it is better to stop at an instrument of about 1 m. A shorter one will be inconvenient to work (you will have to shift it too often and there is a higher risk of making "steps"), and with a long instrument it will not be possible to turn between the walls and the jamb.
For marking you need a tape measure (2-meter is enough), a simple pencil goniometer. To get the surfaces in an optimal way, you will need an aluminum rule.
To prepare the solution and apply it to the wall, you need to prepare:
- A bowl for preparing a mixture.
- Scale for measuring volumes.
- Dishes for water.
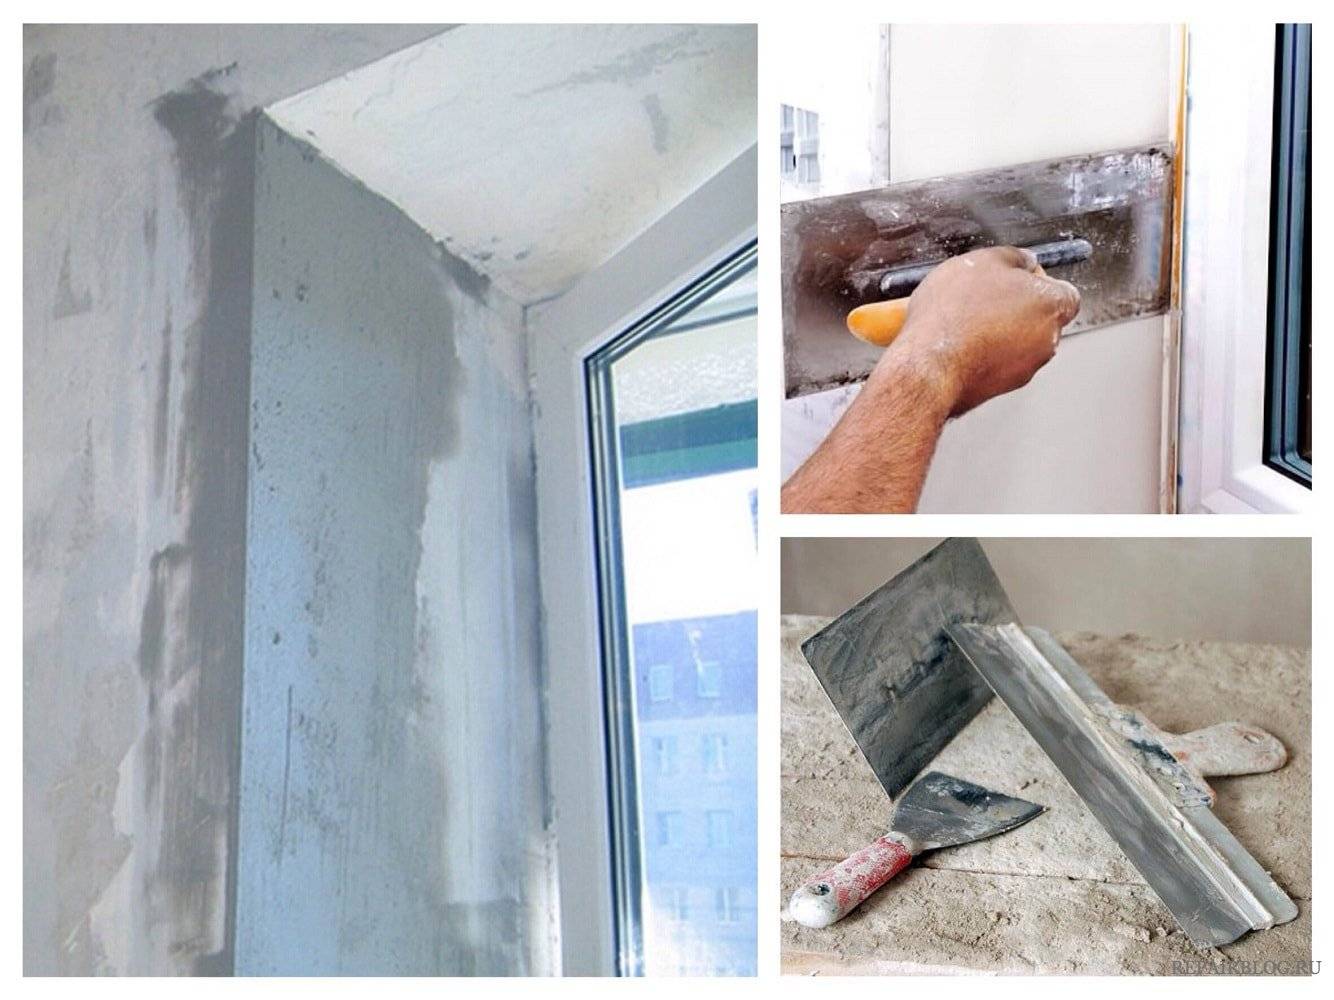
- Tools for applying the ready-made mixture to the walls: a spatula (5 cm), a trowel (as used by bricklayers), trowels and trowels (if you plan to plaster with cement-based mixtures). If you plan to use a plaster-based mixture, instead of a trowel and grater, you will need a wide (45 cm) trowel, a trowel and a sponge-based trowel.
- Pickaxe hammer.

You will also need to take care of protective equipment. Mixtures based on gypsum and cement are very aggressive on the skin of the hands. Therefore, you need to take care of gloves (a medical sample will suffice). You also need a work gown or other workwear. In order not to dust your eyes and hair while working, you should also choose a hat and goggles.

Another aspect of safe work is secure leg support. Do not work from wobbly stools or chairs. A reliable stepladder is already a somewhat more suitable option, but it will have to be rearranged often, and your legs will get tired from working on a narrow platform. Therefore, if possible, it is worth putting together comfortable goats.
Plaster on windows - step by step scheme
Step 1: Calculate the opening
So, we have a brand new and finely installed window, a comfortable and wide window sill - and the ruins of the walls around all this beauty. You can plaster the opening at right angles to the plane of the window, using the technology of the Middle Ages (then the very presence of windows in the room was a feat). But it is much more interesting to learn how to plaster the slopes on windows and doors with an increase in the illumination of the room.
This repair technique has a special name "angle of dawn", in fact it means the expansion of the window (less often door) opening into the room. Thus, there is more light in the room, as well as difficulties with plastering. But the result in the form of strict lines of the enlarged opening is worth it.
Step 2: Layout and preparation of the opening
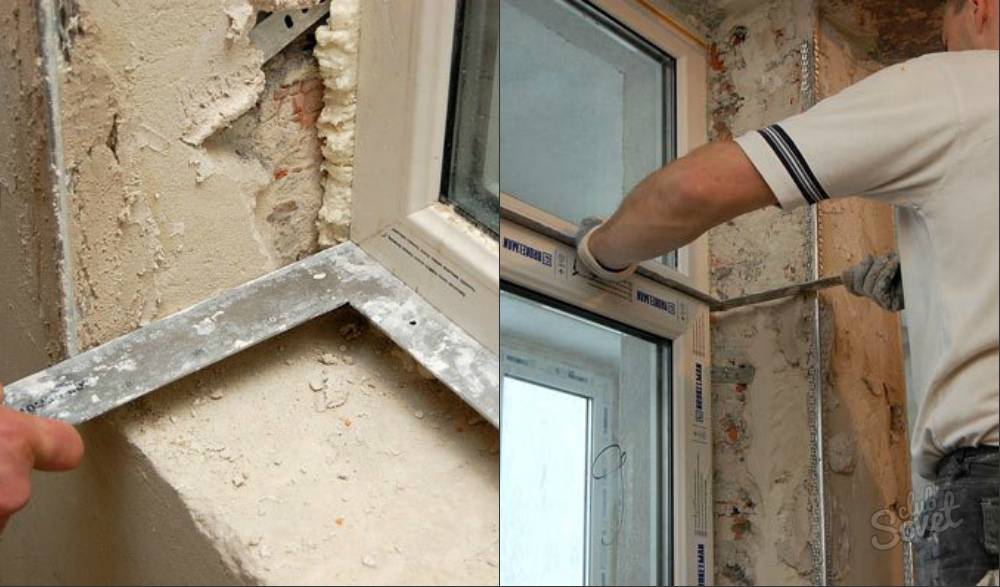
The angle from the frame to the edge of the slope is set by a goniometer, its value should be the same on the sides of the window. Do not determine this angle "by eye", otherwise the repair result is unlikely to please your eyes at the end of the work. The amount of expansion is from 1 to 2.5 cm for every 10 cm of the opening thickness. If the distance from the window to the inner wall is 25 cm, then the "expansion displacement" will be from 2.5 to 6.5 cm. These points are fixed at the bottom and top of the opening with deep risks.
It is necessary to prepare the base of the slope for plastering. For this, all layers of old paint, previous putty and other contaminants are removed. Do not be afraid of deep removal of previous building layers - the cement-sand mortar needs space for strong adhesion to the surface.Cement and sand plaster fits well on all common building materials - concrete, brick, aerated concrete. But the composition of the preliminary primer, which the walls are treated with before plastering, must necessarily take into account the specifics of their material.
Step 3: Internal vapor barrier
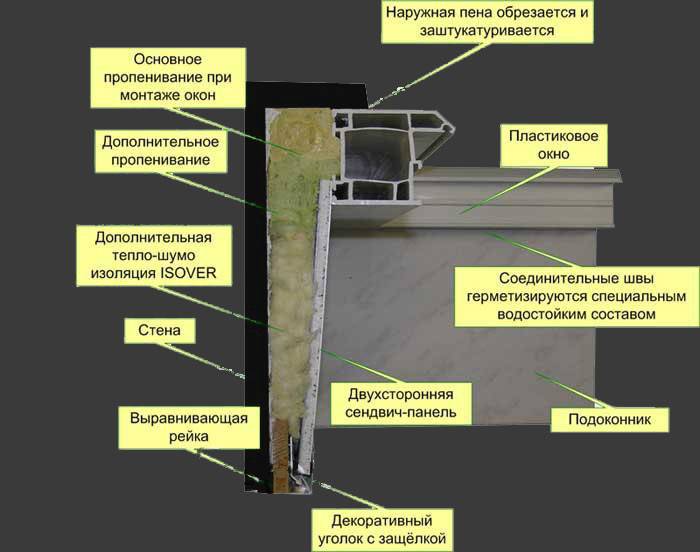
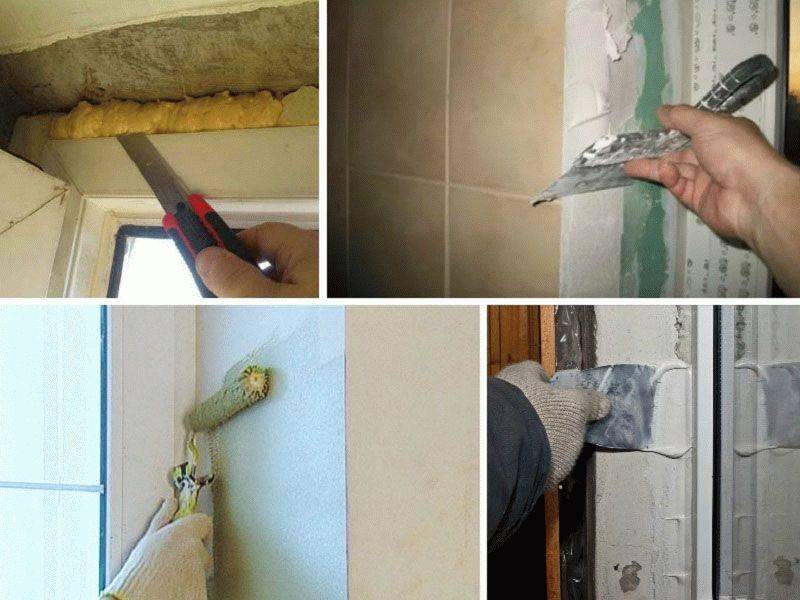
The joint between the window (door) frame and the slope is already insulated with polyurethane foam or rough plaster. It is necessary to cut off excess foam and carefully treat the entire joint line with a vapor barrier film or silicone-based sealant. Internal vapor barrier will prevent the windows from fogging up during strong temperature changes - it is performed in just 5 minutes, it is inexpensive, and benefits for years.
Step 4: lighthouses as the basis for impeccable precision
When plastering slopes, the exposed beacons are very different from their counterparts used for concreting floors or laying bricks. In fact, these are rather limiters made of straight and wide rails. They are nailed (screwed) tightly to the surface of the inner wall - exactly according to the risks taken after the goniometer. The edges of the planks create a border for the future plaster and protect the corner from accidental damage while the mortar is not dry.
Accurate installation of lighthouses is the basis of a quality slope. It is better to re-nail the rail than to get an opening with a deviation from the desired values. After the installation of the lighthouses, the integrity of the vapor barrier layer is checked, the plastering surface is once again treated with a primer for proper adhesion (adhesion) to the solution. It is better to apply the primer not with a spray gun, but with a brush, this increases the coverage of hard-to-reach areas.
Step 5: Plaster directly
The solution for the slope is first applied in small portions along the perimeter of the laths, with strong movements of the spatula. Next, we start filling the opening, and the procedure depends on its depth. For a cement-sand mortar, a layer of up to 5-6 cm is optimal, if the depth of the opening is greater, the mortar is thrown in several steps.
When the slope is filled with a "slab" mortar, the excess is removed with a precise and single movement of the aluminum rule. The apparent simplicity of such a "stroke" requires a lot of experience. After leveling the solution exactly on the beacons from all three plastered sides, you must wait until it dries. Further, the lighthouses are removed, the places of their installation are leveled with a solution. Remains of the plaster mixture are diluted to a semi-liquid state and rubbed into the surface of a slightly hardened slope with gentle movements of a float. This reduces the risk of cracking of new plaster when it dries completely.
How to plaster a slope with your own hands?
First of all, start by protecting the window. If the window is new, do not remove the adhesive tape. If removed, then masking tape will help you. Cover the glass itself either with sheets of thick paper (glued on tape) or with sheets of cardboard.
However, metal-plastic windows are easily disassembled. It is enough to remove the plastic plugs on the hinges, pull out the metal rods, put the window in the "airing" mode and remove it from the hinges.
Preparation for work.
We remove the old coating, right down to the brick. Either a punch or a chisel with a hammer will help with this. We clean everything from dust and cut off excess polyurethane foam. After stripping, we saturate the slopes with a deep penetration primer. It is advisable to choose a bacteria-resistant primer.
Tools: level (from 1 meter), container for the mixture, mixer, spatulas, knife, plaster corner.
We plaster the slopes with our own hands.
The slope filler mixture is the very ingredient that will determine the future look of the window. It is best to choose a putty with coarse sand grains. This will be the "base layer". After it dries, it will be possible to cover it with a “finishing coat” of smaller particles.
When choosing mixtures, look at the "vapor permeability" of the plaster.The higher it is, the more difficult it will be for bacteria and fungi to start.

Step-by-step instructions for plastering slopes:
- With a spatula 100-120 mm we put wide strokes of the main layer;
- We work out the corners with a plaster corner (it should be completely covered with a solution);
- Slightly leveled, but do not achieve absolute smoothness;
- We are waiting for it to dry.
Plastering of slopes on lighthouses.
In order for the slope to turn out to be correct, two boards (lighthouses) are enough. See Figure 1 for the installation of beacons.
We expose beacons step by step:
- Determine the mark on the window frame from which the plastering will begin.
- Place a long spatula (or level) so that one end touches the mark and the other rests against the wall.
- Move the end that rests against the wall half a centimeter (this space will be occupied by the future layer of plaster).
- Fix the first board (rail, lighthouse) near the frame (next to the mark).
- Fix the second board (rail, lighthouse) near the slope (from the side of the room). It should be extended by 5 mm. This is the optimum thickness for the thinnest plaster layer.
 Figure 1. Lighthouses are marked in orange.
Thus, you now have 2 beacons. How do you know that you have set them correctly? If you attach a spatula (or level) to them, it will lie at an angle to the slope. Determine the most optimal angle and feel free to get to work.
Window slope plaster
To facilitate the removal of dirt after the work done, window frames, glass and the area around the window should be tightened with a protective cellophane film, which can be simply thrown away at the end of the work. If, when dismantling the old window frames, the edge of the slope is damaged, it is necessary to install an ordinary corner. Which one to choose, plastic or metal, you decide for yourself.
Tools and materials
To make plaster slopes with your own hands, you will need the following tools and materials:
- roulette;
- pencil;
- putty knife;
- Master OK;
- containers for water and mixing the solution;
- pick;
- malka (by the way, you can make it yourself);
 With the help of a bevel, you can make the same angle of inclination on all slopes
- deep penetration primer (you can do it yourself by stirring PVA glue with water in a 1: 2 ratio);
- cement (or ready-made plaster mix);
 The use of ready-made mixtures will greatly facilitate the work and will allow you to get a high-quality solution
- rail for level output;
- building level (you can use a plumb line);
- brush or roller;
- water-based paint;
- putty (finishing);
- sandpaper (fine grain) or masking net.
DIY work technology
 We find the zero level and set up beacons for plaster around the entire perimeter
Before starting all work, it is necessary to prepare the surface for applying the solution. After that, we find the zero level and set the beacons for plaster around the entire perimeter of the future slopes of the window frame. Installing wooden slats will make the work easier.
We prepare the mortar for slopes in accordance with the instructions on the package. It must be thoroughly mixed, to achieve uniformity in all layers. After setting all the landmarks, they begin to process the surfaces of the slope with a primer (or a mixture with PVA).
The finish is best repeated several times with short breaks.
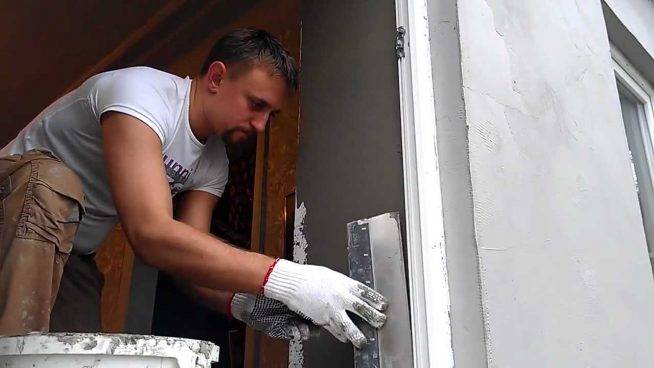 We proceed to surface treatment with a primer. When the desired level is reached, the last movements of the spatula should be carried out from the window towards the room.
After preparing the solution, take a spatula and throw in the first layer of the solution. If you need to make the plaster slopes high, then the solution should be applied in layers at short intervals, during which the layer dries out a little. We begin to apply the solution from the bottom up, focusing on the lighthouses or wooden slats.
"Driving out" the required height, it is important to apply the solution correctly: first vertically and then horizontally.When the desired level is reached, the last movements of the spatula should be carried out from the window towards the room.
 The mortar, especially in the upper part of the slopes, is best applied in small portions.
Many people recommend increasing the number of layers for high-quality plaster of the upper slope and at the same time reducing the volume of the solution applied on the spatula. Malka will be useful for you when making plaster slopes with an angle, if this angle should be the same on all surfaces. Using this tool is simple: you install one end on the window frame, and the other on a wooden rail, which is fixed on the edge of the slope.
 All irregularities are removed with fine-grained sandpaper.
After that, a layer of finishing putty is applied. All irregularities are removed with fine-grained emery paper or a masking net. Finished dry slopes are covered with water-based paint in several layers with drying between approaches.
 Finished slopes have an excellent appearance and improve thermal insulation
What will it take to work?
The main material is plaster mix. Most often, two types of plaster are used: gypsum and cement-based.


Features of the cement mixture
There are compositions for a rough coating, including coarse sand, and for a fine surface finish, with a fine-grained sand inclusions. These solutions can be prepared quickly and are fairly easy to apply. But it must be borne in mind that it takes a long time for the layer to dry completely, and this will increase the duration of the repair as a whole. But the diluted mixture grasps so slowly that it will allow an inexperienced performer to cope with the work. Another plus is the inexpensive price.


Properties of gypsum plaster


There is another option - special acrylic mixtures. They are universal and can be recommended for any surfaces. But the cost of materials is such that not everyone can afford to use them.


But you also need to prepare the primers in advance: deep penetration and finishing. Putty and sealant may be needed.


How to choose a plaster and prepare the right mortar?
You can buy a mixture for plastering slopes. For outdoor use, facade plaster is better suited. Following the instructions, dry mixes are diluted and applied to surfaces. Despite the inconvenience and efficiency of preparing ready-made solutions, many people prefer to make mixtures on their own. Their quality depends on the observance of proportions and the choice of the right material.

For external finishing of slopes, frost-resistant and moisture-resistant are suitable, the best option is a cement-sand mortar. It is cement that is the most durable among the binders for external slopes. The component composition provides excellent adhesion to the base. The integrity of the coating remains much longer than when using other mixtures. Plaster of paris and clay are inferior in many characteristics. They are sensitive to moisture, which can lead to deterioration of the coating.
The cement is diluted with water. Sand is most often used as a filler. The standard proportion is 1: 3, the consistency of "liquid sour cream" is considered ideal. Too thick mixture can cause surface cracking and weak watery solution will spread.
The cement-sand mixture sets in 15 minutes, hardens in 11-12 hours. If you do the plastering of slopes with your own hands and there is no experience in this matter, it is better to prepare the solution in small portions. The application process requires efficiency, you can simply not cope, as a result, the material will harden and be unusable.
Ideally, defects do not appear on a well-finished slope. The plaster should not flake off, crumble, crack, etc. If these phenomena are observed, additional costs will be required for restoration and sealing.In order to prevent marriage in work, we recommend that you first study the instructions for using the material or consult with professionals.
Technology
Slope plastering begins after the surface of the main walls has been leveled. The work to be done is dirty, therefore it is advisable to close the door leaf, floor and door frame with a film, oilcloth or other similar materials. The jamb can be pasted over with masking tape - it will be easier to clean.
Preparation
The first stage of work is surface preparation. First, remove poorly adhered plaster, pieces of brick, and other building material. If the doors have been changed, the old plaster can stick out a lot. In this case, even if she holds up well, she is knocked down.
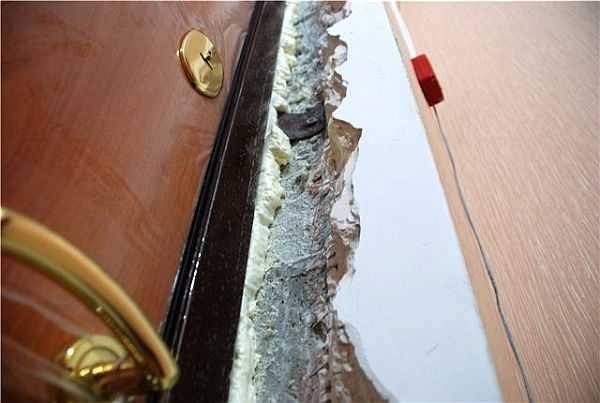
If the old plaster sticks out strongly, it is chipped
Then, grease or oil stains, if any, are treated with neutralizers. Old paint is also peeled off: the plaster does not adhere well to it. After - dust and dirt are cleaned off.
If the cracks were not foamed when installing the door, you will need to do it now. Polyurethane foam is applied to the wetted surface in volume - no more than 1/3 of the required amount. First, all the dust is cleaned, then moistened with a spray bottle. After a few minutes, it will greatly increase in size, filling in all the empty gaps. After waiting for the foam to polymerize (harden), cut off the excess with a knife. It is more convenient to do this with an ordinary stationery for paper.

Do-it-yourself installation of door slopes begins with sealing the gaps between the door frame and the wall
If the plastering will be a cement-sand mortar, the surface is moistened. This can be done from the same spray gun or with a brush or roller.
Setting up the guides
It is more convenient to plaster the slopes with your own hands, as well as the walls, along the guides. Outside the doorway, to obtain an even and rigid edge, a perforated paint corner is usually placed. Once well secured, it can be used as a guide.
It is cut to the height of the doorway. The upper edge of the corner, which will be adjacent to the main wall, is cut down at an angle of 45 °. It is better to do this, since during work this edge for some reason always bulges up and causes a lot of inconvenience.
There are several ways to fix the corner:
- Gently apply the mortar to the inside of the corner, then press it against the corner. It is necessary to apply the solution carefully: the walls are made very thin and even from a small mass it breaks. Therefore, it is better to use the second method.
-
The solution is applied to the corner, and the corner is pressed into it.
Having pressed the corner well, it is leveled so that its edge is flush with the main wall. The solution protruding through the holes is removed with a spatula. Then they take a flat bar (you can use a building level or a rule), apply it to the corner, checking how even the corner is exposed. Check both from the side of the main wall and from the side of the slope.
The procedure is repeated on the other side, and then from above. At the junction of the corners, the absence of drops can be checked by sliding your finger along the junction.
There is another way of attaching the corners - on nails or on self-tapping screws. This method is good when working with drywall, but when plastering it is not used: the hats get in the way.
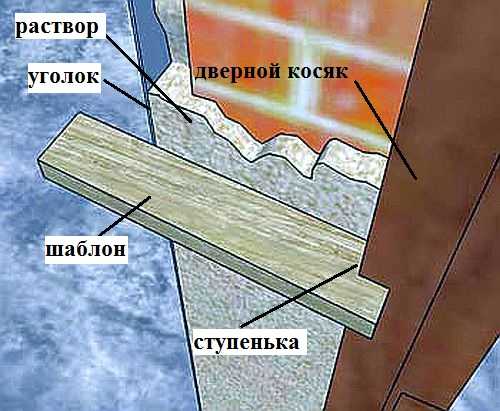
When plastering door slopes, it is convenient to use a template
The second guide is the doorframe. When installing the doors, they were exposed exactly, so this is a good reference point. But since the solution should not cover the entire surface of the jamb, a template is cut out of some dense material, with which the solution is then leveled. It is better to cut it out of a piece of plastic: both the edge is smooth, and it slides well, and quite dense. You can use a piece of flat wood plank. Only the edge that will cut off the excess mortar should be perfectly flat. The part of the template that will slide along the jamb is made in the form of a step.This protrusion will remove excess solution.
You can work with a spatula or a rule, but then a beacon is installed and fixed along the jamb at the required distance. The tool rests on it when cutting off excess mortar.

Slope plastering can be carried out along the guides
In this video tutorial on plastering slopes, the technology for attaching perforated corners is explained in detail, explanations are given on the technique of applying putty for finishing.
Tips & Tricks
It is more convenient to carry out work at a height with a structure resembling a goat. Compared to a stepladder, this is not only safer, but also allows you to cover a large area without rearranging from place to place.
There is a more modern plaster mix that contains acrylic. It is more versatile, but also more expensive.
It is necessary to work with the sealant very quickly, otherwise it may harden. Cured sealant is very difficult to peel off the surface.


It is also important to correctly calculate the time of working with the mixture. If plastering takes more than one hour, then it is better not to knead the entire volume of plaster at once, but divide the mixture two or three times so that it does not dry out in a bucket.
If instead of door slopes it is necessary to plaster arched, then first the work must be done on the side slopes, and then tackle the upper slopes. At the end of all work, decorative corners can be glued to the corners - they will give a more accurate look to the finished slopes.
If you follow the recommendations exactly, then the process will go without unexpected difficulties.
The process of plastering slopes, see the video.
Tools and mixes
Plastering begins with the selection of the necessary mixtures and tools that will be needed in the process. It is necessary to prepare everything in advance, because the technology does not allow delays, especially after the solution has been prepared. The minimum set of tools and accessories required includes:
- level;
- rule;
- pencil;
- roulette;
- malka;
- putty knife;
- Master OK;
- hammer;
- container for solution;
- container for water.
 Before starting work, you need to prepare all the necessary tools
The level should be of high quality and not too long in order to operate with it more conveniently. The rule is better to choose aluminum. A trowel should be chosen in small sizes, and a spatula should be 5 centimeters wide.
In addition, you may need a can of polyurethane foam, a sealant, a utility knife of suitable sizes. It is also desirable to have a trowel, grater and grater, as well as a convenient construction goat of appropriate size. However, when plastering door slopes, you can get by with ordinary durable chairs.
 An important step is the choice of a mixture for plaster
Do not forget about workwear. It should be comfortable and free of movement. It is worth wearing nitrile gloves on your hands - this will protect the skin from direct contact with the solution.
Next, you need to decide on the choice of the mixture that will be used in the plastering process. There are three main mix options.
Traditional - the use of a self-prepared mortar based on cement, sand and water, sometimes with the addition of glue. This is perhaps the most budget-friendly method. Its advantage is its low cost, its disadvantage is the need to independently prepare the solution, observing the proportions to achieve the required consistency and physical properties.
 You can prepare the mixture yourself
The second method is the purchase of ready-made dry mixes. In order to obtain a solution, it is enough to dilute them with water. They are usually easier to apply than self-prepared compounds.
Finally, the third method is a ready-made liquid solution. This is the most expensive and most comfortable option available. In addition to cement, sand and water, it contains various additives that increase plasticity and enhance other useful properties.The most modern types of such ready-made compositions are also distinguished by the fact that after application it does not need to be rubbed, so that the implementation of all processes is simplified.
 Liquid solution is the most expensive and most comfortable option available.
Why protect slopes?
In general, it is difficult to underestimate the importance of windows. First of all, they are a source of natural light, and their role in the interior is also far from the last. And this applies not only to the windows themselves, but also to the slopes that frame them, which can also give the room a unique look. They hide the mounting elements, and the whole structure acquires integrity and completeness.

However, creating an interior is far from the main function, although, of course, it should not be underestimated. In addition, the finishing of the slopes affects the thermal insulation of the room. After all, even a layman knows that the greatest heat loss will always be in the area of windows and entrance doors. And in order to reduce them to a minimum, it is necessary to carry out complex work on the installation of window sills, slopes, and their finishing. And only then will the room be cozy and warm at any time of the year. In addition, if you do not trim the slopes, then the dew point will be inside the room, which will lead to constant fogging of the glasses.


