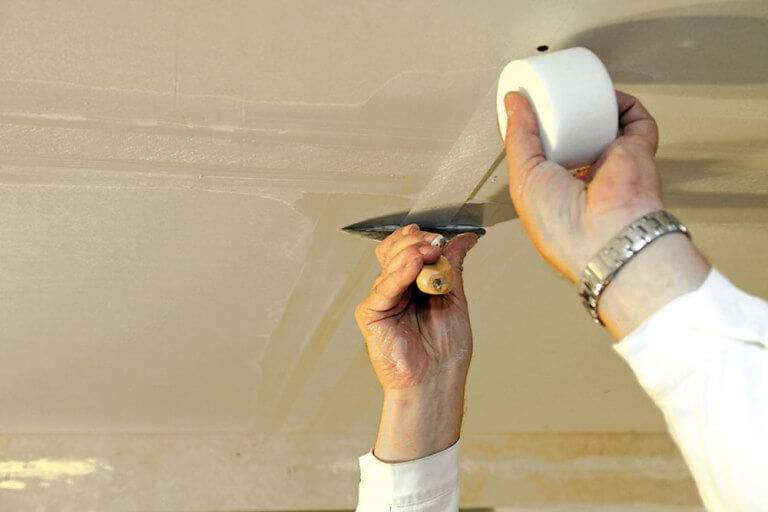
Ceiling alignment
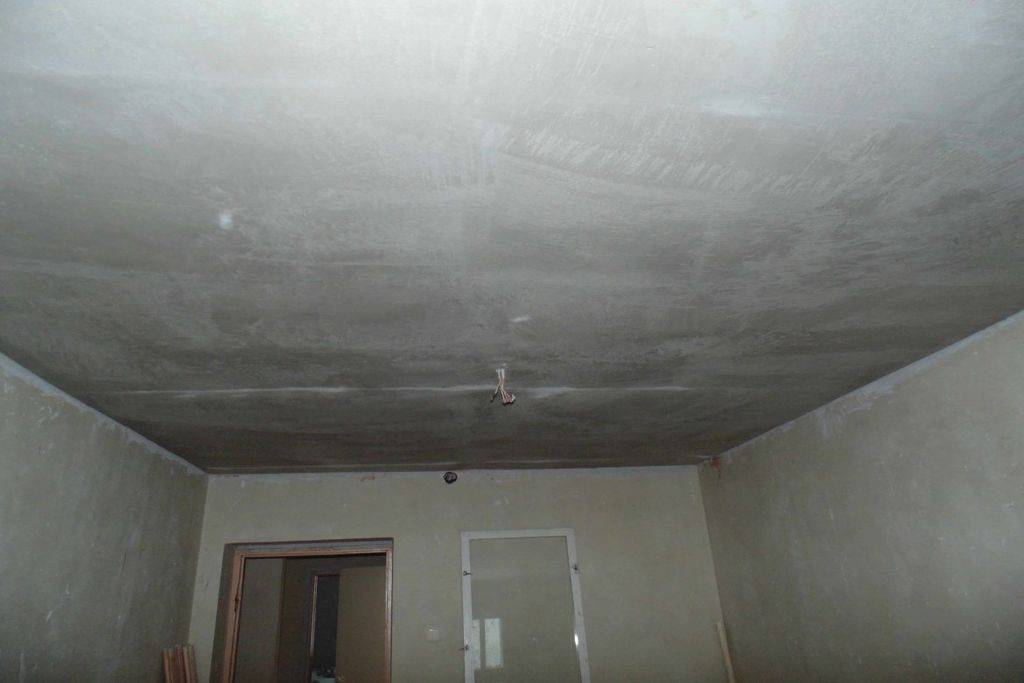
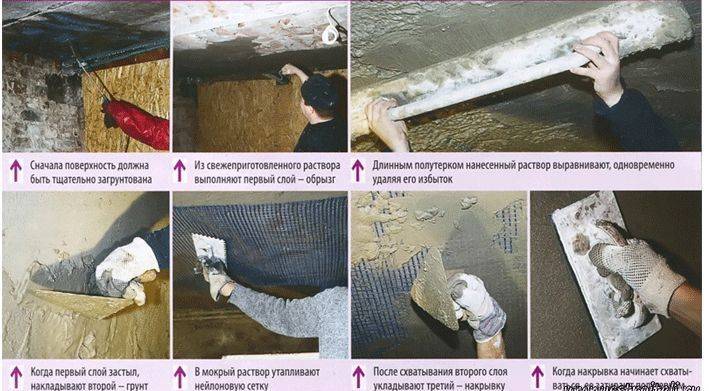
First of all, large cracks and irregularities are closed. For those who know how to level the ceiling with putty, there is nothing difficult. This is done with a special roughing putty mixed with tow.
The peculiarity of the putty is that it has an increased grain size in comparison with the building material used for finishing. The tow is impregnated with a putty and placed in cracks and other holes.
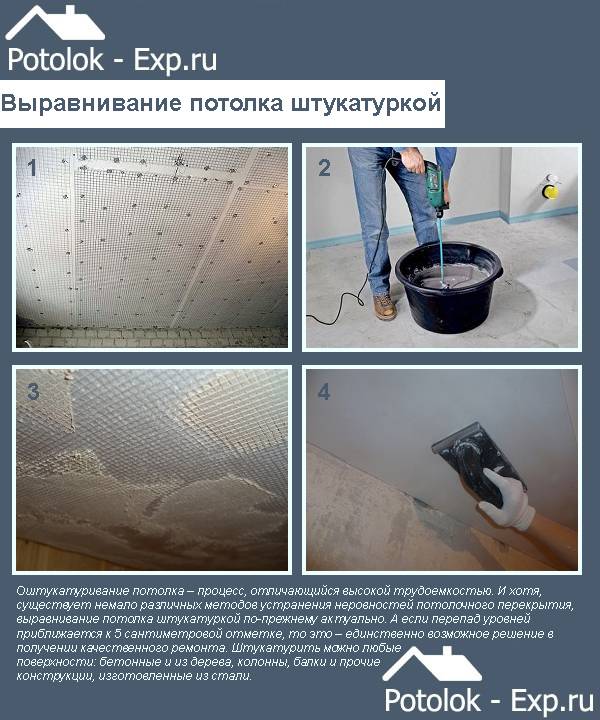
In order not to form new cracks, it is necessary to reinforce the rough ceiling. For this, a thick layer of roughing putty is applied to the edges of the slabs. When the layer dries a little, the mesh is pressed into it.

Applying the first layer of putty
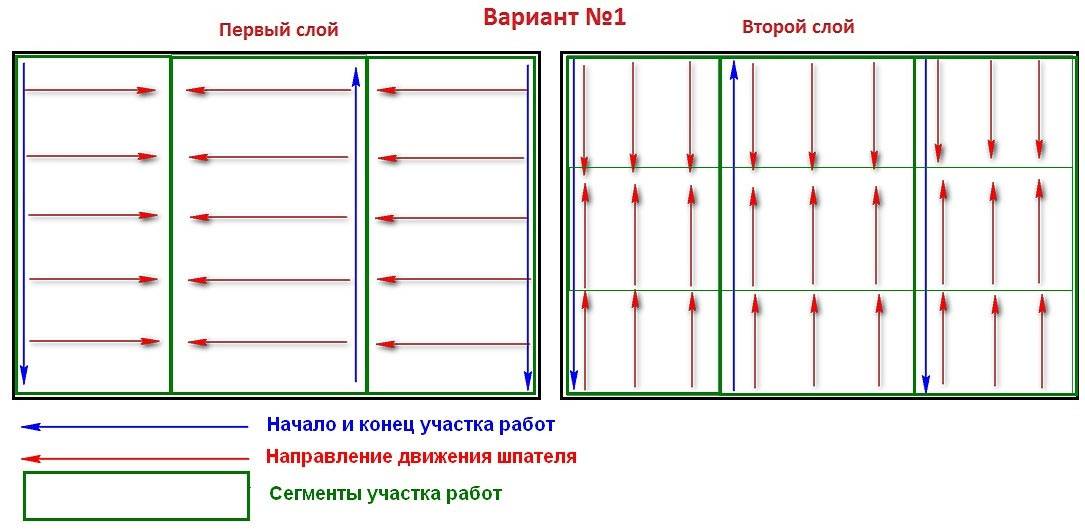
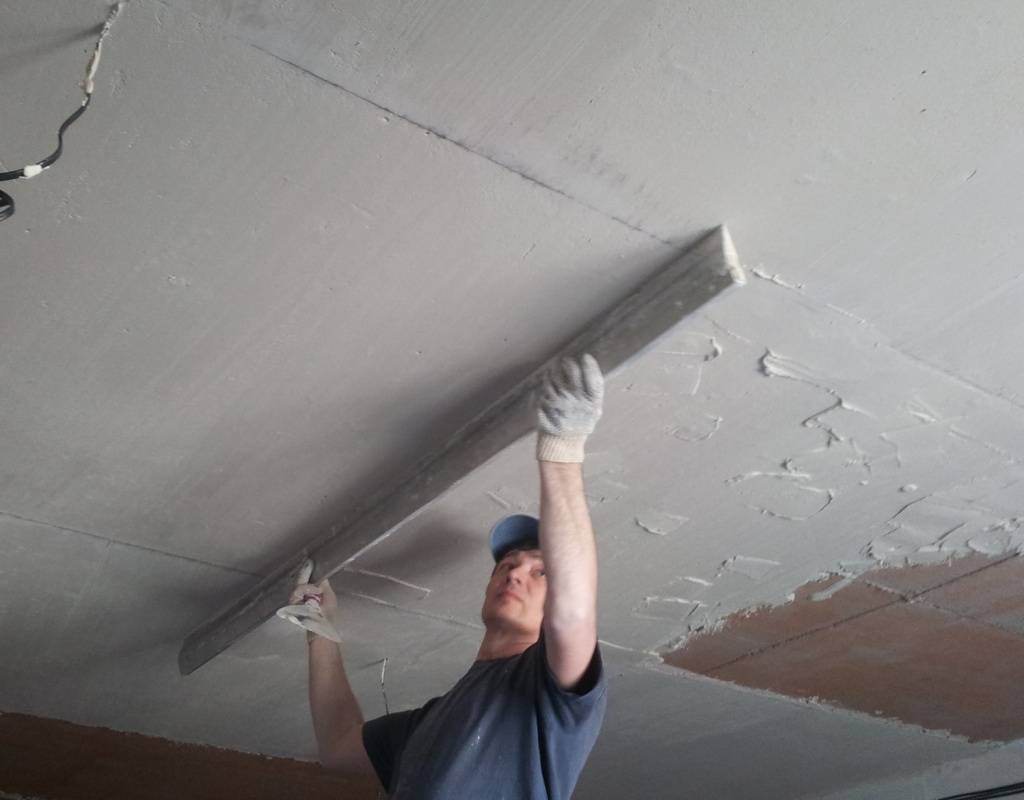
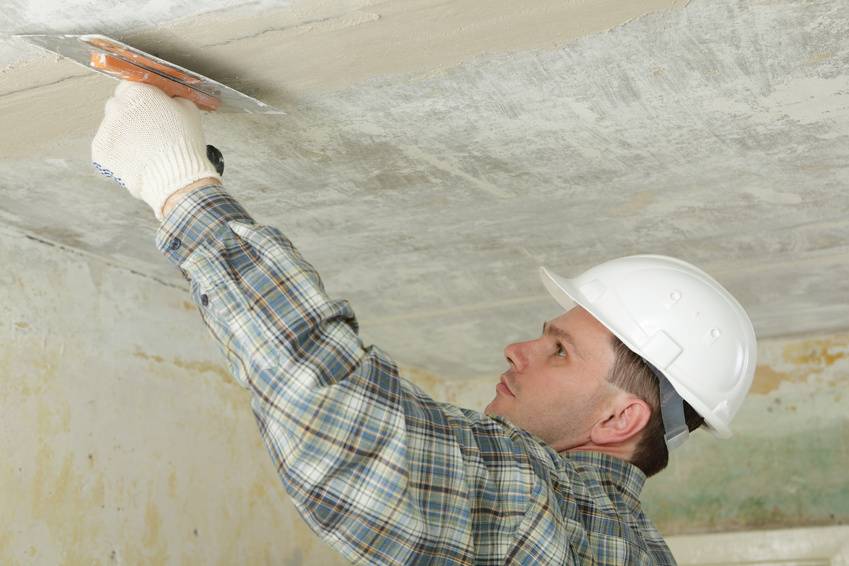
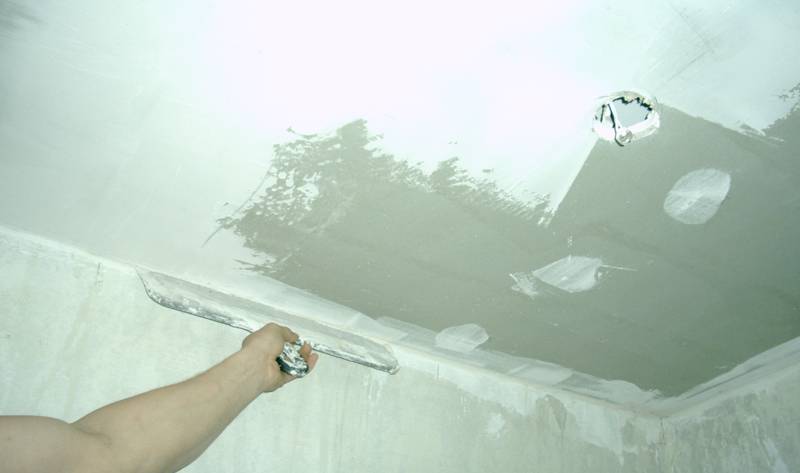
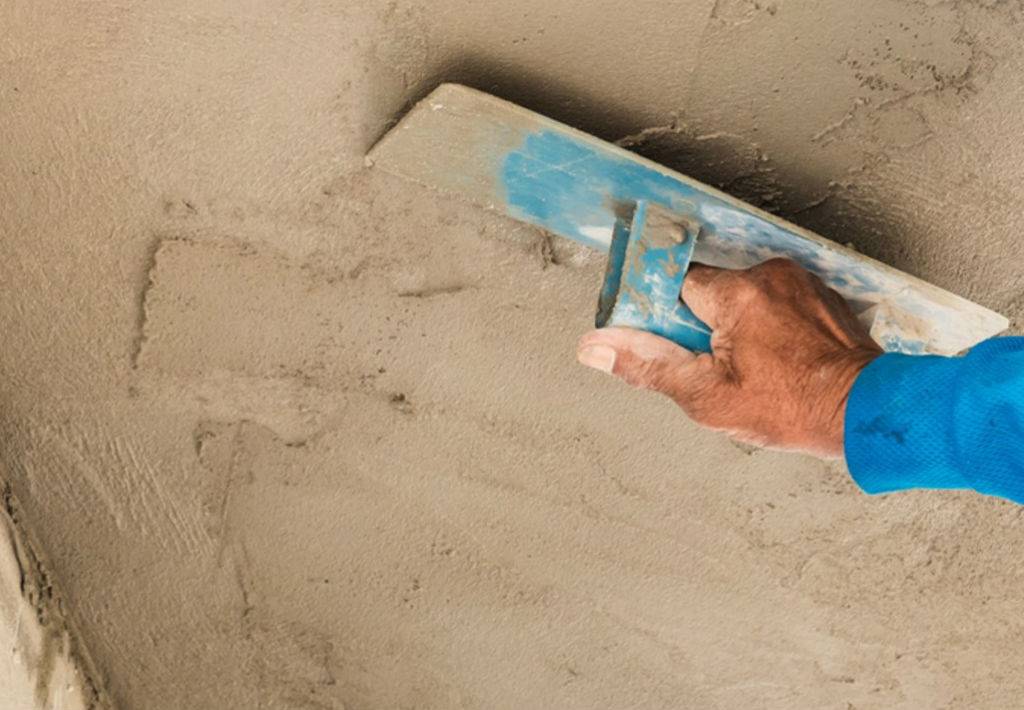
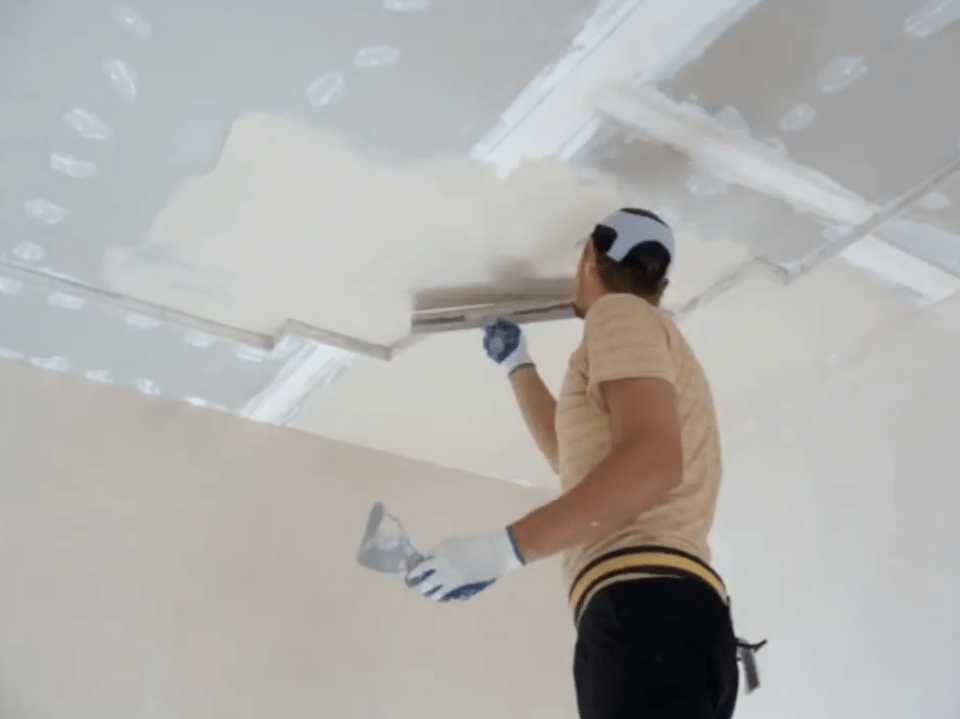
The first layer of putty is applied to the mesh with a wide trowel. Movements are carried out in the direction "towards yourself". The thickness of the first layer should not exceed 20 mm. After the ceiling is completely covered with layers of putty, it is leveled with a rule - a special tool.
Drying of the first, thickest, layer takes at least 3 days. The time required for the first coat to dry may vary. It depends on the thickness of the layer itself, the material used, the level of humidity and temperature in the room.
After that, subsequent layers are applied. When applying them, the building rule must be turned with the straight side towards you. In this case, the alignment is better.
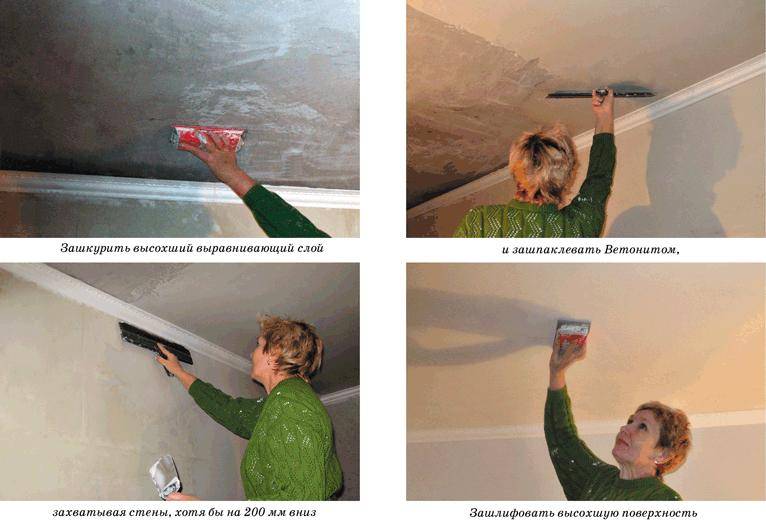
If aligning the ceiling with your own hands is done for painting, then after applying the last layer of putty on the ceiling, moisten it with water and rub it with a felt float. In this case, depressions and small irregularities are leveled. After the last layer has dried, the plaster is rubbed with a metal brush or sandpaper.

Fiberglass reinforcement
If the rough ceiling is problematic enough, i.e. there are large cracks and cracks on it, then fiberglass reinforcement is used. Reinforcement can be made for the entire ceiling or its individual parts.
For reinforcement, the canvas is cut into ribbons, with which the last layer of plaster or putty is fixed. Grouting the surface with sandpaper or a metal float in this case is carried out after the reinforcing layer has dried.
Finishing putty
After carrying out all the rough work, they proceed to the final ceiling putty. The surface is thoroughly cleaned of dust that remains after sanding the rough finish. This can be done with a vacuum cleaner with a soft brush, dry brush, or damp cloth. In the latter case, the ceiling must be given time to dry.
The finishing putty is also applied in several layers, each of which must dry before applying the next. A wide spatula is used as a tool. After the surface is leveled, if necessary, the finishing filler should also be cleaned with fine sandpaper.

Materials and tools
Everything that needs to be done to the ceiling before painting requires careful execution.
First of all, you should purchase or prepare tools and materials:
- Polyethylene film. She covers floors, furnishings that cannot be taken out of the room. Windows and doors also require protection from debris and dirt, as they will begin to crumble when cleaning the ceiling surface from the previous coating.
- Ladder... It is an irreplaceable device that greatly simplifies the work.
- Putty knife... Without this tool, it is impossible to clean old whitewash and paint from the ceiling.
- Sander... Helps to remove old coating and level the surface of the ceiling.
- Bucket... It is filled with water, which is required to facilitate the work associated with the removal of the finishing layer, as well as to clean the floor before applying the primer.
- Putty... It is used for filling gaps, eliminating irregularities and for pre-coating the floor surface. It is better to know in advance what is the best putty for the ceiling for painting, if such a finish is planned.
- Sandpaper... Helps eliminate minor irregularities.
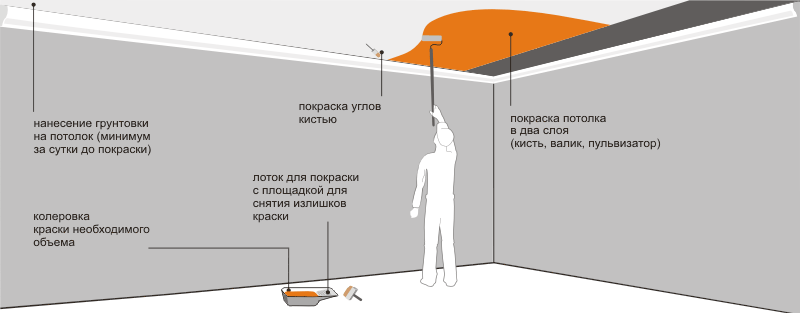
- Primer... It must be applied before applying a fresh coat of paint. The primer provides a stronger bond between the concrete surface and finishing materials such as new wallpaper and paint.
- Respirator and special glasses... They are needed to protect the respiratory system and eyes from the smallest dust particles.
- Work clothes set... Old trousers and a long-sleeved shirt are suitable for construction work. They will protect the skin from dust and dirt. It is better to wear gloves on your hands.
- Spray gun, brush and roller... For faster and easier removal of the old whitewash, it is advisable to moisten it using a spray gun and a roller, and apply a primer to the cleaned concrete with a brush.
- Lantern... It helps to detect irregularities on the ceiling surface after the previous coating has been removed and when the putty is applied.

After purchasing all the materials, they begin to prepare the room where the repair is planned.
Leveling the ceiling with your own hands with putty
There are 2 ways to putty ceilings - manual and mechanical. Both methods are suitable for independent work. If you have the skill to work with a spray unit, then it is not necessary to buy it, but to rent it. This method is suitable for large areas of putty.
The manual method involves many techniques for performing ceiling putty. Each plasterer has a certain set of techniques that allow them to quickly and efficiently do their job. All methods of putty are preceded by preparatory work:
- Arrangement of a scaffold or ladder ladder, ensuring the safety of work;
- Preparation of tools for cleaning defective areas and cleaning the ceiling (scrapers, brushes, knife, hammer, sponges, rags, etc.);
- Preparation of personal protective equipment (gloves, goggles, respirator, clothing);
- Floor surface protection, remove furniture if possible or cover with protective material.
For different types of floors (concrete, wood, sheet) there are dry putty mixtures. The preparation of the concrete ceiling is carried out by cleaning the old peeling finish to the base of the slab, tapping the voids with a hammer, cleaning the ceiling with a scraper, a metal brush, cleaning the ceiling from dirt and dust with a wet sponge, rags. The work is dirty, but the quality of the primer and putty largely depends on it.
Tools and materials
Before you putty the ceiling for painting, you should check the presence of tools:
- drill with kneading attachment;
- kneading bucket;
- roller and brushes;
- spatulas;
- construction trowel;
- construction float with abrasive mesh of different sizes;
- grinding;
- ladder.
Materials should also be prepared:
- deep penetration primer;
- putty mixture (starting plaster);
- finishing putty;
- dye.
Rules for choosing a putty mixture
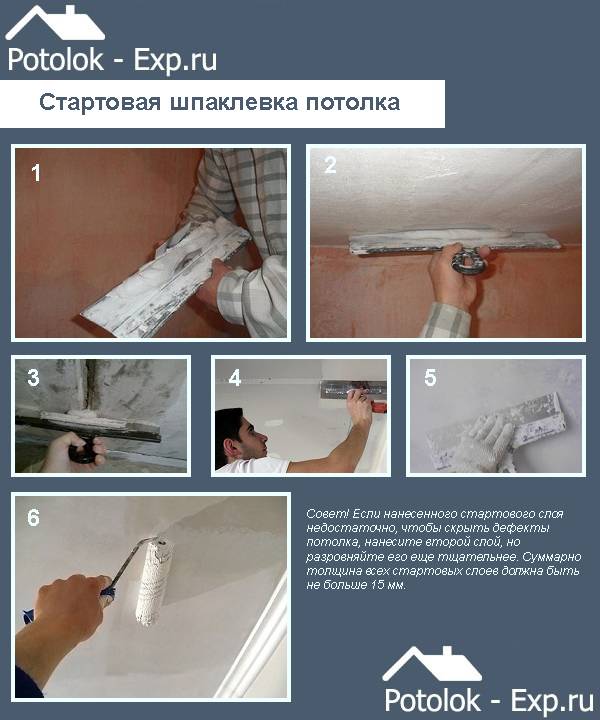
The starting compound is a mixture with coarse abrasives, designed to eliminate serious defects - chips, potholes. The total thickness of the application is up to 1.5 cm. You can apply the mixture in two layers, pre-drying the previous one and observing the indicator of the total thickness. The kneading should be the consistency of thick kefir, the putty should not be stretched, as well as applied in lumps - applying with a spatula with firm pressure on the tool to seal all defects.

The finishing mixture is a composition with very fine abrasives.Such a putty evens out the plane, giving it a mirror-like smoothness, therefore, the batch should be of a consistency not thicker than fat milk and the mixture is applied in a very thin layer, stretched over the largest possible area.
When choosing which putty is better for a ceiling for painting, you should pay attention to the following parameters:
- Appointment of the premises. A kitchen or bathroom needs a mixture that is resistant to moisture and dirt.
- Ceiling material. For a wooden base, a mixture with a fire retardant should be chosen in order to increase protection against fire, a composition with good adhesion is useful for an old concrete ceiling, and soft mixtures for a surface made of gypsum plasterboard sheets.
- Composition. As additions, components against fungus, mold, protective agents, etc. are added.
Primer selection rules
In addition to the composition, impregnation is needed to level the plane. The primer for the ceiling under the putty is selected for extremely deep penetration
You need to pay attention to the manufacturer's recommendations for the type of substrate for which the impregnation is intended.
There are several types of primers:
- Acrylic. It is used for impregnation of bases made of concrete, wood, gypsum board, foam concrete, plastered surfaces.
- Phenolic. It should be used for metal, wooden ceilings and plasterboard sheets.
- Alkyd. The mixture is applied before coating with alkyd paints, wood can be processed.
- Glyphthalic. Used for metal, wood surfaces. Considered toxic and suitable only for outdoor use or in well ventilated areas.
To choose a high-quality soil, it is better to look for the presence of antifungal components, impregnation with moisture-resistant qualities.

The question often arises - why do we need a ceiling primer for painting? The mixture increases the adhesion of the base to any decorative and finishing materials, protects the surface from biological life forms. If preparing the ceiling for painting with your own hands does without soil impregnation, after a short time the putty will peel off along with a layer of paint and you will have to do the repair again.
Creation of plasterboard structures
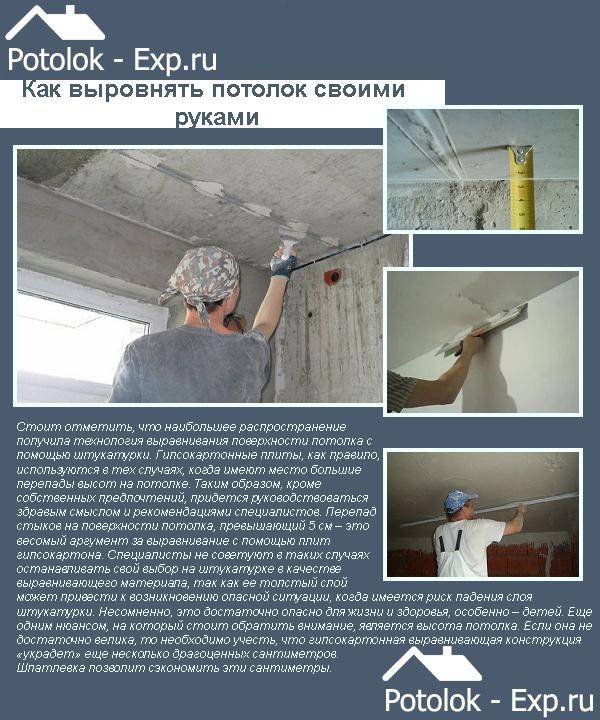
Drywall is another option for leveling the ceiling in an apartment. Plasterboard sheets allow you to align the ceiling plane as much as possible. This option is used to level the ceiling, which has a height difference of more than 5 cm, as well as for additional sound insulation and insulation.
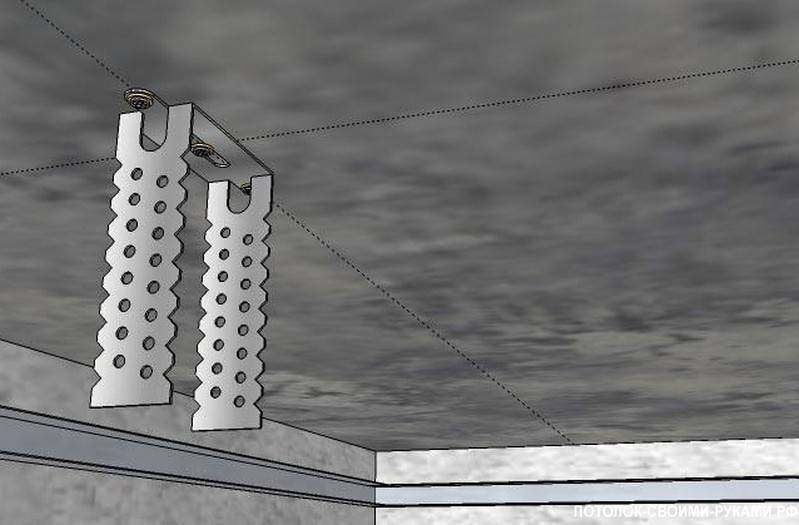
Drywall cannot be attached directly to a concrete ceiling; it requires a frame made of metal profiles or wooden blocks. The frame elements are fixed to the ceiling using hangers or brackets, which allows the ceiling plane to be aligned as much as possible. Therefore, plasterboard ceilings are called suspended. When installing suspended ceilings, it becomes possible to mask any communication systems, protrusions and pipes.
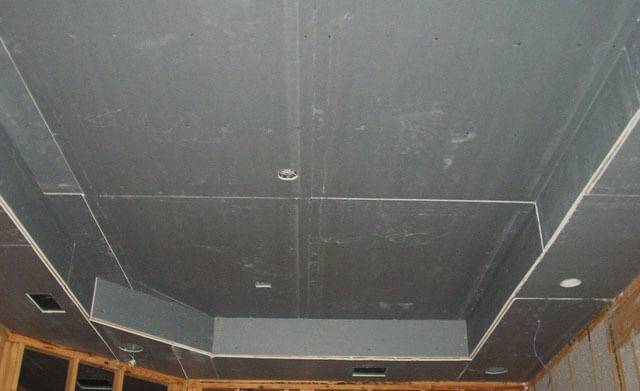
When calculating the required number of drywall sheets, the area of the room is taken into account. To simplify the calculations, a room plan is drawn, in which, in addition to the main dimensions, the location of the guides and hangers is indicated. Most often, a kind of lattice with cells measuring 40-60 cm is created from the guides.
Ceiling plaster technology
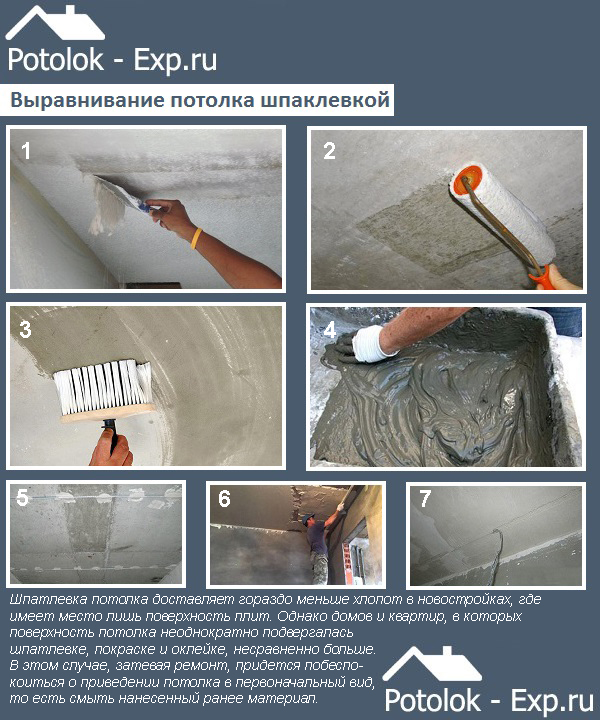
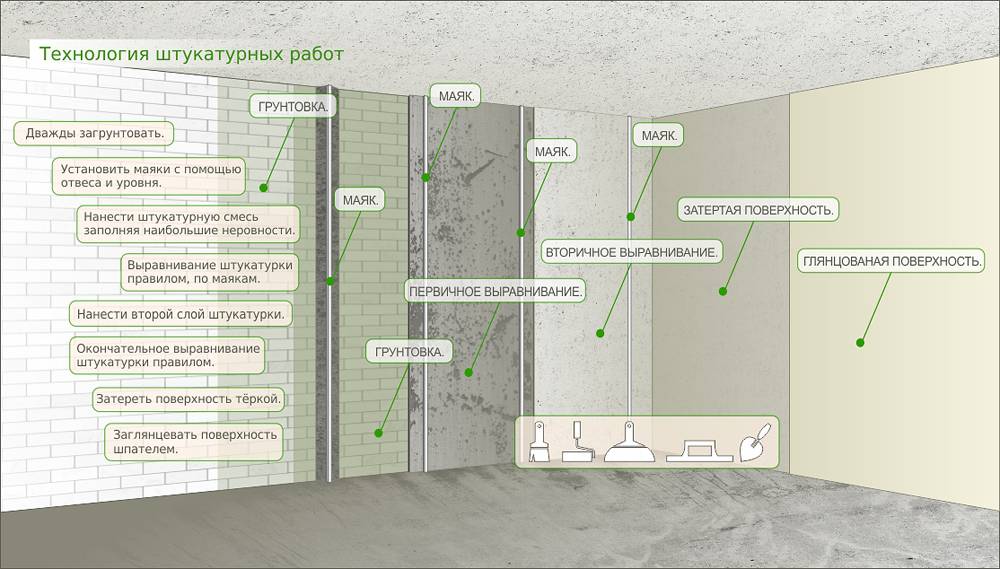
The process consists of several sequential stages. Before puttingty the ceiling, it is necessary to prepare and clean the surface. Initially, the old finishing coating is removed, loose areas are cleaned. Wallpaper and whitewash are removed by wetting and then removing the coating with a metal spatula. The base is cleaned from the remnants of dirt and dust.
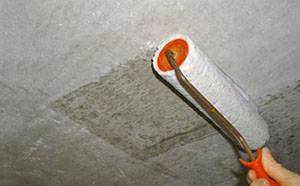 Then, using a roller or brush, the base is treated with a primer in 2 layers. Layers are applied perpendicular to each other. The primer should lie flat, without streaks. To continue the work, they wait until the base dries up. Drawing
After preparing the surface, they proceed directly to the ceiling putty with their own hands. The process can be conditionally divided into several stages. So, how to properly putty the ceiling?
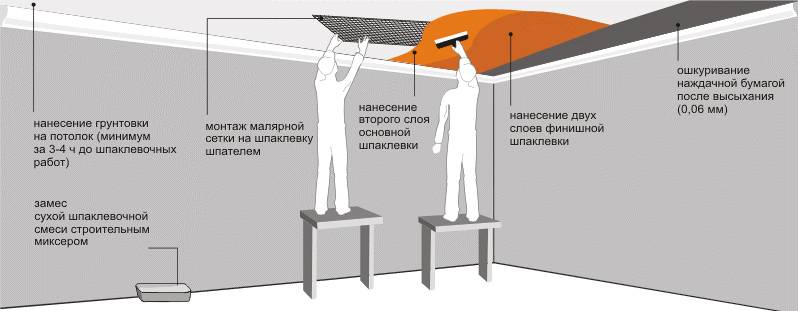
 The first stage is mixing the putty solution. To prepare the composition, it is recommended to use a mixer or a drill attachment. In this case, the mass is homogeneous, without lumps.
To prepare the correct solution, follow the manufacturer's instructions for use. The consistency of the solution should resemble thick sour cream.
 The second stage is the application of the first layer to the ceiling. To get a quality finish, you need to know how to properly apply the filler to the ceiling.
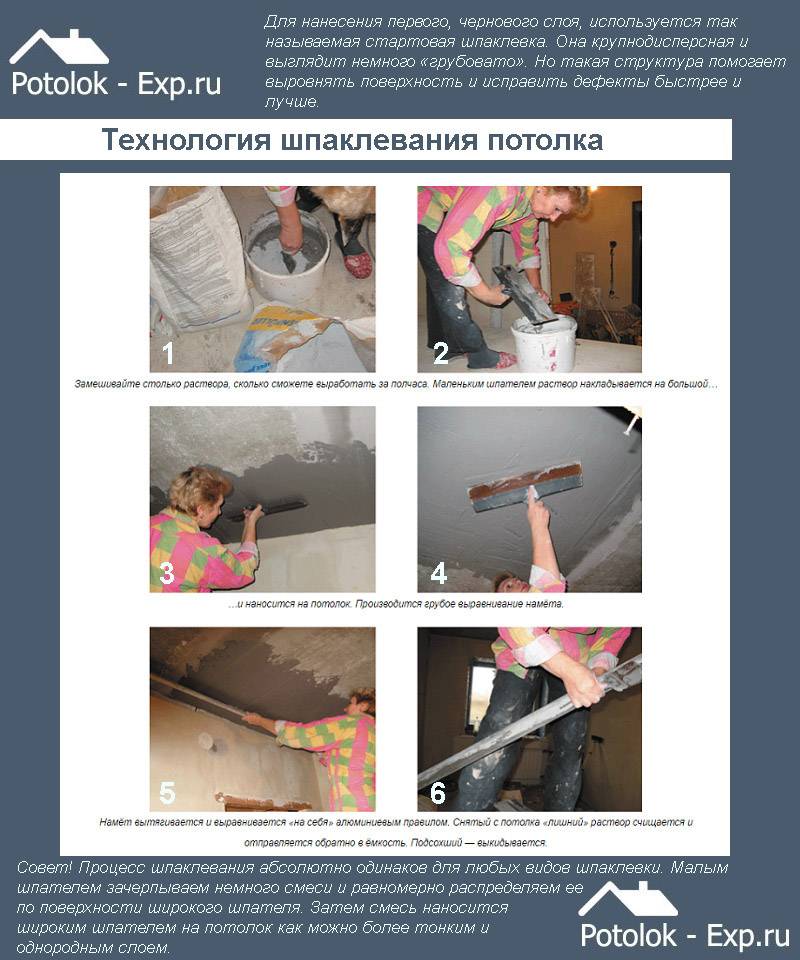
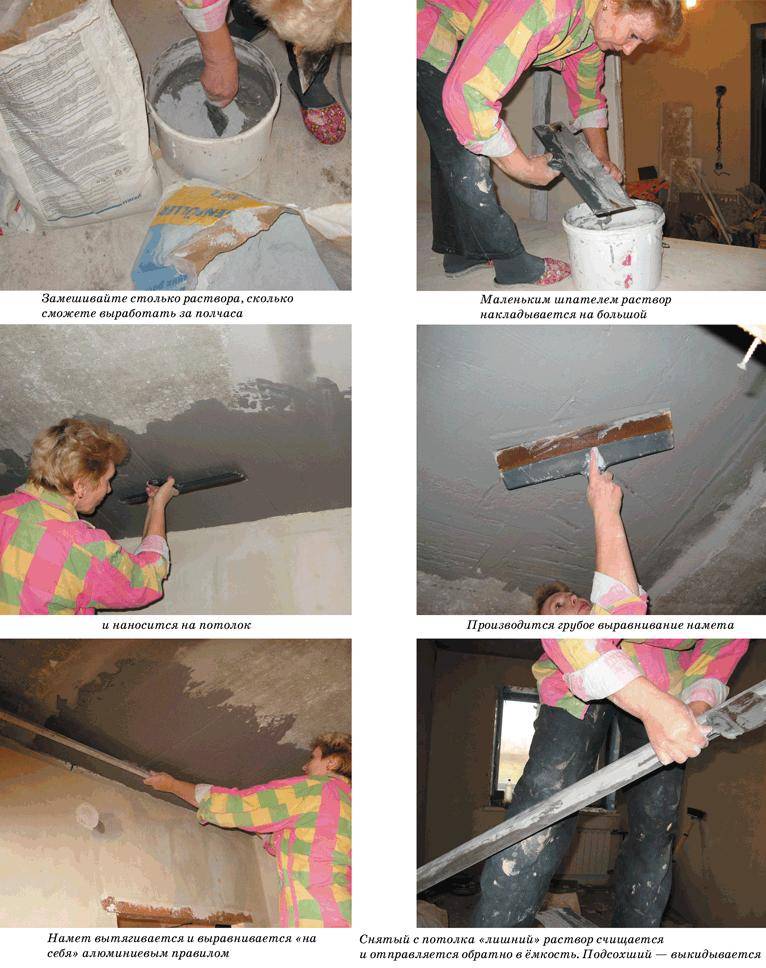
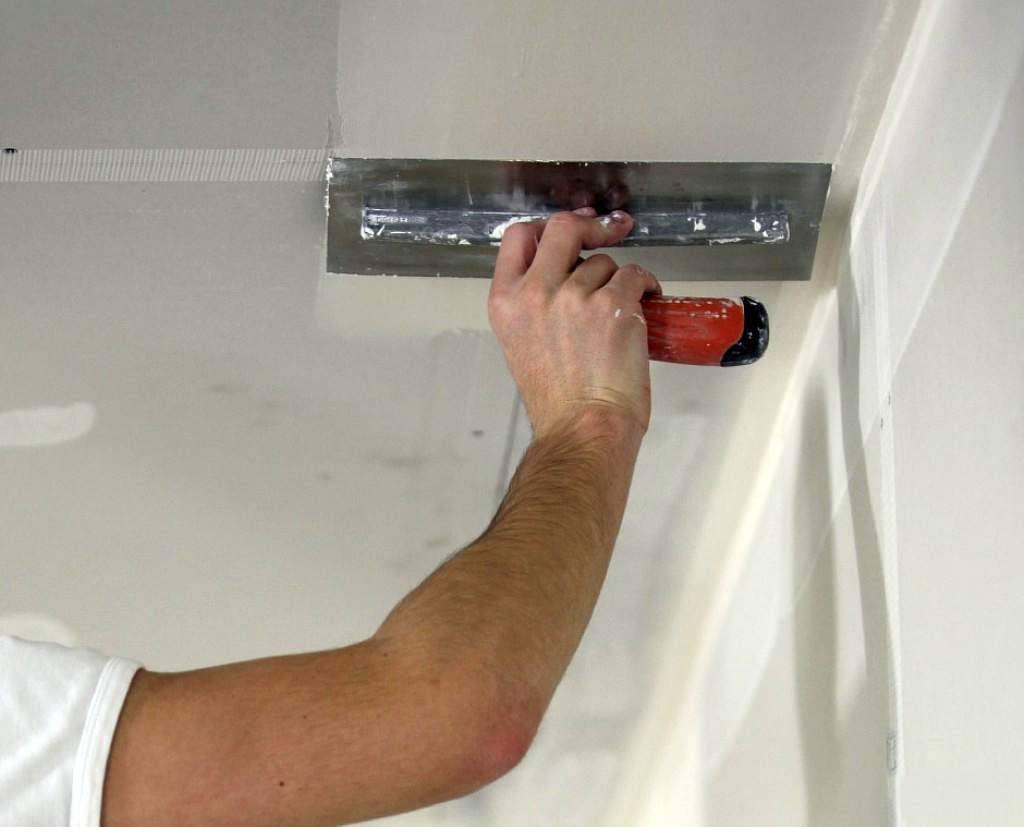
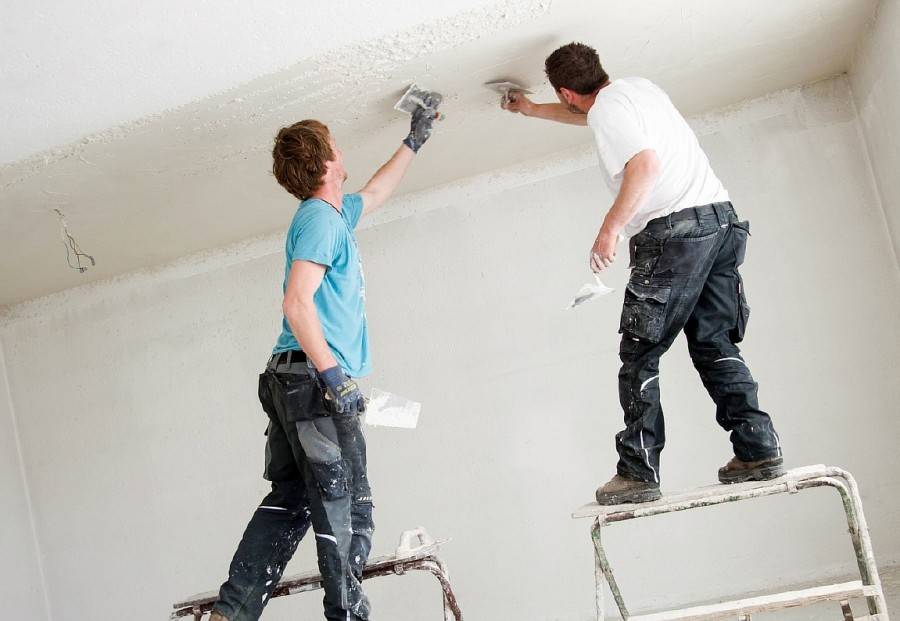
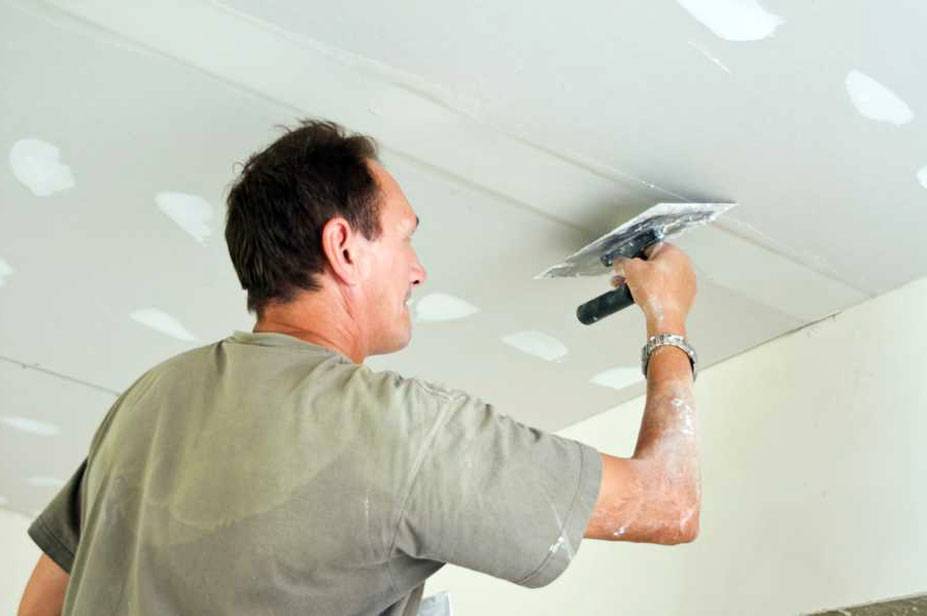
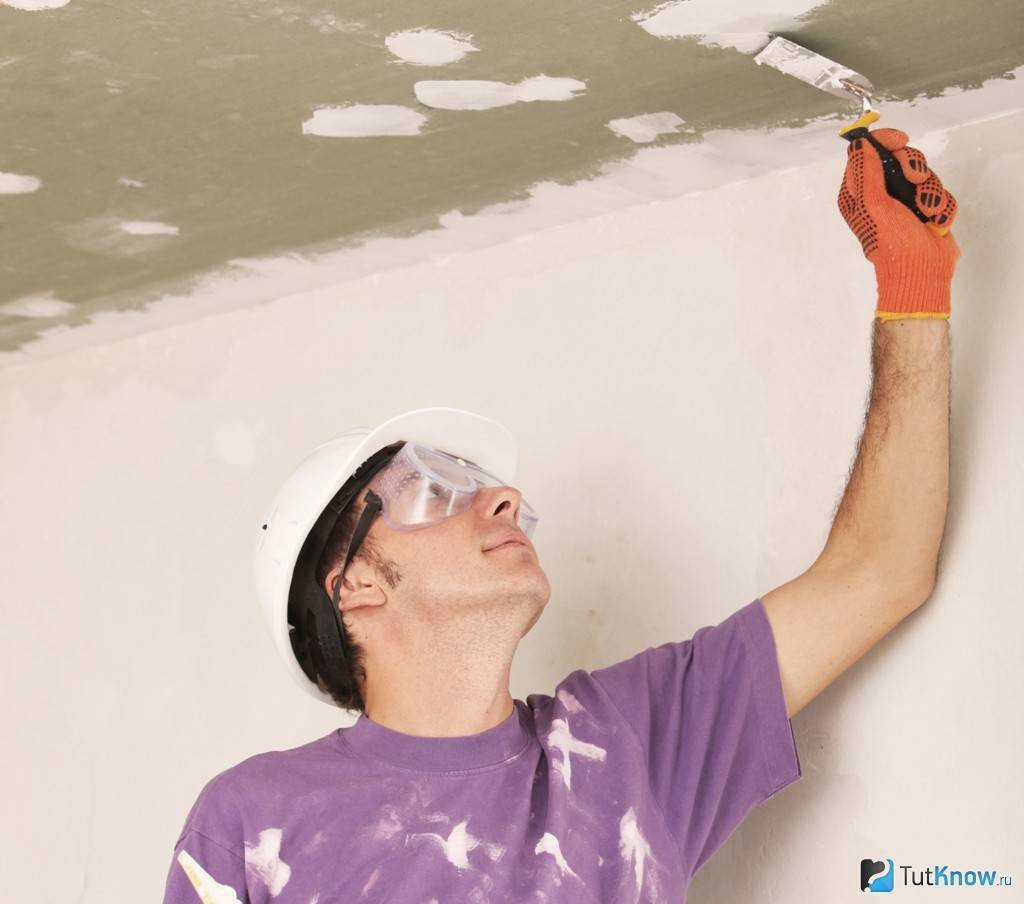
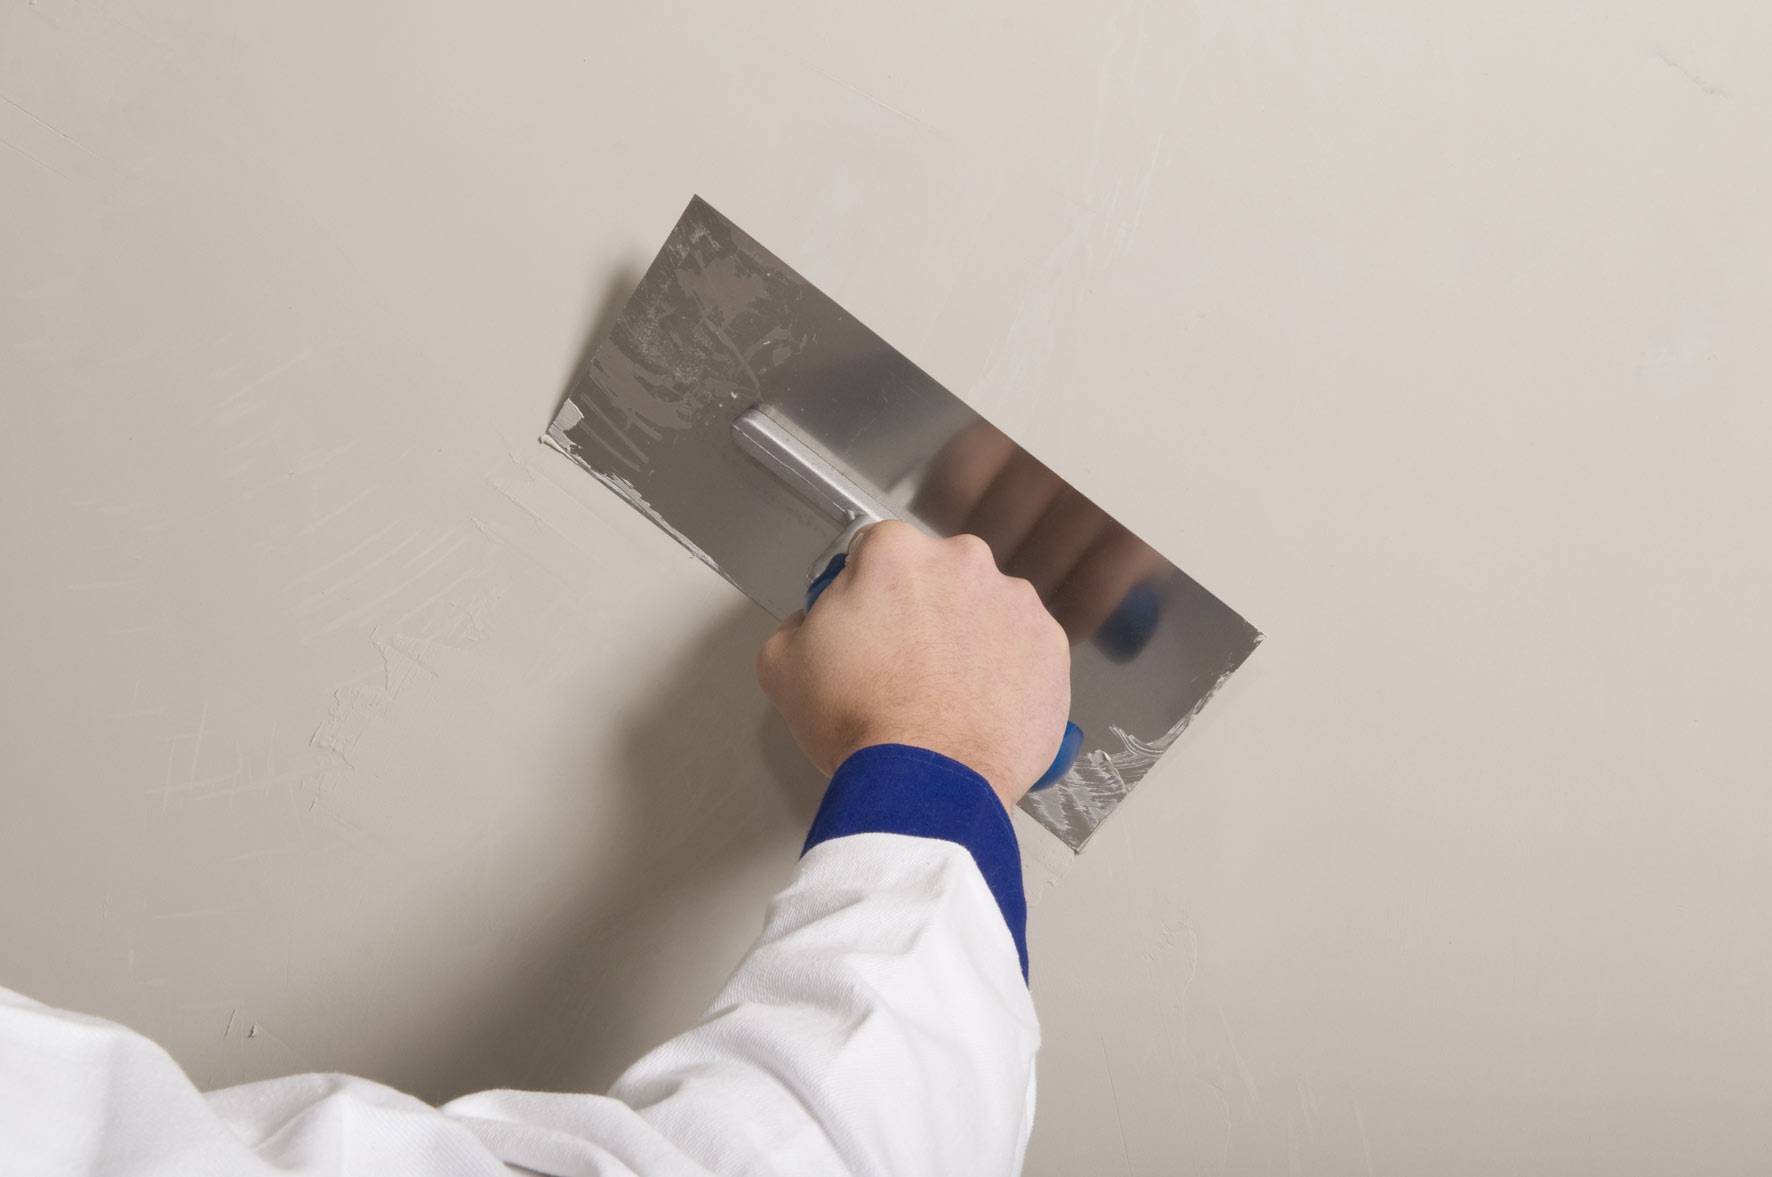
For surface treatment, two spatulas are used - a narrow one and a wide one. A small portion of the mixture is taken with a narrow tool and applied evenly over the working part of a wide spatula.
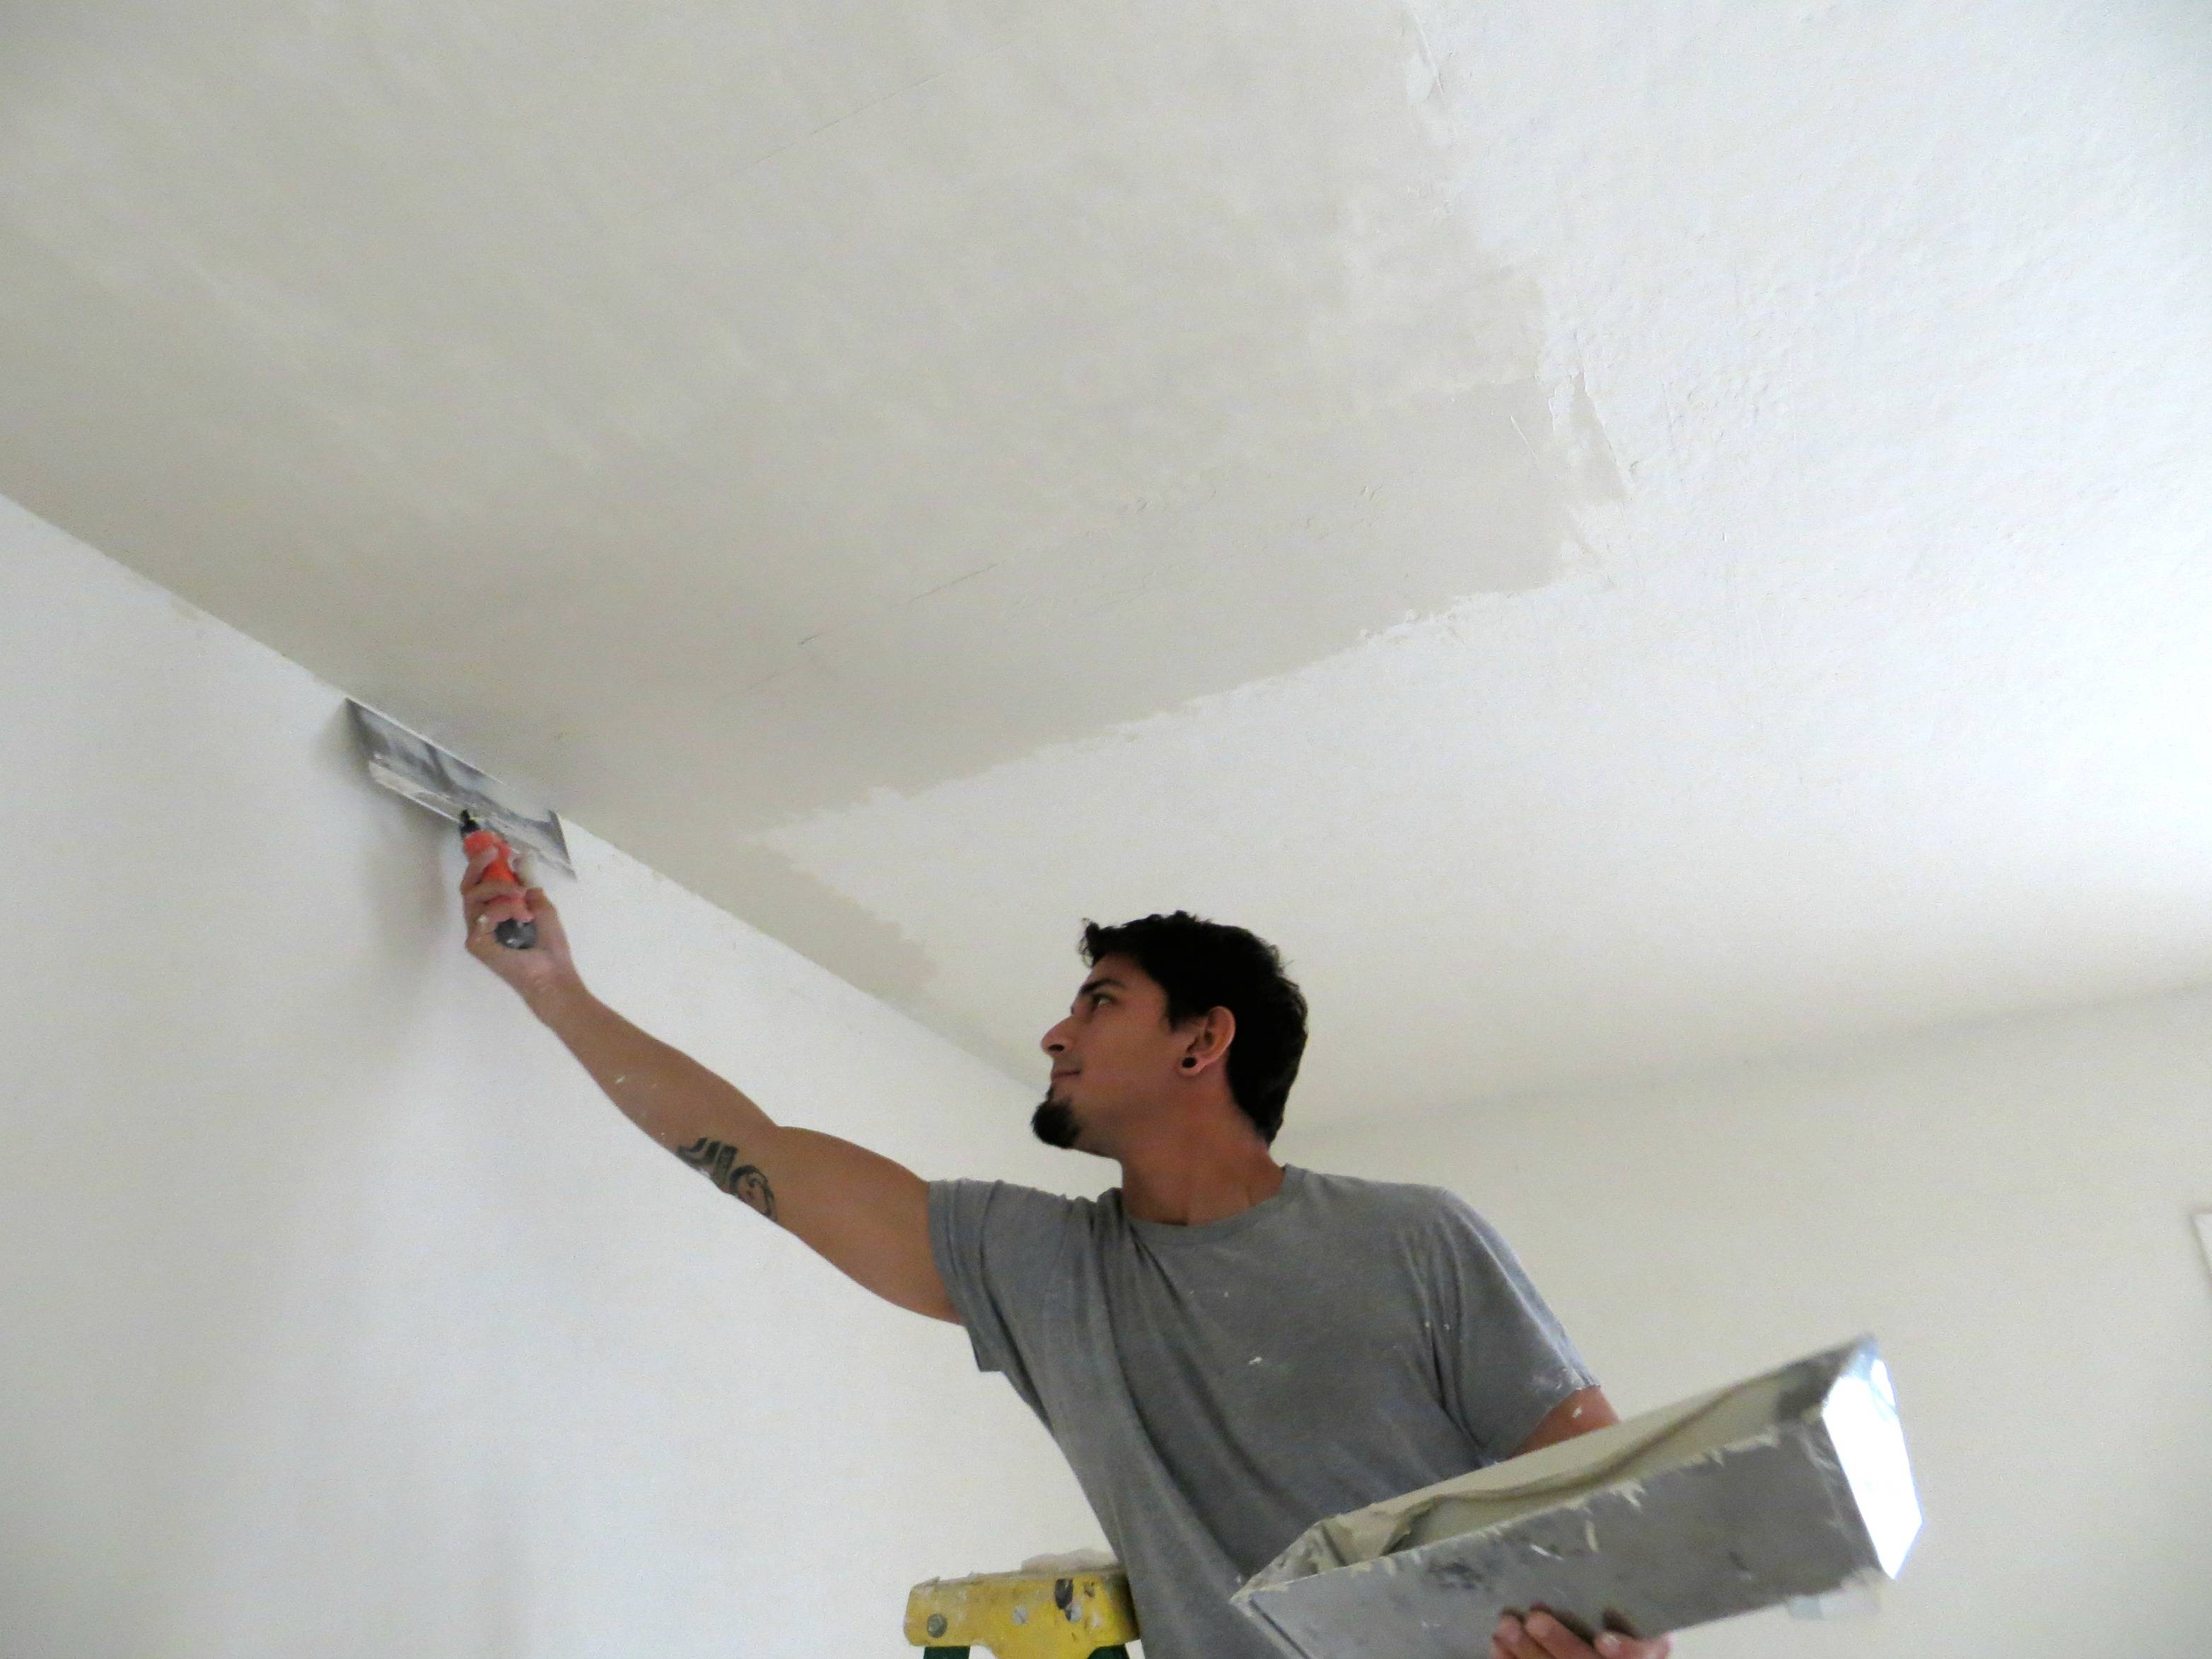
Further, the composition is distributed over the surface of the ceiling with a layer of equal thickness. The layer should be as uniform and thin as possible. The composition remaining on a wide spatula is removed with a narrow tool and sent back to the container with the composition. Instead of a wide spatula, you can use a sander. With its help, work is done faster.
Thus, the entire surface is processed. The ceiling is not touched until the first layer is completely dry. The holding time depends on the composition, and it is indicated on the instructions for use from the manufacturer.
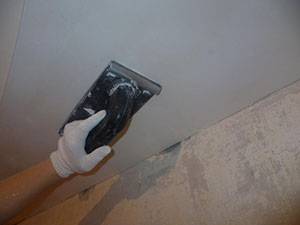 The third stage is leveling the dried layer. After the first layer of putty has dried, remove all irregularities. Sagging is removed with a spatula or sandpaper. After removing excess composition, the surface is cleaned of dust, as it affects the quality of the subsequent layer. Drawing
The next stage is the imposition of the second and subsequent layers. The number of layers depends on the evenness of the base. The more differences and irregularities, the more composition is required to be applied.
If the differences are no more than 10 mm, the putty is applied in several layers. If the dimensions of the defects are more than 10 mm, then a reinforcing mesh is used to strengthen the leveling finish. It eliminates the risk of cracking. It is allowed to use the mesh with a small layer of putty.
All subsequent layers are applied in the same way as the first. But each subsequent layer is applied only after the previous one has completely dried.
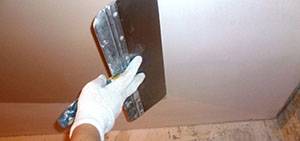 The final stage is the application of the finishing putty to the ceiling. For the last layer, a special composition is often used.
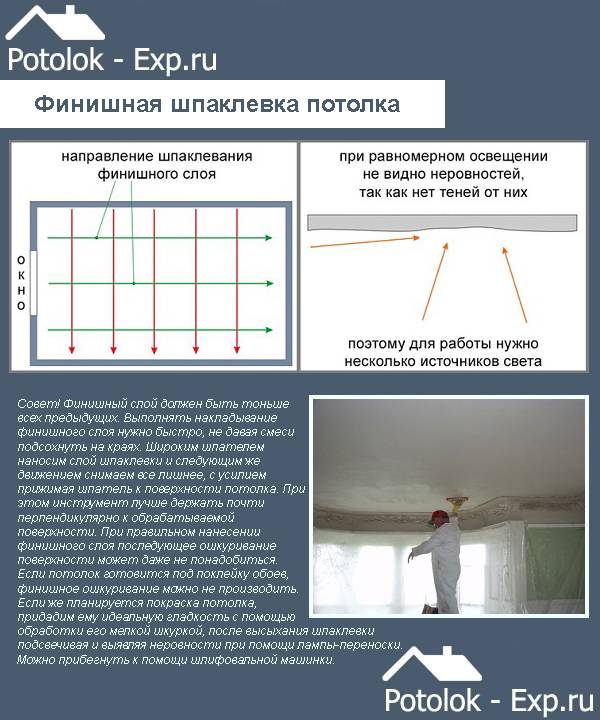
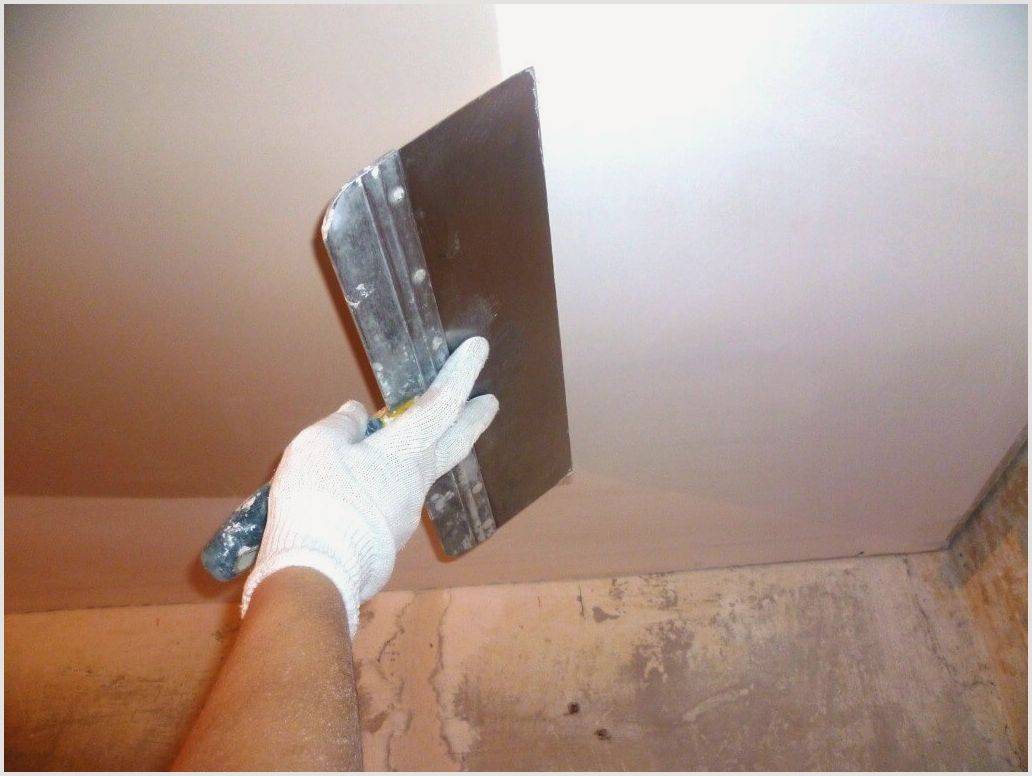
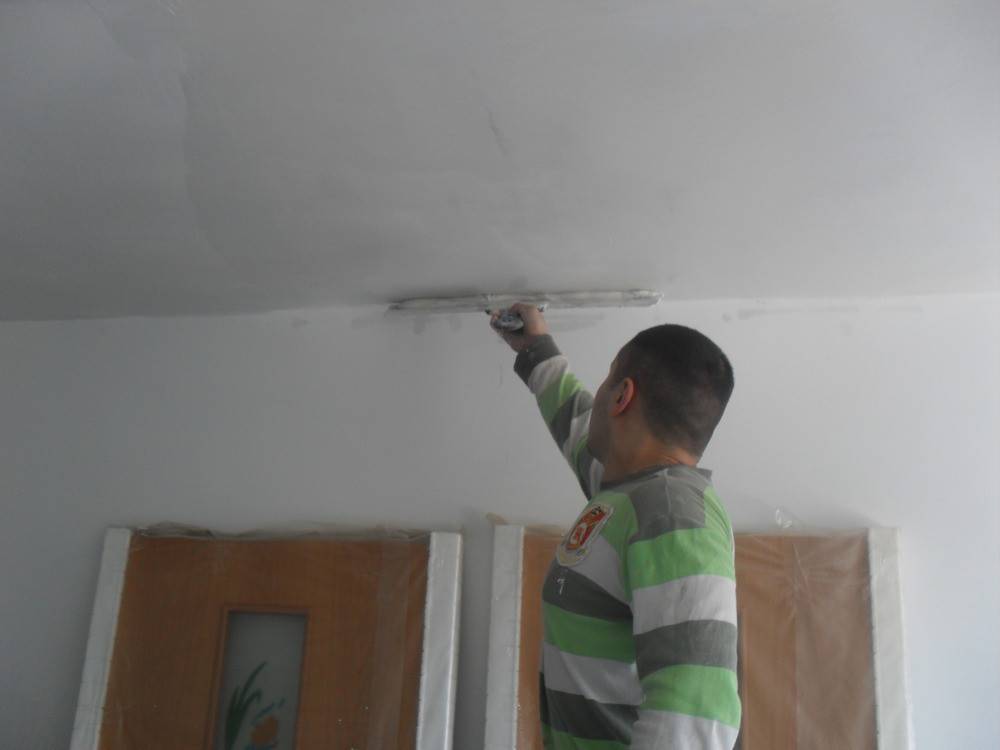
How to apply ceiling finishing coat? The last layer of the composition should be the thinnest. The mixture is applied with a wide spatula. The work is carried out at a fast pace, since it is impossible for the putty to dry out at the edges.
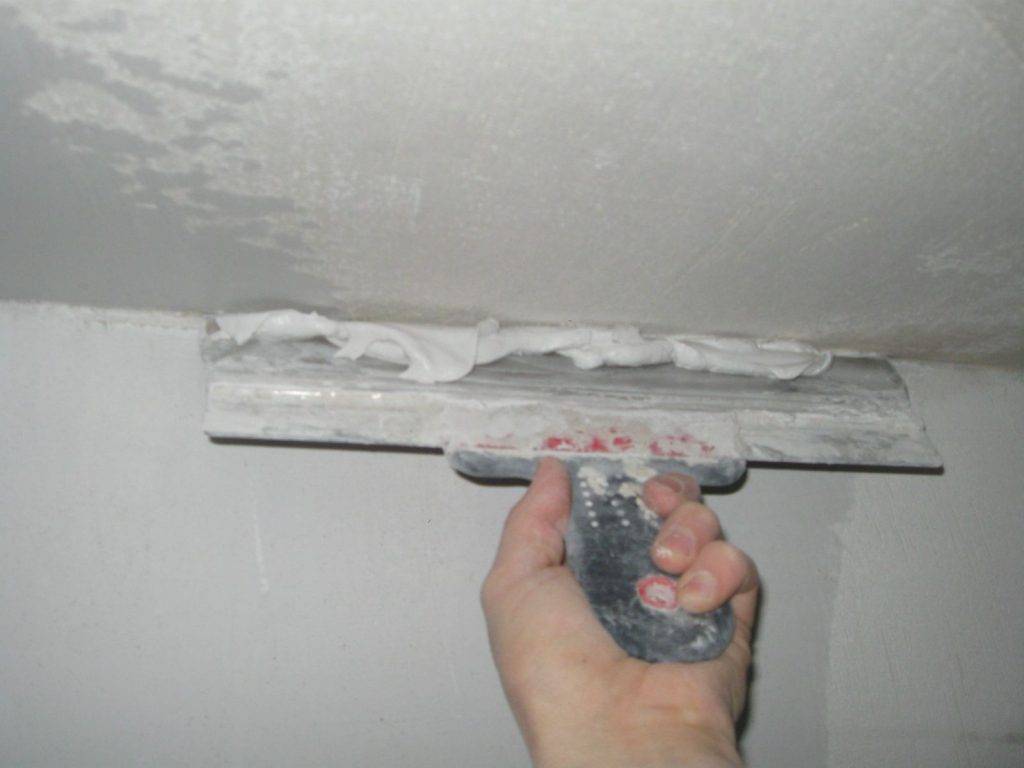
When working, it is recommended to hold a wide spatula practically perpendicular to the surface, which allows obtaining a layer of the required thickness. Excess composition is immediately removed with a spatula. Drawing
If the whole process was carried out correctly, then after the finishing layer has dried, sanding is not required. But if in the future the ceiling is painted, then grinding the surface is a mandatory step. The ceiling is treated with fine grain sandpaper. A carrying lamp is used to identify all defects.
This is the main technology of ceiling putty. However, when working, you should take into account the individual nuances of surface treatment.
How to putty the ceiling?

With any repair, especially in new buildings, the owner is faced with the process of leveling the ceilings with putty. However, not many people can imagine how this is done.
The complexity of the work lies in the fact that the master is in constant tension. During the putty, you need to constantly keep your hands up, and this is not at all easy.
It is necessary to apply the putty to the ceiling in step-by-step uniform layers, up to the application of the finishing layer.
How to properly putty the ceiling?
Ceiling putty is carried out during the repair of any new building, and can also be carried out during major repairs in the premises of old houses.
Before applying the first, starting layer, it is necessary to prime the surface. Primer is applied with a roller or a wide brush.
If putty is done in a new building, then initially it is necessary to close up the joints of the floor panels, after that - apply a starting putty. It is executed as a draft layer.
The technology for applying the putty itself is simple:
- We knead the putty in a bucket by adding water and mixing the mixture with a construction mixer with a drill;
- The finished mixture must be collected on a narrow spatula and applied to a wider one, which will be used for filling, evenly along the entire length of the working surface of the spatula;
- Then you need to put the putty knife to the wall and with a smooth motion at an angle, pull it along the wall at about 300 until the putty is smoothed out;
- Grooves that appear after application are best removed immediately by re-moving with a spatula. Before re-moving, the excess putty from the spatula can be removed back into the bucket;
- With such movements, you need to continue to apply the putty until the entire ceiling is closed.
After applying and drying the starting layer, you can level the ceiling with a finishing putty mass. For this, it is best to use a ready-made mixture.
What kind of spatula to putty the ceiling?
To carry out puttying work, it is necessary to prepare special tools. These tools are, first of all, a spatula of different sizes. You need to choose high-quality spatulas so that the working surface is not curved, otherwise the quality of the putty will be low.
Required spatulas:
- One large trowel, 47 or 60 cm wide, for direct work on the ceiling;
- One smaller trowel, 10 or 12 cm wide, for applying putty on a wide working trowel;
- One narrow spatula, 4 or 6 cm wide, for work behind pipes, batteries, narrow inaccessible places;
- Electric drill with a mixer for mixing the putty mass;
- Several buckets: one with water for washing the mixer and tools, one for mixing the putty, one for pouring water into the dry mixture;
- Several rags, a respirator and construction goggles.
The process of plastering ceilings is quite laborious. But you can easily do it by filling your hand on the first squares of the square.
How to sand the ceiling after putty?
When plastering the ceiling, there may be times when the layer of putty may be small. If the putty process has already begun, and you see that you have already applied a thick layer, but you are not pulling the level, it is best to finish the putty and go to the plaster.
For this, ordinary cement-sand mortar is no longer suitable. You need to buy ready-made dry plaster and dilute it with water.
It is advisable to choose a white or light shade of plaster, then it can approximately be in the same substance and color with the putty. In addition, the finished plaster adheres very well to the putty.
In order not to peel off one or another material, then before switching to another type of finishing material, the previous one must be pasted over with a mounting mesh, and then plastering.
Also see:
Plaster can be applied immediately in large layers from 5 mm to several centimeters, unlike putty. When the plaster is dry, you need to look at the level. If it is flat enough, you can immediately level it with a finishing putty.
Also watch a detailed video instruction on how to putty the ceiling
Putty on concrete or plastered ceiling
First of all, it is necessary to determine the degree of curvature of the ceiling surface - the starting putty is not always required, sometimes the finishing one can be dispensed with. If the differences are more than 5 mm, the need for a rough alignment is obvious.
Ceiling starting filling
Puttying starts from the corner located on the wall with a window to work in the direction of the light. A wide spatula is taken in the right (working) hand, and a narrow one in the left. Situated under the starting point, a portion of the putty is taken from the container with a narrow spatula and evenly distributed over the wide blade. Pressing the blade of a wide spatula to the horizontal ceiling corner, move it with a confident movement along the ceiling, covering it with a strip of putty of a uniform layer thickness and filling in the defects. The tool does not come off the surface until the mixture is generated.

After the end of the movement with a small spatula, collect the remnants of the mixture from the blade, return them back and add fresh solution. Next to the completed strip, the next one is applied - with an overlap of a couple of centimeters. Having covered the area above oneself with such parallel stripes, the same is repeated along it, but in the perpendicular direction. Having finished, they putty the adjacent fragment of the ceiling, trying to smooth out the stripes in the sections and their joints. Having covered the entire ceiling with the mixture, the putty is given time to harden and the presence of errors is determined with a two-meter rail. If necessary, the starting filling is performed again - after the previous layer has completely dried.
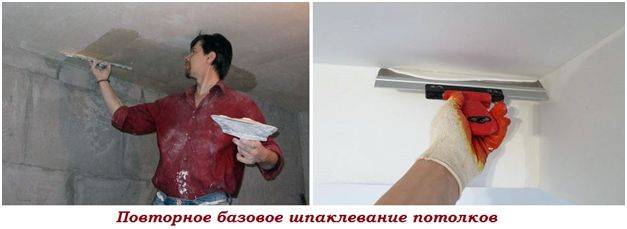
If no abrasive roughing has been performed between overlays, no priming will be applied.
In detail and accessible, especially for beginners, ceiling putty from the first layer is shown in this video:
Finishing plastering of ceilings
Finishing putty is the final stage in preparing the ceiling for painting, after which there should be no defects on the surface.
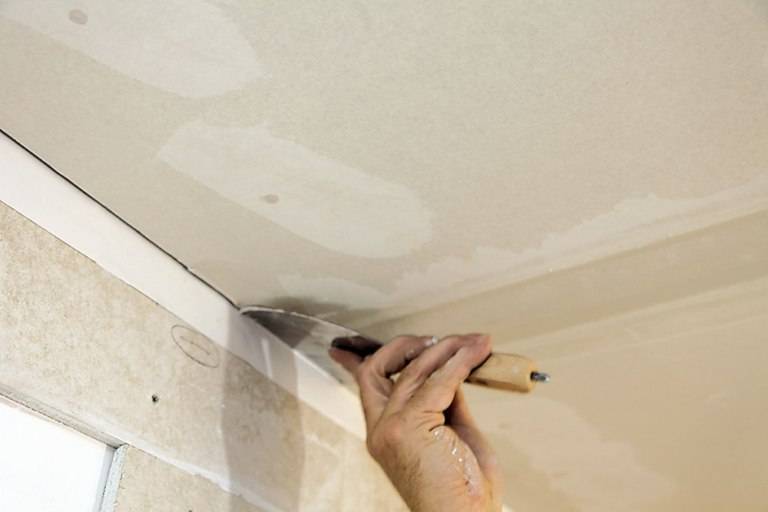
With a sharp spatula of medium width, placing it at a low angle to the base, all small bulges - lumps, crumbs, insects - are “shaved off” from the ceiling.
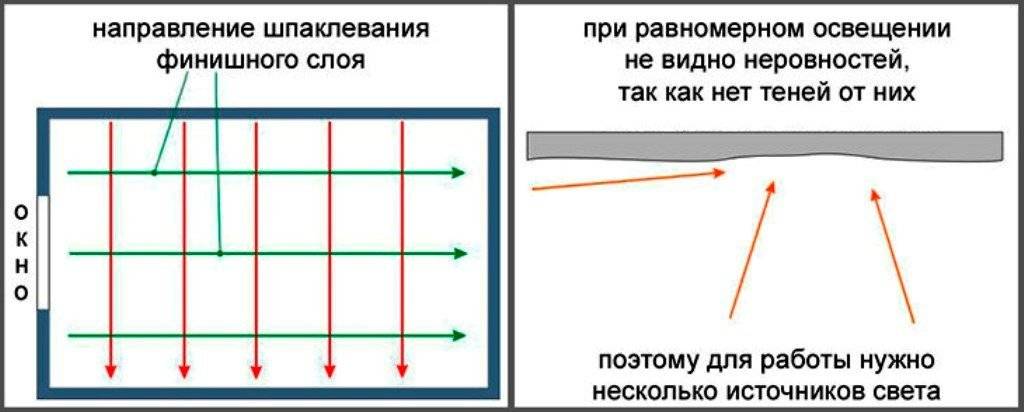
The finishing putty is applied to the dust-free and primed starter coating. Work starts from the same angle as for basic alignment. The ceiling is also putty with a wide spatula, on which the putty is laid with a smaller tool. The base to be trimmed should be well lit. The sun's rays should not fall on the putty, but this condition is not relevant for the ceiling.
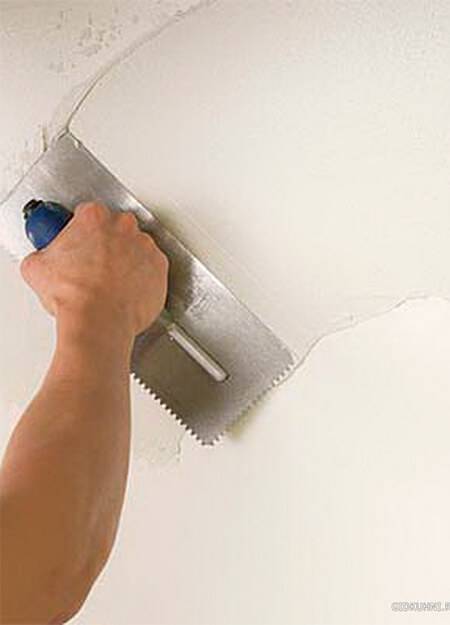
The layer thickness for a single application should not exceed 3 mm. The movements of the spatula can be straight or semicircular - it depends on the individual manner of work and the area to be trimmed.
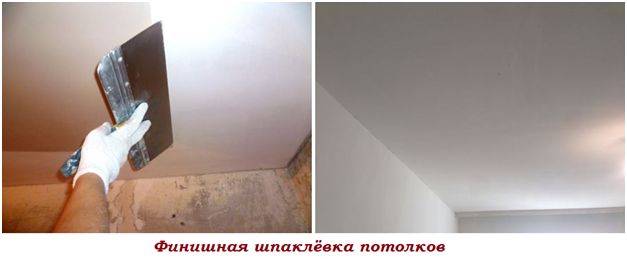
The basic rules and useful recommendations are also clearly demonstrated in this video:
Even if a coating with a thickness of a fraction of a millimeter is sufficient for finishing preparation, it must be done in two layers - so that later there will be something to grind. If the finishing layer is thin, the sandpaper can wipe it down to the starting filler, and then the surface structure of this "bald head" will stand out on the ceiling with graininess - this will require an extra layer of paint, or even two, otherwise the stain will remain noticeable.
A completely dry topcoat should be uniformly white (gray) and then sanded with a low grit abrasive tool under side lighting with a portable light.
The final grinding operation, technically not difficult, but responsible, is clearly described in this video:
Primer
Before puttingty, you will have to treat the surface with a primer solution. For this, it is recommended to take deep penetration formulations.
Mix selection
There are a number of effective blends, each with its own specific characteristics.
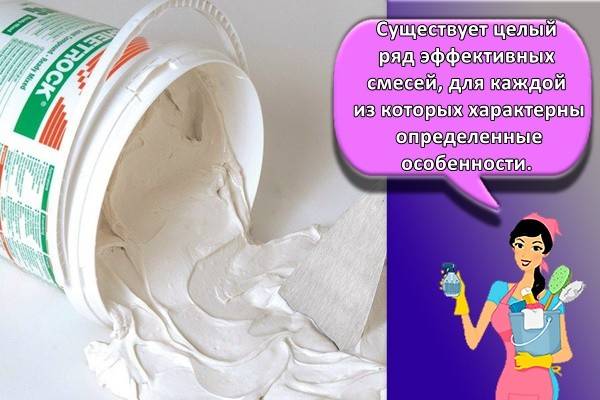
Acrylic
This is a versatile option that suits all types of surfaces. It takes 2-4 hours to dry such a primer. This is a great option for drywall processing.
Phenolic
Such compositions are used for the treatment of metal and wood surfaces. It is forbidden to apply the primer on the putty, while it is actively used as the first layer.
Glyphthalic
This is the most powerful formulation.It is allowed to work with it only in well-ventilated rooms. The substance is not used for living rooms.
Work order
A roller or brush is used to apply the primer. In some situations, it is permissible to use a primer spray. However, in such a situation there is a risk of uneven coating and high mortar costs.
This step ensures the best adhesion of the putty mixture to the ceiling surface. Before proceeding to the next step, it is recommended to wash off the solution that gets on the walls.
Installing the frame
The algorithm for assembling a frame for a plasterboard ceiling includes the following steps:
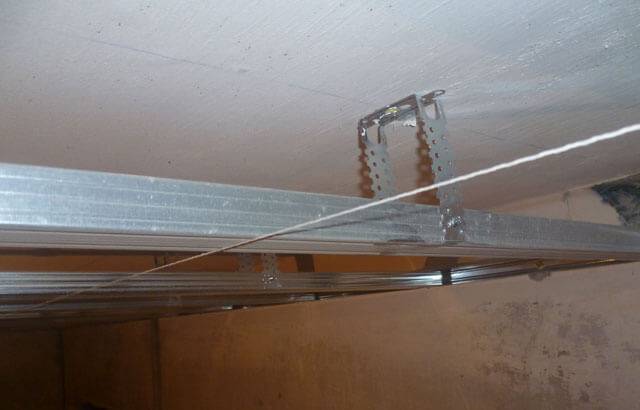
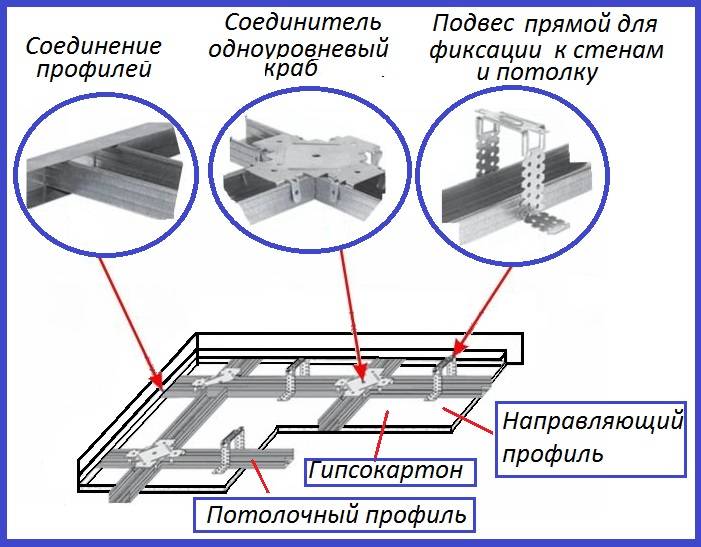
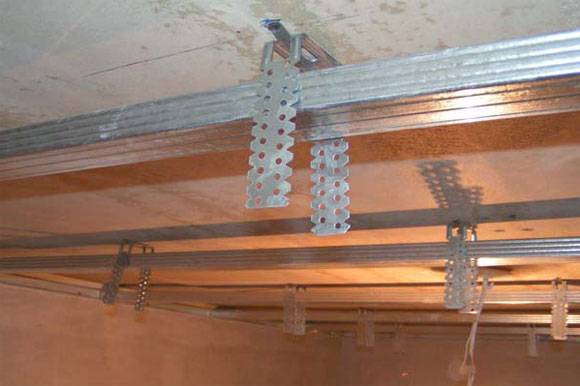
- First, you need to set the UD profiles around the perimeter of the room at the desired level. After that, suspensions are attached to the ceiling surface in accordance with the markings. After mounting the CD-profiles, the edges of the hangers will be bent to fix the jumpers.
- The connection of individual parts of the frame is carried out using a "crab" fastener. To connect the parts along the length, you can use both such a fastening and the usual joining - the profiles simply overlap each other with an overlap of about 10 cm and are connected with self-tapping screws.
Leveling the ceiling with plasterboard
With the help of drywall, you can give any ceiling a completely smooth surface.
It is advisable to use this method in two cases:
- if the height differences on the ceiling exceed 5 cm;
- if you need a thermal or sound insulation device.
Plasterboard ceilings are called suspended - GKL sheets cannot be attached directly to concrete, it requires the installation of a frame from a special profile. The frame is attached to the ceiling using hangers or brackets that allow you to accurately set the horizontal level of the drywall sheets. Also, using this technology, you can close any communications, protrusions and pipes.
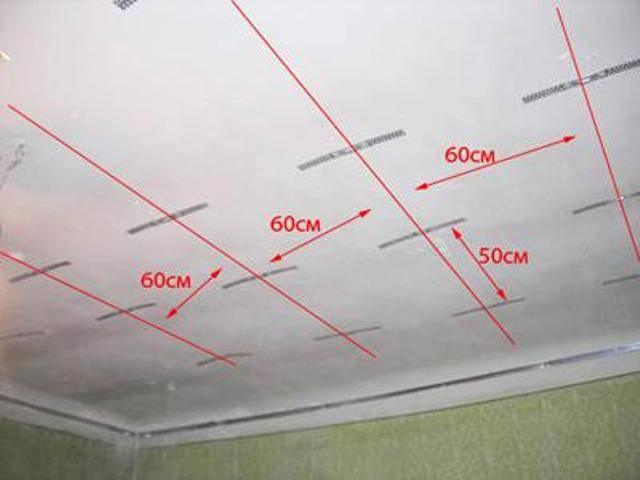
The calculation of the required number of sheets of gypsum board and profile is performed according to the area of the room. To do this, it is convenient to draw a sketch on a scale and mark on it the location of the guides, hangers and the sheets themselves. The guides are usually placed at a distance of 40-60 cm in the form of a lattice.
The preparation of the rough ceiling before fixing the drywall can be carried out not as thoroughly as before painting - it is enough to remove the peeling coatings and repair cracks that can worsen the sound insulation properties of the ceiling.
Required materials and tools:
- sheets of gypsum board or gypsum plasterboard, depending on the type of room;
- galvanized profile and plasterboard hangers;
- connecting elements and self-tapping screws;
- jigsaw or metal scissors;
- screwdriver;
- tape measure, level and marker.
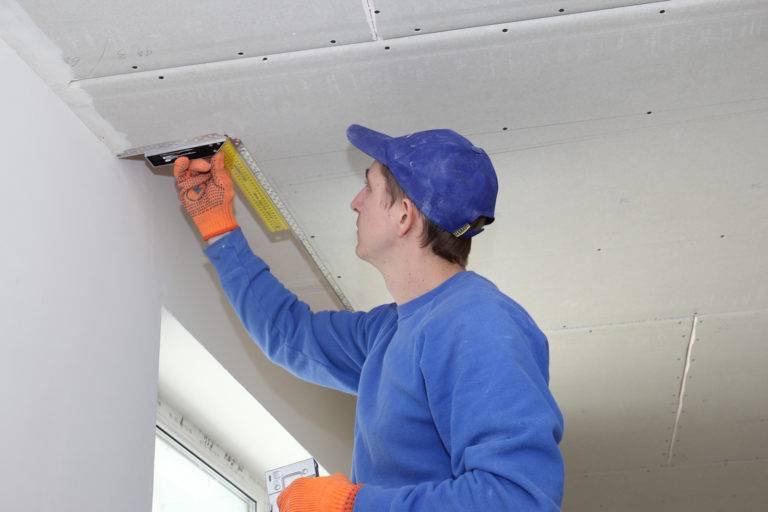
Before starting the assembly of the frame, markings are applied to the ceiling, along which guides and hangers are later attached. It can be done with a pencil or marker directly on the ceiling or with stretched cords. The mesh size is chosen so that all drywall joints fall on the profiles.
Step 1.
CD guide profiles are attached along the perimeter of the walls so that their lower part is on the control line, which was drawn when detecting the ceiling difference and the lowest corner.
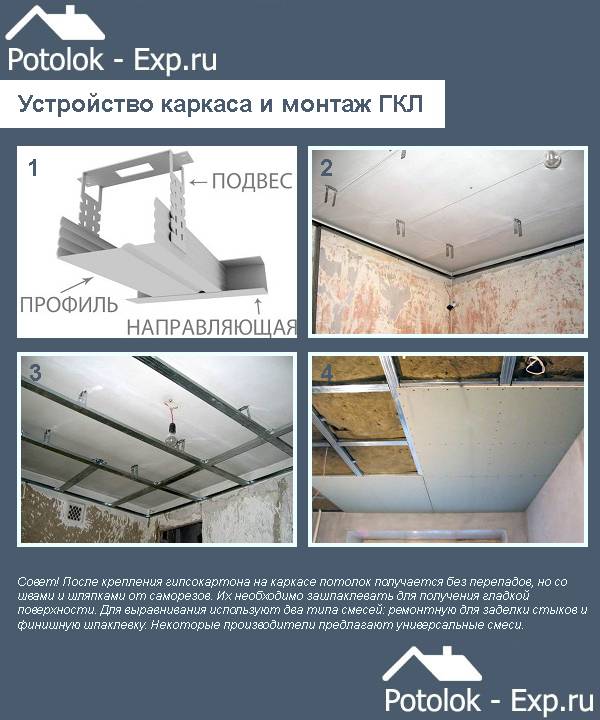
Step 2.
U-shaped brackets or hangers are attached to the ceiling along the lines of the location of the guides. This is done using anchor dowel nails.
Step 3.
They are inserted into the UD-profile guides with the flat side down and set them according to the drawn markings and fixed brackets. Check the horizontal level and fix the profiles in the brackets. The transverse guides are fixed using the "crab" system along the markings.
Step 4.
GKL sheets are fastened with self-tapping screws to the prepared frame. Joints of at least 2 mm are left between the sheets - these are easier to putty to obtain an absolutely smooth surface. After fixing the drywall to the frame, the ceiling is obtained without drops, but with seams and caps from self-tapping screws. They must be putty to obtain a smooth surface.

Plasterboard leveling and filling
For leveling, two types of mixtures are used: repair for sealing joints and finishing putty. Several manufacturers offer universal mixes.
Required materials and tools:
- repair mixture and finishing putty;
- water-based primer and roller;
- spatulas - narrow and wide;
- half-grater or fine-grained skin;
- serpyanka ribbon.
Step 1.
Primer the ceiling with a roller or brush, being careful not to over-wet the top paper layer. Wait for the primer to dry. Mix the repair compound for sealing drywall joints using a mixer. It is not necessary to prepare a lot of composition at once - the period of its use usually does not exceed two hours.
Step 2.
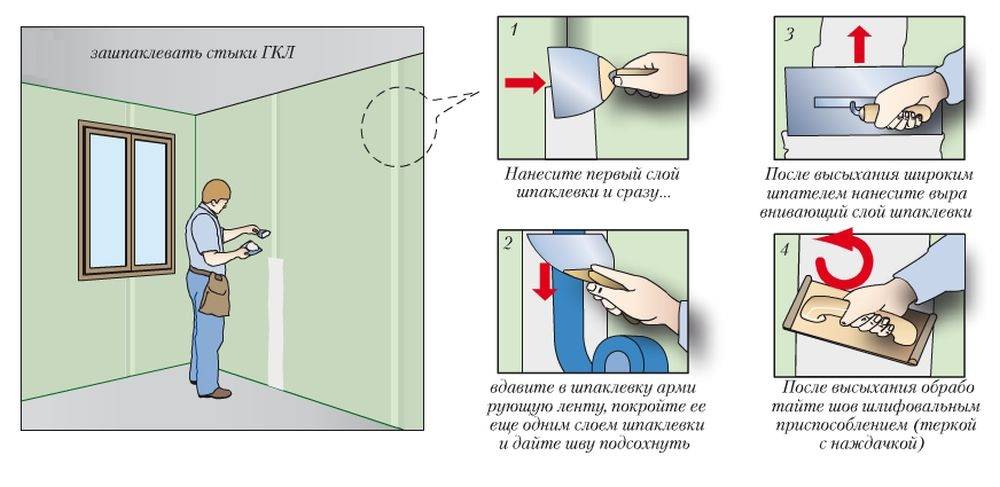
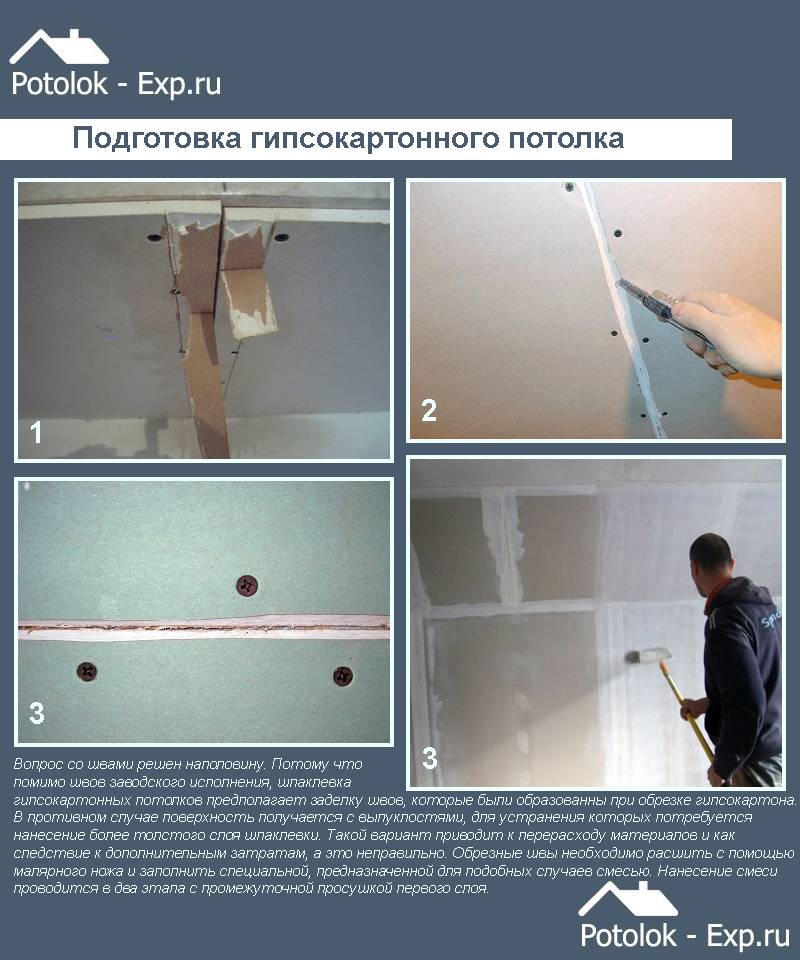
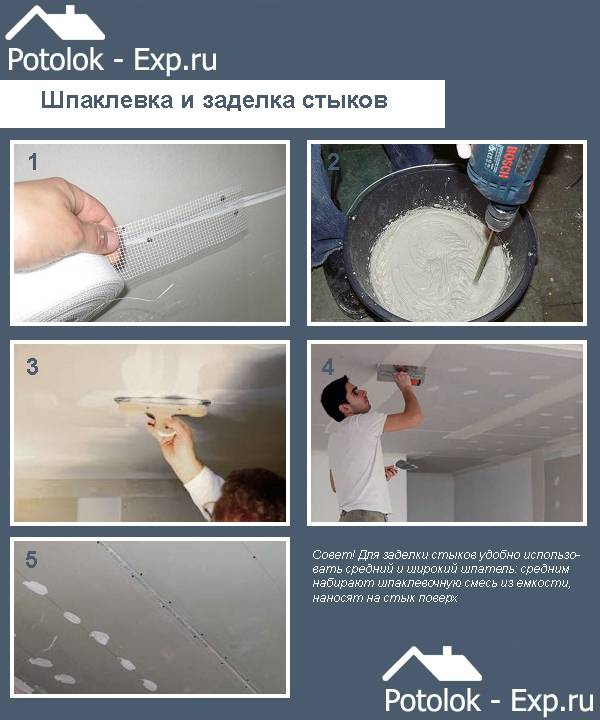
The seams between the sheets are glued with a serpyanka. Where the cut sheets meet, it is necessary to chamfer the sheets at an angle of 45 degrees.
Step 3.
Using a narrow spatula, the joints between the sheets are filled with the repair mixture, after which the excess is removed with a wide spatula and the putty is also leveled over the serpyanka. The heads of the self-tapping screws are covered with the repair mixture using a narrow spatula in cross-shaped movements - first in one direction, then in the other.

Step 6.
After the putty has completely dried, it is sanded and swept, then a layer of finishing putty is applied over the entire surface of the ceiling. To do this, use a wide spatula. The layer of finishing putty should not exceed 2 mm.
Video - Installation of plasterboard on the ceiling
As you can see from the article, it is not so difficult to align the ceiling with your own hands.
It is important to choose the right technology and materials, as well as follow the instructions and not neglect any of its stages. In this case, you will get a flat and durable ceiling surface, on which any decorative finish will look advantageous.

