Preparation for the repair of LED devices
 Digital multimeter
Preparing to repair an LED chandelier includes the following simple steps:
- Creation of electrical insulation for each instrument. It is strictly forbidden to use pliers or pliers with bare handles.
- Disconnecting the chandelier from the power supply and dismantling it with a screwdriver, pliers, knife and other handy tools.
- Finding the problem by visual inspection and a multimeter.
Visual inspection
Carrying out a visual inspection before repairing a chandelier, it is important to understand its design and operating features. Complex lighting devices, for example, raster ones, contain drivers and lamps of different types, and some other varieties contain an antenna with several control units. The sequence of repair of LED street lamps will directly depend on the design features of the product.
The sequence of repair of LED street lamps will directly depend on the design features of the product.
Therefore, before inspection and repair, it is important to study the instructions for detecting control units and subsequent repair.
Lamp LED Circuit Check
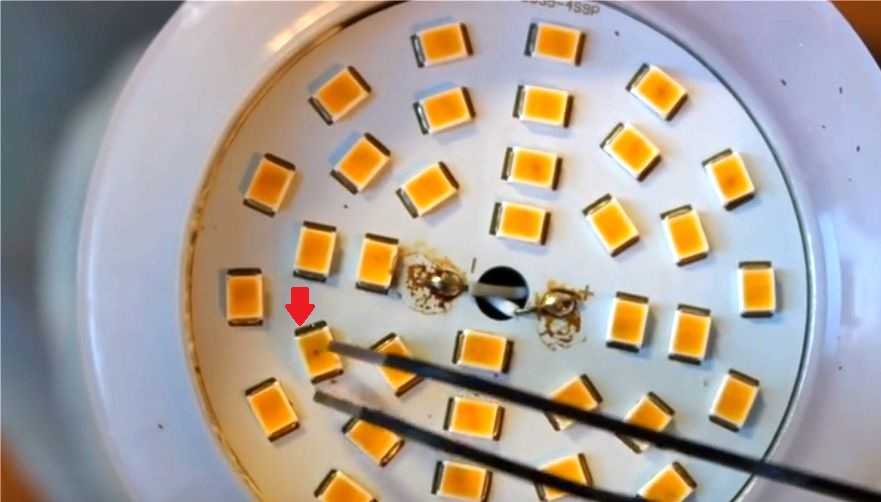
To check the LED circuit of the lamp, you can take a jumper and alternately install it between the contacts of each diode with tweezers. In the absence of a jumper, you can connect the lamp to the network, take any wire and strip both ends of the contacts by tinning. Then close the contacts of the burned out LED and observe the reaction. If the device does not light up, it is possible that several diodes have burned out.
Ways to repair a 220 V LED lamp
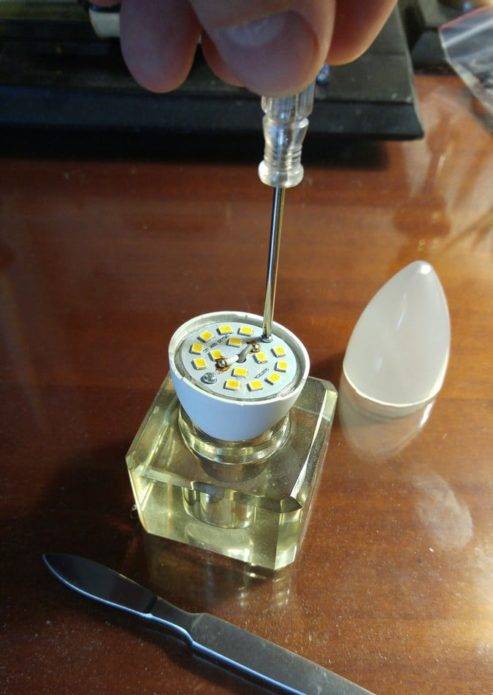
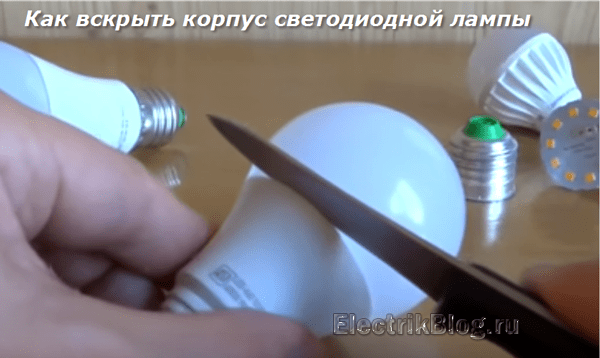
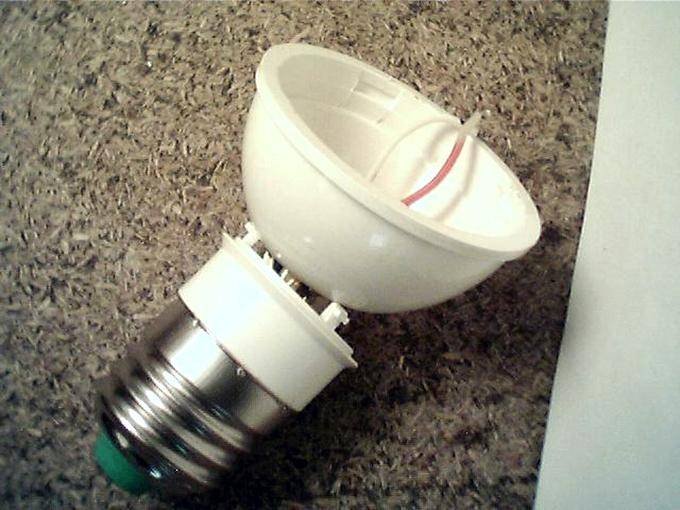
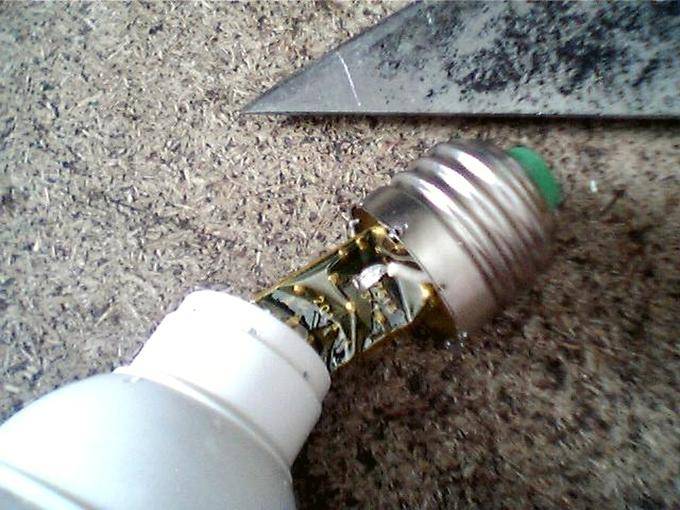
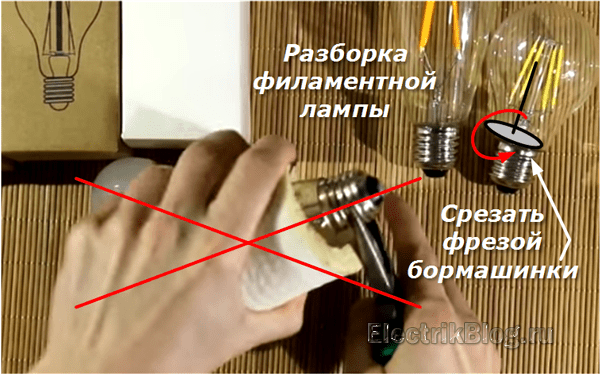
The most affordable way to dismantle an LED lamp is to untwist it with a screwdriver
There are several different types of SL designs. Depending on their type, different methods of lamp repair are used. In order to get to the electronic filling of the lamp, you first need to remove the protective cap.
The cap can be attached using:
- threads;
- latches;
- sealant.
To remove the cap, different methods are used - unscrewing along the thread, detaching the latches with fine tweezers, softening the sealant with a solvent or hairdryer.
In order to dismantle the LED lamp, you must perform the following sequence of actions:
- Perform a visual inspection of the electronic components. If the driver or LEDs have an abnormal appearance (swollen or burnt out), then they must be replaced with serviceable elements of the same type.
- Carry out a visual inspection of rations and connections.
- Perform a "ringing" of the diodes using a tester. To check, the switch of the device is set to the continuity position. When the red probe of the tester is closed to the anode, and the black one to the cathode of the diode, the latter should glow. When the polarity of the probes is changed, the number 1 should remain on the tester screen. Otherwise, the LED is faulty and requires replacement.
- Repair the driver. If the lamp uses a simple type driver, it can also be repaired. To do this, it is necessary to check the serviceability of the fuse, rectifier diodes, smoothing capacitor and replace the faulty circuit elements.
Due to violations by the manufacturer of the manufacturing technology of LED lamps or their incorrect operation, an early failure of the lamps is possible. In most cases, these lamps can be repaired by hand.
Driver circuits and how they work
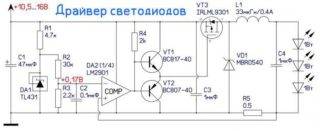 The crystals located in the bulb operate on low voltage direct current. Diodes can operate in a certain range, which creates a built-in converter.
The device performs the following tasks:
- rectification of electricity;
- lowering it to a given value;
- voltage stabilization;
- protection against electromagnetic radiation;
- smoothing impulses.
Drivers are categorized according to their design:
- With current stabilization. The device works on the principle of pulse-width modulation, creating an even and uniform signal, ensuring high-quality and long-term crystal life. The products are distinguished by high efficiency, the ability to convert current of any voltage, and a wide temperature range of operation. The device is based on a microcircuit that connects directly to the network. It has found application in lamps used for street lighting and fire alarm systems.
- With voltage stabilization. The basis of the block is an electronic chip, which is responsible for the precise boundaries of the output signal. This eliminates the risk of lamp burnout due to peak loads and achieves an even glow. The downside is the high cost of the product.
- No stabilization. The node is mounted on a board and has a rather simple device, which affects the final price of the product. The converter, resistor and capacitors protect the crystals from mains noise, short circuit, smooth out ripple and rectify the current. The advantage is the ease of repairing LED lamps and the variability of the output signal. The disadvantage is that the device converts the input signal without stabilizing it, which leads to the burning of diodes. Such models are used in the production of low power lamps used to illuminate surfaces and objects.
DIY repair of LED lamps, lamps and chandeliers.
23,414 views
When a chandelier or lamp stops working or breaks down, many believe that it will be difficult to make it on their own or think that it is easier to take and buy a new one. But today, LED lamps, chandeliers and even lamps are quite expensive relative to others. As practice shows, in most cases it is possible to quickly and cost-effectively repair lighting devices and LED lamps.
Many will be able to make repairs to LED chandeliers, lamps and lamps with their own hands. At the same time, you will save a lot, but we will tell you how to make repairs later in our article.
DIY LED lamp repair.
Any LED light bulb consists of one, but more often of several and even dozens of LEDs and their power supply circuits, let's start with the repair of the latter.
So, as I already said, powerful LED (or LED) panels or lamps come with a separate unit, which simplifies its repair as a separate unit, or we change it to a new one or open it, look for faulty parts and re-solder them.
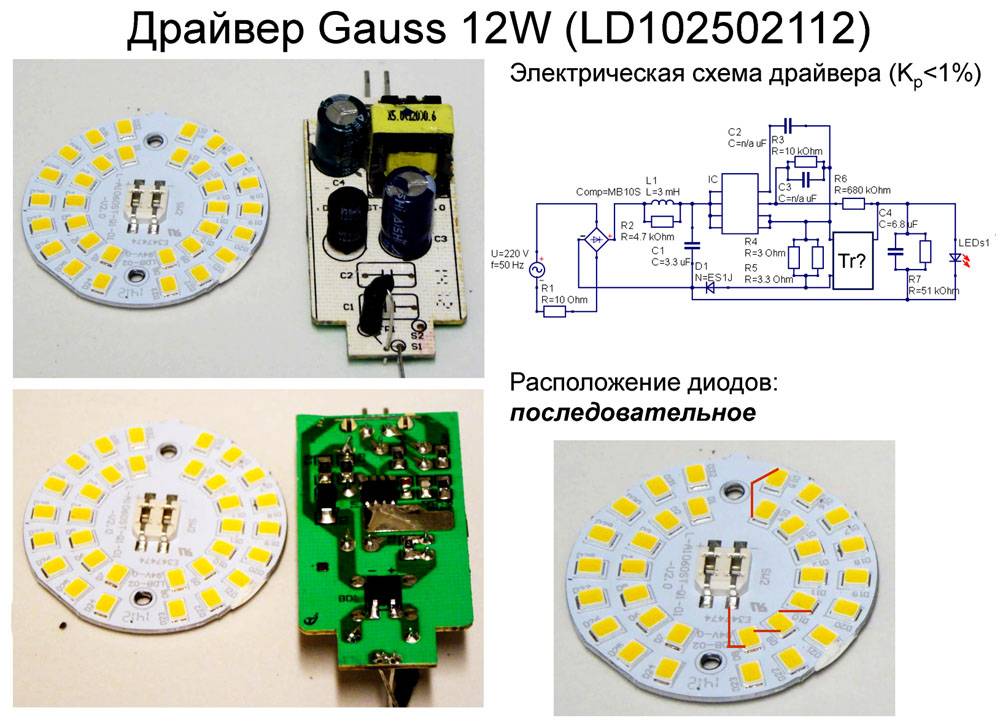
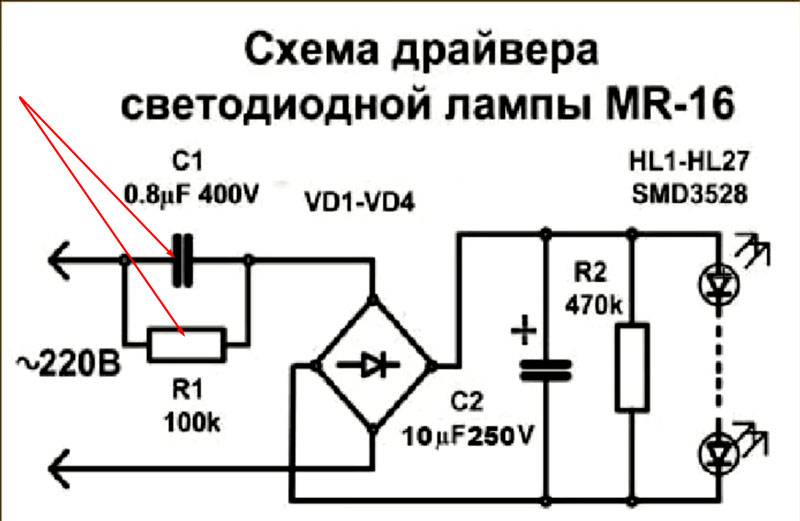
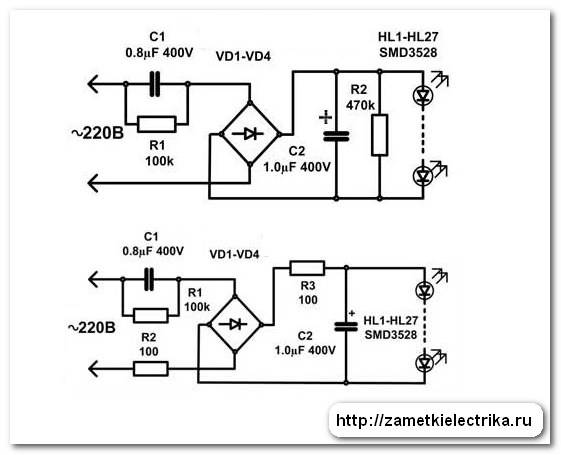
But the most common are inexpensive Chinese-made LED lamps with a transformerless rectifier. consisting of a diode bridge with capacitors and LEDs on one board. More powerful and more expensive models come with a special driver for power supply (see the picture on the right).
We will consider the repair of the simplest and most common LED lamp options. consisting of a standard base and a group of several dozen LEDs.
We will start the repair by checking the transformerless rectifier, which should produce a constant voltage in the range of 5 to 20 Volts and a current of up to 0.1 Ampere.
- As a rule, most often in such a circuit, a cheap Chinese capacitor of 1 microfarad 400 V burns out (sometimes you can even find it at 250 V). The capacitor in the diagram cannot be checked, so we buy and change it right away. It costs only about 3-5 Russian rubles.
- Low-resistance current-limiting resistors and diodes break less often. you can check with a multimeter in ohmmeter mode or continuity in the manner described here.
- After making sure that the power supply is working properly, proceed to checking the LEDs. To do this, we take a 9 Volt Krona battery and alternately apply voltage to each LED through a 1 kOhm resistor. On the faulty one, simply close its conclusions. then the rest will be able to earn, but maybe they will shine a little brighter.
- If there are no more than a dozen LEDs in the lamp and most of them are burned out, I recommend to those who know how to work with a soldering iron, remove all the old LEDs from the board, then turn them over to the reverse side, where the contact tracks are located and solder the LEDs from the LED strip directly to them. Look at what happened. The arrows point to the LED strip from which the LEDs were taken.
Attention. the LED is connected only through a current-limiting resistor or resistance selected individually depending on the voltage of the power supply and the operating current of the LED. I was lucky on the tape and in the lamp the resistors turned out to be the same size
If they are different, then you will have to evaporate from the LED strip and transfer the resistors as well.
I was lucky on the tape and in the lamp the resistors turned out to be the same size. If they are different, then you will have to evaporate and transfer the resistors from the LED strip.
I recommend buying LED strips. on which there are fewer LEDs and their greater power, otherwise it will shine dimly.
In addition, you will learn a lot of useful information on this topic from our article: How to make an LED lamp yourself?
Repair of an LED lamp with the replacement of a radio element
We disassemble the lamp body, we mentioned this a little earlier, but still we will repeat ...
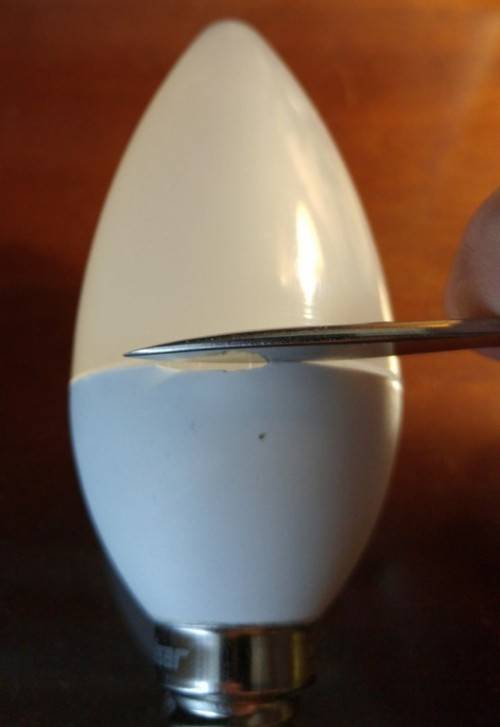
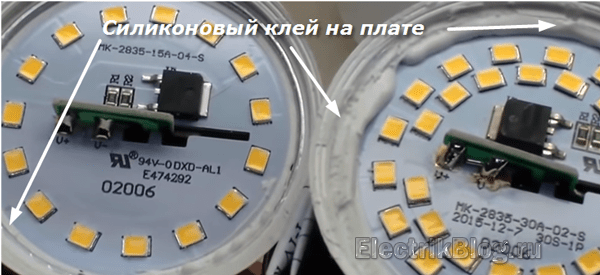
Cut off the glue and unscrew the fasteners.
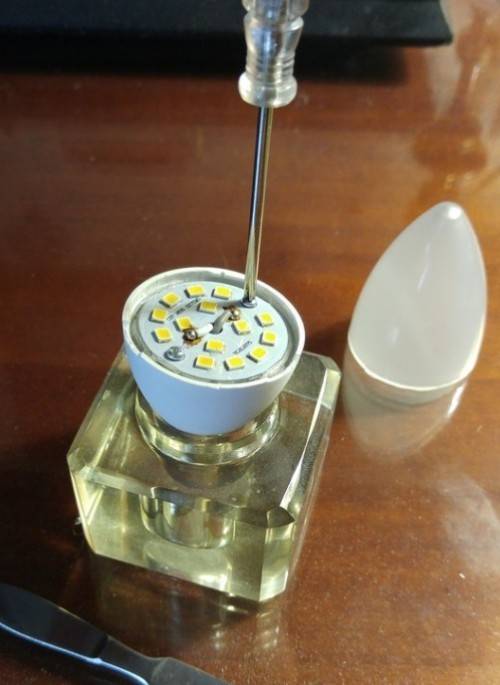
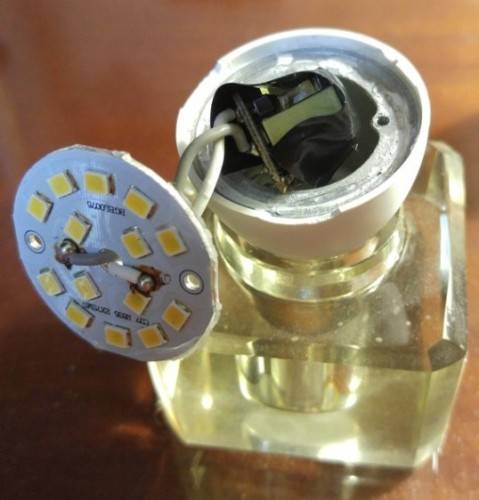
We get to the circuit and connecting wires.
Here we will just continue to consider our version, which we touched upon above, with a capacitor. So, even if you can see it visually, or you have determined the malfunction of the radio element by using a measuring device, then the part must be changed.
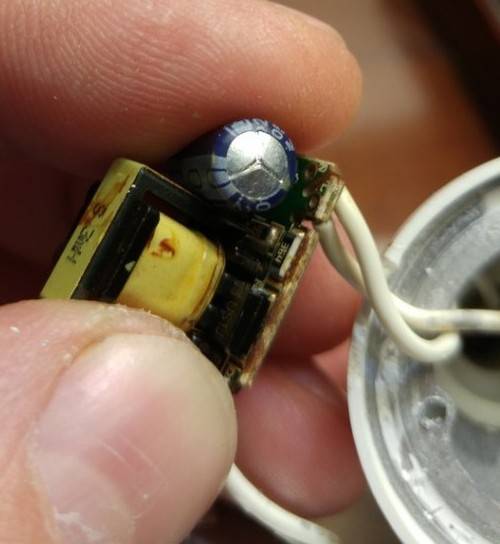
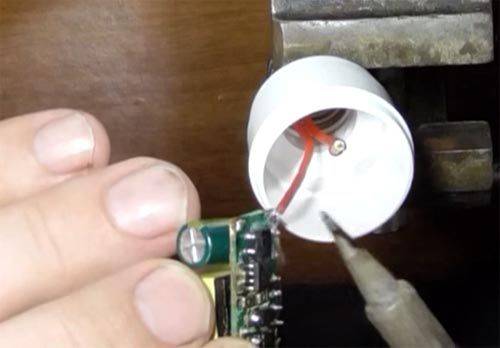
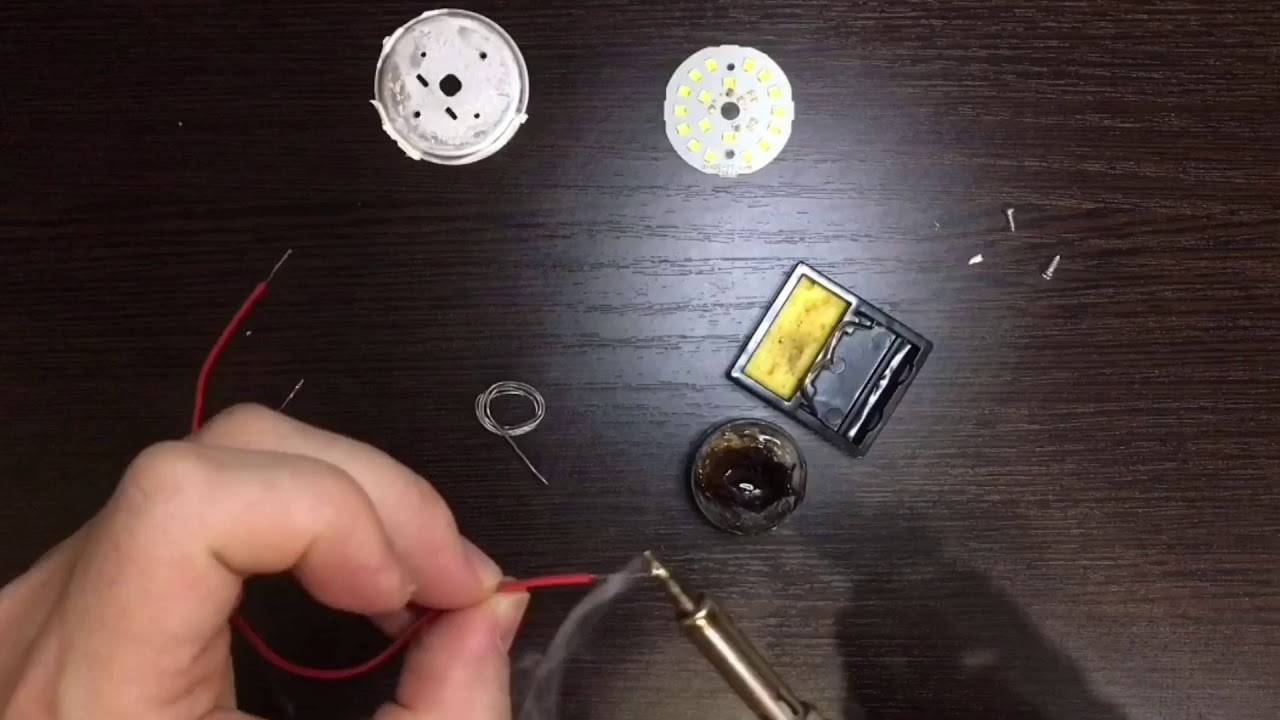
We take a soldering iron and solder the radioelement
It is important not to overheat the neighboring elements, not to break the legs, not to break the contacts, not to overheat the printed circuit board in order to avoid peeling of the foil from the PCB. Changing the capacitor

Then we isolate the board from possible contact with conductive surfaces and collect everything in a reverse order.
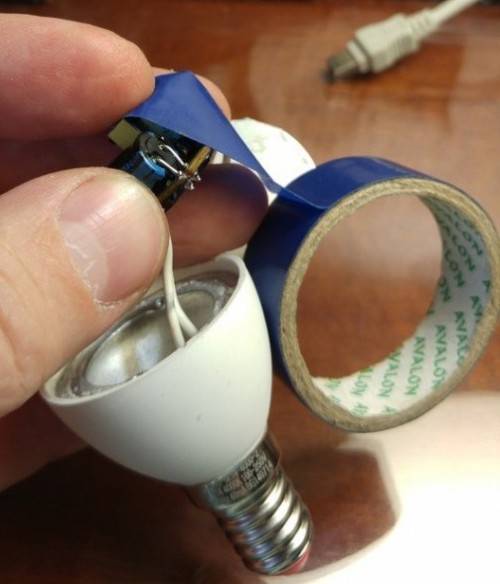
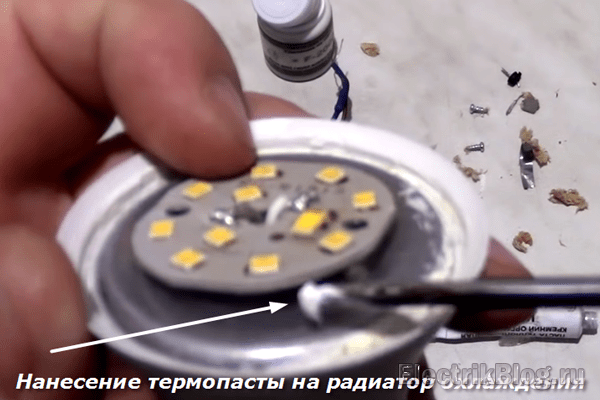
When replacing the board with LEDs, it is necessary to update the thermal grease, which provides heat transfer from the LED board to the heat dissipating heat sink.
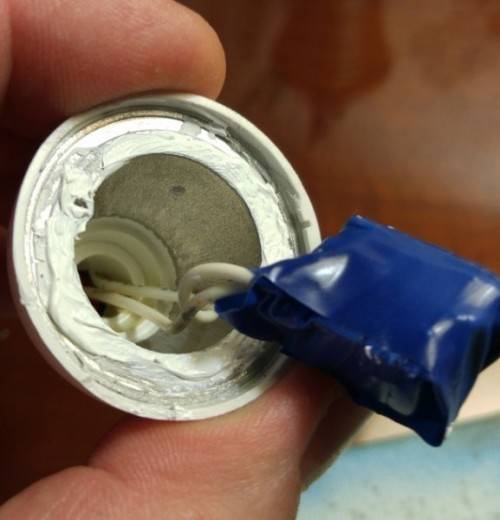
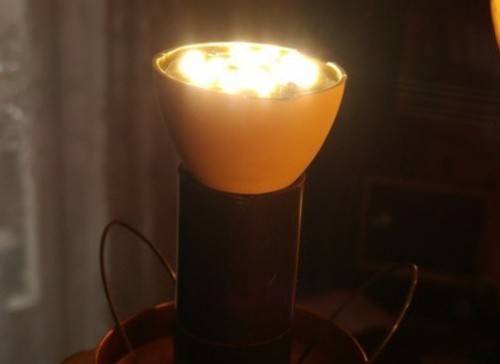
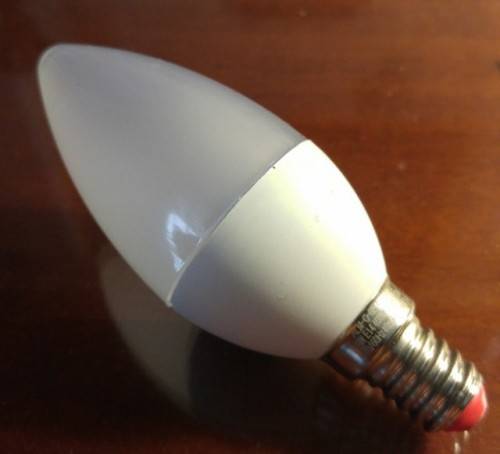
Before gluing the body, we test the performance and glue the diffuser to the lamp. This case related to the repair of a lamp with a radioelement replacement line.
LED lamp repair with LED driver replacement
If you do not want to search for a burnt-out radio component or you simply do not have such an opportunity. Let's say, there is currently no multimeter to check the part, then you can do a little more easily. Go to the nearest radio store in your city and buy a so-called driver. Essentially an effort stabilizer for LEDs
Here it is important to choose a stabilizer that will provide the work of the LEDs of the required power. That is, we look at the declared lamp power and ask the driver that can provide this power. Now let's go back to a specific case
Now let's go back to a specific case.

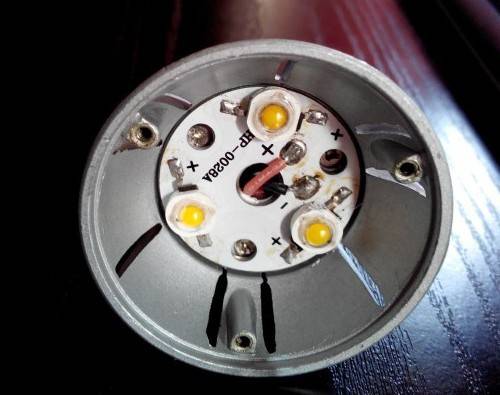
We unscrew the reflector from the body.

Removing the LED diffusers.
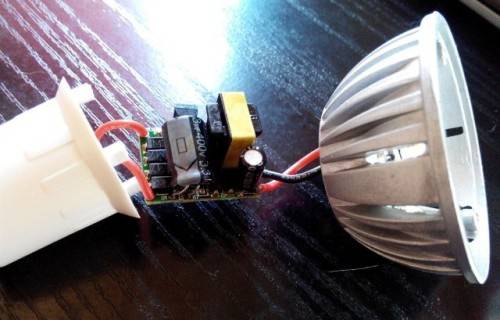
We cut the wires from the aged driver, it is better to unsolder to ensure the connection between the driver board with one solid wire.
We solder the wires of the new driver in place of the old ones.
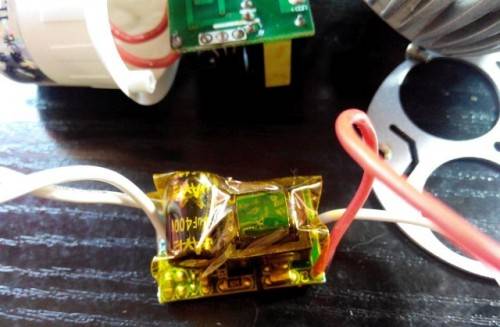
Here it is important not to confuse the entrance and exit, otherwise everything will burn out, and not work

We check everything again and put the lamp back. If necessary, insulate the driver and apply thermal paste.This option is not bad because here you actually need to bite the wires at the input and output of the aged driver, connect the wires from the new board and that's it. The lamp can be assembled back. The only limitation is that this option will not work if the fault is a burned out LED.


If you have nowhere to purchase a driver, or maybe you just want to try your hand at radio engineering, then you can make it yourself. Fortunately, one of the circuits is quite simple to assemble, require a minimum of radioelements, and do not live in poverty in adjustment. Wiring diagrams of drivers for LEDs, which can be used, including for an LED lamp, are laid down in our article "DIY Drivers for LEDs." You can find out more about the LED lamp itself "LED lamp".
DIY LED lamp repair: device and principle of operation
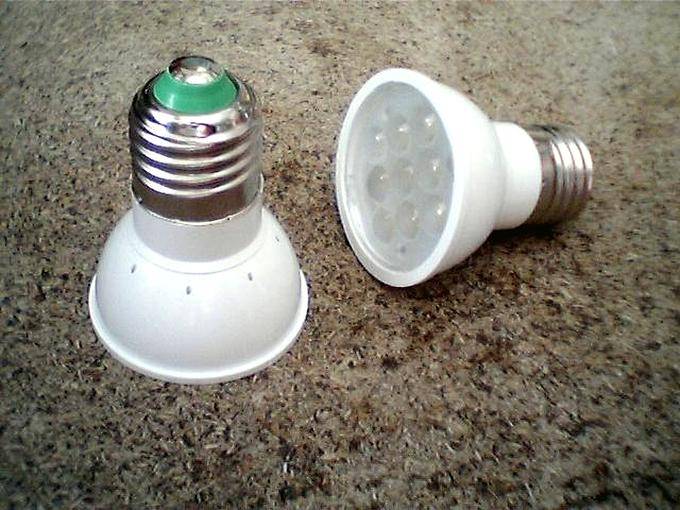
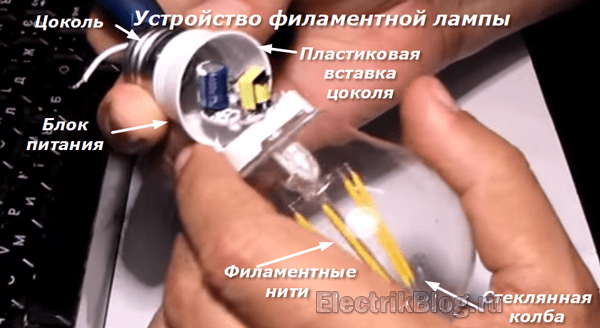
Before deciding how to disassemble an LED lamp, you need to understand its device. The design of this light source is not complicated: a light filter, a power board and a housing with a base.
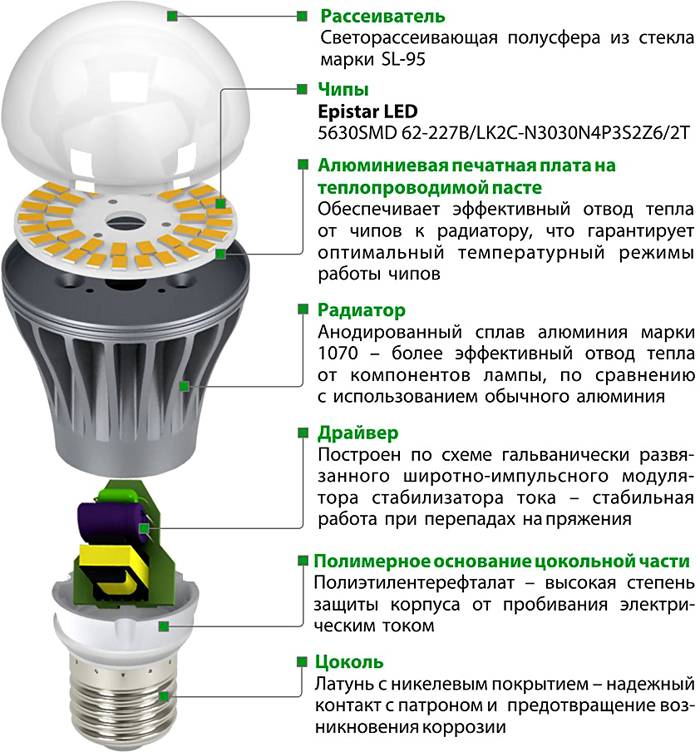
The diagram shows a similar design device
Cheap products often use capacitors to limit voltage and current. The light bulb contains 50-60 LEDs, which are a series circuit. They form a light emitting element.
The principle of operation of the products is similar to the operation of semiconductor diodes. In this case, the current from the anode to the cathode moves only straight. Which contributes to the emergence of light streams in LEDs. The parts have little power, so the lamps are produced with a lot of LEDs. To remove the unpleasant sensations from the produced rays, a phosphor is used, which eliminates this defect. The device eliminates heat from spotlights, since the luminous flux is reduced with heat loss.
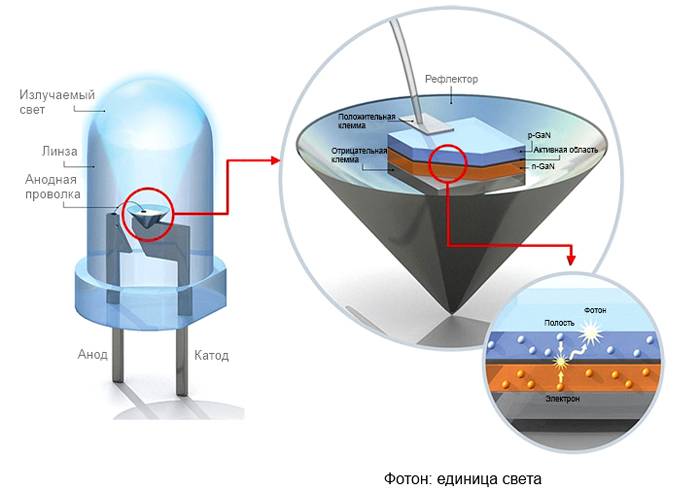
How the design works can be seen in the presented diagram.
The driver in the design is used to supply voltage to the diode groups. They are used as a converter. Diode parts are small semiconductors. The voltage is transferred to a special transformer, where some deceleration of the operating parameters is performed. A constant current is generated at the output, which allows the diodes to be turned on. Installing an additional capacitor prevents voltage ripple.
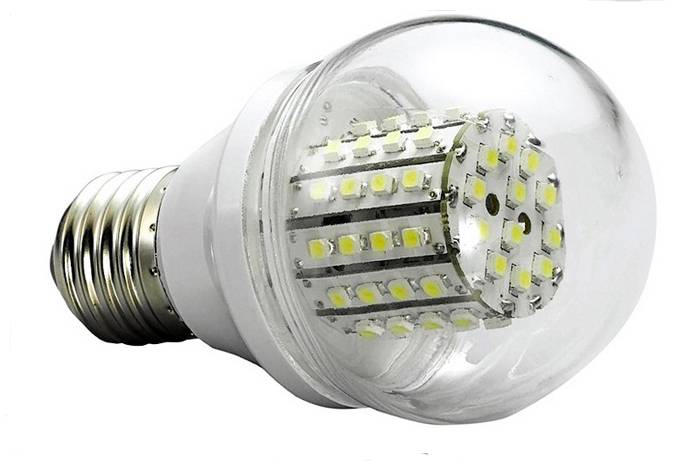
It is not always possible to determine the malfunction of the LEDs without dismantling the case.
LED bulbs come in many different types. They differ in the features of the device, as well as in the number of semiconductor parts.
Related article:
Diagnostics and replacement of LEDs
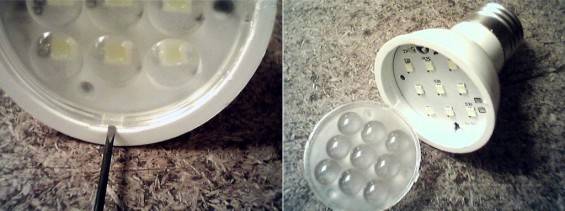
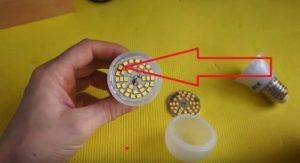
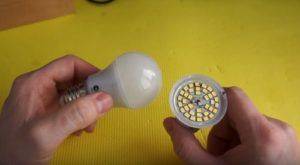
Before proceeding with the repair, remove the diffuser. Removal methods differ depending on the lamp design. Most of the diffusers are removed with a screwdriver, for which you need to pry it in several places, finding a weak point.
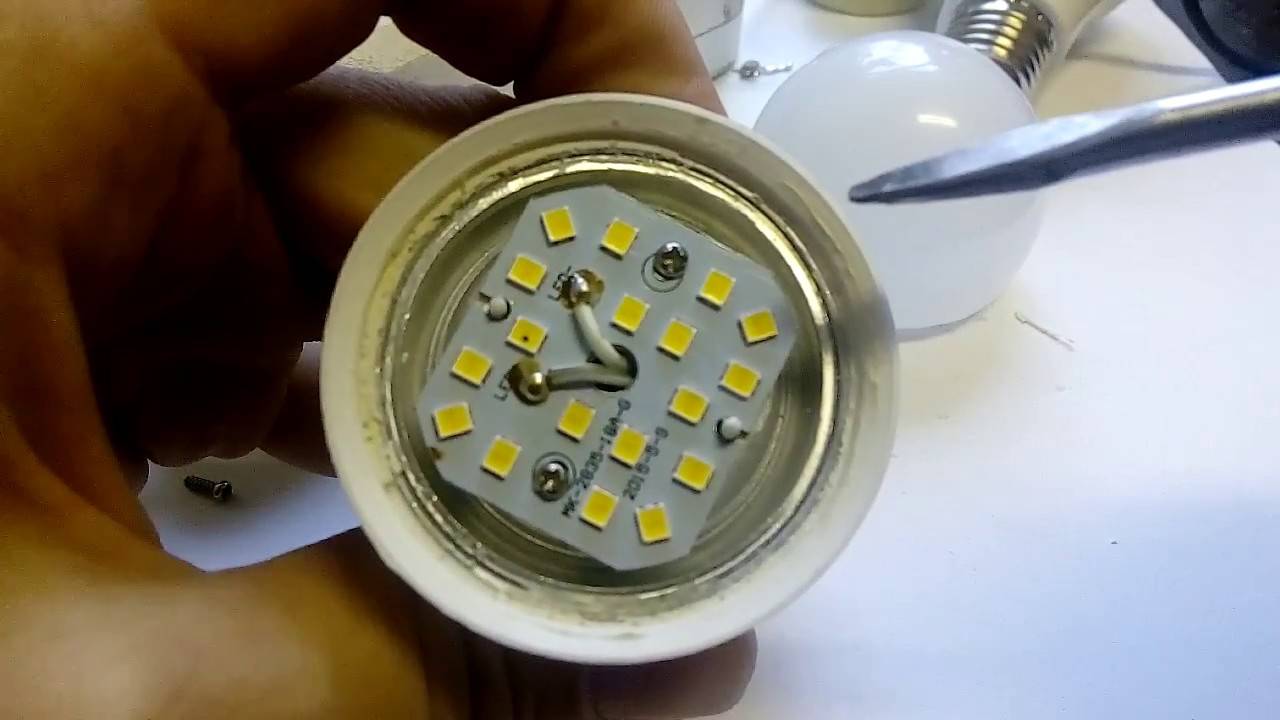
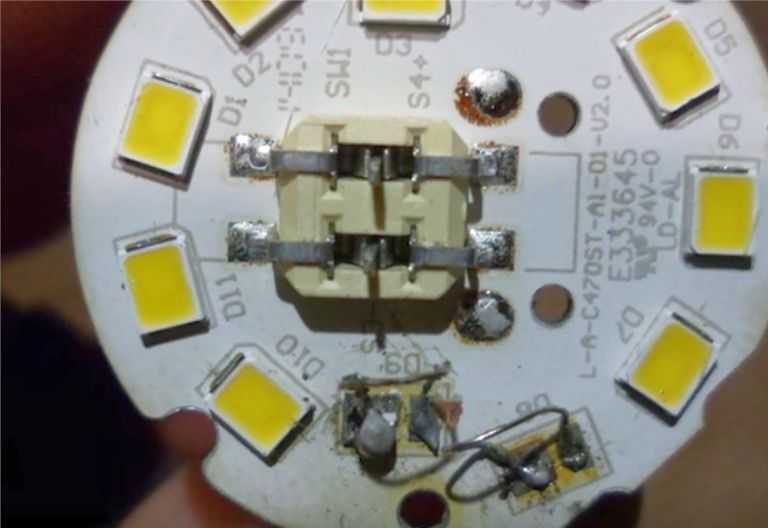
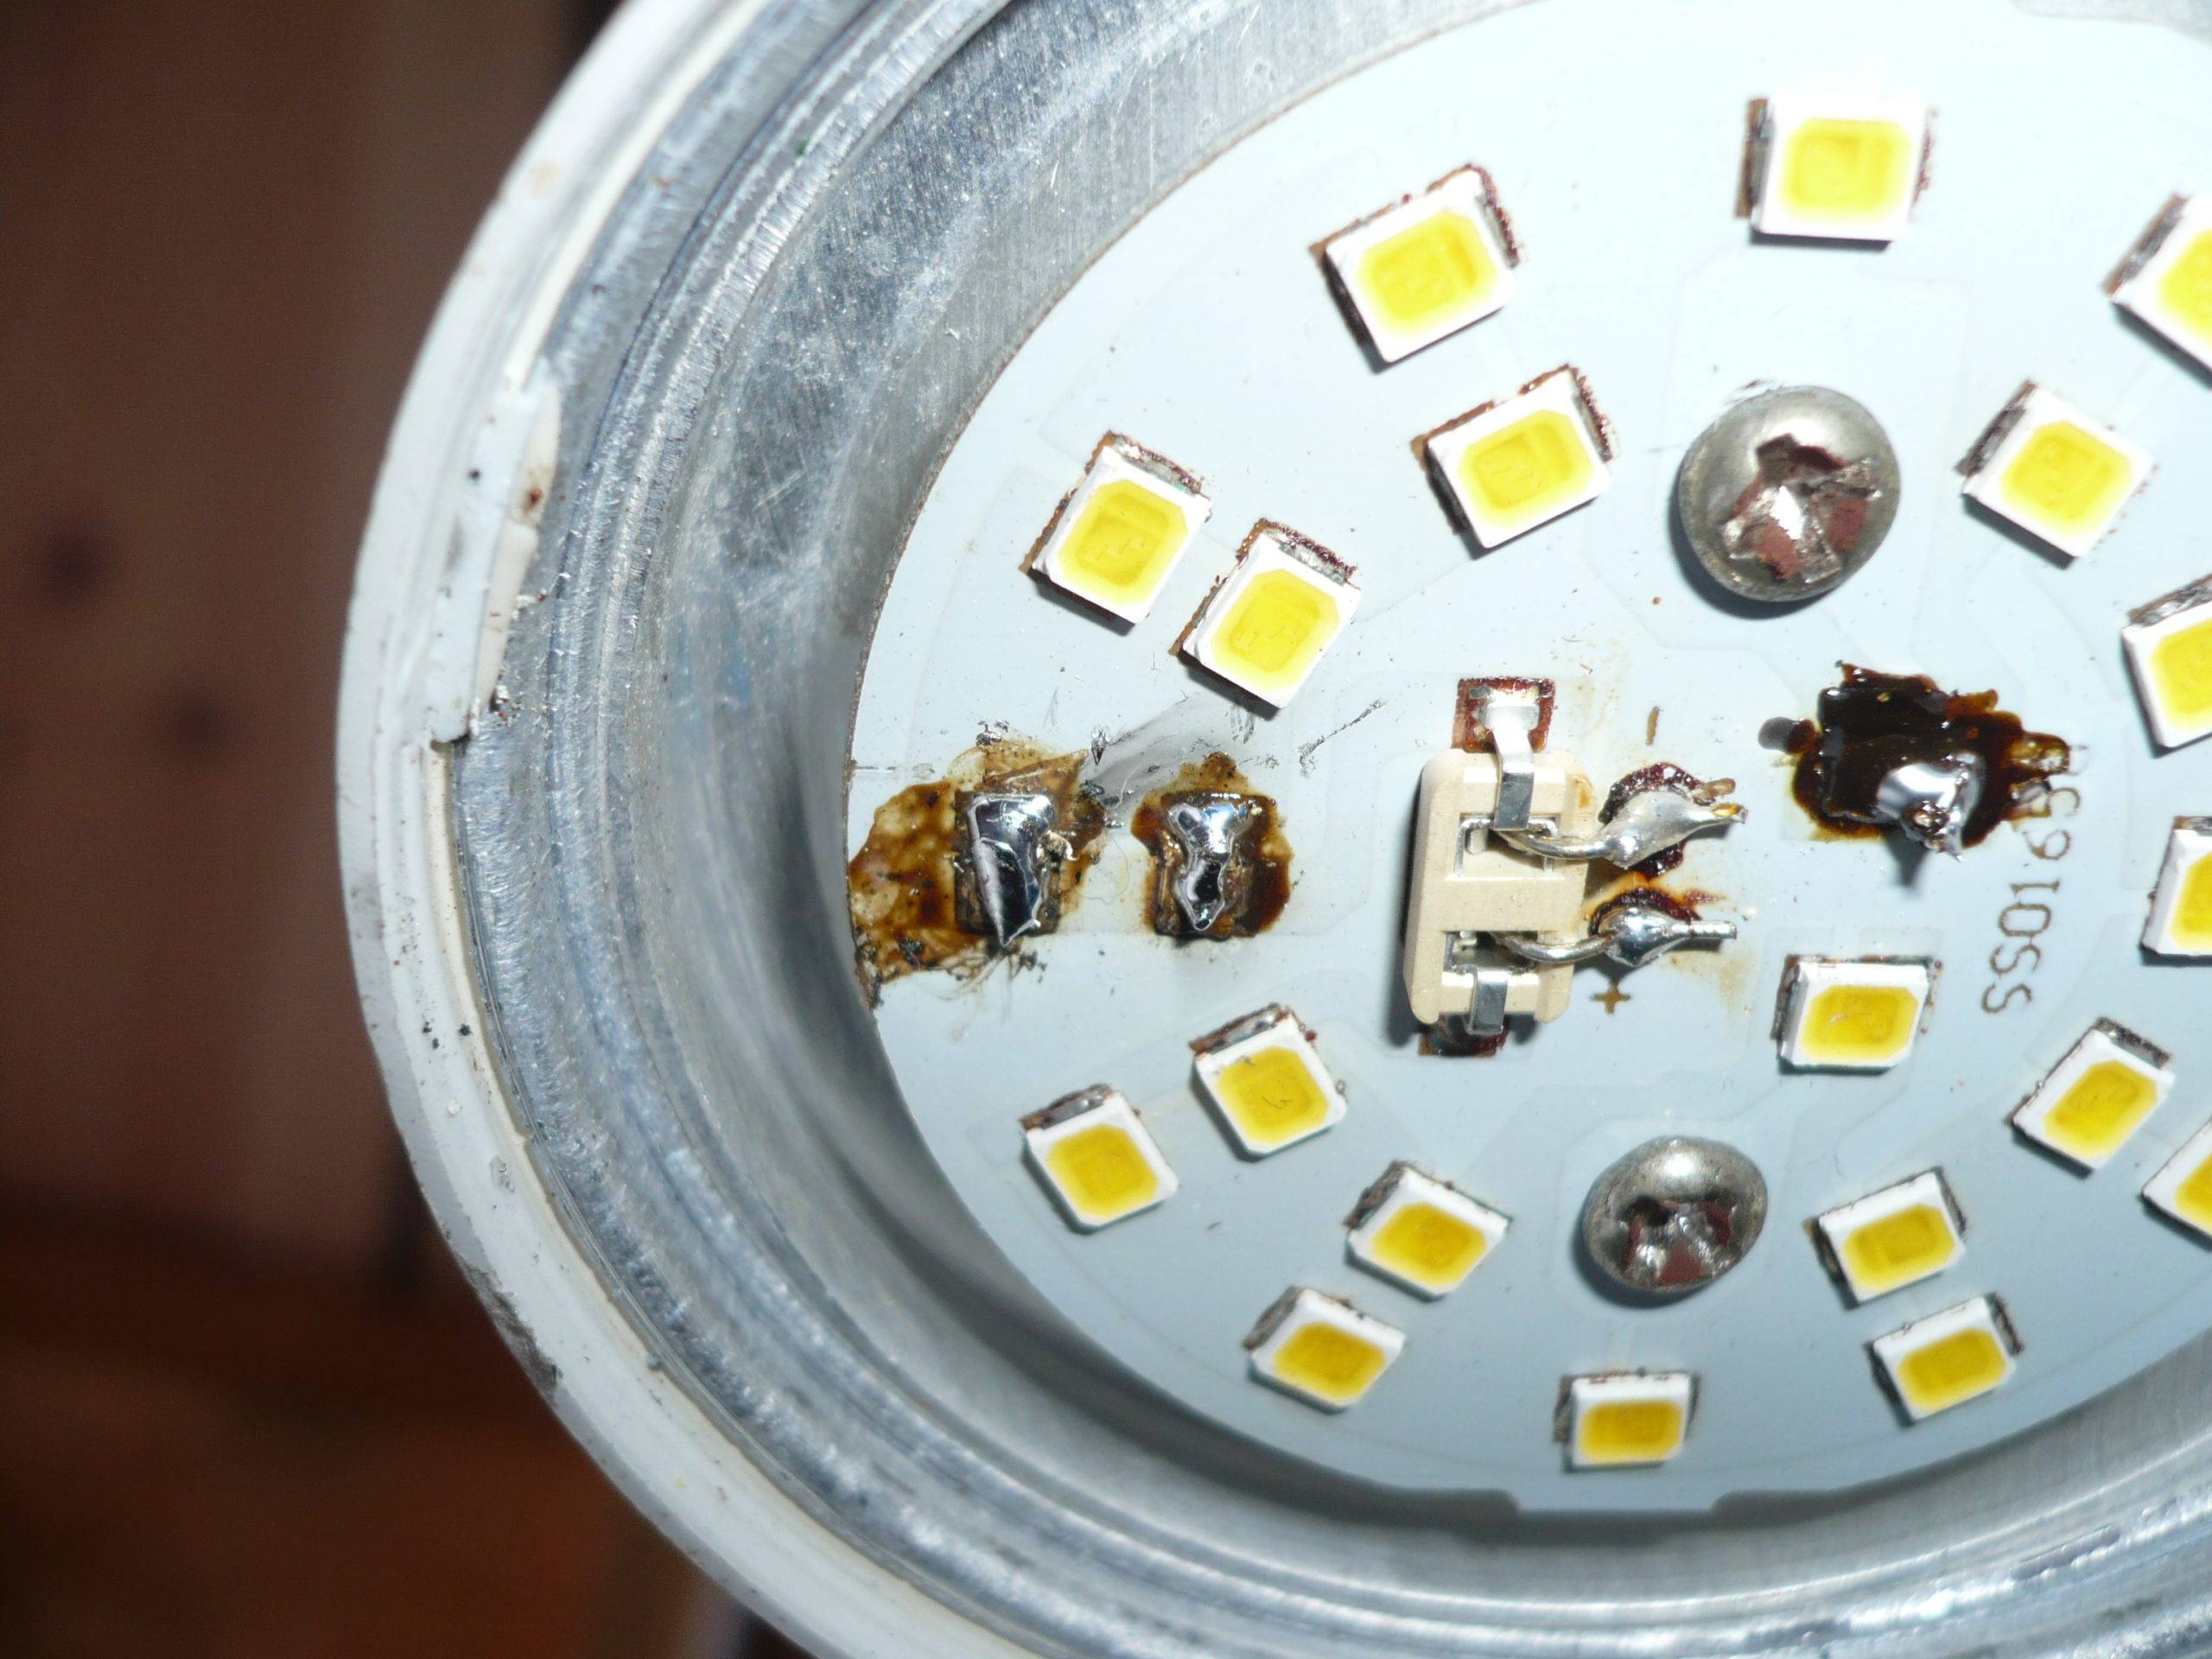
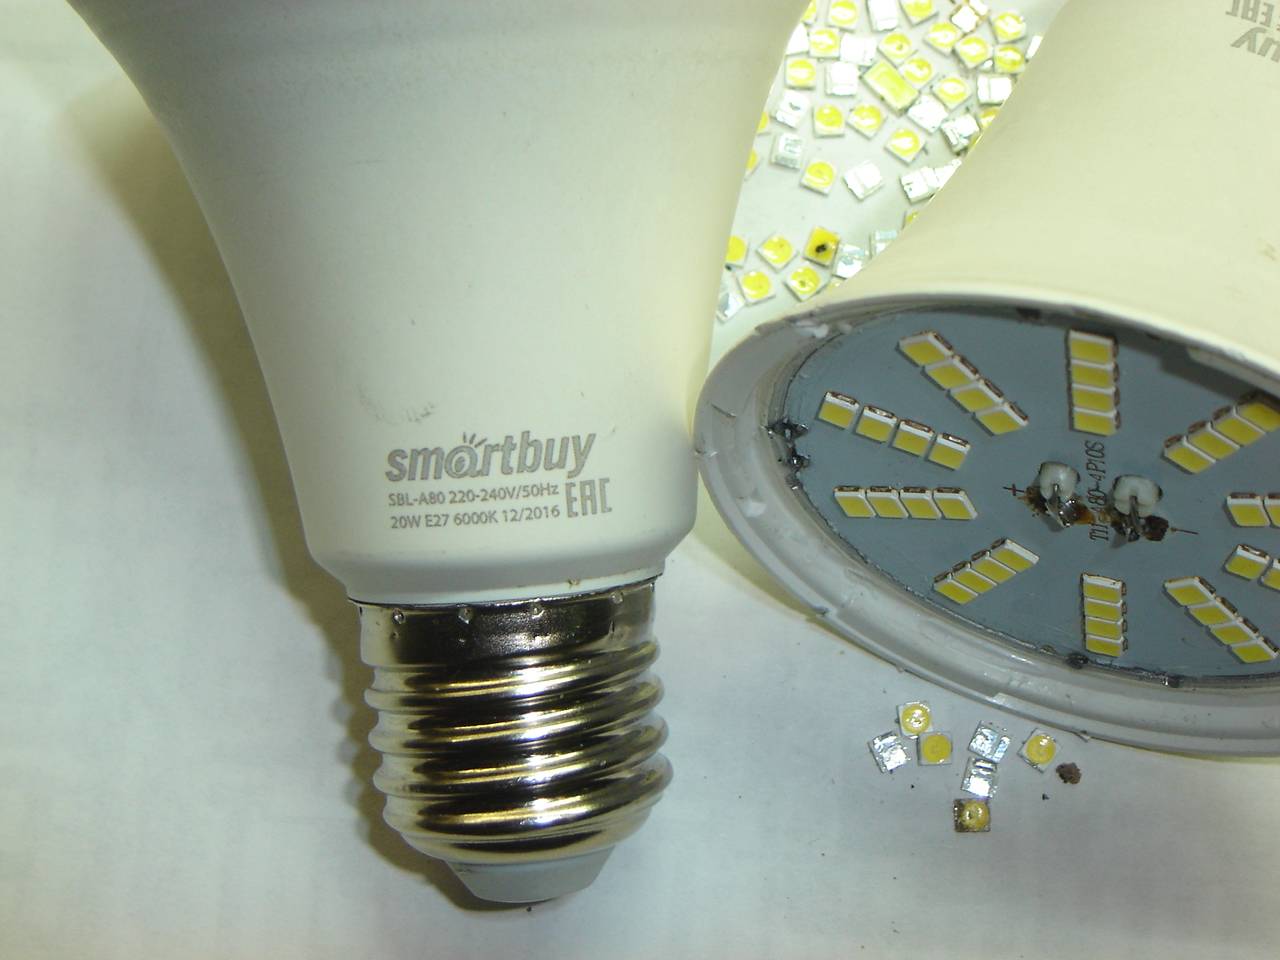
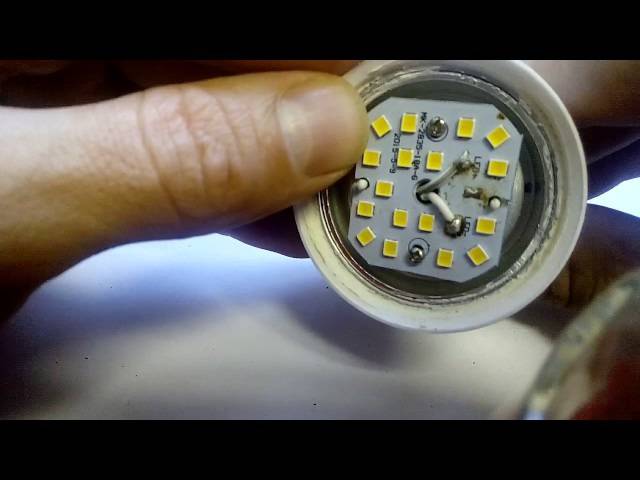
LEDs need to be inspected: black dots on some elements indicate their failure. The quality of the soldering is also inspected - a broken contact in the serial chain of LEDs interrupts their power supply circuit. The same happens when any of the diodes fails.
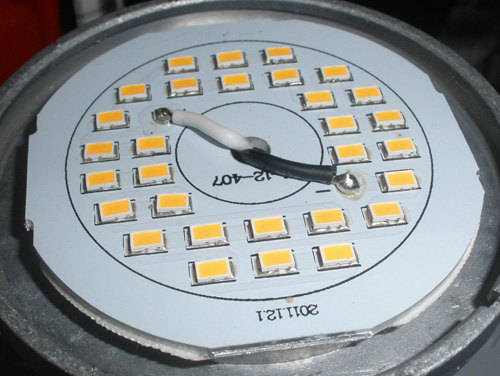
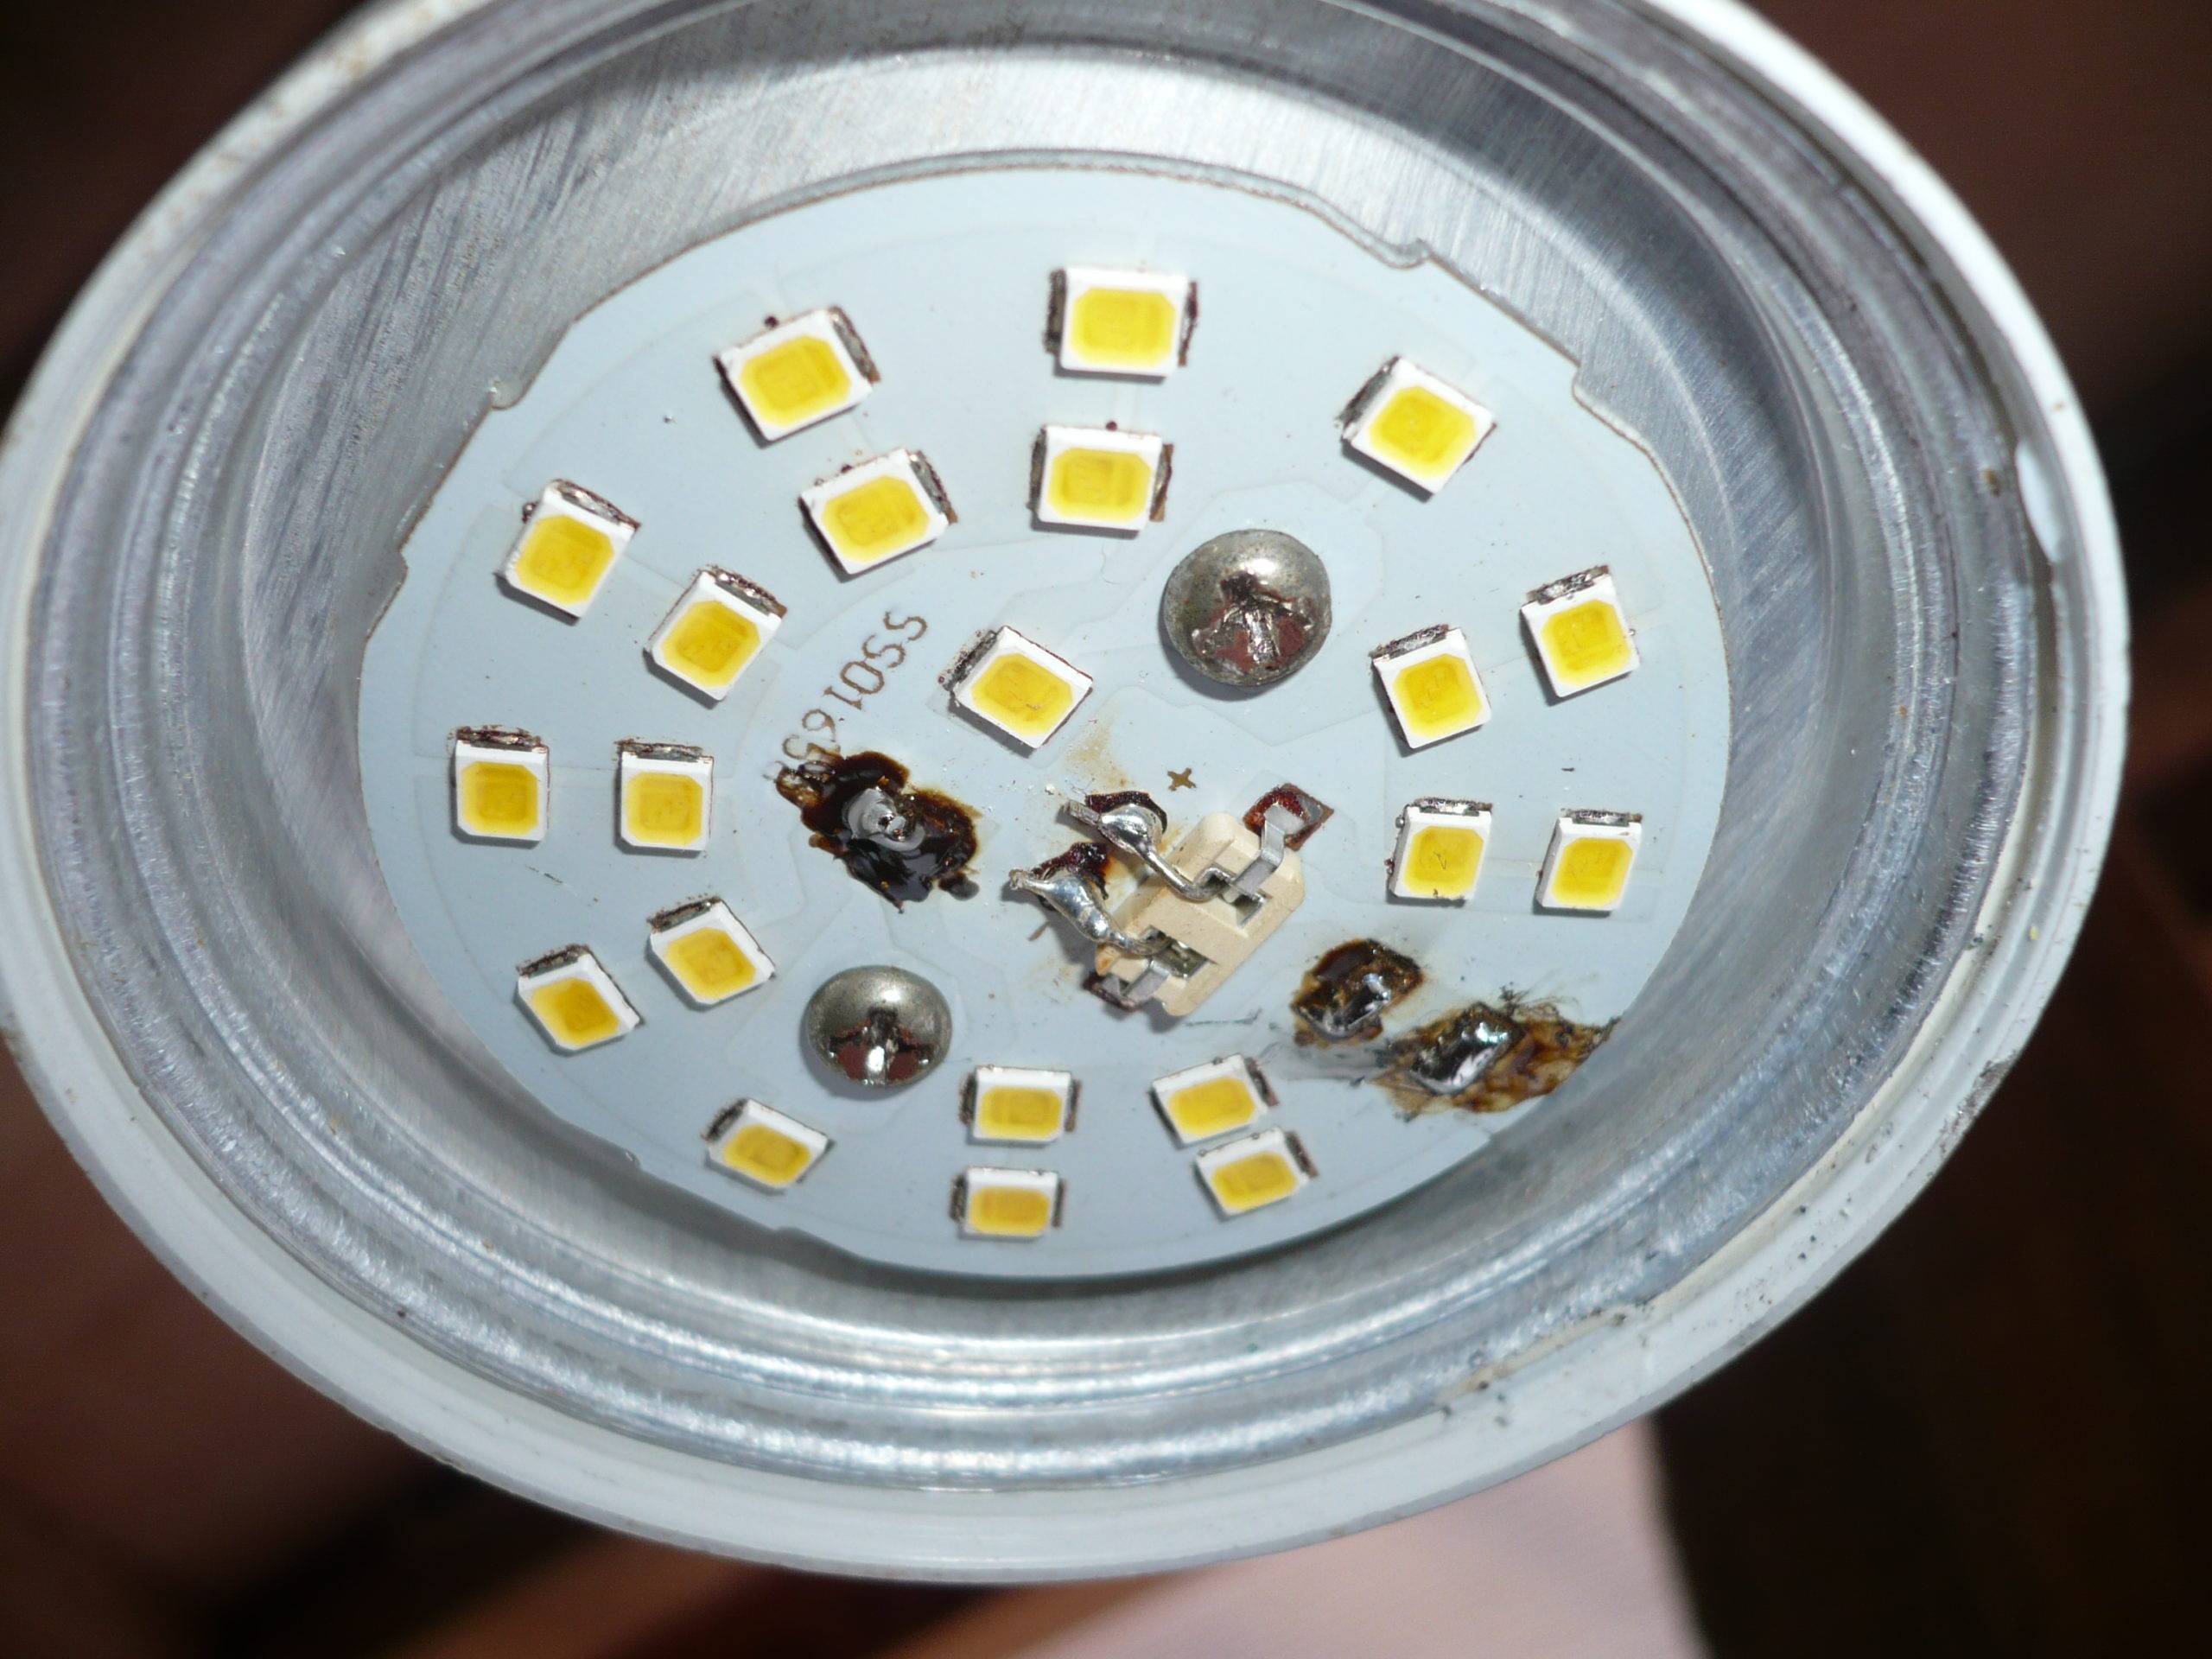
LED lamp without diffuser
The serviceability of the LEDs is checked with a multimeter. Their resistance is measured in the forward direction. It should be small, the value for comparison is determined on serviceable elements. When tested, the working diodes glow dimly. You can test the LEDs by applying voltage to them from a 9 V battery through a 1 kΩ resistor.
The detected faulty elements are soldered from the board, and a jumper is soldered at the place of their installation. If there is a donor lamp, the LEDs are replaced, or parts from an LED strip with a similar design and characteristics are used.
Solder the LEDs carefully.To do this, first heat up the solder on one side and remove it using suction devices. If they are absent, after complete melting of the solder on one of the leads, it is removed by vigorous shaking of the board. Residues are removed with a clean sting (you can also shake it first) with an abundant amount of rosin. It is already easier to unsolder the second conclusion.
After installing a jumper instead of a diode, the entire lamp will glow dimmer. This is due to the fact that the total resistance of the circuit, although insignificant, will decrease. The current through the lamp will increase, as a result, more voltage will remain on the capacitor. Removing one to three diodes will not affect lamp performance. But when there are few of them, the increase in current will become so noticeable that the remaining parts will overheat, the process of failure will become an avalanche. Therefore, with a massive breakdown of LEDs, leave the lamp as a donor of parts, replacing it with a new one.
Breakdown reasons
After we figured out the basic principles of LED lamps, we can move on to the reasons why they fail. These include:
- large voltage surges;
- inaccuracy in the process of installing a light bulb;
- incorrect selection of the lamp;
- the influence of external factors.
Voltage drops
Despite the stability of 220 volt LED lamps, sudden voltage drops have a destructive effect, disabling the lighting element.

The reason for the differences can be:
- Poor wiring installed in the room by yourself or by unskilled workers.
- Problems at the power plant.
- Weather.
It is worth noting that other lighting elements also suffer from the voltage drop, burning out even faster than their LED counterparts.
Incorrect selection of the lamp
The reason for the failure of an LED light bulb can be the lamp itself, if you buy it in a hurry, without foreseeing all the nuances of the interior. For example, due to an unsuccessfully selected plafond, the light bulb will not cool well, constantly overheating. In this case, its service life will be significantly reduced, and the owners will spend a lot of money on replacing bulbs and troubleshooting. Try to responsibly approach the purchase of a lamp for the room, and most problems can be avoided.
Installation error
Many owners who buy a chandelier or plafond for a house mount it on their own, without observing the necessary rules. All this affects the operation of devices, including light bulbs. In the absence of proper experience, try to mount the lighting under the supervision of a knowledgeable person who is able to discern erroneous actions and point out them in time.
Otherwise, you will still have to call specialists who will correct your mistakes.
External factor
External factors are no less destructive for LEDs, and they are worth paying attention to. External factors include:
- blows to the lamp housing;
- vibration;
- weather.
Remember that a light bulb is fragile and must be handled with care. The same vibrations will not affect the LED itself, but will quickly destroy the light bulb driver.
LED light circuits
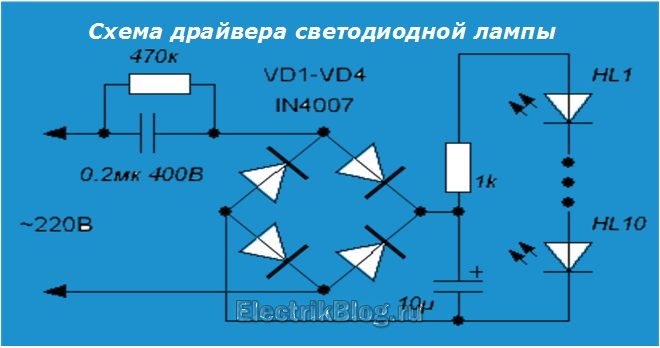
LEDs are powered from low voltage - about 3 V, consume very little current - from 20 to 50 μA, they can be connected to a 220 V network only through a converter. It can be seen at the bottom of the lamp. The circuit of a 220 V LED light bulb is also simple, but it is easy to identify possible problems from it.
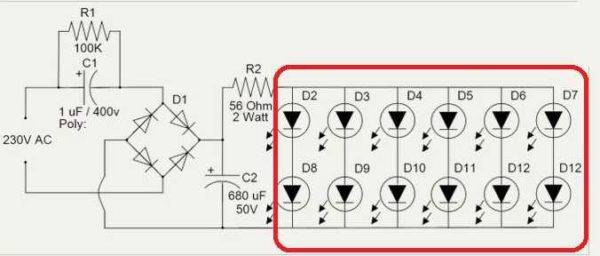
Diagram of a 220 V LED lamp
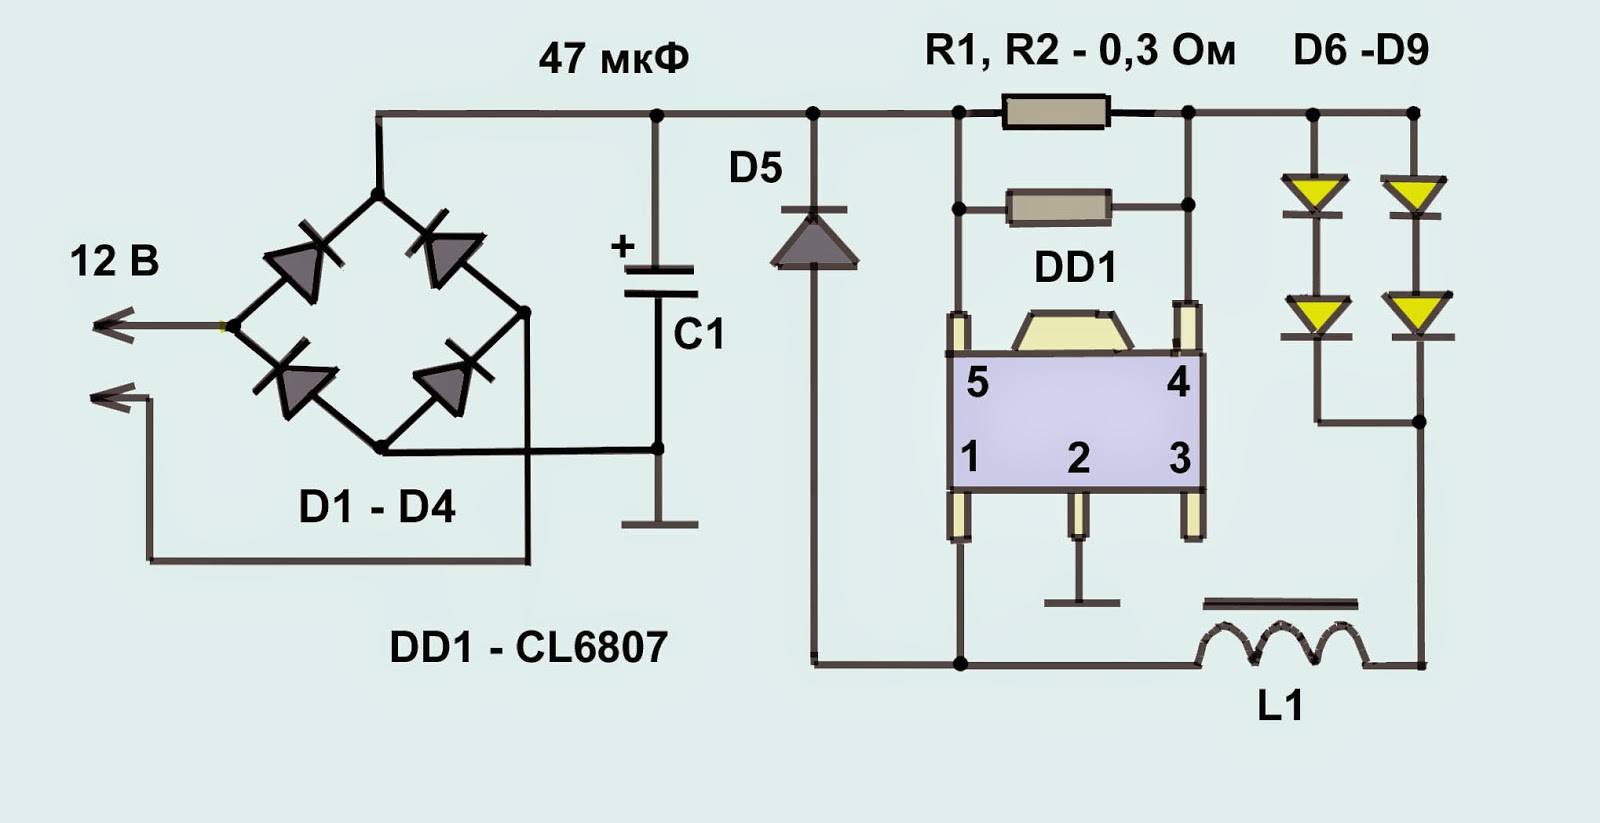
The figure above shows a circuit with a diode bridge. It converts and stabilizes the voltage. This is one of the most common options as these lamps are not very expensive. As you can see, in this version, the diodes are connected in parallel, but this is a rare option. Most often they are connected in series - one after the other.
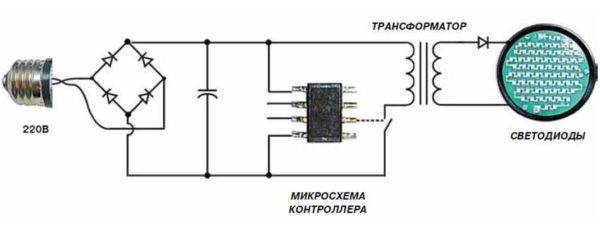
With microcircuit
There are other LED bulbs as well.They contain a microcircuit. Such lamps are more expensive, but usually more durable, since the operating parameters are controlled by a microcontroller, which provides a more stable power supply. And poor-quality food is equal to a rapid decrease in the brightness of the glow. Sudden voltage surges generally lead to breakdown of the LED. Since they are connected in series - one after the other - the failure of one LED means the breakdown of the entire lamp. It just doesn't light up. Although, say one LED out of 80 does not work.
We carry out repair of LED lamps, diagrams, videos
19 May - LED Bulbs
The simplest type of homemade lamps is usually based on old lamps with a standard base and an array of dozens, sometimes hundreds, of round white LEDs. These lamps are the simplest and most easily made at home. Now you will get acquainted with the repair of an LED lamp, but the site has many other useful articles about the device and types of these lamps.
How to repair an LED bulb
So, if, unlike purchased lamps that are not repairable, a DIY LED lamp can even get a second start in life in the event of a breakdown. If your homemade light bulb burns out, then take your time to throw it away. Let's try to fix it. The repair of such lamps must first be divided into two parts: the repair of light-emitting elements and the power supply. LEDs are not directly connected to the 220 V network, but receive current through a current stabilizer, which is a step-down electronic transformer. With its check, repairs should begin. Such stabilizers allow providing a constant voltage value of 5-20 V at the output, as well as a current not exceeding 0.1 A.
we study the device of the LED lamp before repair
LED lamp power supply repair
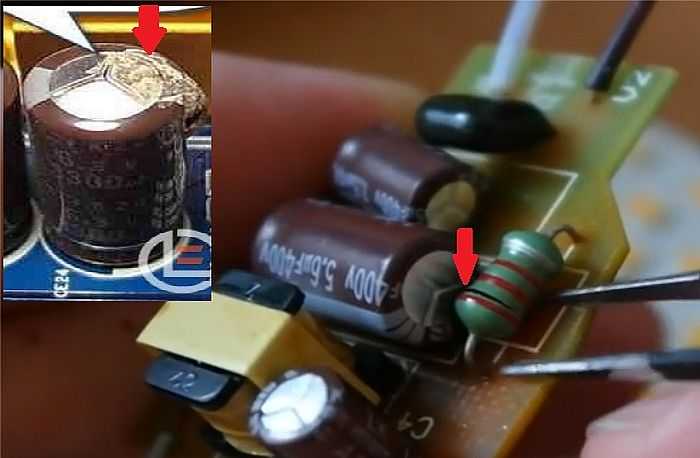
Such a power supply usually suffers from a burned-out 400V 1uF capacitor, which serves as a ballast resistor. It makes no sense to check its performance with capacity meters, since a defect (leakage) can only appear in the case of a 220 V mains voltage, as a result of which the best option would be to replace it. The diodes located in the rectifier sometimes also burn out, although much less often, however, among them you can find a faulty one using a tester.
Sometimes half-watt current-limiting low-resistance resistors can fail. In this case, an ohmmeter can help. Colored stripes painted on the resistor housings indicate their resistance.
Finding a burnt out LED
In the event that the power supply is serviceable, then you should start checking the LEDs themselves. To do this, you can use a 9V battery and, using a 1 kΩ resistor, test all the LEDs one by one. After detecting a faulty LED, you just need to close its outputs.
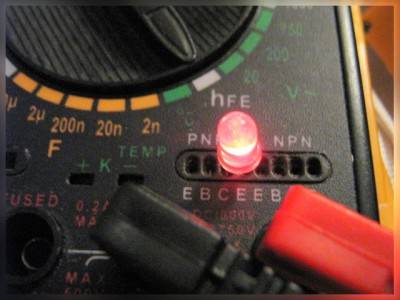 Usually, in homemade LED lamps, the elements are connected in a chain, like in a garland, as a result of which, even if one of them is short-circuited, the others will continue to glow, perhaps even a little brighter.
After completing the repair of the lamp, it is necessary to assemble it back into the case, and then screw it into the holder.
How to repair an LED lamp with your own hands
Despite the fact that the manufacturer claims a service life of LED lamps for more than 10 years, they often fail much earlier. But do not throw it away, try to repair it yourself. For example, let's take the simplest LED lamp, consisting of a standard base and a certain number of LEDs. The repair begins with checking the transformerless rectifier. The voltage emitted by them should be in the range from 5 to 20 Volts, and the current should be no more than 0.1 Ampere.
1. Replacing the capacitor.The most common reason for a breakdown is a cheap Chinese capacitor burned out, for example, 1 microfarad 400 V, and sometimes 250 V. The easiest way out of this situation is to replace it with a new capacitor, besides, this is a cheap part costing 4-5 rubles.
replacing the capacitor on the LED lamp
2. Replacing the driver. The second type of LED lamp repair is to replace the driver. Please refer to the table below to know which driver is right for your lamp.
Improving the lamp during repair

In the very fact of the repair, there is little good, but the forced intrusion into the device's device gives some advantages. In addition to the fact that a beginner can learn how to repair an LED lamp without the help of specialists, it makes sense to use this opportunity to improve the quality of the lamp. For example, during repairs, it is worth experimenting with LED diodes. Often, boards and the case itself with a heat-dissipating function are not suitable for "native" LEDs - as a result, with a more or less high-quality basis of the device, the light sources do not reach the possible maximum in radiation characteristics. Therefore, in some cases, it is worthwhile to completely update all diodes.
The opposite situation is also common, when a capacitor and a rectifier are absent in the base itself. As a rule, this defect is caused by Chinese lamps, in which a series connection of pairs of "opposite" diodes with a ballast capacitor is realized, which leads to frequent blinking. Of course, repairing LED lamps will eliminate this flaw, but such revisions of circuits at home will not ensure the durability of the device, although the quality of lighting will undoubtedly increase.
The interior of the LED lamp
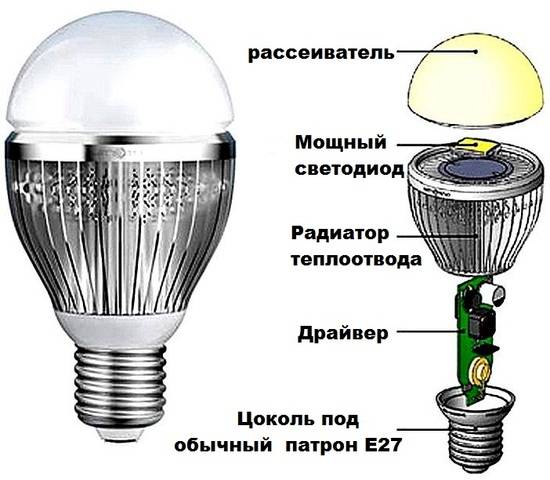
If you find out how the light bulb looks inside, it becomes more clear what could be the reasons for the breakdown.
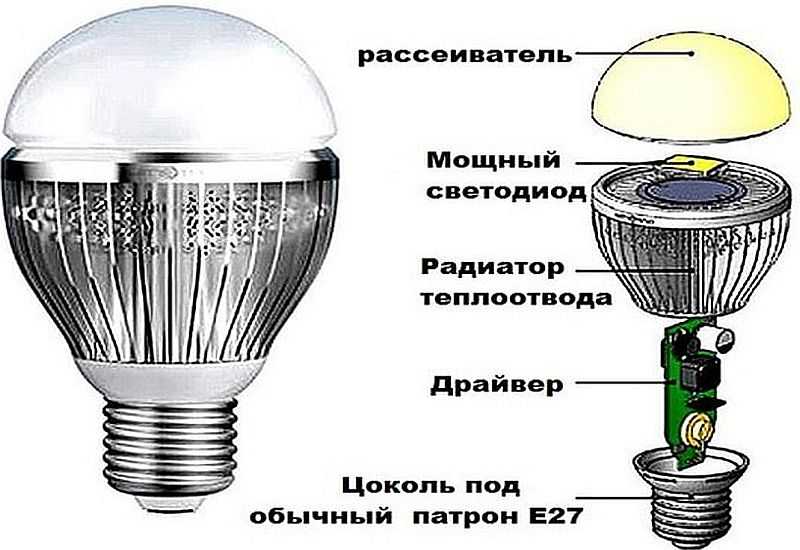
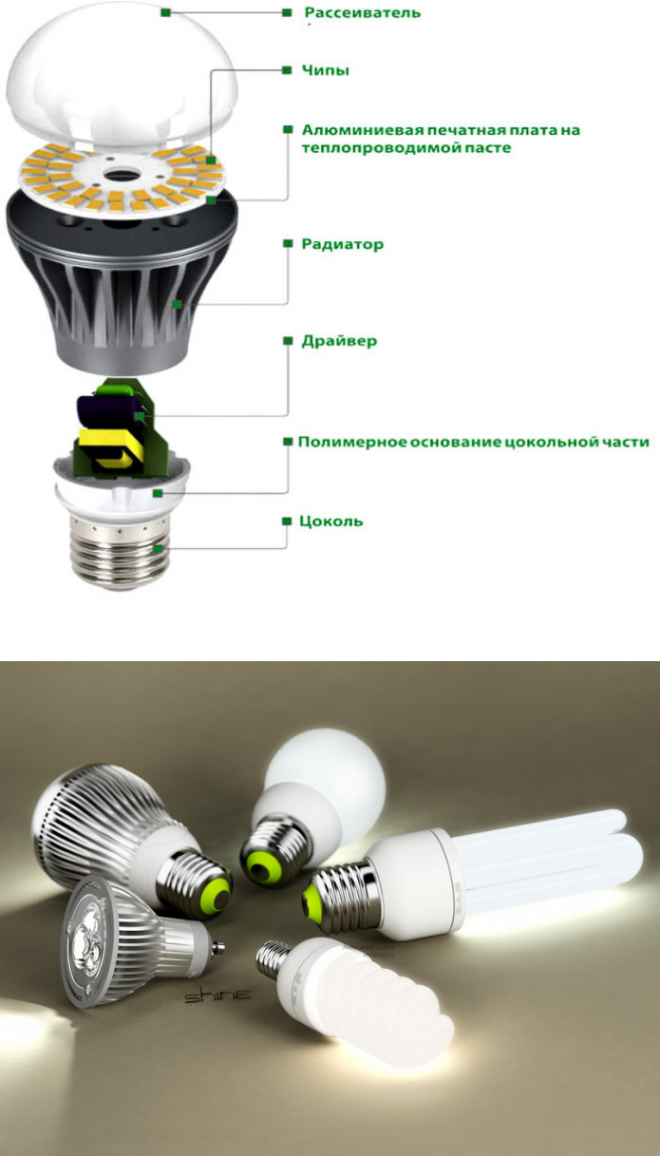
LED lamp (SL) for voltage 220 V consists of the following elements:
- hulls;
- base;
- drivers;
- radiator;
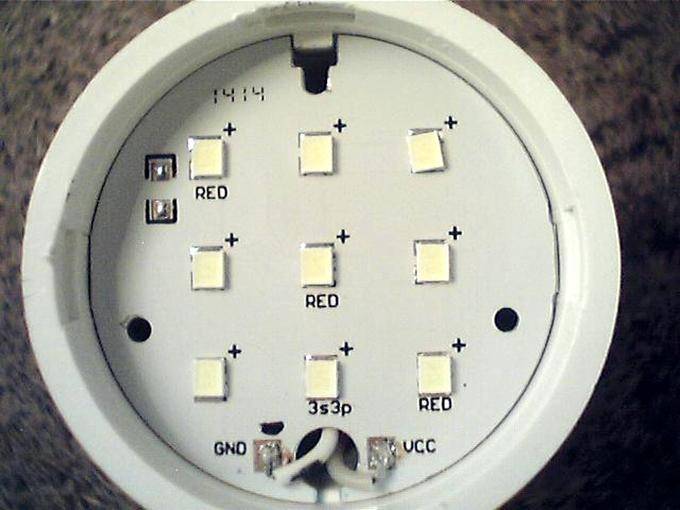
- the board on which the LEDs connected in series are located;
- protective cap or diffuser.
The base is designed to connect the lamp to the mains socket. Together with the protective cap, it is attached to the lamp body. The board with diodes is installed on the heatsink, which is responsible for removing heat from the LEDs. The driver is used to ensure the operation of the LEDs and converts the AC voltage 220 to DC.
In the most high-quality and expensive lamps, current stabilizers using a microcircuit are used. These drivers provide the best possible LED performance. Cheap products, such as lamps made in China, use an AC bridge rectifier with a smoothing capacitor and a ballast resistor. The disadvantage of such a power supply is the dependence of the output voltage and current on power surges, which has a bad effect on the operation of LEDs.
Dismantling and repair of LED lamps for 220
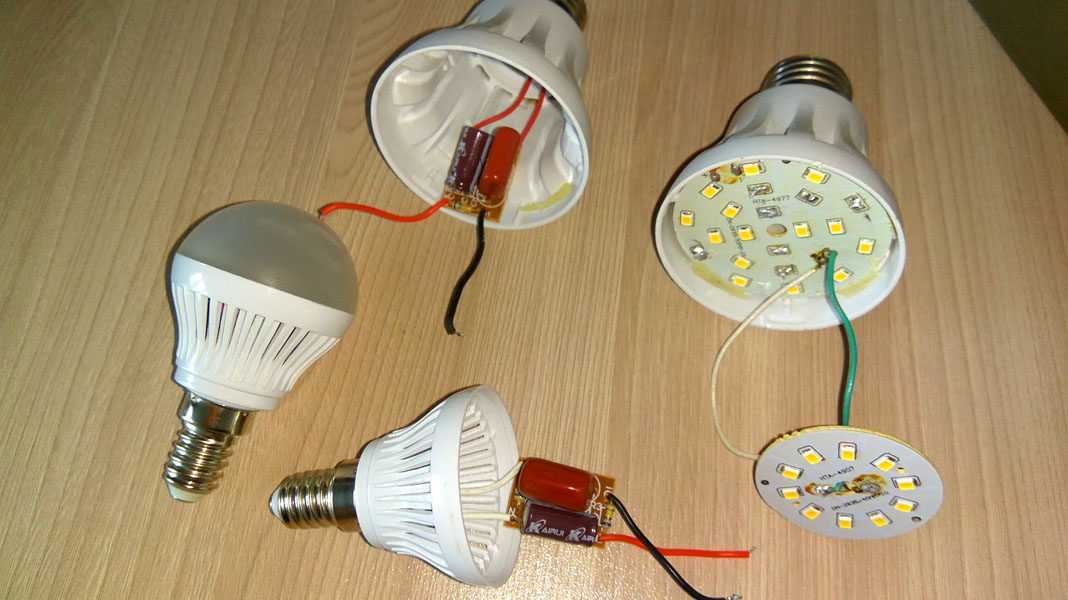
Next, I will lay out material on the disassembly of LED lamps that came to me for repair. Not all of them, of course, will not have enough time for you to read or mine to publish (there are thousands of them). I must say right away that you can disassemble any lamp, the main thing is to approach the process with feeling, clearly, arrangement.
These three LED lamps stopped working on one day (to see the moon in some phase turned negative for them), which actually caused this publication.
Disassembly, diagnostics, repair of the LED lamp GX53 (tablet)
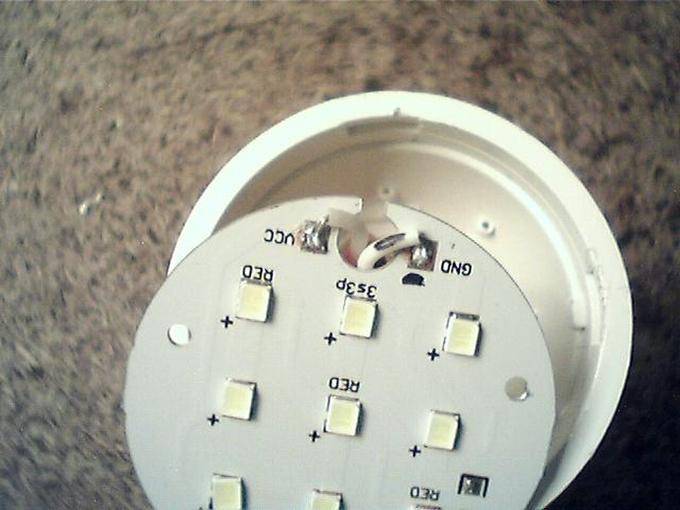
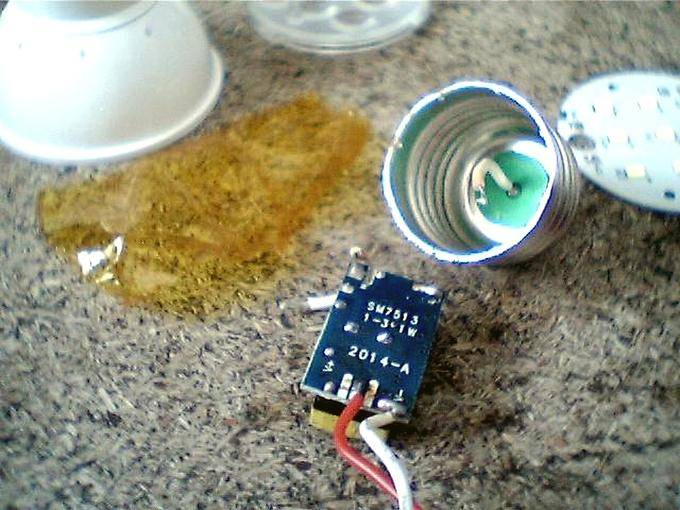
Gently pry under the protective cap with a thin tool and go in a circle (there is an adhesive base). Having removed the protection, we unscrew the two self-tapping screws that secure the GX53 driver to the case. If you need to remove the block, unsolder the board from the contacts. In this lamp, there was just a malfunction in poor contact on one side.
Disassembly, diagnostics, repair of LED lamps GU 5,3 - SBMR 1605
The protective plastic screen sits on the glue. We pry with a thin narrow blade along the edge of the protection and cut through the glue in a circle.We get access to the board with LEDs. Here, without further analysis, we can measure the voltage coming from the driver. For further disassembly of the SBMR 1605, we solder two antennae and gain access to the electronic unit. In this lamp there was no contact (broken track) from the power supplied to the LEDs. I soldered the jumper.
Disassembly, diagnostics, repair of LED bulbs LB-108
These budget LED lamps LB-108 5 W for a GU 5.3 base were bought to replace the halogen backlight in the MR16 lamp. Their cost is only 8 rubles apiece. But cheap is cheap. For a month of operation, one has already gone out of combat formation.
To disassemble the lamp, we remove the O-ring by prying it from several sides with a thin screwdriver, remove the protective glass (yes, this is not glass here is a real magnifying lens), unscrew the shank and the entire interior, together with the driver, in our palm.
In this instance, the chain of work was interrupted by one burned-out LED. There are no donors for it yet, and I see no reason to put a jumper on it, since there is a reserve. Left him as a donor.
In general, I advise home craftsmen not to throw out LED lamps that have stopped working, they can be useful in the future if there is a desire to carry out simple repairs with their own hands.
In the future, when new samples arrive, I will post material on disassembly and maintainability of LED lamps.
Design and basics of functioning
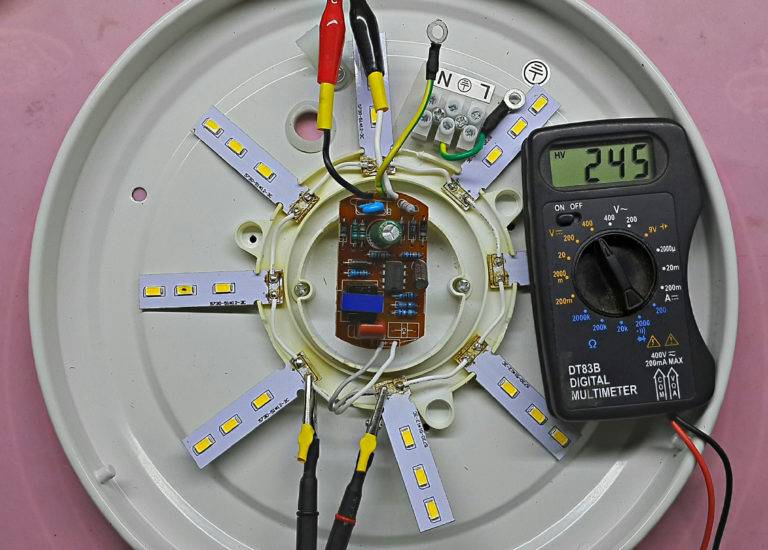 LED luminaire design
LED lamps are an electric arc ignited in a vacuum at the border of the pn junction. By exercising voltage control, it is possible to make regulation of the arc light. By design, the chandeliers include a fixing unit with a control unit, a radio receiver, a lighting segment, a remote control, and decor. In addition, music systems with speakers and ribbon illumination are often built into devices.
The fixing unit includes a bar with a cross, the control unit contains controllers with printed circuit boards and wires, and the lighting segment contains sockets for LEDs.
LED malfunctions
The most common reason for the inoperability of an LED lamp is a malfunction of one or more LEDs connected in series. Actually, there are four possible reasons.
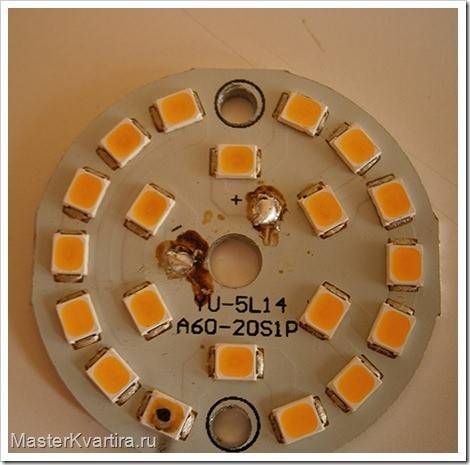
Burnout. It is not difficult to identify even without any instruments. This will be indicated by a conspicuous burnout of one of the elements or a barely discernible small black dot on the outside of the part.

If 1-2 LEDs burn out, you can simply put jumpers. This will not be reflected on the performance of the light bulb, except that the light output will decrease, but you should not wait for a long service life of the lamp, after such a “repair”.
Therefore, it is advisable to add an equivalent load, solder a resistor into the power circuit. Resistance is calculated according to Ohm's law, R = U / I. Where U is the voltage drop, I is the consumed current. Power is taken with a margin of 0.5-1 W. When two LEDs are excluded from the circuit, the resistance and power are doubled.
For example, instead of a burned-out LED-SMD-5730-05, you need to put a resistor with a resistance of 183 Ohm, with a power of 1 W, or even better, put two resistors with a nominal resistance of 91 Ohm (CF-50), each with a power of 0.5 W.
Breakdown. A malfunction in which the diode, LED ceases to perform its functions, but turns into an ordinary conductor. It is impossible to detect a breakdown without a device. It is quite possible that one of the LEDs was already faulty from the beginning, because it would never occur to anyone to open an LED bulb in a store. Indirectly, the occurrence of a breakdown may indicate a mismatch in the current-limiting resistor.
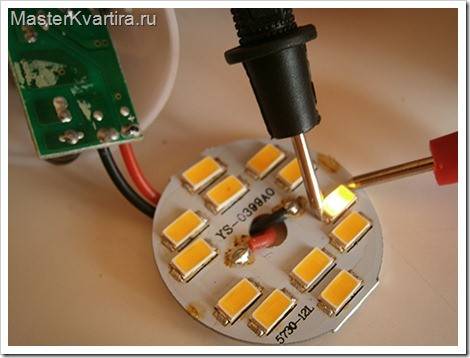
- Don't drink it. Such a malfunction is not uncommon for Chinese bulbs, and we do not keep others. Therefore, before changing the LEDs, make sure the quality of the soldering.
- Lack of supply voltage. Verifying that the supply voltage is present is the first thing to do if there is no other clear (visual) evidence of a malfunction.
Replacing individual LEDs operating in a serial chain is a controversial topic. The fact is that each LED already initially has its own unique parameters, and in a sequential chain of such "individuals", some work at the limit of their capabilities, and some shine half-heartedly. It is logical to assume that all LED chains should be of the same rating and from the same batch, but this is not a panacea for parameter scatter.
LED lamp device
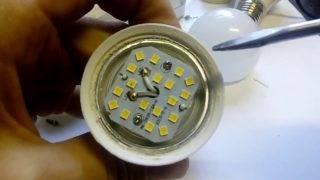 To repair an LED lamp with your own hands, you need to know its structure.
The LED lamp is a prefabricated device consisting of electronic and mechanical parts, assemblies and mechanisms. The principle of operation is designed to change the parameters of materials under the influence of an electric current.
The LED lamp consists of the following fragments:
- Base - for connection to a 220V household network. Cylinders of sizes E 14 and E 27 are used.
- Frame. Made of heat-resistant plastic. Serves for placing an electrical circuit.
- Dielectric layer between base and case.
- Driver. An electronic unit designed to stabilize the input signal to the operating parameters at which the crystals can function.
- Crystals. Emit a glow when an electric current passes through them.
- Radiator. Designed to receive and remove excess heat from the heating parts located on the board.
- Cap. Serves for uniform dispersion of the light flux emitted by diodes.
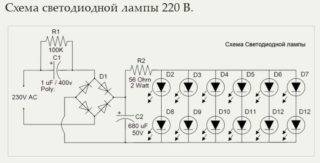 The principle of operation is that the voltage through the base is supplied to the driver, which converts alternating current into direct current. Depending on the set parameters, the frequency can increase up to 100 Hz (the chandelier will burn brightly and evenly) or decrease (the lamp will start blinking).

