Hair dryer repair
Recently, a hairdryer was brought to me for repair, which is not the most old-fashioned, but times are different now, who repair a hairdryer for $ 10, and sometimes it's easier to buy a new one, given that the entire market is literally crammed with cheap Chinese hairdryers. So take this opportunity to consider the design and operation of hair dryers.
Household hair dryer
The hair dryer operates on a 220 V, 50 Hz network. Any hair dryer has two main parts - a heating element and an electric motor.
As a rule, a nichrome spiral is used as a heating element, it is it that provides warm air. In hair dryers, DC electric motors with a power of up to 50 watts are mainly used, there are exceptions.
Passing through the spiral, the current loses its initial strength, since the spiral has a certain resistance, it is this current that is rectified by the diode bridge and supplied to the electric motor.
Electric motors in hair dryers are designed for voltages of 12, 24 and 36 Volts, only in very rare models are 220 Volt electric motors used, in this case, the voltage from the network is directly supplied to the electric motor.
A screw (propeller) is attached to the rotor of the engine, which provides heat removal from the spiral, it is thanks to this that a sufficiently strong directed flow of warm air is obtained at the outlet.
The power of the hair dryer depends on the thickness of the coil used and the power of the installed electric motor.
But most often, the main reasons for inoperability are a broken spiral, an inoperative engine, contacts of switches that have melted from heat, a broken mains wire or plug.
What the hair dryer consists of:
- Elements in the diagram: 1 - diffuser nozzle, 2 - body, 3 - air duct, 4 - handle, 5 - cord twist fuse, 6 - "Cold air" mode button, 7 - air flow temperature switch, 8 - flow rate switch air, 9 - "Turbo" mode button - maximum air flow, 10 - a loop for hanging a hair dryer.
- Wiring diagram for a simple hair dryer
- The electric motor is supplied with a DC voltage obtained by means of a diode bridge consisting of four diodes (or simply from one diode).
Let us single out two elements of the circuit that are consumers (loads), these are the spiral and the diode bridge (the motor is not counted, since it is the load of the bridge). In the circuit, the elements are located in series (one after the other), which means that the voltage drop across each of them will depend on its resistance and their sum will be equal to the mains voltage at the third position of the switch.
Most of the entry-level hair dryers have a simple wiring diagram, in such hair dryers there is only one switch that turns on the fan and heating element. Heaters can be made in various modifications, but in all hair dryers they are made of nichrome coiled into a spring.
- However, almost all simple modern hair dryers have 2-3 steps of power and air flow regulation.
- More advanced hair dryers have smooth controls for the airflow speed and air temperature.
- Rules for the use of hair dryers
The recommended maximum run time is 5 minutes. At the end of the work, remove the temperature regulator to a minimum, leave it on a cold blower for half a minute, and only then turn off the hair dryer. Try not to take it with wet hands, otherwise moisture may get on the internal elements of the circuit, which can lead to a short circuit. AKA KASYAN.
A few words about possible malfunctions
Knowing the problem will significantly reduce the repair time for a household appliance. The most typical malfunctions are:
- no power: the technical model does not turn on;
- the fan has stopped or its blades are not working at full capacity;
- when the device is running, a characteristic burning smell is heard;
- the appearance of a spark is a clear sign of problems with the power unit;
- the hot air supply has been cut off. There is only cold air outlet.
Based on the knowledge of the device of modern models, and the possible causes of failure, let's consider different options and try to solve this or that problem.
Hair dryer disassembly
As a rule, the cases of hair dryers are made of plastic, which are fastened with self-tapping screws. You need to unscrew them with a curly screwdriver. Next, you need to move the halves of the case, remove the latches from engagement
The latches are very fragile and it is important to be careful not to break them. Especially if you want to take apart the Rowenta hair dryer. How to do it right? The main thing is to unscrew all the screws
It happens that in hair dryers, depending on their design, hidden screws are used. They can be found under the labels or logos of the manufacturer. If you do not unscrew them, then with further disassembly you have every chance of breaking the latches.
How to do it right? The main thing is to unscrew all the screws. It happens that in hair dryers, depending on their design, hidden screws are used. They can be found under the labels or logos of the manufacturer. If you do not unscrew them, then with further disassembly you have every chance of breaking the latches.

There is one more feature, if you do not know how to disassemble a hair dryer brush - such devices consist of several parts and have a rotating head. When disassembling such a device, you need to carefully remember in what order and how the parts are attached to each other.
This is very important and necessary for the subsequent correct assembly of the hair dryer.
Device and principle of operation
All models have the same set of parts:
- frame;
- fan;
- a heating element;
- control module;
- power cord;
In a nutshell, the principle of operation can be described as follows. The fan, sucking in air from the outside, directs it to the nozzle, which has a spiral. If it is on, a hot air stream will come out.
The body of the device is made of durable, heat-resistant plastic. The fan is assembled on a DC collector motor. Such a motor works from a voltage of 12, 18, 24 or 36 volts. Rarely are 220 volt AC motors.
A special frame is used for the heater. They make it from a material that does not conduct electricity and is incapable of burning. A nichrome wire is wound on the frame in the form of a spiral. The number of sections of the spiral is made according to the number of modes of the device.
The temperature of the heating element rises during operation. If it is not cooled, a fire can break out in a matter of seconds. The fan acts as a cooler.
When the device is turned on, hot air is blown over the thermostat. When the temperature of the element rises to a critical one, the contacts at the coil open. This is invented to force the heating element to turn off in time.
To control the operation of the thermostat, a thermal fuse is sometimes installed. It is disposable. When overheated, it simply burns out, interrupting the electrical circuit of the heater, forcing the device to shut down forcibly.
Inspection procedure
If the hair dryer is completely devoid of signs of life or does not function well, then a visual inspection of the power circuit is required. It is best to conduct events in the following order:
- There is a problem with the cable. It is necessary to start the procedure for inspecting the power cable from the outlet. The problem may lie in the absence of an electrical network or some other malfunction. If the voltage exists, then you need to inspect the cord of the electrical appliance, moreover, most often the breakdown occurs in the place where it enters the case. Then they move to the fork. Before carrying out repair work, it is necessary to de-energize the device.If there are any kinks, there are no burners, then it is necessary to disassemble the hair dryer and check the connection points of the wire with the internal parts. It often happens that the engine falls off. The situation can be corrected by ordinary sealing.
- Fan malfunctions. In this case, the device simply stops spinning or does it very slowly. To identify the cause, you will also need to disassemble the unit, otherwise you will not be able to get to the part. At the very beginning, the impellers are inspected; they should not be dirty and dusty. Often the mechanism does not gain momentum precisely because of the hair that wound around it during operation. Next, you need to disassemble the structure completely, thoroughly clean it and the filters on it. If the manipulations did not produce the desired effect, and the device did not work, then the breakdown cannot be eliminated on its own, you will have to take the hairdryer to the service.
- Breakdown in the engine. The most unpleasant problems happen with the engine. You can understand that the reason lies in it by the characteristic smell of burnt wiring, as well as by sparks that slip in the place where the motor is located. It won't be easy to fix the problem if you don't have experience. First, it is necessary to identify the exact location of the malfunction with the help of a tester, and only then, based on the problem, fix the malfunction or completely replace the element with a new one.
- Heating element problems. In the event of such a malfunction, cold air flows from the household appliance instead of the hot stream. Most often this happens due to a burnt out or broken spiral. To repair the breakdown, it is necessary to disassemble the device, the fan, in this way it will be possible to get to the desired part and replace it. It is possible to make repairs, but, as a rule, after some time it will become unusable again.
Possible malfunctions
Due to its simple principle of operation, the following breakdowns of a household hair dryer most often occur:
- there is no power at all (the device does not turn on);
- the fan does not spin or the blades are not gaining momentum well;
- during operation, a burning smell is heard or something sparks in the engine area;
- the hairdryer does not blow hot air (only cold air).

If there is power in the outlet, but the hairdryer does not work, carefully examine the appearance of the cord for repair: it may have been broken somewhere, frayed or cut. The most problematic points of the cord are considered to be the place of entry into the device body, as well as the point of connection with the electrical plug. If, apparently, no obvious reasons for the breakdown could be found, proceed to disassembling the case. It is not at all difficult to disassemble the case of the hair dryer with your own hands, the main thing is to find all the fasteners and unscrew them (they can be hidden behind stickers, rubber plugs, etc.).
When you get to the internal structure (pictured above), first look at where the electrical cord connects to the rest of the circuit. Very often, the motor does not start due to the fact that the wire falls off at the bonding point. If in your case everything is exactly like that, the repair can be completed with simple soldering or twisting of conductors.
Is the cord working, but the hair dryer still doesn't work? We carry out repairs further and check the rest of the chain elements. If you have a diagram of your device model, use the tester to ring the remaining elements: fuse, switch and mode switch. It is not uncommon for a household electrical appliance to overheat and turn off due to a blown fuse. It needs to be replaced with exactly the same one in terms of characteristics.
By the way, the opposite situation happens - after turning on and drying the hair, the hair dryer does not turn off. This is also the fault of the switch itself!
Another malfunction - the power on / off button does not work. We have already described how to repair a light switch.The repair in this case is similar - check the break contacts with a tester, clean them to a metallic color, and if you cannot fix the breakage yourself, replace the switch. In the same way, check the mode switch, if the hair dryer does not switch speeds or does not regulate the temperature (for example, it does not work at 2 speeds), try to repair the regulator or perform the simplest replacement.
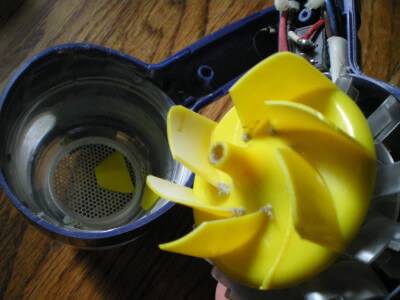
By the way, if the fan smells of burning when you turn on the fan, then most likely the hair dryer stinks due to strong pollution. Very often, a thorough cleaning can help you solve the problem yourself at home with a minimum set of tools for an electrician!
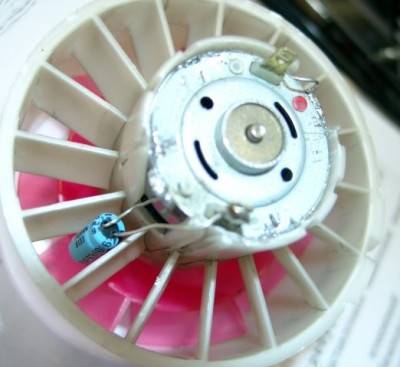
That's all that I wanted to tell you about what to do if the hair dryer does not work and how to repair it yourself if the fan, switch or engine breaks down. We hope that the provided instruction was useful and interesting for you. By the way, an industrial model (construction) can be repaired using the same instructions in the pictures. In fact, the construction hair dryer is similar in design, only it is more protected on the outside and has more powerful parts inside!
Related materials:
- How to repair a chandelier yourself
- How to make a USB fan out of handy tools
- Overview of electric fan heaters for the home
How the device works
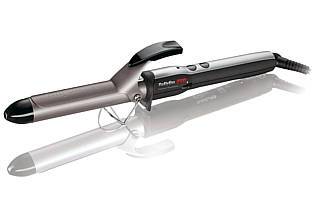 Modern curling irons on the market differ in a variety of shapes and a set of functions. But, regardless of brand or model, they are all similar in design.
The basis of the device is a round case with a heating element inside and a triangular flexible support leg. A power cord with a plug is connected to the handle. A metal clamp is hinged.
Unfortunately, the simple design of the styler does not guarantee its reliability and trouble-free operation. Even not cheap models of the most popular brands fail.
If you repair your hair curler with your own hands, you can save money and time that you would have spent on a visit to the master. The main thing is to properly disassemble the device and determine the cause of the malfunction.
Hair dryer repair
If the cord is found to be defective, it must be replaced. The integrity of the cord can be checked with a multimeter. Turn on your multimeter to measure resistance, measure the resistance of the cord cores one by one. A serviceable core will show zero, and a burnt one will show infinite resistance.
The thermal fuse is a one-piece piece. It is short-circuited; when the critical temperature is reached, it simply burns out. This can also be checked with a multimeter, if such a defect is present, then the fuse must be replaced. In this case, you will need a soldering iron and a new fuse.

The malfunction may also lie in the thermal switch. The bimetallic plate is the basis of this device, due to the high temperature it can lose its properties and stop working. Then such a switch must also be replaced, since it cannot be restored.
Burnout of the heating element can be another reason for repair. This most often happens with the Scarlet hair dryer (you can learn how to disassemble and repair it from the article). Burnout of the spiral can occur for two reasons: failure of protection and long service life. In this case, you need to replace the coil, after restoring the protection. A non-working motor must be replaced.
The procedure for inspection and repair of the hair dryer
In order to repair the hair dryer, you need to inspect it. First of all, any inspection starts with the food chain.
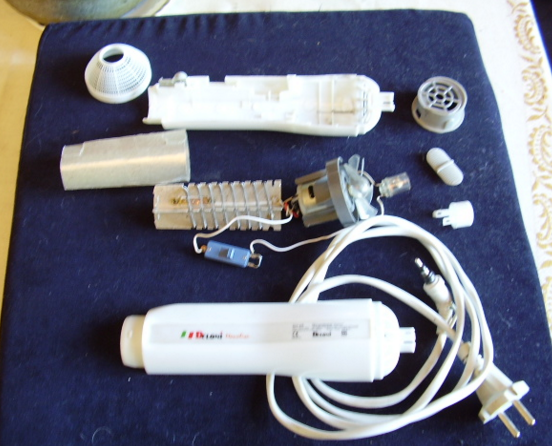
Below you can view detailed instructions that will help you to perform a high-quality repair of a hair dryer. This instruction is suitable for all types of hair dryers.
Cord
Inspect the outlet before inspecting the cord. In most cases, it is she who causes the breakdown. If everything is fine with the outlet, then you can proceed to inspect the cord. All work you need to perform only on a de-energized device.When examining it, you visually need to find the cause of the breakdown. If it is not there, then you should disassemble the hair dryer.
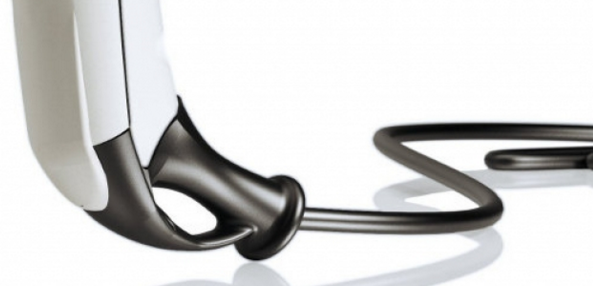
Inside this device, you may encounter several options for the electrical resistance of the wire:
- A pair of detachable contacts.
- Spike.
- The wiring is housed in plastic caps.
The last option is the most difficult when performing repairs. Repair of a hair dryer first of all begins with a "continuity" of the wiring. The call must be in two wires at the same time. When performing this type of inspection, you need to remember that you cannot make more than two holes in the wiring of the hair dryer.
Almost everyone can inspect the contact pad of the hair dryer. You need to take this device in your hands and visually look at it for damage. Usually if it is damaged, then it can be seen at a glance. Usually, the breakdown must be found at the junction with the hair dryer body. If the vacuum cleaner does not suck well, then the cord should also be checked.
Hair dryer switch and switch
When you are repairing a professional hair dryer, you need to close the switch and see how the hair dryer responds to this step. Before you start repairing your hair dryer, you need to write down the wire layout. Checking the speed and temperature switch is done using the same circuit.
If during inspection you find an item that is not working correctly, then you need to inspect it. If you find carbon deposits, then you can remove it with an eraser. You need to wipe all contacts with alcohol. If you find broken parts, then you can replace them with analogs.
Fan
A clogged air duct is the most common breakage on a hair dryer. To fix this problem, you need to remove the filter and clean it.
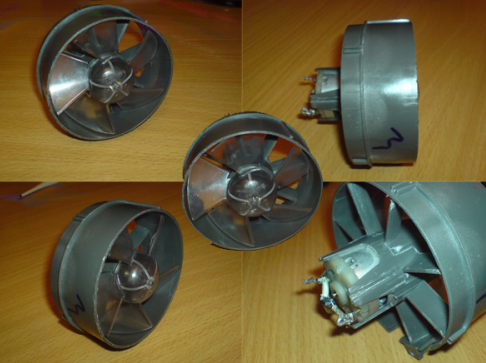
If the fan blades are not spinning, then you need to inspect it for hair. To remove hair from it, you need to remove the propeller. In doing so, you need to avoid effort and distortion.
Spirals
Any hair dryer can have several heating elements. If you find a break in the spirals, then twisting the wires can fix the problem. You can visually observe all defects in heating elements. If the spiral cannot be repaired, then they must be replaced with similar ones.
Chip
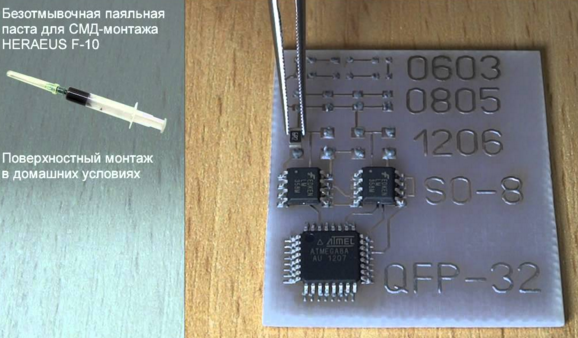
Sometimes the getinax backing can crack. That is why, in order to perform high-quality repair of the electric hair dryer, you need to cover the damaged areas with solder. Sometimes bad capacitors can swell. Typically, the top edge may contain cuts and when the product breaks, it may swell.
If this defect is found, you will need to replace the capacitor. If you find resistors that burn out, then they need to be replaced.
Thermostat
Some hair dryers may be self-regulating. Usually this effect is achieved with a resistive divider. Further actions will depend on the parameter control. But sometimes you can follow these guidelines:
- Eliminate the sensor completely and check the response of the device.
- Close the wires and see what happens next.
If there are no changes, then you need to download the circuit diagram of the hair dryer.
General arrangement of hair dryers
Due to its widespread availability, regardless of the manufacturer, most hair dryers have a similar design. The main elements are the heating element and the electric fan. The heating element is a conventional coil made of high electrical resistance alloys. Thanks to this, the coil can be heated to high temperatures and not burn out. In electric hair dryers, nichrome wire is used as a heating element. Even with a very high resistance, the coil will certainly burn out if it is not cooled.

Cooling for hair dryers is air, that is, the heating element is cooled by a strong air flow.The force of the flow is calculated in such a way as to prevent burnout of the spiral. The main element in the cooling unit is the electric motor. The power can be different and varies from the class of the hair dryer and from its manufacturer. The higher the class of the hair dryer, the greater its power. Motors of increased power are put on the Rowenta hair dryer. We will explain below how to disassemble it. Motors for hair dryers are produced in a low-voltage version. The supply voltage, as a rule, does not exceed 12 volts. This is necessary to ensure the compactness of the hair dryers and their safe use. To lower the voltage to the required one, a step-down coil is included in the circuit, which is built into the heating element. In addition, the hair dryer has a power button, which can also be a power regulator.
How to disassemble and repair a hair dryer using the example of various models
Any Roventa hair dryer has the main components in the design. Without them, he will not perform his functions. The design includes units and parts that help to dry hair of absolutely any length. And models with the ION badge make it possible to carry out the best hair styling.
Although each model has its own switches, the appearance, however, they operate the same regardless of this. According to experts, the most complicated part of the device is a thyristor, therefore, you can make repairs yourself without problems.
Disassembly algorithm
Repair must begin with an ordinary inspection of the device, that is, diagnostics. Algorithm:
- It all starts with the outlet. Look: are there any burned contacts or they are loose. If you notice any malfunctions, then it is necessary to carry out a stripping or tightening. Check that the plug engages with some force.
- Next comes the power wire. Diagnostics must be carried out in the place where it enters the handle of the device. Here you can find a contact block. From there to the plug itself, an inspection should be carried out for damage to the insulation or kinks.
- Most often, the dismantling of this device begins with the disassembly of the case. The body structure is made of two halves, which are connected with screws, and in front of the nozzle - with specially designed latches. Disassembly must be carried out carefully, as these latches can be broken. There are also screws that are hidden by stickers, plastic inserts and removable covers.
Therefore, before disassembling, be sure to read the instructions.
Fan. In front of this element there is a protective grill and a filter, which are obstacles to hair getting into the hair dryer. Very often this protective grill can become clogged with hair, so it needs to be cleaned. Cleaning is carried out with a small brush.
Electric motor. If this element does not function properly, then the whole apparatus will be junk. The reasons for the incorrect operation of the electric motor can be: breakdown of the winding or burnout of the diode bridge. After dismantling, the rubbing components of the electric motor must be lubricated
It is also important to tighten problem areas, you can do this manually.
Spiral. In the presence of almost all models, there are several spirals that help to carry out the operation of various heating air modes.
They can be restored by soldering. Defects can be noticed immediately without any problems. In some cases, it is possible to replace the spirals with components made of nichrome thread. They also have similar characteristics.
Microcircuits. There are types of malfunction. For example, a base made of getinax can crack. In this case, the break of the tin track occurs. Areas that are damaged can be tinned, and then the coating must be done with solder. Another problem is capacitor swelling. You just need to install new capacitors. There is also a possibility of malfunctioning resistors.They turn dark. It is important to simply replace them.
Repairing devices from Rowenta, Philips, Ionic, Remington, Dewal and others has its own difficulties, especially for those who are not enlightened in this. Since they have smooth-acting regulators, the spirals are made from specially designed alloys. If you need to connect them, then you are unlikely to be able to do it reliably.
Before dismantling this device, you need to find the electrical circuit of the device. If it was not possible to find the instruction, then you can consult with a specialist. Remember the simple truth - it is not difficult to disassemble any device, it is much more difficult to reassemble everything.
Hair dryer design
In order to repair the hair dryer, you will need to familiarize yourself with its design. To familiarize yourself with its design, you can disassemble the hair dryer. This process does not take long. Usually its case is fixed with screws, but sometimes the manufacturer may provide latches for securing the case. That is why you need to be careful when disassembling, as sometimes inexperienced craftsmen can damage its case.
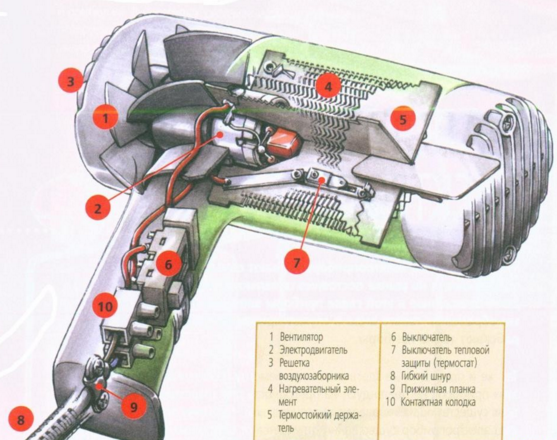
Each hair dryer has a DC motor. The mains voltage is equalized using a diode bridge. If you have purchased a cheap product, then in its design you can find only 1 diode.
As a rule, the switch in this device must simultaneously close the circuit through which the spirals will be powered. It is these spirals that will set the motor in motion. Also, each device has a thermostat in its design. This device will monitor the temperature. If it starts to rise, then he will turn off the heater. If your hob is broken, then you can read how to repair it.
If it's a heating coil
One of the reasons when the air is not partially and / or completely not heated up is the failure of the filament coil. The situation is not often repeated, but it is better to be prepared for it. Having opened the case and reaching the spiral, you need to visually inspect it.
Often, amateurs make the same mistake: they try to repair the heating element on their own, connect the nichrome thread. The positive effect will last no more than two or three months. Then again, repairs.
Experts recommend "not to suffer", but to replace the broken spiral with a new one.
Electric power unit.
The venom of trouble when a hair dryer breaks down can be considered a failure of the power unit. Hair dryers can spark, give off unpleasant odors and even burn out. Therefore, the repair must not be delayed. You can use a tester to verify the problem with the motor.
Photo: Dismantling and repair of the Maxwell MW-2019 VT hair dryer.
In this situation, it makes no sense to even try to breathe life into the engine. There are two options for solving the problem: replacing the electric power unit, or repairing it at a service center. Only specialists can carry out high-quality work with the provision of guarantees.
Chip problems.
It happens that the getinax substrate is destroyed: microcracks appear. To carry out high-quality work to eliminate the problem, you will need to apply solder to the damaged places. Frequently failed capacitors swell. If a defect is found, the capacitors will need to be replaced. Another problem: non-working resistors. They are not repaired, but simply replaced with new products.
A few words about the problems of the thermostat.
Some hair dryers are equipped with independent regulators. The adjustment effect is possible by using a resistive divider. There are two ways to troubleshoot: turn off the sensor and see how the appliance responds. Or short-circuit the wires and watch what is happening. If there are no changes, you will need a schematic diagram of a hair dryer of a certain model or the help of the service center masters.
Some Tips
Repairing a professional device is quite difficult. Since the parts contained in it are equipped with special controls and various options, such as the Care button. In addition, the spiral is often made of a special alloy, which, when heated, creates negative ions that have a beneficial effect on the quality of the hair.
But even such devices have the same technique:
- cable;
- switches and various buttons;
- cleaning from dust and dirt;
- inspection of the spiral and motor;
- capacitor and resistor control.
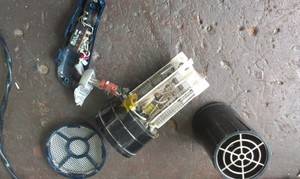 But before carrying out independent repair work, you must familiarize yourself with the schematic diagram of the device. As you can see, fixing household hair dryers is not that difficult. But if there are any doubts, then you should not do the repair yourself, but it is better to take them to a service center.
Rating of the best plyeks
Knowing how to disassemble your curling iron and repair it yourself will extend the life of the device. And this is definitely a positive point. However, in order to avoid repair work, or at least minimize them, you must initially try to choose a high-quality styler.
Today, the market for beauty devices is replete with a huge number of models that are able to give curls a wide variety of shapes. Small and large curls, Hollywood curls, corrugation - this is not a complete list of styling.
There are also such curling irons on sale that they themselves carry out the capture and winding of the strand. Technological progress does not stand still. Manufacturers do their best to improve the convenience and modernization of the styler functionality.
When choosing a device, first of all, you need to pay attention to the brand. This is the most important criterion.
The more serious and well-known the company is, the longer the purchased curling iron will last and the better the curling will be.
 Among the leaders of the rating are the following brands:
- Roventa;
- Remington;
- Philips;
- Brown;
- Bosch;
- "Vitek";
- Scarlett;
- Polaris.
Stylers of the listed manufacturers can be seen, probably, in any home appliance store. They cannot be classified as cheap. And yet they are in high demand.
In addition to these brands, there are professional curling irons that are sold only at specialized points. If you believe the reviews, the best among them are:
- Bebilis;
- "Deval";
- Velekta Paramount;
- Valera.
Of course, the latter are more expensive. True, they compensate for the costs with their endurance and long service life.
Repair of malfunctions of vibration machines
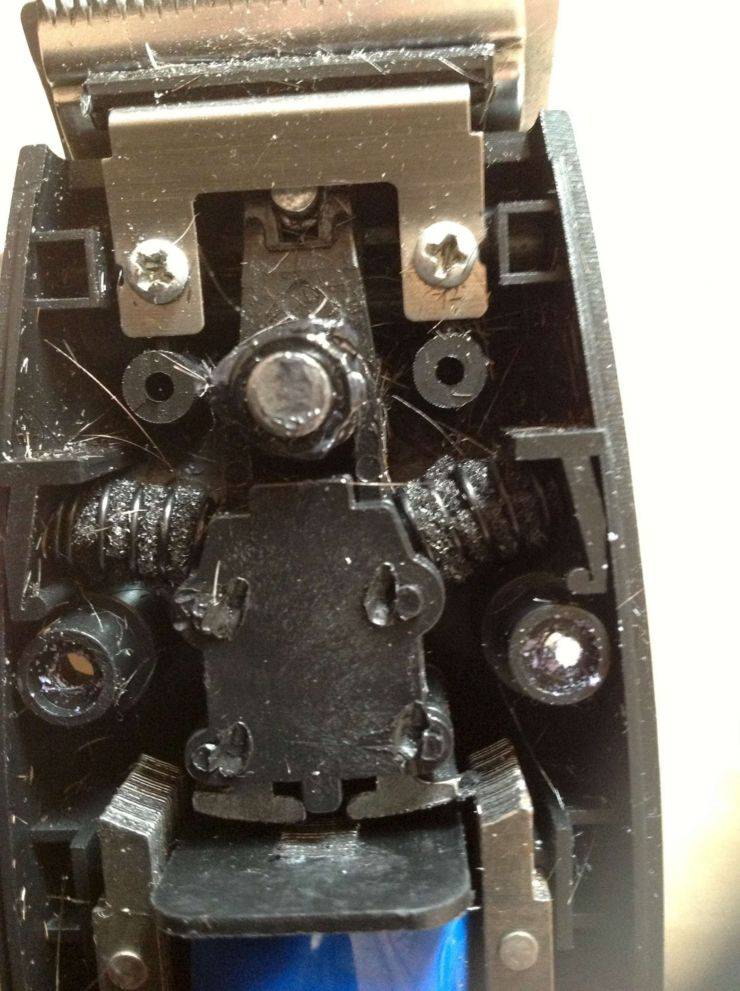
Vibrating devices work with springs placed near the pendulum. If even one of them breaks down, the machine breaks down. You can replace it yourself by opening the device case and discovering a breakdown. Spare parts for clippers are sold in specialty stores.
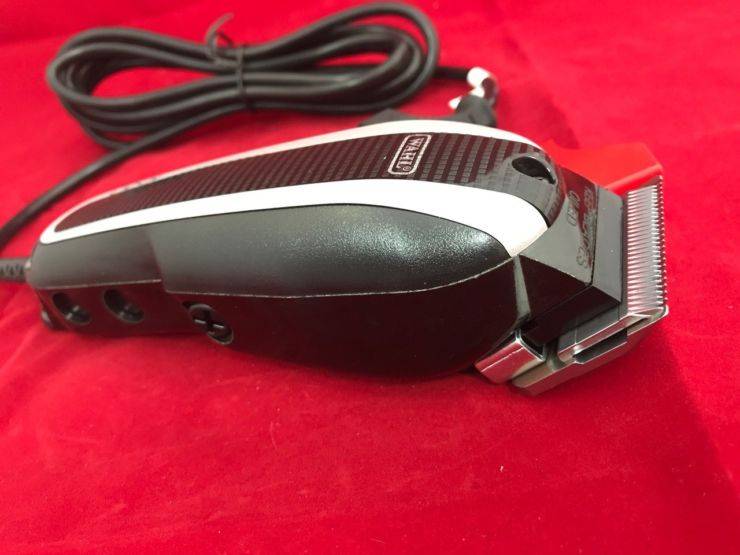
A vibration machine can often make a strong noise due to large differences in the power supply. Some modern devices have a special adjustment, with which you can adjust the machine to the voltage level.
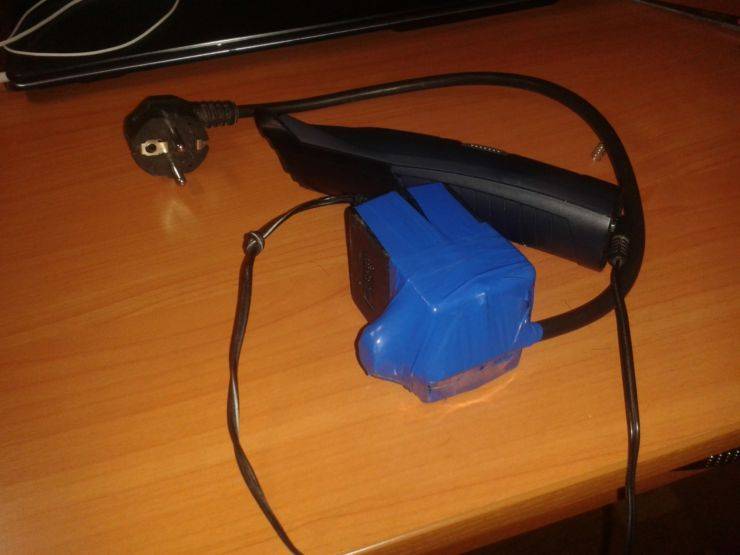
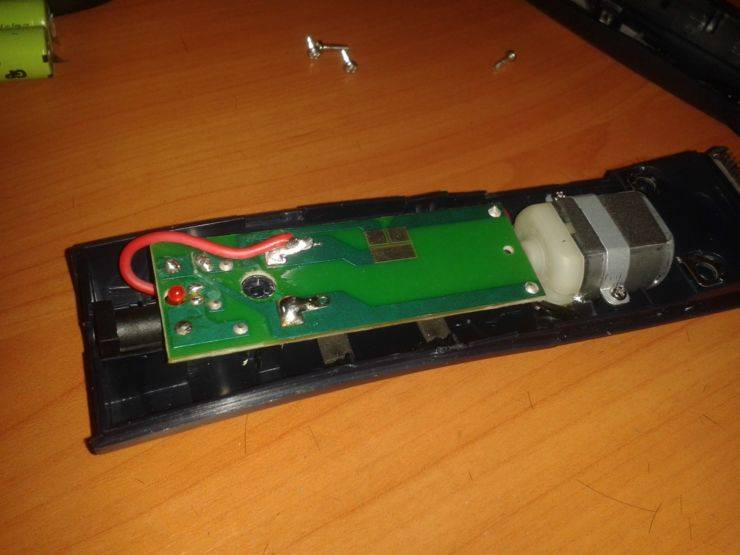
It should be remembered that all repairs and lubrication of hair clippers must be carried out with extreme caution, because you can damage the "insides" of the clipper, scratch them. Any damage will affect the performance of your device.
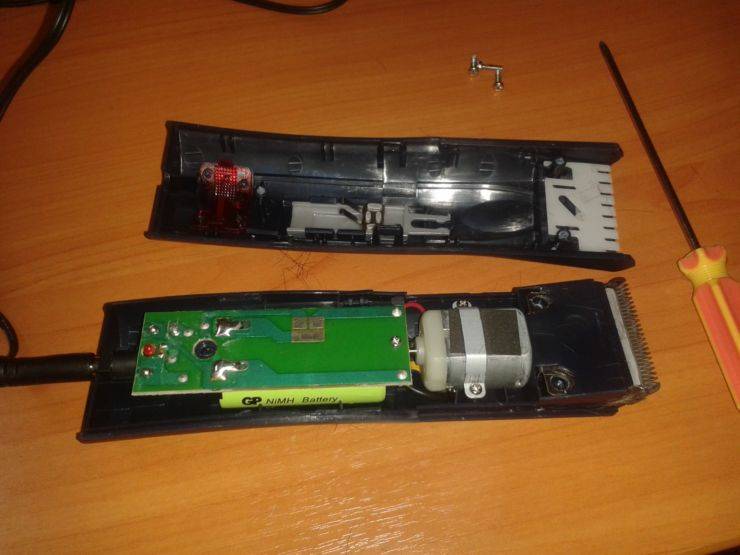
When tightening the bolts, do not use excessive force to avoid stripping the threads. Otherwise, the bolts will not be able to hold the elements of the machine.
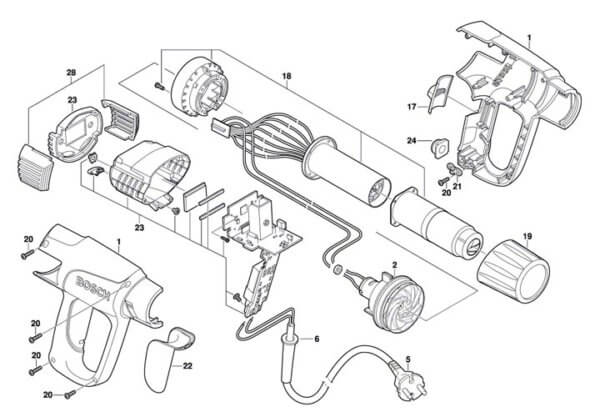
How to repair a tool: diagram
First, a construction hair dryer is diagnosed. This is done visually and empirically. For direct do-it-yourself repairs, use a screwdriver and a soldering iron. To replace the required part, you must purchase it in advance.
- The coil is replaced taking into account the resistance value. The disconnected conductors are soldered into place.
- To replace a capacitor, the part is selected taking into account the power characteristics and the nominal voltage value.
- The external wire is changed by disassembling the hair dryer (its body). First, disconnect the damaged wire, check the serviceability of the rest. When a new wire is connected, then they check the health of all wires and the device itself. Only then the body of the instrument is assembled, connected to the electrical network.
Repair scheme for a building hair dryer:
Device device
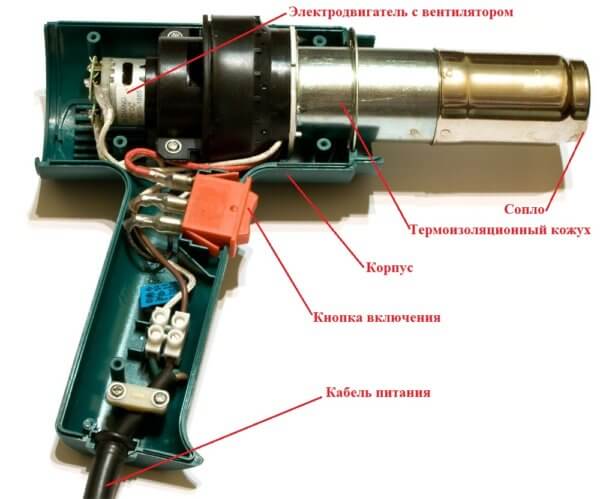
The main elements that make up the building hair dryer:
- engine;
- a heating element;
- fan.
The power of the device is large, and the productivity depends on the number of liters of air that the hairdryer passes per minute.
Many modern models have the following features:
- regulation of air flow and temperature;
- selection of the desired operating mode;
- nozzles that simplify work with materials of various strengths;
- LED indicator that determines the heating temperature.
Advice
Unlike a conventional hair dryer, the construction one has a much more powerful electric motor and heating element. An electric motor, spirals and fans are concentrated inside the case made of shock-resistant plastic. The latter are heating elements.
In addition to these elements, there are additional elements inside the mechanism that play an important role in the operation of the hair dryer:
- Off button. Sometimes with a built-in temperature controller.
- Temperature regulator. The air escaping from the tool nozzle is heated by this sensor.
- Replaceable nozzles. They are attached to the nozzle.
Let's sum up
In order for the suddenly broken tongs not to spoil the hairstyle and mood, the choice of this device must be taken very seriously. But since the purchase of even the most expensive styler does not guarantee its eternal work, it is better to immediately acquire the tools necessary for repairs.
Do not try to disassemble the iron after purchase. First, it will still be under warranty. And secondly, there is a risk that you will not put it back. And instead of a brand new device, you get a non-working set of parts. It's another matter if the styler has already broken down - in this case, you definitely have nothing to lose.
If you cannot repair the forceps on your own, do not hesitate to seek help from a specialist. After all, the main thing is a functioning device, not who repaired it.
