Expert advice
To successfully fix email. do it yourself soldering iron, you need to do it as the experts advise:
- When rewinding a spiral, you must carefully ensure that adjacent turns are located at a distance from one another. A mica gasket must be placed between the rows of winding.
- When soldering deformed or defective parts, mechanical stress on the cord must be avoided. This will preserve the electric heater for a long time.
- Do not leave the soldering iron spiral turned on for a long time in order to avoid shorting the electrical wiring in the event of a malfunction of the parts included in it.
- When repairing, you need to use a power regulator to select a safe mode for heating the tip.
- If it was not possible to avoid overheating of the device and safe use of the tip, then the melted place is carefully insulated. Perform with electrical tape and cambric, put on the damaged sting.
It is easy to repair the soldering iron with your own hands. To do this, you need to understand the causes of the malfunction, correctly calculate the power of the electrical network for operation.
Checking the power cord of the iron using a table lamp
You can check the power cord on your iron in various ways. Everything will depend only on what you have in stock. If you do not have any appliances in your house, then you can check the iron using a table lamp. To do this, you need to squeeze the latch, as shown in the photo.
Now you need to clean the contacts to a shine. If your terminals will fit effortlessly, then you need to tighten with pliers. It is quite possible that this was the problem. If everything is in order, then the table lamp plug must be connected to the blue and brown wires. The switch, which is located in the table lamp, must be in the on position. If the table lamp shines steadily, then the device is fully functional.
Checking the health of the power cord on the iron
When ironing the laundry, the power cord is constantly bent. The greatest bend will always be at the junction of the cord with the iron structure. This is where the power cord will fray. This malfunction begins to manifest itself much earlier before the breakdown. If it heats up normally, but the indicator lamp starts blinking, then this is a manifestation of future breakdown.
If the insulation of the wires that are inside begins to fray, then a short circuit of the device may occur. If this happens, then you need to unplug the iron from the outlet and start repairing it yourself. If the iron stops heating up then you need to check the voltage at the outlet. If the socket is working properly, then you need to move the wire at the junction with the iron. If the indicator lights up, then the cause will be a wire break in the power cord.
Common breakdowns
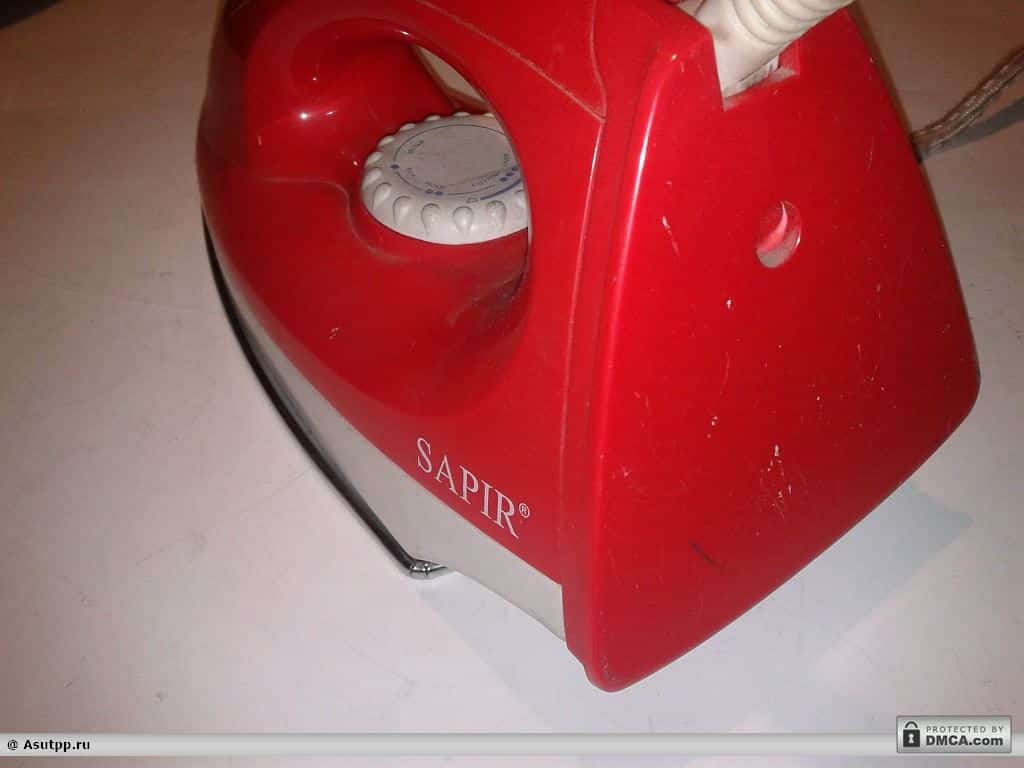
Due to the simplicity of the device and operation, the list of common malfunctions in various models of Vitek irons - VT-1201, VT-1209, VT-1244 and others - is the same. This statement is also true for devices of other brands, since they have no fundamental design differences. A description of the main breakdowns is given in the table below.
|
Illustration |
Breakdown description |
|
|
Open or short circuit in the power cord. One of the most common and dangerous defects that occurs as a result of long-term operation. Over time, the cord is subjected to stress, the wires located under the outer insulation are bent and twisted.Thermal insulation can also be damaged, leading to the risk of melting the insulation of electrical conductors. Such malfunctions can result in electric shock. Breakage is eliminated by replacing the cord |
 |
Scale build-up. This is more likely not a breakdown, but the result of improper operation, leading to a violation of the vaporization function. Salts contained in hard water precipitate on the steam-conducting holes of the sole. To avoid this defect, you should pour only purified softened water or distillate into the iron. To remove scale, the holes are cleaned with a cotton swab or any other object, the hardness of which should not exceed the hardness of the sole material. |
 |
Damage to the thermostat. This part allows you to adjust the heating temperature of the sole. The bimetallic plate maintains a predetermined temperature by connecting or disconnecting electrical contacts, depending on the temperature. Over time, contamination or the ingress of fibers in the fabric may disrupt contact. As a result, the heating element will not heat the sole. To eliminate the breakage, you will have to disassemble the iron and clean the contacts with fine sandpaper or any sharp metal object |
 |
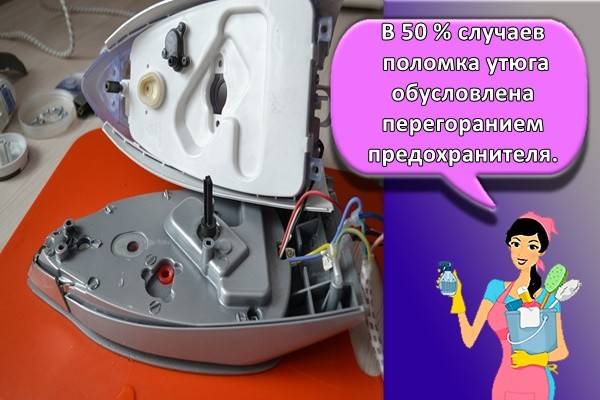
Thermal fuse tripped. This part is a fire protection device. The thermofus opens the electrical circuit and turns off the electric iron if the heating temperature of the sole exceeds the permissible one. Various models have both disposable and reusable safety devices. When diagnosing, the serviceability of the fuse is determined by a multimeter. The resistance of the working device is zero. If the thermal fuse is defective, the multimeter will show an open circuit. Breakage is eliminated by replacing the part |
 |
Breakdown of the heating element. This breakdown is common and leads to a complete loss of ironing performance. The outsole just doesn't get warm. In modern models, the heating element forms a single structure with the sole and cannot be replaced separately. A multimeter is used to check the health of the heater (see fig.). A normally operating heating element has a resistance ranging from 20 to 40 ohms. If the multimeter shows an open circuit, you will have to buy a new iron, since the cost of replacing the sole is commensurate with the price of a new device |

This video introduces readers to typical irons malfunctions, the procedure for diagnosing and eliminating them:
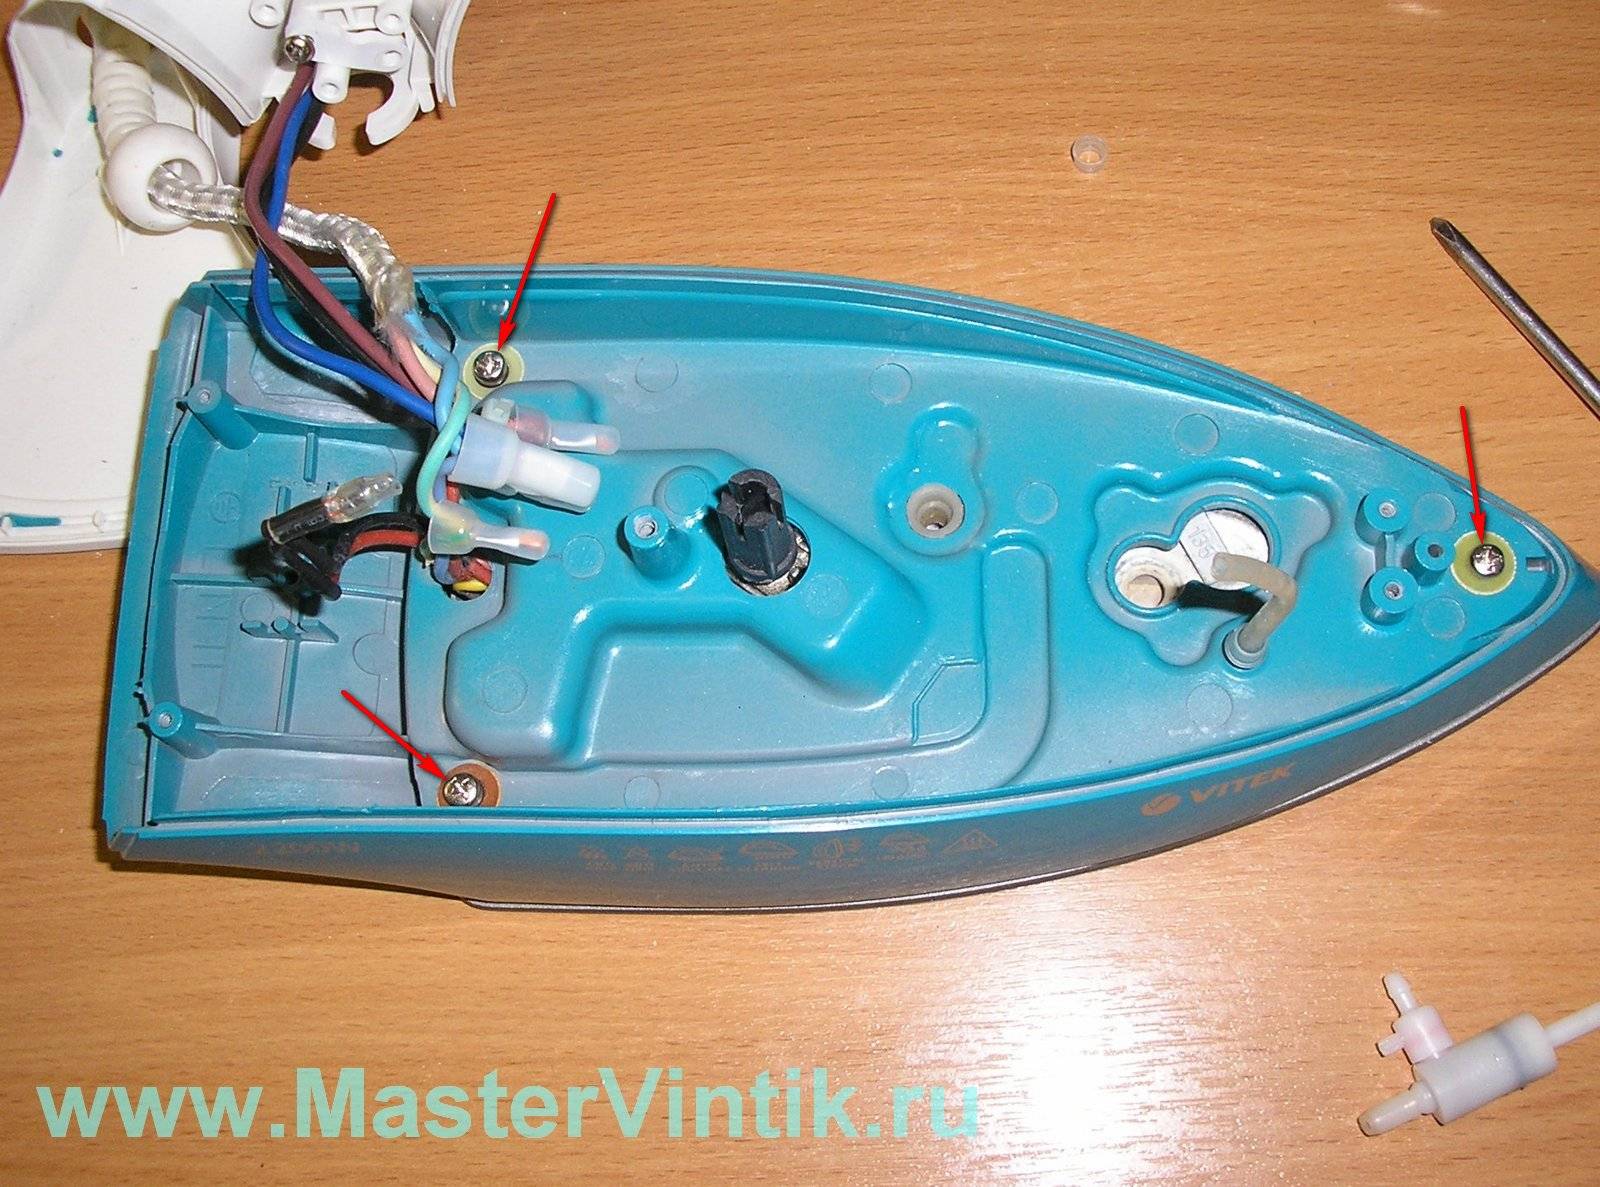
Electrical appliance inspection
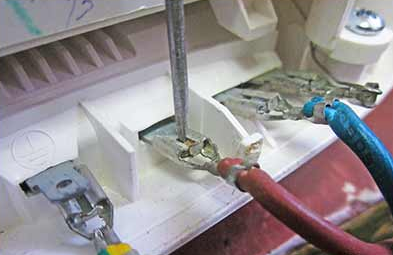
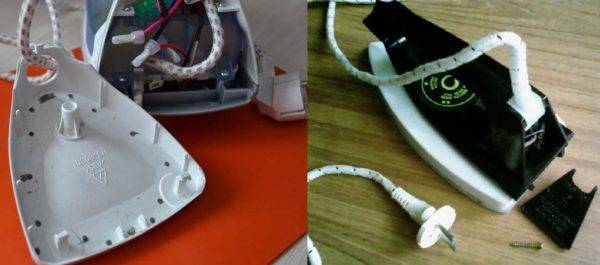
As with the repair of any household appliances, the repair begins with a visual inspection of the electrical appliance itself. In photo # 1, we can observe a poor-quality connection of the power cord of the electrical appliance, the wires are connected and wrapped with insulating tape.


The power cord must be solid and free of any connections. With such a repair, it is advisable to select the power cord with a fabric braid. If you follow the fire safety measures when using the iron, then an ordinary flexible two-core or three-core cable is quite suitable, the third wire of which will be the ground wire.

photo # 1
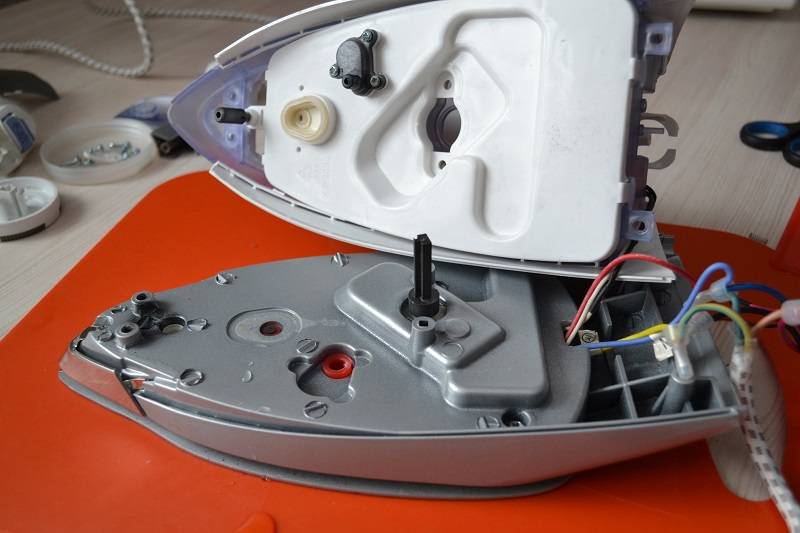
Temperature regulator
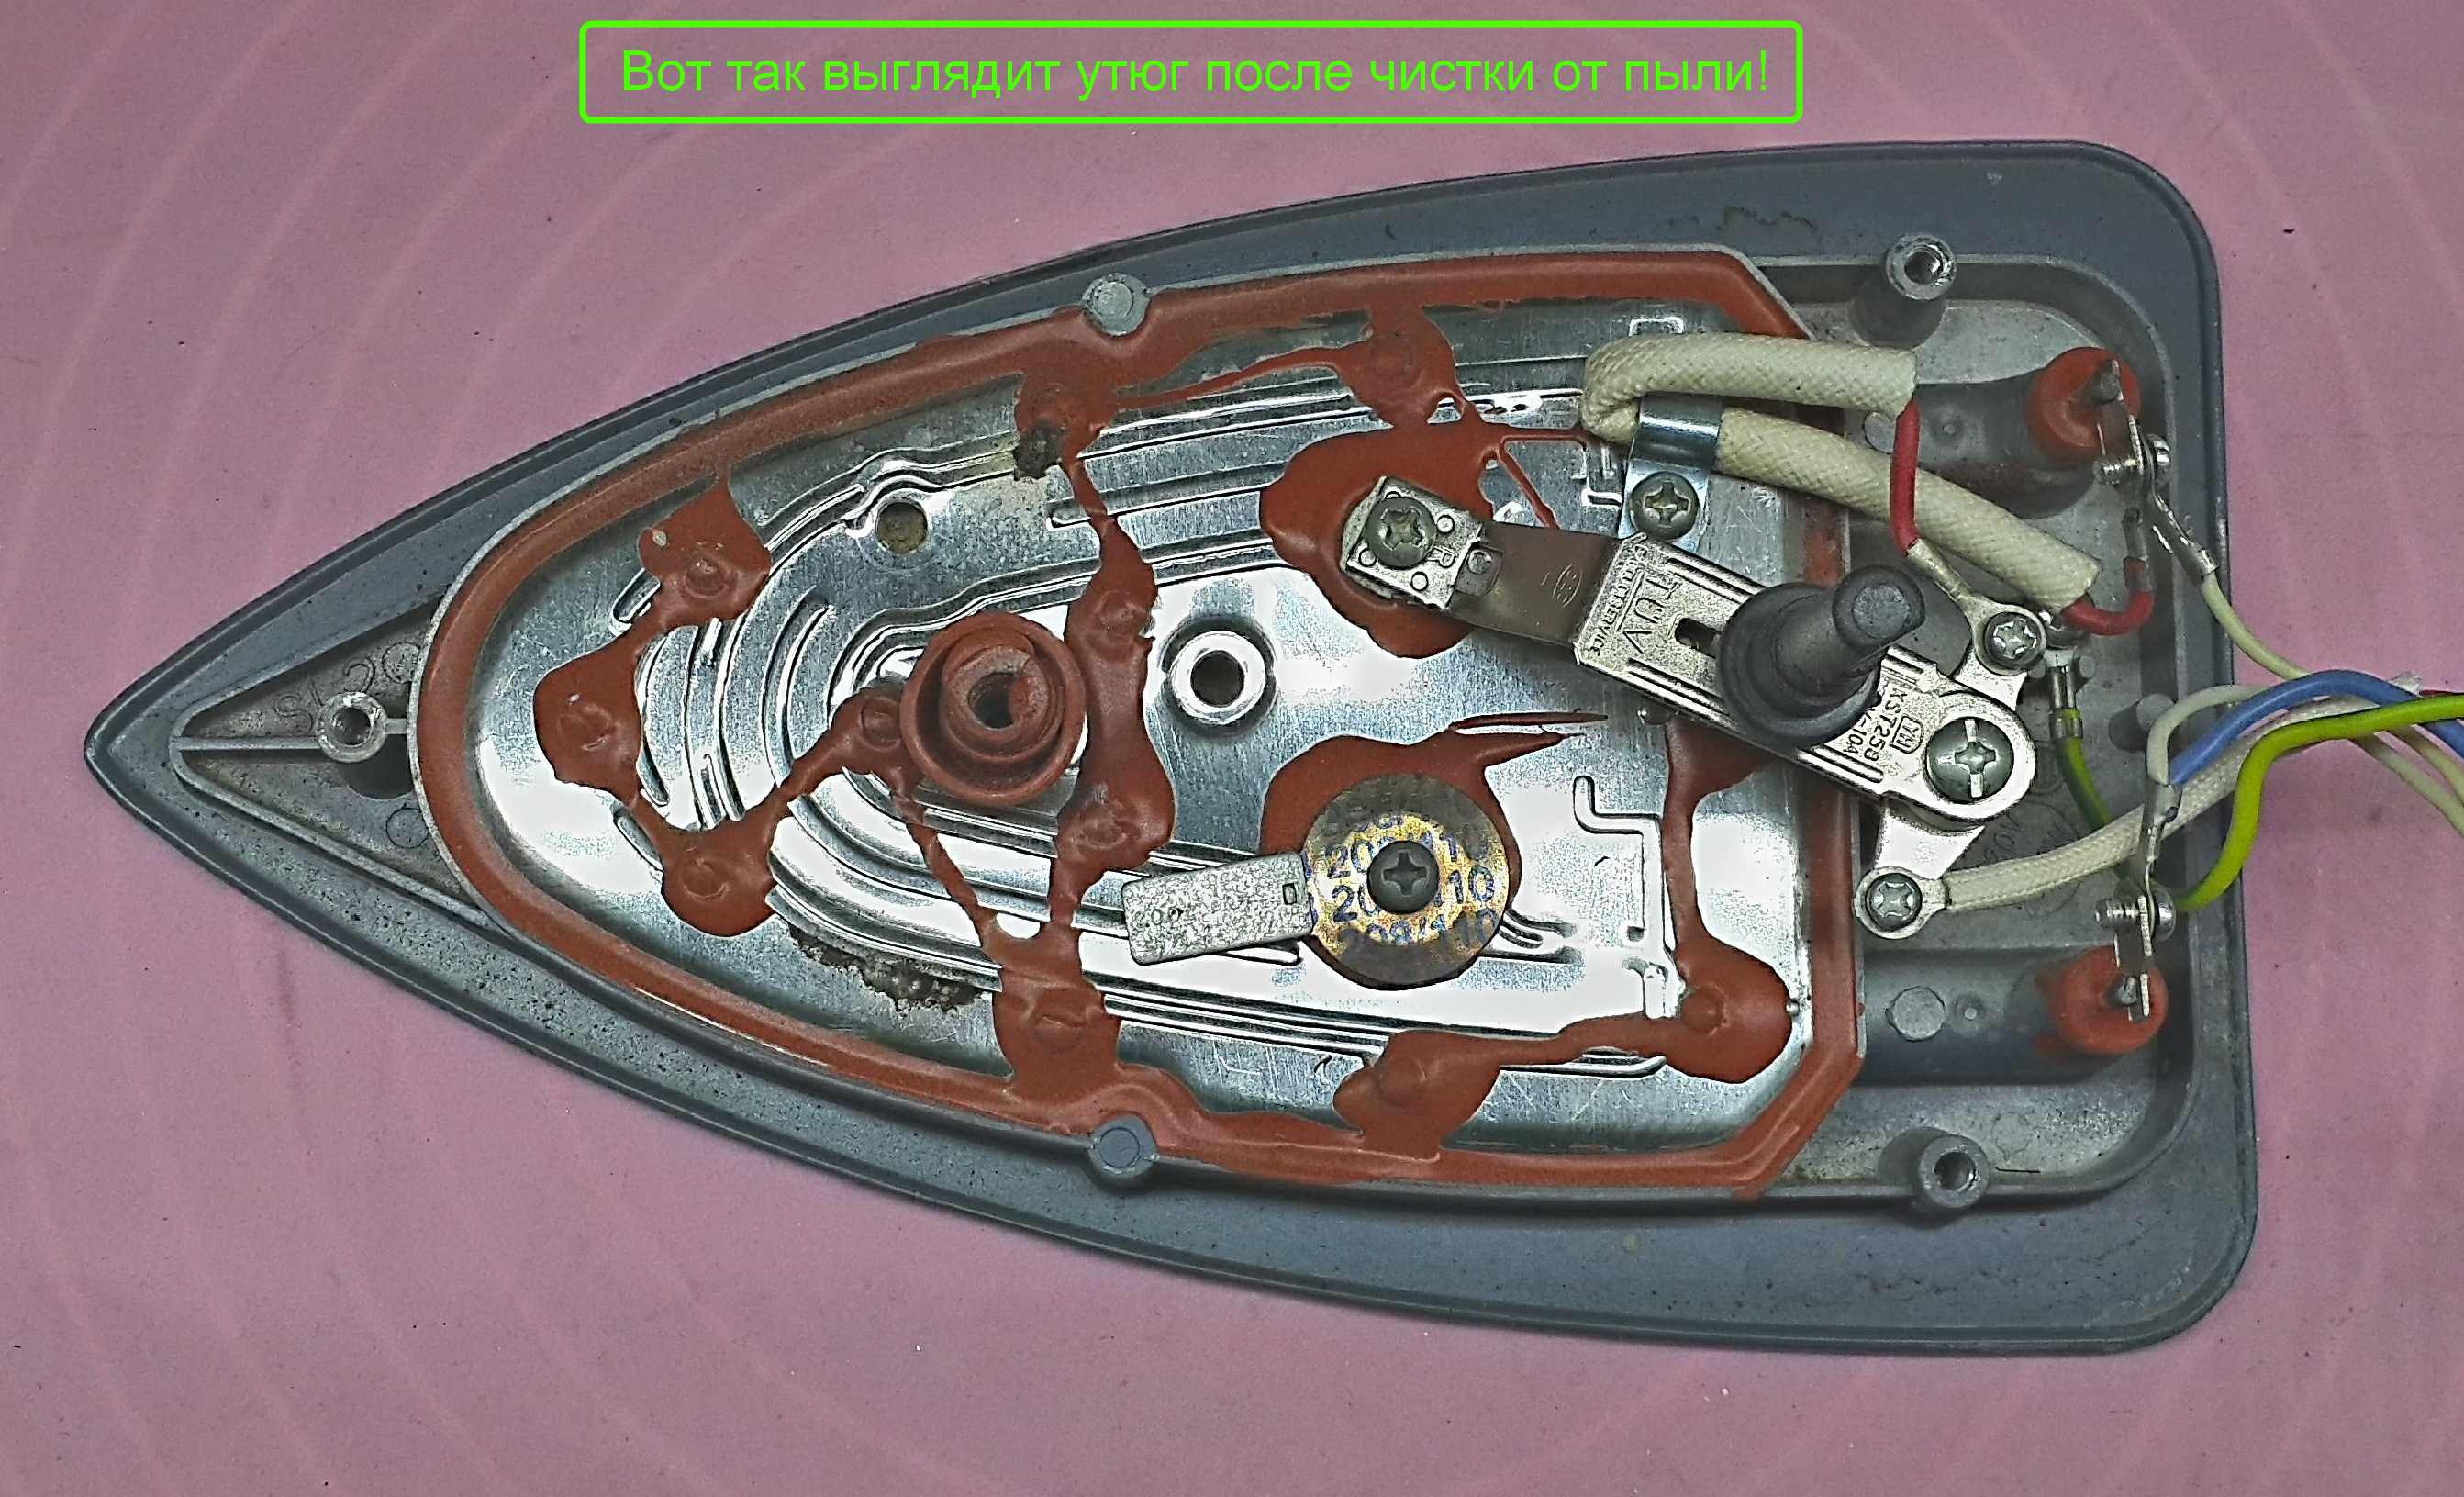
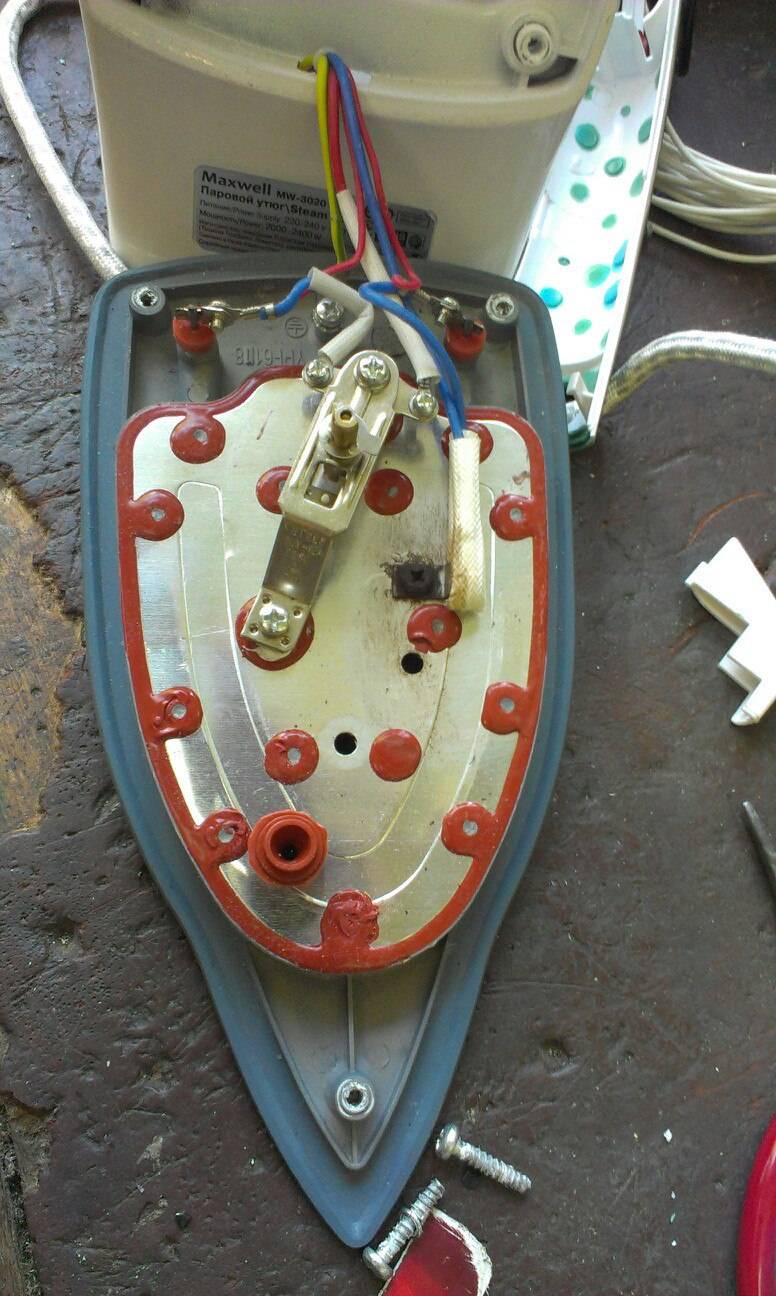
Further, do-it-yourself iron repair - inspection of the temperature regulator. Having detached the plastic case from the sole of the iron, we get access to it.
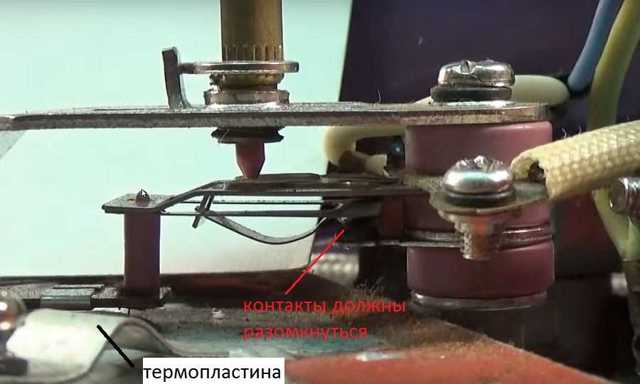
How does he work? It consists of three main parts: a rod, contact plates attached to it and a bimetallic plate. The bimetal plate is heated from the soleplate of the iron. As the temperature rises, it heats up, bends. At a certain temperature, it is bent so much that it opens the contacts, turning off the power. When the iron cools down, it returns to its original state, the contacts close again, and the iron starts to warm up again.
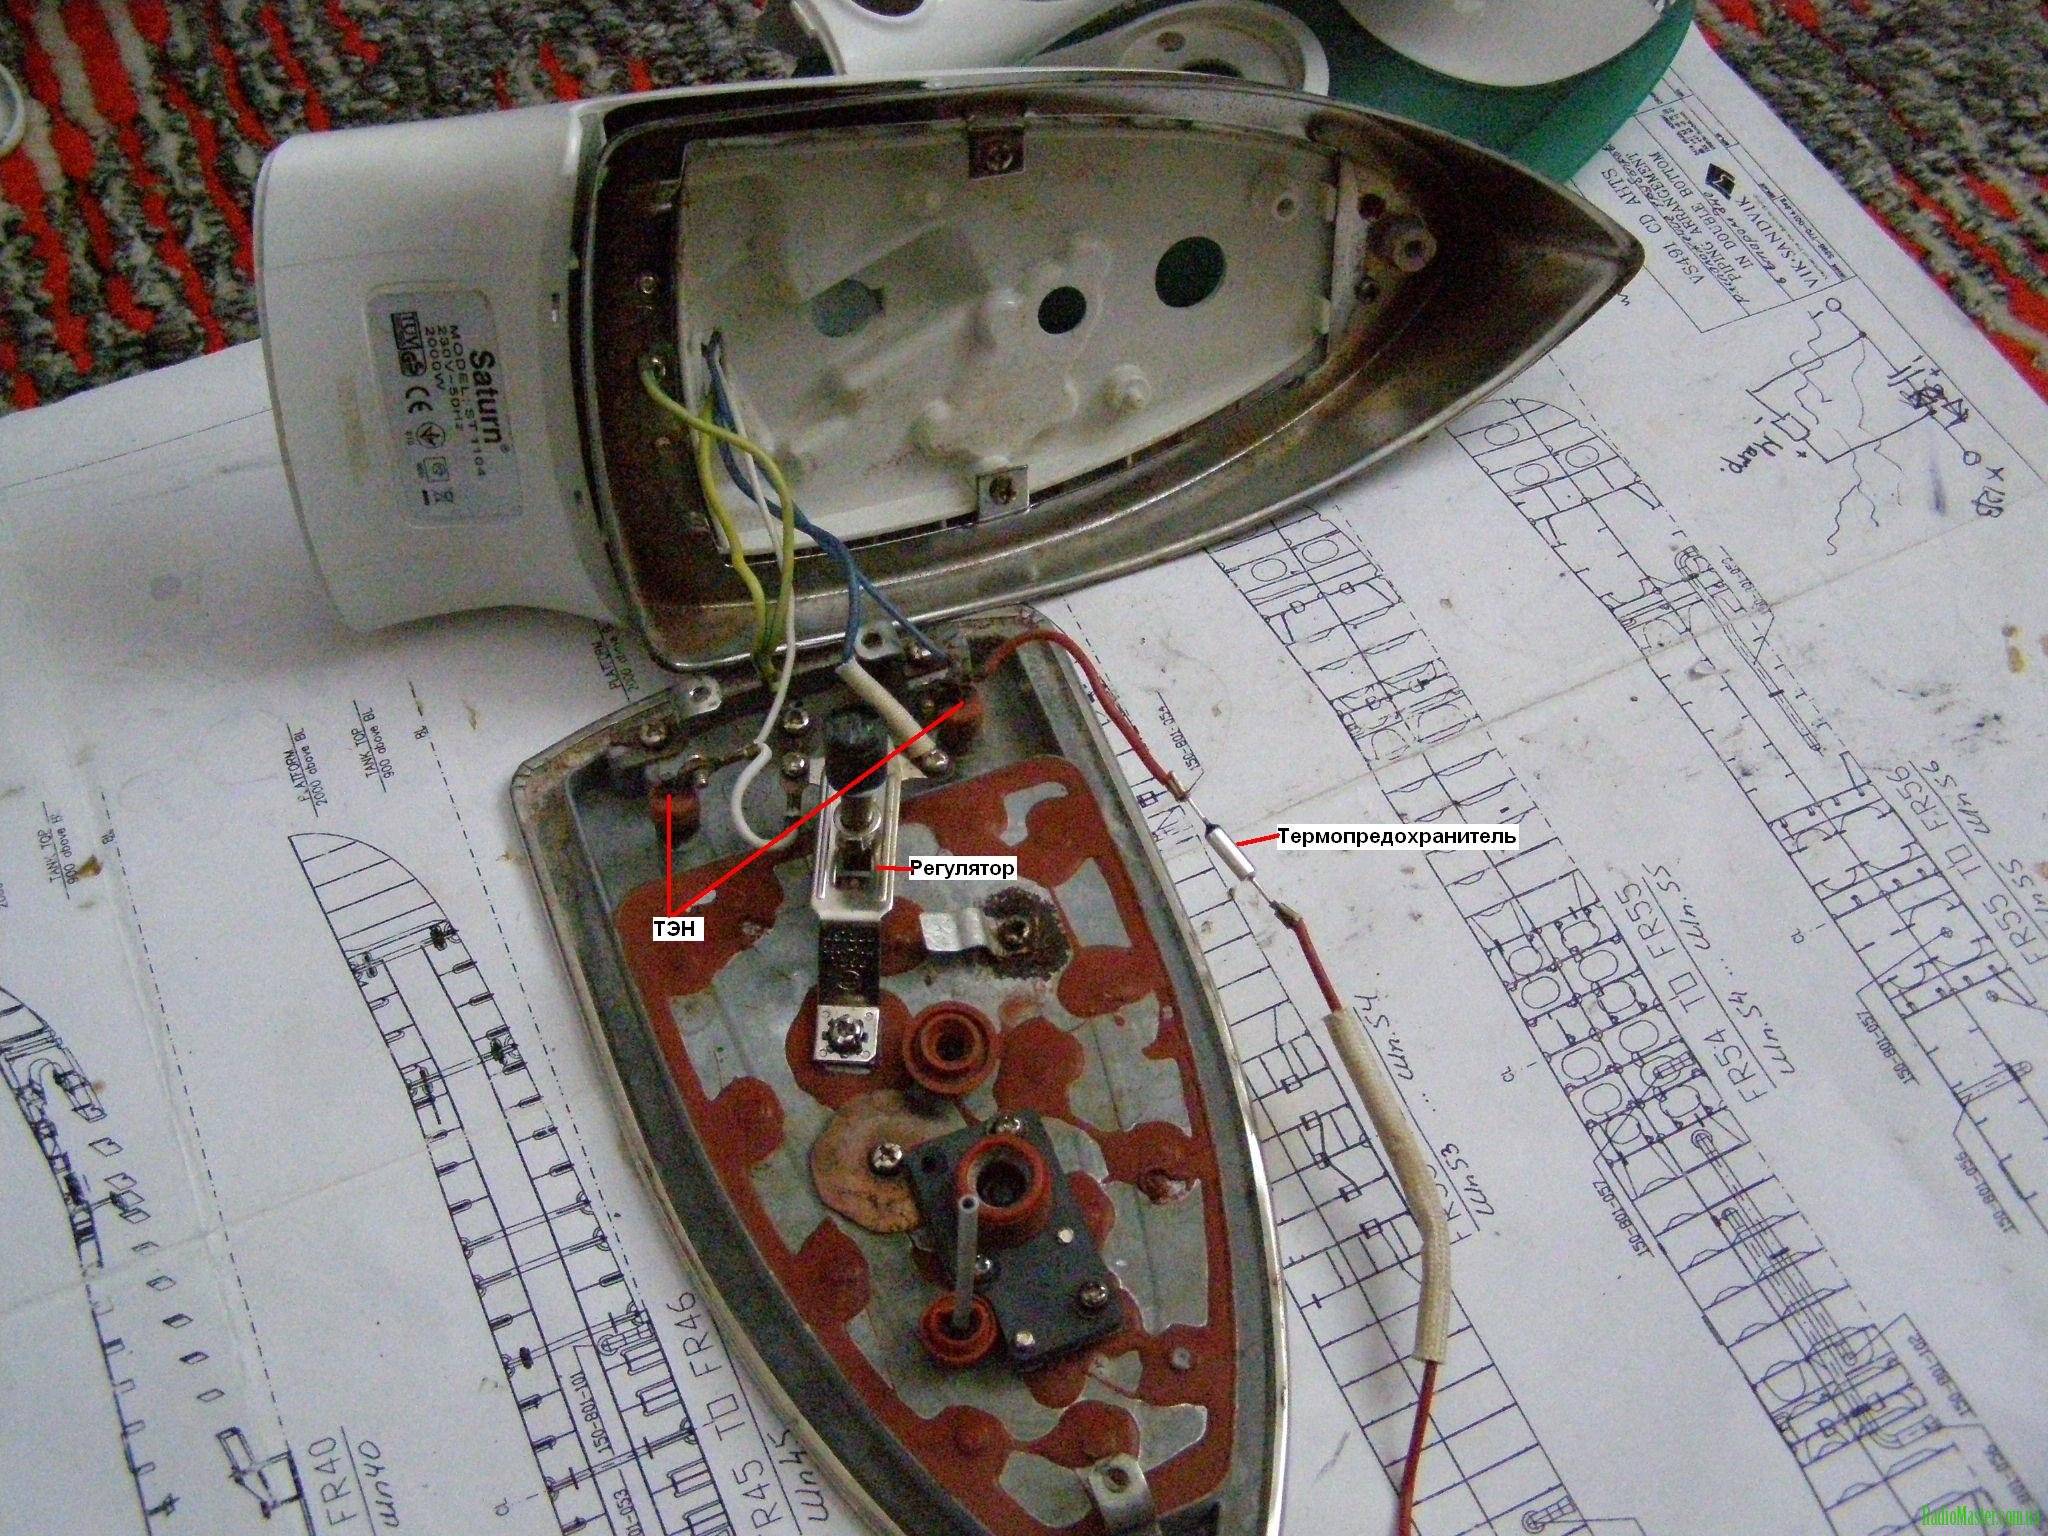
First you need to check if it works at all. Twist it from one extreme position to the other. In one of the positions, a characteristic click should be heard, which is emitted by closing contacts. It is through them that power is supplied to the heating element of the iron.Leaving the thermostat in this position, check the presence of electrical contact.
Two contacts leave the temperature controller (wires are connected to them that go to the heating element). We touch them with the probes of the multimeter (dial mode). If it beeps, everything is fine. But by putting the regulator in another extreme position, you should get a "break" - the contacts should open. In this case, this node is working normally.

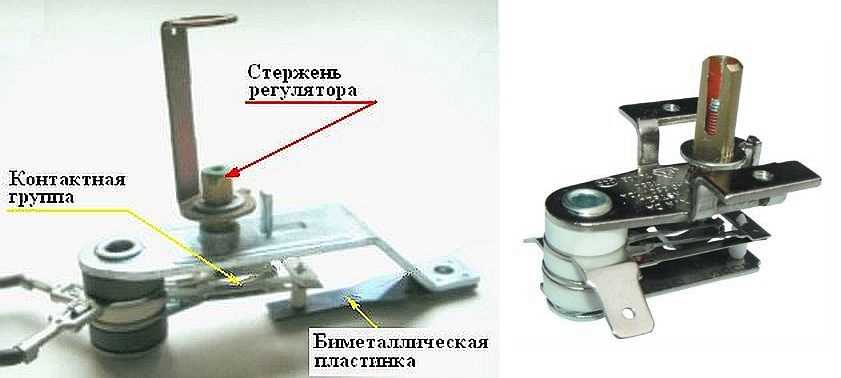
Iron temperature controller
Visual control will not hurt either - maybe they are burnt, oxidized, weakened. If there is scale, dirt, rust, they can be carefully cleaned. To do this, you can use a strip of very fine sandpaper or a nail file. Do not be too zealous - do not cut the contacts completely. When cleaning, try to bend the plates to a minimum - so as not to loosen the contact.
Sometimes the adjuster is difficult to turn. Grasp it with pliers or pliers and rotate it back and forth until you get a smoother ride. Then you need to take a simple pencil and rub the knot with graphite. It does not sinter at high temperatures and has good lubricating properties.
After all the manipulations, again check the presence of a contact in the "on" position of the thermostat. If everything is fine, you can try to connect the iron and check if it works. Perhaps the repair of the iron with your own hands is over. If not, let's move on.
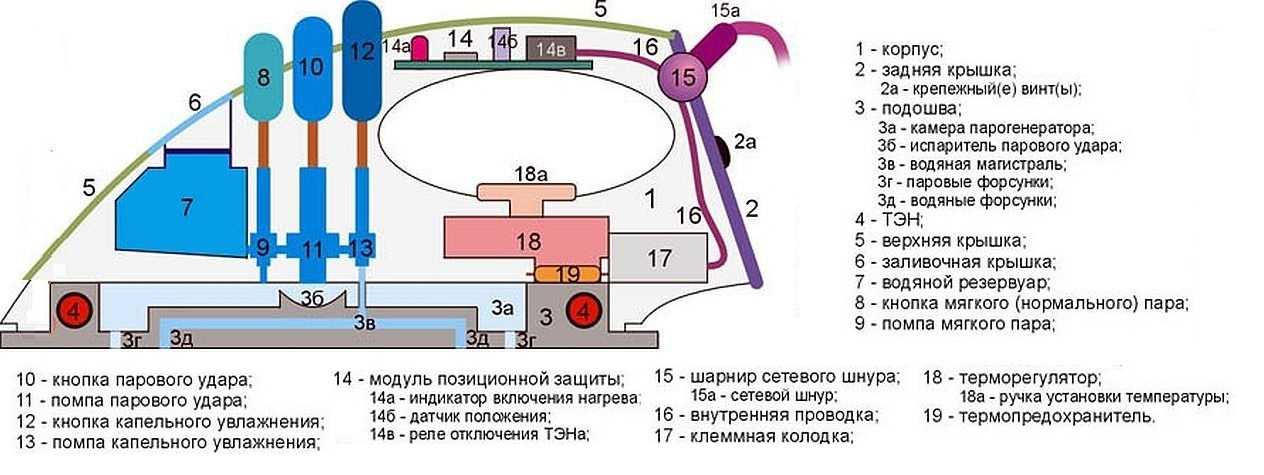
How the steam iron works
But where to find all these secret cogs? To do this, you first need to get acquainted with the device of a modern iron with a steam generator (steamer). Its general scheme is shown in Fig.:

Diagram of an iron with a steam generator
The shock steaming system (superheated steam) is installed only in certain models, because it is effective only when the thermostat is close to the maximum (three points). In good irons with shock steam, the shock pump is blocked if the regulator is set at 1-2 points. What is always written in the instructions, how what, pray tell, a normal housewife reads the instructions for the iron? That is, if there is no steam boost, then, perhaps, to eliminate the "malfunction" you just need to turn the temperature regulator.
The positional protection module turns off the heating element if the position of the soleplate of the iron differs from the horizontal position: it was placed upright, dropped, etc. This is perhaps the only electronic innovation in irons. In high-quality irons, positional protection is the second most frequent source of breakdowns (after scale in the steamer, see at the end), but at home it is most often quite maintainable.
How the Chinese soar
If you look at the sole of not even cheap Chinese irons, it turns out that many of the drip humidification nozzles are fake, fake. In fact, when fully heated, a steam boost is obtained if you press the steam button; in the same position of the thermostat, soft steam comes from the button with droplets, and for drip humidification, in this case, you need to press both buttons at once.


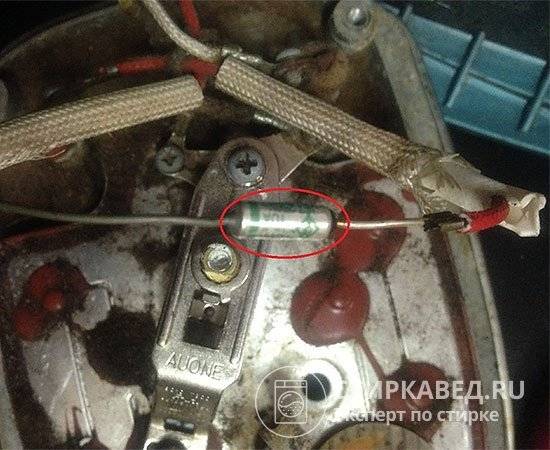
Thermal protection
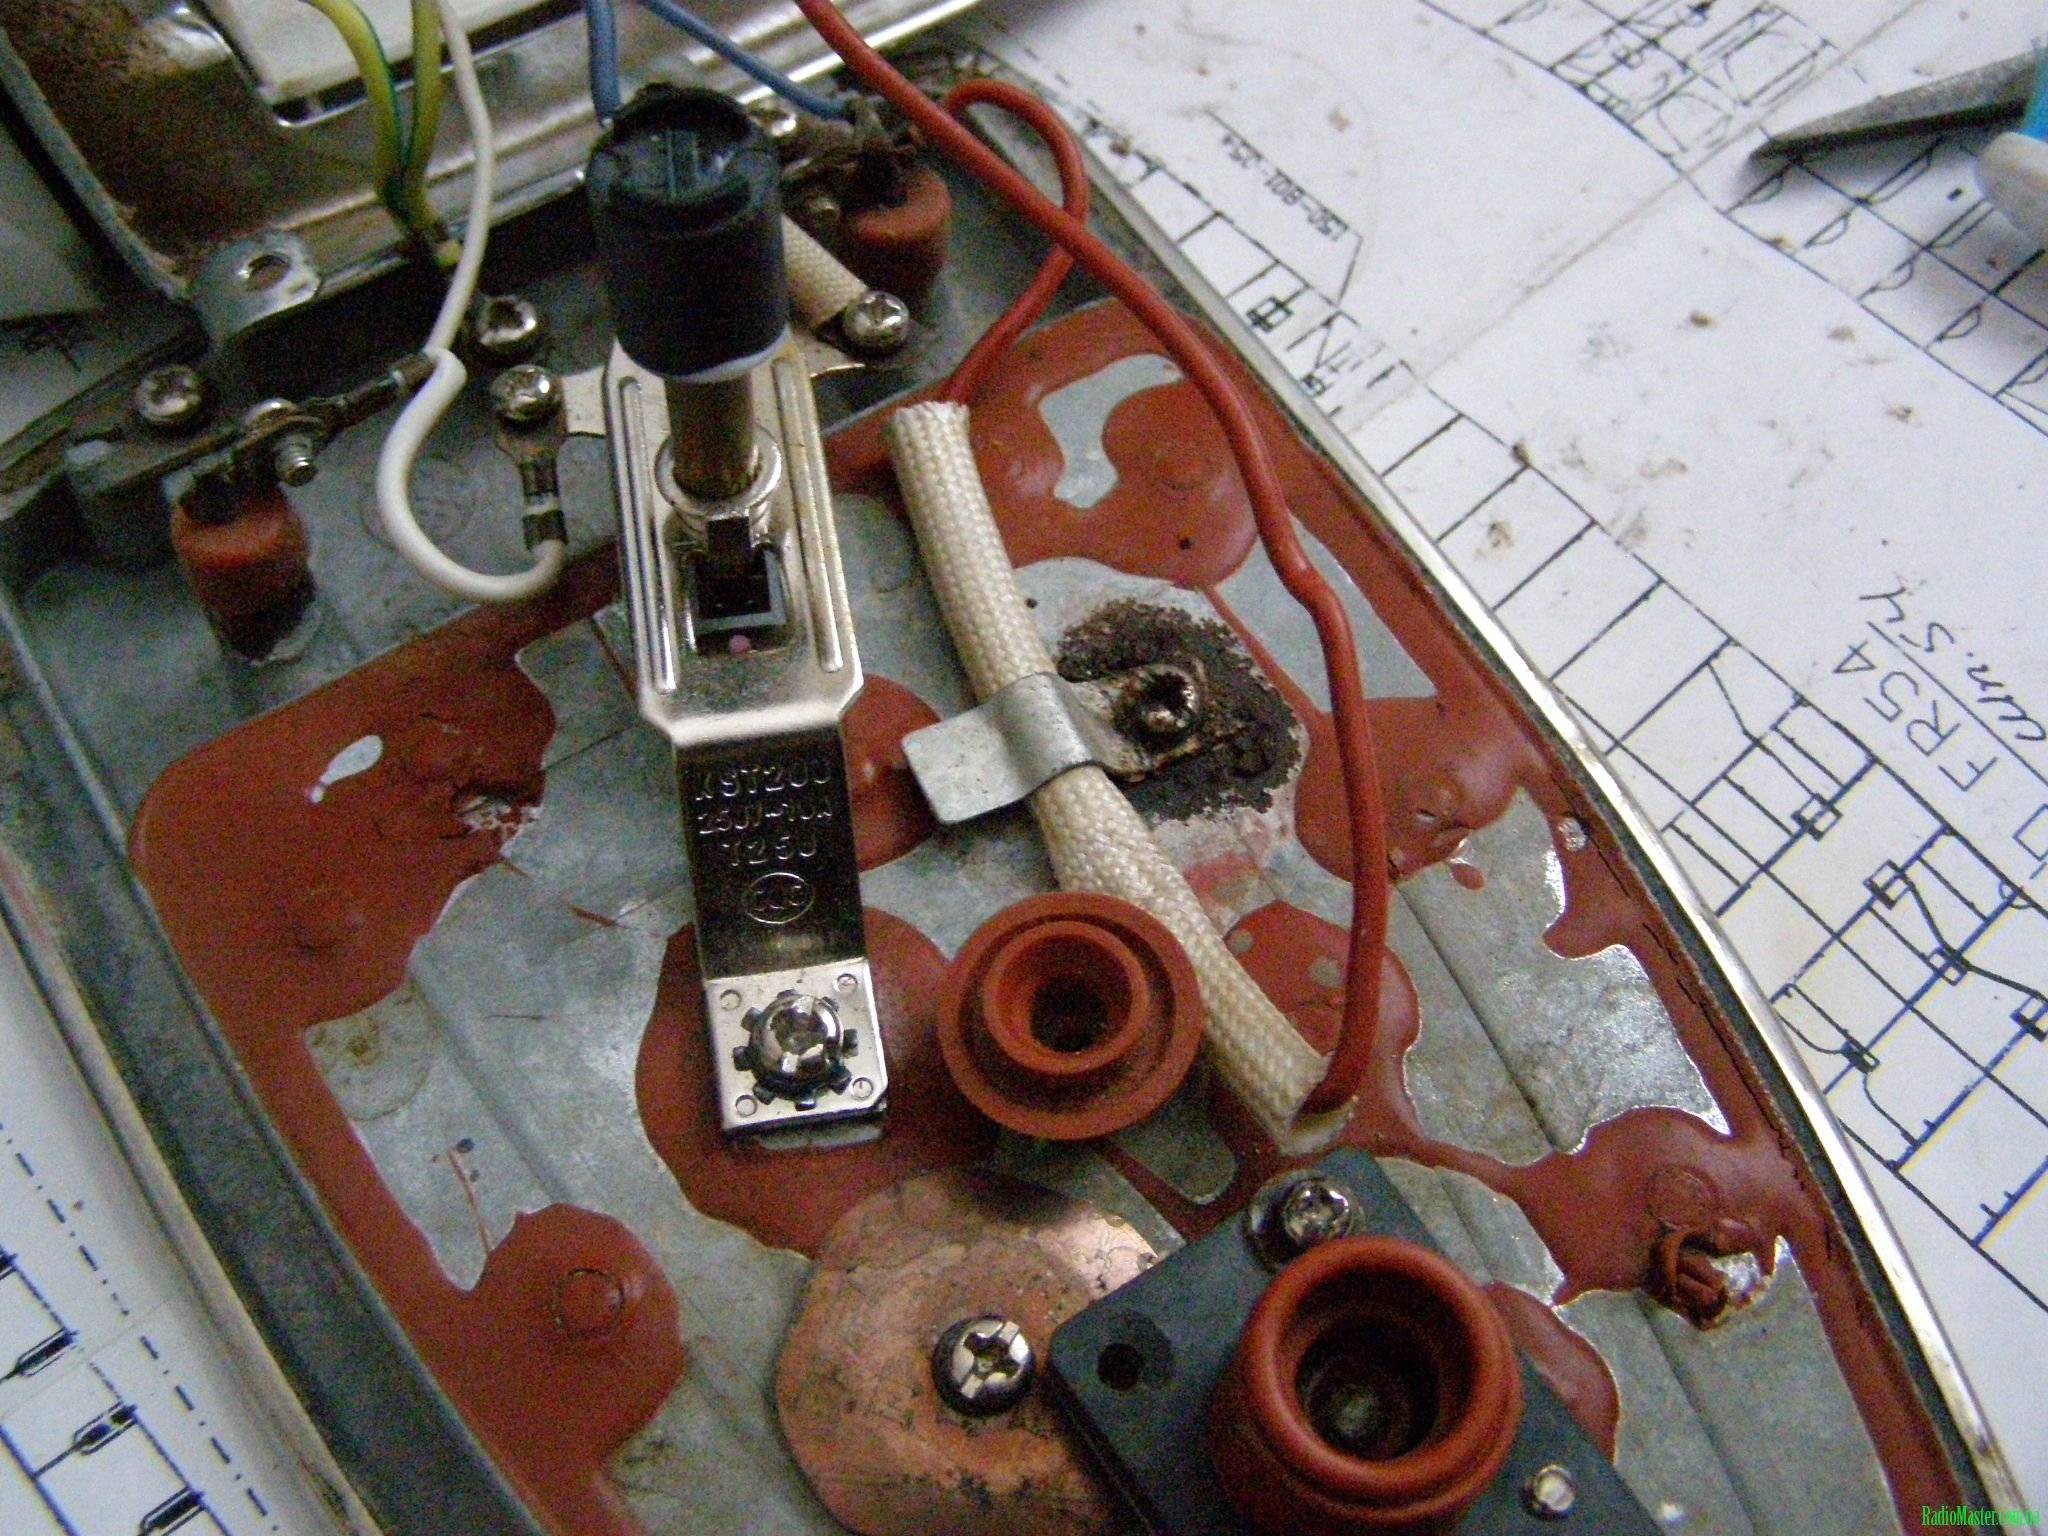
A thermal fuse (thermal) is triggered if the temperature of the sole of the iron exceeds 240 degrees or the current through the heating element is a certain set value. That is, the thermal fuse, instead of the unusable one, must also be selected by current, depending on the power of the iron:
- 2200 W - 25 A.
- 1500 W - 16 A.
- 1000 W - 10 A.
- 600 W - 6.3 A.
Excessive thermal current is needed, because 220 V is the effective (effective) value of the mains voltage; the amplitude is 220 V x 1.4 = 308 V. The half-cycle duration of the 50 Hz frequency is 10 ms, and the thermal response time is 4-5 ms. Suddenly, the mains voltage will jump to the maximum permissible value of 245 V, the thermal fuse for the operating current of the heating element can burn out in a perfectly working iron.

Thermal protection devices for irons
Thermal fuses are disposable (pos. 1 in the figure), recoverable, pos. 2, and self-healing, pos. 3.The first ones burn out and must be installed in a dielectric heat-resistant sleeve (usually made of fiberglass), otherwise a breakdown of the mains voltage to the sole is very likely. In a recoverable thermal fuse, the prestressed bimetallic plate "flips" and opens the contacts. To restore it, you need to squeeze something sharp through the window in the contact until it clicks back. The self-healing thermal protection will return to its original state if the iron is unplugged and allowed to cool completely. Self-healing thermals are structurally combined with a thermostat (see below) and are always supplemented with a current fuse.
Safety engineering
A steam iron is an electrical appliance that also comes into contact with water, so care must be taken when disassembling such dangerous equipment. Before starting work, you must disconnect the iron from the power supply, and only then drain all the water
If serious problems are found precisely in the electrical part, then it is better to immediately contact the service center.
Since it is not very difficult to disassemble the iron, many consider it their duty to find and fix the problem on their own. However, this does not work in all cases, so sometimes it is much easier to buy a new device than to try to revive the old one with your own hands. The same applies to repairing it in the workshop. The costs fully justify the purchase of a new iron, to which the owners should already be treated with "respect." First of all, this concerns the recommendations of manufacturers, as well as the use of the most pure water for the device.
No steam escaping - cleaning the soleplate holes
It so happens that the iron seems to be working, but for some reason the steam does not come. The steam cannot find a way out, usually because scale (limescale) has accumulated on the holes. To clean the sole, take a baking sheet and pour a solution of vinegar (1 tbsp. Per 1 liter of water) or citric acid (1 tbsp. L. Per 1 tbsp. Water) into it, and place the iron. Place it so that the spout is below the back edge. Pour water to a height of 1-1.5 cm. Now you need to adjust the steam supply to the maximum, and put the baking sheet on fire. Bring to a boil and let cool. We repeat the process 2-3 times.
To avoid limescale build-up, use purified water to extend the life of your iron.
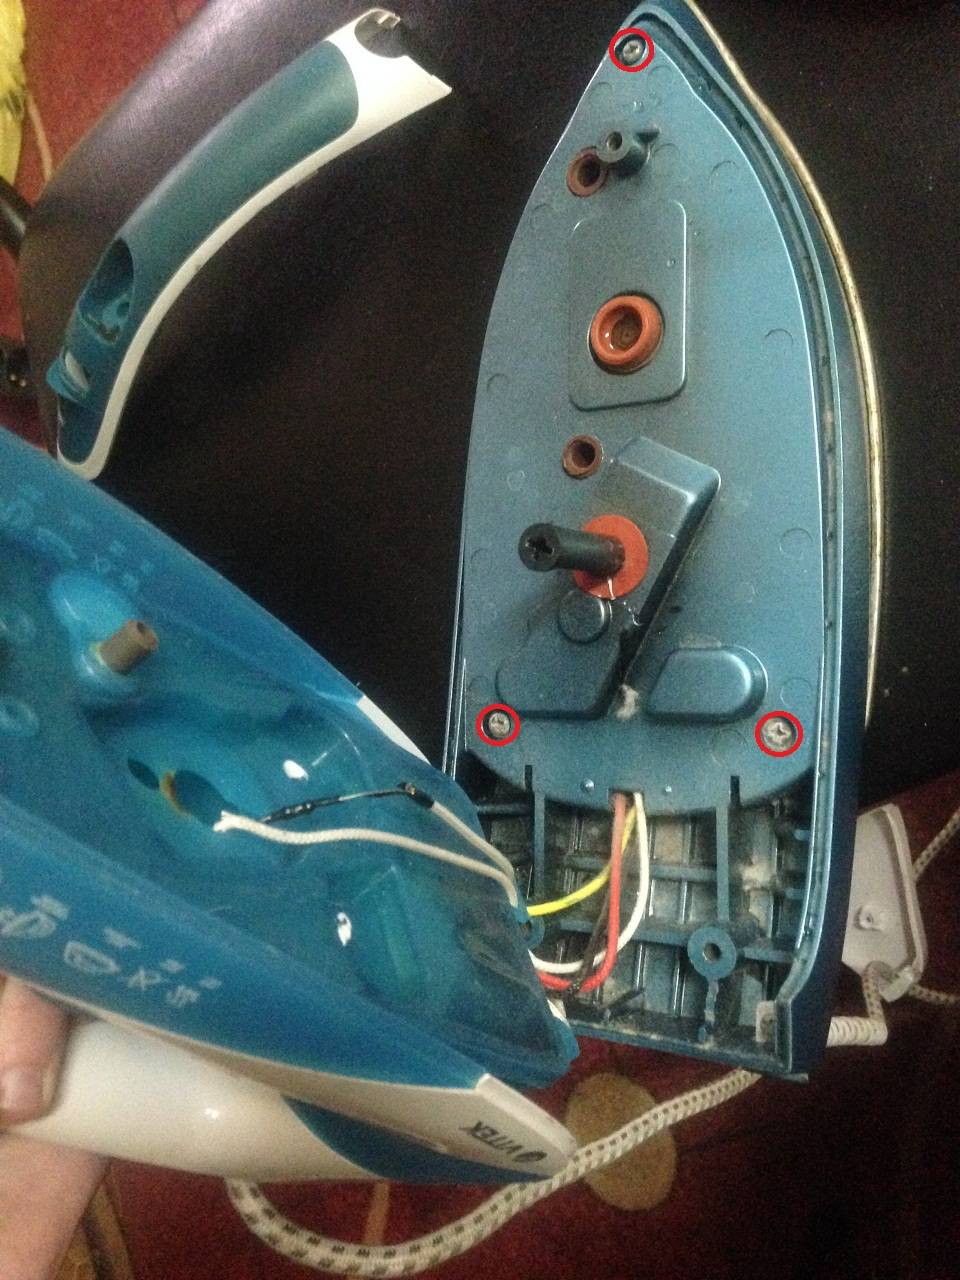
How to disassemble the iron
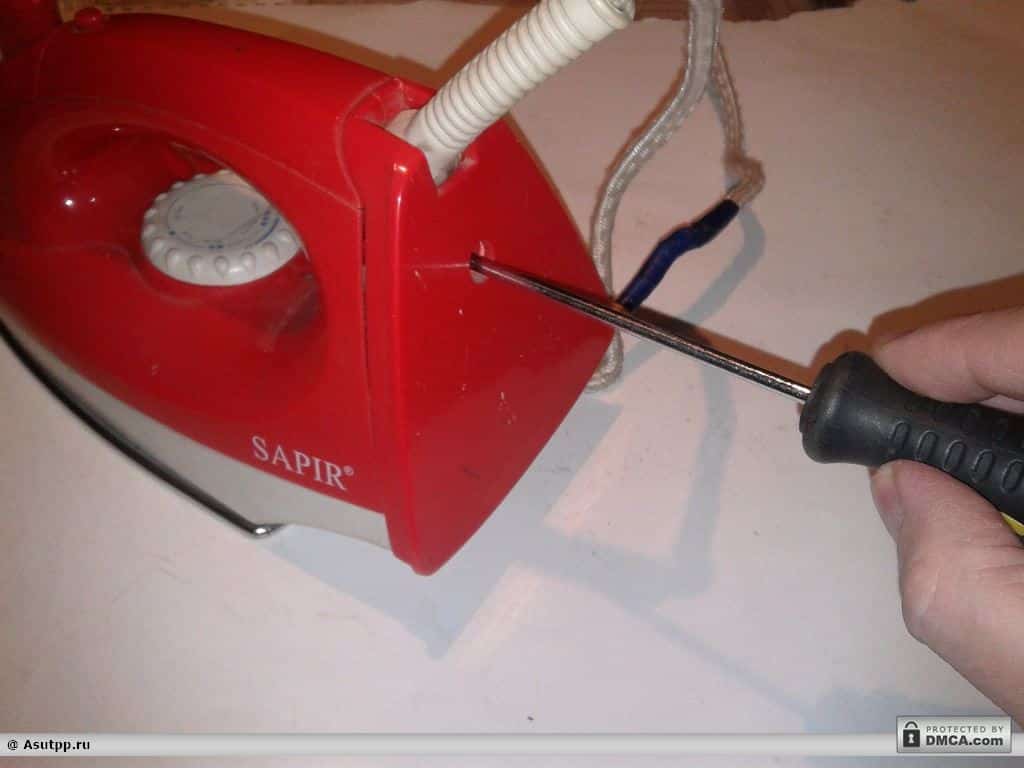
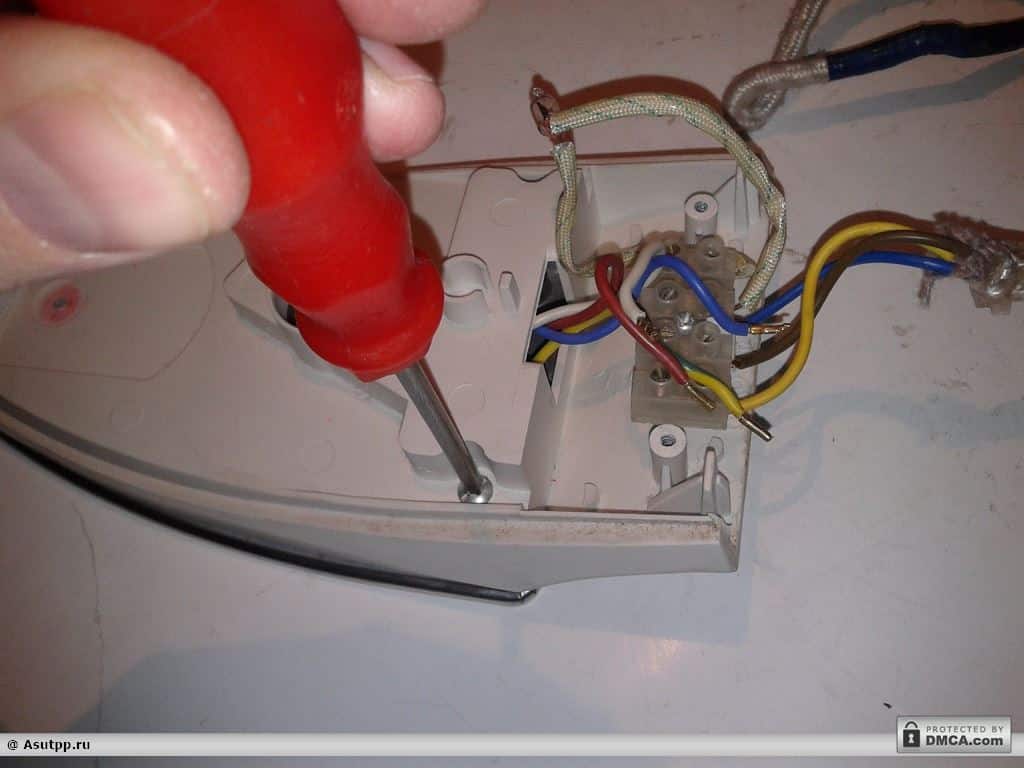
The first difficulty faced by those wishing to repair the iron on their own is disassembly. This is far from simple and obvious. The easiest way is to remove the back panel. There are several screws that are visible and which are difficult to unscrew. In addition to screws, there may be latches. So, having unscrewed all the visible fasteners, we pry the cover with the tip of a screwdriver or an old plastic card, separate the cover from the case.
Under it, a terminal block is found to which the cord is attached. If there are problems with the cord, you can not disassemble the iron further. But if everything is fine with the cord, you will have to disassemble it further, and this may cause problems.
In some irons - Philips (Philips), Tefal (Tefal) there are also bolts under the lid. We unscrew them too. In general, if we see fasteners, we remove them.
Removing the back cover is the first thing to do when disassembling the iron
Each manufacturer develops its own design, and it often changes from model to model. Therefore, difficulties arise. But there are several points that are found in almost any manufacturer.
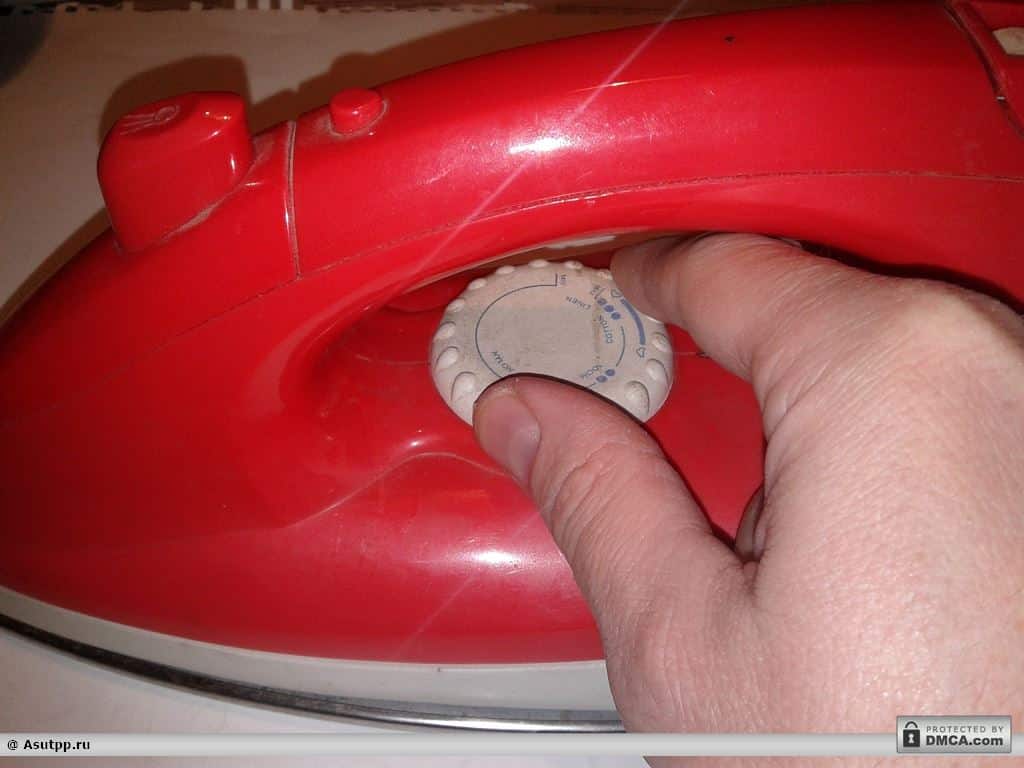
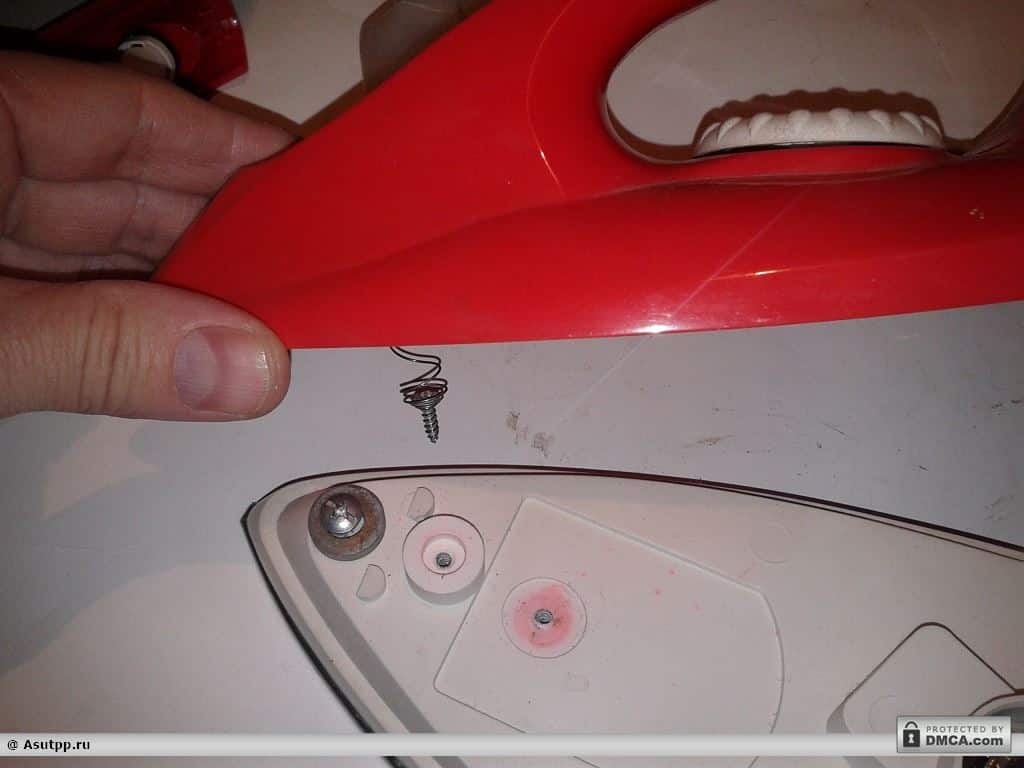
Immediately you need to remove the temperature regulator dial and the steam supply buttons for which they need to be clamped in your fingers and pulled up. The buttons may have latches, so you might need something thin to squeeze them out a little - you can pry them off with a screwdriver.


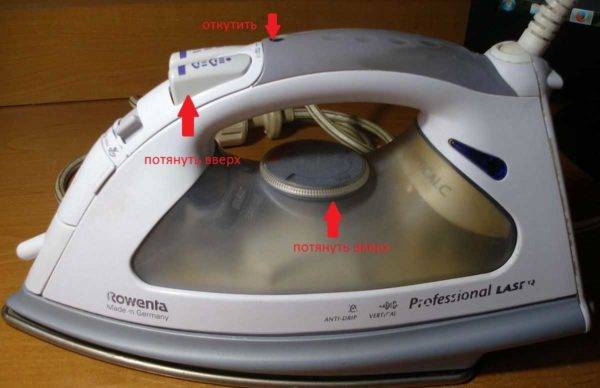
To disassemble the iron you need to remove the buttons
Some irons, such as the Rowenta, as in the photo, have bolts on the handle (found in some Scarlet models). If there are any, we unscrew them.A screw is also hidden under the removed buttons, we also unscrew it. Then we remove the upper plastic parts. They are usually fastened with latches. To make it easier to remove them, you can put a knife blade or a piece of plastic (plastic card) into the lock.
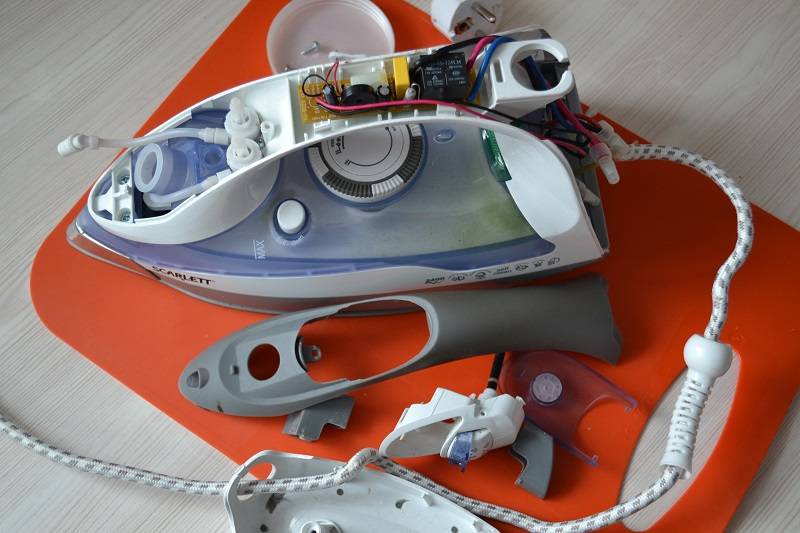
There are usually a number of bolts under the covers. Having unscrewed them, we continue disassembling until the body and sole are separated. Unfortunately, it is impossible to give more precise recommendations - there are too different designs. What can be advised - to act slowly and carefully. And a few videos on how to disassemble irons of different brands.
Basic details
The soldering device is made from a copper rod. Nichrome coil heats the device
It is important that the heat is immediately transferred from the heating element to the sting - this is the name for a rod with a wedge-shaped tip. It is inserted into a steel tube that is wrapped in glassy cloth or mica
A wire is wound around the mica, which serves as a heating element. To reduce heat loss, nichrome wire is wrapped with asbestos. The ends of the nichrome spiral are attached to the conductors of the electrical cord. To ensure reliability and preservation of the generated heat, the coils are bent and folded in half at the point of connection with the copper wire. Additionally pinched at the point of engagement.
The listed elements are located in a metal case. It can be made in two ways: welded from two pieces or constructed from two pieces of metal.
The overhead rings are used to fix the housing on the metal tube. After the electric current is applied, it is distributed from the nichrome to the spiral, and after that the heat is supplied to the tip.
For rations of low-power diodes, experts advise using an electric current with a power of up to 12 W. Large parts and thick connecting wires need to be soldered with more powerful devices. A soldering iron with a power of 40 to 60 watts is suitable. Parts that are complex in design and heat permeability are soldered with devices with a power of 100 watts or more.
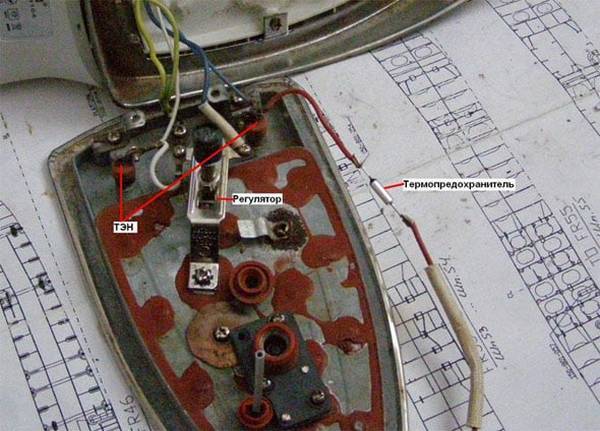
Thermostat
The soleplate temperature regulator is the most important unit of the iron and one of the most prone to breakage; it is a mechanical trigger device driven by a bimetallic plate. There are no "magnets, like in the refrigerator regulator" in the iron's thermostat. As in the thermostat of the refrigerator, there is also a mechanical trigger, only of a different design. Its principle of operation is simple:
- A part with a moving contact is pressed against a fixed changeover spring. The contacts are closed, the heating element is heating. The compression ratio of the spring is adjusted with the temperature setting knob.
- On the other hand, the movable contact is connected with a bimetallic plate by a dielectric pusher rod.
- The bimetallic plate, bending from heating, presses through the rod on the movable contact until it overpowers the spring.
- The spring throws over and opens the contacts.
- The heating element turns off, the sole of the iron with a bimetallic plate cools down.
- The bimetallic plate is straightened. When its pressure is sufficiently weakened, the spring is thrown back and returns the regulator to its original state.
The heating element heats up again, the cycle repeats. In old irons and some new ones, the thermostat is assembled according to the scheme with a free rocker (item 1 in the figure):

Diagrams of the device thermostats of irons
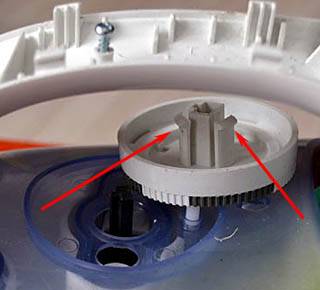
Its disadvantages are 2 pairs of contacts prone to sticking, and a large hysteresis, i.e. the difference between the response and return temperatures of the regulator. Therefore, regulators with a free rocker always have an adjusting screw under the handle, which is twisted if the iron heats up too much (twist 1-2 turns) or weakly (twist the same). The temperature adjustment knob must be removed to access the calibration screw. It sits on the axis under friction, but is held in the body by paws with stops, see fig. on right.To remove the handle, it must be turned at least until it stops (beyond the first point) and pulled up.


Iron temperature adjustment knob
Most modern irons are equipped with a unified double spring-loaded thermostat, pos. 2: it works very well and almost never needs to be readjusted during operation. Its weak points, firstly, as in the previous. case, contacts, see below. Secondly, the ceramic rod (marked in blue), which sometimes cracks. The stem length is 8 mm, and a new one can be made from an MLT-0.5 W resistor, pos. 2a. The resistor leads are bitten off to a length of 1.5-2 mm, the paint is washed off with dichloroethane or a surfactant remover, the conductive layer is cleaned with sandpaper. If the resistance of the resistor is more than 620-680 kOhm, someone puts it instead of the rod as it is, the paint burns without smoke and stench. However, then the sole of the iron can be unpleasantly "pinched" by electricity. And what is much worse, the resistance of a resistor with an unprotected conductive layer can decrease several times, and the leakage current through it can increase to a dangerous value.
How to clean contacts
It is not necessary to clean the burnt contacts of the iron temperature regulator with sandpaper, as advised in many sources: they work under high current and after cleaning with sandpaper they quickly burn again. In the regulators of modern irons, the contacts are thin-walled stamped, and in this case they burn out to holes. To clean the contacts, you need to wrap the nail file along the suede soaked in alcohol, stick it between the contacts and rub until the suede stops getting very dirty with carbon. An alternative is to cut a thin wedge out of an ink eraser and clean the contacts with it. Then - with the same wedge from a pencil eraser. Finally, wrap the nail file with a rag moistened with alcohol instead of suede and remove the sticky eraser particles from the contacts.
Abstract reasoning
Manufacturers justify the transformation of the iron into a kind of combination lock with the requirements of safety, design and ergonomics. But, sorry, from the visible fasteners on the irons, as there were 1-2 screws behind, it remained. Moreover, the details of the bodies of old irons were made of their fragile bakelite and polystyrene, and the current plastics compete with metals in strength.
In fact, we, alas, live in an age of non-eternal things. One of the fundamental attitudes of the consumer society is inexorable: a product of mass demand must work flawlessly (the reputation of the manufacturer, and of course) no more than 2-2.5 warranty periods, and then quickly and irreversibly come into complete disrepair. At leading manufacturers of consumer goods, up to half or more of the design personnel are involved in ensuring that, God forbid, the product does not turn out to be too durable.
How the work of the industry for the trash can affects the environment, and the involvement of really high-class specialists in actually harmful activities on the mass consciousness, is another question, but the iron almost does not lend itself to such attempts: it is too simple, but inside it is too hot and humid. Therefore, damage to the iron at the design stage is reduced mainly to making it difficult to disassemble it outside the service center. Nevertheless, it is still possible to fix the iron at home with improvised means if you know where and what secrets can be hidden in it and how to open them without risking permanently ruining the iron.
Features of working with different manufacturers
Manufacturers produce several models of irons, each of which, despite the external differences, is based on the same design. Therefore, the repair of devices of the same brand is carried out according to the same algorithm.
Scarlett
Scarlett irons have a standard design. In this regard, such devices can be repaired, guided by the given diagram. The only thing to consider is that for some models of this brand, the bolts are located in inconvenient places.
Vitek
There is an emergency thermostat in Vitek brand irons.Therefore, in order to repair the device, it is necessary to check more details with a multimeter. Malfunctions with Vitek irons are basically the same as those discussed earlier.
Tefal
Under the Tefal brand - both cheap and expensive irons with additional details. This feature complicates the repair of this brand of equipment. In particular, some models have a non-standard back cover. And to disassemble such a technique, you will need to disconnect a number of additional latches.
How the iron works
In order to disassemble and repair an electric iron, you need to know how it works and works. Without this knowledge, it is useless to start repair work. Almost all steam irons from different manufacturers - Philips, Braun, Tefal, Vitek and others - have the same device and principle of operation. Differences can only be in the technical performance of individual parts.
 Steam ironing device
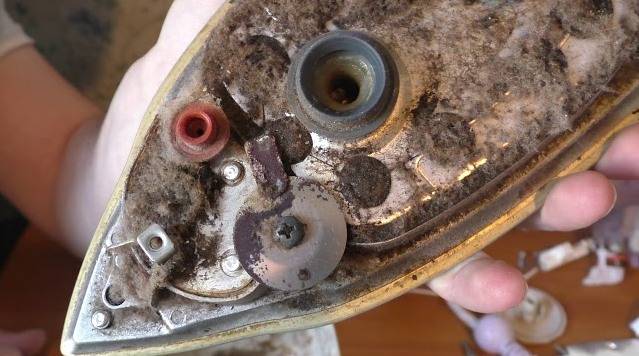
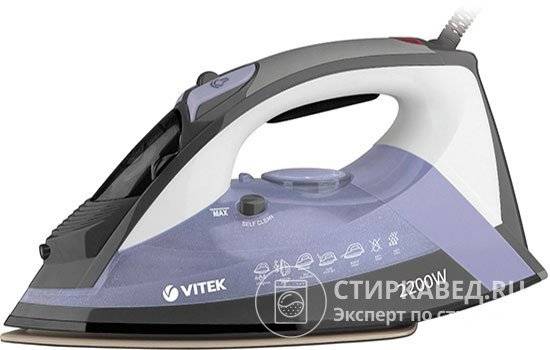
The main part in any electric iron is a sole with a tubular electric heater built into it (hereinafter also referred to as a heating element). The power of the heating element in modern Vitek irons is usually 2000W, 2200W or 2400W. The devices are available with soles made of different materials - stainless steel, aluminum, Teflon, ceramics and others. The soles have holes through which steam is released to ensure the desired ironing quality. The heating temperature of the metal base is regulated by a built-in thermostat.
 Vitek irons in design and ergonomics are not inferior to eminent competitors
In devices with a vaporization function, a reservoir is provided into which water is poured. The liquid must be cleaned and softened - only in this case it is possible to prevent the formation of scale inside the sole. Water enters from the reservoir onto the heated soleplate, is converted into steam and exits through the holes. The intensity of vaporization is also adjustable. Most modern models have the function of forced exit of a steam cloud with maximum intensity - steam boost.
Typically, electric irons have water spray nozzles. The electrical connection is provided by an electrical cord that can move freely relative to the housing. Inside the case, the cord is attached to the terminal block. Thus, the construction of modern steam irons is not complicated. Even those who are far from technology can understand it.
Possible causes of breakdown
Open in wiring
A break in the electrical network is the most common cause of device breakdown. If the fault is in the electrical cord, then you can correct the situation yourself. It is enough to replace the cord or plug, depending on where the break in the wiring occurred.


If the nichrome winding breaks, then the repair is performed in more complex stages, but it is also possible to fix it yourself. To determine the breakage and repair of the winding, a special device called a multimeter is used. Its use depends on the power, which is indicated on the body of the soldering iron or in the passport.
The fixing rings move apart, the protective case of the soldering iron winding is removed. The casing for protection is made in two types:
- A metal tube is attached to the pin with a winding, which abuts against the handle and is fastened with a clamping ring in the place where the sting is located.
- The protective body consists of two longitudinal halves of the tube, the edges of which are noticeably reduced in diameter. The two component parts are fixed with clamping rings.
Advice
To insulate the edges of the winding, asbestos gaskets, heat-resistant fiberglass or mica tubes (plates) are needed.
Burnout
The bending area during the work of the soldering iron is the most vulnerable to burnout of parts. Where the wire enters the soldering iron itself, and you need to repair it. Having disassembled the tool, you need to ring the wires coming from the plug, and then cut off a small piece (no more than 15 cm) from the side of the entrance to the soldering iron.If there is no contact during this action, then the piece is cut off from the side of the fork.
In many cases, it is not possible to repair the burnt-out part on its own and resume contact. In this case, you need to replace the wire with a new one, having done all the above steps. If the heating tool itself burns out inside the soldering iron, then this is much more difficult, but it is possible to eliminate it. They are repaired in one of the following ways:
- Rewind the heating coil if the soldering iron was rated for a power of no more than 36 volts. The supply voltage of 220 volts complicates the task. A thin long wire is wound around the base of the heater. In this case, the forks must not have direct contact.
- The entire burned-out heating element is changed, which is fixed with one screw, the shortest in length. The sting is fixed with a genuine screw.
We offer you to watch a video on how to repair a burnt out soldering iron:
Bad contacts
In many cases, if the connection is poor, it is necessary to check the voltage supply to the mains. If the power of the electric current is correct, then the following may be the cause of poor contact:
Incorrect tip position. It is enough to insert it a little deeper into the body and fix it. If the rod is short, replace it with a suitable one.
Dross on the sting. It can be removed with a simple emery paper or a file. The heated tip is dipped in rosin and the tip is rubbed on a braid with solder
When a thin and even layer of solder forms on the tip, the scale is completely removed.
Attention
The procedure for descaling the tip is carried out throughout the entire operation of the soldering iron as the tip of the tip blackens. High lead solder
The power of the instrument must be adjusted to avoid excessive lead release.
Incorrect sharpening of the tip of the soldering iron. You need to sharpen it in the form of an oval bevel. This shape will provide efficient heat dissipation.
DIY iron repair
Almost everyone can carry out an independent repair of the iron. Any iron has a small amount of parts. That is why, after reading our article, you can easily figure them out. Here is a photo that shows the device of the iron. Sometimes it is much more difficult to disassemble the iron. That is why in this article we looked at the disassembly of the Fhilips and Braun iron.

Here are the main reasons why irons stop working:
- Broken power cord.
- Damage to the thermostat.
- Bad contact of terminals in the iron.
- Oxidation of contacts in the thermostat.
- Thermal fuse defective.