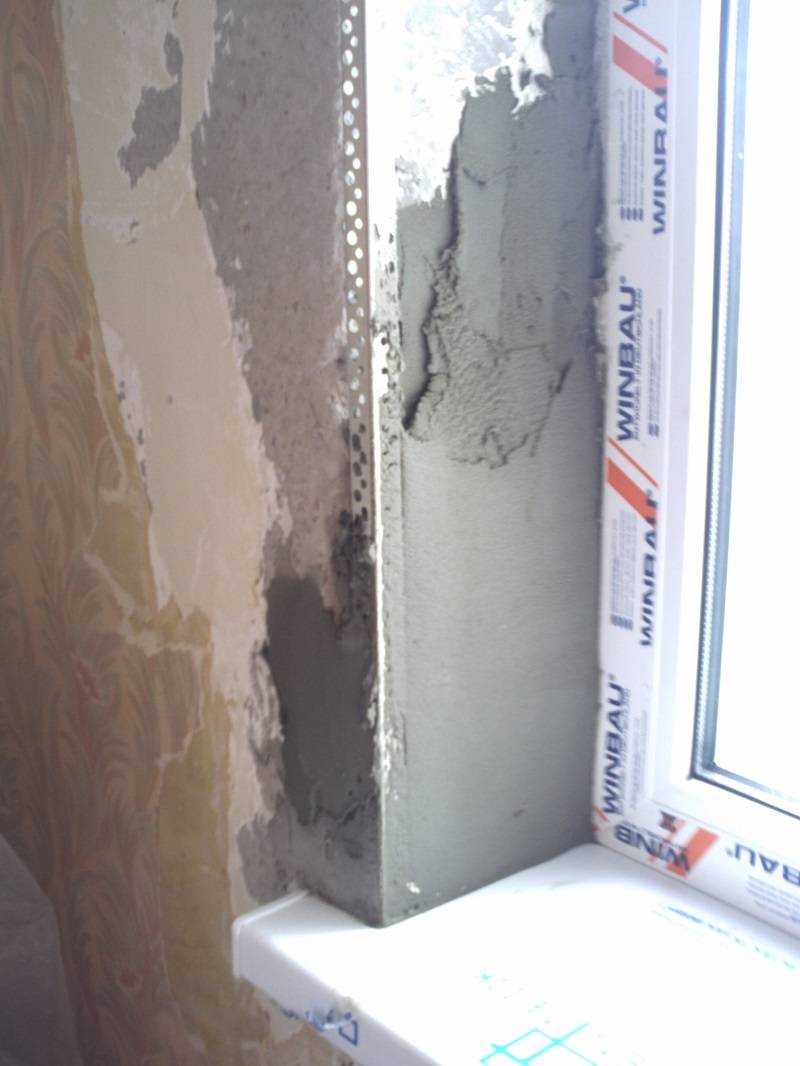
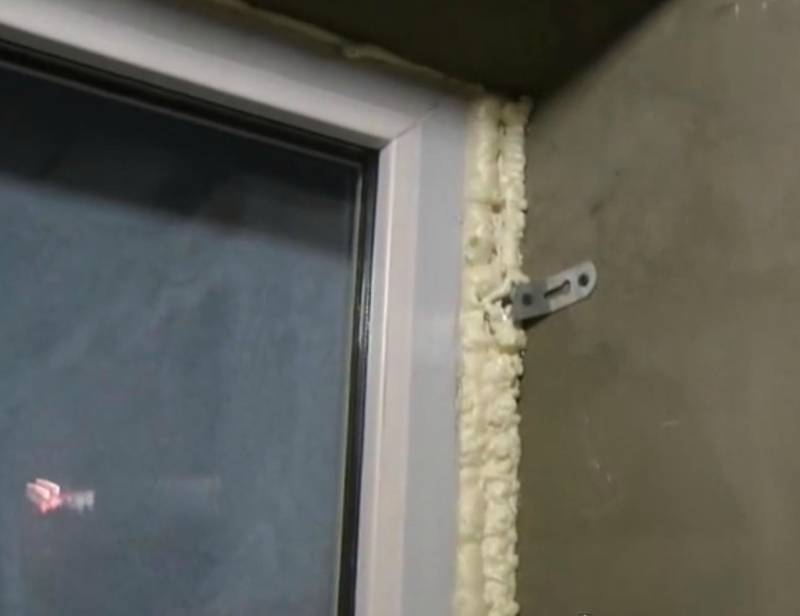
Finishing of slopes with plaster with insulation
Window plastering is different, it is possible to use insulation, but you can not use it. Step-by-step window decoration with plaster with insulation is as follows:
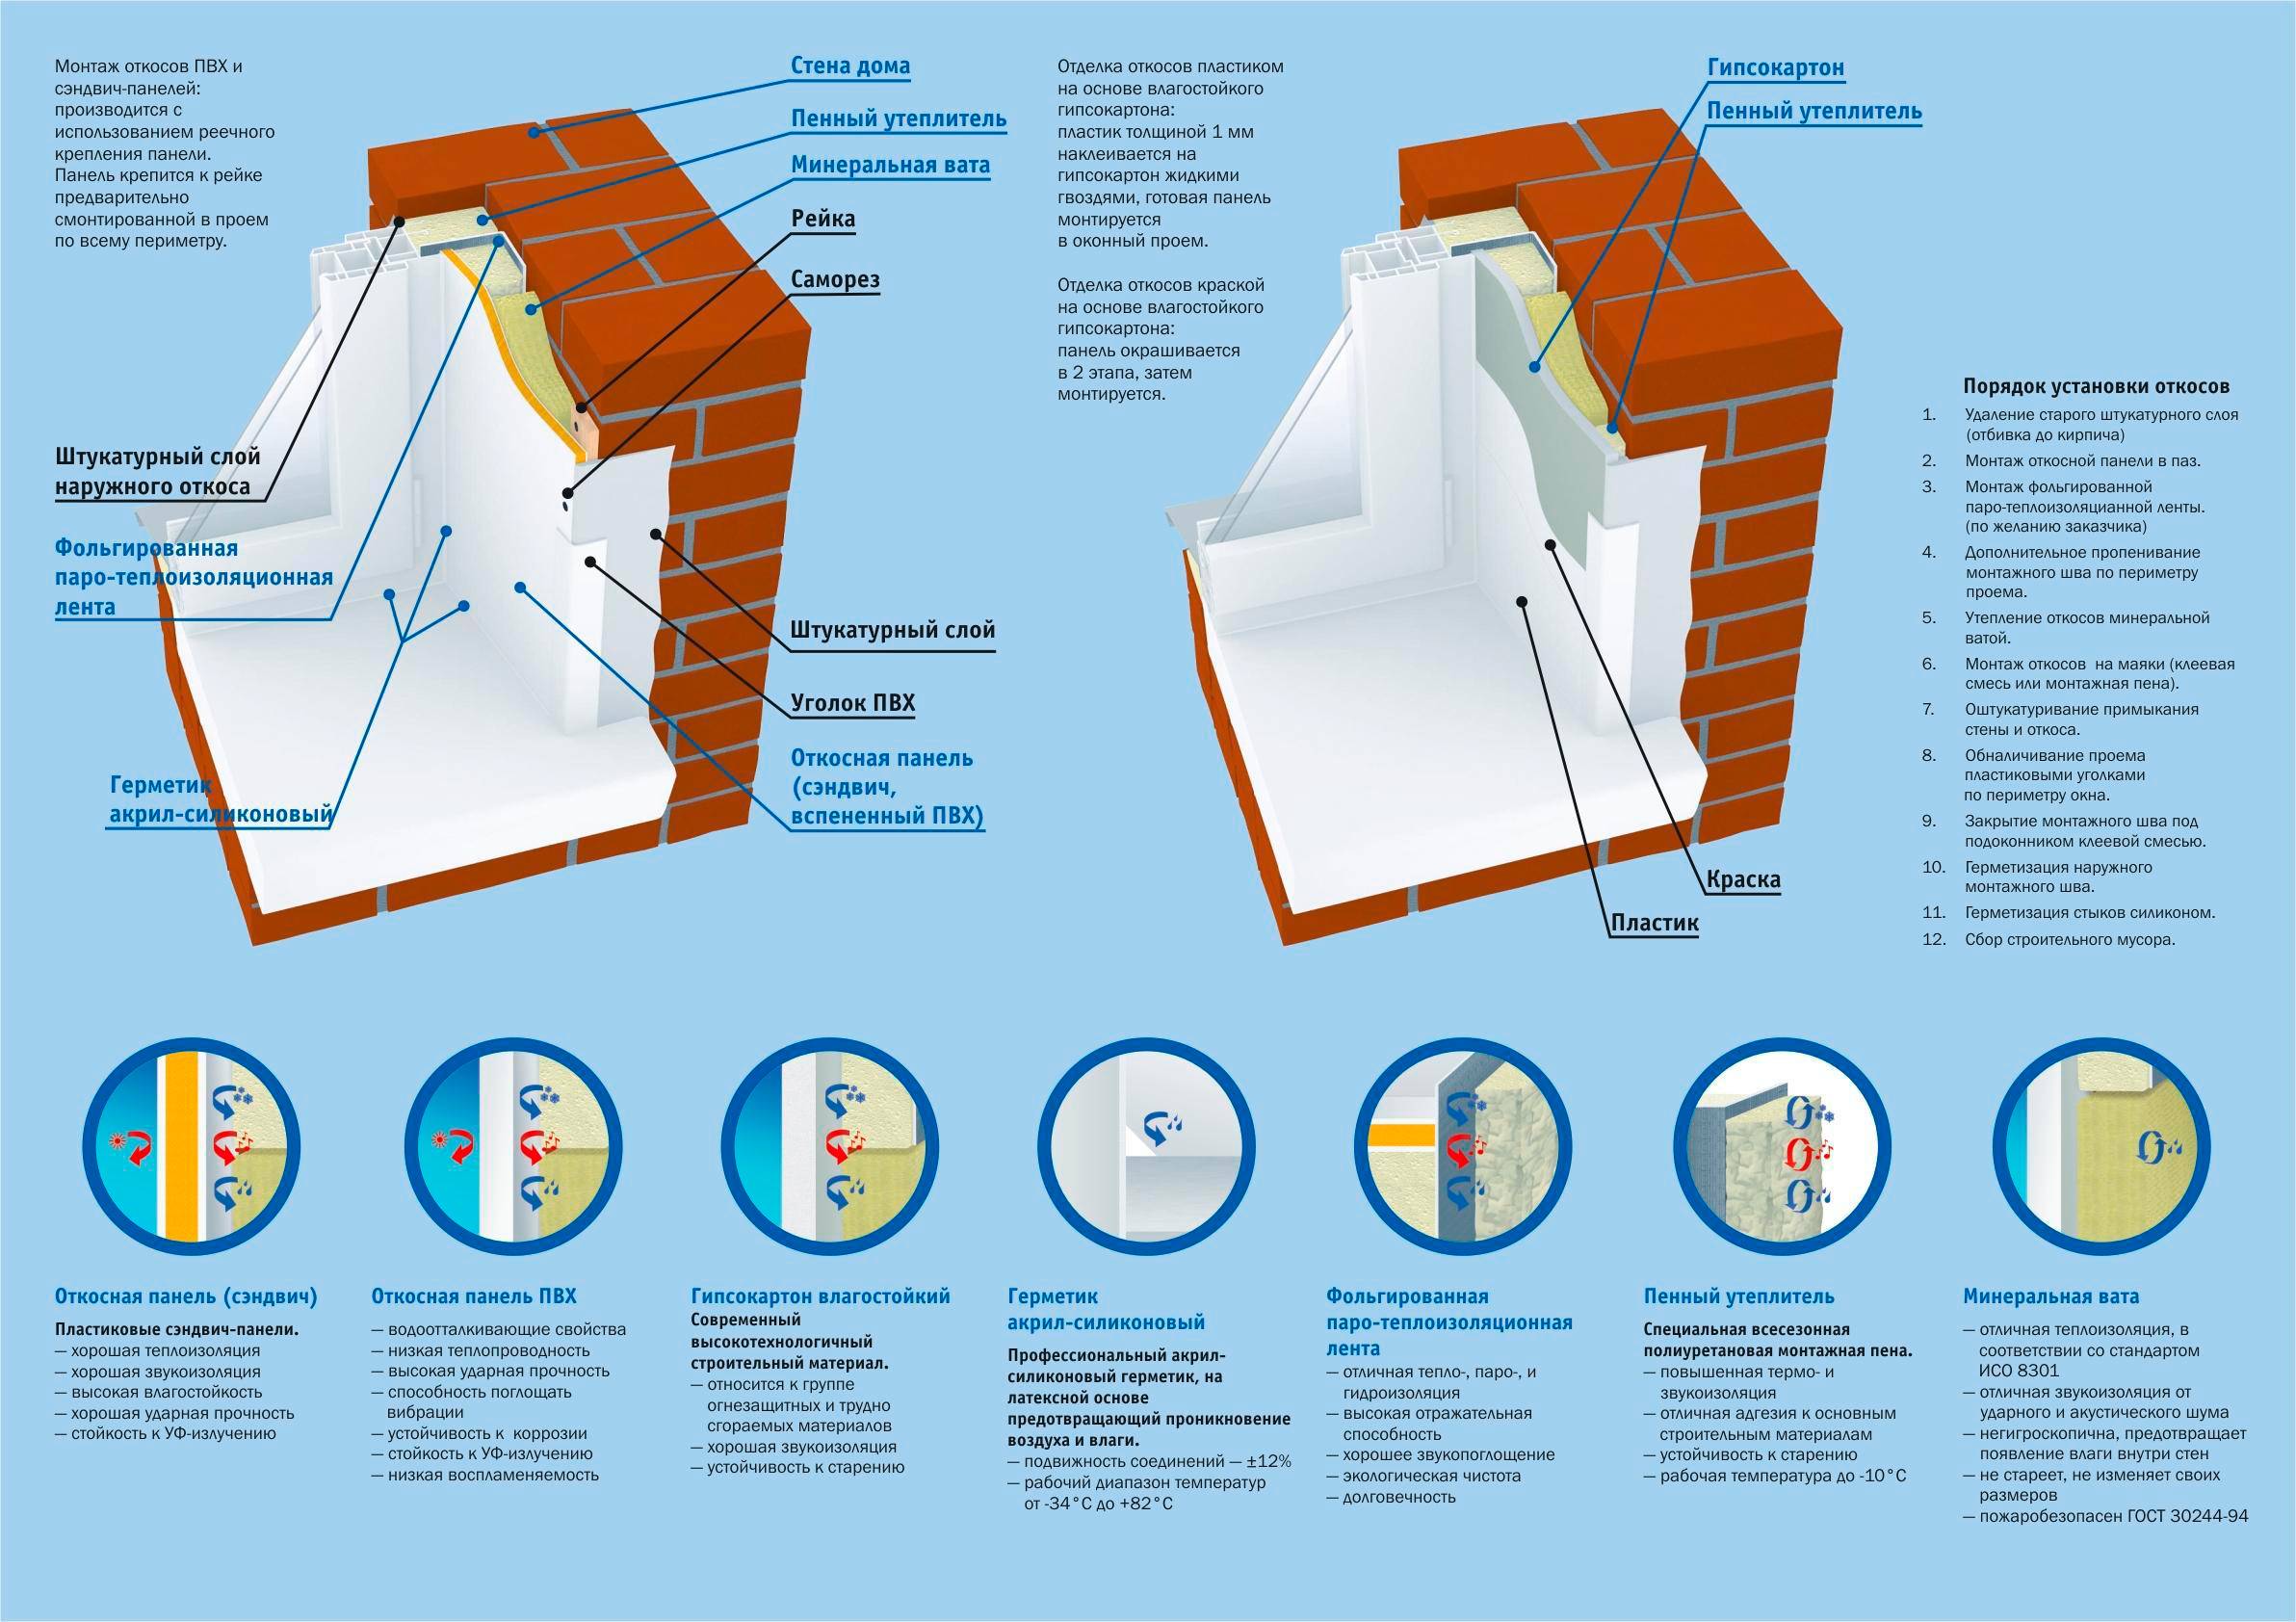
- Insulation is being installed, in this case it is better to use polystyrene or expanded polystyrene. It is glued to an adhesive solution, to a primed wall, which is pre-leveled if there is a large flaw. A good insulation should not exceed 1.5 cm in thickness, you need to look at the store when choosing a material.
- The fastening of the material is carried out with glue or foam. The solution is applied directly to the insulation.
- First, the material is glued to the side walls of the window, after which the upper part is sealed. If the work is carried out on the street, then you need to start at low tide. If necessary, the joint of materials is foamed.
 Plastering external slopes
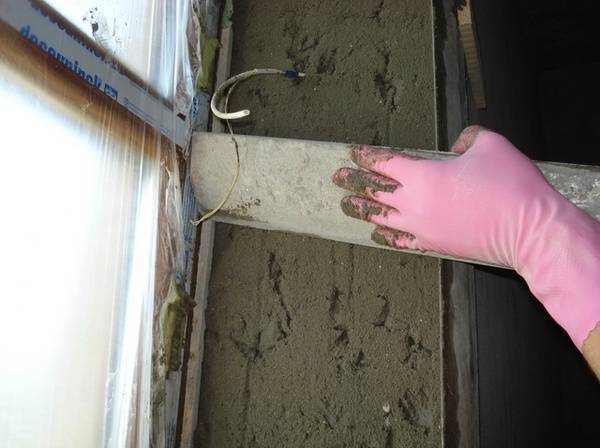
- It is possible to align large window openings according to a similar scheme, but in addition, insulation material is used with a fungus. For such an attachment, you need to punch a hole in the wall, install a dowel through the insulation and into the finished hole.
- In order for the finishing material to serve for a long time, a mesh for reinforcement is used. The outer corners must be finished with corners that are glued directly onto the putty or other mortar.
- The mesh is pressed into the putty, the excess material is removed.
- The mortar is applied using the standard method in several steps, usually 2-3 times is enough to level the window.
- At the end, a finishing layer is applied and stained.
Such a slope will be washing, since paint is applied over the plaster, which protects the window from water.
How to install it yourself?
It is not necessary to level the walls under plastic slopes before cladding. But it is recommended to putty deep and wide depressions with a radius of more than 3 cm to improve adhesion, prevent "shrinkage" of polyurethane foam or insulation. Subsequently, it is necessary to grind the surface with sandpaper.
It is permissible to start installation work at least one day after the installation of the window unit.
Surface preparation
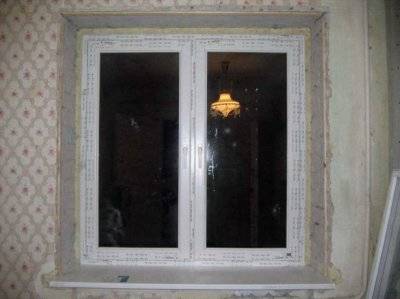 Surface preparation instructions:
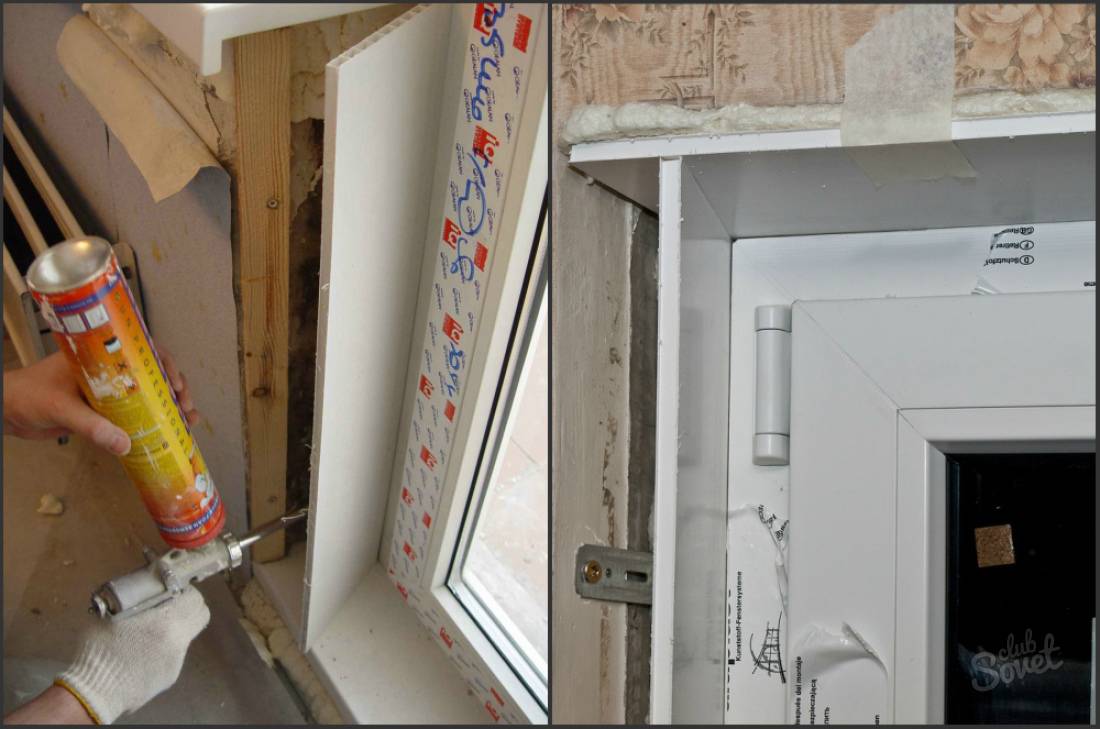
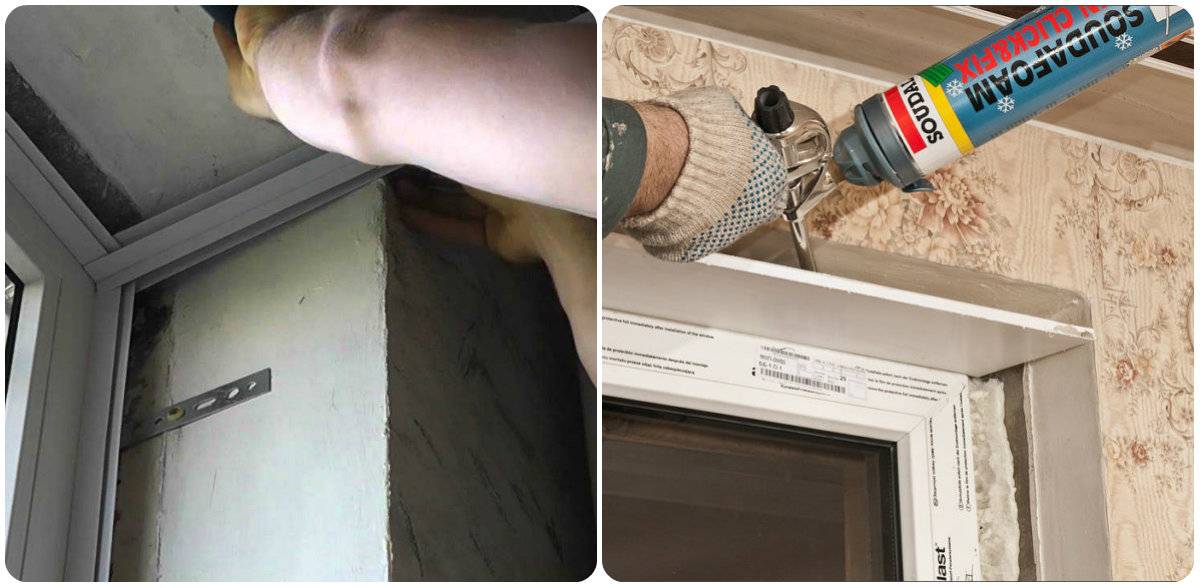
- Remove excess polyurethane foam protruding from the joints of the window block.
- Clean the surface from dust, dirt, walking with a hard brush or dry cloth.
- After removing greasy stains, stubborn dirt, wait until the surface is dry.
- Close the edges of the window close to the window frame with masking tape.
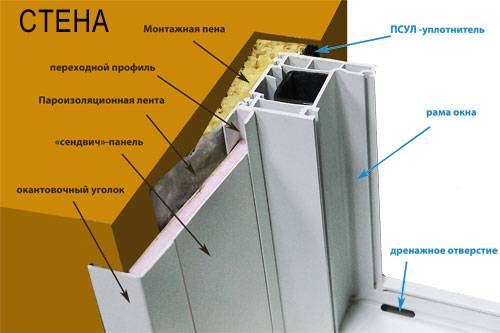
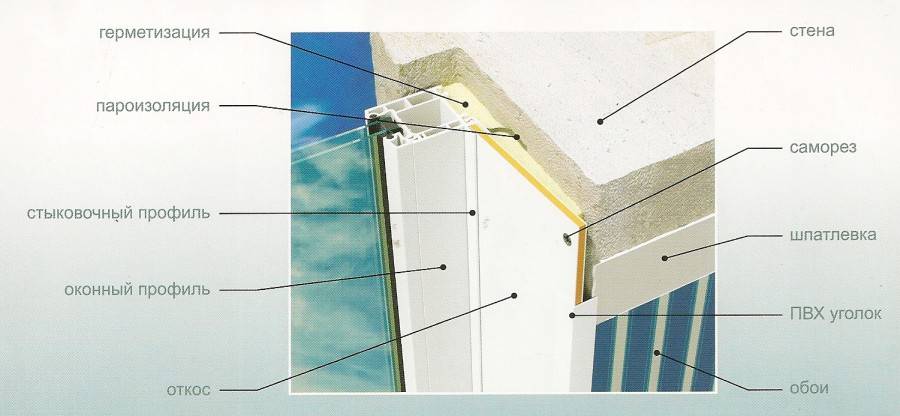
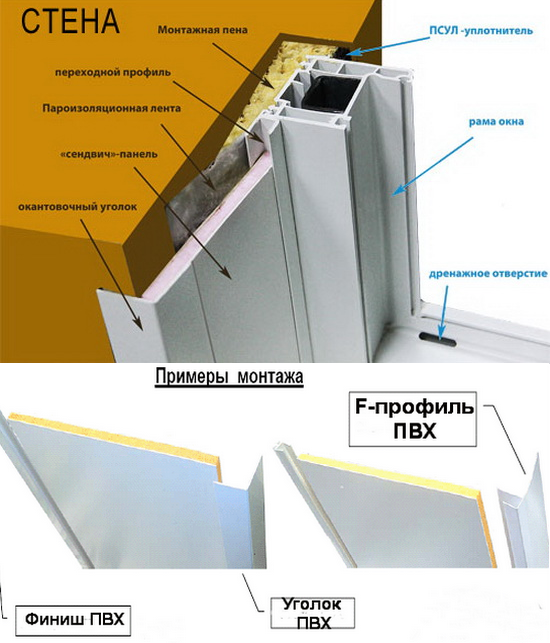
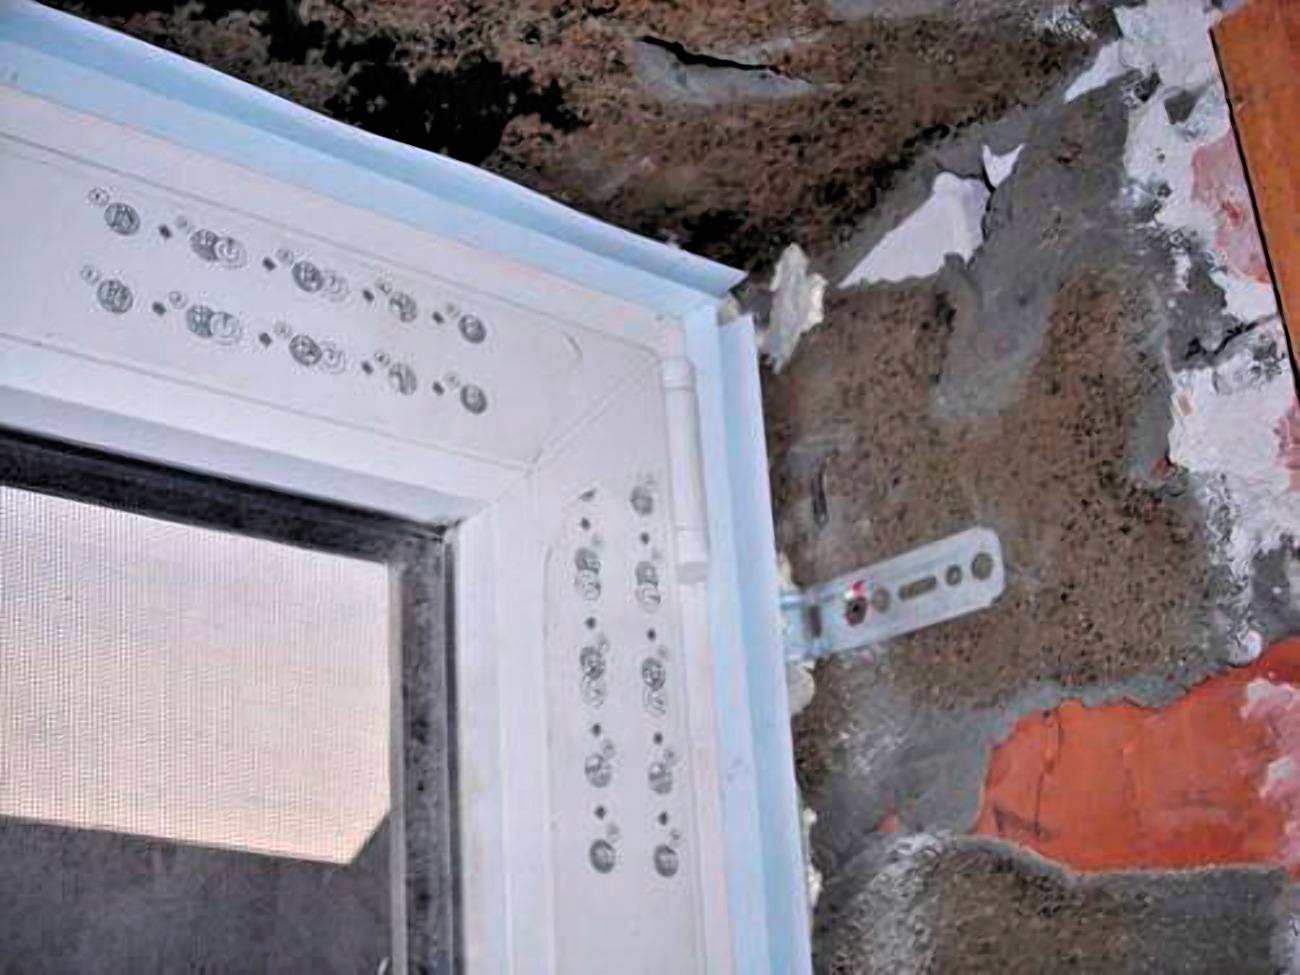
When installing a window block, specialists decorate the docking nodes with PSUL tape in order to protect the layer of polyurethane foam from the adverse effects of weather factors. If the joints are not protected, it is recommended to insulate the foamed areas by gluing the joints with masking tape or lubricating with vegetable oil.
How to install a starter profile?
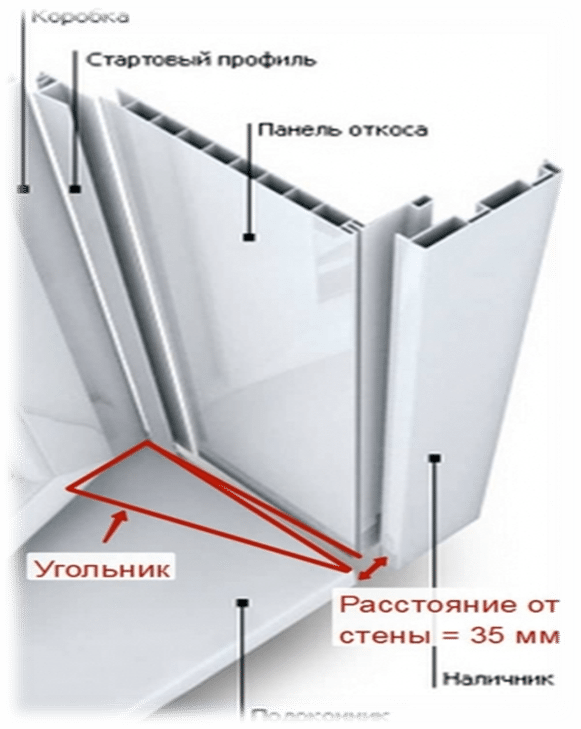
Before starting work, it is necessary to first measure the perimeter of the window slopes along the entire base of the window frame. To install the primary frame, U-shaped starting profiles are used. Stages of work:
- Cut 3 profile elements to fit the slopes - 2 side and 1 top.
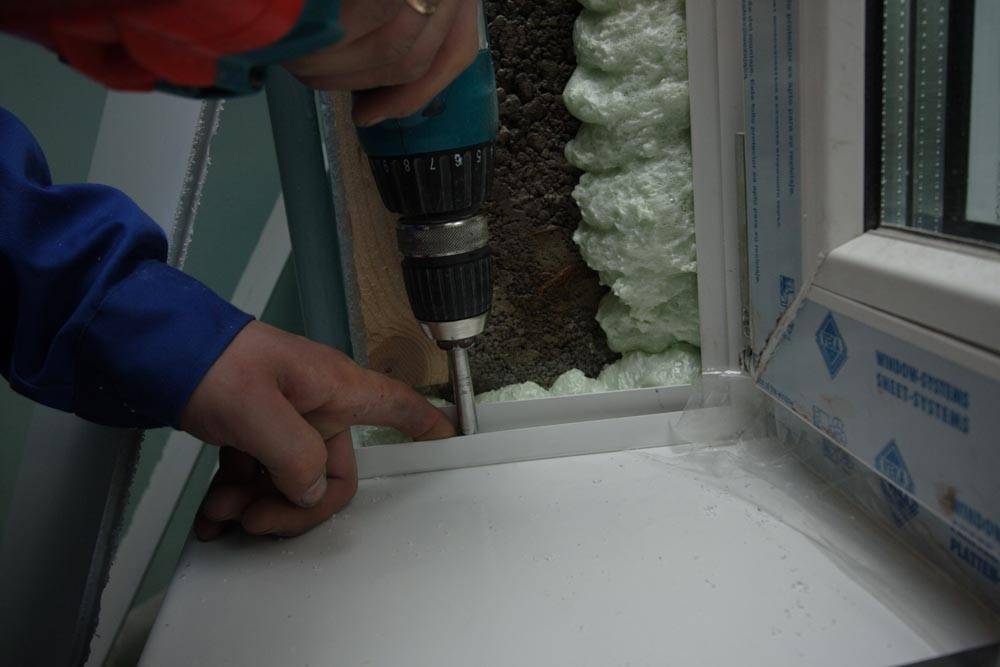
- Fix the side profiles with semi-cylindrical self-tapping screws at a distance of 20 cm along the outer perimeter of the window frame.
- Install the upper profile in the same way.
Manufacturing of lathing
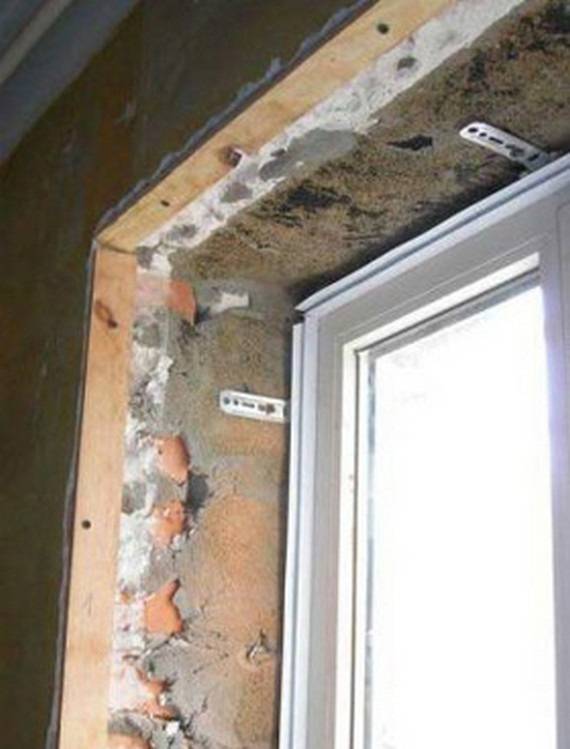
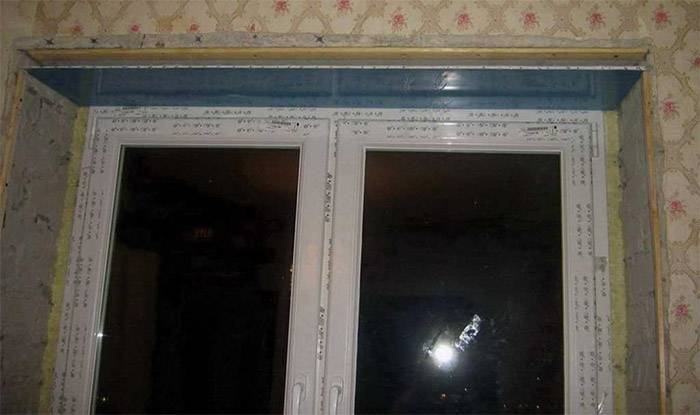
Wooden battens for lathing are installed along the outer perimeter of the window block. They are fixed at the base of the walls - side and top. Having previously measured the perimeter of the niche, prepare the material for processing and installation:
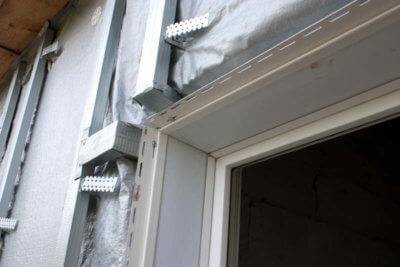
- Saw off the edges of the side and top rails at a 45 degree angle using a wood hacksaw.This is necessary for joining the crate elements when installing in a niche.
- Fix the top rail to the dowels, observing a step of 30 cm.
- Fix the side pieces of the battens in the same way.
- Check the proportionality of the arrangement of parts with a building level.
The outer surface of the timber should be as flat as possible, without serifs or cracks. Use a plane if necessary.
Installation of panels
Based on the results of surface preparation, after installing the frame, they begin to install the cladding panels:
- Measure the perimeter of the upper niche, cut off the top panel element using a jigsaw or a wood saw.
- Install the top panel into the starter profile, then screw it with self-tapping screws to the batten at an angle of 45 degrees.
- Measure the perimeter of the side walls, prepare the side blanks.
- Fix the side elements along the edges of the battens, having previously filled the space with polyurethane foam.
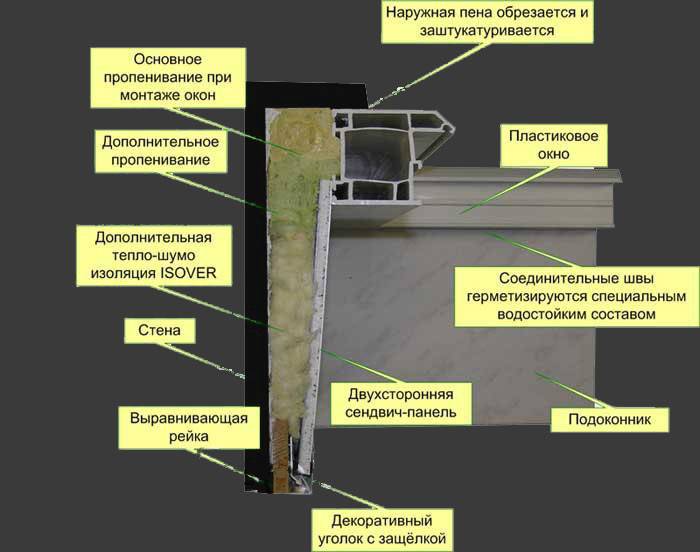
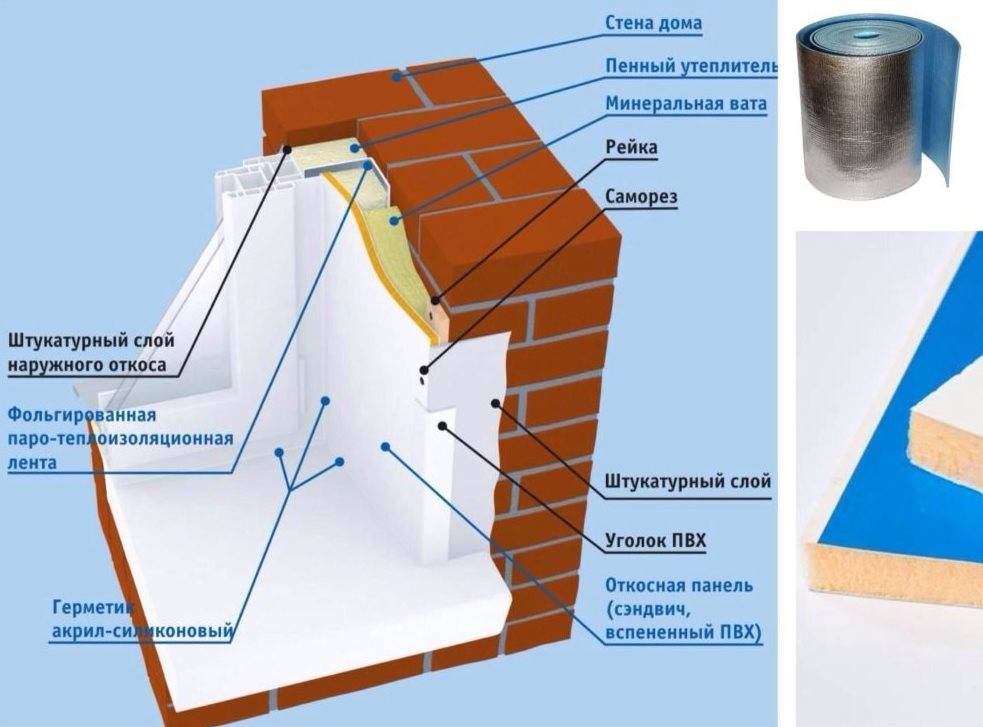
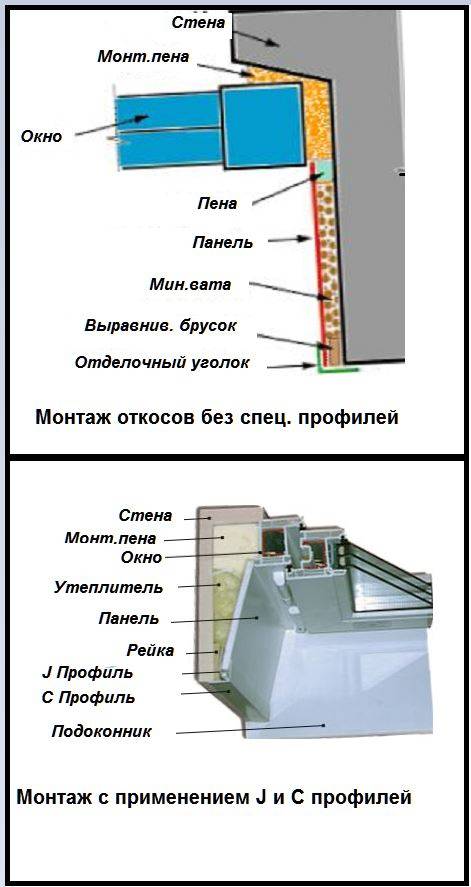
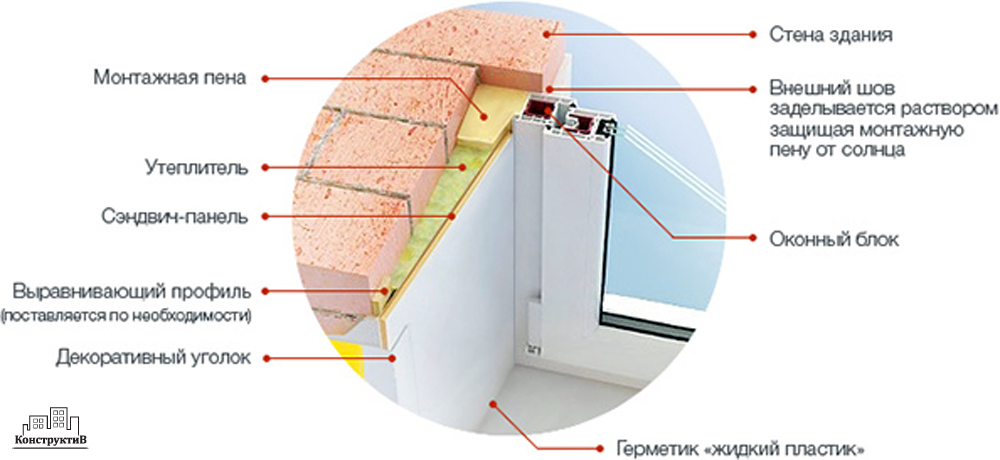
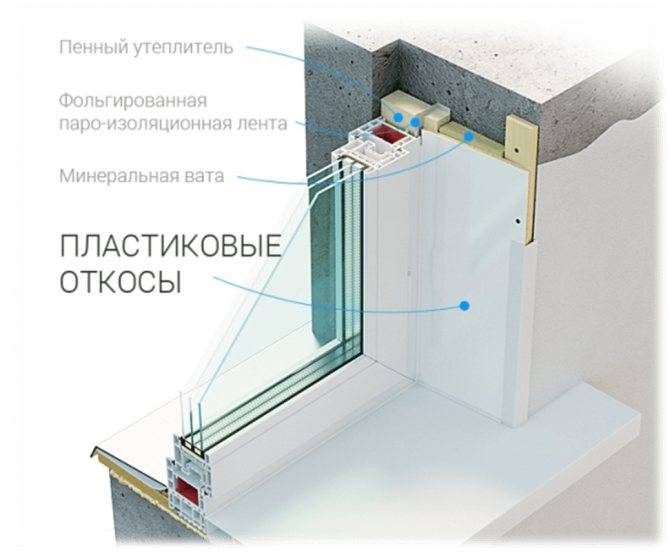
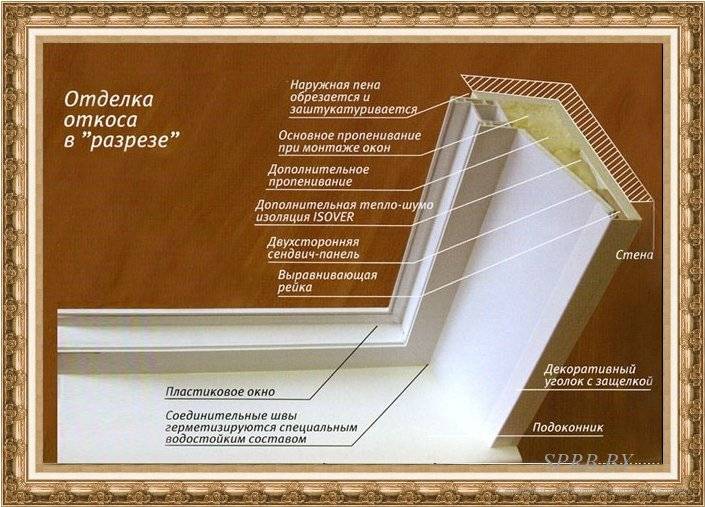
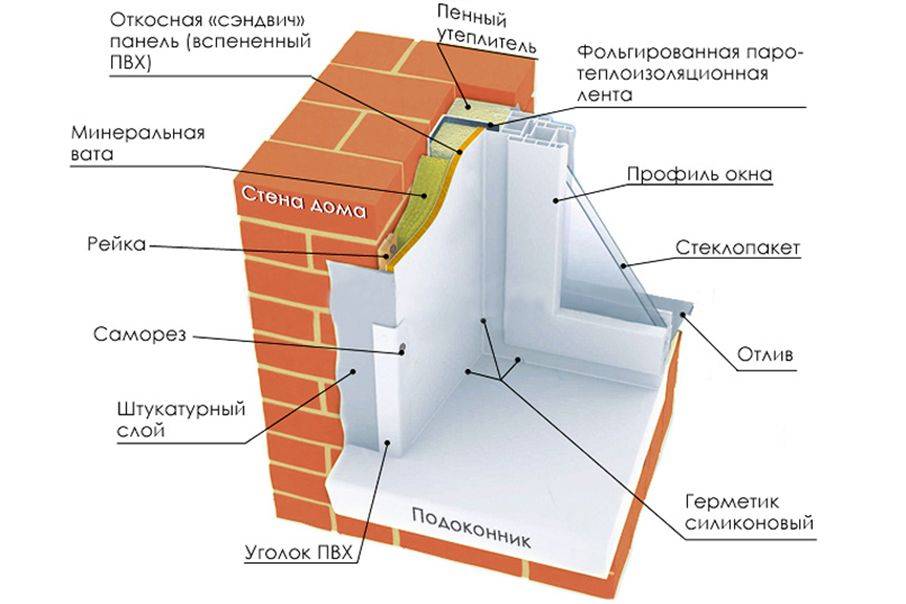
Before installing standard PVC boards, fill the space between the wall and the plastic with mineral wool or foam insulation. When using mineral wool, it is recommended to insulate it with a waterproofing film, fixing it at the base with “liquid nails”. The inner corners adjacent to the window frame are filled with polyurethane foam.
How to mount a finishing profile?
At the final stage, the finishing profile is mounted using an F-shaped plastic rail that fixes the structure and does not require the installation of decorative corners. Having previously measured the perimeter of the window niche, divide the strip into 3 elements, adding a 5 cm allowance to the edges of the top strip. Then:
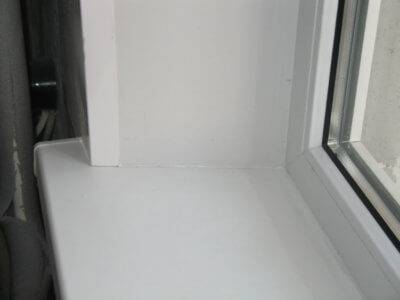
- Step back 5 cm from the edge of the side blanks, cut off the inner walls of the grooves along the entire base of the profiles.
- Try on the profiles, attaching them to the base of the window niche, mark the corners on a cut for joining.
- Cut off the mating corners on all profiles.
- Secure the profiles to the edges of the niche.
- Seal the joints by removing the excess with a rubber spatula.
An allowance of 5 cm and a longitudinal cut in the inner grooves are necessary to fix the workpiece in the areas in contact with the self-tapping screws. An alternative to the longitudinal truncation of the grooves can be the formation of small cuts in the attachment points. The main thing is to prevent the plastic from being pushed through with self-tapping screws and shining through the base.
Work technology
If you have firmly decided to independently finish the slopes on plastic windows, then the first thing you need to do is prepare the equipment, tools and material. In the store, you can easily find everything you need to do this work, and also help you calculate the amount of material. In principle, this task is not so difficult that it cannot be performed by a non-specialist. If a person knows how to work with a hammer, then it will not be difficult for him to cope with this task.
Materials and tools
To complete the work you will need:
- plastic panels. Their length is calculated as the sum of the lengths of the sidewalls and the upper part of the slope;
- start and F-band. Their lengths should match your original calculations.
- solid block with a section of 10 × 15 mm;
- mineral wool for thermal insulation;
- fasteners - dowel-nails, screws or self-tapping screws;
- silicone is required for the final seal. It is desirable that it has the same shade as the plastic panels;
- screwdriver. In its absence, an ordinary drill will do. But it is most convenient to perform this work with a perforator, which has the functions of both tools;
- building level. It is desirable that it be of the laser type, but you can limit yourself to the bubble type. You will also need a stapler;
- tools for cutting plastic. In principle, ordinary scissors will be enough, but it is most convenient to do this with a grinder or a jigsaw.
We advise you to purchase a starter profile.Thanks to him, you can quickly cope with the task at hand, and you also do not have to spend money on special adhesives.
Making slopes with your own hands
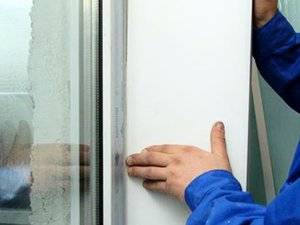 The first step before attaching the plastic is to process and prepare the surface. Since this work is often carried out during repairs, there will necessarily be a lot of dust and dirt, which must be carefully removed. The easiest way to do this is with a long, hard-bristled brush.
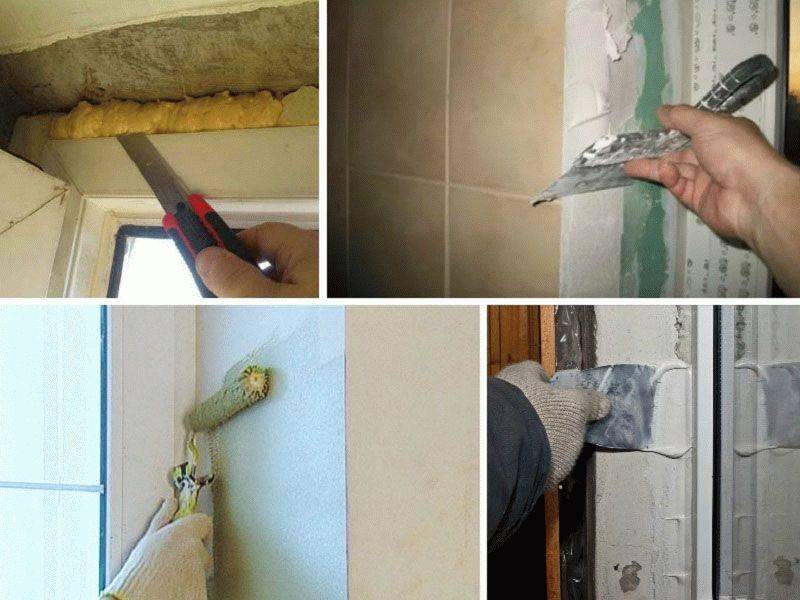
Pay attention to the window frame - polyurethane foam often remains on it, which must be cut off without residue. To do this, you can use a regular construction knife with removable blades.
Keep in mind that during the finishing of the slopes, you will have to stick on a special vapor barrier and waterproofing inside the room. If this is not done, then if water gets inside the seam, it will freeze with the onset of cold weather and destroy it. As a result, you will need to carry out unscheduled repairs, but you can easily avoid it if you adhere to the technology:
- Before installing the panels, the surface of the slopes must be thoroughly primed. It can also be replaced with special solutions from a hardware store, which will help to further protect the opening from mold and mildew.
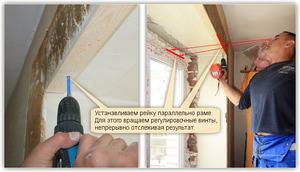
- After that, you can install the start profile. To do this, it is attached to a wood leveling strip. It is mounted on ordinary screws along the contour of the window, measuring the horizon by level.
- You will need a stapler to install the profile to the tree. In principle, when doing this work, you can use a metal profile instead of wooden bars, which will be more practical. Staple staples should be placed in increments of no more than 20 cm. This will ensure maximum structural reliability. Similarly, you need to act in the manufacture of slopes on drywall windows. In this case, the installation is carried out to the lathing from the profile or timber.
- Additionally, a profile or a wooden block is installed along the outer contour of the window opening. To fix it, you can use not only self-tapping screws, but also ordinary nails. It is advisable to periodically measure the installation angles using a level. If you do not do this, then later you will have difficulties in adjusting the structure to the perfect fit of the parts.
- It is necessary to take plastic panels pre-cut to size, carefully and securely fix them in the groove of the starting profile. Then they are brought to the very bottom if the sidewalls are being installed.
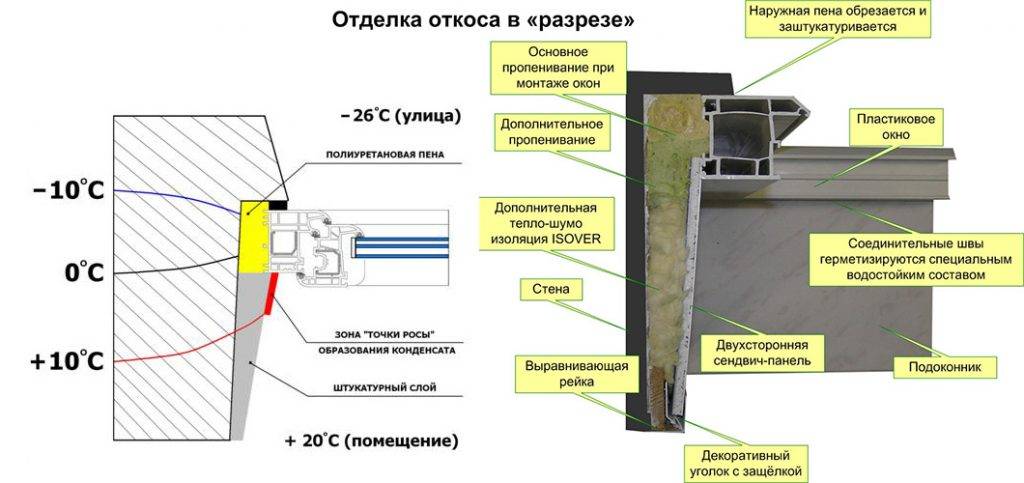
Upon completion of the installation of plastic panels, the space between them and the wall must be filled with polyurethane foam
But this must be done very carefully, since this material tends to expand in volume after spraying. Therefore, it is recommended to apply it in a small amount, and the frozen excess foam is removed with an ordinary knife.
Views
The classification of types implies the material used and the technique of execution depending on it, and the final decorative appearance of the structure often does not coincide with the materials of execution. For example, the design of a window opening may look like brickwork, natural stone, ceramic tiles, gypsum stucco molding, marble surface or rough texture of stone crumbs. And also the slopes can be covered with wallpaper, varnish, various paints. But under any decorative layer, the slopes will consist of a choice of one of several materials most often used in modern construction.
In this regard, the slopes are divided into several types.
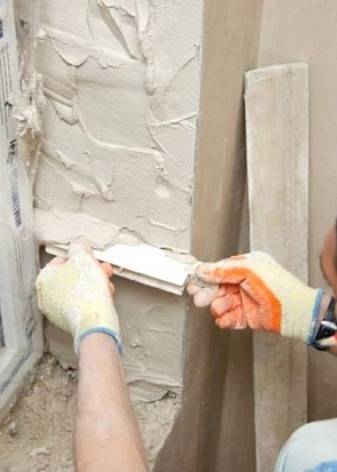
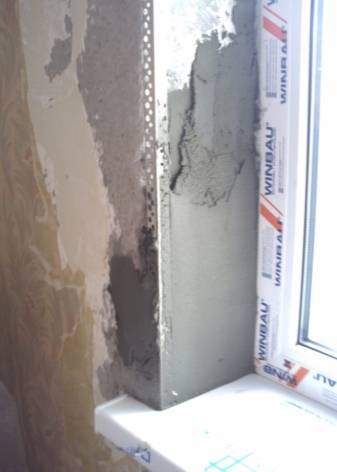
Plastered
Plaster is a traditional material for finishing window openings. In its original version, the method was used to save money and in conditions of a shortage of finishing materials.
The process consisted of leveling part of the wall with a primer, applying plaster and then painting the slopes.Thus, the slopes became an extension of the wall, but did not have a tight adhesion to the window frame. As a result, cracks formed over time, the thermal insulation was low. The windows had to be additionally insulated from the outside, not always in aesthetic ways: plasticine, cotton wool, moss. To date, the technology for applying plaster has undergone significant changes, and now this type of slope is considered one of the most stylish options.
Plasterboard slopes
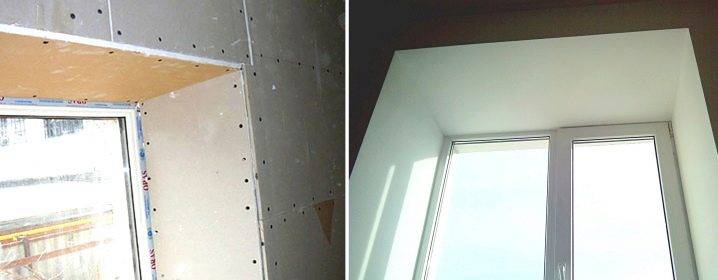
This is a modern and economical way of facing a window opening. Drywall retains heat well, is an inexpensive material, and its texture serves as an excellent basis for applying any kind of decor. Pieces of drywall are often left over from renovations in modern premises, and in order to save money, they can be used as material for slopes. The disadvantages of this type include the instability of drywall to dampness, as well as a tendency to deformation at the joints of the window and wall.
Plastic slopes
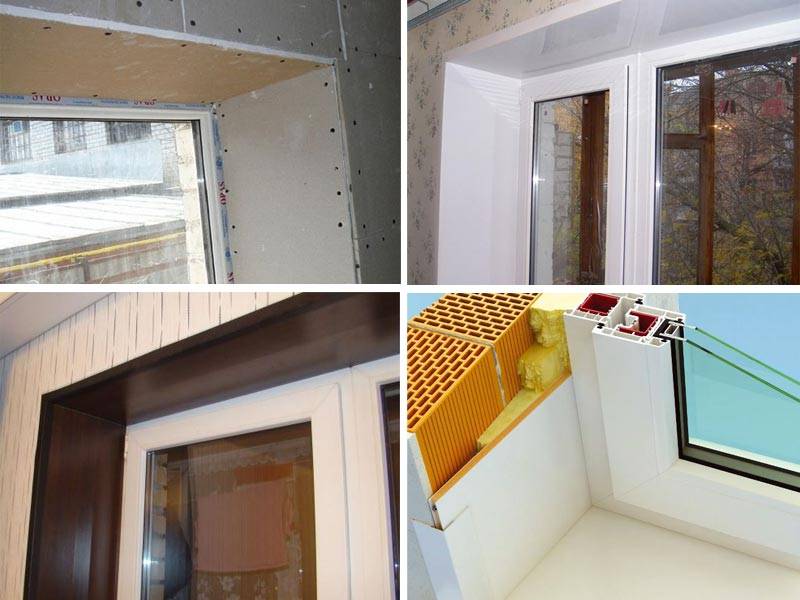
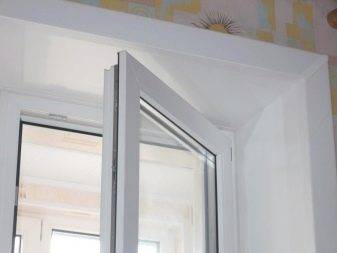
They are today, perhaps, the most popular type of cladding for window openings. The plastic used for the slopes can have different modifications and textures, can serve as a decoration in itself, or can be stylized for any material. Plastic panels are durable and practical, easy to install. It is easy to hide all unsightly "insides" of a window opening with thin sheets - insulation, polyurethane foam, wall imperfections.
Plastic is perfectly cleaned with ordinary household products, is not afraid of moisture and prevents drafts. The disadvantages of plastic include its high cost, as well as fragility at low temperatures in unheated rooms. On the building materials market, plastic panels are presented in a wide variety of colors. It will not be difficult to choose any shade of white, beige, milky color for the window frame, as well as any other color or pattern for the wall, wallpaper or a separate accent of the interior.

Wooden
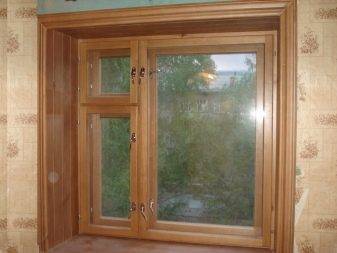
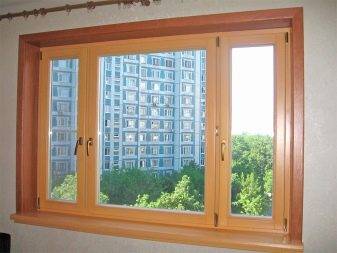
The tree is considered an elite type of slopes, has a high cost and requires special care. As a rule, wood panels are left in their original natural color by varnishing. It makes sense to place wooden slopes as a continuation of frames made of wood material, which in themselves are an indicator of respectability, or as a continuation of a pronounced log wall. For example, if the interior is made in country, chalet or rustic style.
The main advantage of wood is its environmental friendliness, excellent "warm" appearance and durability of the material. The disadvantages include the high price, as well as the observance of special rules for caring for wood.
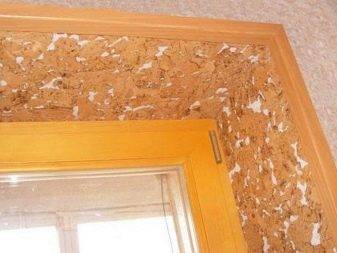
Cork
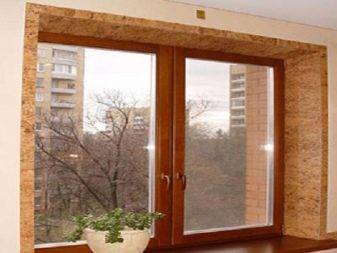
Cork, as a facing material, has its advantages in the form of a high level of noise and heat insulation, it is presented in different natural shades and is pleasant to the touch. However, the high cost of cork panels in relation to low strength, rustic appearance and difficulty in maintenance is a significant disadvantage. Due to these circumstances, cork slopes are not popular and are quite rare. However, they can be kept in mind when developing a particular style direction in the room.
The scheme of finishing the slopes with plasterboard
First, we carry out preparatory work. Before tilting, you need to prepare the window. It is required not to save on polyurethane foam, otherwise there will be cracks that will blow through. you will be freezing in winter.
If a gap is noticed, walk again with foam, nothing terrible will happen. The next day, when the foam hardens, cut it off carefully and start finishing. Next, we make the outer slopes. They can be done in two ways
The first method is initially a layer of filler, then a layer of finishing filler to produce the exterior slopes.
The second method is finishing the windows with cement grease.The choice of methods depends on the condition of the wall. If the wall is flat, use the first method. In other cases - the second. Before work, you need to carefully prepare the wall. Remove old paint, if any.
In order to make external slopes, you will need:
- mixing utensils
- finishing corner and scissors that cut metal.
- primer and container for it
- cement grease or putty (depending on the wall)
- putty knife
Instructions
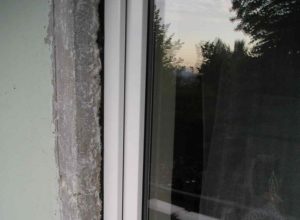
Instructions
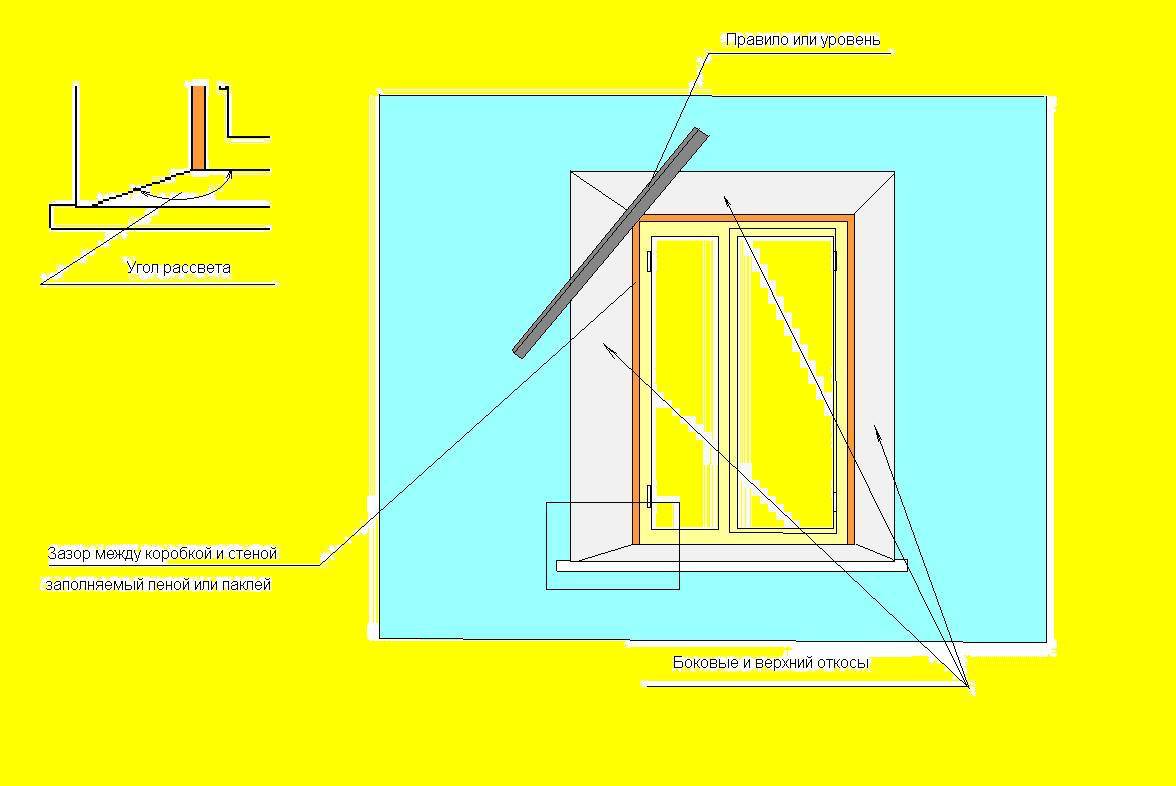
First, let's analyze the slope of the cement grease. First you need to set the zero mark. A wall will be built up to it.
From the outside, the wall covers the window from 5 mm at the top and sides. If this is not the case, then you will have to build up the wall to the desired indicator.
This procedure is necessary so that the windows are well closed from the outside. Remember to keep the slopes symmetrical.
After preparing the walls, you need to treat their surface with a primer, then wait for it to dry completely. After that, we begin to prepare the mixture.
It is important!
Try not to make it too thick, otherwise it will not apply well to walls and stick to them. A good mixture is cement mortar with glue, it is the most durable .. If the wall is uneven, then they must first be repaired
Then, with the second layer, we display the wall to the desired indicator. To create an even corner, we use a finishing corner. In more detail, then you need to apply the required amount of cement grease to the corner of the wall and press it into this corner
If the wall is uneven, then they need to be repaired first. Then, with the second layer, we display the wall to the desired indicator. To create an even corner, use a finishing corner. In more detail, then you need to apply the required amount of cement grease to the corner of the wall and press it into this corner.
Then remove excess mixture and level the wall. In order for the corner to be fixed firmly, you need to apply a layer of grease to the outside of the wall. The last stage of exterior decoration is painting. External slopes made of putty. If the wall is already flat, does not require building, then this method is ideal.
Just as in the first method, in order to make a corner, a finishing corner is used. The last stage is painting. After we have done all the work, you need to peel off the protective film from the outside on the windows. First, you need to make all measurements, that is, the height, length and width of the window.
After that, we remove the protective film and start work. First of all, the installation of the side panels is done. To do this, cut the profile to the desired length. We attach this profile to the edge of the window using self-tapping screws. Then with dowels along the edges of the windows, you need to install the slats.
Note!
Loan on a wooden plank, we will fix the side slopes with a construction stapler. All seams must be filled with assembly glue, then remove excess
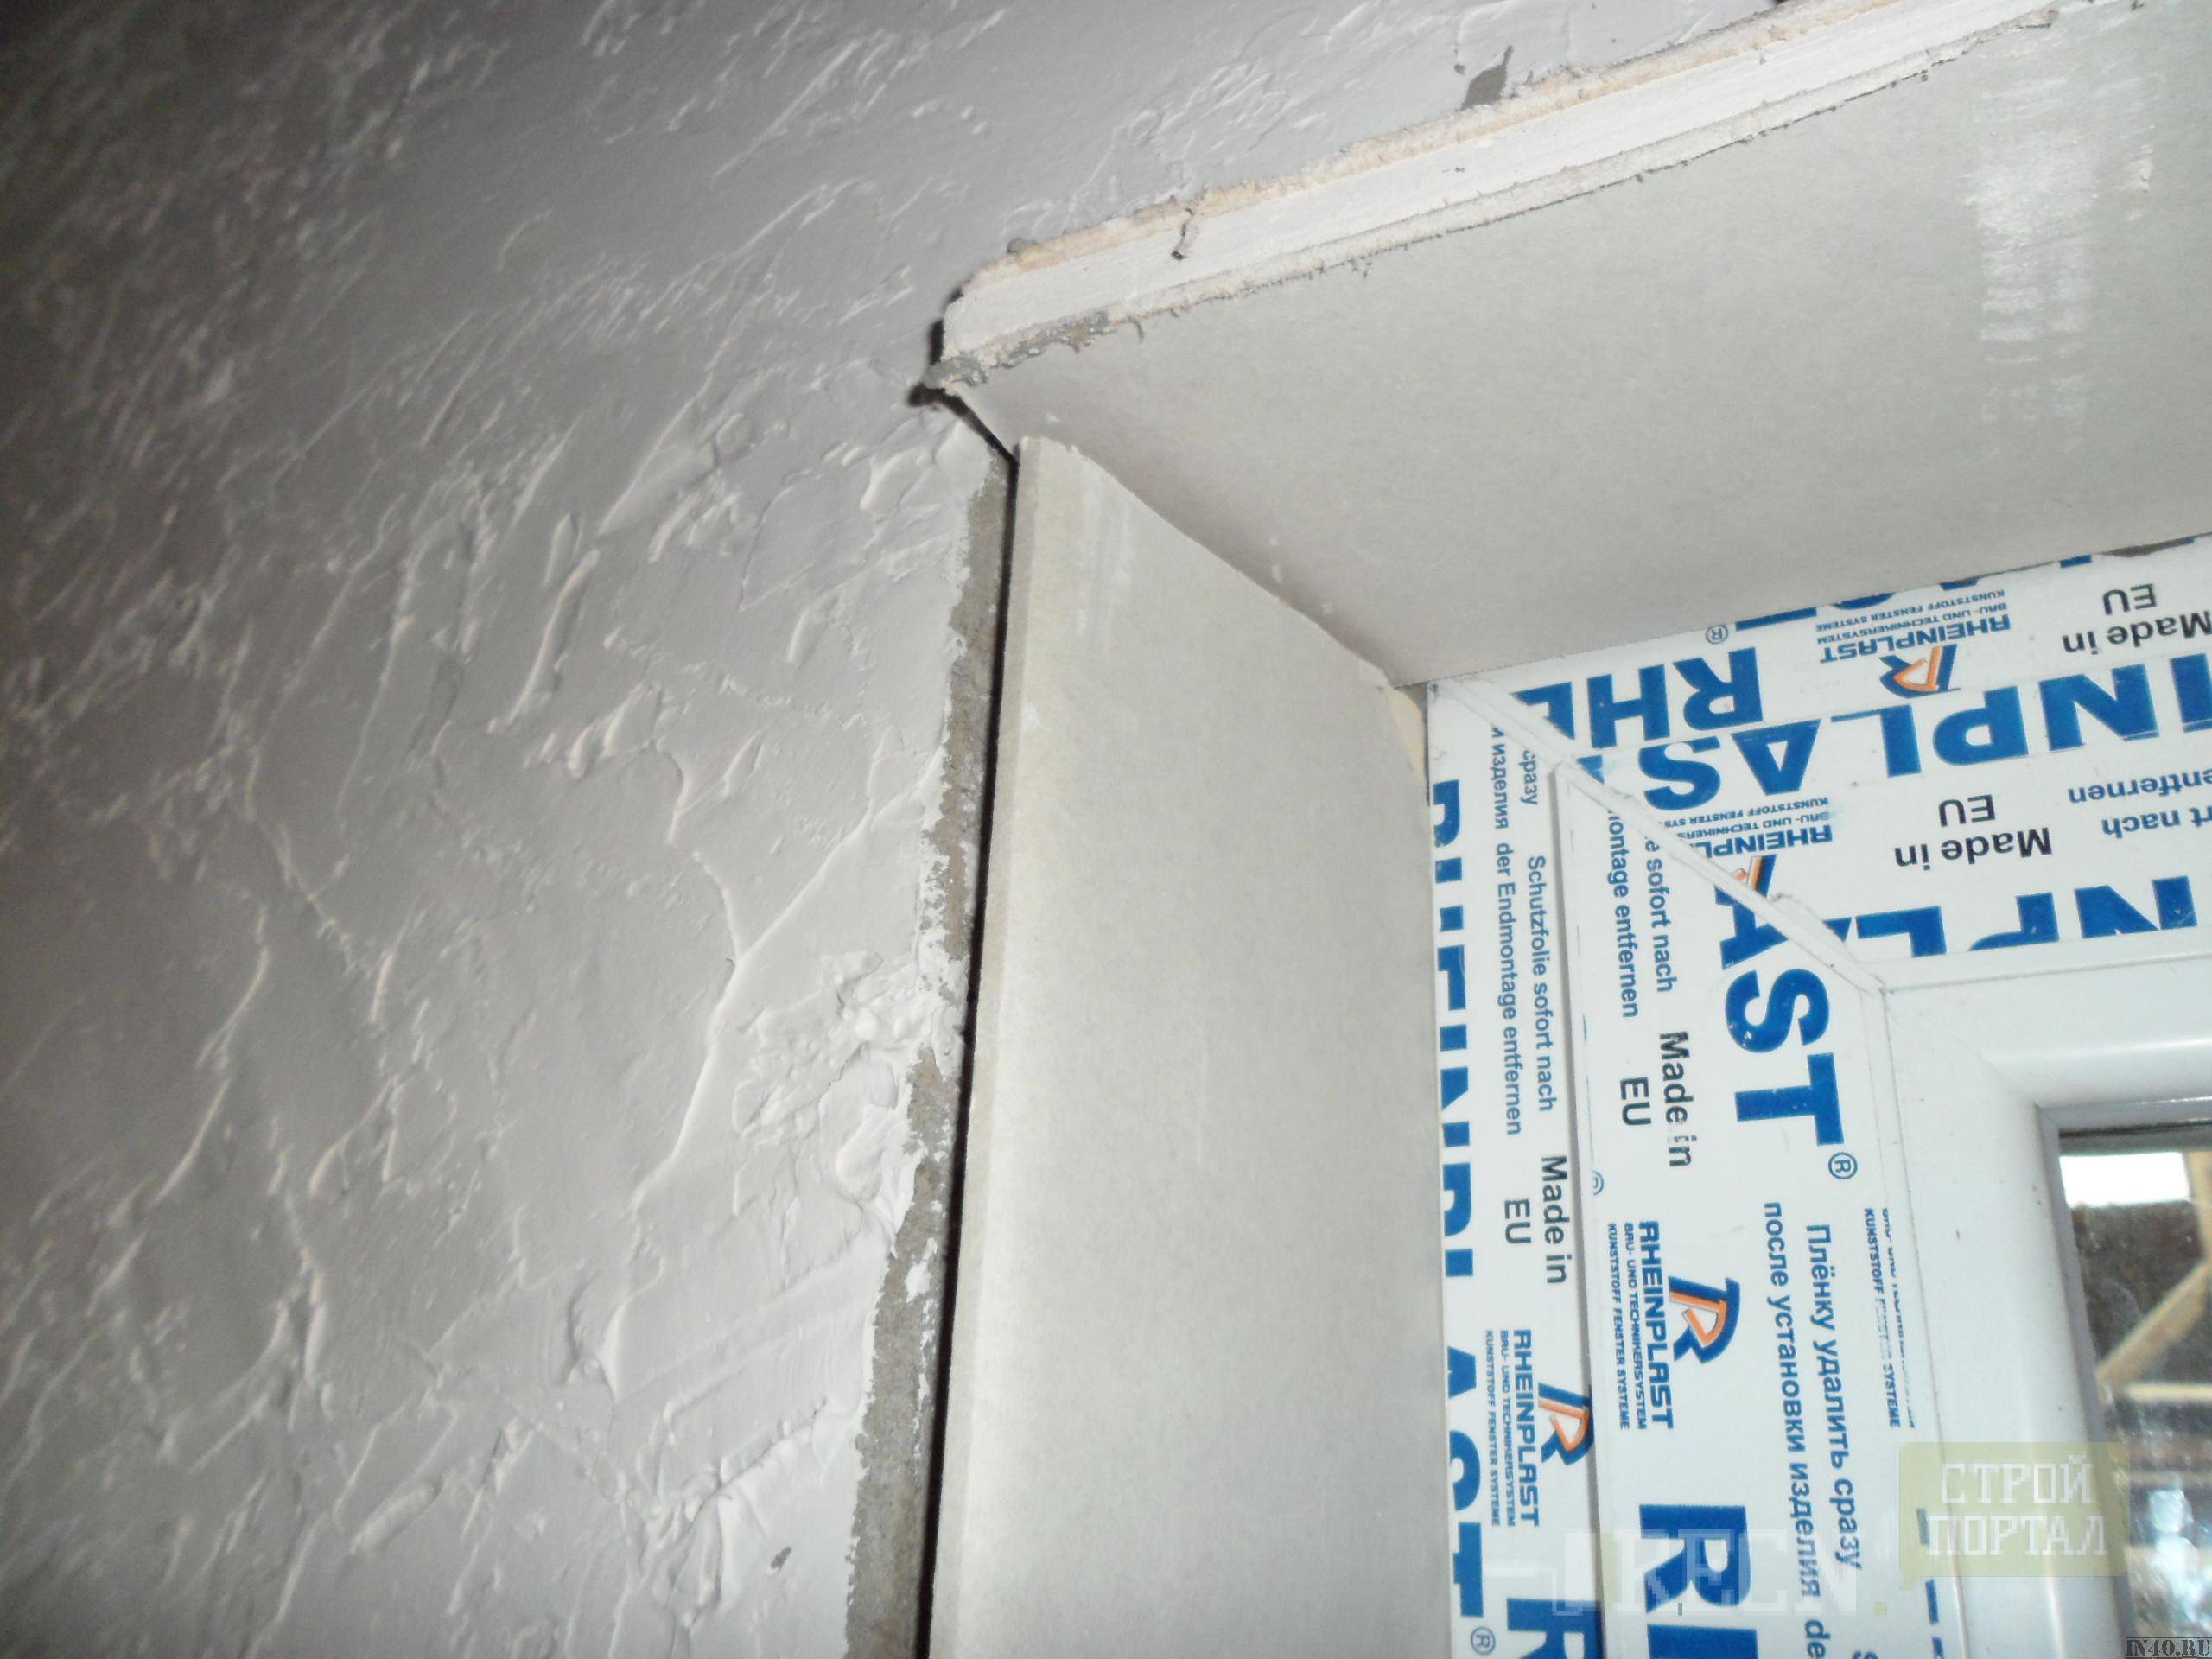
Plasterboard slopes on windows.
First you need to do the following: clean the wall of old paint, then cover the side panels with a primer. After that, we make all the necessary measurements and cut drywall. Before gluing this drywall, you need to check the entry of the panels.
Apply the prepared mixture to the wall, then glue the side panels of the drywall. After we have made sure that the installation is correct, have established the symmetry of the corners, we can proceed to the installation of the top panel.
So all the panels are well attached. Now you can start finishing the plasterboard panels. It is done with putty. If we want to get an even corner, we need to use painting corners. The putty is very easy to apply to the surface and side panels of the drywall.
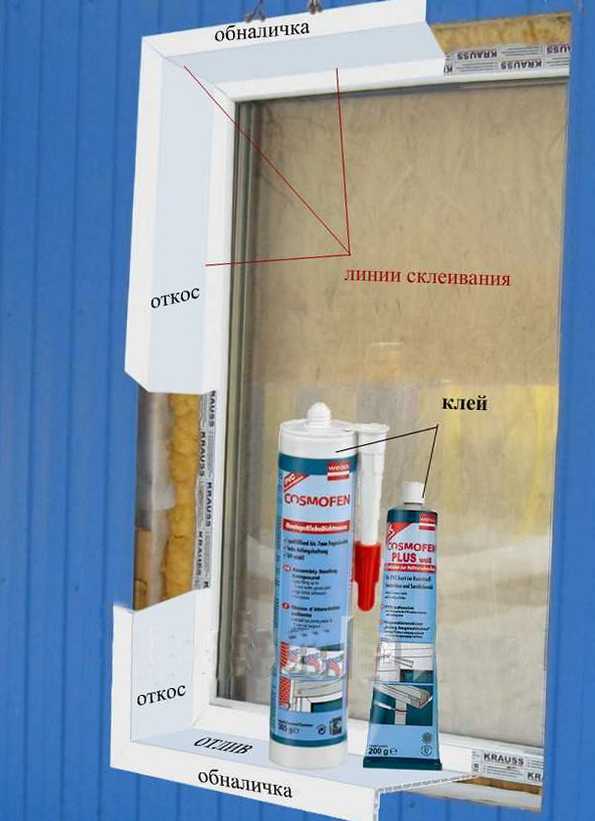
Photo report 2: we mount plastic slopes with a starting profile
The installation of plastic slopes begins using this technology with the preparation of a window opening.We cut off the foam exactly, remove everything that does not hold well, clean off the dust, if necessary, walk along the opening with a primer that improves adhesion.
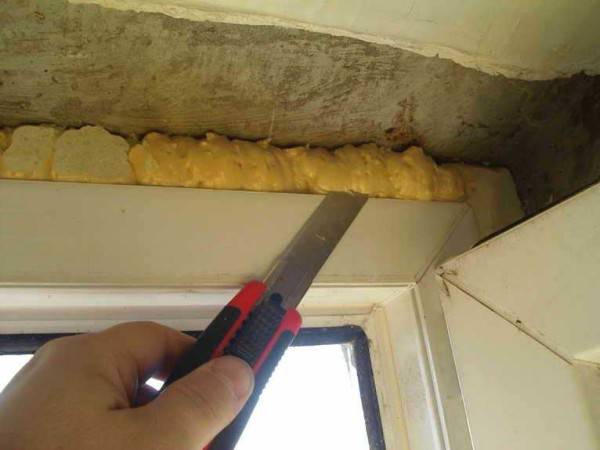
Preparation of a window opening
A wooden block is attached along the perimeter of the opening, but already near the frame. Choose the thickness depending on the distance: it should almost go over the frame. One side of the bar must be earned with a plane, making a tilt. The angle of inclination of this face is equal to the angle of installation of the slope. You can saw it off, but it is even more difficult to do it, unless there is a circular saw with an adjustable angle.
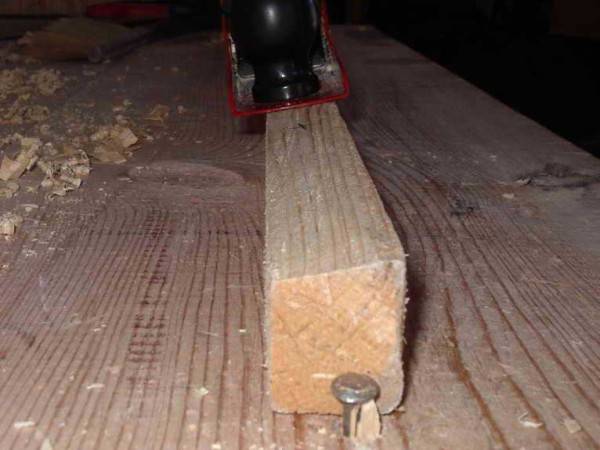
We make a slope on one of the edges of the bar
We fasten the processed block to the walls along the perimeter of the opening. The fastening method depends on the wall material. If the wall is brick, you can try with self-tapping screws, you need to put dowels in concrete.

We fasten the bar
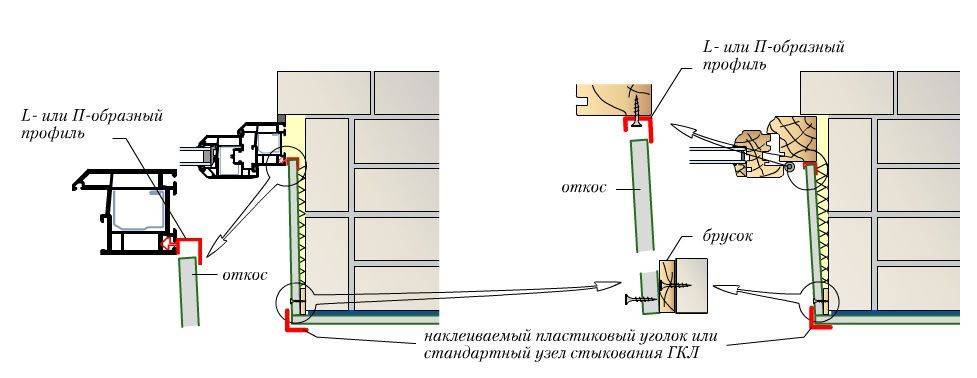
Buy a starting profile in the store, set it with its long side to the bar, fasten it. It is more convenient and faster to fix it with staples from a construction stapler to the bar, if there is none, you can use small nails or self-tapping screws with flat heads.

We fix the starting profile
When choosing a starting profile, take a dense one. It is more expensive, but you dearly only three meters per window, maybe a little more. A dense profile will hold the plastic well, soft - bends and the look is ugly. Another point - when installing the profile, press it as tightly as possible to the frame so that there are no gaps at all, or they are minimal.
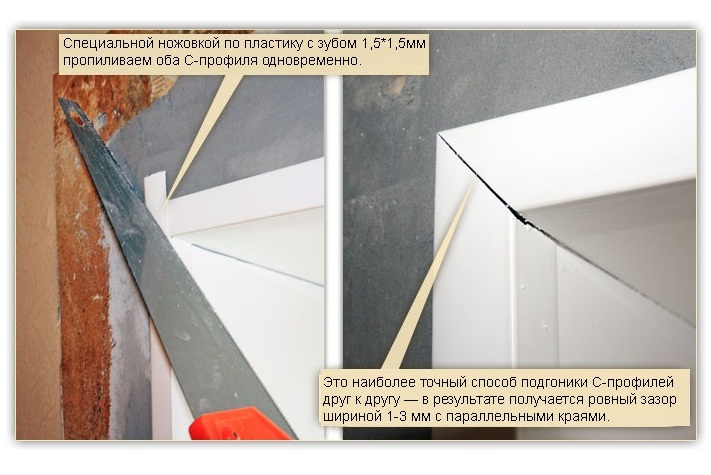
At the top, when joining vertical and horizontal profiles, you need to be especially careful and cut them off exactly at an angle of 45 °. If there are small gaps, they can be repaired with acrylic.
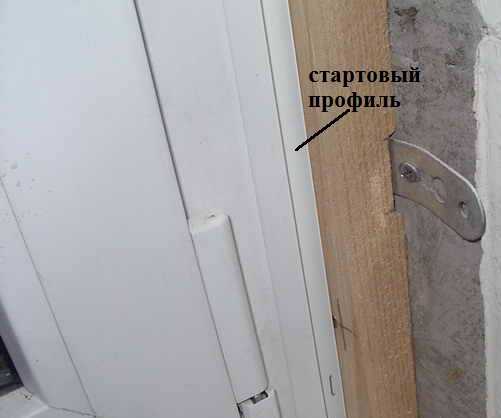
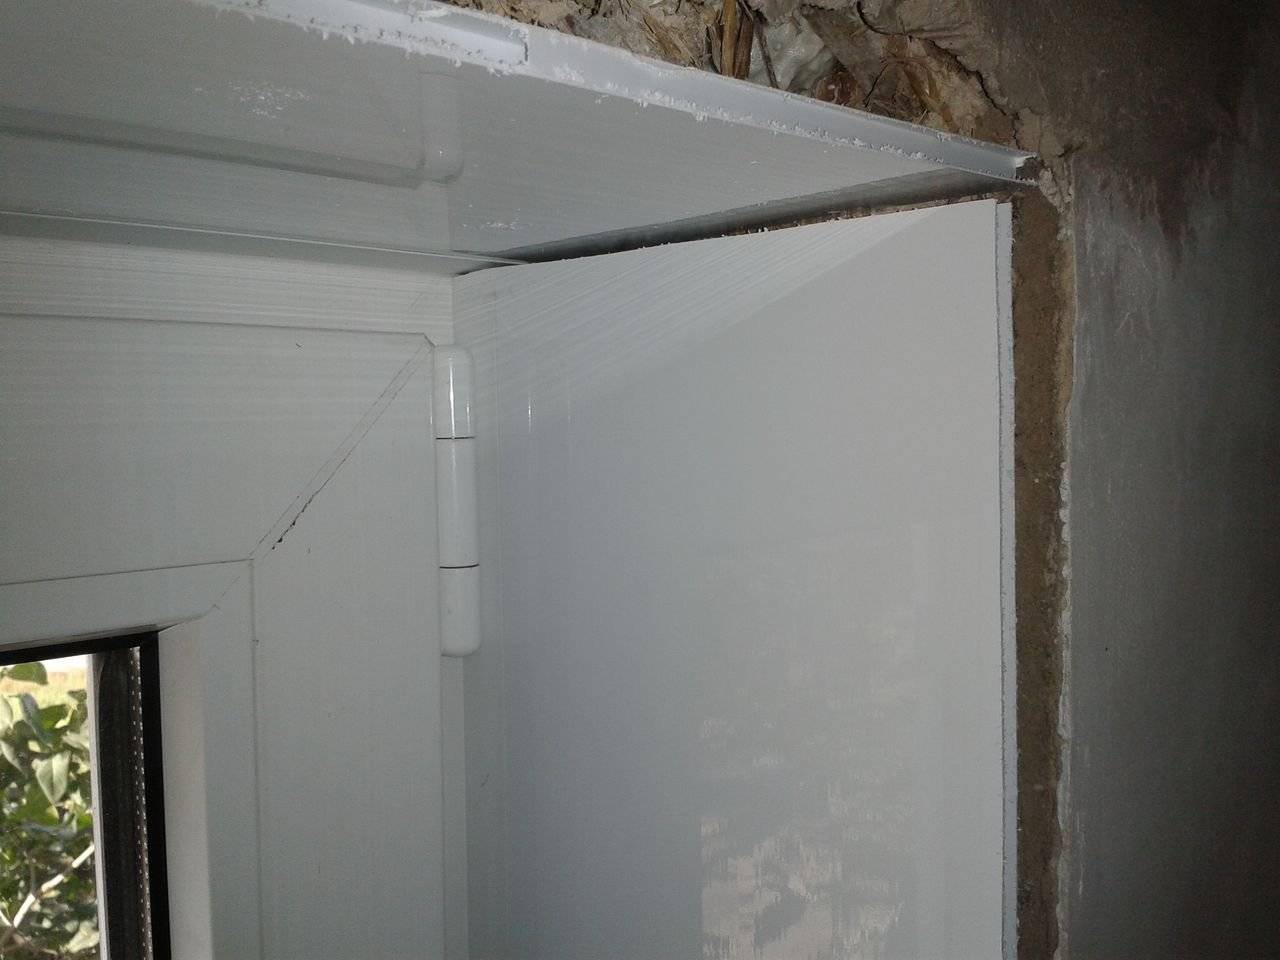
Installed start profile
Using this technology, it is more convenient to start the installation of seam slopes from the sidewalls. Insert the panel into the fixed starting profile. It is also better to take them from expensive and dense ones, with a thick layer of plastic. If you put cheap (ceiling) ones, then the front wall is thin, and jumpers will be visible in bright light. In addition, such plastic can be pushed through even with a finger.
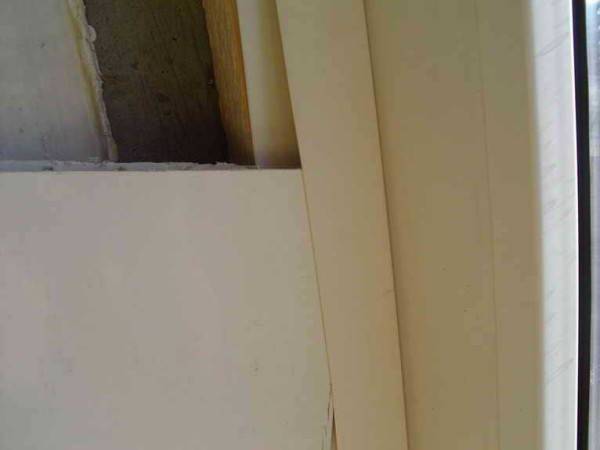
Insert the plastic panel into the profile
The width of the plastic panel should be larger than the slope. If the width of one is not enough, two are joined. But then, at the junction, an additional vertical bar will be needed, to which the first strip will be fixed.
The panel inserted into the profile is, as a rule, longer than the opening. Holding it with your hand, mark the line of the opening. Having removed, cut off along the marked line.
Cut to size
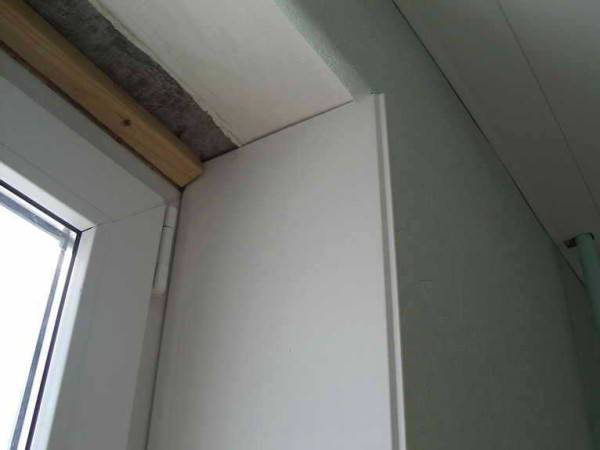
We install the panel again, move it a little from the wall and fill it with polyurethane foam, trying to fill it without gaps, but without excess. To do this, we start from the far lower corner - we draw from the bottom up near the nailed bar. Until we got to the top, the foam expanded a little at the bottom. Draw a line with foam again, but closer to the edge. The closer to the outer edge, the less foam is required - after all, the panel is installed under a slope, so make the paths thinner and thinner. Having reached the middle, make a snake on the rest of the surface and press the panel as it should stand. Align and check. Secure to the wall with masking tape. The second part is also installed and then the upper one. It can also be cut out according to a paper template, and the edges can be adjusted to perfect (or almost) coincidence with sandpaper.
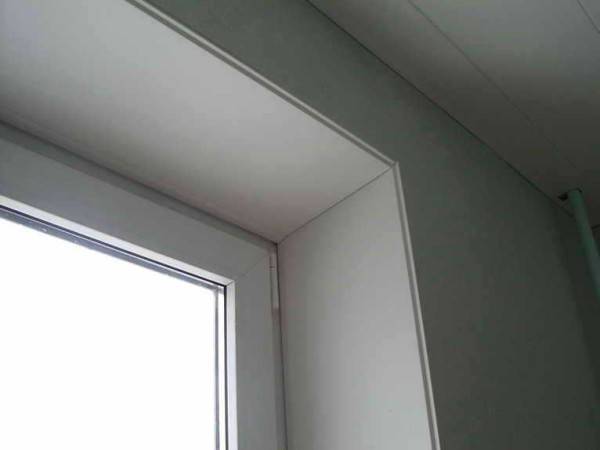
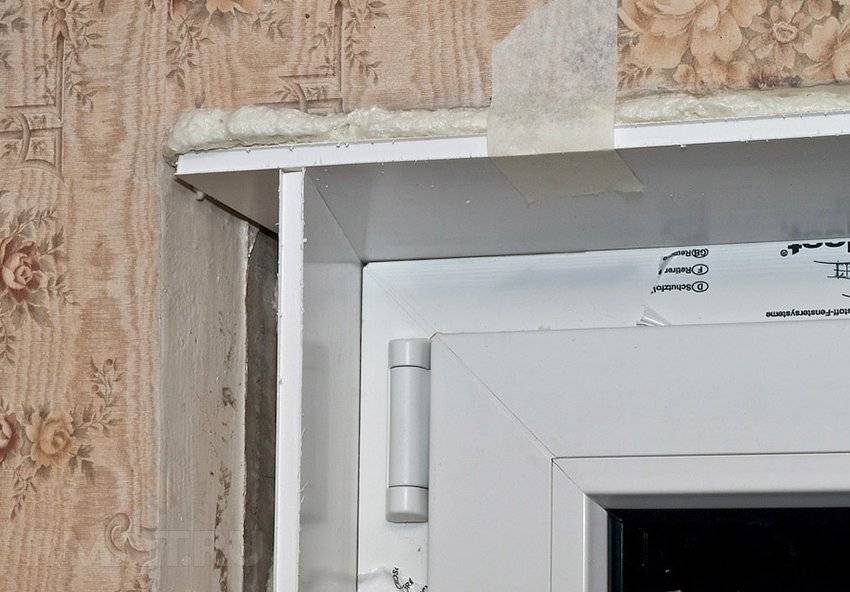
Installed plastic window slopes
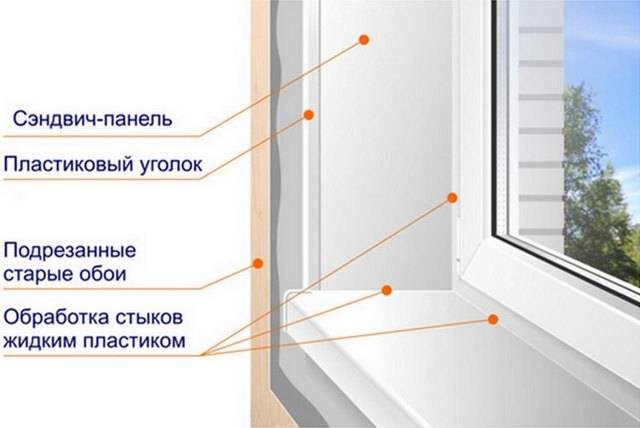
Having installed all parts of the slope and secured with masking tape, leave until complete polymerization. Then, in order not to putty the gaps between the slope and the wall, a white plastic corner is glued to liquid nails. The main task is to cut exactly at the corners. It is easy to glue: apply a thin strip of glue on both shelves of the corner, press, passing along with your hand, hold for a couple of minutes. So they are installed around the entire perimeter, then, before the glue dries, they are also glued with masking tape and left.

Installed corners along the perimeter of the slope
After a day, we remove the tape, the plastic slopes are ready.

It looks like a window with installed plastic slopes
If there are gaps somewhere, they are sealed with acrylic, as described above. Do not use silicone. In the light, it quickly turns yellow. In a year or two, your windows will look terrible. Look for a white acrylic sealant and mask with it.
Properties of plastic materials
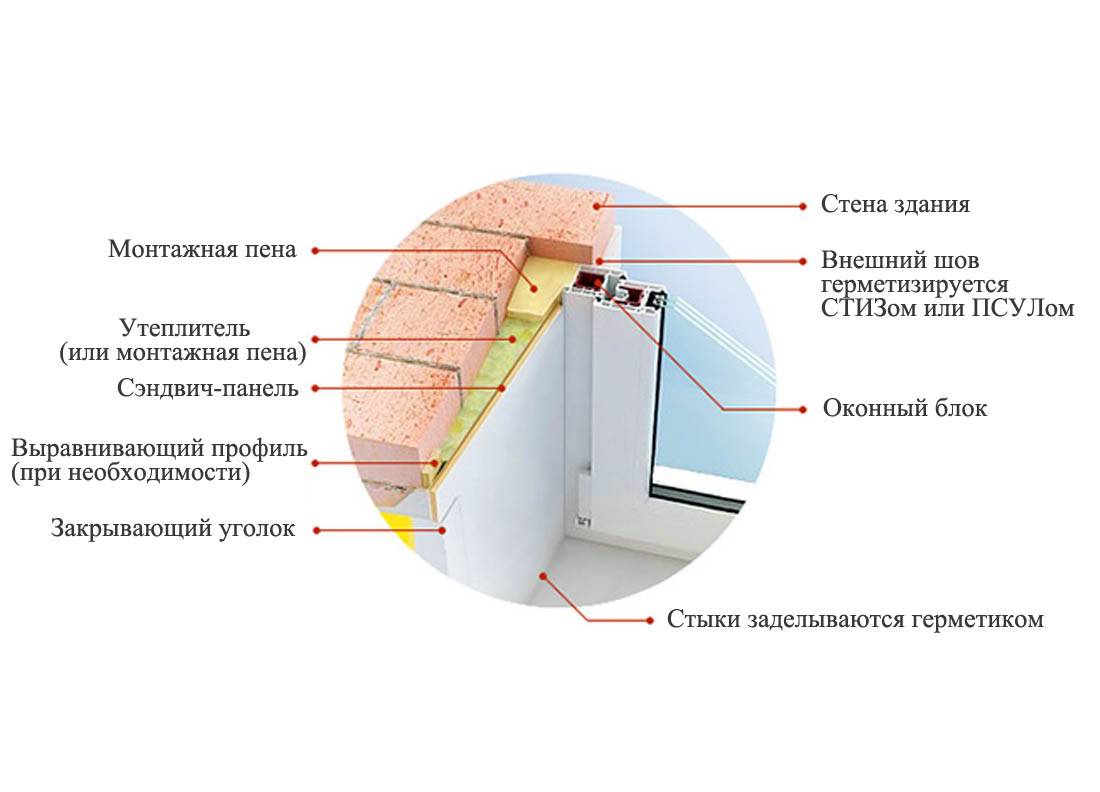
Standard PVC has a hollow inner structure, sealed with stiffening ribs. Sandwiches have a multilayer structure, in addition to a plastic base made of polyvinyl chloride, they contain a layer of insulation. Specifications:
- There are 3 ways of joining - seamless, embossed, rustic - to create a monotonous or embossed structure. Seamless patterns are suitable for finishing slopes.
- Different types of coating finishes - matte, glossy, monotonous, patterned.
- Division by operational purpose into sheet, panel, wagon.
- The use of polystyrene, mineral, non-polyurethane insulation in sandwich panels.
Plastic properties:
- low weight;
- soundproofing;
- low heat conductivity;
- environmental Safety;
- antiseptic safety;
- resistance to chemical, thermal irritants.
PVC panels have a wide dimensional grid, where products are sold on average in plates of 3 x 1.5 m. The thickness of the panel plays a key role, for slopes it is optimal from 10 to 24 mm, but not less than 8 mm.
Important
The thicker the sandwich panel, the more layers of insulation it contains. However, when choosing, one should take into account the installation of heating systems, which can lead to incorrect thermoregulation.
Installation of two-layer models is optimal.
Self-finishing of slopes with plaster
The external slopes should be plastered immediately after the polyurethane foam hardens. It is necessary to completely exclude the possibility of environmental factors affecting its integrity.
Materials and tools
The speed and efficiency of work depends not only on the skill of the master, but also on the availability of all the necessary materials and tools. Therefore, prepare them in advance so that they are all at hand.

You will need:
- container for the preparation of plaster mixture;
- construction mixer or drill with a special attachment for mixing components;
- a set of spatulas of various widths. You will also need an angular option;
- Master OK;
- building level;
- square;
- wide brush with soft bristles;
- trowel for plaster;
- building mixture for facade work;
- putty for outdoor use;
- decorative plaster;
- fiberglass reinforcing mesh;
- primer solution.
Selection and preparation of plaster mix
As the main material for plaster, you can use a conventional sand-cement mixture. However, such a composition does not differ in durability and does not have "insulating" properties. Therefore, for such work, a special facade plaster is better suited, preferably "warm". In addition to cement and gypsum, reinforcing components, loose thermal insulation materials of natural origin and plasticizers are added to the composition of such materials.

Such mixtures have good waterproofing and soundproofing characteristics. Ready-made compositions have good adhesion. Due to its homogeneity and finely dispersed consistency, the solution adheres perfectly to the surface. Of course, such a mixture is more expensive than concrete mortar, but not much is needed to decorate the slopes.
Step-by-step plastering process
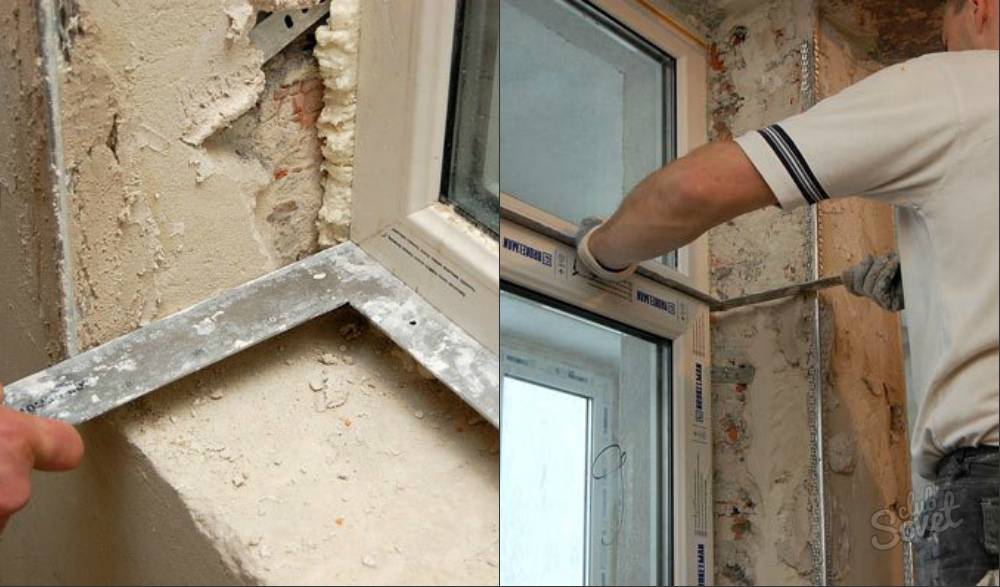
- We clean the slopes from the old plaster. It is advisable to completely get rid of the residues of the coating, in which subsequently cracks may appear.
- If the cleaned surface turns out to be too smooth, it is necessary to increase its adhesive characteristics by means of notches.
- We remove dust from the surface.
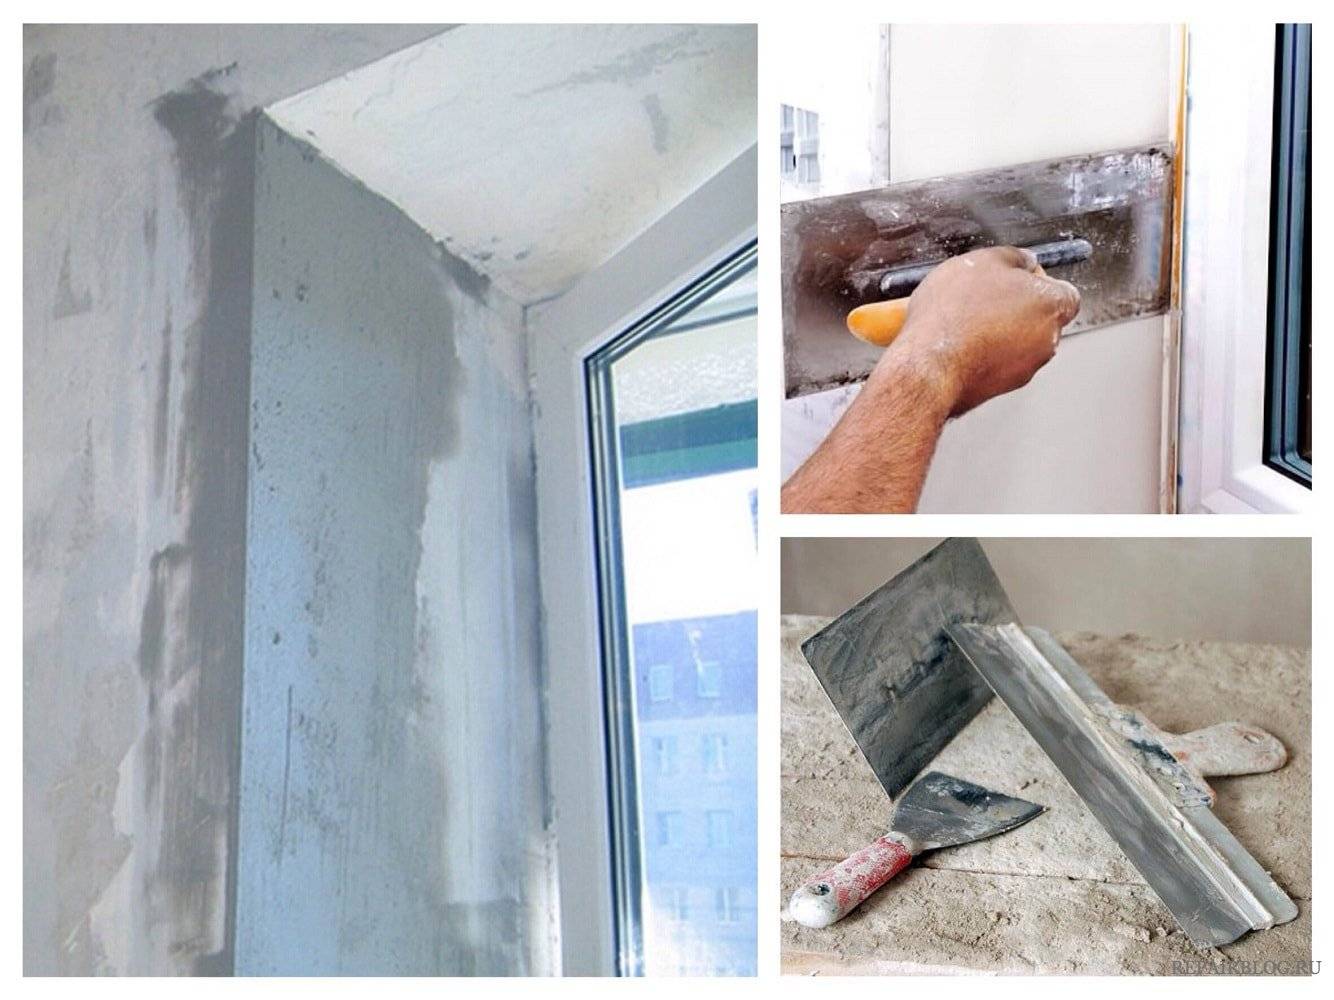
- We apply the first - starting layer of plaster and level it with the rule. It is recommended to apply several thin coats on the upper slope.
- Form a beautiful corner with an angled spatula.
- We glue the reinforcing mesh.
- We level the surface with putty and apply a primer.
- Apply the finishing layer of the material and paint. You can use decorative plaster.

Plastering
Decorating window slopes outside or inside the house is often done by plastering the surface. But to apply this method is relevant only if the slopes are perfectly flat. The layer of plaster should not exceed 2 cm in thickness, otherwise the slopes will quickly crack and become unusable. This type of finish is successfully combined with the finish of the door slopes with artificial stone.
| Stages of work | Target |
| Slope preparation | Removal of greasy stains, dust, the use of an antiseptic |
| Slope priming | Increases adhesion of finishing materials |
| Application of the first leveling layer of plaster | The plaster is applied by spraying with a spatula, leveled with the rule |
| Reinforcement of the slope | To give the structure resistance outside the house, you can use a reinforcing mesh on the slope, which is pressed into the first layer of plaster |
| Applying a decorative plaster layer | Finishing the base, giving it texture, painting |
 Plastering
The advantages of plastic structures
 The installation of window blocks involves a number of mandatory stages, which include finishing the slopes. A couple of years ago, very little attention was paid to this point. Usually it all came down to ordinary plaster with a cement-sand mortar, after which the slopes were whitewashed with chalk.
Nowadays, many people know that it is impossible to create an atmosphere of comfort and warmth in the house without competently executed finishing of the slopes. This procedure is also important because it allows you to permanently solve the problem of drafts, and on top of that, noticeably improve the appearance of the room.
If until today you have not thought about how to correctly make slopes for plastic windows, then it is time to understand this issue and find out which materials are best used for this and what secrets this technology has.
The first thing you should understand is that not everyone succeeds in performing well the first time. do it yourself slopes... Therefore, if you have doubts whether you have the skills to do this job correctly, then it is best to entrust it to an experienced specialist. So you will save yourself from unnecessary expenses and at once solve a bunch of problems that many of our compatriots regularly face - drafts, mold, condensation, ice on the windows.
To understand why it is worth finishing the slopes, you can get acquainted with the advantages of this operation. The first thing to mention is that plastic is used for it, which today is considered the simplest and cheapest way of finishing.
Generally speaking, plastic finishing of window slopes has the following advantages:
- For decoration, plastic or sandwich panels are usually used, which are of low cost. It follows from this that you will not be required to spend a lot on the purchase and installation of plastic for slopes on windows.
- Uncomplicated installation technology. This makes it possible for any person to do the job, even those who do not have experience in construction.
- Plastic panels attract owners not only by their low price, but also by a wide range of colors, and this makes it easier to choose the most suitable option for the design of the room.
- Plastic is one of the strongest, most reliable and durable materials. Therefore, after finishing the slopes with it, you can be sure that you will not have to do this for many more years.
Of particular concern to the owners is the cost of finishing window slopes, if you call a real specialist. Usually, in practice, it turns out that the foreman has to pay about 40 conventional units for the work. But this is not necessary.If you thoroughly understand the nuances of the technology, you can make PVC slopes yourself using ordinary or sandwich panels, thereby significantly reducing the cost of the process.
These materials will perfectly fit into the design of window structures, which can also be attributed to their advantages. By deciding to do this work on his own, the owner can save about 30-40% of costs, which can be a very tangible benefit in modern conditions.
How to properly finish the internal slopes with your own hands
Regardless of the finishing option, preparatory work is performed:
- remove old plaster if it is cracked;
- remove wallpaper or a layer of paint;
- clean surfaces from dust;
- primed with an antifungal agent.
Further steps depend on the type of design of the window wall.
Plaster without insulation
The sequence of finishing the openings with a plaster-putty mixture:
- Installation along the outer contour of the window opening of a metal profile (outer guides) using a level. Fixing to walls with dowels. The profile should be wider than the edge of the wall by the thickness of the plaster layer (about 1 centimeter).
- The perforated corner is attached flush to the frame in height and width (inner rails). Its height must match the protruding edge of the outer profile.
- The prepared mixture is applied to the walls at a given thickness of the plaster. The outer corner is formed.
- After the start of the hardening of the solution, it is leveled using a rule and guides. The movement starts from the window sill to the ceiling, along the guides. Excess mixture is immediately removed.
- After the plaster has dried, remove the outer profile. A plaster putty is applied to the corner projections, on which a painting corner is installed.
- When the painting corner dries up, its inner part is hidden under a new layer of putty, leveled by the rule. Outside, they are fastened with a mortar, pressing and leveling with a spatula.
- Use an angled spatula for inside corners.
- A millimeter of finishing putty is applied to the finished layer.
- The last stage: grouting the surface.

Plastered surfaces are primed and painted.
Insulated plaster
Thermal insulation of plastered slopes keeps the walls warm in any frost. For insulation, polystyrene foam panels are used up to 1.5 centimeters in thickness. Installation starts from the side slopes. "Liquid nails" are applied to the surface of the panel and glued to the prepared (leveled, dust-free) wall.
Wide slopes require additional fixing for strength. From the side of the wall, a dowel with a wide head (fungus dowel) is inserted into the insulation (recessed by 1 millimeter), through which spacer nails are driven in.
Then corners are glued to the outer corners, from which a fiberglass mesh is laid to reinforce the plaster layer. To evenly distribute the mesh over the foam, use buttons, after which a thin layer of starting putty is applied to it. After leveling and complete drying, a finishing putty is applied. Completion of work is similar to putty without insulation.
PVC panels
Fastening of conventional plastic panels and panels with insulation has minor differences. A starting profile is attached along the inner contour, to which an angular one is attached. A plastic F-profile is attached to the outer edge of the opening, which serves as a panel holder and a casing. Then they measure the slopes, cut the material and install. Sandwich panels are mounted with a starting profile or through a groove in the assembly seam.
Installation of plasterboard slopes
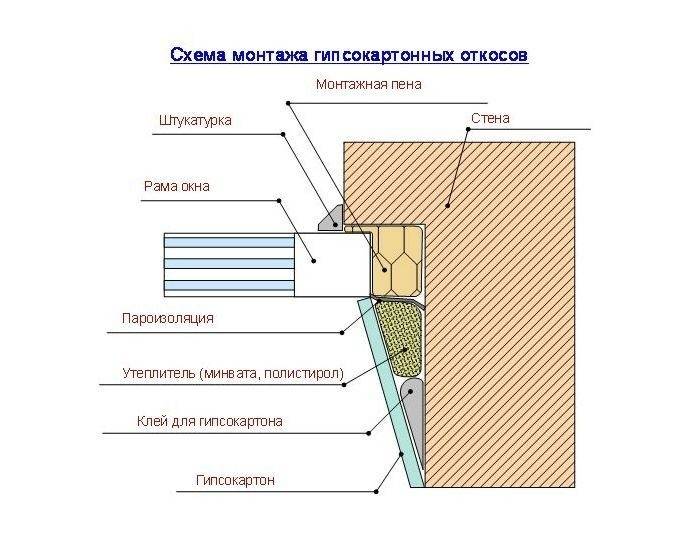
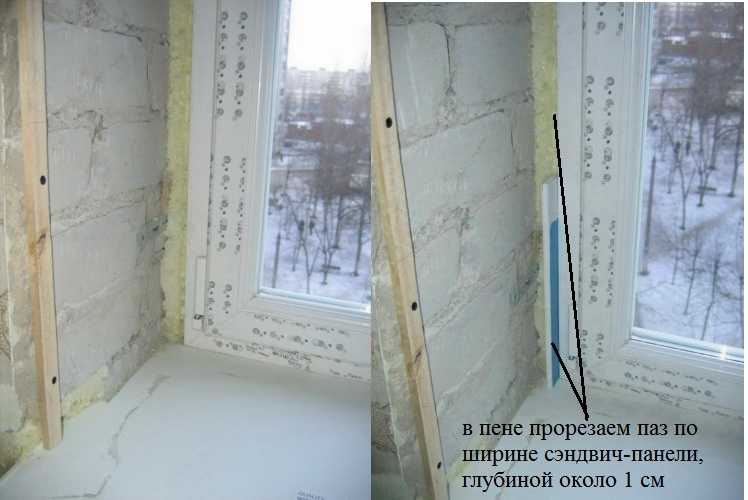
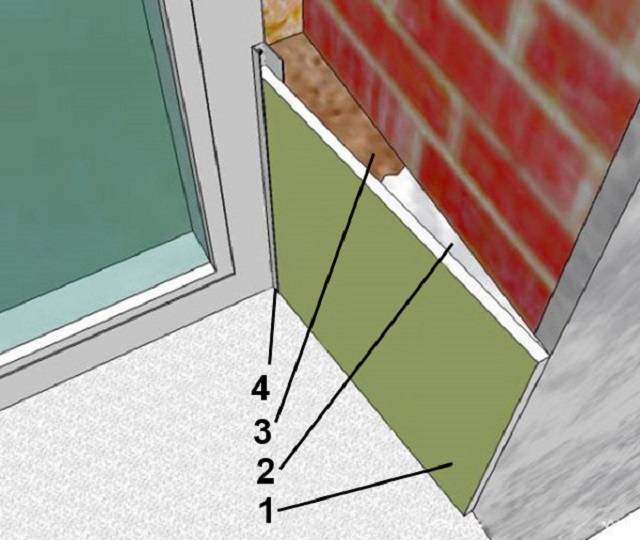
To remove slopes from drywall, you will need polyurethane foam, putty. Installation begins by cutting a gap in the foam around the window frame. With a clerical knife, a recess is made in it by 5 millimeters to the width of the sheet. Measurements of slopes and material cutting are made.
The upper slope is placed first. Putty is applied to the edge. The drywall is inserted and folded back slightly.The gap between the slope and the wall is foamed, after which the slope is pressed with a piece of board along the entire length of the slope.
The sidewalls are installed in the same way. Then a metal corner is glued to the putty around the entire perimeter. After drying, drywall is putty twice: starting and finishing mixture. The last stage of installation: priming, painting.

