How to fix a bathtub if the walls are of low load-bearing capacity
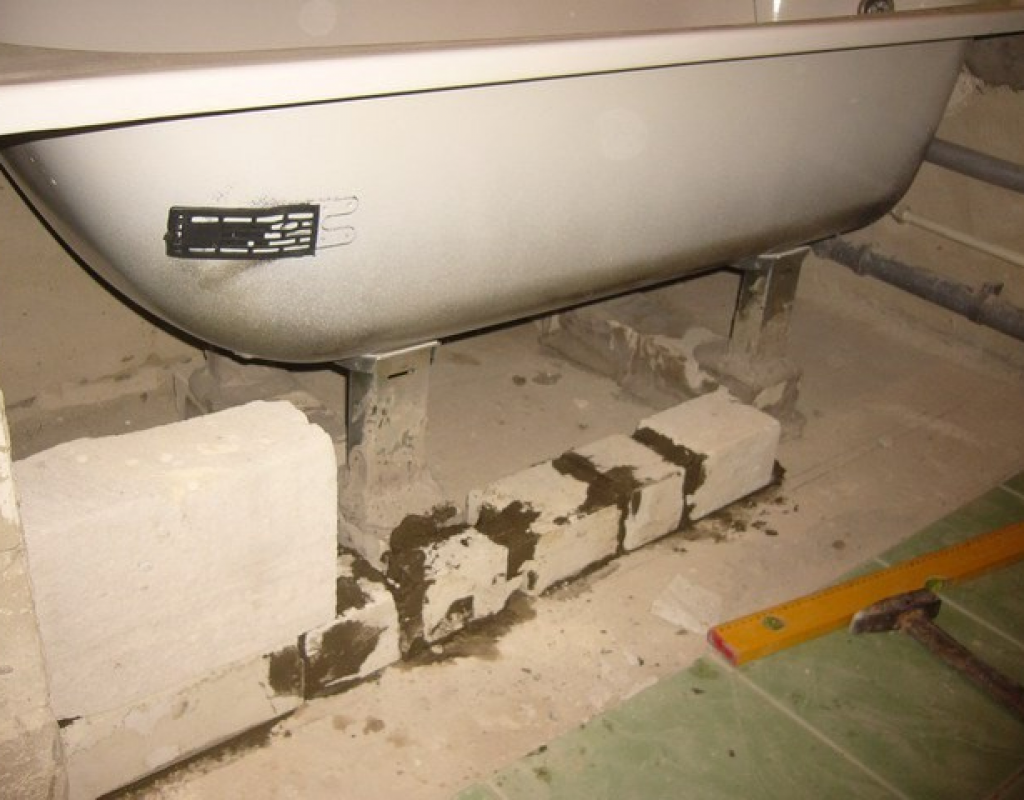
If fixing the bathtub to the walls is not an option (drywall or foam block, just an old crumbling wall), you can only create a reliable base on which it should be installed. One of the options is a pedestal, described above. Often it is supplemented with a frame supporting the front board. This usually has the maximum load, so a frame is assembled, which is attached to the floor with dowels, even if tiles are laid on the floor. When installed, one of the sides has a reliable support, which provides the necessary stability.
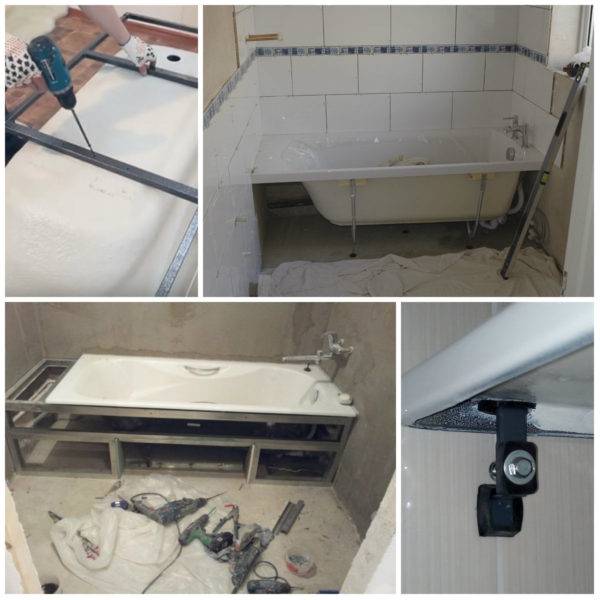
The retaining wall for the front side is made of timber, plasterboard profile. Can be welded from a profiled pipe, a corner with a small shelf.
 If you cannot fix the bathtub to the walls, you need to make a solid base for installation on the floor.
The second option is a welded frame made of a profiled pipe, which is welded to the size of the bath. She "sits" on the frame, and it, in turn, is rigidly attached to the floor all on the same dowels. The gaps between the wall and the side can be closed in any way possible, but this will not hold the bath, namely the frame.
For shock absorption and noise reduction, you can use rubber gaskets - made of hard rubber. Or boards as in the photo. They can also hold the container from the sides. This fastening of the bathtub to the floor is secure. She's definitely not going anywhere. By the same principle, you can make a frame for a freestanding bathtub, and sheathe it and refine it to your liking.
Tools and materials
There are several materials and tools that need to be prepared for the job.
Screwdriver or screwdriver
It is no secret that when installing the bath, you will have to screw on special fasteners. Most often, conventional Phillips or straight-type screwdrivers are used for this. However, some people do not want to manually turn the screws. In this case, you can use a battery-powered screwdriver. This tool is ideal for screwing in screws and screws.

Wrench
A wrench is a hand-held tool that has been used for many years to screw or unscrew threaded fasteners. Most often it is used in workshops and in production. However, a wrench is also useful when installing a bathroom structure. Experts advise using open-end wrenches.
Building level
No repair work should take place without a special building level. This tool is used to determine deviations from horizontal and vertical surfaces. It is also used to shift the angle of inclination. When installing the bath, a tool is needed to set the structure straight. Bubble levels are considered the most common and quality levels.
Perforator
A hammer drill is called a hand-held electric tool that performs rotating and reciprocating movements. This tool is used for the following purposes:
- creating through holes in wall or floor surfaces;
- drilling of metal materials;
- gouging surfaces.
When installing a bath, a perforator may be needed if you need to lead sewer pipes into the bathroom.
Roulette
The construction tape is considered to be the most widely used measuring tool. During the installation of the bath, you will have to periodically take measurements, and therefore it will not be possible to do the work without a measuring tape. It is necessary to use such models of tape measures, in which the length of the web reaches three meters.

Marker
In the construction industry, special markers are often used, which are used when marking various surfaces. They are suitable for marking concrete, glass, asphalt, metal and textile surfaces.
Construction square
Some people use a construction square when installing a bathroom structure. Such a tool is used when tracing corners, as well as when checking their sharpness. Sometimes a square is used when you need to draw vertical lines on walls or floor surfaces. In the construction industry, models with a length of about a meter are popular.
Factory hardware and frame
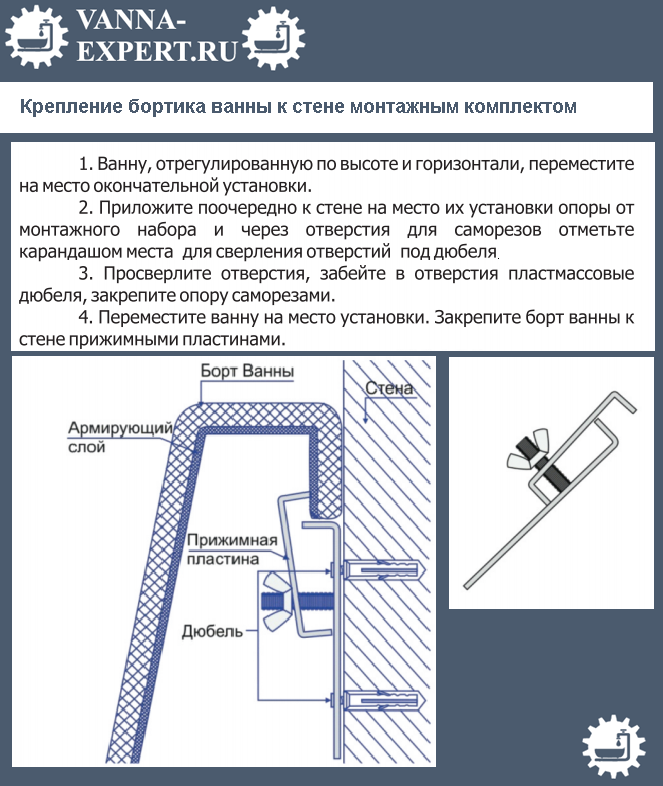
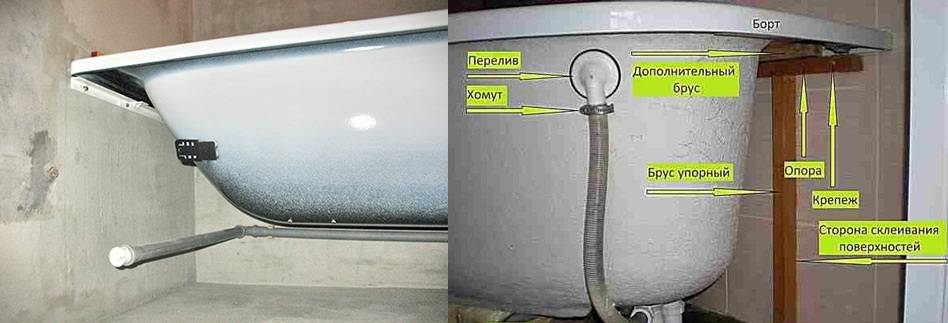
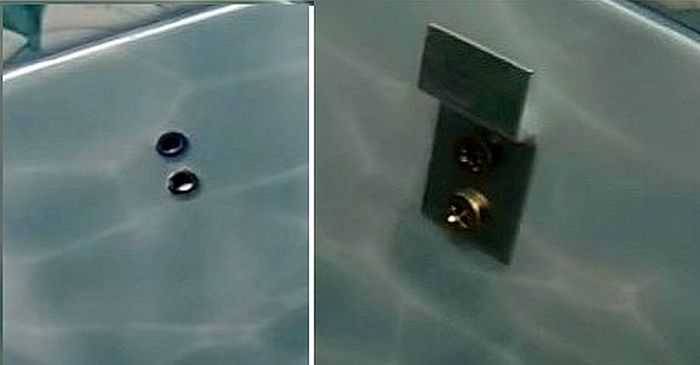
Providing the ability to fix the acrylic bathtub from shifting in the horizontal plane, manufacturers complete the plumbing with metal brackets or polymer fasteners of a similar shape.
 Factory bracket for attaching the side of the bowl to the wall.
A staple is a curved steel strip, one plane adjacent to the supporting surface, the other forming a hook. Plastic fasteners are molded in extruders or cast in one piece.
 Plastic Factory Bath Hardware
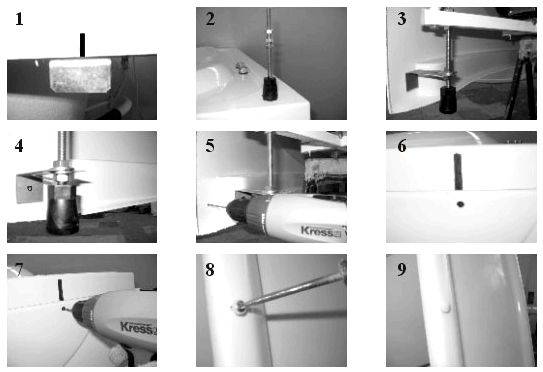
The step-by-step installation procedure for the supporting structure is as follows:
-
frame elements are attached to the bowl with self-tapping screws from below;
- the bathtub is installed at the place of operation, the sides are set in a horizontal plane due to the height-adjustable legs;
-
marking on the walls of the upper edge of the bowl of its adjacent sides is made;
- the bathroom moves, the height of its side is measured, the markings on the walls are transferred lower by the value of this value;
-
staples or plastic fasteners are mounted along the line;
- the bowl is lifted over the hooks, put on them with the side.
In the standard supports of the height-adjustable legs of the acrylic bathtub power frame, there are usually no holes for attaching them to the floor. The most inexpensive option for fixing a sanitary ware in a horizontal plane is making such holes, marking after adjusting the height, removing the bath, drilling blind holes in the floor.

If the bathtub is installed after facing the walls with tiles, PVC panels, then the gap remaining between its sides and walls is sealed with a sealant by default.

This material is actually an adhesive with high adhesion to plastic and ceramics. Therefore, the bath bowl is guaranteed not to wobble, even without additional measures to stabilize the spatial position.
Some beginner mistakes
Inexperienced craftsmen can mount an acrylic bathtub to the wall. To install the bowl correctly, there are a few simple tips to follow. Some beginners make mistakes while fixing plumbing to the wall. As a result, the bath staggers, the joint, sealed with a sealant, begins to let water through. Failure to take action could damage the drain system or bath body.

To avoid problems later, do not think that by moving the bath close to the wall and covering the joint with sealant or a special solution, you can achieve good fixation. To achieve this, you need to use brackets, brackets, or other appropriate fasteners. You can also cut into the wall, creating a strobe. However, ordinary mortar or sealant will not be able to firmly fix the bath against the wall.
It is also worth noting that many craftsmen cover the joints with gypsum-based solutions. Of course, such compositions are distinguished by whiteness. But gypsum mixes are absolutely not suitable for wet rooms. Therefore, when creating the finish, you need to use special white or transparent sealants. They should include antiseptic components. Thanks to the use of sanitary sealant, mold and mildew will not form at the joints.
Having considered how to mount an acrylic bathtub to the wall, you can do it yourself correctly. In this case, plumbing will last a long time, will not loosen and collapse.
How to mount a bathtub on a tiled floor with adhesive-backed legs
Read the attached instructions, make sure that all elements are complete and in good working order. Check the condition of the flooring using one of the above methods. This type of bathtub is allowed to be installed both on concrete and wooden supporting structures.
Step 1. Tilt the tub upside down, making sure that the distance to the drain hole will provide a good connection to the sewer pipe.
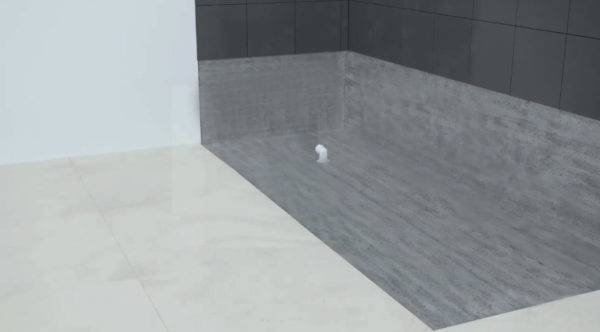
Sewage pipe

Inverted bath
Step 2. Degrease the bottom of the tub where the double-sided tape is located. It is better to degrease with special solvents, if they are not available, then it is allowed to use alcohol or vodka. After the vodka, the surfaces must be thoroughly dried. The places where the adhesive tape is glued are marked on the bottom of the tub.

Degreasing
Step 3. Remove the protective oiled paper from the tape on the legs. Slide them gently along the lines and press firmly. Take your time, work with utmost care. If you are mistaken, then it will be problematic to tear off the legs. In addition, the adhesive surface will significantly deteriorate its original properties, and the fixation will be unreliable. You will have to change the double-sided tape, and it is quite difficult to find a high-quality one in stores, and you will have to waste a lot of time searching.

Remove the protective film from the tape

The legs must be pressed firmly against the bottom of the bath
Step 4. Tighten the adjusting bolts on the legs until they stop and check their location with a level. They should lie in the same horizontal plane, if this is not the case, then adjust them.

Position check

Rechecking after tightening the adjusting bolts
Step 5. Assemble and install a siphon on the bath; the specific work algorithm depends on the design features of the equipment.
Step 6. Measure the distance from the legs to the sides, it is necessary to mark the location of the side stops of the bath.

Measuring the distance from the legs to the sides
We have already mentioned that light steel and acrylic bathtubs cannot be attached to the floor only on legs. This is due to the fact that such structures are very unstable; during use, they can tip over or slide over smooth ceramic tiles. It is possible to specially fix the legs to the floor with anchors only in certain cases for baths installed in the middle of the premises. And then such work is not recommended for two reasons: you need a lot of practical experience in installing bathtubs and you have to drill holes in the tiles.
If it becomes necessary to replace or move the bath to another place, the drilled tiles must be replaced. This is quite difficult for two reasons. Firstly, most often you will not be able to buy exactly the same replacement tiles, traces of replacement will remain on the floor. Secondly, it is difficult to dismantle a well-laid tile from the base; there are high risks of damage to nearby ones.
Step 7. On the walls of the room under the level, draw lines at the height of the sides. Make sure all angles are 90 °.

Markup scheme
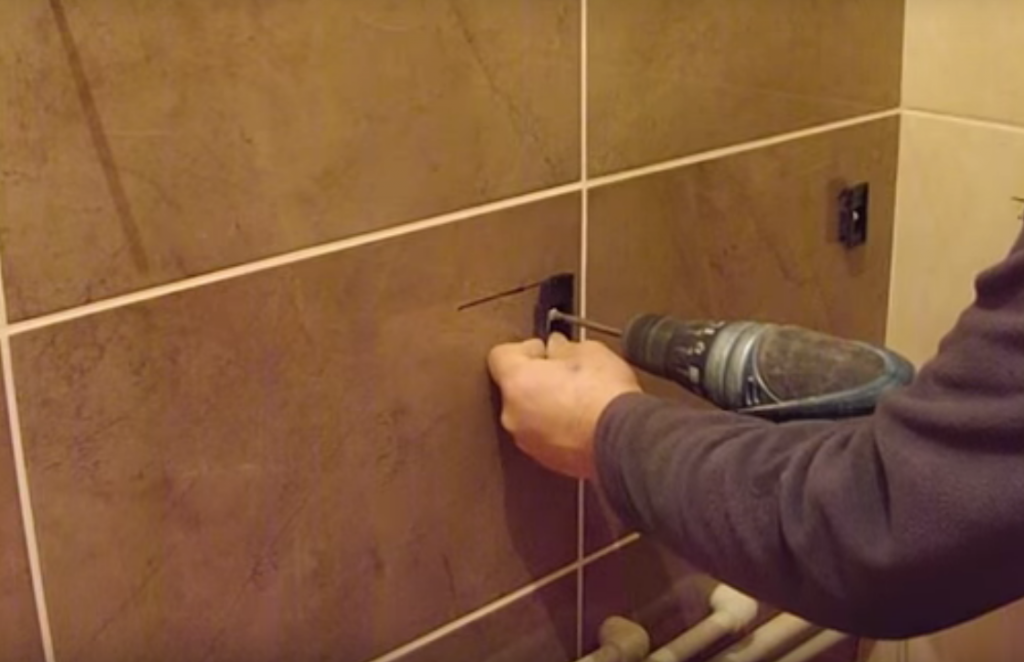
Step 8. Temporarily replace the tub and mark the fixing points of the side rests. Move the bathroom back and drill the holes for the dowels.

The bathtub was leaned against the wall
Drilling markings

Drilling holes

Installation of dowels
Step 9. Along the lines drawn, apply a layer of silicone sealant, install the bath on the hangers. The thickness of the sealant must be such that all the unevenness of the tile is covered. Squeezed out excess material should be leveled and removed.

Application of silicone sealant

Fastening hangers

Bath installation

Aligning the sealant
Step 10. Finally align the legs and attach them to the floor. If it is made of wood, then it is enough to tighten the screws.If the floor is made of ceramic tiles, then for fixing, you must first drill the holes for the dowels and, after installing the bath, drive the dowel-nails into the plastic parts.

Securing the feet to the floor
Step 11. Check the tightness of the siphon connection. This can be done under pressure using special equipment or by gravity. Fill the bathroom before overflowing, place sheets of paper under all pipe connections. Open the valve and wait until the water is completely drained. Take out the paper, if there were minor leaks, then wet spots will appear on it. If problems are found, they should be corrected immediately.

Checking the tightness of the siphon
The final step is to install the decorative screen. It can be made of masonry materials or panels, tiled with ceramic tiles or use plastic panels.

Installing a decorative screen

Tiled screen example
Features of installing acrylic bathtubs
Since this type of plumbing has thin walls, it will need reliable support. Do-it-yourself installation of an acrylic bathtub is carried out in the following ways: using a factory-made frame included in the kit, or on legs, as well as on bricks.
In some cases, you have to use a combined method - using a frame, supporting the bottom with bricks in certain places. This method is useful when the lower part of the product is very thin and seems too unreliable.
A frame for an acrylic bathtub and legs can be included in the kit, sometimes in an extended version. The difference between these elements is huge and it concerns not only cost. The fact is that the legs put on the slats are attached to the reinforced bottom, as a rule, by 2 - 4 self-tapping screws, but the sides have no support.

The frame for an acrylic bathtub looks more massive, it is made of thick profiled tubular products with a square cross section. In addition, it has a larger number of anchor points. The sides are partially strengthened with supports, and the other part is fixed to the bottom and thereby propped up.
These actions are provided for by the technology of how to properly install an acrylic bathtub, so there is no need to be afraid of them. The reason is that the fixation points are reinforced with special plates. But in order not to damage the product, before starting the installation work, you must carefully study the instructions with a detailed description of the sizes of fasteners that can be used.
Installation stages
There are ten stages of the installation of the baths, which must be familiarized in more detail in advance.
Brick podium
First, you need to create a podium in the bathroom, on which the structure will be installed. They are made from various building materials, but most often they are made from durable red bricks. Brickwork is not very high, 3-5 rows are enough. The podium must be reliable in order to withstand serious loads.
Adjusting the height of the legs
Many models of structures are installed on special legs, the height of which a person can independently adjust. It is recommended to adjust them in advance and set the optimum height. They need to be adjusted so that the height is at least ten centimeters.

Markup
Experts advise to do the marking in advance, so that in the future the product will be easier to install. Before marking, you need to put the bath in place. This will help to determine the main features of its horizontal regulation. Then marks are made on the structure where the fasteners will be installed.
Installation on a frame
Many people do not recommend placing the product on the floor and advise placing it on a sturdy frame. The created frame is installed in advance on an inverted bath, after which the height of the structure is adjusted.After screwing all the racks, the legs are installed, and the frame, along with the bath, is installed on the floor.
Sewer connection
After fixing the frame and installing the structure, they are connected to the sewer system. First, a siphon is connected to the product drain. Then it is connected to a protective grid and a receiving pipe. All joints are additionally treated with a sealant. After that, the pipe from the siphon is connected to the sewer.
Level adjustment
To keep the bathroom level, it will have to be adjusted using a building level. It is necessary to do the adjustment even during the installation of the frame so that it is installed without tilting. Also, the level will be needed when the structure is installed on the legs.
Masking tape for sides and walls
The joints formed between the side and the wall must be treated with silicone sealant. It is used to make the structure fit better against the wall. However, sometimes the sealant is not enough and you have to use masking tape. It is installed on top of the silicone and attached to the surface of the bead and wall.

Gap filling with polyurethane foam
Some people decide to seal gaps and crevices with building foam instead of sealant. Before using it, you must carefully clean the joints of debris and dust. Then they are defatted with an alcoholic liquid and processed with foam. It must be applied carefully so that it does not go beyond the cracks.
Fastening on legs
It is necessary to attach the legs to the bathroom structure in advance, before installing it on a brick niche. To fix the legs, the bath is turned upside down, after which special fasteners are installed on it. Then the legs are screwed to the mounts, on which the product will stand.
Examination
When the installation is complete, the stability of the structure can be checked. First you need to make sure it is level and not tilted. Then the strength of the podium is checked. To do this, you need to get into the bathroom and lie in it for 10-15 minutes. You also need to draw water into it and drain it in order to check the performance of the drain system.
The nuances of fixing different models of bathtubs
Often, the owners are worried about the problem of how to fix the bathtub to the floor. I must say that for this it is necessary to carefully choose the fasteners when purchasing the product. The various materials from which the tanks are made require specific fixing elements. The greatest demand is for acrylic and steel plumbing, as well as cast iron. Fasteners must be purchased according to the material from which the product is made.
 A securely fastened bathtub guarantees further ease of use
Cast iron plumbing fixtures are characterized by increased strength and service life, but at the same time they have a very high weight. Installation of such containers should be done only to a high-strength surface. You are unlikely to encounter a similar problem when purchasing a new bathtub, since most manufacturers abandoned the production of cast iron plumbing in the late 80s of the last century.
Steel containers, as a rule, are fixed to a special base, which is laid out in advance from white or red bricks. This material will allow you to firmly and accurately fix the plumbing fixture. Fastening a steel bathtub to the wall and floor is usually done using specific brackets.
The greatest demand today is for acrylic products that have all the necessary properties. In such a bath, the possibility of slipping is excluded, in addition, acrylic has the ability to retain heat well. The industry produces containers made of acrylic of various shapes and sizes, so it is possible to choose a high-quality appliance that is optimal for your bathroom.
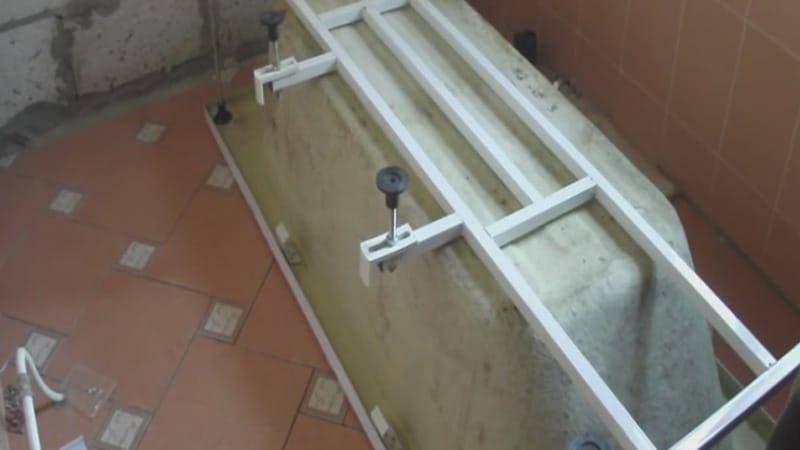 The acrylic bathtub comes with a steel frame that performs a load-bearing function
But there is a nuance, since acrylic itself is an elastic material, such baths are not characterized by high reliability. When exposed to a load exceeding the calculated one, the product may become unusable, therefore it is necessary to mount the container on a special metal frame. These systems are often included with the product. This will make the structure capital and will significantly increase its reliability.
How to install an acrylic bathtub?
If you decide to equip your bathroom with acrylic rather than metal plumbing, then you should familiarize yourself with how it is installed to the wall. In order for you to be able to fix such a bath with your own hands correctly, prepare the following in advance:
- building level;
- marker;
- rubber hammer;
- sealant;
- screwdrivers;
- fasteners;
- spanners.
Step 1: markup
After you do, you can start installing a new one. First of all, you need to make sure that its legs are screwed on securely. Tighten the bolts if necessary. Then it will need to be placed against the wall and checked with a level for horizontalness. If everything is in order with this, then take a marker and make marks, stepping back about 20 cm from the edges of the plumbing (at the head and along its long side). This must be done so that you can then set the hooks evenly.
If, when measuring horizontality, the level reveals a skew of one of the sides of the bath, then you will need to adjust its legs. Only then will it be possible to make marks for the hooks, which will be fixed in the future. In this case, the wall must first be treated with a small layer of sealant, provided that it is whitewashed. This will protect it from mold and mildew.
Step 2: do-it-yourself acrylic bath installation
Now you need to move the bath a little to the side so that you can install the drain. First, you need to attach a product designed to drain the drain. Rubber gaskets must be installed under the upper and lower rings. Further, a water outlet is connected to the siphon located on the floor. It is imperative to make sure that its installation is carried out with high tightness. After that, an overflow pipe is installed from the outside of the acrylic bathtub, which is necessary in order to drain excess liquid when the plumbing is overfilled. It will need to be connected to a floor siphon.
The next thing to do is to attach the hooks to the wall. They usually come with the bathroom, as well as special dowels. For each hook, you need to spend 2 fasteners. After that, you need to check their reliability. Then you can attach the acrylic bathtub to them. In order for it to "sit" tightly on the hooks, you will need to tap on its sides with a rubber mallet. After that, you will need to fill the gap with your own hands with sealant, which was formed when the plumbing was attached to the wall. Next, the legs are adjusted, this should be done only if necessary. After all, they have already been displayed correctly before. However, when attaching to hooks, they may become misaligned, so additional adjustment of the legs will be required.
The last thing to do is to check the tub for leaks. To do this, it will need to be completely filled with water, and then inspect possible leaks. If the installation went well, then there should be no smudges. If they are observed, then it will be necessary to carry out additional sealing of the connections and make sure that they are securely tightened.
From the information provided, it is clear that you can do it yourself. In this case, the process of work depends on what material it is made of.So, metal plumbing is installed according to one instruction, while acrylic - using a completely different installation scheme
Therefore, it is important to pay attention to what the bath is made of, and then, according to this parameter, to mount it to the wall according to the instructions provided. Using it, you will be able to carry out work efficiently, quickly and without errors. This means that the result will please you.
We wish you good luck in installing the bathtub to the wall!
This means that the result will please you. We wish you good luck in installing the bathtub to the wall!
Methods for installing panels in the bathroom and a variety of frames
Plastic panels can be installed by hand using two mounting methods:
- frame;
- frameless.
To make it easier to navigate which method of fastening to give preference, here are a few differences between the two methods of fastening:
- the metal frame takes up a lot of useful space, which is so critical for placing a toilet or bathroom;
- the metal frame consists of separate profiles, so the installed plastic has voids under it that are easy to push;
- in the case of the frame method of fastening, there will be a void between the wall and the plastic, in which various microorganisms will develop;
- to make a frame for plastic panels, you will need to purchase metal profiles and various fasteners, while for a frameless method, you will only need glue liquid nails.
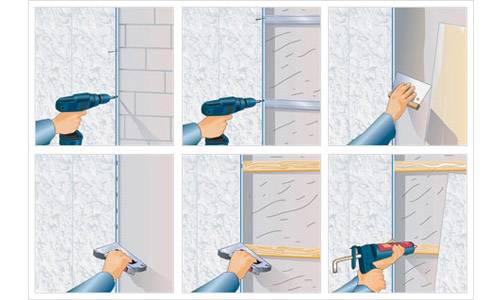 The most common ways of attaching plastic panels
 Panel mounting options
Features of installing a bath
When installing this plumbing fixture, you need to follow some recommendations. First of all, water drain pipes are connected to the bath, and this can be done only by putting the device on its side. It is necessary to fix the product to the base, floor, and walls only after connecting it to the sewer. The gaps left during the installation process between the wall and the bath rim should be hermetically sealed using special waterproof compounds. In addition, a special decorative strip must be installed. Mounting the screen will significantly increase the overall aesthetics of the room.
 When fixing the bath, do not forget to seal the seams.
Cast iron bathtubs are usually installed on sturdy steel legs. They are securely fixed to the base of the plumbing fixture using tie bolts or special steel wedges. You can also mount the bathtub to the wall. However, since the cast-iron container has an impressive mass, this can be completely dispensed with.
The steel bathtub wall mount is a set of brackets supplied with the fixture. It is quite simple to fix the container. However, it must be said that this should be done immediately on all planes adjacent to the bath. Installation must be done before the tiles are laid on the walls, if you planned to leave the partition behind the container without cladding.
Let's consider how the acrylic bathtub is attached to the wall. The easiest way to do this is by fixing a metal frame to the partition, which serves as a support for the container.
 Some models of acrylic bathtubs are fixed to the wall with special latches.
There is another method, how to fix the acrylic bathtub to the wall. This is done using special latches, which are usually supplied by the manufacturer with the product.
Also, a steel or cast iron container can be equipped with a similar panel. As a basis, it would be advisable to use a galvanized profile sheathed with plasterboard, which can subsequently be tiled.
The order of performing these works should be as follows. First of all, it is necessary to measure the height from the floor to the sides, the length and width of the container, and the distance between the bathroom and the wall, if necessary.Further, in accordance with the measurement, the profile is cut and a strong frame is assembled. The resulting structure is fixed to the wall. Plumbing fittings are connected to the bathtub, which is connected to the sewage system.
 Treatment of the outer sides of the steel bath with foam will increase the heat capacity and sound insulation of the product
After these steps, the bathtub is put into place and leveled using the adjustable feet. At the final stage of work, the joints are closed with masking tape, the outside of the bathtub is filled with polyurethane foam and sealed with a layer of waterproofing.
Fastening and communications
Before fixing the font to the wall and floor, it is necessary to connect it to the communication system. There are several rules to follow to ensure proper installation:
First of all, drain and overflow pipes are attached to the font.
They need to be fixed only on a container lying on its side.
Turning on its side should be extremely careful so as not to damage its covering and the floor covering in the room.
The connection of the siphon to the pipes is the work that is carried out after fixing the drain and overflow.
It is important to know - only after the above steps can the container be put on its legs. The legs themselves are mounted on an inverted font.
After completing the installation of all the necessary elements, the bathtub is carefully placed in the right place and horizontally aligned using the building level
Alignment is carried out by adjusting the legs.
Next, you need to lean as close as possible to the wall
The remaining gaps are treated with a sealant.
After all the plumbing is installed in its proper place and connected to the sewer, the system is checked for leaks. To do this, you need to take a full bath of water and drain it, checking at this moment the plumbing for leaks and cracks. If there are any, they must be eliminated immediately.
When everything is ready and checked, a plasterboard frame or a special podium that will hide the bottom is arranged on the font.


