How do I hang the shelf? Basic moments
Before proceeding, in fact, to the suspension, you need to decide on three important points:
- Estimated load.
- Mounting method.
- Purpose (functionality).
 This transformable furniture composition, due to its modular design, allows you to vary the elements in any order.
Actually, the load is the key parameter that determines everything else. The method of fastening and, under certain conditions, the place of installation depends on it. As for the purpose, it directly affects the location of the shelf and determines the ease of use: who will use it and how often. For example, in the nursery, it should be located lower than in the living room.
 You can remove or add additional parts depending on what items will be stored on the wall shelves.
Preparatory work
In order to properly hang the shelf, the first step is to inspect the surface for the possibility of using the selected mounting method. In turn, the choice of fastening depends on the functional purpose and the load that the shelf will exert on the wall at the place of fixation. Thus, before proceeding with marking and drilling, you need to make sure that the wall material and fasteners are selected correctly (sometimes this can only be assessed after installation).
It is important to fix the shelf to the wall in such a way that it looks attractive, harmoniously matches the design, and at the same time is safe and conveniently located.
The next step should be to determine the footprints. For this, two methods are used: calculated and template. With the calculation method, the brackets or hinges must be fixed in advance - this will allow accurate measurements of the suspension points (holes or hinges) and transfer them to the wall using a ruler or tape measure. The template is simpler - the shelf, as it is, is attached to the wall and the attachment points are indicated after the fact.
 Skews are tracked using a level.
How to hang a shelf on the wall: the tools you need
It is clear that each type of work requires its own tools. However, in most cases it is advisable to have on hand:
- Electric impact drill. In principle, you can do with a hand drill, especially for materials such as foam concrete or drywall. But if you have to work with a concrete wall, you will need a puncher here.
- A set of drills and bits. It is never known in advance what will be faced (in terms of wall material), so it is always best to keep a spare drill for different types of surfaces with you.
- Level. Of course, sometimes they eliminate distortions and a glass of water, but with the help of a level it is more convenient to do this.
- Screwdriver. Its presence significantly speeds up the installation process. Although you can use screwdrivers.
- Little things. Pencil, ruler, core, hammer, electrical tape, etc.
Before you hang the shelf: safety precautions
When carrying out such work, it is extremely important to take the necessary precautions, since the risk of injury or injury to others is quite high. It is prohibited to start installation if:
- Work is carried out without gloves, goggles and a mask (to protect the respiratory system when preparing holes).
- The existing power tool has not passed a preliminary surface inspection for visible damage and a test switch.
- The wall was not inspected to determine the possible occurrence of electrical wiring below the surface.
- Usability is not properly ensured.
 During fastening, the type of fastener itself is very important.
Step-by-step instructions for attaching the shelf to the hinged hinges
The traditional and reliable method of hanging shelves, can be used on all types of walls, but with the above weight restrictions.
Step 1. Determine the exact location of the shelf on the wall. For clarity, it is better to apply and move it to different places, so you can choose the optimal placement.
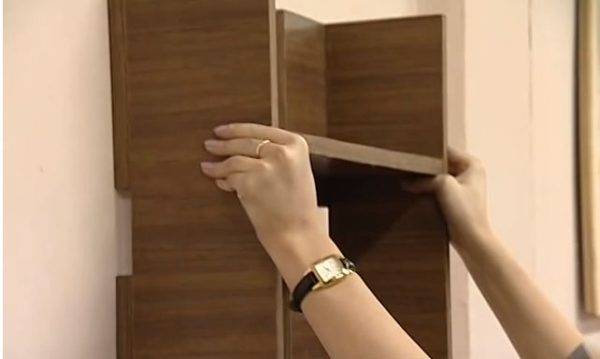
Select the optimal shelf position
Step 2. On the wall, carefully mark the selected spot. Do this with a thin ordinary pencil; it is not recommended to use felt-tip pens.
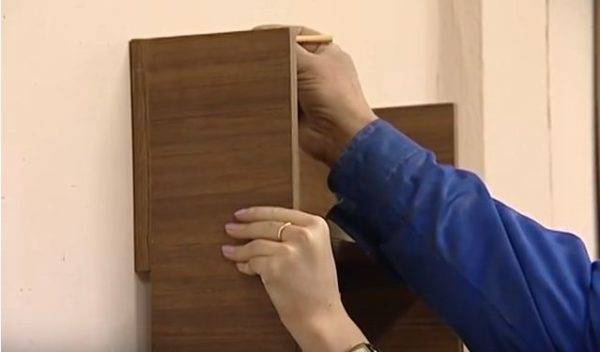
The attachment points are marked with a pencil.
You can hide them in two ways:
- draw from below or on closed sides;
- during accurate marking, raise the position of the shelf a few millimeters above the line, the horizontal elements of the product will close it.
Step 3. Place the shelf on the table and accurately measure the distance between the holes of the hinge hinges. This is a very demanding operation, make no mistake, measure only along the axis of symmetry of the element.

Measure the exact distance between the holes of the fixing eyes
Step 4. Using a bubble-level construction bubble, make marks on the wall. Check all dimensions again.

Check the location of the marks on the level
Step 5. Start drilling the holes. This should be done with a drill in punch mode with a drill with a victorious soldering. The drill diameter must match the diameter of the plastic part of the dowel.

Carefully drill holes in the wall
The hole depth should be 1–2 cm longer than the dowel length. The fact is that it is impossible to completely remove construction dust from it, it will not allow the plastic element of the dowel to be fully installed. It is not recommended to hammer it with a hammer for two reasons. Firstly, with a high degree of probability, it will not sit down anyway. Secondly, it is very difficult to get the deformed plastic element later. It is necessary to increase the diameter of the hole, and then take special measures to reduce it.

The depth of the hole in the wall should always be slightly more than the length of the dowel
Step 6. Insert the plastic parts of the dowels into the wall and screw the screws into them. Leave a gap between the head of about 5 mm, it is necessary for the passage of the hinge loop.

Insert a dowel and screw in a self-tapping screw
It remains to hang the shelf in place and the work is completed. As mentioned above, this method is used for all types of shelves except glass.
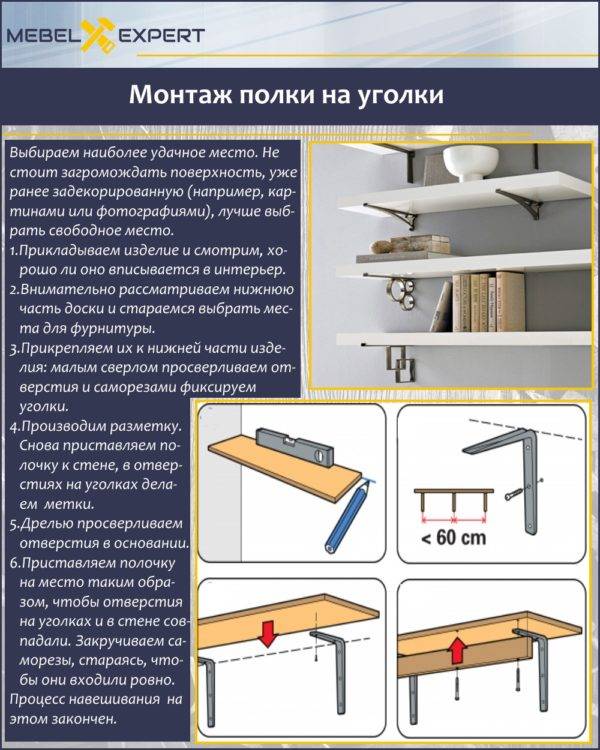
Installation of the shelf on the corners
Tips and tricks from specialists
Although fixing the shelf is not the most difficult task, there are some installation rules. Advice:
- Do not place the shelf too high or in a place where it can interfere with movement.
- To install the shelf evenly, a piece of electrical tape is glued at the attachment point along the level.
- Use more durable fasteners when installing the shelf on a gypsum fiber board.
- Correctly calculate the number of fasteners and the load on the structure.
- When drilling the hole for the dowel, use a drill with a diameter equal to the size of the sleeve.
When preparing holes in the wall and the shelf, it is important to keep the drill straight, otherwise the screws will not hold tightly, which will cause the structure to fall.
p> Share link:
8 More Proven Tips
Craftsmen engaged in construction and finishing work have their own little secrets in any kind of activity. In order to independently carry out the fastening of shelves to any surface, you should listen to additional tips:
- 1. If the building is old, then after the hole is drilled, a little glue is poured into it and only then the dowel is inserted and the screw or anchor is screwed in.
- 2. The size of the dowel is chosen slightly larger than the hole. If this is not found, they score two, one in the other.
- 3. Be sure to use a spacer mount.
- 4.If the hinges fixed to the shelf are wide enough, small dimensional errors are permissible when drilling the holes, but it is best to make preliminary accurate measurements.
Fixing shelves to the wall is not the most difficult task.
It is important to take into account all the nuances, design features, the material from which the wall is built in the room, and choose the right fasteners
Step-by-Step Guide to Attaching Wall Mounts
Before you attach the shelf fasteners to the wall, you need to choose the right holders and auxiliary tools. For example, for a wall made of brick, cinder block, aerated concrete, both dowels and anchors are used. Strong walls can withstand significant loads and will not collapse or deform due to the suspended heavy shelf. You can hang shelves of any shape and material on a concrete or brick wall. It is also allowed to load them with various objects: from books and encyclopedias to all kinds of ceramic, metal figurines. Plaster walls will not be able to withstand heavy objects. It is better to attach small bookshelves or shelves with light decor and decorations to them. Regardless of the wall materials, the installation of fasteners is carried out according to the general scheme:
- Marking of the installation locations of the holders.
- Installation of mountings for shelf supports.
- Installation of shelf supports.
- Installation of shelves.
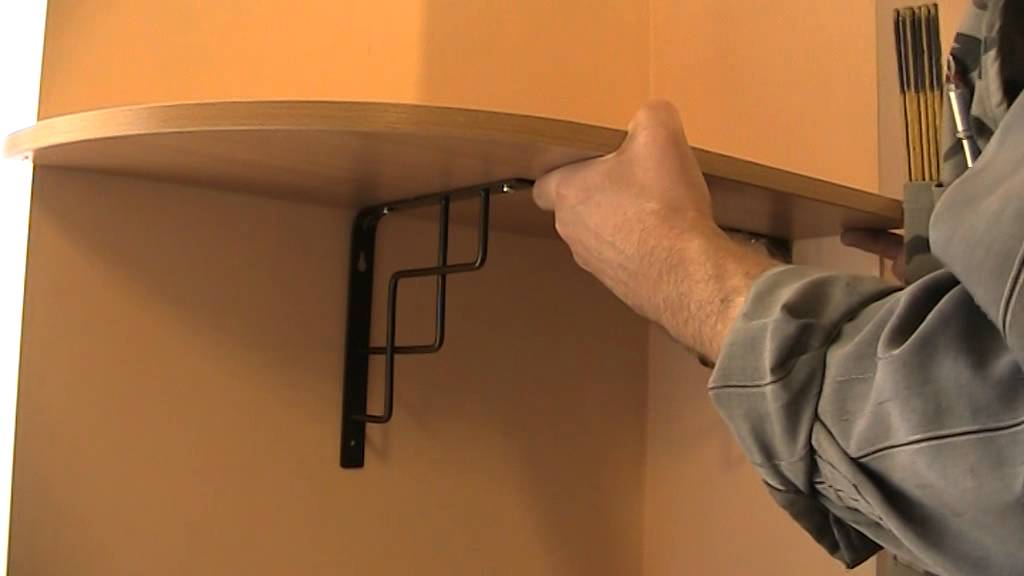
Materials and tools
Depending on the selected shelves, mountings for them and the characteristics of the wall itself, the installation of the interior decor will be carried out in different ways. You may need the following tools and materials to mount the shelves to the wall:
- nails and a hammer (will help secure small shelves for flower pots or light decor);
- screws (provide reliable fixation of medium weight shelves);
- dowels (suitable for installing bookshelves or shelves for a variety of souvenirs);
- anchor (will allow you to securely fix multi-level wall racks or shelves with a large weight);
- screwdriver, drill, perforator (used for fastening screws or workpieces in the wall of holes for dowels);
- level and pencil (will allow you to correctly mark the installation locations of the fasteners);
- Selected mounts (visible or hidden)
- caps for screws or nails (if their heads are visible on the shelf and should be hidden).

How to fix the holder without visible attachment
To carry out the installation of a hinged wooden shelf using hidden shelf holders is within the power of every owner. It is attached according to the following scheme:
- Mark the places for metal pins evenly under the level (the diameter of the pins should be at least 10-12 mm).
- Mark the mounting locations on the shelf. The distance between the fasteners on the wall and the shelf must be the same!
- Drill holes in the wall for fasteners.
- Install the fasteners. Additionally, they can be fixed in the holes with liquid nails (but it will be very difficult to remove them from the wall later).
- Drill the corresponding holes in the shelf.
- Attach the shelf to the previously installed shelf supports.

Fastening glass shelves with your own hands: features
The use of vertical shelf supports will help to simplify the installation of glass shelves located one above the other. They are complemented by perpendicular supports and stops. Such fasteners are capable of withstanding a large weight, eliminating the danger of glass displacement. Mount restraints can look like full-fledged roof rails. Attaching them to the wall is pretty easy. The following diagram will help you do this:
- Marking the location of the mountings for the vertical strips (mounted on 3-4 dowels).
- Drilling holes for installing dowels (if tiles are being drilled, use a special diamond drill).
- Installation of dowels.
- Installation of vertical shelf supports.
- Installation of glass shelves.

Fasteners for hanging shelves on a plasterboard wall
Since drywall is a fragile material, you need to fix the shelves on it with special fasteners. Butterfly dowels (also called umbrella dowels, mollys) open during installation into the wall, creating a solid stop. They are ideal for hanging lightweight plastic or wooden shelves. However, to securely fix the fasteners, you should use screws that are 1-1.5 cm longer than the dowel itself. Installation work is carried out as follows:
- The attachment points of the shelves are marked under the level.
- We drill holes for the butterfly dowel.
- Dowels are being installed.
- Corners, brackets are fixed.
- The shelf itself is being installed.

Types of fixing shelves to the wall
Wall mounted shelf supports are divided into 2 types. They exist for installation:
- invisible;
- visible.
When it is important to solve the problem - how to independently attach the shelf to the wall without visible fasteners - it should be borne in mind that it is the first option that is more difficult to implement. The shelf is perfect for the general environment in the house.
 The shelf is perfect for the general environment in the house.
This method is used when it is necessary that the fastening materials are either simply not noticeable, or do not take up space in the attachment location. This method is suitable for wooden shelves and made of MDF, chipboard.
Concealed fittings without visible fasteners
Usually, when you need to attach a piece of furniture to the wall, this is done so that the fittings are invisible: they try to hide it.
 The cables will adorn the shelf.
Types of such accessories:
- Plates - they are used to fix multi-level shelves. This flat fastening system is made of metal, with holes for screws;
- Rods - shelf holders are also made of metal (a kind of pins, with one end they are screwed into the attached piece of furniture, the other into the wall);
- Wooden blocks - thanks to them, they install shelves-boxes. The frame is mounted, the bars are attached to the wall in a horizontal position. Then the piece of furniture is simply "put on" on wooden blocks and fixed by means of self-tapping screws;
- Concealed hinged hinges - thanks to this fastening system, open shelves seem to grow into the attachment point. Visually it seems that they are not supported by anything. That is why they are called "floating".
Concealed installation visually makes the structure lighter, while the space seems to become wider.
Open fastening systems
Visible mounts are the most common method for mounting shelves on a wall. Such work is performed under the main canvas.
 You can keep various items and literature on the shelves.
Types of open fasteners:
Reinforced brackets - can withstand up to one hundred kilograms. They are used for heavy shelves or when the product is supposed to withstand severe loads. The peculiarity of this mount is a jumper that connects the bracket parts (its horizontal and vertical sections);
Corners - the most common and simplest fastening method. It can be called suitable for an interior of any style.
The corners hold the load - twenty to forty kilograms (it is important here what type of design is important);
Reiki - can be made of wood or metal. Installed either vertically or horizontally;
Decorative - such details look very beautiful
They are used to hold shelves and also as a decorative element.
There are other open-type fastening systems, but they are as common and convenient as the four types of fastening systems mentioned above.
Fastening glass shelves
This is a separate type of furniture, has its own differences and requires a completely different fixture. The main disadvantage of glass is fragility.Fasteners must ensure reliable fixation and, at the same time, minimize forces on the glass. We will not consider the design differences of glass shelves, they have no effect on the fastening technology, it is recommended to use the same fasteners for all.
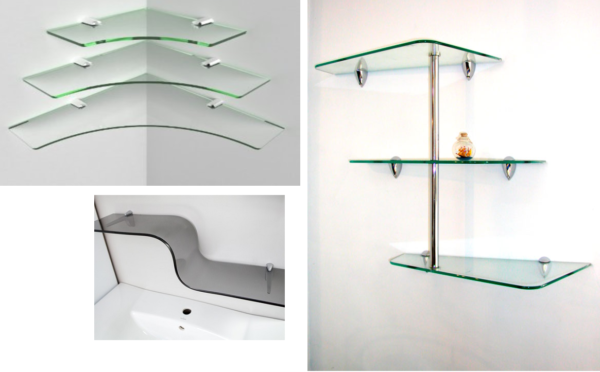
The design of the glass shelves does not affect the choice of fixings
Fasteners must meet the general requirements - to eliminate point loading. The glass is inserted into special horizontal slots of the brackets, the clamp is made with small bolts. The bolts themselves have sharp ends; with slight pressure, the glass cracks. To prevent such phenomena, special elements are used.
-
Plastic insert. The dimensions correspond to the parameters of the brackets, fit into the technological slot and adjoin the glass on both sides. The main task of the insert is to increase the friction between glass and metal and to increase the reliability of the glass shelf fastening.
-
Metal plate. Placed between the bolt and the plastic insert, evenly distributes the point load over the entire mounting area.
The fasteners are fixed to the wall under the level, the technology is no different from the above
Plastic spacers are put on the end of the glass; in this position, the shelf is carefully inserted into the bracket mounted on the wall
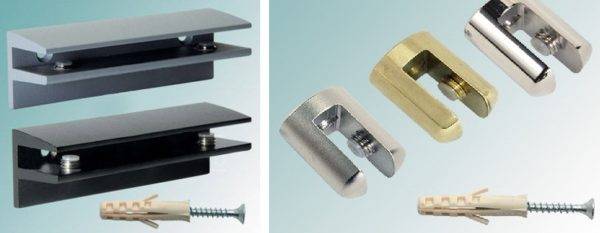
Shelf holders are screwed to the wall with self-tapping screws

First, unscrew the tightening bolts on the brackets
Next, you need to slightly raise the shelf up, a gap will appear at the bottom. It is here that metal plates are inserted, bolts abut against them. While tightening, they lift the plate up, it is pressed against the plastic inserts. And those already, in turn, clamp the glass shelf.

Holders screw to the wall, insert glass and clamp fasteners
Such a mount, by the way, has one unique advantage - you can change the position of the shelf, move it slightly to the left / right. To do this, you just need to loosen the clamping screws a little, put the shelf in a new place and tighten them again.
Features of fastening racks depending on the type of wall
When planning to fix a rack or shelf, you should take into account the main factor - the material of the wall to which the structure will be attached.
Concrete wall
Almost anything can be hung on concrete walls. It is able to withstand high loads due to its colossal strength. Screwing a self-tapping screw into such a wall is problematic. To solve this problem, a puncher is used. Many people choose a dowel as a fastener. But if the structure is very heavy, experts advise using an anchor bolt in this case.
The procedure is performed in the following sequence:
- Before fixing the rack to the wall, it is necessary to outline the place for fixing the bracket.
- With the help of a building level, future holes are marked.
- Holes are drilled.
- Brackets are installed.
- The shelf is attached to the fasteners and secured with self-tapping screws.
The fixed type of mount acts as an excellent addition to any interior. For drilling holes, you must choose special concrete drills.
Plasterboard wall
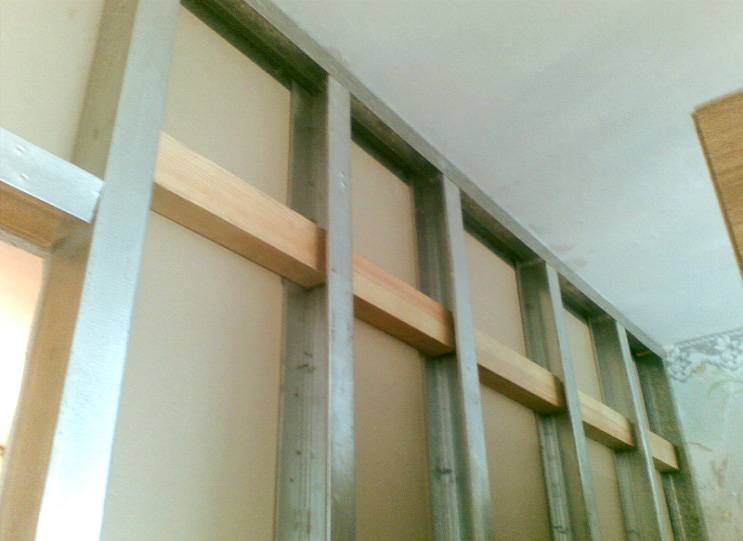
In houses and apartments, drywall is often used as partitions. The material is very easy to work with. But structures can only be fastened to the main walls. This aspect should be taken into account at the design stage of a wall or partition. Subsequently, the shelf is attached to frame posts, crossbars or to supporting structures pre-built into the plasterboard wall. In exceptional cases, the light shelf can be hung using a butterfly dowel.
Wood wall
The easiest material to work with is wood. The main thing is to correctly measure the distances between the holes, to maintain the horizon. The shelf is fastened with self-tapping screws.
Foam block and hollow brick
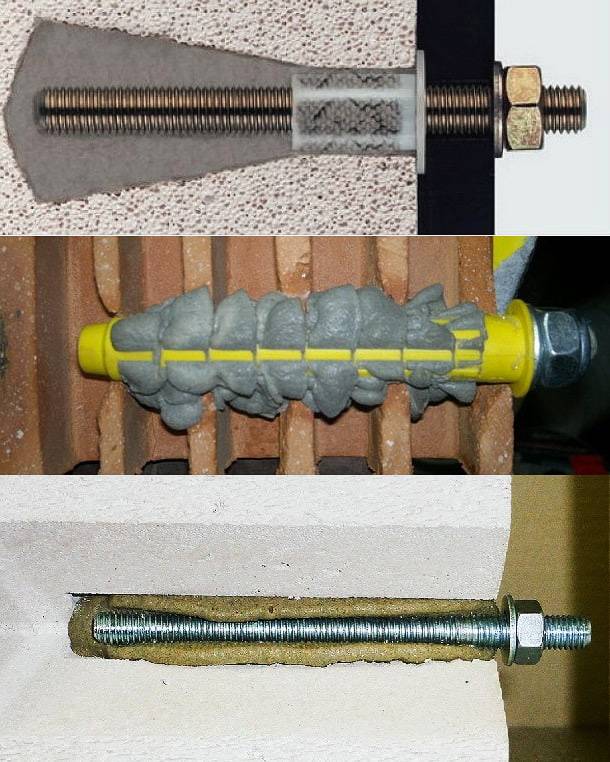
For hollow blocks (foam block or hollow brick), special fasteners are used, which consists of a dowel and a screw. But there is a special kind of mounting parts - these are chemical anchors. A dowel is hammered into the wall, a sleeve is inserted into it, after that special glue is poured into the sleeve, only after that a screw is screwed in. This design allows you to evenly distribute the load on the wall.
Construction Tricks: Secret Fasteners ↑
All kinds of metal corners for wall shelves, convenient brackets, and a building profile are appropriate only if they are correctly selected and fully meet the stylistic features of the room. But sometimes the technical details do not match the environment and you have to go for a trick - use one of the secret fastening methods.

Decorative composition without unnecessary details
There are several generally accepted options with which tight abutment and rigid fixation provide invisible elements. Let's take a look at the three most popular ones:
- hidden hinges;
- wooden block;
- metal rods.
The first method is the most popular. Hinged flat hinges are attached to the back of the shelf, then the structure is suspended on pre-screwed screws. The main thing is to accurately measure the distance between the hinges, otherwise the extra holes "give out" the technical trick and spoil the idea. We recommend using a building level to level the horizontal.
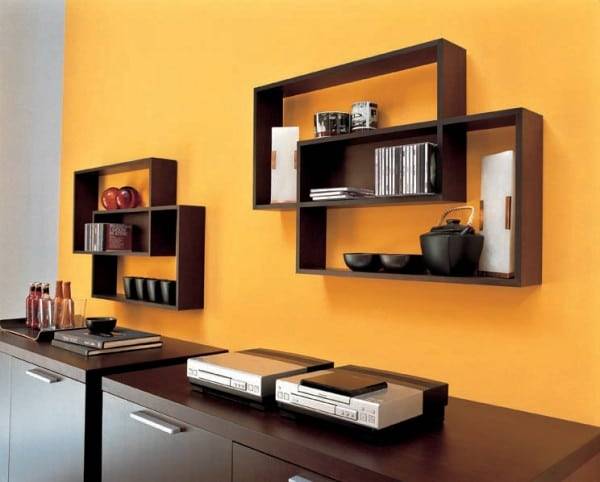
Modern austere style
The second method is threading the base of the product onto strong metal pins embedded in a concrete slab or brickwork. The role of the pins can be played by pieces of reinforcement or steel threaded rods of the required diameter provided for this. The heavier the product (along with the potential filling), the more studs will have to be screwed into the wall. For guaranteed stability, the cross-section of the fasteners for wooden shelves should not be less than 12 mm, the length depends on the conditions.
The third option is the installation of a bar with a square or rectangular section, which subsequently serves as a base. Masking will take place if the thickness of the bar and the thickness of the shelf hung on it match perfectly. The connecting parts between the two surfaces are pins - wooden pins. To increase strength, before joining the parts, they are greased with glue.
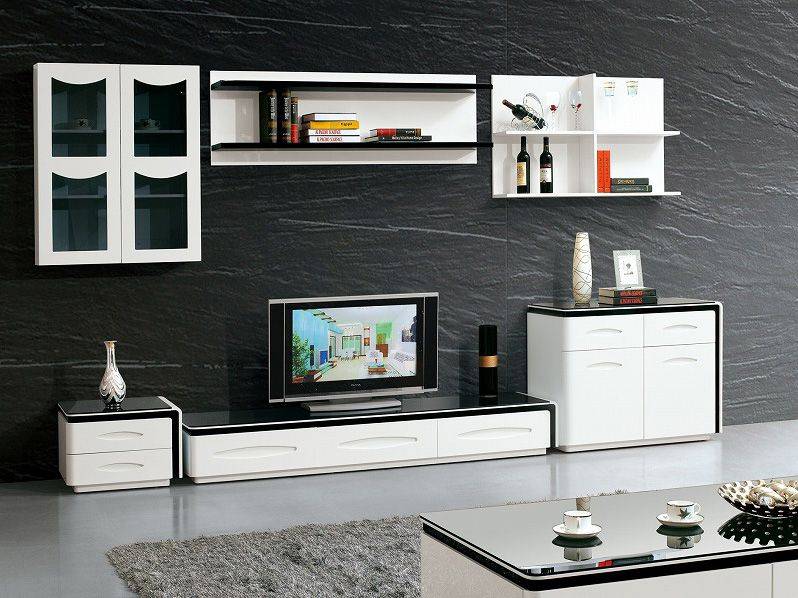
Wall-mounted set of three different designs
If your interior design did not include the use of additional visible elements, hidden fittings will help out.
Step-by-Step Guide to Installing Wall Fasteners
An empty shelf is applied to the wall, the attachment points are marked from below, a level check is performed.
Depending on the type of base, holes are made or not made with a drill. The thickness of the drill should be the same diameter as the dowels, anchors.
The horizontal elements are first fixed on the shelves: they are "baited", then the evenness of screwing is checked, and then tightened all the way.
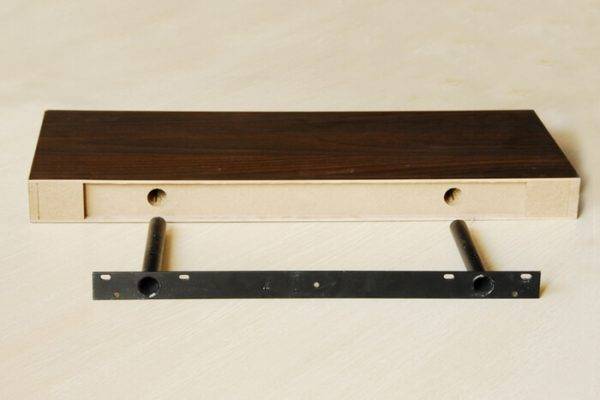 Preparing for installation
A dowel is inserted inside the wall holes, a shelf is applied, checking the correctness of the holes made. If everything is correct, the shelf is screwed with screws. First, they "bait", check the even location, then pull it to the end.
An example of fixing a shelf with your own hands can be seen in the following video:
Installing the holder without visible attachment
Concealed attachment means absolute marking accuracy.
Installation on rods is carried out in stages. First, the mounting plate is fixed horizontally to the wall with self-tapping screws, dowels with pre-drilled holes. Then the product is put on firmly fixed protruding parts of the mount.
The plates are screwed to the back with self-tapping screws. In this case, you need to use a cutter for notches or put the back wall so that it is slightly recessed inside the shelf.This is necessary so that after installation there is no gap between the two planes.
Recesses are cut out under the hidden hinges with a milling machine so that the loop is “flush” with respect to the edge. All fasteners are fixed with self-tapping screws, ready-made elements are suspended on pre-installed screws with dowels. It remains to hang the product by the loops.
Features of installing glass shelves
The glass cannot be drilled, so hinges or similar fittings cannot be used. You can't just put glass on top of the fasteners because of the slippery surface.
The optimal solution is the installation of pressure holders or "pelicans". Advantage - fasteners are reliably hidden behind decorative overlays, increasing the attractiveness of the shelves.
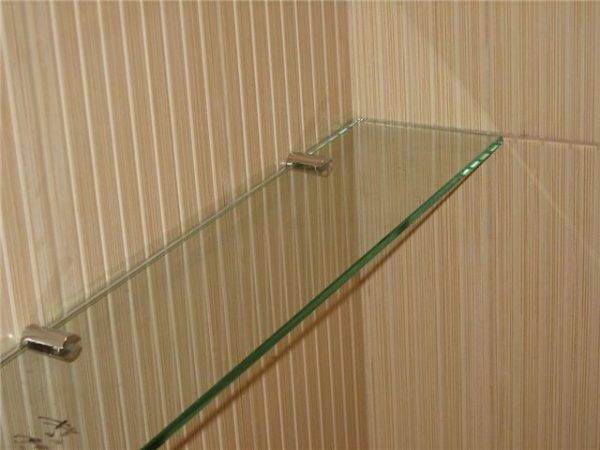 Installation example of a glass shelf
First, the parts are disassembled, holes are drilled, fasteners are installed, and how smoothly the installation is checked. The last step is to put on decorative plugs, insert, fix the shelf.
How to get the job done with plasterboard walls
GKL sheets do not differ in their ability to firmly fix shelf holders. In such a case, you need to take care of the reinforcement of the base.
At the stage of assembly or sheathing, additional metal or wood profiles are attached to the frame. Then, during the installation of the shelf, the fasteners are not screwed into drywall, but into a metal profile or wood, which strengthens the position of the product.
 Metal dowel for drywall
When the workspace was already sewn up with drywall, no additional reinforcement was made, there is a way out in the form of special fittings. Umbrellas, butterflies, Knauf Hartmut, Driva moths or Legs will do.
Types of fasteners
Conventionally, shelf supports are divided into two large groups: visible fasteners and hidden fasteners. The first type often has an original look, complemented by forged elements or other decor. Also, visible fasteners can have a minimalistic design. The hidden holders are ideal for wooden shelves. Due to the invisible fastening, it will appear that the shelf is simply glued to the wall. At the same time, it will be able to withstand heavy loads. For shelves made of other materials (for example, metal), hidden fasteners are rarely used.
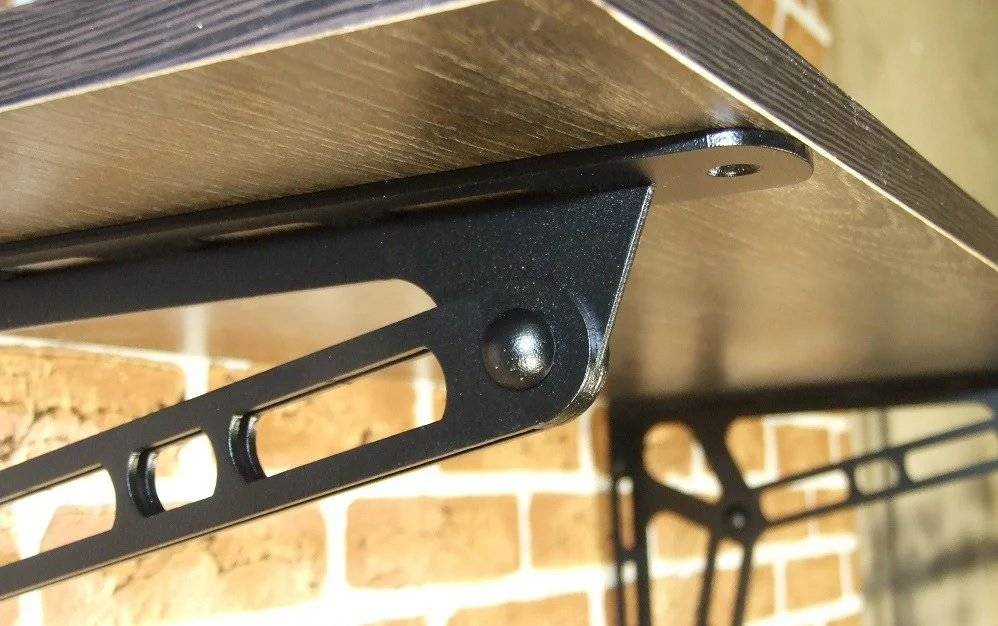
Hidden
You can hang the shelves in the house so that the fasteners remain invisible and do not violate the attractiveness of the element being mounted. There are different flush-mounted fasteners:
Flat hinges.
They are fixed on the shelf with nails or glued to light products. To hang the shelf, screws are screwed into the wall under the installed hinges. Then the hinges are put on the protruding screw heads.

Metal shelf supports-pins.
They are a long part, recessed into the wall, and a short front part, which is inserted into the shelf. Initially, appropriate holes are prepared for the pins on the wall and in the product. Sometimes steel threaded rods are used instead of conventional shelf supports.

Brackets, fasteners, corners and hinges
Visible shelf mounts are made of metal and plastic (can have a metal base). A distinction is made between the following visible shelf supports:
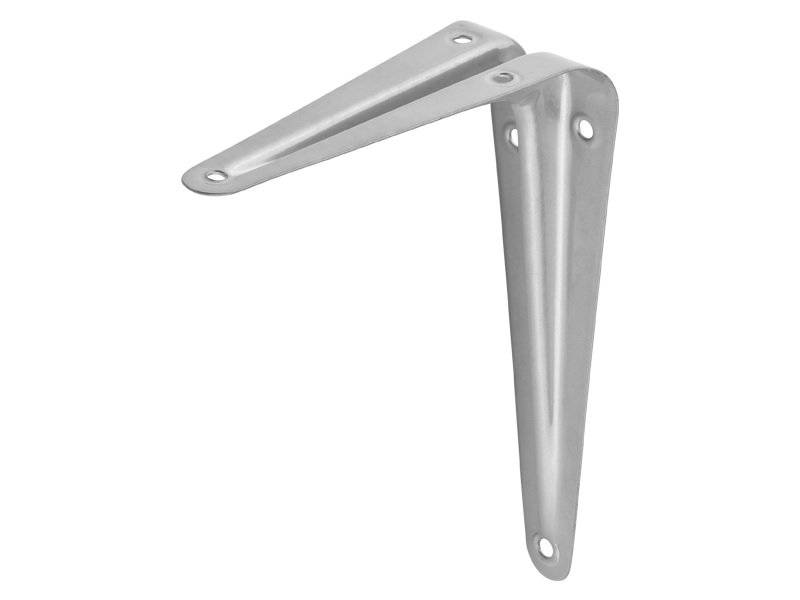
Brackets.
According to the purpose and the expected load on the product, the brackets used can be in the form of small shelf supports with a prepared hole for installing the shelf (for example, pelicans). For heavy attachments, T-shaped fasteners are used.

Corners.
Furniture corners are attached from underneath to the shelf, and also mounted on the wall itself. They can be L-shaped fasteners or a curved, decorated arc.
Hinges.
Furniture hinges for spacious shelves are only slightly visible above the products. Unlike thin counterparts, for flush mounting they are thicker and can withstand heavy loads.

Finally
In the absence of experience in securing wall shelves, it is better not hesitate to seek help from specialists.Naturally, the call of the foremen requires additional costs, but the quality of the work will certainly be an order of magnitude higher.
If you have the skills to work with plasterboard, brick, cinder block and other surfaces, then you can start installing fasteners under the shelves, without putting it on the back burner.
The 6 Best Dog Breeds for Families with Young Children Many families decide to get a dog around the same time they have their first child. But which dog breeds are best for families.
How does it feel to be heir to the royal throne? 7 Surprising Facts Royal heirs are entitled to a number of benefits, but until recently they were also limited by ancient traditions formed for the last time.
How to inform your daughter or son that there will be another child in the family Are you expecting another child? Congratulations! You probably want to share this joy with family and friends, but what about older kids? When.
Top 10 Busting Stars It turns out that sometimes even the loudest fame ends in failure, as is the case with these celebrities.
Deathbed People Regret: Nurses' Revelations Human life is short. But often people think about what could have been done and accomplished when it’s too late.
Unforgivable mistakes in films that you probably never noticed There are probably very few people who would not like to watch films. However, even in the best cinema there are mistakes that the viewer can notice.
