Installation preparation stage
Before installing the chandelier on a stretch ceiling, a set of measures is taken to prepare for this procedure. It comes down to the installation of the selected mount. These works are carried out before the direct installation of the stretch ceiling.
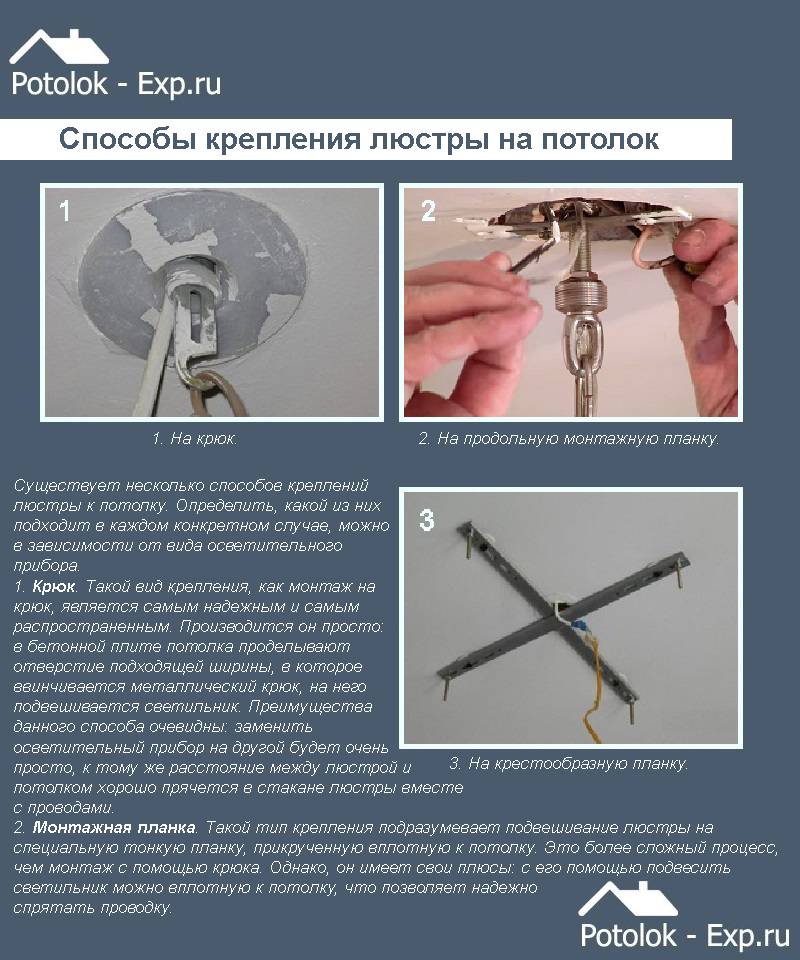
The hook is attached in several ways, depending on its type:
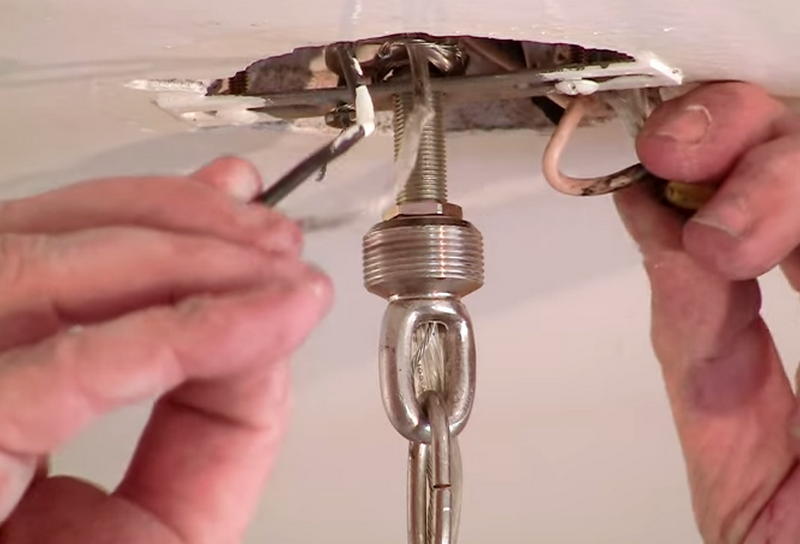
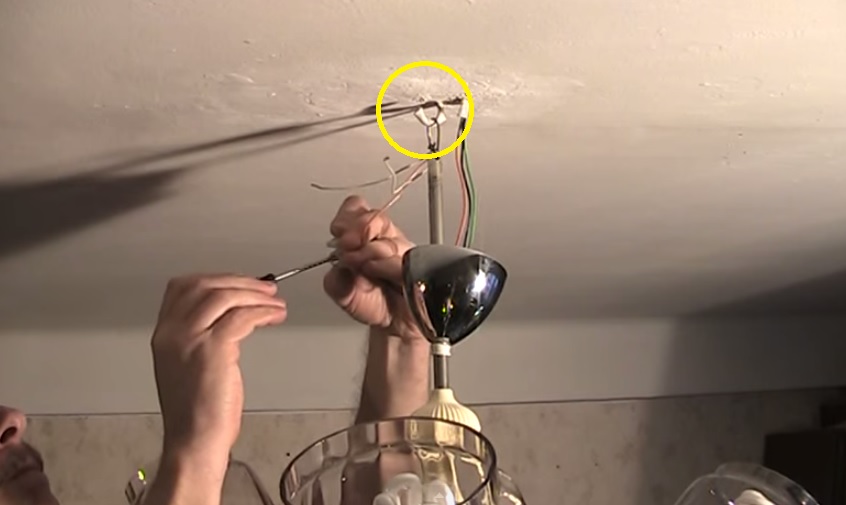
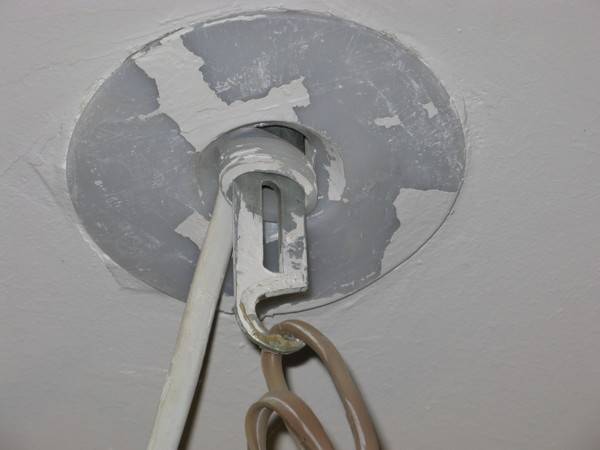
- The anchor hook is the easiest to attach. For it, a hole is formed in the ceiling corresponding to the diameter of the hook. The anchor is driven into the hole, and then a nut or hook is screwed in. The choice of the size of the anchor is carried out taking into account the size of the chandelier so that the hook can support its weight.
- If the hook is installed at the construction stage, then a more reliable option is a through-type mount. A through hole is formed at the selected location. To fix the hook, two metal plates are taken, in the central part of which there are holes corresponding to the diameter of the shank. One plate is fixed to the ceiling, and the other plate is attached to the floor on the upper floor. The shank is passed through the holes and the floor slab, after which, using the nuts, the plates are tightly pressed to the base.
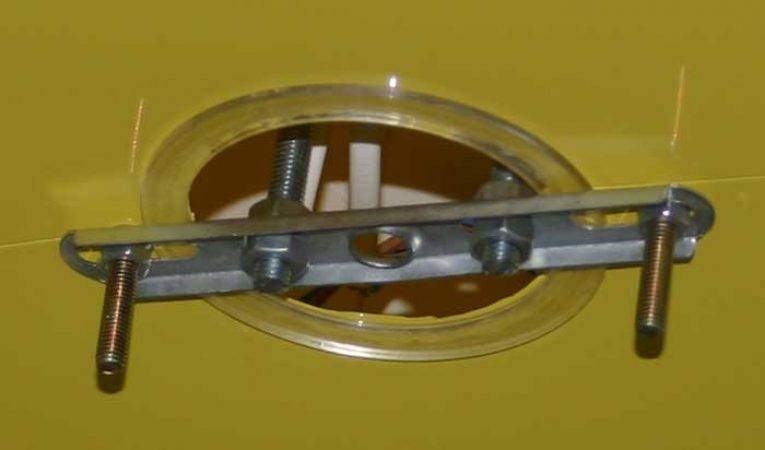
- Only one metal plate is required to install the mortise hook, as there is already a spacer on its shank. As in the previous version, a hole is made in the floor slab up to the hollow channel. Its diameter corresponds to the size of the spacer. The length of the hook is standard, therefore, after installing the plate and fixing it with two nuts, part of the shank is cut off. After inserting the hook into the hole, the plate is tightly pressed against the floor slab with a nut.

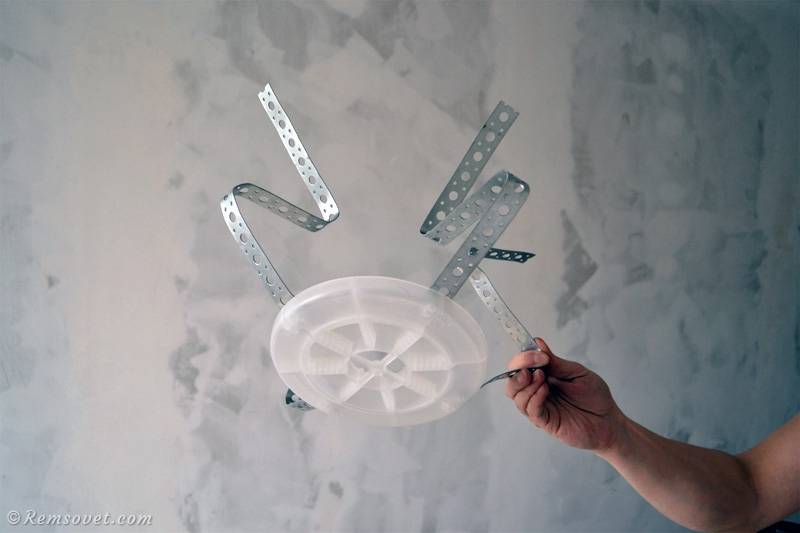
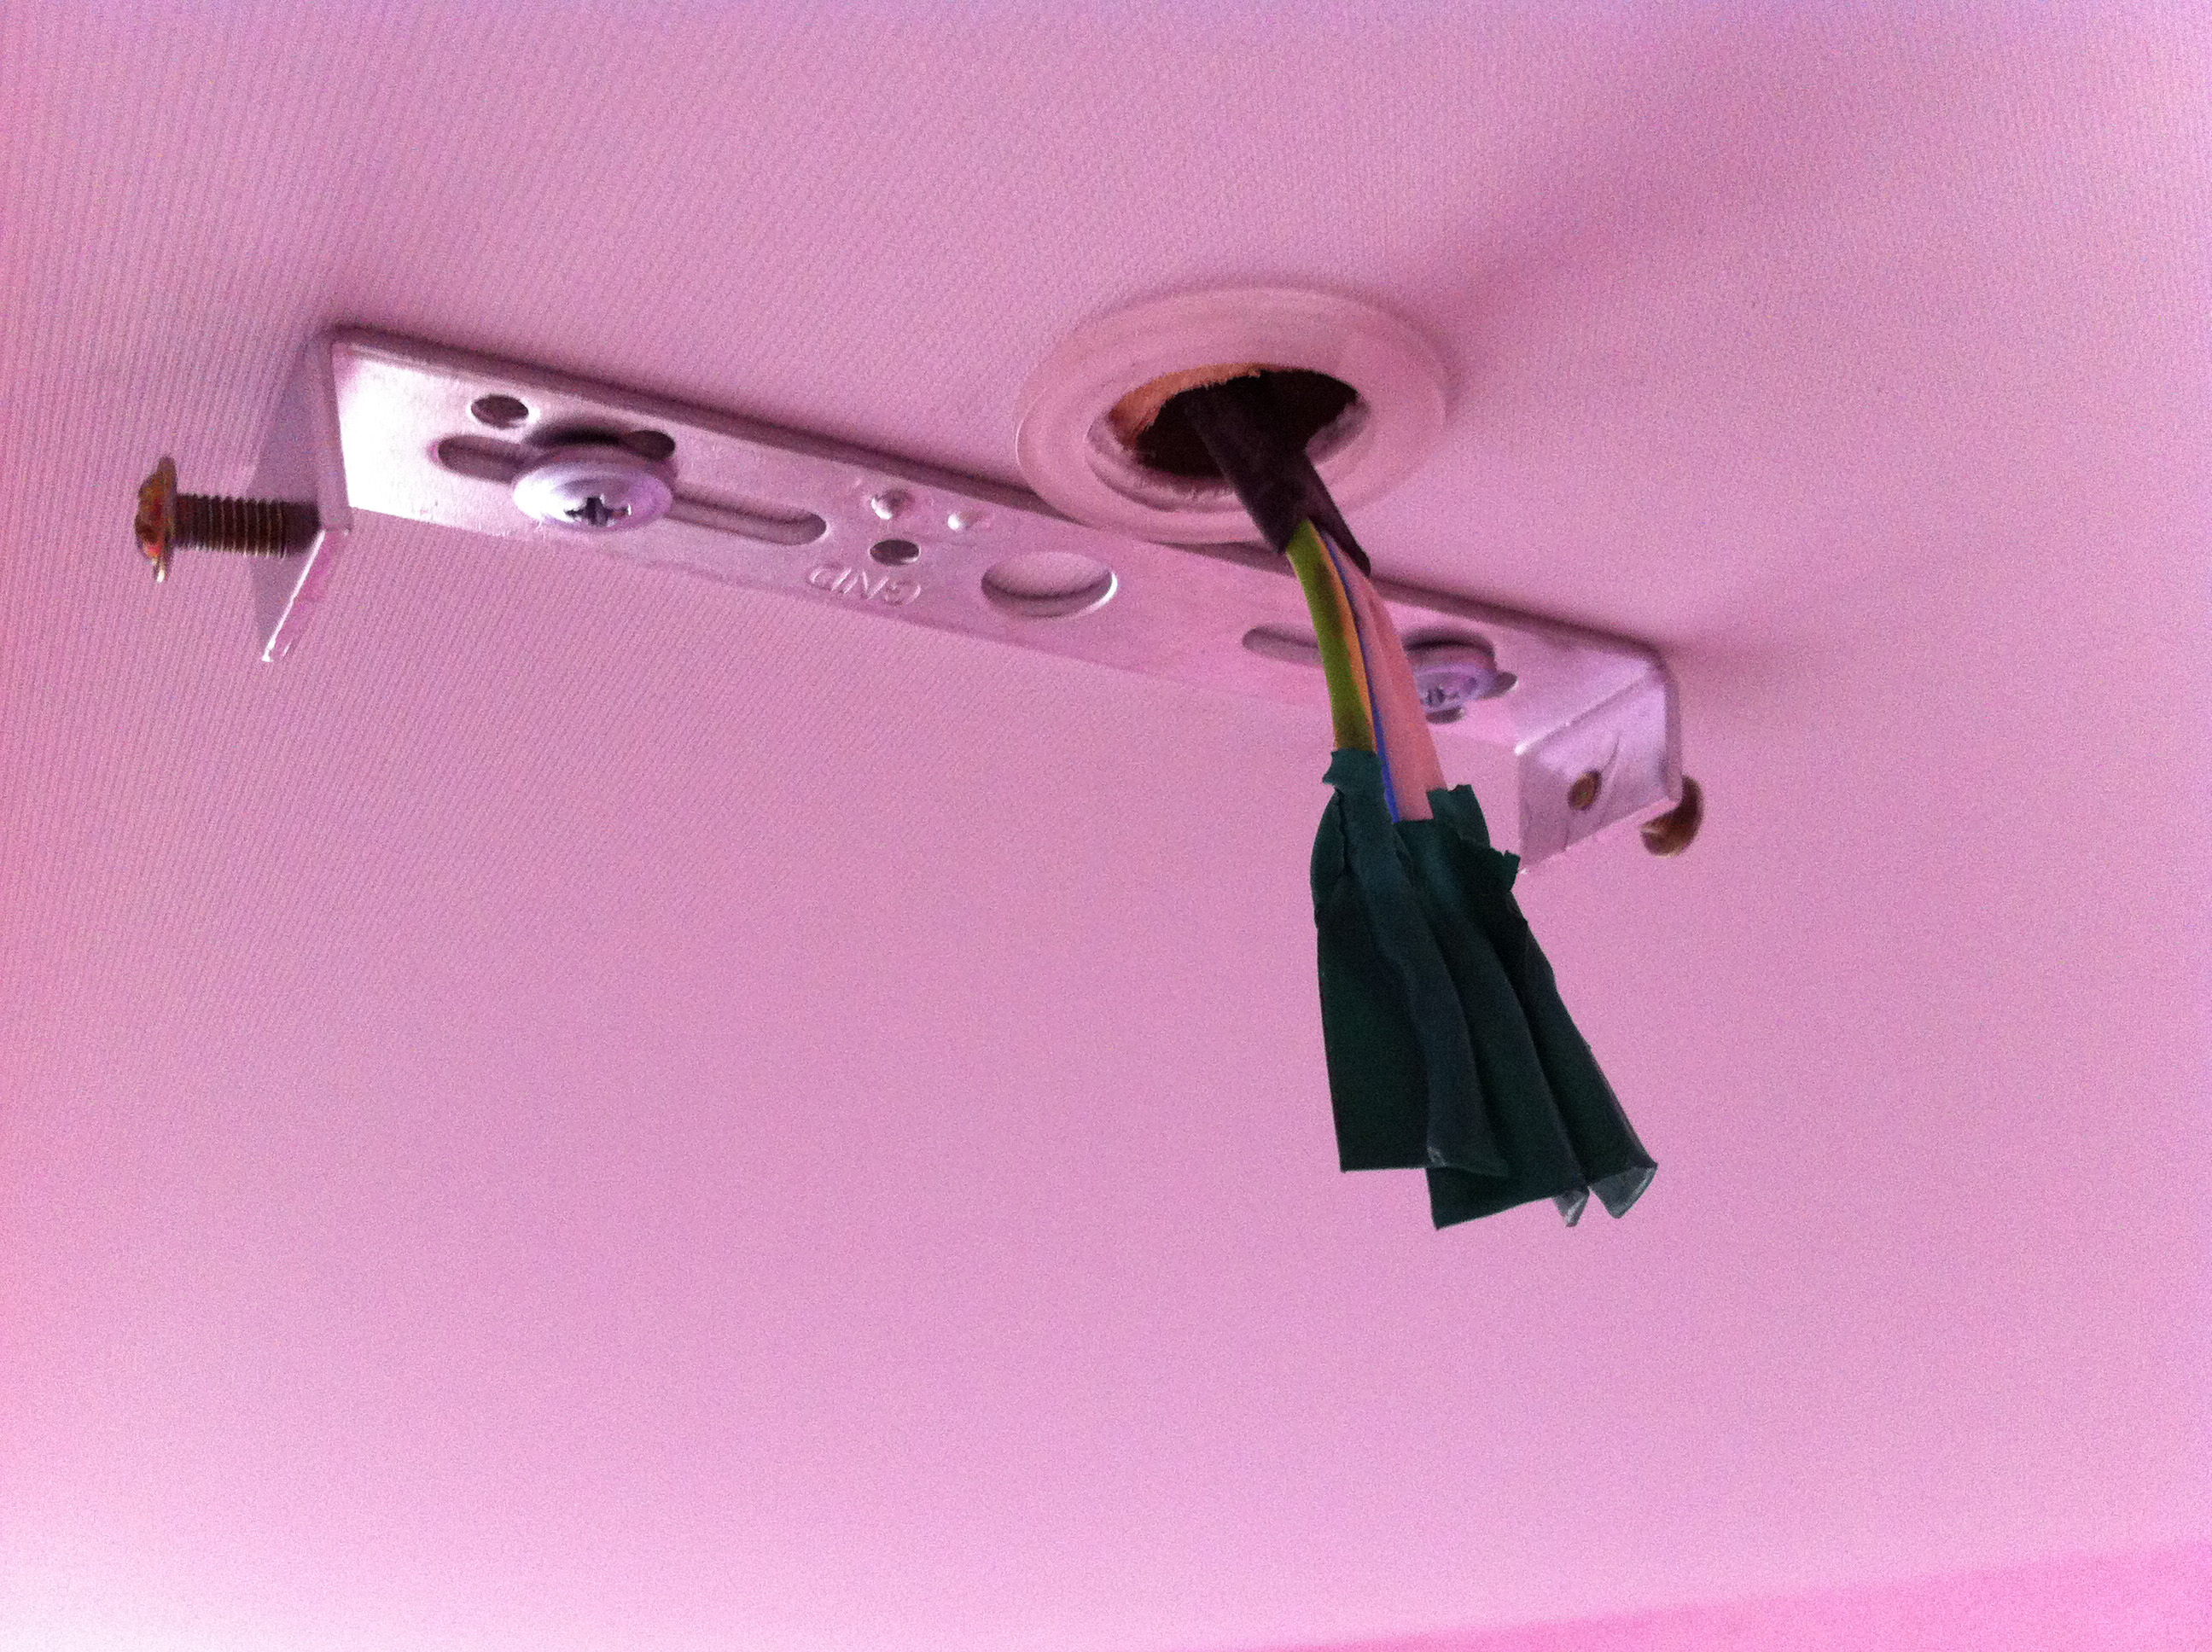
The longitudinal mounting plates are of standard dimensions. To fix them on the ceiling, a wooden bar is preliminarily attached, the height of which is approximately 0.5-1 cm below the ceiling canvas. After that, a bar is mounted on the bar.
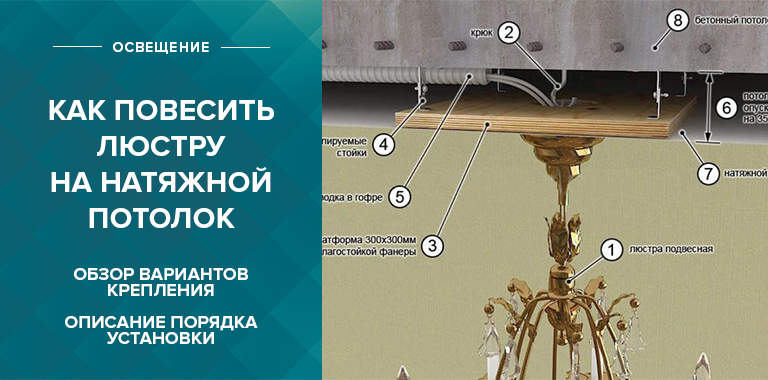
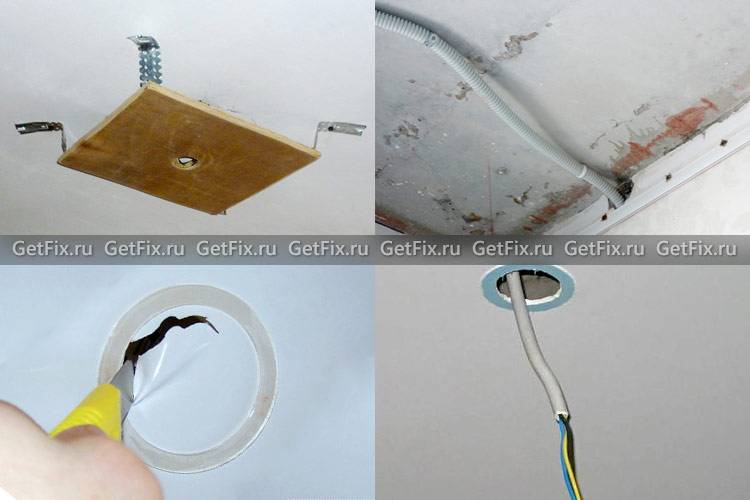
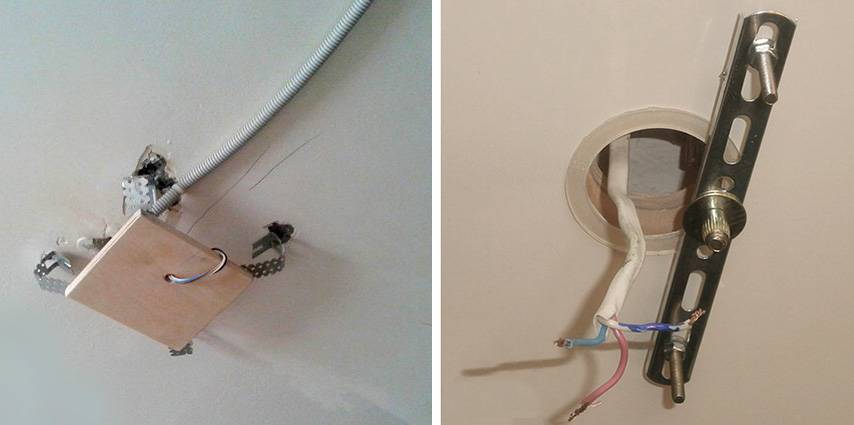
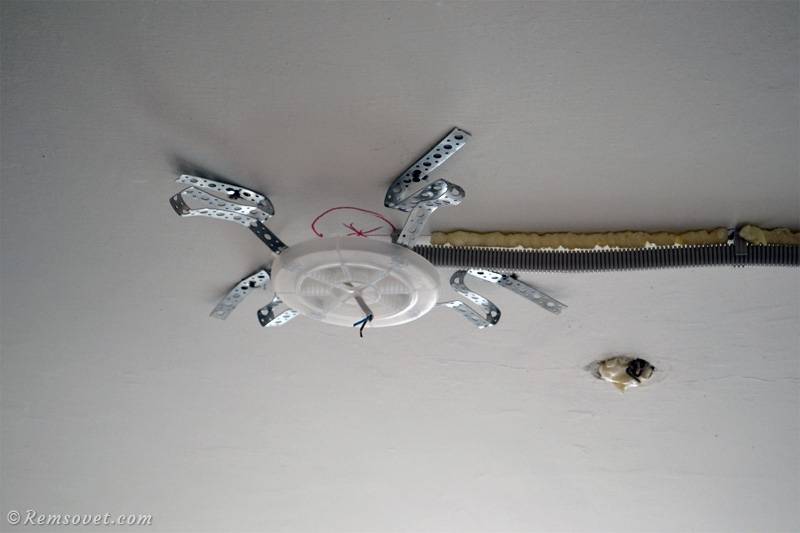
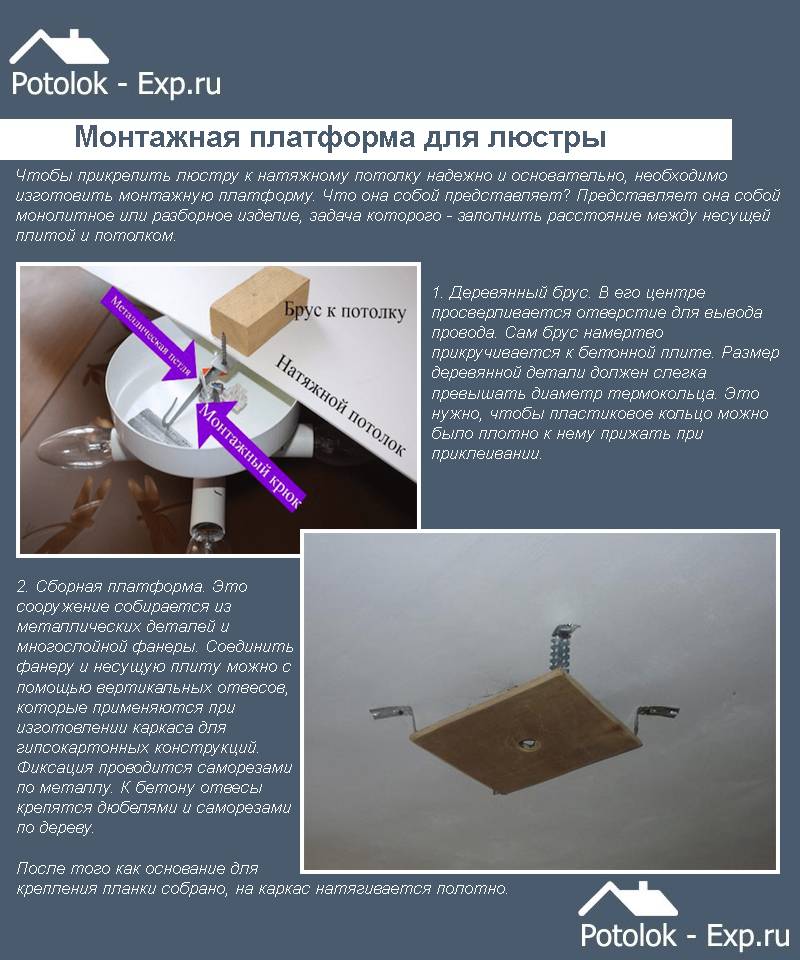
The cruciform bar can be mounted on two square bars or on a plywood platform. A hole is made in the center of the platform through which the wire is led out. This structure is fixed to the ceiling with a suitable plate, fixed to the base with self-tapping screws. For greater strength, the platform is attached to anchor dowels. If an I-beam is used, the installation method is similar. Only the technology of attachment to the base of the platform differs.
We connect to the network correctly
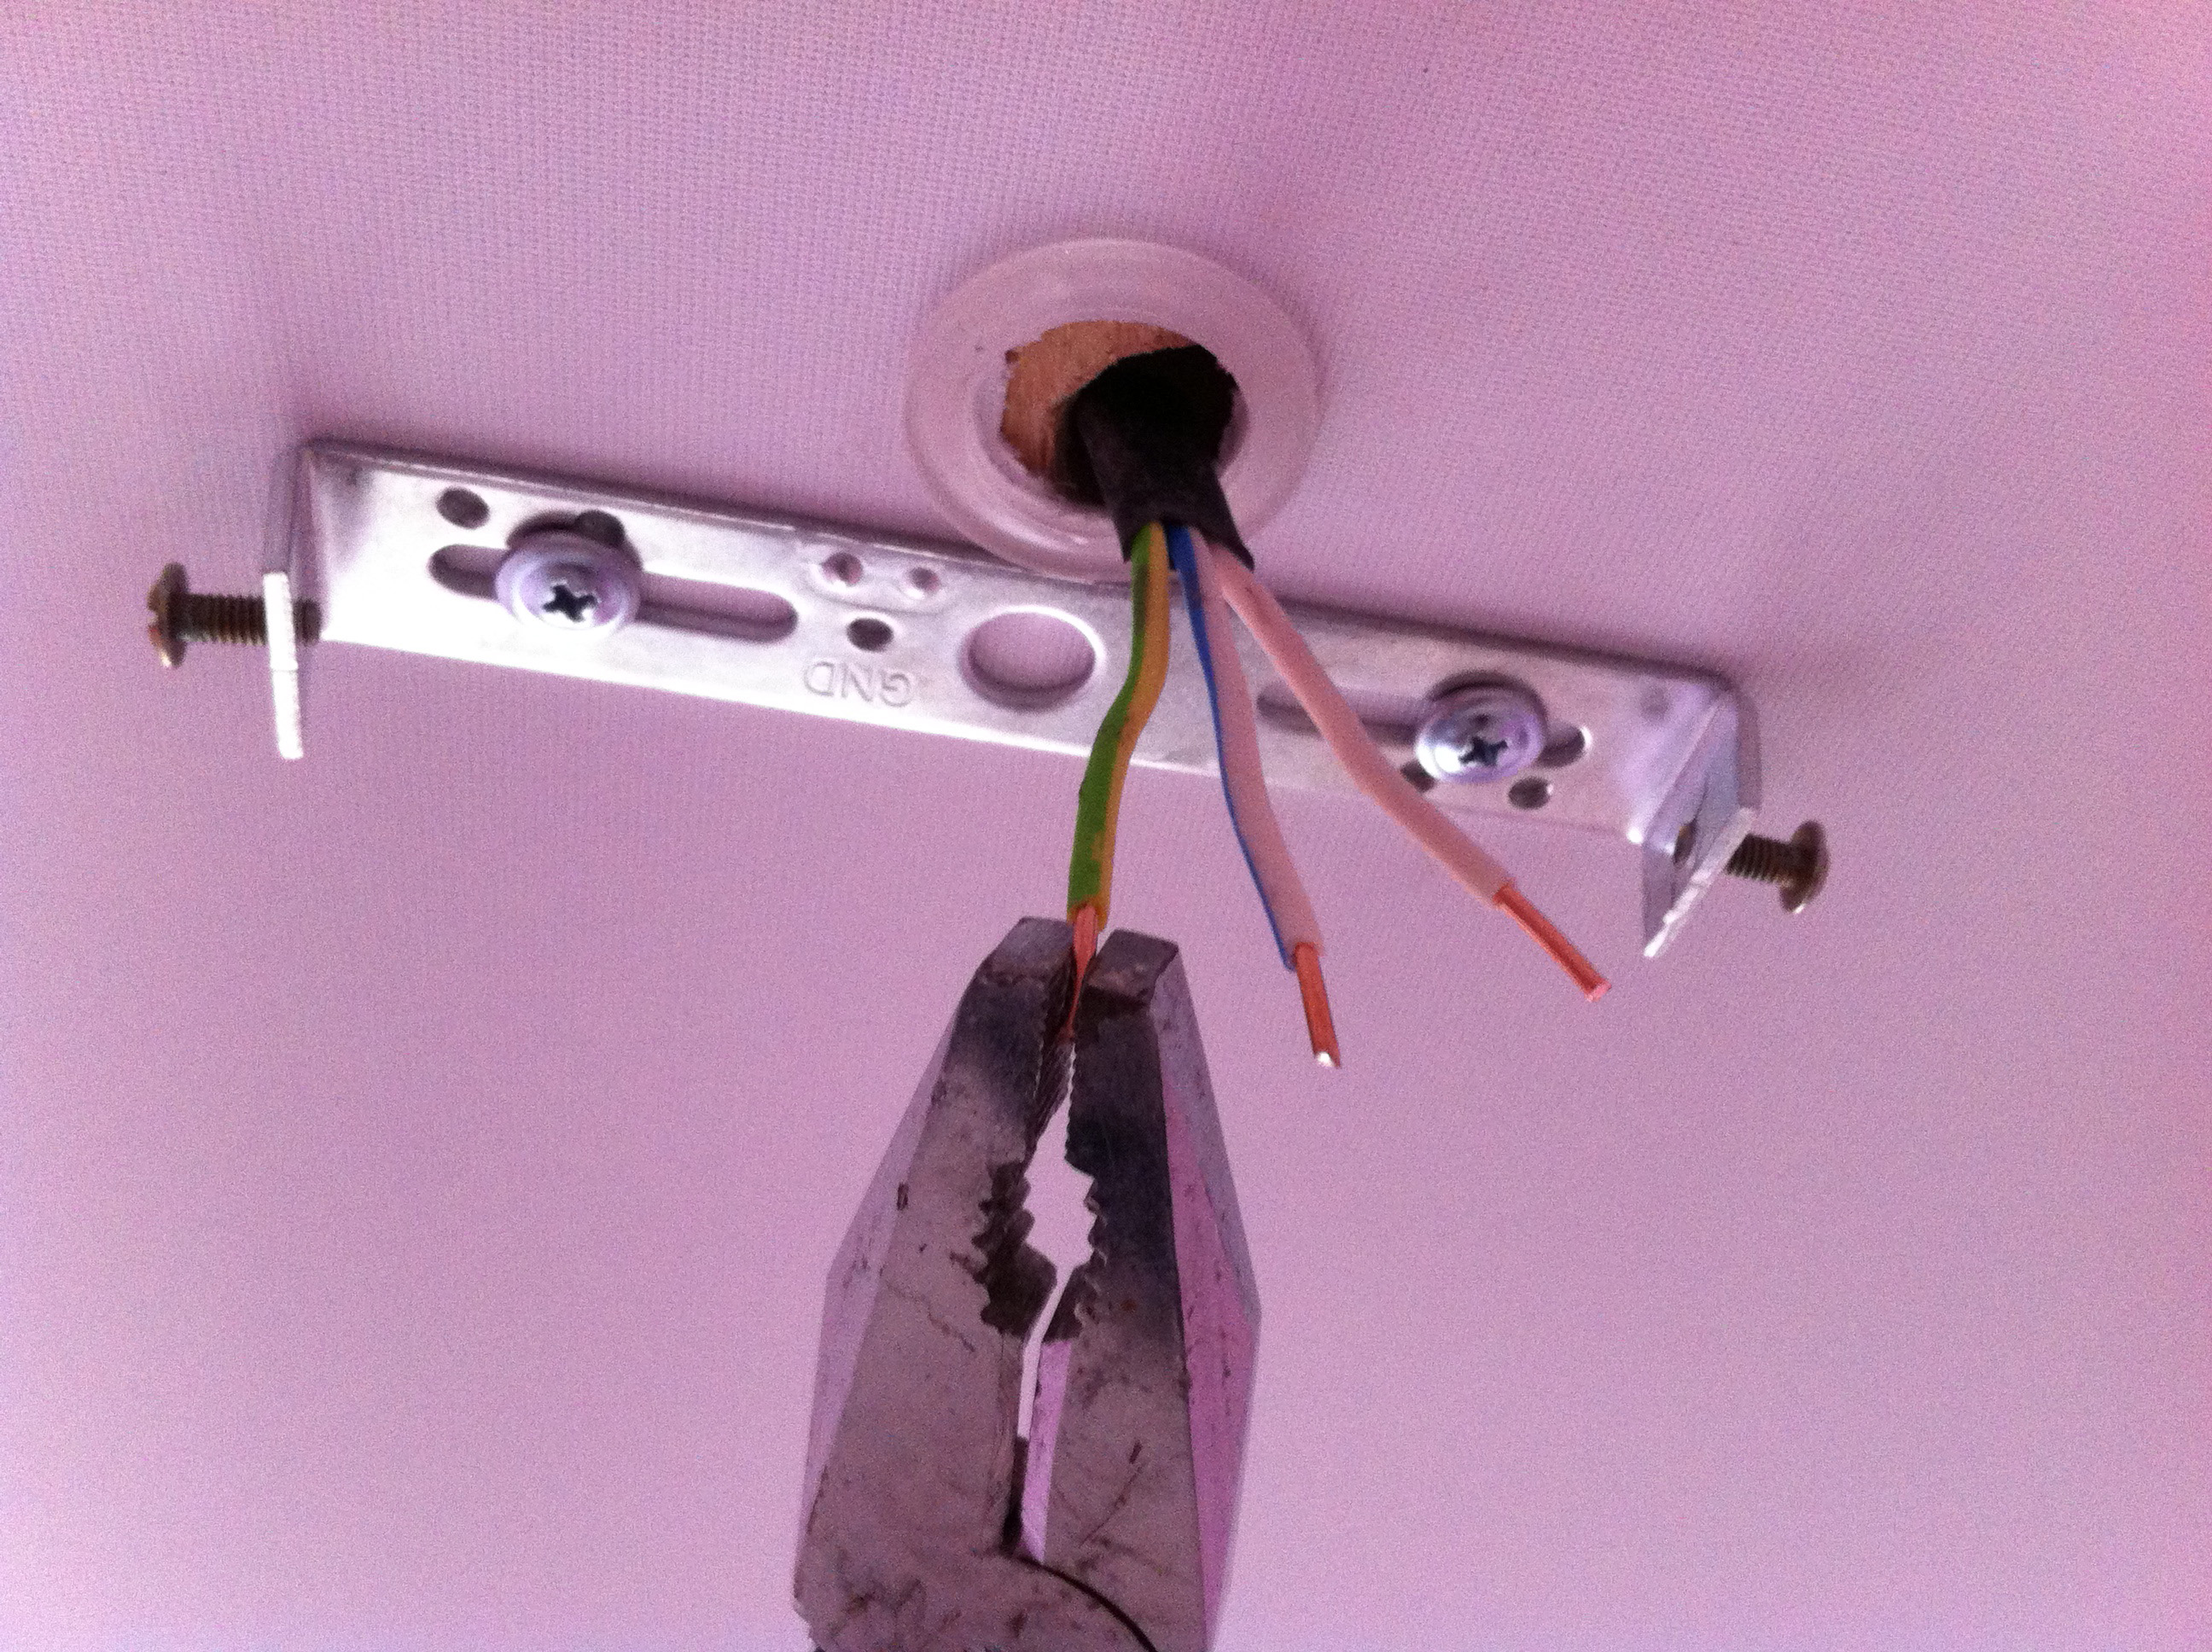
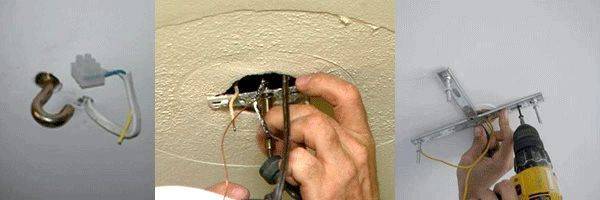
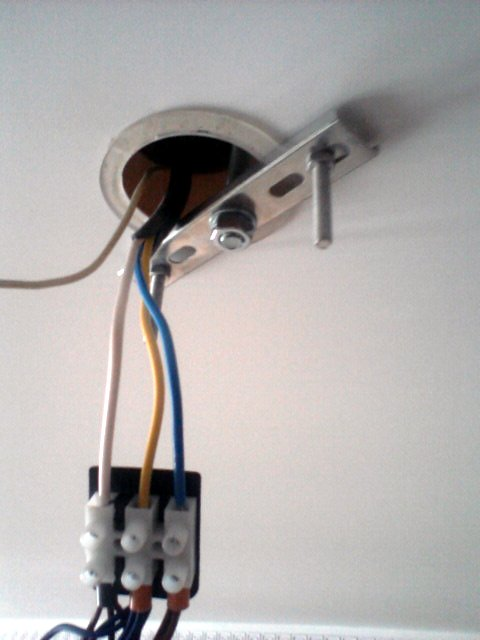
You can connect the luminaire to the network after the installation is completed. To do this, you need to push all the wires through the hole in the stretch ceiling. Further it is necessary:
- Measure the required length of the wires. The cable must be completely covered with a decorative chandelier cover. Cut the wiring if necessary.
- Strip bare wire ends.
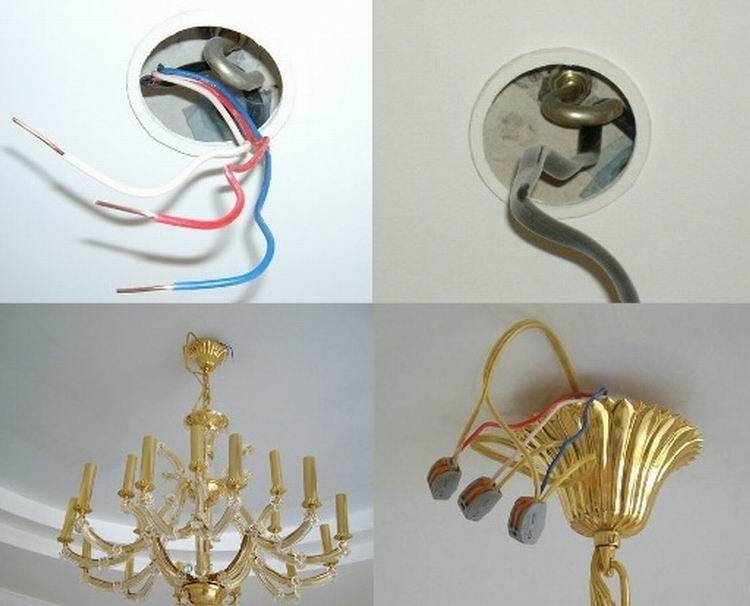
- Using the terminals, connect the electric cables to the wires of the chandelier.
When performing the last operation, you need to be guided by the instructions attached to the luminaire. At the end of the work, it is recommended to close the terminal box. If the latter is not there, then the wires can be connected by wrapping them together. In this case, the bare ends must be covered with insulating tape.
How to change a chandelier on a stretch ceiling
If a luminaire is being replaced, the luminaire must be removed to gain access to the fasteners.
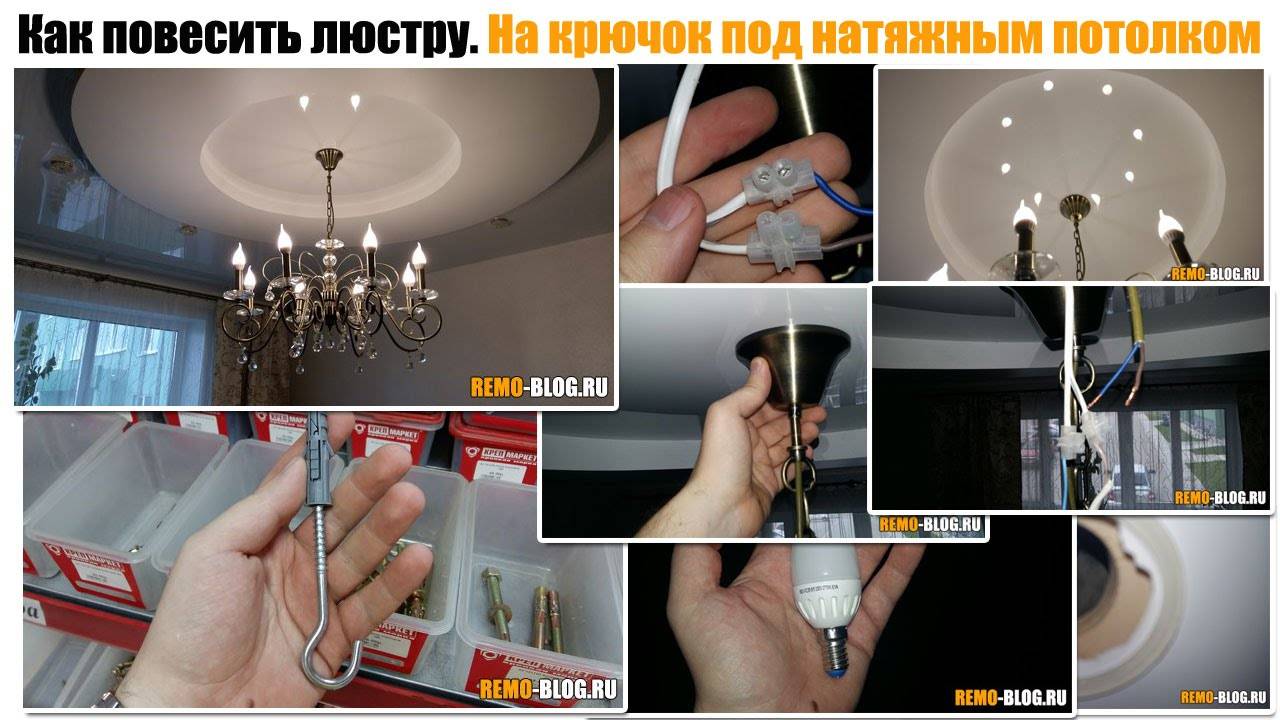
If the lamp was attached to a hook, then you can hang the chandelier on it, which you purchased to replace the old one.
If the installation was performed on an embedded element, then you can also use this embedded to fix a new device.
In the event that it is necessary to change the position of the lamp, it may be necessary to install a new canvas, since the hole that was made for the installation of the old lamp remains.
When installing additional lamps on an already installed structure, the panel will need to be dismantled, embedded elements installed, the panel installed, and after that, the lighting system will be installed.
Thus, the chandelier can, like other light sources, be installed on a stretch ceiling. However, for this, it is necessary to carry out the installation of embedded elements that allow you to create a rigid base for fasteners.
How to "drown" a chandelier in a stretch ceiling
Some luminaire models have a large base diameter (40-60 cm) and a high side that covers the transformer. Such a chandelier looks more aesthetically pleasing if you “drown” it a little into the ceiling.
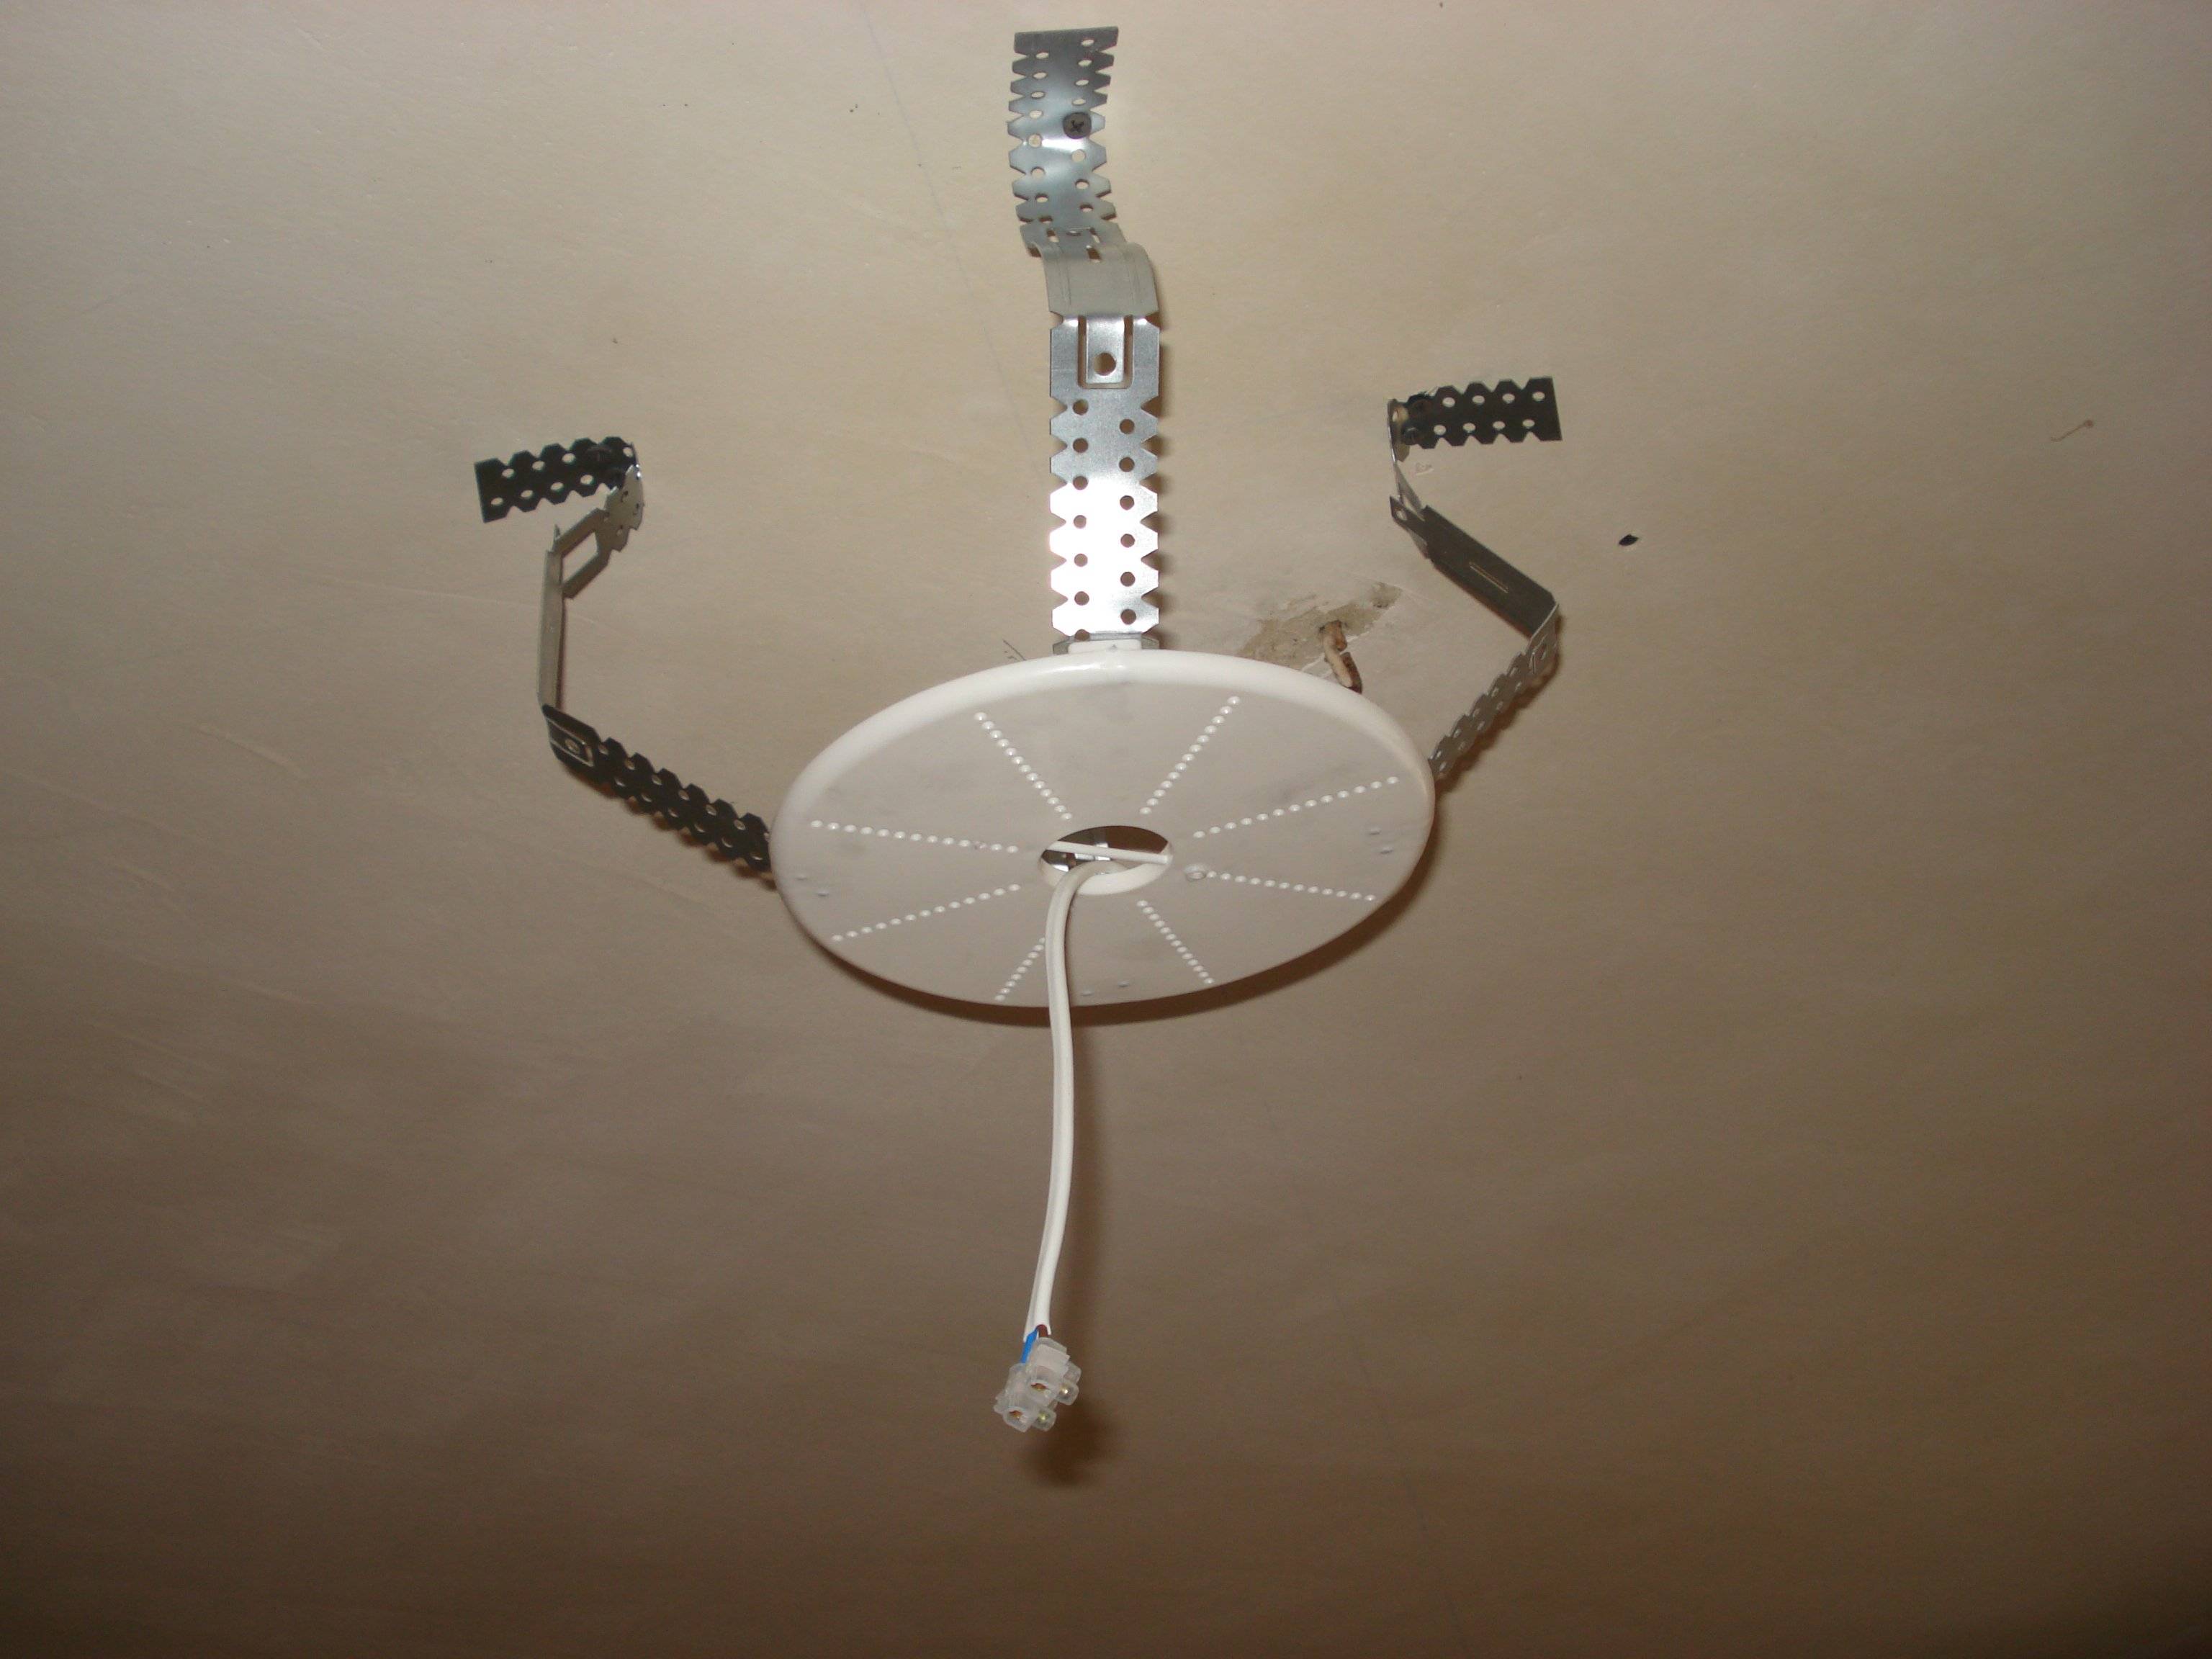
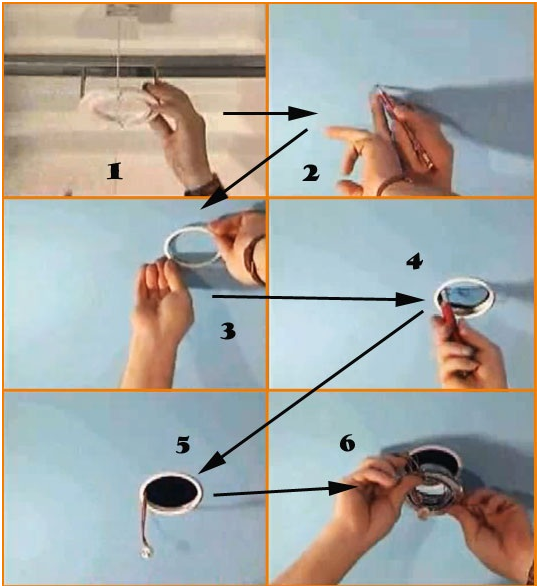
For installation, you will need a large diameter protector ring, matching the size of the base. But such thermal rings are not sold in stores, so you have to do it yourself. You will need a PVC sheet with a thickness of about 2 cm. This is an inexpensive material that is sold in many hardware stores. A ring with a diameter slightly larger than the base of the chandelier is cut out of the panel. Then they apply the lamp to the ceiling and trace around with a marker. A homemade ring is glued to this contour. To make it smoother, you can not apply the composition immediately to the entire surface. First, opposite points are glued, then between them, etc.
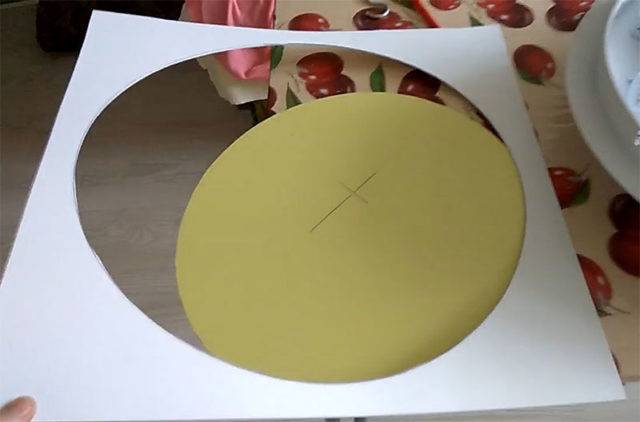
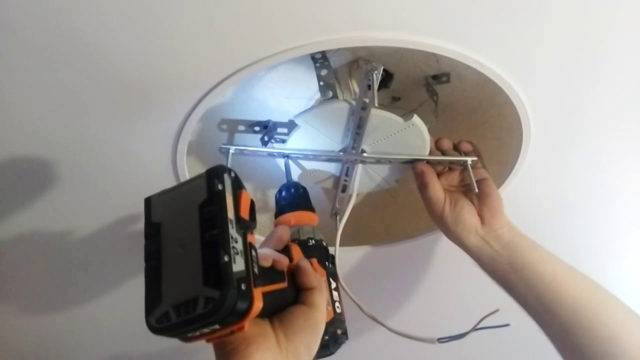
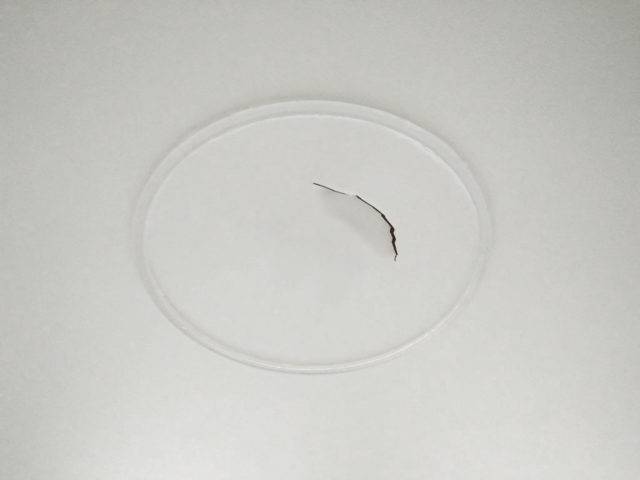
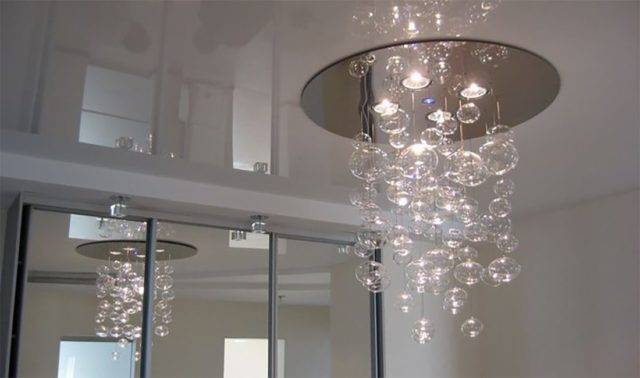
When the ring is fixed, the film is cut inside and removed. But not flush with the protector, but leave about 2 cm. Then the inner edge of the canvas is cut, folded inward and glued to the ring. Further, a bar is screwed to the mortgage and a chandelier is attached to it, but the base will be recessed in the plane of the ceiling. Thus, thanks to the self-made protection, the PVC film will not suffer.
We do the correct installation of the chandelier
The further operation of the ceiling and the lamp depends on how competently the installation of the device is done with your own hands. The polyvinyl chloride cloth serves solely for decorative purposes and is not intended for attaching any objects or devices to it! Incorrect installation can lead to rupture of the web, moreover, over its entire surface. And this already promises extra spending.
To avoid such breaks, special plastic rings are used to save the canvas. The reinforcing ring is attached to glue containing cyanoacrylate (glue-moment is suitable). It must be applied in a solid line and tightly applied to the PVC canvas. So it will hold on more reliably. When the glue dries well, you can cut holes.
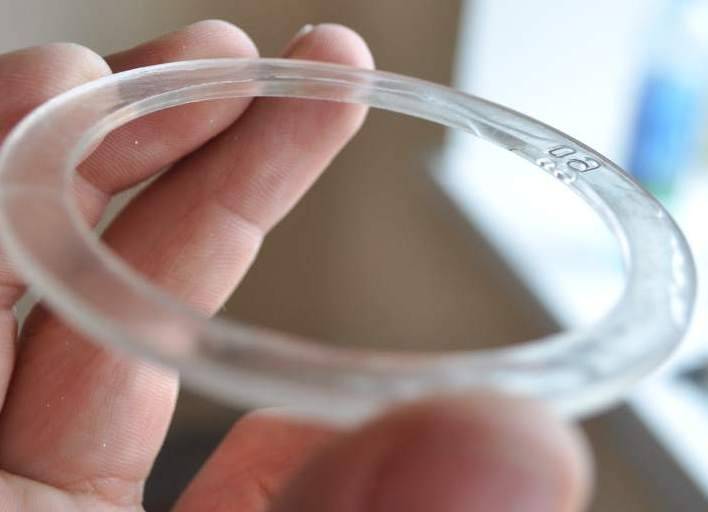
Ring for attaching a chandelier to a stretch ceiling
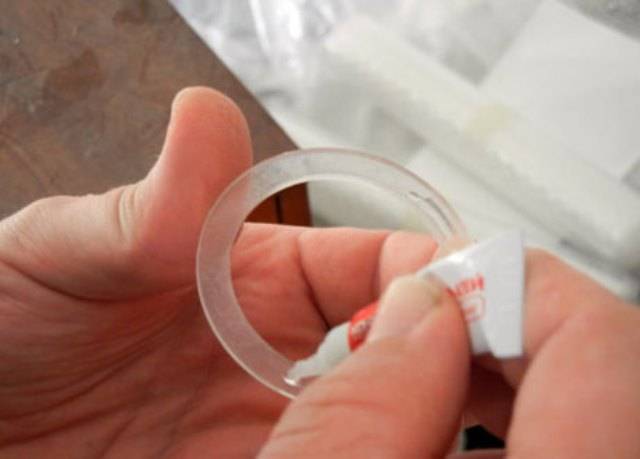
The ring is attached to the tensioning fabric with glue
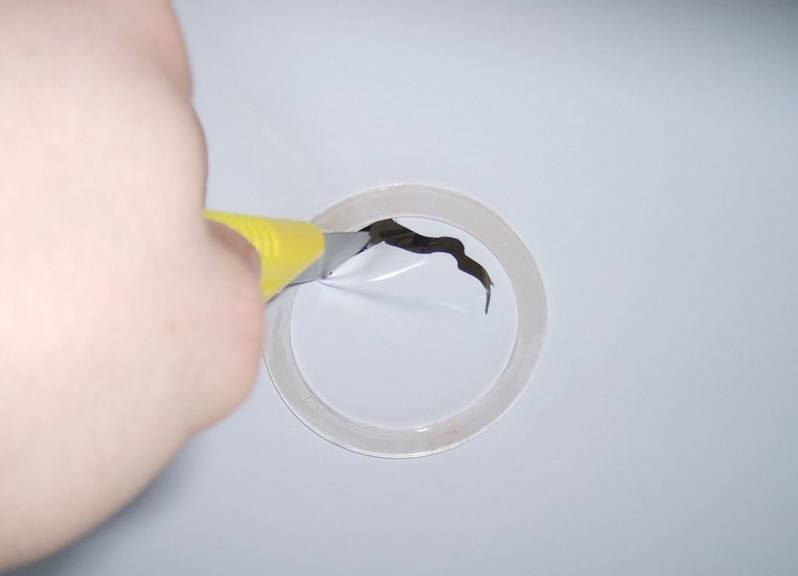
After the ring is attached, a hole is cut out for attaching the chandelier
All preliminary work (installation of an anchor hook, strips) must be carried out while the frame is being installed. Hang the lamp after the canvas is stretched and dry.
Chandeliers and stretch ceilings - is the combination a success
Stretch ceiling systems today occupy one of the leading places in popularity. The thing is that the technology of installation of such structures and the affordable price of this type of ceiling design have been greatly simplified. You can even make stretch ceilings with your own hands today. All that remains is to choose the right lighting equipment that is suitable for such suspended structures. Initially, it is clear that it is problematic to install massive and heavy lamps on a stretch ceiling, and you really want to decorate the hall in your own house with a beautiful chandelier.

Moreover, the central arrangement of the lamps makes the interior rich and saturated. Stretch ceiling chandeliers play an important role in terms of aesthetics. Located in the center of the upper part of the room, such lamps qualitatively change the interior of the room, enhancing the visual effects.Depending on the texture of the canvas, you can achieve an excellent reflective effect, or vice versa, get a calm diffused light inside. Correctly selected chandelier, design of the lamp will add more gloss and chic to tension suspension systems. Chandeliers with shades, on the contrary, will provide pleasant and calm diffused lighting. In short, a chandelier and stretch ceilings are two structural elements in apartment design that go well together.
The secret of success in this case depends on three factors:
- whether the lamp is correctly selected;
- what kind of lighting you need;
- what is the technology of mounting pendant lights on suspended ceiling structures.
The luminaires produced at the moment allow realizing almost any idea, providing a wide field of activity in terms of design. The only condition that must be observed in order to be properly covered with PVC film is to take into account all the subtleties and technical nuances.
When planning the installation of a chandelier complete with stretch ceiling structures, one should take into account the fact that any mechanical damage adversely affects the quality of this finish.
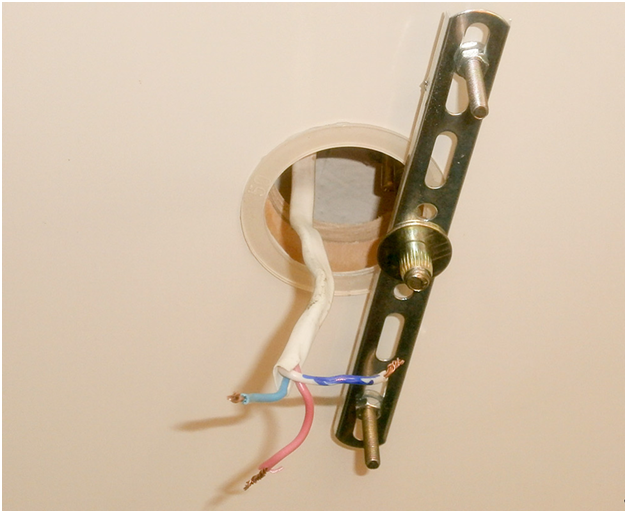
The thing is that the initially stretched canvas is not a strong and reliable basis for attaching attachments. Subsequent damage to the integrity of the new ceiling surface can ruin the entire work. The canvas in the place of mechanical damage can break more than necessary, besides, the rest of the surface is covered with waves. This is about technology. Another factor that should be taken into account is the correct selection of the power of the luminaires. The canvas is a polyvinyl chloride film, which, despite its high technological properties, is very afraid of overheating. A chandelier with powerful lamps hi to the fact that the stretched canvas at the point of contact with the lamps will deform. Let us first dwell on the choice of lamps for this type of ceiling design.
Using the crosspiece
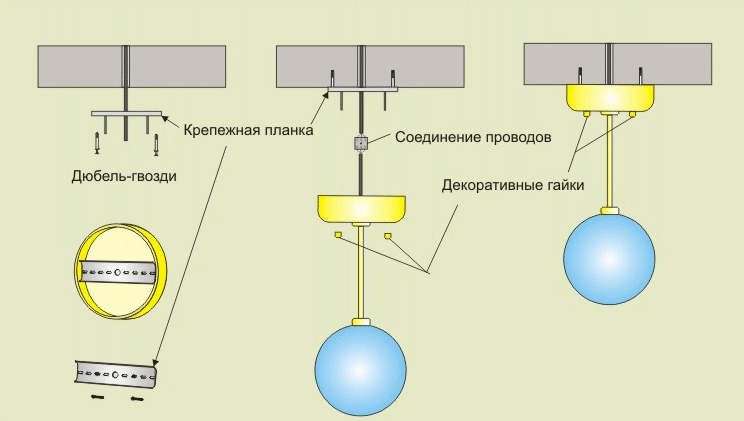
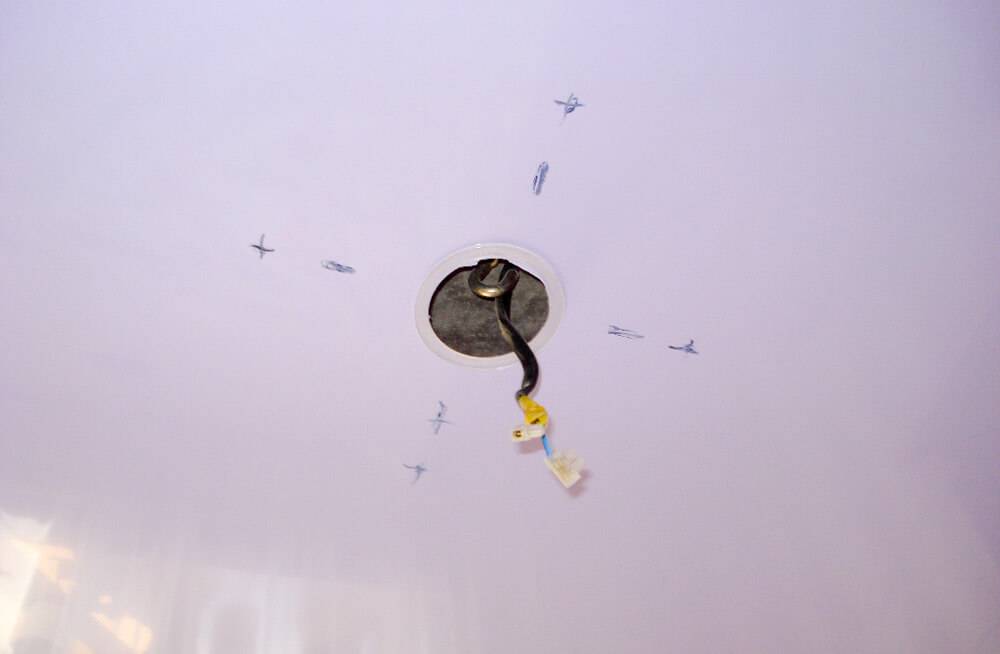
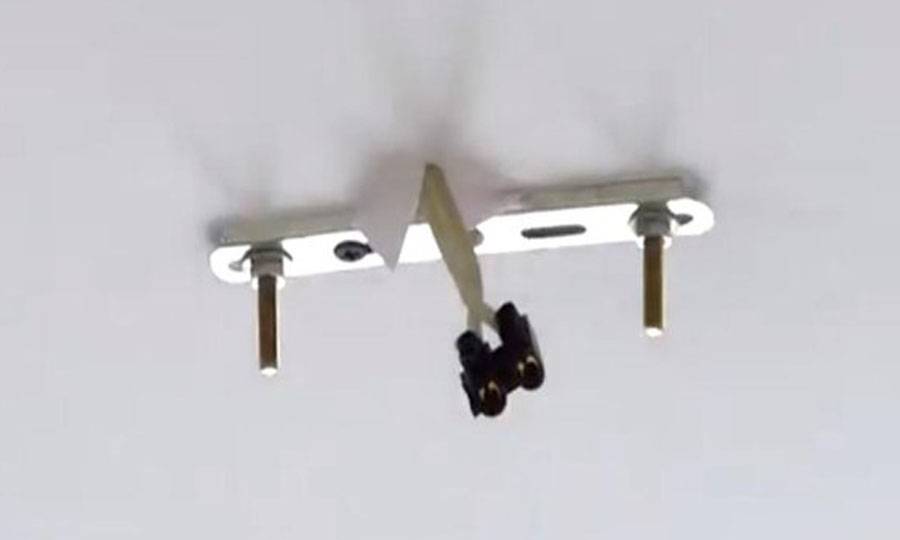
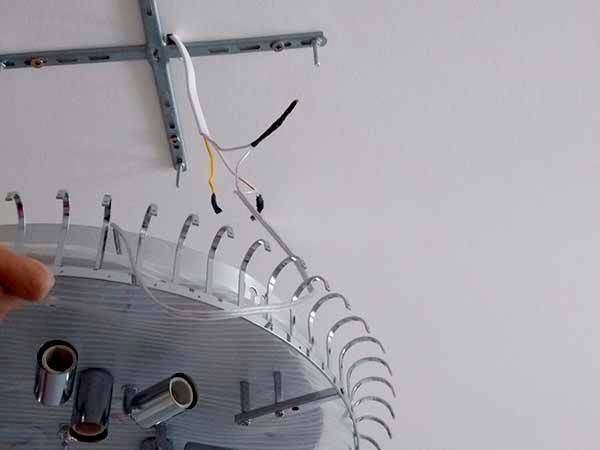
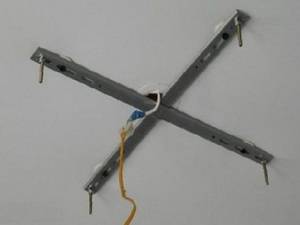 For a heavy ceiling lamp, a cross is more suitable. In this case, make five holes in the ceiling at once using thermal rings. Four of them are for the cross, one for the chandelier. The crosspiece is installed when the frame is attached, after which the ceiling is pulled. The wires are pulled through the cut hole. The chandelier is mounted on a crosspiece, the connection is closed with a cap, which is fixed with decorative nuts. You can also use an I-beam to mount the luminaire.
After installing the chandelier, you need to connect the electricity. If installed correctly, all lamps light up, otherwise they made a mistake somewhere. Usually, everything works out at once, since it is not difficult to mount the lamp. Sometimes when buying a new chandelier it turns out that its cap is smaller than that of the old one. In this case, a decorative overlay helps.
The main thing when installing a ceiling lamp is accuracy and lack of haste. It is better not to save money and use energy-saving lamps that last a long time and do not heat the surface. This will help preserve the coating and extend its life.
Used options for mounting chandeliers on tension suspension systems
To achieve the best effect and the result of your work satisfies you and meets all the necessary requirements, use tried and tested technologies. Having an idea of the intricacies and features of technology, you will be able to fix the chandelier or move the lamp to another place.
In the case of stretch ceilings, the work is greatly simplified. The electrical wiring is laid in an open way. All communications will be closed as a consequence of the stretched canvas. For safety, electrical wires are enclosed in a corrugated channel.This will protect the wiring from accidental mechanical damage and eliminate the risk of fire in case of short circuits.
Next, let's figure out the question of how to hang a chandelier on a stretch ceiling? What are the methods of fastening, and what is the installation technology based on. It should be said that the choice of the mounting method is influenced by the design of the luminaire and its dimensions.
We use a metal hook for fastening
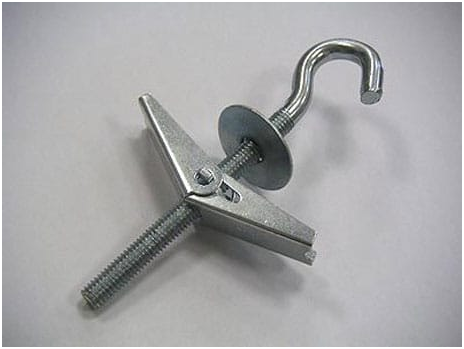
This method is considered one of the most reliable. The metal hook is mounted directly into a reinforced concrete floor and is capable of supporting a significant weight suspended from it. Lighting sources attached in this way can be lamps of any shape and size. As a rule, there is an assembly hook in each room, installed by the builders at the time of the delivery of the object. If the hook is missing, you can install it yourself. The main thing is to make the markup correctly and install the mount in accordance with the technological requirements and SNiPs.
For work, you need a puncher. The mounting fastener can be an anchor or a dowel.
Less often, a wooden mortgage is made under the hook. This option is used in cases where it is not technically possible to make a deep main hole for the hook.
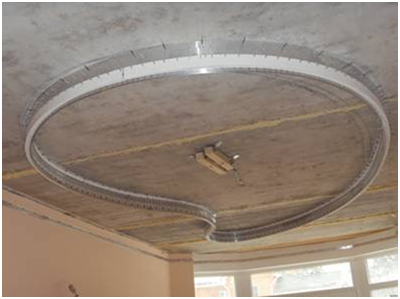
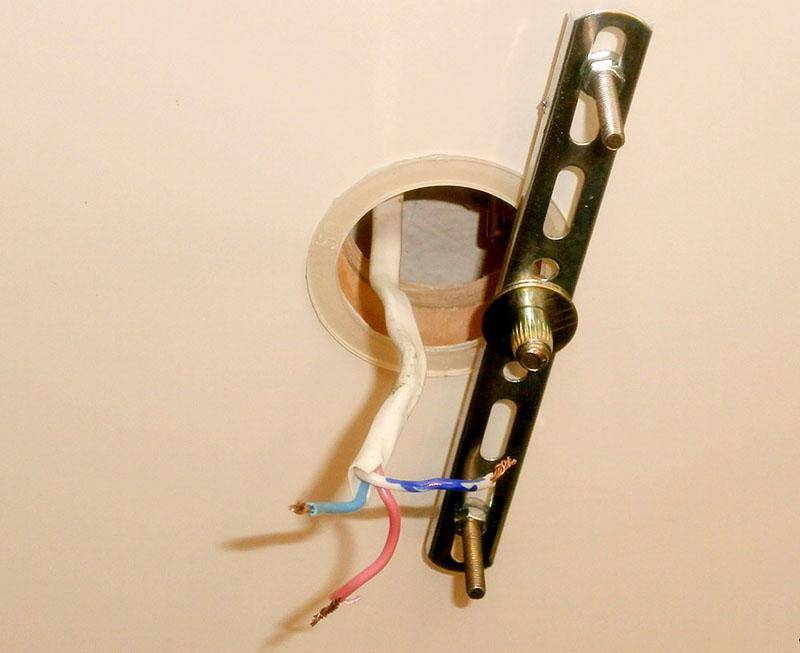
After the web is stretched, a heat-resistant ring is glued in the place where the hook is located. The film is cut out in the middle of the ring, after which the electric wires are led out through it. The place for installing the chandelier is ready.
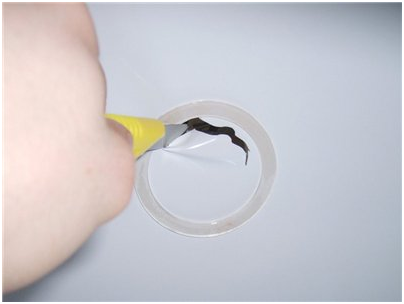
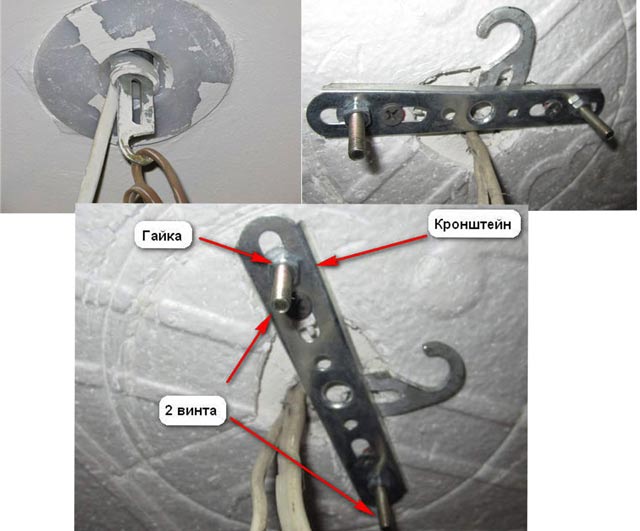
Installation of the luminaire with a fixing strip.
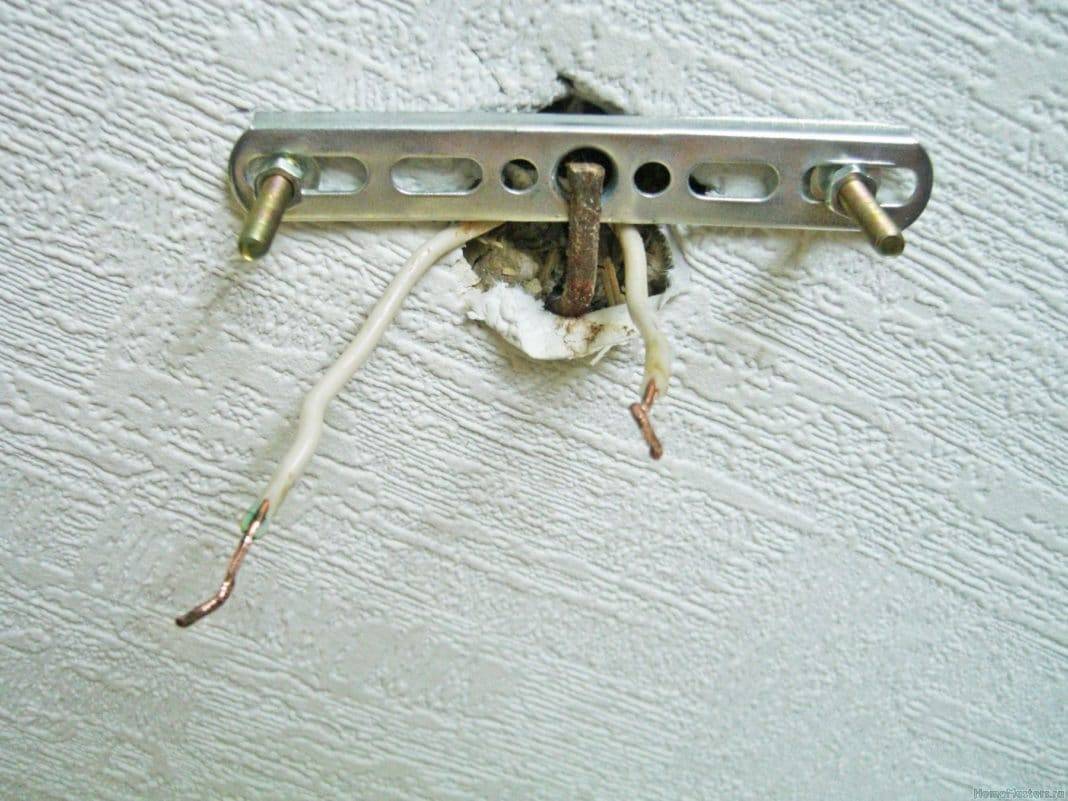
The fixing bar is used in situations where you are planning to install a chandelier in a new home. The iron hook is usually not installed in the ceiling during the construction of new private houses. We install the fixing strip already in the place where the location of the lamp is planned in the future.
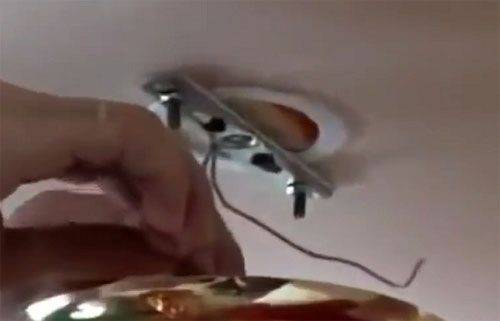
Almost any chandelier comes with a mounting strip and mounting studs. Before starting work with the fastening strip, holes are made in the concrete floor and wooden blocks are installed. The mounting plate is already installed directly on the wooden block within the area of the hole that the thermal ring creates. After the strip is securely fixed to the base ceiling, the electrical wires of the lamp are connected to the electrical wiring, and the chandelier body is mounted.
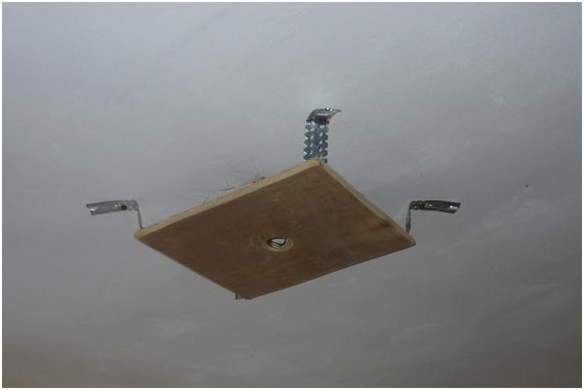
Mount on a cruciform bar
This method is used when installing luminaires with a significant weight and with a wide base. The cruciform bar allows the weight of a heavy structure to be evenly distributed. However, such a device cannot be used in conjunction with a mounting hole in stretch ceilings.
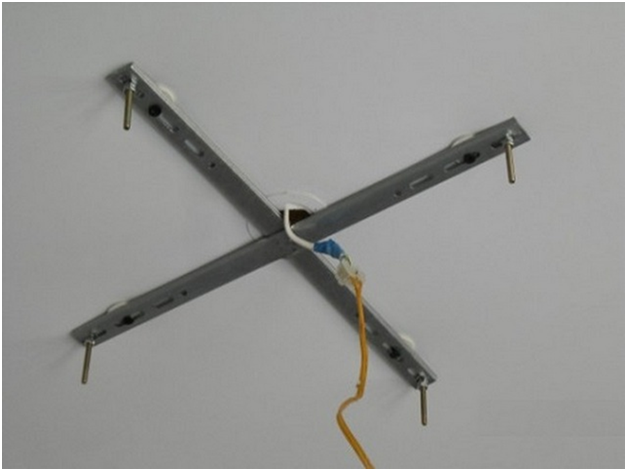
In this case, in addition to one central mounting hole, you will have to make four more of the same holes, only of a smaller diameter. The wires are led out through the central hole, the other four are used for mounting the studs.
The technology with this method of attachment is somewhat different. First, a supporting platform is attached to the base ceiling - the base. Usually this is a wooden fixture, the dimensions of which correspond to the parameters of the cross.
After connecting the wires, you just have to attach the chandelier body with studs and decorative nuts.
Hook fastening
- To install a chandelier using a mounting hook, you will need:
- hammer drill or hammer drill;
- a set of drills for concrete;
- mounting hook (or hook-shaped anchor) with a new settler (usually comes with a lighting fixture);
- hammer.
First of all, using a perforator in the ceiling, at the installation site, it is necessary to make a hole, the diameter of which corresponds to the size of the new settler. Next, use a hammer to drive the base for the hook into the hole made. Then screw the mounting hook into the new settler to the required depth. The most common anchor diameter is 6-14 mm.
There are 4 of the easiest and most reliable fastening methods. Let's dwell on each one in more detail.
- Method 1.
- You need to take an anchor bolt, the size will depend on the severity of the chandelier, on average 7-15 millimeters.
- Drill a hole in the ceiling, insert.
- The nut on the anchor must be screwed in all the way until the sleeve unclamps itself.
- Method 2. Applicable only for private houses.
- We make a through hole in the interfloor slab.
- We take 2 orthogonal plates with an area of 25x25 or 35x35 cm, up to 3 mm thick with ready-made holes in the center.
- We put the first one in the floor of the upper floor. If it is not there, then in the attic, and the second under the ceiling.
- We take the hook, screw on the nut. It will hold the plate.
- Next, we push the hook into the ceiling hole and screw on the second nut from above, which will pull the 2 plates together.
- Method 3. It is used if the slab for the floor is six-hollow.
- We make a hole of 30-50 mm in the ceiling.
- We push a piece of reinforcement with a diameter of 9-10 mm into it and put it in a hollow channel parallel to the ceiling plate. The length will depend on the thickness of the board.
- We make a hook from wire rod (d 10 mm), at the other end of which there should be a ring.
- We put the ring on the armature. All is ready.
- Method 4.
- Cooking materials: 2 nuts, metal plate, hook.
- Take the plate and drill a pair of holes with a diameter of 9.0 mm diagonally.
- Screw the nut onto the hook until it stops.
- We put on the plate and wrap another nut on top, pressing it against the plate, tighten it.
- Cut off the protruding edge.
- We attach the structure to the ceiling with 7.0 mm studs.
Anchor hook
Perhaps the most common option, which many also love because in many apartments such a hook is already underway, as they say, by default.
- If it is absent, but there is a need to hang the chandelier on the stretch ceiling in this way, follow the basic procedure that will help you quickly cope with the problem:
- using a drill, make a hole in the concrete base with a diameter of 6 to 14 mm;
- insert the anchor hook into the hole obtained and tighten the suspension nut.
Have you installed a stretch ceiling? Let it dry - withstand exactly the time period that is prescribed in the performance characteristics of the film.
Many beginners, who really do not know how to hang a chandelier on a stretch ceiling, rush to complete all operations faster - and then pay with a torn canvas, not only ruining their mood, but also significantly undermining their budget:
find the location of the hook;
stick a plastic ring on the stretch ceiling;
when determining its size, take into account the size of the cap - it must completely cover the diameter of the ring;
cut out with the inside;
pull out the wires;
it remains only to connect the lamp.
Through fastening
Distributed mainly in private homes. In this case, not only a threaded hook on the rod is used, but also two 2x2 or 3x3 mm plates.
- make a through hole and place the first bar;
- screw the nut onto the hook to hold the second plate;
- insert the hook into the hole and screw on another nut from above;
- as a result, 2 plates should be pulled together - all that remains is to hang the chandelier.
Further actions are not fundamentally new: we also fix the rings on the stretch ceiling, cut out a part, pull out the wires and connect the chandelier. Again, when using plastic rings, keep in mind the diameter of the decorative cap of your lighting fixture - it should be slightly smaller so that the final installation is pleasing to the eye, and does not make you wrinkle from aesthetic defects on the stretch ceiling.
Hook installation
 The anchor hook is installed when the frame is mounted on the stretch ceiling. You can hang the chandelier when the canvas is stretched and dry. This is the most reliable installation method, but it requires care and attention.
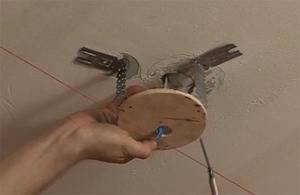 If the length of the existing hook is too short, then a new mount of a suitable size is installed to mount the chandelier. In this case, a hole is drilled with a drill to install the anchor with a hook. The spacer of the anchor must fit exactly into the hole, after which the suspension nut is tightened until the sleeve is completely unclasped.
After that, the false ceiling is installed. When the work is over, they find the place of fastening the hook and stick a plastic ring there. Its size is chosen so that it is completely covered by the chandelier cap. After the glue dries, you can cut a hole, pull out the wires and attach the chandelier to the stretch ceiling. Then the wires are insulated and hidden under a cap.
With this installation method, you can easily replace the chandelier with a new one. When buying a new lamp, you need to make sure that its cap is no less than that of the old one.
Fastening a chandelier to a stretch ceiling
The stretch ceiling itself cannot be the basis for a strong fastening, moreover, any interference with its structure can cause it to rupture.
According to the type of installation, luminaires are divided into two categories:
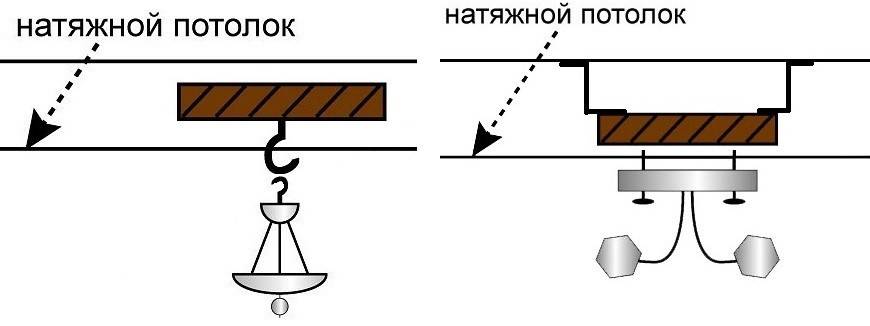
- Mounting is done on a mounting plate;
- Fastening is done on a hook.
To fasten with a mounting plate, you first need to prepare a place for this. The mortgage will be the base, it should be higher or at the same level as the stretch ceiling. The thickness of the mortgage should be suitable in order to firmly hold the fasteners in the plywood, and the length and width should be exactly the same as at the base of the future chandelier. A wooden beam should be attached to the ceiling under the suspended one, then the suspended ceiling itself is installed.
If the chandelier has several fasteners, you will need two bars. They are lowered to the level of the stretch ceiling, which will be installed later, then, if the height allows, they are hidden under the canvas of the ventilation box and the electrical wiring with the racks intended for this.
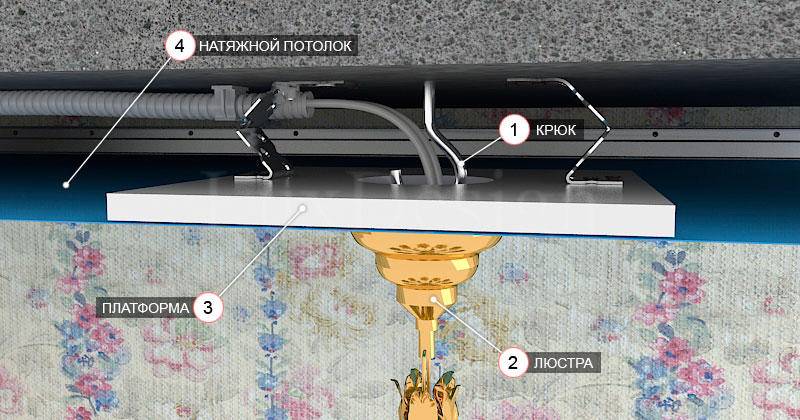 The chandelier is fastened to the stretch ceiling either on a hook or on a mounting plate
A threaded hook is the most popular type of attachment, as only a hanging chandelier can be attached with a hook. Hooks vary in diameter, which is matched to the weight of the chandelier. The larger the diameter, the more weight it can withstand. The anchor is suitable for installing chandeliers over 10 kg.
In typical houses, the hook must be initially installed by the builders, so if its position in the center of the room suits you, you just need to make sure that the height at which it is located is suitable for fixing the chandelier. If you need to install two or more chandeliers, you can fix the hook yourself. To do this, a hole is drilled in the ceiling with a puncher, and the hook is installed using an anchor. A dowel is also suitable.
Safety engineering
The basic rules when working with the installation of luminaires on stretch ceilings are:
- To avoid deformation of the film, it is necessary to monitor the clamping force of the structure. Exaggerating it can lead to loss of surface integrity.
- Before the very process of drilling holes for lighting fixtures, you should carefully find out where the electrical wiring runs, so as not to accidentally stumble upon it. Usually it is located at the joints of the panels or in the inner cavity of the walls. For detection, you can use a specially designed probe.
- For greater safety, the required wires must be insulated with corrugated hoses. Otherwise, due to the tight fit of bare wires, it can occur in the network, which can also be reflected on the tension surface by melting it from sparks emanating from the wiring.
- It is allowed to insulate the joints with electrical tape.
- Switch off the power supply before starting work.
- It is necessary to carry out the installation in rubber gloves, since this material is thermally conductive and can to some extent protect the body from current.
Stretch ceiling is not only a beautiful addition to the overall style of the room, it has such advantages as:
- Waterproof.
- Ease of care.
- Large range of colors.
- A wide range of textures.
- Quick installation.
- Elegant appearance.
It is complemented by correctly selected lighting, namely lamps or chandeliers, the installation of which does not require large financial investments and efforts. Installation can be carried out independently, without the involvement of outside help. In this case, compliance with all installation rules will ensure long-term operation of the lighting fixtures and the stretch ceiling.

