Which glue to choose
When preparing for work, a natural question arises - what glue to glue ceiling skirting boards made of polystyrene. After all, the foam, firstly, is corroded by solvents, and secondly, it does not adhere to some types of adhesive - it simply rolls off the surface of the baguette, and thirdly, it is very light.
The above conditions fully comply with:
- polyurethane foam;
- polymer glue;
- acrylic putty;
- acrylic or silicone based sealant;
- "liquid Nails".
The list below shows how you can attach a skirting board to a wall or ceiling. But this does not mean at all that each type of adhesive is technologically advanced and efficient from a financial point of view. For example, the use of sealants because of their high cost is pointless, and with acrylic putty and foam, you can glue ceiling plinths only on a bare, unfinished wall.
Glue
The glue is best used in situations where it is necessary to connect the fillet to the wallpaper. But it should be remembered that for foam plastic, the choice of adhesive is limited due to the chemical reaction of the styrofoam from which the baguette is made with paint solvents. Therefore, it is very easy to give advice here: "Titan", "Eko-Hacet" or "Moment montage". A detailed description of each type of glue can be found in the work "How to choose glue for a skirting board"
We will pay attention to several nuances:
- to use "Titan" (0.5 liters costs 150 rubles and more) and "Moment montage" (the price of 0.25 liters starts from 200 rubles) is very expensive from the financial point of view. Here, in relation to polystyrene, the quality indicators of the glue are significantly overestimated, which affects the price;
- "Eko-Hacet" is available at a cost (from 65 rubles per 0.25 l), but it belongs to contact types, which is not taken into account by the majority of consumers. The glue has a completely different application technology: a layer is applied to the fillet with a "snake" layer, after which the plinth is firmly pressed against the wall and ceiling for a few seconds in order to leave a mirror trace of the adhesive. After that, the baguette is set aside for the time indicated on the package (usually 5-10 minutes) for adhesion to appear.
Editorial advice: It is better to refuse glue for attaching foam baguettes for financial and technological reasons.
Polyurethane foam
The most budgetary option for attaching a baguette is polyurethane foam. But to use it, two conditions are needed:
- unfinished wall;
- skirting board with free space on the back side (groove or concave), where the foam can expand without lifting the fillet from the wall.
Acrylic putty
If the wall is not covered with wallpaper, there is no need to choose glue for a long time - this is an acrylic putty. The option is the most optimal for the following reasons:
When applied to paint, the wall must be primed at the fillet attachment point with penetrating solutions in two layers.
"Liquid Nails"
Liquid nails can contain different chemical components. For foam, you need to buy synthetic resin glue on a water-acrylic basis. It sets quickly (from 15 seconds to 30 minutes, and Tytan professional writes in general for 5 seconds), has an excess, for foam, peel strength (40-60 kg / m2), can be used in a wide temperature range: from - 40 to + 35oС.
Quite a high cost, although with a careful search you can find democratic prices, it is compensated by a low consumption (can be applied pointwise) and convenient packaging.
Conclusion: "liquid nails" are a good alternative to all methods of fixing the ceiling plinth. Fillets fixed with their help receive reliable, long-term adhesion to the base (wall or ceiling).
How to glue correctly?
How to glue and cut the ceiling plinth correctly, see this video.
Surface preparation
To fix the foam ceiling skirting boards as firmly as possible, first prepare the surface. The walls and ceiling are carefully leveled, then primed. This is best done with an acrylic primer.
Surface priming
What kind of glue is right?
Not all types of glue are suitable for installing foam skirting boards, some of them react with the material, corroding it.
For work, they most often use:
-
Moment glue. When working with it, regular ventilation of the room is required. If the glue gets on any surface, it is immediately wiped off with a dry cloth.
-
Liquid Nails. It is a versatile assembly adhesive that adheres well to many surfaces. It has a high setting speed - just a few seconds before hardening. There are two types: acrylic and neopropylene. The first option is safer, but it should not be used in rooms with high humidity. They work with the second only when airing.
-
Acrylic putty. Adheres almost instantly and masks well the gaps between the ceiling, wall and foam baseboard. Approved for indoor use.
Warning WARNING! When choosing an adhesive for installation, pay attention to its color: it should be white or transparent and not change its shade over time. To save money, you can make the adhesive yourself
To prepare a solution with your own hands you will need:
To save money, you can make the adhesive yourself. To prepare a solution with your own hands you will need:
- 1 part cold water;
- 1 part of any fine finishing putty;
-
1/4 part of PVA construction glue.
Adhesive at home
Combine all the ingredients to a consistency of moderately thick sour cream, break up the lumps. Use the ready-made putty with the addition of PVA within two hours. Stir well before use. It will also be useful to familiarize yourself with how to make do-it-yourself wall putty.
How and how much to apply?
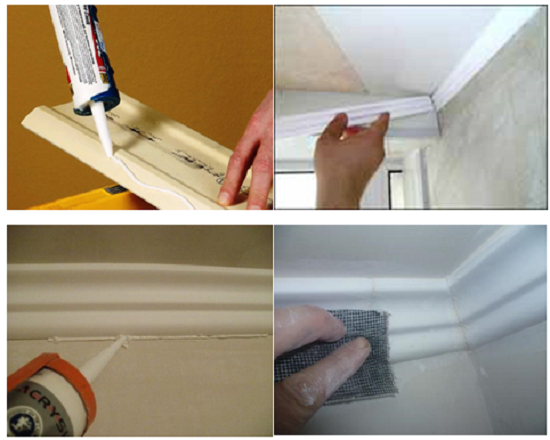
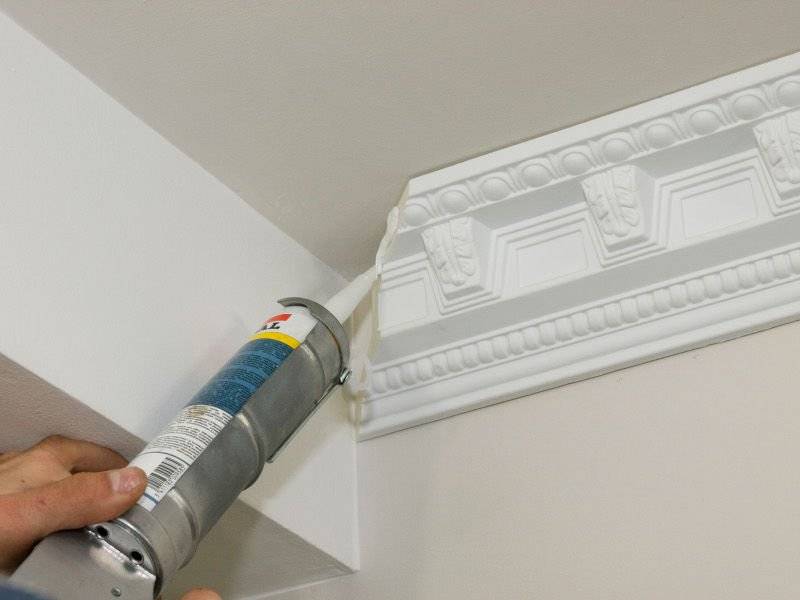
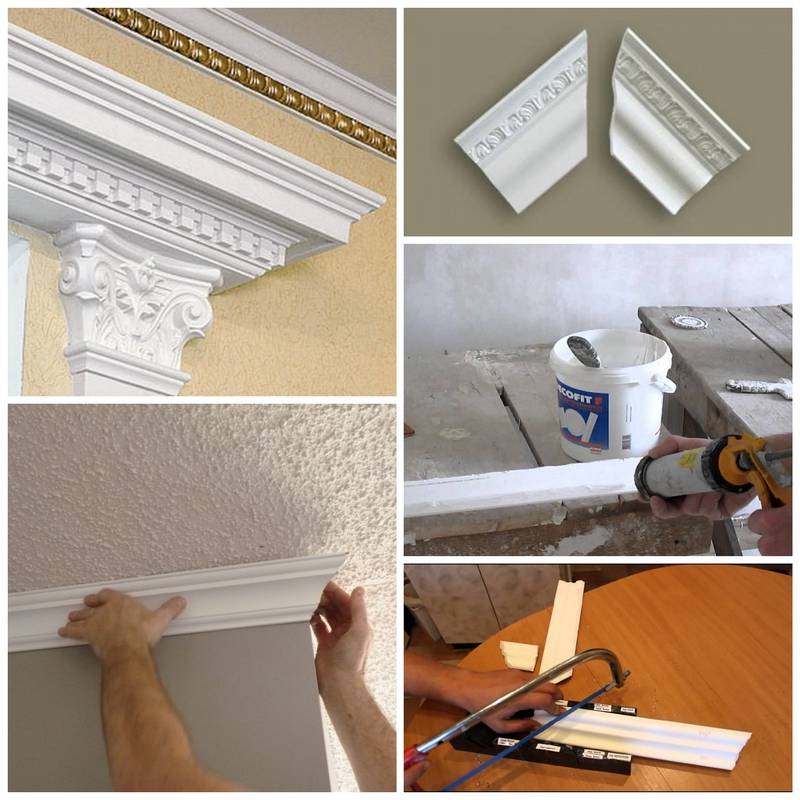
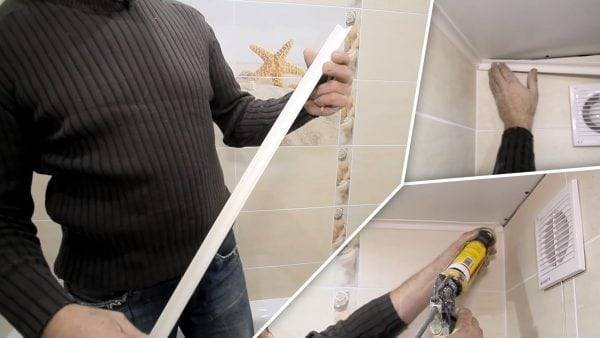
The glue is applied to the skirting board pointwise with an interval of 15-20 cm using a construction gun and only on the edges - the places that will be attached to the wall and ceiling.
Applying glue with a construction gun
The mixture with PVA glue is applied with a spatula. No need to apply in the middle. The layer should be even, but not very thick, so that you do not have to remove a lot of excess putty after gluing.
Applying the mixture with a spatula
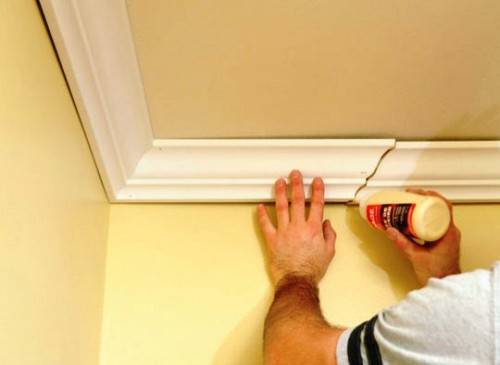
On the second plinth, the adhesive is applied to the end joint in order to fasten the two strips.
How to press?
They begin to glue from the corner in the most visible place of the room. They act like this:
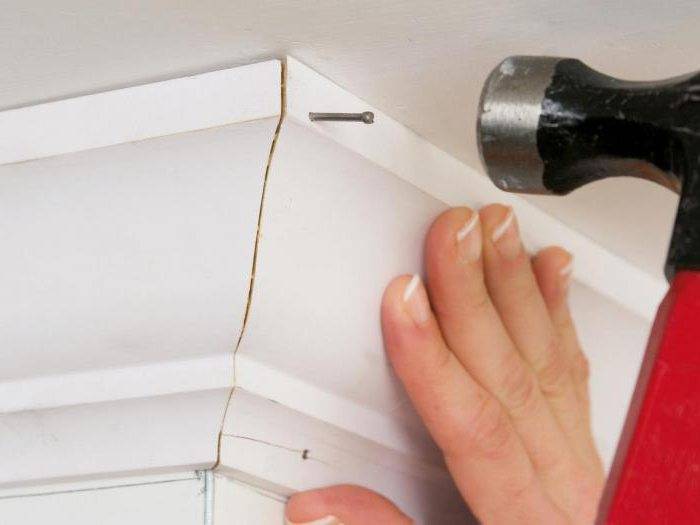
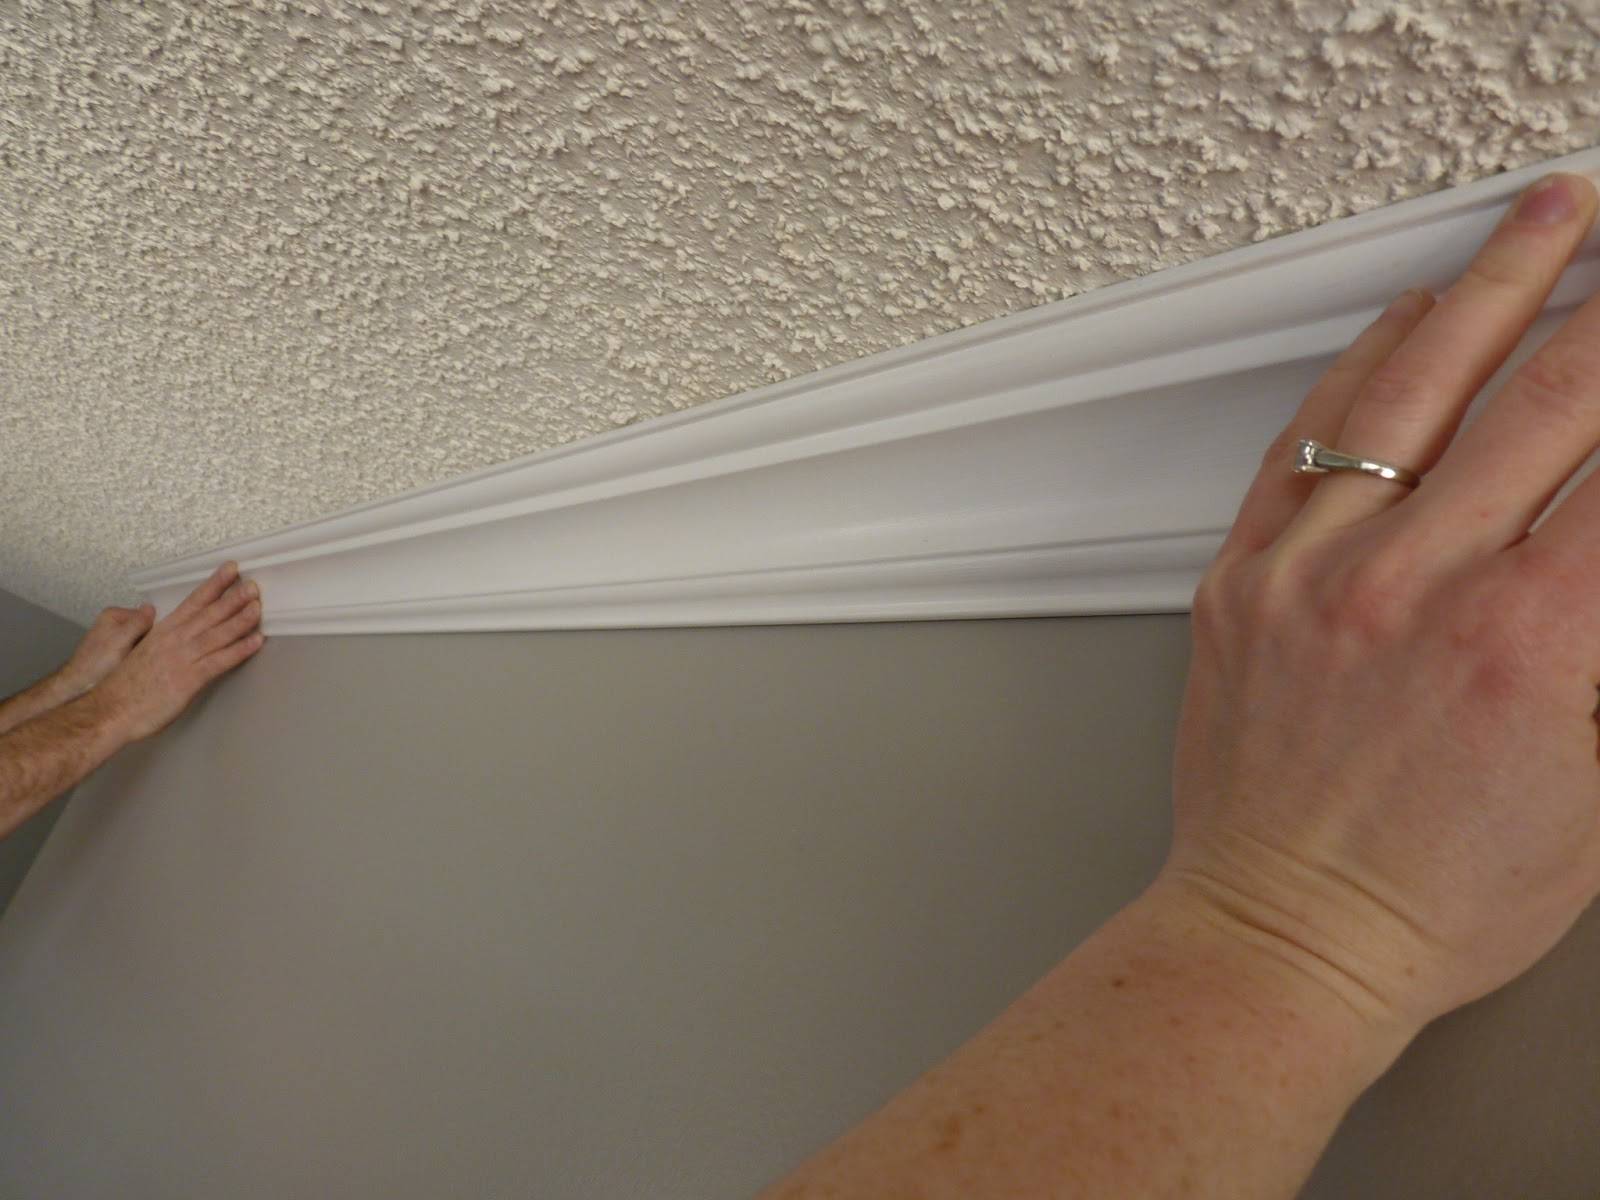
- Immediately after applying the glue, the plinth is applied to the ceiling in the desired position. The main thing is to prevent displacement.
-
Press firmly to the surface and hold for about two minutes. Press only the edges of the plinth.
Applying the mixture and pressing the skirting board
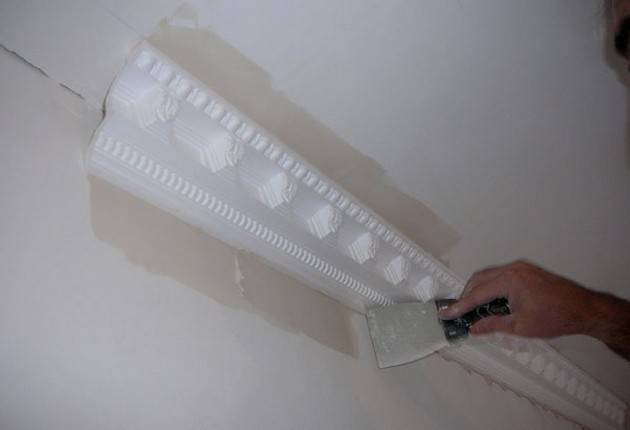
- A little adhesive will come out. It is immediately removed with a spatula.
- The next element is attached in the same way.
Warning WARNING! Do not press on the middle of the skirting boards, they can deform and glue unevenly
How to work with joints?
Unfilled gaps between the skirting board and the wall or ceiling are carefully covered with a small amount of putty or glue, depending on what material is used. Wipe off traces of the adhesive with a damp cloth or sponge.
Spreading putty in the joints between skirting boards
The plinth is left until the glue dries (the exact time is indicated in the instructions for a particular type). Then, if irregularities remain at the joints, they are carefully cleaned with sandpaper.
The joints are cleaned with sandpaper
Exclamation Circle REFERENCE: a few months after installation, the foam may dry out, then gaps will form between the joined elements, which will need to be repaired again.
Varieties of polymer compositions
Polymer adhesives are divided into two groups. The first includes compositions of instant action (for example, "Moment"). They grab in just a few seconds. In this case, you need to set the edging to the level very quickly.
The second category of formulations is preferable for novice installers. In this case, there will be enough time to align the position of the baguette. Polymer compositions may contain toxic components. So, "Moment" includes ethyl cyanoacrylate. It can irritate the skin. Therefore, work is carried out only in protective clothing, gloves and glasses. Even a small drop of this composition, if it gets into the eye, can lead to loss of vision.
Mounting options
Styrofoam moldings are glued. Regardless of what kind of glue you use for the ceiling plinth, the decor is glued to the finished and unfinished base, as well as to the walls or to the ceiling. Depending on this, there are some differences in the installation technology. Let's consider them in more detail.
Fastening to a finished surface
Since the foam decor is very light, it is allowed to attach it to a finished surface, such as wallpaper or a painted base. In this case, the glue putty for the ceiling plinth is not suitable, usually polymer adhesives are used.

During installation on a finished surface, the following rules are observed:
- The walls and ceiling near the glued plinth are protected with masking tape so that the glue that comes out does not stain the finish.
- The glue mixture is applied in the thinnest layer on one or both surfaces to be glued. If too much glue is applied, it will protrude from the decor and into the finish.
- If, nevertheless, the glue comes out, it is carefully removed with a spatula, but not with a damp sponge.
- A white silicone sealant is used to fill the gaps.
- Skirting boards can be painted before or after installation. The second method is better in that you do not have to additionally protect the walls from the coloring agent.
Wall mounting without finishing
More often used is fastening to the base without finishing. Since the foam decor has an impressive lifespan, the wall and ceiling decoration can be changed several times, and the skirting boards cannot be dismantled.
When fastening to walls or ceilings without finishing, putty or polymer glue is used as an adhesive mixture. Bonding is carried out only on a prepared substrate. To do this, it is cleaned of the old finish, leveled with putty, polished and primed.
During work, they adhere to the following rules:
- Installation is carried out from one of the corners of the room.
- The glue putty is applied to the base in a continuous layer.
- If, after gluing the part, a putty mixture comes out, it is removed with a spatula.
- Putty is used to seal the joints, and ceiling plinth sealant can be used for cracks.
- Painting is carried out after the putty has completely dried.

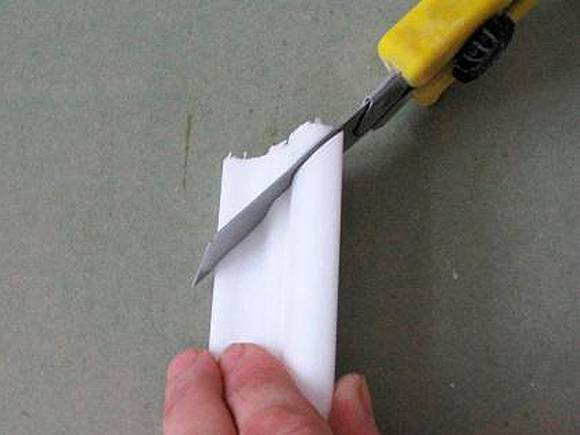
After fixing the moldings and painting them, the walls and ceiling are finished. Wallpaper is usually cut with a slight overlap on the baseboard, and after gluing this stock is cut off with a clerical knife. When painting the ceiling, the plinth is protected with masking tape.
Ceiling or wall mounting
As a rule, the ceiling molding is attached to the wall and ceiling surface at the same time, because it is mounted on the joint of two surfaces. For the convenience of fastening, there are two ribbed planes on the back side, on which the glue mixture is applied.
In some cases, the styrofoam decor is only attached to the wall. This technique is used in the case of installing a stretch or plasterboard ceiling. The skirting board is installed at a distance of 10 mm from the ceiling surface.This is not done by chance, but for the device of hidden ceiling lighting. The LED strip fits into the gap between the skirting board and the ceiling.
In addition, wall fasteners are used when installing decor in combination with stretch ceilings. It is impossible to glue the part to them, therefore, only the section of the molding that is attached to the wall is lubricated with an adhesive mixture.
Preparatory stage
It is recommended to apply fillets after painting the ceiling and walls. If the walls are supposed to be pasted over with wallpaper, it is better to do this after installing the ceiling plinth - firstly, the fillets will be more securely fixed, and secondly, the plinth will not have to be dismantled when the wallpaper is subsequently replaced.
Lightweight foam plinths can also be glued over wallpaper. To protect the wall decoration from accidental contamination with glue or sealant, stick masking tape around the perimeter of the room, stepping back from the ceiling a distance equal to the width of the fillet.
If you want to make a colored edging of the ceiling, it is more convenient to use pre-painted skirting boards. If you decide to paint the fillets yourself, check how the second layer of paint will lay down - whether it will be possible to later unnoticeably paint over the joints between the elements filled with sealant or putty.
To calculate the amount of material, you need to calculate the perimeter of the room and divide it by the length of the selected fillet. The resulting value is rounded up, plus one more fillet is added - a margin for adjusting the elements and for accidental damage to the plinth during installation.
Paste a VALID AdSense code in Ads Elite Plugin options before activating it.
When buying, be sure to inspect each skirting board - all elements must be from the same batch (so that there are not the slightest discrepancies in geometric dimensions and color).
What are ceiling plinths
In the event that the walls in a house or apartment have rounded corners or the design of the room is implemented using columns, the ceilings are finished with a flexible polyurethane skirting board, which is well suited for framing semicircular and curved surfaces. These planks come in a wide variety of colors. In addition, paintable options are available. Some disadvantage of this type of fillet is considered to be its rather large weight.
On painted or whitewashed ceilings, as well as tiled or sheathed with plasterboard, lightweight foam or expanded polystyrene baseboards are usually mounted. Their main distinguishing features are ease of installation, low cost and aesthetic appearance. Ceiling skirting boards made of polystyrene or expanded polystyrene often imitate stucco molding. It costs less than any other kind of fillets.
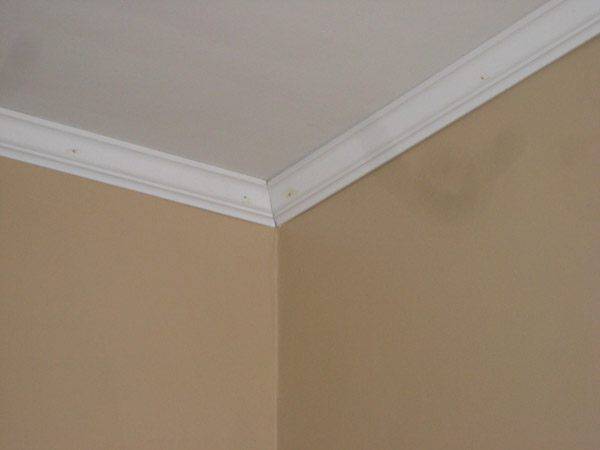
In solid rooms with expensive interiors, decorated in a classic style, wooden skirting boards can be used. They are made from solid wood or laminated MDF. The last option is quite effective. However, such fillets are somewhat fragile. Sometimes veneered baguettes are also used. They are made from cheap species (mainly pine or spruce) and revetted with a thin layer of expensive wood (walnut, oak, cherry, mahogany, etc.). Such a fillet can look no worse than one made of solid wood and at the same time costs less.
PVC ceiling skirting boards can often be seen in apartments with stretch ceilings. Such a fillet, in addition to being decorative, also has a practical function. The harpoons of the canvas are attached to it. Plastic skirting boards are also used when ceilings and walls are finished with PVC panels or MDF sheets. In this case, it is simply attached to the upper frame profile for the skin.
As for the rest of the parameters, the ceiling plinth can vary in width, color, shape, texture, etc. It will not be difficult to buy an option that is ideal for a particular ceiling finish today.
DIY installation
As mentioned above, before starting work, you need to draw up an action plan, as well as the exact amount of materials needed with a margin. Ceiling fillets need to buy 10-15% more than required, in order to avoid their shortage.
It is important to buy fillets in large quantities so that there is no shortage
To calculate the required number of skirting boards, there are online calculators that can be found on any construction site. But self-counting does not require skill. It is enough to know the length and width of the room. Next, add their value, and multiply the resulting number by 2. Divide the result by the length of the ceiling plinth, that is, by 250 cm.

Gray wallpaper with white baseboards looks good

Combination of skirting board with wallpaper in white shades
The ceiling plinth is recommended to be matched to the interior of the room
It is important that its color matches the wallpaper perfectly. To do this, you can take a small piece of wallpaper with you to the hardware store when choosing skirting boards and match the colors
Surface preparation
Preparatory work before gluing the ceiling plinths is done in advance. The surface of the ceiling is carefully examined and if flaws and irregularities are found, then to eliminate them, sandpaper is used, attached for convenience to a wooden block.
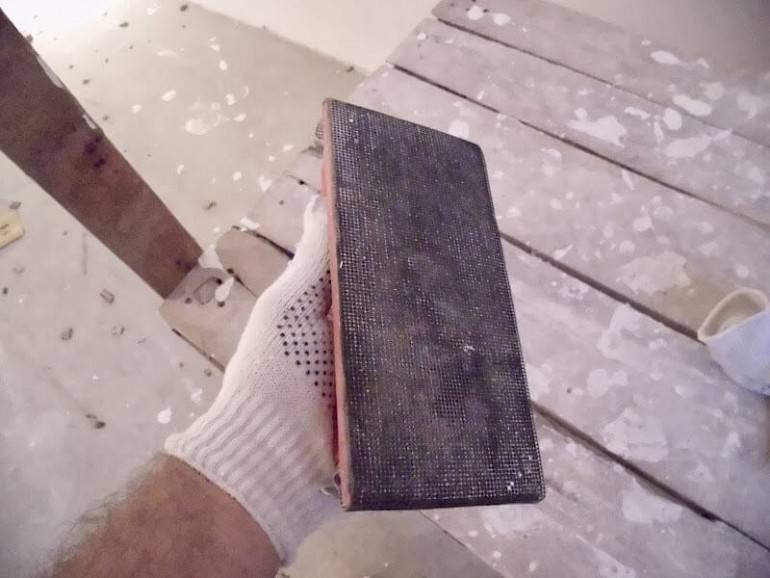
Sandpaper on a wooden block, which eliminates unevenness well
In the future, the ceiling is treated with a special primer prepared in advance. The primer must be prepared strictly according to the manufacturer's recommendation, otherwise the desired effect will not occur. After all the actions performed, the surface requires complete drying, after which you can start working.

Priming the ceiling and walls before gluing the skirting board
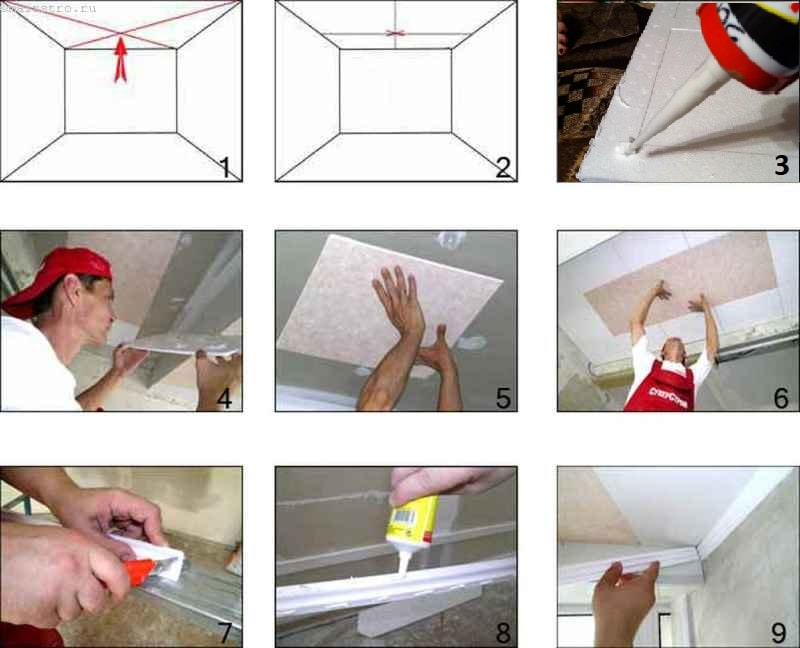
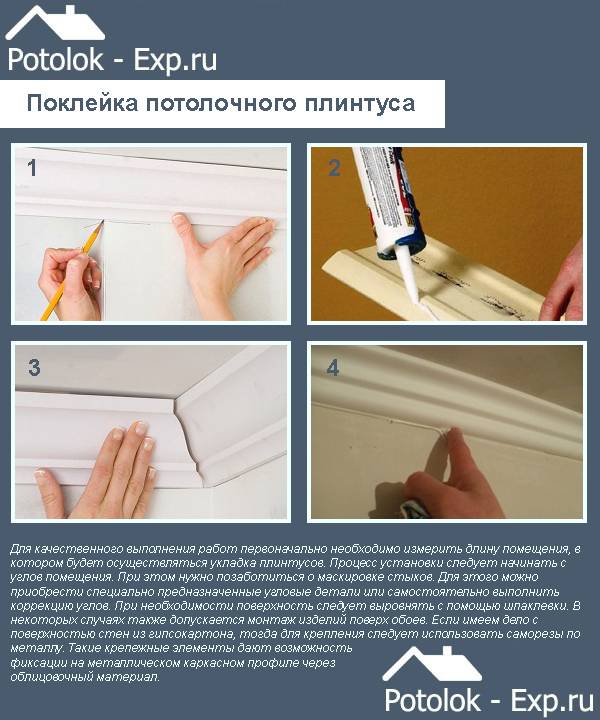
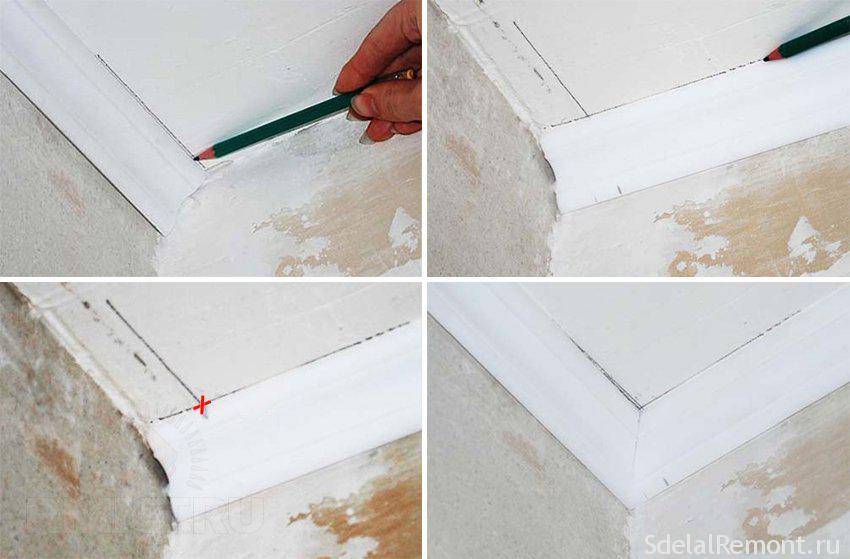
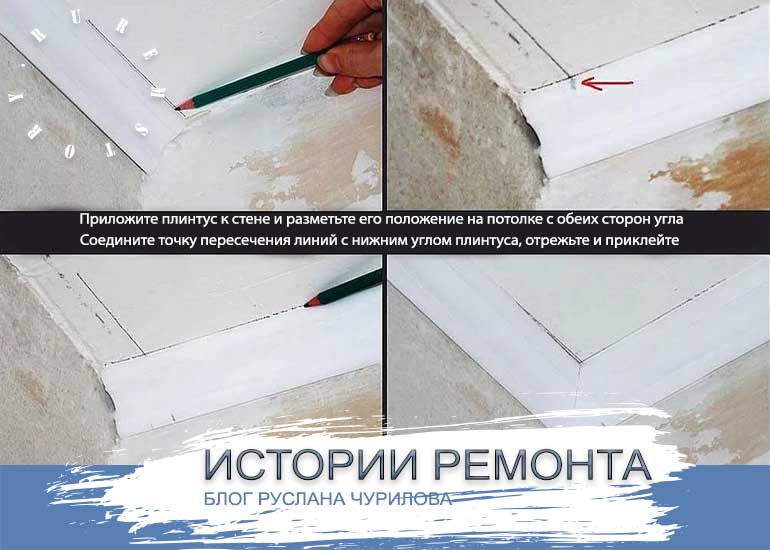
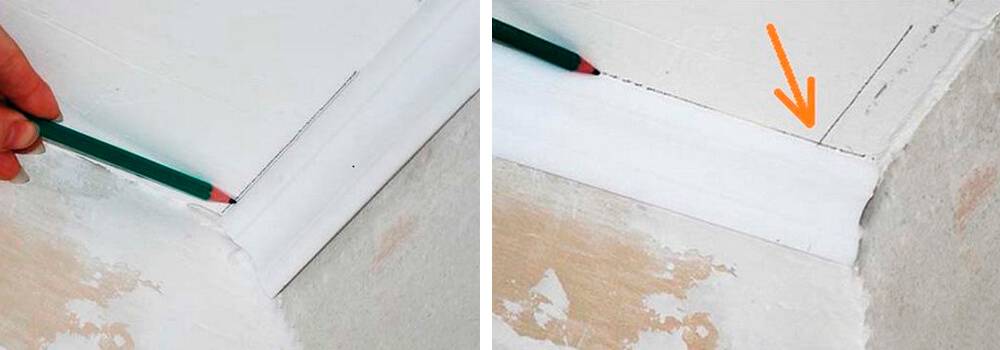
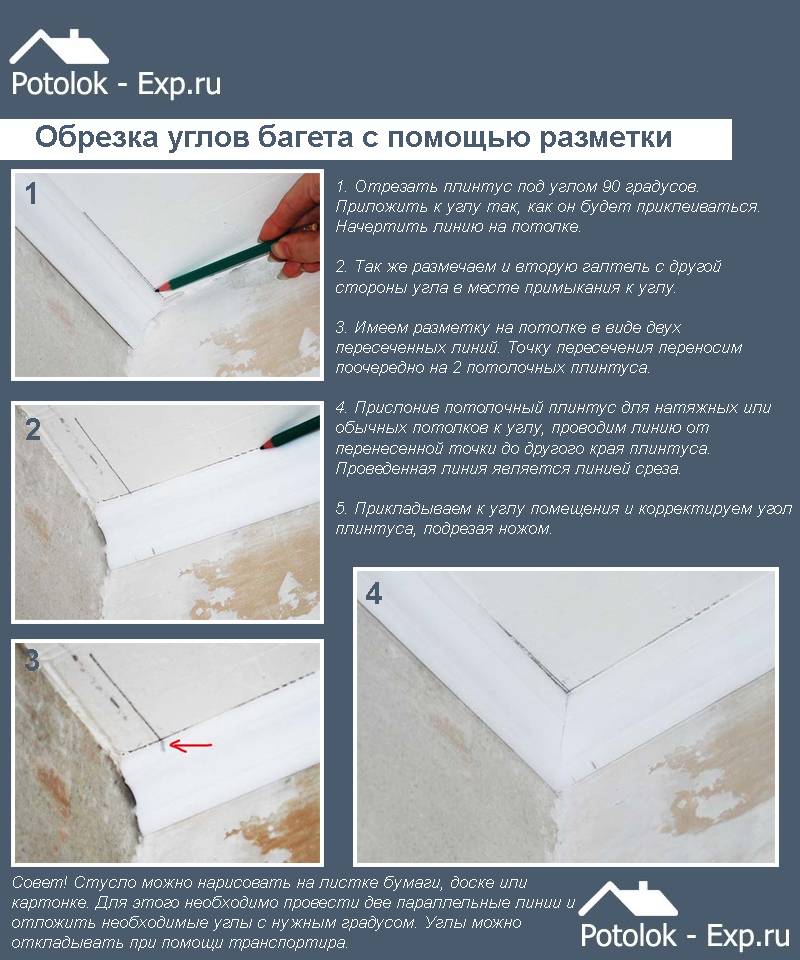
Warning WARNING! For the best result when installing the skirting board, markings are made. The ceiling element is applied to the desired location and a line is drawn along its edge
Measuring and cutting
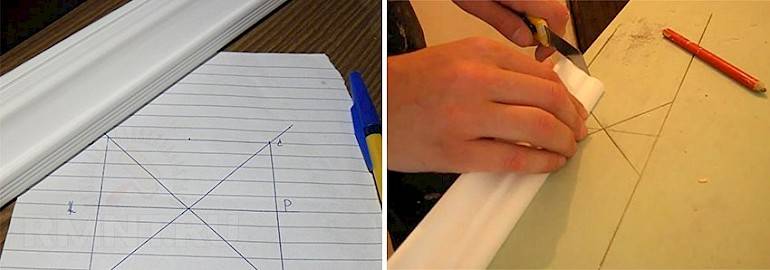
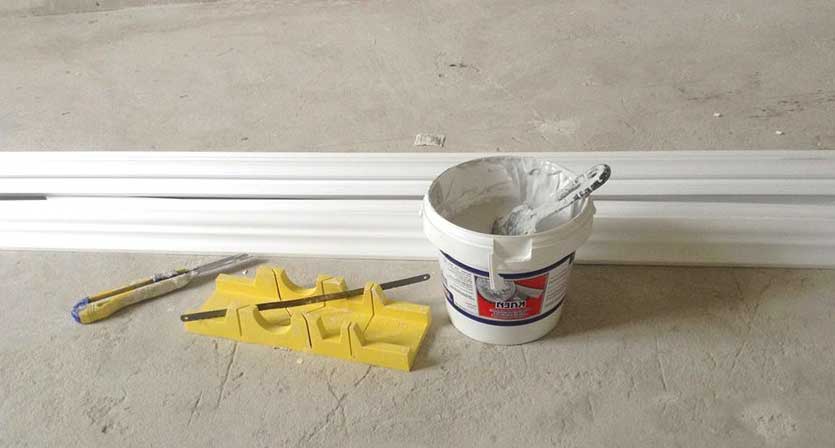
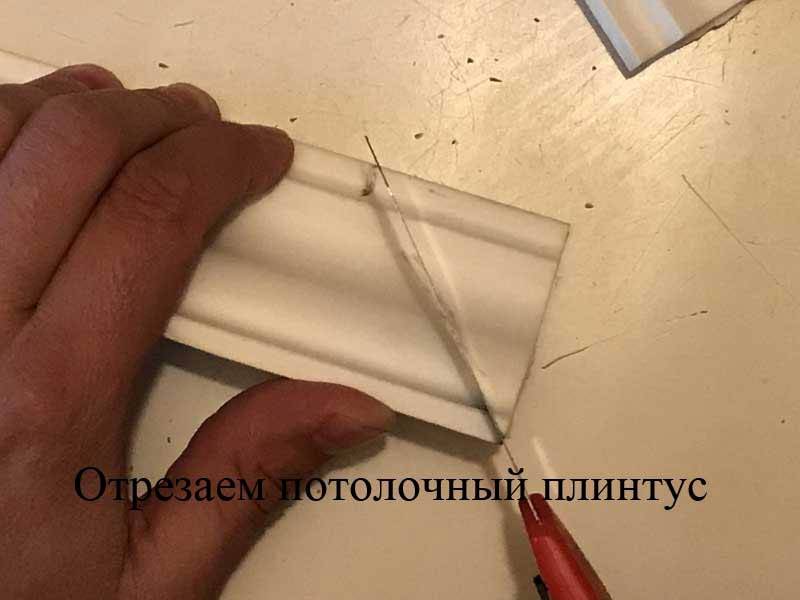
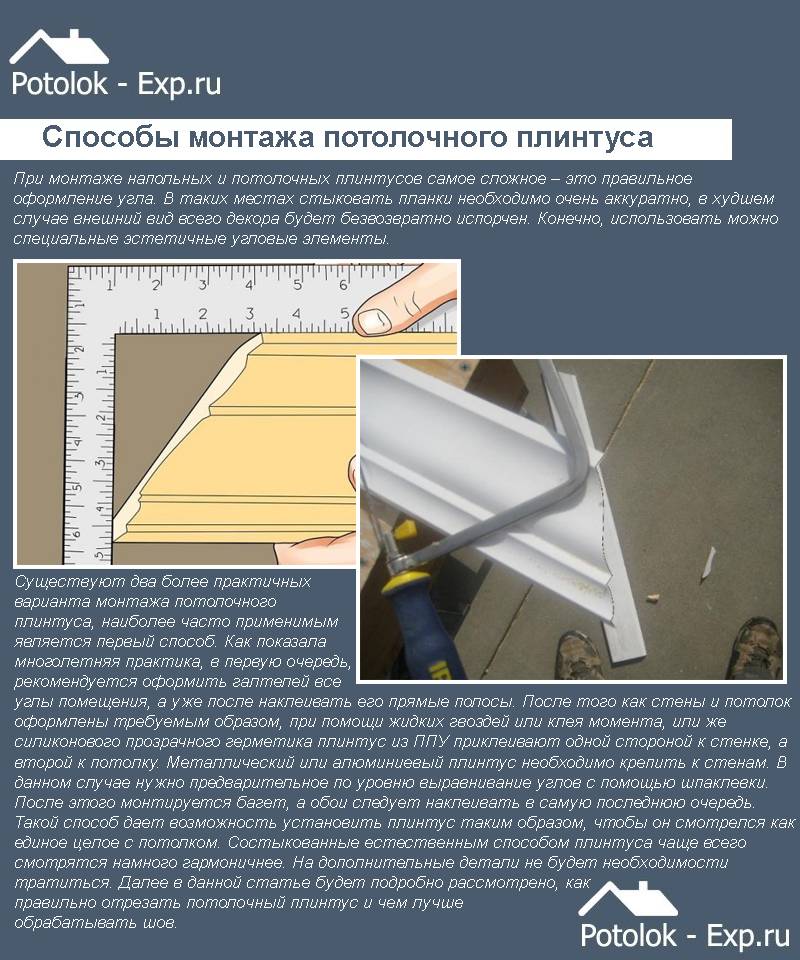
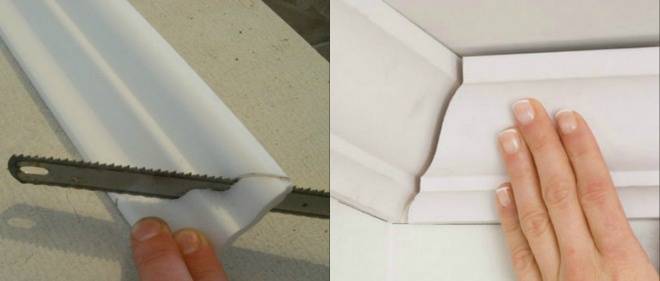
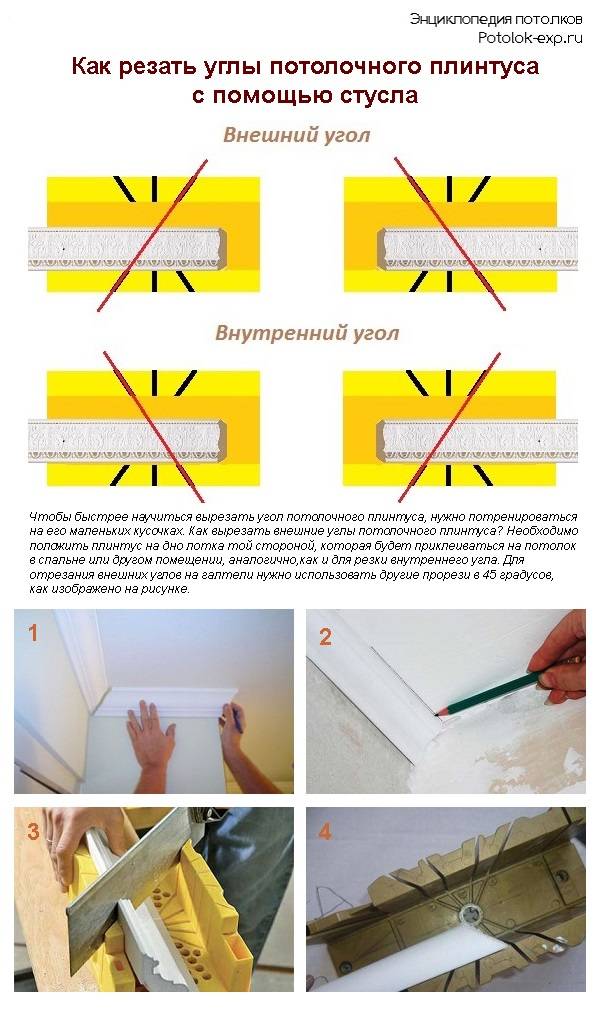
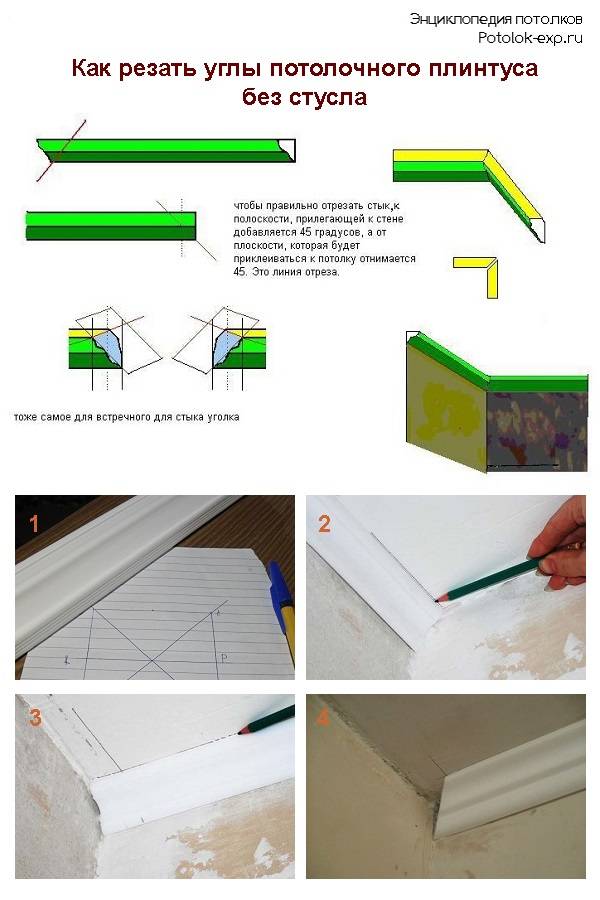
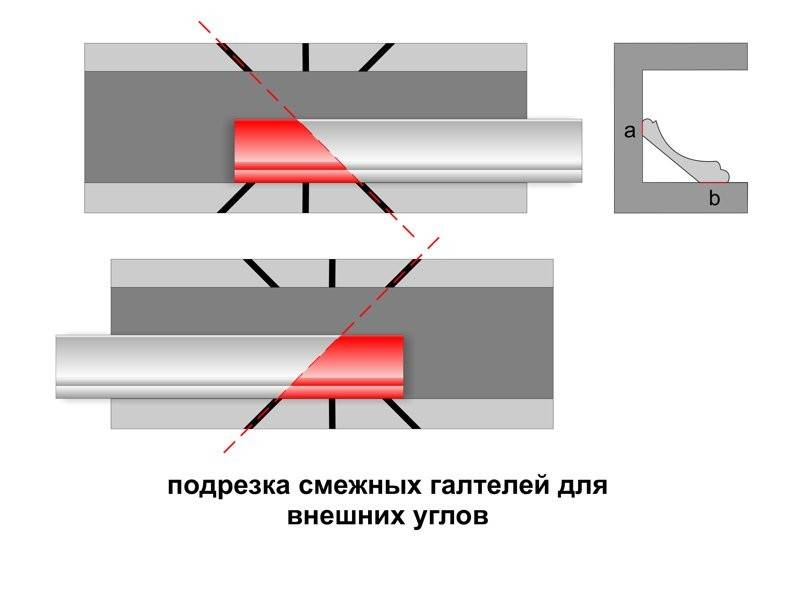
Professional renovators recommend that beginners measure the length of skirting boards before starting work. For convenience, a diagram is drawn up on a sheet, all sections are measured, a calculation is made and the elements are trimmed. It is worth knowing that every wrong action can lead to deformation of the ceiling element.
Warning WARNING! To avoid deformation, it is recommended to practice on the unnecessary part.
Application
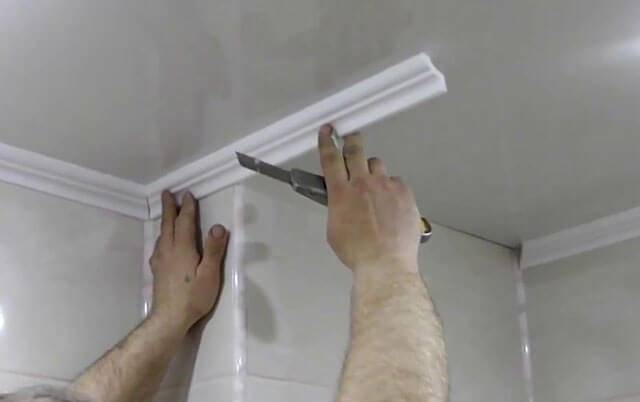
There is a roughness on the inner surface of the ceiling element, which must be removed with sandpaper. At this stage, a spatula 8-10 cm wide is needed, with the help of it the solution is applied to the entire surface of the plinth, which will subsequently interact with the walls and ceiling. This procedure is not difficult, even for a beginner. The main thing is to ensure that the solution does not fall on the outside of the baguette.
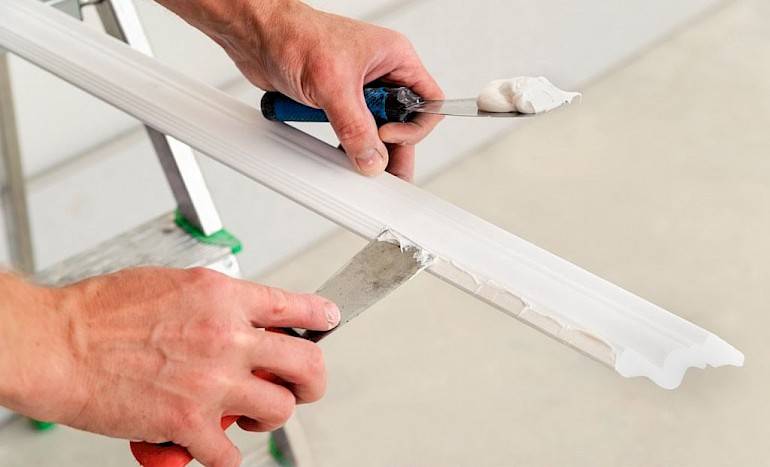
Gluing
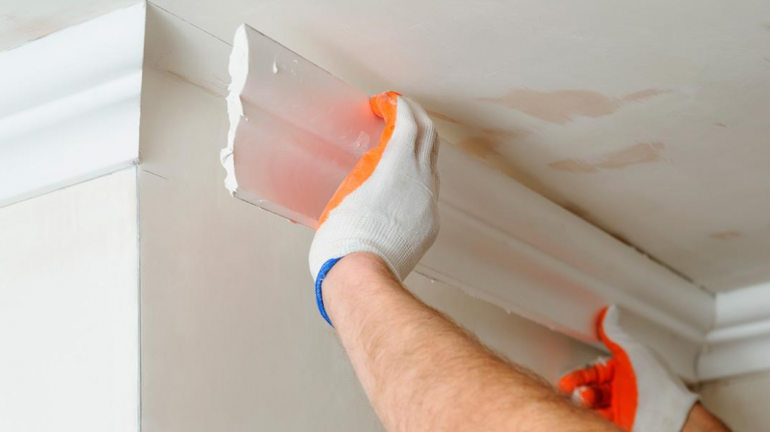
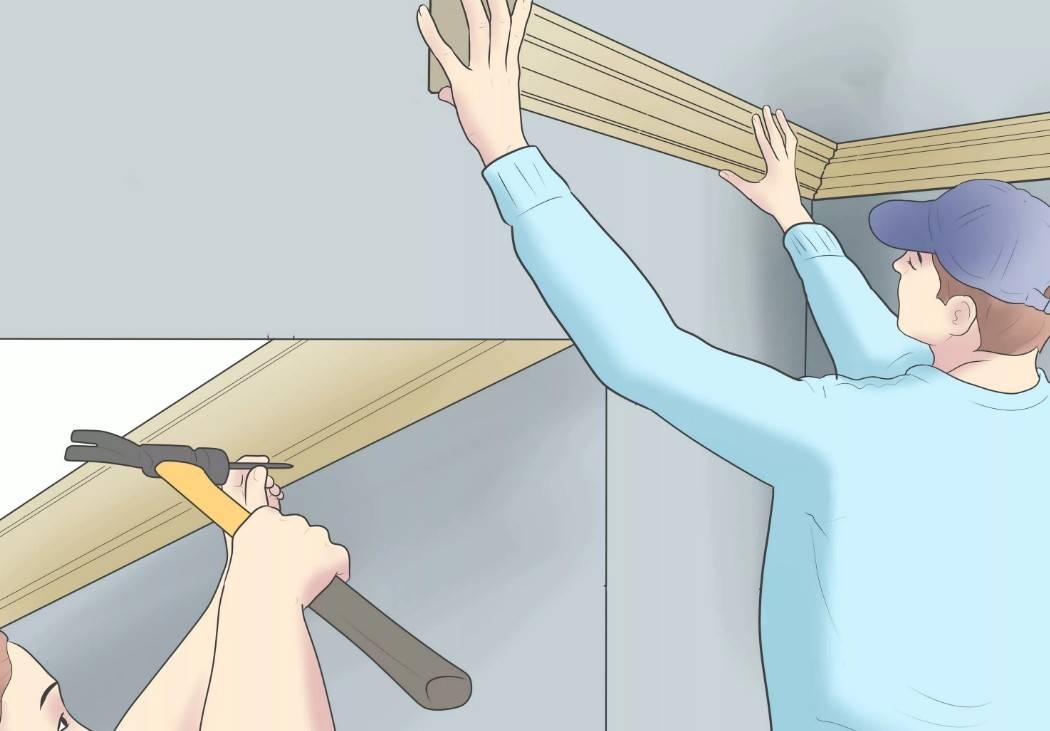
Ceiling skirting boards are glued from the corner of the room to the corner. The site for starting work should be chosen the one that is in the field of visibility. Before connecting the element to the surface, it is necessary to check that there is no excess glue. In another case, if there are surpluses, then later, when connecting the elements, it is difficult to get rid of the remnants of the glue. Then the element is connected to the ceiling surface. The markup that was done earlier will help you verify that the installation is correct. When choosing an instant adhesive, there is no need to press the skirting board hard against the ceiling surface. Thanks to this solution, the element is fixed instantly. After the skirting board has adhered to the surface, immediately remove the remaining glue from under the edges until it is completely cured.

Hand Right IMPORTANT! Excess glue is not always removed.If there are irregularities or other defects on the surface, then the solution carefully smoothes them out, which gives an advantage when the edges of the skirting boards are formed.
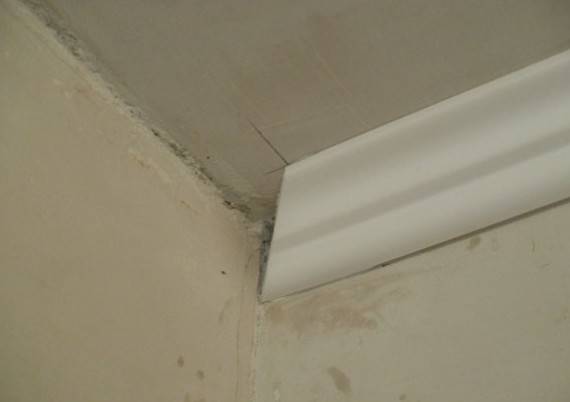
How to join corners correctly?
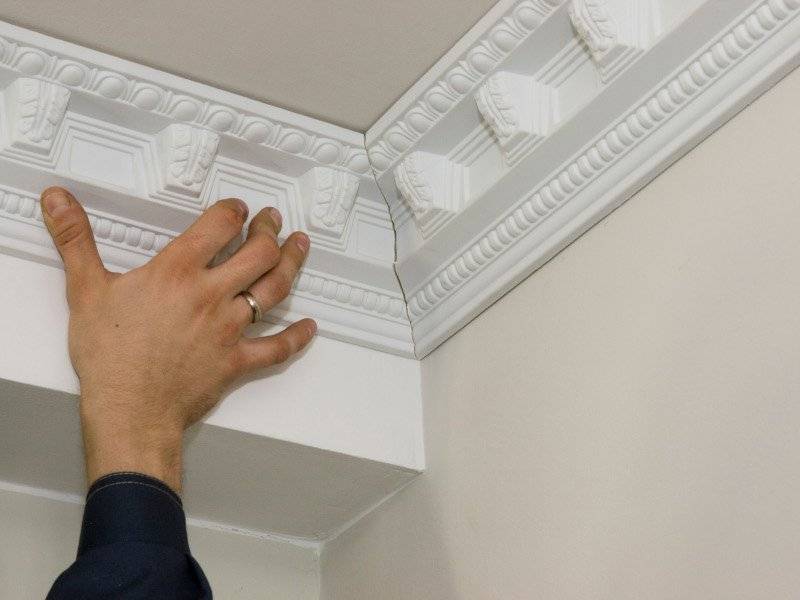
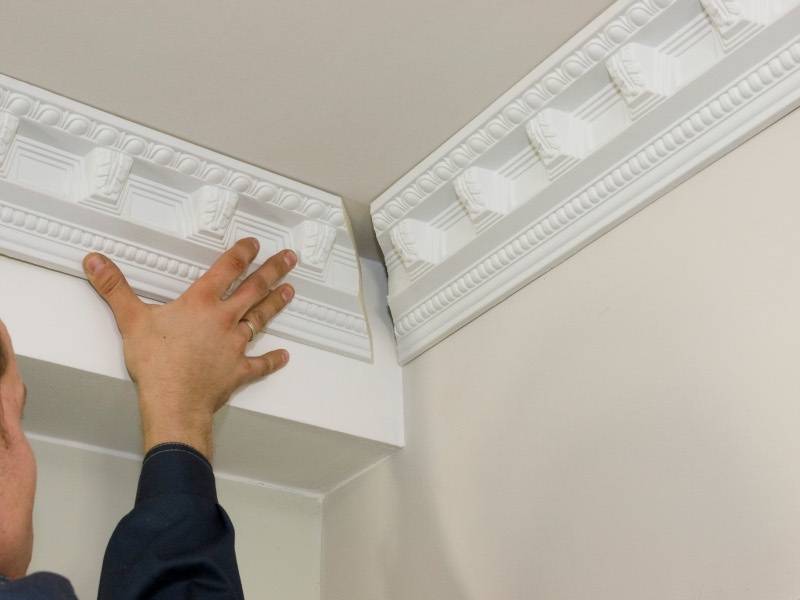
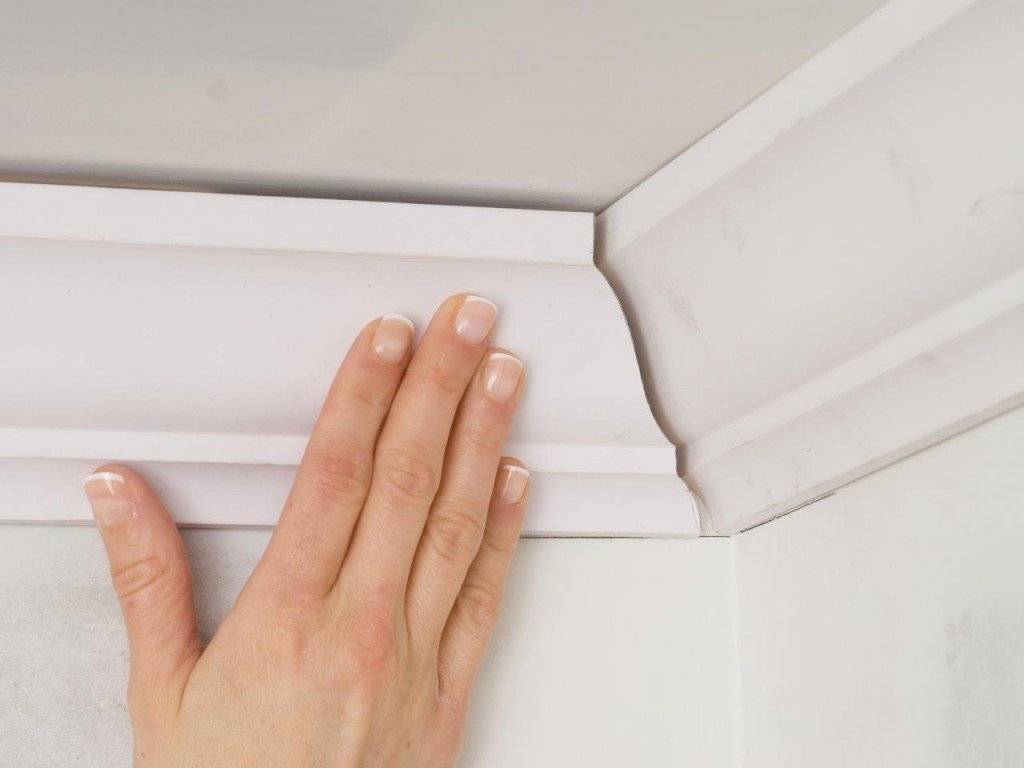
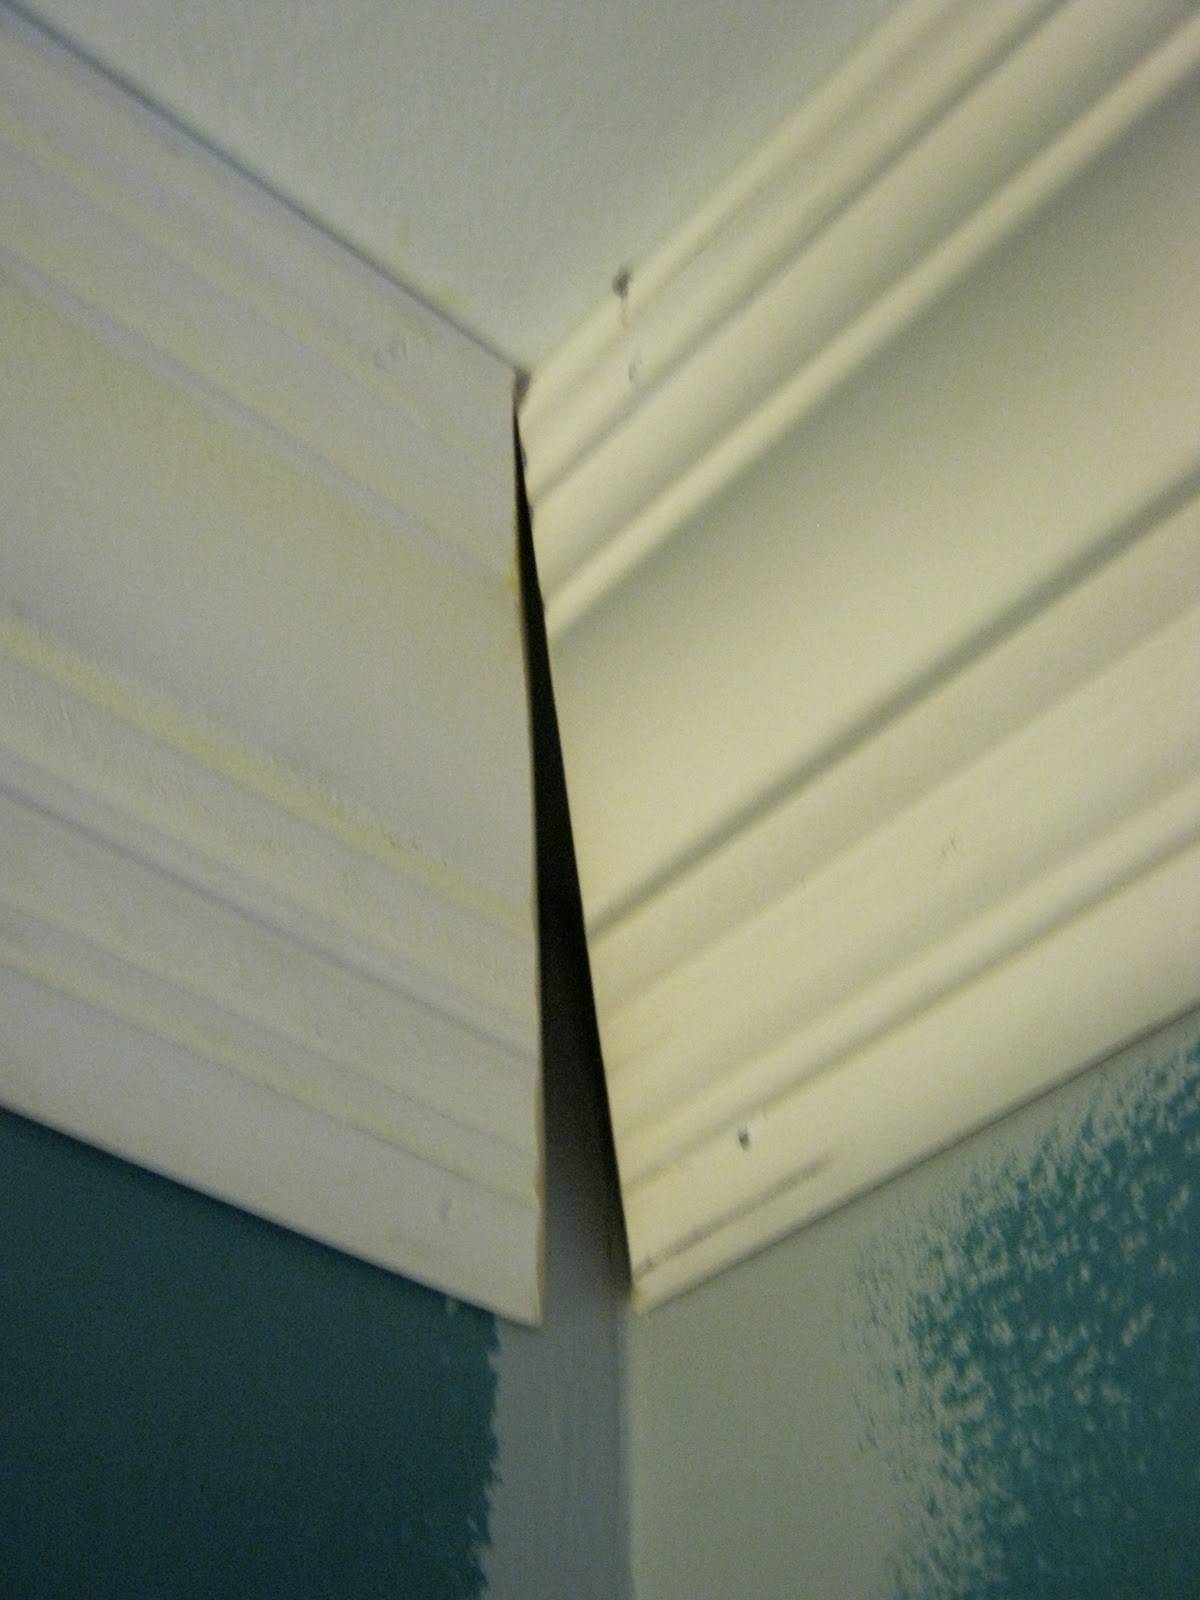
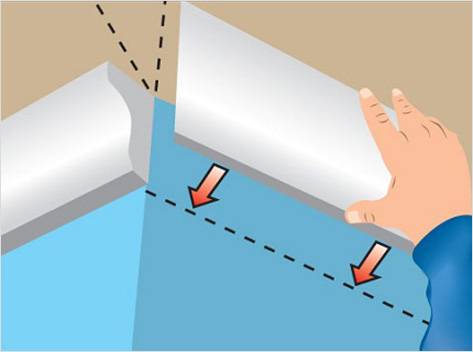
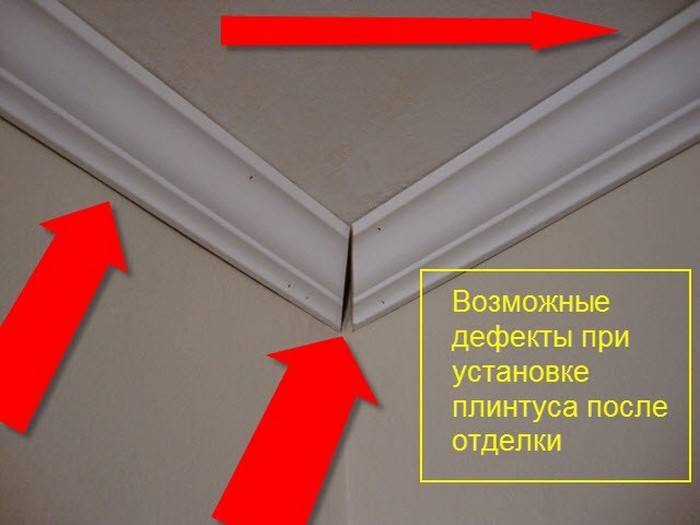
When connecting the second element to the surface, often for beginners when joining skirting boards, common mistakes appear, no glue is applied to the inside of the element. It is always worth remembering that glue is necessarily applied to each element of the skirting board. After all, it takes a small amount to avoid surplus or make it minimal. To dock all the elements, you need to press the element into place and dock with another element. In this case, care is required, it is necessary that the elements ideally coincide with the joints. Otherwise, all the flaws will be striking not only the owner, but also all the guests.

Features of gluing on different ceiling surfaces
Difficulties also arise when there is no proper understanding of how to glue baguettes to a ceiling made of different materials. It is a mistake to think that different surfaces need exactly the same approach.
Stretch ceiling
This option is very popular. This is easy to explain, because it is possible very quickly and without much effort to get a flat surface, which can have a different design.
It is important to take into account one feature when you need to choose a fillet for such a coating: the side of the part that will face the ceiling remains without adhesive. That is, the fixation is carried out directly to the wall.
Therefore, the products must have the following qualities:
- Low weight. In this case, foam, polystyrene foam, plastic and some types of polyurethane are suitable. At the same time, we glue the ceiling plinth to compounds that have a quick and reliable fixation.
- The side facing the ceiling should be smaller than the side facing the wall.
- Additional support points will be needed to set up wooden moldings. These can be: dowels, hidden anchors.
When installing the skirting board on a stretch ceiling, it must be borne in mind that fastening will be made only to the wall surface
Designers advise choosing PVC products, they are in best harmony with tension structures.
GKL ceilings
How to glue skirting boards to plasterboard surfaces? This is a fairly simple procedure, because the base is almost perfect.
A little attention should be paid to the joints of the gypsum boards, because they may contain the remnants of the putty. Any irregularities can be easily eliminated with sandpaper
Installation of plinths on gyiscardboard ceilings
Plastered ceilings
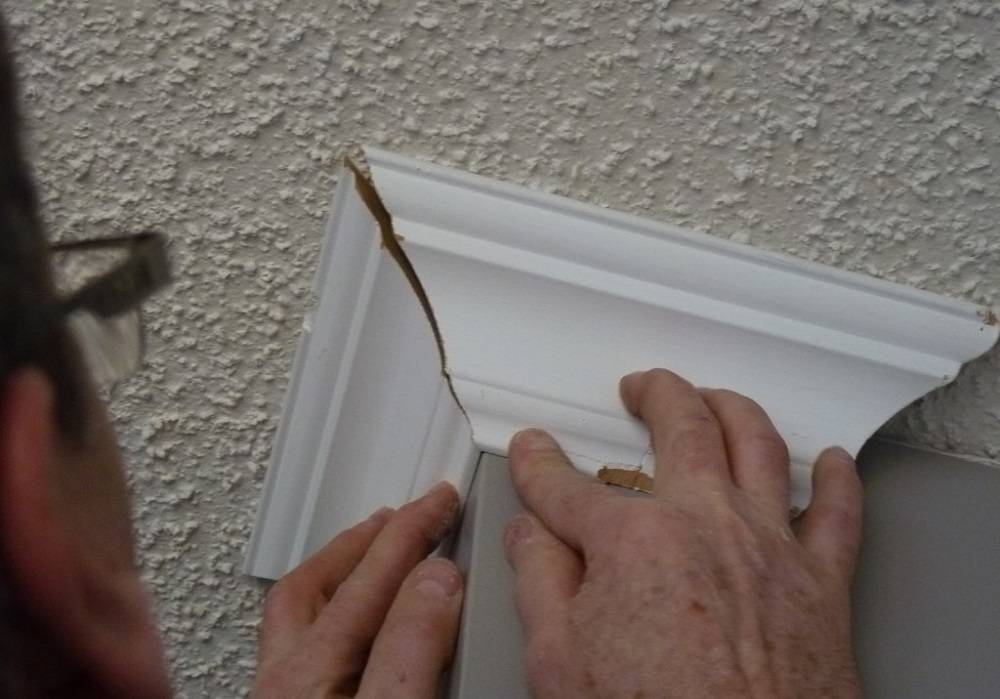
Such surfaces have their drawbacks. Therefore, before installing the ceiling plinth on a plastered ceiling or wall, their evenness is checked. If the defects are small, then there is no need to fix them. For such a case, you can use fillets with soft edges, which will not create very noticeable irregularities.
Summarizing the above, it becomes very clear that the installation of moldings requires proper attitude. All the talk about how to quickly glue skirting boards to the ceiling, but maintain quality, does not make sense, since this is a guarantee that the desired effect will not be achieved.
Masking joints and painting
If, after gluing the ceiling plinth, there are small gaps between the planks, this is absolutely not a problem, because they can be easily eliminated by rubbing in a white sealant. If you have not yet whitewashed and painted the ceiling, then the following is the best option.
With a light putty, you need to go over all the glued strips, smearing them like a coloring compound, and after drying, you should remove the excess with a fine sandpaper or a special grinding sponge for plastering.After such a final finish, the ceiling and moldings will become a single whole, and you, in turn, will not find a single gap.
After you have glued the ceiling plinth and eliminated all the flaws, you can start painting the plinth. The process of painting the skirting board is considered optional, but if you want to give your ceiling a finished and more attractive look, you still need to paint the skirting board.
But if the plinth is white, then it must be painted, otherwise it will begin to acquire a yellowish tint over time. For this purpose, as a rule, water-based, acrylic or latex dyes are used. You can take nitro paint, but the surface of the baguette should be primed before applying them.
As a rule, for the best adhesion of the glue, painting should be done no earlier than a day after the pasting procedure. The most practical coloring composition is acrylic or water-based paint. Carefully paint over each fillet with a brush so that it does not paint over everything around. It is best if you do this before you apply the wallpaper.
We have now figured out how to properly glue the ceiling plinth. Take into account all the subtleties of installation, be sure to carry out the installation before the final finishing of the walls, start from the corners, and then fasten the baguette in a straight line
When attaching the molding under decorative lighting or tensioning fabric, the technology will be different, but not fundamentally, it is important to remember some of the nuances, and the work will go like clockwork
Skirting board types and glue selection
It is necessary to select a tool depending on the material from which the plinth is made. Some adhesives can destroy the structure of the product and are not suitable for the job. You can find different types of borders in stores, the main ones are described below along with recommendations for choosing an adhesive.
Polystyrene and Styrofoam
These skirting boards are the most inexpensive and practical, widespread, sold in every hardware and hardware store. They can be painted - the appearance will be no less attractive than gypsum ones. We sell ordinary skirting boards, two-level eaves, fillets (skirting boards with a groove). Even in the absence of experience in repair, foam and polystyrene curbs can be glued to the wall, the process is simple.
Many are interested in what is glued first - wallpaper or plinth first? Foam elements can be glued directly to the wallpaper, the reverse procedure is less convenient. Due to their low weight, the skirting boards will stick to any glue, but their fragility must be taken into account. You need to cut it carefully, then grease it with two strips of glue. The use of acrylic putty will be effective. The gaps between the planks and the ceiling can be repaired with a gypsum finishing mixture, to which a little PVA glue has been added. The joints are sealed with white sealant.
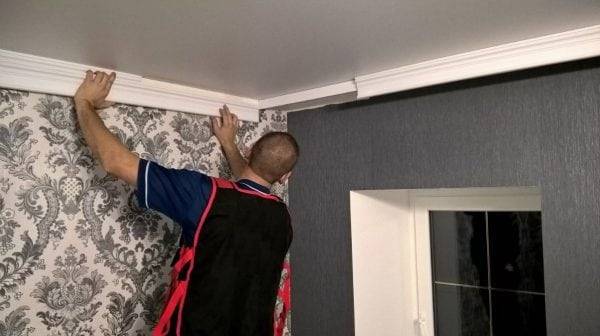
Polyurethane and plastic
Polyurethane is a flexible material that is resistant to wear and temperature changes. Usually, polyurethane skirting boards are bought for those areas where there are a large number of corners, bends, recesses of different sizes and shapes. They are especially relevant for rooms with columns, they are perfectly combined with a suspended ceiling, they are successfully glued to a stretch ceiling.
When choosing an adhesive, one must take into account that such skirting boards can shrink during operation. The joints are made as tight as possible, any gaps, even small ones, are filled with silicone sealant. Use reliable glue - "liquid nails", "Moment", "Titan". Be sure to glue the ends of the baseboards with glue, it is advisable to buy a special tool for the latter.
Plastic skirting boards usually come with corners - external, internal, connecting strips. It must be glued with "liquid nails" or other glue with high adhesion to the surface.
Plaster and wood
Wooden skirting boards are used less often than others, they require professional skills and a very reliable glue.Basically, they are purchased for apartments, houses with a classic interior, they are not recommended in high humidity. Lighter models are glued on "liquid nails", and heavy baseboards are additionally drilled with self-tapping screws.
Gypsum cornice is very durable, has an excellent margin of safety. Even molds are sold for self-casting of parts, to which dry mass is attached. For reliable adhesion, a mixture of alabaster with PVA or other polyvinyl acetate glue is used. More massive structures are also coated with "liquid nails".
How to choose?
When choosing an adhesive for mounting a baguette on the ceiling, you need to consider the product that is best suited for the material from which this decor item is made. It makes no sense to save on the quality of the adhesive, since the finished result may ultimately be unsatisfactory. In various cases stipulated by the design project, the ceiling plinth can be fixed from above to the wall directly on the vinyl wallpaper, fixed directly to the stretch ceiling, it can be glued to the tiles in the kitchen or to the tiles in the bathroom. Experts advise you to first choose and buy a baseboard, and then buy glue that you can use for it.
Assembly adhesive designed for foam fillets, polystyrene moldings, PVC moldings, as well as compounds for joining joints, come in different price categories. Products from European brands tend to be somewhat more expensive than domestic options. In the matter of choice in terms of price, you should be guided by your financial capabilities and preferences, as well as the quality of the product.
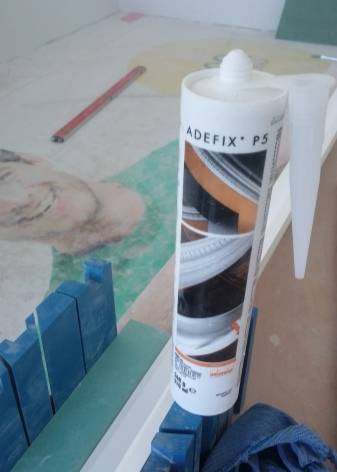

For the correct choice of mounting adhesive, some recommendations may be useful to you.
First of all, pay attention to the expiration date of the product. If this period has already passed, then the adhesion of such a composition may be low, and therefore unsuitable for high-quality installation work.
Study carefully the label of the glue, where its composition and purpose are indicated.
You should be aware that waterproof compounds are labeled accordingly on the packaging. Products intended for use in non-burning rooms or outdoors have an image of a mercury thermometer or an icon in the form of a snowflake.
Pay attention to the integrity of the adhesive packaging. Minor scratches or damage can cause the adhesive to thicken or dry out. If air gets into the tube with glue, it means that the polymerization process has already begun inside - such a product is not suitable for installation work.
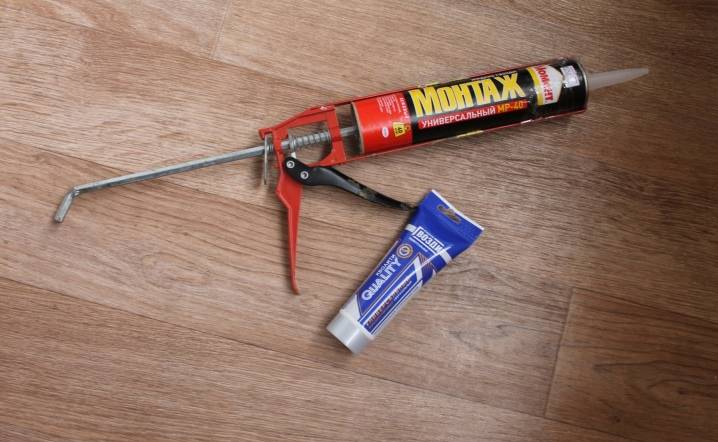
When choosing an adhesive composition, consider the decor material. For example, a skirting board made of expanded polystyrene can be glued with any universal compound that does not contain organic solvents. It is best to choose a transparent glue for such fillets that does not contain additional fillers. As for wooden moldings, liquid nails are best suited for their installation. The glue is applied in a well-ventilated area, since it contains organic solvents, and before applying the adhesive, the working surface must be thoroughly cleaned of plaster and primed. Therefore, in addition to glue, you will also need to purchase deep penetration primer.
An overview of the installation adhesive for the ceiling plinth in the video below.

