Possible problems
Several mistakes can be made during construction.
Connection of foundations - due to different loads, a difference in subsidence is possible, due to which the furnace may be skewed in the future.
If you take river sand instead of quarry sand, the masonry mortar will not be strong enough due to the smoothness of the sand grains and their poor adhesion.
Hewn, cut brick breaks down faster, so when laying it, you should try to install it with the cut side inside the seam.
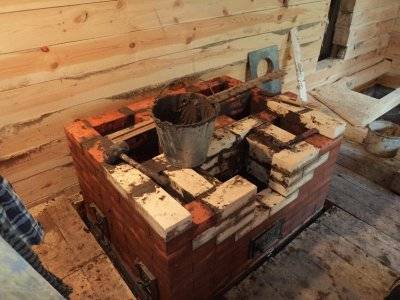
When laying the chimney, it is necessary to use a special plug so that the mortar does not remain on the inner walls, while the surface of the masonry is cleaned from the mortar every 4-5 rows.
If you do not arrange a cleaning hole in the places where the chimney changes direction, soot will accumulate in it. When installing dampers and doors, one should not forget about the property of metal to expand - masonry cannot be performed without a small gap.
These and other mistakes can be avoided by consulting an experienced craftsman before starting work.
Recommendations for using a small stove
In order for the oven to be useful and save money, it is necessary to monitor its condition. Even a small crack increases the loss of efficiency. For better heating, only dry firewood is used for kindling. Be sure to close the view.
Thorough cleaning of soot is carried out once - in the summer, in winter they cost a little cleaning, but at least 3-4 times per season. The accumulated soot reduces the heat dissipation of the device. In the event of a malfunction of the view, latches or doors, the stove must not be melted, since it is they who control the draft and help to evaporate the carbon monoxide.
Despite all the nuances in the construction and operation of a mini-oven, it acts as an excellent heating device, and can compete with modern gadgets in the speed and delicacy of cooking many dishes. No wonder our ancestors considered the stove to be the soul of the house and put the structure in the middle of the hut.
Not even several centuries have passed since it returned to us, only in a slightly different form. But its small size is not the main thing, because in terms of functions and the wonderful atmosphere that is created in every home, the device is very similar to the good old Russian stove.
Purpose of the street oven
In addition to cooking in the fresh air, it will become an assistant in many things:
- canning vegetables, berries;
- drying mushrooms, fruits;
- smoking meat, fish.
There are many advantages to purchasing it. The garden stove does not consume gas or electricity, as it runs on wood or coal, its location near the gazebo will make it convenient to receive guests, dinner with the family, and the interesting design of the structure will turn it into a decoration of the estate.
Users often search for:
- Woodpile for firewood in the country
- Firewood storage shed
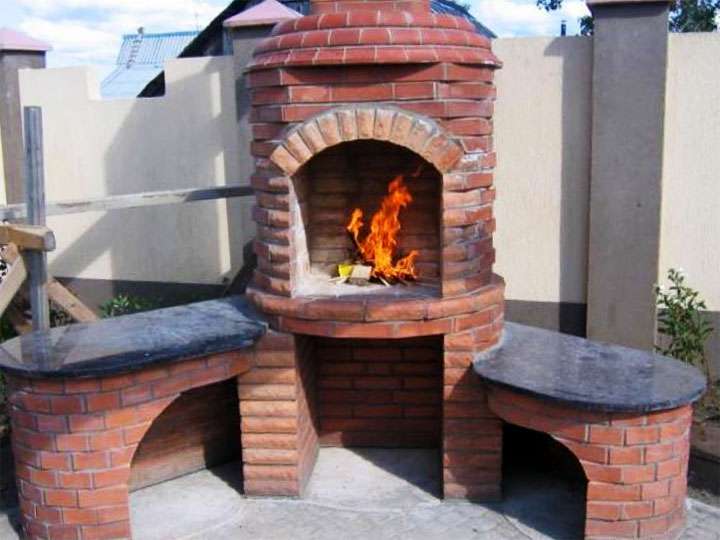
If you decide to make it yourself, it is worth considering that:
Buying quality material is a guarantee of the durability of the device.
Better to choose a combination oven
This is more practical.
When choosing a place for a future structure and carrying out construction work, it is important to observe safety precautions.
Accurate calculation of the amount of materials will save money and reduce the time of all processes.
Types of brick ovens
Differences in the schemes of furnace devices are manifested in the features of the masonry, shapes and sizes.
Simple barbecue
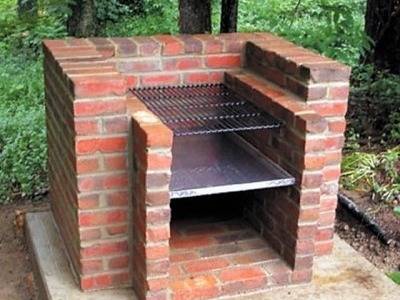
The demanded construction of a street building is a barbecue stove. It is erected using simple brickwork, which resembles the letter "P".
The inner walls have several protrusions for fixing meat grates and a metal sheet for coal. The structure is small in weight, so you don't have to equip a massive foundation.
For the base, choose trimming concrete posts. Erect the device to the height that will be convenient from the position of comfortable cooking.
Street stove with smokehouse
In the design of such a furnace, a smokehouse is equipped above the hob in the smoke collector. To create it will turn out from more affordable materials than barbecue. A feature of the stove with a smokehouse is the absence of refractory masonry.
Diagram of a straight-through chimney for a stove
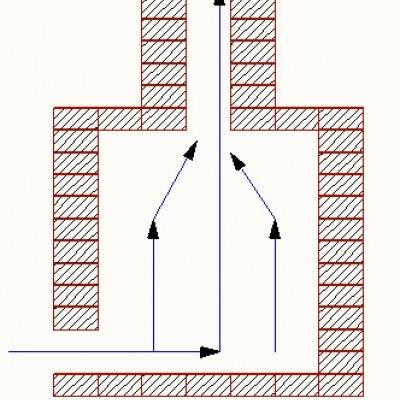
This device is more difficult to build than the previous ones, but the increased usability and attractive appearance cover all the shortcomings.
In appearance, these products look like a fireplace. However, this is not quite true. It is dangerous to use an open flame in this type of stove. This is due to the structure of the pipe - it is performed in a straight-through manner.
It is cooked in such ovens using coal. Firewood is used only at a great distance from residential and utility buildings.
Factory furnace prices
Owners of summer cottages, country cottages should consider stationary, mobile purchased stoves.
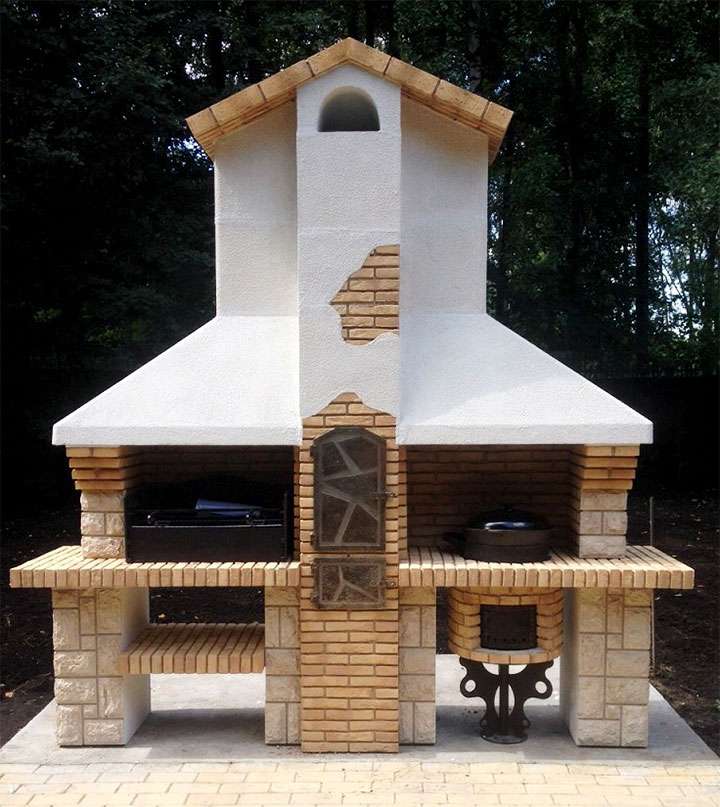
A barbecue stove made of red refractory bricks, 1.4 m long, 0.98 m wide, 2.12 m high, 1.3 m deep, excluding installation, will cost 78 thousand rubles. The same construction of aerated concrete - 55 thousand. The price of a brick oven with a length and depth of 2 m, equipped with a cutting table and a built-in sink will be 105 thousand rubles.
A product of smaller depth, 71 cm. Without additional devices and cladding will be released in 54 thousand.
Self-construction of the furnace will be several times cheaper. Regardless of the type of construction chosen, it will delight the owners with delicious meals on the fire, make evenings warm and cozy with family and friends.
Materials and tools
First, prepare the required tools:
- shovel;
- solution bucket;
- level vertical and horizontal;
- pliers;
- trowel;
- pickaxe;
- hammer, including rubber.
We prepare reinforcement and formwork, if we do the concreting of the foundation with our own hands.
We purchase a sufficient amount of refractory, fireclay bricks to cover the entire structure. Building materials must:
- be resistant to temperature changes;
- not be exposed to corrosion and other influences from the outside;
- be whole;
- be certified.
Then we check the availability of the necessary metal inventory:
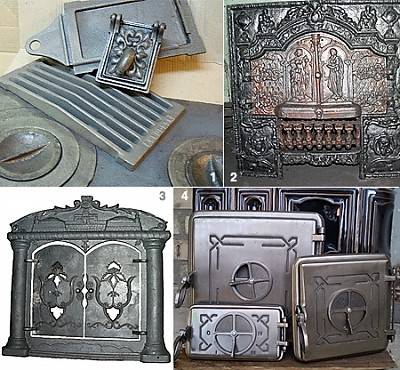
- pipes;
- lattices;
- staples;
- gate valves;
- doors;
- corners.
Their number must correspond to the design of the furnace.
We are preparing a solution for masonry, which will include:
- clay;
- sand;
- alabaster;
- cement, etc.
Pre-consult with the builders and choose the most appropriate solution. Experts advise cement-sand grade M250 and higher.
Project selection
If you like grilled meat, then the elements of barbecue and barbecue should be included in the oven. For smoked meats, you can mount a smokehouse. The Russian street oven provides a hob, which will provide the owners with healthy boiled, steamed or stewed dishes. And the presence of a place for a cauldron - exquisite oriental: pilaf, shulem, shurpa, etc. For each type of stove - its own schemes and subtleties of masonry.
In addition to functionality, it is necessary to think over the overall appearance, which will be harmoniously combined with the entire site and with the house.
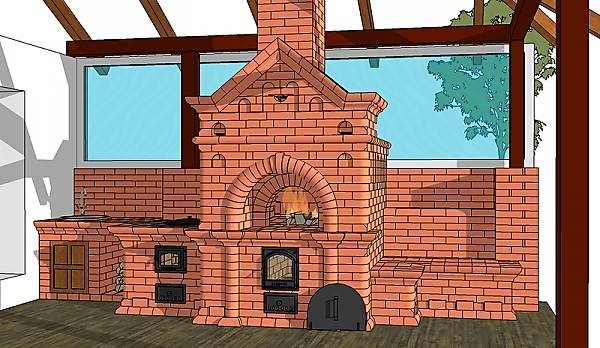
Photo 2. An example of a brick construction project with a Russian stove, sink and cauldron. A comfortable, warm seating position on the side.
Combined brick garden stove
This model is designed to be built in a gazebo. It combines the advantages of a Russian stove and barbecue.Enough space is required to erect such a unit. Benches, chairs, tables should be located away from the structure.
The main stages of laying a garden oven:
You need to decide on the parameters of the device, prepare a drawing, and also purchase everything you need for work.
It is important to make a solid foundation of cement and sand. How to lay the base was discussed earlier.
It is necessary to wait a few days for the foundation to solidify well.
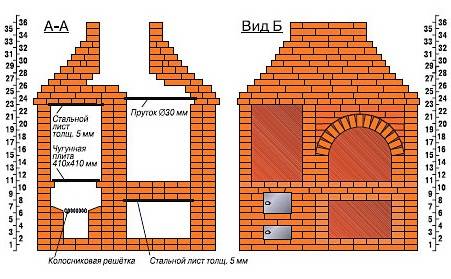
The laying of the stove is done according to the drawing
The solution is mixed from sand and clay in a 3: 1 ratio.
The Russian garden stove is equipped with two grates, which should be located 1 m above the stove. One of them is intended for making a fire, and the second one will prepare food.
The barbecue must be placed on a concrete base. You need to organize two compartments: a cooking table, where you can integrate a sink, and a brazier equipped with a smoke pipe.
The chimney is the main part in the gazebo arrangement. The most convenient and correct shape is trapezoidal. When installing this system, you must be careful, because the slightest mistake can lead to a malfunction of the structure.
Using the blueprints, there will be no problems with the construction of a Russian stove and barbecue. The main thing is the exact observance of the sizes and required shapes.
How to make a Russian summer brick oven for outdoor cooking
Summer Russian stove suitable for cooking dishes of any cuisine in the world. In it you can bake bread, pies, flat cakes, lavash, as well as Italian pizza. The outdoor oven is also designed for cooking fish and meat dishes. A Russian stove on the street is capable of keeping warm for a long time. Its main disadvantages are its large size and irrational high fuel consumption, which also increases because such a furnace takes a long time to warm up. It is recommended to heat an outdoor stove for cooking only with hardwood firewood.
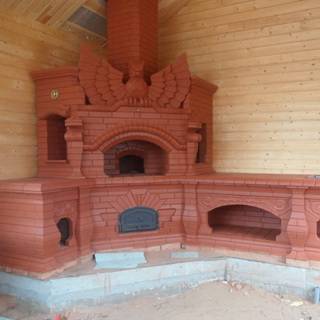

The classic outdoor cooking oven has no smoke ducts. The improved Russian stove additionally has a heating shield with smoke channels and a kitchen stove.
A street Russian stove on the street under a canopy is placed on the base - a baking oven. Above is the furnace crucible and the furnace.

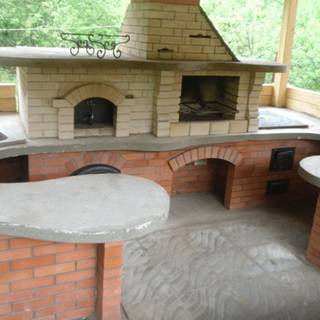
Firewood is burned in the crucible, food is prepared. The furnace mouth is located in the furnace for the exit of flue gases from the crucible. Above the mouth there is a furnace smoke collector, and above it - a chimney. The walls of the inclined chimney serve as a second gas threshold.
The choice of the size of the firebox-crucible depends on the purpose of the stove.
When building a Russian stove on the street with your own hands, its outer walls should be lined with thermal insulation to reduce heat loss.
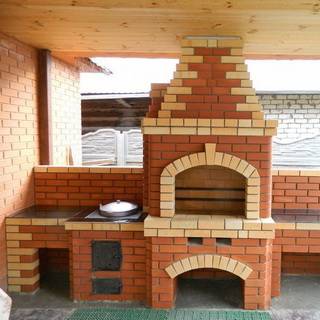
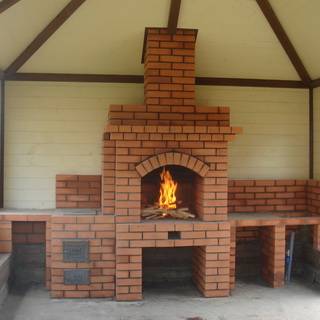
To do this, you can use vermiculite with clay or expanded clay and basalt wool. You can cook in such an oven in the cold season at temperatures down to -10 ° C, but much more firewood will be required. Look at the photo of the stove on the street - options for its arrangement are demonstrated:
Choosing the best place
The location of the stove for a garden house must be approached with all seriousness, since not only effective heat transfer depends on this, but also your safety from a fire. Of course, ideally in the old days, and even now, the place where the stove will stand was planned before the construction of the house began.
Here are the basic requirements for determining a place for a stove:
- The room where you plan to install a wood-burning stove must be at least 16 sq.m.
- The stove must be installed on a solid foundation, which means that there should be no floor beams underneath. The chimney should exit in a place where there are no overlaps.
- Building near the outer wall is not desirable, because precious heat will be given to the street. Therefore, it is better to determine it in the center of the house, the chimney will come out in the area of the ridge, and the pipe will be less in height. For timber houses, central placement is recommended for fire safety reasons.
Now let's talk about the features of choosing a place for the oven. The best option to ensure good heat dissipation is to place the stove so that all the walls can come into contact with the air inside the dwelling. Rooms should not be large, then you cannot do without additional heat sources.
Therefore, ideally, it should be placed in the opening of the partition between the rooms, and the firebox would go out in the kitchen or hallway area. On the one hand, the kitchen also becomes warm with the ability to cook, and on the other hand, it removes garbage from living quarters.
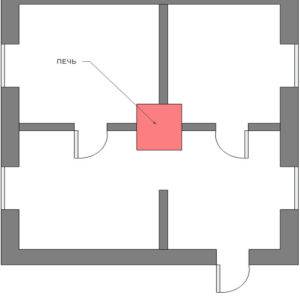
When installing a multifunctional oven in large rooms, it should be placed again in the center of the room. The stove turns into a place of concentration of comfort, which gives home. It turns out something like a studio apartment, with a free layout, where the stove becomes a space divider.
Step-by-step instructions for building an outdoor brick oven
Start of work - drawing up a project, where the consumption of materials, their total cost and the choice of location are calculated. The stages of construction include:
- Pouring the foundation.
- Laying of the base, blower, smoke channels.
- Installation of grate, firebox.
- Hob fasteners.
- Chimney and fittings installation.
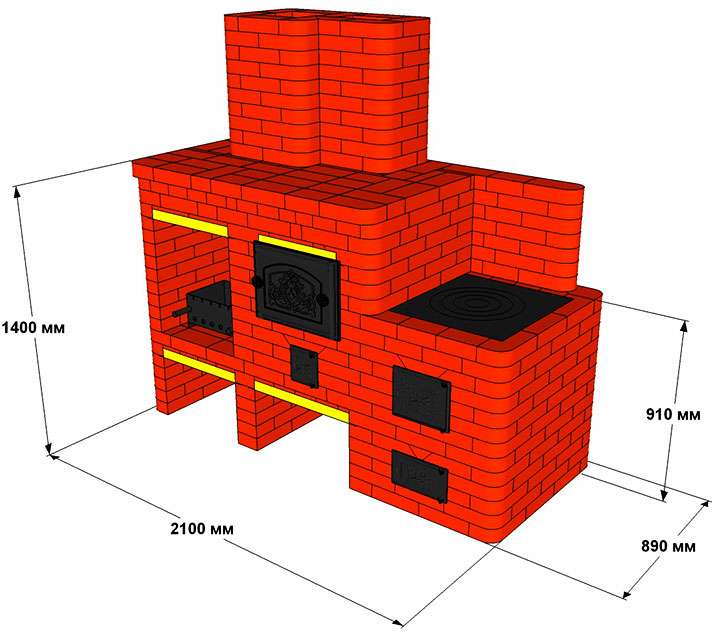
Brick oven scheme
From materials and tools you need to prepare:
- refractory, facing brick;
- cement;
- clay;
- sand;
- crushed stone;
- firebox doors, blower doors;
- grinder with disc nozzles;
- steel pipe;
- metal rods;
- asbestos-cement slab;
- shovel;
- level;
- hammer;
- celtic;
- cord for marking.
Consider a detailed description of each of the stages of construction.
Foundation construction
It is better to pour a monolithic foundation under the stove, having previously marked the area with a nylon cord. In this case, the width of the territory should be 10-15 cm more than the width of the masonry.
A hole is pulled out to a depth of 50 cm. The soil is compacted. Steel rods are installed horizontally. They are covered with a layer of rubble. The pit is filled with a mortar of cement and sand in a ratio of 1 to 3.
To avoid cracks in the foundation, it must be periodically watered with water until it dries completely.
2 layers of cinder block are laid out. An asbestos-cement slab is installed on top. This will raise the height of the oven.
Another option - the monolith is covered with roofing material to create a waterproofing base.

Furnace masonry
- The order in the first row begins with a whole brick, each subsequent one - three quarters, halves. The evenness of the masonry is checked by the level.
- In the second row, a blower door is installed, which is wrapped with an asbestos cord. A 3 mm iron wire is preliminarily put in the order to fasten the door.
- The opening between the brick and the door should be no more than 10 mm. Having blocked the blower, the grates are mounted.
- The masonry is carried out up to the height of the second door fastener. The dimensions of the bricks are adjusted with a grinder.
- The top of the oven is covered with a stone slab. If a hob is needed, then it is better to fix a cast iron one.
The brickwork of the stove is clearly shown in the photo.
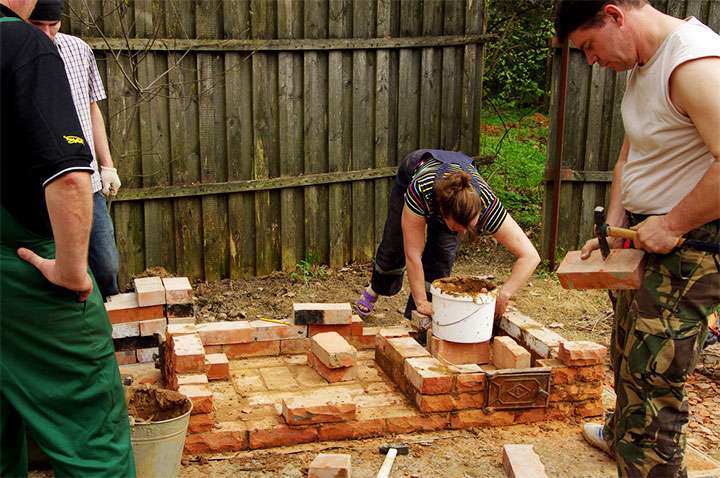
Photo: lay out rows 2 and 3
If desired, an arch of brick or stone is laid out.
Chimney
For its installation, you need to take into account several important recommendations:
- The chimney fasteners begin to be carried out in the direction from the stove.
- The most convenient to install is a modular system, which is lined with bricks on the outside.
- At the joints, the modules are treated with a heat-resistant sealant for the integrity of the seams.
- Each element of the system is connected to a depth of half the pipe section.
- The joints of the chimney parts must not pass through the structure overlap. They are easily accessible to remove blockages if necessary.
- The recommended distance between the brackets when attaching the modules is at least 2 m.
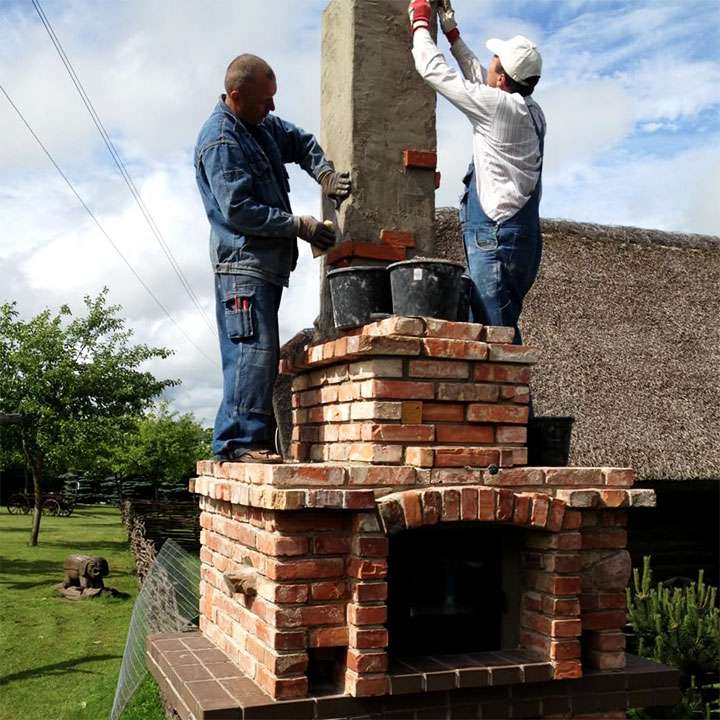
Chimney lining
How to protect the oven from climatic factors
At the end of the masonry, brick seams are carefully checked for integrity, rubbed over. The revealed cracks are filled with a solution.
For an aesthetic appearance and prolongation of the service life, the device is faced with refractory tiles, porcelain stoneware or natural stone. You can build a canopy that will exclude rainfall on the structure.
Calculation of basic parameters
Before choosing a working project for a heater, it is necessary to make a preliminary calculation according to the parameters of a particular room. The most accurate method is sizing based on the heat dissipation of the furnace. In order not to go into complicated calculations, a simplified calculation scheme proposed by I.V.Kuznetsov is used for well-insulated houses. This method uses the average heat output taken from one square meter of the unit surface (TMEP). For a conventional firebox, take a value of 0.5 kW / sq. m, and if necessary, intensive heating, which occurs with a strong cold snap - up to 0.76 kW / sq. m.
In principle, these values are already enough to select a suitable project from those that can be found in the public domain. If the available options are not suitable for any reason, then you will need to calculate the parameters of the main elements of the furnace and design your own design.
Firebox
The dimensions of the furnace are determined based on the maximum volume of the fuel fill. In this case, the amount of combustible materials is calculated using their calorific value and specific gravity, focusing on the required power. The volume of the firebox should be 2–3 times larger than the obtained value, which will allow the stove to be reheated at extremely low temperatures.
When calculating the size of the combustion chamber, it must be borne in mind that the maximum filling should not exceed 2/3 of the volume of the combustion chamber. In addition, the dimensions of the furnace and all its components must be adjusted to the size of the bricks used for laying the furnace. In your calculations, you can use special tables developed taking into account the need to heat rooms of various sizes.
Calculation table for the main elements of a brick oven
Ash pan
The height of the ash pan depends on the type of fuel used. For low ash combustible materials such as coal or peat briquettes, this value is taken equal to 1/3 of the height of the firebox. If the stove is fired with wood or pellets, then the height of the ash chamber must be reduced to 1/5.
Chimney
When calculating the chimney, it should be borne in mind that the place of its installation must comply with SNiP
Unlike gas heating equipment, wood stoves do not require a lot of draft, so a rectangle would be the best shape of the smoke channel. When calculating the chimney, it is taken into account that the section of the blower should not exceed the area of its gas duct, while all values are adjusted to the dimensions of a standard brick. Since accurate design requires a lot of data and parameters, it is best to use one of the special programs. Nevertheless, for the most common cases (no kinks in the smoke channel, vertical passage, rectangular section, height from 4 to 12 m), you can use the average values for furnaces with a power of up to 14 kW:
- Less than 3.5 kW - 140x140 mm.
- 5 - 5.2 kW - 140x200 mm.
- From 5.2 to 7.2 kW - 140x270 mm.
- From 7.2 to 10.5 kW - 200x200 kW.
- 5 - 14 kW - 200x270 mm.
To calculate the amount of material required, it is best to use special tables. Below is one of them.
Calculating the number of bricks
Which stove is right for your garden house?
First, we need to decide what function the hearth will perform for the garden house:
- If you visit the country house only in the summer, and you only need it for cooking, the cooking type of stove will suit you.There is no heating in its design. The combustion chamber, equipped with a chimney and an ash pan, is lined or made of bricks, and a metal plate lies on top.
- Heating stoves are used by summer residents when they just need heating, and there is an electric stove for cooking. The design of such a furnace is simple; it consists of a combustion chamber, an ash pan where ash is collected and a chimney. These include fireplaces, with the help of which the owners of summer cottages are trying not only to heat their living quarters, but also to create suburban comfort. The efficiency of heat transfer of such structures depends on the thickness and origin of the material, the method of masonry. Laying in one brick allows you to heat the walls of the furnace up to 600 degrees, laid out according to this scheme are called Dutch furnaces. Stoves can have different shapes, it all depends on the area of the room, the interior and the desires of the owners.
- In our country, the most popular is a heating and cooking stove, its design is more complex, and consists of a combustion chamber, chimney, ash pan, hob and oven. To build such a stove, you need a lot of space, but thanks to it, the house will be warmer, and a delicious dinner simmered on the stove by a skilled hostess is guaranteed. Such a stove has many devices, it can be equipped with a drying chamber, a stove bench, and a tank for heating water can be placed in the structure. This version of the oven is the most versatile.
Recommendations for choosing purchased designs
The key indicator in purchasing a ready-made kitchen stove is the type of fuel on which it will work.
The factory-made summer stove has several design options.
- If there is gas nearby, you should consider buying a gas stove with an oven. Its heating temperature is adjustable. The device is ready for operation at any time and does not require the cost of finding fuel.
- A cheaper solution would be to buy an electric stove. Easy to operate and convenient to transport.
- In the absence of communications, an excellent wood-burning option is a solid fuel stove. Suitable for the most remote suburban areas.
- Universal cookers allow the use of several types of fuel, which significantly saves time on cooking.
It is worth noting that factory models have a number of advantages in operation:
- a large selection of finished products of various sizes, colors; metal alloys and refractory mixtures are used as materials;
- the scheme of operation of the device minimizes the risk of fire and smoke leakage;
- lightweight structures.
- fast assembly and installation.
However, a do-it-yourself project of a closed or open summer kitchen with a stove will take into account the features of the site, the wishes of the owner and save money. In addition, step-by-step construction instructions have now been developed for furnaces of varying complexity.
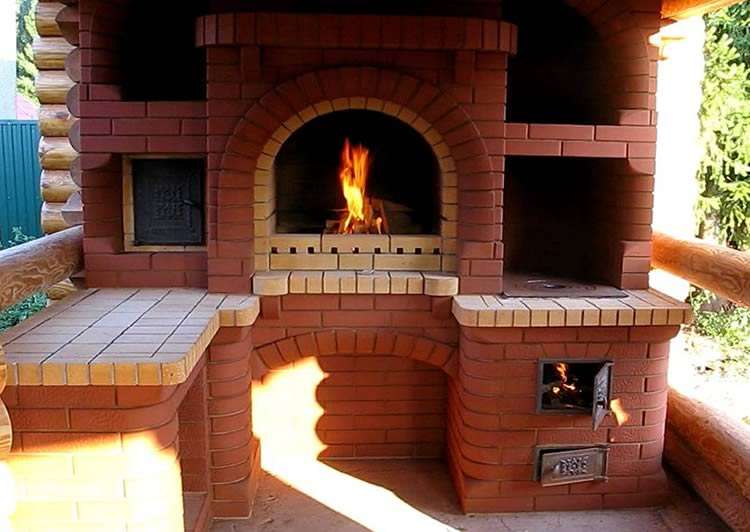
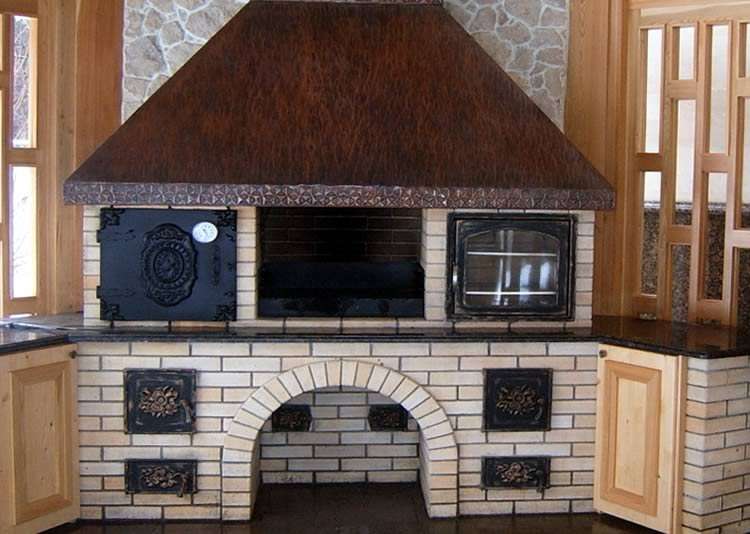
Budget options can be:
- Russian stove for a cauldron;
- two-burner stove with oven;
- barbecue oven with barbecue.
It is important to remember that when creating a furnace, you need to accurately draw up a drawing in order to take into account the nuances of construction, the amount of material required and the amount of work
Schemes, product dimensions
There are two main types of devices that each master focuses on.
- The first type of stove is suitable for heating small spaces. It has the following dimensions: 51 by 51 cm - base area, 175 cm - length. For laying out the firebox, fireclay brick is necessarily used. It is fireproof and very durable, which avoids cracking. Red brick is perfect for cladding the product. The design has a pipe and an oven for cooking. For greater strength and good efficiency, the cabinet is usually made of sheet steel.
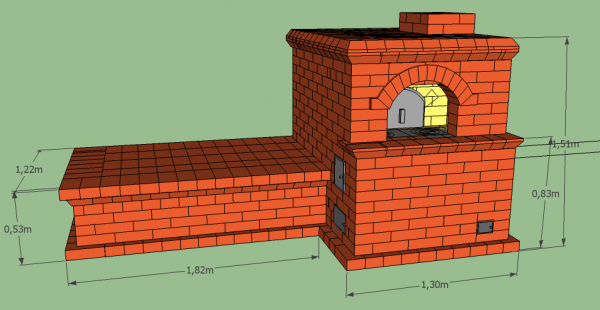
Photo 2.Diagram of a Russian mini-oven made of bricks with a stove bench and a place for cooking.
- The second version of the mini-oven does an excellent job of heating small rooms, the device is also equipped with a hob, so this design is more often chosen for summer cottages and private houses. The chimney is laid out in one brick. This is done to ensure that waste vapors and gases enter the chimney correctly, bypassing the oven on the right and left sides. In terms of area, this structure is 51 by 51 cm, its length is 215 cm. For laying out the firebox, refractory bricks are used.
Attention! When laying out the firebox, several types of bricks cannot be used. Each species has a different expansion temperature, so this alignment will lead to cracks
