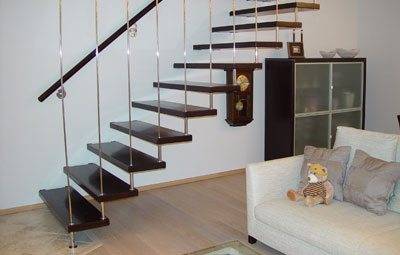
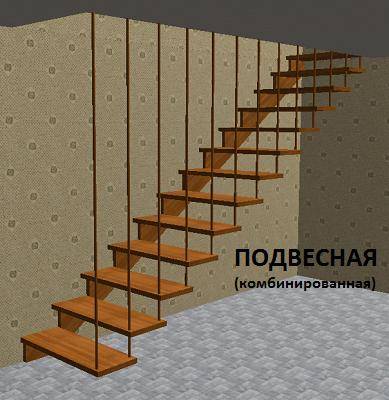
Suspended stairs are a "fresh breeze" in your home. Indoors, they look like light transparent structures, and many design styles use them as a highlight in the interior.
General information
The stairs are attached to the interfloor with metal braces, which in turn support the step in a given position. The opposite side of the step is rigidly attached to the load-bearing wall.
And although such ladders outwardly do not look reliable, moreover, some people are even afraid to walk on them, the hinged ladder, when properly installed, is quite strong.
The combination of graceful metal suspension rods with the warm solid wood of the steps gives a certain charm to the staircase and opens up wide possibilities for the flight of design ideas.
Have you built a house or are doing major renovations, and you want to add space to the interior? Ordinary wooden or concrete stairs are not suitable here. But a suspended staircase would be a perfectly acceptable solution.
This article was conceived as an instruction and with its help any owner who is able to perform elementary plumbing and carpentry work can build such a staircase in his house with his own hands.
Before starting construction, watch the 2 videos in this article, they discuss common mistakes when building stairs.
Selection of tools and materials
Tool
- Electric drill with a set of drills
- Rotary hammer with a set of drills
- Construction level
- Plumb line
- A set of keys
- Grinder with a set of disks
- Lever and tap for threading
- Welding machine desirable
- Roulette
Material
- Metal strip 50x10
- Metal corner from 50x50
- Hardwoods oak, beech, ash, etc. For steps
- Set of anchors, sleeves, nuts
- Wall-mounted handrails
Calculating the dimensions of the stairs
Naturally, we start by calculating the exact dimensions of our staircase.
Hanging ladders are calculated according to the same principle as the rest.
For example, let's take a small staircase with a height of 144.78 cm.
- To calculate the number of steps, divide the total height by the standard height
Steps 144.7: 17.7 = 8.17 round this value to 8. - We calculate the distance between the steps 144.7: 8 = 18 cm.
In total, at a height of 144.78 cm, we will have 8 steps with an interval of 18 cm.
This video in this article will help you perform the calculations.
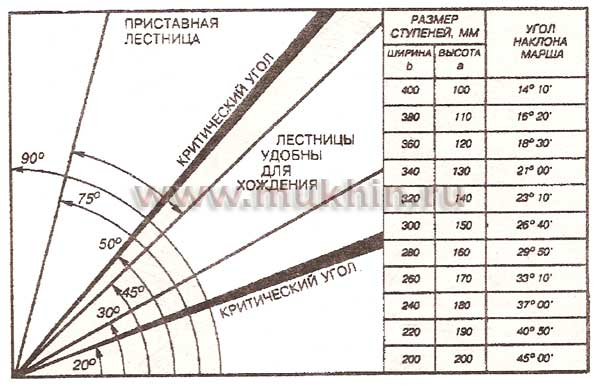
For the convenience of calculations, we provide a photo of the table:
Mounting
We attach the stops to the wall
- Hanging ladders are best mounted before finishing work..
The drawing of our staircase is already ready and now we mark the attachment points of the steps on the supporting wall.
-
- Next, we cut stops from the corner for each step.
- We will mount them on the wall. The stops should be slightly smaller.
- The width of the step itself, the indent from the edge in the region of 20 mm.
- We drill holes on the wing of the stop, the wing is applied to the wall 3 holes.
- The wing on which the step 2 of the holes will lie.
- All holes can be made of the same diameter, but we start from 10-12 mm.
- It is better to number the stops.
- We apply each stop to the design place of the step attachment and mark with a pencil the places for drilling holes in the wall.
As we remember, the stops are attached to the wall with 3 anchors.
Take anchors with a length of at least 200 mm. More is possible.
We drill holes with a perforator and fasten the stops with anchors. The cross section of anchor bolts is from 10-12 mm or more, as you like.
Making a frame
- Hanging ladders require a sturdy frame... The frame will be made from a corner, which we will mount on the ceiling of the ceiling. The most optimal option is to weld the frame, because it is bolted for a long time and is less reliable.
With a corner, we will only tie the ceiling overlap, both in the upper part and in the lower one. We have above and below the overlap, we got a U-shaped strapping. Now both parts should be fastened together.
We have a 50x50 corner, connecting two corners end-to-end - we get 100 mm, the thickness of the overlap, as a rule, is greater. To connect two corners, we cut the strip into segments equal to the thickness of the overlap and weld the corners together with these segments with an interval of 200-300 mm from the inside.
An important point: Cook each segment separately and only when all 3 segments are ready, put them in a girth on the ceiling and weld in the corners.
- When the U-shaped frame is welded and installed, it should be fixed... First, connect two opposite parts of the frame that are adjacent to the wall with a metal strip. If the slab thickness is large, then connect the upper frame rail and the lower frame rail in two separate strips.
We got a closed rectangular frame. Along the perimeter of the ceiling, there is a strapping from the corner, and along the bearing wall there is a strip. Next, the frame should be securely fixed.
To do this, we drill holes in the strips with which we welded the corner of the upper and lower contours, then drill a hole into the depth of the ceiling with a puncher (we assume that a reinforced concrete slab is used for the ceiling) and fix the frame with anchors, we also fix the strip along the load-bearing wall.
We mount the suspended structure
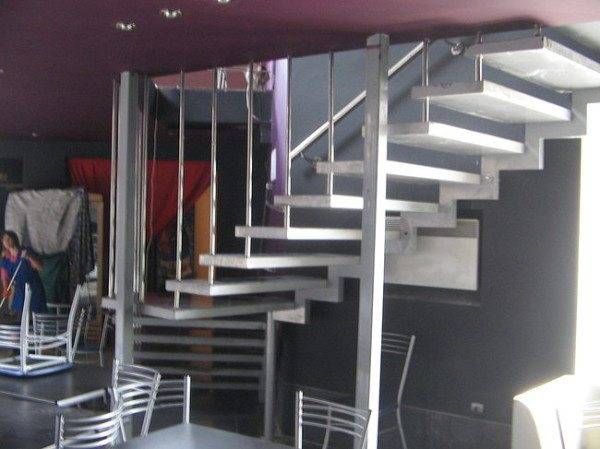
- The next step will be the installation of the structure, on which metal rods will be attached, supporting the steps and the fence of the staircase on the second floor..
To do this, we cut corners similar to those that went to the strapping.
The structure will be mounted only from two sides, from the side opposite to the load-bearing wall and from the side opposite to the end of the staircase. We weld the corners to the frame, in the form of the letter T, so that they form a semblance of an I-beam.
In the welded corners, having accurately measured, we drill a number of holes for fastening metal rods from below and fences from above.
On the large, bearing side, the holes in the upper corner should be strictly opposite the holes in the lower one. On the side of the side rail, it is sufficient to drill holes only in the upper corner.
- Cooking metal studs... The studs are made of round rolled metal, with threads cut along the entire length. Length is calculated by the formula, the thickness of the interfloor overlap plus 100 mm. For the side where only the side railing will be attached, the overlap is plus 50 mm.
Further, we mount the studs strictly along the plumb line. From the inside, under the corner, we firmly fix the studs with nuts. With the expectation that on the carrier beam, 50 mm remain on both sides. From the side, where there will be only the upper fence, we fix the hairpin under the upper corner with a nut, and to the lower one, we grab it by welding. Here, of course, only 50 mm should remain on top.
We hang the steps
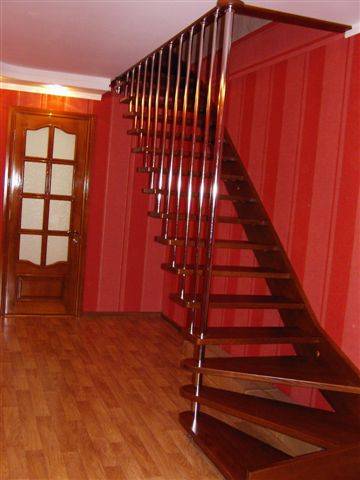
- Our suspended ladder, of course, must be suspended on something..
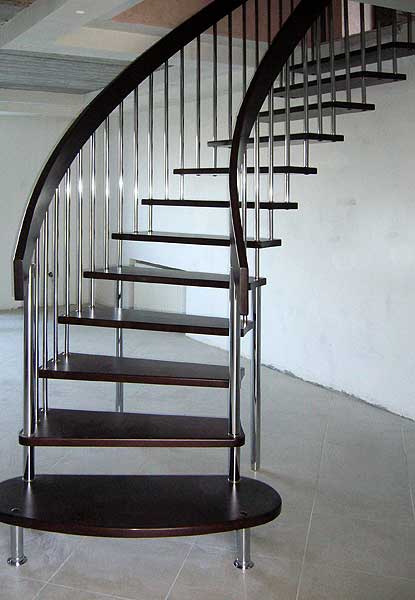
The fact is that we plan to use metal, nickel-plated tubes for hanging the steps and as balusters of the stairs in the fence. They will greatly facilitate the entire structure. And although their price is much higher, the appearance is worth it.
We measure in height and cut off the tubes. We cut an internal thread in the tubes on both sides, to a depth of 50-70 mm. Screw the finished tubes into the left 50 mm pins from above.
We fasten the steps below. To do this, in the steps prepared in advance, we make holes along the diameter of the tube. We put the step on the tube and fix it from below with specially prepared bolts. You can simply put washers for strength.
But we advise you to cut metal strips, according to the size of the corner fixed on the wall, drill two holes at the distance of the tubes, then use the strip as a washer, fixing both tubes at once. - After two bolts, we fasten the step to the corner on the wall... If you don't like the look of the open bolts, drill a small indentation in the stair tread to match the bolt head, drown it, close it with a wooden furniture plug, cut and grind.
Attention: the thickness of the board for the steps must be at least 40 mm.
If you are afraid that such a board will break, run a metal strip under the board from the front suspension to the corner on the wall.
It'll be enough.
- The upper railing is mounted in the same way... The tubes are screwed onto the studs, the railings are mounted on top and fixed to the wall.
It is better to choose handrails and buy in advance, and fasten them to the wall.
It is easier and more reliable.
Output
As you can see, a suspended staircase, with a strong desire, is not so difficult to execute.
Every normal man is quite capable of making such beauty with his own hands.
In the video provided in this article, you will find comprehensive information on the topic we have considered.

