Wooden furniture has always been very popular; it easily fits into any interior and looks stylish and elegant. True, the price for such furniture is quite high. But nothing prevents you from making an exclusive table yourself, if you have the necessary material at hand.
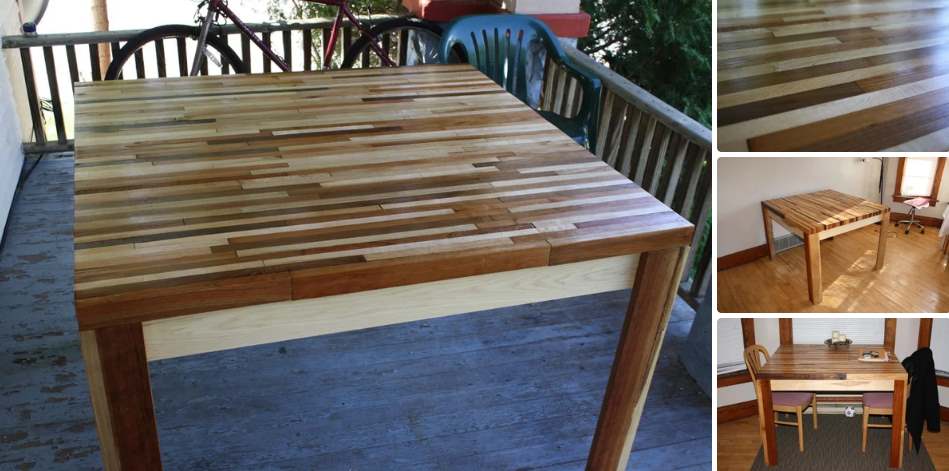
Sometimes, during construction or reconstruction of an old house, there are many wooden planks or cuts left. Usually they go to kindle a bath or a fire. But do not rush to part with them. Short planks will be an excellent table top for your future table. I will explain how to implement this project.
What do you need
To create a table with your own hands, you will need.
Materials (edit):
- Wooden boards;
- Polyurethane varnish;
- Corner brackets;
- Wood glue.
Instruments:
- Saw gasoline or electric;
- Clamps for pipes;
- Sander;
- Roulette;
- Level;
- Drill or screwdriver;
- Drill for wood.
Step-by-step instruction
Now I'm going to tell you how to use all of these tools to create a great table.
Wood cutting
The boards at your disposal must be made of the same height when placed vertically. To do this, using a tape measure, the required distance is measured and the unnecessary is cut off with a saw. The main thing here is to monitor the evenness of the cut, otherwise the surface of the table will be ribbed. Create an impromptu desktop, determine what size the tabletop you will have.
Remember that the more area you want to create, the harder and more painstaking the work will be. The author of this project, as he honestly admits, was only enough for 1 square meter of the countertop.
Bonding parts
In order to ensure a better adhesion of the wood during the gluing process, use a pipe clamp. At the same time he will be able to hold 5 or 6 boards. Glue in the gaps can be applied with a special pipette to make everything look as neat as possible. After gluing several segments, it will remain, with the help of a second person, whom you will define to help you, to glue the main array. Here, you will have to act as a clamp with an assistant. After applying the glue, keep the boards pressed against each other for a while to ensure a better grip.
Grinding
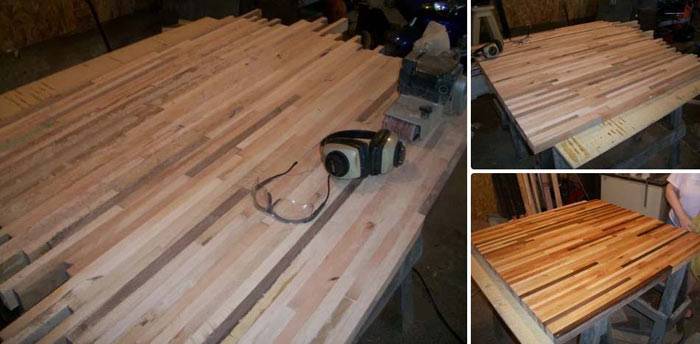
After the boards are glued together, you need to cut off the excess edges. To do this, measure the desired distance using a corner and tape measure, draw a line and walk along it with a saw. Gently remove any residual glue that came out after clamping the boards by hand. Next, start sanding your future countertop. It will take a lot of time manually, so it is better to prepare the sander in advance. You can start with sandpaper at 60 microns, and finish already at 240 microns.
Attaching the legs
The standard table height in accordance with GOST is 72-78 centimeters. Your legs should be at least this figure, unless it is a coffee or bedside table. Otherwise, it will not be very comfortable to sit behind him. For the legs, take two 4x1cm wide boards of the same height and glue them to the edge of each other at a 90 degree angle. Using iron corners of the desired size, attach the legs to the tabletop. It is recommended to make an additional tie between the legs (skirt) along the bottom of the table top from narrow bars.
Finish coating
The surface of the table and legs must be additionally processed. To accentuate the unusual wood pattern, use clear polyurethane wood varnish. After drying, it is recommended to lightly sandpaper the surface between each layer of the coating.

