Roof options for "gable"
Decking, metal tiles
Economical and reliable material. The easiest to install among all the presented ones. The overwhelming majority of summer cottages use profiled sheets and metal tiles in construction.
Metal tile
This material can be used for the construction of roofs (it is especially well suited for shed and gable), as well as for wall cladding. If you want to save money on your gazebo, but not lose in reliability, then the professional sheet will be your choice.
Corrugated board
Ondulin
Euroslate is perfect for the presented roof shape. It has a relatively inexpensive cost, a long service life, and is also conveniently placed on a flat surface.
The standard dimensions of 2 by 0.95 meters allow this roof to be laid on the slopes with virtually no residue. Another plus is the softness of the material - the raindrops will not make as much noise as in the case of corrugated board.
Soft tiles
The cost of soft tiles is higher than other materials. However, you can buy it in exactly the amount you need for the roof sheathing. This is possible thanks to the small standard sheet size of 1 x 0.33 mm.
It is very often used for the construction of gazebos; in the last year, it has become a direct trend. Apparently, the builders realized that it is advisable to overpay a certain amount for such a reliable and beautiful material.
Shape selection
The easiest option is a square or rectangle. However, such forms have become boring, although they are being built faster. Of much greater interest is the pergola with a circular roof. If the roof has one slope, it is quite possible to make it semicircular with your own hands. Lovers of creative solutions can go even further and experiment with triangular, hexagonal buildings.
Drawing of a gazebo with a pitched roof
When an unusual shed roof is being built with your own hands, the drawings will be more complicated, and the calculations will be much more serious. It is necessary to determine in advance how much material will go to the frame. This will make the building extremely stable.
How to assemble a gazebo frame
Stock up on building materials. These are pine beams 10 x 10 cm, slats 2.5 x 2.5 cm, boards 4 x 15 cm (you will need edged and unedged ones).
- They cut the beams according to the size of the future building. Since the timber is not cleaned, the splinters are removed with a plane.
- Then you need to free the concrete posts from the formwork. They are covered with waterproofing material - for example, roofing felt.
- The lower harness is laid on the posts. Connect by the "thorn in the groove" method. Staples are used for reinforcement.
Connecting frame elements
- The racks of the finished frame are placed on the harness. You need to install short pieces of wood at the back - they will set the desired angle of inclination. Temporary braces will help keep the elements upright.
- With the help of a strapping at the top, the edges of the posts are connected, the frame is fastened with corners. The building level will help with checking the correctness of the shapes.
- It remains to attach the floor joists to the harness at the bottom, lay out every 80 centimeters. And then cover the base of the floor with boards.
- Further, beams are attached to the racks, and the openings are sheathed with slats.
Subtleties of roof construction
Despite its simplicity, a pitched roof is a reliable structure. It makes the room cozy, and the stay in the gazebo pleasant and safe in almost any weather.
Shed roof top trim
To cover an already built frame with a roof, proceed as follows:
Saw all the boards into rafters
It is important to make the elements longer to create the supporting structure.
The rafter leg is directed to the very top, marking the cutting points.The resulting grooves will help connect the rafters to the beams at the top.
In exactly the same way, grooves are created in other parts of the rafter system.
The front and rear rafters are fastened with metal corners and nails. A thin rope is pulled between them, which will play the role of a level. Focusing on him, they attach the rest of the rafters to the harness at the top.
After cutting the roofing material into strips, they are spread on the legs of the rafters. One piece of material should overlap another 15 cm. A construction stapler is used for connection. The overlap depends on the angle of inclination of the ramp. The smaller it is, the larger the overlap will be.
Using unedged boards, they create a crate, leave gaps of 20-30 cm. If you plan to cover the roof with metal tiles, make wide gaps.
Install the topcoat with fasteners
Please note that after attaching the sheets should be in contact with each other by 10 centimeters. Wind boards are screwed to each end section.
The structure, built by one's own hands, is refined in the following way. Floorboards are sanded with a machine and treated with an antiseptic. They can also be painted with a varnish that is resistant to mechanical stress. Stain is smeared on the walls, ceramic tiles are glued to the concrete base. It is desirable that the tiles have a matte finish - then it will not slip. The process of collecting the gazebo roof is discussed in more detail in a separate article.
Chairs are installed inside the room, and the side panels are decorated with a lattice. The gazebo with a magnificent pitched roof is ready!
The foundation for the gazebo - to do or not
Since the roof structure is quite light, it logically does not need a foundation. But is it really so? If the gazebo is ordinary, then of course, the load exerted is several times less than that of the gable options. Therefore, small structures do not need to be laid on a deepened foundation. It is enough just to install four posts at the corners of the structure.

However, there are options for gazebos that represent the whole complex. Often, a barbecue or barbecue oven is installed in them. In this case, brick or metal ovens will exert a large load on the surface. In this case, you will have to think about the slab foundation. It is expensive but very reliable. Alternatively, use a tape base.
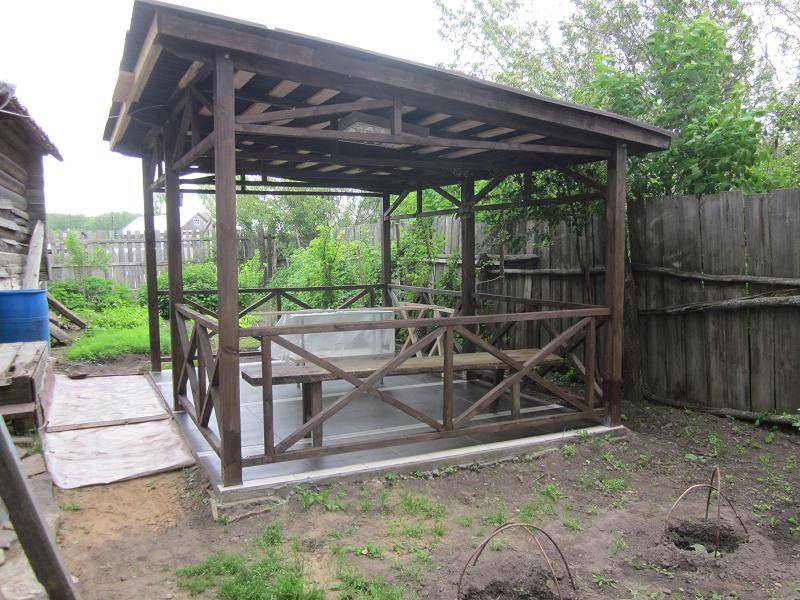
The same applies to the walls of a gazebo with a pitched roof. The gazebo can be open like a terrace so that users can enjoy the fresh air. Another option is baffles for wind protection. With them, the total weight increases. And there are also deaf gazebos that will help you stay inside all year round.
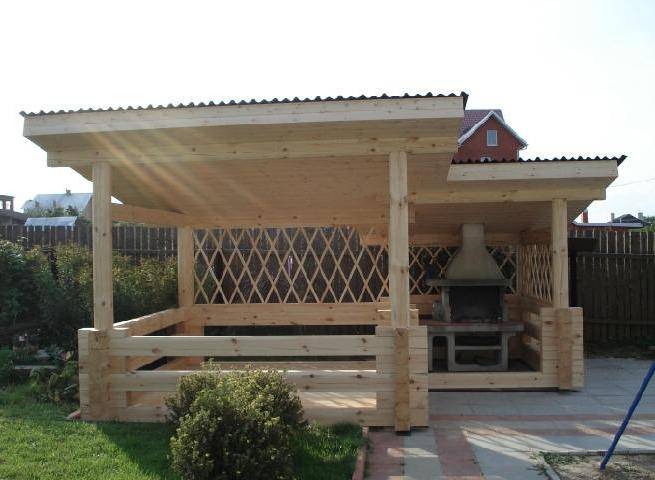
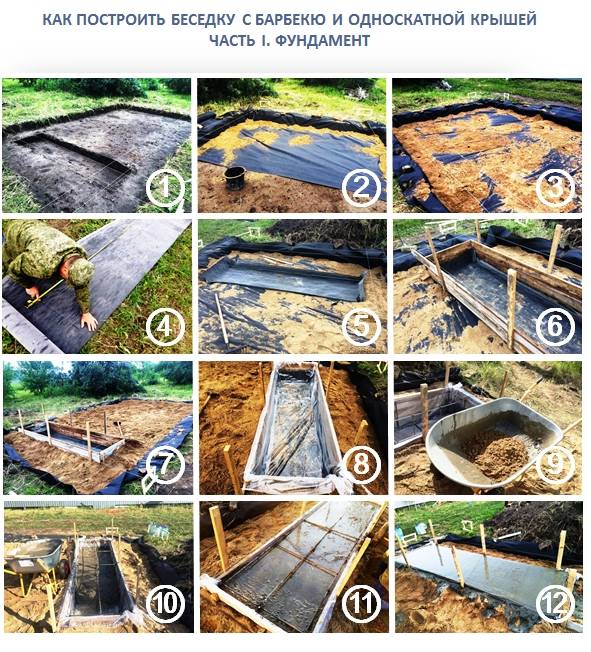
If you need to make a gazebo with a barbecue, then the principle of creating a foundation is visible in the photo. We will not dwell on this for a long time.
Additional calculations of the roof structure
Since the roof will consist of rafter legs, it is required to determine their length. Most often, the length of the rafters is determined by gas: it is enough to add the length of the overhangs in front and behind to the width of the arbor wall. They serve for the purposeful removal of sediment from the roof. The minimum overhang is 30-50 cm. It turns out that in order to determine the length of the rafters, you need to add 60-100 cm to the width of the gazebo for two overhangs.
But another question is the step of the rafters. Usually it is 60 cm. The crate, laid on the rafters, is another matter. Here you need to choose the correct attachment pitch. What does it depend on? There are several factors. Again, it all comes down to the roofing material. For example, for hard roofs such as metal, corrugated board, slate, the recommended pitch is 60–70 cm. But for a soft roof, a continuous sheathing is required.In this case, the consumption of material increases, as does the total weight of the arbor. Another factor is climatic stress. The higher they are, the smaller the step is.
Note! Since the gazebo is made of wood, it must be protected. Despite all its positive properties, it does not react well to high humidity and can rot
To extend the operational life of a wooden gazebo, all elements are treated with antiseptics and protective agents. Such processing must be performed year-round.
Installation of the structure frame
Before the base has hardened, it is important to have time to mark the location of the frame components. They are sawn and processed with an electric planer.
To create the optimal angle of inclination of the roof slope, the outer vertical posts should be an order of magnitude higher than the inner ones. Suppose you are going to create a structure with a height of 2.5 meters, then in the center the roof should have a height of about 3.2 meters. At the moment when the base is frozen, proceed with the direct assembly.
Formation of the frame of the gazebo with a pitched roof
It is carried out systematically, in several stages:
- Remove the formwork from the posts and cover them with a waterproofing layer. Create squares of roofing material 30 * 30 centimeters in size and lay them on each of the supports in several balls (the best option is two). In addition, the heads can also be carefully coated with a layer of bitumen.
- Carry out the installation of the lower frame trim. To do this, it is worthwhile to fasten using the "thorn and groove" method and perform a screed with metal staples.
- Install vertical framed partitions so that the roof of the gazebo is at an angle. There should be the same number of them, just like the base piles. Until the moment, until you hold the upper harness, to strengthen the structure, use temporary struts. They should be positioned clearly in an upright position. Remove parts of the frame with strapping. For convenience, you can use corners.
Variety of gazebos for the garden
- Floor wooden planks are installed. Keep in mind that the larger the segment between them, the greater the thickness of the material should be. After setting the lag, proceed to the next step - creating the flooring flooring. A grooved board is best suited for this, but, alas, its cost is quite high. In order to save money, you can carry out the flooring with an ordinary edged board (for this purpose, it is worth using a plane).
- A wooden railing is mounted, which is attached to the corners of the vertical posts. In the event that the drawings imply the presence of sheathing of some of the parts of the opening, we proceed to its implementation. Decorative sheathing with gaps looks very impressive: with its help, you can perform two functions at once - to leave room for air to penetrate, and also to protect yourself from sunlight even on the hottest day. We can say that this is where the assembly of the frame ends. Let's start creating the roof.
Detailed construction drawings
Do-it-yourself wall gazebo
No matter how small a free-standing gazebo is, it still takes up enough space. The ideal option for a small yard is to make a wall gazebo with your own hands. Indeed, this option has a lot of advantages. First, savings, because less materials are needed. Secondly, compactness, because the space is needed half as much as for a free-standing gazebo. Thirdly, it is very convenient, you do not have to go far, that is, it serves as a veranda and, most importantly, such a gazebo can serve for different purposes, for example, you can put a workbench, here is a workshop in the fresh air. Sleep on a sweltering night, organize a summer dining room. In addition, it is even easier to build a wall gazebo than an ordinary one. Here, step-by-step diagrams show how to do this, and you can read step-by-step instructions on the website.
Do-it-yourself wooden gazebos 300 photos, drawings, diagrams
Here is a small gallery of handmade wooden arbors. Of course, you can collect more photos, because there are millions of options.Each gazebo, made not according to a template, but with your own hands, even according to standard drawings, is still a work of art. Here are collected relatively simple designs that are within the power of any master who does not have much experience. There are, of course, examples of industrial products, which may come in handy.
Square gazebo drawings
Square gazebos 150 photos
Drawings of hexagonal arbors
DIY hexagonal gazebo 50 photos
Drawings of octagonal arbors
Do-it-yourself octagonal gazebo 100 photos
Sketches of gazebos with drawings and dimensions
In this section, we will look at examples of different types with drawings. If you do not have time to draw yourself or you do not know how, then the examples given will help you when building your own version of the gazebo.
Simple gazebo made of wood
Wood, the most common material, cheap and not difficult to work with. When it comes to construction, most people do not even hesitate to choose wood as the material.
This figure shows a fairly simple version of a gable gazebo.
The next drawing also represents a simple gazebo, albeit with a hipped roof.
The number 1 denotes the lower strapping made of a 100x50 bar, 2 - a vertical support (80x80 bar), 3 - entrance racks (80x50 bar), 4 - an upper strapping and 5 - rafters.
In this version, the main thing is to connect the top of the tent. Here, a slightly different rafter pattern is needed than with a gable roof.
Do-it-yourself gazebo made of wood, drawing with a gable roof
A gazebo with a gable roof, as well as with a flat one, is one of the common options erected on a garden plot.
The figure shows a 3x3 layout.
Foundation
As a foundation, concrete blocks are used, which are installed according to the level on a prepared and marked site. This is a less laborious process compared to concreting. Roofing material is placed on the foundation blocks. Next, the lower harness is assembled. For it, a beam of 100x100 is used. To fasten the vertical racks, gaps are cut out at the ends of the timber, which, when the timber is connected, give a square where the rack will be inserted.
This is a very convenient option, as it provides additional support for the rack. We install the assembled lower trim on the foundation, after which we begin to assemble the side walls.
Walls and trim
First of all, we install four support posts, after which we make the upper strapping. In order for the racks to be leveled, during further construction we strengthen them on jibs. After the upper harness has been erected, we make the middle one.
Fastening is done with metal corners and self-tapping screws. After assembling the frame, you can start building the roof.
Roof
You can first assemble the roof on the ground and install it on the upper harness, or make triangular rafters, fix it on the upper harness, and then assemble the roof on them. As for the second option, the triangular rafters are made as shown in the photo.
If you are assembling a roof on the ground, then it will look like this:
The assembly scheme in both cases is the same, the only difference is in the place of assembly. Therefore, we choose the option that is more convenient for you. When assembling the roof, grooves are cut in all elements, then the entire rafter system will be even. At least two people will have to lift the rafter system upstairs, so you will have to take care of your partner.
After installing the rafter system, the crate is made.
The lathing is needed for laying roofing material on the roof. It can be slate, metal tiles and other material.
With the roof in place, you can start laying the floor. We use a floorboard. Before installation, it is covered with an antiseptic.The main thing is to install the first board exactly, and then attach the rest to it.
And the last - clapboarding of the gazebo
Usually, only the lower part of the gazebo is sheathed: from the floor to the middle harness. The upper part can be left open, or a decorative grille can be installed. At the end of the finishing work, the gazebo can be painted, you can leave it covered with stain.
As a result, you get something like this:
Do not want to constantly repair the roof - calculate the angle of inclination correctly.
Its value depends on several factors and is chosen from 8 to 60 degrees. If the area where your site is located is very windy, then the roof should be flat to withstand the winds. If the weather conditions are more favorable, then the angle can be made larger. In this case, water and snow will not linger on the roof.
The size of the angle also depends on the choice of roofing material. Let's say you decide to make a slate roof. For her, the smallest slope angle will be 20 -30 degrees, and for tiles - 22, the optimal angle for corrugated board is an angle of 8 degrees. For each material, construction experts offer different angles of inclination. And this must be taken into account. If the angle is incorrect, your roof will quickly deteriorate under the influence of snow or rain.
Professional list

Perhaps the simplest option for creating reliable structures for the upper floor is a profiled sheet.
How to make a roof on a gazebo, where to start? First, the rafter system is erected, then a waterproofing film is attached to the rafters. This can be done with a stapler.
Then the profiled sheets are fastened with an overlap (so that there is no moisture penetration) and fixed with self-tapping screws. Special skills and abilities are not required when installing profiled sheets, therefore, making a roof from such material quickly enough, and most importantly - economically.

Alternatively, the profiled sheets can be replaced with roofing material - another cheap material. Its only drawback is fragility, so if a recreation area is a non-temporary option, then it is better to make it from a more durable material.
We looked at several materials that can be used when planning a vacation spot, and we hope that you have found the answer to the question "how to make a roof on a gazebo."
Since the most important indicator is the cost of work, it is better to calculate all costs in advance at the planning stage and decide what is right for you during construction.
Selecting the type of construction
If you are going to make a gazebo with a roof in one slope, you need to thoroughly work out the issues of the degree of closeness, the choice of building materials and the shape of the object.
Closure degree
According to the degree of closeness, recreation facilities can be conditionally divided into groups:
- open (easy to build and used when it is a fine day or rain without wind);
- half-open ("windows" are left in the walls, but, despite them, rain spray and wind hardly get inside the object);
- closed (comparable to a summer kitchen and fully assembled, which is why they are suitable for recreation even in bad weather).
Overview of materials for the base
Finding suitable building materials is important. In case of the wrong approach to this matter, you will have to reap the benefits - to repair the gazebo in a year after the construction.
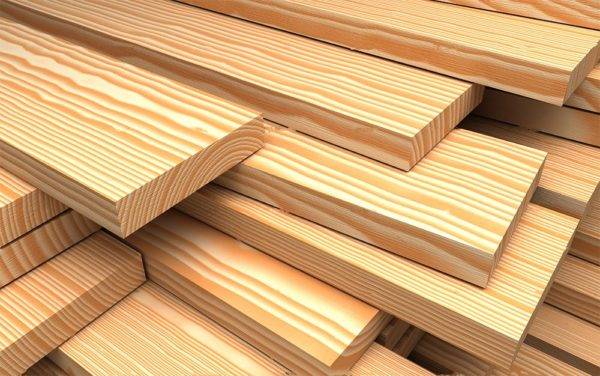 Most often, the gazebo is built from wood, since it is simple and familiar.
The frame of a gazebo with a pitched roof can be created from beams, metal pipes or corners.
Having firmly decided that the structure will be wooden, it is necessary to find beams with a section of 10 × 10 cm. They will become the pillars of the structure. The front wooden supports should be half a meter higher than those installed at the rear.
The lower edges of the beams, which will be hidden in the ground, are covered with a compound that protects the wood from decay. Antifungal primer or machine oil can act as such a tool. And to enhance the effect, it does not interfere with the use of roofing paper, which the pillars are wrapped before pouring with liquid concrete.
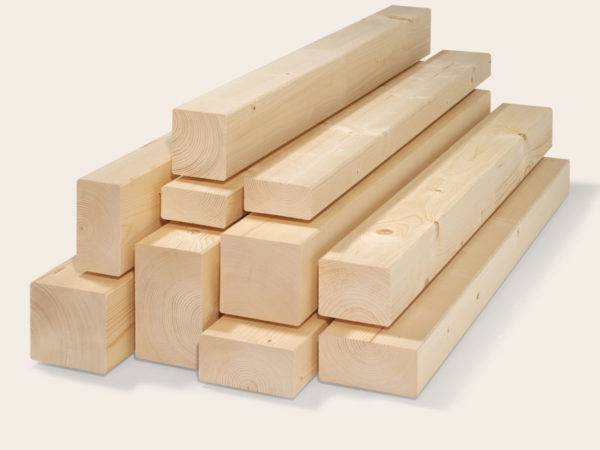 For the construction of a gazebo, it is preferable to buy bars of standard length
Having conceived to make the frame of a light gazebo metal, it is necessary to take only profile pipes with a cross section of 5 × 5 cm or metal corners with a thickness of 3 mm. And for those who are determined to build a gazebo made of heavy material like slate, it is better to find more durable pillars - pipes with a cross section of 7 × 5 cm.
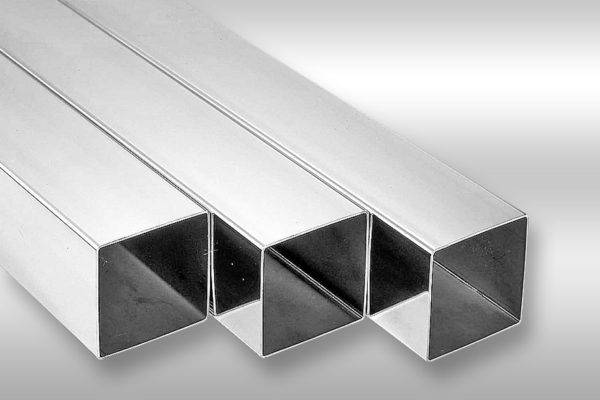 Profile pipes in the construction of a gazebo are used as racks
Wooden gazebos are chosen by adherents of tradition.
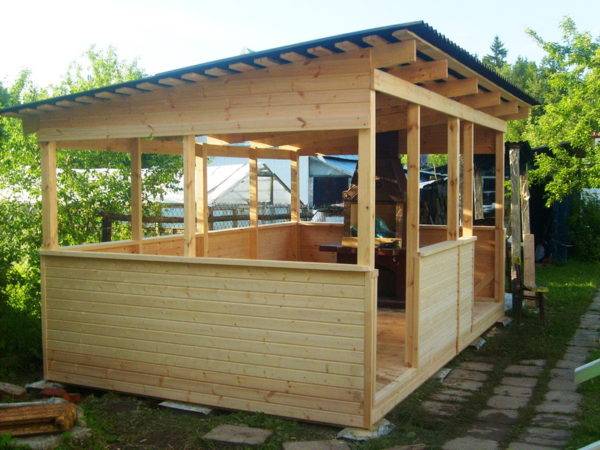 A wooden gazebo with a pitched roof inspires confidence, as it has won a good reputation long ago
Supporters of alternative solutions like metal buildings, because a structure made of shaped pipes looks special and does not rot, unlike a wooden object.
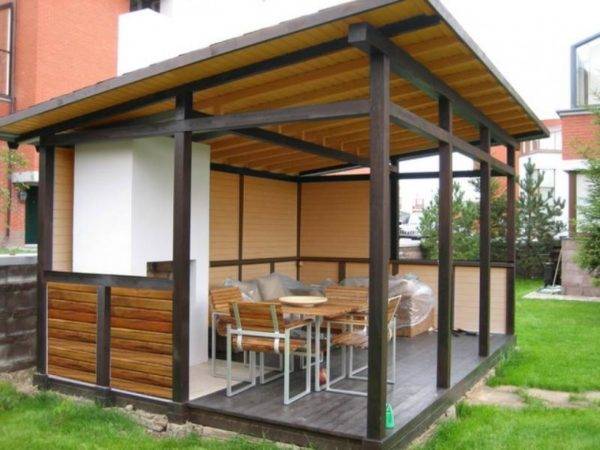 A metal gazebo with a pitched roof is chosen by those who do not want to fight wood decay
And some home craftsmen have even more modern views: they make a gazebo out of polycarbonate. The sheet of this material is large - 2.1 × 6 meters. Therefore, they manage to cover a significant area without creating many seams.
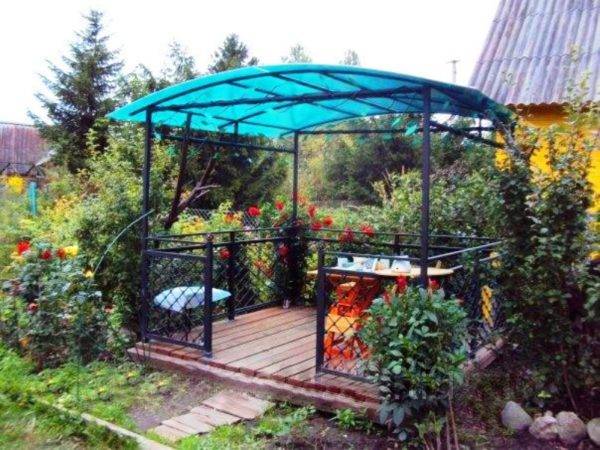 During the construction of a gazebo, polycarbonate often becomes a roofing material.
If there are no special requirements for the material for the walls of the gazebo, then the choice of roofing construction raw materials must be thought out to the smallest detail.
The wooden base for the roof material can be boards with a section of 10 × 5 cm and auxiliary elements with a section of 3 × 5 cm, located at a distance of 35-60 cm from each other. What exactly should be the gap depends on the weight of the building materials.
If it is planned to make a metal gazebo, then thin pipes with a cross section of 2 × 2 cm will be needed for the construction of the roof lattice.
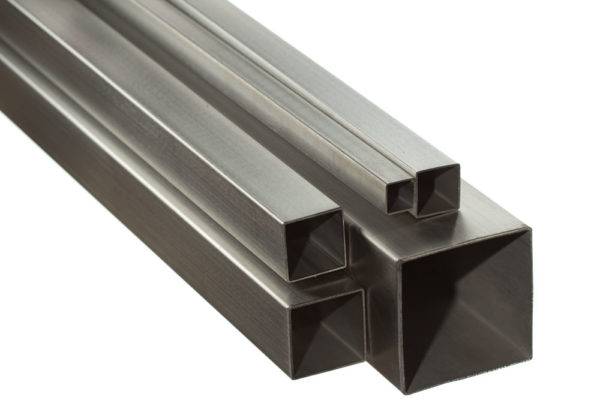 To create the lathing for the roofing material, the thinnest pipes are taken, since the frame of the gazebo will not withstand the weight of large metal products
Construction form
You should not get hung up on gazebos that resemble a square or rectangle in shape. Of course, building a structure with faces like a simple geometric figure is easier and faster. But constructions of non-standard shape are much more conducive to relaxation.
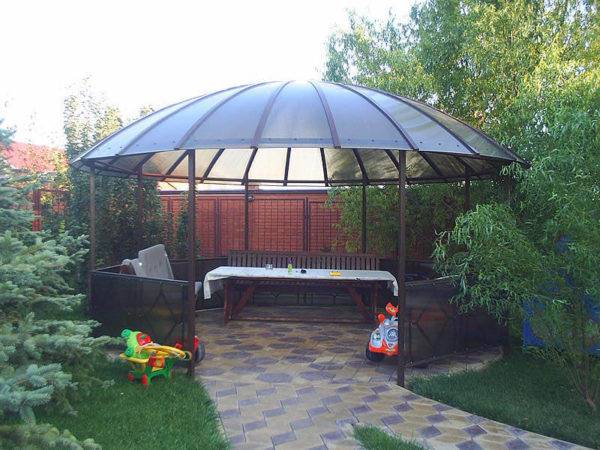 A gazebo in the shape of a circle is of more interest than a rectangular structure.
A gazebo with a roof in one slope can really be made semicircular. And if you wish and opportunities, you can move away from traditions even further - to create a triangular or even hexagonal building.
Algorithm of actions
- We make a base of 2.5 by 2.5 meters from the beams, fasten them with a saw cut, put them on concrete slabs. We align the bars, using a level and a square, fix the bar in the center 50 by 100 mm.
- We put 2.2 meter pillars in the corners, chamfering 1-1.4 cm, fasten them to the base using self-tapping screws and temporary spacers.
- For the upper strapping, we take beams 100 by 50 mm, we fix the beams under the railing.
- Next, we build the frame of the future roof, for this we fasten the timber vertically at the intersection of the diagonals, attach the logs to it. We make a lag protrusion by 300 mm, the height of the roof is 600 mm.
- We sheathe the resulting frame with sheets of plywood.
- Both entrances should be 900 mm wide, the width of the railing is 700 mm. For the manufacture of handrail posts, we use beams 100 by 100 mm, we take a height of 850 mm.
- We give the structure strength with the help of spacers made of boards, we sheathe them with clapboard.
- We cover the roof of the building with flexible tiles.
- We cover the floor with an edged board, pre-treated with a plane, covered with an antiseptic solution.
To decorate the openings of the gazebo, we use a wooden picket fence.
Attention
! We start calculating the picket fence with two solid lines. On the railing, we postpone the distance of the vertical left post, then we fix the crate itself, combining the point that was set aside on the railing with the diagonal of the post
We divide the entire space between the slats into the required number of steps (identical parts), then cut off the picket fence, fix it. We put the crate from the upper left corner in a cross - in a cross.
Advice
! When attaching the lathing, it is important to check the parallelism of its laying, and you also need to control the distance between the slats. If there are free resources, you can additionally conduct electrical wiring in the gazebo, install a shelf under the TV, make sockets
All structures made of natural wood, it is important to immediately cover with protective impregnations
If there are free resources, you can additionally conduct electrical wiring in the gazebo, install a shelf under the TV, make sockets
All structures made of natural wood, it is important to immediately cover with protective impregnations
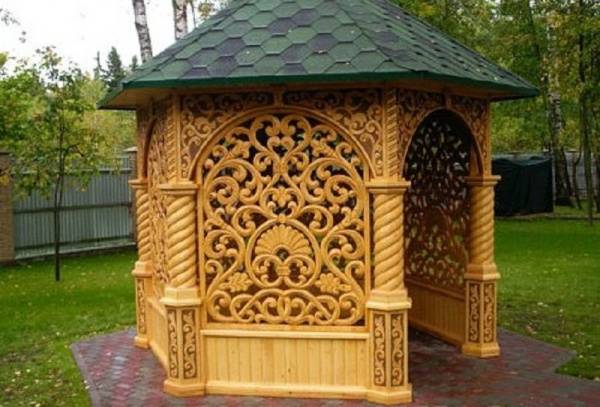
3 valuable expert tips
When a gable gazebo is being built with your own hands, there is always a risk of making a mistake or oversight. The fix requires additional investment and time consuming. So that everything works out the first time and does not have to redo the work, use the recommendations of the masters.
- What kind of covering to choose for the roof? Not all materials are suitable for a gable roof. It is worth taking a closer look at a surface that has a low resonance capacity. For example, slate or ondulin, roll types of roofing. They dampen the sound of falling drops and maintain silence. But metal tiles and decking, on the contrary, create a lot of noise and interfere with communication.
- Installing a barbecue is a great idea. But in this case, the roof must be made of non-combustible materials. Even if the roof does not have refractory properties, you can find a way out. A protective metal screen is installed over the place where the fire source will be. It can also be made from asbestos cement.
- Do I need to make a channel to remove the smoke? If you are building a gazebo with a stove, barbecue or fireplace, then yes. Otherwise, smoke and combustion products will remain in the room, making your stay less comfortable.
Construction process
The hipped roof of the gazebo with your own hands is not an easy task, but we will tell and show in the photo all the features of this process. The most important step is preparation. To get started, we need drawings of the future roof. Once again, we recall that complete symmetry is important for this roof option, so be careful.
As an example, we will consider a gazebo with four identical walls. We begin to calculate the roof. The area of the slope is calculated by the formula:
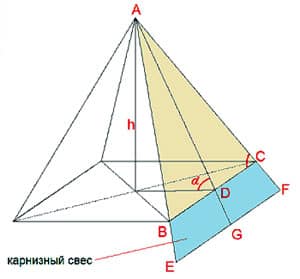 Photo - Scheme of the hipped roof
We recommend using a slope of 30 to 40 degrees. All other parameters are calculated according to the drawings.
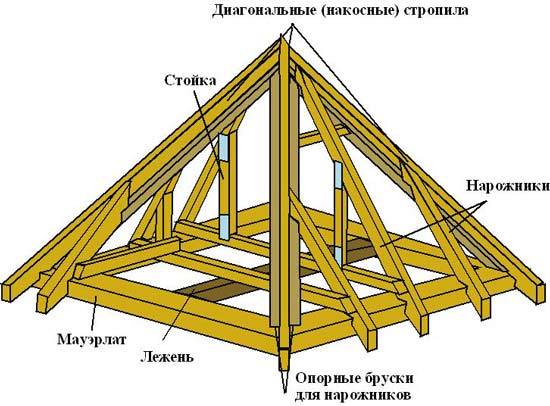 Drawing - The structure of the hipped roof for the gazebo
Because we have a quadrangular gazebo, we will make an inclined rafter system. It consists of:
- The Mauelrats;
- Oblique rafters;
- Rafter legs;
- Other structural elements (girders, purlins, etc.).
The assembly of the main units must be started on the ground - this will significantly reduce the time spent on installing the roof. You need to be the first to lay the Mauelrats, place the beds on them and complete the frame with scaffolds. From the corners opposite to each other, it is necessary to raise the rafter beams and connect them in the ridge. When the knot is ready, we attach the rest of the rafters to it. To give this structure rigidity, you need to install a vertical beam in the center of the roof. Now it remains only to mount the rafters and rafter legs and raise our structure directly to the roof.
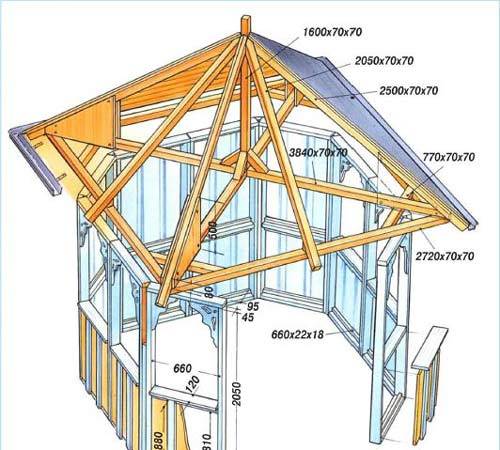 Drawing - Hip roof option
On this, the construction of the roof of the gazebo with your own hands can be considered complete. Once again, check the correct angles with a protractor and install the beams in their rightful place. Do not cut any additional elements into the boards of the rafter system so as not to weaken them.
Tips from the masters:
- Always make the overhang at least half a meter further than the wall of the gazebo - this will protect you from drops and increase the rigidity of the roof;
- Be sure to fasten the rafters to the walls;
- When covering the roof, do not forget about air cushions and ventilation ducts;
- The main thing in building a roof is calculating the angles, be especially careful at this stage.
Gazebos with a transparent roof
For a gable roof gazebo of any style, polycarbonate is a real godsend. It does not need to be bent, you can take it in whole sheets at once and it is convenient to fasten it. Such gazebos are light, spacious and quiet:
It is only important to know a couple of technical points when working with such a roof. So, all metal fasteners that you will use must be anti-corrosion
The fact is that polycarbonate keeps heat too well. It lets the sun's rays pass through itself, but does not release invisible infrared (heat, in fact). For comparison, touch the windowsill on a sunny day - warm, but the glass is cold, although, in theory, it should have just warmed up first
So, all the metal fasteners that you will use must be anti-corrosion. The fact is that polycarbonate keeps heat too well. It lets the sun's rays pass through itself, but does not release invisible infrared (heat, in fact). For comparison, touch the windowsill on a sunny day - it is warm, but the glass is cold, although, in theory, it should have just warmed up first.
Or pour water into a plastic bottle and put it in the sun - the liquid will quickly heat up, but it will take a long time to cool down. The same thing happens with any transparent roof, under which it is always much warmer than outside. As a result, polycarbonate roofing sheets turn out to be colder than the air under them, and all invisible water vapor always rushes up to them. And it settles in the form of water droplets directly on the metal mount, which, in turn, is even colder than polycarbonate.
Such is the physics! This process is called condensation, and for fasteners, it turns into rapid corrosion and oxidation, unless you have purchased anti-corrosion accessories.
Make your dream come true!
Creating a roof for a gazebo
The roof covering for the gazebo can consist of one slope. Perhaps this is the most suitable option for such structures, since it is distinguished by the ease of installation of the roof structure, which, despite its availability, has a spectacular and attractive appearance.
A pleasant shade will leave the roof, and the covering will protect from the direct influence of sunlight. To determine the most suitable angle of inclination, we recommend that you use a special calculator for construction calculations. When creating a roof, it is important to use high-quality fasteners
Such auxiliary tools can be easily found in the vastness of the network by going to thematic sites and forums. I am assembling the roof, do it in several stages:
- First you need to cut the rafter legs. It is best to do this with a margin and with the expectation of 2 additional overhangs of approximately 0.4 - 0.5 m. To each rafter, special cuts should be attached, which should be attached to the upper part of the base strapping. They will serve as a kind of pattern for the rest of the legs. They should be created according to a single scheme.
- All elements should be connected with nails or metal corners. Considering the angle of inclination, stretch the line and twine.
 The final stage of construction work
- Stretch with waterproofing tape and cut into several even strips. When fastening them, do not make a strong stretch, use a construction stapler. It is recommended to make a small overlap of about 10-15 centimeters. The greater the degree of inclination, the greater the overlap of the film sheets should be.
- Carry out the installation of roofing sheets, taking into account the advice given by the manufacturer, and also use the fasteners that come with it. In addition, try to respect the distance between the sheets and the need for an overlap (at least ten centimeters). Remember that the angle of inclination always determines which material is best for laying on the roof of the gazebo.
- The last thing that needs to be done is to fasten special boards, which are used to protect against wind at the end of the structure.If necessary, move eastward for a sink.
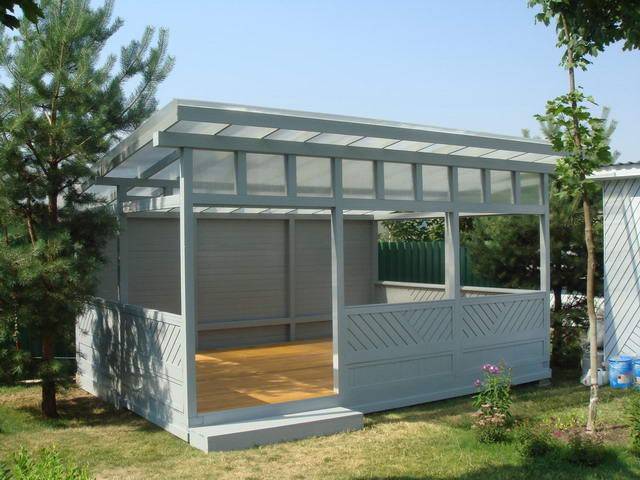 Spacious and light gazebo in light colors
All is ready. Such a lean-to gazebo is a real find for owners of country houses, as well as summer cottages.
It does not matter at all whether it will be autonomous or attached to the structure, the single-pitched gazebo will be a stylish and original decor of the site. She will always show guests that the owner of the house has good taste, and also strive to equip her site with her own hands. In this article, we examined in detail what stages of construction must be performed, as well as what structural features a gazebo has, assuming a pitched roof
If you are not sure about the choice of a particular material, be sure to consult with a specialist in the construction industry.
