How to knit a scarf-transformer: diagrams and descriptions
Option 1 (the easiest)
You will need:
yarn (optional):
- in the original, the transformer scarf is made of "grass", 100% polyamide, 100 m for 50 g - 6 hanks
- Tecno Yarn Art yarn - 100% polyamide, microfiber 100 m / 50g - 300g
- circular cn. No. 7;
- hook number 2.
Description
We collect 100 loops on circular knitting needles, then knit with front loops in a circle. The product will be of any length, it all depends on your parameters and preferences. We finish it by crocheting the edges of the work - 2 rows with a single crochet. This do-it-yourself snood with knitting needles stretches perfectly, so it can be used as a hood, dress, cape, snood or vest.


You will need:
- yarn (70% wool, 25% acrylic, 5% polyamide, 65 m per 50 g.) - 10 skeins;
- cn. No. 3.5 (for braids) and No. 4;
- markers;
- hook number 3.5.
The product, knitted with needles, is ideal for a girl with 42-46 pp. clothes.
Description
We will need to knit this model with a pattern of braids ("arans"). Such weaves give the product volume and the necessary density.
We collect 100 loops, we knit a scarf of the desired size according to the diagram below:

After drying, we crochet the product on the front side with single crochets in each loop. Then we just have to sew its edges, connecting them in a circle. You should fold the scarf-transformer "figure eight" and put on, dropping one loop at the waist, and straighten the other on the shoulders. If you wish, you can sew from behind the lower part of the upper "loop" that lies on the shoulders, with the upper part of the lower "loop" that is on the back, thus forming an original vest.
Option 3 (scarf-jacket)

Unusual, delicate, but at the same time quite warm - all this is about this beautiful accessory. If you carefully study the schemes and description, even a novice craftswoman can connect it.
You will need:
- ryazh (35% wool, 25% mohair, 23% merino, 10% angora, 7% polyamide, 95 m per 50 gr.) - 10 hanks;
- cn. No. 6.
Garter stitch: knit front and back rows with front loops.
A pattern of leaves and zigzags should be knitted according to scheme 1:
In the purl rows, the item should be knitted according to a given pattern, we make the yarn overs with the purl. We start with the edge p. And the loops in front of the rapport, repeat the rapport, finish the p. After the rapport and the edge p., Repeat the indicated rows.
Description
We collect 40 loops for the sleeve, now we need to knit 3 rows of garter stitch for the plank, then continue with a pattern of leaves and zigzags. After 15 cm = 30 rows from the plank, we add 1 p. For the bevels of the sleeves on both sides, in every eighth row 3 x 1 p., In every fourth row - 10 x 1 p. And in every second p. 8 x 1. When the transforming scarf is ready, do not forget to close the loops, moisten the finished product and let it dry in a horizontal position.

Warm, elegant and versatile this scarf is perfect for fall days!
You will need:
- yarn (50% angora, 50% acrylic, 100 m per 550 g.) - 6 skeins;
- cn. No. 4.
The finished product will be 190 cm long and 45 cm wide.


Description
Before starting knitting, be sure to calculate the loops, in our case, their number will be 105 loops. Distribute the loops on the narrow side of the future scarf as follows: 1 chrome. p., 5 p. garter stitch, 2 p. stitch, braid of 24 pet., then 2 pet. out. stitch, 37 pet. garter stitch (middle part), 2 pet. we knit out. stitch, now again a braid of 24 pet., 2 pet. out. satin stitch, now 5 p. garter stitch and 1 chrome. NS..
The number of loops in the middle part of the panel depends on the total number of loops made in accordance with our preliminary calculations, and therefore it can vary: if we need to dial not 105 points, but 100 points, then in the middle part there will not be 37 points. , and 32 p. (37 - 5 = 32). Therefore, if we scored more than 105 loops, then the excess ones are again added to the average 37 loops.
It is also worth remembering that it is better to knit edge loops with front loops, this will make the edge of the scarf more neat, more ribbed and protect against rapid stretching and deformation.
The main decoration of this snud is the original embossed aran braids, to create which you need to move 3 pet. left or right according to the scheme using the auxiliary knitting needle.
That's all! We hope we helped you decide on the model. Be beautiful!
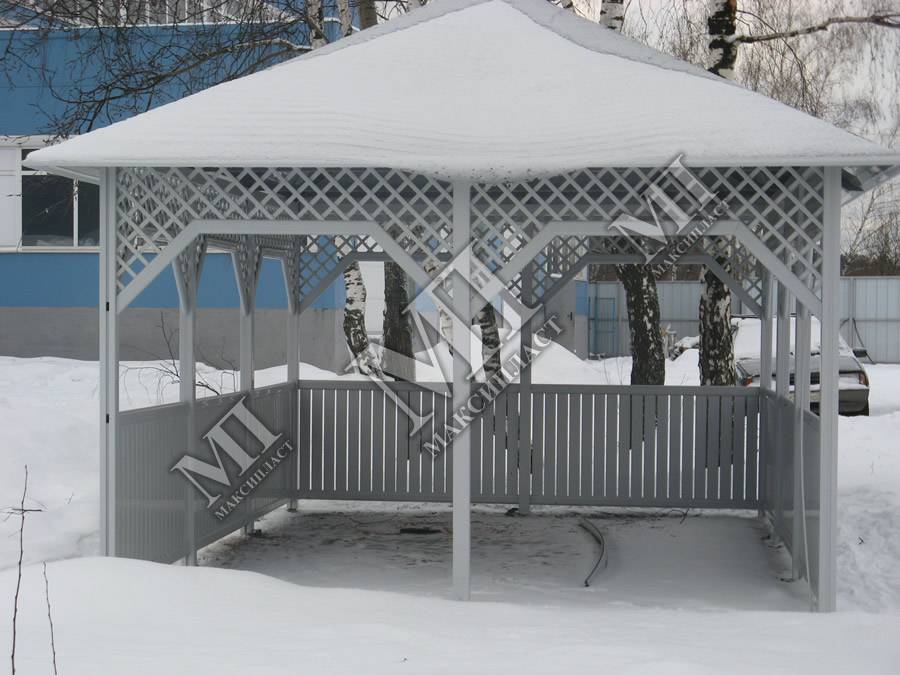
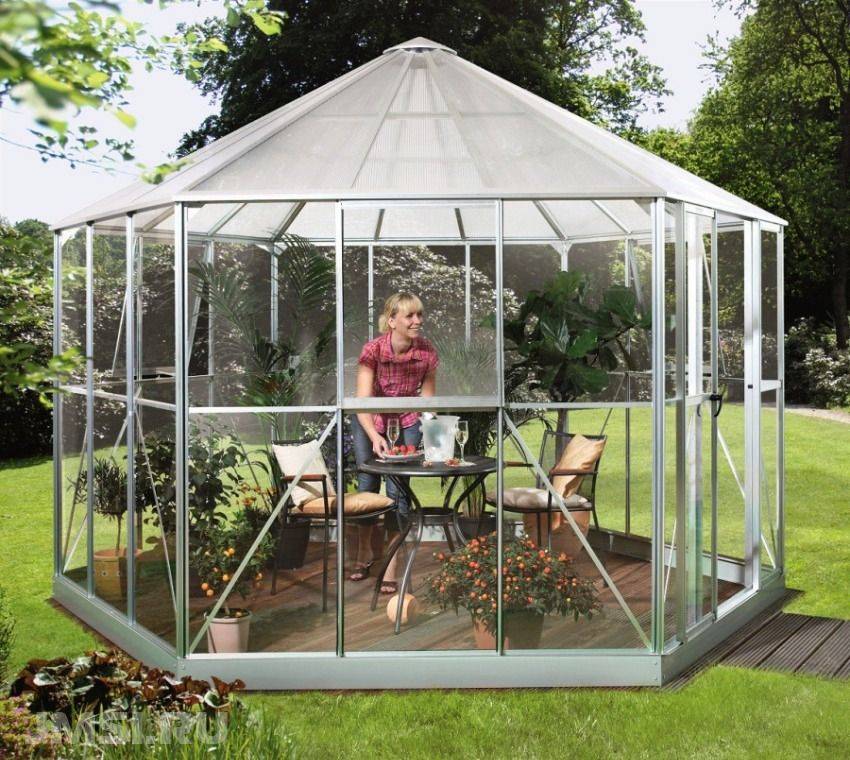
DIY construction of a polycarbonate gazebo
Another advantage of polycarbonate is that it is not difficult to make a structure out of it with your own hands.
Choosing a place for a gazebo
By and large, a polycarbonate structure can be installed anywhere you want. But if a capital structure is planned, then the choice of its location should be approached responsibly.
It is best if the area for the gazebo meets the following characteristics:
- Dry and level place with low water table.
- In partial shade of trees and without drafts.
- Close to the main buildings.
Tools and materials
Before construction, you need to prepare:
- shovel;
- screwdriver;
- hacksaw;
- fasteners in the form of nuts and screws;
- drill;
- hammer;
- screwdrivers;
- chisel;
- drill;
- nails;
- glue;
- paint;
- cement mortar.
There are many options for the design of polycarbonate gazebos. But when the work is done on our own, it makes no sense to make some particularly complex structure. To build a simple and reliable polycarbonate gazebo, you will need the following materials:
- polycarbonate itself;
- boards and slats;
- wooden beam;
- metal pipes and profiles for the roof;
- bricks for decoration.
The base of the gazebo
In order for large brick-polycarbonate or wood-polycarbonate pavilions for summer cottages to be reliable and durable, they must be installed on a base platform or foundation. To ensure the strength of a standard small gazebo, the installation of supporting pipes is sufficient. For this:
- The marking of the site is being done.
- Depressions are dug in the designated places.
- Pipes are installed in pits and rigidly fixed in a strictly vertical position.
- The pits are filled with cement mortar, which hardens within a few days.
If it is necessary to fill the entire site, this must be done simultaneously with the installation of the support pillars - this way you will get a solid monolithic base.
Gazebo frame
The work on the construction of the frame can be performed in two versions:
- The carbonate panels are gradually attached to the bearing pillars. Even one person can handle this task.
- The entire structure is installed on the supporting pillars. This will require the strength of several people, and in some cases, even special equipment.
In any case, the frame is secured with bolts or welding. For reliability, it is best to use two fastening methods at once - both bolts and welding.
Roof
The shape of the roof is chosen at the request of the owner. The main thing is that the roofing material is installed at an angle (for rainwater drainage) and absolutely tight. To ensure tightness when installing the roof, it is necessary to use special cuffs, slats and gaskets.
Internal arrangement
It is mainly about the table and benches. It is best if they will be attached from the inside to the surfaces of the gazebo. The best material for making furniture is wood. Only first it must be processed with sandpaper and soaked in varnish.
Decorating
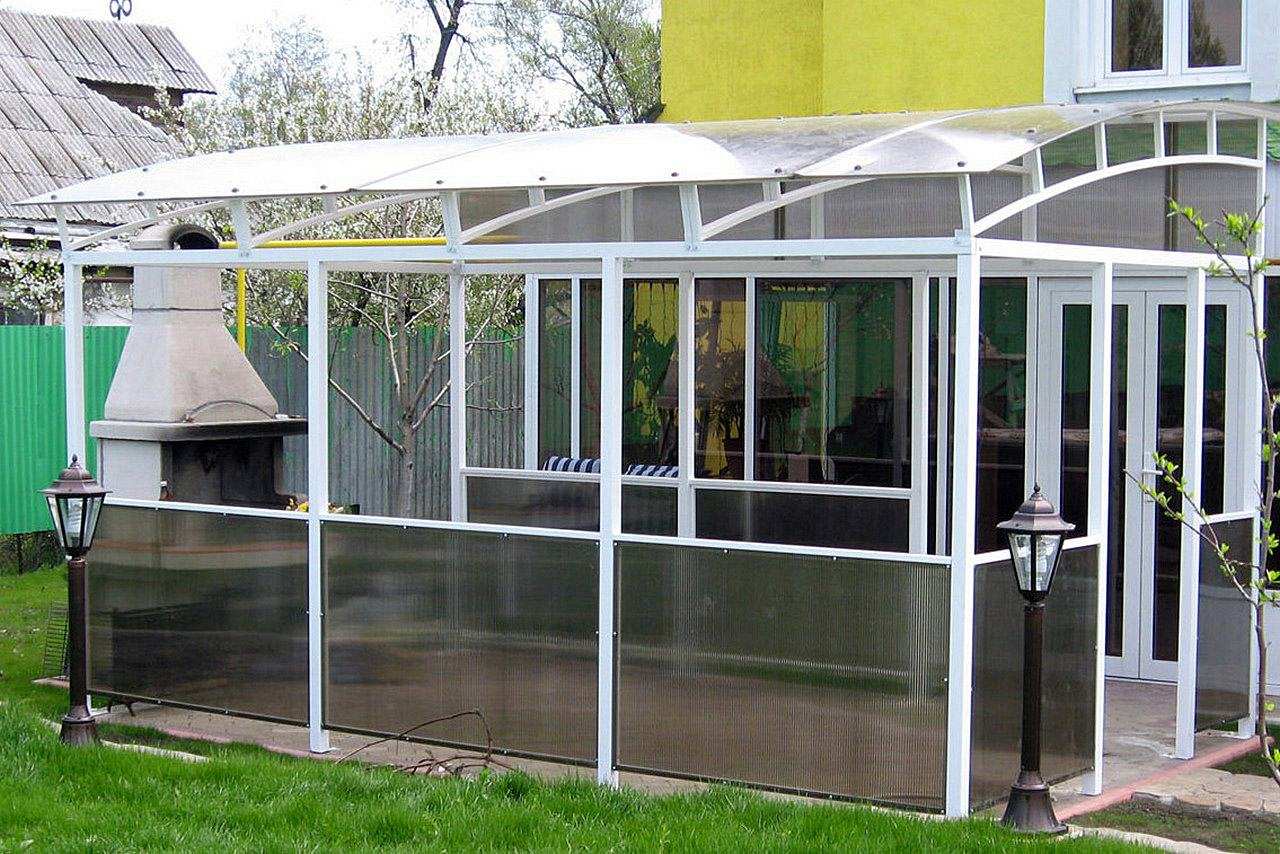
By themselves, polycarbonate gazebos have an attractive appearance.But it can also be improved by decorating the base of the structure with bricks, as well as decorating the gazebo with lanterns, tablecloths, floor lamps, vases, dried flowers, etc.
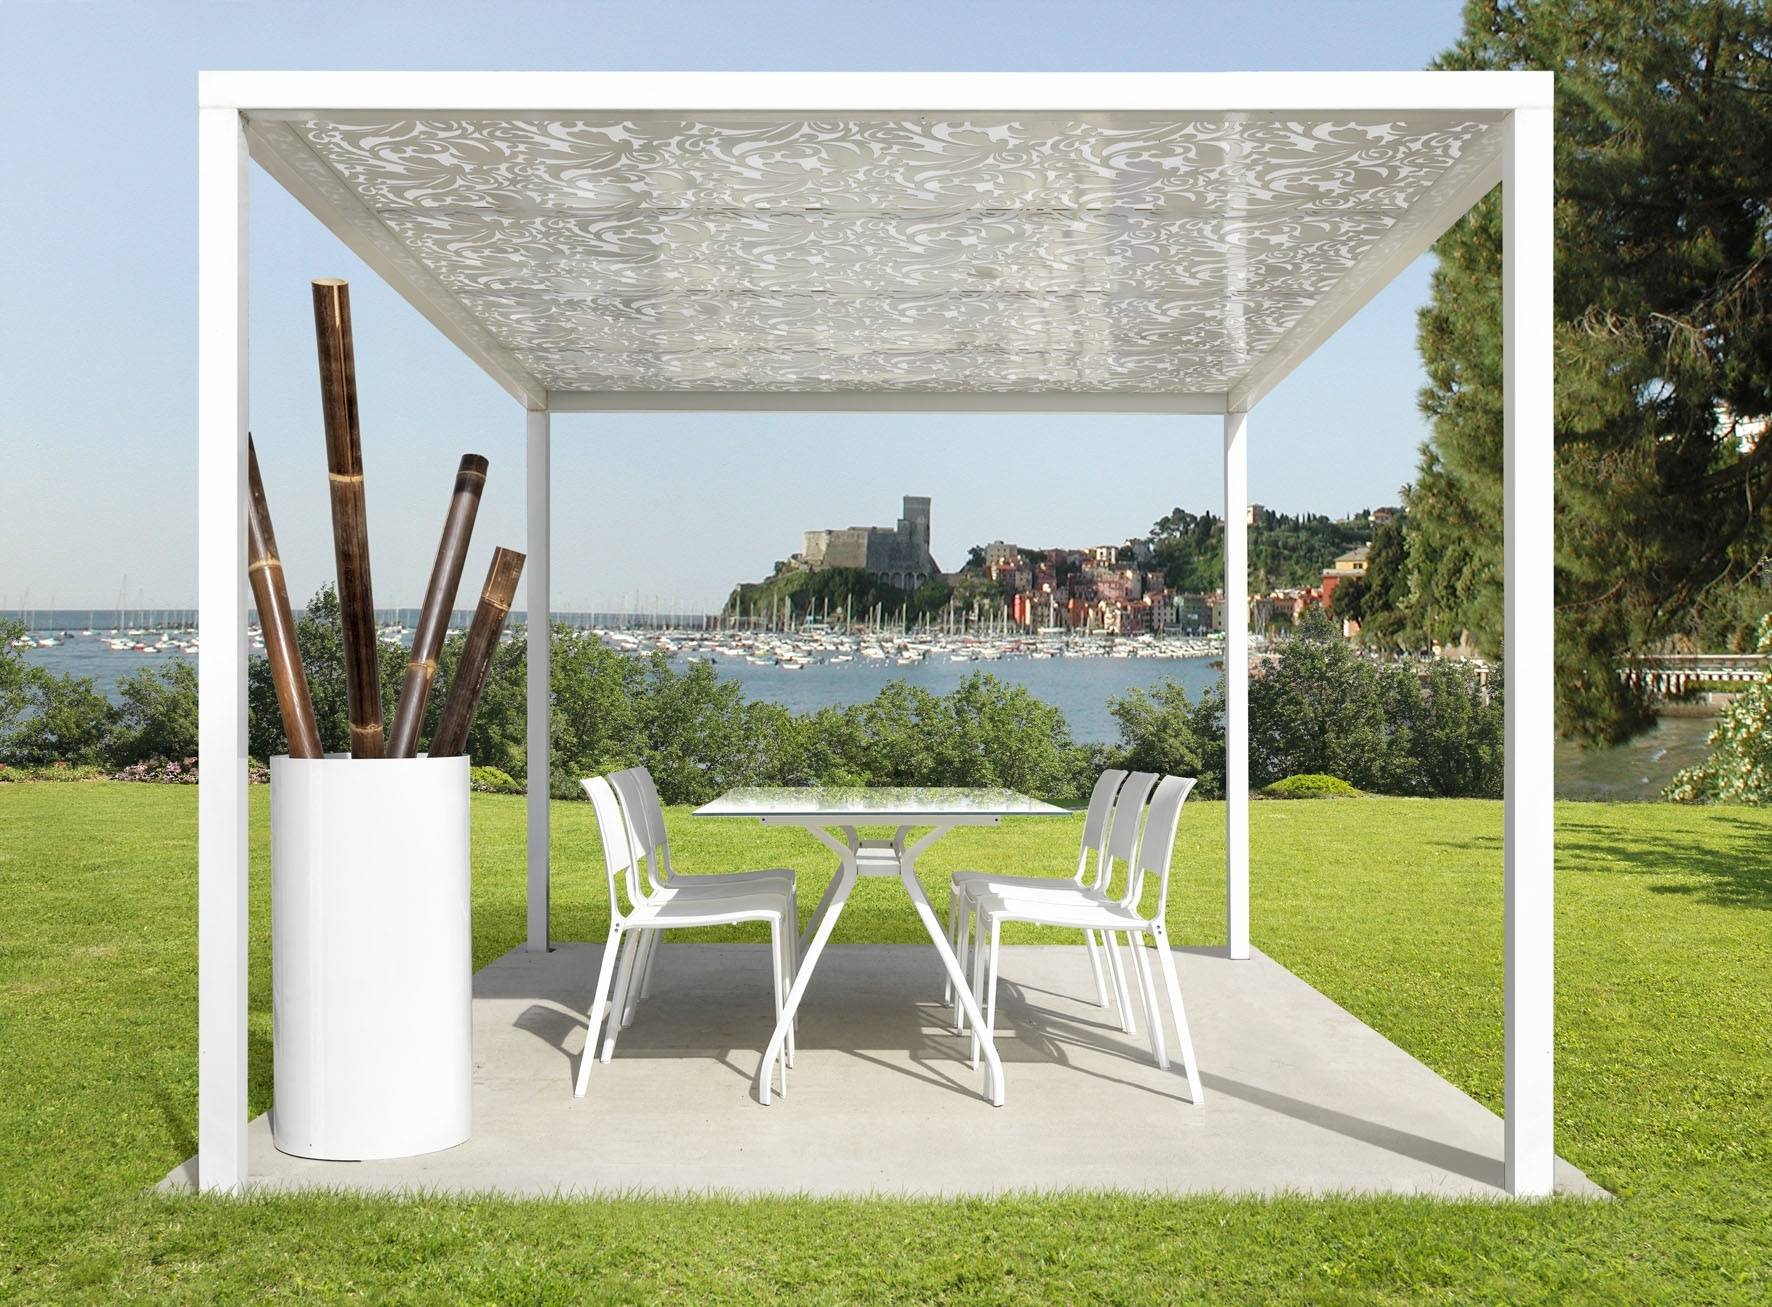
Design options for such awnings
Experienced craftsmen have long understood the value of PVC pipes as a material for various crafts. Chairs, benches, greenhouses and greenhouses, gazebos and awnings are made of plastic pipes; there are a great many options for using this flexible and pliable material. We also decided to keep up with this issue and offer you some of the most popular do-it-yourself canopy designs using PVC pipes.
Arched canopy made of PVC pipes. This is perhaps the most popular summer cottage and tourist shed made of PVC pipes. Even a child can make it, since it consists of two long PVC pipes, bent into an arc and dug into the ground. A piece of fabric is placed between the arcs, which will act as a roof. Such a canopy is quite stable and protects well from the sun and light rain, although in windy weather it is, by and large, useless.
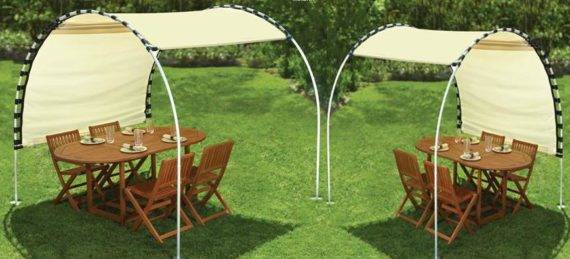
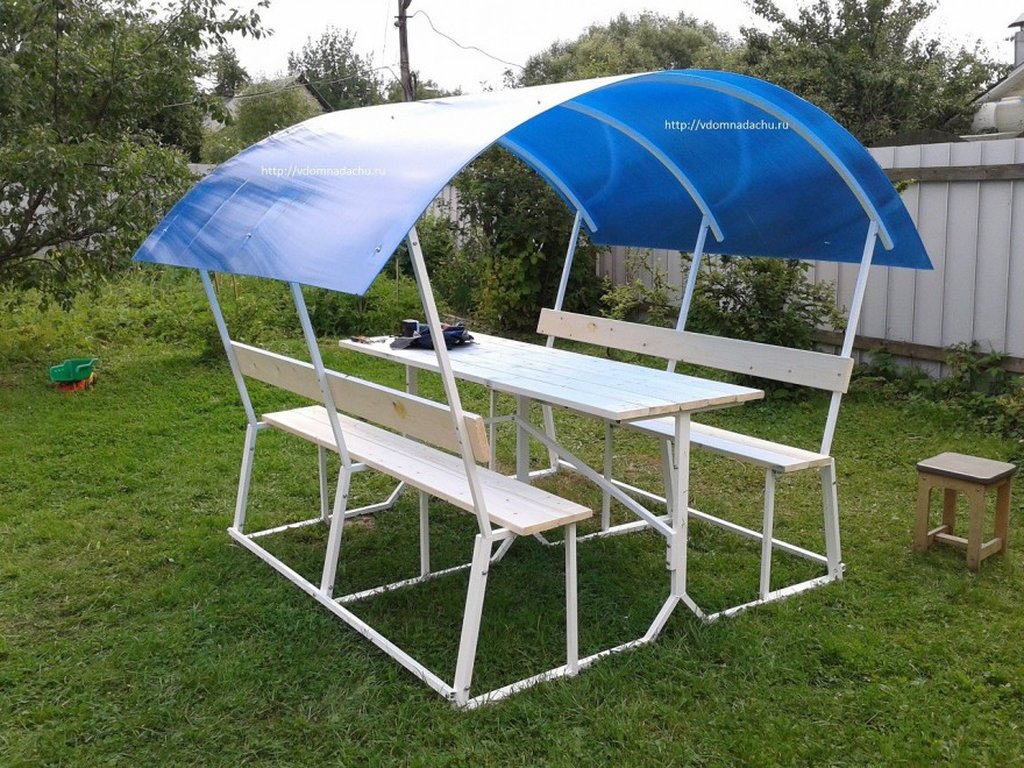
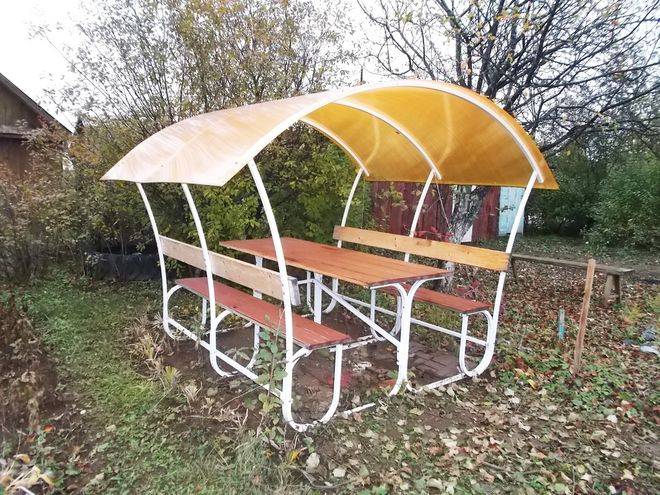
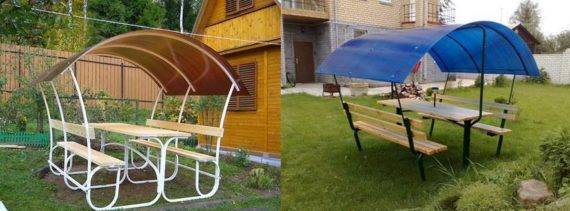
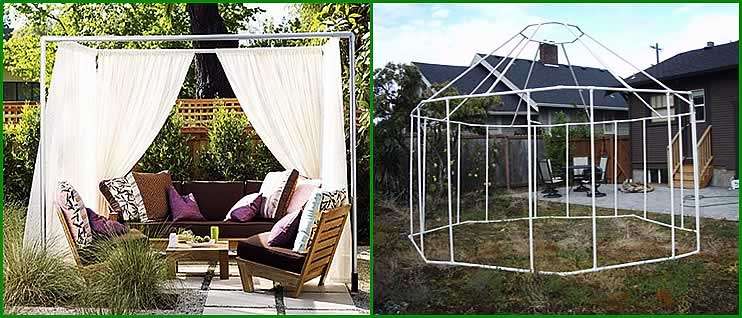
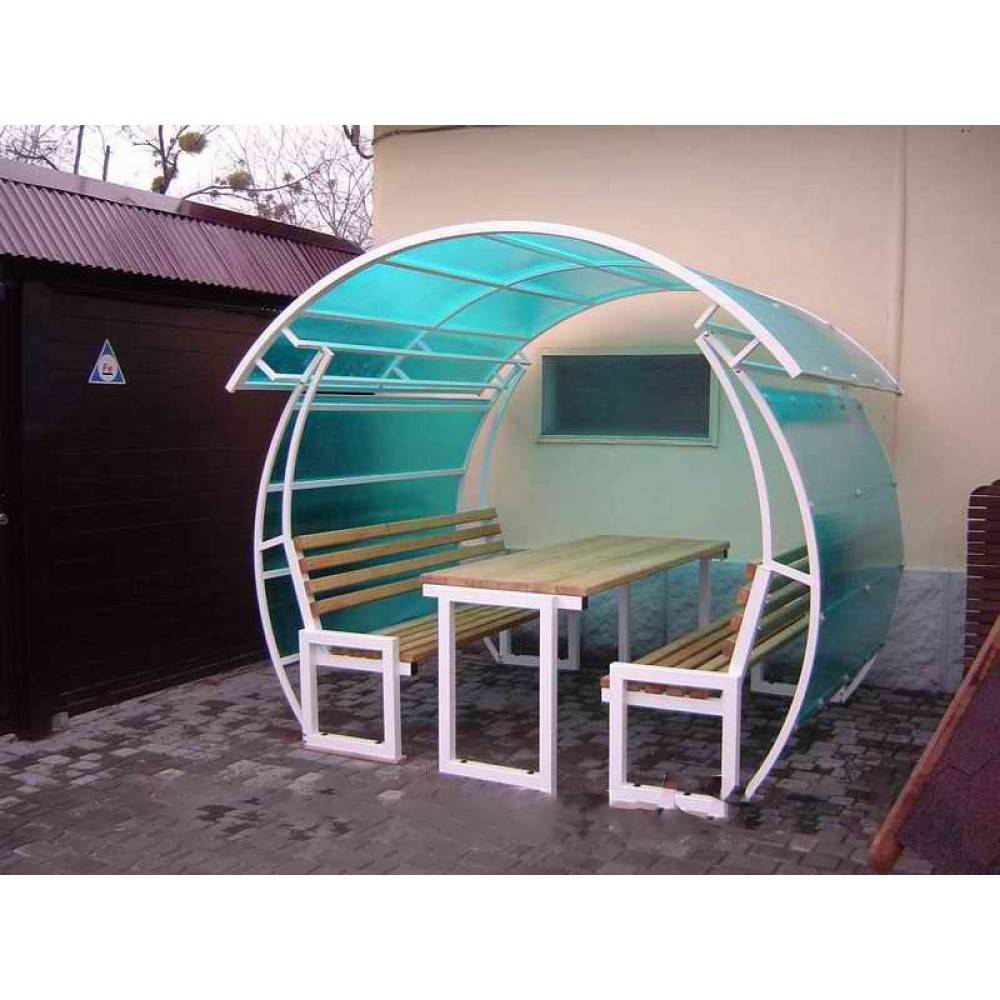
Portable arched canopy made of PVC pipes. This canopy is both more interesting in appearance and more complicated in design. Such a canopy consists of several bent and intricately interconnected PVC pipes. For such a canopy, not only a soft, but also a hard roof is acceptable. This canopy differs in that in a single structure there is not only a frame for supports and a roof, but also a frame for benches and a table, which makes it look like a gazebo, hence the name of the gazebo canopy.
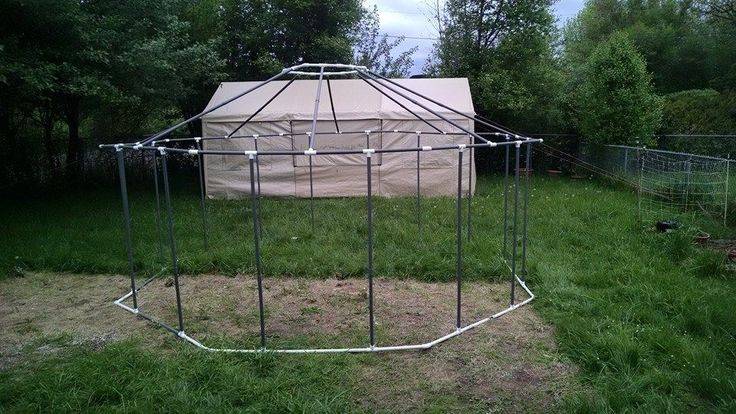
Easy collapsible carport from PVC pipes. This canopy is good because it can be assembled and disassembled by one person in about 1 hour or even less. Its supports consist of eight PVC pipes, which are fixed to the roof frame as a whole and dug into the ground at a shallow depth.
Any weather-resistant fabric, such as tarpaulin, is used as a roof for such a canopy. Rigid roofing is not used. The canopy should not be operated in wind gusts of more than 15 m / s, although if it falls, there will be no harm to the machine, since it is light.

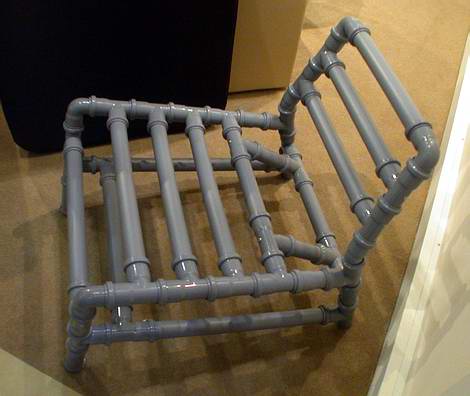
Lightweight canopy made of plastic pipes with a bench. This canopy is good because it is small and can be stored, for example, in a barn. In hot weather, you can take out such a canopy, sit on a bench under it and enjoy reading a book. The bench under the canopy is bent from several thick PVC pipes, the roof frame is made of thinner and more flexible tubes, and a woven fabric is stretched over it. This canopy can accommodate two people.

"The simplest marquise" made of plastic pipes. The structure of the canopy is pretty simple. Two long plastic pipes and two short ones are stuck into the ground. A roof made of lightweight fabric is stretched between them. In order for the structure to be stable, it is necessary to additionally strengthen it with rope guides.
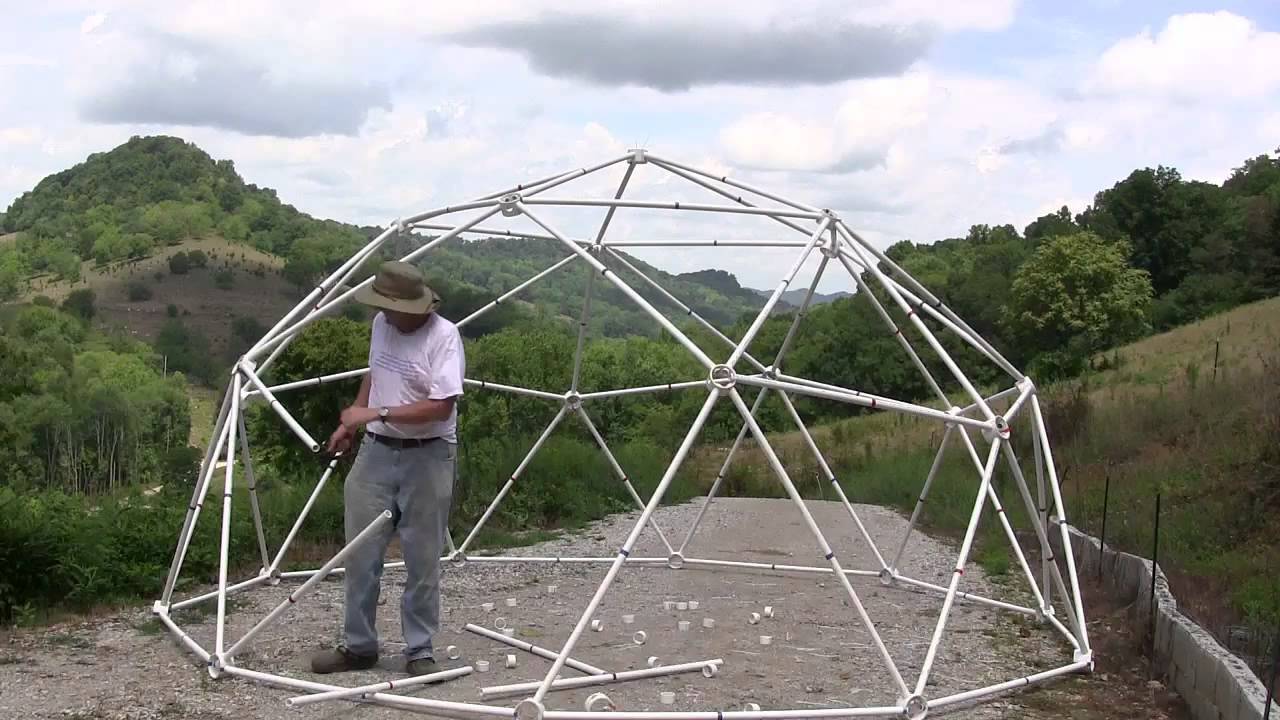
Stages of building a gazebo
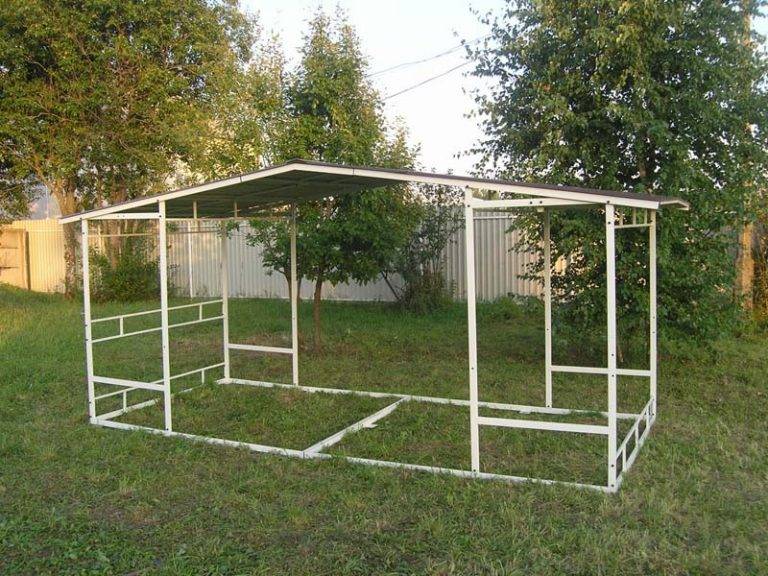
The first stage in the construction of a gazebo made of shaped pipes is the assembly of the frame. In order for everything to work out correctly, you need to decide on the design of the future building, and also make a drawing of it. The gazebo can be of any shape - square, hexagonal or rectangular.
Mark in the drawing the dimensions of the structure in length, width, calculate the required amount of material, then you can start assembling.
Next, you need to make the markup of the future gazebo directly on the site. According to the shape of the building, you need to dig trenches for the columnar foundation. For the support racks, such a length of pipes is required so that 50-60 cm goes into the foundation. Therefore, the pit should be at least 50 cm deep, and about 40 cm in diameter.
Having dug a trench with your own hands, you need to tamp the earth in it, place the support racks there and fill it with concrete.
Foundation strapping
The foundation strapping can be done with your own hands using the same profile pipe as the entire structure of the gazebo. The belts are welded to the top and bottom of the frame along the entire perimeter. It is necessary to arrange the belts so that the person entering the gazebo does not touch the upper belt with his head and does not stumble over the lower one.
Base for the plastic frame of the gazebo
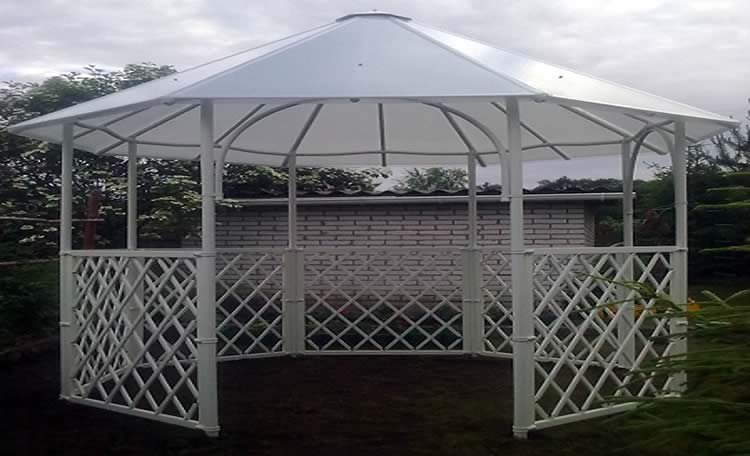
For a hexagonal gazebo, you will need a channel. The marking is carried out in the same way as in the first case, then the resulting circle is divided into six parts. The channel bar is cut into equal lengths with a grinder and connected to each other by welding.
The frame of the base of the future gazebo made of a shaped pipe in the shape of a hexagon is ready. After its completion, pipe sections of future racks are welded to it.
Construction of the roof and side parts of the gazebo
After it turned out to make the frame of the gazebo with your own hands, proceed to the implementation of the roof and side walls. For the roof, you will need to build rafters, as a rule, a profile pipe is used for them. The slope angle of the rafters is set at 10-150.
If a standard square or rectangular gazebo is being erected, then the rafter part is made in the form of triangles. For a large gazebo, in which the length of the rafters exceeds 1.5 meters, spacers and crate are welded. This is necessary so that the polycarbonate does not sag or deform.
For a gazebo in the form of a polyhedron, the roof rafters are concentrated near the axial post, which must be higher than all the others for the required slope. Polycarbonate is attached to the rafters using self-tapping screws or thermal washers: after marking and laying the sheets on the roof, they drill holes in the pipes and fix the roof.
To equip the side panels with your own hands, pipe sections with thinner walls are welded onto the walls than on the supports. If desired, the walls can be sewn up with wood paneling, plastic, or a hedge made of wild grapes or climbing perennial flowers.
Features of the construction of a gazebo made of PVC pipes
The process of building a gazebo from plastic pipes itself is not much different from the previous one. In the same way, at the initial stage, markings are made and a trench is dug under the base with their own hands. Further, a frame made of reinforcement is dug into the ground, to which the boards of the lower garter are attached.
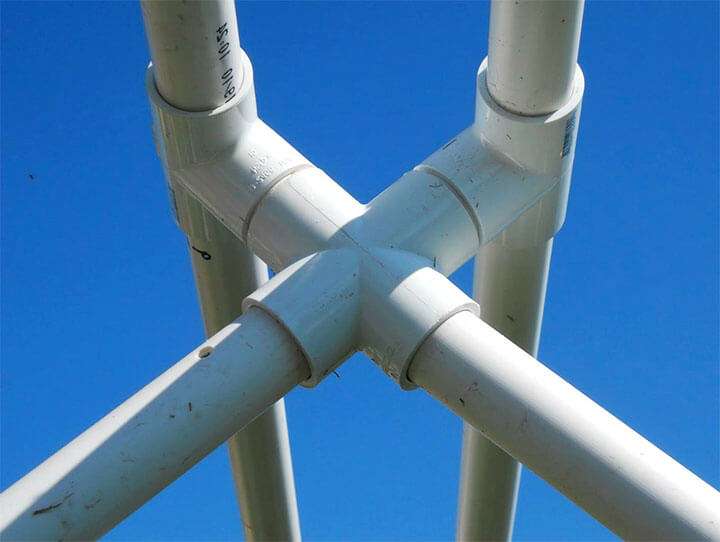
After that, the risers are put on the top of the garter. The supports are connected to each other using special fittings. For angles 1800 and 900, several connector options are required.
After the frame is assembled, proceed to the installation of the roof. For her, in the upper harness, they provide for the installation of tees in 450, into which the rafters will be attached.

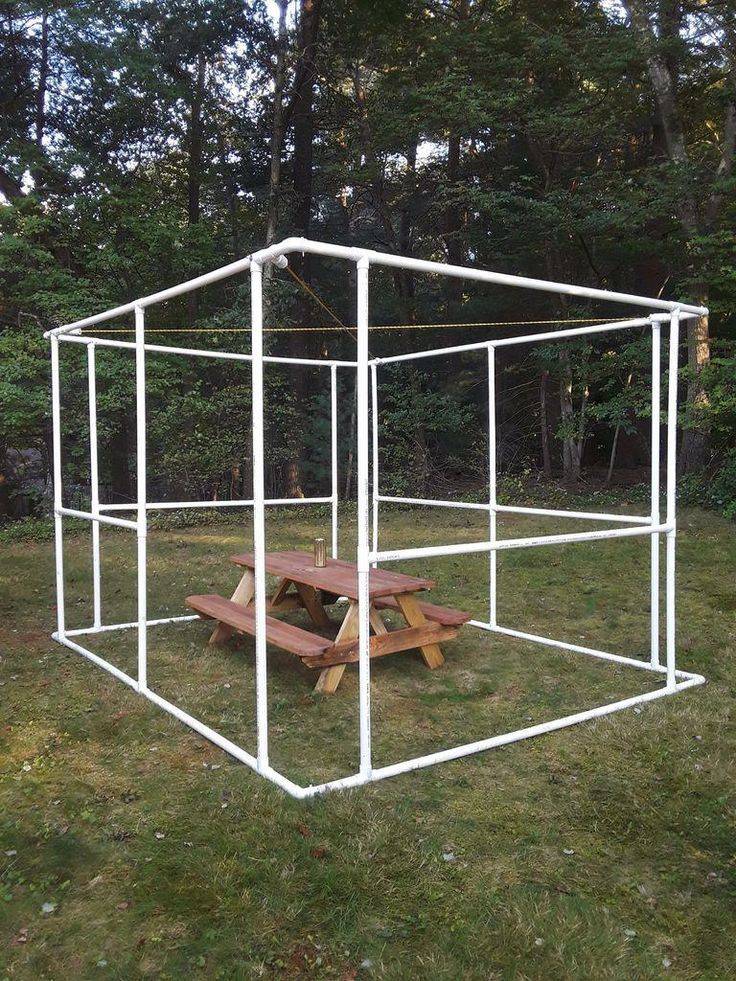
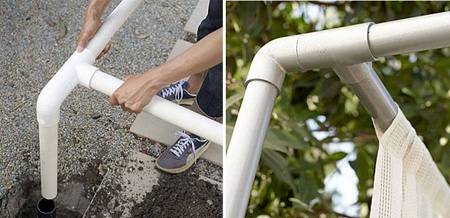
Frame for a gazebo made of PVC pipes
Tarpaulin or fabric is used as a material for roofing in lightweight structures of PVC gazebos.
After the walls and roof of the gazebo have already been completed, it is necessary to equip the floor. The most optimal, but also more expensive option for a strong and durable gazebo is a concrete floor. For lightweight structures of their PVC pipes, the floor can be covered with sand or fine gravel.
They also equip a wooden covering: in this case, the edged board is connected with a small gap: this is necessary so that the wood can expand from the effects of moisture. During the period of arranging the floor, benches and a table are installed.
How to make a gazebo with your own hands from water pipes
Let's take a closer look at each stage of the work.
We prepare materials and tools
- polypropylene pipes;
- precision scissors for cutting material;
- metal tubes or pieces of fittings;
- soldering iron;
- couplings (fittings) of different diameters;
- material for wall cladding, roofs;
- construction hair dryer;
- shovel.
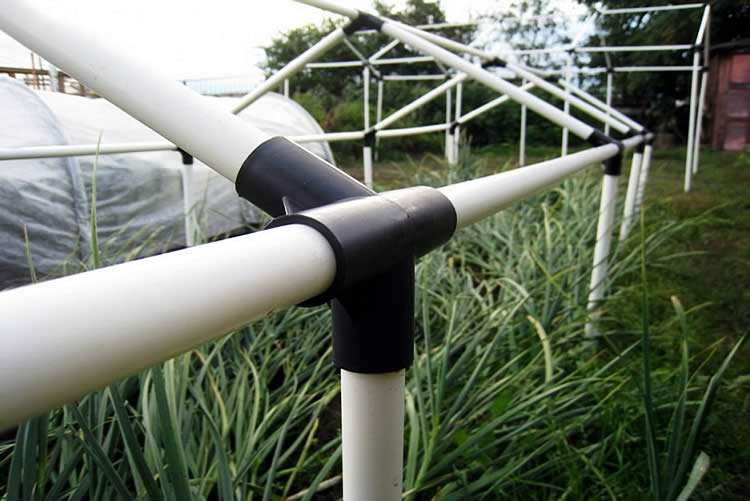
Fittings of the following types are useful:
- angular - for connection at an angle of 90 0;
- tees - fix three pieces of pipe at right angles;
- extension - for fastening three pipes under 180 0.
Cutting polypropylene to size
When the design drawing is developed, and all materials are purchased, it is necessary to start cutting the parts for the structure.
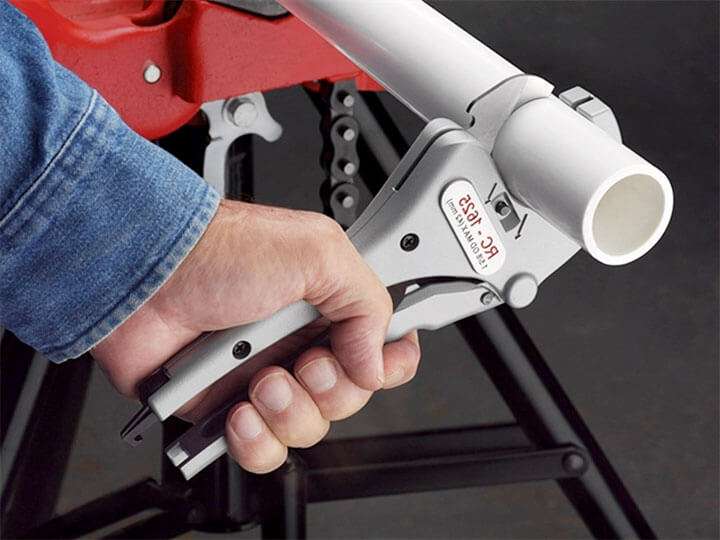
For the convenience of cutting PVC pipes, it is advisable to purchase special scissors, or use a hacksaw for metal
Conventional metal scissors cannot cope here, so you need to take precision ones with a ratchet-split mechanism. They can easily fragment pipes with a diameter of 3 to 40 mm.
Since the blades of these scissors are made of top grade alloy steel with a serrated bar, the cuts are smooth, without burrs. No effort is needed. Everything is done with the movement of one hand.
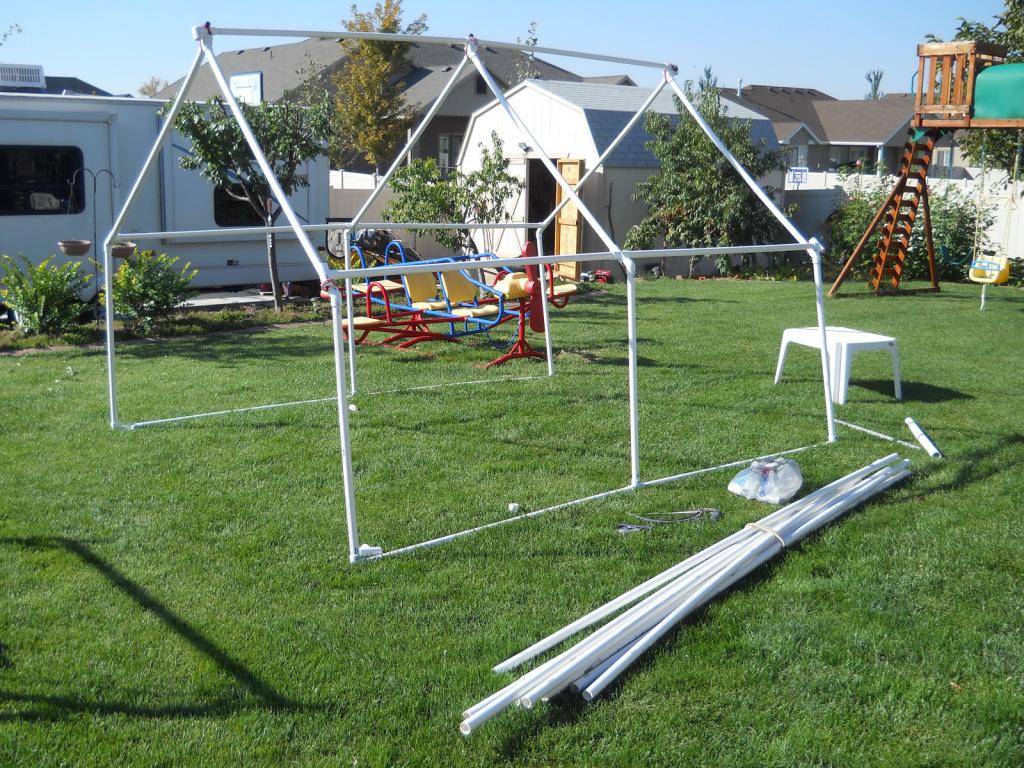
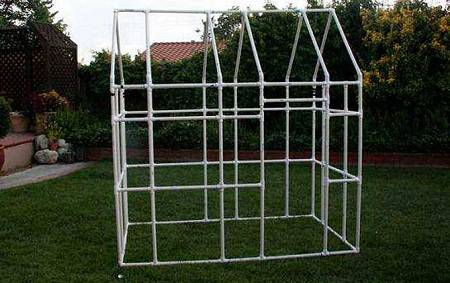
Assembling the frame of the gazebo
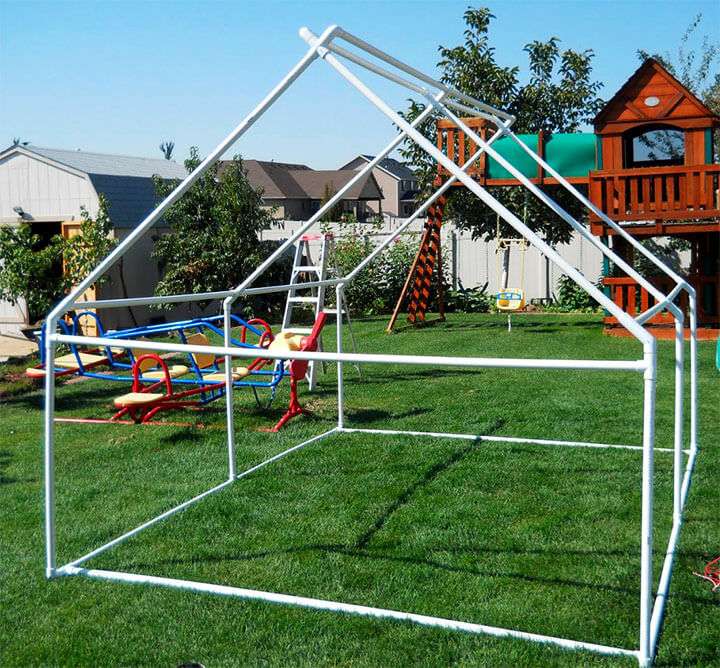
The procedure is as follows:
- We carry out markings for the installation of supports. There should be at least four of them, one in each corner. The uprights will add rigidity to the gazebo, resistance to strong winds.
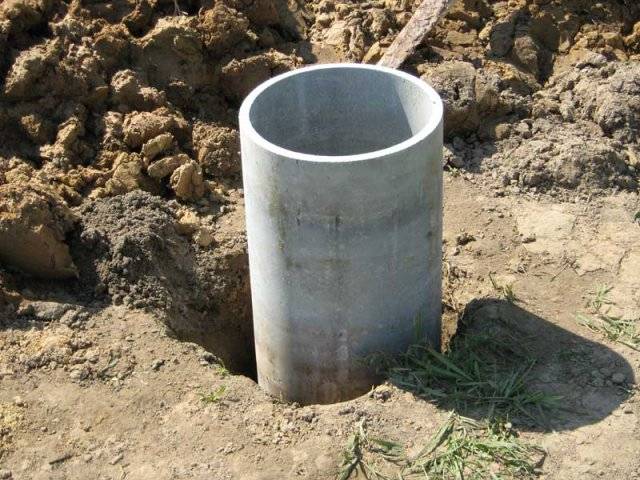
- We dig holes for them with a depth of 20 cm and above.
- We insert pieces of metal pipes into the pits. Their diameter should be slightly larger than plastic ones so that the latter fit snugly. An alternative is reinforcement rods. In this case, polypropylene pipes are pushed onto them from above.
- As soon as the supports are firmly fixed, you need to proceed to the upper strapping. To do this, at the top of the frame, parts of the cut pipes are connected to each other and risers with corner or triple fittings (depending on the type of project). The skeleton is ready for the roof.
But a significant drawback of such a plastic frame is instability to wind and rain.
Wall decoration
The choice of material depends on the budget of the owners.
Popular options for finishing:
- polycarbonate;
- polyethylene film;
- awning or tarpaulin;
- curtains.

In the last two cases, for better fixation, it is better to sew loops to the canvas. To do this, use a thread with a needle or a construction stapler. If you choose fabric for the upholstery, it must be waterproof. Shower curtains are also suitable.
Users are also looking for:
Polycarbonate fasteners are carried out on a ready-made structure. This will require special thermal nuts and sealant. Such a building can easily stand in the rain, but it is also more difficult to disassemble it.
Wild grapes can be planted around the perimeter of the gazebo. Overgrown, it will create a shadow.
We carry out roofing
Fittings built into the top rail make it possible to design any roof design.
The simplest version with a gable roof is done as follows:
- When performing the upper piping to the pipes, we fix the tees at an angle of 45 0.
- We insert the rafters into them.
The roof frame is ready. We lay roofing material on top.
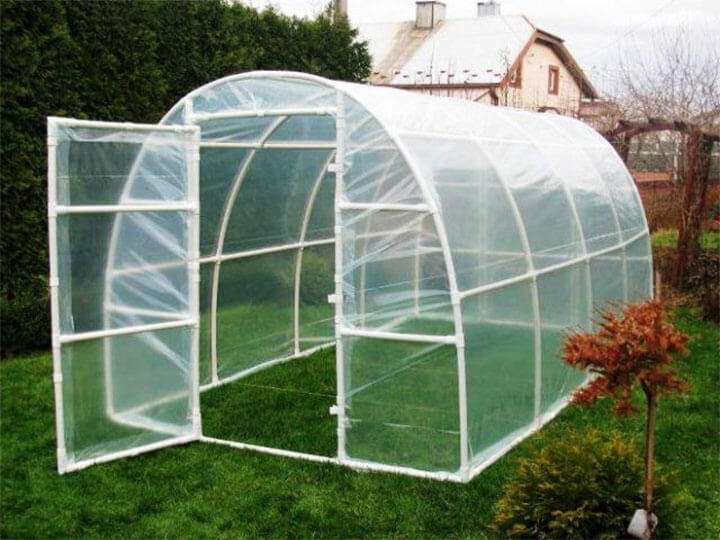
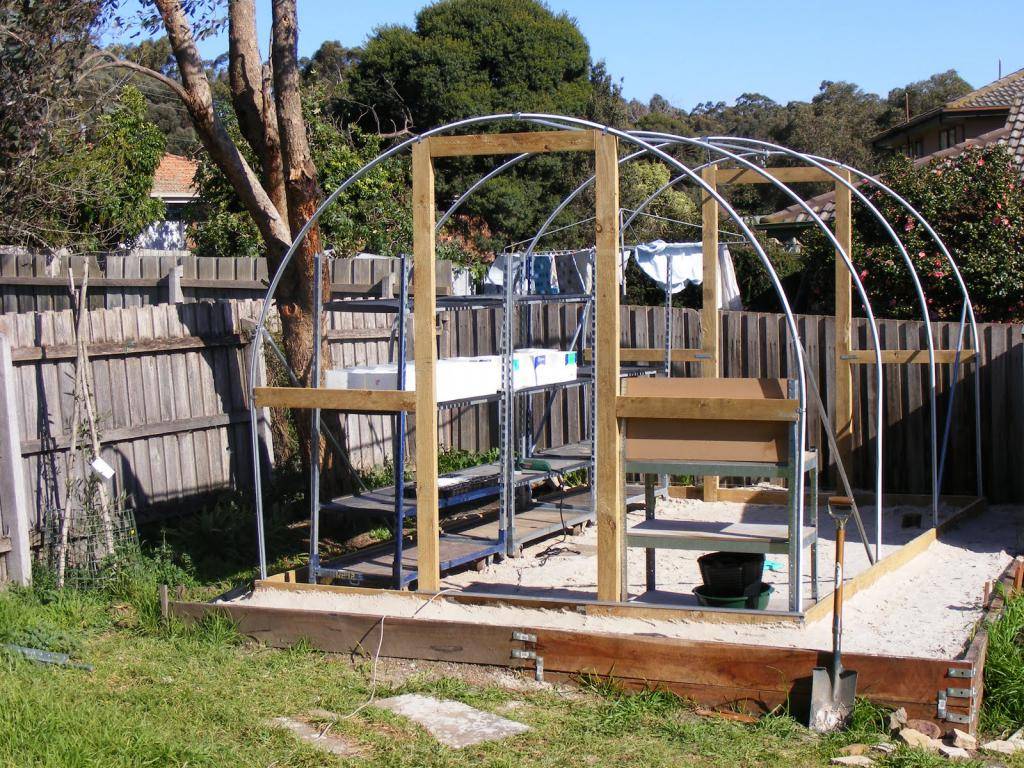
Photo: greenhouse in the country. The principle of assembling the frame is the same. Differences in the geometric shape of the structure and in the wall cladding.
DIY erection
First, find a suitable place for the gazebo. It is desirable that it is located in the shade. It's good if there is a comfortable path leading there. The structure cannot be installed in a low-lying area, so that water does not drain there.
In the gazebo located next to the house, it will be easier to organize tea drinking and feasts. A gazebo built in the back of the garden will be more atmospheric.
Consider the size of the structure, focusing on both the number of people you want to receive there and the amount of free space on the site. For example, for one or two people, a gazebo of 1.5x1.5 m will be enough, for a family of 3-4 people, a square structure 3x3 m will be a good choice.
Create drawings of the gazebo and, based on them, calculate the required amount of material
Please note that the racks will need pipes about 20 cm higher than the planned height.

Many experts recommend using a rectangular PVC profile for the construction of a greenhouse, which is stronger than pipes with a round cross-section.
For construction, the following tools will be required:
-
precision scissors or hacksaw for metal;
-
fittings or metal pipes of a slightly larger diameter than plastic;
-
corner, extension fittings and tees;
-
shovel;
-
construction hair dryer.
The foundation
At the selected location, clear the soil and make markings. In the corners of the future structure, dig holes 20 cm deep and insert iron pipes there. Top up the sides with soil and compact it. If the structure is large, you can make a columnar foundation by installing formwork and pouring concrete in the recesses.
Insert plastic pipes into metal ones. You can also stick pieces of reinforcement into the ground and place racks on them. If the structure is supposed to be collapsible, after removing the gazebo, do not forget to close the pins so that no one is injured. You can use empty plastic bottles for this.
Frame for walls
For simple gazebos, four racks with a top harness will be enough:
- Prepare 4 pipe sections: 2 in length and 2 in width of the structure.
- Connect the long pipes to the uprights with tees.
- Insert both ends of the short pipes into the corners.
- Attach the elbows to the tees using connecting extensions.
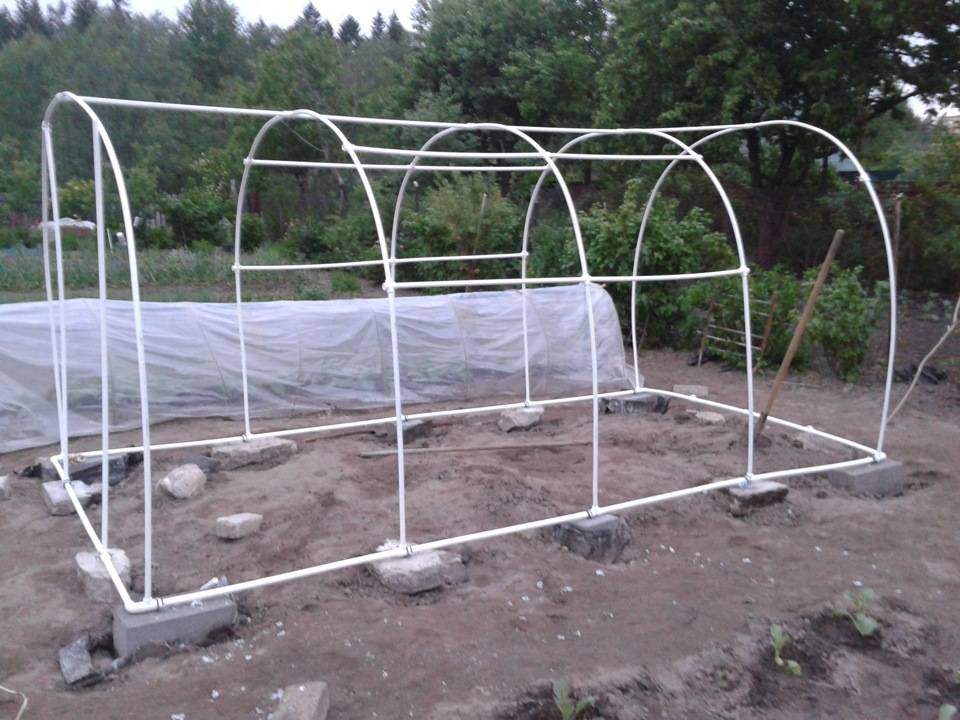
Roof
In such a gazebo, the roof can be gable or arched. It is undesirable to make a single-slope one: precipitation will accumulate on a flat one, and to create an inclined one will require racks of different heights, but in this case it will be difficult to make strapping.
To create an arched roof, cut the required number of flexible pipes - approximately one per 1-1.5 m of the length of the structure. Secure them with cross members using cross fittings. You can fix the arcs to the strapping using tees-adapters.
To create a gable roof, cut a long piece of pipe that will act as a ridge girder and several pairs of rafters.
The rafters are fixed on the ridge girder using a two-plane cross. They are attached to the strapping using the same tees.

Often, in this kind of gazebo, the roof is not installed at all.
How to sheathe
The gazebo can be sheathed with polycarbonate.
The sheets are attached to the body with thermal washers and self-tapping screws. Check in advance on an unnecessary piece of pipe, whether it cracks due to screwing in the bolt.
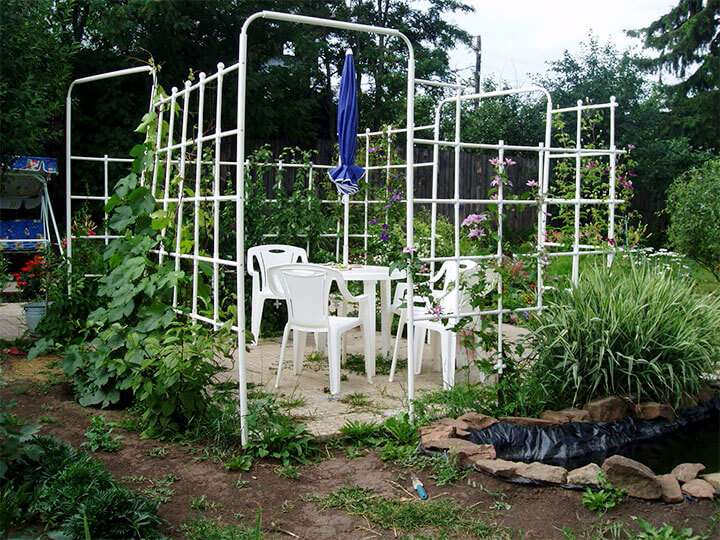
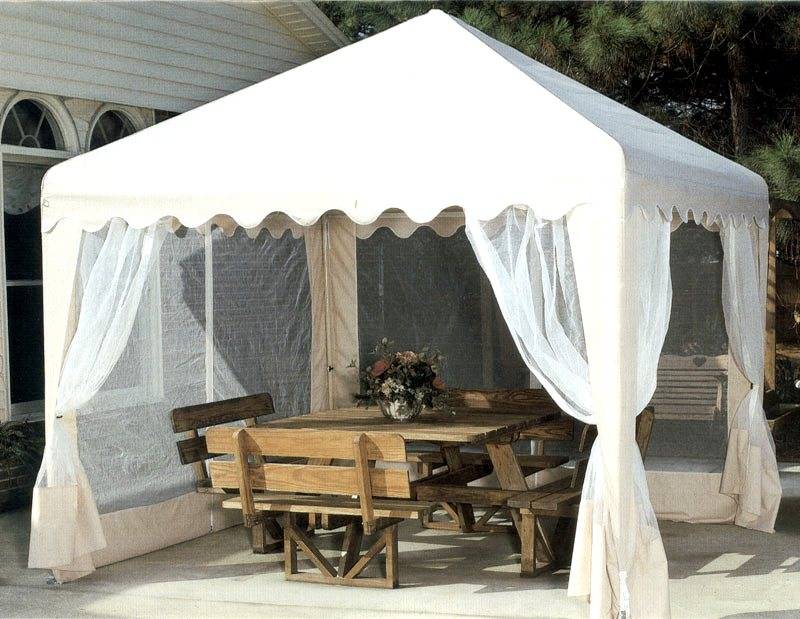
How to decorate
The gazebo can not be sheathed, but only curtains can be fixed on it. To do this, wide loops of ribbons should be sewn to them, or the top of the fabric should be stitched so that a drawstring is obtained. The pipes of the upper piping are threaded into it.
You can also decorate the gazebo by tying the curtains to the racks using wide hooks. Sometimes lambrequins or a long fringe are additionally used - this gives the design a special grace.

Stages of building a gazebo
The first stage of construction of a gazebo from shaped pipes -. In order for everything to work out correctly, you need to decide on the design of the future building, and also make a drawing of it. The shape of the gazebo can be any
- square, hexagonal or rectangular.
Mark in the drawing the dimensions of the structure in length, width, calculate the required amount of material, then you can start assembling.
Next, you need to make the markup of the future gazebo directly on the site. According to the shape of the building, you need to dig trenches for the columnar foundation. For the support racks, such a length of pipes is required so that 50-60 cm goes into the foundation. Therefore, the pit should be at least 50 cm deep, and about 40 cm in diameter.
Digging a trench with your own hands, the earth needs to be tamped in it,
place the support racks there and fill it with concrete.
Foundation strapping
The foundation strapping can be done with your own hands using the same profile pipe as the entire structure of the gazebo. The belts are welded to the top and bottom of the frame along the entire perimeter. It is necessary to arrange the belts so that the person entering the gazebo does not touch the upper belt with his head and does not stumble over the lower one.

For a hexagonal gazebo, you will need a channel. The marking is carried out in the same way as in the first case, then the resulting circle is divided into six parts. The channel with a grinder is cut into equal lengths and interconnect.
The frame of the base of the future gazebo made of a shaped pipe in the shape of a hexagon is ready. After its completion, pipe sections of future racks are welded to it.
Construction of the roof and side parts of the gazebo
After it turned out to make the frame of the gazebo with your own hands, proceed to the implementation of the roof and side walls. For the roof, you will need to build rafters, as a rule, they are used for them. The slope angle of the rafters is set at 10-150.
If a standard square or rectangular gazebo is being erected, then the rafter part is made in the form of triangles. For a large gazebo, in which the length of the rafters exceeds 1.5 meters, spacers and crate are welded. This is necessary so that the polycarbonate does not sag or deform.
For a gazebo in the form of a polyhedron, the roof rafters are concentrated near the axial post, which must be higher than all the others for the required slope. Polycarbonate is attached to the rafters using self-tapping screws or thermal washers: after marking and laying the sheets on the roof, they drill holes in the pipes and fix the roof.
To equip the side panels with your own hands, pipe sections with thinner walls are welded onto the walls than on the supports. Optional walls can be sewn up with wood panels
, plastic, or make a hedge from wild grapes or climbing perennial flowers.
Features of the construction of a gazebo made of PVC pipes
The process of building a gazebo from plastic pipes itself is not much different from the previous one. In the same way, at the initial stage, markings are made and a trench is dug under the base with their own hands. Further, a frame made of reinforcement is dug into the ground, to which the boards of the lower garter are attached.
After that, the risers are put on the top of the garter. The supports are connected to each other using special fittings.
For angles 1800 and 900, several connector options are required.
After the frame is assembled, proceed to the installation of the roof. For her, in the upper harness, they provide for installation in 450, into which the rafters will be attached.
Tarpaulin or fabric is used as a material for roofing in lightweight structures of PVC gazebos.
After the walls and roof of the gazebo have already been completed, it is necessary to equip the floor. The most optimal, but also more expensive option for a strong and durable gazebo is a concrete floor. For lightweight structures of their PVC pipes, the floor can be covered with sand or fine gravel.
They also equip a wooden covering: in this case, the edged board is connected with a small gap: this is necessary in order to so that the wood can expand from moisture.
During the period of arranging the floor, benches and a table are installed.
Today, a variety of building materials makes it possible to bring to life even the most daring ideas of engineers and designers. Often, some of these materials are not used for their intended purpose, but simply because of their convenience and cheapness.
This can be said about common plastic. Its various forms have become part of our construction industry. A gazebo made of plastic pipes, like a greenhouse, as well as other buildings, is no longer a rarity.
This material is famous not only for its relatively low cost, but also for its ease of handling. Thanks to this, almost everyone can make almost any structure, for example, from water pipes.
Some special moments
Very often, the gazebo is arranged in a different way. For example, instead of a casing pipe, pins from reinforcement are placed in the ground, which, in turn, are attached to the boards of the lower trim.
After that, the risers are simply put on top. This design is convenient in that it is easier to disassemble. In addition, it is also easier to attach the fabric to the tree from below.
It is worth saying a few words about the furniture. It can also be done with plastic pipes and fittings.
As for the floor for the gazebo, it is better not to use the lower harness as its basis, since it is not strong. For the floor, install columns and put logs on them. As a lag, you can use a beam of 100 x 50 mm, while it is better to lay it on the edge.
On top of such logs, a floor of boards is laid. Boards with a thickness of at least 30 mm are used. With a large length of a piece of a board between the logs, boards with a thickness of 40 mm are used.
Construction of a gazebo
All work is divided into several stages:
- A place is chosen for the gazebo.
- Supports and pillars are installed.
- Risers are being installed.
- The upper strapping of the structure is being made.
- A roof frame is installed.
Preparatory work
Collect the building materials prepared in advance and start assembling. If you want your gazebo to be unattached to the ground. And for a fully transported one, it is not necessary to dig in the pillars, but in this case, the lower strapping is also necessary, otherwise the structure will be fragile and may crumble in a strong gust of wind. Learn about the drawing of the gazebo with dimensions by.
You can make several such sites on which to install casing pipes - dug into the ground, they will not spoil the landscape, but they will make it possible to transfer the structure to a new place and install it in just a few minutes.
Preparation of the base
Mark the site and dig in the casing, this means that the base for the gazebo is already ready. For light portable gazebos, you do not need to put the floor; here a plastic coating is best suited and, moreover, you can choose an artificial one.

The lawn spreads and collects very quickly, easy to clean, easy to clean, does not rot even with a lot of moisture.
Strapping
List of building materials for strapping the gazebo:
- connecting fittings;
- tees for connecting sections at right angles;
- extensions for elements at an angle of 180 degrees;
- needles for connecting two elements at right angles;
- fittings for various connections according to your chosen arbor design.
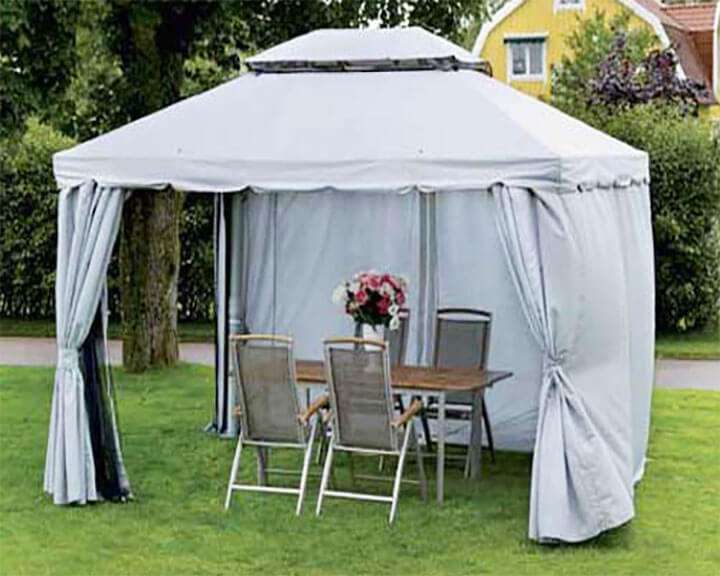
When the frame is assembled, it remains to install the roof and side planes. For the lungs, you should choose the lightest material: tarpaulin, rubberized fabric, polycarbonate sheets. The same materials are perfect for walls, they are easy to install and also quickly removed for the winter. You can completely cover the gazebo so that you feel comfortable inside the building in cool weather. He will tell you about the construction of a greenhouse made of PVC pipes.
Sheathing
You can simply fasten the material with wire; you can use special fastening materials and hardware for this. It is not worth using bolts and screws for such collapsible structures - this will complicate your work when disassembling the structure. If you have chosen as a covering material, it means that such a structure is more reliable and durable, it can be fixed with screws.

It is beneficial to make the same light chairs and tables from pipes at the same time as the gazebo - you get the interior of the gazebo in the same style: fashionable, beautiful, modern.
This particular casing design is the best. It is easily and quickly mounted, does not interfere on the site and allows you to very quickly mix the gazebo to a new place, just prepare the same sites in other corners of the garden. Find out how to build a greenhouse from PVC pipes.
For well-ventilated places in the garden, you can also use PVC water pipes, for example, for a small gazebo 2x3 m, you will need the following pipes and fittings:
- PVC pipes 2 m - two pieces;
- PVC pipes 3 m - two pieces;
- PVC pipes 2.5 m - four pieces;
- fittings L and T shaped, 2 pieces;
- casing pipe - four pieces;
- for fastening PVC glue.
The work is carried out exactly according to the same principle as discussed above - the casing pipe is installed firmly in the ground, its upper edge can not be raised much above the surface. It is imperative to backfill pipes, use drainage and stones so that your structure can withstand gusts of wind.
If painting is not required for metal-plastic and polypropylene pipes, then it is better to paint these PVC pipes with a light color - so your beautiful new gazebo will not deteriorate for a long time, it will not be afraid of the sun's rays.
Today, a variety of building materials makes it possible to bring to life even the most daring ideas of engineers and designers. Often, some of these materials are not used for their intended purpose, but simply because of their convenience and cheapness.
This can be said about common plastic. Its various forms have become part of our construction industry. A gazebo made of plastic pipes, like a greenhouse, as well as other buildings, is no longer a rarity.
This material is famous not only for its relatively low cost, but also for its ease of handling. Thanks to this, almost everyone can make almost any structure, for example, from water pipes.