Types of gazebos in the country in shape
Modern builders and manufacturers of recreational sheds offer a variety of structures - round, square, in the form of a tent, etc. When choosing polygons with a large number of edges, carefully calculate the place for installation, here you need a large area.
Square gazebos

The standard geometric shape simplifies construction - this explains the popularity of square gazebos. Ready-made structures are on sale, it is also easy to build a canopy yourself. Square is a universal shape, which is built from different materialschoosing the design of your choice.
Polygonal gazebos

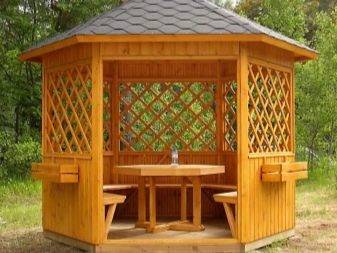
These are structures with a lot of faces. Hexagonal gazebos look impressive, have an increased area, and do not limit the decorator's imagination. Open structures are easy to make with your own hands, and any materials are suitable for installation - metal, wood, plastic. Closed polygonal gazebos require a clear design and increased material costs.
Round gazebos

Very beautiful structures that are made of wood or metal. Wrought iron gazebos are made open or semi-open. Compact, round objects will fit well in confined areas, for example, in an area with difficult terrain.
Combined gazebos

A difficult option in construction with the use of different forms, configurations. To make a combined gazebo, you need a lot of space, arrangement of the foundation, a careful calculation of the plan and project.
Step-by-step instruction
It's a paradox, but in order to build a gazebo made of wood with your own hands, you will have to start with concrete. Namely:
Mark a 2040 × 2040 mm square on the selected site and place concrete blocks in its corners. If they are too large, dig them into the ground so that 70-100 mm remains above the surface. But at the same time, their upper faces must be in the same horizontal plane.

Now take 5 boards 1800 mm long and two boards 2000 mm long and knock off the regular pentagon as in the following diagram. Trim all protruding corners with a hacksaw, and additionally strengthen the upper corner of the figure with a wooden frog.

Double-check the diagonals well, they should be the same in the correct pentacle. If everything worked out, according to this figure, as according to the template, make another one, the same. These will be the load-bearing trusses of our gazebo, their power frame. And so that it takes on a real shape, lift the structures to a vertical position, knock down their bases with two two-meter boards and fix them in this position with the help of slanting. As a result, you should get the following picture.

But the structure is still too flimsy, but because, in order to give it working rigidity, make a crate for it. The step is chosen depending on the available roofing material. For corrugated board, it is one, for ondulin another, and bituminous tiles are completely mounted on a solid shield.

After the roof, go to the floor. Remove the already unnecessary diagonals and form a beautiful plank flooring from the same fortieth board. If your sawn timber has passed chamber drying, leave a gap of 3-4 mm between the boards. If the wood has natural moisture, the cracks will appear on their own. And they are not needed so that after the rain there is no water in the gazebo.

Next in line are benches, and at the same time additional screeds for our load-bearing trusses. The rear leg is made from a solid board and two props. The two front ones are L-shaped structures, the manufacture and installation of which we have depicted in the diagram.

It remains to heal all this with boards and two comfortable benches are ready. And next in line is the table. For him, we have developed such cute legs.As you can see, everything is made from the same lumber with a section of 150 × 50 mm, so you should have a minimum of scraps.

Unlike the bench and the floor, the board of the table knocks off tightly fitted and preferably dry boards. And if moisture lingers on them, it can always be swept away.

Add another screed on the back wall and proceed to sanding. Carefully grind all the details of the gazebo with sandpaper and remove the shavings after you. Agree, a splinter received at the wrong time will ruin almost any holiday.

It remains only to open the lumber with an antiseptic, and when it dries up with varnish and you can cover the house with "slate" In our case, this is corrugated board, but you choose based on the characteristics of your site.

Vasily Molka
Hexagonal arbor with a diameter of 3 m
With your own hands, you can build a garden gazebo in the shape of a hexagon. It looks unusual and very interesting, but it's easy to make. The whole process of work is presented in stages in step-by-step instructions.
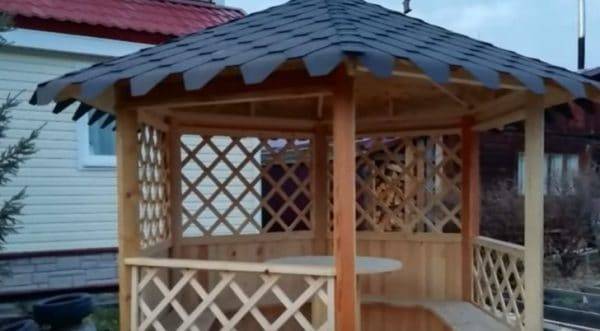
For this gazebo, you need to prepare the following material:
- timber 40 to 150;
- rail;
- OSB board;
- soft tiles;
- concrete.
Operating procedure:
After the space for the gazebo has been selected and cleared, you need to set the peg in the center of the site, tie the rope and measure 1.5 m.At the end of the rope, tie another peg and draw a circle, outline the boundaries of the gazebo. Its diameter will be 3 m.
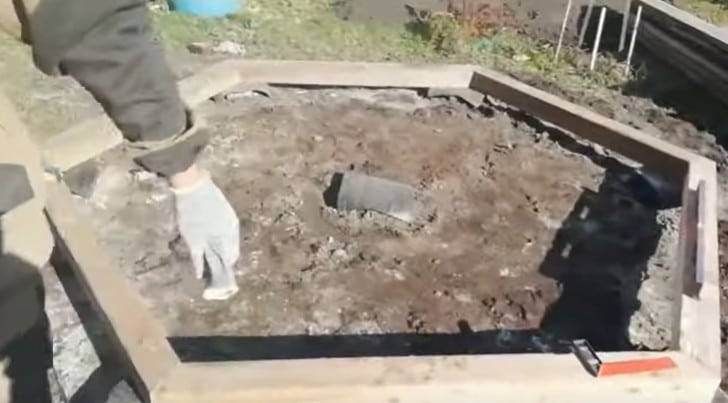
Install a concrete point foundation. Make anchor points along all faces of the future hexagon and in the center.
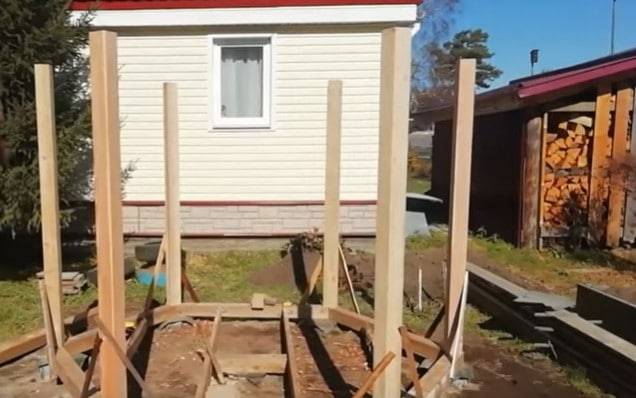
Install the joists for the floor and assemble the frame of the gazebo from the timber.

Cover the roof with OSB sheets.

Decorate the sidewalls of the gazebo, sheathing it with clapboard.
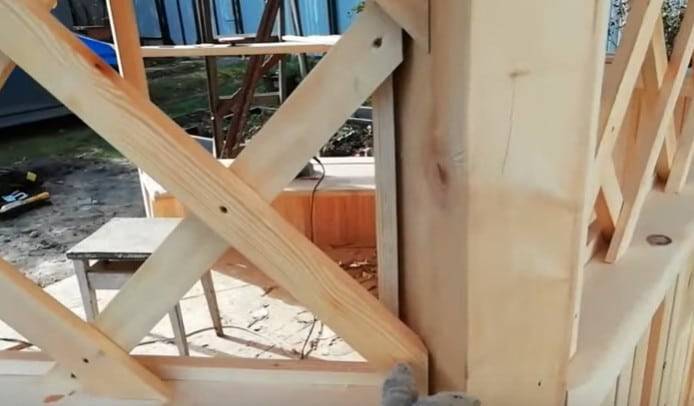
Decorate the openings with a lattice. Details on how to do this are described above.
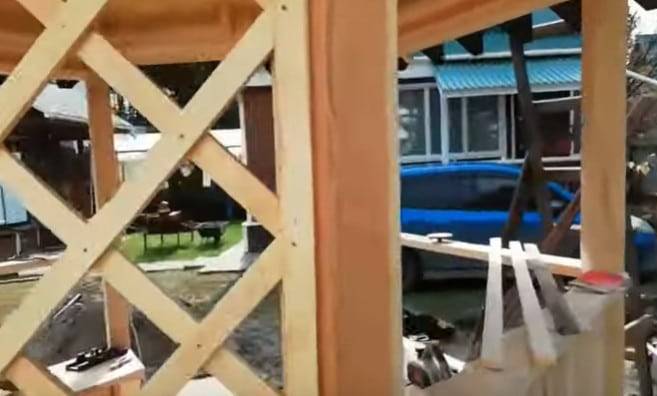
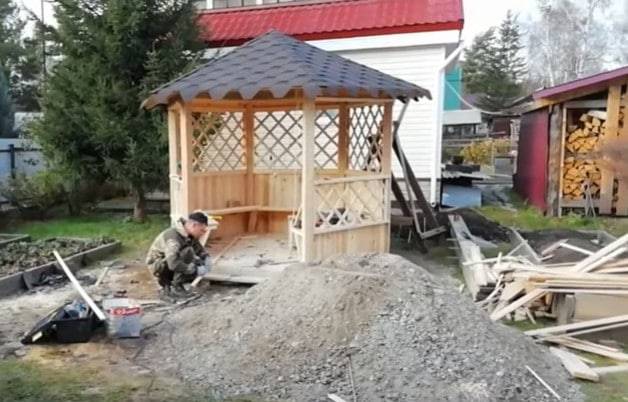
Cover the roof with soft tiles.
From the same material, you can build benches around the perimeter of the gazebo and make a table. Drawings and calculation of materials for a hexagonal arbor are in the photo above.
Simple summer gazebo made of fabric for a summer residence with your own hands (with photo)
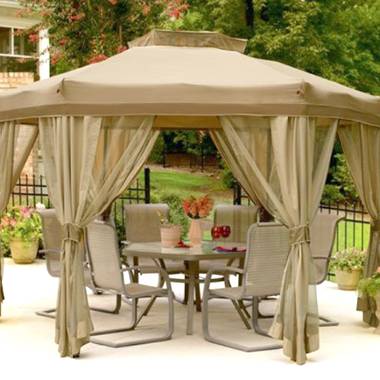
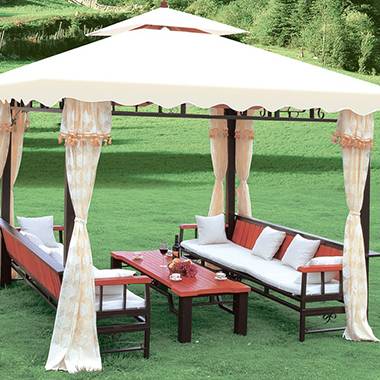
As mentioned earlier, many materials are suitable for creating gazebos. But there are often problems with their delivery to the summer cottage, and construction work, as a rule, does not end quickly.
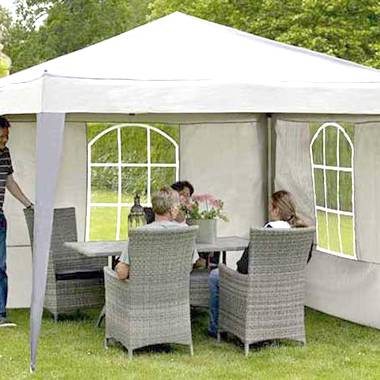
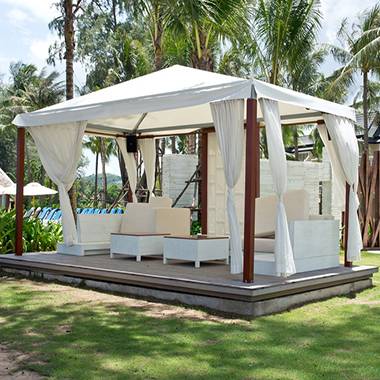
Few people know that there is an easy, quick and simple way to erect structures such as gazebos, showers, verandas, toilets. Moreover, as building materials, you only need pieces of any fabric, epoxy resin and four metal pipes or wooden poles for supports. The technology of building a gazebo made of fabric for a summer residence is extremely simple.
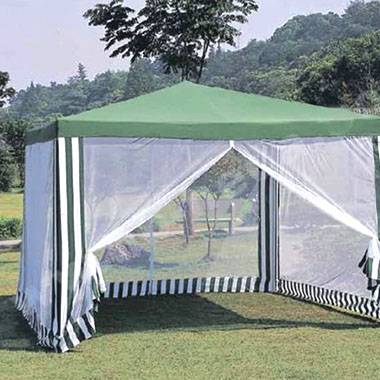

Install four pillars (metal pipes, logs, etc.) in the selected place at the corners of the future building.
Apply parquet wax to a horizontal flat surface, such as a plywood board.
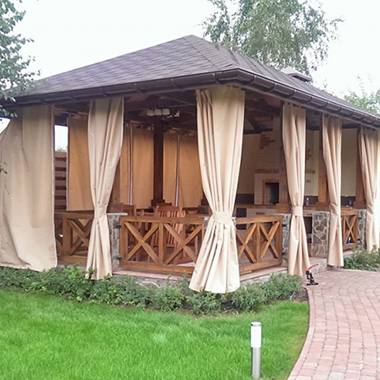
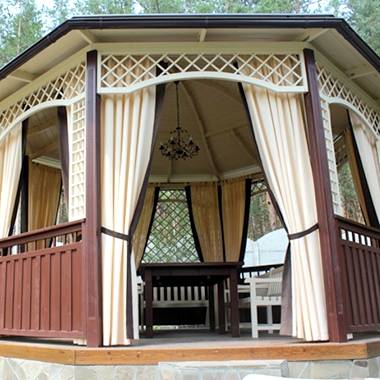
From any fabric, cut a piece to the size of the future wall panel, lay the fabric on the backboard and saturate it with epoxy, adding dye if necessary. For greater strength of the summer gazebo, a panel of 2-4 layers of fabric can be formed from fabric. Make the required number of panels for the walls and ceiling - they will be ready in a day. Attach the panels to the installed posts. Strong, durable, lightweight construction is ready!


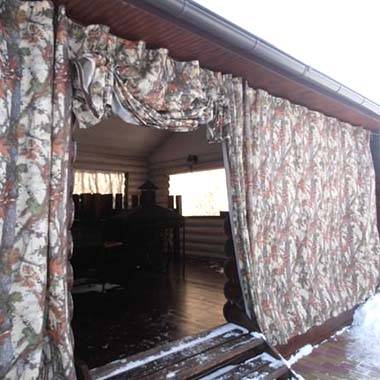
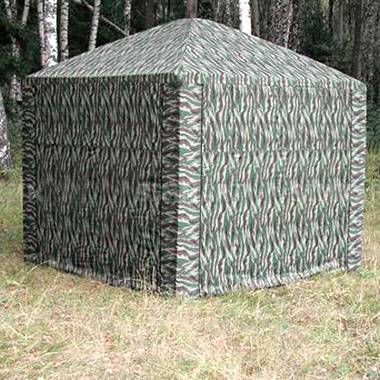
Look at the photo - you can build such a simple gazebo with your own hands in an oriental style. To do this, make not a flat roof, but an elegant dome: to the tops of the four upright pipes located at the corners of the building, attach a piece of any fabric so that it sags, and apply (preferably by spraying) epoxy to it. The next day, remove the cloth, turn it over and fix it on the tops of the pipes.
As you can see in the photo, it is not at all difficult to build such a gazebo:
How to make a roof on a gazebo
Installing the roof is the next stage in the construction of an octagonal gazebo with your own hands. The step-by-step construction diagrams presented will give you a better understanding of the process. If you plan each aspect in as much detail as possible, you can, firstly, prevent possible mistakes, and secondly, make a roof even with minimal experience. You already know how to install pillars and cover the flooring; building a roof, of course, requires more skills, so if possible, contact your friends who may have more experience in this matter.
Construction roofs for an octagonal gazebo on At first glance it seems difficult, but everything is not so scary, the main thing is attention and accurate calculation
- Start with the rafters and cut both ends 63.5 degrees with a miter saw. Attach one end to the posts, and the other should be fixed in the center of the rafters. Make sure you line up everything perfectly, otherwise the roof won't be symmetrical.
- In general, fastening rafters and fastening roof rails, but do not forget that it is better to fix everything with galvanized screws. Alternatively, you can cut the triangles out of plywood and nail them in place.
- Regardless of the choice, accurate measurements and making appropriate cuts with a circular saw are essential.
- Then cover the entire roof surface with tar paper, starting from the bottom to the top. Make sure the roofing strips overlap by at least 5 cm to create a waterproof cover for the roof framing.
- After covering the entire surface, close the edges with strips of roofing felt and fix them with staples.
- One of the last steps is the installation of the shingles. To do this, it is better to read the instructions if there is no experience in this area.
Foundation
The construction of a columnar foundation for a gazebo 3x3 m is performed as follows:
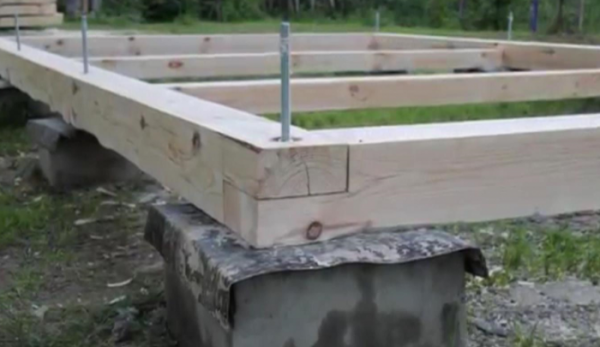
- With the help of pegs and a control cord, they mark the territory. Future posts will be located a meter apart. That is, we will fill in 9 supports.
- They remove the fertile layer of soil 30 cm. It will come in handy in the future.
- Pits 50 cm deep are dug according to the markings. Their bottom is well rammed and a sand cushion 10 cm thick is poured in. It is compacted.
- Formwork boards are installed in the pits so that they rise 20 cm above the ground.
- They put (even drive in) metal rods into the ground to reinforce the posts. They can be replaced with a boot (broken brick).
- A concrete solution prepared from cement, sand and crushed stone is poured into the pits in a ratio of 1: 3: 6. The mixture is rammed to drive out the remaining air.
- In the center of each of the extreme corner supports, construction pins are embedded for fastening the strapping beams.
Important: the drying of concrete supports is carried out gradually, covering the columns with oilcloth for the period of solar activity. After they have solidified, the formwork boards are removed, and the space around the pillars is covered with soil, having previously wrapped them with bituminous mastic.
Creating a Dimensioned Drawing
Before you start creating a gazebo with your own hands, you need to think over in what form it will be made (open or closed), what style it will have in order to be in harmony with other buildings on the site. The material used in the work will depend on this. Then the location is selected. It is desirable that she be near the house and all paths lead to her.
Read more about how small architectural forms are used in landscape design and how to create them yourself.
When making drawings of the future structure, write down all dimensions in detail so that everything on paper matches the terrain. Be sure to indicate where the windows, doors, stairs will be. For them, also indicate the sizes. Draw the roof separately.Think over the foundation. Finally, draw electrical wiring and plumbing, if any. You can also display the locations of furniture, lamps and other interior elements.
Round gazebo option:

Hexagonal arbor option:

Square gazebo option:

How to make a gazebo out of wood
It's not enough to find a beautiful project. It still needs to be implemented somehow. And preferably with your own hands, without hired workers and mortgages. And we will begin our gazebo construction by choosing a suitable place.
How to choose a seat
When choosing a place for a wooden gazebo, you first need to think about how you plan to use it. There are two options:
- Like a dining room. Arranging noisy gatherings there with friends and relatives.
- As a place to relax. Retiring there with a laptop and a cup of coffee.
In the first case, look for a place not far from the porch, or you will then be tortured to run across the entire area to the refrigerator.
In the second option, it must be the corner as far as possible from the front door, in which it would be difficult to find you. Believe me, as soon as you want to relax, there are a lot of people who want to prevent this.
Also, when choosing a place for a gazebo, you must consider:
- Shading
- Opening view
- Noisiness
- As well as distance from the household and the compost pit
And at the same time, the clearing you have selected should also suit you with its size. As such to find, alas, but we can not tell. Everyone has their own plot, and it is useful to plan it even before capital development.
How to choose the style of the gazebo?
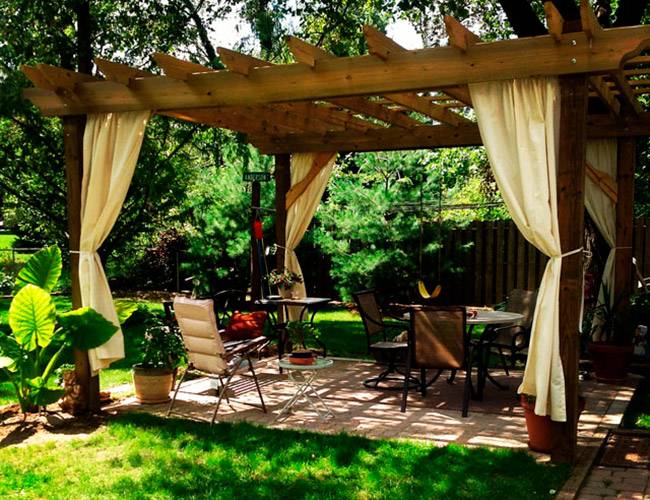
The situation is no easier with the choice of pergola design. It is known that it must correspond to the spirit of the entire architectural ensemble and be executed in the same style, and there are a great many of them today. Here is just a list of the most popular ones.
- Chalet
- Country
- Fachwerk
- Bungalow
- Neo Electric
- Ranch
- And Neo Tudor
Unfortunately, within the framework of this review, we do not have the opportunity to at least briefly go over their characteristic features. And there is no need for that. Each owner, for sure, learned all the subtleties of the chosen design even before the house was built. Therefore, we move on.
Materials and tools
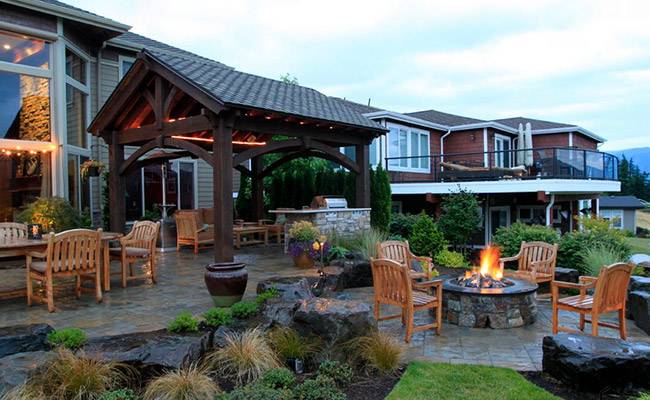
If you still have not changed your mind about building a wooden gazebo for a summer residence with your own hands, prepare the required minimum of tools and materials according to the following list. Namely:
- Shovel
- Hammer
- Nails 75 and 100 mm long
- Saw
- Level
- Roulette
- Pencil
- And gon
And also a board with a section of 150 × 40 mm. and roofing material corresponding to the design of your capital buildings.
And yes, this is really the minimum, but no one will forbid using a circular saw or jigsaw instead of a hacksaw, and replacing the hammer with a screwdriver or pneumatic tool.
Arbors options by type of material of manufacture
The types of gazebos for summer cottages are classified according to the material of manufacture. A gazebo-canopy for a summer residence is built from wooden boards, sheets of metal, and closed structures on the foundation are built from stone and brick.
Wooden gazebos
In small summer cottages, sheds are built from boards, rounded logs or bamboo. The material does not limit imagination, and with some skill, a summer wooden hinged structure can become an adornment of the local area.
The advantages include:
- efficiency of construction;
- low material consumption;
- lack of foundation;
- the possibility of assembling / disassembling with your own hands;
- high aesthetic performance.
A wooden or wicker gazebo is a great place to relax in the heat. The buildings made of environmentally friendly natural material are lightweight, can be of any size, which allows them to be quickly installed in a free area of the site.

Minuses:
- Regularity of care. Raw materials need to be processed from bugs, mold, decay.
- Flammability. The tree burns very quickly, therefore it is impossible to do without a flame retardant treatment.
- Risk of shrinkage and warpage. These disadvantages arise only when choosing low-quality materials, against a background of weak soil.
There are more advantages, besides, the maintainability of the material allows you to quickly repaint the structure, return its aesthetic appeal.
Metal gazebos
It is difficult to attribute metal products to the budget segment, since such gazebos are often made to order. Forged posts, fences look impressive, but they are expensive. With your own hands gazebos for summer cottages made of metal are made of standard metal structures. Buildings are decorated with ready-made modules, including forged panels.
The simplest option is a frame gazebo. Support posts made of pipes, canopy made of galvanized sheet - reliable, strong and durable. Over time, the canopies are modernized, the openings between the posts are sewn up and a semi-closed or closed structure is obtained.
Additional benefits include:
- incombustibility;
- ease of care;
- the possibility of decoration, for example, coloring;
- long service life.
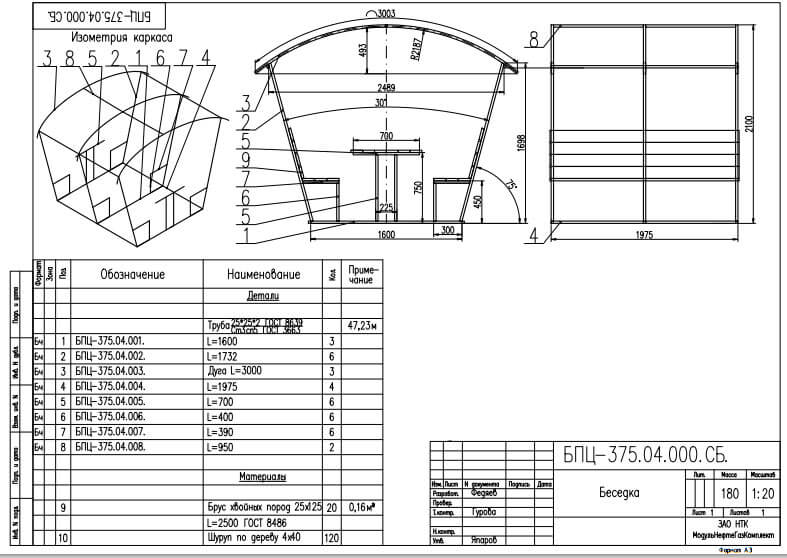
The high cost of the material, the need to use welding, additional costs for the construction of the foundation increase the estimate - this is a minus. In addition, the material needs maintenance - regular renewal of anti-corrosion impregnation. Outdoors metal quickly rusts, so protection is indispensable.
Stone and brick gazebos
Depending on the wishes of the owner, capital structures can be of any type - from mounted to closed. However, all buildings require a solid foundation. The development of the project is carried out with special care, entrusting the matter to specialists.
Buildings have the following advantages:
- All-season use. With good insulation, the brick recreation area will be suitable as a guest house.
- Security. The material does not burn, does not emit toxic substances when heated, and withstands many freeze / thaw cycles.
- Many options for interior design. Spacious rooms are complemented by a fireplace, sewage and water supply, a kitchen and recreation area is distinguished.
- Variability of forms, designs. During construction, different materials are used, the presence of a porch, a domed roof, etc. is included in the project.
There are few cons, but they are significant:
- high consumption of materials - the estimate will be significant;
- thoroughness in the development of the project - take into account the area, mass of the building, etc.;
- not all sites can be built, since the object has a large mass;
- on a small area, the construction of a brick structure is irrelevant, so large spaces are needed here;
- the need to build a foundation.
Finishing
Now it remains to lay the floorboards so that they fit snugly together.
On the outside of the gazebo, at a level of 80-90 cm from the bottom, a belt is made from a bar. You can put a nice wooden window sill on top of it.
Sheathed the gazebo with clapboard. It can be positioned both vertically and horizontally. If only all the planks fit tightly to each other.
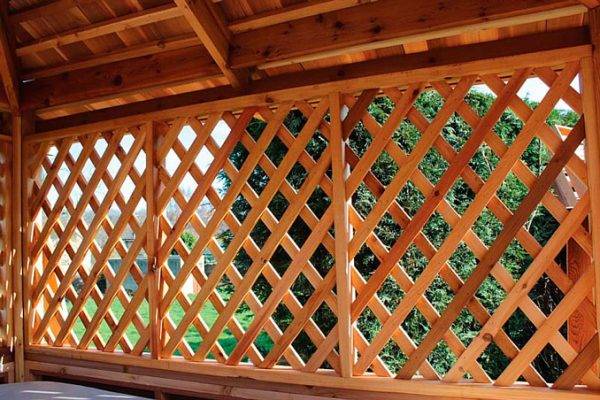
If there is a desire, then the upper part of the gazebo from the belt to the roof can be closed with a decorative oblique crate made of slats. They are placed at an angle of 45 degrees in relation to the windowsill. The evenness of the slats is controlled by the building level. Then ivy or other climbing plants are allowed along the crate.
For an attractive appearance, wooden structural elements can be stained or directly varnished.
Important: all wood materials are treated with antiseptics and fire retardants before use.
Having mastered, how to build a gazebo at the dacha with his own hands in stages with a photo, even a beginner master can independently build a pretty wooden structure in 3-5 days.
You may be interested in: How to build an outdoor shower for a summer residence on your own
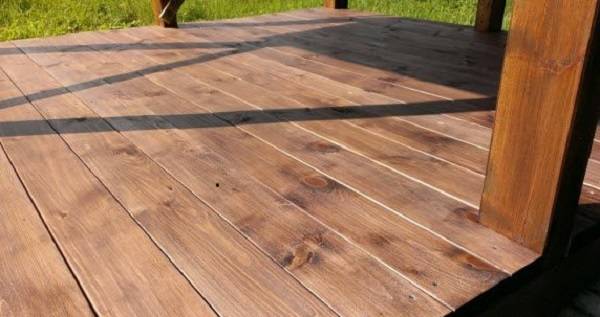 The floor in the gazebo
What other inexpensive roofing materials would you recommend using for a gazebo?
Gazebo with barbecue for a summer residence - an inexpensive project with a photo
As mentioned earlier, the grill installed in the gazebo makes the rest more attractive, especially if you are with friends. There are two ways to make a gazebo with barbecue. In the first version, you put the barbecue in a ready-made gazebo, and in the second version, you install the gazebo over the barbecue. It all depends on what you already have.
Below are several drawings of such gazebos.


And the following photos show options for gazebos with barbecue.

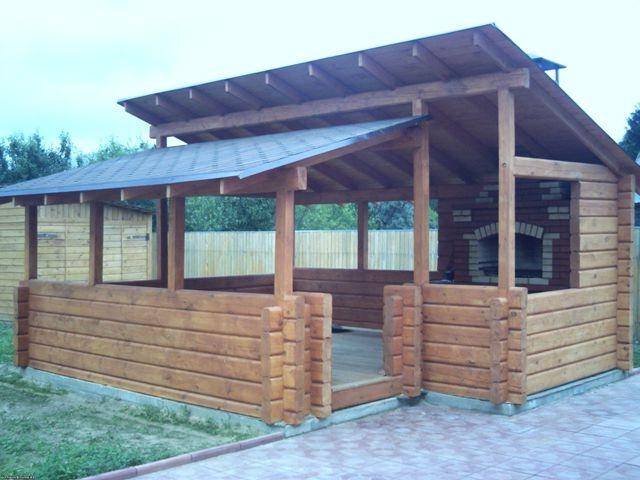

If you are doing both a brazier and a gazebo at the same time, then when installing the lower trim of the gazebo, do not forget to dig the foundation for the brazier in the selected place of the gazebo.
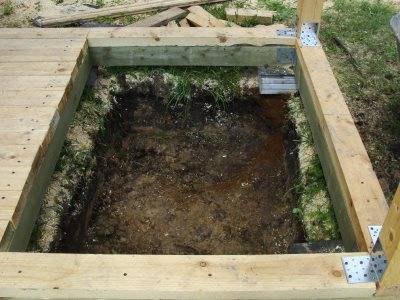
Well, then, everything is done in the same way. The gazebo is built as mentioned above, and the installation of the barbecue was described in previous articles.
Examples of finished buildings
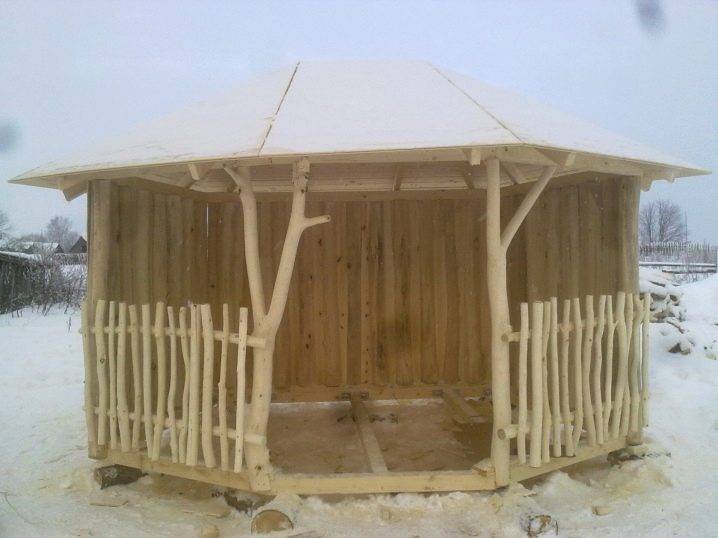
It is not very logical to cite gazebos made of well-known building materials as an example, because their best examples look like ordinary gazebos, not built from leftovers. But in the first photo you can clearly see that many different types of wood were used for the construction, including sawed tree trunks and branches from them.
Those who absolutely do not recognize bottles as a building material will certainly be surprised by the second photo, because on it, no less than a capital structure made of glass bottles and concrete, into which plastic windows are even mounted. If this material can be used to build a building for a full life, then even more so for recreation.

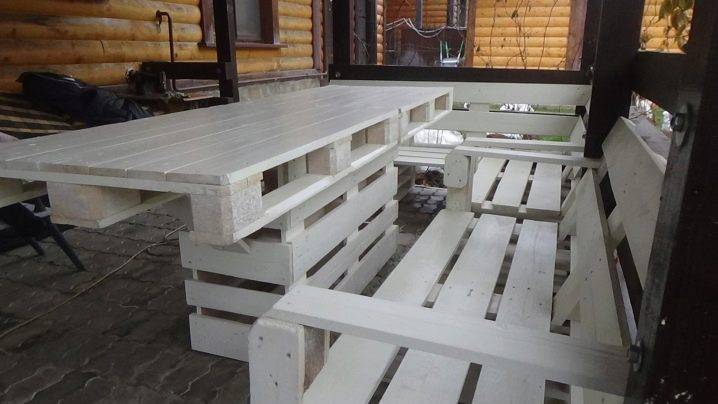
Finding a full-fledged gazebo made of pallets is quite difficult, if only because it can be difficult for one owner to find enough of them for the construction of an entire building. But even a few pieces can be appropriately used in a gazebo made of another material - for example, the third photo shows how you can easily and very stylishly solve a furniture issue using white-painted pallets.
About, how to make a gazebo from wood with your own hands, see the next video.
Types of gazebos by design
Designs are classified - stationary, collapsible, portable. The choice is due only to the capabilities and preferences of the owners. For example, stationary objects are installed on the site with a house of permanent residence, and in the country they are collapsible, portable.
Stationary gazebos
These are any objects that cannot be quickly transferred to another location. Most often, stationary recreation areas are made of massive materials - brick, stone, logs. But there are structures made of light metal or frame modules.

Advantages:
- reliability;
- strength;
- long service life;
- protection from bad weather;
- a variety of internal content.
The disadvantages include massiveness and a large area of buildings.
Collapsible gazebos

Most often these are budget ready-made gazebos. They are made of a metal frame and a mosquito net. The structures are easy to transport, they do not cause difficulties during installation. The collapsible group includes transformer gazebos with the possibility of converting into a canopy, etc.
Experienced users buy collapsible structures with fabric canopies and modules with mosquito nets. The denser the canopy, the longer it will last. The most durable materials are dense cellophane film or thin PVC.
Pros:
- affordability;
- the ability to buy at any supermarket;
- ease of installation / disassembly;
- a light weight;
- compactness when folded;
- versatility of application;
- small area.
Minuses:
- Seasonality of use.Do not put such a gazebo in winter and do not leave for a cold period.
- Poor weather and wind protection.
- Small capacity.
Portable gazebos

Structures without a base, support. The structures resemble a tent, only in an enlarged size. Pros - ease of installation and assembly. Cons - use in warm weather and no protection from rain, wind.
Portable systems are suitable for small areas. The price of products is low, the period of operation depends on the care of use. In order not to buy a structure, they do it with their own hands: cellophane or a mosquito net is pulled onto a frame made of wooden slats.
Trapezoidal gazebo made of wood
A trapezoidal garden gazebo can be made with your own hands in almost 1 day without drawings, according to the photo and step-by-step instructions, which are given below. For work you need boards "forty" 1.5 m long. Screws are used for fastening.
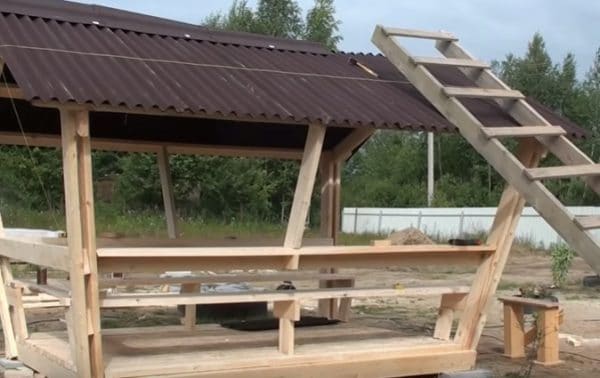
To make a garden gazebo with your own hands should be like this:
Mark the borders of the gazebo, install the base in the form of 4 slabs in the corners, place boards on them.
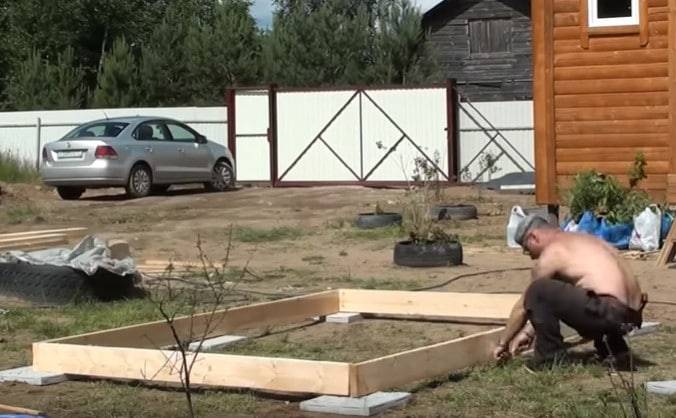
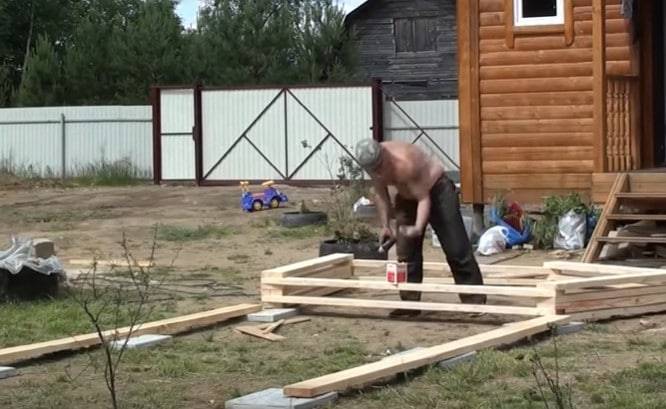
Since the shape of the gazebos resembles a trapezoid, it is important to outline the side parts, lay out the boards of the side walls and parts of the roof in a certain sequence, fasten them, fix the resulting parts of the gazebo on the lower boards, make a temporary tie
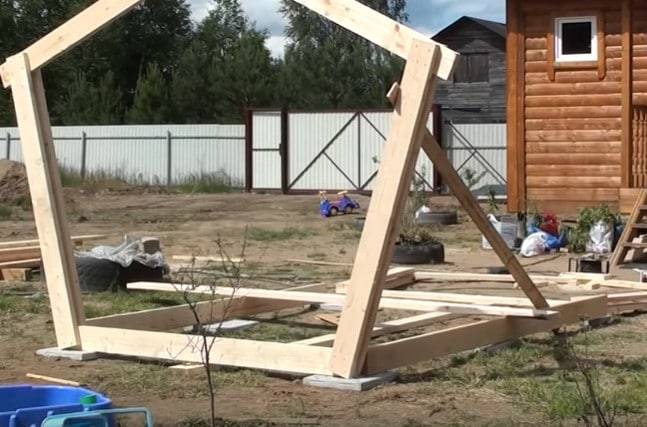

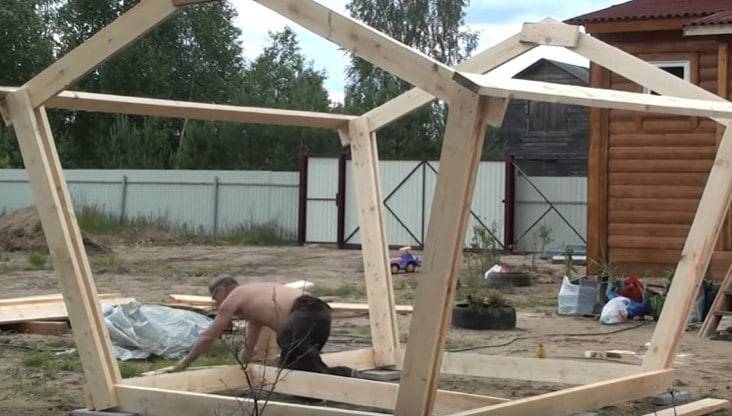
Fasten the base of the gazebo and the roof with horizontal boards.

Lay the floor, finish the edges.
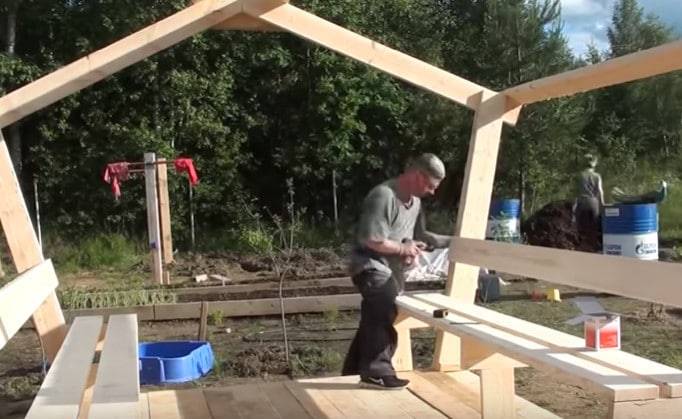
Make the bases of the benches around the perimeter, lay boards on them.
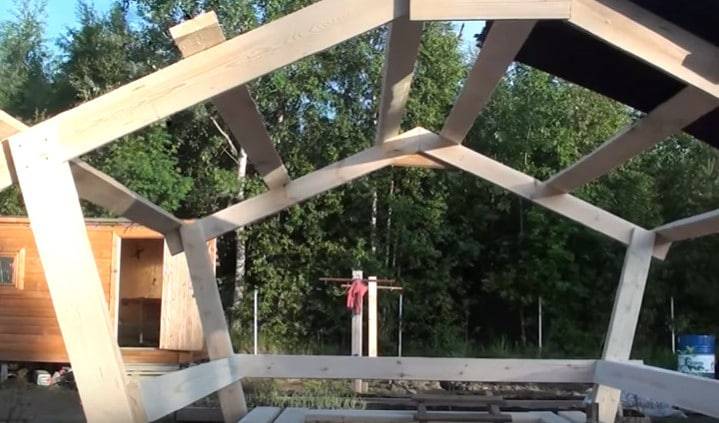
Make the screed of the walls horizontal boards, they will also act as backs for the benches.

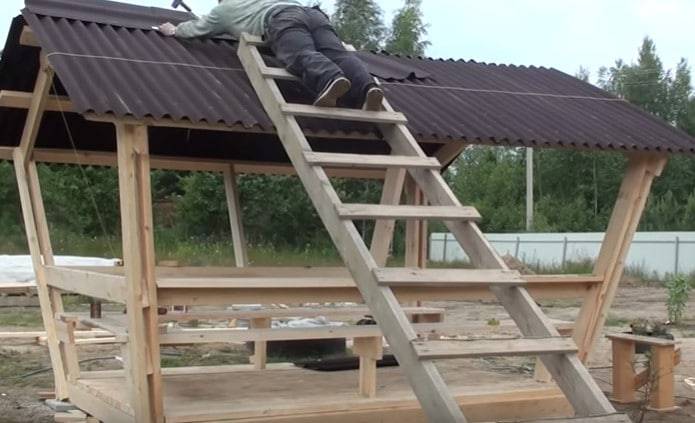
Fasten the roof with boards and cover with metal corrugated sheets.
Also read: Glued laminated timber houses, pros and cons, photo
This garden gazebo can be made with your own hands in 1 day. It is quite simple, but it has everything to enjoy your vacation in the country with family and friends.
Seat selection
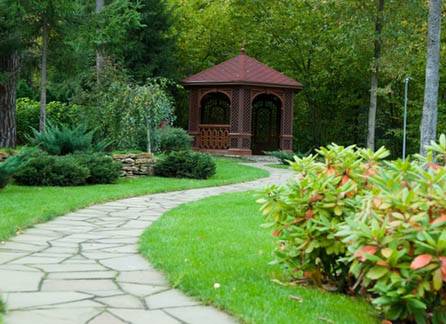
Before construction, you need to carefully plan the future resting place. If there is a pool or decorative pond in the yard, the gazebo can be located next to the south side. The entrance to the gazebo should be directed towards the water.
If the gazebo is located in the garden, then it is better to build it in the dense shade of a tree. Nearby you can provide a swing or a hammock. In addition, you can build a brick or metal brazier. For convenience, you need to provide lighting at night and lay paths to the gazebo.
The next step will be drawing up a project, calculating the quantity and cost of the material
It is important to estimate the future budget and find the possibility of using more economical options for handy tools. The correct layout of the gazebo is necessary for a comfortable and pleasant stay.
Wooden gazebo
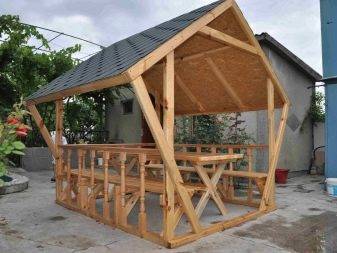
Below we will tell you how to make a reliable gazebo from a wooden bar.
Style
It is best to create a gazebo in accordance with the architectural design of the house, and you can also choose one of the following:
- The classical style was carried out in clear laconic forms.
- The oriental, on the contrary, does not tolerate simplicity and has unusual decor and bizarre shapes.
- The village hut will remind you of a picture from childhood. Such a gathering house is completely made of wood with the addition of semi-antique decor.
Design
If you have decided on the purpose of the gazebo, the place of installation and the choice of material, then you can start designing. The drawings indicate the location of the entrance, the location of the table, chairs, barbecue, windows, if they are planned in the project, and so on.
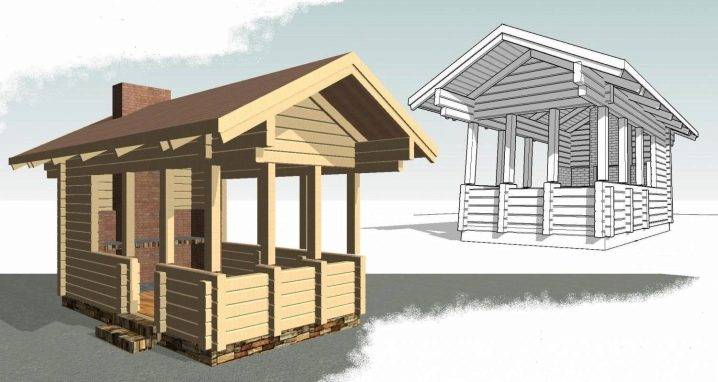
The shape can be chosen round or square, which are easier to assemble. Hexagonal or octagonal shapes are also in demand among builders, but it will be quite difficult to build such a structure on their own in one day.
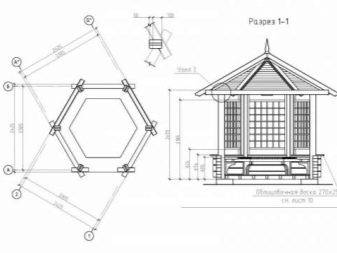
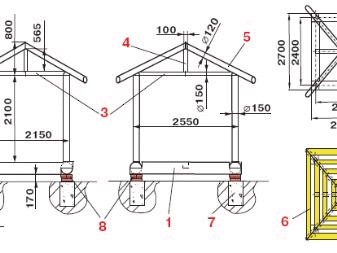
Foundation
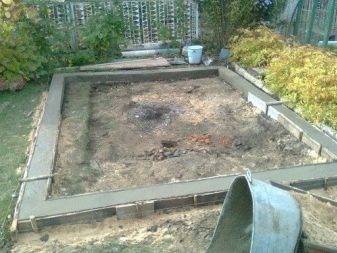
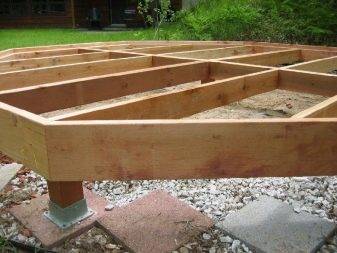
When building most buildings, the first step is to build a solid foundation. The gazebo in this case is no exception. Considering that the gazebo is a structure that does not have a huge weight, you can safely choose a pile or strip foundation.
The strip base is a closed loop made of reinforced concrete beams installed around the entire perimeter of the building. The foundation on piles rests on the ground only with the lower ends of the piles. It goes deeper than the belt one, and is more suitable for clayey, mobile soils.
Construction
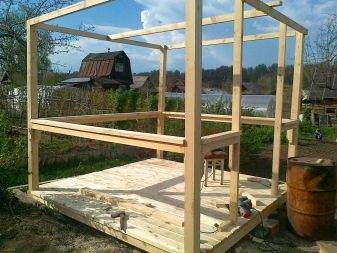
Wooden logs impregnated with an antiseptic are laid on the created foundation and attached throughout the entire area using iron reinforcement and nails. Then support structures are installed, in which you can use timber beams 10-15 cm thick. The ends of the structures are connected by beams, on which the roof and lathing are mounted using rafters.
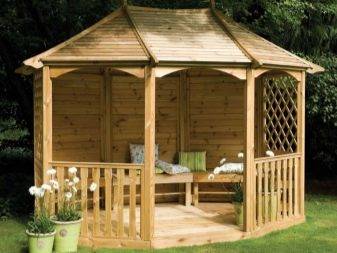
For a standard gazebo, a gable or hipped roof is suitable. The choice of this structure for the roof will ensure its durability due to the fact that precipitation and dirt will not linger on it, rolling down the surface.

A four-pitched roof is mounted according to the same principle, only additional beams are installed in the middle of the wall.
The rafters are covered with chipboard sheets, and any material suitable for the budget is placed on top. It can be slate, corrugated board, ondulin or tarpaulin. Drains must be installed along the contour of the roof, along which, in case of bad weather, water from snow and rain will drain.
The walls are sheathed with clapboard or wooden planks, and the floors are covered with rubble and covered with tongue-and-groove boards. The floor covering is chosen according to taste, most often linoleum or marble chips are used. In the place where the barbecue or stove is installed, the floor must be protected with stainless steel sheets or made of stone.
It is advisable to cover the wooden gazebo with special antiseptic solutions to protect against insects, rot and mold, and fireproof varnish will save the structure in the event of a fire. At the end, a railing is installed, which is sheathed with an edged polished board.
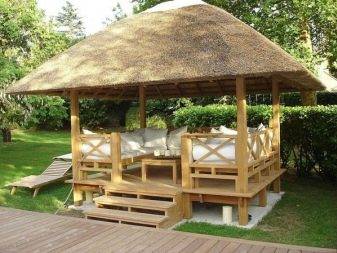
After the installation work is completed, you can start decorating it internally and filling it with furniture. The desires and imaginations of the owners are important here. Options for decorating the entrance and walls with climbing plants, garlands, lanterns are very popular with summer residents.
Advantages and Disadvantages of Various Designs
- Of all the above structures, each can be called interesting and original in its own way. Glass and plastic bottles will help create an unusual garden gazebo. The advantages of these materials are: strength and durability. The pallet and wooden trunks option can be called more natural and environmentally friendly.
- Plastic does not allow air to pass through well, so you should not build a too closed gazebo from such bottles, since in summer it will be very hot and stuffy in it. We can say that the effect of a "greenhouse" will be created, because it is not for nothing that many summer residents build greenhouses from this improvised material.
- A gazebo made of glass bottles is more suitable for cold regions, as it will be quite comfortable in it even at low temperatures.
- Open breathable wood and pallet structures are a great option for summer vacations. Therefore, when choosing a material for the construction of a gazebo, it is necessary to take into account the climatic and natural conditions of the area where it will be built, as well as the wishes of the owners of the summer cottage. You can view a selection of photos of various types of summer cottages and choose the option you like best for yourself.
Stages of building a gazebo
Before proceeding with the installation work, it is advisable to prepare design drawings or at least sketch out a scheme for the construction of a gazebo. If there is documentation, the master can purchase the required amount of building material and not overlook anything.
The diagram should include the following components of the gazebo:
Foundation. More often it is columnar or tapered. Less often - monolithic in the form of a concrete cushion.But the latter option requires an overspending of building materials and is not so necessary for a wooden structure. An exception is the high level of groundwater at the site.
Frame. It implies an indication on the diagram of the number of support pillars and the type of sheathing (lining, timber, board, lathing).
Roof
Here it is important to immediately decide what type of roof will be mounted - single-pitch, gable, hip-pitch, etc.
Drawing with dimensions Important: according to the drawings, the master calculates the required amount of reinforcement, fastening metal corners, screws, roofing material.
