How to install a rivet?
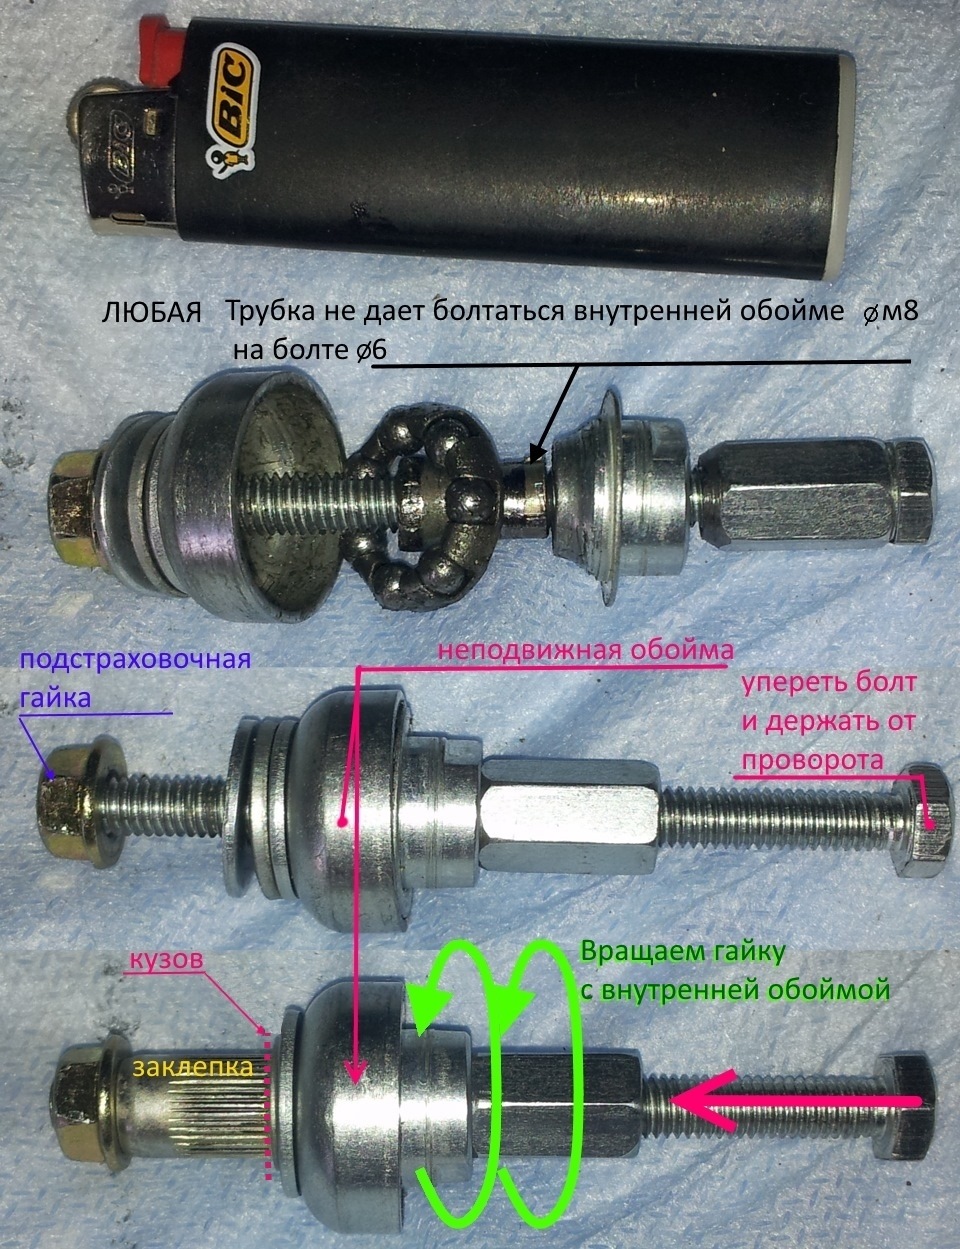
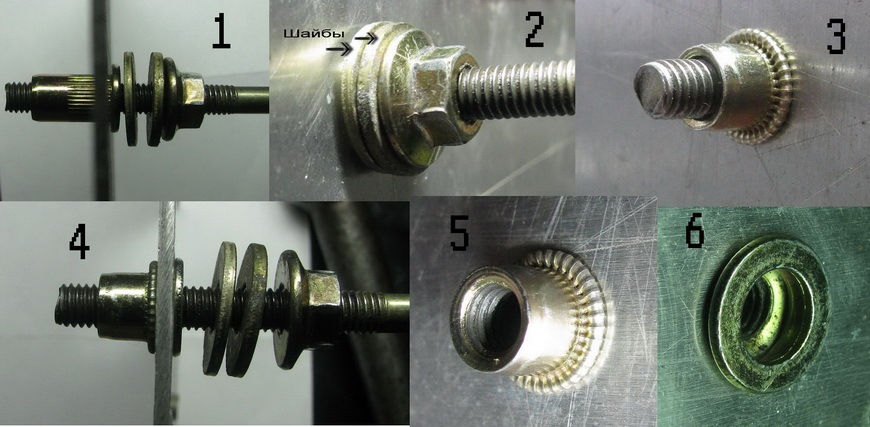
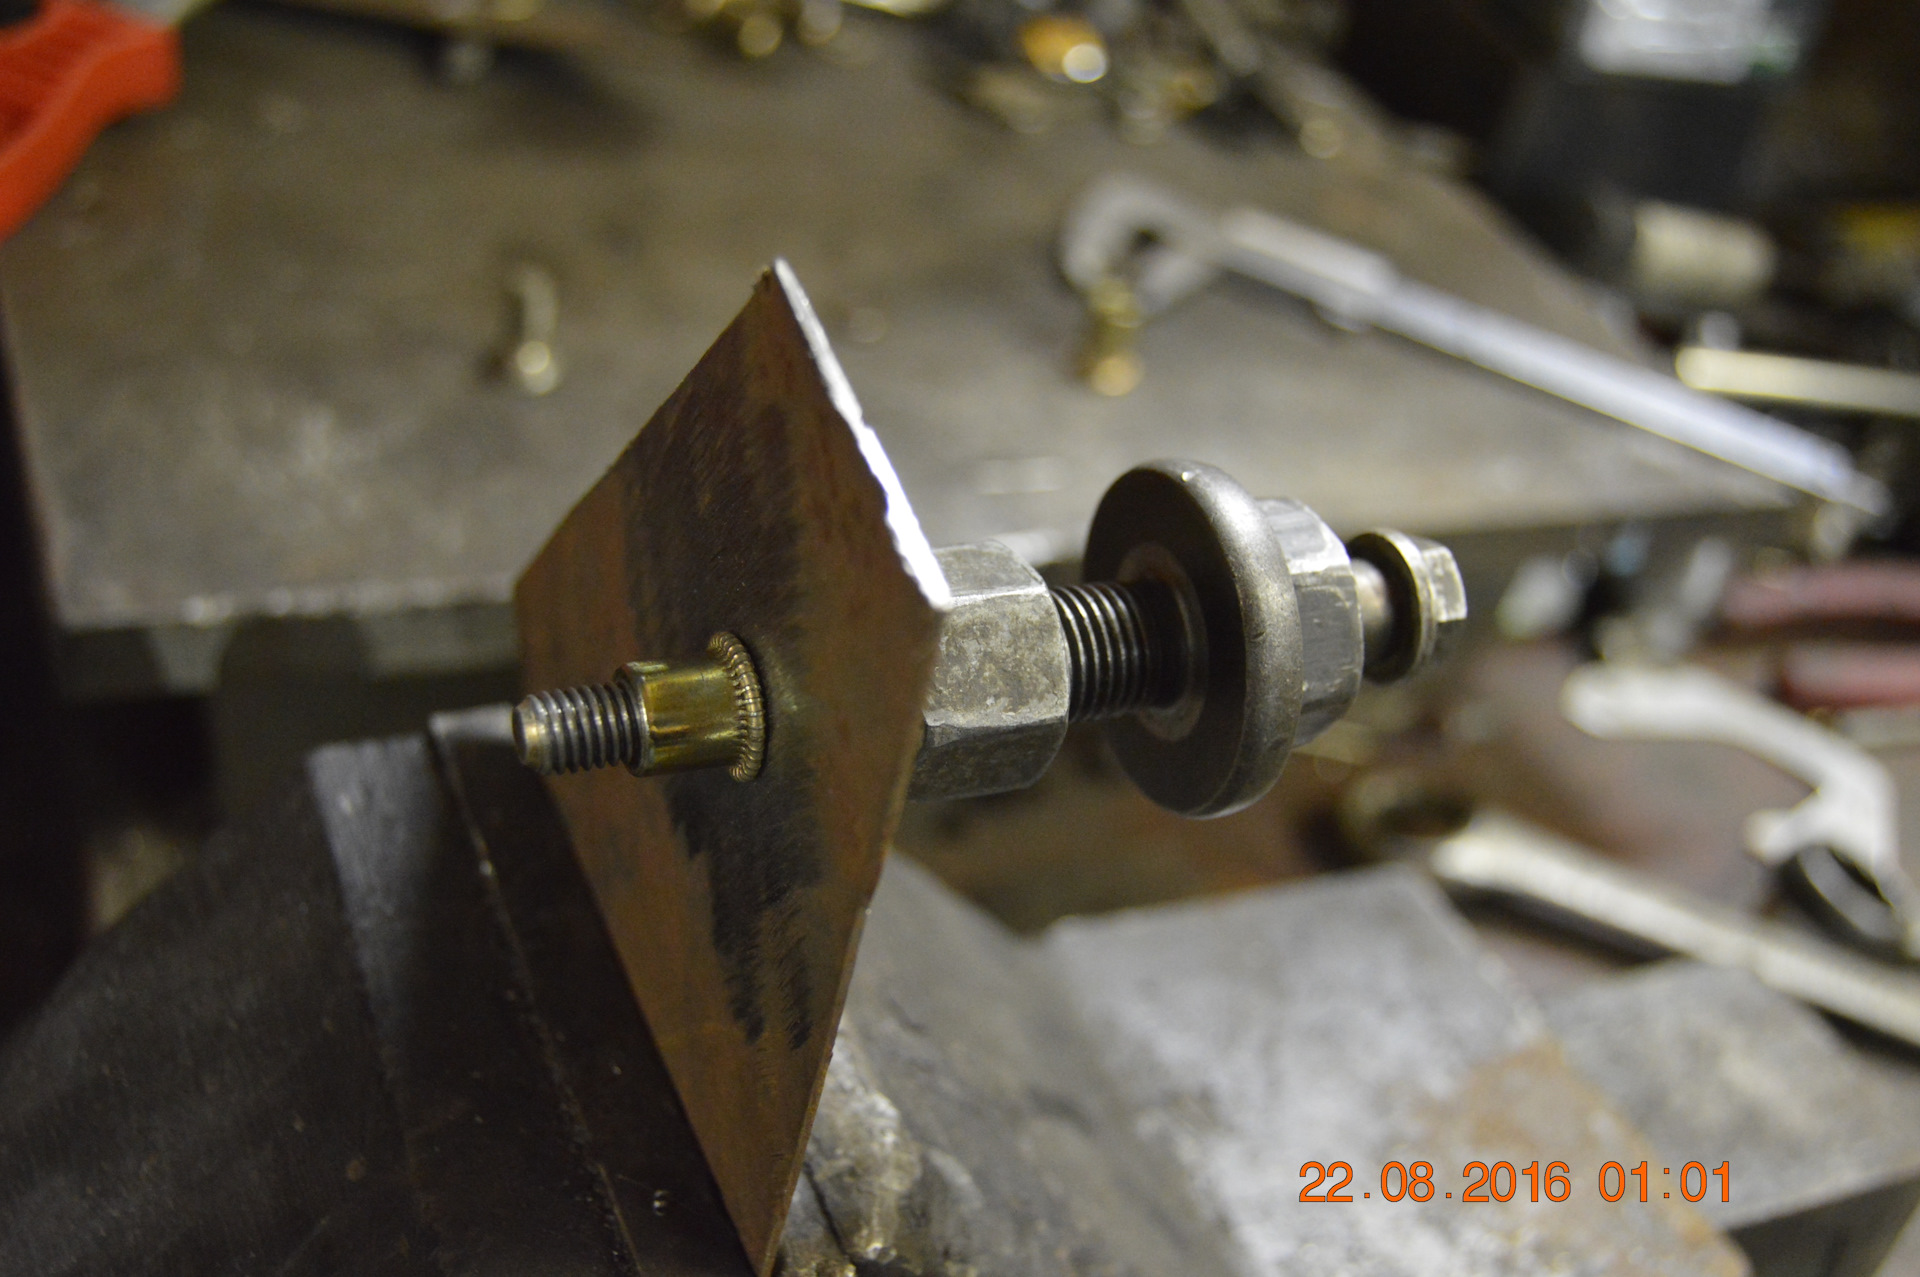
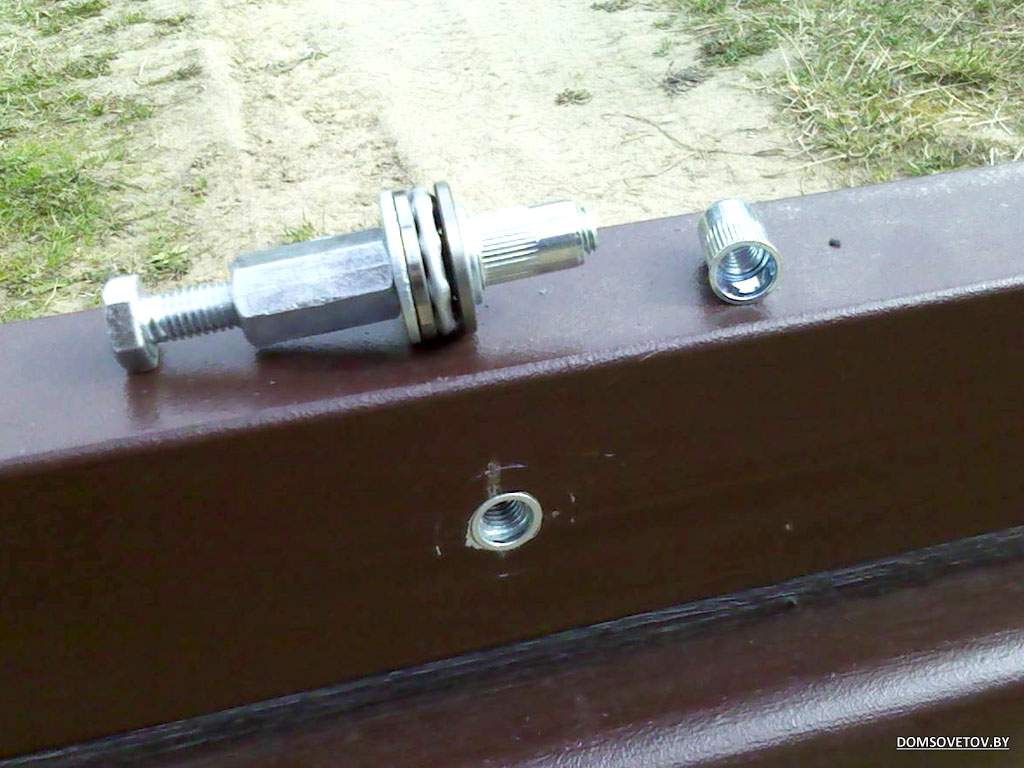
Installing threaded rivets using the design described above will require two wrenches. One needs to hold the head of the bolt, and the other needs to turn the nut so that it pulls the bolt along with the rivet. The signal that the rivet is flared will be a change in the applied force. When the consumable collapses completely, it will become impossible to rotate the nut. After that, it remains to unscrew the bolt.
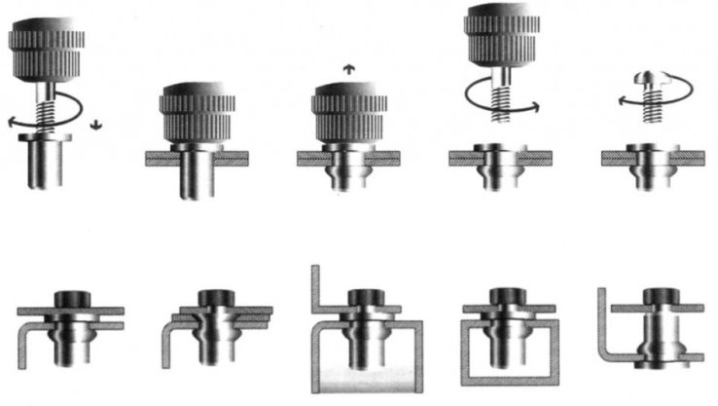
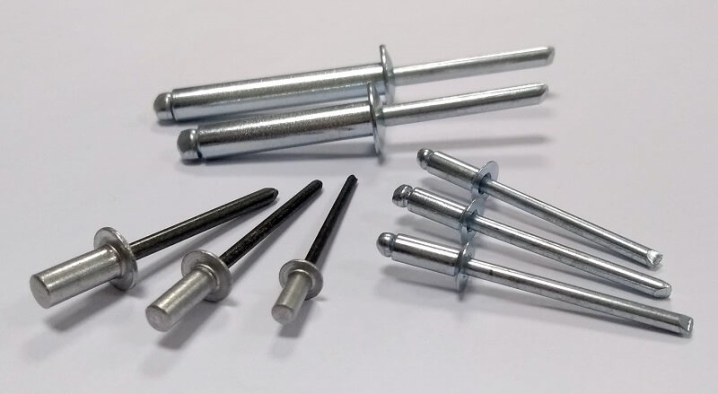
Riveting a blind rivet is somewhat more difficult, the main problem in the absence of a factory riveter is to grip the rivet stem. But even this problem can be solved with some technical skills and tools.
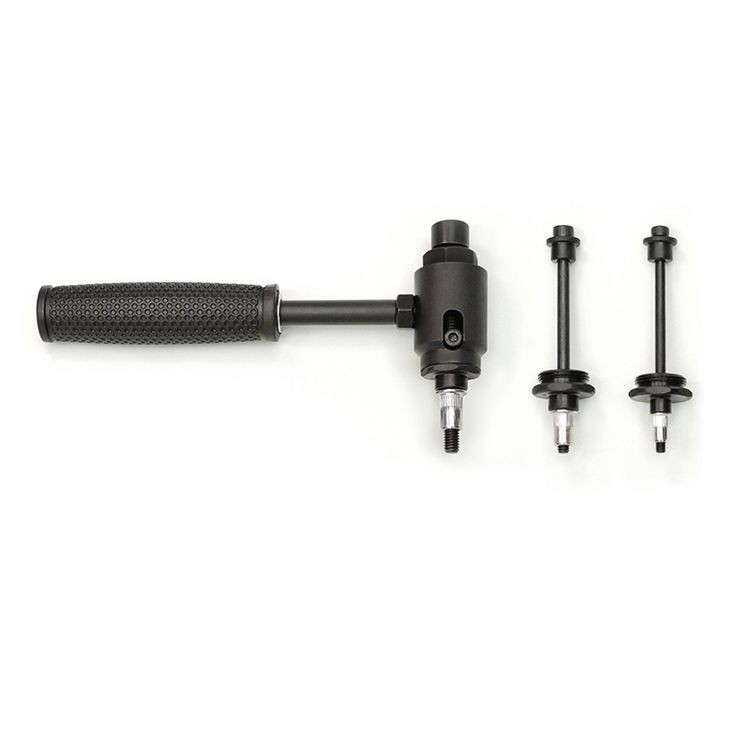
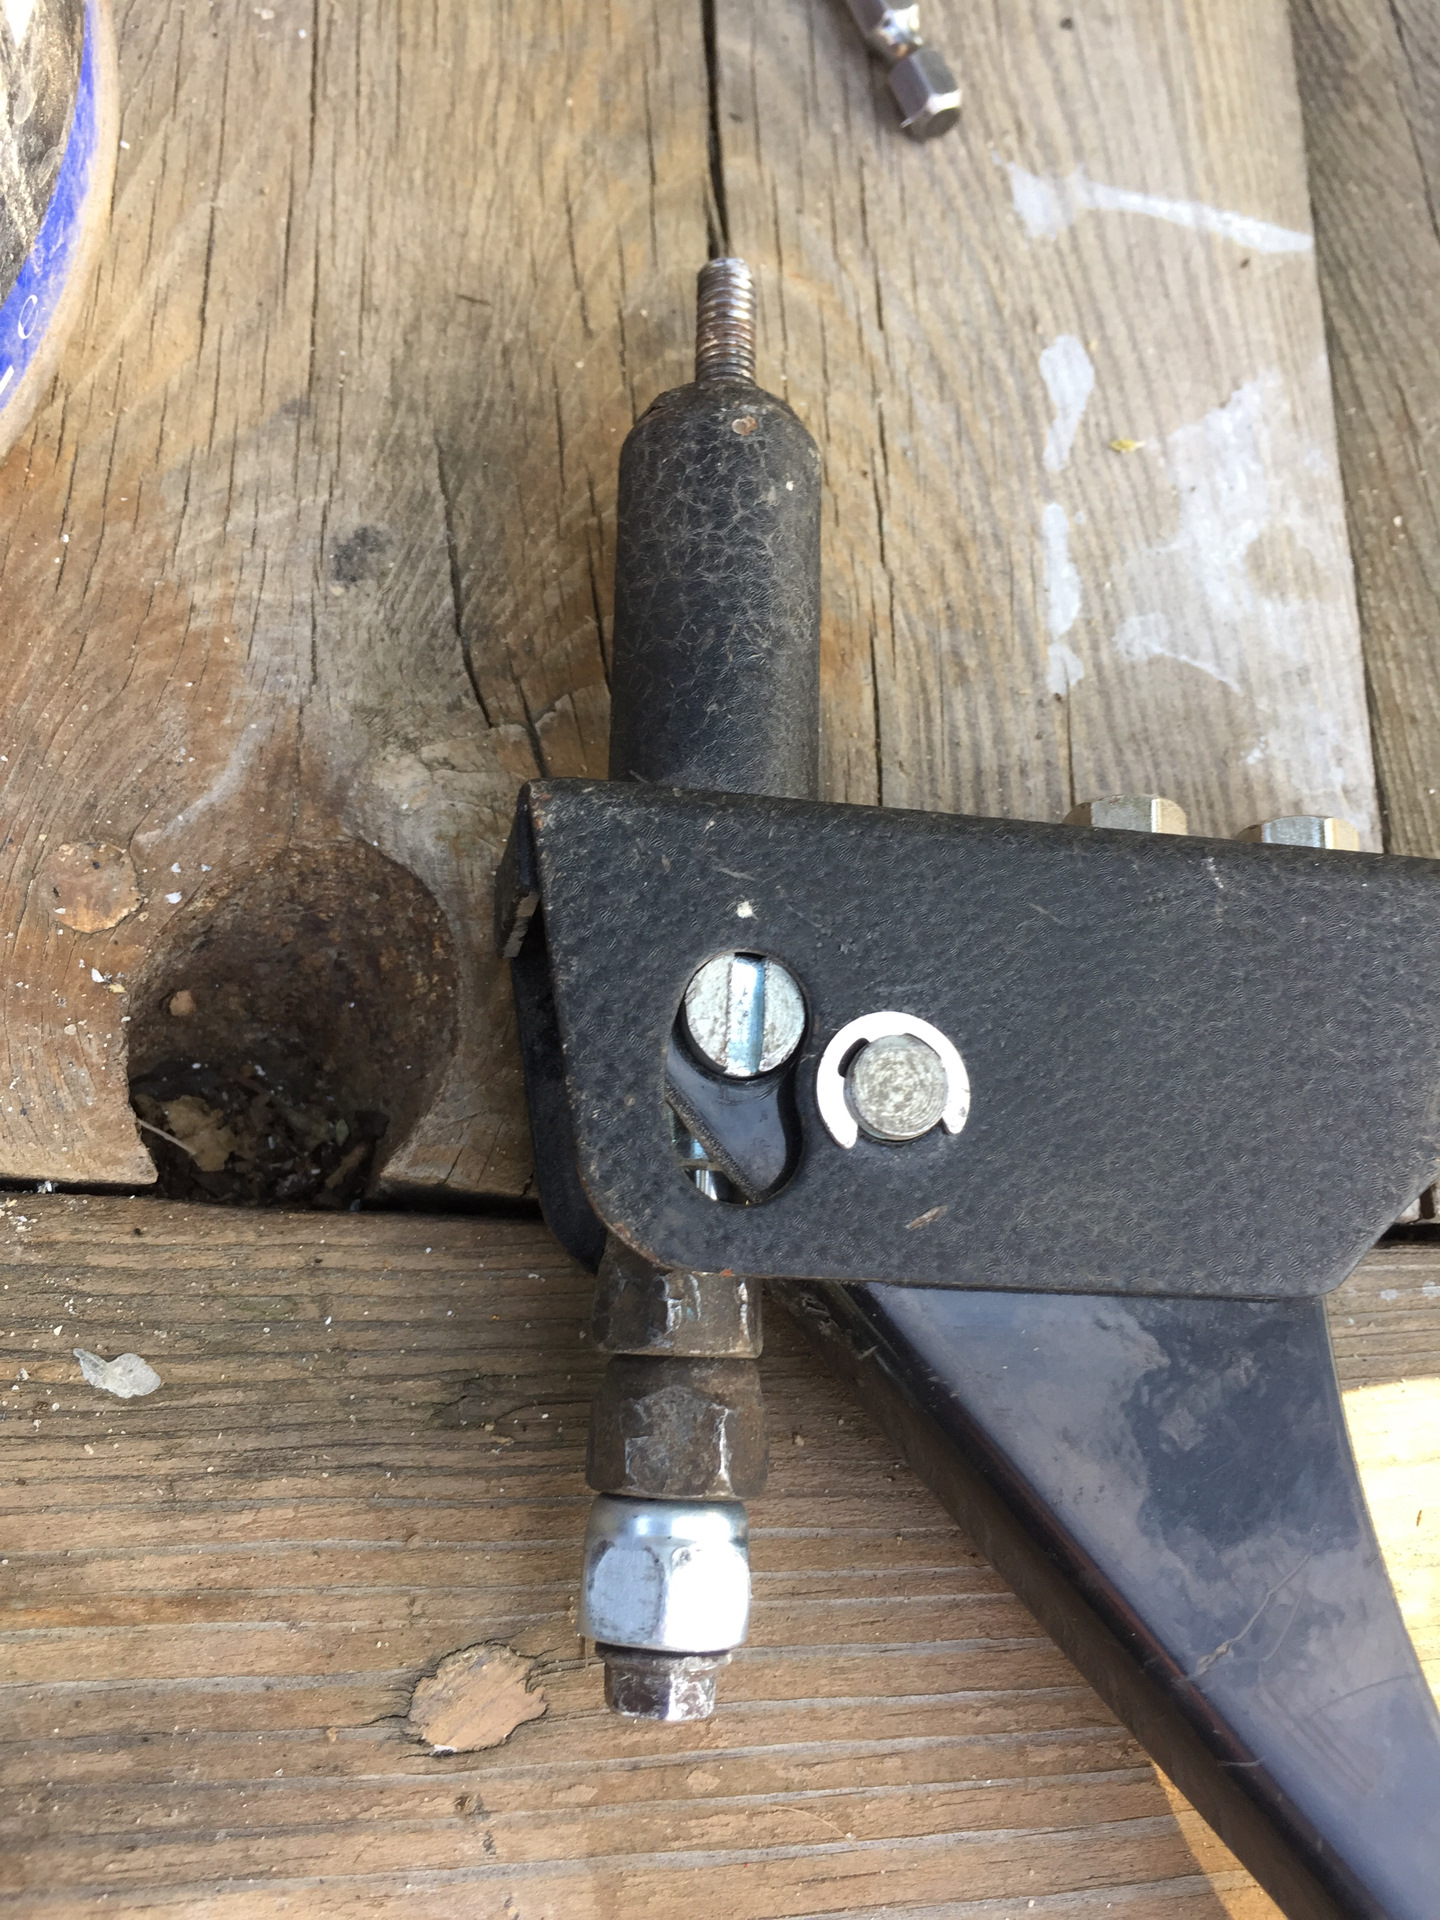
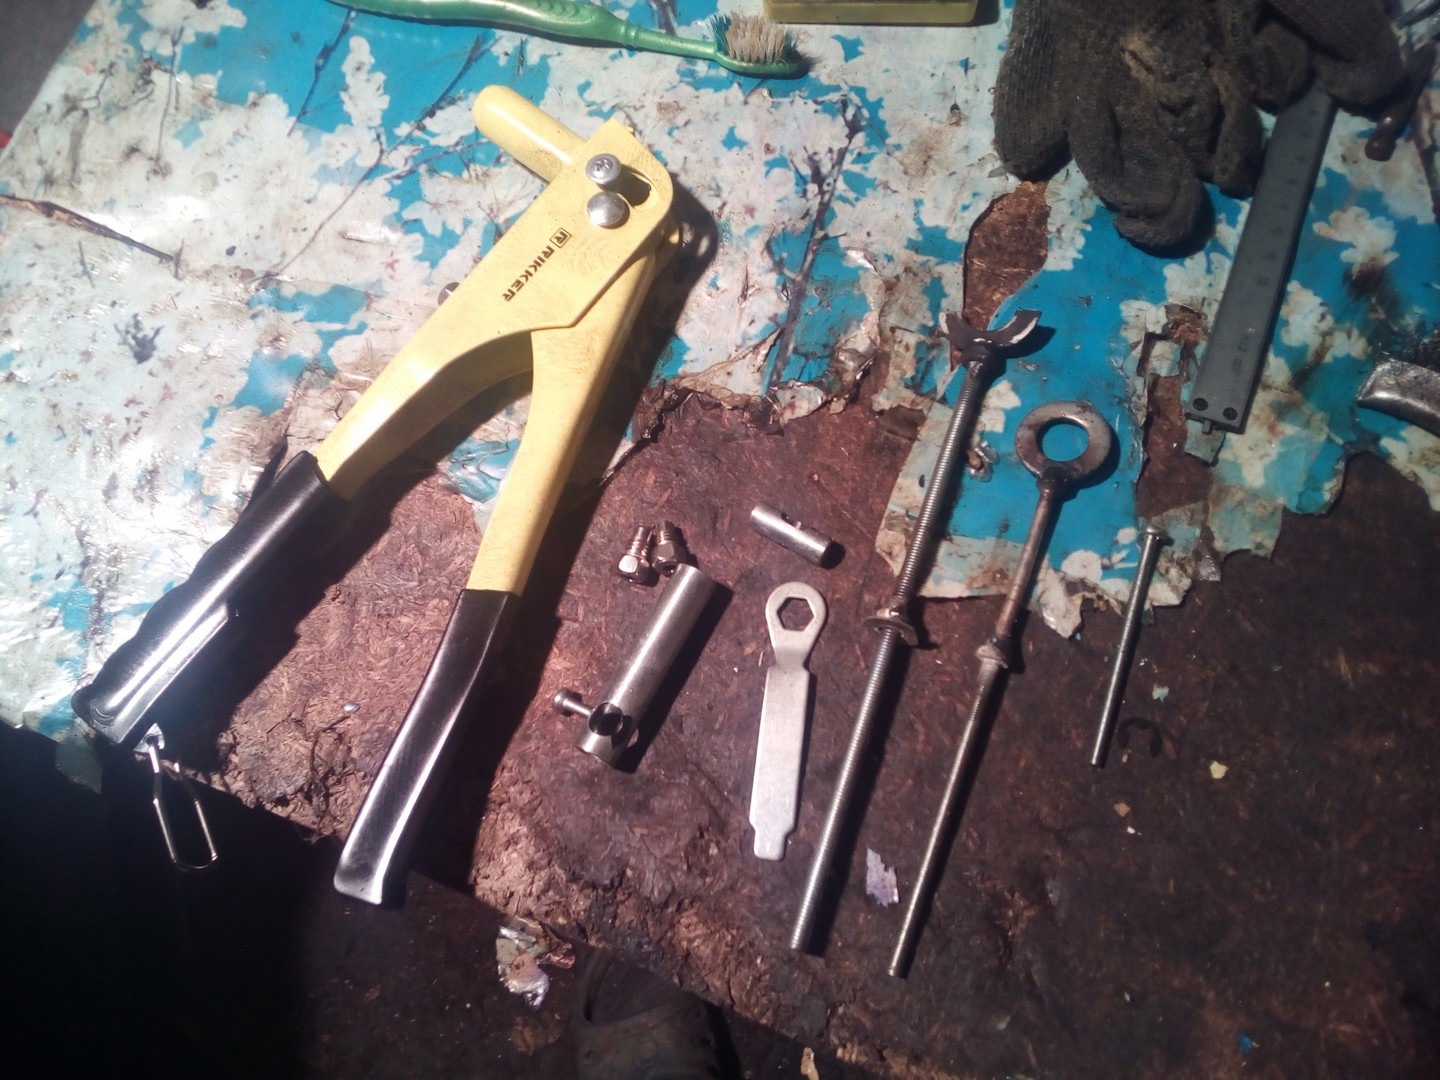
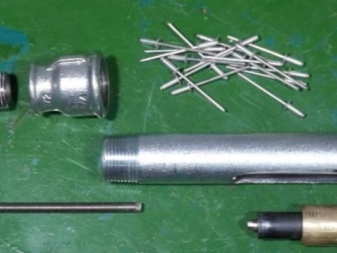
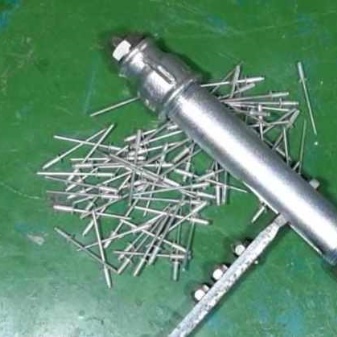
Cut a piece 3 cm long from the prepared steel pipe. Next, drill a hole with a diameter of 9 mm in it, on the opposite side of the pipe - with a diameter of 3 mm. Process them with a 9 mm drill under the sweep, make a cut with a grinder from the edge of the pipe segment to a small hole. Process the edge with a grinder to obtain a conical expansion. On the outside of the pipe section in the area of the large hole, weld a nut, between the holes - a bolt for installing the handle from the drill, you can weld an improvised handle.
The end of the long bolt must be sawed down so that a plane is obtained in which a hole with a diameter of 4 mm must be drilled. The bolt is screwed into a nut welded to the pipe section. A knob can be welded to the bolt head or a wrench can be used to turn it.
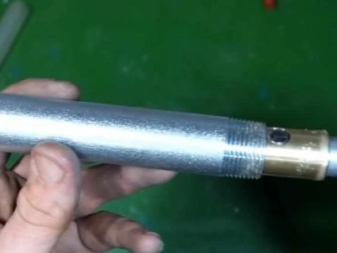
To bring a homemade rivet into working condition, a rivet must be installed in it. To do this, the end of its rod is pushed into the bolt hole, then the riveting sleeve must be placed so that its head rested against the sweep on the pipe segment, for this the rod must be bent - the alloy from which it is made makes it easy to do this. Well, then everything is the same as with the factory riveter: the rivet is inserted into the hole on the fastened parts by turning the bolt, with the help of the thread, the stem is pulled out and rolled.
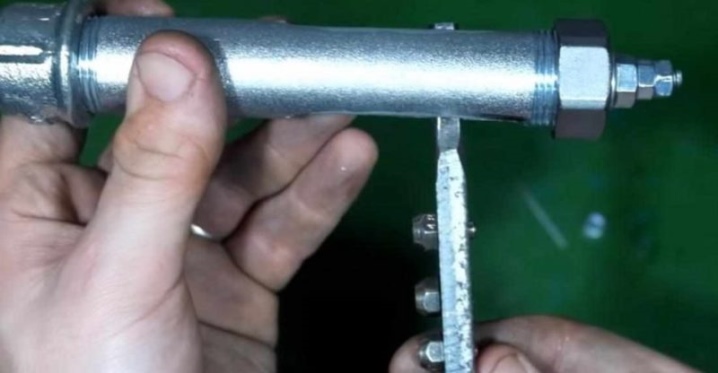
As can be seen from the description, it is still impossible to do without some kind of set of tools and materials for making a homemade riveter.
The process of installing riveted accessories on clothes or shoes is technically simple - it is important to choose the appropriate tools:
- a rivet with metal legs can be installed using a slotted (flat) screwdriver;
- the turnstile rivet-button is installed using a tube and a hammer, and a Phillips screwdriver is needed to secure its lower part.
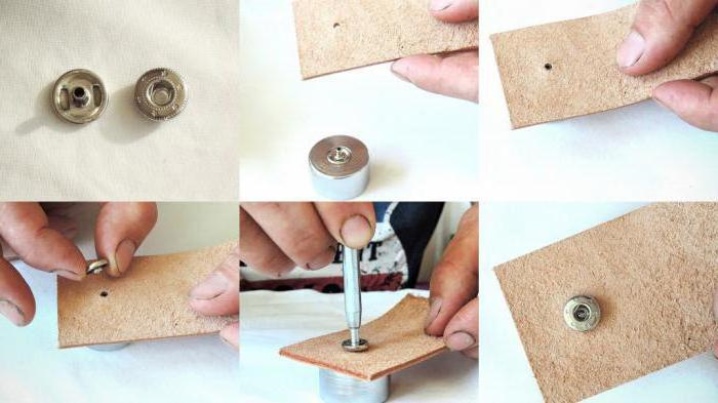
Step-by-step instruction
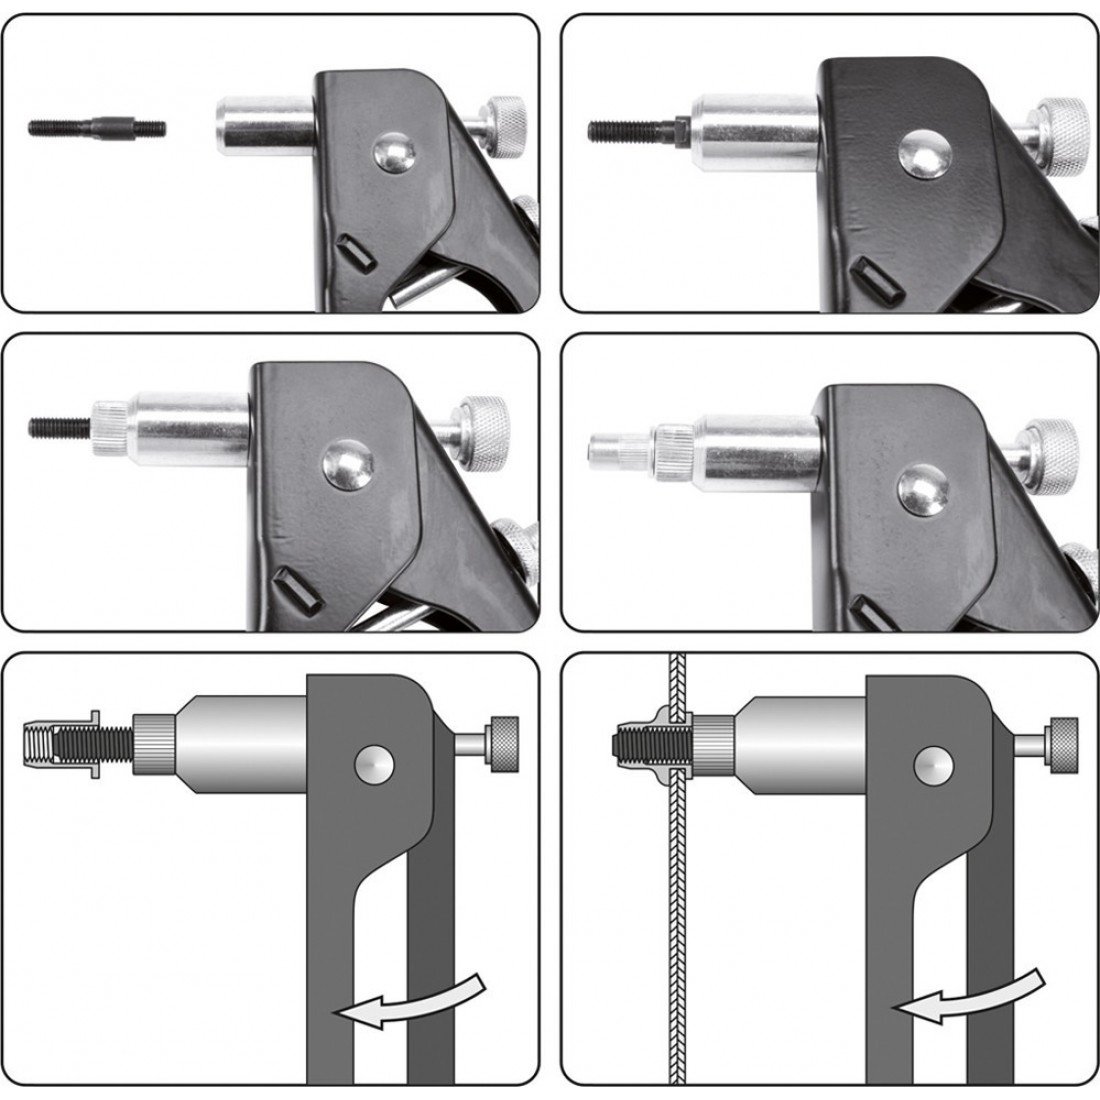
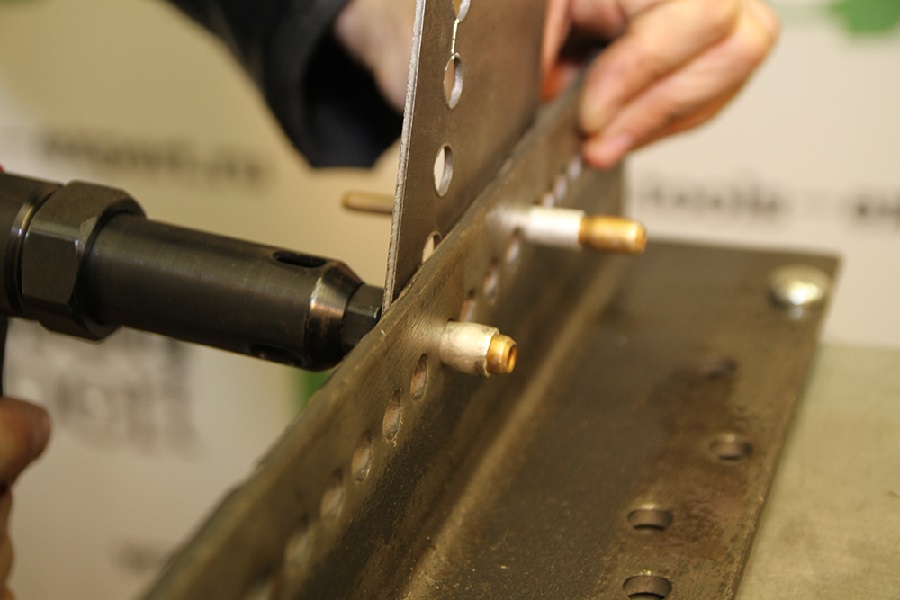
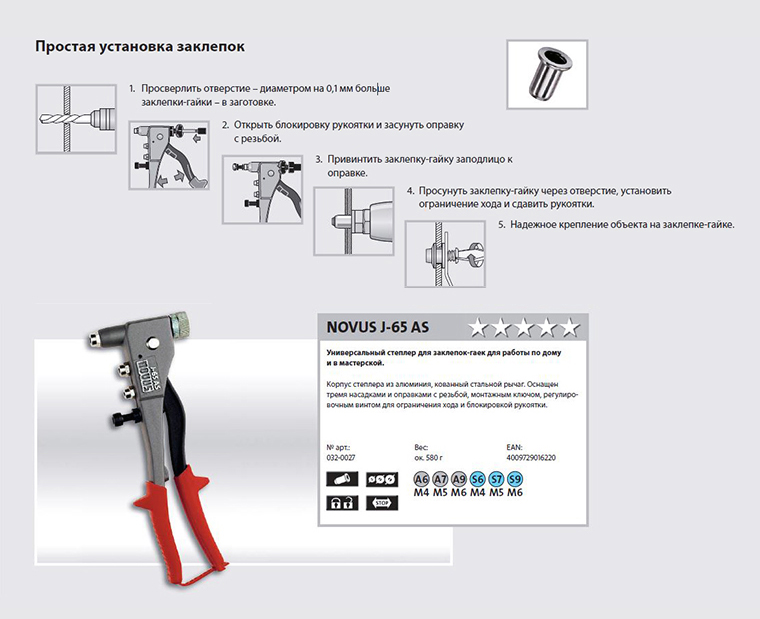
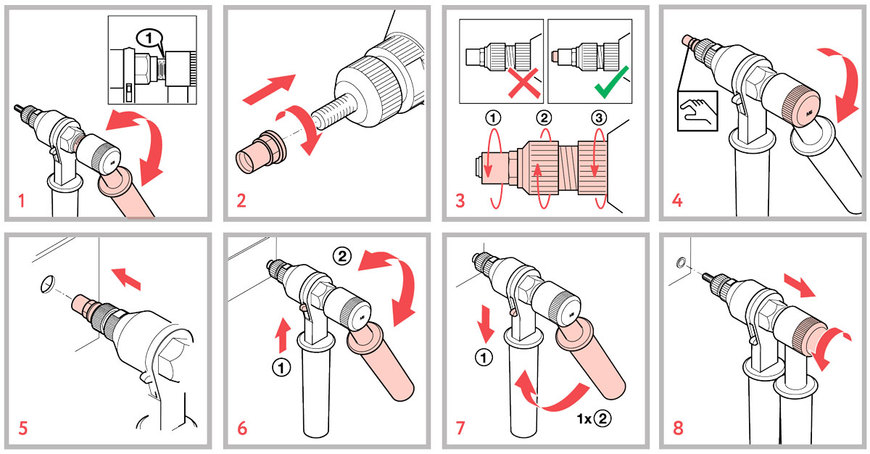
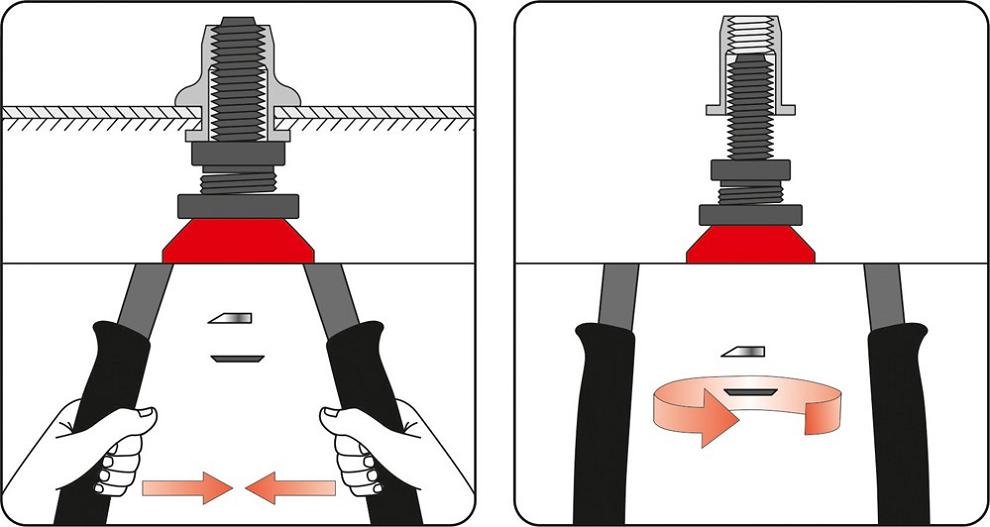
If there is a riveter, it must be adjusted to the corresponding rivet nut, the stroke of the threaded rod must be adjusted in accordance with the rivet length. If all adjustments are correct, the step-by-step instructions for installing a threaded rivet looks, in general terms, as follows:
- connect parts or structural elements as required;
- knowing the diameter of the rivets, choose a drill 0.1 mm larger;
- drill the blanks, trying to maintain the perpendicular;
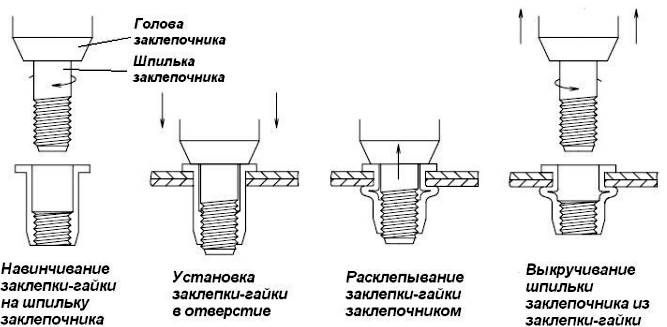
- screw the rivet onto the stem of the rivet head;
- carry out the installation of the connection by pulling the threaded rod with the rivet handles;
- unscrew the rivet.
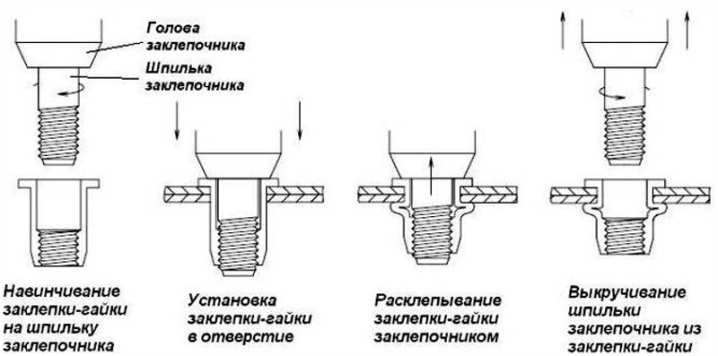
That's it, fastening with a screw rivet is done. If necessary, you can strengthen the connection with a bolt and nut, or install any other structural element using a bolt, since a threaded fastener has appeared on the surface.
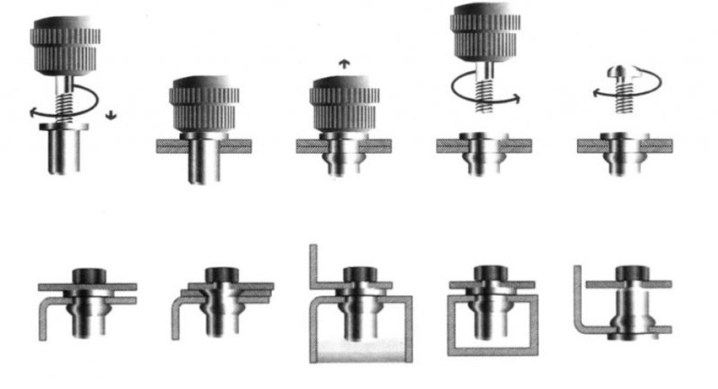
It is quite possible to fasten a threaded rivet without a rivet using a homemade device.
If the device is assembled from those elements that are listed above, in general terms, it is worth setting a rivet with it as follows:
- drill a mounting hole with a diameter of 0.1 mm larger than the diameter of the rivet;
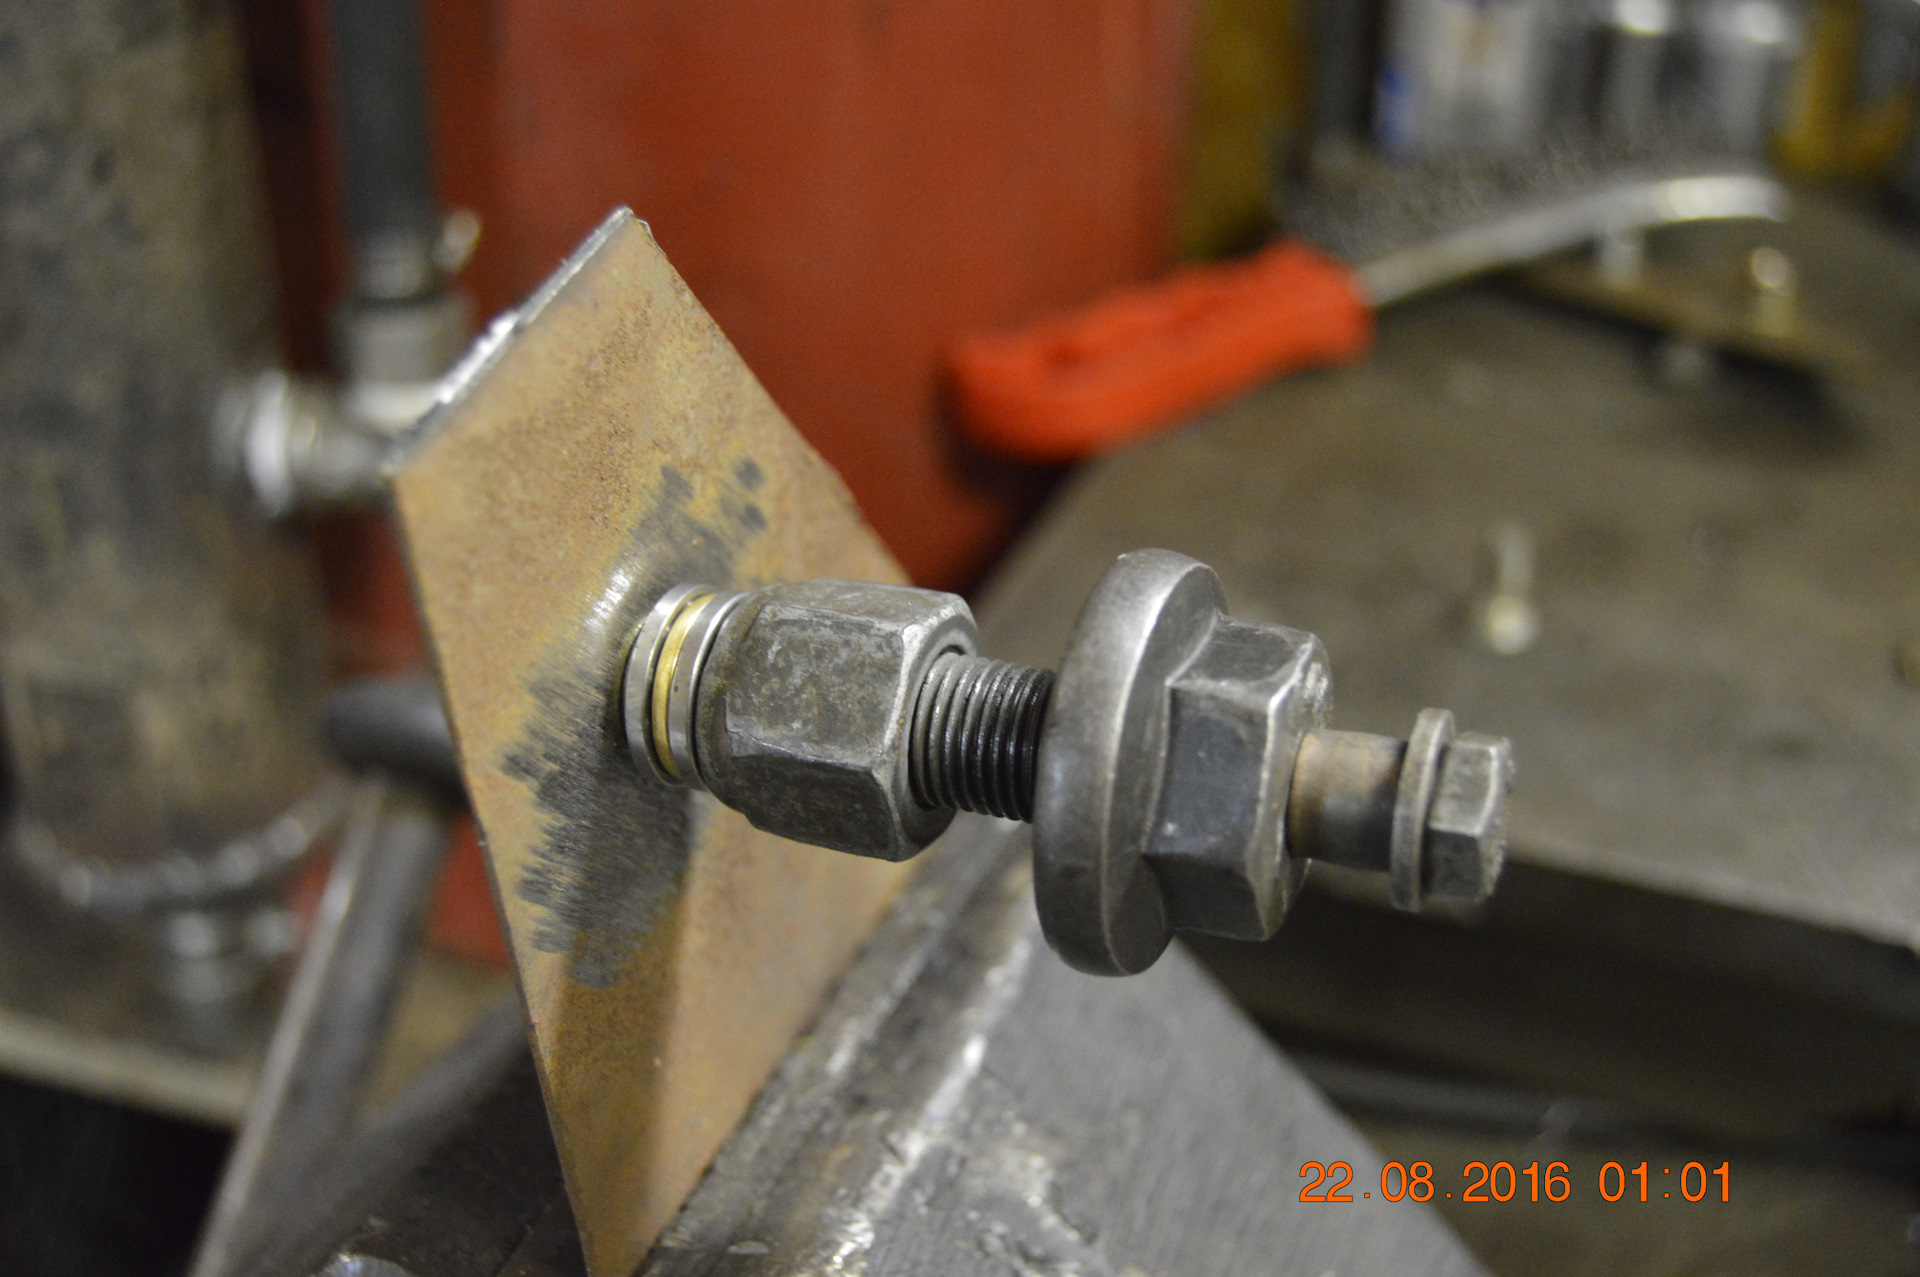
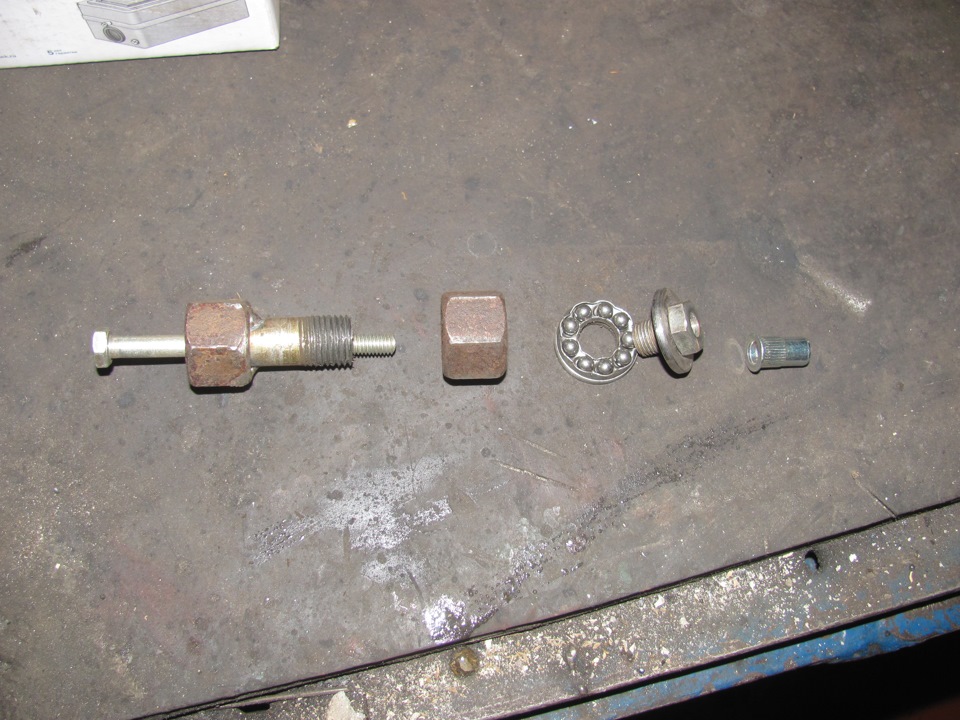
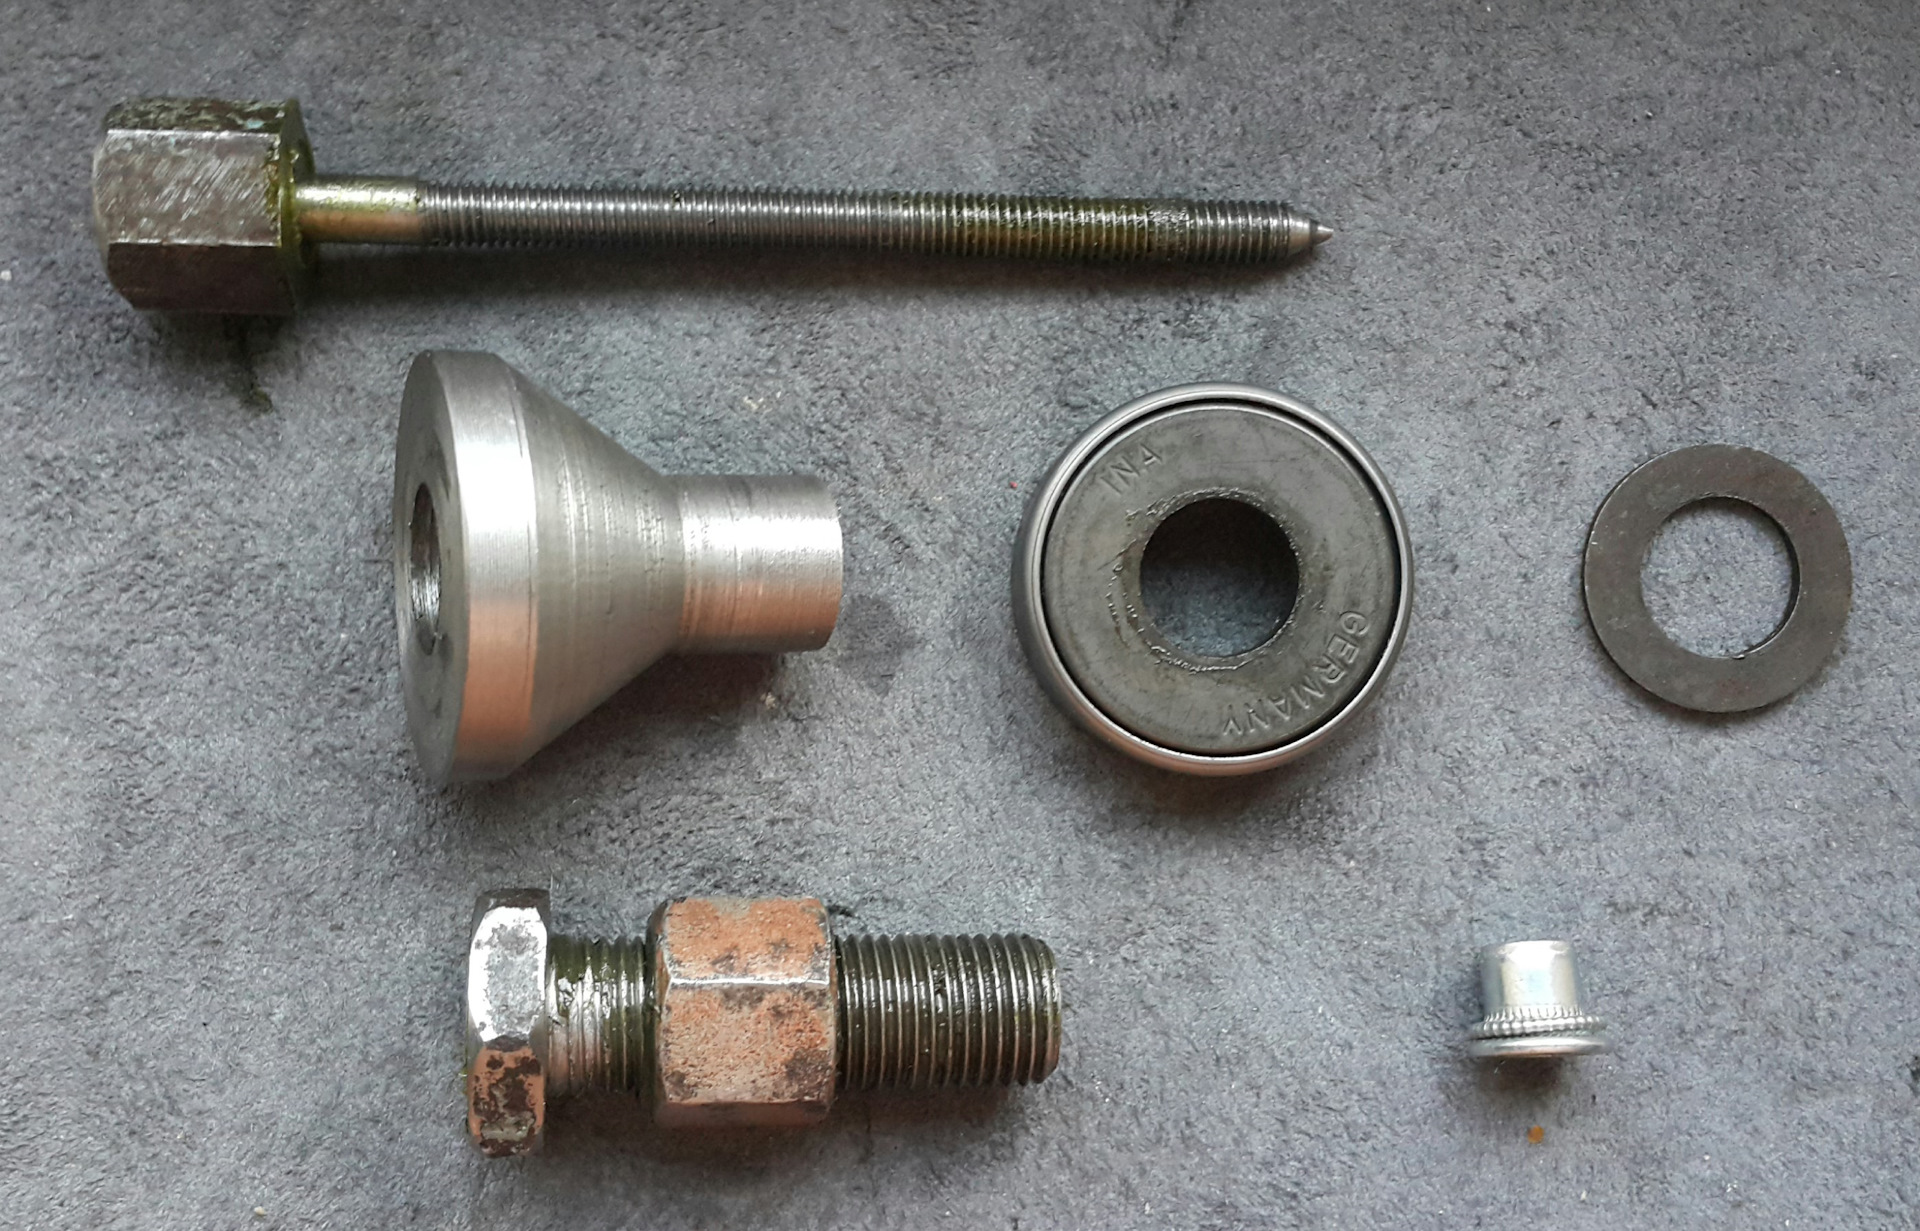
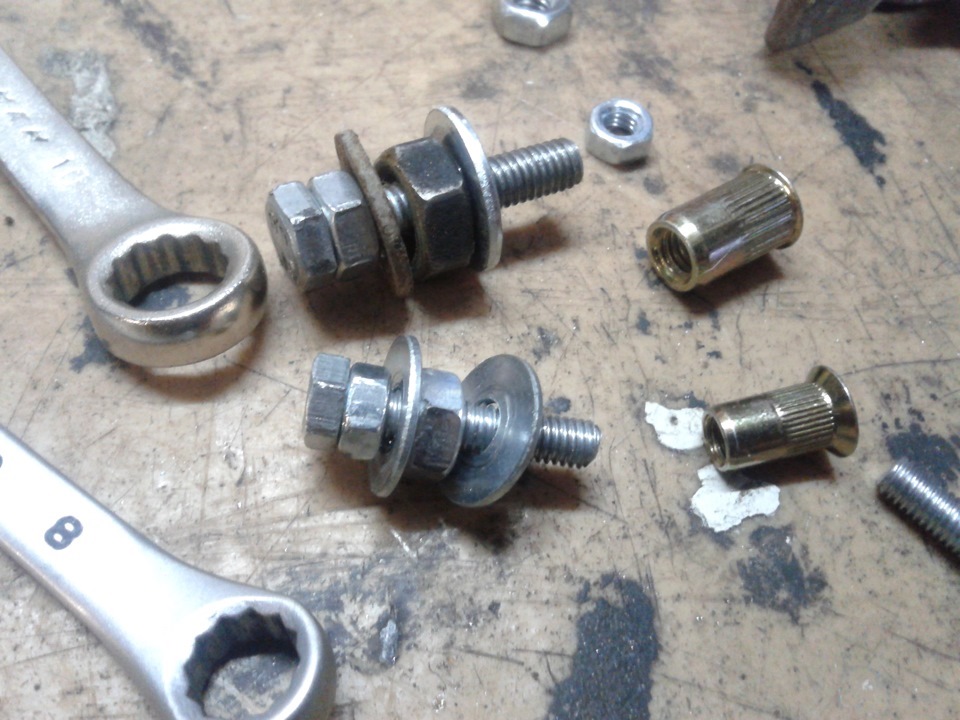
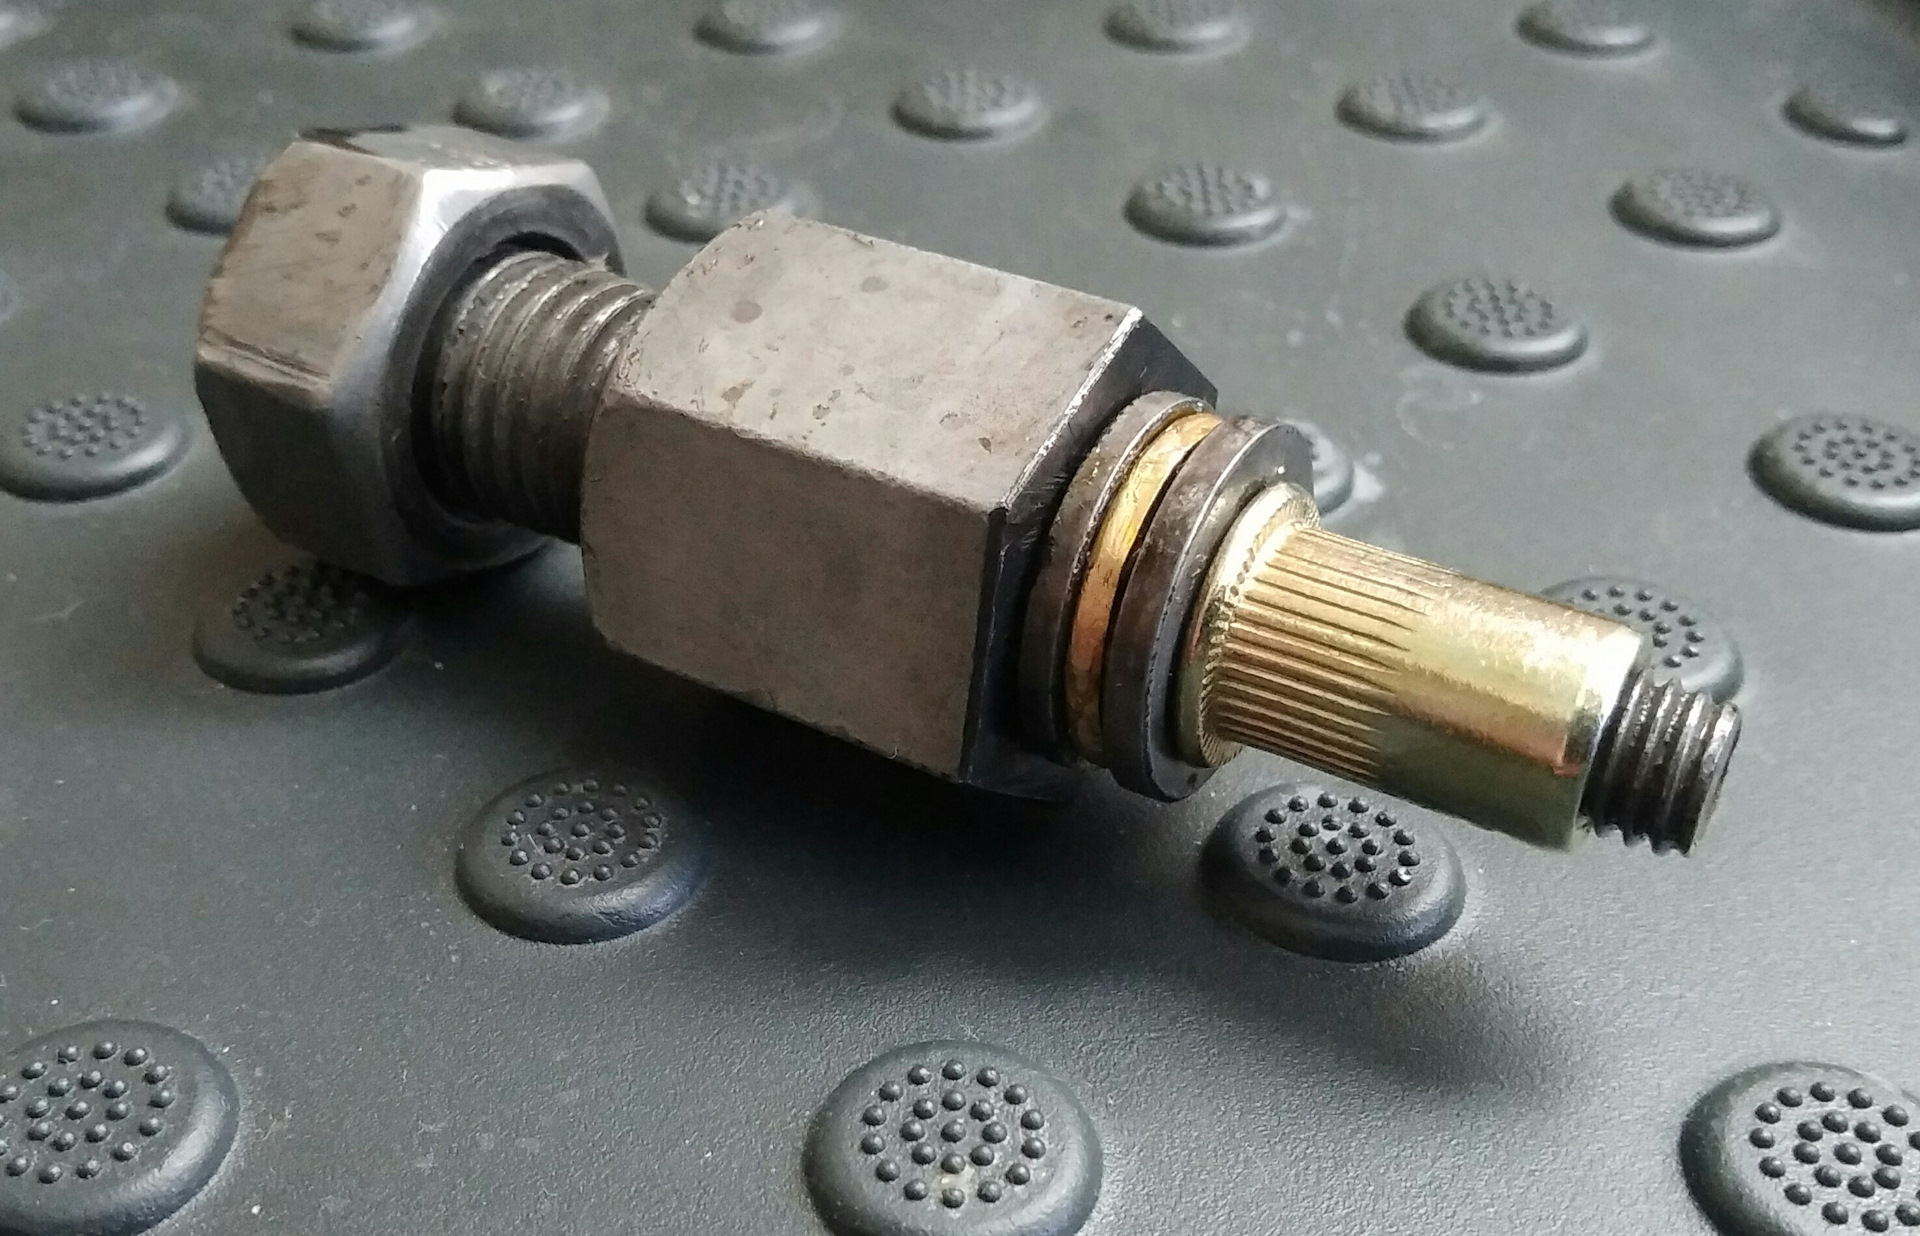
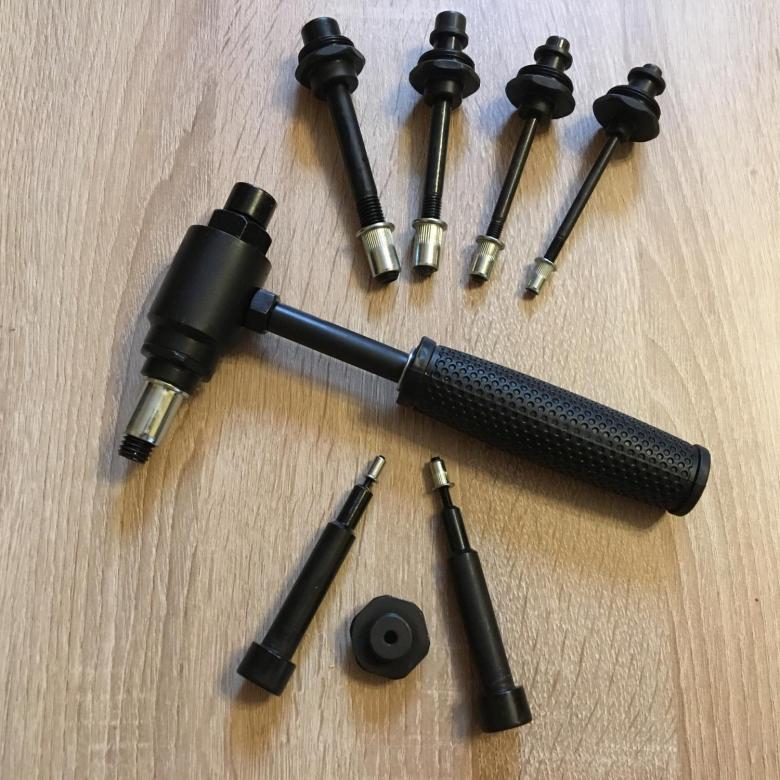
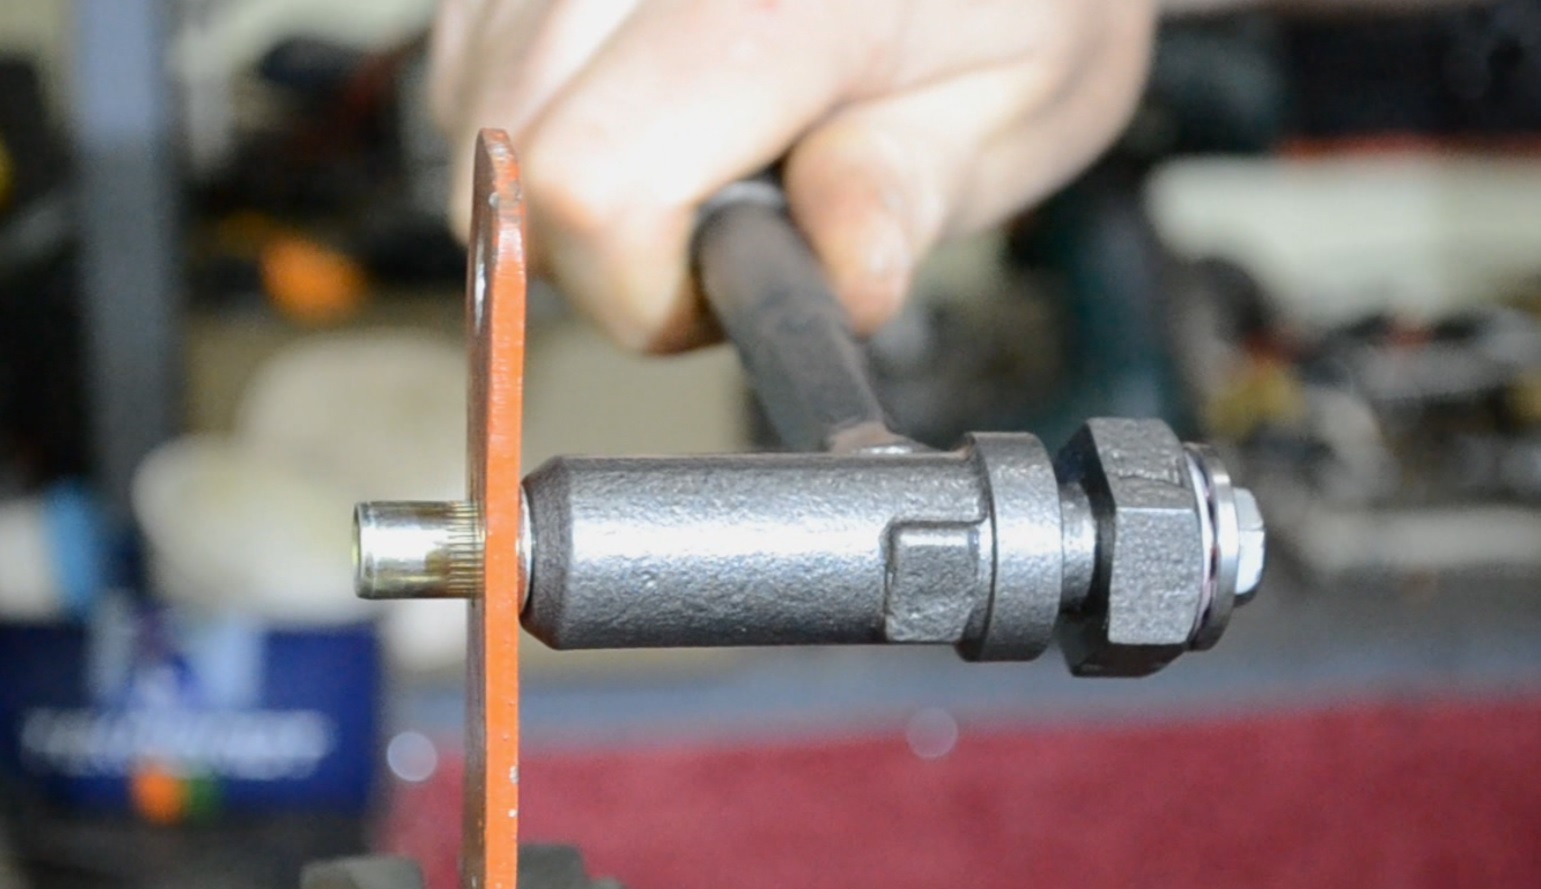
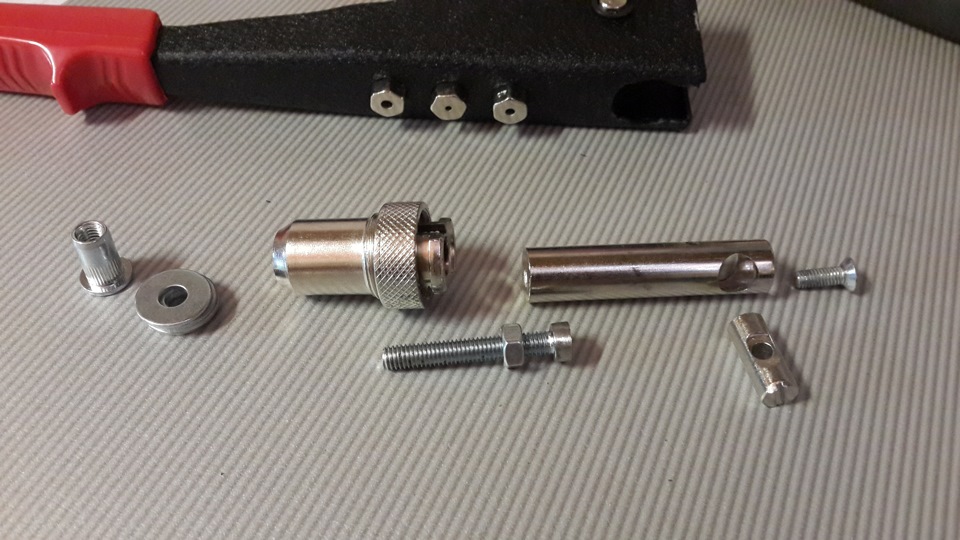
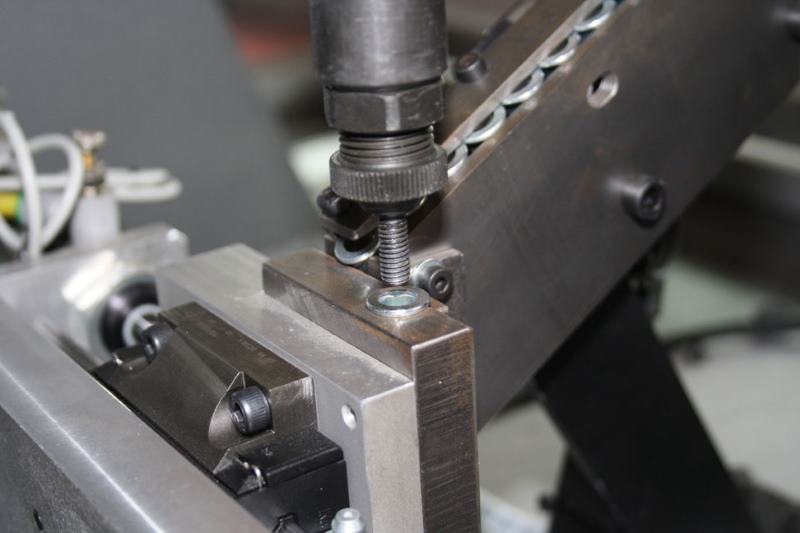
- assemble a homemade riveter: screw a nut onto a long bolt with a thread corresponding to the thread of the consumable, put a washer on it, then install a sleeve, which is also covered with a washer;
- screw a rivet onto the end of the bolt;
- turning the nut, ensure that the bushing rests against the rivet head through the washer;
- insert a rivet into the prepared hole;
- keeping the bolt from turning with a wrench, turn the nut with another wrench so as to pull out the bolt and deform the rivet;
- when it becomes difficult to turn, unscrew the bolt.
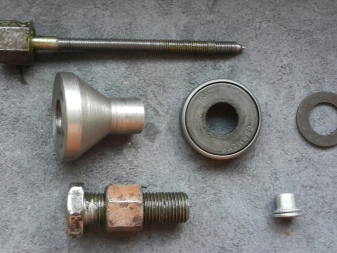
If necessary, you can strengthen the connection with a bolt and nut.
It is clear that self-made structures for installing threaded rivets, made by different craftsmen in different conditions from different components, may differ slightly.
An additional design element of a homemade device for riveting with threaded consumables can be a small bearing that allows you to concentrate the force on the operation itself, reducing unnecessary friction.
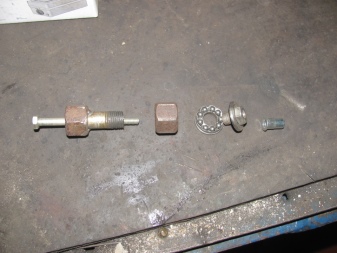
Peculiarities
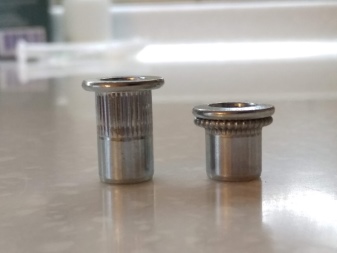
Rivets are fasteners in the form of a sleeve or a rod with a embedded head at one end and a head that closes in the process of riveting at the other. Threaded rivets differ from blind rivets by the presence of a thread. That is, they are hexagonal or cylindrical bushings with a support flange in the upper part and a thread in the lower one. The upper part is made in the form of a thin-walled tube without threads and often has a longitudinal outer notch. During the installation process, it is deformed. The vertical notch on the top ensures uniform deformation and prevents material tearing.
The advantages of threaded rivets include:
- ease of use;
- strong fastening of elements made of fragile and thin materials such as sheet metal without deformation;
- the possibility of one-sided fixation in the event that the total thickness of the parts to be joined exceeds the length of the fastening element without loss of strength;
- maintaining the strength of the connection over time;
- mechanical and chemical non-aggressiveness;
- maintaining the integrity of the surface and paintwork;
- the ability to connect elements from different materials;
- lack of mechanical stress in the structure;
- possibility of dismantling and re-installation.
Despite the fact that at present, in most cases, instead of rivets, welded or glued joints are used, the fasteners under consideration have a number of advantages in comparison with them, which determine their indispensability in some nodes. First, threaded rivets are thermally stable. Secondly, they do not cause structural changes in elements during installation, unlike welding, which is especially important when joining parts made of different materials, the behavior of which can be unpredictable. Thirdly, threaded rivets ensure movement retention.
However, these fasteners have several disadvantages:
- installation is complicated by the need for pre-making holes;
- most threaded rivets do not seal the seams;
- installation is associated with high noise levels.
Species overview
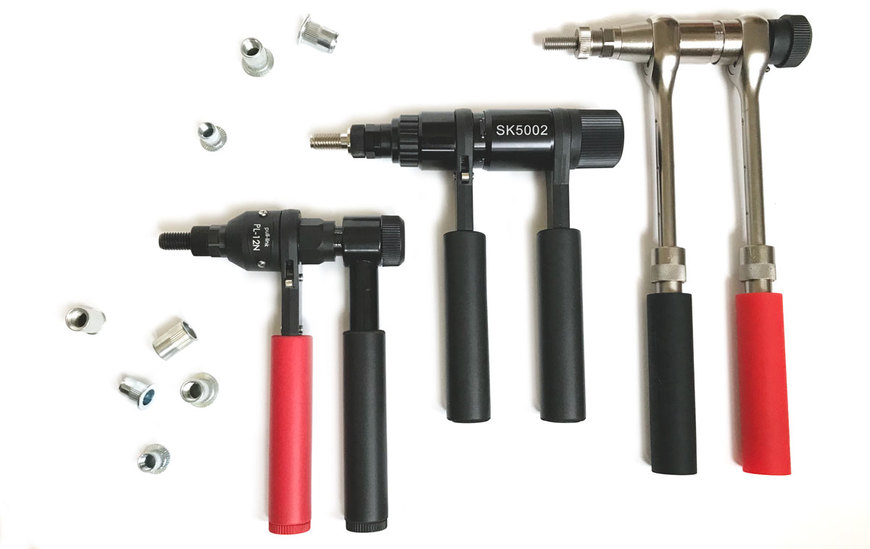
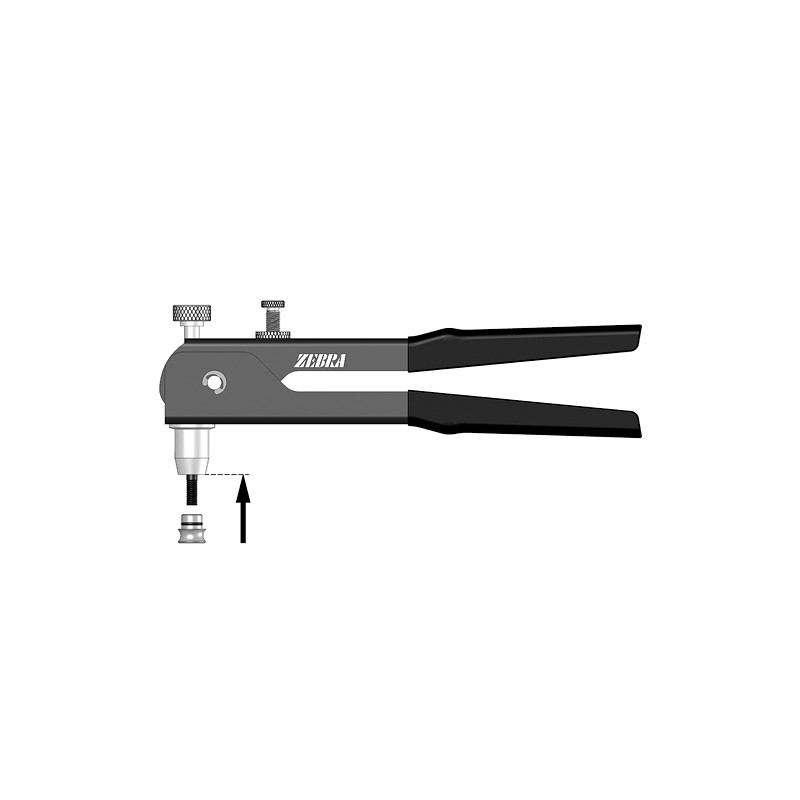
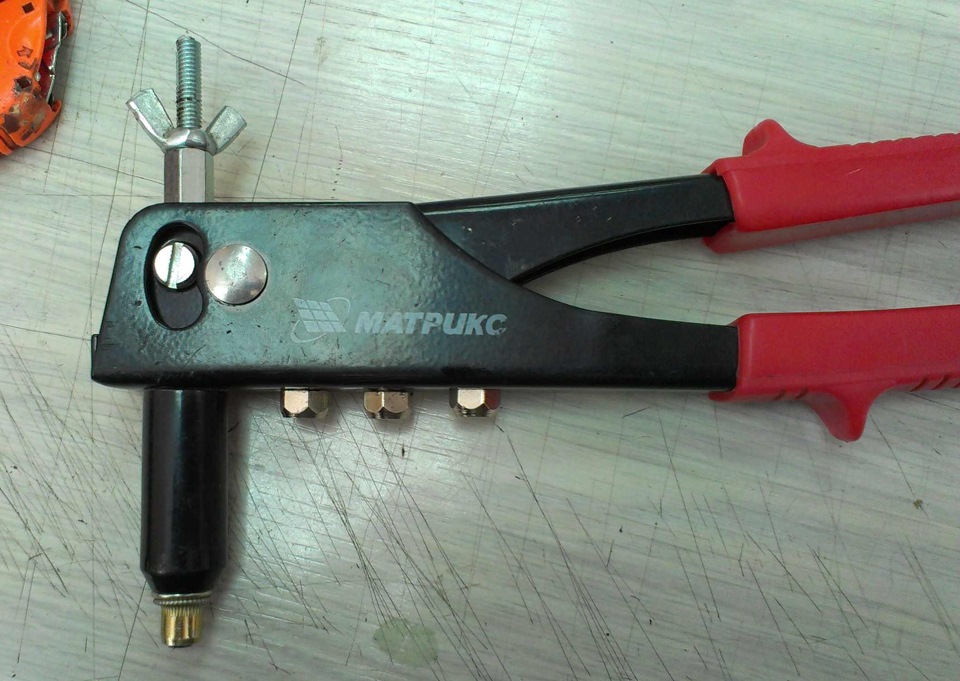
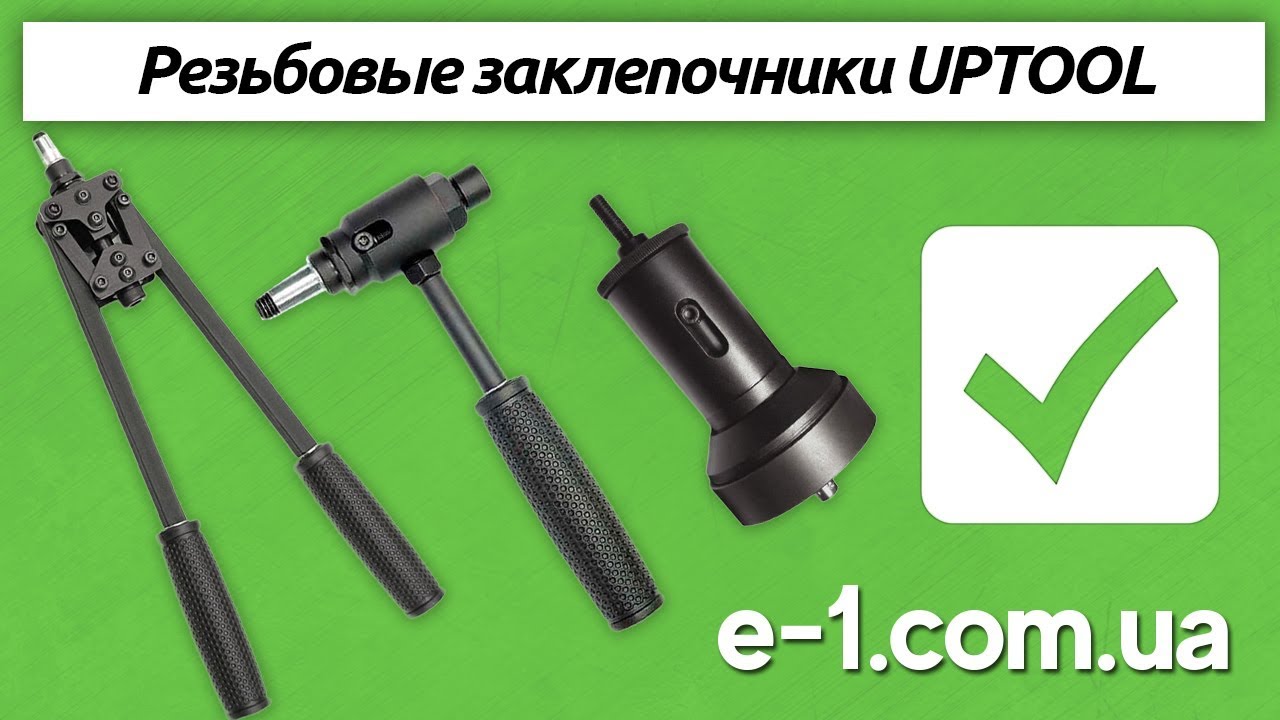
Depending on how often the threaded rivets have to be installed, the master can choose the type of tool that is convenient for him. For example, an electric nut gun works much more productively than a manual one. Pneumatic is considered to be industrial, suitable for installing rivets in line.The principle of operation of the two-hand ratchet riveter differs from the classic pistol version.
Manual
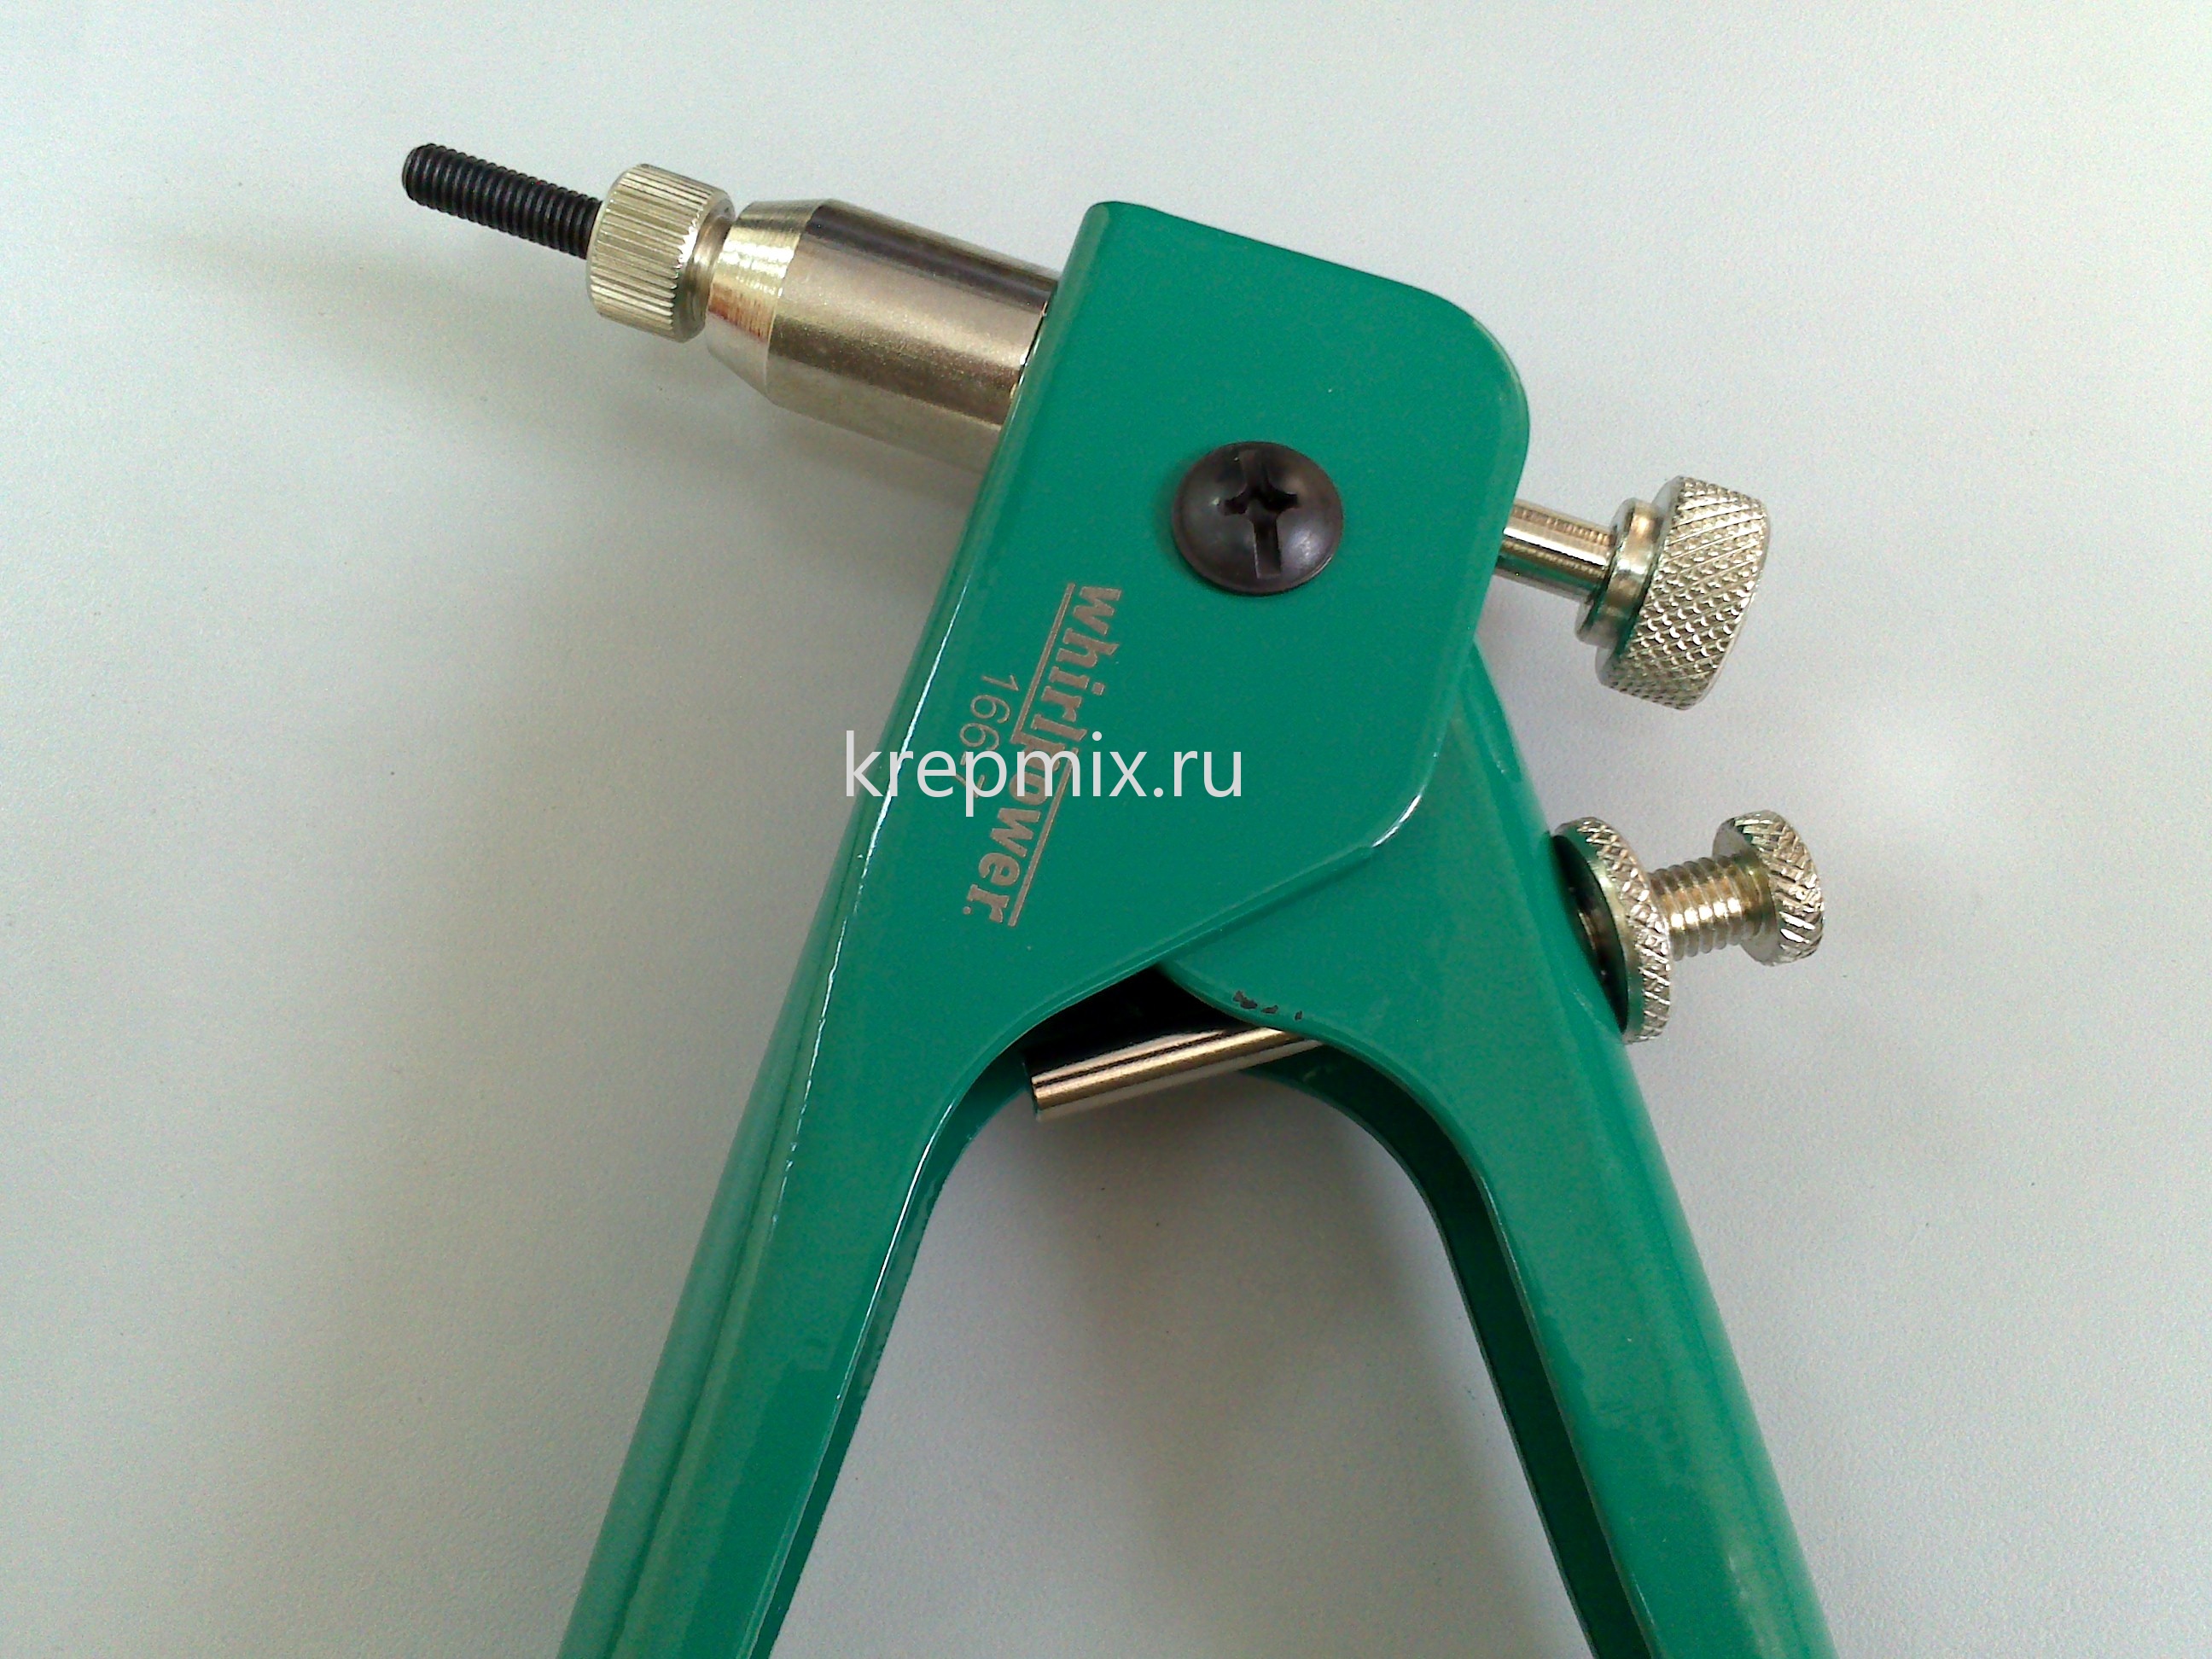
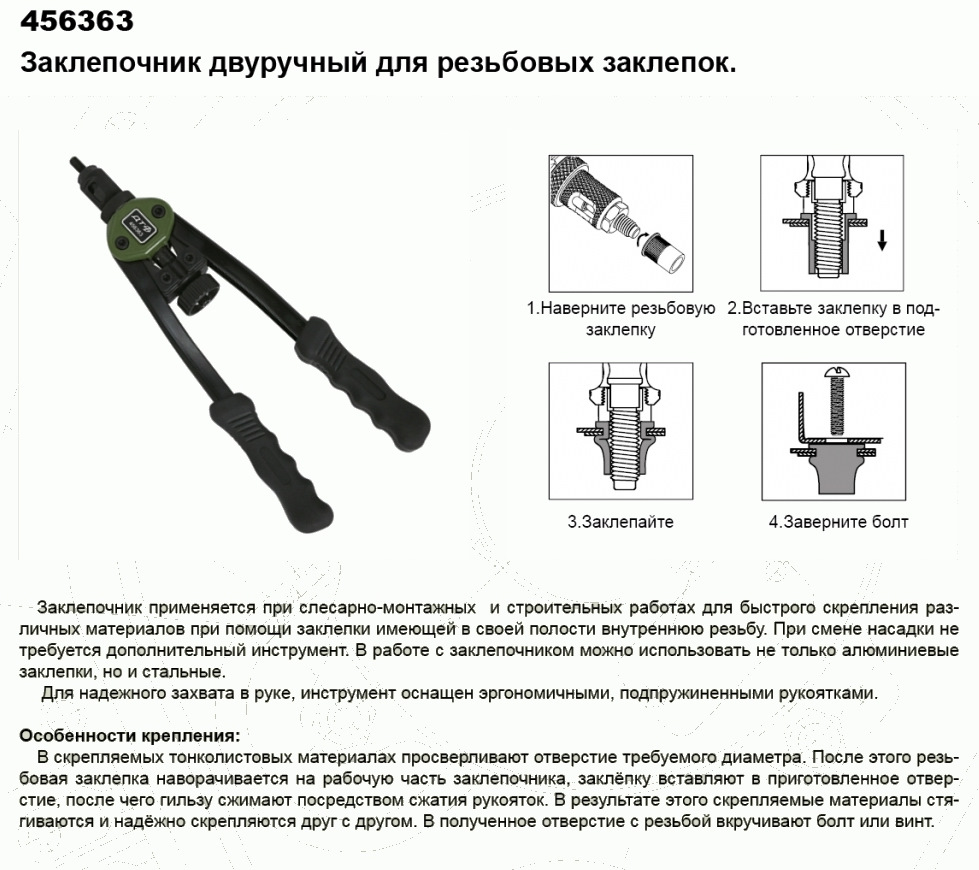
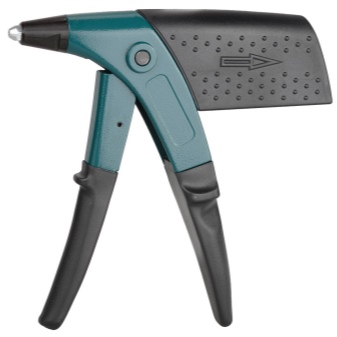
Threaded riveters of this type use the principle of a lever in their work: upon contact, the tool squeezes the nut, causing it to deform. Outwardly, it resembles pliers or pliers, but the location of the working area may not be straight, but lateral. There are lever-type riveters with 1 or 2 handles. In the first case, one of the parts of the structure remains static, is part of the tool body, but does not differ in a large compression force - they are used on nuts up to 5 mm in diameter... Two-handed models are capable of creating more pressure, suitable for fasteners with a diameter of up to 6.4 mm.
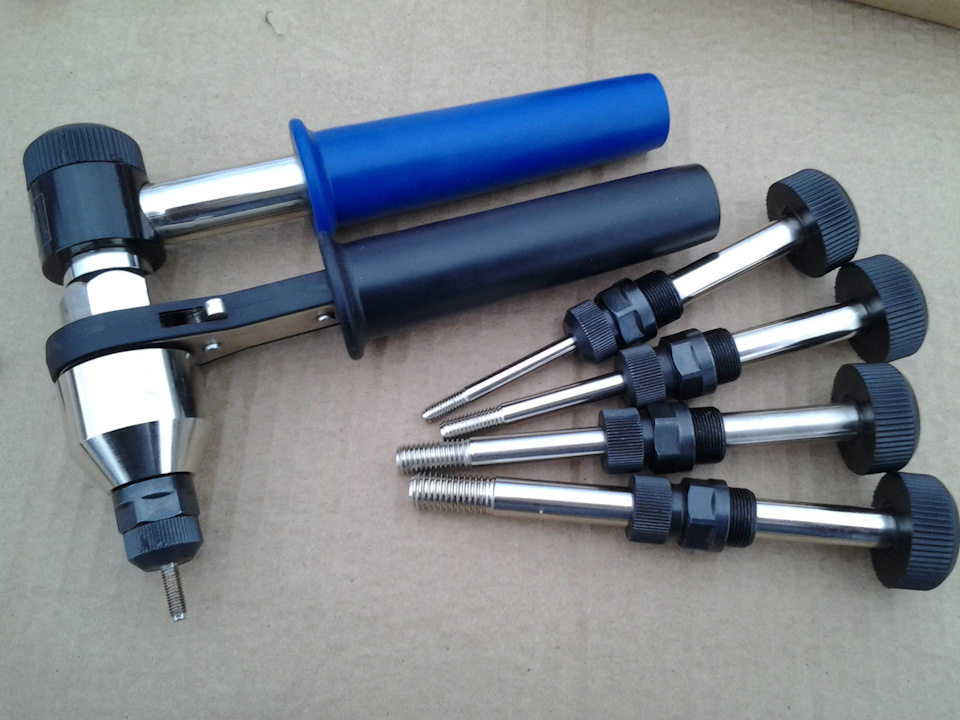
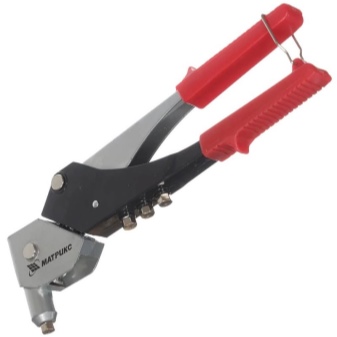
Ratchet rivets are also hand tools, but they have a fundamentally different type of design. They use 2 handles, sequentially fixed on a common axis at right angles to it. The lever force is generated by rotating these elements around the circumference. This tool is ideal for working with large diameter threaded rivets. Available in "second length models" for mounting fasteners into thicker joints.
Telescopic ratchet rivets are a relatively new phenomenon in the hand tool market. They are equipped with levers that allow increasing and decreasing their length in a certain range, independently of each other. This is convenient when working in confined spaces. In addition, the different lengths of the levers provide an increase in the force exerted on the metal when the nut deforms during installation.
Threaded type ratchet gearbox rivets have a planetary mechanism inside the housing. It increases the force imparted to the driven shaft, speeds up the fastening process by 3-4 times. The costs of physical forces are reduced, and labor productivity is increased.
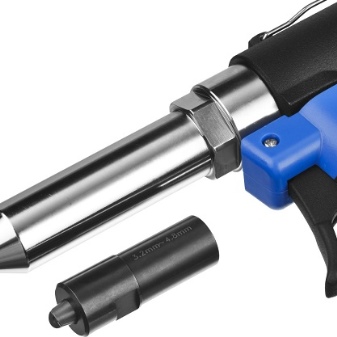
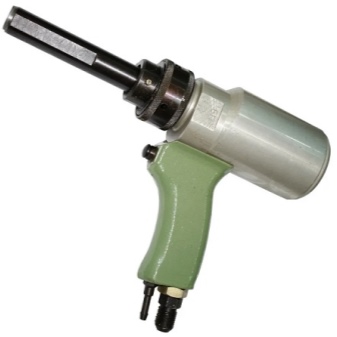
Pneumatic
This type of tool works on the basis of compressed air. The external unit - the compressor - provides a sufficient intensity of impact on the surface of the threaded rivet. This type of equipment can hardly be called portable and compact, it is most often used in the industrial field, in line work.
Pneumohydraulic
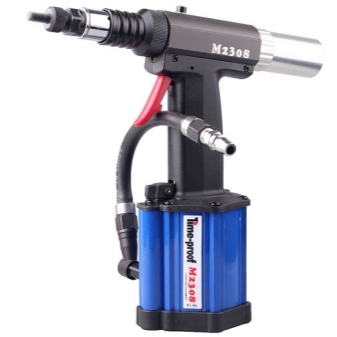
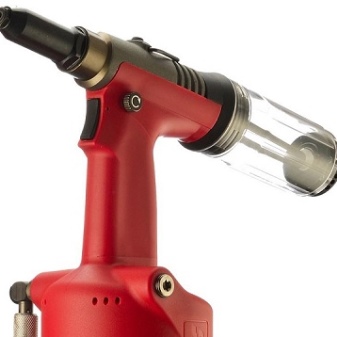
Rivet guns of this type are capable of handling the largest diameter fasteners. The combination of pneumatic and hydraulic effects provides a significant increase in the force exerted on the nut during deformation. Such high power in everyday life is simply useless. That is why it is recommended to use it for industrial purposes, in production or in private workshops.
Rechargeable
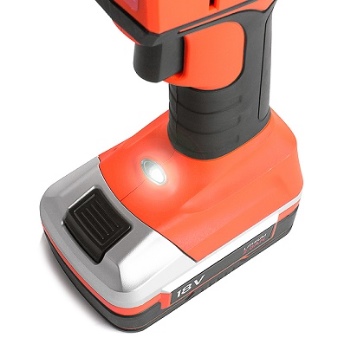
Like classic electric rivets, this tool has a motor connected to a power source in its design. In rechargeable equipment, this role is played by a removable or replaceable battery. The devices are quite autonomous, convenient to use, and have a pistol-type design. The power of the force depends on the performance of the power tool itself; most options cope well with both small and large rivet diameters.
Summary
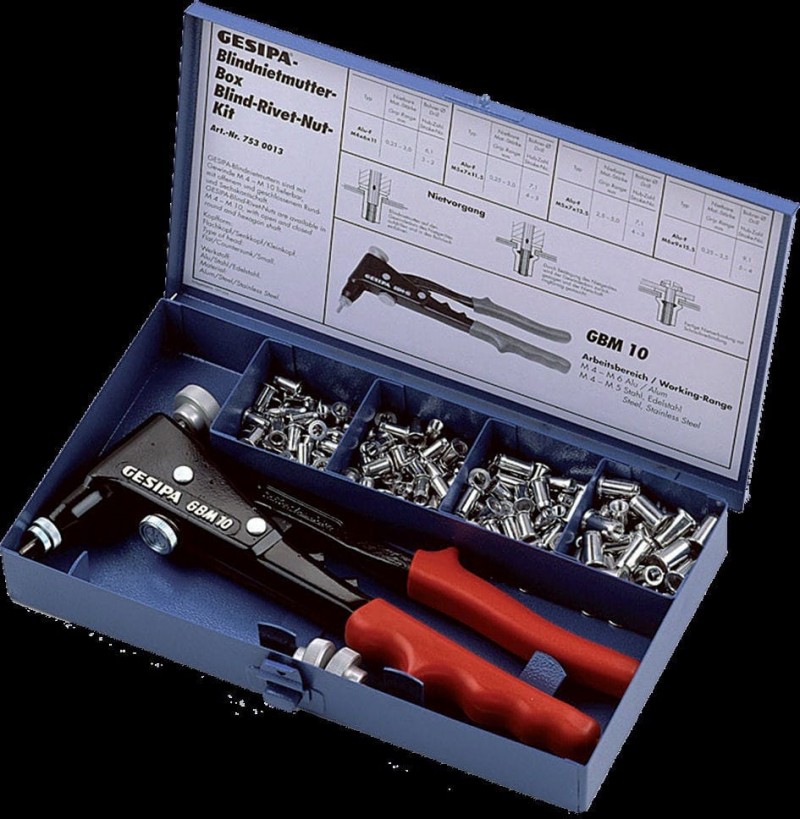
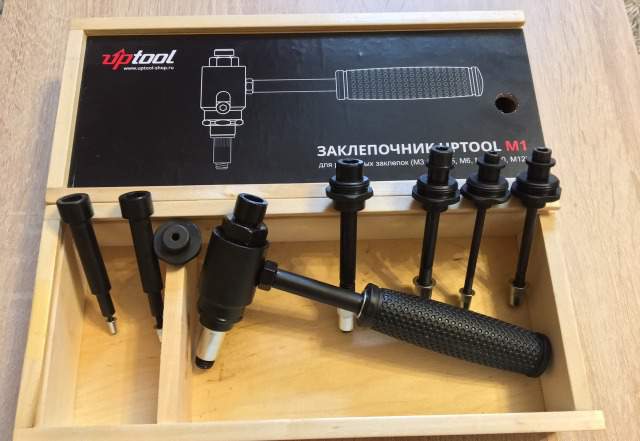
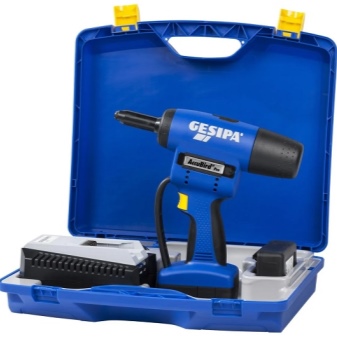
As you can see, each type of rivets fulfills its role and is necessary. If the usual ones can be replaced by pull-out ones, then the threaded ones are unique in their class and make it possible to install additional equipment where it is difficult to use any other method of fixation. The diameter of the retainer is selected depending on the needs. Factory threaded rivets are usually supplied in a plastic case for easy storage. If there is a need to install large diameter components, then the model with two handles is better suited.
Varieties

The difference between rivets of this type lies not only in their diameter, but also in other parameters, one of which is the metal of manufacture. The following can be used as a basis:
- steel;
- aluminum;
- copper;
- stainless steel.

Each of these metals has advantages over the others. Conventional steel rivets are most often coated with zinc to prevent rusting during operation. In this regard, stainless steel products benefit, but their cost is slightly higher. They are also more durable. Copper and aluminum are used in cases where interaction with a similar metal is required, and the rivet will not hold a too heavy module. Each element has a head that guarantees fixation from the front. It can be flat or hidden. In the second option, an expansion of the outer diameter of the hole will be required to hide the sides. Blind rivets are used most often in the case of one-sided mounting. The latter is carried out in a situation where the thickness of the metal of the workpiece is greater than the rivet and the latter does not have the ability to fully compress it. In this embodiment, fixation occurs due to the expansion of the element body inside the hole.

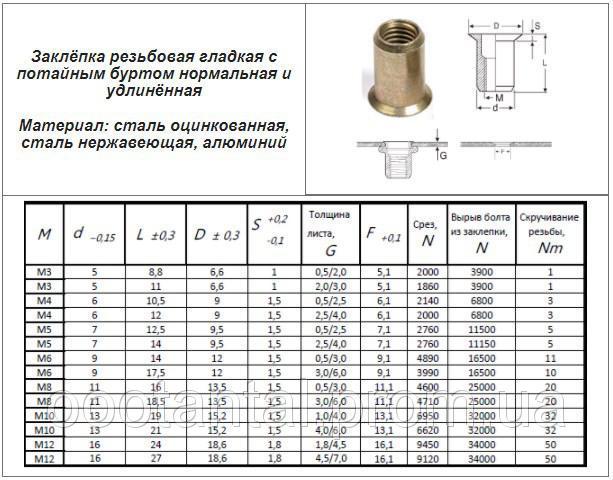
Hanging modules have different thread pitches and diameters, so products that match them are required. That is why companies involved in the production of such clips are most often ready to provide their customers with rivets that have a diameter from M4 to M8. This applies to nut structures where there is no access to the back of the metal. There is also a collapsible screw type, which is available in sizes from M3 to M16. The cut profile of the product can also be different. The most commonly used is round, but it can also be hex. In the second case, making a hole for such a unit requires some effort, but turning it is much more difficult, and in some cases impossible, when compared with a round version.
Threaded rivets can be specialized, therefore, depending on the application, they can have a reduced resistance to electric current. Other elements have increased strength, since they are designed to work under heavy loads. Depending on the shape, the retainers are able to provide a tight connection. On the heads of some elements, special marks are applied, which make it possible to identify them among other products. Anti vibration rivets are often used in cars. Especially when it comes to mounting on body parts.
Other types of rivets
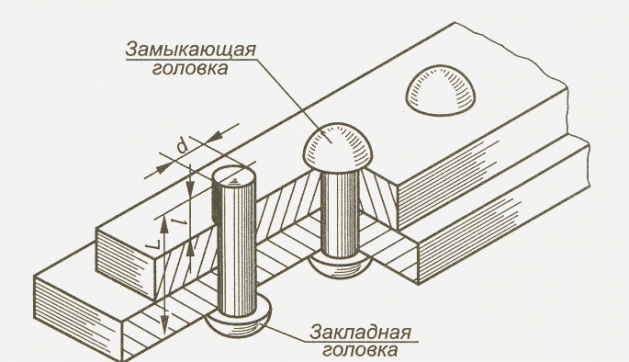
In addition to threaded rivets, there are blind rivets and standard rivets. Previously, the standard rivet was used more. It is a cylinder with one of its parts expanding. The latter is made in a semicircular shape or with sweat. The installation of such a rivet requires more effort than in the case of other types. Such retainers are practically out of use. The first step for installation is to fix the two parts in the position in which they will be fixed. Clamps are used for these purposes. After that, a marking is made of the place where drilling will be carried out. The hole diameter must be 10% larger than the diameter of the rivet itself.
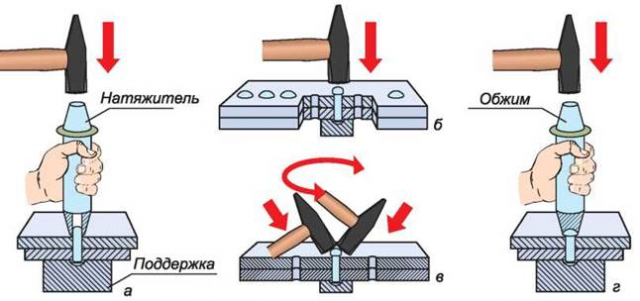
After that, a rivet is inserted into the prepared hole, it must be placed on the back side so that the part without the head is directed upwards. After that, the parts must be positioned in such a way that there is a good stop for the rivet head. After that, the straight section is riveted, as shown in the photo. To do this, you can use a hammer or a special electric tool. The protruding part of the rivet must be given the same shape as that of its head.Riveting must be carried out in such a way that the rivet body completely fills the hole in the details. If this does not happen, then under the cutting force, the rivet will fail, and the assembly will be destroyed. The rivet length should not be too long or too short. In some cases, for greater ductility, a conventional rivet can be heated with a gas burner.

The view of the pull-out fastener is shown in the illustration above. The installation of such an element is carried out several times easier, since the whole process is automated. Each fastener has a steel or other rod, which fulfills the task at hand. The rod is connected to a small ball that is at the end of the element. Selection of the diameter and drilling of the hole is carried out as in the above option. After that, the retainer is installed in its place. The riveter is installed in such a way that the mandrel is fixed in its holder. As the handles are squeezed, the rod pulls up the ball, which flattens the back of the fastener and, thus, fixing the two parts. The rod is cut automatically as soon as the force reaches the limit value.
How to choose?
When choosing a tool for setting female rivets, it is very important to ensure that it meets the desired parameters. The diameter of the nuts with which you work is important.
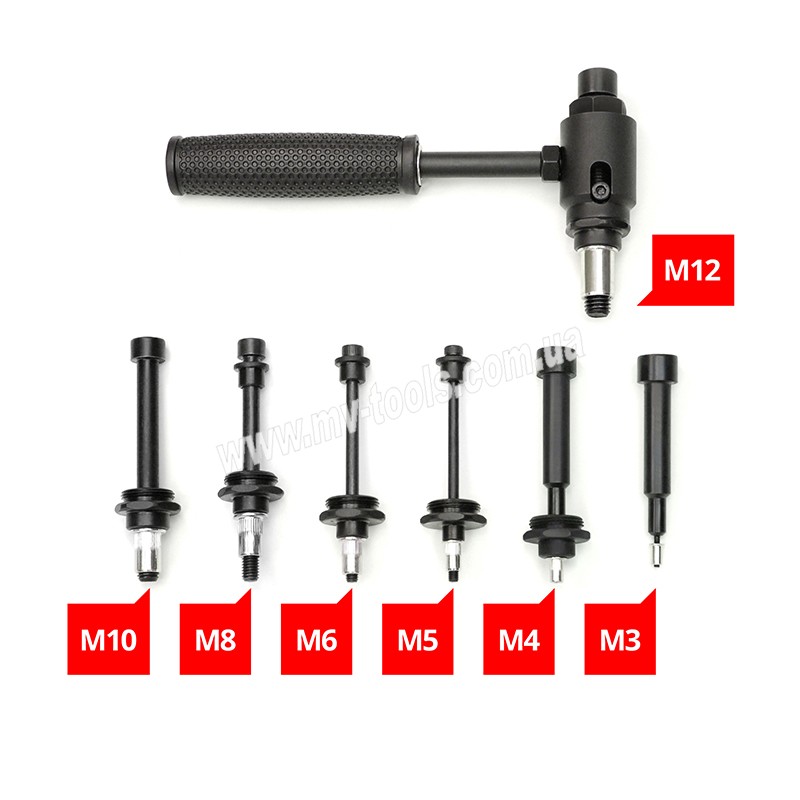
If manual types of rivets still cope with fasteners of the size M5-M6, then for options M8, M10, M12, you will need a professional battery version or a two-hand ratchet type model. A number of important selection criteria should also be noted.
Rivet material type
It is important to understand that most inexpensive riveters are designed to work with soft aluminum fasteners. They are not suitable for installing steel nuts, the tool may jam
If you plan to work with titanium or stainless rivets, it is better to choose a cordless or hand-held ratchet tool model.
Effort applied. For home use, a two-handed riveter of any type will be sufficient - with closing handles or a ratchet. If you have to work outdoors or in a summer cottage, it is better to purchase a battery model. It can handle both large diameter rivets and miniature versions.
Head type. The most versatile is the swivel element, which can be easily installed in any desired position - from the side or straight. This provides easier access to difficult work areas. It is important that it wedges securely in the selected position. If you have to perform the simplest operations, you can take a simple riveting machine with a side head.
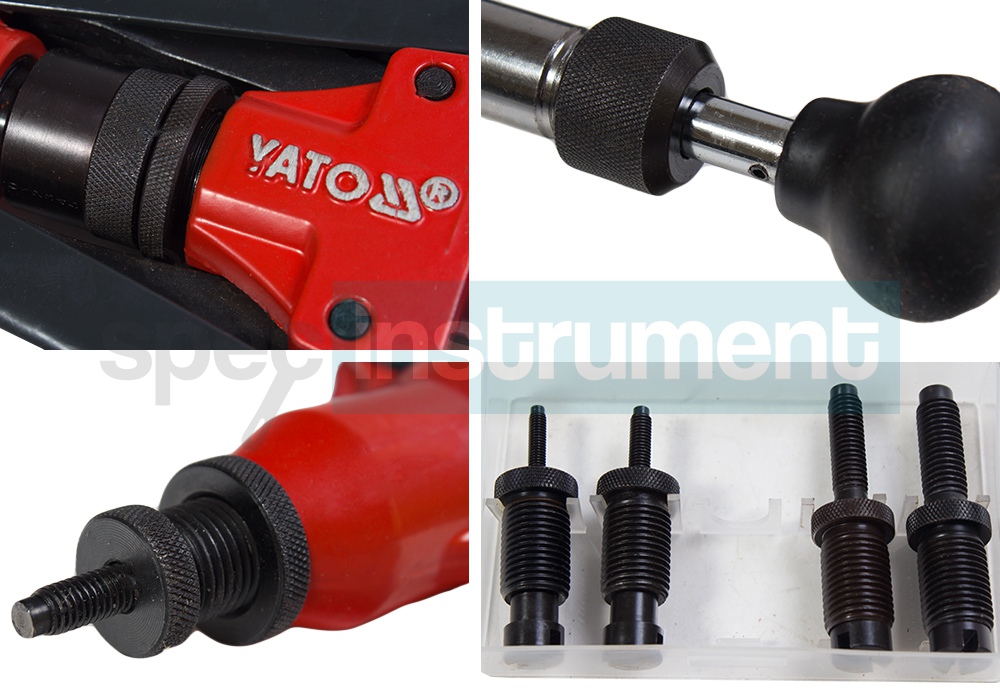
Equipment. Additional set of interchangeable heads, special wrenches, tool lubricant. All this should be present in the basic configuration of a quality product. In addition, the battery model must have replaceable brushes for motors of the appropriate type, a storage case, a charger, and sometimes a replaceable battery.
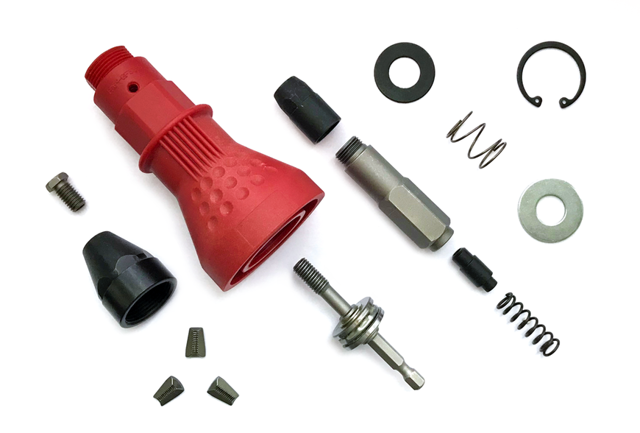
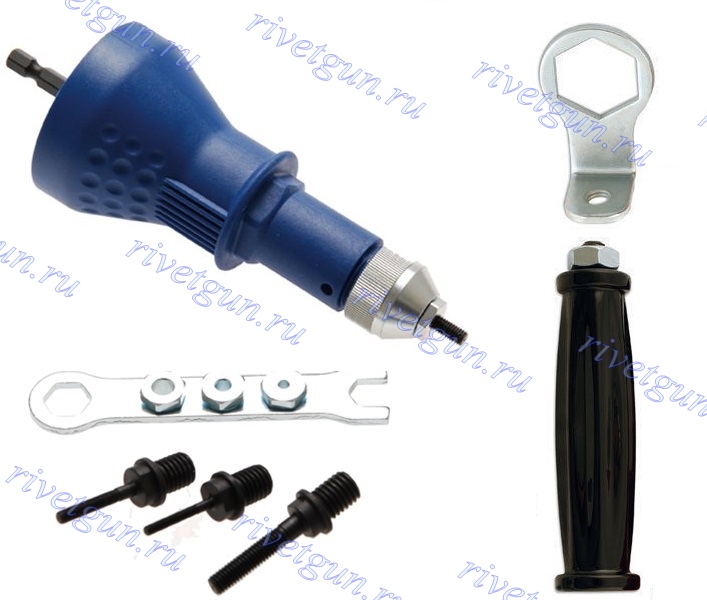
Feasibility of the purchase. If the tool is not planned to be used regularly, it would be more expedient to purchase a screwdriver attachment for installing rivets. With frequent use of threaded connections, it is worth choosing the model that best suits your budget.
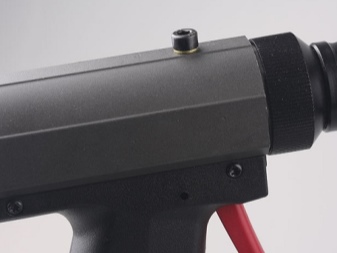
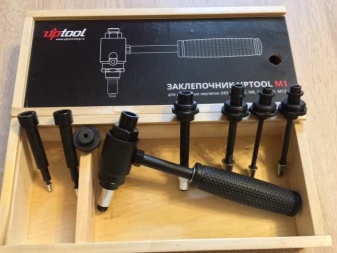
All of these factors directly influence the selection of a suitable riveter for working with threaded nuts. It is worth considering that the difference in cost between a hand-held and a cordless tool is quite large. It is imperative to estimate the scope of work in advance. The pneumatic and hydropneumatic options should only be considered for industrial purchases.
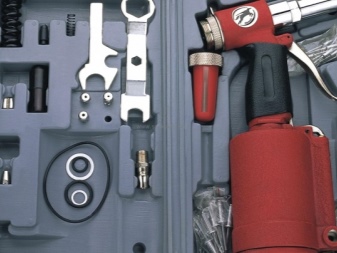
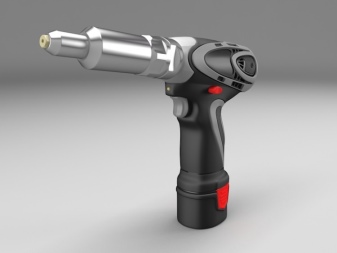
DIY riveter
If the installation of threaded elements is required for duty or work, then it makes sense to purchase a factory product that works with hand force or based on a pneumatic mechanism. In most situations, the installation of such rivets is rarely required, so you can assemble the riveter yourself.
Bolt-based

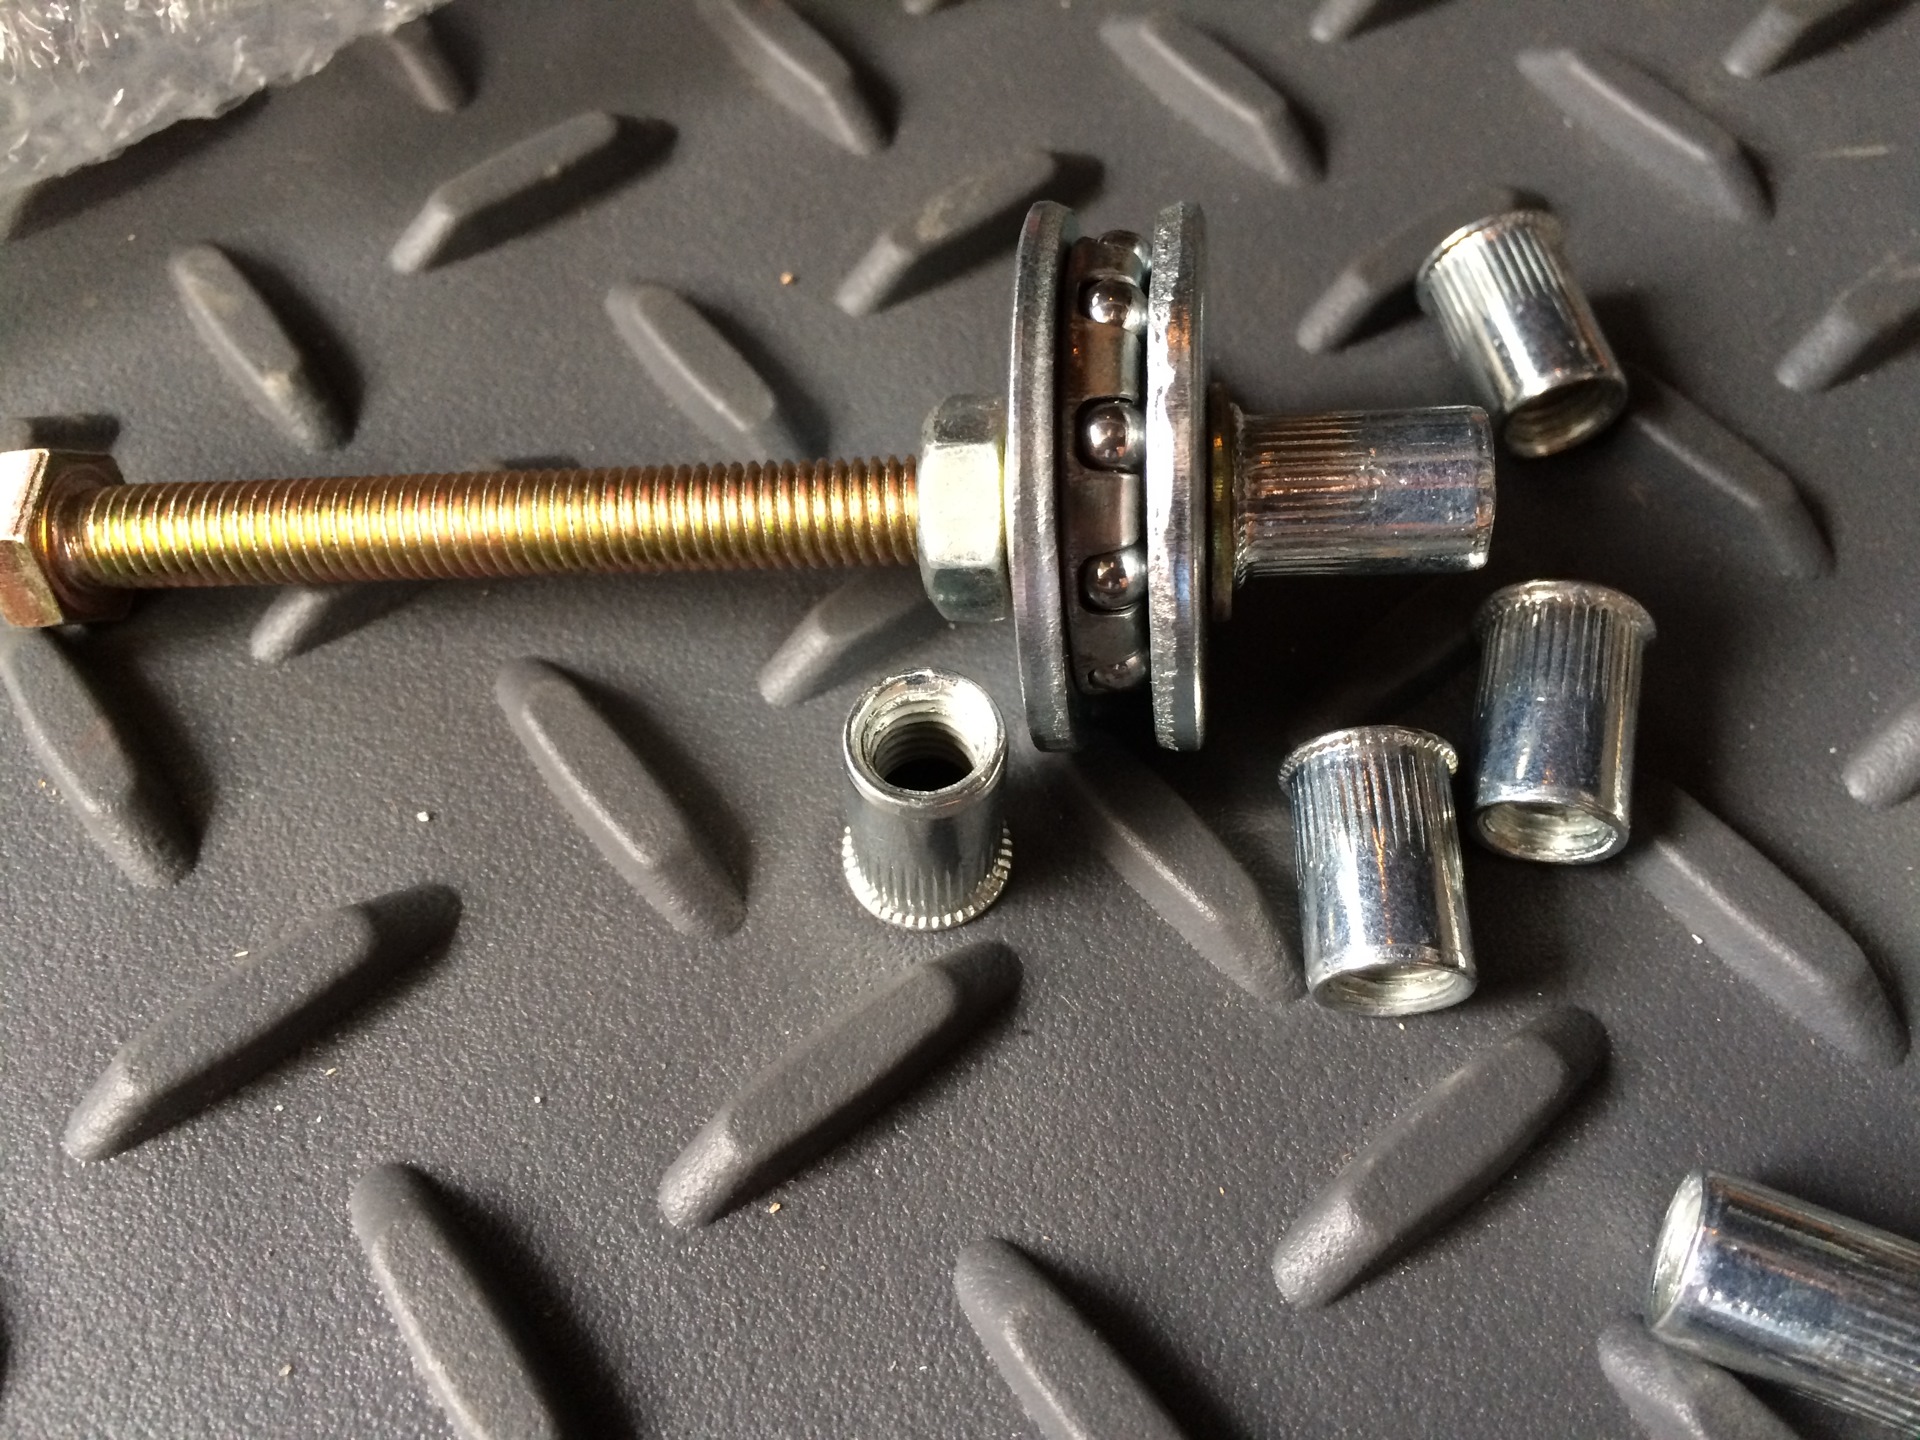
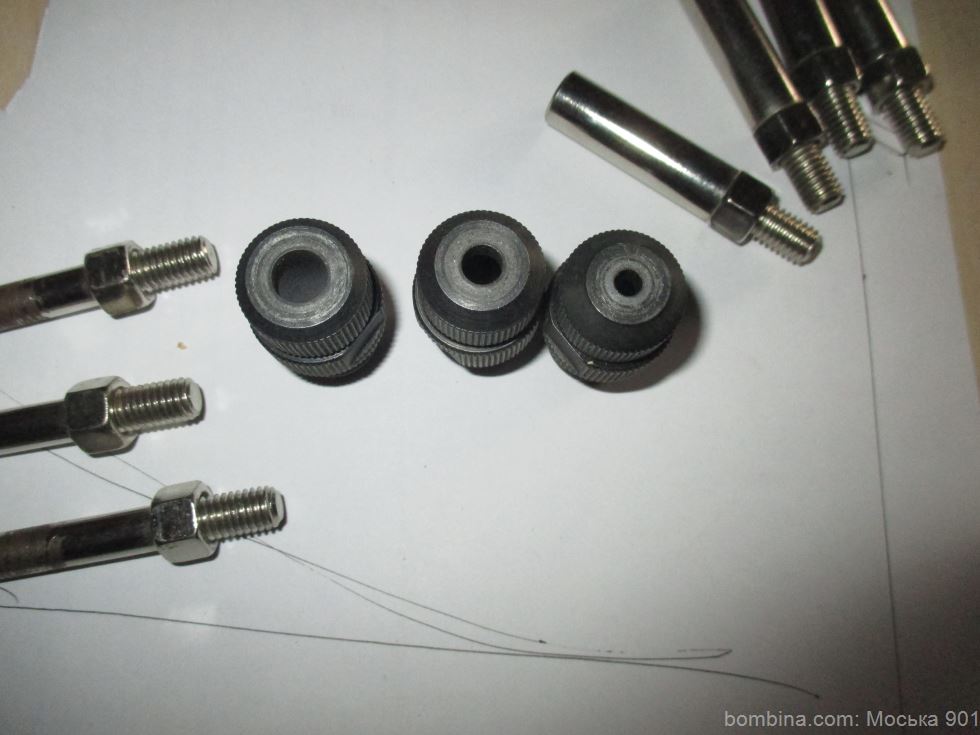
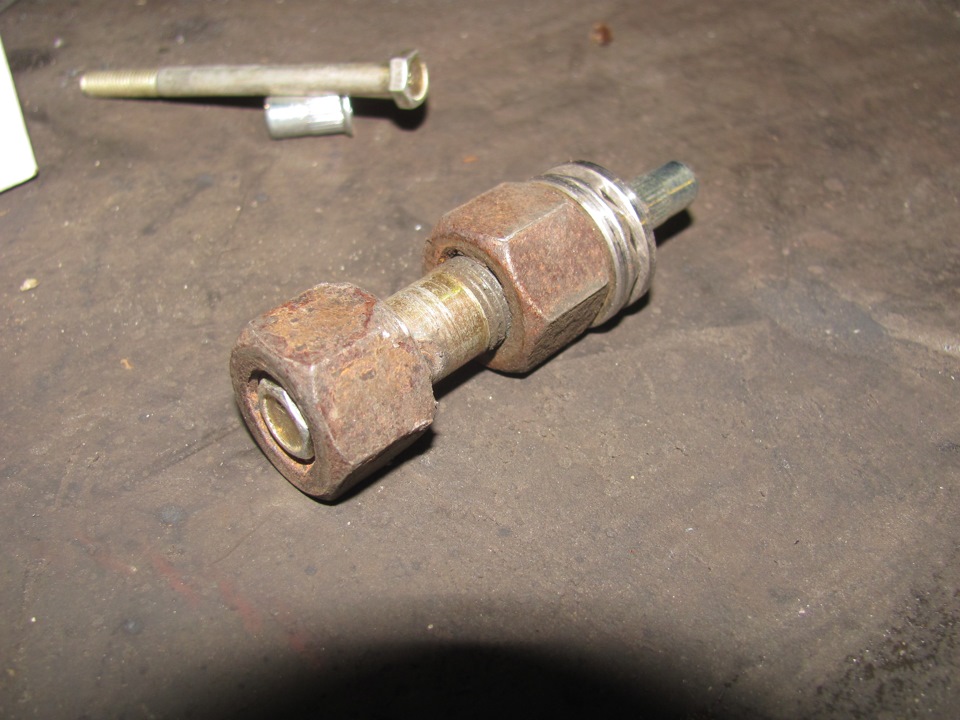
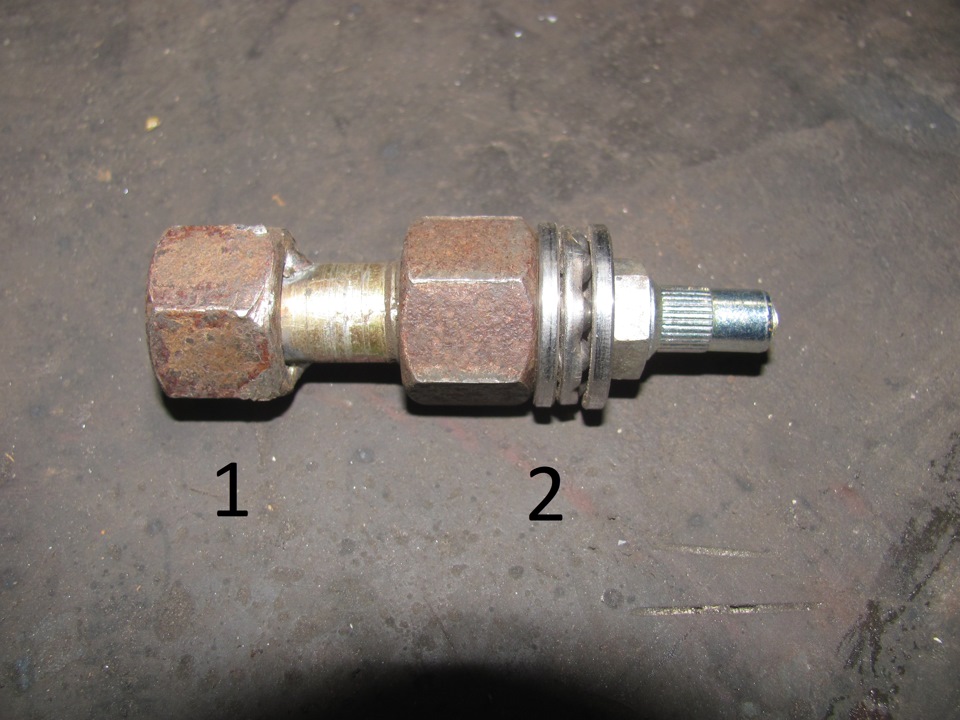
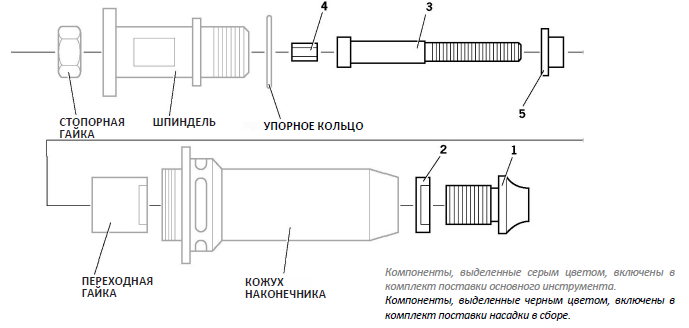
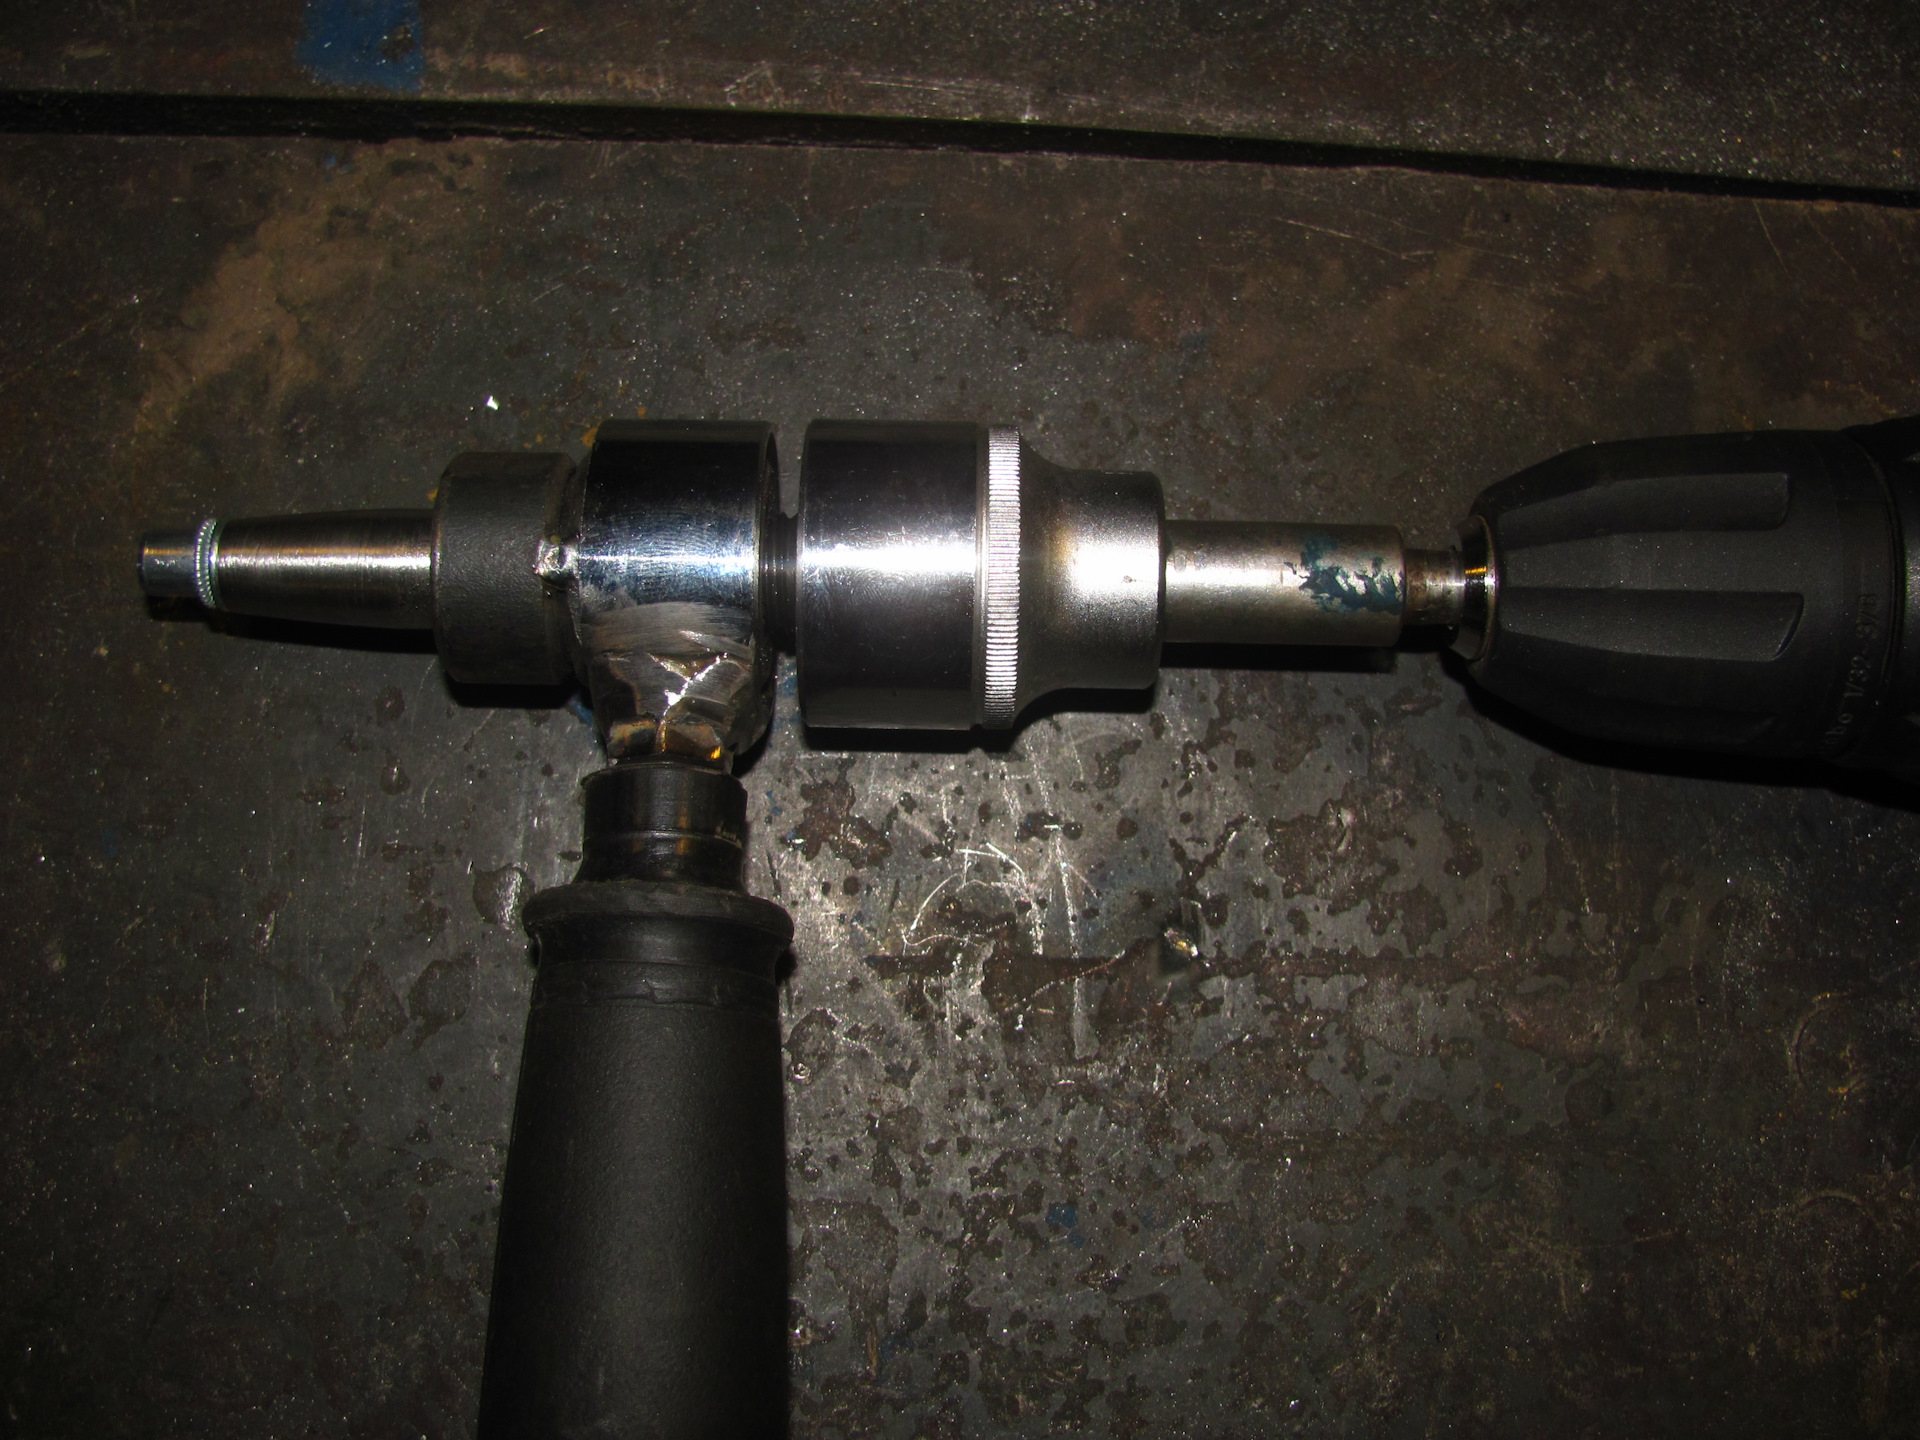
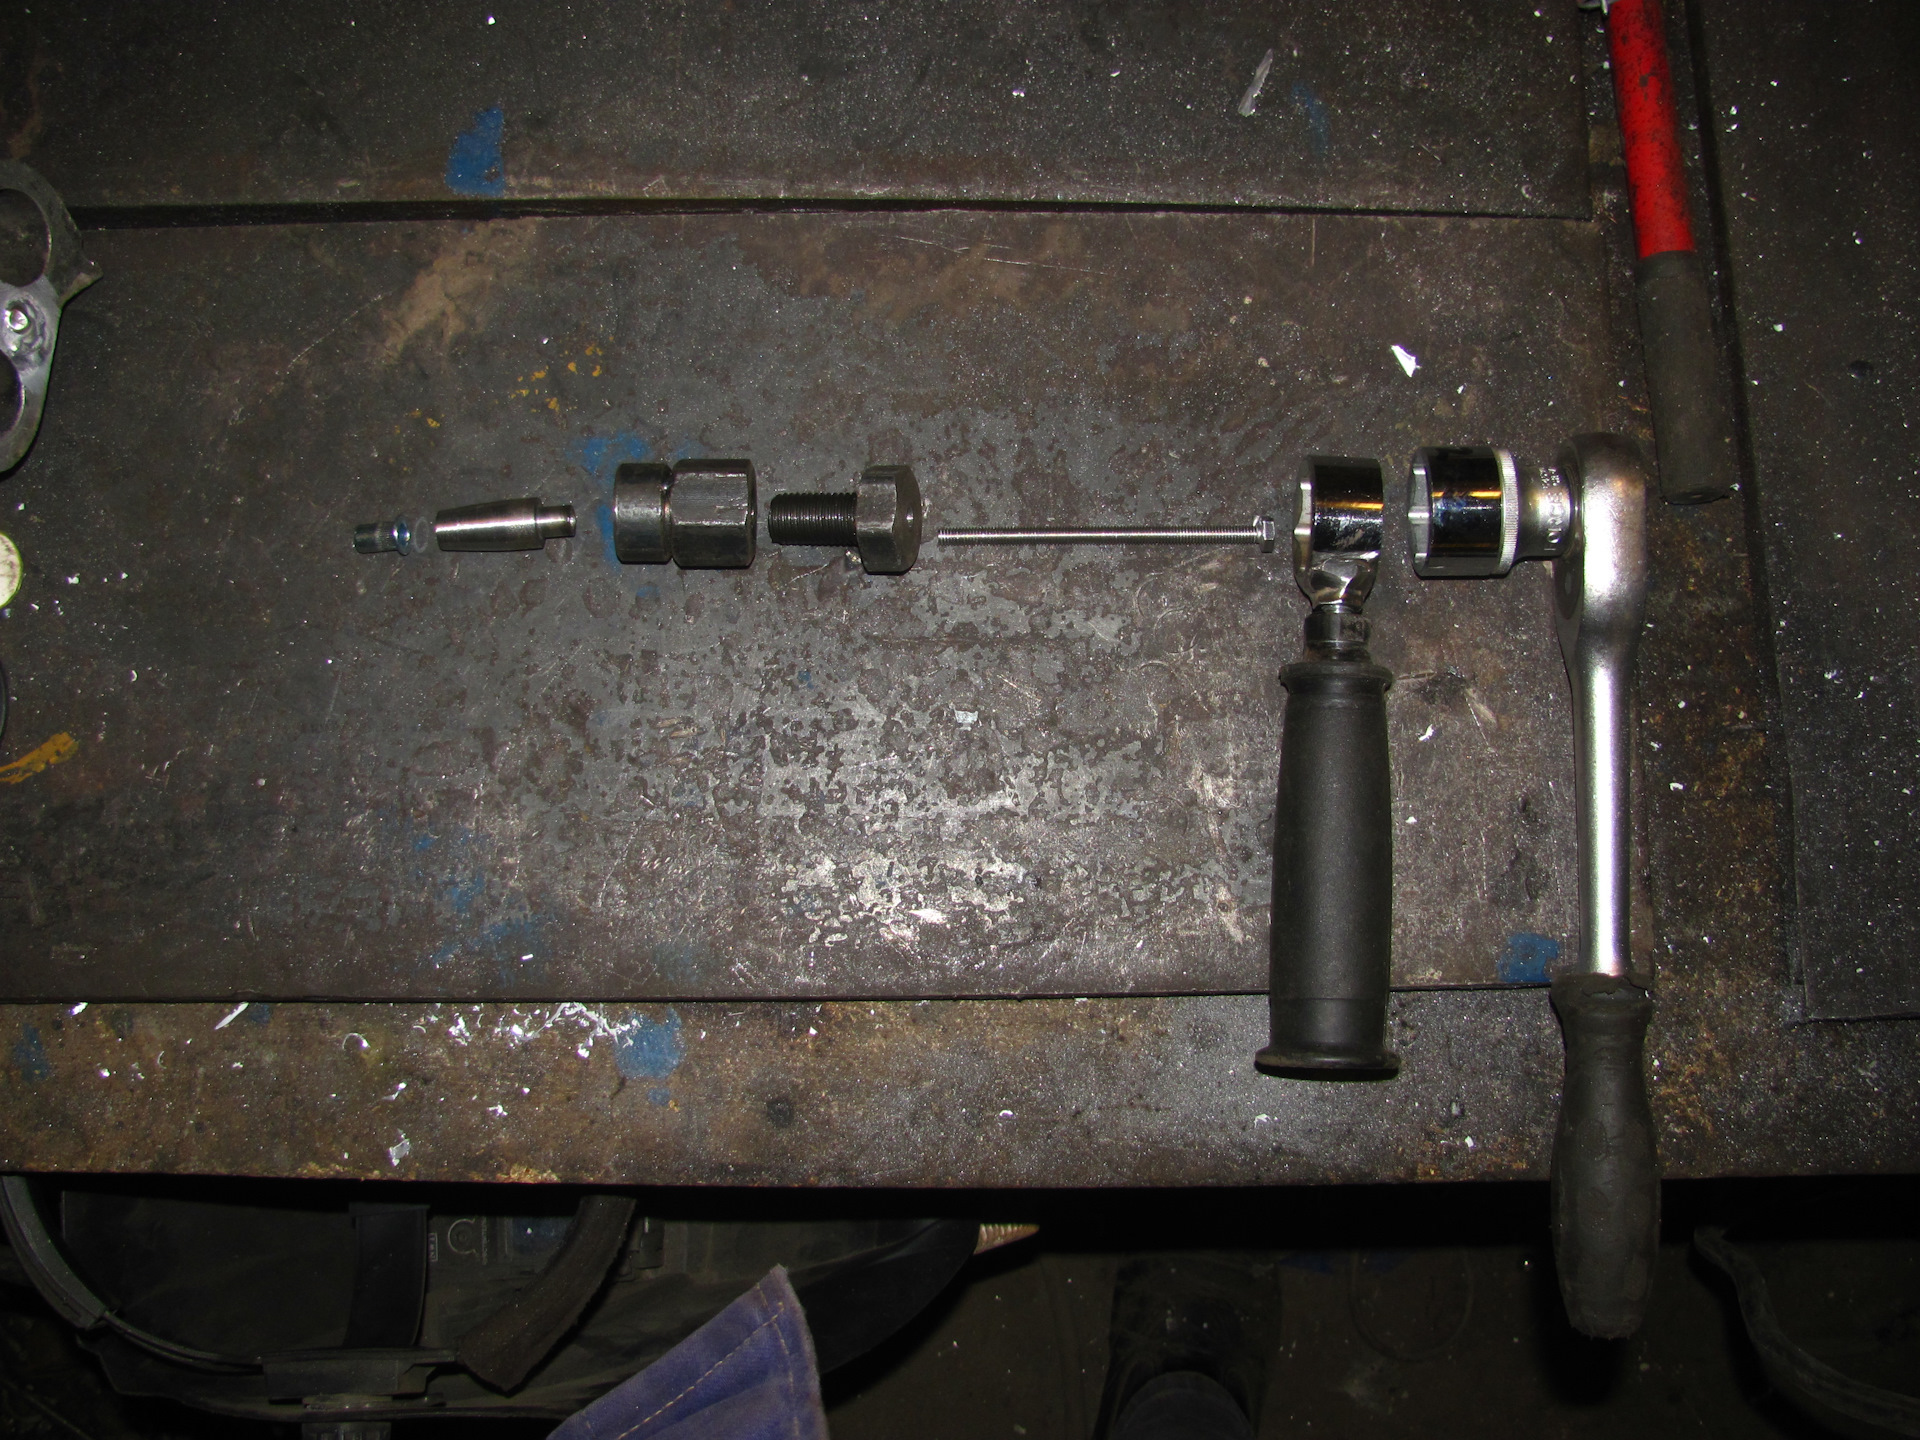
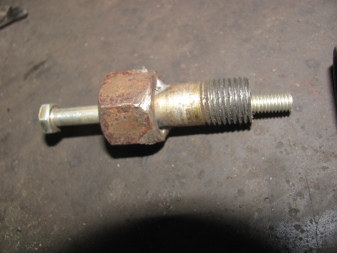
To assemble the entire structure, you will need a bolt similar to the one shown in the photo above. It can be taken from the crankshaft of a car engine. The diameter of the bolt must be such that a hole can be drilled inside it, through which another bolt with a thread size that will match that used in the rivet will be inserted. The length of the second bolt must be at least 100 mm. The length of its thread should be as large as possible; if necessary, it can be additionally cut with a scraper.

Additionally, you will need a nut that will freely screw onto the thread of a bolt with a large diameter, as well as a collapsible bearing. The inner diameter of the bearing must be such that a long bolt that will be used for clamping can freely pass into it. The assembly is quite simple. To do this, insert a long bolt inside a larger one in diameter. A nut is screwed onto a large bolt, and a collapsible bearing is put on the thread of a long bolt.

A rivet is screwed onto a long bolt, which must be installed in the hole. Two keys are required to work. One of them will hold the nut, and the other should rotate the bolt. To simplify the task, you can weld the handle to the nut. The bolt rotates until the stop becomes significant. You shouldn't be too zealous. Once the result is achieved, you need to unscrew the long bolt. The bearing in this case is a stabilizer that prevents the bolt from biting inside the structure. A video about this riveter is below.
Note! The disadvantage of this design is the need for multiple rivet bolts with different threads.
Installing the fastener
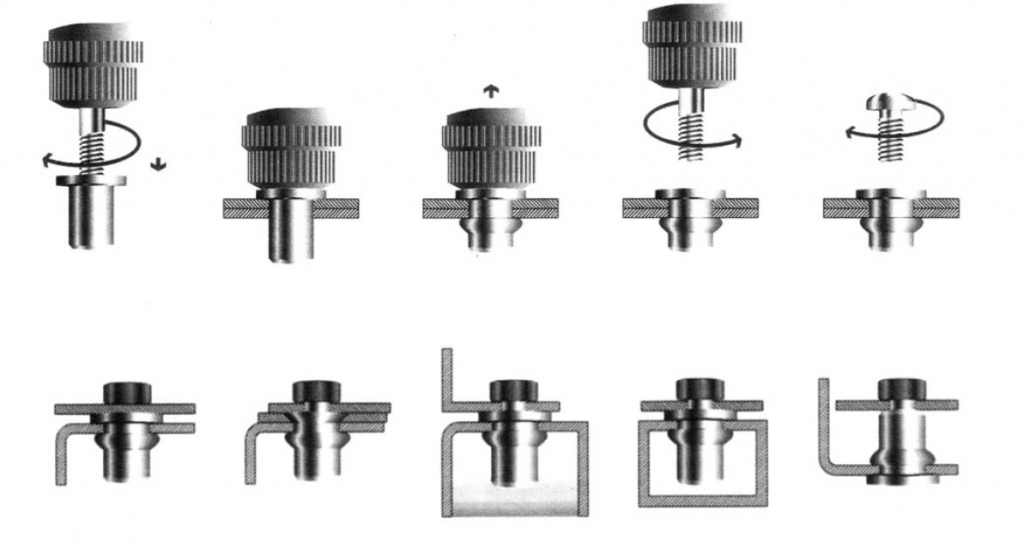
Installing a threaded rivet is practically the same as using conventional rivets. All work is done in several stages:
- A hole of the required diameter is drilled in the workpiece.
- The threaded rivet rod is screwed into the rivet and the rivet is inserted into the hole.
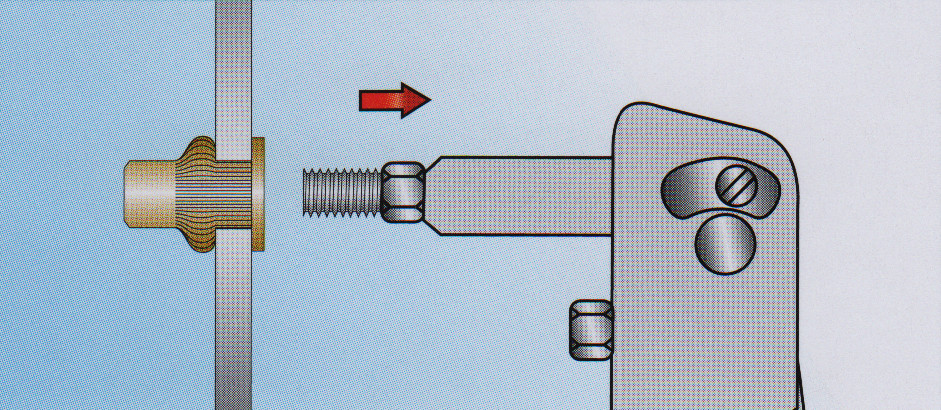
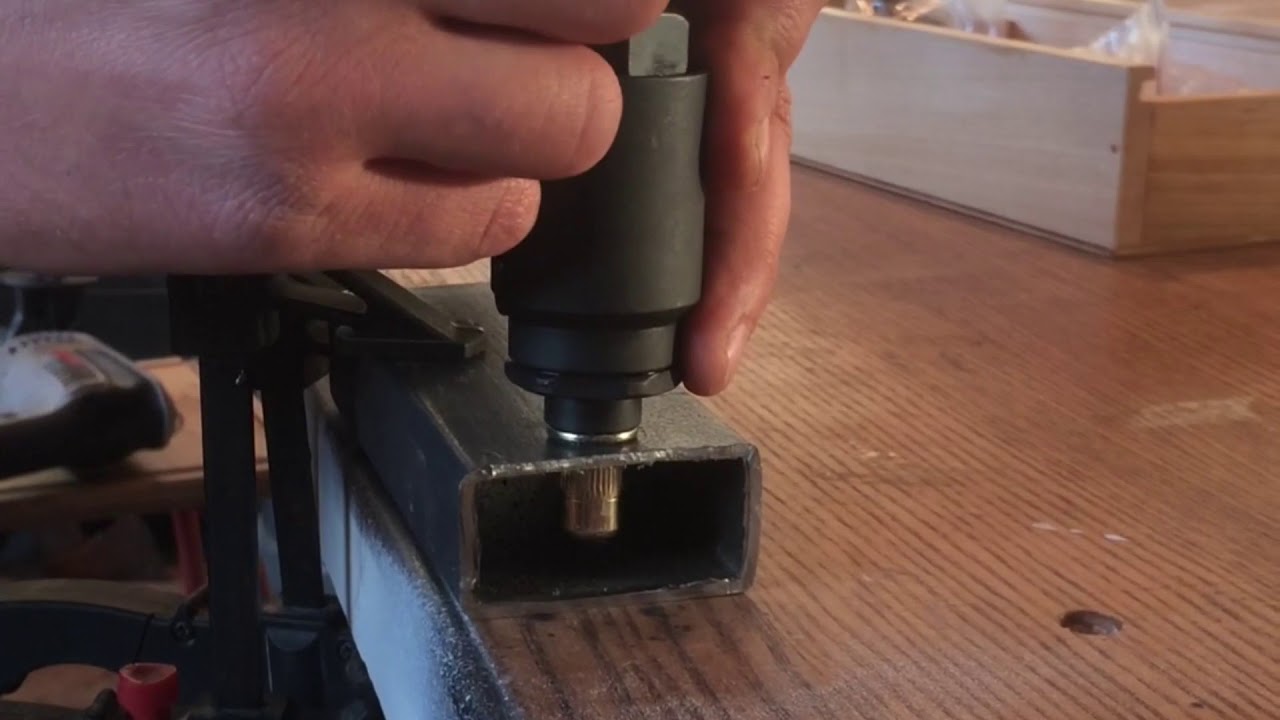
- The threaded rod is pulled into the rivet body and the non-threaded part of the rivet is compressed to securely fix the rivet in the hole.
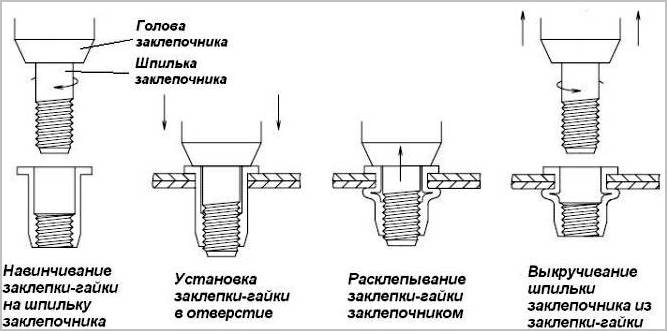
If a large number of installation operations are to be performed, then in order to increase productivity, it is recommended to first make the required number of holes. And then start installing the fasteners.
Views
Due to the variety of threaded rivets, their classification is very difficult.
So, according to the material, they are differentiated into:
- made of carbon steel;
- made of stainless steel;
- aluminum;
- copper.
In addition, there are polymer models (neoprene). To install them, specialized tools are not required, which is why they are called self-aligning.
By the type of thread, there are:
- nut - with a thread on the inner surface, creating a non-separable connection (threaded rivets-nuts);
- screw - the thread is located on the outer surface, create collapsible connections.
In addition, according to the shape of the head, threaded rivets are classified into flat and countersunk, according to the profile of the legs - into round and hexagonal, according to the configuration of the bead - into open, countersunk, small, closed, large.
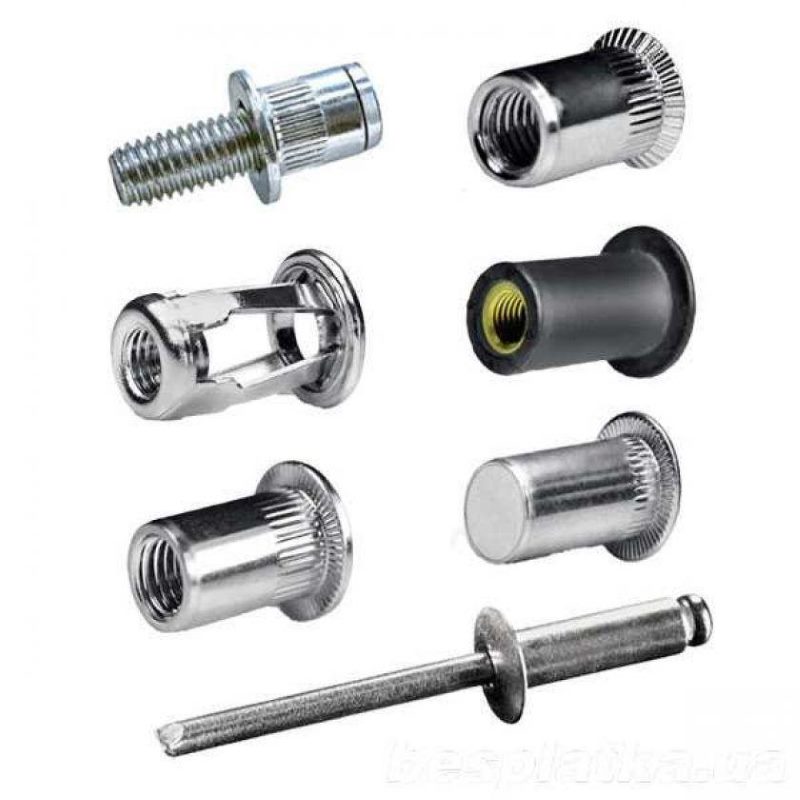
In addition, these fasteners are produced for various diameters and thread pitch of the suspended elements. For rivets with female threads, diameters M4 - M8 are usually used, for screw rivets - M3 - M16.
Finally, there are threaded rivets with additional specific parameters: electrically conductive, with an enlarged head, with vibration isolation, with increased force, with marks, sealed, with an inch thread, etc.
Peculiarities
Threaded riveter is a tool designed to install a special type of universal fastener. It works with special nuts that have a screw-type thread on the inside. After installation, such a rivet can be used for its intended purpose or act as the basis for a threaded connection paired with a bolt or stud. Standard material thicknesses for threaded fasteners are 0.3 to 6 mm.
A special riveting tool is needed in order to successfully mount the mount to its intended place. The principle of operation of the equipment is quite simple. Its design has a special head for rivets - a platform on which one of the parts of the metal retainer is attached. The second is inserted into a pre-made hole, aligned with the tip of the tool, and then subjected to mechanical, pneumatic or other action. The edges of the metal workpiece are flattened, the nut is securely fastened inside the metal or other material.
Recommendations
When making a homemade riveter, it is very important to maintain all lines and planes. Skewing during the riveting process can cause a fragile connection or breakage of parts of the fixture.
If the garage or workshop does not yet have a sufficient supply of components and tools for constructing a home-made device, it is better not to waste time looking for them, but to postpone work until you purchase a factory tool.
It is better to do the same if you are not confident in your technical skills .. For how to install a rivet without a rivet, see the next video
For information on how to install a rivet without a rivet, see the next video.
Peculiarities
Riveting is one of the options for non-collapsible assembly of parts. The advantage of this method is its low cost. Consumable material - rivets - are relatively inexpensive. You can buy them at any store that sells fasteners.
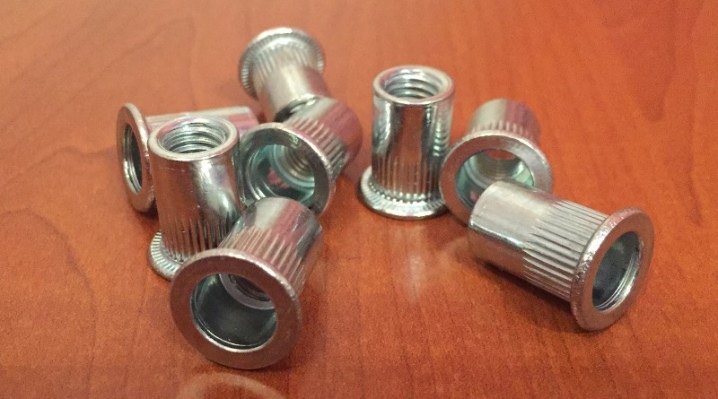
Modern materials are divided into two main types: threaded and exhaust. Both are essentially hollow tubes with a cap at one end. In the first case, a thread is cut inside the tube, and in the second, a stem with a thickening at the end is inserted into it.
Usually, to install a large number of standard rivets, a special tool is required - a riveter. It can be electric, pneumatic or manual. The use of this equipment allows to reduce the physical efforts associated with crushing a metal rivet. These tools are not cheap at all, this is what becomes the main reason for refusing to use rivets in everyday life or for small repairs. Indeed, the purchase of an expensive tool for the sake of one or two rivets is hardly justified.
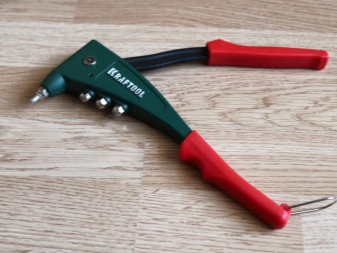
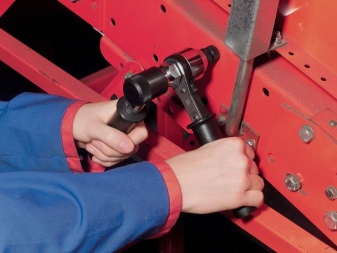
Below we will consider how to install a rivet without special equipment.
What do you need?
So let's get started!
Given: parts that need to be connected, but at the same time cannot be welded, for example, so as not to spoil the painting.
Objective: Install no more than 4 rivets.
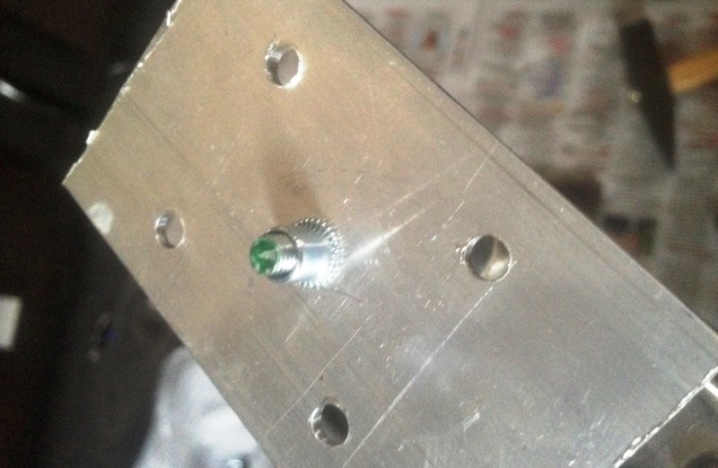
The task: to rivet without a riveter, since it is not available, but it is quite expensive, and the purchase for the sake of 4 rivets is completely unjustified.
Given: threaded rivets and ... what is in the garage, plus the notorious ingenuity, without which in this case there is nothing at all.
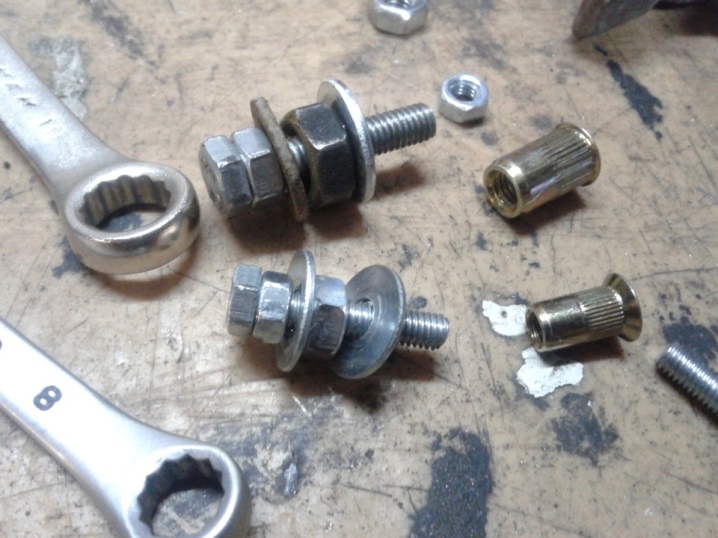
Having rummaged in the deposits of any iron trash accumulated over the centuries, you need to find a long bolt that matches the diameter and thread pitch of the existing rivets, or, conversely, purchase rivets of the corresponding parameters, if such a bolt already exists.
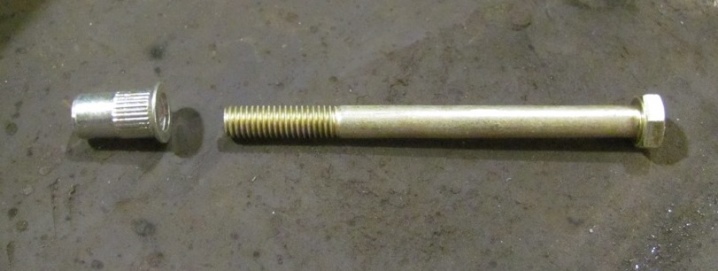
Next, you need to build the simplest riveter, with which you can roll the rivet.To do this, you should select:
- a steel sleeve, for example, made of a nut of a slightly larger diameter than the already mentioned bolt;
- at least 2 washers with a hole diameter corresponding to the diameter of the bolt;
- a small bearing (some craftsmen consider the bearing to be superfluous);
- a nut that matches the size of the thread to the already indicated bolt.
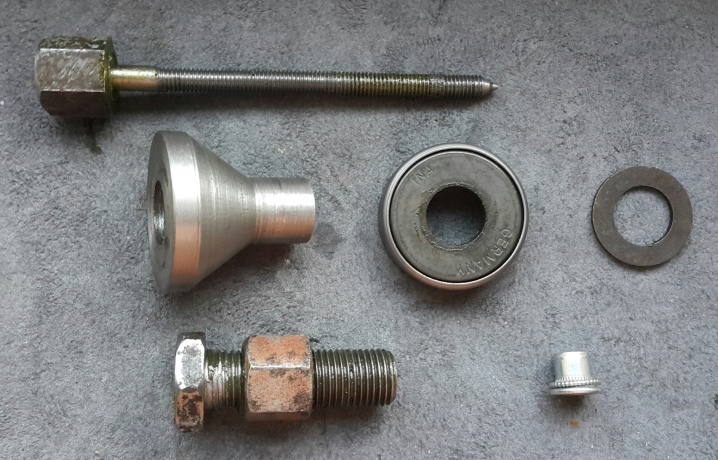
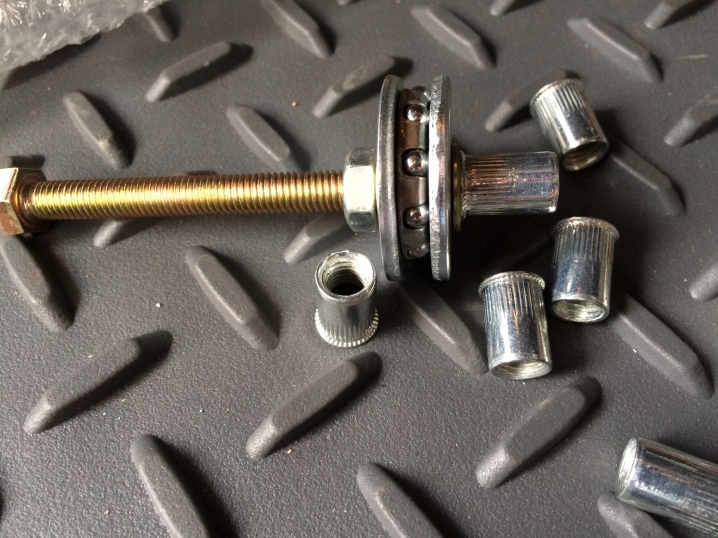
A homemade riveter is mounted as follows:
- screw the nut onto the bolt;
- install the washer;
- install the bearing;
- put the puck back on;
- put on a sleeve that can be covered with another washer.
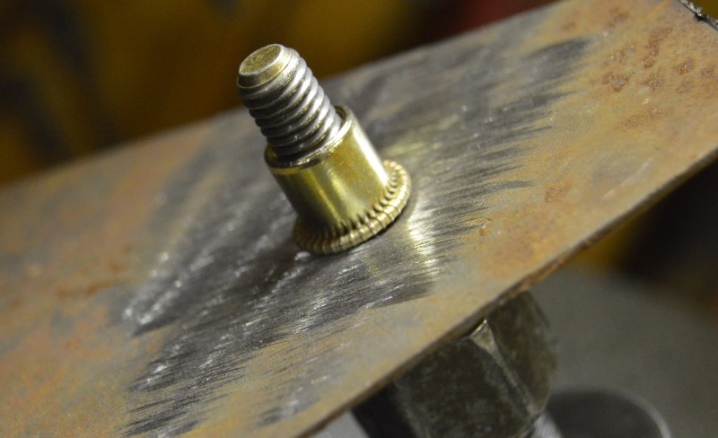
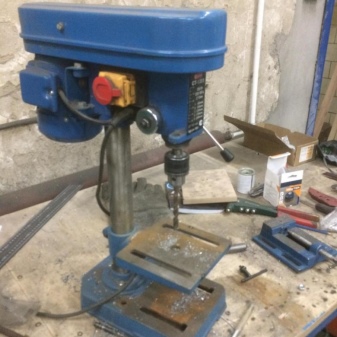
To make a homemade rivet installation device, you will need the following materials and tools:
- steel pipe with a diameter of 5 cm;
- long bolt with a diameter of 8 mm;
- a nut for the previously indicated bolt;
- welding machine;
- grinder, drilling machine, drills.
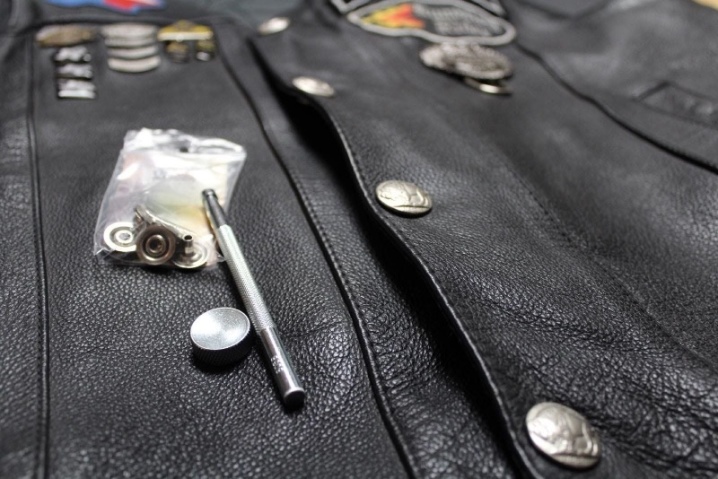
In addition to the need to install a threaded or blind rivet fastening metal or other parts and structural elements, there may be a need to install the rivet as an accessory on clothing or shoes. Tools for such an operation do not have to be made from scrap materials, they can come in handy:
- screwdrivers: Phillips and slotted;
- pliers;
- hammer;
- a bolt or piece of steel bar with a flat-grinded end;
- a piece of steel tube, similar in diameter to a rivet.
The various accessories used for clothing are made of relatively soft metal and have a small thickness; it does not require much effort to rivet it.
How to use?
When using a threaded rivet, the master must carry out the work in stages. Regardless of whether a hand or battery tool is used, you will first have to prepare the surfaces to be connected, select the fasteners and the corresponding head. The procedure includes several points.
Cleaning of working surfaces. Since threaded rivets are usually fixed in the metal, it is necessary to ensure their reliable contact with the base. Traces of paint and other coatings are removed, burrs and other metal defects are removed. The easiest way is to do a rough file with a file, and a more delicate one with a sander.
Alignment of layers of bonded material. Better to use a clamp to secure parts of the workpiece in the desired position.
Marking. With the help of drawing devices, the point of installation of the rivet is selected. A punch marks the area in which the drill bit will abut.
Making a hole. It is drilled through, immediately through both layers of material, connected by riveting
It is very important to fix the tool tip perpendicular to the plane. The choice of the drill diameter should be slightly smaller than the mount itself - by 1-2 mm
If concealed installation is planned, the hole is countersinked.
Rivet preparation. A rod is attached to the tool head, the diameter of which corresponds to the internal thread of the nut to be installed. A rivet is tightly screwed onto it until a tangible stop.
Mounting. The counterpart of the mount is placed in the prepared hole. The rivet head with a screwed nut is installed close to the surface. The tool must be strictly perpendicular, otherwise the connection can be damaged. When a force is applied to the head, the rivet is deformed, it is installed.
Completion of work. The stem is unscrewed from the resulting threaded connection. The installed rivet is checked for distortions and other defects, traces of deformation in the threaded part. If they are present, you have to remove the mount, start over.
In the next video, you will find a detailed overview of a quality threaded rivet riveter.

