Rubber crumb consumption per m2 during installation.
Since two types of products are used in the installation - ready-made tiles and a rubber compound, the knowledge of how to calculate the amount of materials will also be needed during installation. It is believed that the equipment of territories with separate elements is a job that a beginner can cope with. But to obtain a screed, it is better to involve the labor of specialists.
In this case, it is almost impossible to give any recommendations, since too many nuances affect what should be the consumption of each of the components. If you use small chips, there should be more glue. If dyes are added to the composition, then the amount of binder must be increased. The spread in the amount of glue can be significant - it is added, on average, in the range of 4-12 percent.
Istimpex adheres to proven technologies in the production of its own flooring, produced under the Magness brand. Therefore, she guarantees the excellent quality of the product, and by performing professional installation, the manufacturer is ready to vouch that there will be no complaints about his floors.
Materials (edit)
Regardless of the type of laying technology and manufacturing of the working mixture, when creating the coating, you will need crumb rubber, adhesive composition and coloring pigments. For the arrangement of floors in swimming pools, on sports grounds and treadmills, granulate up to 2 mm in size is used. For playgrounds and playgrounds - medium fraction crumbs 2-5 mm.
A one-component adhesive, polyurethane, is most often used as a binder. It provides the coating with water resistance, abrasion resistance, resilience and durability. Less commonly, two-component binders are used, including epoxy-polyurethane adhesive and a hardener. Such a composition is inconvenient to use, since it must be used within half an hour after preparation.
You also need to pay close attention to dyes. The pigment gives color to the future coating
The composition of high-quality dyes should include various components of inorganic origin and iron oxyls. For high-quality installation, a primer is required. The base is processed with it to ensure good penetration of the laid mass.
Tools and equipment
The equipment used in the work will affect the reliability and durability of the created coating. The following equipment will be required when laying the pavement.
scales
To obtain a high-quality mixture when preparing it, it is important to observe the accuracy of the dosage of all components. Deviation from the prescribed rate even by 5% can lead to a decrease in the properties of the finished coating
Roller
This is a heavyweight manual unit designed to compact the working composition on the base. It is best to refuse the use of lightweight equipment - it will not be able to effectively compact the mixture, because of which the coating may soon collapse. In work, a thermal roller can be used for rolling seams and joints, as well as small rollers for corners.
Mixer
Thanks to this equipment, high-quality mixing of all components of the working mixture is carried out. For mixing the components, auger equipment or a unit with a top loading and a side discharge opening is suitable.
Auto stacker
This is a device, the working bodies of which are an adjustable scraper and a weighty pressing plate. The rear part of the equipment is equipped with heating elements for heating the working mixture to a predetermined temperature.
Spray
This equipment allows you to evenly apply the composition to the surface by spraying a finely dispersed composition over the surface. It is intended for applying a topcoat and masking small "flaws" made during installation.
And you will also need buckets, basins or wheelbarrows to transport the solution to the working area. After preparing the toolkit, you can start laying.
Roll coating
Rolls are used mainly in small rooms - in gyms, in garages, inside the house. It is produced abroad due to the difficulties in production.
Unfortunately, this type of flooring cannot be used outdoors for paths, because in winter the water underneath freezes. The load begins to distribute unevenly, which is why ugly waves appear on the surface. This flaw cannot be corrected.
But the material itself can easily withstand a wide range of temperatures, so it is used for flooring in skate parks, on roller skating grounds and for other similar purposes.
Very often, rolls are used to form temporary ones in the fresh air, for example, when holding exhibitions or presentations.
For an outdoor playground
It allows you to quickly mount and dismantle the surface, install the required amount of equipment and ensure the safety of visitors. The only thing that needs to be prepared for it is a perfectly flat flooring.
Roll-up is very popular for the design of warehouse and industrial premises, that is, in premises with heavy floor loads and high traffic. This material is easy to keep clean, it does not rub, does not lose its color and shape, does not squeeze through repeated use, that is, it is durable and does not require constant replacement.

This type of flooring requires a perfectly flat base, otherwise it will be damaged very quickly.
This limitation is imposed due to the presence of seams. If they are not perfectly aligned, foreign objects can enter the gap and damage it. But you can choose the thickness on which the degree of depreciation will also depend.
In some cases, such roll materials are used as a backing for self-leveling seamless.
In this case, several layers of polyurethane are applied to the rubber surface, after which it will not react to surface irregularities, weather conditions or temperature changes. Becomes seamless, which allows you to distribute the load on it as you please. The durability of the material is also increased.
Prices for seamless laying of crumb rubber (with material)
| Thickness | Price rub / m2 | |||
| from 100 m2 | from 300 m2 | from 700 m2 | from 1000 m2 | |
| 1. One-layer colored coating: Crumb with coloring pigment. | ||||
| 10mm. | 1 070 | 1 000 | 940 | 890 |
| 15mm. | 1 560 | 1 460 | 1 370 | 1 290 |
| 20mm. | 1 980 | 1 850 | 1 740 | 1 640 |
| 25mm. | 2 390 | 2 240 | 2 100 | 1 980 |
| 30mm. | 2 810 | 2 630 | 2 470 | 2 330 |
| 35mm. | 3 230 | 3 020 | 2 830 | 2 670 |
| 40mm. | 3 640 | 3 410 | 3 200 | 3 020 |
| 45mm. | 4 060 | 3 800 | 3 570 | 3 360 |
| 50mm. | 4 480 | 4 190 | 3 930 | 3 710 |
| 2. Two-layer coating (sandwich): black crumb (backing) + full color EPDM rubber crumb | ||||
| 10 + 5mm. | 2 530 | 2 370 | 2 220 | 2 100 |
| 15 + 5mm. | 3 090 | 2 890 | 2 710 | 2 560 |
| 20 + 5mm. | 3 640 | 3 410 | 3 200 | 3 020 |
| 25 + 5mm. | 4 200 | 3 930 | 3 690 | 3 480 |
| 30 + 5mm. | 4 750 | 4 450 | 4 180 | 3 940 |
| 40 + 5mm. | 5 870 | 5 490 | 5 150 | 4 860 |
| 10 + 10mm. | 3 570 | 3 340 | 3 140 | 2 960 |
| 15 + 10mm. | 4 270 | 3 990 | 3 750 | 3 530 |
| 20 + 10mm. | 4 960 | 4 640 | 4 360 | 4 110 |
| 25 + 10mm. | 5 520 | 5 160 | 4 850 | 4 570 |
| 30 + 10mm. | 6 070 | 5 680 | 5 330 | 5 030 |
| 40 + 10mm. | 7 190 | 6 720 | 6 310 | 5 950 |
| 3. Single layer rubber coating: full color EPDM crumb | ||||
| 10mm. | 2 880 | 2 690 | 2 530 | 2 380 |
| 15mm. | 4 130 | 3 860 | 3 630 | 3 420 |
| 20mm. | 5 380 | 5 030 | 4 720 | 4 450 |
| 25mm. | 6 630 | 6 200 | 5 820 | 5 490 |
| 30mm. | 7 880 | 7 370 | 6 920 | 6 520 |
| CURRENT PRICES for seamless rubber and rubber coating TM "MAGNESS", taking into account materials and turnkey installation work, without hidden payments, in rubles per square meter, VAT included, including delivery in the Moscow region (from Moscow to the Moscow small ring ( "Small concrete"). The cost of rubber coating in other regions (hereinafter referred to as the Moscow small ring) is recalculated taking into account the increase in transport costs. We do NOT lay the coating on hard surfaces Sports marking 150 rubles per running meter We work on a prepaid basis. |
Advantages of coatings
Rubber floorboards are chosen by people who care about the safety and comfort of their loved ones.
After evaluating the totality of properties, it is obvious that it is perfect for public and private use, a summer residence, a courtyard, paths in the garden, near a house, and other places where children play or are engaged in outdoor activities.

Water does not accumulate on the surface, therefore, the appearance of ice in winter is excluded.
They do not require special skills for installation; if necessary, installation can be carried out independently. You can install them permanently, on an adhesive base, or in a mobile way, on double-sided tape. But the installation surface must be flat and equipped with waterproofing.
The guarantee of quality and durability.
In order for the coatings to be reliable, durable, and last a long time, it is important to select not only high-quality components. It is also necessary to correctly calculate how much rubber crumb is needed per m2
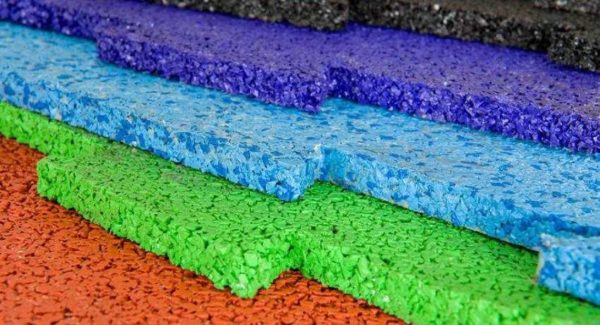
In the manufacture of materials used in different fractions. For example, some types are needed for a single-layer rubber coating in black or any other color. Others will be needed for colored tiles. Several types of crumb can be used in the production of multi-layer floors. So, for the upper layer, thin colored rubber is used, and for the lower one, a larger fraction. As a result, the thickness of the coating as a whole will be at least one and a half centimeters.
By the way, both the seller and the buyer wins in the manufacture of multilayer products. Since the composition includes large chips, which are cheaper, the cost of the finished coating becomes cheaper. At the same time, the thick rubber tile provides safe conditions during its operation, which is very valuable when laying on children's or sports grounds. Also, the manufacturer can save money, since it makes the lower layers black and the upper ones colored. Savings are obtained by reducing the consumption of polyurethane glue: using coarse chips, you can add less binder. The amount of each of the components is also influenced by such a factor as the color of the rubber granules.
It can be concluded that calculating the number of components is a delicate matter that requires a professional approach. It is impossible to act here by eye.
Option # 1 - laying on the ground
This method is more relevant for the garden. For laying on the ground, tiles of greater thickness are used; material with a thickness of 30, 40, 50, 80 mm is suitable. In this case, the tiles are laid on the base, which must be prepared in advance.
The scheme of the phased laying of rubber tiles on the ground gives a visual representation of the sequence of work
First you need to remove the top layer of soil, clear it of weeds, and tamp it well.
A layer of crushed stone (80-100 mm thick) is laid on the compacted soil. A layer of cement-sand mixture is poured onto the soil layer (ratio 1/3). The top layer will be the base for the tile flooring.
When laying on the ground, it is advisable to install a curb, it will give strength to the structure, and the path with the curb looks more aesthetically pleasing.
The curb will make the walkway more durable, and its appearance will only benefit, especially if the same color combination is used for the walkway and curb tiles.
It is not necessary to make a slope when laying on the ground, because the outflow of moisture will occur naturally. When laying on a cement-sand mixture, you need to choose a tile that is connected to each other using bushings, they are usually included in the kit.

The bushings are used for firm joining of the tiles, do not allow them to move during laying and later during the operation of the track.
A garden path made of bright rubber tiles of two colors, laid out on the ground, looks aesthetically pleasing; as it is used, the structure will become stronger, because a mixture of cement and sand under the influence of moisture will become stronger
Laying steps
The question of how to lay a self-leveling crumb rubber coating is relevant for many who are planning a playground device. It will be useful for everyone who is going to use this material indoors or outdoors.
It is possible to create a high-quality coating only if the requirements of the laying technology are exactly observed.
- At the first stage, the surface is prepared, after which a layer of primer is applied to it.
- After that, they proceed to laying the coating, followed by a monolithic layer.
- The final stage is the application of the markings and the finishing varnish layer.
Surface preparation and priming
wood, concrete or asphalt surface
Recent Entries
Chainsaw or electric saw - what to choose for the garden? 4 mistakes when growing tomatoes in pots that almost all housewives make Secrets of growing seedlings from the Japanese, who are very sensitive to the earth
Then proceed directly to priming, the main positive point of which is to improve adhesion. In addition, such an operation effectively removes dust and gives the surface increased strength characteristics. Primer ADV-46, ADV-56, ADV-17 is used as a material. It should be approached competently, since they all have their own characteristics and purpose.
In order not to be mistaken with the choice, you need to focus on the conditions in which priming will be carried out. When all the main operations of the first stage are completed, it is necessary to pause for no more than one day, after which you can proceed to the next stage.
Laying a monolithic layer covering
Even a layman can create a crumb rubber coating. If work is planned outside, then you need to make sure that this day will be sunny and free from bad weather. First, you need to prepare a working mixture. In order to correctly calculate its amount, it is necessary to adhere to the following scheme, which corresponds to the norm for a layer thickness of 0.1 cm when processing an area of 1 m2.
For her you need to take:
- Rubber crumb - 7 kg,
- Binder ADV-65 - 1.5 kg.
- Pigment - 0.3 kg.
The listed components are placed in a concrete mixer and thoroughly mixed. When the mass acquires a homogeneous structure, it is coated with a base on which a primer has already been applied. To give the site a flat surface, squeegees are used. After that, you need to walk along it with a roller, on which a release agent is previously applied.
There are some peculiarities in terms of creating a coating with your own hands in the room. In this case, the technology provides for the application of a monolithic layer. Thanks to him, the surface will acquire increased resistance to mechanical stress.
The first step is to apply ADV-61 filler, which will eliminate pores. Next, a reinforcing mesh layer is placed on it. After sustaining a pause of 24 hours, they begin to pour the ADV-61 compound. The layer should be 1.5-2.5 mm thick. To level the surface to be created, use squeegees and a notched trowel.
To avoid unexpected results, you should make sure that optimal conditions are created for the work: air temperature + 20 degrees, humidity - 80%. The site will be ready for use only after a week has passed since the laying of the coating.
The final stage
prepared from the following components:
- oligomer ADV-17;
- coloring paste;
- catalyst.
A roller or brush is used as a marking tool. Usually, 200 g of the mixture is needed to create a marking on an area of 1 m2. It is possible to carry out high-quality staining only on condition that this work will be carried out in two layers.
It is also important to take measures to increase the ability of the coating to withstand external influences. Therefore, after a day has passed from the moment of installation, ADV-63E varnish is applied to it, which, among other things, will give the coating a more aesthetic appearance.
The dyeing technology involves applying the mixture in 2 layers using a velor roller. 0.05 kg of varnish is used for 1 m2 of surface. It is necessary to maintain a pause of 3 - 6 hours between layers.
This material is perfect for creating surfaces on sports grounds. If all technology requirements are met, it can be guaranteed that the coating will successfully cope with its task.
Sports flooring recommendations
IMPORTANT! NECESSARY INSTALLATION CONDITIONS FOR A NEW COVERING
Laying a new sports flooring is not at all as simple as it might seem at first glance to a person who never faces the necessary conditions for laying a new flooring.
So, there are special, strictly prescribed technical standards for laying a new coating In general, before starting the laying process itself, it is necessary to provide the following favorable conditions for this: First, it is necessary to ensure the favorable temperature regime recommended by the standards for laying the coating, which is equal to the level not less than + 5 ° С
It is important to remember that this temperature regime must be maintained throughout the entire process, both for the base itself and for the environment! Secondly, the humidity of the base, on which the coating will be laid, must be kept at a level of at least 4%. At the same time, the technology of laying any artificial turf implies that the time of the work should be combined with favorable weather conditions, that is, with dry weather without wind or any precipitation, which in the end may turn out to be much more expensive than the cost of laying the coating made by our professionals. strictly complying with all technical standards and requirements.
But it is still useful to be realistic - the weather conditions do not always correspond to the strict technological requirements for laying the pavement. A particularly difficult situation arises if the "rainy season" is clearly delayed for a long time, and the terms of delivery of the object are clearly spelled out in the concluded contract, where nothing is said about the weather "circumstances".
It is important to remember that if the laying of the pavement is not suitable for the weather conditions, the work done by the first "craftsmen" that comes along is guaranteed not to meet your expectations. And in the end, the cost of work recklessly saved on handicraft and self-taught stackers will still have to be spent on paying for the repetitive work of professionals
Our company uses the latest technological developments that allow us to guarantee high-quality installation of artificial turf even in the most severe weather conditions. We do our work efficiently and on time!
In addition, our company provides all its clients with a flexible system of personal discounts for all work.
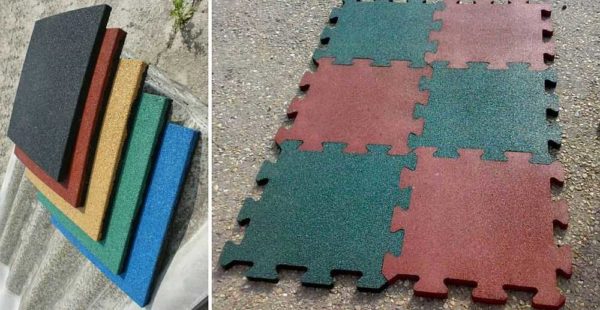
Rubber crumb tile
The rubber tiles are separate pieces. Most often these are squares with a side of 50o mm. Available with straight edges, or with formed cuts / locks. The thickness of the material can be from 20 mm to 50 mm. With a tile thickness of 20-30 mm, the coating turns out to be tough, with low shock-absorbing ability. If you want the rubber covering for playgrounds to give a springy effect when dropped, you need slabs from 35 mm to 50 mm thick.
The smaller the granule size, the more uniform but also the harder the coating
Which one is better to choose
From the point of view of reliability, options with locks are more attractive. But in any case, everything fits on a platform limited by borders (curbs), the tiles are laid close - even if you want to take out one fragment with smooth edges, it is very difficult. So you don't have to worry about this, and laying flat tiles is easier.
Better to attend to the quality of the tiles. It is made from compressed crumb rubber. Colored, usually, is made multi-layered. At the bottom - a cheaper black crumb, at the top - a colored layer. In any case, it is better to touch and crumple it. Literally. It is clear that a plate with a thickness of 35 mm or more cannot be bent into a bagel, but some elasticity must be present. Having turned it in different directions, you should not see any changes. No cracks or creases should appear on either the front or the seamy side. Edges and edges must not peel off.They must be durable, not subject to mechanical stress.
Crumb rubber tiles for playgrounds
In tiles with smooth edges, some manufacturers make bevels - this is such a small bevel around the edge of the tile. Perhaps this is how the tiles themselves look better. But it is better to have a rubber covering for a playground absolutely even. So that nothing is poured into these grooves and does not fall asleep. It will definitely be easier to clean this way. In general, you have to choose, but a flat surface seems more preferable from the point of view of practicality.
Styling features
Lay the rubber crumb tile on a flat base. It can be concrete, dry screed, asphalt. There is a special type for laying on a compacted gravel bed, on top of which a layer of sand is laid and leveled. Special tiles are thicker and have a layer of denser backing. The laying technology itself is similar to the order of laying paving slabs - level the sand into a level, lay out the tiles, and precipitate it with a rubber mallet. To make the coating more stable and the seams not to rise, screeds are driven into the ends of the tile (into the already laid tile, then the next one is placed on it).
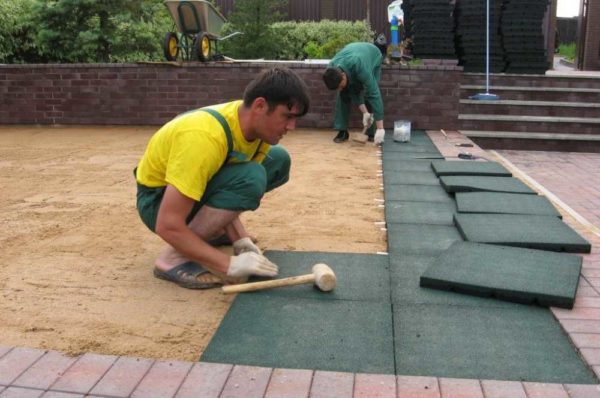
Rubber flooring for playgrounds: Laying crumb rubber tiles on a sandy base is similar to laying paving slabs
There is another technology that allows you to get an almost monolithic coating of rubber tiles. When laying, we coat the end with polyurethane glue, butt it tightly with the previously laid row. The joint is fixed with several staples from a construction stapler (steel staple 10 mm long). There are 3-4 staples for each seam. When laying the first row, we coat only the right or only the left end, in the second and all subsequent ones - two adjoining ones. After the glue dries (about 24 hours, but you need to look at the package), we take out the staples with a stationery staple remover (it is also a stapler, a staple remover, a staple remover, a dragon) or prying it off with a screwdriver. As a result, we get an almost monolithic rubber coating for playgrounds.
Also, rubber tiles for playgrounds can be laid on a concrete screed. In this case, polyurethane glue is required. Consumption - 1-2 kg per square meter.
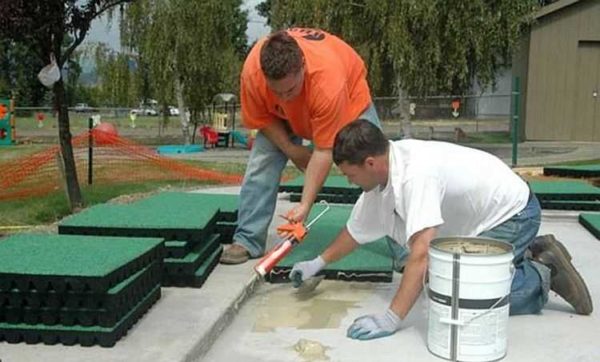
When laying on concrete, use glue
First, the screed is cleaned, dried, then covered with a layer of primer (60% glue + 40% white spirit). There is no need to wait until the primer is dry or absorbed, so you can prime in small pieces to make it easier to work. Then each tile is coated with glue, laid on the base and pressed well. For high-quality gluing, each laid 1-2 square meters is rolled with a heavy (at least 20 kg) roller.
In both cases, when laying the rubber covering for the playground, try not to stain the front surface with glue. It doesn't rub off. The trace still remains. Yes, this is not so noticeable after a couple of weeks, but it still spoils the mood.
Stages of work when laying crumb rubber.
Installation of crumb rubber made by ISTIMPEX begins with priming and preparation of the base
It is important to maintain the proper time, waiting for the surface to dry. These points are strictly observed by professional installers.
The second important stage is the preparation of raw materials. At this stage, you need to correctly calculate the proportions of the components. The mixture contains crumb rubber, polyurethane and dye. It is especially difficult to give a uniform color to the site if it is very large and several batches need to be performed. Then, in each regular one, you need to add exactly as much coloring pigment as in the previous ones, so that the color turns out to be uniform in all areas.
The next stage is kneading in a mixer. And mistakes are inadmissible here.The components are laid in a certain order, and mixed so that the rubber crumb and pigment are distributed throughout the mass. Lumps should not be allowed to form.
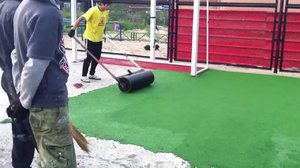
After that, the actual device of the rubber coating begins. The mixture is unloaded, evenly laid out and rolled with special rollers
It is important to properly distribute the material and give the coating the proper thickness. In this case, it will serve the prescribed period without wearing out prematurely.
Varieties of crumb rubber coatings
The popularity of crumb rubber is increasing every year.

They differ from each other in the way they are laid and in size. Additional finishing elements are also produced from rubber: skirting boards, protective corners, curbs, etc.
Taking into account the purpose of a specific area, the appropriate, most practical and convenient type of coverage is selected. For example, if it is a small area under a hinged hammock for a summer cottage or a table and chairs, then you can use rubber tiles or roll cloth.
If the site is intended for children or training on simulators, then it is better to choose a seamless covering.
Stages of work
It is not difficult to make your own rubber coating on the site, but in this matter it is important to follow the step-by-step instructions. All work is divided into several stages.
Preparation of the base
The first stage is preparatory. It is necessary for high-quality preparation of the base for the subsequent application of the mixture. Crumb rubber adheres well to asphalt, wood or concrete. To improve the adhesion properties, the surface must be cleaned from dirt (oil stains and dirt from chemicals are unacceptable). First of all, the concrete area must be moistened, and then sanded with a grinder. To clean the base from dirt and dust, use a construction vacuum cleaner. An ideally prepared substrate should be clean and dry with a slight roughness on the surface.
Often, the installation of the coating is carried out on the soil or sand and crushed stone flooring. In this case, experts recommend using a rolled rubber backing. It will help to reduce the consumption of the composition and increase the damping qualities of the finished surface. To strengthen the subgrade, it is recommended to apply a layer of geotextile fabric to it. It will protect the base from erosion by groundwater.
To increase adhesion, the prepared sub-base must be primed. For these purposes, you can take a store composition or make it yourself. To prepare the primer, you will need to mix turpentine and polyurethane glue in a 1: 1 ratio. The resulting solution is applied with a roller to the site. The approximate consumption of the primer is 300 g per 1 m2.
Preparation of the mixture
To form a decorative coating with a thickness of 1 cm and an area of 5 m2, you will need to take 40 kg of rubber granulate, 8.5 kg of polyurethane-based glue and at least 2.5 kg of pigment. First of all, add crumb to the loading tank, turn on the equipment and mix for 2-3 minutes. During storage, the granulate often cakes, and if you neglect its mixing, lumps may remain.
After mixing the crumbs, load the dye and mix it with the crumbs for 3 minutes to evenly distribute. The glue composition is poured into the rotating equipment in a stream - it is impossible to stop the operation of the equipment while mixing. Otherwise, lumps may form. After applying the glue, all components are mixed for 15 minutes. The mass should be dense and homogeneous.
Applying and rolling the cover
It is recommended to lay the mortar in segments with an area of 1 m2. For each such square, you need to distribute 10.2 kg of solution. The working composition must be leveled with spatulas alternately on all segments, and then compacted with a roller.With a large amount of work, the handy tool must be replaced with automatic stackers.
Laying the rubber cover can also be done using a two-layer technology. In this case, it will be possible to save money on painting the working mixture located in the lower part. To achieve greater elasticity of the coating for preparing the mortar for laying the first layer, it is recommended to take granules up to 2.5 mm.
After laying and hardening, a fiberglass mesh is laid on the rough layer. In the future, a finishing color coating is formed on it. It will take from 8 to 12 hours to sinter the composition.
Rubber crumb consumption per 1 m2.
For a durable and convenient operation of the coating, it is important not only to calculate the amount of ingredients. Laying of crumb rubber must be done correctly
If you buy ready-made plates for laying, then beginners will also cope with this work. But seamless filling definitely requires professional knowledge and skills.
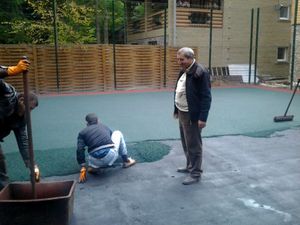
To begin with, the territory for coverage is being prepared. And here you will practically not have to perform complex work. Usually the floor is cleaned of dust and dirt, leveled if there are large holes and potholes. But at the same time, many irregularities will be corrected by the rubber mass itself, which should also be attributed to the number of advantages of the material.
After that, the installers begin the pouring process. Usually, a rubber mixture is made on site, since it hardens relatively quickly. Stackers need to evenly distribute the weight, compact it and achieve a level surface. And you can start operation literally in a day or a few days, depending on the composition of the mixture and the thickness of the layer.
The company "Istimpex" is ready to produce a high-quality coating according to customer requirements. Also, its employees perform professional installation of plates and high-quality seamless filling.
Features of working with the material.
The specificity of rubber coatings is such that they can be laid in almost any place - both outdoors and indoors, and there are different installation methods. In the first case, the finished slabs are simply laid on the prepared base. The second uses a bulk mixture
And then it is important to observe many technological subtleties. In the process, a certain fraction of crumb rubber is used, the consumption of which is not so easy to calculate without experience
Let's talk in more detail about the filling technology for manufacturing a rubber coating. In this case, it is also necessary to prepare the base. Moreover, it may not be the most even - a mixture of crumbs will help hide many defects. The material is laid on concrete and asphalt, wooden boards and soil. After preparation, the substrate must be dry and clean, and a slight roughness will just contribute to perfect adhesion to the rubber mass.
It is difficult to give specific recommendations regarding the calculation of the amount of material. Requirements for the composition and volume of the mixture may depend on such criteria as the quality of the crumb rubber, the requirements for the poured area. For example, if it is necessary to make a safe area for children's games or sports, then the coverage is usually thicker. In some cases, a thin layer is sufficient, and then the material consumption is minimal. A pleasant bonus for customers who are still considering whether to choose rubber crumb or find another solution will be the news that such a product can be used in any weather conditions. Even installation is performed over a wide temperature range. It's just that in warmer weather the rubber hardens faster, and in cool weather the process lasts longer.
Advantages and disadvantages of crumb rubber coatings
Rubber coatings have many advantages and, when laid according to all the rules, can last more than 10 years.
- Strength and wear resistance. Due to the composition and special manufacturing technology, the rubber floor has high protection against mechanical and chemical damage, does not deform under heavy loads.
- Safety and comfort.Shockproof and anti-slip material is able to prevent injuries for adults and children, and it will be a pleasure to step on such a surface.
- Practicality. It is not afraid of frost or sun, does not crack, does not fade, passes moisture well, prevents grass germination, and is easy to clean.
- Aesthetics. The coating is distinguished by a wide variety of design, looks bright and original.
The material has antistatic, noise-absorbing and electrical insulating properties.
Of the shortcomings of crumb rubber and products made from it, their decent cost should be distinguished, although it justifies itself in many ways, as well as high flammability, which is why it is forbidden to mount coatings near sources of fire.