Application of primers
Working with a primer is extremely simple. The main thing is to know what tools you need, the right choice of solution. Such work is within the power of any person. The workflow itself can be split into several periods.
Working with a primer is extremely simple.
Preparation of the primer composition
The preparation of the solution is always clearly spelled out in the instructions, mainly on the sealed packaging. This is followed by the following steps:
- Shake, mix the solution, pour into any container convenient for work. Construction utensils can be as follows: enameled, wooden, plastic. Metal is subject to destruction (sometimes it is smeared, in several layers, with oil paint, each must dry).
- We dilute the primer in accordance with the instructions.
- We also transform dry mixtures in accordance with the rules.
- We mix the solution thoroughly, you can do this with a construction mixer.
We mix the solution thoroughly, you can do this with a construction mixer.
To be more specific, we can single out primers for a specific purpose: lime, adhesive paint, universal. You can prepare them as follows:
- Calcareous. For ten liters of material: fatty lime dough (two and a half kg), table salt (fifty or one hundred g) or aluminum alum. Stir the dough in cold water (5 liters). Dissolve salt in a boiled hearth (2 liters). Then pour it into a container with dough. Remains - three liters of water, add. The next mandatory procedure is filtering through a sieve or other product (one to one mm);
- Adhesive painting. Ten liters of water: the so-called - aluminum alum (one hundred fifty g), forty percent household soap (two hundred g), hard animal glue (two hundred g), drying oil (twenty five to thirty g), chalk (two to three kg). Alum is added to three liters of boiled water, glue is in two liters of the same water. A soap solution is added to the glue (for two liters of boiling water - all the soap), mix, add drying oil. Then add alum, chalk, mix, allow to cool. They are filtering.
If a person loves experiments, you can cook it yourself, but it is better to buy soil from a well-known manufacturer.
If everything is done exactly, according to the instructions, a single mixture without lumps appears.
Surface preparation
Before work, you need to carefully prepare the walls:
- Surface paint. It all depends on the type of paint, for today it is mainly water-based. It can be removed with a simple spatula; it is better to moisten the walls with soapy liquid. The enamelled walls are removed with emery;
- Wallpaper. Removal takes place with a spatula, after wetting the wallpaper with water (or a soapy solution with wallpaper glue). Washable wallpaper is cut in free order. Then moisten with soapy liquid and remove. If not removed the first time, moisten the paper - and try to remove them again. You can also use a heated iron. It should be applied to the wall through a wet cloth. After removing the wallpaper, you should wash the wall and walk again with a spatula;
- Mold, mildew. To clean these microorganisms from the walls, specialized means are used. You can prepare the solution yourself, based on bleach;
- Checking the plaster. The main thing is that the cement surface does not have cracks and does not crumble. You can check its strength by light tapping. You can hear where there is emptiness in the walls;
- Drywall. It is advisable to putty before work;
- Cleansing from dirt, dust.
Before work, you need to carefully prepare the walls.
Surface application
A primer for walls under putty - the technological component is extremely simple:
- Consider the air temperature. Better if +30 -5.
- Working tools: roller, brush, tray, telescopic rod or pull-out product, stepladder, gloves, mask, overalls.
- Follow the previous two steps: clean the walls, dilute the concentrate.
- Add material to the tray.
- Moisten a roller or brush in the solution. Apply primer to the wall, observe that the liquid does not spread. It is applied from bottom to top, in a thin layer.
- Work carefully. There should be no dry areas. Remember to clean your work supplies.
- Use the brush in places where it is difficult to roller.
- After processing, you need to wait until it is completely dry.
- Then apply a second coat.
- This is the best way for all types of work: wallpapering, painting, etc.
All the work can be done using a specialized sprayer, it is used if the object is quite extensive.
All the work can be done using a specialized sprayer, it is used if the object is quite extensive.
Putty - start or end of work?
Many people confuse the concepts of "plaster" and "putty", considering them synonymous. In a sense, this is so, but plaster is usually understood as a base leveling layer, which gives the surface the desired geometry and properties, removes irregularities and heterogeneity of the material of the base structure. The putty is considered the final stage of work to eliminate irregularities and defects; it uses mineral and polymer mixtures with a minimum grain size, giving a smooth surface and, among other things, an even color.

The confusion also occurs because there are concepts of "base" and "finishing" putty. These are materials on the same or different substrates with varying degrees of graininess and different covering power.
To compare materials, consider the table.
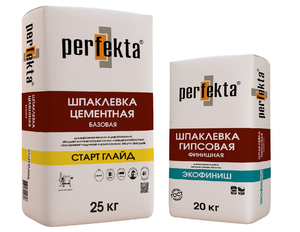
| Plaster | Putty | ||||
| Type of material | Cement starting plaster (cement-lime, cement-clay, clay) | Gypsum or cement coating (finishing) | Cement | Gypsum | Acrylic (polymer) |
| Filler fraction size, mm | 2 ... 3, up to 5 | 0,5…1 | 0,5…1 | Not applicable * | |
| Permissible layer thickness, mm | 6…50 | 1…6 | 0,5…2 | ||
| Permissible type of defects to be eliminated, purpose | Unevenness of walls (curvature, "overwhelmed" corners and planes), potholes, large cracks and crevices, elimination of unevenness of masonry, creation of a base layer for finishing | Removal of small irregularities, cracks, cracks, preparation for decorative plaster and gluing textured wallpaper | Elimination of small irregularities, cracks, cracks, sealing holes from fasteners, old finishes, chips.
Preparation for painting, decorative plaster, wallpapering, other types of decorative finishes |
||
| Height of irregularities on the surface after application, mm | 1..2 mm | 0,5…1 | 0.2 ... 0.5 (up to 1) ** |
* Filler in the form of sand, stone chips, crushed shells, textile and viscose fibers and others is used for decorative plaster and homemade decorative plaster from putty.
** The height of unevenness after putty depends on the type of material - starting or finishing - and the planned decorative finish
Taking into account the maximum permissible dimensions of irregularities after surface treatment given in the table, we understand that it is necessary to putty the walls under the wallpaper, and not plaster. An exception may be surfaces on which it is planned to stick wallpaper with a significant thickness and high surface relief (for example, imitation of brickwork).
Putty work
Plastering the walls with your own hands is quite feasible and does not belong to the number of difficult works. The substrate must be dry and clean.
It is important to remember and know, otherwise the whole filling process will go down the drain.
Tools and materials
To carry out puttying work, you will need:
- narrow (10-15 cm) and wide (40-60 cm) spatulas;
- putty material (starting, finishing);
- sanding block (with abrasive mesh);
- containers for diluting putty;
- foam sponge;
- drill, puncher, screwdriver;
- brushes, roller for priming walls;
- sandpaper or grout;
- level.
Phased execution of work
- Preliminary preparation. Initially, you should clean the surface, dry it, remove areas of grease, old putty, paint. The surface should never be dirty, damp or frozen. This negates the degree of adhesion of any filler material. As a result of such an error, the putty can fall off in whole layers.
- Surface priming. This step should not be neglected. The priming is carried out between all the putty layers, as well as after the final finishing layer before gluing the wallpaper. It provides additional bond strength.
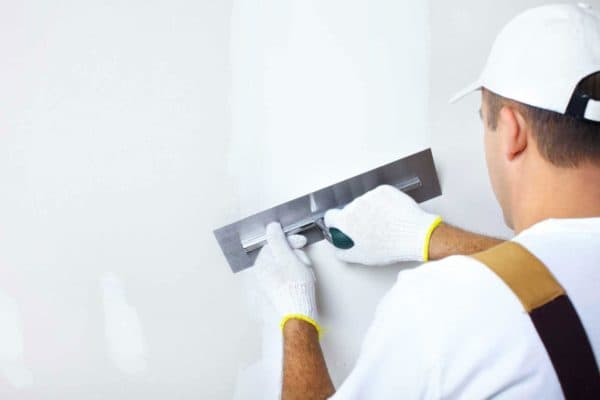
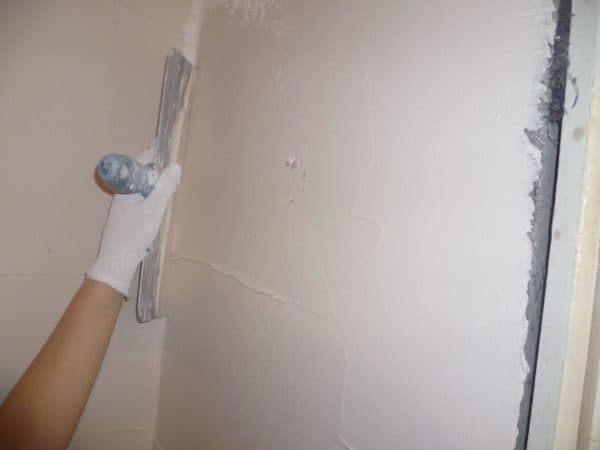
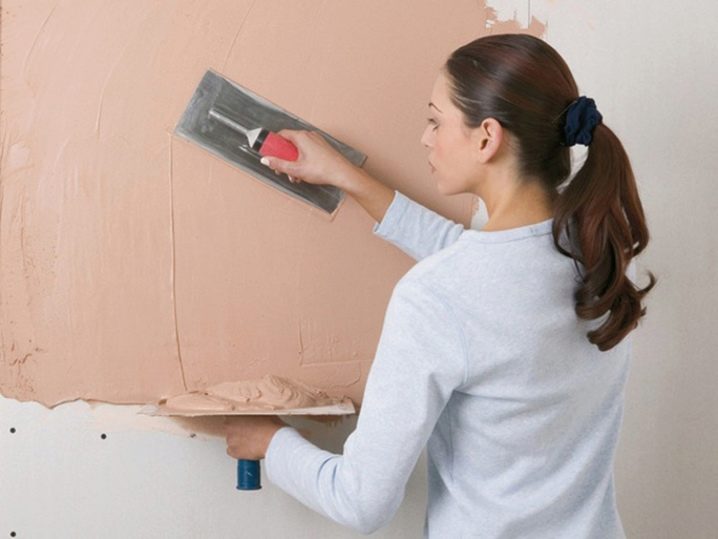
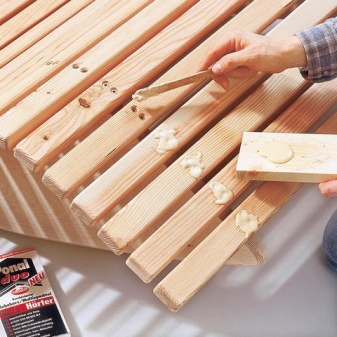
- Putty application. Depending on the base, the purpose of the room (the choice of putty has already been mentioned), one or another type of putty is applied, as well as the required number of layers. Each of the layers should dry well, and then should be treated with a primer. The starting putty is applied with a large spatula in portions, diagonally. In order to avoid visible transitions, each portion is applied with a slight bead over the previous layer. The tool must be held at an angle of 30-35º to the surface. The finishing layer is applied no earlier than in a day. A narrower trowel is used and the layer thickness is reduced to 2 mm.
- Final primer. It is carried out immediately before wallpapering the walls.
Corner filler
Smooth and clear corners are very important for the walls on which the wallpaper is planned to be glued. This process is very responsible and a little time consuming for beginners.
If necessary, you can use a silicone tube or a plastic confectionery syringe through which the required amount of putty mixture is squeezed out. Then the corners are sharpened with an abrasive.
Slope filling
Slopes are filled with the same method as corners or walls. However, the process itself is quite painstaking, and it is quite difficult for beginners to cope with slopes. It is recommended to use an angled spatula and check evenness with an abrasive.
Varieties
There are different types of starter fillers. Such materials can be made independently, but at the same time you need to follow the recommendations of specialists and take into account various important nuances. It is quite natural that a self-made composition will be somewhat inferior in quality to products from well-known companies. In addition, the consumption of self-made materials is usually very significant. For this reason, if possible, preference should be given to ready-made fillers.
Self-created
If you still do not want to give your money for a starter putty, try creating a suitable mixture with your own hands. Let's understand the intricacies of cooking in more detail:
Gypsum-chalk putties are well suited for making concrete and drywall surfaces smoother in dry rooms. If you want to get such a putty, put gypsum (1/4) and chalk (3/4) in a dry container. They will need to be mixed gently. After that, place this mixture in a container where there will be a solution of the adhesive (carpentry / animal) - it should be five percent. Stir the material thoroughly to get a homogeneous mass, and apply it immediately, as such a coating hardens in the shortest possible time.
Oil formulations are very well suited for wood substrates that are used in conditions of significant temperature fluctuations (external walls, timber window frames). It is necessary to combine chalk (2 kg) and drying oil (1 kg), then attach a desiccant to them (100 g will be enough) and boil the resulting solution. After that, you will need to cool the material and apply it warm.
Ready
You can not waste time preparing the putty on your own, but buy ready-made products. Varieties of such coatings:
- Polymeric. The color of such fillers is white. They are very convenient to use, they do not shrink, they are durable and elastic. However, not all consumers are satisfied with the price of polymer materials - many believe that it is too high.
- Plaster. They are great for use in rooms that are dry and well heated. Such materials are most often applied to walls and ceiling surfaces. They do not differ in moisture resistance, but at the same time they do not shrink, are elastic and dry quickly.
- Cement. They can be used in rooms where the humidity is quite high. They are great for façade walls, door openings and window openings. It should be borne in mind that when dry, such putties can shrink. The color of such coatings is gray.
Other ready-made putties can be applied to surfaces made of wood, metal and other materials. The following options are possible:
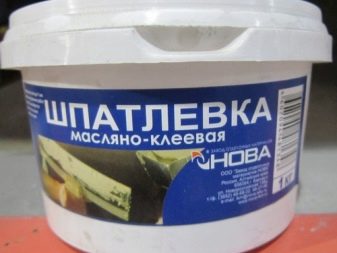
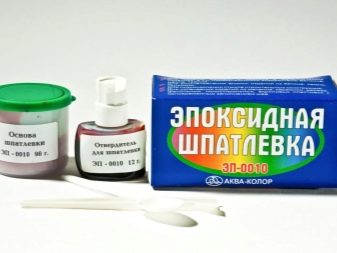
- adhesive putty materials;
- epoxy compounds;
- oil coatings.
Do walls need to be primed?
Many people think that pre-priming walls is just a waste of money. However, if you want the future decorative coating to look perfect and last as long as possible, then the walls must be primed before puttingty.
Deep-penetrating primer:
- protects the surface from peeling;
- promotes more uniform penetration of putty, adhesives and dyes.
The choice of primers is quite large in the construction market, and manufacturers offer special types for each type of surface. To cover the walls after plastering, it is better to use deep penetration acrylic, polystyrene or perchlorovinyl mixtures or universal compounds of medium porosity.
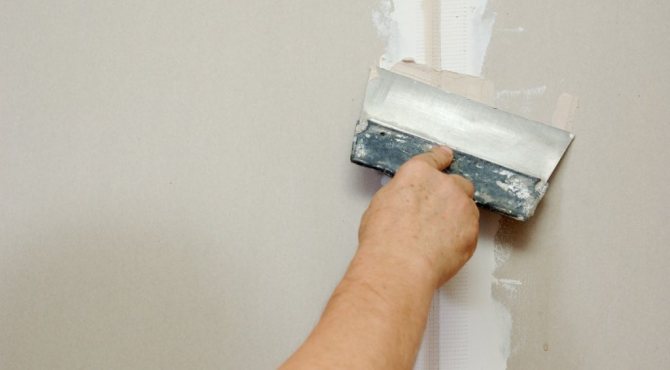
The walls must be pre-treated with a wet sponge to remove the smallest dust particles. It can be primed with a roller or with a brush - the roller distributes the mixture more evenly, and it is more convenient to apply it with a brush in hard-to-reach places. Also, for convenience and speed, manual sprayers are used.
The putty is started only after the primer has dried. The time of its complete fixing is always indicated on the package and can vary from 5 to 15 hours.
Surface preparation
How to do without wall putty for wallpapering? In order for the repair to be of high quality and serve for many years, you need to prepare the surface for applying the material. To work, you will need the following tools:
- glue bucket;
- sandpaper;
- measuring tape;
- roller and brushes;
- plumb line and level;
- scissors and knife;
- spray bottle with water.
When gluing wallpaper to replace the old one, the latter must be removed from the wall. Removing them is pretty straightforward. Old paper sheets are moistened with water and carefully removed with a spatula. If it was not possible to remove all the material, then the surface is cleaned from irregularities and paper residues with sandpaper.
Wallpaper sticking tool
After cleaning, the walls are rinsed with water and dried. Pits, cracks and other serious defects will have to be leveled with a putty. For this, you can use starter mixes. Nails and screws must be removed or drowned in the wall and also putty.
Uneven walls will have to be brought to perfection with a starting putty. Especially if the finishing material is very thin. Liquid wallpaper can be applied to a concrete wall without putty.
Types of putty
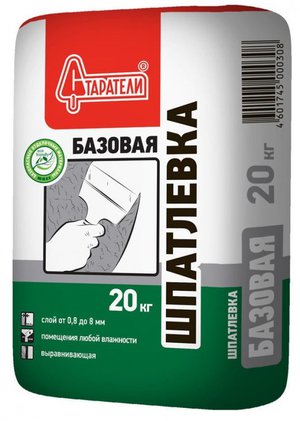
Before starting to putty, you need to select the desired material. It depends primarily on the type of premises being repaired. Suggested options:
- Gypsum-based. They are elastic, non-waterproof, quick-drying, non-shrinking. Typically white. They are used to decorate the walls inside the premises - dry and heated.
- Cement based. These are moisture resistant, shrink after drying. Mostly gray.The materials are intended for finishing facades and various openings. Used for finishing rooms with high humidity.
- Polymer mixtures. They are the most durable, elastic, without shrinkage. White. Mixes are the most expensive and versatile.
There are also glue, oil, epoxy, etc.
Both starting and finishing putties are used for the same purpose, but the former level out rough, uneven surfaces, where a large layer is needed, and the latter for the final coating, when very small defects need to be smoothed out.
Both materials must be of the same brand. Only under such conditions, the treated surface will remain guaranteed even and durable.
No. 3. Types of putties according to the degree of readiness
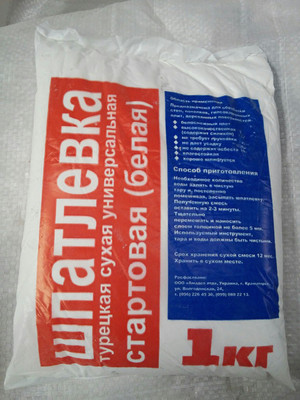
There are few options here - putty can be sold in two versions:
- dry mixture requiring dilution with water in strictly defined proportions;
- ready putty.
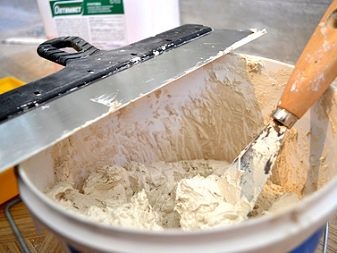
Dry mixes are the most widely sold, as they are inexpensive and have a longer shelf life. Such putties are sold in packages weighing from 5 to 25 kg, they are easy to transport and store. In order to obtain the necessary pasty putty from a dry powder, it is enough to seal the composition with water in a certain amount. It takes a little time for mixing and stirring, but the putty obtained in this way quickly sets, therefore it is necessary to work quickly, and kneading the material in large batches will not work. To obtain a solution with clearly defined parameters specified by the manufacturer, it is necessary to act strictly according to the instructions. Some also consider the need to spend time preparing the solution as a disadvantage, but, to be honest, this is not a very big time investment. Another disadvantage is the presence of dust during mixing.
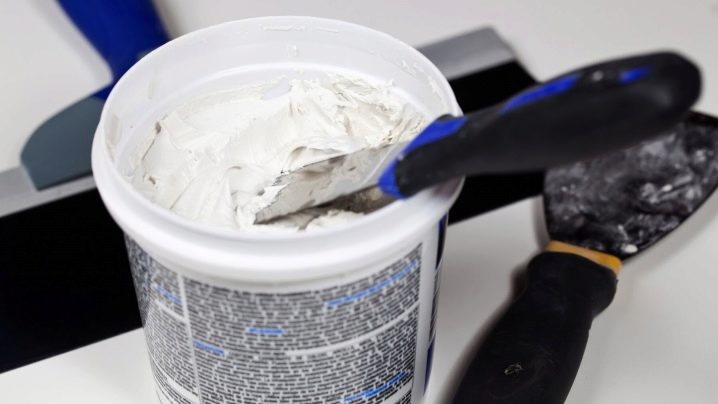
Ready-made formulations are sold in buckets or large tanks. It is easy to guess that they can be used immediately, and this saves time and there is no risk of violating the proportions, having received a putty of the wrong quality. Additional tools and containers are also not required. The shelf life of the finished composition is less than that of dry putty, but much longer than that of dry putty diluted from powder. Ready-made compositions are more expensive than dry ones.
Which putty to choose
So what kind of putty to choose? A few words about the composition and frequently asked questions.
Choosing a putty according to its composition
Here I will tell you what putties are in composition and to which of the above types I can attribute them. At the same time I will answer frequently asked questions. I think everything will fall into place here.
Plaster putty
The main composition is gypsum, the rest is plasticizers and all kinds of additives. Gypsum itself has a coarse fraction compared to other types of putties. Therefore, it belongs to the type of starting finishing materials, well suited for preparation for wallpaper, cobwebs and rough decorative finishes.
Acrylic putty
Acrylic is such a versatile material that can be used in the production of all types of putties, both starting dry and finishing in buckets. And also acrylic putties are widely used in the processing of wood, car bodies, etc. Therefore, it is probably not correct to use the term "acrylic putty" for a specific application. In this case, it can be both start and finish. It is very often used in the production of wood putty.
Latex putty
Think for yourself, latex is rubber. Therefore, the putty for wall decoration cannot be rubber, it simply contains a latex component. This putty is very flexible and can be used in damp rooms, although it all depends on the manufacturer.
Polymer putty
Basically, these are all finishing putties, except for gypsum. Acrylic and vinyl are also polymers, so acrylic and vinyl putty can also be called polymer.
Dry putty for walls
It is a starter material, mainly gypsum and acrylic.Again, suitable for preparation for wallpaper, cobwebs and decorative.
What putty to choose for painting
The wall is prepared for painting as follows:
If the plaster is on the wall - 2 layers of starting gypsum putty, primer, if required, we glue the cobweb or reinforcing mesh and 3 layers of finished finished putty, grind and you're done. If you are interested in specifics, then I use acryl-putz starting at the beginning and rotband pasta or sheetrock at the finish. This is with regard to high-quality painting. If high-quality painting is not needed, then you can putty 3 layers of starting putty, grind and paint.
What putty to choose under the wallpaper
Under the wallpaper I use a starter putty, which comes dry in bags. If we putty plaster, then basically 3 layers of gypsum or acrylic starting putty are enough. I can recommend acryl-putz, prospectors, typhoon, knauf. (if they are sold in your regions)
Pay attention to the price, cheap stuff is almost always bad. We'll talk about how to putty the walls under the wallpaper a little later.
Start-finish putty
Positioned as a universal filler. Very well suited for preparation for wallpaper, cobwebs and for rough painting. As a finishing putty on cobwebs, this mixture will not work, I also do not recommend it for finishing for painting ceilings and slopes. The finishing putty should be ready-made in buckets on a polymer basis, not dry. There are no universal putties that perform their function well everywhere.
Best finishing putty
During my long time in the finishing industry, I have tried working with different brands. I used them in different conditions and on different surfaces. As for the finishing putty, I can safely say that you need to take Knauf rotband pasta, sheetrock, Bostik finspakel (it hardens strongly) Often the finishing putty is called "ready putty for walls"
Summing up the selection
Brief selection of putty. For those who are too lazy to read the entire article, who just need to know the number of layers and which putty to buy:
| Preparation type | Work order |
|---|---|
| under the wallpaper | 3 layers starter |
| for painting | 2 layers of starting, cobweb, 3 layers of finishing |
| for decorative coating rough | 2 layers of starting, mesh reinforcement, 1 layer of starting |
| finely dispersed decorative coating | 2 layers of starting, reinforcement, 3 layers of finishing |
| slopes | 2 start, web, 3 finish |
| GKL for painting | finishing of seams with special putties, cobweb, 3 finishing layers |
| GKL under the wallpaper | finishing of seams, finishing of seams with finishing putty |
| loggia | 3 layers of facade (if you really need to putty, and it is damp on the balcony) |
| basement | if it is very damp, facade putty 3 layers. |
| bathroom | although not recommended, I use the same technology as in other rooms. But you can paint it with moisture-resistant paint. |
We will talk about this in more detail in the following chapters.
Preparation of the solution
It is known that you can buy a ready-made mixture or a ready-made solution for filling, or you can do it yourself.
To make gypsum putty at home, you will need 2-3 kg of chalk, a kilogram of gypsum, a 5% solution of wood glue. We mix the chalk with gypsum, then gradually pour this mixture into the glue previously poured into the bucket and stir thoroughly so that the result is a homogeneous mass. Such a solution becomes solid very quickly, so it is better to prepare it in small quantities. It is used on concrete surfaces to mask drywall joints, but only in rooms where humidity is not high.
You can also make oil putty yourself. To do this, you will need a kilogram of drying oil, 100 g of desiccant (to speed up the solidification process) and two kilograms of chalk powder. We mix all the ingredients until a uniform consistency is obtained. This solution is not afraid of temperature extremes and high humidity.It is used on wood surfaces, as well as on walls that will be painted with oil paints.

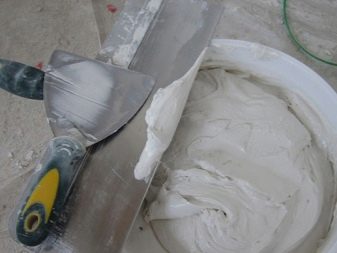
Making a solution from a purchased putty mixture is not difficult at all.
Below is a step-by-step instruction, adhering to which you can get a high-quality solution for puttying walls:
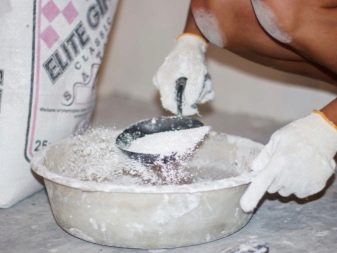
- Pour clean water at room temperature into a plastic bucket, about a quarter.
- Slowly pour the dry mixture into the water. The quantity must correspond to that indicated in the instructions.
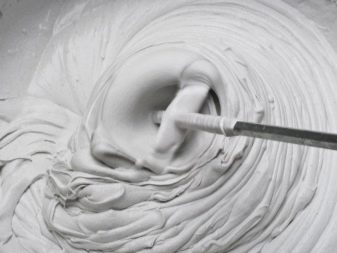
- Using a mixer, beat everything until you get a homogeneous mass without visible lumps.
- Let the solution stand for 5-10 minutes.
- Then we mix well and we can use.
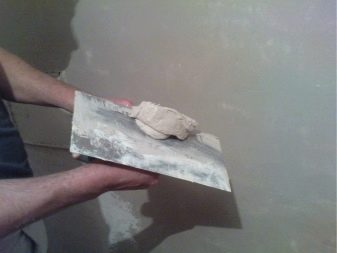
In appearance, such a solution should resemble thick sour cream - this is a very important detail, since neither excessive thickness nor excessive liquid will give a high-quality result when used. A layer of thick putty will fall off immediately, and the liquid one will simply spread.
It is important to remember that in one batch of the solution there should be as much as enough for 40 minutes of work.

Why do you need putty
Surfaces made of a variety of materials are leveled with it - you can putty everything. It's only about the right choice of material.
What can be treated with putty:
- Stone.
- Concrete.
- Brick.
This material has proven itself perfectly in working with slopes (door and window), when finishing arches, etc. The putty start outwardly differs little from the finishing mixture, but it has a denser structure and is cheaper.
Specifications:
- Ecological cleanliness.
- Fast drying.
- High resistance to cracking.
 Nowadays there are mixtures for both outdoor, and for the internal finishes. This must be taken into account. If the facade putty is used for interior decoration, then such a coating will not last long, and the repair will soon need to be done again. And if you take a mixture for interior work and putty the facade on it, then it will become unusable even earlier.
In both cases, the result is the same: wasted time, material and money. In addition, the old coating will have to be completely removed, which is not a very pleasant experience, given the abundance of dust that will be released during these works. To prevent this from happening, you need to consult with sellers and managers of building markets, and also carefully read the instructions on the packaging.
If you have reason to believe that due to inexperience you can spoil the solution due to little experience in such works, because you do it too slowly, then it is better to purchase a product marked "Putty max". It is better to make the solution smaller at first in order to have time to use it before it hardens.
Application area
Putty start is used for preliminary wall finishing. She can align any walls, and quite quickly. It can be polished well. During surface treatment with a grater, dust does not hang in the air, but simply falls down, which reduces the harmfulness of this production. List of works performed:
- Alignment of all kinds of slopes, arches.
- Sealing cracks, strobe.
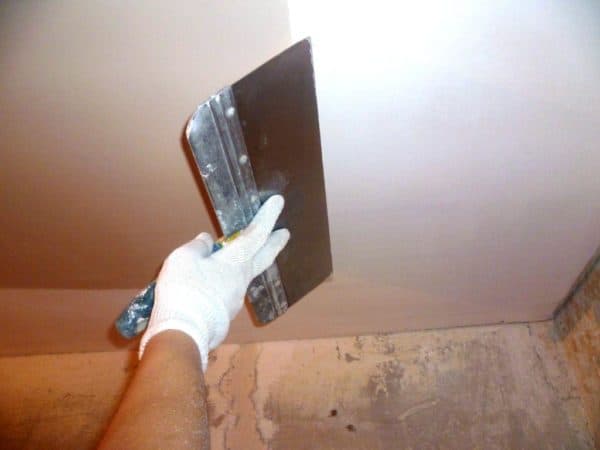
- Sealing of joints "wall - ceiling".
- Sealing door and window frames.
- Corner alignment.
As already mentioned, this material is applicable for both indoor and outdoor work.
Sanding the walls after putty
So we figured out how to properly putty the walls, now we will answer the question of how to sand the walls after the putty. There is nothing complicated in grinding, there are only a few small nuances, which I will now tell you about.
Hand grinding
In hand sanding, a "hand grater" is used - this is a tool for sanding walls after putty, I advise you to buy it from white plastic because blacks leave streaks in the corners when sanding. It is better to use not the cheapest sandpaper. The most important and the very first thing to say - remember to use a respirator!
If we use a household vacuum cleaner, then there is a possibility of spoiling the equipment. Therefore, first remove large debris with a spatula and sweep. We vacuum the rest of the dust.
| Surface | Abrasive |
|---|---|
| under the wallpaper | 80-120r |
| for painting | 180-240r |
| for decorative finishing | 120-180 rub |
Grid for grouting putty
Personally, I do not use a mesh, in my region they are not of high quality and the surface is scratching. As far as I know, it can be used with special graters that are connected to a vacuum cleaner. Only industrial devices must be connected, for example, bosch gas50.
Machine grinding
In my opinion, machine sanding is perfect for sanding under wallpaper, and requires a certain skill, so as not to rub large holes. It is better to grind by hand for painting. Machine grinding reduces labor costs, reduces dust, and speeds up the process. But you will need a grinder (preferably a special one for grinding walls), a vacuum cleaner. All this can be rented if you need to grind large volumes.
Consumption for 1 m2
 When buying putty in a store, each owner asks himself how much material needs to be bought to be enough for repairs, and whether he will have to run to the store again.
There is another extreme, when too much material is purchased and it remains unclaimed for many years. The result is wasted money and, as a result, a feeling of annoyance about this. No one of the finest artisans or specialist store sales consultants can give a clear answer to this question.
What are the calculations for making a purchase:
- The number of square meters to be processed.
- Layer thickness.
 On bags with material there are approximate consumption rates based on the thickness of the coating - this is what you need to focus on when buying. This will give at least a rough answer to the question asked so often.
You can make a purchase with a small margin, or it is possible based on calculations. In the end, if the material was not enough, then for this case there are small packages that can be bought when the repair comes to an end and it is already clear how much more material may be needed. So this material should be purchased on the basis of these considerations.
 Sometimes starting putty can be applied to reinforcement - fiberglass mesh. This is applicable when the surface irregularities are already very large. This technique allows you to increase the thickness of the layer and its adhesion strength to the surface, in addition, it will save material.
If the deviations from the normal surface are small, then the material is simply applied in several layers without any reinforcement.
It is difficult to overestimate the importance of starting putty in modern repair and construction. With its help, the work, which was once produced by other materials, very far from being perfect, is accelerated several times. You don't need huge skills to work with this material, just effort, diligence and desire is enough, and everything will work out for you.
Successful renovation!
Preparing walls for finishing putty
First you need to free the room from furniture. What you can endure, endure. Dust from this process cannot be avoided. The floor must be covered with plastic or newspapers. The more surface you cover, the better.
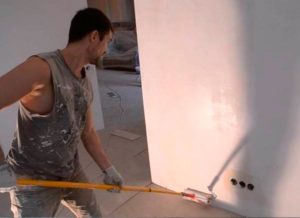
Why primed walls
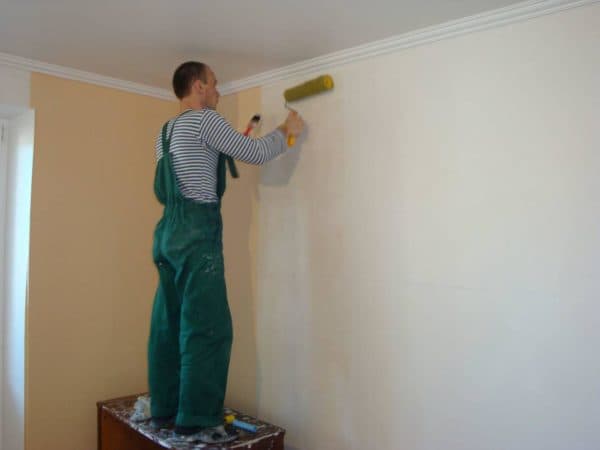
If the room was too dusty, clean the walls with a wet broom. In order for the putty to adhere well to the walls, they must first be primed. Primer is a special liquid. After it dries, a microfilm of adhesive is formed on the walls. The walls are completely degreased, cleaned and free of dust, so that the putty will not fall off in the future. Pour the primer into a plastic container and dilute with water. The concentration is indicated on the bottle. Next, use a roller with a long handle to prime the walls.This process is similar to ordinary painting, the main thing is to ensure that the walls are completely primed. This is easy to guess from the wet stains on the wall.
Some moments
Plastered walls under the wallpaper with your own hands is easier than for painting. Wallpaper will hide small defects and imperfections. But you need to make sure that there are no previous wallpapers (if any) on the wall. Because under the influence of the primer, they will get wet and will stick to the putty.
The easiest way is to putty and prime the gypsum board (gypsum plasterboard). There are no special recommendations for this, we just drive it with a roller from top to bottom. Whatever the surface, it is better to prime separately with a narrow brush near the ceiling, floor and on the sides, since the roller does not reach the end in these places.
Plastering walls after plastering is a more laborious process. Therefore, it is necessary to prime it with very high quality. To do this, it is better to use a brush to fill in all micro cracks and depressions.
GKL putty
Which primer to choose
The primer is used to create an adhesive layer on the surface, which contributes to a favorable adhesion of the composition to the wall
When choosing a primer, you need to pay attention to the room. If it is damp, it is better to choose a primer with an antibacterial effect that prevents the formation of mildew.
The alkyd primer is powerful but does not penetrate into the material. It should not be used for plaster, putty and gypsum board. It is suitable for wood and iron as it has an anti-corrosion effect. In addition, such a primer creates a film on the surface to be treated, which is why the material does not breathe.
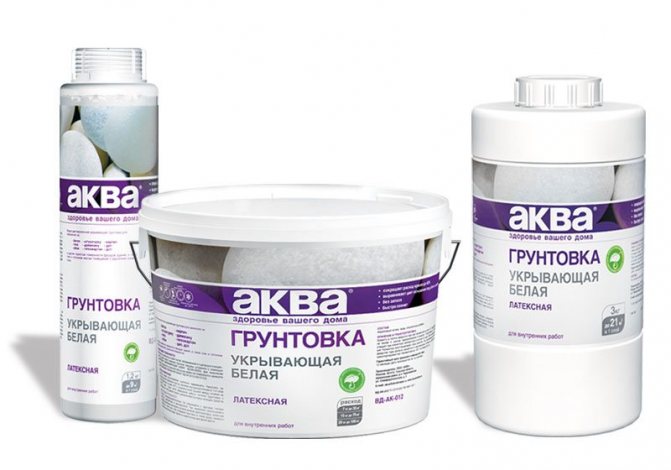
Latex primer is suitable for almost all surfaces. This is ideal for plaster and crumbling surfaces. It is very moisture resistant, waterproof and elastic. But it has such properties due to the addition of synthetic substances to it, so it is not suitable for connoisseurs of environmentally friendly products.
An acrylic primer is best for home use. It does not have a pungent odor, dries quickly and is easy to use. The thick composition is diluted with water to the desired consistency and applied to the wall. Any surface can be treated with this primer. And its price will pleasantly surprise.
A deep penetration primer is used in cases where the surface is loose, loose and not solid enough. It can be old plaster, wood, or just plasterboard with crumbling corners.
Such a primer penetrates deep into the material, gives it strength and water resistance, which is especially important in damp rooms.
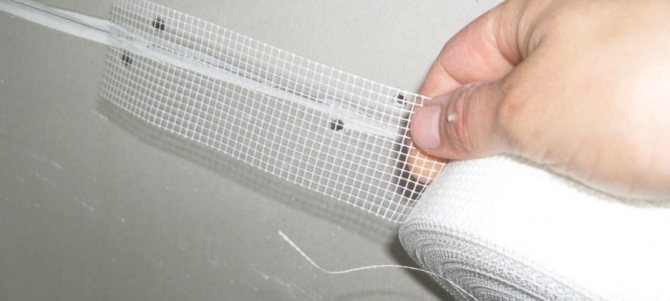
Additional preparation of gypsum board for primer
The joints between drywall sheets contain gaps and grooves. It is better to use plaster to eliminate unevenness in these places. Due to its coarser composition, it will smooth the surface faster. But it is not enough just to run with a spatula. After the plaster dries, a crack forms at the junction, since the composition has nothing to hold on to in the area of the gap. To prevent this from happening, we use a serpyanka. Serpyanka is a mesh tape in a roll, similar to gauze. It comes in different widths and has a sticky surface on one side, so it can be easily glued to the joints. After gluing the serpyanka, apply a layer of plaster from the bottom up. We make sure that it does not move and, if necessary, correct it. Drying time 2-3 hours. After that, we remove small stony particles with sandpaper. The surface is now ready for priming.