Composition and specifications
Putty is a powder containing various chemical elements. The direction in which the mixture will be used (in wet and dry rooms, for exterior or interior decoration of buildings and structures) also depends on the amount of the base and additional additives. The powder is packed in bags weighing from 5 to 25 kilograms, and also comes in bags weighing up to 2 kilograms.
If this is a powder composition, then it should be diluted with plain water, but ready-made putty in plastic containers is often found on sale.

Consumption for 1 m2
As for the material consumption, it largely depends on the area and quality of the coverage of the working area. And you need to correctly calculate how much coating material is required, so much so that it does not remain and is not wasted. The packaging contains information about the consumption of funds per 1 square meter of area, but these data will be approximate, because the final figure depends on several indicators:
- condition of the treated area: the presence of cracks, voids, roughness;
- what material is putty applied to: wood, metal;
- which layer is used: primary or final;
- the professionalism of the worker.
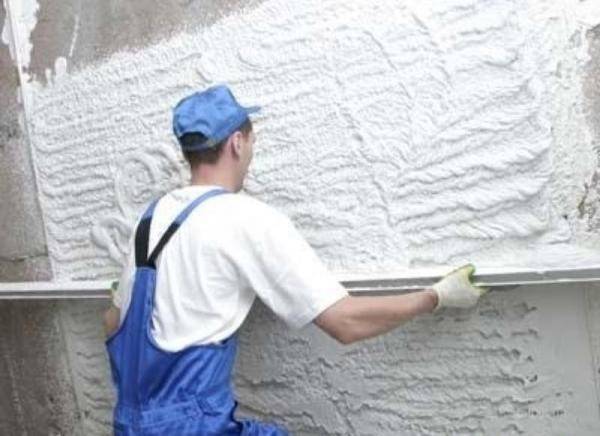
When working, a starting and finishing putty is used. In the first case, the material will leave enough to fill all the grooves, cracks and bring out a smoother surface. The first layer is applied with a thickness of no more than 1 centimeter. If you put more putty on, then the layer may subsequently crack or peel off. It is generally accepted that a 30-kilogram bag of starting putty is enough for 3-4 m2 of area.
The finishing mixture is needed to create a quality layer for the final finish. In this case, the thickness of the coating is minimal. One bag weighing 25 kilograms is enough for 25 square meters of walls.
Areas of use
Having examined how the putty differs from the plaster, we go directly to the area of their application during repair. The following methods are distinguished:
- alignment of walls;
- restoration;
- decorative finishing.
In the first case, the application takes place in one or several layers with a thickness of 2-3 mm. In the rest, the finishing is final.
 Fine finishing
Aligning the walls
Some tips for leveling walls:
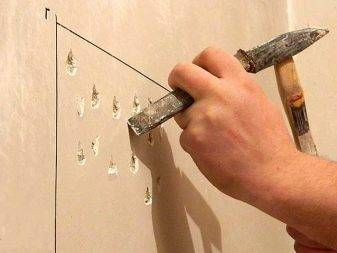
- Calculate the level of the wall (using a tight thread). Small irregularities do not require the installation of beacons.
- Initially, putty only problem areas, then pull the mass with a spatula. A finishing putty is applied after the wall.
- The wall is cleaned with sandpaper.
 Aligning the walls
Restoration and decorative finishing
In continuation of the topic, what is the difference between plaster and putty, we will analyze the restoration and decorative wall decoration. The most significant and obvious cause of defects is the initially incorrect application of the plaster to the wall. If the finishing work was carried out in hot dry weather, and the surface was not wetted, be sure to wait for small cracks throughout the area. For this, restoration is carried out using decorative finishes.
 Decorative wall decoration
Repair with decorative plaster consists in filling cracks and chips with fresh mortar. Stick to the following rules, otherwise chips and breaks will soon appear again:
Composition of building mixtures
Both plaster and putty contain natural fillers. In this case, an ordinary sand-cement mixture is used as the base of the plaster, to which polymer plasticizers are added. Due to them, the solution turns out to be more plastic and fits well on the surface to be treated.In addition, this building mixture can be made from gypsum, to which stabilizing substances are also added. Thanks to them, the plaster acquires high plasticity and sets a little slower than pure gypsum.
If necessary, the plaster can be prepared with your own hands. In this case, to give the mixture high adhesion, PVA glue is added to the sand and cement. In the absence of sand, homemade plaster can include cement and lime, clay and lime, clay and gypsum, or clay and cement.
The basis of the putty is also cement and sand with the addition of plasticizers. But if in the first case sand of coarse fractions is used, then only fine-grained sand is suitable for the manufacture of a putty mixture. Thanks to this composition, the material acquires good waterproof properties and is successfully used for exterior wall decoration.
In the case when the putty is made on the basis of gypsum, it is used only for internal work. Gypsum simultaneously plays the role of both a binder and a filler, differing in a much finer grinding than in the manufacture of plaster. In addition, in shopping centers you can find universal putty mixtures, suitable not only for internal, but also for external consumption. They are usually made from acrylic resins, chalk and water.
To work at certain objects, special trains have been created:
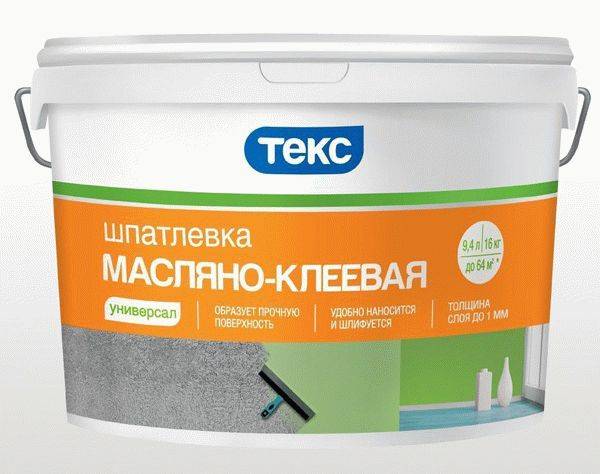
- oil - based on natural drying oil;
- glue, in which linseed oil and glue are added;
- epoxy - based on epoxy resins;
- latex - with latex as a binder;
- made of polyvinyl acetate adhesive with mineral fillers.
Types and features of polymer putties
Polymer putty is a general definition that is used in relation to several types of compositions made on the basis of polymers. It is customary to distinguish three types of putty, which differ in the main polymer component:
- Polymer cement putty. The product is used as a leveling agent for cement-lime, cement-sand, brick and concrete surfaces. The plastic mass can be applied with a layer of up to 20 mm, which allows using a polymer-cement putty as a starting coating;
- Latex. Styrene is considered the main component; it is also often called acrylic latex. With the help of the mixture, a neat and even finish layer is obtained. The area of application of the solution is very extensive. The composition can be used both on wood and on brick, concrete or gypsum board. There are two forms of release of latex putty: dry and ready-made.
- Acrylic polymer. The main component is acrylic. The product is considered universal and can be divided into the following subclauses:
- Starting putty. It is used to eliminate large flaws on the surface: cracks and potholes;
- Finishing putty. Completes the finish and gives the surface a perfect smoothness. It is applied under the wallpaper or coloring composition;
- Universal putty. Includes properties of starting and finishing mixture.
Benefits of using
- Ease of use. Unlike other materials, the oil putty is supplied ready-made and does not require preliminary mixing of the components before application.
- Affordable cost. Due to its low price and moderate consumption, oil putty is advisable to use for processing large areas.
- High adhesion to all types of surfaces.
- Plasticity and easy application of the composition to the surface.
- Reduction of technical breaks between stages of construction work, which is associated with a fairly quick drying.
- The topcoat after the oil putty treatment has a longer service life.
- Lack of harmful substances, safety of use.
- The putty does not contain organic solvents, therefore it is practically odorless.
This putty composition is recognized as the most environmentally friendly, but for the treatment of wooden walls, in some cases, instead of non-toxic components, drying oil of technical origin is used, which is characterized by an insignificant chemical odor. In this case, to eliminate the smell, it is enough to simply ventilate the room after finishing the walls.
Application technology
Before starting work, attention must be paid to safety requirements. For the convenience of the process, the room should be ventilated.
It is better to wear rubber gloves on your hands so as not to get them dirty or cause allergies.
The technological process is divided into several stages: preparatory, main, and final. Each of them is important, requires a careful approach, strict adherence
The preparation of the material and the necessary tools are also important.
 It is better to wear rubber gloves on your hands so as not to get them dirty or cause allergies.
How to dilute the mixture
The glue putty is thoroughly mixed after being moved into the container. If it has a high density, which creates difficulties in work, you can add drying oil or diluted CMC glue.
You should know that dry CMC is diluted in warm water. For 1 liter, 50 grams of dry matter is enough. After thickening, stirring and filtering through cheesecloth follows. You can use old nylon tights or stockings. This is so that there are no lumps left in the glue.
 The glue putty is thoroughly mixed after being moved into the container.
Required tools
The list of tools required for a comfortable finishing process includes:
- A set of spatulas, different in shape and size. Some are intended for filling wide areas. Others trim narrow places, where it is inconvenient to work with wide spatulas;
- Mixer. They are diluted with the composition. On construction sites, this is a common tool. At home, it is replaced by a hammer drill with a nozzle. You can also use a drill or stir with a spatula;
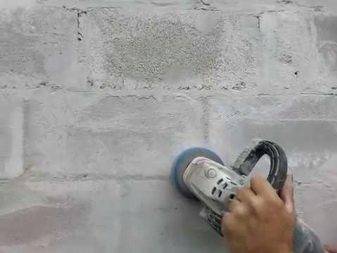
- Sandpaper. It is necessary for sanding the dried putty surface. If a completely smooth surface is required, it is processed with a fine sanding mesh. Often, products for grinding are attached to a wooden block or grater;
- Tank for material dilution. It must have a suitable volume so that the oil-glue putty can not only be conveniently stirred, but also grasped with a spatula. The capacity can be a wide plastic or metal bucket, a trough.
 Prepare the necessary tools in advance so as not to be distracted during the work.
Surface preparation for work
The quality of the final result depends on the correct preparation. Therefore, this stage is extremely important:
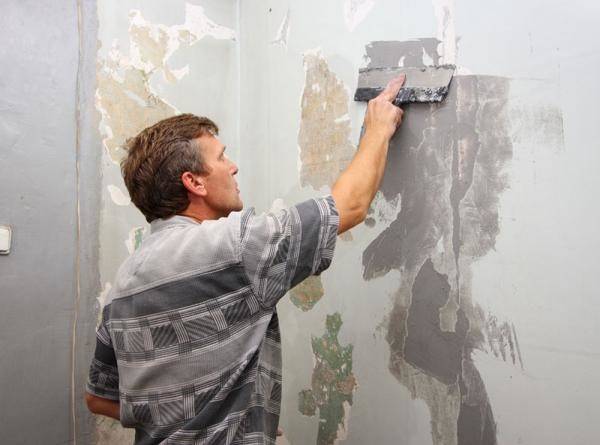
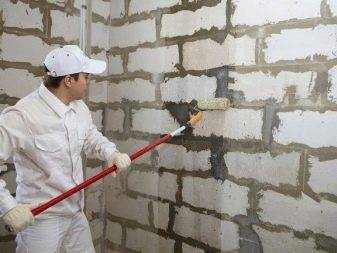
It is necessary to get rid of the old coating. Clean walls, ceilings from old layers of paint, wallpaper. If it is possible to clean up to a clean base;
Defects are revealed on the surface. If these are cracks with a depth of 4-5 mm, they are plastered;
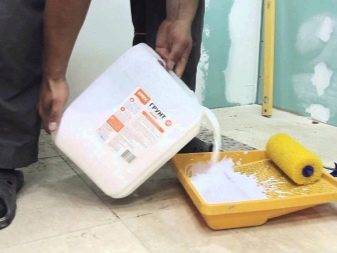
The dried solution is used to prime the entire area intended for finishing. For dedusting, use ready-made deep penetration primers
It is important to consider the base material and the type of work. When buying a primer, be sure to check whether it is suitable for concrete, wood, other substrate
Can it be used for indoor or outdoor work.
Application of the composition
On the primed surface, after drying, glue putty is applied. In case of good evenness of the wall or ceiling, the first layer is made “on the slicker”. It dries quickly and re-primed. The next layer should remove gaps. Make the surface monochromatic, if further painting with water-based compositions or pasting of thin wallpaper follows.
Putty can be applied in several layers. Depending on the selected type of process.The universal oil-glue putty can be used for ordinary cosmetic and high-quality finishing. Each time, priming is performed on the applied putty layer.
The spatula should move smoothly, leaving a continuous strip of composition behind it. It should be held at an angle to the surface and lightly press the mixture against it. The joints can be processed with a rubber trowel or using special angle nozzles. You can buy a station wagon kit for finishing.
 The spatula should move smoothly, leaving a continuous strip of composition behind it.
Given the ease of application, the advantageous aspects of oil putty, the use of the composition is considered the most common. The putty is easy to do on your own, without the cost of professional services. It is enough to carefully study the technology of work and choose the right material.
What putty to choose for the walls under the wallpaper
Classification of putty by composition: gypsum, polymer (acrylic) and cement.
- Let's consider their advantages and disadvantages:
- Gypsum putties are attractive at an inexpensive price, lend themselves well to leveling, do not shrink. The only drawback is poor moisture resistance. This alone limits the scope of their use.
- Cement putties are distinguished by excellent moisture resistance, but they have a significant drawback - a high degree of shrinkage.
- And finally, polymer putties. Undoubted advantages: excellent moisture resistance, do not shrink at all. With the help of polymer putty, high quality of the treated wall surfaces is obtained. The only drawback is the high price.
By purpose, putties can be divided into starting (leveling), decorative (finishing) and universal.
Characteristics of leveling (starting) mixtures: high strength, excellent adhesion, large grain size. Recommended: for leveling walls after plastering. Application thickness: 3 -20 mm.
For a high-quality decorative finish, it is advisable to apply finishing putties to the surface to be treated. With their help, you can get a perfectly smooth, even surface, hiding small flaws. The strength of the finishing putty is less than the starting one, its processing does not cause difficulties. It is applied in a small layer up to 4 mm.
Universal fillers combine the properties of decorative and leveling compounds. They cost more, although in terms of properties they are slightly inferior to the finishing and starting coatings. We recommend using it when processing walls without major flaws.
The modern market offers dry and ready-to-use putties. It is attracted by the low cost of dry putty and the possibility of its long-term storage.
It is convenient to use ready-made putties. You do not have to use a mixer to prepare a homogeneous putty mixture. This saves time and virtually no dust. But ready-made putties are much more expensive than dry ones.
Consider:
Preparatory work
Prepare the walls before applying the gypsum plaster.
- It is necessary to remove the previous coating, clean up greasy stains, remnants of paint and wallpaper, dirt.
- If there are metal elements such as nails, these should also be removed. If for some reason this cannot be done, then the surface must be treated with anti-corrosion compounds. For example, you can just paint.
- Wooden elements that will hide under the plaster must be treated with an antiseptic.
- If there is a fungus, it must be cleaned, and this place should be treated with deep penetration fungicidal compounds.
- Next, it is recommended to gently tap the walls with a hammer. This is necessary in order to find weak unreliable areas. If there are deep cracks and potholes on the wall, then it is better to repair them. You can use the same gypsum plaster, just make the mixture thicker. The rest of the defects will easily disappear during plastering.
Primer
The next important step is priming. Weakly absorbent and smooth surfaces such as concrete must be treated with concrete contact. If the surface of the walls absorbs moisture well, for example, foam concrete, then it is recommended to treat it with a special primer twice with an interval of 4 hours. It can be an acrylic primer with hydrophobic additives. For walls with normal absorbency, deep penetration acrylic or styrene-acrylate primers should be used.
Priming is required. If the walls draw moisture from the solution, it can crack. Therefore, there can be several layers of primer.
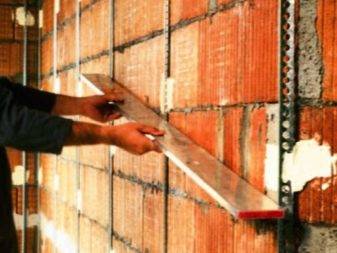
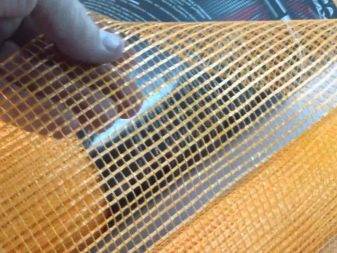
Installation of beacons and installation of the grid
Beacons can be installed to adjust the thickness of the plaster. They are arranged vertically with a step of 10-20 cm less than the size of the rule. The lighthouse should stand 20-25 cm from the corner of the room.
If the layer thickness is planned to be more than 4-5 cm, then it is necessary to install a galvanized reinforcing mesh. Otherwise, the layer may come off under its own weight. The maximum layer of gypsum plaster is 8 cm.
Before installing the mesh, it is necessary to apply the markings in increments of 40 cm. Holes are drilled at these points and dowels are inserted. In these places, the mesh is fastened with an overlap of at least 1.5 cm on stainless steel screws. The mesh can also be planted with construction glue, but without pressing it hard against the wall. If it is necessary to strengthen a door or window opening, then the mesh is attached diagonally. The required area is cut with metal scissors. Installation begins from any upper corner of the room. It should be fixed so that a gap of 3-5 mm remains between the wall and the mesh. This is necessary so that it is located inside the plaster layer.
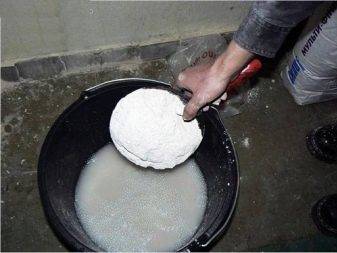
Making a solution
Now you can start preparing the solution. There is always instructions on the package. The dry mixture is diluted with water in a 2: 1 ratio, that is, 2 kg of plaster are taken for 1 liter of water. First, water is poured into the container, then the mixture is poured. You need to mix them using a construction mixer or a special drill attachment. Then leave it for 5 minutes so that the chemical additives begin to work, then mix well again. The result of the application depends on the quality of the batch.
Do not mix a lot of solution at a time. It sets quickly - within 30-40 minutes, therefore 20 minutes are given for application, and another 20 - for leveling. Therefore, it is better to prepare gypsum plaster in small batches. Do not "rejuvenate" the drying solution with water. This leads to a deterioration in the quality characteristics of the mortar and a decrease in the service life of the plaster layer.
Features and characteristics
Gypsum putty
To prepare a working mixture based on gypsum, use:
- gypsum (in some cases, alabaster);
- water-soluble polymers;
- mineral fillers.
Due to the use of gypsum, marble flour and quartz white sand, the mixture is white, in some cases light yellowness is allowed.
Depending on the size of the fractions, the putty is divided into two types:
- Start. Its purpose is to hide small surface defects, remove cracks and chips of the base, therefore, as part of the starting mixture, large fractions of bulk materials are used. It serves as the basis for the final leveling layer.
- Finish. To obtain a flat and smooth surface, only small fractions of bulk materials and special plasticizers are added to the composition of this putty. Application - final finishing. You can glue wallpaper or paint on the finished surface.
Scope of gypsum putty:
- elimination of minor defects (chips, cracks);
- masking the joints of sheet material;
- leveling the bases for subsequent pasting or painting;
- stucco molding on the ceiling;
- decoration of arches, cornices and columns.
Manufacturers most often produce this type of putty in bags of 20-25 kg.For the subsequent dilution of the material with water to the desired consistency, follow the instructions printed on the package. In some cases, it is possible to purchase a ready-made pasty mixture in a plastic container.
When working with gypsum-based solutions, it is necessary to prepare them in small portions, since the mixture dries up within 30-40 minutes. Dry mixtures can be stored for at least 1 year.
Given the hygroscopicity of the base material, the use of this type of putty is possible only in rooms with normal humidity, and they are not suitable for a toilet, bathroom or kitchen. The finished surface "breathes", letting in vapors.
Application of gypsum fillers is possible on the following substrates:
- drywall;
- wood;
- concrete;
- brick.
Polymer putty
To prepare a working mixture based on polymers, the following materials are used:
- as the main component - acrylic, polymer cement or latex;
- fine-grained mineral fillers.
The difference between polymer putty and gypsum putty lies in the chemical method of making dry matter.
The following surfaces can serve as a basis for applying this material:
- drywall;
- concrete;
- plaster;
- plywood and chipboard.
This type of putty is not used for metal surfaces.
Is it possible to apply polymer on gypsum plaster? The answer is affirmative - polymer compositions have excellent adhesion to almost any substrate, therefore they are often used as a finishing layer on an already laid starting layer of another material. In addition, these leveling compounds can be used in rooms with higher humidity levels - this is the essential difference between gypsum and polymer bases.
Polymer materials allow you to get a strong surface with a perfectly white color, which is suitable for both wallpapering and painting.
Polymer compositions are most often sold ready-made. The putty is packed at the factory in plastic containers of various capacities. Such material is completely ready to be applied to the walls. When opening the package in a room with room temperature, the finished mixture does not lose its characteristics within 2-3 days.
For the preparation of putty, dry mixtures and water are used independently. The ratio of water and powder, as well as the rules for preparing the solution, are indicated on the package. Manufacturers pack dry mixes in 20 or 25 kg paper bags.
When choosing what is best for leveling walls, one should take into account the advantages of polymer compositions:
- versatility of use (excluding leveling of metal surfaces);
- better adhesion to any substrates compared to other types of putties;
- immunity to high humidity;
- lack of unpleasant odor;
- polymers allow obtaining surfaces with the highest strength characteristics;
- immunity to temperature surges;
- no shrinkage when gaining strength;
- immunity to the action of chemical compounds;
- the finished solution can be stored for at least 10 hours;
- the mixture contains only environmentally friendly materials;
- does not require special skills when applied, a novice finisher will cope.