Location options
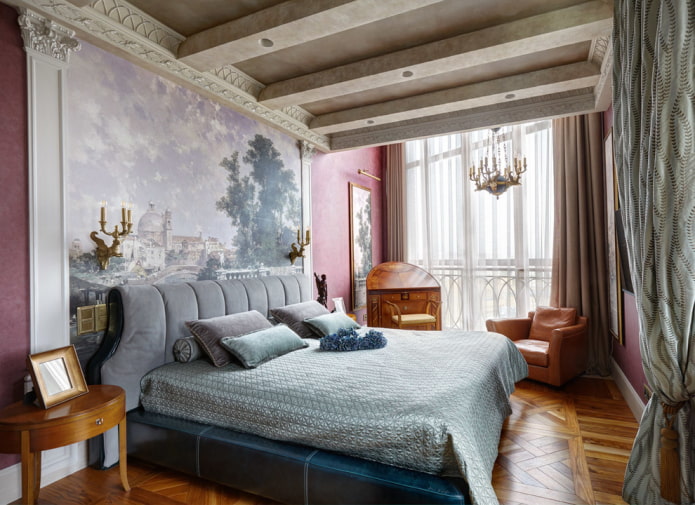
Across
The transverse arrangement of the ceiling beams will visually bring the room closer to the shape of a square, expanding the walls. In a spacious room, you can use a full-fledged timber, complementing the picture with low chandeliers or spotlights. In a compact room, there will be enough boards to support the interior in the desired style.
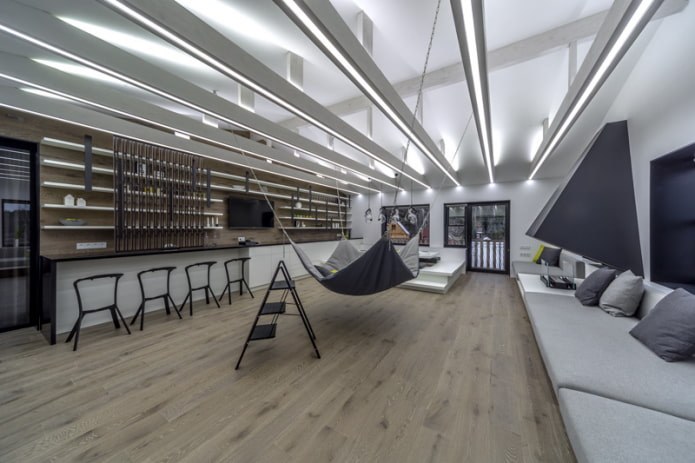
Along
The longitudinal arrangement of the ceiling beams will make the room look longer. By decorating the LED flight panel, you can get the effect of floating in the air.
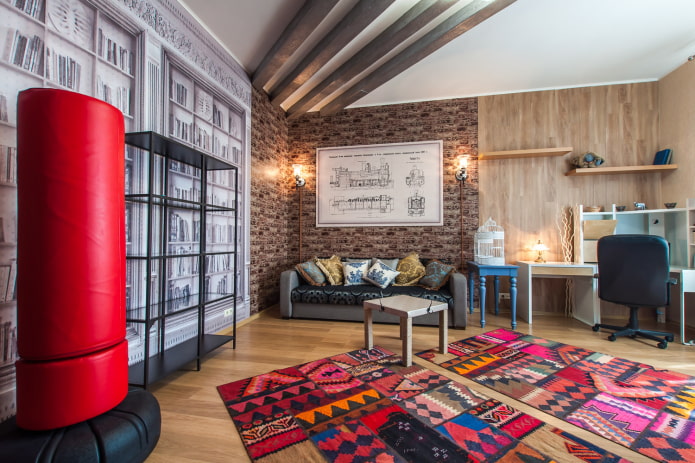
Diagonally
The diagonal arrangement of the ceiling beams will make the room more voluminous. A similar decoration method looks interesting in a modern living room interior. The beams can be located around the entire perimeter of the ceiling, or they can only occupy a part.
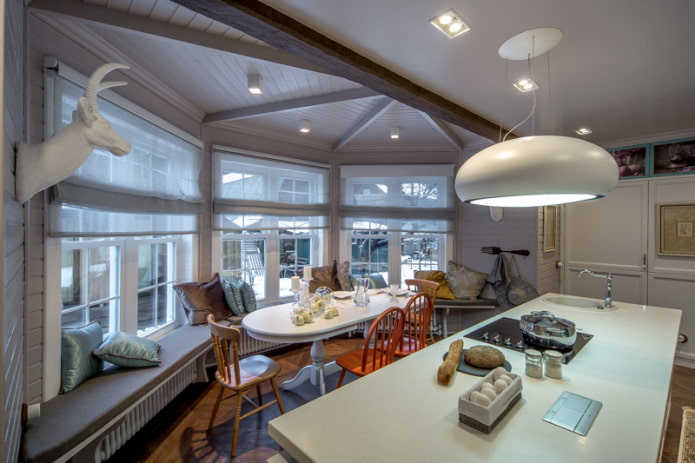
Half ceiling
Ceiling decoration will partially visually divide the room into two zones, while maintaining the area. For example, in the kitchen, this way you can separate the cooking area from the dining area.
Laying cross to cross
Such an arrangement of the ceiling beams will make the space volumetric. To emphasize the relief and unusual arrangement, the color of the beams can be made in contrast to the main color.
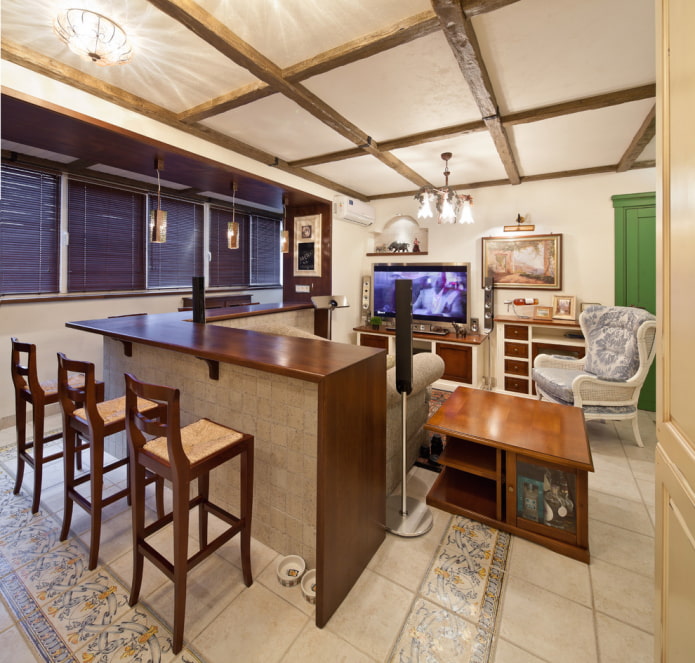
Dividing a room into zones
A great way to zoning space. A ceiling structure will indicate the desired area or divide the room into two areas. For example, in a studio apartment, beams can be located in the cooking area, thereby separating the rest of the space, or in the bedroom, a complex structure will decorate a sleeping place, denoting a sleeping area.
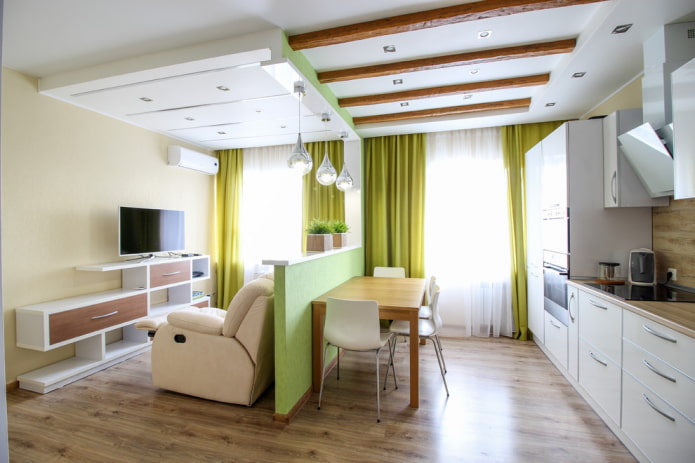
Roof structures
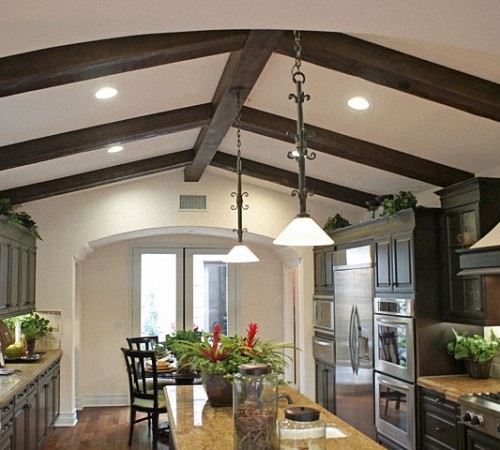
An interesting interior solution would be to erect a structure on the ceiling according to the principle of a roof structure, for example, a "rack" or "truss". It is these structures that are located under the roof of the building, holding it. Such structures are suitable for interior decoration with high sloping ceilings.
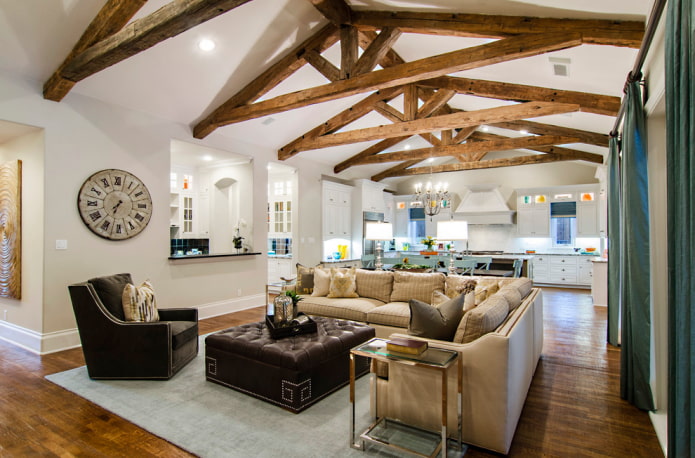
In the photo there is a bright kitchen-living room, the ceiling beams are made according to the principle of a roof structure.
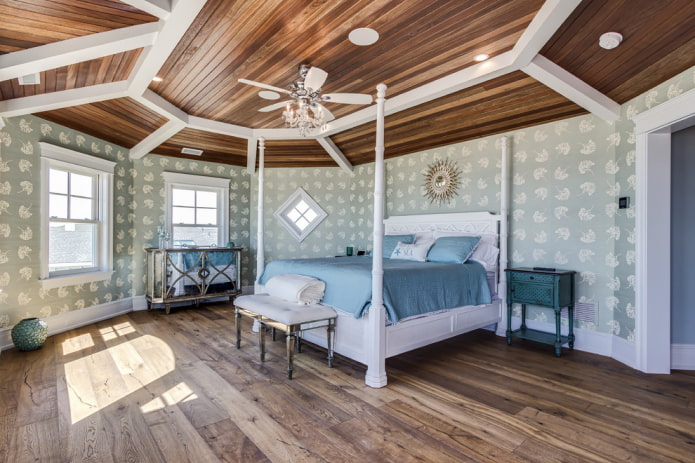
Unusual styling
Location methods can be completely different from beautiful patterns that make up any drawing to complex geometric shapes. Complex ceiling structures will look harmonious in a room with high ceilings.
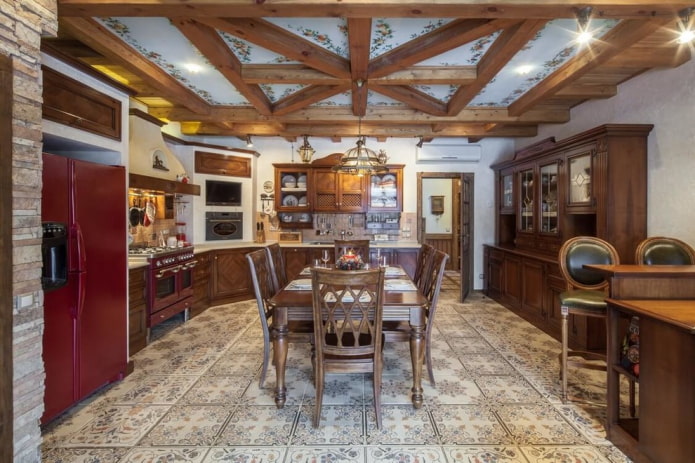
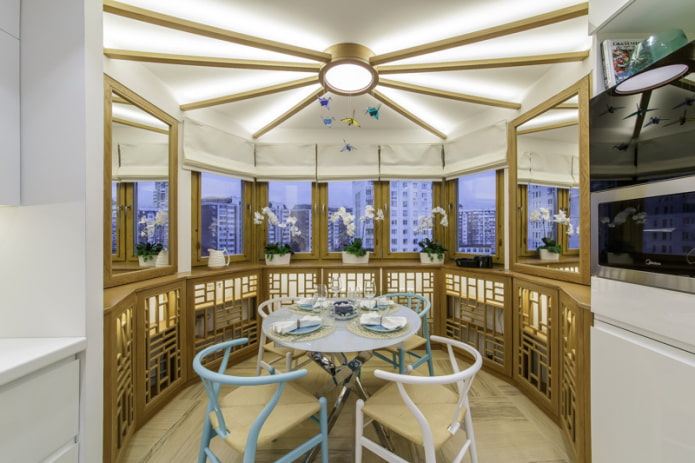
How to attach beams to the ceiling
The peculiarities of the procedure depend on the material from which the false beams are made. Let's take a closer look at each of the options.
How to glue foam beams to a regular ceiling
This is the simplest option for placing false beams in a modern apartment. If you want to decorate a kitchen or a hall quickly, inexpensively and on your own, there is no better option.
Step 1. First, markings are made on the ceiling and on the walls to indicate the places where the false beams will be glued. Places of the sticker must be primed for better adhesion.
Step 2. Then the beam is coated with liquid nails and glued to the required place. Foam products are practically weightless, and liquid nails set literally instantly.
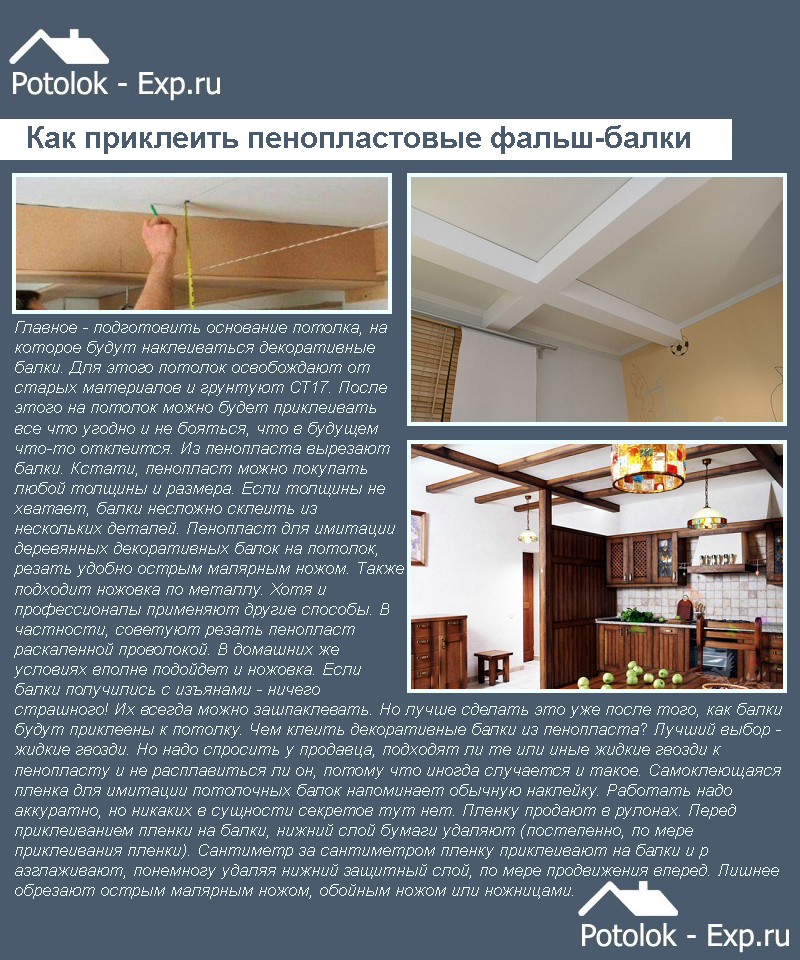
How to glue foam beams
Step 3. If the room is narrow, you can stick 2 beams along the long walls of the room, and simply place the cross beams perpendicular to them. Such a simple ceiling will help hide the irregularities of an ordinary concrete ceiling and will look very advantageous.
How to quickly attach wood beams to a wood or concrete ceiling
This is also not very difficult and not expensive to do.
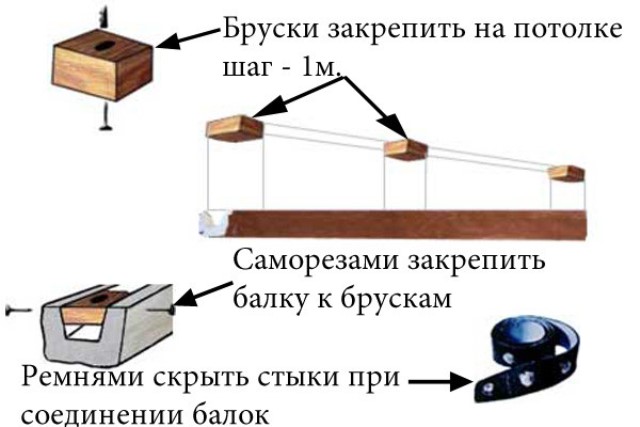
Fastening wooden false beams to the ceiling
Step 1. Draw lines on the ceiling for placement.
Step 2.We drill holes in the timber with a 12 mm drill with a depth of no more than 0.5 centimeters every 30 cm.
Step 3. In the same holes we drill 8 mm holes, into which we drive the screws by 120 mm.
Step 4. We apply the timber, mark the places for the holes on the ceiling.
Step 5. Drill 8 mm holes on the ceiling in the marked places with a puncher.
Step 6. We drive chopiki into them.
Step 7. We fasten the timber.
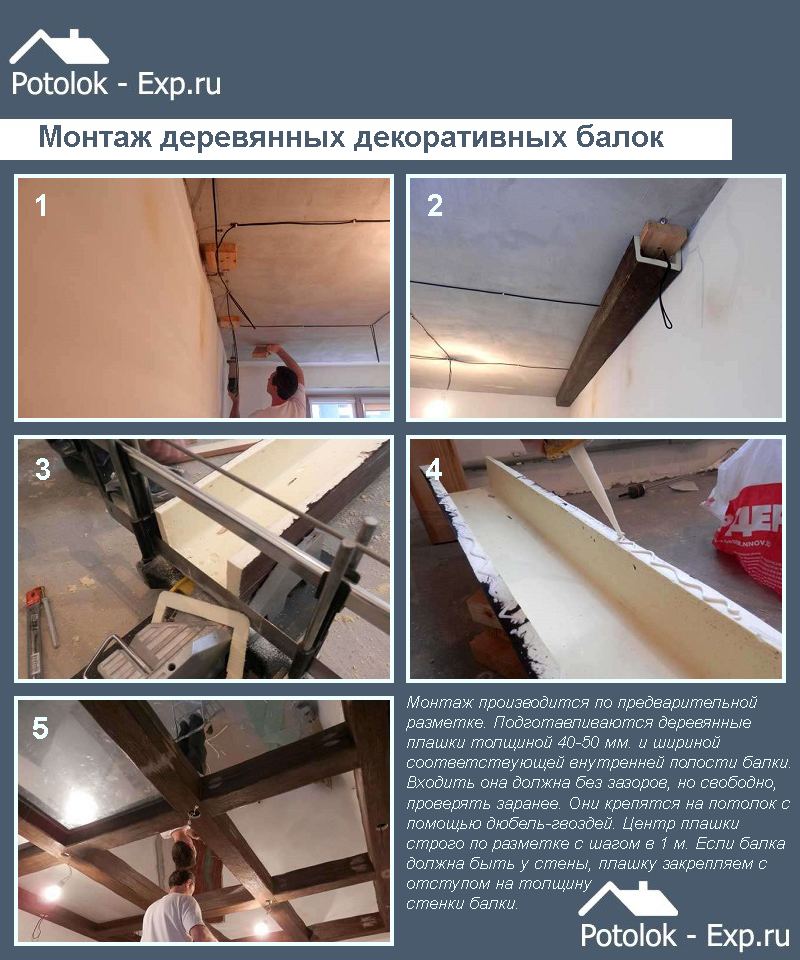
Installation of decorative wooden beams
Since the screw cap goes in a flush, we cover these places with putty on wood. After drying, we tint with a stain, then varnish. You can cover the screw caps with wooden plugs or special decorative overlays with imitation of forged nails under the caps. You can attach nails to regular dowels - this is an even faster option.
If you plan to cross-distribute the beams, then unevenness may occur at the joints. The design of these nodes depends on the exact style of the room. If this is a country, for example, then these places can be covered with leather decorative belts or a large twine glued in several rows.
Installation of polyurethane decorative beams on beams
This is a professional way of editing.

Decorative beam B1 made of polyurethane (wenge, cherry, oak, olive, walnut, light oak)
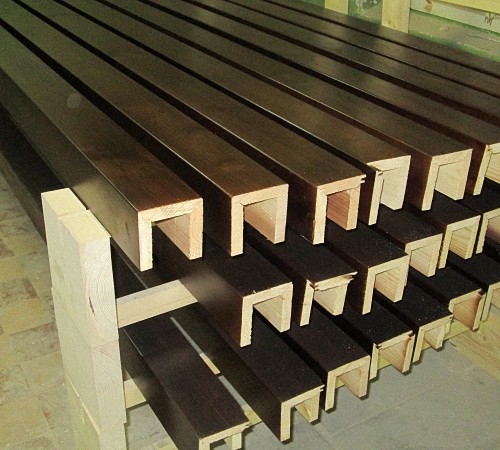
Step 1. For polyurethane false beams, wedge-beams are made of wood, which fully correspond to the internal cavity of the beam.
Step 2. The marking of the ceiling is made: lines are drawn along which the beams will be attached.
Step 3. Wedge beams are installed along the line after 1 meter on self-tapping screws or dowels.
Step 4. When installing the false beam, polyurethane adhesive is applied to the ceiling. This is not necessary for fixing, but for a tighter fit to the ceiling, so that there are no gaps.
Step 5. The beam is tightly put on the beams and screwed through the sides with screws.
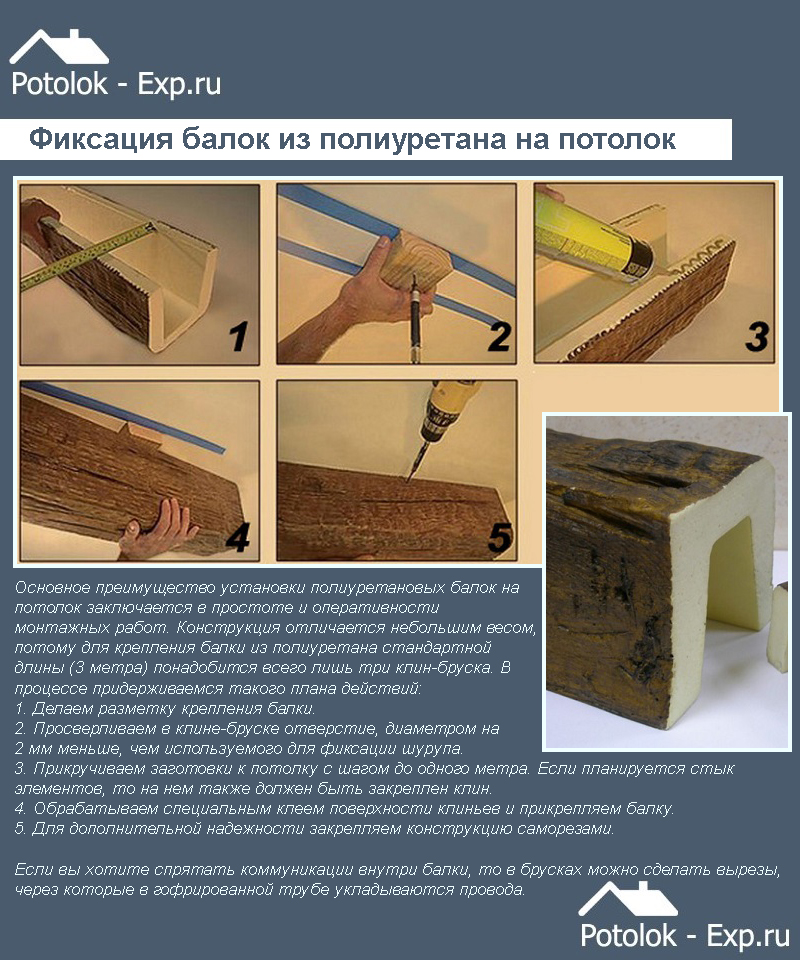
Fixing polyurethane beams to the ceiling
Step 6. The screws that fasten the false beam to the timber and the joining points of the beams are covered with decorative leather belts with imitation of rivets.
Features of the device of beams on a stretch ceiling
To make a stretch ceiling and decorate it with decorative tanks, you should install embedded parts similar to those installed for hanging chandeliers. A mortgage for a decorative false beam is just a wooden block of the required thickness. It is attached to the main ceiling, and the stretch ceiling is stretched in such a way that it passes, touching the lower plane of the bar. Then false beams are attached to the timber through the ceiling.
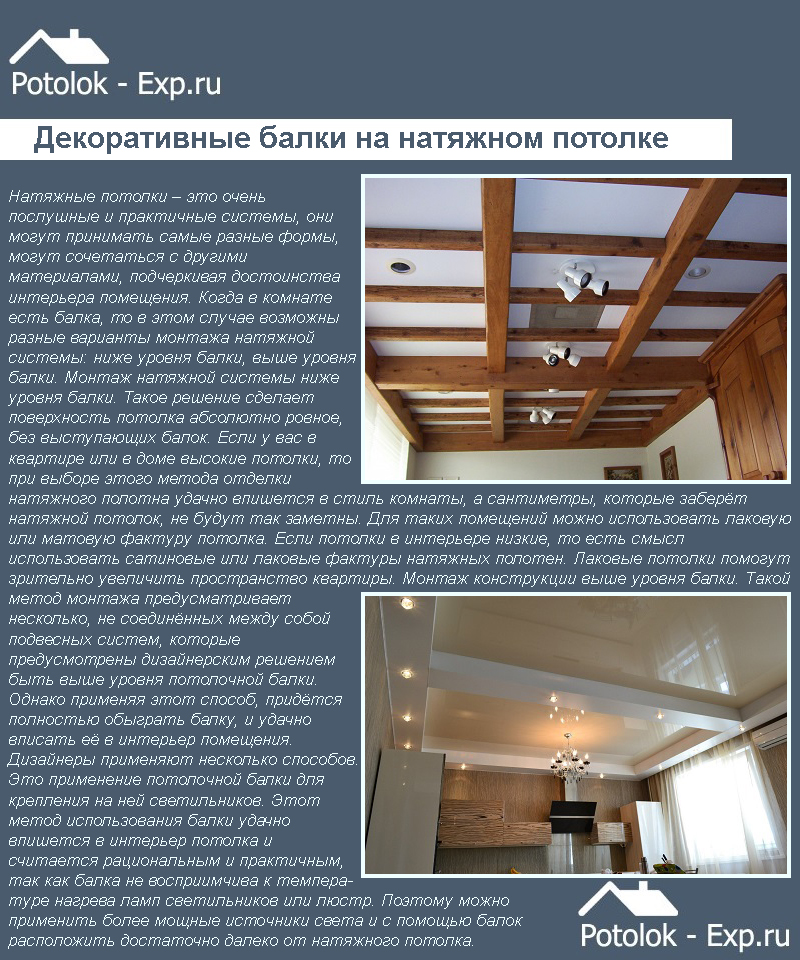
Decorative beams on a stretch ceiling
If the stretch ceiling has been hanging for a long time, but you want to somehow diversify the interior without dismantling the canvas, you can use external consoles with fasteners to the wall or internal bars screwed to the walls. Beams will be attached to them with self-tapping screws.
Features of the device of beams on a plasterboard ceiling
Since the plasterboard ceiling is suspended, you can't just attach the beams to it. We'll have to remember / tap the places where the frame profiles go, and attach the beams to them. You can fix it in any convenient way: with a long anchor through a beam, gypsum board and profile or on a bar attached with a self-tapping screw to the gypsum board and profile. A self-tapping screw screwed exclusively onto drywall will not hold the beam for a long time.

Installation of beams on a suspended ceiling
Design examples
Matching beams can be found for almost any interior
At the same time, it is very important that they fit into the general layout of the room, go well with furniture and decoration, and do not look too massive or too miniature in relation to the height of the ceiling. The peculiarity of your living space is also of great importance - beams in an apartment or in a private house can look different
In a private house
In the interior of a private house, false beams often look very interesting.With their help, you can beat a triangular roof and create an unusual design using parallel beams. Such decor is usually done in country or Provence style interiors. In the first case, you should limit yourself to natural shades, and in the second, try choosing beams in pastel colors. Such decor will give the interior a complete look.
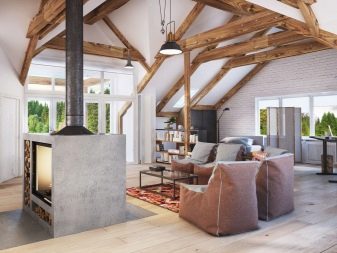
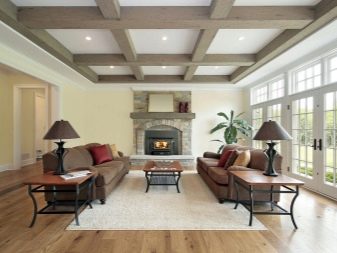
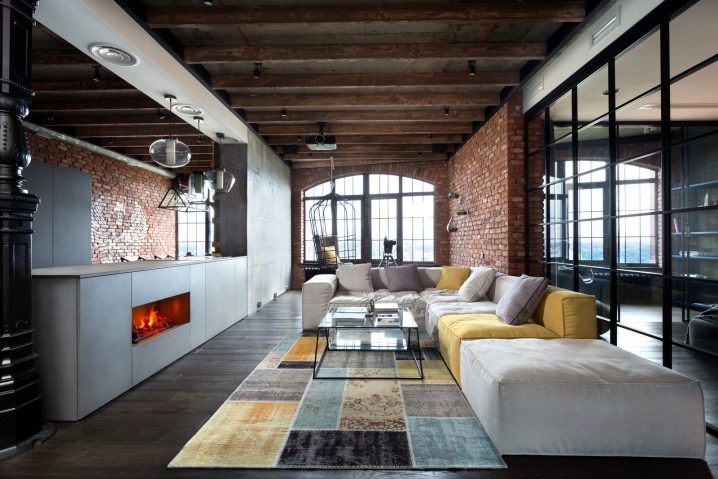
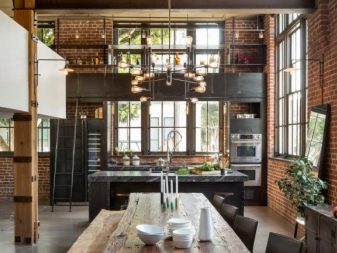
Often, in modern houses, a minimum of partitions are made between rooms. If you have a lot of free space in your home, you can try creating a loft-style interior. The arrangement of the false beams can be simple - parallel or crosswise. You can decorate a house in a similar way with your own hands. Most often, to match the loft, massive and fairly simple beams made of light wood species are selected, such a finish will be successfully combined with any furniture.
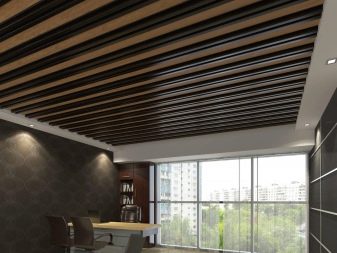
Plastic or metal false beams can look very interesting in a private house - such options are most often chosen by lovers of a modern interior. Even if you value the environmental friendliness of materials and the beauty of natural wood, the combination of a wide variety of surfaces and materials in the interior is in fashion now. Metal in combination with wood can look very unusual, this will create a truly stylish and sophisticated interior. Plastic, on the other hand, allows you to arrange decorative elements for the ceiling of any interesting shape. You can choose a sophisticated design product that will successfully decorate your home.
In the apartment
In an apartment, false beams can also be used to decorate almost any room. This will allow you to make an additional accent on the ceiling and decorate the room in an interesting way. Often in spacious studio apartments, artificial beams are used to visually delimit the room. For example, using one or two beams, you can separate the kitchen from the bedroom without having to install arches or walls. This is also true for modern combined rooms: beams will become a godsend for design projects for a kitchen-living room or living room-nursery.
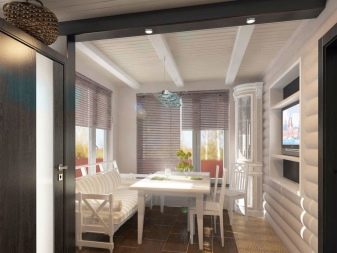
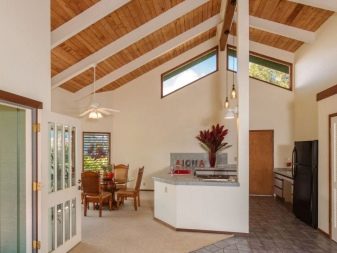
Very often in apartments, beams are installed in the living room. Usually these are wooden elements or wood imitation: such decor will allow you to feel like a part of nature, even if you live in the center of a big city. It is not at all necessary to combine wood beams with a country-style interior, as they are almost universal and will suit any type of interior. Only for classics is it better to choose smooth plastic beams. Experimental lovers can even consider bright plastic options or shiny metal products.
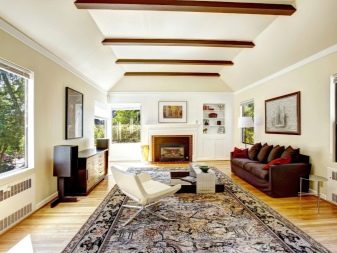
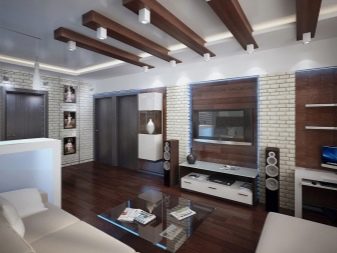
In bedrooms, beams are often made as invisible as possible, so a variety of light pastel colors are very popular. Wood painted white may look good. Such beams will create an atmosphere of calmness and comfort in the room. Plastic white beams of a wide variety of shapes are also widely used for bedrooms. This is especially true if you prefer laconic design solutions.
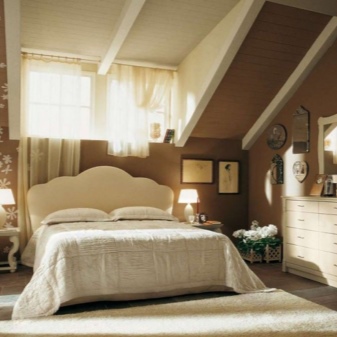

Decorative beams. What is it and what are they for
For modern design, special, lightweight polyurethane decorative beams have been developed, which in appearance do not differ from wood, but are hollow on the inside. Such design elements serve not only as decoration, but also as a device for hiding various defects on the ceiling and walls, and also serve as a box for electrical wiring and even plumbing communications.
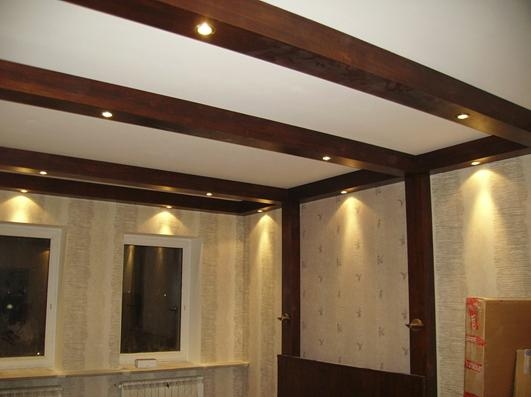
False beam ceiling conceals wiring
What can be done with decorative beams
Polyurethane raised beam. Classic
We are talking about decorative design elements - beams that do not bear functional responsibility and, in fact, are fake, because a beam is a horizontal beam that carries the mass of the ceiling or serves for the rigidity of the frame (see Decor do it yourself ceiling - finishing methods).
Polyurethane raised beam. Modern
Now the Countri style (Country) is in vogue and entering a public institution such as a cafe, restaurant or bar, you can see the decoration of the room with false beams, with lighting fixtures built into them. On the one hand it is beautiful, on the other hand it is convenient. The range of products includes products of different colors, repeating the structure of oak, beech, bamboo, spruce and other tree species.
Beam console
With the help of such decorative elements, the room is given a romantic touch of antiquity and, although the style is called Country, this does not mean at all that the design should have a touch of Western culture.
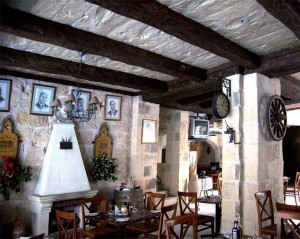
Countri style room
- Nowadays, false beams for the ceiling can imitate both rural life and an old castle, and can even create the atmosphere of a tavern.
- To design decorative beams, they also use a kind of belts that imitate a forged strip with rivets. Such decoration will give the room a feeling of good quality and comfort (see Decorative ceiling beams and their use in the interior).
- As with any construction work, the installation of polyurethane false beams begins with marking the ceiling. That is, you need to mark the places where the beams will be located in order to install the wedges to fix them.
Installation of decorative polyurethane beams
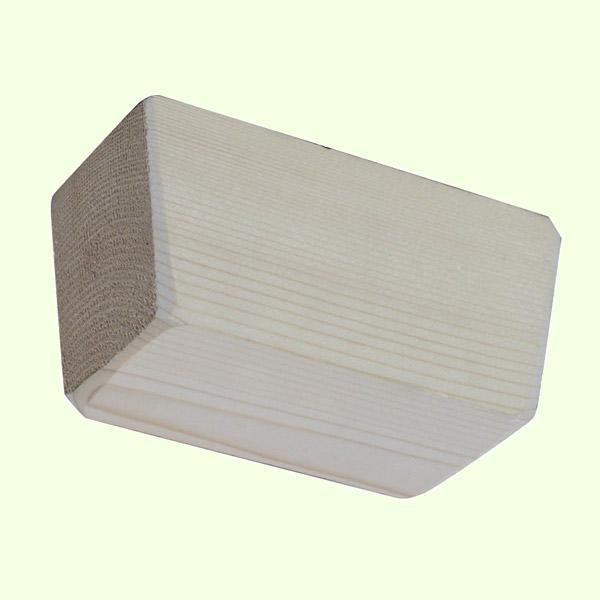
Wedge beam for fixing false beams
Wedge-beam for polyurethane false beams is made of wood and must exactly fit the cavity of the device. The cavity itself has the shape of a trapezoid, therefore it is called a wedge (see Decorating the ceiling using modern materials). For their fastening, dowels and screws are used, with which you can fix the element through the middle, or from the longitudinal side, screwing in the screws obliquely.
Distance between wedge-beams - 1 meter
- Wedges for fastening a polyurethane beam are installed at a distance of one meter and when marking it, it is advisable to make control lines on the side of the future beam so that there is a reference point on the beams. When installing the beam, polyurethane adhesive must be applied to the surface of the walls. This measure will serve not so much for fixing as for a tighter fit, so that there are no gaps after assembly.
- The false beam is put on the wedges and screwed to them with self-tapping screws. Right now, you will need the marks made on the side of the wedges, and you can close the screws with a decorative belt or bracket. If the beam turns out to be short, then join it with the next one and again cover the joining place with decorative elements.
After assembling the false beams, you can install consoles, which also have no functional purpose, but only serve as a decorative decoration, creating an imitation of supports.
I would like to pay special attention to lighting, because false ceiling beams are empty inside, which allows you to hide the wiring and mount recessed lamps. Although polyurethane belongs to the category of CM (structural materials), it has a temperature limit that operates in the range from -60⁰C to + 80⁰C
This suggests that the lighting devices that will be mounted in them should not have more than 50W, so as not to create a critical temperature for the crystal lattice of the material.
The distribution of electrical wires in the cavity of the false beams made of polyurethane is made in a protective sheath of the cable channel in the form of a corrugated hose. But to mount the wire, you need holes in the wedge beams, which you need to make in advance.
The thinnest corrugated cable channel is 10 mm, so the hole in the wedge beam must be at least 12 mm. For the installation of recessed luminaires, the holes can be cut with a knife along the diameter of the bracket for the holder.
Calculation and installation
False beams can be used to decorate ceilings of all types - standard painted, as well as stretch and plasterboard. They allow you to effectively zone the space or a false window on the ceiling.PPU-beams successfully imitate window openings; in the course of work, stained glass or mirror panels are fixed between them. In Europe, the technique is popular when the beams from the ceiling area go over to the wall area.

If the room requires a visual expansion of the space, then when placing the beams, it is important to take into account the following factors:
- if you want the room to look wider, it is better to place the beams on the short side;
- if you need to visually increase the length, it is better to place PPU beams along the length of the ceiling;
- cross-shaped fastening will add volume to the general space;
- the use of one or two beams allows you to separate one work area, for example, a bar counter;
- an important role is played by the frequency of placement: for example, if the ceilings are too high, then the close fastening of the beams to each other allows you to slightly reduce the height;
- on the ceiling of medium and high height, beams are traditionally fixed at a considerable distance from each other, in addition, installation with a herringbone is allowed;
- mansards without a ceiling look especially impressive, when the beams go through the columns and are fixed with their ends in the walls, thus creating the effect of a chalet or hut.
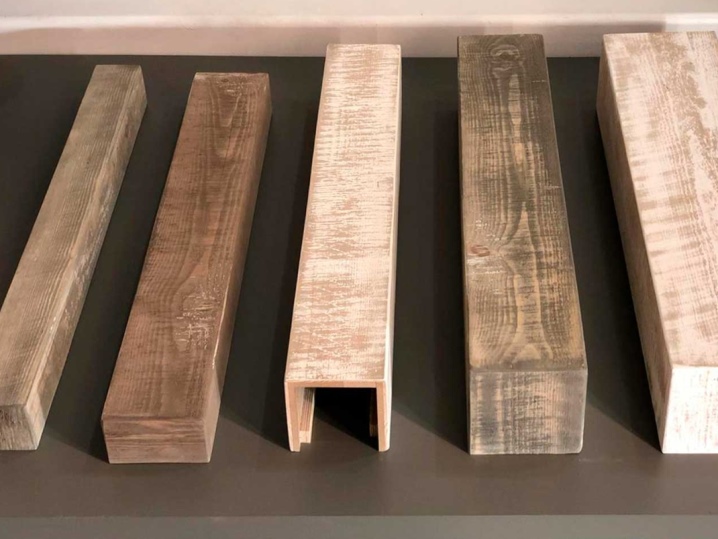
Securing beams includes several stages of work.
- First of all, for the installation of PPU-beams, it is necessary to prepare fastening beams made of wood so that their dimensions and shape exactly correspond to the dimensions of the intra-beam cavity.
- Next, you should mark the ceiling, that is, draw the lines along which they will be fixed.
- At the next stage, the wedge-beams are fixed on self-tapping screws.
- When installing false beams on the ceiling, smear a little adhesive solution for PPU products. Keep in mind that this is not necessary for fixing the false beams, but for their more firm adhesion to the ceiling covering, so that even small gaps practically do not remain.
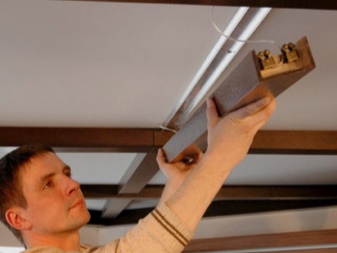
- The beam is pushed onto the bars and screwed tightly with hardware on the sides. The screws that attach the false beam to the timber, as well as the joining areas of the beams, are closed with leather overlays that imitate rivets.
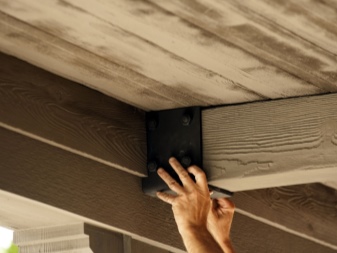
- In order to fix the beams on the stretch ceiling, it is necessary to mount special embedded parts, they are similar to those used for hanging lamps. The embedment is a simple bar of optimal thickness. It is fixed to the base ceiling, and then the stretch fabric is stretched so that it is slightly in contact with the lower plane of the beam. The false beam is attached to a wooden beam through the ceiling.

The ceiling made of gypsum plasterboard belongs to suspended ones, so it just won't be possible to attach false beams to it. You will have to tap those areas where the frame logs pass and fix the beams directly to them. This can be done with an elongated anchor or on a bar attached with self-tapping screws to a plasterboard profile.
Approval procedure
How to legitimize such a connection of premises? Actually, there are two regulatory bodies - the BTI and the Housing Inspectorate.
First of all, you need to contact the BTI to call an engineer. He will conduct an inspection and the necessary measurements, on the basis of which a new technical passport will be issued.
Next, you should contact the research institute that designed your house or a licensed design office to receive a project. The price will vary depending on the complexity.
Sample application for redevelopment of an apartment
The BTI will tell you what other documents are needed specifically in your case. Often this is permission from the Ministry of Emergency Situations, SES, the Committee for the Protection and Protection of Historical Monuments. They are always obliged to provide heat calculation. For a cadastral extract, contact Rosreestr.
After that, all documents are submitted to the Housing Inspectorate. The decision usually takes a standard two weeks. You will then be given permission or denial. Which, however, can be challenged in court.
What changes can be made without permission? No need to coordinate:
- replacing the old floor with a new one, for example, laminate;
- transfer the gas stove, sinks, sockets without changing the utilities themselves;
- replacement of window and door blocks.
The answers to this question are given by the Housing Code of the Russian Federation in Article 26 and Article 25.
Current legislation makes a distinction between redevelopment and redevelopment.
The first means a change in the configuration of the living space - and this is the transfer and demolition of walls, doorways, built-in wardrobes, mezzanines. Actually, this is what will be reflected in the BTI plan.
Conversion or conversion is all sorts of changes involving engineering systems. And it will also be reflected in the technical plan of the BTI.
That is, both must be previously agreed upon.
The location of the beams in the interior
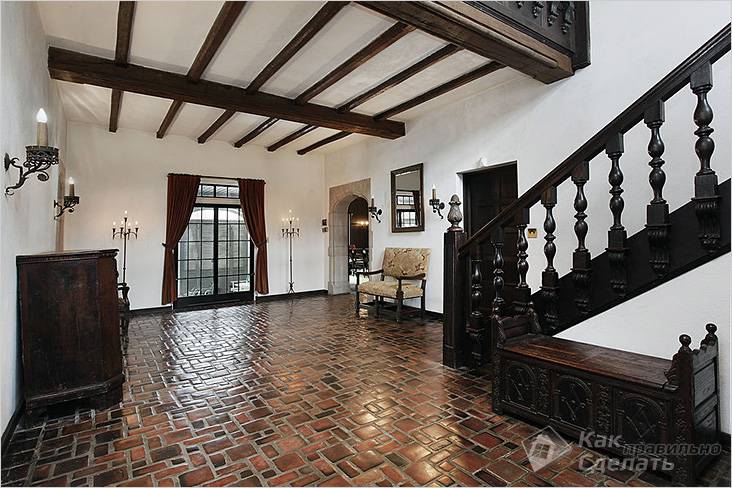 Successful arrangement of beams in the interior
With the help of beams, you can visually change the space of the room. In order to visually make the room wider, the beams are placed along the width of the ceiling. And if the beams are placed along a wider wall, then the room will become visually longer.
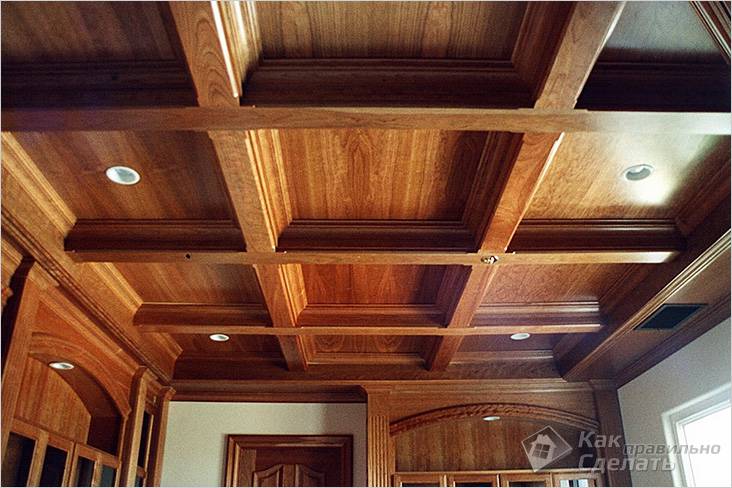 Coffered ceiling
The imitation of such a ceiling is achieved by arranging the beams in a lattice or crosswise. This design makes the ceiling volumetric. You can decorate with beams only part of the ceiling in the form of a "lattice", "herringbone" and other shapes. Niches on plasterboard ceilings are decorated with beams.
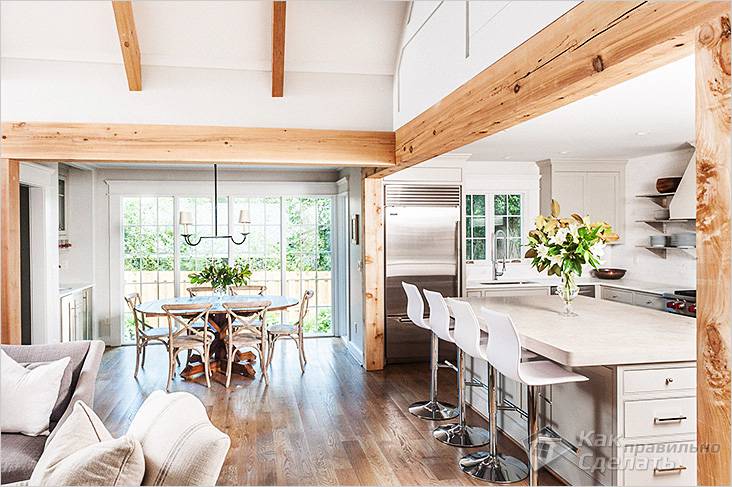 Example of zoning with a beam
One large beam can be used to divide the room into zones. To do this, it is located on the border of the zones, for example, above the bar counter or above the dining table. This dividing beam can be equipped with luminaires.
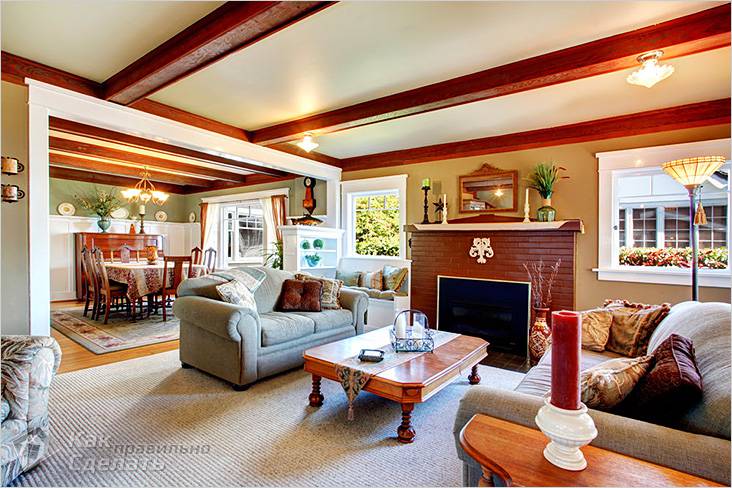 Low ceiling room
Low ceilings can be played up as follows: the ceiling beam goes over to the wall and is connected not with the beam, but with a thin strip of the color corresponding to the beam. In this way, you can visually make the ceiling higher.
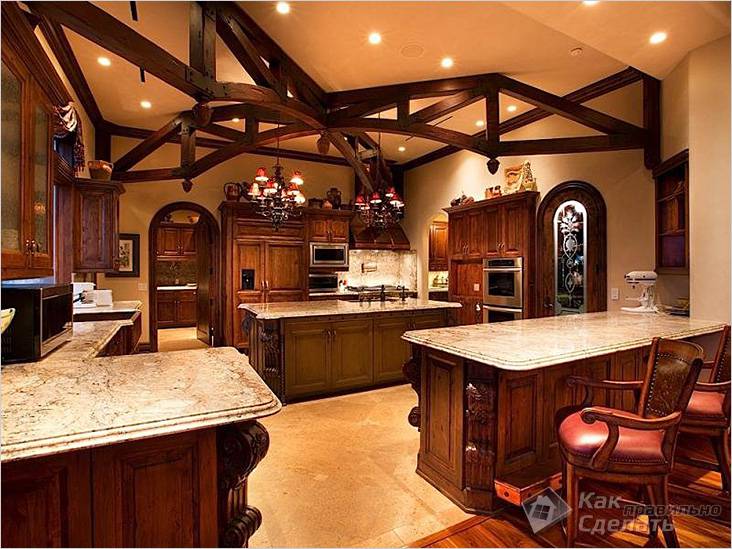 Beams in a room with a high ceiling
A ceiling that is too high can be corrected by lowering the beams and securing them to opposite walls. This method will allow you to streamline a large space.
False beams made of polyurethane - installation features
The installation of polyurethane false beams begins with the production of markings, the surface to which they will be attached. It is necessary to mark on it the wedges that ensure the fixation of the beams.
For fastening the beams, wedges of the bars are used. To make them, a tree is required that exactly copies the cavity of the beam. This cavity has a trapezoidal cavity and is similar to the shape of a bar. To fix it, dowels and screws are required. They fix the wedge beam along the central and lateral parts.
The installation of the wedges is carried out at intervals of one meter, therefore, when carrying out the marking, draw not only the installation locations of the beams, but also the trajectory of the installation of the beam.
In the process of installing the beam on the surface of the wall or ceiling, you must first apply an adhesive for working with polyurethane materials. This procedure will provide not so much fixation, but the absence of gaps between the beam and the wall.
Next, the false beams are installed on the wedges and fastened with self-tapping screws. At this point, you will need to mark the side of the wedges. A decorative bracket or strap will help close the fixing points of the beam with the bar. If necessary, in this way, several beams are assembled into one hinged structure.
When the false beams are assembled, proceed with the installation of the consoles, these elements are optional and serve as a decorative function and simulate supports.
Pay attention to having the right lighting, as the polyurethane beams are empty inside and will require wiring and recessed fixtures. As mentioned earlier, polyurethane is a fireproof material, although it has a certain temperature regime from -55 to +75 degrees
Therefore, the power of the lamps that are installed in a polyurethane decorative beam should not exceed 0.5 kW, so as not to provoke melting and crystallization of the material.
When installing electrical wiring inside beams, it is recommended to use a protective sheath such as a corrugated hose. Please note that if it is necessary to install wires or other communications, holes are pre-drilled in the wedge-beams.
The diameter of the thinnest corrugated channel cable is one centimeter, so the minimum hole in the wedge bar was 1.2-1.5 cm. To install the fixtures, the holes are cut with a knife, in relation to the diameter of the cantilever cartridge.
To carry out the parallel connection of point-type luminaires, special loops are made, it is possible to construct them in combination with a corrugated hose. When cutting the loop, the excess sections of the corrugation are cut off.
Decorative beams and interior styles
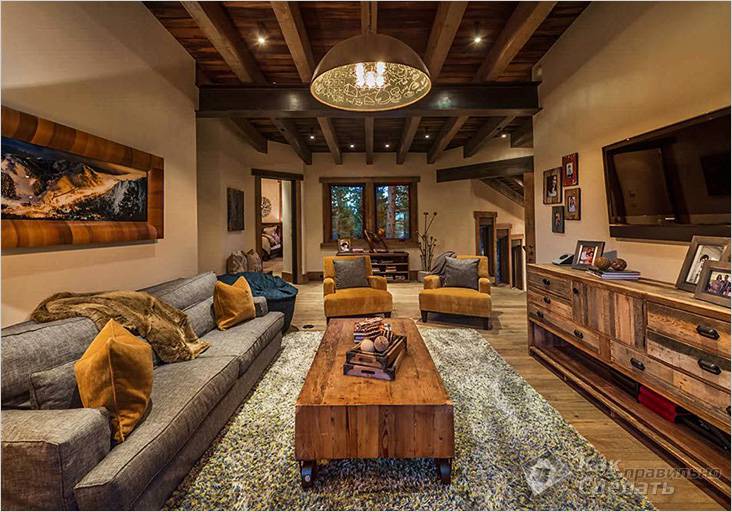 Dark ceiling beams in the living room
Ceiling beams in the interior are suitable for almost any style - from strict classics to modern high-tech. Moreover, the ethnic style involves the use of decorative beams.
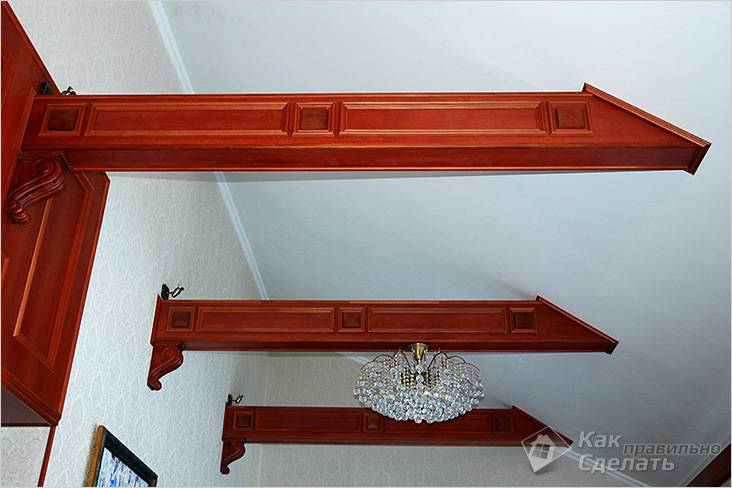 Lacquered beams
The classic interior looks very worthy with smooth lacquered beams - white or dark. And in a modern interior, which is characterized by bold solutions and creativity, smooth beams will look very impressive not only in white, black or gray, but also in bright colors, for example, red, blue or pink.
Lovers of rural style should use beams with an imitation of old cracked wood. At the same time, the shades of the beams can vary from the lightest to very dark, be contrasting with respect to the interior and not be combined with anything. For this purpose, it is better to acquire beams with a rough texture.
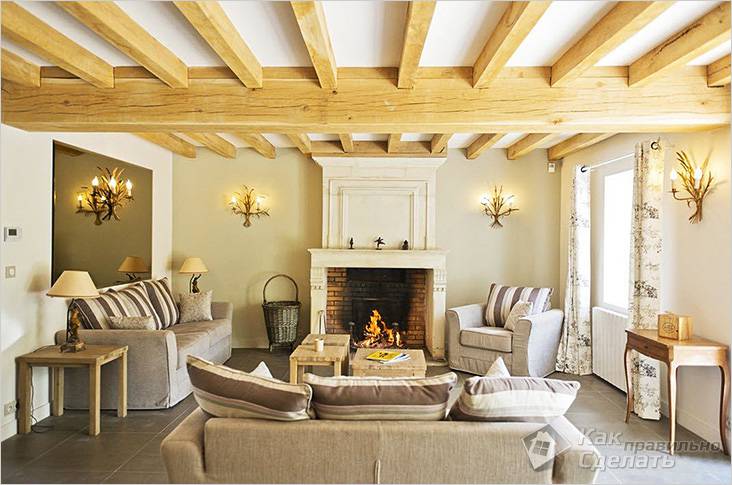 Living room in French country style
The French country style or Provence is interesting for the use of graceful and neat beams, preferably light, as if bleached shades.
Decorative plasterboard beams
This is not just a spectacular decoration, you can hide pipes, ventilation, wires or install spotlights inside. GKL false beams are often used for zoning, for example, to separate the kitchen from the living room.
Material features
Plasterboard sheets are stronger than polystyrene. In addition to the usual gypsum board, fire-resistant, water-resistant and fire-resistant types of material are produced.
Slabs are lighter than wood, but more fragile (damaged by falling or impact). GKL is easily cut into pieces with a sharp knife. The surface is painted, decorative plaster and other similar finishing materials can be applied.
Sometimes a plasterboard false beam is used as a rough design. From above it is sheathed with laminate, parquet board or other available decorative materials.
Manufacturing technology
A plasterboard false beam is made according to the principle of a box. The frame is assembled from a metal profile (less often - from wooden slats), and from above is sheathed with a thin CHL (6.5 mm). This technology is used to create a beam from scratch or to refine an existing supporting structure, for example, if it is uneven.
In addition to drywall sheets, you will need:
- aluminum profile;
- self-tapping screws;
- screwdriver;
- laser level or chopping cord;
- construction knife.
To make a plasterboard beam, you can first assemble a frame from profiles on the ceiling, connecting them with transverse posts and jumpers, and then sheathe the gypsum board. But there is an easier way. Two U-shaped guides are screwed to the ceiling parallel to each other. Strips are cut from drywall with a large margin in width. It will be needed to compensate for the differences in height of the rough ceiling.
GKL is screwed to one of the profiles from the outside. On the other hand, set the level to the desired beam height. At this mark, the guide is screwed.The sheet below is cut flush with the edge. The level can be replaced with a chopping line.
On the other hand, they do the same. The lower guides are held only on drywall, they need to be strengthened. To do this, make transverse jumpers. The profile is cut to the internal size and mounted across, fixing it to the ceiling through suspensions. The edges are screwed to the guides. Sewn up another strip of gypsum board from below, covering the structure.
This method is shown in detail in the video. We recommend that you look if any points remain unclear.
Finishing
Plasterboard finishing is carried out in several stages. Take breaks between them to wait until it dries completely. First, the seams and caps of the screws are covered with putty. The joints and outer corners are additionally reinforced with a paint net.
After that, level the surface again. When applied in a thick layer, the false beam will be covered with cracks. And if you do it in two stages, the imperfections of the lower layer will even out when the upper one is applied. The finish coat is thin and will not crack. After that, the beam is primed. Then they are painted in 2-3 stages.
In addition to painting, the surface of the plasterboard box can be finished with decorative plaster, pasted over with wallpaper or self-adhesive film, as well as sheathed with laminate or parquet board.
Ceiling mount features
When using this material, the assembly takes place during the assembly process. The fixing option depends on the type of overlap.
The guides are attached to the concrete slab as follows:
- First, holes are drilled in the profile.
- Apply to the ceiling and make marks.
- Drill in these places with a perforator and hammer in plastic dowels.
- Once again, attach the guides and tighten the screws.
Self-tapping screws are suitable for fastening to a tree. In both cases, the length of the fastener is selected in such a way that it fits securely into the ceiling. In most cases, universal self-tapping screws 5x50 are suitable.
Application in the interior
Since for hundreds of years in various countries, ceiling beams have been widely used in building structures, false beams are actively used in many styles. For each style, its own kind of beams is suitable. For example, decor with wooden products is used in the following styles:
- One of the more popular styles is Chalet, which has its origins in the French Alps. It is characterized by the use of wood-colored products.
- Another common style is Provence, which also appeared in France. Beams are used in blue, beige, white, and in some cases woody.
- If you want to give the room a rustic distinctive style, choose Country. Products used in natural wood color.
- In the northern countries, the Scandinavian style arose, which is characterized by false beams of light colors.
- The Mediterranean style features light colored ceilings and dark wood beams.
The styles listed above are historical. But false beams are actively used in various modern ceiling designs.
In which design styles are false beams provided
The interiors of the house are tied to a certain style. Only a careful selection of color, decorative solutions and accessories will allow you to combine all the elements and give the house coziness, comfort and individuality. False beams fit perfectly into the following styles:
- Provence. The softness of light shades will come in handy, so false beams are often made of clarified wood, painted over and whitened in cream, blue tones. The kitchen looks perfect, where garlands of flowers, bunches of onions, garlic, and bunches of spices are hung on the beam elements.
- It is impossible to imagine a Swiss chalet without such a decor. But if in old alpine houses, beams are a supporting element, then in our latitudes it can be a decor that also has a functional purpose. For example, beams in the attic, attic living space.Are there protruding floors? So much the better, the base of the roof needs to be insulated and decorated with high quality.
- Japanese style. Wooden ceiling beams, contrasting in color with the rest of the decor, fit perfectly into the minimalism of the decor. Lightweight structures should only be wide and strong enough, moreover, the abundance of decoration of the lamellas is not allowed, this is not accepted here.
- Loft. No longer new, but surprisingly diverse style, which is loved for its simplicity and quality. Loft - housing in which everything should be "in sight": beams, floor slabs, wall panel material, communications. Such naturalness is inexpensive, because initially industrial premises were turned into lofts. All unnecessary was removed, garbage was taken out and housing "for the poor" is ready.
- Classic interiors can also be complemented by ceiling décor elements. But it should be either natural materials - solid wood, or high-quality imitation. The shade of the decor should match the basic tone of the furnishings or be the same color as the floors. The latter option looks especially advantageous against the background of white wall panels. Also, the solution with the same color of floors and ceiling beams fits into retro, country styles.
- The decor of the premises in the direction of hi-tech, modern also allows the use of fake timber on the ceiling. But you will have to carefully consider accessories, upholstery and furnishings - ceiling decorations do not allow excesses, it is easier to do with minimalism.
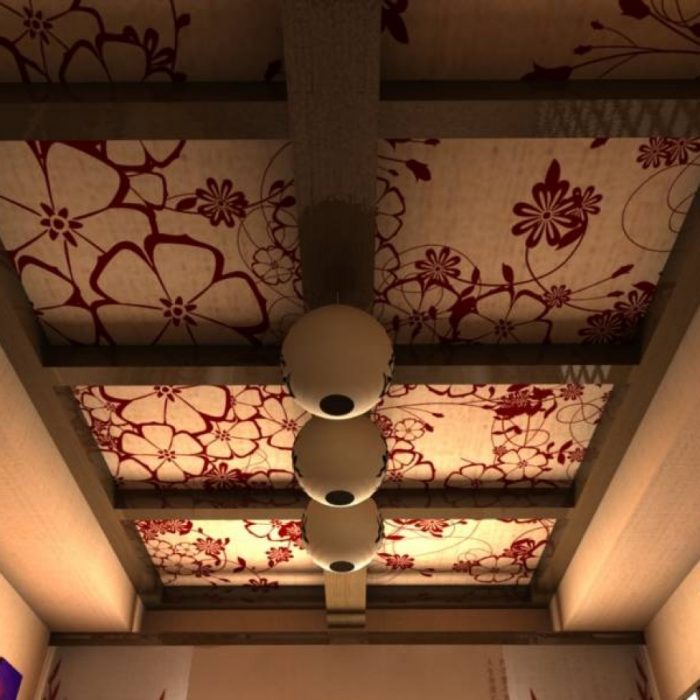
It is much easier to invest finances in renovating the ceiling space, in extreme cases, to sew up irregularities between the elements with sheets of gypsum fiber board, fiberboard, tighten with a cloth or choose some other option for cladding. By the way, woven ceilings are very sophisticated. If you add gilding to the upholstery, you get a Victorian style, and a small floral pattern, soft pastel colors are appropriate in a bedroom, a kitchen made in the direction of Provence, Country, Mediterranean or Scandinavian style.
Variants and layouts
How to arrange the false ceiling beams is up to the owner himself. Today they are attached to any base, including tension, plasterboard structures. Wooden slats are used to create imitation of window covers, between which paintings, mosaics, frescoes, mirrors are located. The transition of the beams to the wall will help to zone the space of the studio, loft. And additional lamps installed in the beams will add even more light, warmth and comfort to the space.
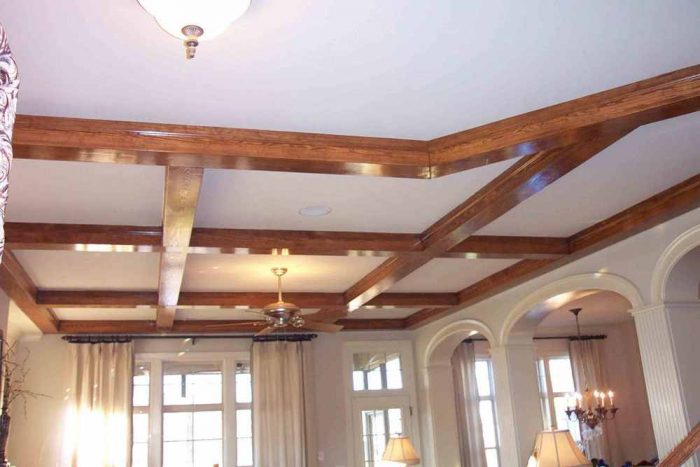
The versatility of the decor does not negate some of the rules for its use:
- placing structures on a short wall will visually expand the room;
- the location of the beams along the length of the ceiling will make the room longer, visually stretch it;
- a cross pattern on the ceiling will add volume to the room;
- one beam on the ceiling is a variant of the “separation” of a part of the room, for example, a kitchen, a bar counter;
- the higher the ceilings, the more often the beams should lie down - the frequent arrangement visually reduces the height, making the room more comfortable.
As for the layout, you can place wooden beams on the ceiling as standard - straight, or diagonally, in a herringbone. In the attic rooms, beams that "pass" through the supporting pillars and abut against the wall with their ends look especially good. Such a "hut" scheme will advantageously hide uneven walls, emphasizing the height of the ceiling.
