Choice of bricks for posts and material for fence sections
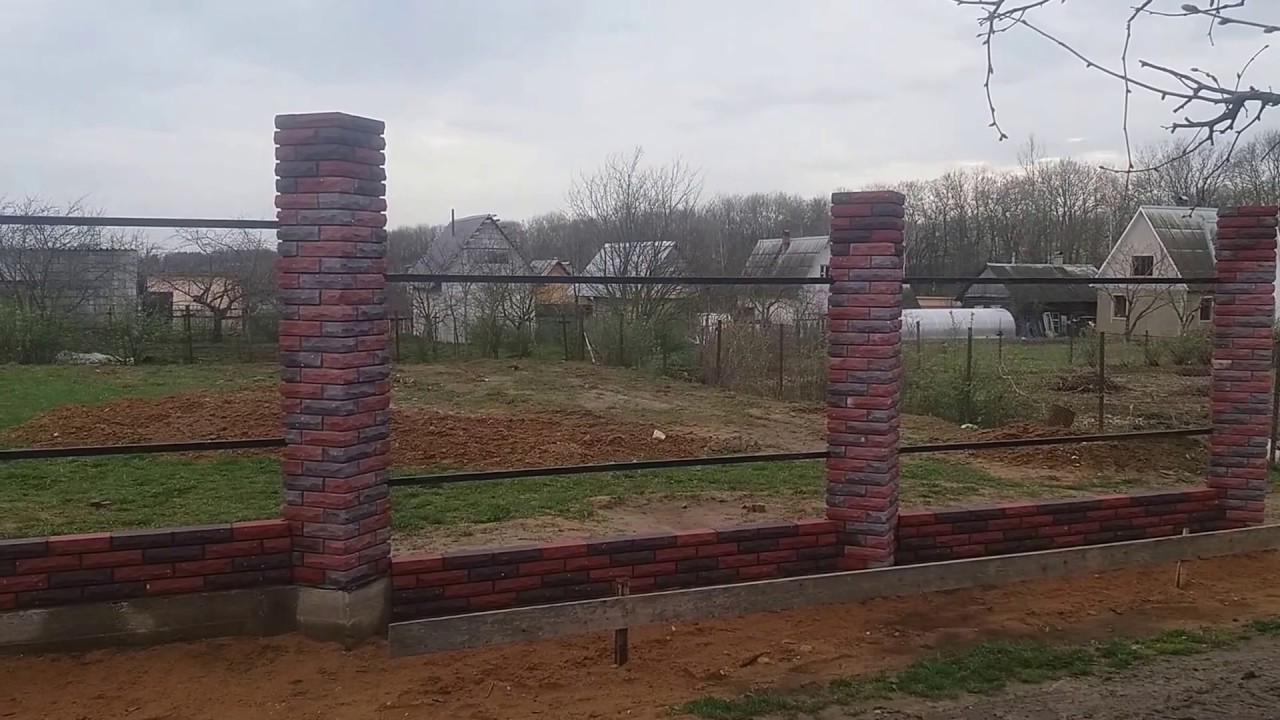
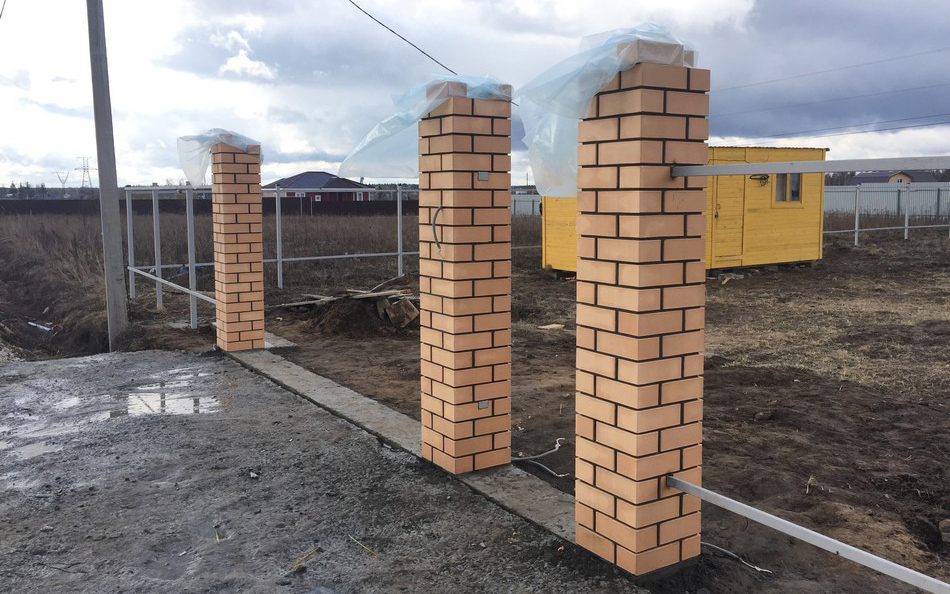
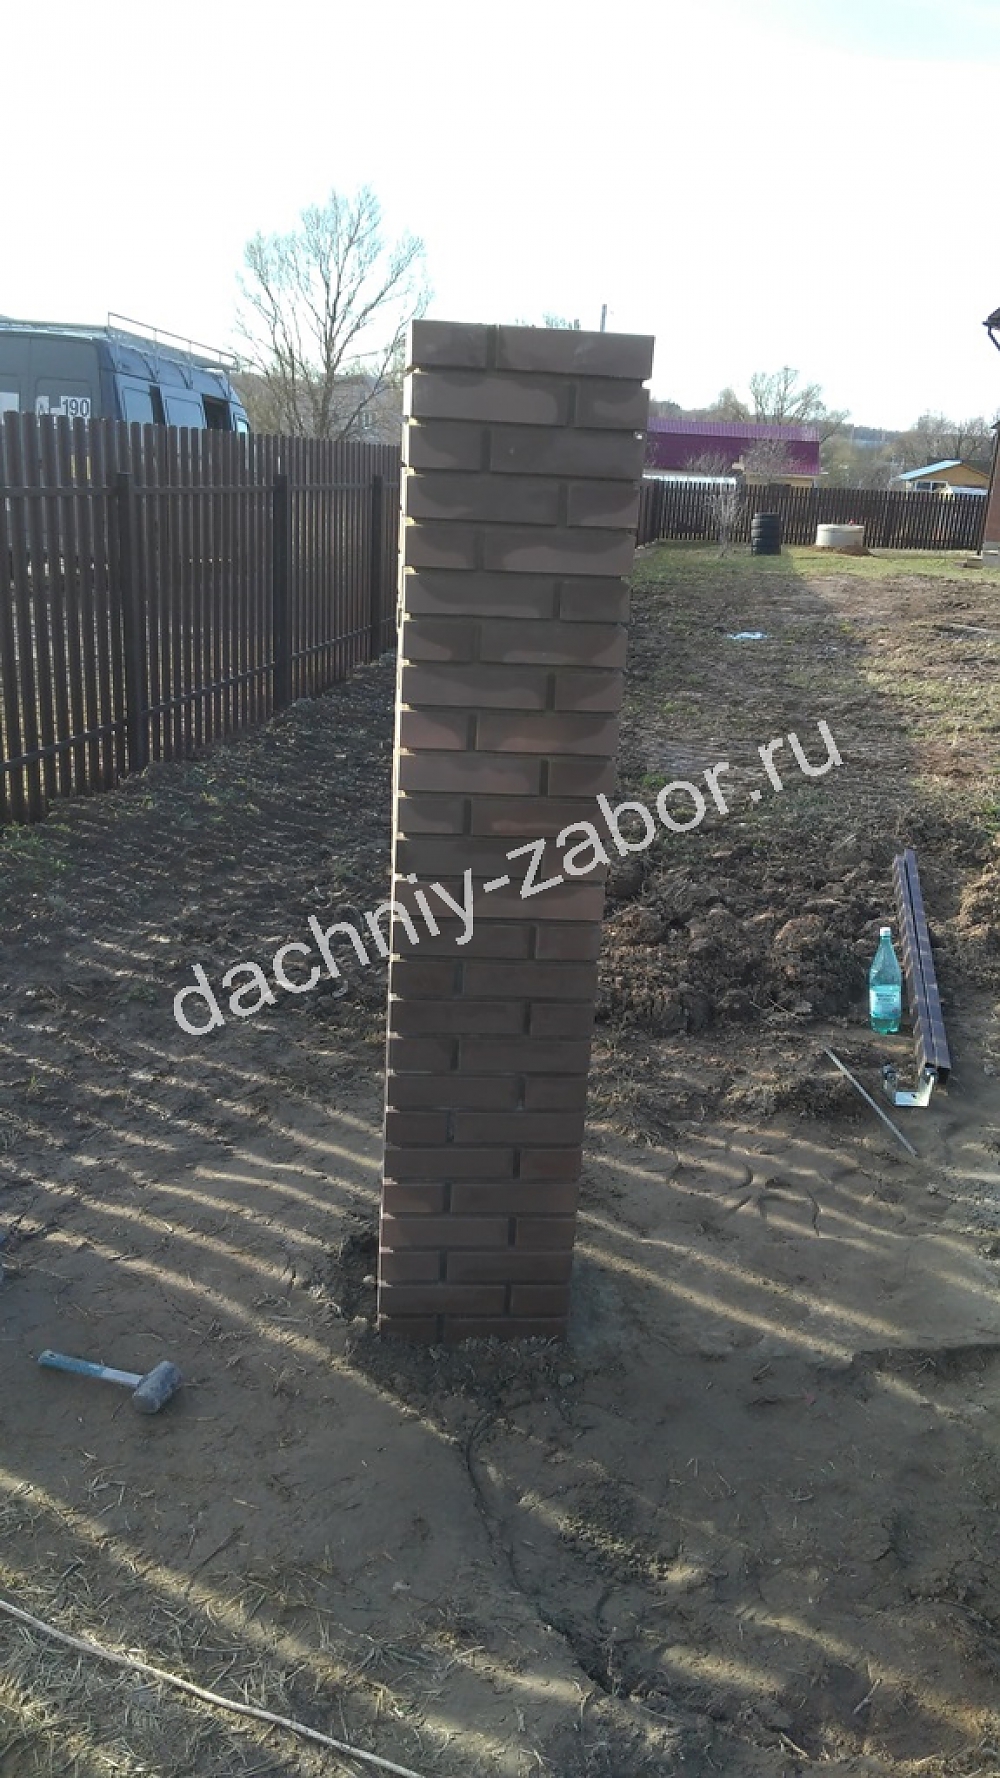
Choosing bricks for pillars, each developer comes from personal ideas about beauty. However, here, too, the practical side of the issue plays an important role. Ordinary smooth facing brick has not proven itself in the best way in such structures.
After several seasons, it begins to crumble and loses particles of the outer layer. This is partly due to the negligence of the owners, who do not cover the poles with reliable caps. Part of the blame lies with manufacturers who are unable to make quality material.
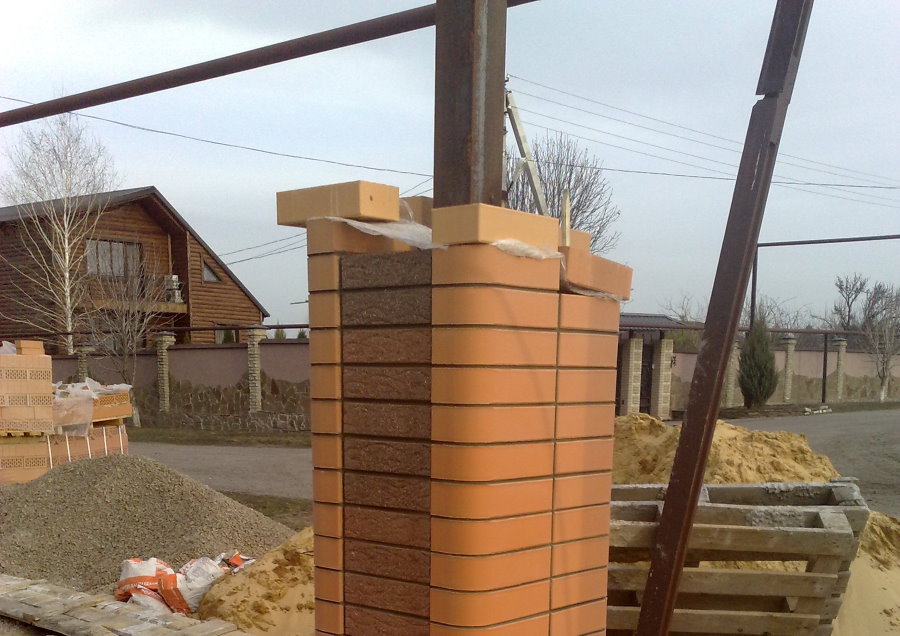
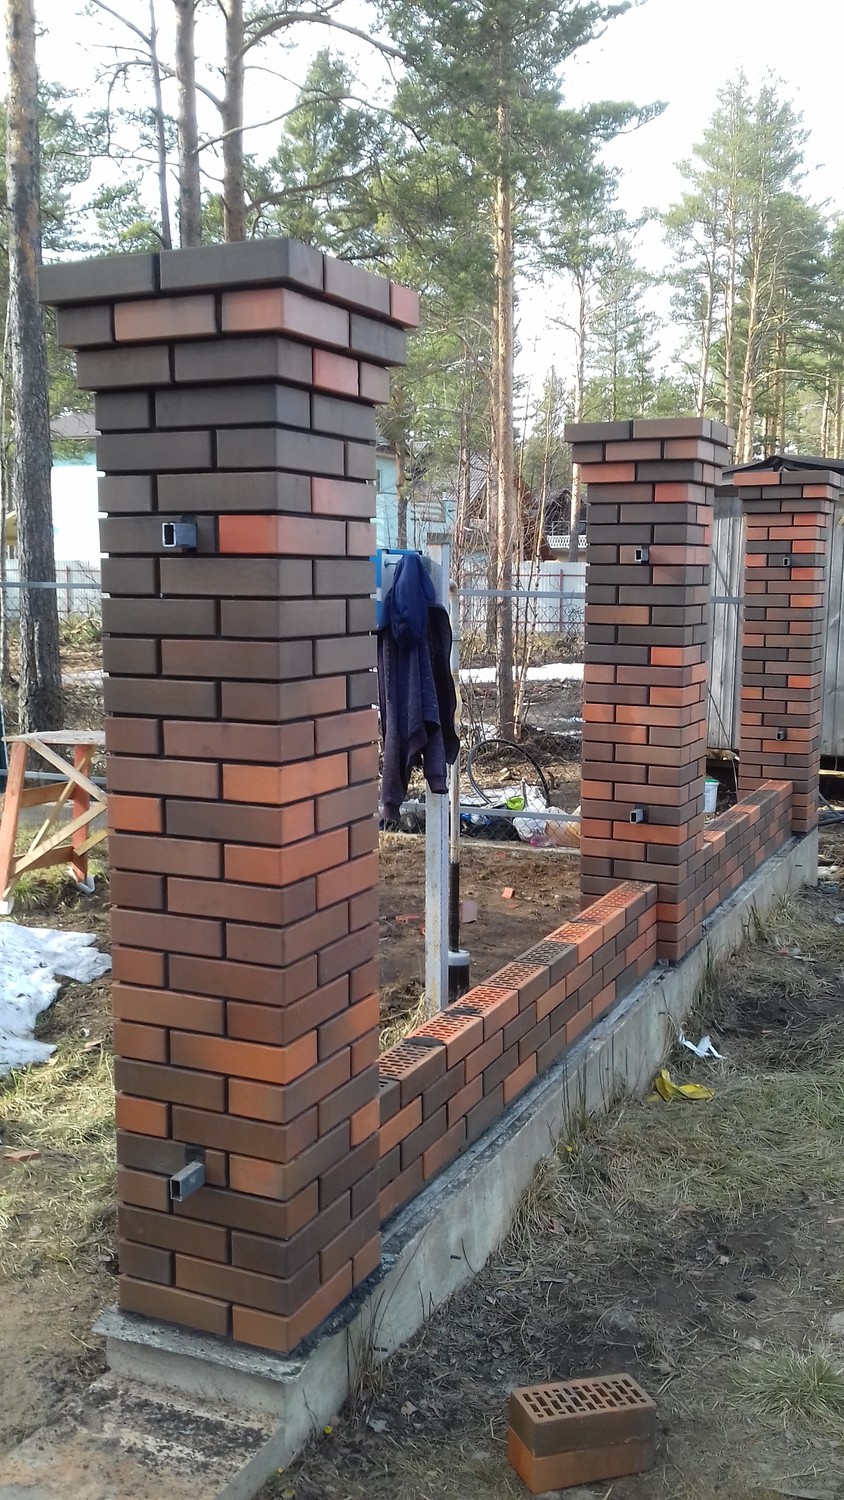
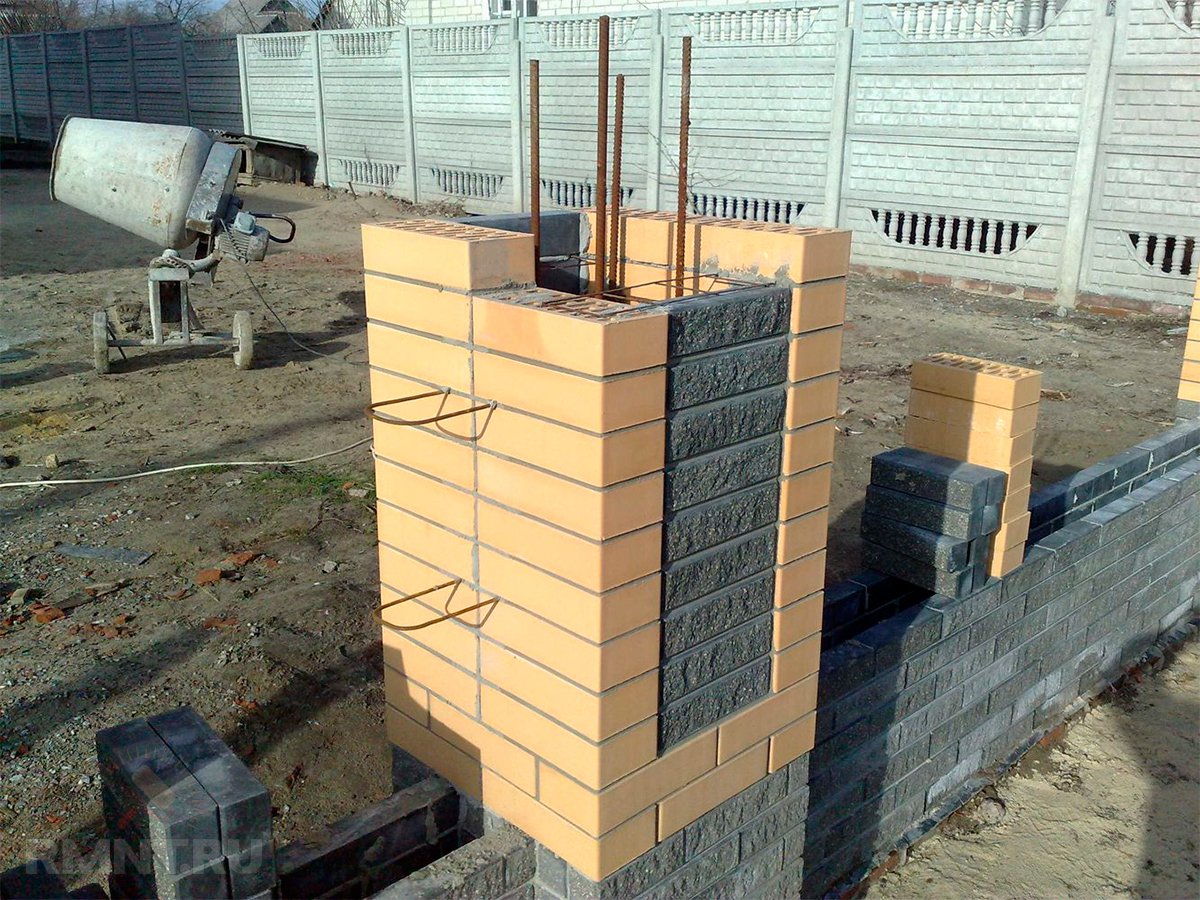
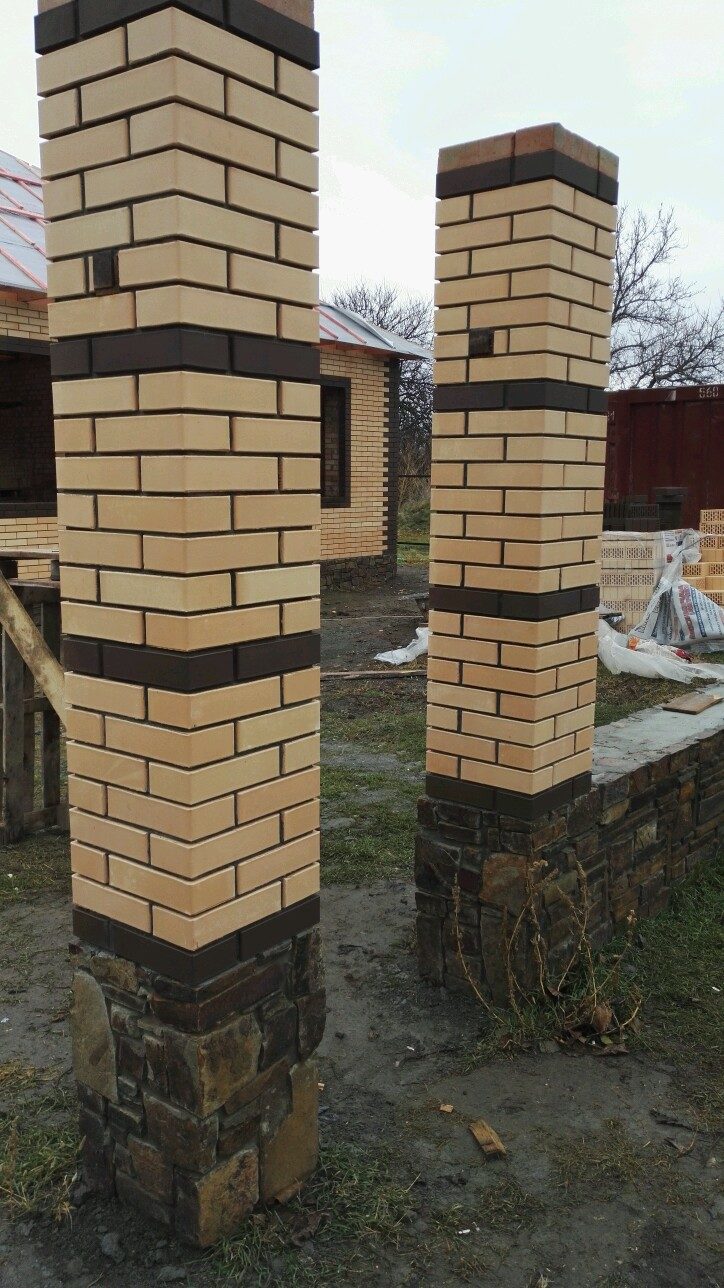
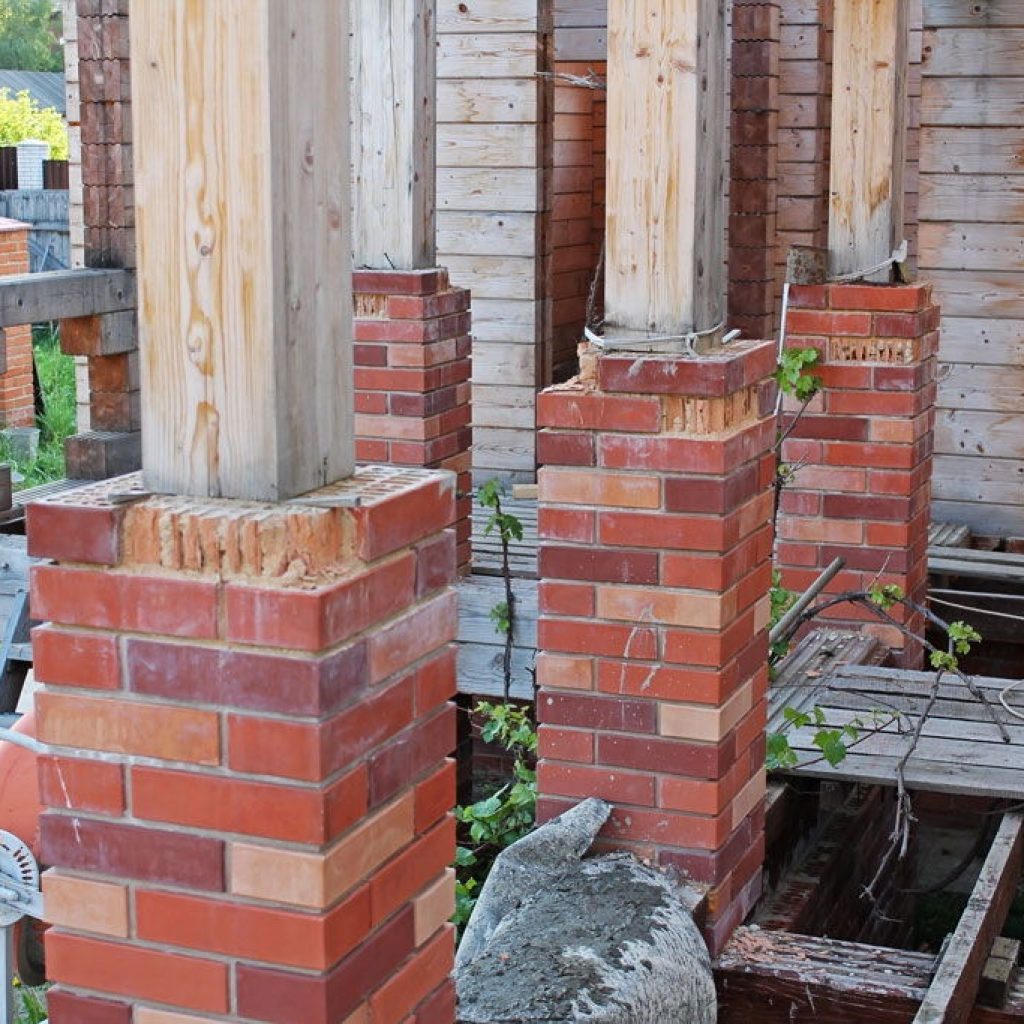
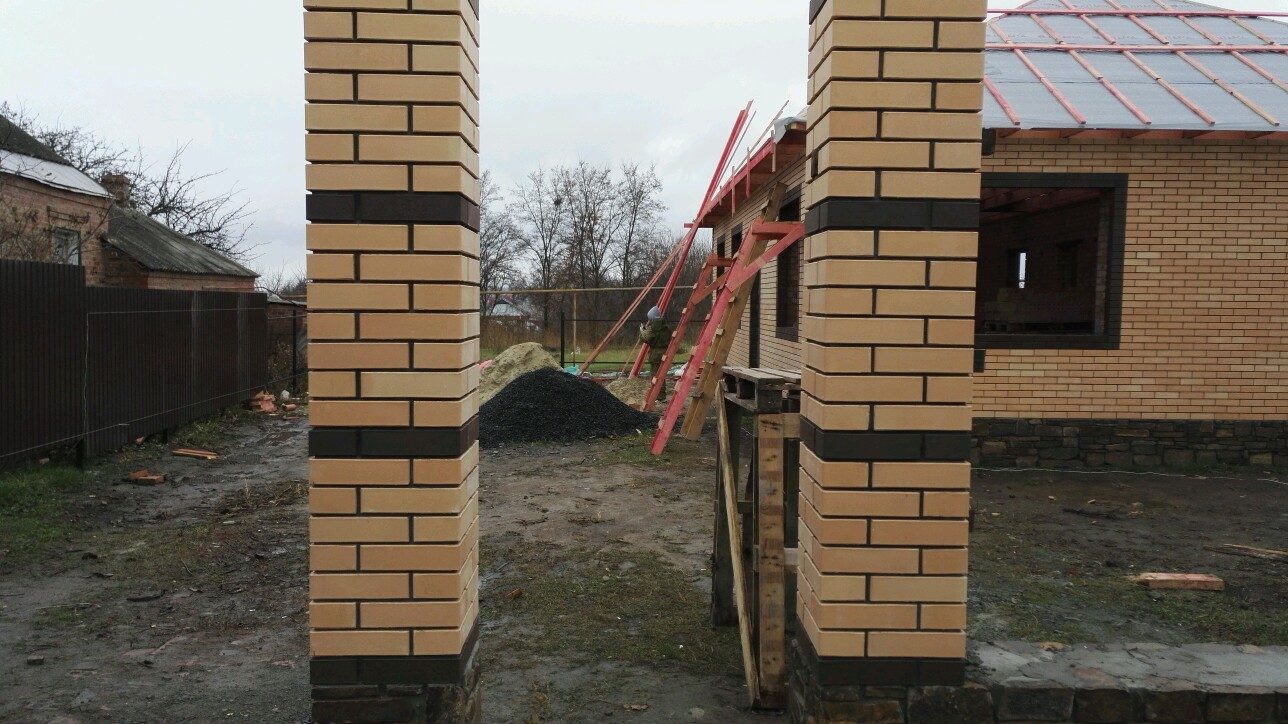
More resistant to precipitation and frost is textured brick for pillars, called "rock". A compromise option, at the same time aesthetic and reliable, is a combination of the two mentioned types of bricks (photo # 4).
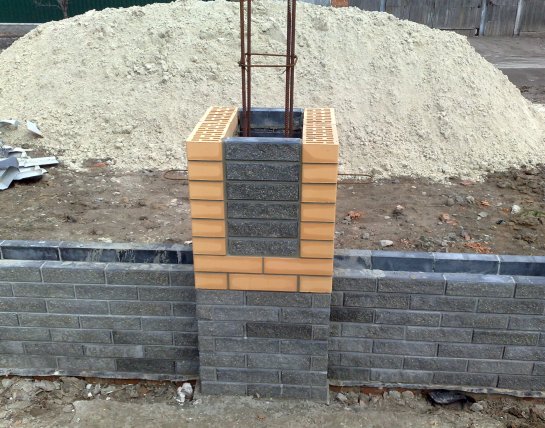 Photo No. 4 Combined masonry is a great option
In the photo, we see the rational combination of the grillage of the fence with its finish. Brick plays a double role here: formwork for concrete and decorative layer.
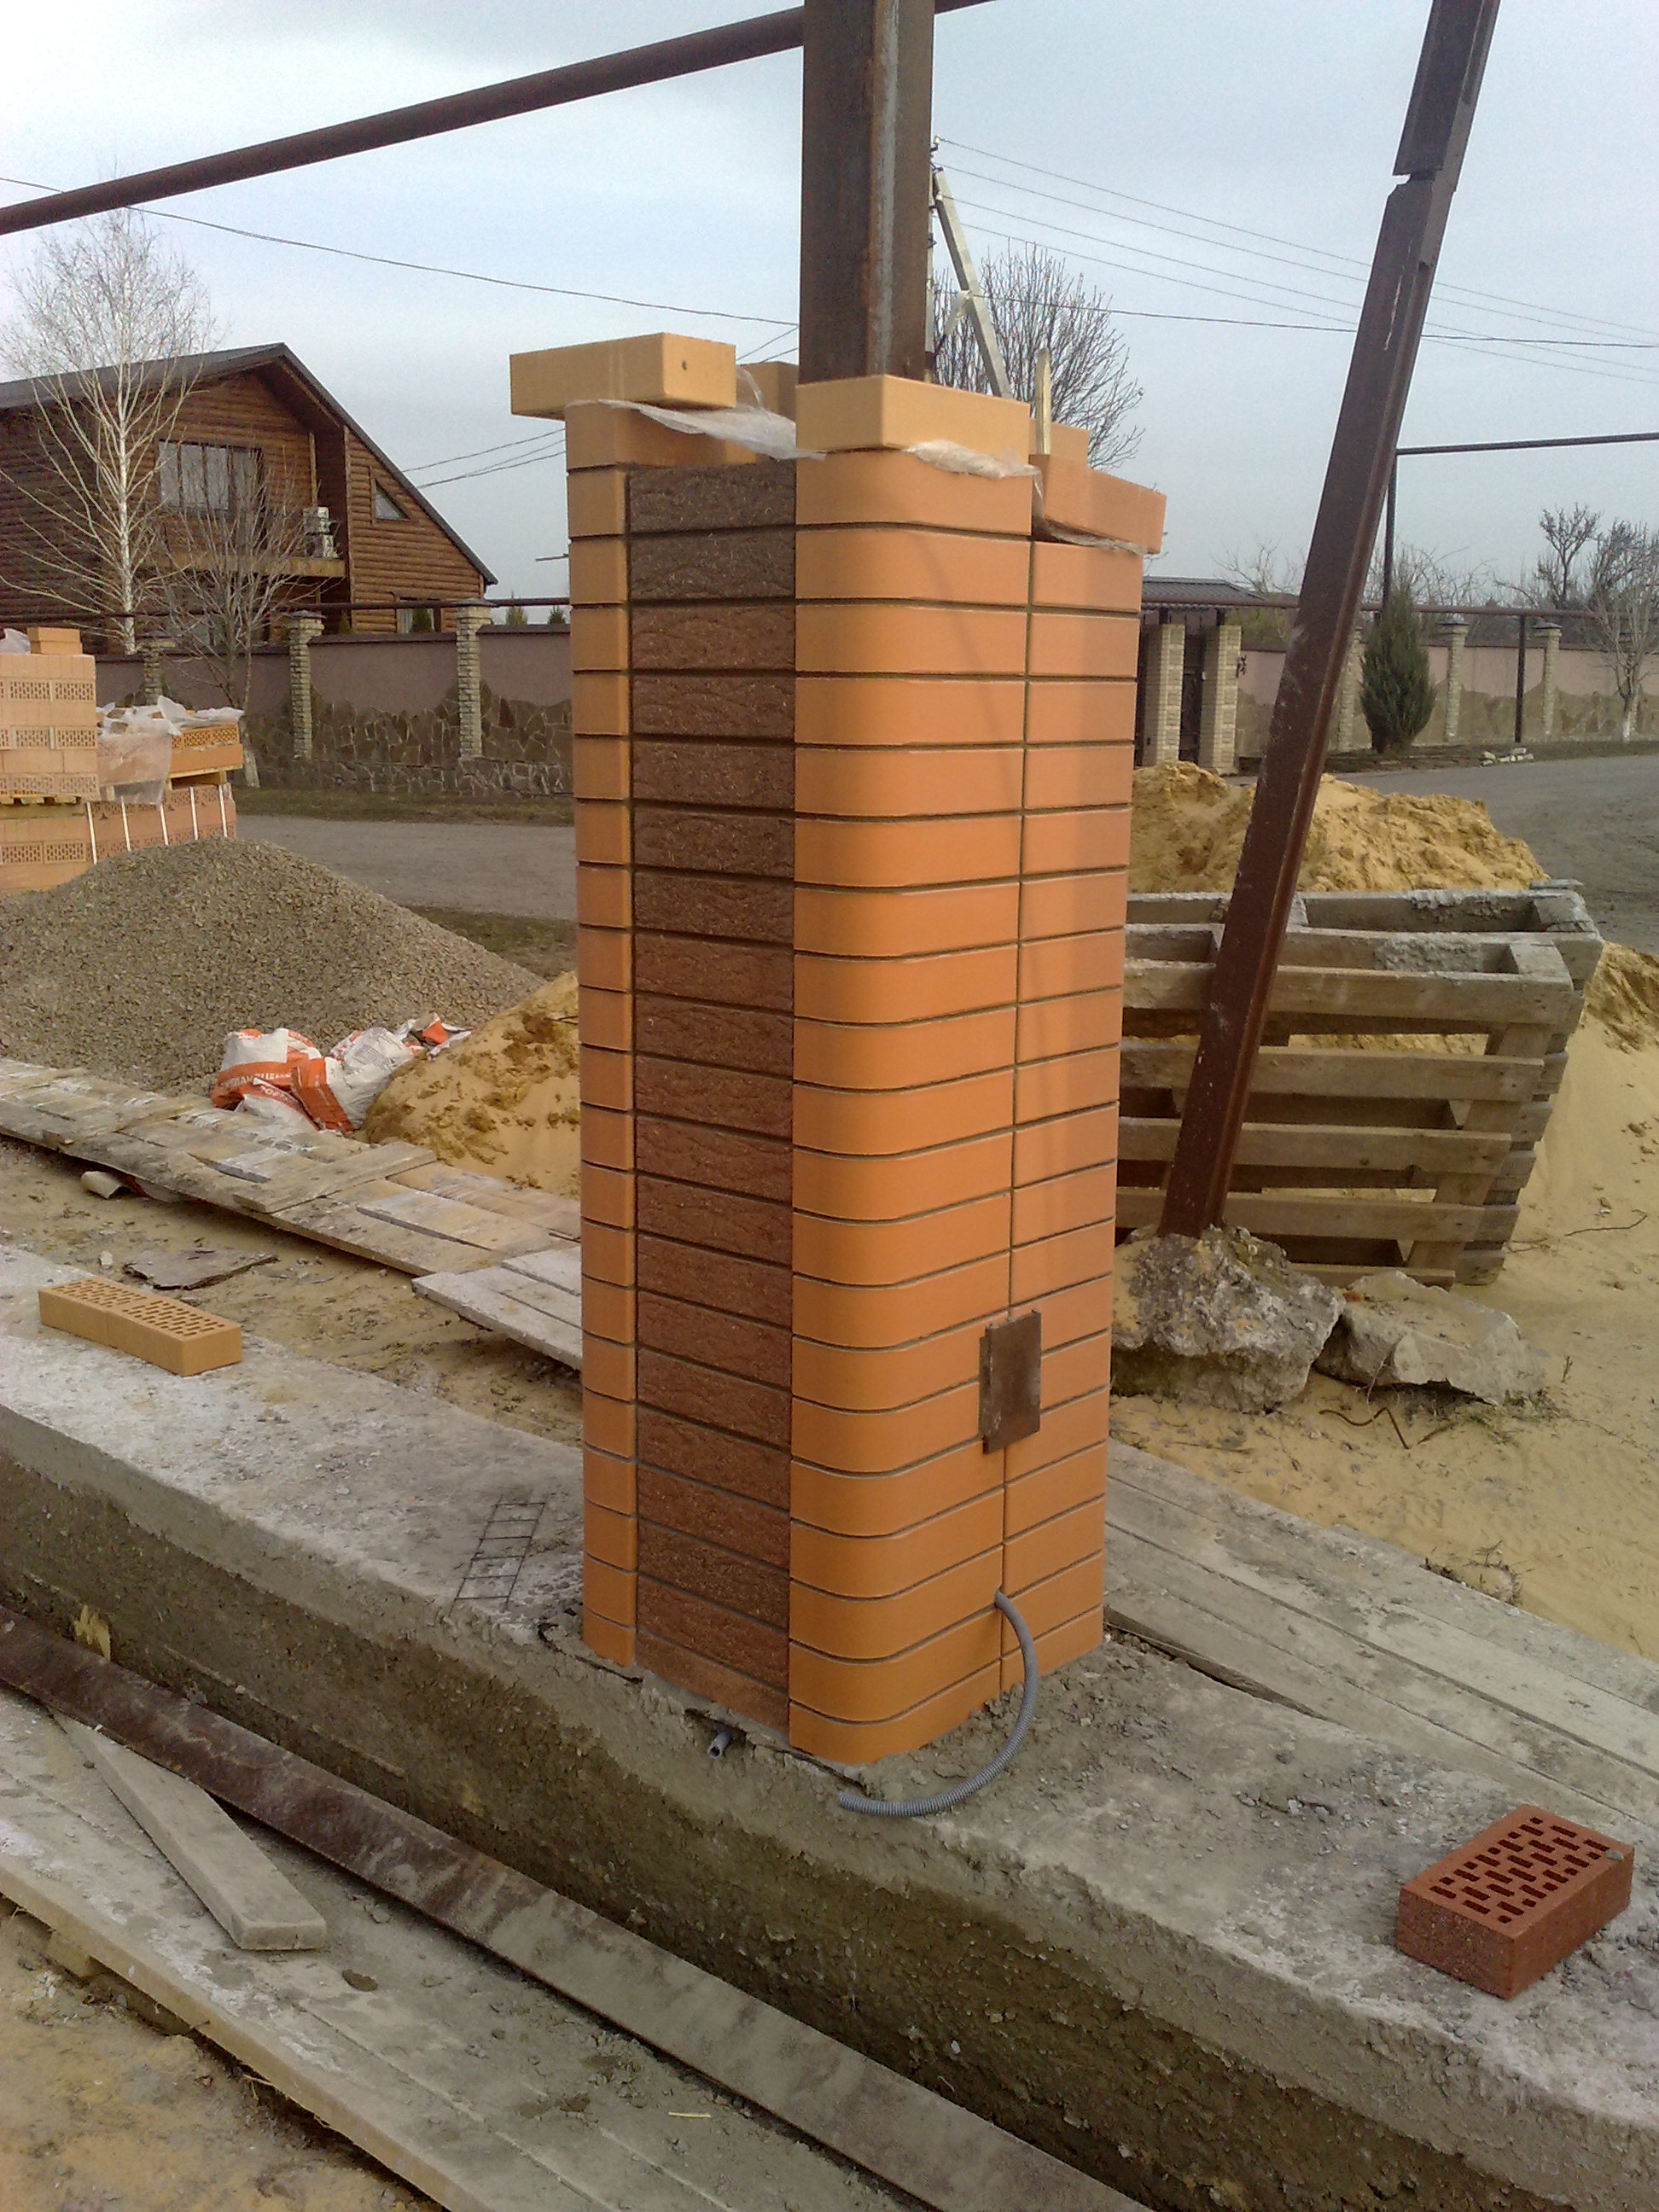
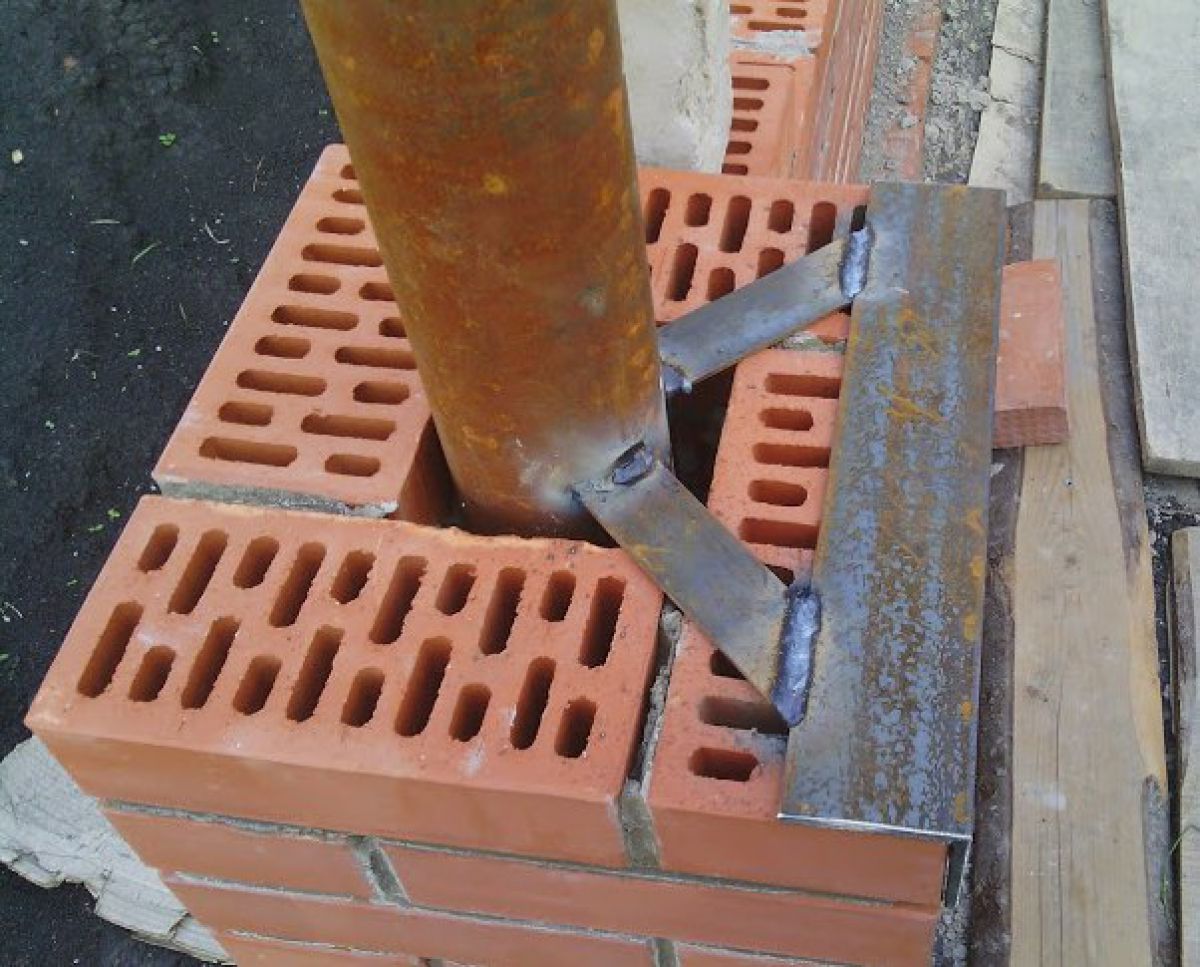
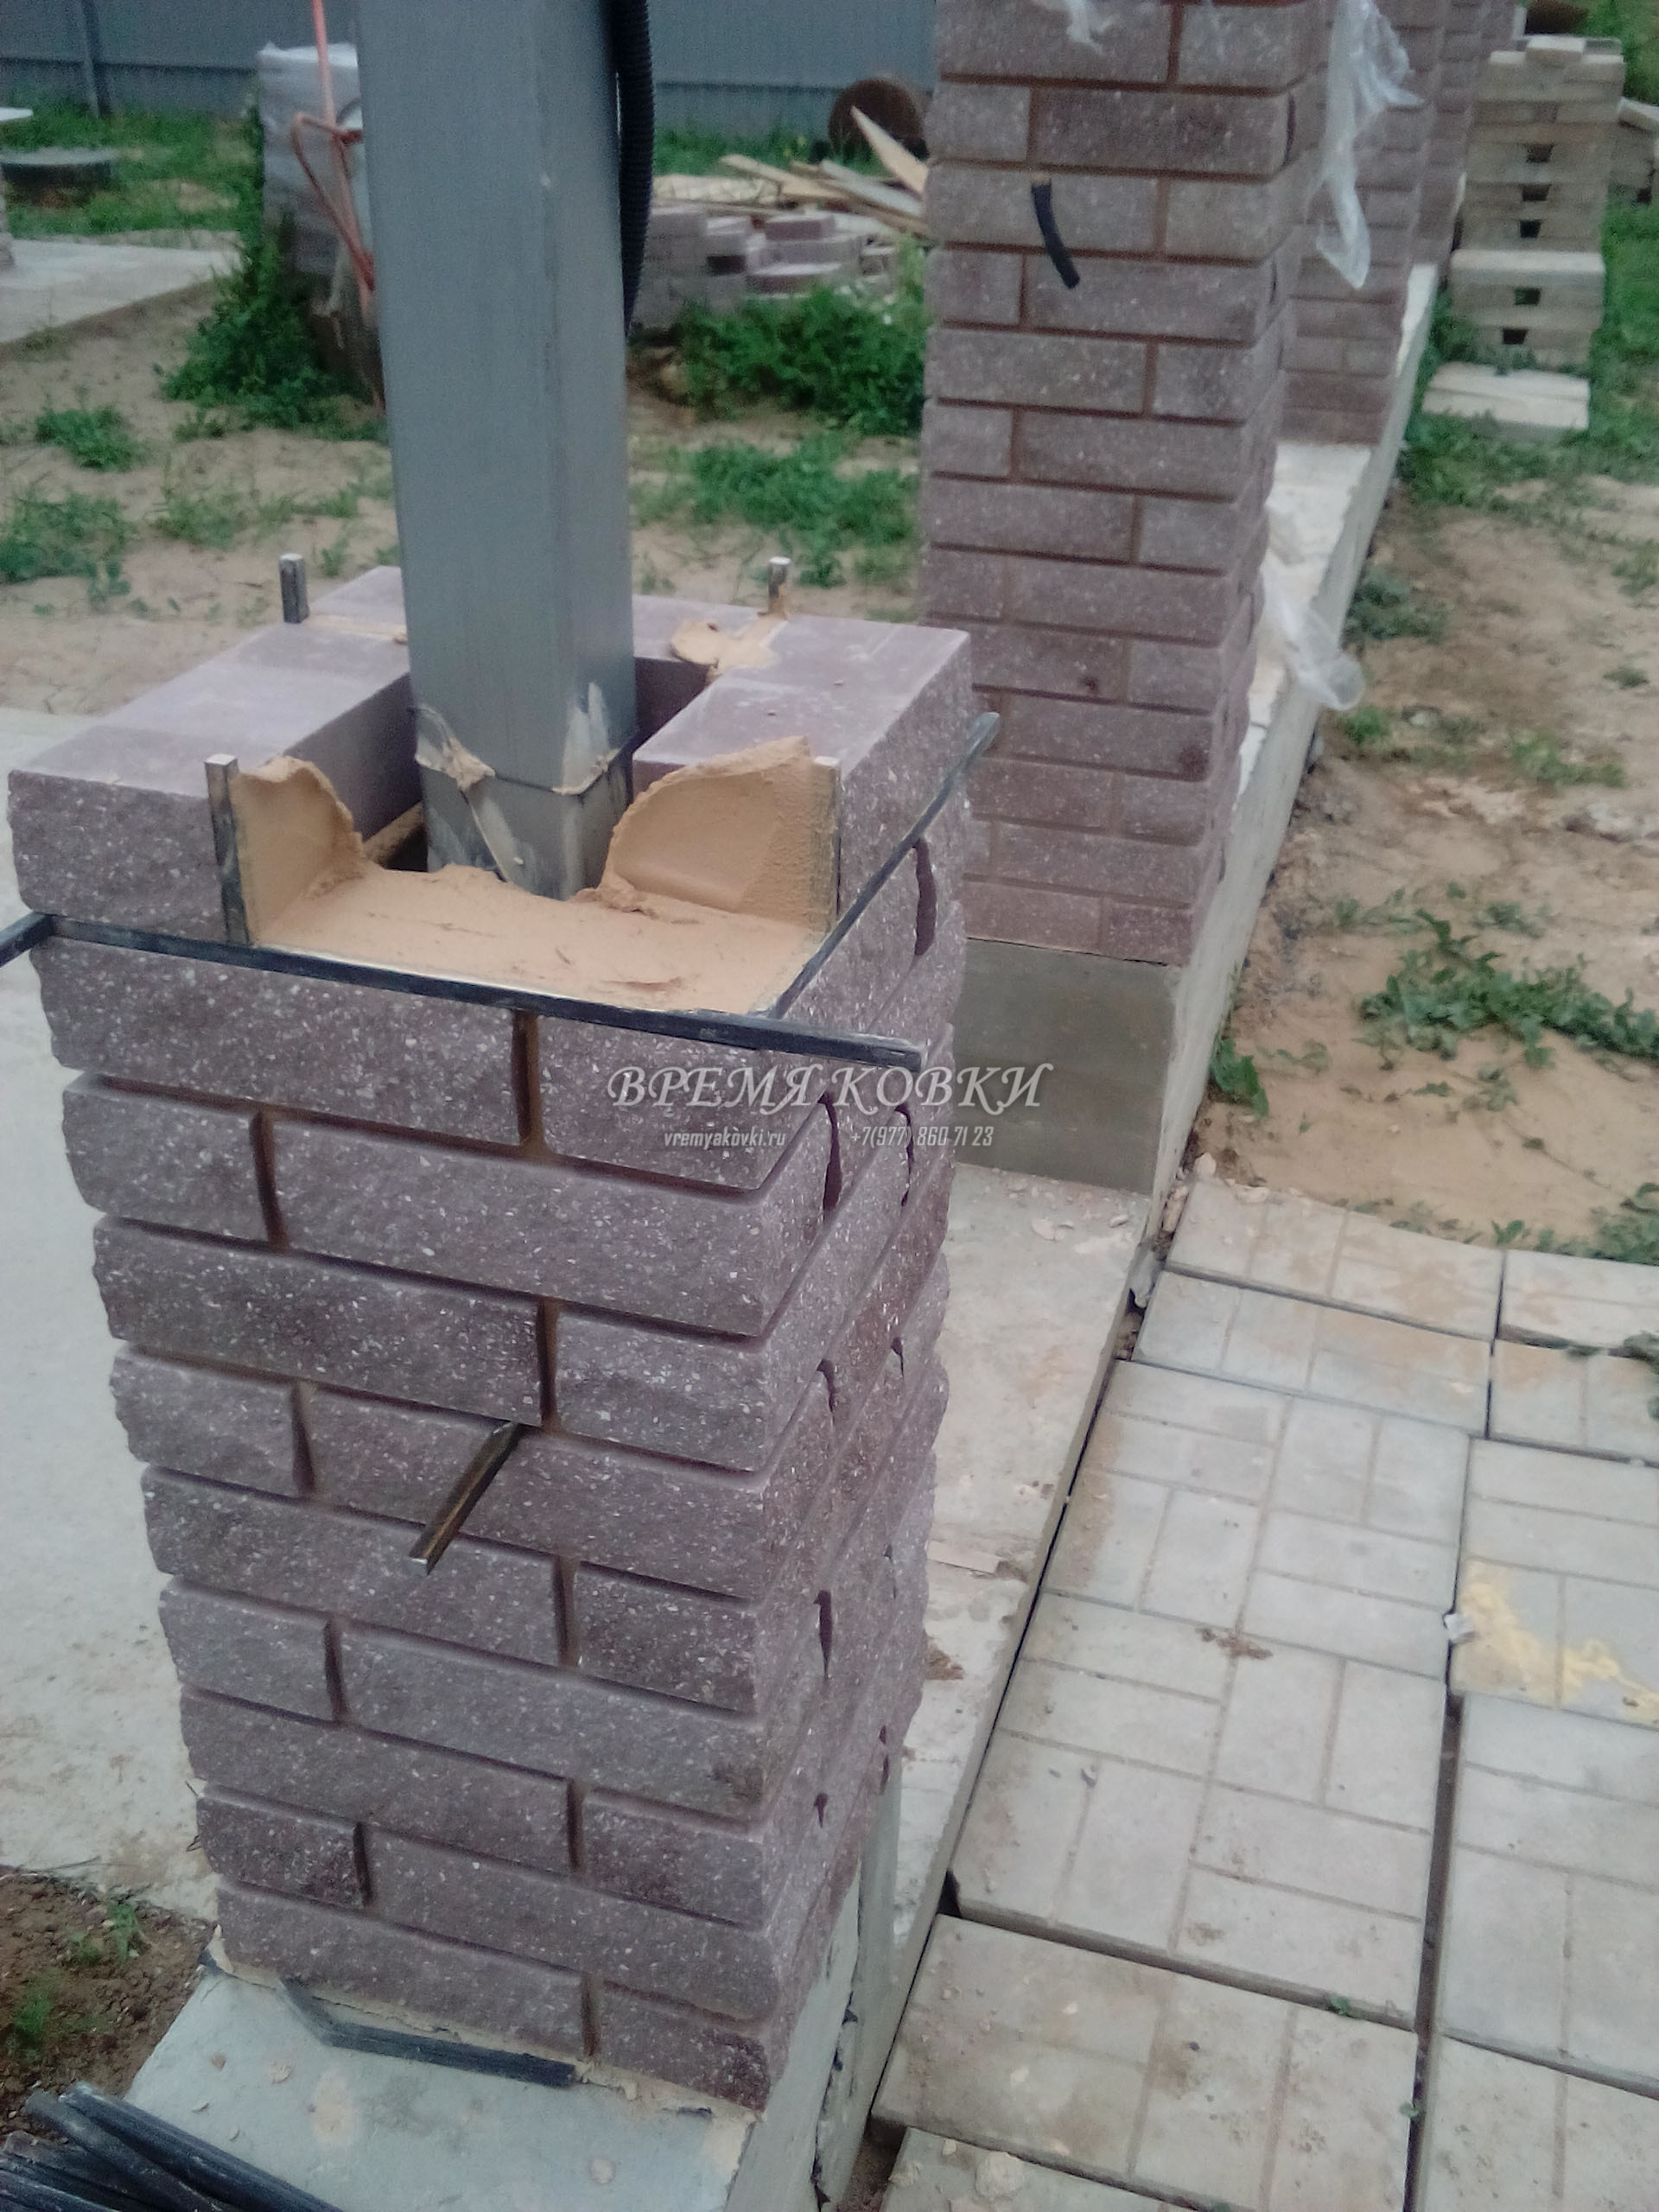
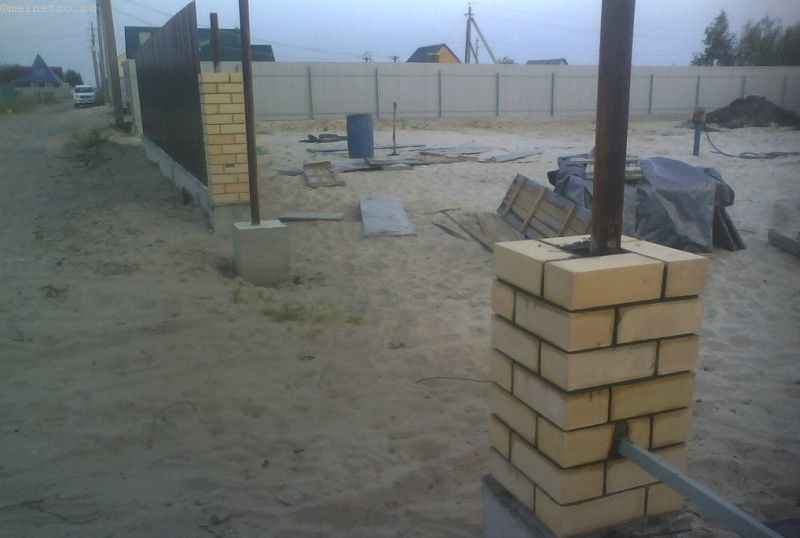
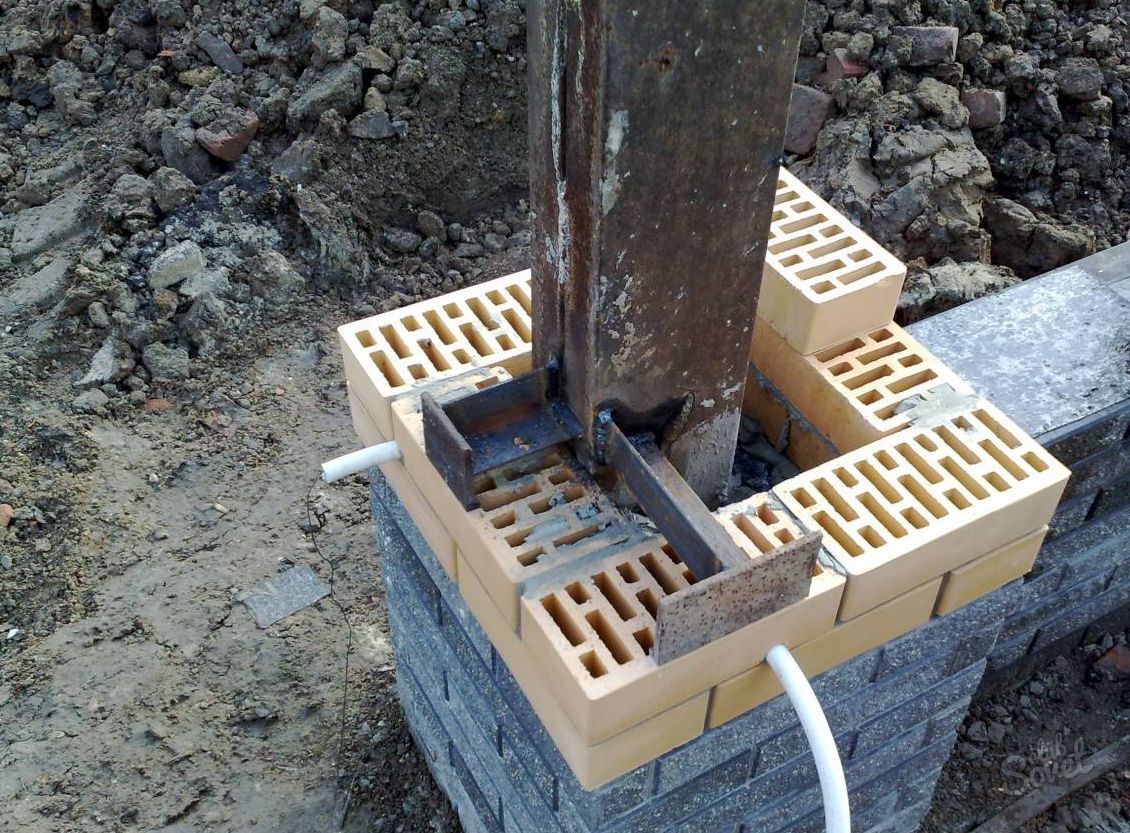
The design of pillars for gates and wickets has no fundamental differences from ordinary sections. To install heavy metal swing gates, the cross-section of the reinforcing cage or rack pipe is increased. In this case, the insert plates should be taken thicker and wider so that the pivot joints do not tear them off the racks (photo # 5).
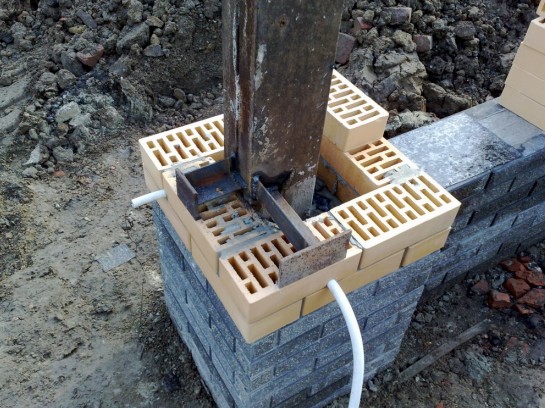 Photo №5 Embedded part of a post with a plate for hinging the gate and a plate for the automation engine
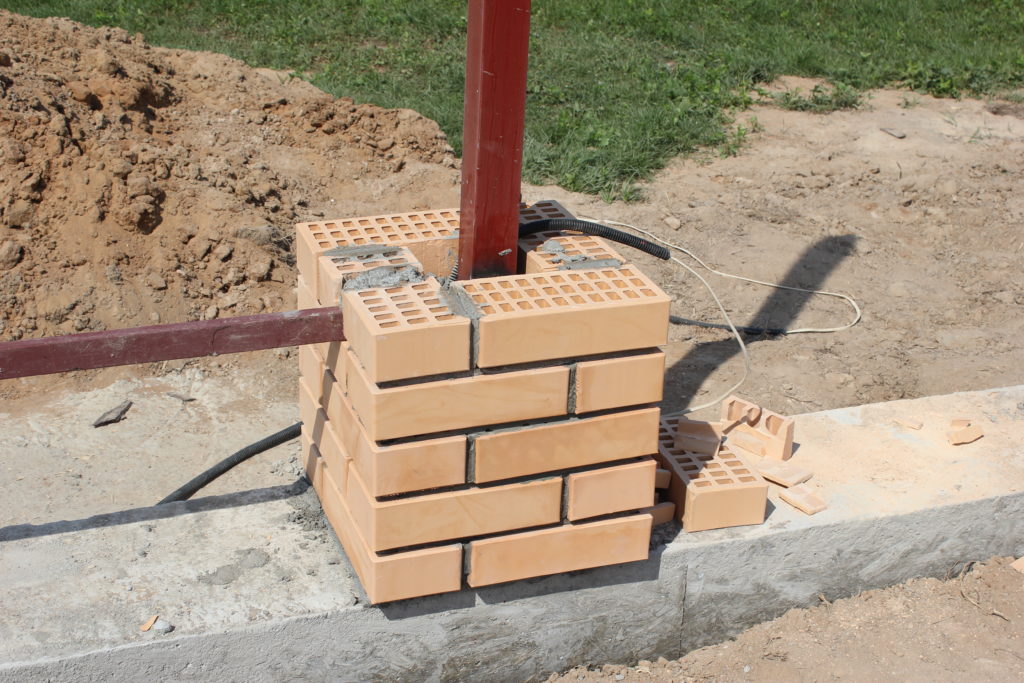
The front gate of the estate is often crowned with decorative lamps, and is also complemented with automation and an intercom. When intending to do this, do not forget to lay a corrugated cable with a wire in the masonry.
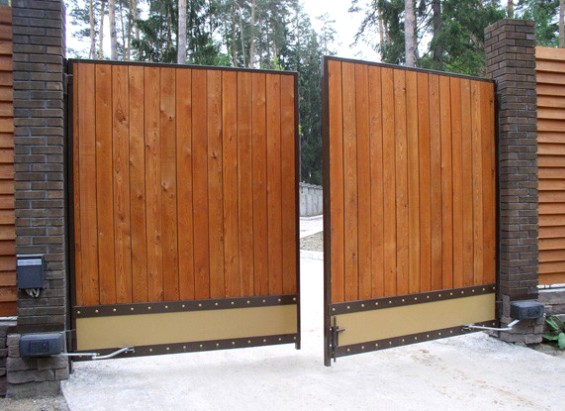 Photo # 6
Having decided from beginning to end to make pillars of bricks with your own hands, decide in advance on the material for filling the sections. The most common options include profiled steel sheet, forging, picket fence and unedged board.
The most expensive, but at the same time the most elegant option is forged lattices (photo № 7).
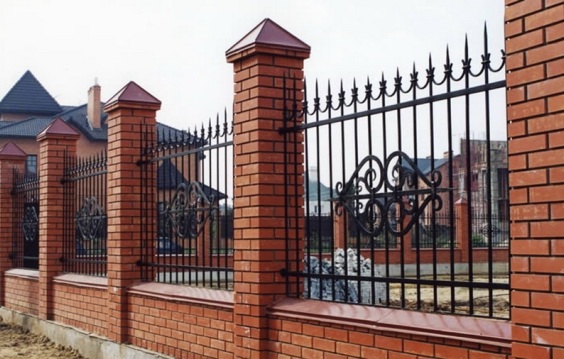 Photo №7 Forged lattice on brick pillars
The combination of brick with natural stone and forging is no less aesthetic and durable (photo # 8).
 Photo # 8 Combined option (brick pillars + natural stone + forging)
Why is the combination of the three materials good? In it, each element contributes to the overall look. The grille can be ordered with a minimum area. She will perfectly fulfill the role of a decorative accent.
Photo # 9 shows a not very successful example of a combination of bricks with forging and corrugated board.
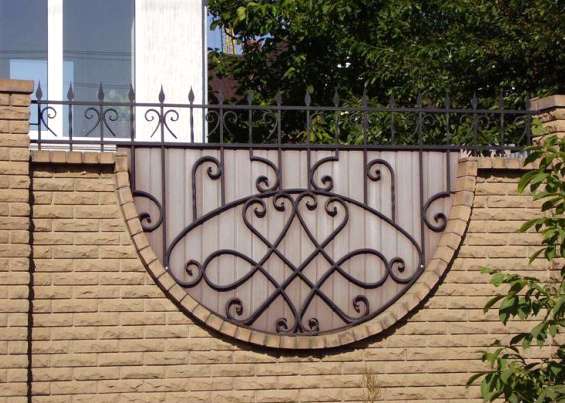 Photo # 9 Profiled sheet looks out of place in such an environment
Having opened a part of the fence due to the forged lattice, the owner for some reason decided to close it again, placing a sheet of penetrated in the opening. The result is a ridiculous and strange combination.
Brick and wood are perfectly combined in any design, helping to create an inexpensive and beautiful fence (photo # 10).
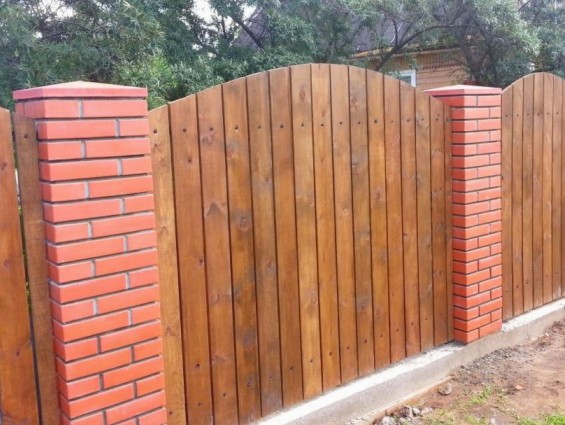 Photo # 10 The classic version of the fence with brick posts and solid picket fence
A picket fence or a board in a section can be mounted not only vertically, but also horizontally (using the overlap method).
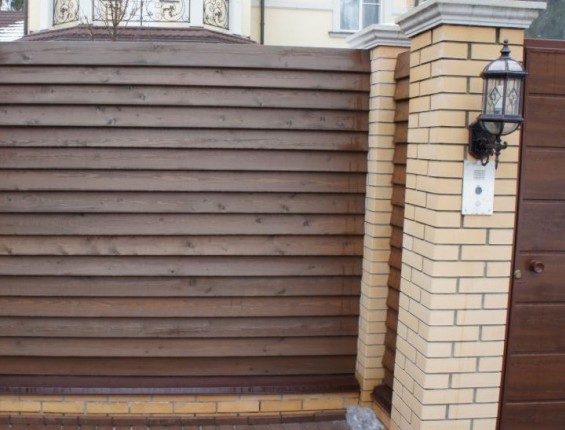 Photo # 11 Horizontal installation of boards between brick fence posts
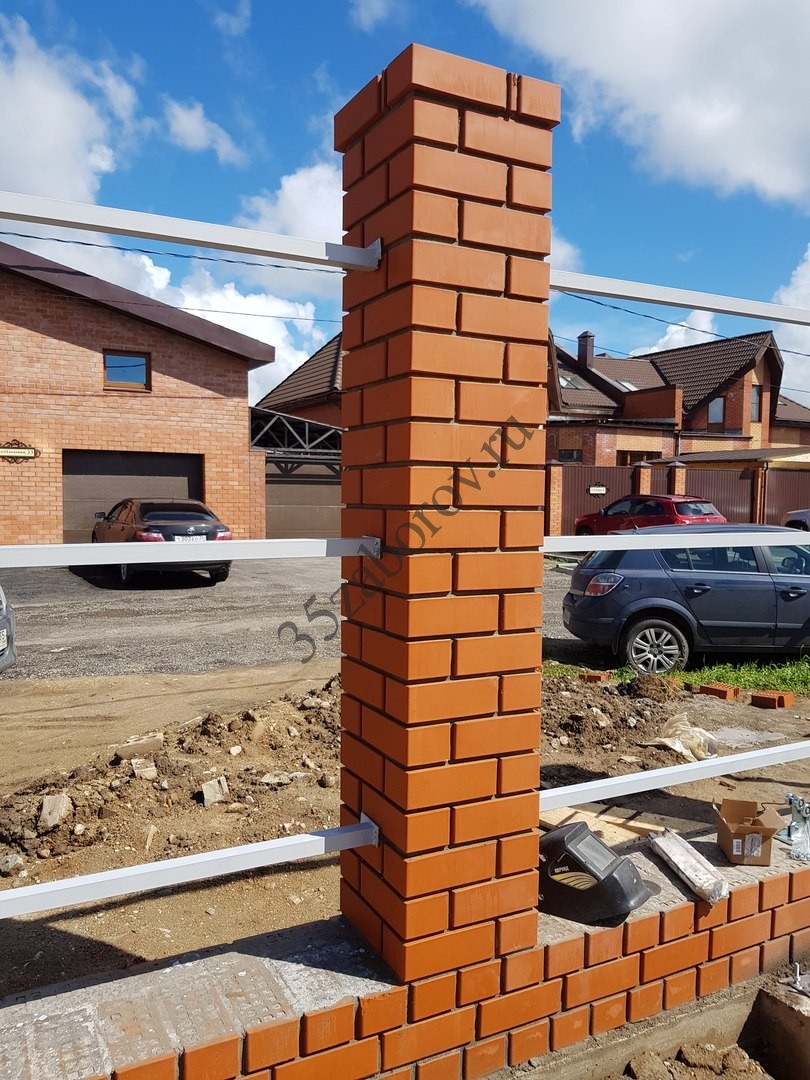
The metal picket fence is growing in popularity. It is several times more durable than a wooden one, but it looks no worse (photo # 12).
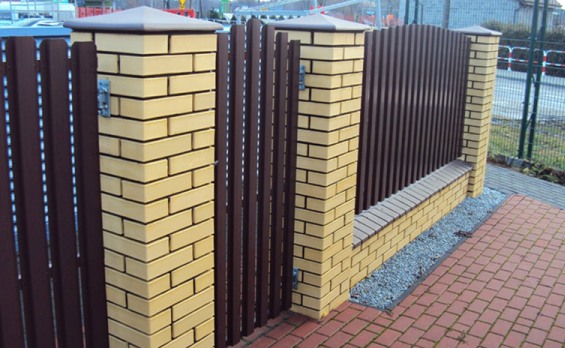 Photo # 12 Metal picket fence - a close relative of the profiled sheet
An obligatory structural element is the caps on the brick pillars. Without them, the material will not last long. Moisture, freezing in the brick, will destroy it. On the market you can find two types of caps - metal and concrete.
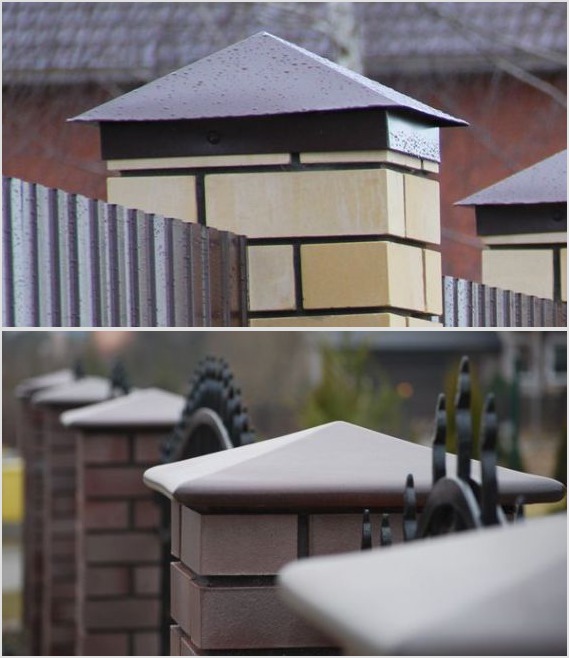 Photo # 13
The choice of material for protective caps is purely individual.It should be borne in mind that the metal on the pole will stand longer than concrete, which is less resistant to frost and moisture.
Calculation of the depth of the foundation
Before you start digging holes for the foundation pillars, you need to calculate the depth of the foundation. In order to accurately calculate the depth of the foundation, you need to know the parameters of the soil on the site, the weight of the future house or structure being built.
 The first step is to study the properties of the soil. Unfortunately, it is not always possible to independently determine the properties and parameters of the soil at the construction site. When studying the soil, it is advisable to accurately establish its indicators as the depth of the location of groundwater and soil freezing.
Accurate information on the properties of the soil on the site is very important because
if you do not take into account its characteristics, then in cold weather due to freezing of the soil or erosion of the soil due to floods, dangerous cracks may appear, or deformation will occur, which will cause up to the complete destruction of the building
The depth of the foundation will be influenced by the weight of the structure being erected. If you intend to build a two-story dwelling or building materials will be used during the construction of a house, the weight of which will be heavy, then the depth of the columnar foundation must be determined taking into account these factors.
Sometimes the terrain of a construction site can be sloped. When calculating the foundation, it may turn out that in some places it will be necessary to dig a hole 60 cm deep under the pillars, and in others, for example, 90 cm. In such cases, the deepest indicator should be taken for the depth of the foundation. After the depth has been determined, they begin to determine the number of foundation columns.
When erecting such foundations, it is necessary to erect a number of load-bearing pillars using one or another building material. The pillars must be located at the nodal points and in places where the main load from the structure falls. As a rule, the pillars must be erected under the load-bearing walls, in the places where they intersect. If the design of the house is such that partitions or some heavy structural elements are provided inside the building that will exert heavy loads on the base, then it is also recommended to install additional pillars under them.
 When constructing a columnar foundation made of bricks with your own hands, you need to carefully calculate the order of the arrangement of the pillars. Usually the distance between the posts is 1.5-2.5 meters. To make the base of the building stable, the pillars are combined into a single connected rigid technical structure. For this, the pillars are tied together with so-called grillages. In a situation where the pillars are installed at a distance of more than 2.5 m from each other, then the installation of strong tie beams (randbalk) is mandatory.
Pillars must be made at each corner of the building and in the center of the structure to prevent possible sagging. The place of the central pillar must be determined so that the center of gravity of the structure of the house is distributed to all available pillars, approximately equally.
The height of the columnar foundation depends on the climatic conditions of the area. If the terrain is in a zone of flooding or a large amount of precipitation, then it is advisable to increase the height of the foundation. In any case, the height of the pillars should not be made lower than 30 cm. After the required number of columns has been calculated, adhering to the approved plan, you can outline the places where the pillars will be located by driving in wooden or metal pegs.
To prevent grasses from sprouting under the building, the topsoil on the construction site must be removed. To do this, 2 m are counted from the perimeter of the future house, in every four directions, that is, the upper layer of soil is removed within much more than the area of the building itself. The removed soil layer should not be less than 10-30 cm in thickness.
Do you need mortgages?
There is no unequivocal answer to this question.If it is decided to weld them in advance, the installation site should be carefully marked. For the wicket I provide two of them, for the gate leaves - three. Brick laying is performed in such a way that the mortgages are located directly in the seam being formed, are symmetrically relative to the top and bottom of the supports. In this case, all work must be done very carefully. Only individual people can cope with such a task.
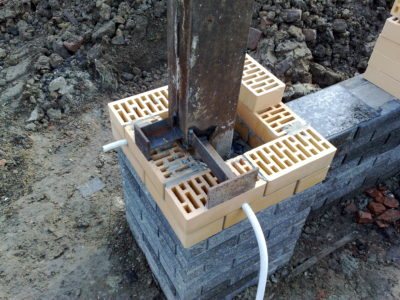
Mortgage in a brick pillar
An alternative option is to weld the elements directly during the masonry process. For this, the bricks are stacked to the desired height, and then the mortgage is attached in any convenient way. This can be done using bots, a clamp, or simply weld the element to the support.
This version of the sash device allows you to do everything not only very accurately, but also very beautifully, which is important for finishing the supports, which many decide to do on their own. Subsequently, it will be possible to paint the protruding elements with paint of the same color as the brick in order to hide the traces of installation work
Attachment option to a ready-made post
If the support is installed and the brick is laid, then the support can be fixed in two ways:
- Through the clamp. In this case, the completely finished post is "encircled" by a clamp frame welded from the corner. Sometimes it is placed in the form of three rings, placed at an equal distance relative to each other along the entire length of the support;
- To reinforcement rods. To do this, using a perforator, sufficiently deep holes are drilled, the diameter of which is slightly larger than the transverse dimensions of the reinforcement. They begin to work from a point located on the seam of the brickwork. Then they move downward, placing the drill at a certain angle. Reinforcement is driven into the holes prepared in this way.
Both options allow you to slightly increase the strength of the mounted structure. However, in this case, the appearance of the structure to be mounted is significantly deteriorated. This can be avoided solely by adhering to the technology for installing supporting elements.
Fence post laying: basic technologies
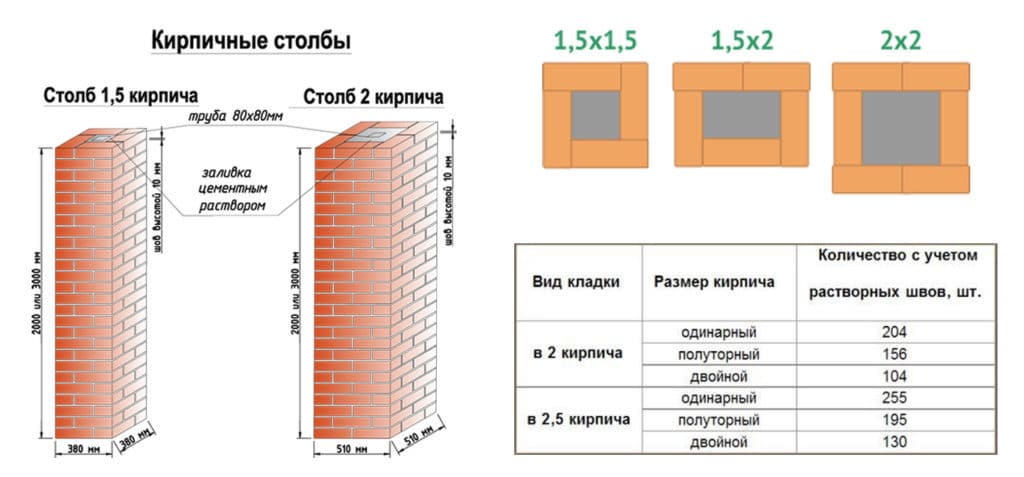
Usually, the pillars are 1.5-2 m high and 38 × 38 cm or 51 × 51 cm wide (for three-meter supports). Strength is achieved by the way the bricks are laid. The seam between the bricks (8-10 cm) of the lower row should be overlapped by the surface of the upper brick. Such a masonry scheme ensures that the rows are linked to each other.
Operating procedure
To correctly fold a brick post on your own, you need to perform the following work procedure.
- Laying waterproofing under the support so that it is not saturated with moisture. The wet brick starts to deteriorate. For insulation, roofing material or special insulation with bitumen ("Gidroizol") and mastic are used.
- Each layer is checked with a level. Use the handle of the trowel by tapping it on the masonry. It is necessary to have other devices for laying brick posts - a hammer with a rubber tip and others.
- It happens that a badly rubbed solution drips onto the brick. The material is recommended to be slightly moistened with water. This one makes it easier to clean the bricks.
- After laying out several layers, measurements are taken. By tapping with a hammer, the displacement is straightened (even 1-2 mm). The vertical gaps are filled with the solution.
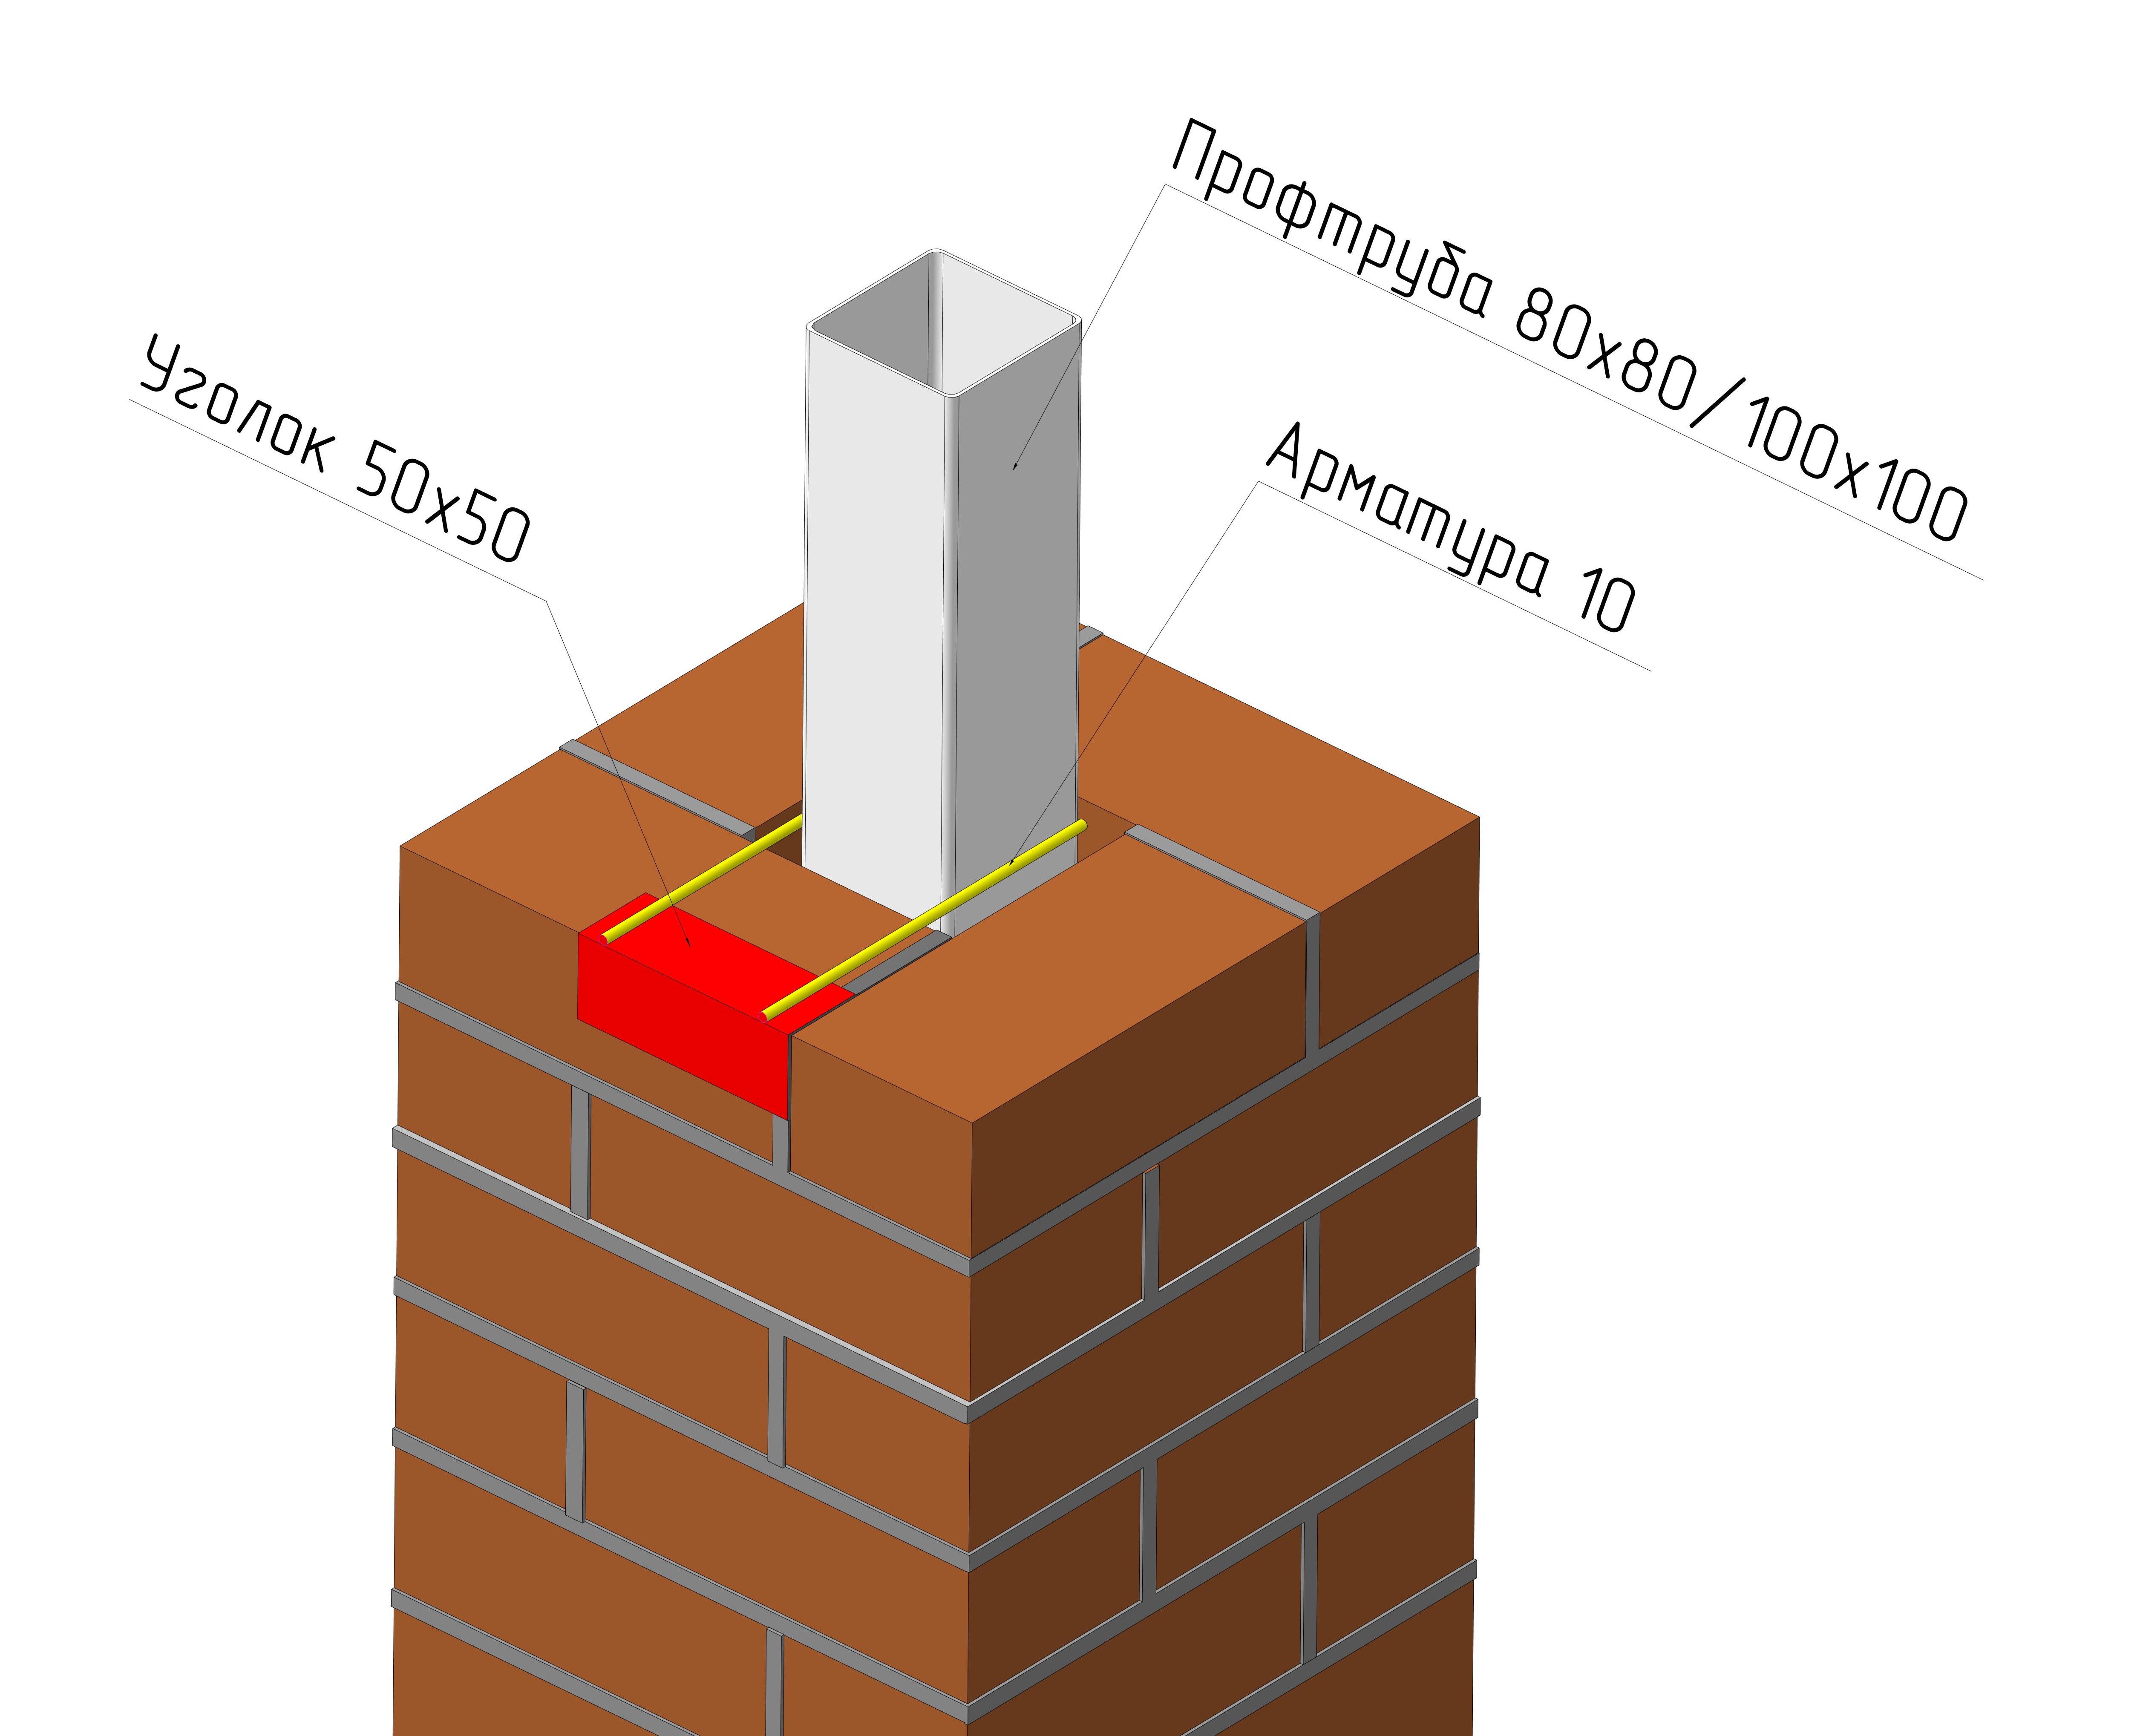
- The voids between the pipe and the masonry are poured with a solution, if it is large, rubble with sand is interfered with, poured into the voids and fixed with a solution.
Brick pillars for bars
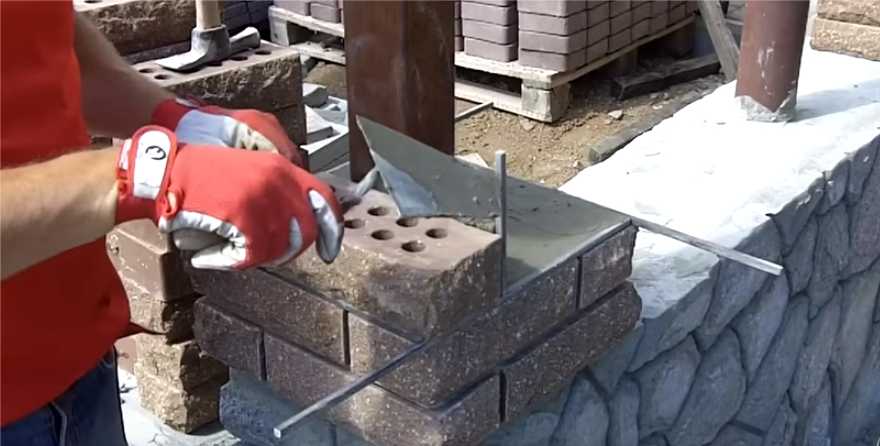
Masonry with rods allows the bricklayer to make beautiful seams, since usually excess mixture crawls out onto the plane of the brick, and the seams are made uneven. The bar (side - from 8 to 10 mm) is cut into pieces that are 10-15 cm larger than the pillar. The first row is laid, then the rod is laid along the edge. A layer of mortar and bricks of the second row are applied. Metal prevents them from sinking. A trowel is led along the bar, cleaning off the excess. Bricks are checked by level. The same method is used when laying the bar on its side. The solution is applied with a trowel, the excess is also removed, a level is applied, the workpiece is removed.The bar is removed, the seam is adhered to with a trowel.
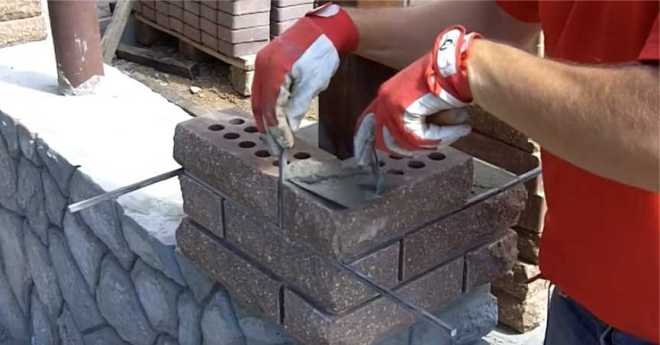
Installation of mortgages for fastening the intake sections
The master often overlooks the detail - what to attach the fence to. For fastening to the pipes in the middle of the pillar, mortgages (corner, pins and others) are welded at the same height so that the crossbars are level. For a solid brick wall, wire loops 8 cm thick are used for every fourth row. In the case of profiled sheet and wood, a cut is made in the brick and metal plates are attached that can withstand the weight of the canvas. Logs are welded onto the mortgages for fastening the fence.
Fence construction using brick pillars
Without a reliable connection with the foundation, a brick pillar, despite its solid weight, will not stand for a long time. A powerful wind load, acting on solid sections of the fence, inevitably leads to overturning of the column, which is not fixed in the foundation. In addition, you shouldn't forget about seasonal ground movements. Lowering and rising a couple of centimeters up and down during the year, the foundation must work in a single bundle with the posts and sections of the fence.
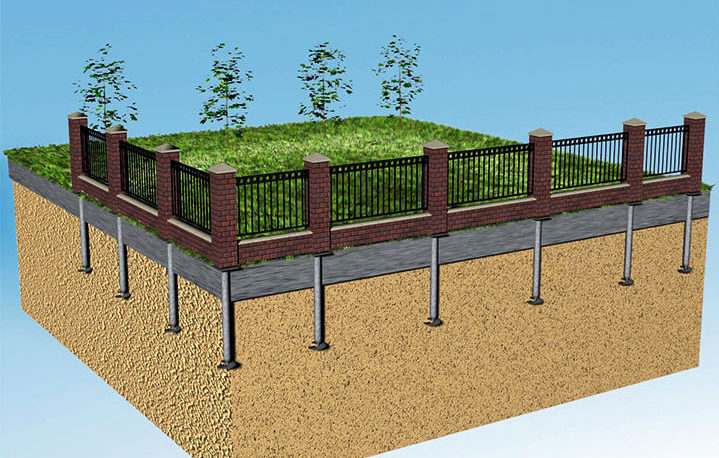
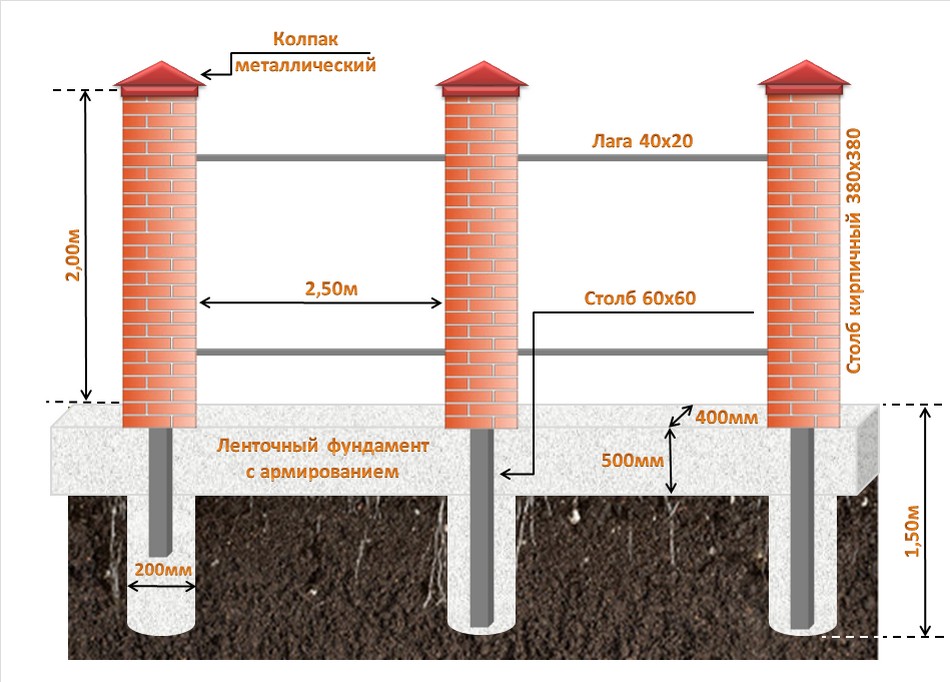
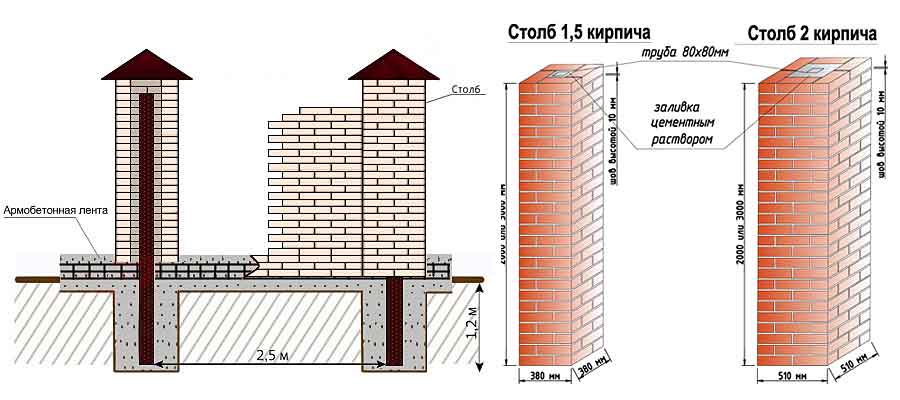
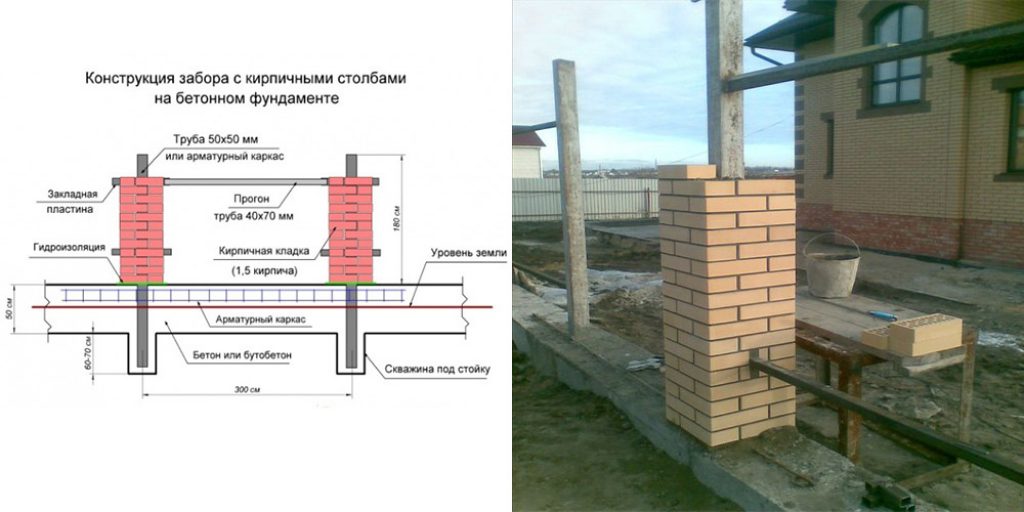
The optimal design of the foundation with brick pillars, designed for a fence made of corrugated board, is clearly illustrated by diagram No. 1.
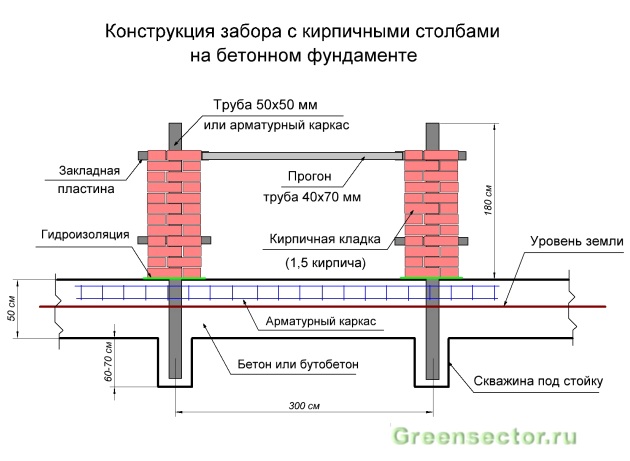 Scheme No. 1
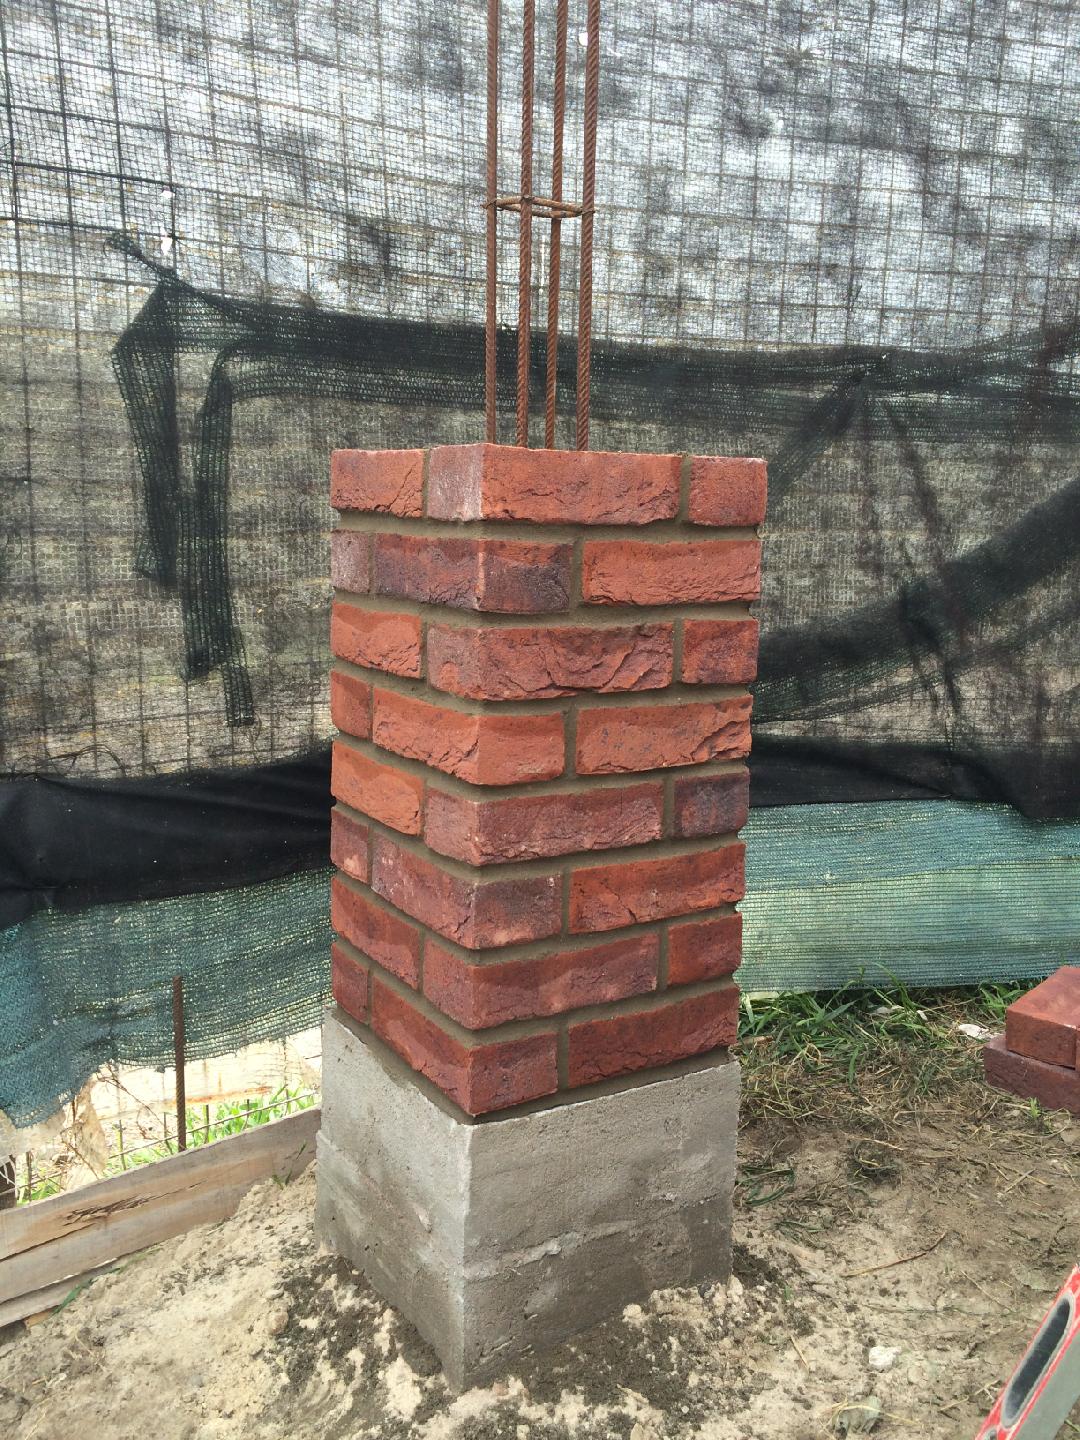
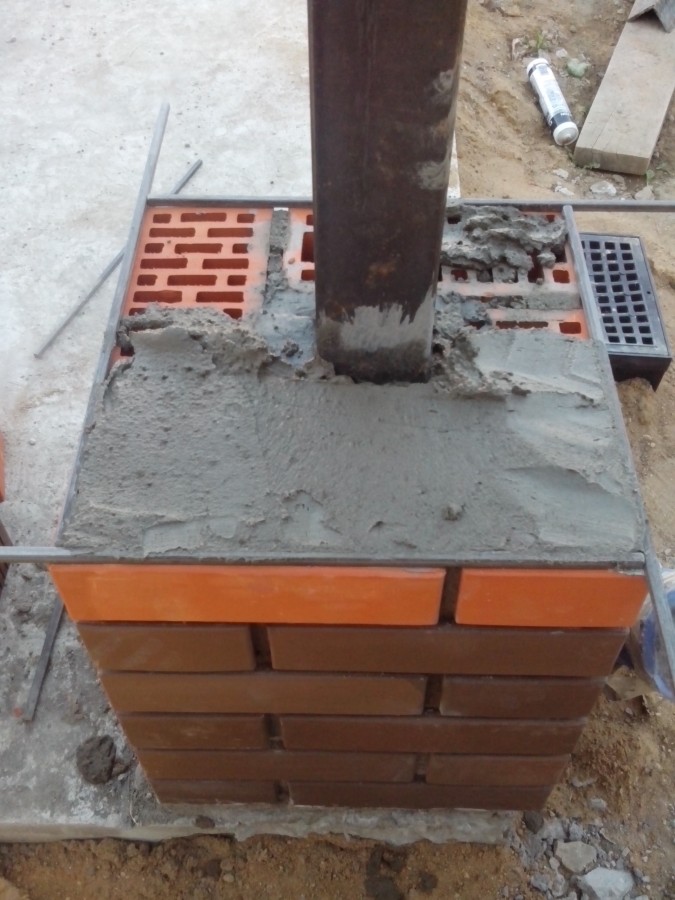
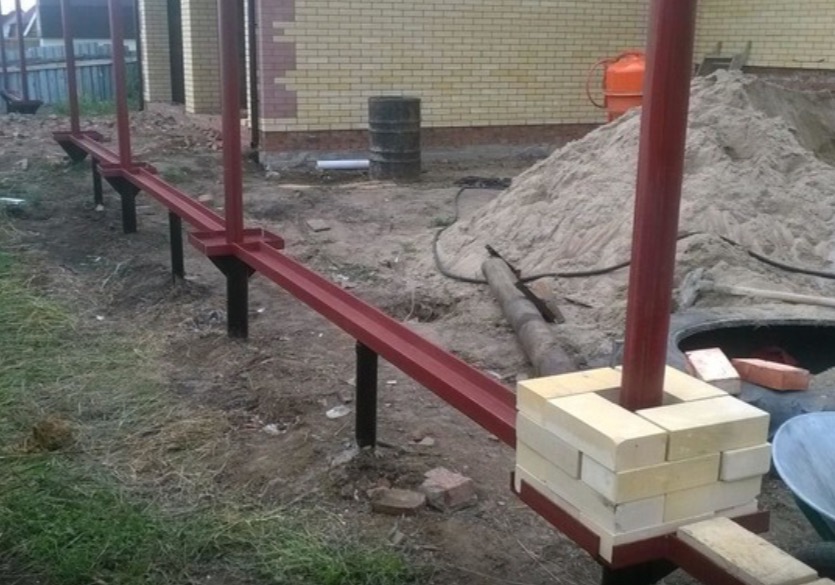
As can be seen from this diagram, a steel rod from a square pipe or reinforcing cage is installed in the brick posts. Embedded plates are welded to it. Steel girders are attached to them under the profiled sheet or picket fence.
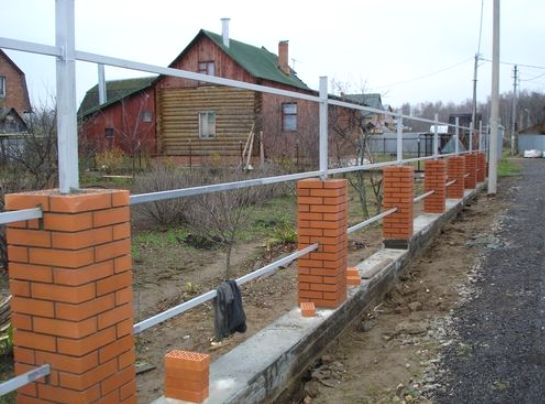 Photo # 1
Foundation type - strip rubble concrete or concrete. A trench is dug under it, and pits with a diameter of 15-20 cm are drilled in the places where the posts are installed. First, concrete is poured into wells with posts of posts installed in them. After that, layer-by-layer concreting of the trench begins.
The main parameters of the foundation (depth, width, degree of reinforcement) and the height of the fence are determined by calculating the strength and stability.
In a simplified version, tested in practice, the following sizes can be recommended:
- trench depth - 20-30 cm;
- the depth of the well for the installation of metal racks of brick pillars, counting from the surface of the earth - 90-100 cm;
- the height of the grillage (the upper part of the foundation, located above the earth's surface) - 40-60 cm;
- foundation width - 20-35 cm;
- the distance between the posts is from 2.5 to 3 meters;
- the height of the posts is from 150 to 180 cm (the cross-section of the masonry is 38x38 cm).
In wet soils, it is necessary to drill holes for racks below the freezing depth so that the forces of frost heaving do not deform the fence.
In weak and unstable soils, in the upper part of the foundation, before concreting it, it is advisable to lay a reinforcing cage of 4-6 rods with a diameter of 14-18 mm. It will preserve the integrity of the foundation and will absorb the loads that arise in the concrete when the soil subsides.
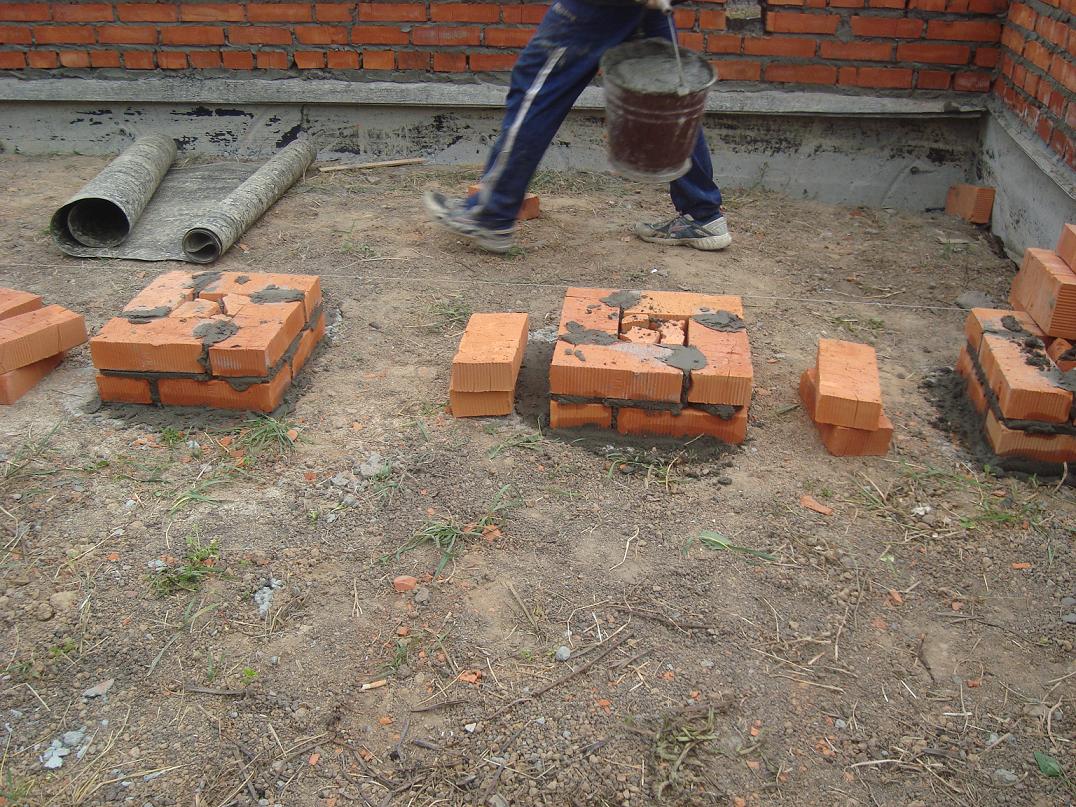
The laying of brick pillars begins no earlier than 2-3 weeks after concreting. Having laid the waterproofing under the posts, you can get to work.
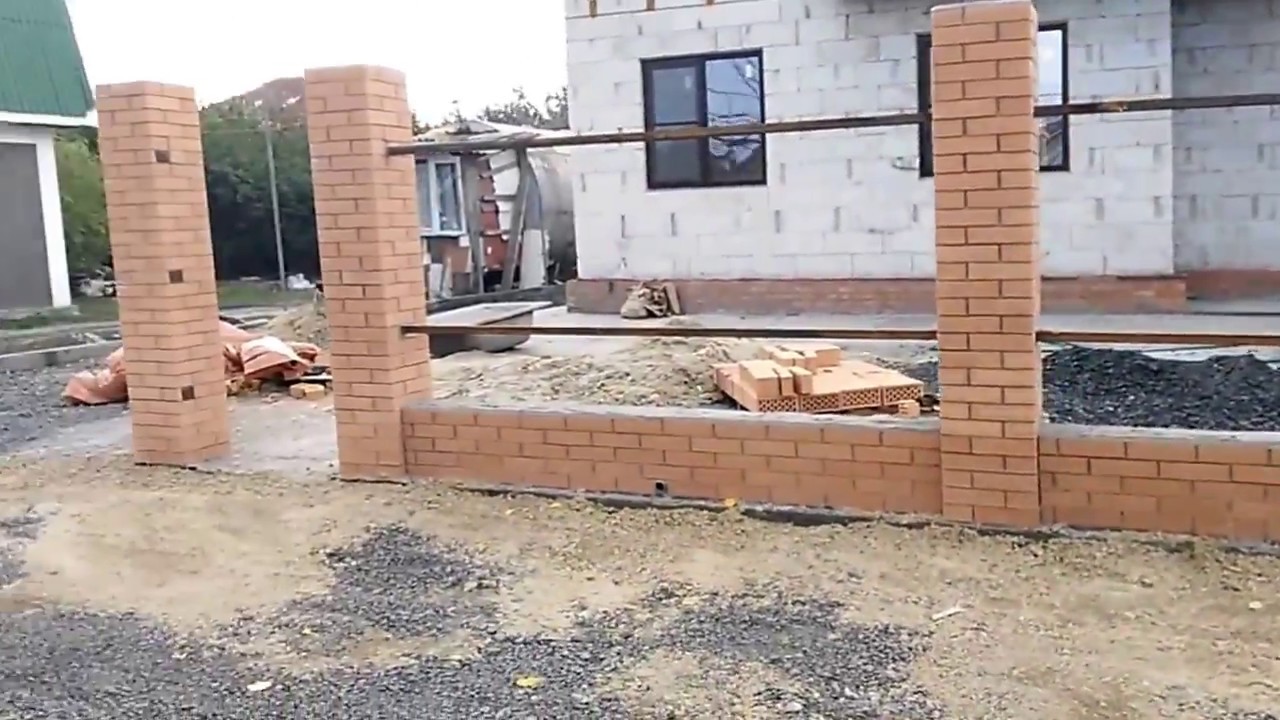
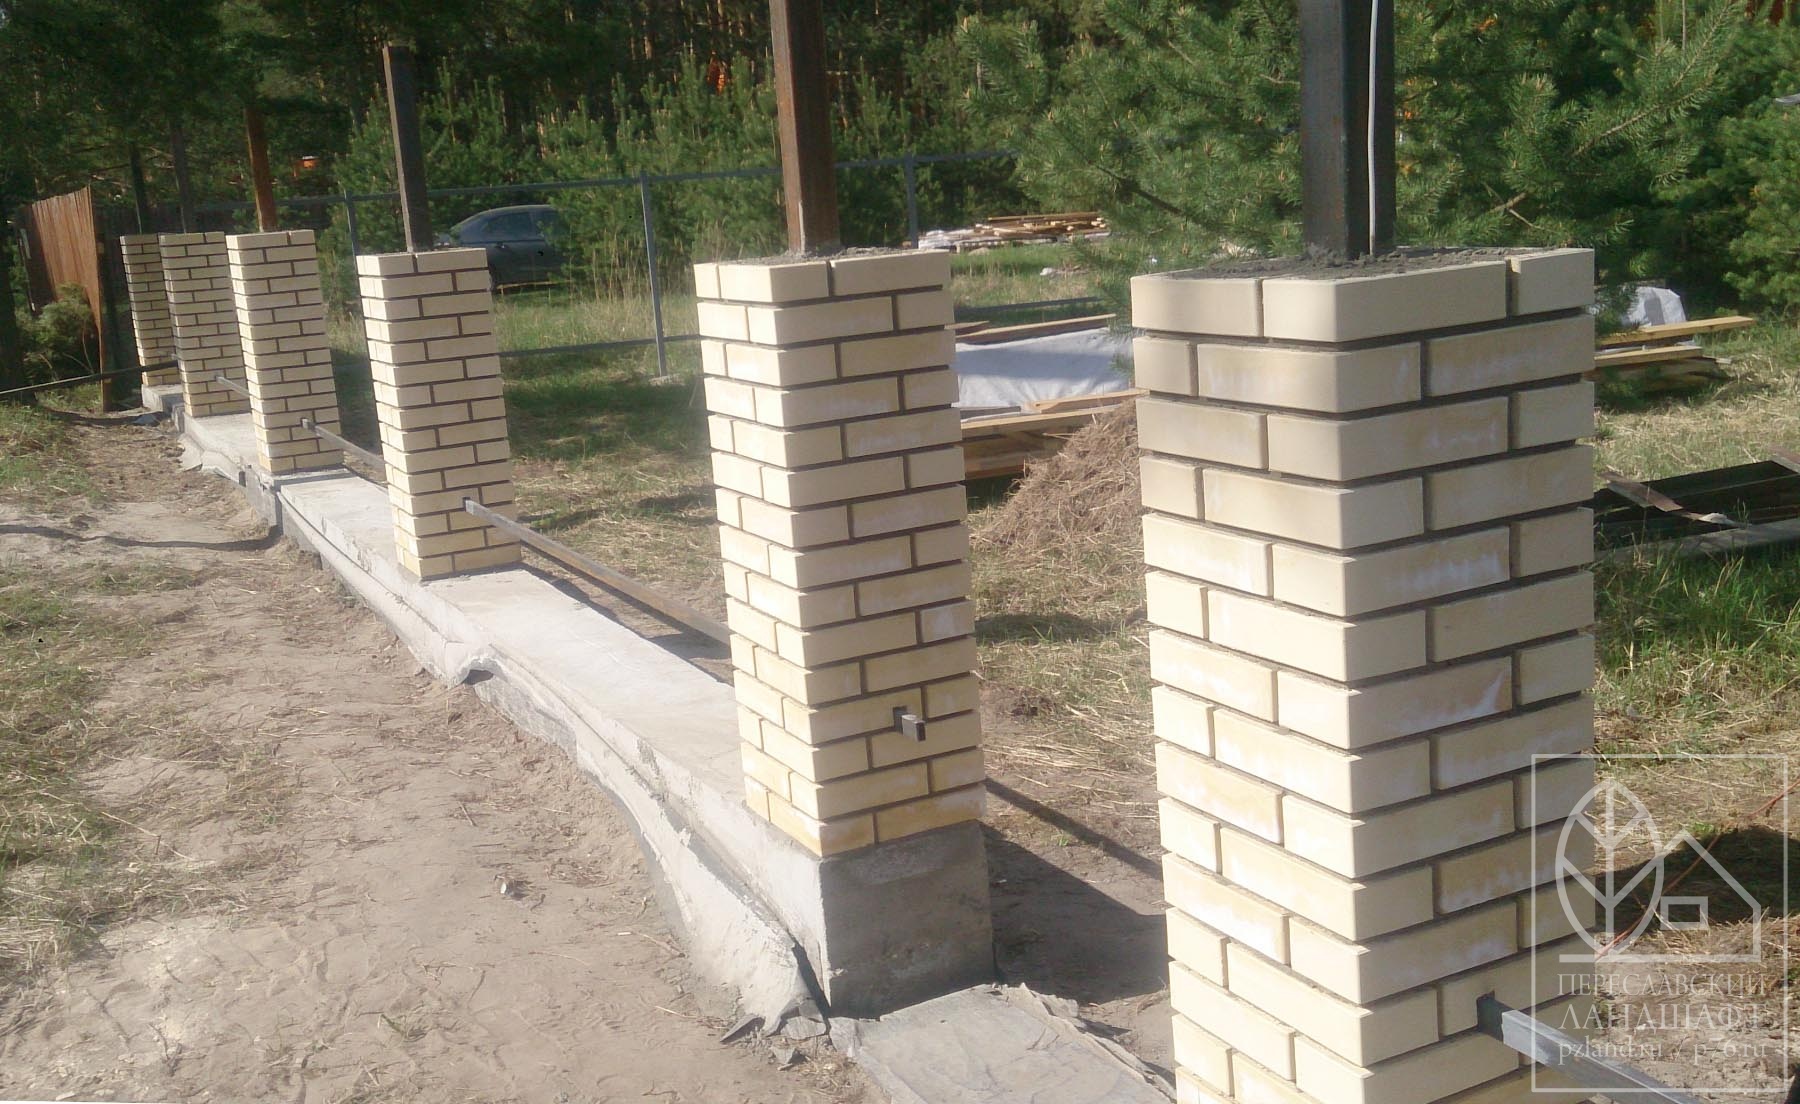
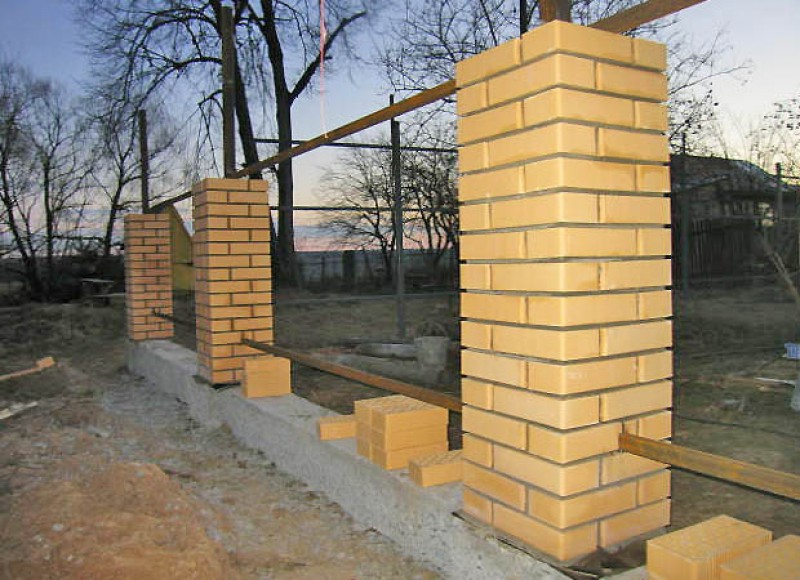
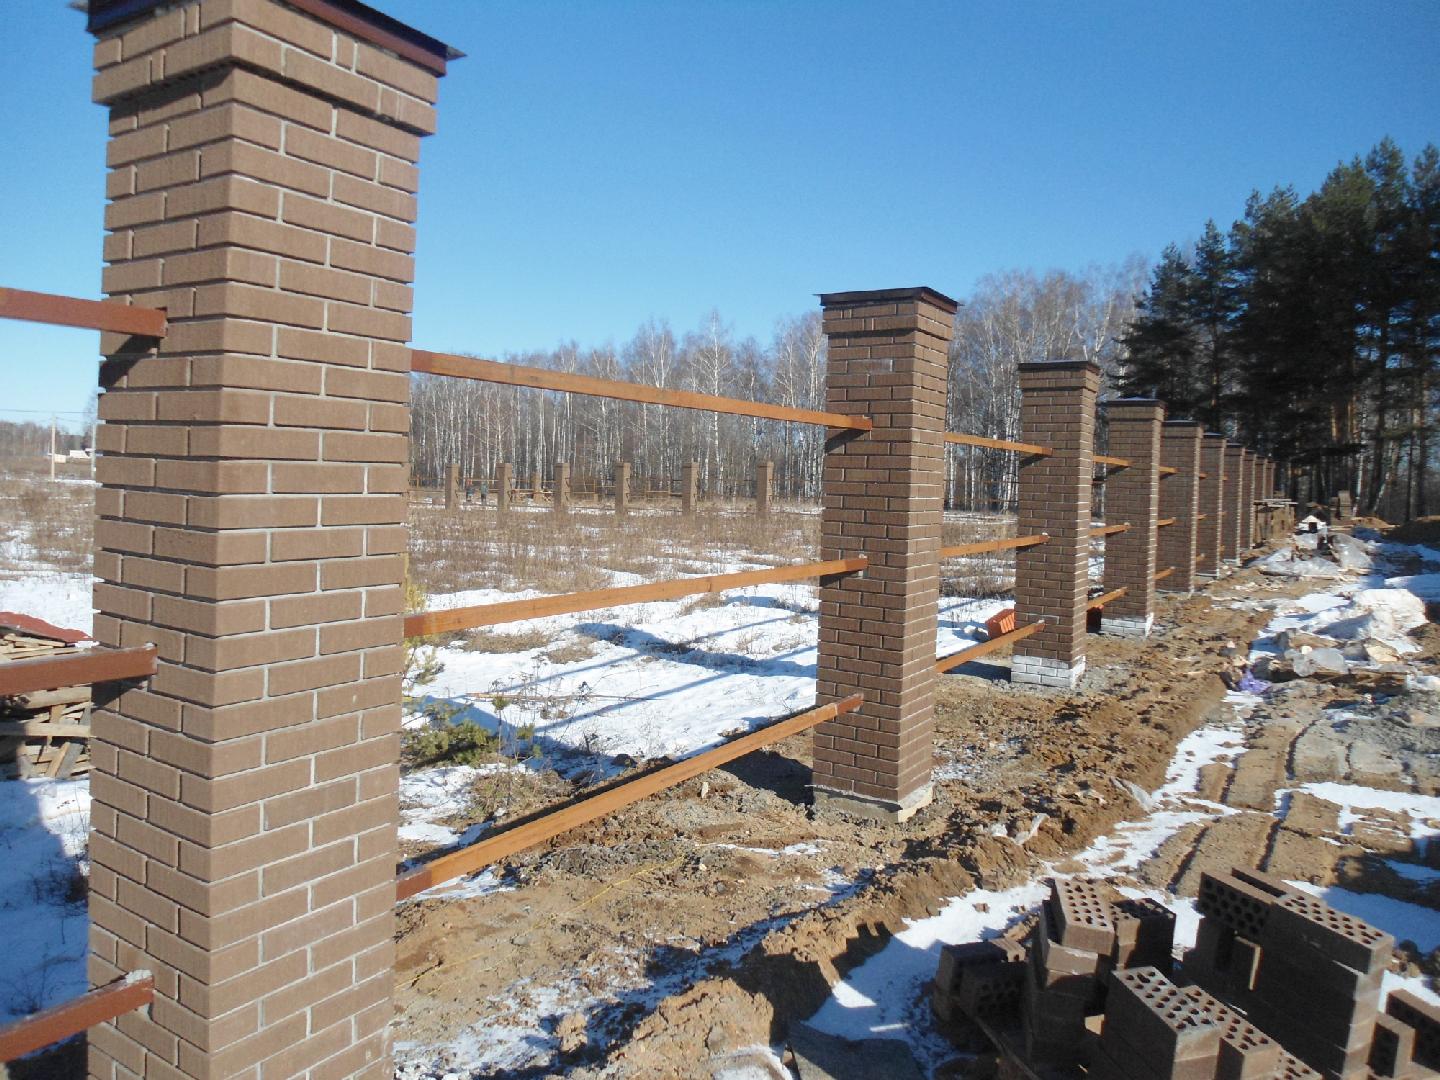
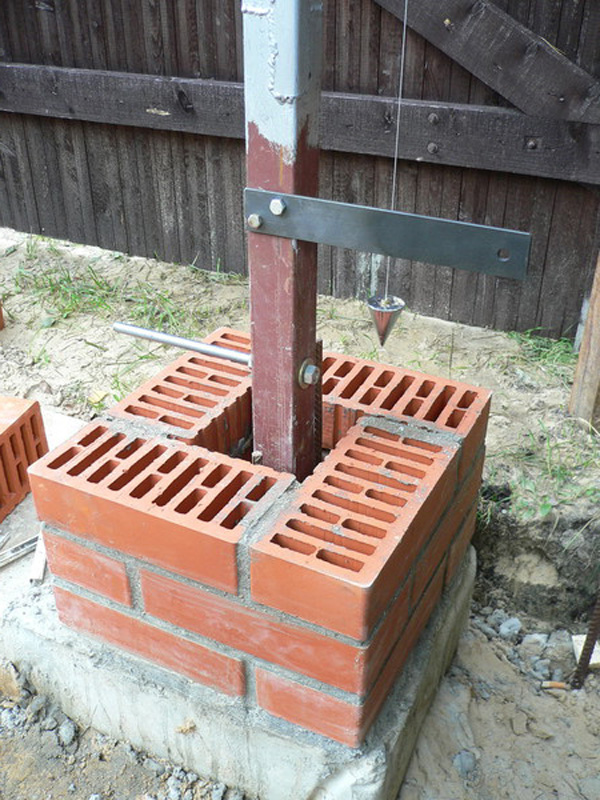
Smooth seams are a guarantee of an excellent appearance of brick posts. Experienced bricklayers use to simplify the work of sections of a square bar, which serves as a seam template (photo # 2)
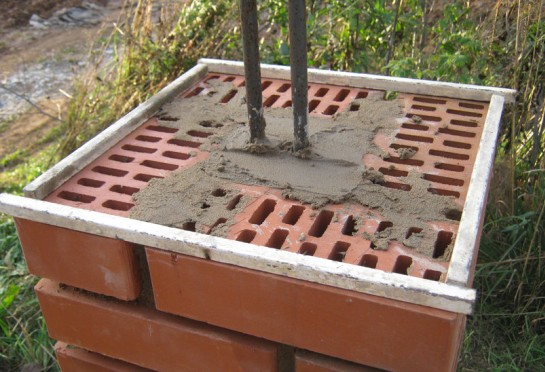 Photo # 2 Square steel bar - a template for laying a column
In the photo we see a fence under construction with pillars made of bricks with a section of 38x38 cm. Inside, for reinforcement, two reinforcing bars are installed. The space between them and the masonry is filled with fine-grained concrete or mortar.
For fences with a height of two or more meters, the size of the column section is increased to 51x63 cm or 64x77 cm. The dimensions of the reinforcing frame increase accordingly.
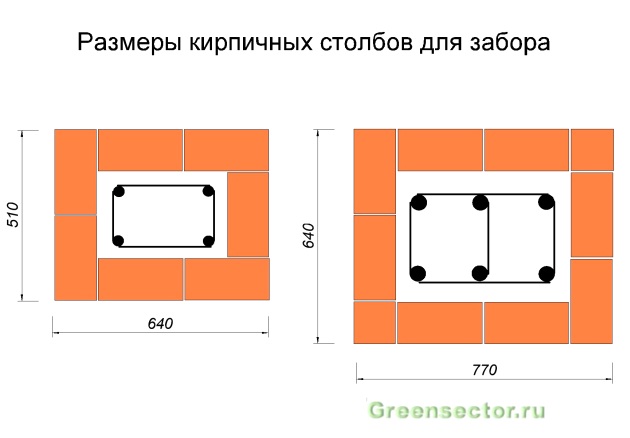 Scheme No. 2
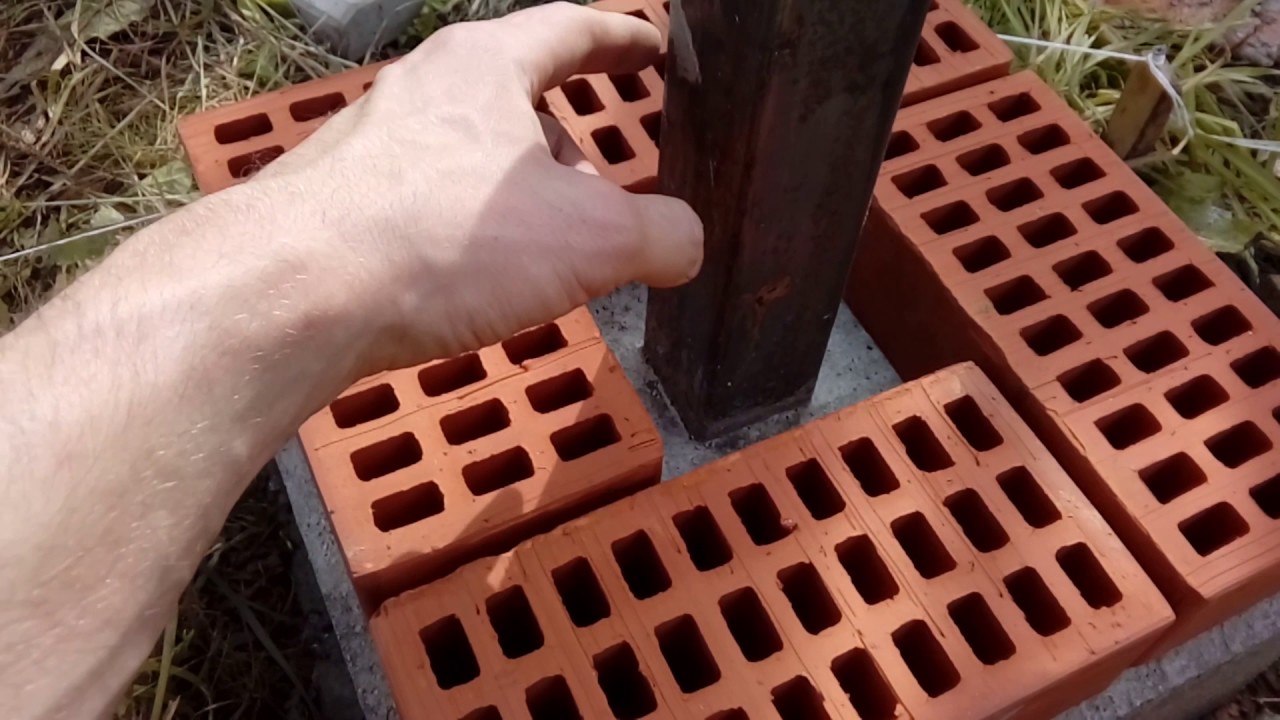
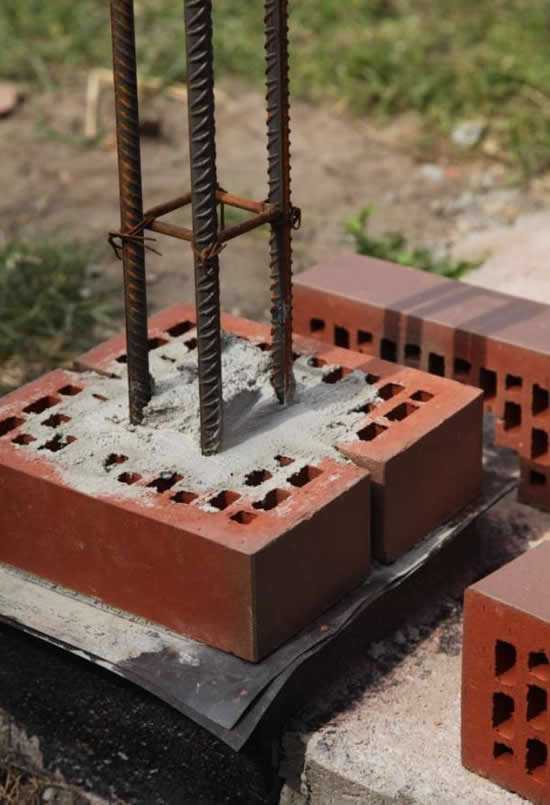
In order to firmly connect the masonry with the concrete filling of the frame, some builders use a reinforcing mesh, running it inside the column by 3-5 cm (after 2-3 rows).
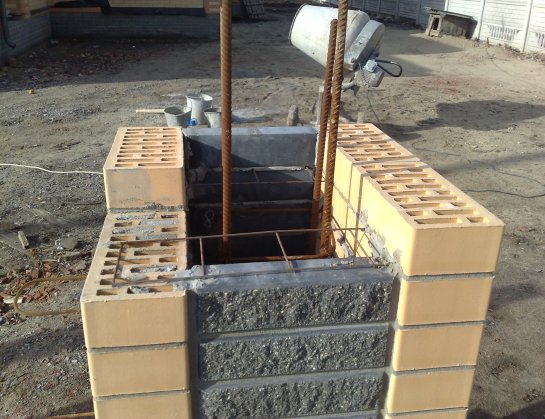 Photo # 3 Reinforcement mesh will connect brick to concrete
The choice of bricks for pillars
Usually, four types of products are used for the construction of brick pillars:
- ceramic brick;
- clinker brick;
- silicate brick;
- hyper-pressed brick.
And in order to accurately determine which of the bricks is of a sufficiently high quality, you can simply carry out a banal check right in the store.
- The easiest way to identify flaws in the material is to examine it for various defects. If cracks are found on the surface of the brick, then, of course, it is better not to buy such material. You can use a metal object to check the quality of the brick. If you knock this object on the surface of the building material, then by the nature of the sound emitted it is easy to determine the quality. If the sound is sonorous, then the material can be bought. If the sound when hitting a metal object on the surface is deaf, then it is better not to purchase such a brick. A dull sound emitted indicates that the material was poorly processed during the production phase.
- Another way to test the quality of a brick is to throw it on the asphalt from about a meter in height. If it splits into several pieces, it means that the requirements were poorly followed during its production. Naturally, then you don't need to buy it. When buying a brick, be sure to ask the seller to show a passport confirming the quality of the product. This document must be mandatory, but if it is not there, then it will be easy to understand what quality the material has. Therefore, it is better not to buy a brick without a passport.
What masonry methods should be used
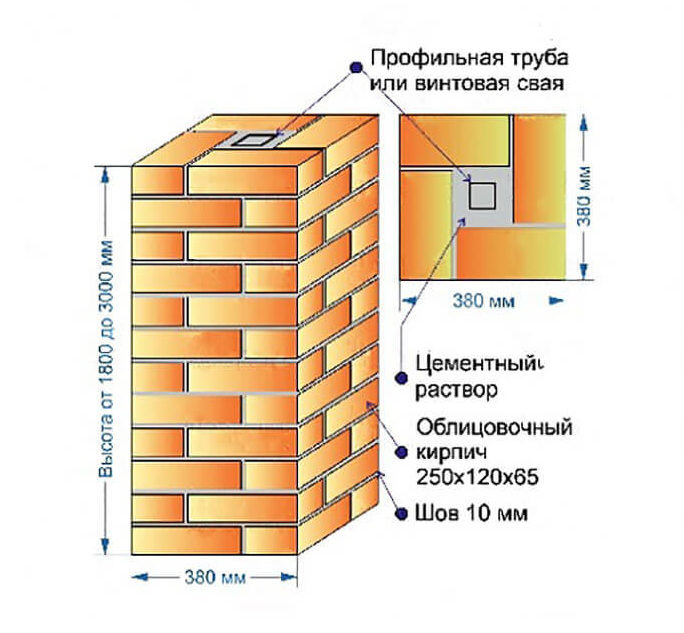 Photo: a pillar 1.5 bricks wide
To strengthen the fence, the rows are reinforced with a metal mesh.
Let's consider the technique of creating pillars in these ways in more detail.
Two by one and a half bricks
The masonry is performed in the following sequence:
- The base of the pillar is formed from 6 bricks, poked to each other.
- In the second row, 2 outer and 2 halves are placed across the elements of the first row. Between them, you need to install 3 bricks parallel to each other.
- On the third row, 4 bricks go from spoons to spoons at right angles to the first row. 2 bricks are placed in the free opening with spoons to the second row, to each other with pokes.
- The fourth row reflects the previous one - it is turned over 360º.
Two by two bricks
 Layout of a pillar in 2 bricks
The order of work is as follows:
- At the base of the support, 8 bricks are placed in 2 rows with a poke to each other.
- Then, on the longer side of the pillar, 2 pieces are laid with pokes at right angles to the bottom row. 4 bricks are placed in free openings perpendicular to the side elements. They must go parallel to each other.
- The next row fully reflects the previous one.
- The latter is formed in the same way as the first, except for the direction of the bricks. They should run at a 90º angle to the first row.
Construction of brick columns
Often, brick pillars to the fences are made in 1.5 or 2 bricks, that is, the cross section is 38x38 cm and 51x51 cm, the height can reach 3 m.
Speaking about the order of work, it is worth noting that it begins with the fact that a double layer of roofing material is spread. This is to prevent the brickwork from absorbing moisture from the soil, which can cause it to crack.
After that, the layout of the columns is made. According to their size, a layer of mortar with a thickness of slightly more than 10 mm is applied, on which the first layer of masonry is laid out - the basement.
Installation diagram of a fence with brick pillars
The material is leveled from all sides with a rubber hammer. The masters advise: before starting the construction of the basement, the brick must be put in water for a couple of seconds so that the mixture dries more slowly and inaccuracies can be easily corrected.
Also, thanks to this, you can easily wipe the brick from excess mortar, which must be removed immediately.
The second row is also laid out on the mixture, but with an offset to close the seam. The bricks are aligned and checked against the size with a tape measure. Even the smallest offset is unacceptable. Therefore, if it is found, then the bricks are moved closer by tapping on the end of the building material. If the sides are not smeared with a solution, then they need to fill the vertical seams. All further rows are laid out according to the same analogy.
Drawing of the foundation for the fence
What to consider
If there is a void between the reinforcing base of the post, it is poured with masonry mortar at small sizes. If the distance is quite large, then it is more economical to fill up the space with crushed stone, which is tamped and poured with a solution of sand and cement.
At the end of the work, professionals also recommend putting a metal cap on the top of the post, which is necessary to protect the brick from excess moisture.
More details about all stages of the construction of the foundation for the fence can be seen in the video below.
Installation of strip foundations on the ground
First, wooden pegs are installed around the perimeter of the construction and the length of the fence is measured with an accuracy of a centimeter. After that, they begin to calculate the number of pillars, taking into account the size of the gates and wickets. Depending on the filling of the body of the fence, the distance between the posts may be different. It ranges from 2.5 to 3 meters. If the soil allows you to avoid the installation of formwork, concrete is poured directly into the ground.
This is possible for clayey, rocky soils, which may not crumble for several days in good weather without rain. If the ground is sandy, formwork must be installed to the full height of the base. For formwork, boards, plywood, flat slate are used. If the house is on a slope, then the fence foundation will have to be made stepwise.
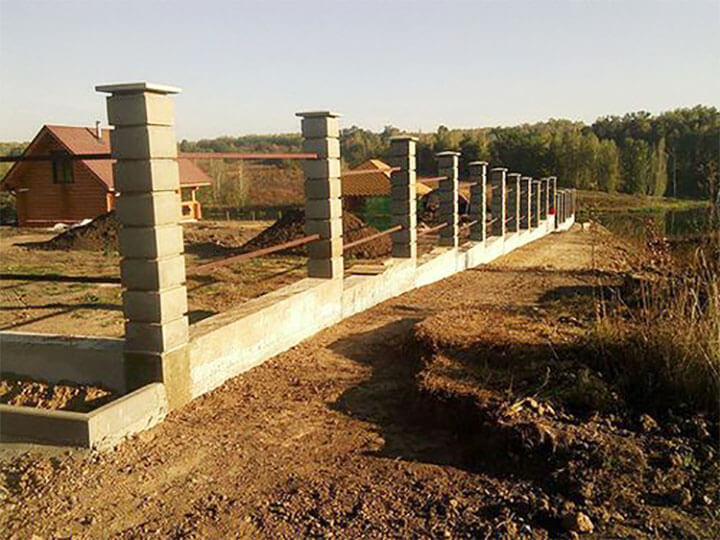 Photo: foundation with pillars installed on a slope
Benefits of using buta
Foundations for a fence made of rubble stone with brick pillars in terms of bearing capacity are in no way inferior to concrete ones. Any stone material of suitable size is used to fill the trench. Large stones are split with a chisel or an old ax. To do this, they are laid on the ground and with strong blows they first cut a long furrow in them, and then split them. Tie the stones together with a solution of the brand of at least M200.
There should be no gaps and cavities between the elements that are not filled with cement mortar. If water gets into the cavity in winter and freezes, there is a risk of rupture of the foundation and the fence may tilt. When the bottom of the foundation is tilted a few centimeters, the top of the fence will go 5-10 cm to the side and everything will have to be redone.
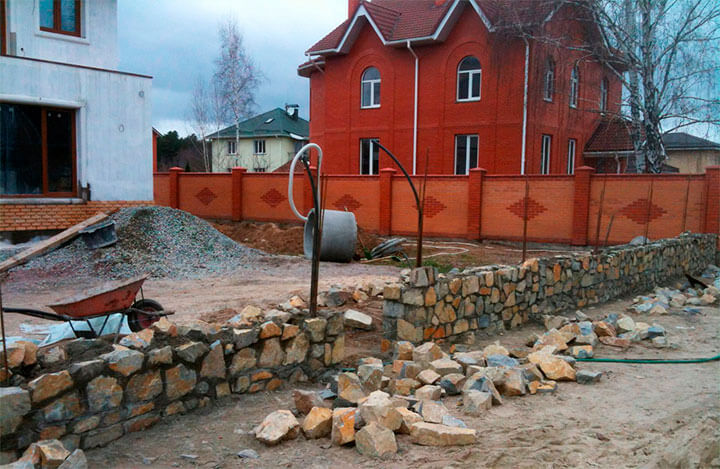 Photo: buta laying
Foundation with glasses and reinforced concrete beam
This is the most cost-effective option for building foundations for brick fences. After breaking down the plan, holes are dug under the fence and concrete glasses are poured into the formwork. At the top of the glass, a recess is left for the thickness of the beam. Reinforced concrete beams, which play the role of a base, can be cast in one place, and after hardening, transported to the fence and installed. An expansion joint should be provided between the beams and glasses.
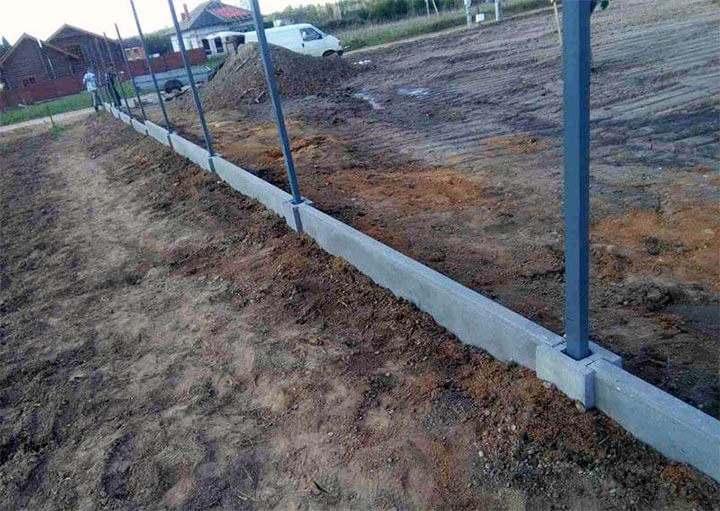
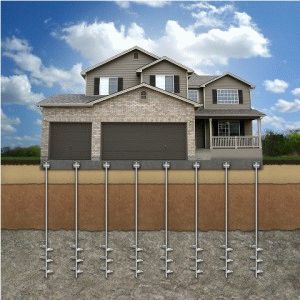
Foundation on screw piles
Steel screw pile supports can be used to construct foundations in soils with low bearing capacity. They have steel caps, on which a concrete grillage is formed under the load-bearing beams.
It should be taken into account that the screw pile supports for houses have a closed contour and are a rectangle or square in the plan
Fences can be long, and in order to reduce the effect of positive or negative temperatures, it will be necessary to make expansion joints at regular intervals. The advantage of steel screw supports is that there is no need to use earth-moving equipment during their construction. In fact, the body of the foundation is above the ground.
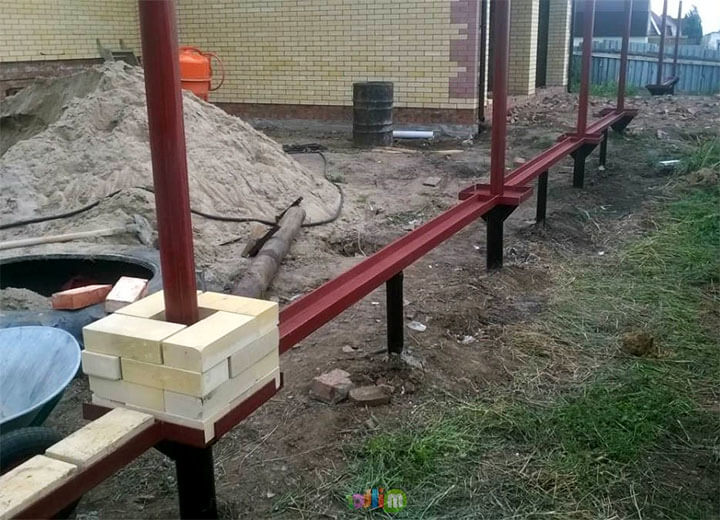
Advice:
- Choose welded piles for low density soils or cast piles for heavier soils. However, keep in mind: cast piles are much more expensive, although more durable.
- The internal cavities of the piles are filled with concrete of a grade not lower than M200.
- For fences with a large windage, with filling with corrugated board, you will have to make a calculation for the wind load.
Arrangement of strip-and-column foundations
This type of foundation is used for brick fences with solid brick filling between posts on unstable soils in climatic zones with a freezing depth of more than 1 meter or in permafrost areas. A very costly way of arranging such bases. This requires the use of special machines and mechanisms: excavators, drilling rigs.
The pillars are concreted in special metal formwork and, after hardening, are treated with bituminous compounds for waterproofing. Waterproofing serves as a lubricant for heaving soils when temperatures drop to -30 ° C and below. The entire body of the foundation with pillars is reinforced with steel reinforcement.
