How to create beautiful texture and embellishments
The beauty on the surfaces is created by the careful hands of the master. We offer interesting solutions for decorating plastered walls using bark beetle, stencil, printing, Venetian and Versailles methods.
Bark beetle: uncomplicated beauty
The main task of applying the decorative mixture is its uniform distribution.

An ordinary 100 mm spatula helps from excess mixture on a grater. We spread a layer of 2-3 mm, no more, otherwise the texture will not appear, and a thin layer will reveal the primer and decorativeness will also fail.
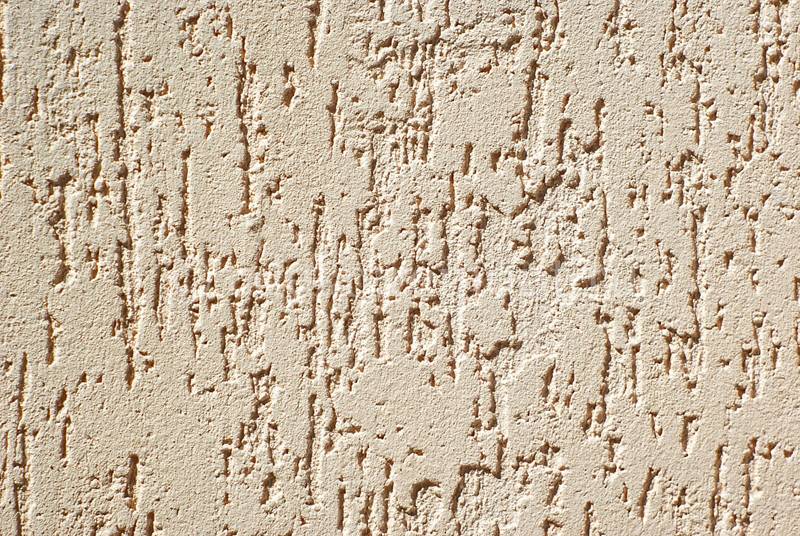
The method of applying decorative plaster do-it-yourself bark beetle is worth watching the video:
Stencils and prints for decorating surfaces
We already know from the article and from the video how to make decorative plaster with our own hands, it's time to learn how to work with it through stencils and using stamps.
The finishing acrylic putty together with the starting putty work wonders. In addition to the mixtures, you will need a color, a primer, acrylic paint and a suitable stencil.
It is not necessary to look for a stencil in stores or on the Internet, it is quite within the power of any craftsman. We use thick cardboard or plywood: the drawing can be downloaded from the Internet or you can come up with yourself: plant, geometric or abstract patterns are drawn with a pencil and then cut out. It is not necessary to process all the walls with a stencil; you can decorate individual areas.

It is better to make cuts on cardboard with a clerical knife, and an electric jigsaw is used to work with plywood.
Let's add a color for acrylic paints to the finishing putty - this is how we select the main background of the walls. We apply the material with a layer of 1.5-2 mm and wait for it to dry out.
For those who work on drywall: When the layer of putty has set, you will need to start removing pebbles with sandpaper, and then apply a layer of primer.
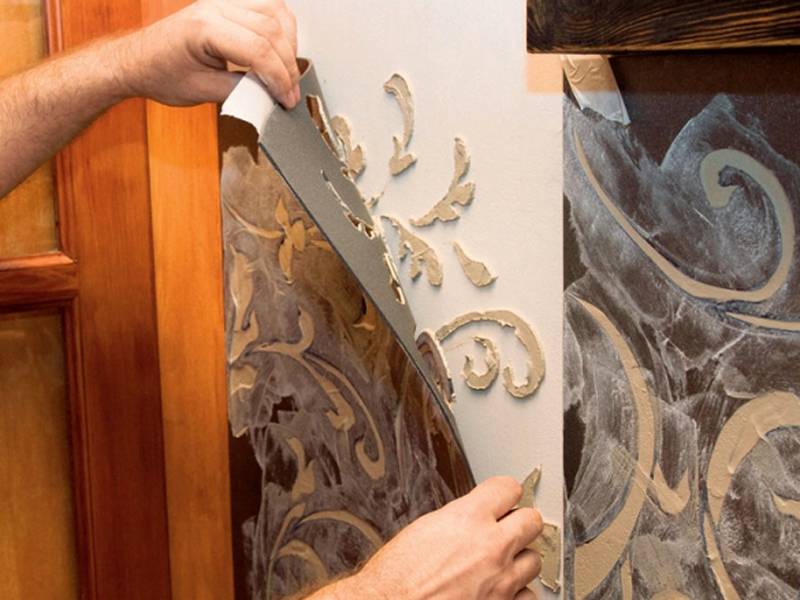
Wait for hardening and remove the stencil and admire the drawing
Painting is done with a brush and acrylic paint, diluted with color.
Polyurethane stamps for wall decoration are no less popular, mainly imitation brickwork, bubbles and decorative stone.
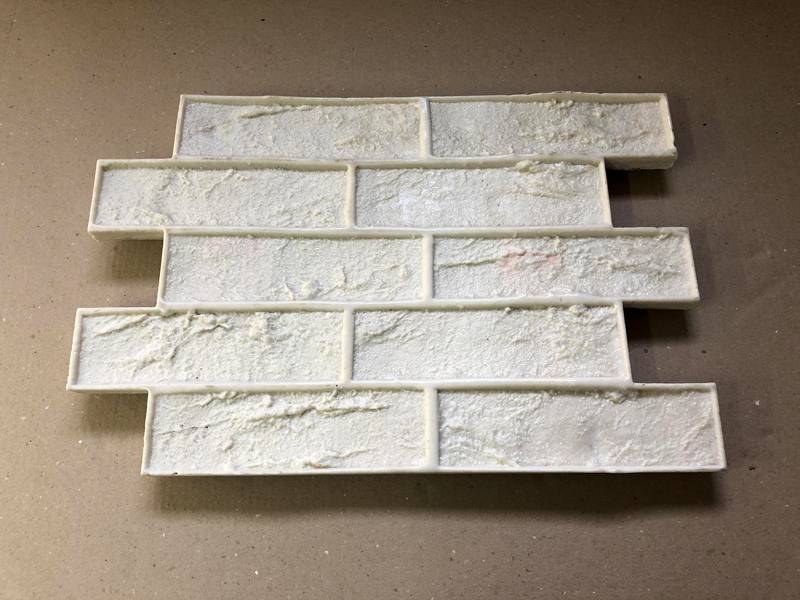
The stamp leaves a mark to a depth of about 5 mm.
DIY decorative plaster in Venetian style
Venetian stucco is good, and the photos clearly confirm this.
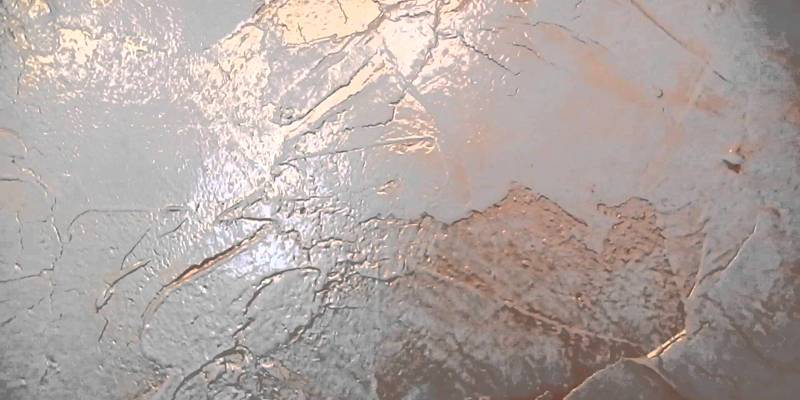
First, we treat the surface of the walls with a primer: the colored walls are covered with a white primer. The color component is added to the putty, the solution is stirred and applied in a thin layer of 1 mm.

Again, everything is covered with a transparent primer and the wall is painted in two shades of the same color.

The final stage is covering the walls with wax.
The work of the master is afraid, so we do not deny ourselves the pleasure of decorating the walls of the apartment with simple technologies.
Features of decorative putty
Putty for decorative finishing is a wide field for the embodiment of bold design ideas. Thanks to this, you can create a variety of stylistic solutions with your own hands:
- randomly applied colored spots and stains on a flat wall;
- images on a smooth plane;
- wall with an arbitrary relief texture.
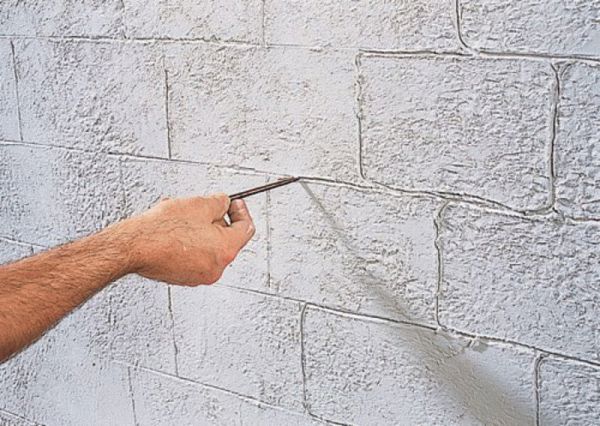 There are many options for decorative finishing with putty, you just need to show a little imagination
The creation of masterpieces of decorative finishes from a simple putty must begin with the preparation of tools: spatulas of different sizes, construction float, sandpaper, trowel for surface structuring, level, sponges, brushes, rollers and other accessories, depending on the type of structure being created.
The whole process of making decorative plaster includes the following steps:
- work planning and surface preparation;
- applying a starting layer;
- creation of a conceived texture;
- finishing finish.
The process of applying "Venetian" plaster
1. Leveling the surface
The first step is to carefully prepare the walls, ceiling or columns for work. The surface must be perfectly clean, even and dry. Any gypsum plaster mix is suitable for leveling the walls. If you prefer the classic sand and cement plaster, you have the option to use it. But gypsum-based mixtures are much better, they dry very quickly. The surface will dry for 1-2 days. Then you can proceed to the next stage of work.
2. Application of decorative plaster
Now you can start the process of applying plaster. This requires an "AB-eska". The mixture is diluted with water until it works. In our case, it should have a thick consistency so that it does not drip from the surface, but also does not become too thick. Putty is taken in small portions, and strokes are made on the desired surface. The drawing can be different: large, small, imitating some material, repetitive. The main thing is not to forget that in the process of work you need to periodically move away from the wall itself and evaluate how high-quality your work has turned out. Whatever your "drawing", the most important thing is to maintain integrity throughout the entire surface. Regardless of whether it is a wall or a column, everything should look like one whole. The layers are applied with a spatula, very carefully, layer by layer. Each layer must dry. Then it is cleaned to eliminate irregularities. The first layer is applied as a continuous layer. It sets the foundation for the future work. The rest of the layers are finishing. They are applied with a steel, flexible spatula. Now you can leave everything to dry. You need to wait from one to several days. Drying speed depends on several factors: air temperature and humidity and the thickness of the coating layer.
3. Surface sanding
We proceed to lightly sanding the surface. This requires a mesh or non-coarse skin. In order not to spoil the unique structure, it is necessary to smooth out only sharp protrusions. The most important thing is not to overdo it. Now you need to sweep away the dust and prime the surface. It is advisable to use a quality primer. It dries for 1-3 hours, the exact time is indicated on the package. If you decide to decorate the walls in the bathroom with "Venetian" plaster, then it is recommended to use synthetic wax as a protective layer. This material perfectly protects the surface from moisture.
4. Paintwork
Your textured surface is ready. You can start paintwork. The wall is covered with old acrylic paint. In order to paint all hard-to-reach places, we use a roller and a brush. The resulting white color is the basis of our composition.
It is very important to allow enough time for this layer to dry completely.
5. Apply tinted paint
You can use any color you want. There is one rule - the second and third layers should differ in color saturation from the first. They can be lighter or darker. This creates a certain effect. At this stage, you need to work quickly and very carefully. The paint is applied in small areas - 0.5 m2, while it should not have time to dry out. Part of the color must be removed from the bumps of the texture. This is done without pressure using a damp cloth. Wipe the surface with light touching movements. The texture of the decorative putty manifests itself in some amazing way. Do not forget to step back and look at our work from the outside. We are waiting for the paint to dry.
6. The final stage
Further at your request. You can leave it as it is and paint the wall with acrylic varnish.Or you can do the gilding effect. For this, pearlescent paints are used. Their selection is very large: diamond, silver, bronze, copper. The cost of paint, of course, is not very cheap, about $ 4 per 200 g. But the consumption is also small, so it will not turn out very expensive. This composition is applied to the wall with a sponge (for example, for washing dishes). The work is ready ... But the surface will finally dry out only after a week. "Venetian" plaster stays on the wall for ten years without any changes. And in case of any minor damage, they can be easily corrected.
The composition of the finishing material
The advantage of ready-made formulations can be considered optimally selected proportions, an accurately calculated amount of water for a certain volume of dry mixture (or a creamy consistency already prepared for work), the same color and texture in one batch of goods.
Important: when purchasing plaster or putty from different batches of the same manufacturer, you may encounter a noticeable difference in color or texture!
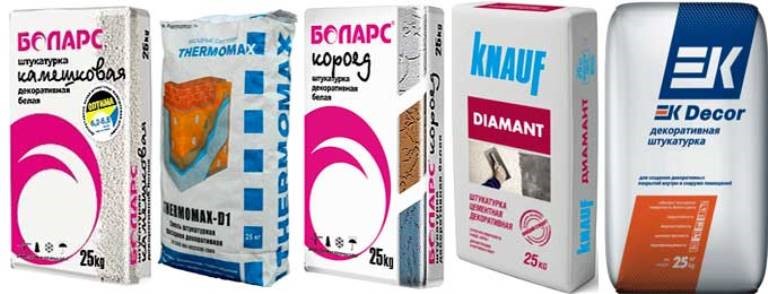
Given the high cost of high-quality compounds and the relative simplicity of their components, you can make decorative plaster from ordinary putty with your own hands. This requires:
- finishing putty. It is the finishing one, since the fraction of solid particles included in the mixture is much smaller than that of the starting one, and the consistency itself is more plastic and convenient for work. It is better to use polymer or gypsum mixtures;
- plasticizers. They are necessary if the putty sets too quickly and it is necessary to extend the hardening period;
- dyes. They can be added to the composition or used after creating the desired texture. In the first case, you need to take care of the compatibility of the components, in the second - about the possibility of applying the selected paint to acrylic or gypsum putty, the nuances of preparation for painting. In addition to coloring pigments, glitters are also used (for example, powdered aluminum);
- fillers. It can be sand of one or different fractions, stone chips or dust, crushed shells, fibers of plant or artificial origin, glass beads, etc.
Since the technology of self-production of decorative plaster with your own hands from putty has been worked out for quite some time, we offer several recipes for creating mixtures of a certain color.
Possible combinations of components in percentage terms (anhydrous mixture).
| Desired color | Base and additives | Shares,% |
| White | Portland white cement | 7 |
| Marble flour | 70 | |
| Marble chips | 13 | |
| Lime | 10 | |
| Light gray | Portland cement | 5 |
| Quartz sand | 74 | |
| Lime dough | 20 | |
| Manganese peroxide | 1 | |
| Terracotta | Portland cement | 10 |
| White quartz sand | 58 | |
| Fluff lime | 15 | |
| Ground brick crushed stone | 15 | |
| Iron red lead | 2 | |
| Green | Portland cement | 15 |
| Green marble crumb | 60 | |
| Fluff lime | 15 | |
| Green pigment | 5 | |
| Chromium oxide | 5 | |
| Yellow | Portland cement | 20 |
| Marble sand | 40 | |
| Sand mountain yellow | 15 | |
| Flour marble | 10 | |
| Fluff lime | 10 | |
| Mummy* | 0,5 | |
| Pink | Portland white cement | 4 |
| Marble sand | 73 | |
| Fluff lime | 20 | |
| Mummy* | 3 | |
| Cream | Portland cement | 8 |
| White lime sand | 60 | |
| White sand marble | 18 | |
| Fluff lime | 12 | |
| Golden ocher | 2 |
* Mummy is not the name of a famous film, but the name of a natural dye of yellow-red-brown color.
As you can see from the table, these options are created on the basis of cement - normal or white.
If gypsum (alabaster) or acrylic putties are used instead of a cement base, you should calculate the percentage yourself, choosing the composition so that it is sufficiently plastic and at the same time does not "drain" from the treated wall.
You can change the color saturation by increasing or decreasing the amount of dye (in the table, manganese peroxide, ocher, red lead, chromium oxide and mummy are suggested as dyes). It should be noted that:
- The addition of chalk or lime will help to "bleach" the mixture;
- ocher gives colors ranging from light yellow to brown;
- manganese, depending on the amount, can give shades from light pink to almost black;
- yellow and red tones are given by chrome (crown yellow and red), natural sienna ("burnt" gives a chestnut color), "mummy", red lead (red tone with a transition to brown);
- natural umber gives a brown with a green tint;
- to obtain blue and blue shades, ultramarine and glaze are used in combination with chalk;
- chromium and lead compounds give different shades of green;
- gray and black tones can be obtained with soot, graphite, charcoal;
- metallic shades are provided by powdered bronze and aluminum.
For convenience, we provide approximate combinations of various colors to obtain new shades.
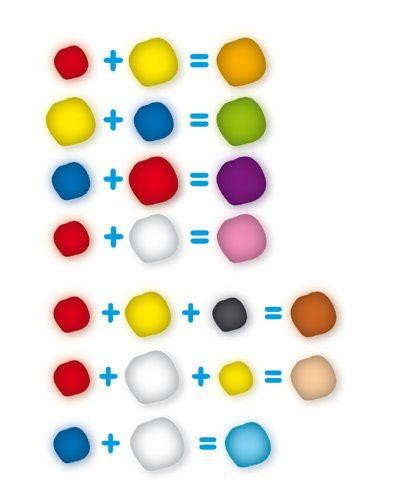
On the same principle of color compatibility, mineral fillers are selected - sand and stone chips.

It is important to understand: for a colored smooth surface, acrylic putty is more convenient, with a large amount of granular fillers it is more convenient to use gypsum, it sets faster and does not allow the applied heavy layer to "slip".
Fractions of mineral additives are selected depending on whether the plaster will be used outside (on the facade, you can take a larger crumb, 5 ... 10 mm) or inside (a size of 1 ... 5 mm is more appropriate), one composition may contain grain of only one or different sizes ...
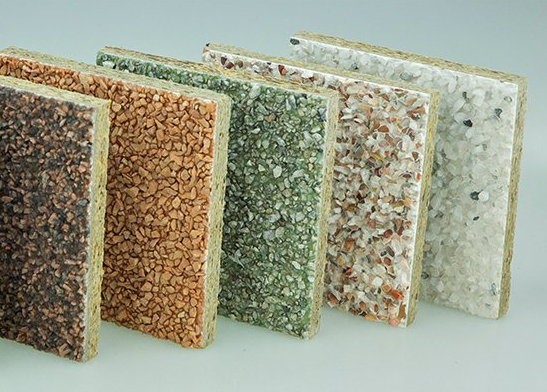
Venetian plaster
For those who wish to see imitation of valuable natural stones on their walls, you can apply Venetian plaster with your own hands. Walls with a touch of the Middle Ages will look unusually beautiful. The ideal effect can be achieved if the material is applied to a perfectly flat work surface.
What are used for cooking:
- sand;
- slaked lime;
- pigments;
- water.
The solution can be purchased ready-made. If you are going to make it yourself, you will need an exact recipe. You can use one of the proportions of the solution below:
- mix three parts of sand with three parts of putty and one part of gypsum mixture, dilute with water until sour cream;
- Mix the primer with water in a ratio of one to two, add the putty until the desired consistency is obtained.
Now we will tell you how Venetian plaster should be applied with your own hands so that the result is impressive:
- For work, arm yourself with a spatula. Apply the material with small strokes or, conversely, sweeping strokes, it depends on the planned pattern. After finishing the first coat, leave the material to dry.
- Once dry, take a spatula with a soft tip and proceed with the second coat. Leave the work to dry again.
- Let's move on to the most important work - grinding. Here you need to use fine sandpaper or mesh. The work is painstaking, because you need to smooth out all the sharp details and at the same time not damage the created structure.
- The next step is painting. To get the proper result, the paint must be applied in several layers, with each subsequent layer having a darker tone than the previous one. Consider this when choosing a color.
- The last step will be to varnish the work done. You can add a golden hue here or leave it unchanged.
This is an incomplete list of works if you are creating not a simple textured plaster, but a Venetian one. After all, there are many varieties of this coating, from classic to marble, and each is created in specific steps.
For example, finishing with plaster, which will look like marble, can be considered one of the oldest ways to decorate a room. Despite this, it is this type of plaster that can be found very often. The price of such a finish is several times lower than natural stones, but the look is not inferior to them and is almost identical.
How are working manipulations carried out:
- with a wide spatula, apply a thin layer of the prepared mixture for Venetian plaster;
- wait about ten minutes and use a trowel to form the desired relief;
- leave to dry (it will take several hours);
- apply the next layer, its shade should be different from the first (put different tones on the spatula and mix them);
- paint the wall and level it with a trowel after five minutes;
- after a day, the surface must be sanded and waxed.
The marble imitation is ready, but the recommendations continue. Now you will learn how to properly paint the applied solution.
Venetian plaster includes many colors. This is necessary for the finished mixture to obtain the desired shade. It would seem that everything is just enough to add color and you're done. The tinting process is done in the following order:
- mix white, add the desired shade to it;
- the mixture is stirred to the desired consistency;
- the resulting color is applied to the edge of the blank sheet;
- the result is compared with the reference one and it is decided what other shade needs to be added.
If you are mixing colors and adding color for the first time, it is important to consider a few nuances. First, when the material dries, it will become lighter in several tones.
Secondly, to remove excessive brightness in the finished coating at the time of mixing, you can add a few drops of black. And most importantly, when using the prepared shade, do not forget that it may end, so it is very important to remember the proportions that you used, and it is better to write down
First, when the material dries, it will become lighter in several tones. Secondly, to remove excessive brightness in the finished coating at the time of mixing, you can add a few drops of black.
And most importantly, when using the prepared shade, do not forget that it may end up, so it is very important to remember the proportions that you used, and it is better to write down
Decorative plaster from ordinary putty: proven recipes
It is quite simple to choose a composition for the subsequent application of a relief on it. Let us analyze how to make a mixture "under a roller", a stencil and any other device.
- We take gypsum or chalk powder (aka calcium carbonate) as a base. It will take 6500 g.
- PVA glue as an astringent. It will need 800 g.
- The solution of KMTs glue is 5%. Diluted in water strictly according to the manufacturer's instructions. Need 2000
- Bar of household soap 72% as a plasticizer. Three on a grater, diluted in a small amount of water to a gel-like state.
The kneading process is very simple. First, prepare the liquid. We introduce powder into it in small portions and mix well. Optimal use of a construction mixer. Let the finished paste stand a little and stir again vigorously. A feature of this variety is a long drying time. We suggest watching a video that shows the process of texturing a homemade material.
There is an even simpler recipe that will require any gypsum plaster with additives. To increase its strength, you need PVA glue. It is added to the water for mixing, after which the mixture is introduced into the liquid in parts. The proportions are observed in accordance with the manufacturer's recommendations. The ready-made solution can be applied in any way you like to obtain a relief surface.
To obtain a bark beetle type plaster, you can recommend this mixture option:
- coarse sand, sifted and washed - 3 parts;
- gypsum finely dispersed composition with mineral additives such as "Satengips" - 3 parts;
- a mixture of plaster with polymer additives such as "Fugenfüller" - 1 part.
All components are mixed dry to a homogeneous mass, which is mixed with water and mixed well.
Instagram @alexandro_guro
A properly prepared and applied home-made decorative mixture from a putty material is not much inferior to an industrial analogue
It is important to select its components, taking into account the purpose.
Materials and their properties
Compositions for decorative plasters are produced in dry or ready-made form. Dry mixtures must be diluted with water or an organic solvent before use, following the manufacturer's instructions. Ready-to-use materials do not require additional mixing with any thinner.
Decorative mixtures are made on a mineral or polymer basis. In the first case, cement or gypsum is used as a binder, in the second - acrylic. To structure the surface of the finish, coarse or fine-grained fillers are introduced into the composition - marble chips, polymer dry chips, fibers, quartz sand.
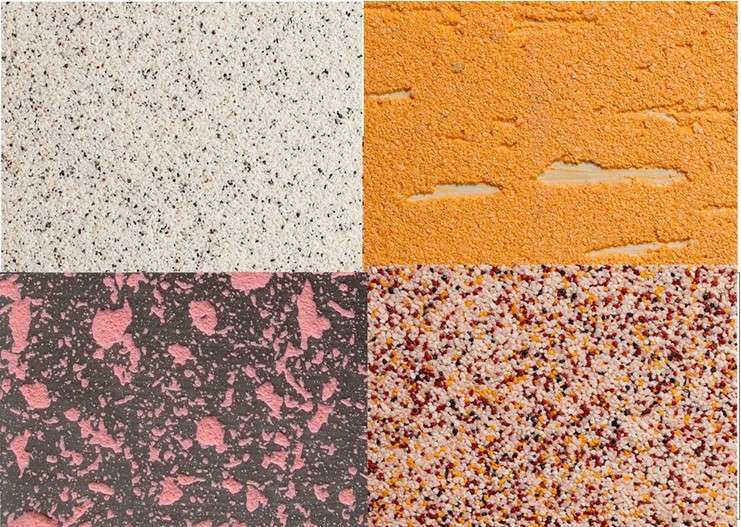
General properties of decorative plasters:
- elasticity;
- high adhesion to any surface - concrete, wood, aluminum profiles, drywall;
- fast hardening speed;
- simple application;
- durability;
- the ability to clean and restore the coating.
When diluted with water, gypsum and cement plasters have a shelf life of no more than 3 hours and are not mixed again. To add color, the dried surface is painted. An indisputable plus of mineral mixtures is excellent vapor permeability. The walls can "breathe", keeping the room at optimum humidity.
Acrylic plasters are stored in a closed container for up to 2 years without loss of plasticity. They can be tinted immediately in the desired color, thereby avoiding additional painting work.
The vapor-permeable properties of polymer compounds are worse than those of mineral compounds, but they are more resistant to moisture, ultraviolet light and wear. Modern loosening additives bring acrylic coatings closer to gypsum or cement mixtures in terms of their ability to transmit steam.
Finishing
After the final hardening of the paste, it is recommended to paint it, which will favorably emphasize the texture of the finish. There are many methods of staining, we will discuss only a few. The simplest one is below.
- We clean the surface with fine-grained sandpaper, if necessary.
- Take a long-nap roller and apply the first, darker layer of paint.
- Dry the surface.
- We take a short-haired tool to paint the decor in a lighter tone.
For textures, where decorative elements seem to be pressed into the surface, the wash method is well suited. For this, a basic light coat of paint is first applied. A dark tone is applied over it. After a short period of time, when the dye has already set, but has not yet dried, part of it is removed with a wet rag.
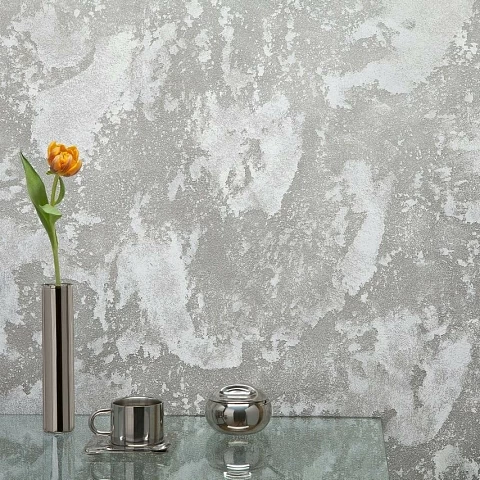 Instagram @centr_som
The result of the so-called dry painting looks good. Dry brushing works best on raised textures. As in the previous version, the basic staining is performed first.
After that, paint is collected on the brush, so that the bristles are almost dry. Then the dye is applied to the base with light chaotic strokes.
We have figured out how to make decorative plaster using putty. Neither special financial costs nor excessive efforts will be required. Everything is simple enough. A wide scope for creativity opens up before the home craftsman, because if you wish, you can create a relief surface, an imitation of natural stone, or even a panel in the form of a bas-relief.
Self-production of decorative mixture
It so happens that the options available in the store for some reason do not fit. You can make the mixture yourself, from scrap materials. This approach can significantly save money. However, it must be remembered that in terms of quality and durability, the mixture prepared by yourself is inferior to factory-made goods. But if we take into account the relative cheapness of finishing materials, a period of 10-15 years is quite suitable. For making a decorative coating with your own hands, the usual one is suitable putty on plaster or cement.

Here's the simplest way to cook:
- Take starting and finishing putty in equal proportions.The starter filler can be replaced with gypsum plaster.
- Pour the mixture into a bucket of lukewarm water.
- Add a little diluted wallpaper glue to the finishing material. The mixture hardens a little more slowly, you can use it for longer. It also makes the wall unattractive for fungus and insects.
- Stir the mixture with a construction mixer or using a drill with a nozzle.

If you use this coating in the kitchen or bathroom, you need an additional coating of water-repellent varnish. There are master classes on the Internet. For facade work, a cement mortar-based coating with the addition of a small amount of primer is suitable. In order for the resulting decor to retain its attractive appearance as long as possible, it is necessary not only to plaster the wall, but to cover it with facade paint. The finish can be solid or in the form of panels.
The specific choice of wall coverings depends on the taste of the owner of the premises and on the requirements for the result obtained. The budget is also of great importance, because the cost of different types of decorative putties differs by an order of magnitude. We must also look at the complexity of the application. Venetian plaster, for example, can only be handled by an experienced plasterer, and conventional textured and structural mixtures are quite simple to apply. You can make the mixture yourself or use factory products, for example, Travertino or Bayramiks. Neighbors and guests will envy you!
Patterns, embossing, roller textures
Now we have moved on to the final stage of the decorative plaster finish, which we prepared ourselves. At this stage, you have to apply the finishing layer and decorate it of your choice. How and how to do this, we will tell you below.
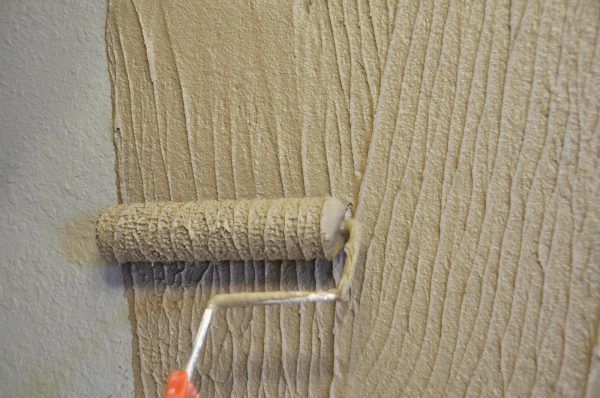
Roller
This is an ordinary paint roller. It has a large pile that naturally pushes through the plaster, leaving an intricate pattern on it. This is the easiest and most affordable option.
You can buy a special textured roller, on the rubber surface of which there are neat patterns. This option will help create a beautiful and stylish relief on the wall.
After covering and drying the decorative plaster, you can paint it in the desired color. If you have used several layers with different shades, then the extrusion of the pattern itself will create a stylish effect on the surface of the wall.
Spatula
There are no less opportunities for the implementation of a creative idea. If you use a ribbed plastic or rubber spatula, then you can easily make straight lines, waves and various geometric patterns and transitions. Ever heard of Japanese rock gardens? You can recreate a similar texture on your wall.
An important advantage of the trowel is that it covers a large surface. If you wish, you can make an arbitrary ornament by applying small vertical or horizontal strokes.
Other options
There are many other professional tools available to help you make your decorative finish. A trowel is perfect for this. It is much lighter and simpler than a spatula, and thanks to its pointed end, small depressions in the wall surface can be effectively squeezed out.
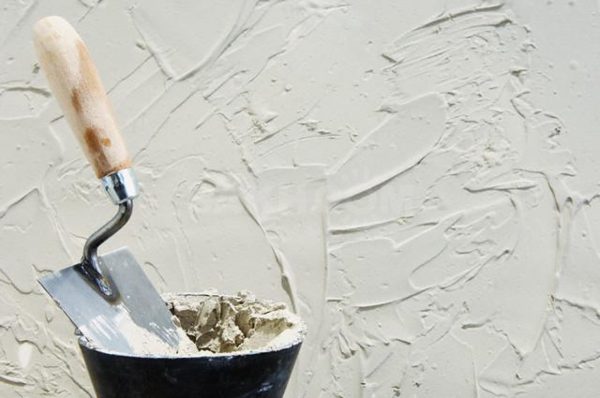
Another interesting option is pre-made rubber molds. They are good in that they help to give the surface the look of brick or masonry, and at the same time significantly speed up the work on decorating the surface.
Relief tools
If you are passionate about the creative process, then to decorate the wall with decorative plaster, you can use:
- an ordinary kitchen sponge;
- a porous washcloth;
- a crumpled plastic bag;
- comb;
- nail.
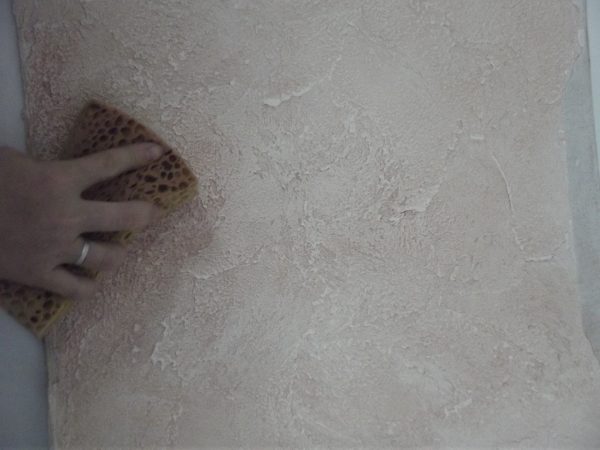
Alternatively, you can put on a rubber household glove and make patterns on the wall with your hands, running your fingers over the thick putty. Craftsmen often use this method and create stunning designs.
Now you know in detail about all interior decoration techniques using decorative plaster made from the usual mixture that is in every hardware store. This will help you create the stunning renovation you've always dreamed of.
