Reinforcement of masonry
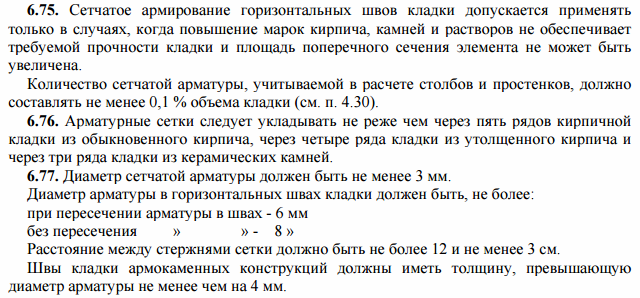
SNiP II-22-81 "Stone and reinforced masonry structures".
GOSTs, SNiPs, SP
SNiP 3.03.01-87 "Bearing and enclosing structures" SNiP II-22-81 "Stone and reinforced masonry structures"
The brick is in the shape of a parallelepiped. The largest faces of the brick are called bed, long side faces - spoons, short - jab:
As a rule, brickwork, in accordance with the cutting rules, is performed in horizontal rows: the brick is laid on the mortar with a bed. If necessary, for example, when making cornices and thin partitions (1/4 brick), the brick is laid on the side edge (spoons).
The rows in the masonry have their own names:
- verst - the outermost row of bricks in the masonry: the outer one is located from the side of the building facade, the inner one is from the side of the room;
- spoon row - a row of bricks that face the outer surface of the wall with a long side face (spoon);
- butt row - a row in which the bricks are facing the outer surface with a short edge (poke);
- zabutovochny row (zabutka) - bricks laid between the inner and outer versts.

1 - butt row; 2 - spoon row; 3 - outer verst; 4 - inner verst; 5 - backing row; 6 - horizontal seam; 7 - vertical longitudinal seam; 8 - vertical transverse seam.
The height of the masonry rows.
Consists of the thickness of the brick and the thickness of the horizontal joints. In accordance with clause 7.6. SNiP 3.03.01-87 "Bearing and enclosing structures" the thickness of the seams of brickwork should be: horizontal - 12 mm, vertical - 10 mm. Thus, the height of a row of masonry for a brick with a thickness of 65 mm is 77 mm, for a brick with a thickness of 88 mm - 100 mm. Accordingly, there are 13 rows of 65 mm thick bricks per 1 m of masonry; 10 rows of bricks, 88 mm thick.
Width (thickness) of the masonry.
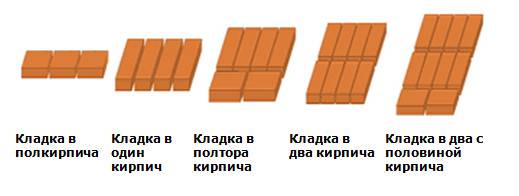
The thickness of the masonry is a multiple of half the brick and is: 25 cm - in one; 38 cm - one and a half; 51 cm - two; 64 cm - two and a half bricks. The partitions are laid out in half a brick 12 cm thick or in a quarter brick - 6.5 cm.
Walls.
The walls to be erected can be either solid - smooth, or with openings or with protruding elements:
- overflow - the place of masonry, where the row is located with a ledge on the front surface relative to the plane of the previously laid bricks. The overlap should be no more than 1/3 of the brick length in each row. Using the overlap of several rows, lay out belts, cornices etc.;
- masonry trim - laid out indented from the front surface of the previous row. The thickness of the masonry is higher than the cut - less than before the cut. The cut is made when the thickness of the walls decreases, when moving from the basement to the wall. The last row of masonry before trimming is laid out with pokes;
- ledge - a place of masonry in which the front plane of one part of the wall protrudes to one side or the other relative to the front plane of the other part;
- pilasters - a part of the masonry that protrudes beyond the common front plane in the form of rectangular pillars. Pilasters are laid out in a bandage with the masonry of the wall;
- furrows - arrange in the wall for placing electrical cables, pipelines, and other hidden wiring. After the installation of the corresponding wiring has been made, the grooves are sealed flush with the plane of the wall. Horizontal grooves are made in height multiples of the thickness of one row of masonry and half of the brick in depth; vertical - multiples of half of the brick both in width and depth;
- niche - deepening in the masonry, a multiple of half the brick. Niches are suitable for placing built-in wardrobes, heating devices, electrical devices, etc.;
- partition - masonry located between two adjacent window / door openings in the outer wall of the building. They can be made in the form of rectangular pillars, pillars with quarters for securing window or door blocks;
- quarter - a place of masonry, laid out by releasing the outer spoon versts from the masonry to the length of a quarter and laying a quarter in butt versts.
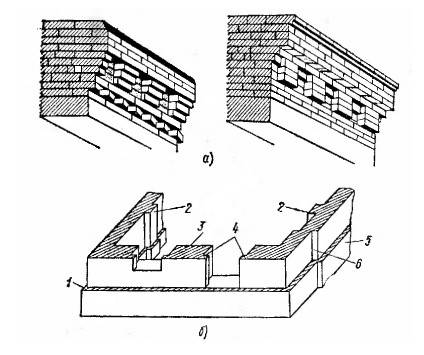
a) - cornice with overlap of bricks; b) - details of the wall masonry: 1 - bleed; 2 - pilasters; 3 - pier; 4 - a quarter; 5 - base; 6- ledge.
Spoon laying
List of sources
Rubble stone: description and characteristics
Any debris of rock is called a rubble stone. On this basis, the material is divided into magmatic, metamorphic and sedimentary. It can be obtained naturally or artificially. By appearance and purpose, rubble stone is divided into three groups:
- Rounded has a naturally oval shape. It is mined in river beds. Such material is used in landscape design.
- Industrial has maximum strength and frost resistance. Rubble stone of this type is used for the construction of dams and dams or for strengthening the railway track.
- Pastel has two parallel edges - pastels. It is convenient for laying fences, foundations or exterior walls.
 It is most convenient to work with pastel rubble stone.
Specifications
The main characteristics of rubble stone are set out in GOST 2173-87. The following properties can be distinguished:
- The weight of the material depends on the rock from which it is obtained. A cubic meter of a light stone weighs 1300 kg, a heavy one - 3 tons. One element can weigh up to 55 kg.
- Frost resistance indicates the number of freeze / thaw cycles that a rubble stone can withstand. The maximum indicator is F400. This material is suitable for the most severe climatic conditions.
- Strength directly affects the service life of the rubble stone. The lowest indicator is M200. This material can only be used for decorative purposes. The highest is М1400. This type of stone is suitable for the construction of roads or bridges.
- Bulk density is important for the correct calculation of the required amount of material. The normal rate is 1.4–1.9 t / m3.
- Radioactivity is a material safety parameter. Only first class rubble stone is suitable for use in residential areas.
 Rubble stone is perfectly combined with other building materials
Preparing the stone for laying
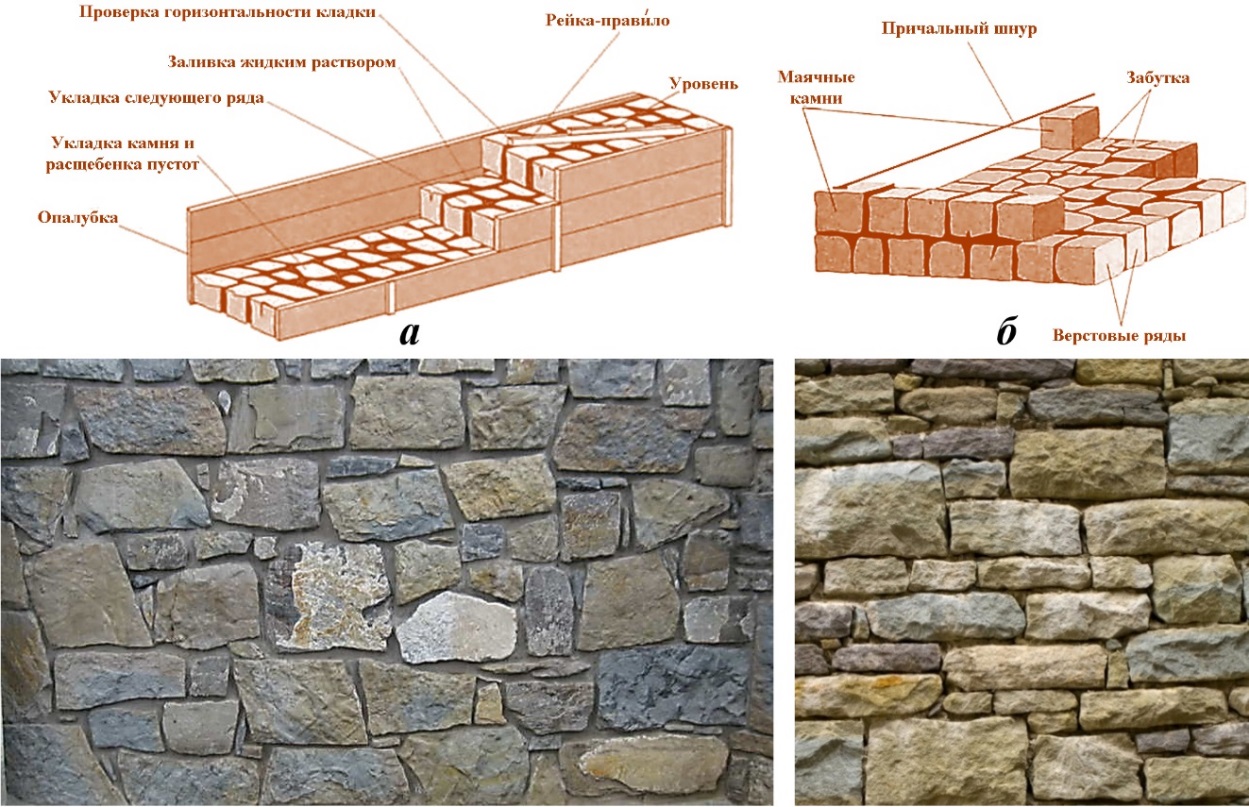
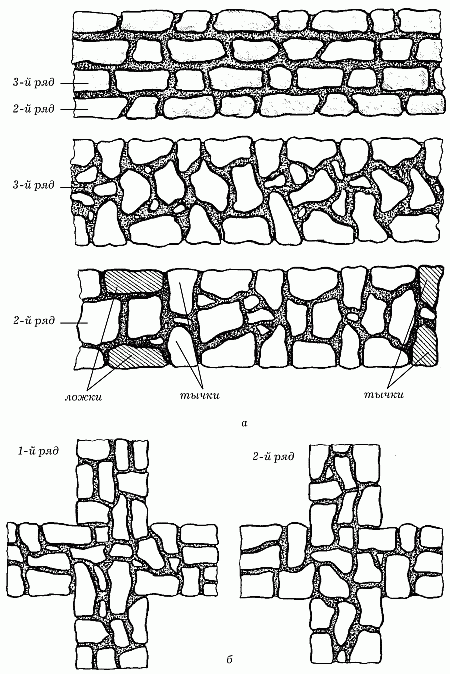
The stone collected or delivered to the construction site is sorted by size and shape. It is preferable to make a masonry of stone of the same mass, but usually natural material up to 30 kg is suitable. The stone, which has a shape close to a parallelogram, is deposited separately - the material is at the corners. Larger blocks - for the lower rows and for the formation of the dressing.
Rubble stone varies in terms of strength. By "rubble" is meant a natural stone of arbitrary shape, chipped pieces of rock layers are also suitable. A small bottle is suitable for laying, within the range of 100 - 500 mm, or which can be carried. Larger cobblestones are crushed into pieces up to 300 mm. Suitable for masonry:
- granite;
- sandstone;
- limestone;
- dolomite;
- shell rock (shell rock of different density, split and rifled).
Stones are selected so that they can be stacked in rows
The combination of the shape and size of the material is no less important for laying stone with your own hands - they must harmonize and create an aesthetic pattern. The formation of the masonry is done according to certain principles in order to obtain a strong base of the vertical plane, and not a chaotic pile-up
Correct laying of rubble stone - with the upper faces horizontally or with a slope towards the middle of the wall being erected, which is important for the correct distribution of the load.
Layers of large stones and smaller ones should alternate, and the voids should be filled with finer material so that there are no cracks in the masonry. To fill the voids, small stones are selected, the rest is filled with "putty". This is a composition of clay and small crushed stone, it is prepared in advance for work.
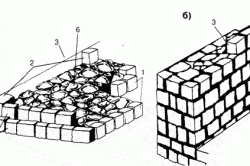
Before laying, the stone is cleaned of small chips and moistened for better adhesion.When a suitable stone does not fit in the right position, small triangular pebbles are placed under it as props, so they should be at hand. Each layer starts from the corner stones towards, reinforcement with a rod is done between the rows. The last row is leveled especially carefully and poured with a binder mixture.
The best material for masonry is hewn or chipped, of a suitable shape, which will give a relatively flat front surface. Very large building materials are split in different ways. Excess points are removed to obtain a suitable geometric shape. Hollow stone masonry is done in the same way, but without additional work.
For rubble masonry you will need a tool:
- hammer;
- sledgehammer;
- Master OK;
- metal rammer and wooden.
Material characteristic
Rubble concrete is a type of concrete, the large filler of which is natural stones of irregular shape, fragments of bricks. It is not suitable for the use of broken blocks with low strength and high porosity - against the background of the rest of the concrete mass, they have reduced reliability and are subject to destruction under the action of intense loads.
Technical characteristics of rubble concrete depend on the properties of the filler. For example, a structure with brick striking weighs slightly more than with large gravel rubble or rubble. Due to the heterogeneity of materials, it is impossible to distinguish certain characteristics of rubble concrete. Here are the averaged data:
- the volumetric weight (density) of rubble concrete is determined by the brand of the used binder and coarse filler, on average 2300 ... 2900 kg / m³;
- the mixture contains 40-60% of large stones, which affects the weight of the structure;
- the strength of rubble concrete is determined by the brand of cement, but in view of the characteristics of the material, it is not easy to calculate it. Experts use a binder of a higher grade than the expected strength of the stone, for example, for mixing M200 rubble concrete, they use M400 Portland cement.
It is difficult to determine the specific gravity of rubble concrete, in practice this is not done as unnecessary - the properties of the fillers change, therefore they take the average value in terms of the density and mass of materials.
DIY buta masonry using the "false teeth" method
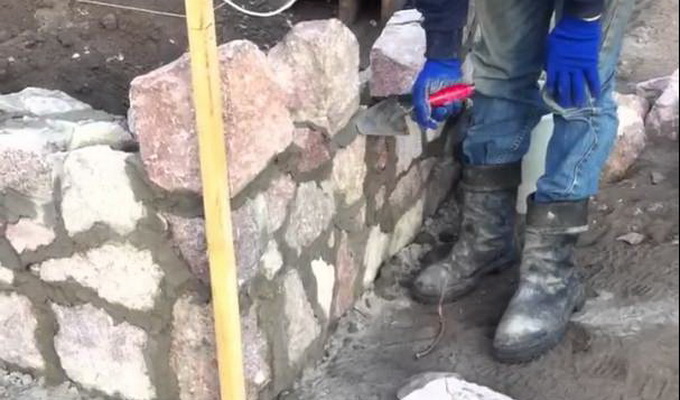
The essence of the false teeth method is that in 2-4 hours (depending on the weather), when the concrete begins to thicken, the first large stones are immersed in the foundation freshly poured with concrete. Before the rubble laying of the walls, of course, you need to stretch the lighthouse strings, which denote the planes of the future wall. In this case, the first immersed stones can be placed on their thorns, the points - like false teeth - (if the wall is not high: the base of the fence, retaining walls, flower beds). If you plan a wall up to two meters high or the basement of a house, then the first submerged stones should be placed on defective or crooked lower beds, leaving good upper beds for the convenience of subsequent masonry. The immersion depth when laying rubble stone with your own hands should be such that the upper parts of their faces are at the same level (in most cases), for convenient subsequent laying. One point is important here: the consistency of the hardened concrete. Concrete with its thickening mass must keep the stones "afloat". The stones should not spontaneously sink below. In order to prevent the stones from falling out of the plane of the wall, they can be propped up from the outside with stones or bricks; and from the inside, support them with the tails of stones set by the people on the opposite side. If the tails of opposite stones (front and back) do not touch each other, then any stone or object can be inserted between them to fix it. In general, it is advisable to prop up all the stones. But if the concrete of the foundation is already quite viscous, then the stones will not tilt. This method is very productive, it saves both time and effort, and at the same time gives a dead link to the foundation.The walls, whose first stones were installed using the "false teeth" method, will be so strong that they can resist the ramming of heavy vehicles.
This method can also be used when laying rubble foundation. In this case, the work will be more constructive. It will be necessary to release stones placed on the priest from the upper row of foundation stones, which should stand in the plane of the future wall. Such stones can be called indigenous.
After the foundation has hardened and the "false teeth" are firmly fixed in their positions, the laying of the wall can be continued either by the traditional method, or by a method that can be called constructive. Let us remember that if we continue laying with the traditional, classical method, then it will be necessary, first of all, to install the first large, gaping and intermediate stones (after the corner stones, of course). If you continue to lay the constructive method, then new large stones will need to be placed on the “false teeth”, trying to cover all the gaps or the first large stones joining each other from above (“false teeth” and just large stones placed on the foundation). This is a completely new approach to business. New stones installed in this way (with retaining stones or supported on each other's tails) will create a picture of a structure full of holes, where the winds walk. Having raised the corner stones to the height of the new large stones, we will thus designate the "horizontal" top of the second row. And only after that you need to start filling up the gaps in the lower row - the row of the first large stones. Having installed well-suited stones in the gaps, you need to fill with mortar (concrete) the voids between the stones inside the masonry. The next day, after opening the seams, you need to repeat the installation of the stones in a similar way over the large stones of the second row, the gaps between which have not yet been laid.
The good thing about this method is that it gives the wall more solid stability. It turns out, in fact, the collection of the stone "backbone" of the wall from large stones. Of course, the higher the wall, the smaller stones will fit into its body. In addition, with this method, there is a certain saving of energy and it is somewhat more productive than the traditional method, because the gaps have to be filled with small stones, which can no longer affect the fitting above them of the stones being laid.
A prerequisite for this method is great accuracy and care when working. It is better to use the constructive method if you already have such experience, when the mason's eye selects from the heap that stone that, in its shape, will just fit in the right place
With experience comes memorizing stones and recognizing them in the chaos of a rubble heap. Recognition and memorization are the training of the eye (the eye), visual memory, abstract thinking, when the right stones are selected from the very first time for laying in a specific place.
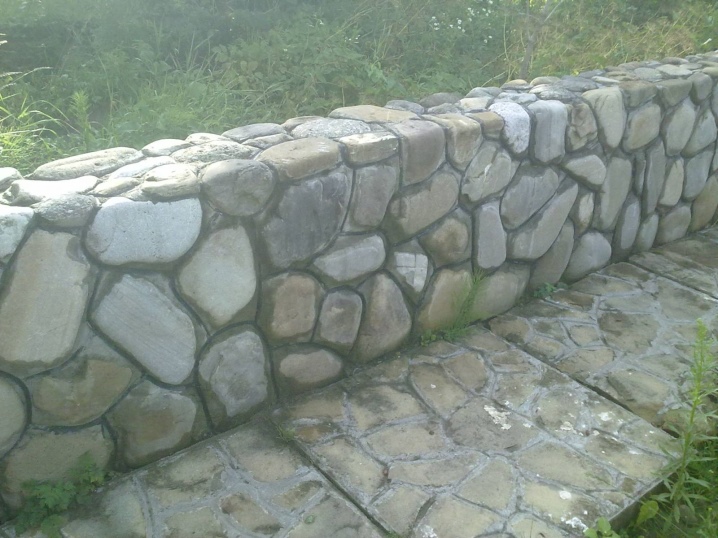
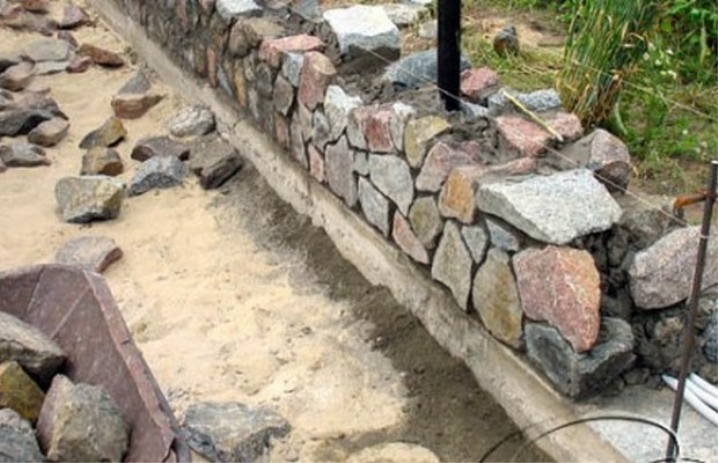
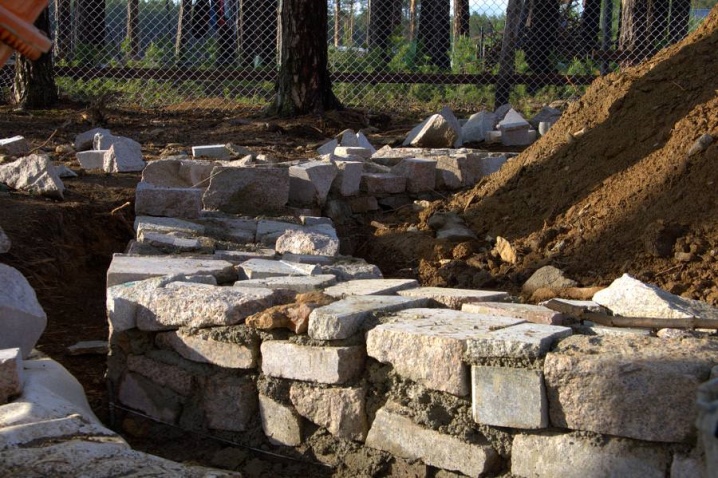
In the photo of rubble masonry, you can familiarize yourself with all the nuances of the process:


Application of backfill bricks
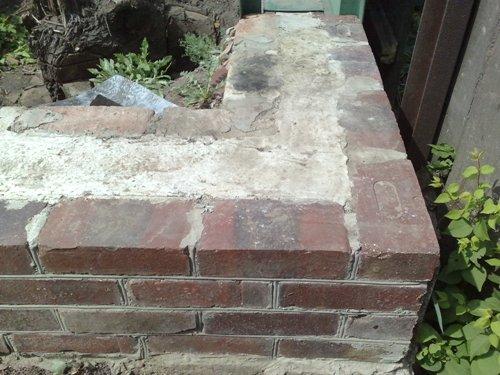
Photo of a base with a backing.
Basically, this material is used for wide masonry with a thickness of at least 2 or 2.5 bricks. He goes to fill the space between them - backing, that is, between the outer (sometimes front) and inner masonry.
Technologically, it looks like this - the bottom is filled with cement mortar and filled with substandard products, both halves and the battle are used
Then everything is aligned with the main masonry, it is important to keep an eye on so that voids do not form. It is advisable to perform backing with bandaging of the seams, at least partially
Basic elements of brick masonry

The photo shows an example of a backbone masonry.
If you plan to erect any structure with your own hands, to perform high-quality and correct masonry, you need basic knowledge of terms and basic elements:
- Each of the six brick faces has its own name:
- bed is the widest line;
- bottom side facing down - bottom bed,
- and facing up, respectively - the top;
- spoons - long side;
- butt - short side (butt) part.
- The masonry also has its own elements, which are named after their position in the masonry:
- verst - the extreme row of bricks, which with one of their sides form the outer surface,
- the outer verst goes out to the facade,
- the inner one is the surface of the walls inside the building;
- part of the masonry between two versts is called zabutka;
- a row of bricks, oriented with their long spoon side along the wall, make up a spoon row;
- if the row is made up of a short end part, the row is called butt row.
- The thickness of the walls depends on the type of masonry, which determines this indicator:
- brickwork has a wall thickness of 250 mm;
- "In ½ brick" - 120 mm;
- "In 1 ½ brick" - 380 mm;
- "In 2 bricks" - 510 mm;
- "In 2 ½ bricks" - 640 mm.
Bandaging
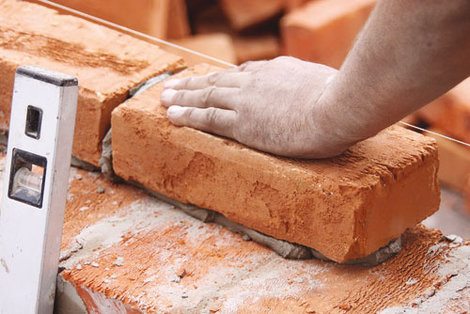
In the photo - the laying of the backing stone.
In order for the erected structure to have greater strength and stability, masonry dressing should be used. If the instructions are followed, then it is easy to do even for a beginner in the construction business.
For bandaging, the bricks of the new row are laid so that each of them rests on two or three of the lower ones. Dressing is carried out for all types of seams - transverse and longitudinal.
There are many types of dressings, but the main ones that are most often used are three:
- single-row - alternation of butt and spoon rows, it is practiced when erecting walls that will not be additionally revetted;
- multi-row - several consecutive spoon rows are tied at regular intervals with butt rows, for example, for a one and a half, a butt row is arranged after five spoon rows, and a single one - after six;
- three-row - a variety of multi-row, in which every three spoon rows there is one butt.
Ligation of the longitudinal seam allows to prevent the "delamination" of the wall in the vertical plane, and the transverse seam creates longitudinal bonds between the bricks, while distributing the load evenly over the entire width of the masonry.
Features of the foundation made of rubble concrete
Unlike a conventional concrete foundation, a rubble structure is laid out similarly to a block one, the stones are not kneaded in a solution. This is the difficulty: the stones must be laid, not poured into the formwork, and their specific shape requires a professional approach. Bricklayers should be engaged in the installation of a concrete foundation, so you can get a tape of maximum strength, it will be distinguished by its durability and reliability.
It is advisable to include reinforcement in the tape - even for a small structure, additional insurance in the form of base reinforcement will not hurt.
Foundation advantages:
- reduced construction costs due to the use of rubble stone and broken bricks (the latter can often be obtained free of charge). During construction, it turns out to save up to 30% compared to the construction of a classic reinforced concrete tape;
- the durability and reliability of a properly equipped structure made of rubble concrete are not inferior to other types of foundations;
- a basement made of rubble concrete looks impressive and does not require additional cladding, especially if natural stone was used for installation. Thus, you can expose the wall from base to wall without transitions;
- the foundation is suitable for arranging on any type of soil except floating;
- even a non-professional can do the installation, only it will take a little more time than a bricklayer;
- a feature of a foundation made of rubble concrete - it calmly tolerates freezing and thawing, suitable for installation in any climatic zone.
The resistance of the material to low temperatures makes rubble concrete an ideal material for construction in the winter. A fragile structure can be left unprotected when it gains 50% of the design strength.
Lack of design - despite the abundance of information about rubble concrete, it is not easy even for a professional to choose the ideal composition of this material
It is important to consider the characteristics of stones used as coarse filler
Components
The composition of rubble concrete for the foundation includes several main components:
- rubble stone (40-60%);
- river sand of medium fraction;
- cement M400, M500;
- water;
- plasticizers.
Natural rubble stone in size can be any with one limitation - the length of the fragments should not exceed 1/3 of the width of the foundation wall. You can use half bricks and fragments of ceramic blocks, large crushed stone, clastic rocks. Rubble stones must first be cleaned of plaque and dirt by screening or washing with a stream of water.
Cement of high grades M400-M500 is suitable for obtaining a structure with optimal strength, corresponding to M300-M400.
Purified river sand is a part of butoconcrete as a fine filler. It is used with cement in a ratio of 3 to 1, maybe 2 to 1 to improve the strength of the structure.
It is recommended to introduce plasticizers into the cement slurry for the foundation in order to improve its plasticity and laying. These can be modifier additives to increase the frost resistance of the material, water resistance.
Water is introduced into the solution as needed in small doses.
Consumption of ready-made cement-mortar for 1 cubic meter of rubble concrete leaves 40-60%, depending on the amount of rubble in the volume of the structure.
The exact composition of the components is determined constructively and depends, again, on the rubble filler.
Concrete masonry
Rubble concrete masonry from hewn rubble
Rubble concrete masonry walls from untreated rubble
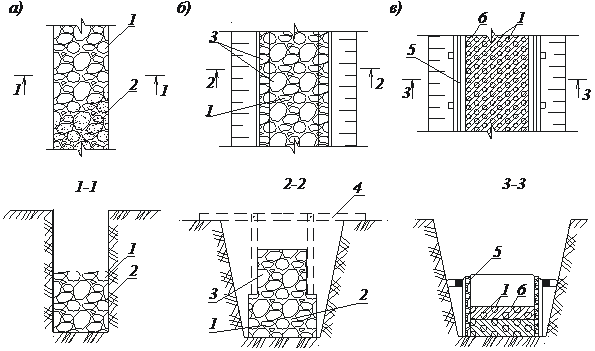
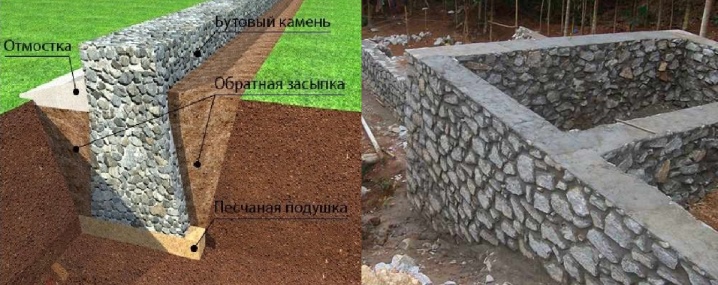
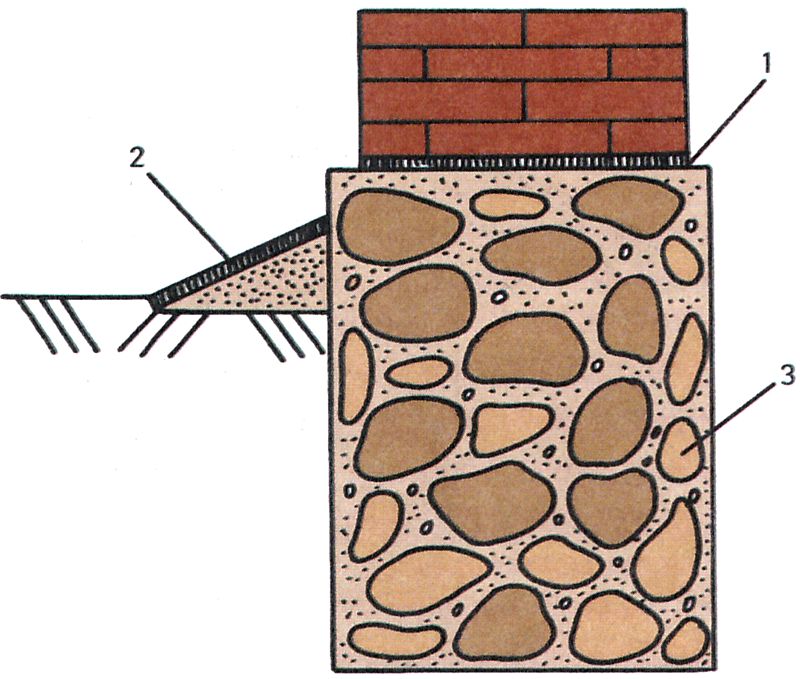
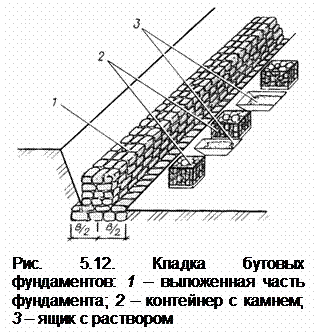
Rubble foundations are a kind of monolithic foundations, but unlike them, when concreting in a mass of concrete laid in a formwork, rubble stones are sunk, saving concrete without reducing strength.
First, a concrete mixture is poured into the formwork in layers up to 20 cm and stones, the size of which does not exceed 1/3 of the masonry thickness, are embedded in it with a distance of 5 cm between the stones and the formwork, then the masonry is compacted by layer-by-layer vibration. Work breaks are allowed after the stones are embedded in the concrete layer with compaction.
Freezing of rubble concrete masonry is allowed after gaining 50% of the strength of the design, while not less than 7.5 MPa.
The choice of foundation design is influenced by the characteristics of the soil, the level of groundwater at the site and the severity of the structure. If it is necessary to deepen the foundation below the groundwater level, it is protected by horizontal waterproofing, at the level of the base of the foundation, and vertical, along the inner and outer edges of the foundation above ground level.
Foundations are erected as soon as possible after digging trenches. Immediately after the completion of all construction work after the installation of foundations, in order to prevent changes in the chemical and physical-mechanical properties of soils, the sinuses between the walls of the foundations and trenches / pits are filled with soil.
After the installation of rubble foundations and backfilling of the sinuses between the foundations and the walls of the trench, a blind area is arranged around the entire outer perimeter of the structure to prevent the soil under the foundations from wetting the ground under the foundations with melt and rainwater, causing their subsidence.
To prevent moisture seepage from the ground into the walls and their dampness, foundations are removed above ground level, this part of the foundation is called a basement. Waterproofing must be arranged between the basement and the wall.
The concrete masonry is carried out by a team of masons-concrete workers of 8 people: two perform the installation and dismantling of the formwork, two prepare the stone and transport it to the place of laying, two lay the concrete mixture, two force it with stones.
Peculiarities
Rubble stone has been used as a building material for many centuries, it is from it that ancient European pavements are made - you have probably seen these paths made of round stones, rolled over the centuries by ice and water. Although, in most cases, this building material is still mined in industrial quarries using the explosive method, as well as during the development of deposits.
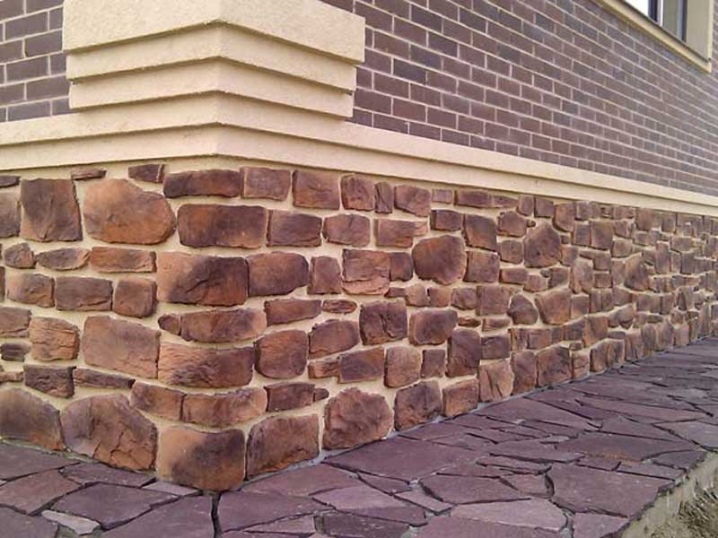
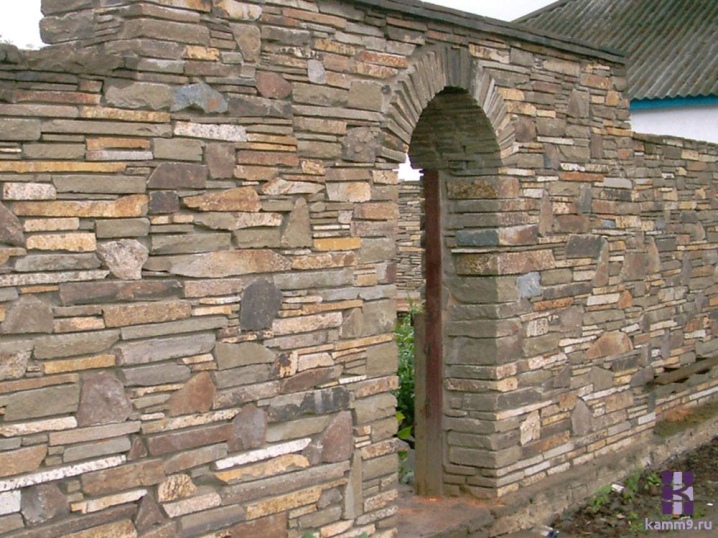
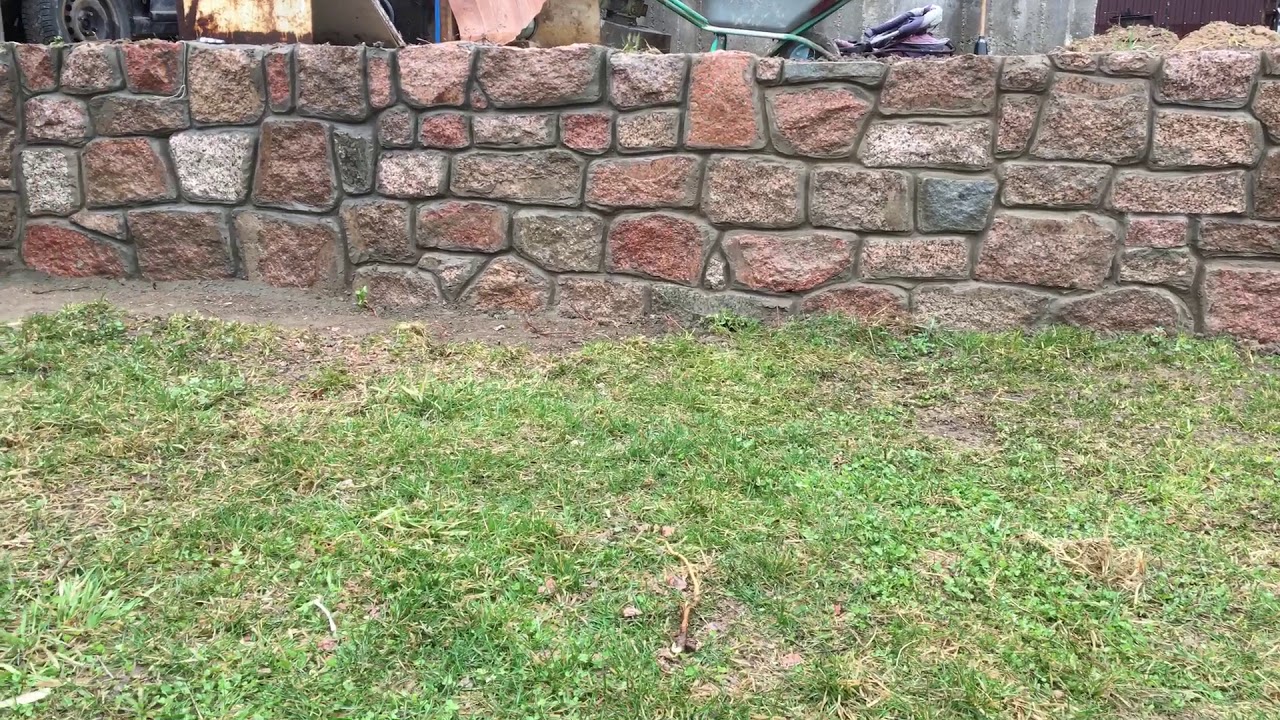
Nowadays, rubble masonry can most often be found in closed suburban villages with rich cottages. Usually, a masonry of natural stones of an irregular configuration has a pair of parallel decks there - it was she who got its name "rubble".

Rubble stone is traditionally called fragments of an uneven shape, obtained from sandstone, dolomite, as well as granite, limestone, tuff; some other rocks are also suitable for this. The length of the building material varies from 20 to 50 cm, one of the popular varieties of buta is cobblestones - these are stones whose ribs are about 30 cm long.

Rubble stone is considered one of the most popular and demanded building materials. Its undoubted advantages include a number of characteristics.
- Environmental Safety. Due to its natural origin, quarrystone is harmless to human life and health, which makes it very popular in the construction of residential buildings and other structures.
- High wear resistance. This material is not afraid of either high humidity or temperature fluctuations, they are resistant to the action of pests and mold. All these factors do not change its technical and operational features in any way, and the stone is able to successfully withstand high loads - both horizontal and vertical.
- Affordable cost. For the manufacture of rubble, the simplest technologies and elementary equipment are used. This has the most favorable effect on the total cost of the work.
- Long operational period. Buta masonry lasts more than a hundred years.
- Aesthetic look. Rubble stone is not only reliable, it also looks very impressive in landscape compositions and facade cladding.
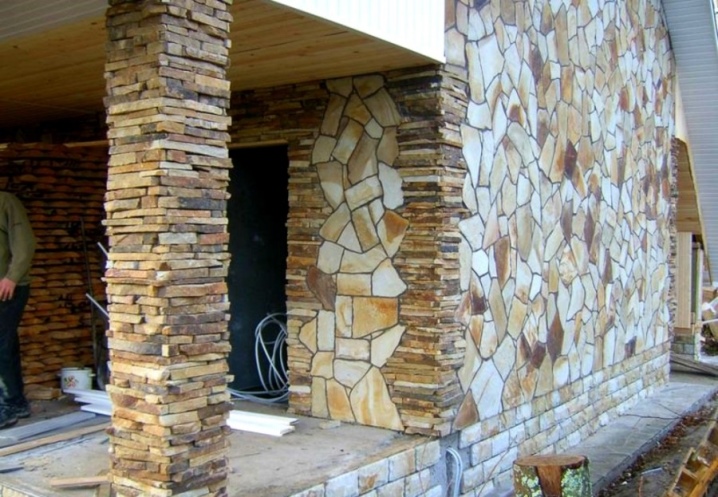
However, it was not without its drawbacks. The main disadvantage of this building material is the exceptional laboriousness of working with it. To fit it beautifully, you need to pick up the pieces so that they fit together in size - this requires a lot of skill.

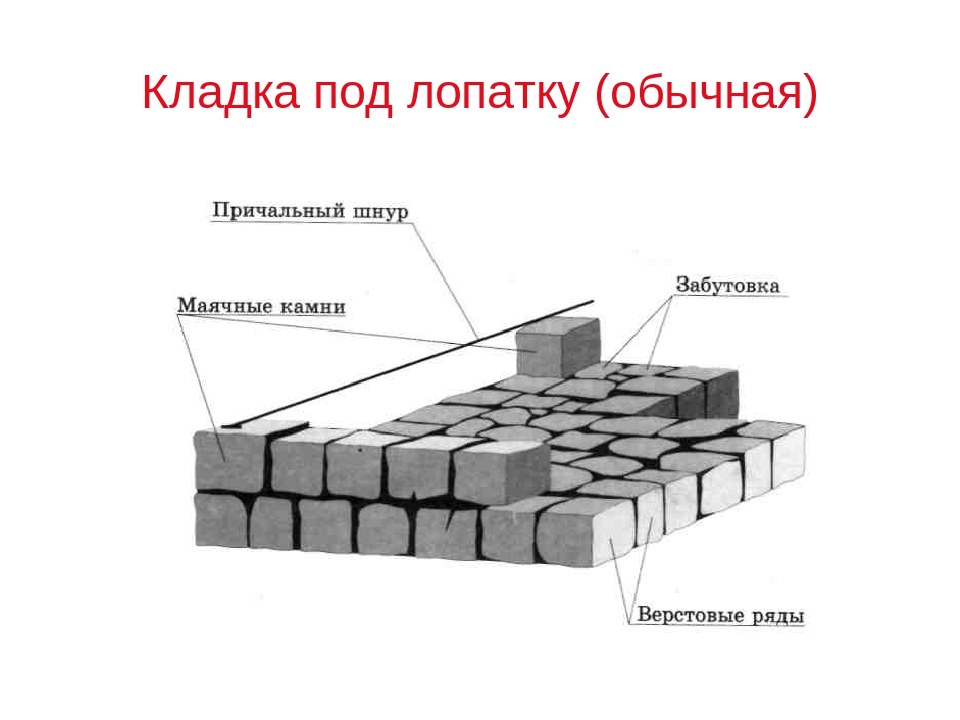
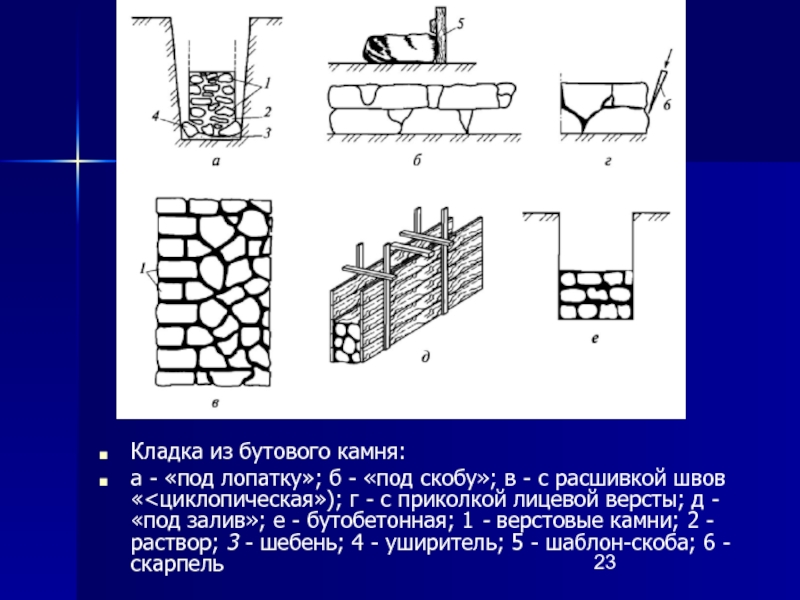
Laying "under the bay"
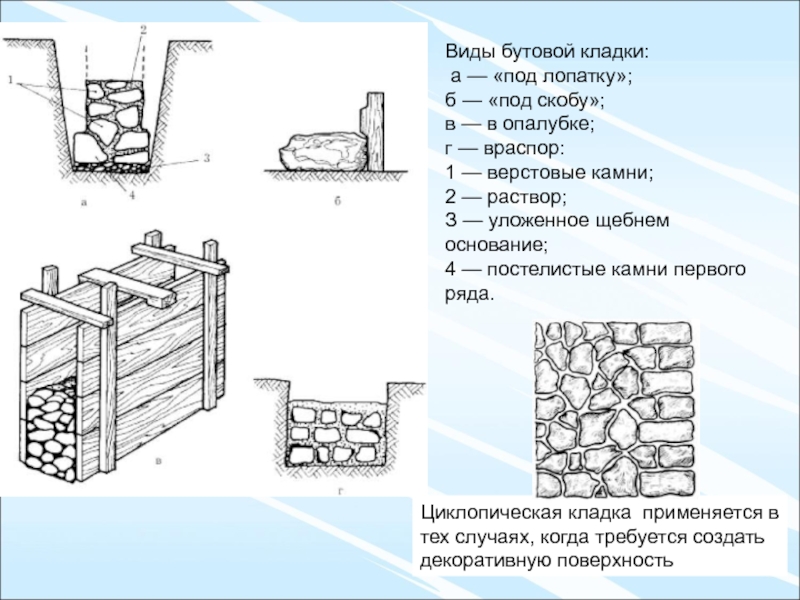
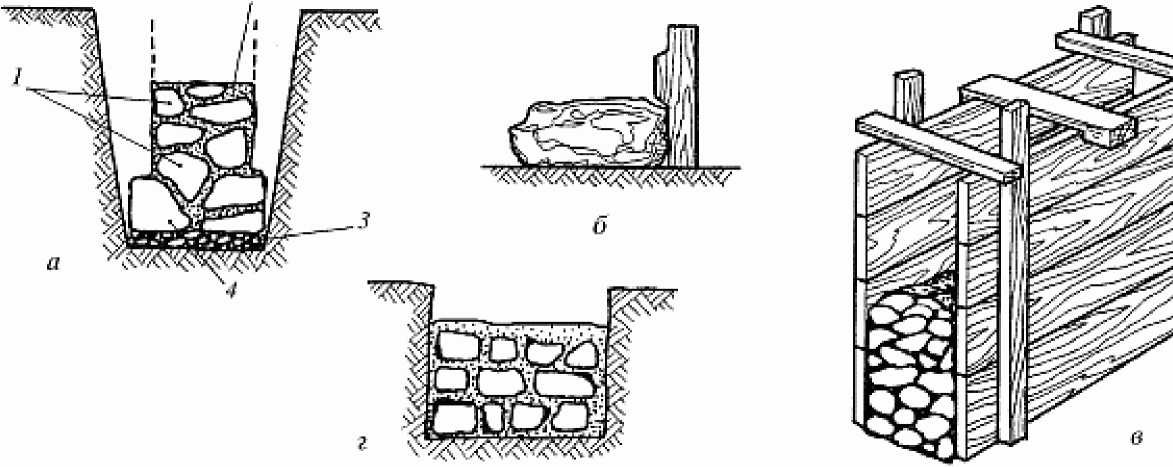
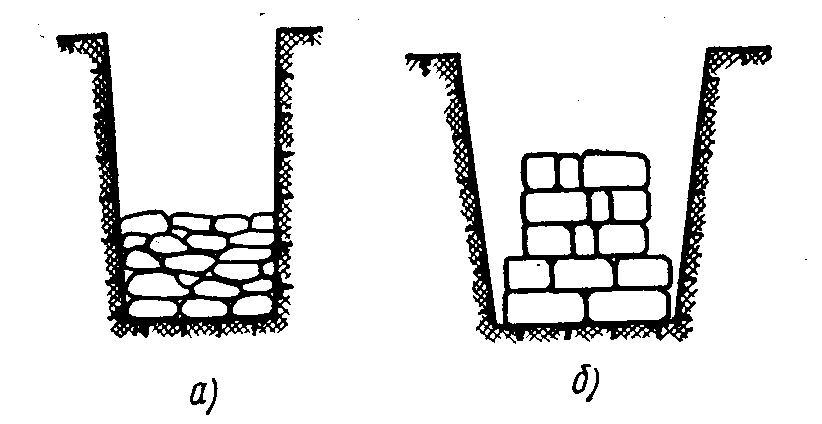
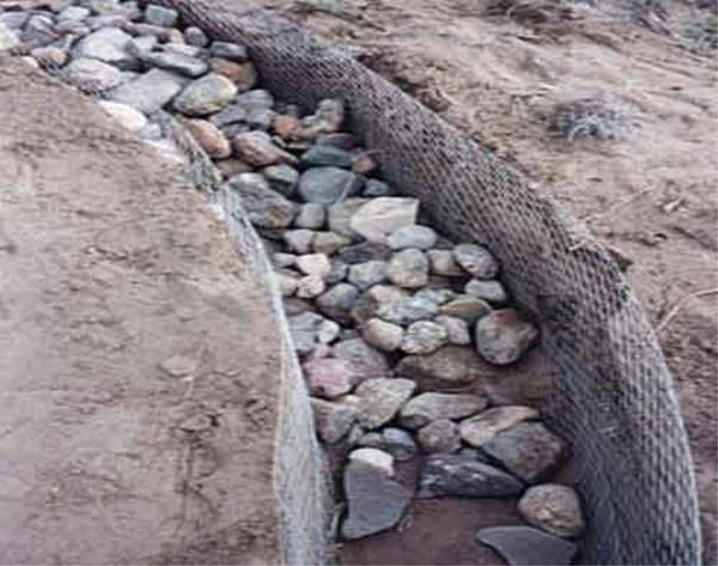
To perform masonry “under the bay”, stones with ragged surfaces, without a specific selection, are used, as well as masonry of verst rows. The depth of the trench with dense soil reaches 1.25 m. Laying is performed without formwork, i.e. in space with the walls of the trench.
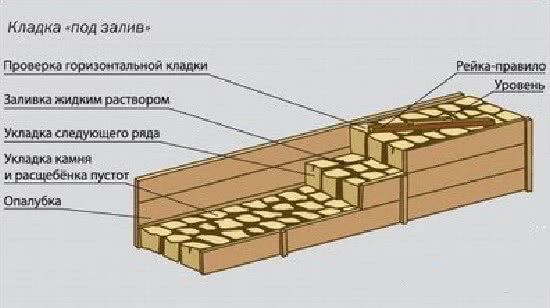
This type of masonry is used for non-subsiding soil. Basically, such masonry is used for the construction of buildings no higher than two floors. The walls in the prepared trench are made vertical. The base of the trench is well leveled, after which a layer of rubble stone is laid dry on a layer of crushed stone (about 10 cm thick), the thickness of which is about 30 cm.
The stones are tightly packed, then, as in the first version, they are cleaved. Then a liquid solution is poured so that its thickness is 10 cm higher than the layer of stones. Then a layer of stones is laid again.
Several ways to crush the stone for laying
Booth is smashed with a chisel and a sledgehammer. A small depression is made in the ground for the stone to avoid ricochet. With a sharp and strong movement, they strike with a sledgehammer in the center. If there is no result, the strikes are repeated at the same point. The sturdy lump can be turned over and tried again. Sharp fragments, after splitting the stone, should be hammered with a hammer.
Booth is smashed with a hammer. If there is no suitable tool, a regular heavy hammer with a short handle will do. The chisel is selected with a carbide tip capable of withstanding the load.The whole scheme of action is the same as described above, but the chisel can also be moved around the circumference until the first crack is formed. Usually 5-10 sharp blows are enough, but it all depends on the density of the stone.
Large cobblestone is the most difficult to crack, but the process is similar to the previous ones - the stone in the depression is split with a chisel
The blows are applied with a hammer until the first sign of splitting.
You can try using a power tool, but it is important to calculate the possible load and choose a reliable attachment. After breaking with wedges, a grinder with a diamond disc is used in different places.
How to make a rubble foundation in the summer and masonry intermittently
Are there possible breaks in the production of rubble masonry?
Breaks in the production of rubble masonry are allowed only after filling the gaps between the stones of the last laid out row with mortar. The solution is used to cover the surfaces of the stones of this row only when the masonry is renewed. In dry, hot and windy weather, the masonry is protected from rapid drying by covering it with shields or roll materials. When erecting rubble concrete foundations, stones and debris from the dismantling of the masonry placed in the concrete mixture must not be contaminated, otherwise they will not have strong adhesion to the concrete. In dry weather, the fragments are poured with water before placing in the concrete mixture. To ensure the solidity of the masonry, work breaks are arranged only after the stones are embedded in the upper layer of the concrete mixture and compaction. During breaks in laying the foundation in dry summer weather, rubble and rubble concrete masonry is moistened 3-4 times a day by sprinkling with water.
What are the conditions for laying foundations in hot weather?
When performing work in summer in hot weather (at an air temperature of 25 ° C above and a relative humidity of the outside air less than 50%), it is necessary to comply with the following conditions: the water-removal ratio of solutions prepared on slag and pozzolanic Portland cements must be increased; the water-holding capacity of each of the compositions of the solutions must be installed at the facility at least once per shift, while the value of the indicator must be at least 75% established in laboratory conditions; the delamination value should be no more than 25 cm3 for solutions with a mobility of 10-12 cm and no more than 40 cm3 for solutions with a mobility of 12-14 cm; clay brick must be abundantly wetted with water before being laid in the structure.
What kind of cement can be used at air temperatures above 25 ° C?
When performing concrete work at an air temperature above 25 ° C and a relative humidity of less than 50%, fast-hardening Portland cements should be used, the grade of which should exceed the grade strength of concrete by at least 1.5 times. It is impossible to use pozzolanic Portland cement, slag Portland cement below M400 and alumina cement for concreting above-ground structures, except for the cases provided for by the project. The temperature when concreting structures with a surface modulus of more than 3 should not exceed 30-35 ° C, and for massive structures with a surface modulus of less than 3 should not exceed 20 ° C.

