Preparation
Before you start building your own jack, you need to prepare a little. It is better to start with the theoretical part and decide what kind of jack you need: what load capacity is needed (to raise the car, or a simpler option is suitable), what type of mechanism do you prefer and, in general, think over all the nuances.
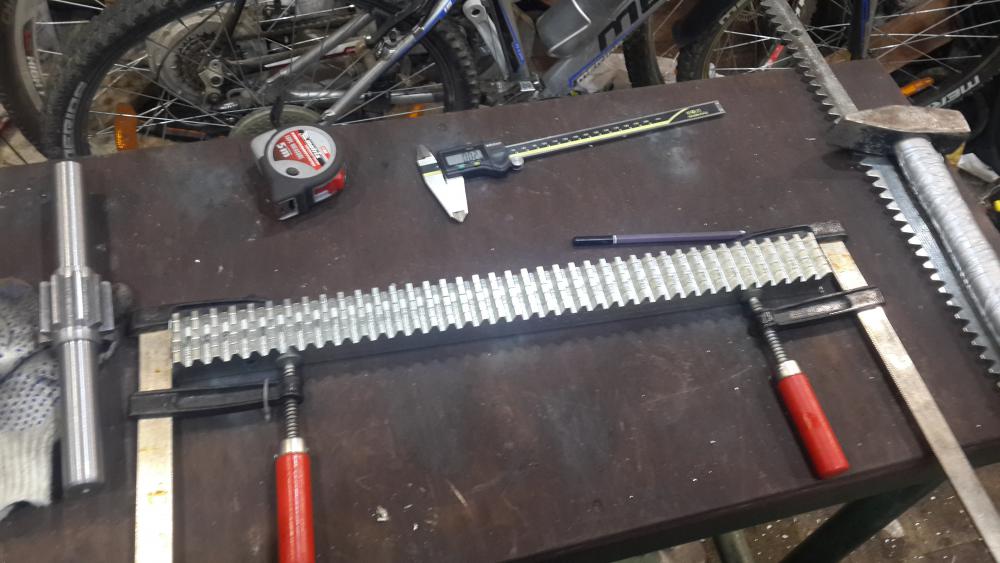
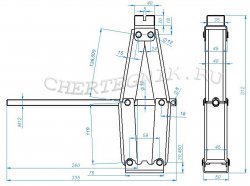
After that, you will need a suitable circuit. And you also need to prepare materials and tools. For some models, additional details may be needed, but the unchanged ingredients for creating a rack and pinion jack are:
- channel (a small piece of size 200);
- square shaped tube with a minimum wall thickness of 2 millimeters;
- 8mm steel strip;
- various nuts, bolts, springs and other small parts.
The list of required tools is also small:
- drill;
- wrench;
- Bulgarian;
- welding machine.
After all preparations are completed, you can start working.
All dimensions indicated for details, by the way, are only approximate. You may well take both more and less reliable options.
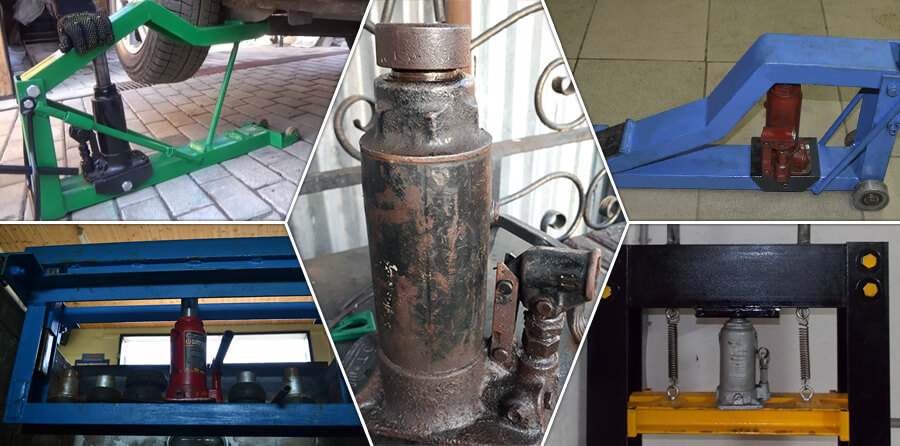
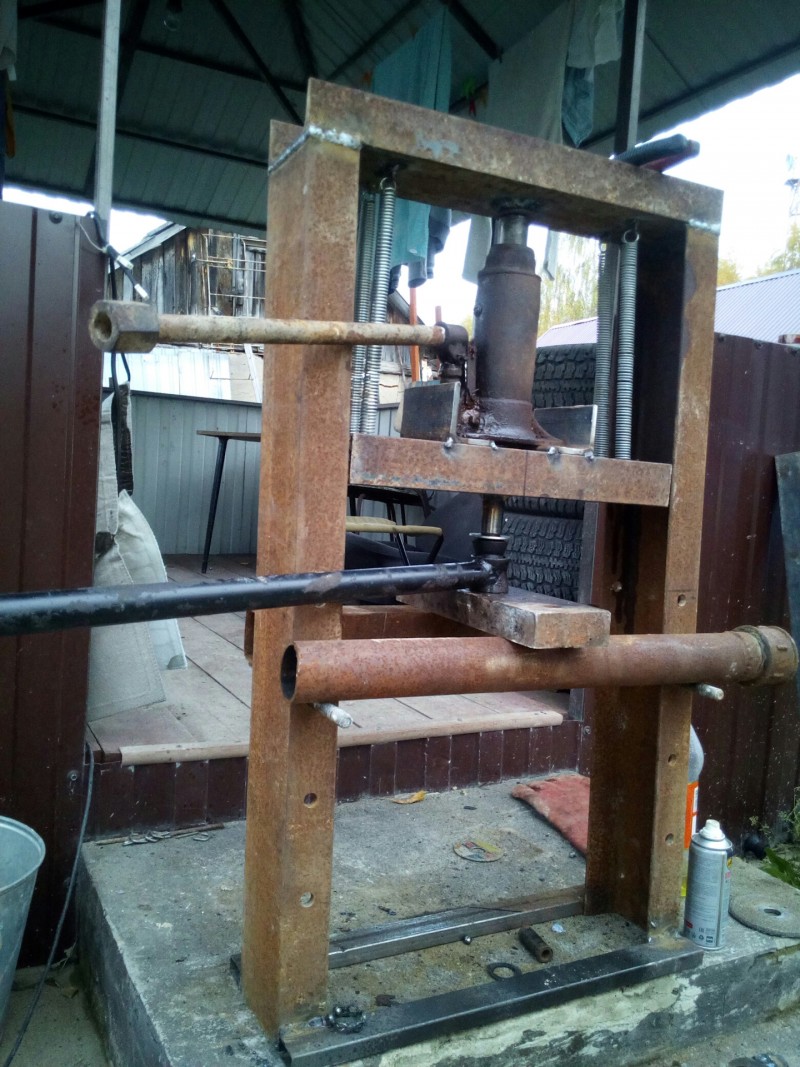
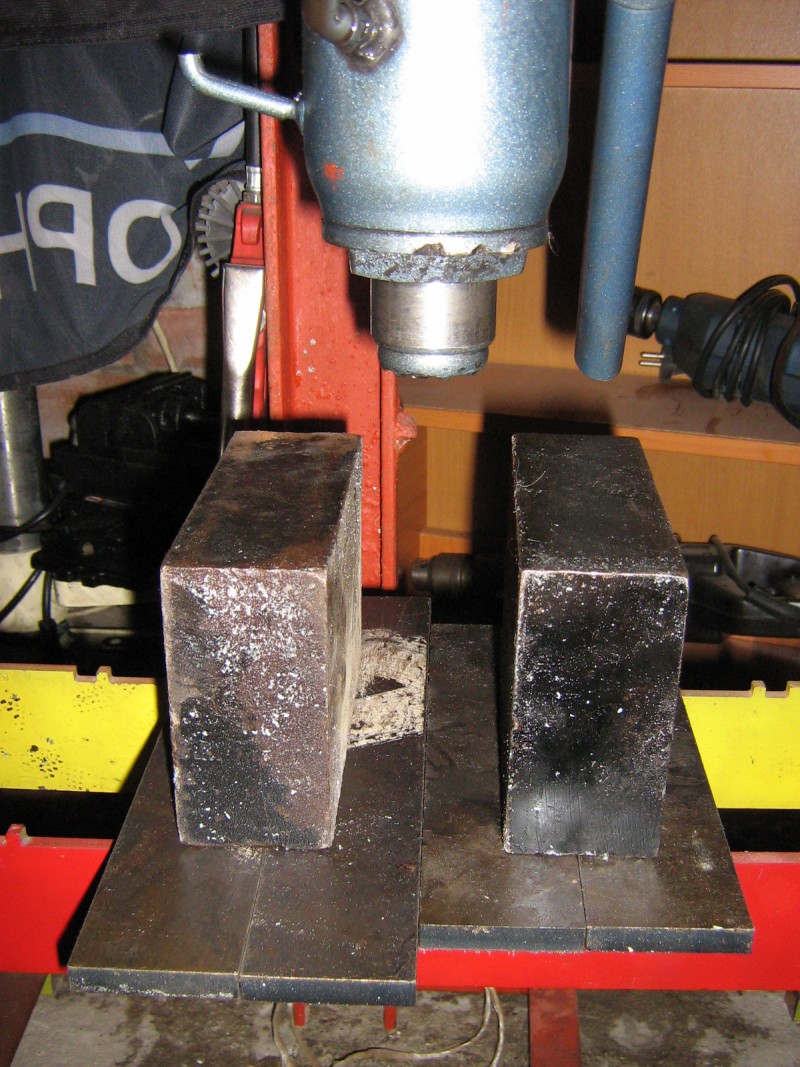
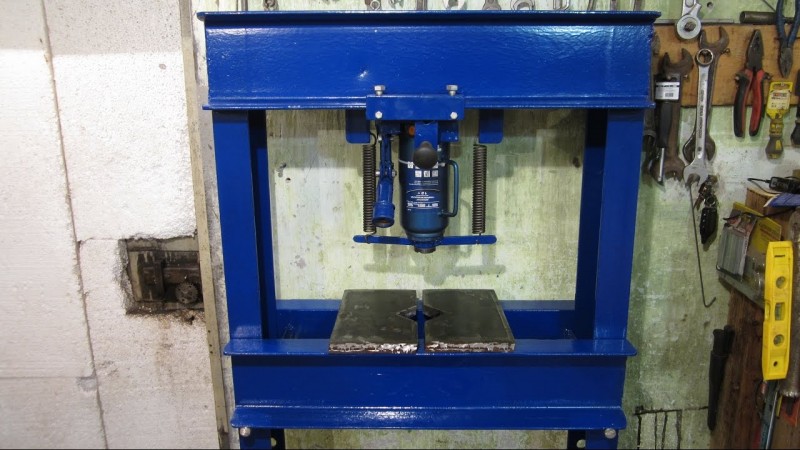
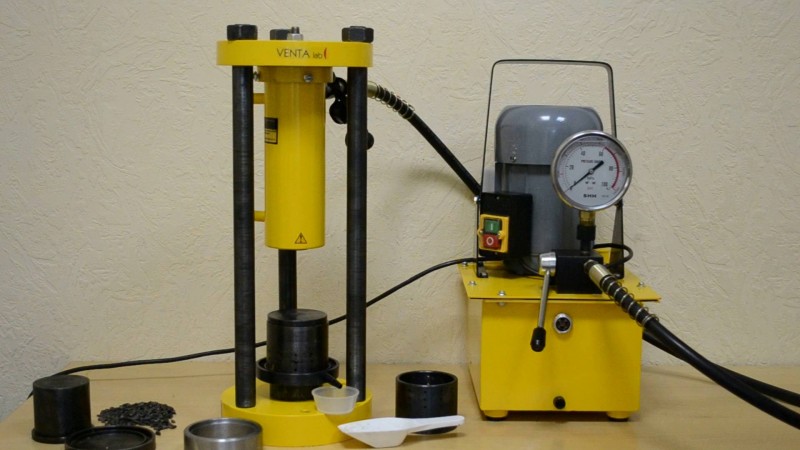
Photo of a press from a jack








We also recommend viewing:
- DIY headlight polishing
- DIY scaffolding
- DIY knife sharpener
- Antenna amplifier
- Battery recovery
- Mini soldering iron
- How to make an electric guitar
- Steering wheel braid
- DIY flashlight
- How to sharpen a meat grinder knife
- DIY electric generator
- DIY solar battery
- Mixer flows
- How to remove a broken bolt
- DIY charger
- Metal detector circuit
- Drilling machine
- Cutting plastic bottles
- Aquarium in the wall
- Insert into the pipe
- DIY garage rack
- Triac power regulator
- Low pass filter
- Eternal Flashlight
- File knife
- DIY sound amplifier
- Braided cable
- DIY sandblasting machine
- Smoke generator
- DIY wind generator
- Acoustic switch
- DIY wax melter
- Tourist ax
- Insoles heated
- Solder paste
- Tool shelf
- Gold from radio components
- Diy barbell
- How to install a socket
- DIY night light
- Audio transmitter
- Soil moisture sensor
- Geiger counter
- Charcoal
- Wifi antenna
- DIY electric bike
- Mixer repair
- Induction heating
- Epoxy resin table
- Crack in the windshield
- Epoxy resin
- How to change a pressure tap
- Crystals at home
Help the project, share on social networks 
Manufacturing steps
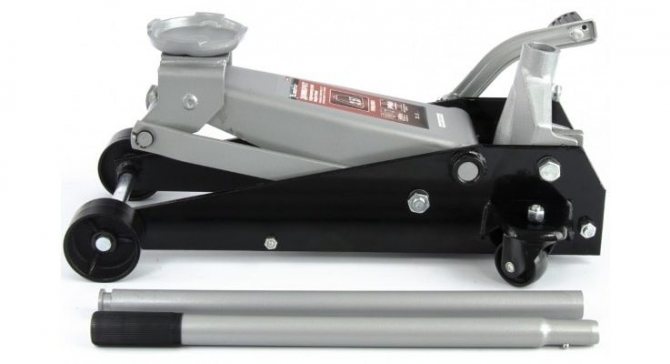
We will describe step by step how to make a rolling lift from a conventional type hydraulic bottle jack.
- First, according to the dimensions of the drawing, a grinder is used to cut the blanks for the base for a bottle jack made of steel channels. For the manufacture of the support platform, the channel must be taken slightly wider than for the installation of the lifting arm.
- Then, the mounting of the support platform and the lifting arm (separately) is carried out by welding.
- On a support platform, called a swing, a bottle lift is vertically installed using available fasteners, which will be the lifting force of the entire structure.
- Now it is necessary from the same channel from which the support platform was mounted, to make and weld the rear post to the last. This part is necessary both for mounting the lifting arm and for giving the entire structure strength and rigidity.
- The same holes are made in the channel at the rear of the lifting arm and at the top of the rear rack. A pipe of a suitable size is inserted into the holes of the lever, which will serve as a movable axis when the lever is lifted under the action of the jack rod, and it is welded. Next, the holes are aligned (in this case, the channel of the lever must fit between the shelves of the channel of the rear rack) and a steel rod is inserted into them through the pipe welded into the channel of the lifting lever. This rod will serve as the fixed axis of the lifting arm. It is cut flush with the outer surface of the C-pillar channel shelves and welded to it.
- It remains to adjust all the assembled parts of the lift, build a stubborn heel on the lower surface of the lifting arm ─ in the place where the stem of the bottle lifter will abut against it. And also a hard rubber bump stop should be attached to the front of the lifting arm - this place the lever will rest against the bottom or other part of the car when it is lifted.
- Since the method of influencing the pumping of oil under the working piston is a lever, it is the foreman's decision to lengthen or not to lengthen the standard lever for the convenience of working with the jack. For the most part, you do not need to do this, and if there is a desire, then it is better to build a removable extension cord.
- It should be noted that in the course of assembling the structure, it is necessary to process all welding places (for example, to clean weld seams), adjust parts in diameter, size, and so on. Otherwise, you can end up with a creaky and loose structure, reminiscent of an unlubricated trolley, and not a high-quality lifting mechanism.
- Next, you will need to mount the handles and wheels to move the device, weld the braces to stiffen the structure and additional devices for the stability of the jack.
- Upon completion of the installation work, it is necessary to check the operation of the hoist and its carrying capacity. It may be necessary to work out to increase the lifting height, as well as to eliminate other shortcomings.
DIY pneumatic jack
As an example, also consider the pneumatic device, which is the easiest to make. So, you will need:
- Air bag. The main working part that can be found on disassembly or on the market. An ordinary rubber cylinder from the air suspension of a car can act in its role. It is best suited from a cargo area, as it is much stronger and can withstand strong pressure, which increases the lifting moment. But it has a great height, so it is not always possible to substitute such a jack under a car with low ground clearance;
- Two bolts. They will be needed to make the valve in the pillow. In general, it initially has a factory threaded hole into which a high-pressure pipe was screwed. Now, instead of it, we need to select the same diameter bolt, and then find another one that will serve as the top cover. They need to be drilled so that when they are connected to each other, a cavity is obtained inside them. Then we put a ball from the bearing and a strong connection for pumping inside the upper bolt. Now the whole structure can be welded and screwed into the hole in the pillow.
In principle, any passenger car can be easily lifted with such a home-made device. It is enough to place a pneumatic cylinder under the platform on the bottom and connect a high pressure hose to the fitting. By supplying compressed air, the pillow will begin to rise with the machine.
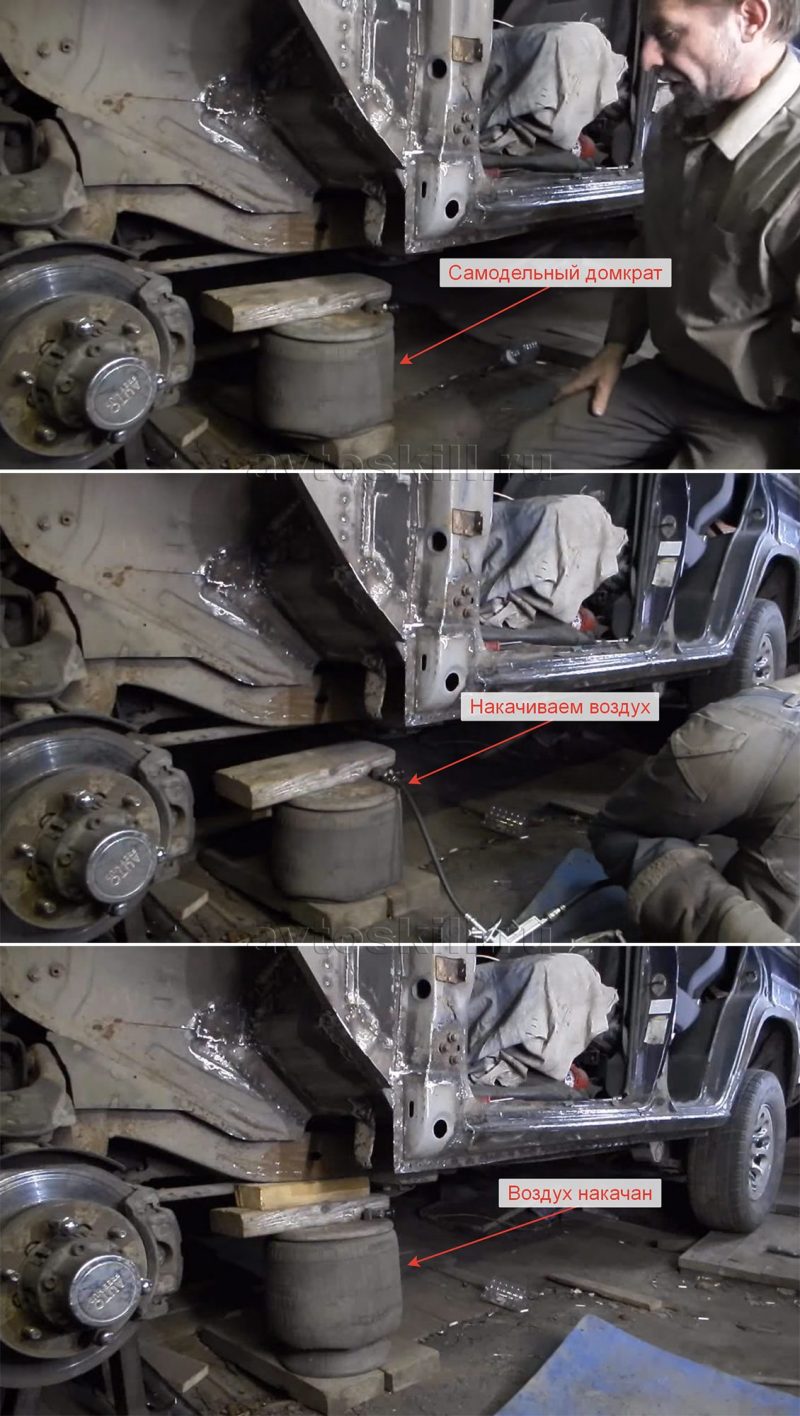
The principle of operation of a homemade pneumatic jack
For convenience, such a jack can be completed by inventing a reliable platform with wheels. Thus, if the cylinder is taken for disassembly, then the device of its own manufacture goes almost for a penny.
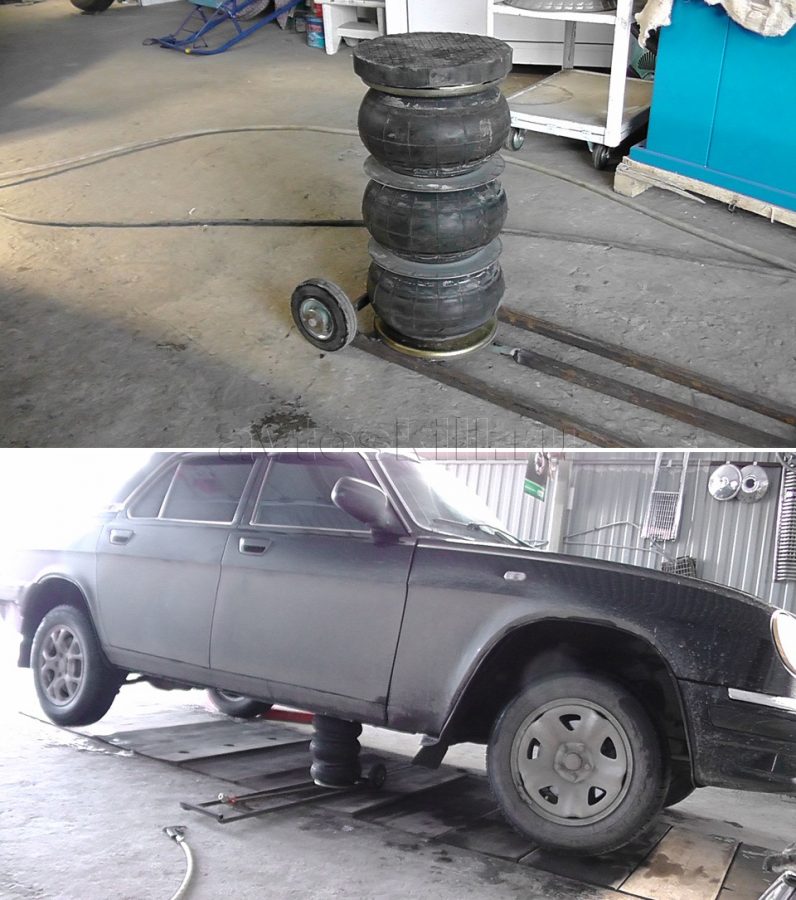
Improved pneumatic jack on wheels
You can also watch a few videos on how to make a pneumatic jack with your own hands:
Tools and materials for a homemade jack
In order to make a jack, there must be a suitable tool. The first step is welding, since it will be used for assembly. It is desirable that it be a semi-automatic apparatus with carbon dioxide. Then the seams will turn out much smoother and there will be no excess slag.
The second, and no less important, is the grinder. It is good if the assortment includes both small and large
With their help, you will cut out steel blanks. You will also need a drill, because you have to make more than one hole. To handle iron parts with ease, you need an electric sharpener. It is key in the fitting process. In addition, it is advisable to have hand tools: files, needle files, bars, hammers, screwdrivers, rasps, drills with a set of taps, sledgehammers, vices, etc. The more tools you have at hand, the easier the manufacturing process will seem.
The more tools are available, the easier and better the jack will be.
A lathe is a great helper in any business, but not everyone has one. In principle, you can cope without it, but if you have such a unit in your garage or workshop, it will work out much faster. After all, with the help of a milling unit, it is easy to grind or process any part. For example, a bolt or a rod. In general, your machine will be very useful.
It is also worth talking about the material. You can buy it at the market or at the scrap metal collection point. The second option is much cheaper, since at the scrap reception all the metal is rusty and bruised. It is not suitable for exploitation, but as a donor it is just that. It is desirable, of course, to purchase as much as possible. Indeed, depending on which jack you want, you may need additional mechanisms or fasteners that you cannot make yourself. Therefore, be prepared to purchase some of the components on the market.
Types of jacks
Before you start making a jack for a car with your own hands, you need to decide on what kind of design it will be. To do this, you need to know the main types of these devices that can be found in stores:
-
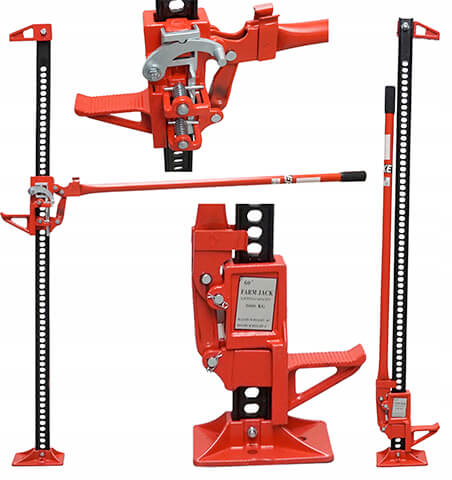
Rack. This type has been used for a very long time. It is based on a long metal rail with holes, a lever and a ratchet with a perpendicular end. Pulling the lever down, the ratchet lifts the weight with it. Pulling up - it works, locking itself into one of the holes nearest on the rail along with the load. Then the cycle repeats again;
-
Screw. The most common jack among domestic motorists. It can be presented in different ways, but the principle of operation is the same - rotating, the screw raises or lowers the dynamic part. It is often made in the form of a sturdy lever attached to a movable mechanism, which in turn walks along the brackets in the body. There is also a rhombic jack. It is much more practical and is a diamond-shaped body that is made of four movable parts. A stand is attached at the bottom, and a lifting platform is attached at the top. A long screw runs through the side mounts. If you twist it, the figure will either fold or stretch upward, lifting the load;
-
Hydraulic. Most often, such devices can be found on truckers who lift heavy truck axles when changing wheels. They can be presented in different ways and have a different principle of operation, but the meaning is the same for all - there is a hand pump that creates oil pressure in the master cylinder. Under his action, the platform begins to climb out with a weight. These jacks are characterized by high lifting capacity, as well as high weight and height;
-
Pneumatic. It is somewhat reminiscent of an air cylinder, which are installed on the air suspension of a car. Simply put, this is a small platform on wheels (maybe without them), on which a hollow thick-walled rubber cushion is attached.Air from the compressor or cylinder is supplied through the fitting. Pressure builds up and the pillow starts to rise.
These are the main types of jacks that are used most often. They are classified precisely by the type of force used (mechanical, hydraulic, etc.), but there are many varieties of them. So, for example, hydraulic devices are haulage, cylindrical, trailed, two-level. That is, there is only one type of jack, but there are several types of it. Therefore, there is a large choice in order to independently make your own model using a prototype.
How to make a do-it-yourself garage jack
Among the large number of homemade homemade device schemes, screw and hydraulic mechanisms are popular. And if in the first case excellent skills in threading are required (a complex shape is made), then the hydraulic option is easier to make.
Building the circuit
The hydraulic homemade jack is great for do-it-yourself use. And there is no reason to doubt its ability to ensure safety, because the oil cannot suddenly lose its properties and break out of the retained level.
Therefore, when working, it is important to pay attention, perhaps, only to the strength of the levers and their reliability.
Popular scheme of a homemade hydraulic jack
Selection of material and preparation of tools
In a homemade design, it is important to take care of strength. Therefore, metal is chosen as a building material.
For the frame, use:
- channel 10 mm;
- channel 12;
- rods 12 millimeters;
- wheels for moving;
- rubber part for the cup device;
- fastening material.
To fit the material you will need:
- welding machine;
- grinder with circles for metal cutting and grinding;
- drills for metal;
- wrenches and screwdrivers;
- measuring instrument: tape measure, ruler, marker.
The supporting part is fixed by welding to create a solid and strong structure. Upper pivot pieces are bolted or rod-mounted.
Construction collection
First, an L-shaped base is created from a 12 mm channel. A hydraulic bottle jack is attached to it. Then, with the help of bolts, the upper lip is attached to the base, on which the jack rod will act. The stem is secured with a swivel rod.
Wheels are additional equipment in the manufacture (suitable from old household appliances). They will help you move the overall structure around the garage.
An example of a homemade hydraulic jack
How to make a reliable do-it-yourself car lift
It is not easy to make a car lift yourself from a jack, and therefore you must read the instructions in advance.
Calculating dimensions and creating a drawing
First you need to decide on the size of the equipment for working with cars.
The choice of the dimensions of the car lift depends on the area of the garage in which it will be used. The average height of the device is three and a half meters, and the width is three meters. Equipment with such dimensions is capable of lifting a vehicle weighing 3-4 tons.

Required components and tools
Having decided on the dimensions of the car lift, you can start preparing the necessary tools and materials. For work you will need:
- welding machine for joining iron components;
- drill;
- drill;
- tape measure for measuring the dimensions of device parts.
The materials from which the device is made include:
- steel corners eight centimeters wide;
- iron plates, the thickness of which should be 1-2 centimeters;
- worm-type gearbox.

Assembly instructions
At the initial stage of creating a lift, steel corners are installed in the walls of the garage pit. After that, a metal plate is installed on their shelves and attached to the surface. A gearbox is installed on top, after which a key is fixed on the drive shaft.
After installing the gearbox, holes are made on the surface of the plate through which the chain will be passed. When the chain is installed, a sprocket is put on the shaft. To install the second chain on the opposite side of the plate, make the same holes.
Peculiarities
An improvised device can be classified as conventional or heavy machinery. The process of work is reduced to the transformation of the turning stage into translational movement. The key components are the screw-nut and the worm-type gearbox.
In this case, the gearbox supplies a twisting moment to the nut, where, being transformed into a translational movement, it creates a lifting of the load. Improved jacks in the add-on have rollers or balls that help to extend the use of the equipment and speed up the lifting of the machine. But the price of such a model will be much higher.
A home-made device can be used as usual, it is used to raise cars and light trucks to a low height. There are several varieties that differ from each other. To decide which one to do, you need to study everything in more detail.
The rhombic jack is one of the common types. It has 4 rhombus-shaped hinge joints of the screw transmission of the beam. It is the most compact. It is quite easy to make, and in case of breakdown, you can replace parts and use again. The model has increased stability and differs in that there is no displacement point on the body, which is obtained when the car is lifted. However, there are drawbacks everywhere. This model can easily break down if used for other purposes or lifted a very heavy vehicle.
Any of these types can be made at home, but some will have to work hard to make. Consider the process of creating a jack using available tools.
Making a press with your own hands
After the drawings and dimensions for the manufacture of the press are determined and verified, and all the necessary materials and tools are prepared, you can start assembling the device.

Here is the sequence for creating a press from a jack step by step:
We make a support platform. It must be as reliable and durable as possible and withstand the operating power of the jack, otherwise the whole device will be unstable.


The uprights and the bottom stop are made of profiled steel pipes. Their height should correspond to the maximum output of the rod, the dimensions of the jack and the thickness of the removable stop. As far as the length of the bottom stop is concerned, it is equal to the length of the support platform.

We weld the bottom stop, platform and racks into a single structure, not forgetting that the corners must be straight. For this we use corners. We add strength with the plates by welding them diagonally to the uprights and the base of the press.

We make a removable stop from steel strips... It will move in a vertical plane using the guides, creating pressure on the object being processed. Instead of strips, you can use a piece of pipe from which the frame was made.
We bolt two guide plates to the stop. Since the press will be used to process different materials and for different purposes, this emphasis must be removable. To do this, in a block of strips we make a pair of through holes.

We install the jack. To mount it, we pull back the shifting stop and insert the jack between it and the platform so that when the position is retracted, the rod tip is inside the retainer. We fasten the base of the jack on a movable stop using welding or bolts. The pressing equipment is ready!

In conclusion, we note that making a press from an ordinary jack is not difficult at all. For this purpose, ordinary materials at hand are suitable, and diagrams and drawings can always be found on the Internet. With a little effort, you will get a useful mechanism that will always come in handy on the farm.
Types and comparative characteristics
Probably every good owner has a jack in his tool kit. And those who often have to lift loads, repair a car, change wheels know that, for safety reasons, it is necessary to put several units of a lifting tool for insurance.
Of course, an ordinary solid object can be used as a fallback. For example, the laying of bricks is familiar to everyone. But such an artisanal approach simply cannot inspire the necessary confidence. Therefore, sometimes you can approach the issue of safety more thoroughly and make a homemade jack for the garage. Moreover, this work does not imply any special difficulties.
Today, the following types are popular:
- screw;
- rack;
- pneumatic;
- hydraulic.
Each type of jack has its own advantages and disadvantages. Some are simpler in the device (therefore, they are easier to assemble with your own hands), some are considered the most reliable and powerful.
Screw
The screw jack device is as simple and time-tested as possible. For this reason, these types are considered the most common. Often these are the jacks that come with standard motorist kits.
But, despite the fact that they are easy to assemble, it will be very difficult to reproduce the mechanism on your own, because you will need to repeat the special thread pattern that is applied to the lift arm and stop. The teeth are given a trapezoidal shape for the following reasons:
- such a thread has a self-extinguishing function (it does not unwind under the influence of a load);
- the transmitting force is multiplied (limitation of use: from 500 kilograms to 10 tons), which ensures ease of operation.
Such lifting tools are not more expensive than other analogs, so there is little point in creating a homemade screw jack.
Rack
Rack structures are used primarily for lifting loads to great heights. The force is also optimally calculated in them.
It is difficult to make a rack structure with your own hands.
Pneumatic
Pneumatic or bottle jacks work on the principle of pumping compressed air into a special container, which squeezes out the stem and raises the load. These models have good lifting capacity, and the power reserve is limited only by the length of the lifting bar.
You can make a homemade pneumatic structure by purchasing only the main mechanism with compressed air. And the levers and additional parts (wheels, stops) are quite capable of making with your own hands, having previously calculated everything.
Hydraulic
Perhaps the best option for a do-it-yourself lifting mechanism is hydraulic. As a rule, the design implies the creation of a rolling mechanism on wheels and ease of lifting.
The working principle of a hydraulic jack is the same as that of a pneumatic jack. It is not compressed air that raises the rod, but oil, which has a low compression ratio. For this reason, hydraulic jacks are used in professional auto repair shops (some models are capable of lifting loads up to 20 tons).
A container of oil and a lever for operation are purchased. And all other elements are designed as needed.
Jack instead of a winch

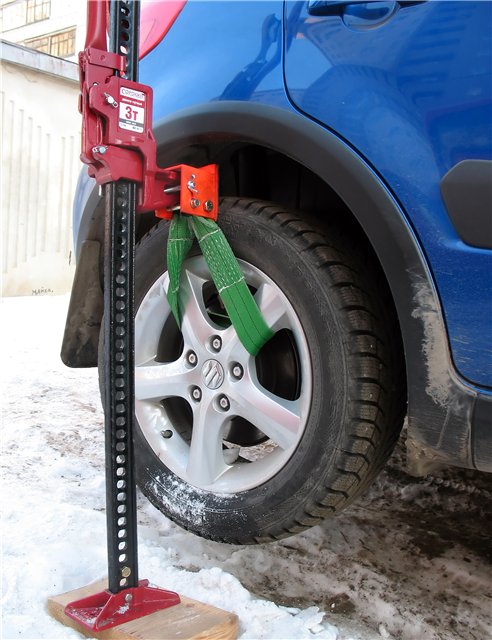
But these are not all Hi-Jack features. The device can easily replace a manual winch and get the car out of any messy story. Moreover, any car, since the carrying capacity of the device, depending on the material of manufacture, can reach three tons. In one approach, you can advance the machine to the length of the rail. True, for this you still need a chain or a cable, but those who go to plow off-road, stock up on chains and cables.

The rack jack does not require complex maintenance, after use it is enough to rinse it with water and lubricate the rubbing parts. There are Canadian devices on sale, there are jacks of Chinese production, there are also domestic ones.However, the test of rack and pinion jacks showed the advantages and endurance of the proprietary Hi-Lift Jack device. The price of a cast iron jack - about 9 thousand rubles, and stamped steel costs several thousand less. A Chinese copy will cost 5-6 thousand. There is no point in taking risks. Good luck to all roads and off-road gambling!
Design
The mechanism is not distinguished by a complex design. So, a mechanical screw bottle jack consists of the following elements:
- screw;
- lever arm;
- worm gear.
When the driver applies torque (in our case, it is a hand), the forces are converted, and as a result of translational movements, the mechanism lifts the car. Nowadays, mechanisms with a three-piece “screw-roller-nut” are very popular. They are a more advanced design of the classic screw jack. But even such mechanisms are very reliable in comparison with electrical counterparts.

By the way, electric motors are additionally installed on some screw jacks. This allows you to increase the efficiency of the mechanism. But the cost of such parts is many times more expensive. Therefore, most motorists prefer to buy a mechanical screw bottle jack 2t. Such a tool will cope with the task of lifting both passenger cars and SUVs.
Recommendations
Only the person who made it is responsible for how a homemade garage jack works. Therefore, in any case, no matter how confident the creator of the jack may have, it is recommended to use insurance - another lifting device when it comes to repairing the engine or pallets under the vehicle body.
The jack is a popular tool for lifting cars. Therefore, if it was decided to assemble the unit with your own hands, you should approach the matter responsibly.

How to create a rolling jack, see the next video.
Manufacturing instruction
On the net you can find many different instructions for the manufacture of rack and pinion jacks: there are both simple explanations, where everything is shown "on the fingers", and detailed analyzes with drawings and dimensions.
The same wide choice is offered in terms of execution. Here you can find mechanical jacks, and electronic, and three-stage and, in general, whatever. Of course, we will not be able to disassemble them all.
But still, let's try to create the simplest homemade jack with a lever mechanism. This process looks like this:
for a start, a piece of a channel with a width of 60 millimeters and a profile pipe are taken;
on the channel on the sides, 2 holes are marked, and then 2 holes are made, the width of which should be a couple of millimeters larger than the width of the profile pipe;
then we take a pipe (for example, a water pipe) and cut a piece from it slightly longer than the width of the channel;
we weld the pipe to the channel approximately in the middle (this is not so important);


- now we take a steel strip and mark it so that we get 3 segments - 2 along the edges of about 200 millimeters, and between them one with a width of 65-70 millimeters;
- slightly cut the marked places with a grinder, and then bend it 90 degrees along the cut line and weld the fold line - the result will be a beech "P";
- at the ends of the resulting part, we make 2 holes with a diameter slightly larger than a piece of pipe;
- we take an axis with a diameter slightly smaller than the hole in the pipe, and a length of 65-70 millimeters, connect all 3 parts and weld;
- make 2 holes with a diameter of 12 millimeters on the sides of the channel, take a bar with the corresponding diameter, insert and weld;


- we make 2 clamps - small rectangles with holes for a profile pipe;
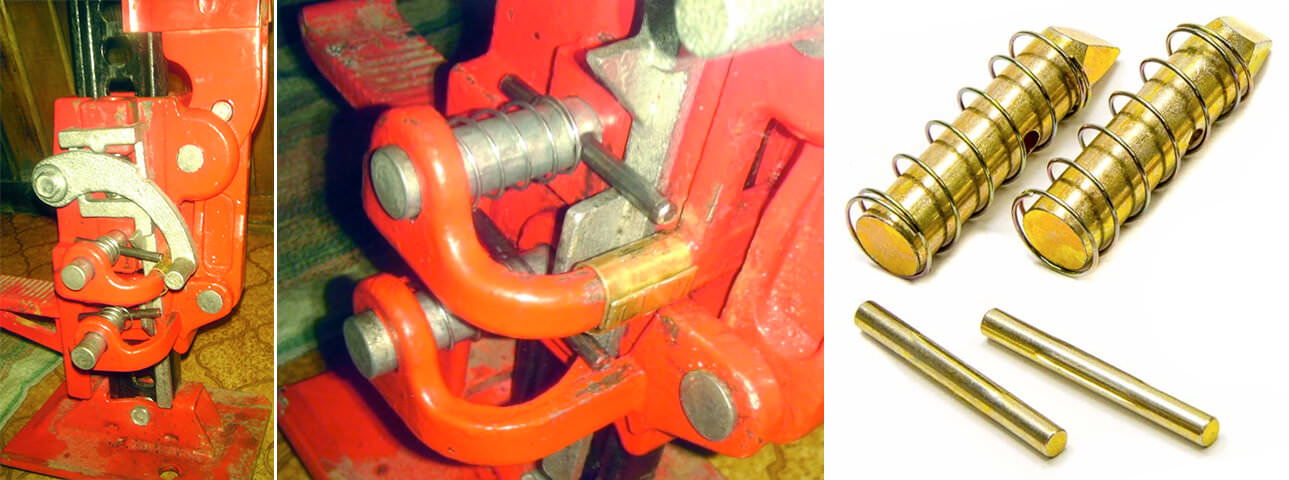
- take 4 nuts and weld 2 of them to the retainer, and 2 from the inside to the channel, insert the retainer into the structure, and connect the nuts with springs;
- make an oval hole in the second retainer;
- we make a stop for the retainer and weld it to the channel from the bottom, and from above we weld the bolt on the same side where the nuts were welded;
- we put a spring on the bolt, connect all the parts, and fix the second retainer with a nut;
- it remains only to weld the lever and the support platform - the jack is ready.
The instructions may seem a little difficult, but in practice everything is much easier. Before starting work, it is best to re-read it a couple of times, think over the entire procedure in your head from start to finish and clarify incomprehensible points.
The resulting device will be able to satisfy the needs of an ordinary consumer and will lift any passenger car up.
For information on how to make a rack jack with your own hands, see the next video.

