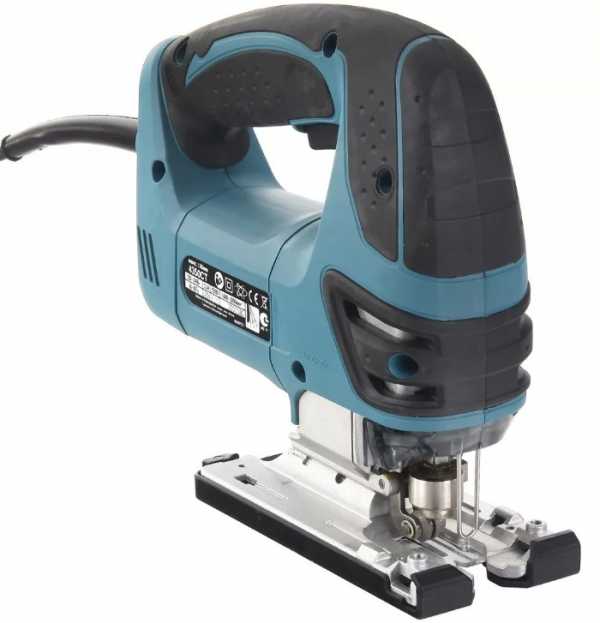
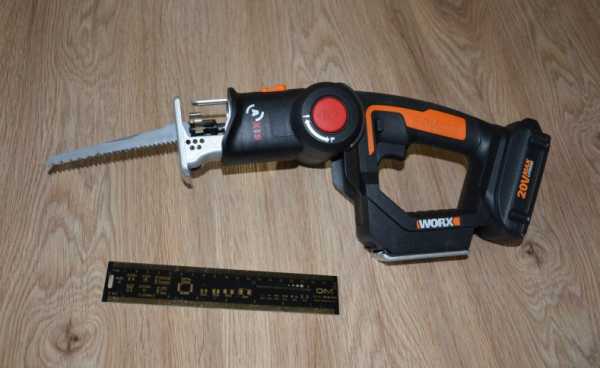
DIY jigsaw guide
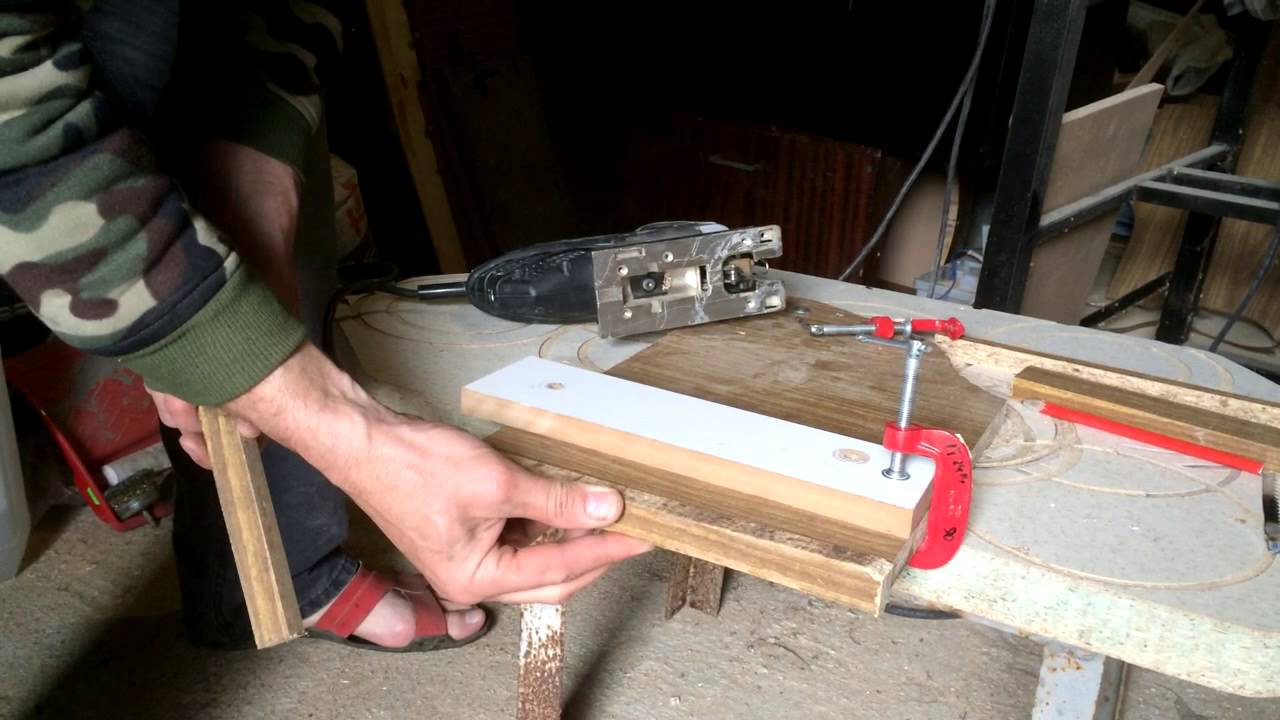
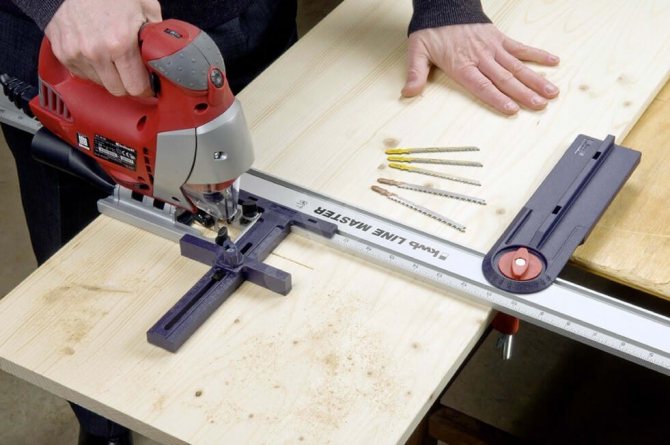
If the jigsaw cuts crookedly, and it is not advisable to buy an expensive guide, you can completely do with improvised means. Any flat edge with a thickness of 5 mm or more can become an improvised emphasis: a straight rail, as a rule, a piece of plywood and other straight surfaces of suitable dimensions. A pair of ordinary clamps can serve as the fixtures of the guide to the material. If the surface condition of the opposite part of the material to be cut is not very important, the guide can be screwed onto a pair of self-tapping screws.
Before installing a homemade stop, you should mark the line of the required cut in advance and retreat from it a certain distance equal to that between the file and the edge of the tool sole. When sawing, guide the tool strictly along the edge of the guide so that it is parallel to the sole of the jigsaw. Operating vibration can distort the movement of the saw in the material, so the device must be held firmly and pressed against the stop, which must be firmly fixed. To keep the line as neat and straight as possible, use the optimal file suitable for the material being cut. More visual processes of making and using a homemade guide are demonstrated in the following videos.
List of sources
Types and operating mode of files
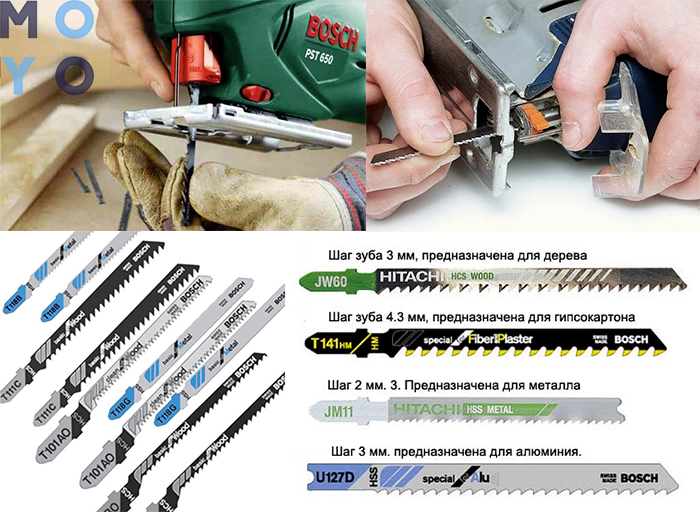
The quality of work depends on the correct cutting part for cutting various types of material. Files differ in shape and setting, have different heights and tooth directions. When choosing a file for a jigsaw, you must be guided by the following rules:
- For a straight cut, a saw blade is used, the blade of which is characterized as the widest. For curved or rounded cuts, a saw blade is used, the blade of which is characterized as medium.
- A clean, straight cut of wood material is made with a standard saw blade, which has medium teeth and points upwards. The length of the file depends on the thickness of the material. If the quality of the cut does not matter, then for a normal cut, you can turn on the pendulum movement, which will increase the speed of the jigsaw. For coarse cuts in hard material, we recommend using wide-tooth and large-tooth attachments.
- For coarse cuts and uneven cuts, large-toothed saws are used. Sawing thick wood material should be done in two steps. Hold the tool firmly when cutting, as when working with thick material, vibration and kickback increase as a result of the saw hitting the work surface.
- For sawing chipboard and laminated surfaces, it is recommended to use a reverse cut file. This file does not chip on the face of the material. If a fine-tooth nozzle is used for cutting, then the work must be carried out strictly on the back of the sawn material. Both methods can be performed at maximum tool speed.
- Straight cutting of metal is performed with a special file with a fine tooth. Externally, the cutting blade is similar to a standard hand hacksaw for metal. This type of file is distinguished by the fact that it produces a clean cut without defects. However, when sawing other materials, the cutting speed is significantly reduced, which leads to rapid heating of the tool. Experienced craftsmen recommend using a plywood sheet when cutting thin sheet metal.Plywood is placed in advance on the work surface, securely attached to the table and thin sheet metal is laid on top of it. This cutting method will prevent breakage and deformation of the workpiece.
- Experts prefer to work with wood using a saw, the teeth of which are directed downwards, such a saw does not deform the surface of the sawn material. In order not to damage the front side of the material surface, the cut should be made from the back side. Making a normal straight cut with a downward saw blade requires experience, as there is increased kickback and high vibration during operation.
- For cutting tiles and ceramic tiles, a non-standard file is used, namely a file without teeth. Cutting tiles with a jigsaw is extremely rare, due to the high consumption of material. They are used only in those cases when it is required to make curved cuts.
- Plastic and plexiglass are sawn with a file with fine teeth down. The saw blade is medium. To make a straight cut, it is advisable to turn off the pendulum stroke. Cutting should be done at medium frequency. In order to avoid overheating of the file and the tool, it is necessary to use cooling. The speed should correspond to 30-40% of the maximum possible tool speed.
Despite the versatility of an electric jigsaw, experienced craftsmen recommend using other tools to cut tiles and metal.
Having studied the basic cutting techniques with an electric jigsaw, it will not be difficult for a beginner to correctly cut not only various materials, but also to cut straight, curved and curved elements. By applying safety rules and cutting techniques, you can solve almost any problem associated with cutting, regardless of the type of material and experience.
If the electric jigsaw is used to cut plastic, plexiglass and wood materials, then the tool, with proper use and proper care, will last more than 5 years.
Jigsaw operation
Prepare the necessary rigging before work.
Take the blade replacement bracket. Loosen the mounting bolt. Insert the correct file and tighten the bolt. The file is replaced in the same way.
Replacing the file
If you have the function of quickly changing the file, then turn the lever of the corresponding unit.
File quick change function
Adjust the stroke rate. The harder the material, the lower the frequency. The tree is sawn at maximum speed. Metal - half as much. For plastic, the speed is 2.5 times less than the maximum. The tiles are processed at a low speed.
Install the pendulum stroke. It is used for thick pieces of wood. There are three positions of the regulator: 1 - thickness 30–40 mm; 2 - thickness 40-50 mm; 3 - more than 50 mm.
Swap switch
Secure the part to the workbench.
Install the device with the cutting end to the workpiece. Turn on. Without pressing on the canvas, guide it along the drawn line. If you use excessive force while sawing, the blade may break.
Change dull equipment immediately so that there is no heavy load on the engine and the device does not fail.
Use a straight edge and staff to make a long cut parallel to the edge. Measure the desired distance. Place the rail along the cutting line, fix it on the workpiece with a clamp. Move the tool parallel to the staff.
For tilt sawing, loosen the platform attachment. Set the angle to the desired value. Tighten the mount.
To cut a straight circle, connect the guide to the center. It is included in the tool kit. Clip it in the middle. Guide the jigsaw around the center.
When cutting patterns, secure the jigsaw to the table. Then you will see the whole drawing. You will be able to guide the part along the desired path with both hands.
To work with thin metal, place plywood underneath so that the workpiece does not deform.
How to fix the jigsaw on the table
If you convert a regular jigsaw into a desktop version, then its capabilities will expand.
Take a countertop with a thickness of 12-15 mm. Drill four holes in it and in the jigsaw platform.
Place the worktop on a base that is at least 22 mm thick. Screw on the jigsaw.
Attaching the jigsaw to the table
If it has a branch pipe for blowing out sawdust, you can connect a vacuum cleaner. To do this, make a round hole at the back of the table base and route the hose from the vacuum cleaner.
Connecting a jigsaw to a vacuum cleaner
Now you can saw.
Finished jigsaw table
How to work with a jigsaw
First, identify one of the two causes, then proceed to eliminate it.
Make cuts along and across the grain. If the file goes only along, then replace it. If the defect is repeated in both cases, you need to adjust the guide assembly.
For some, the problem is solved by adjusting the video.
Support roller
To do this, loosen it and slide it forward or backward.
Setting up the video
For others, adjusting the guide nuts. They are bolted. Loosen them and set the desired position.
Guide crackers
Make control cuts. Repeat the adjustment if necessary.
How to do it yourself?
Branded tires from manufacturers are made in such a way that their borders coincide with the line along which the sawing takes place. Branded products are glued with a special tape, it prevents damage to the soft material. All these little things are convenient and necessary. This tire provides performance, precision and comfort.
There are also disadvantages in such products: a brand tire may not always correspond to production tasks.
If the tool has to be used from time to time, then the purchase of an expensive tire is optional. The best option is to make a tire yourself. In terms of quality and functionality, such guides are often not inferior to the best world analogues.
To make a homemade tire, you need to take some durable material as a basis, they may turn out to be:
- corner;
- trim pipe;
- metal guide;
- laminate.
The material should not deform under the influence of excess moisture or temperature drops.
Guide drawings can be found on the Internet. Any sample you like is easy to bring to mind, adjusting it to the features of this equipment
In this case, it is important to comply with all sizes. Hand-held circular saws are often made with comfortable handles, which improves the quality of work and makes work much easier.
Materials that will be required to make a universal tire:
- plywood or chipboard;
- epoxy adhesive;
- self-tapping screws.
Of the tools you will need:
- clamps;
- turbine;
- ruler protractor;
- fine sandpaper;
- marker.
For small circular saw
It is manufactured in the form of a rail miter box. The following items are required:
- building rule (2 meters);
- clamps;
- propylene fragments;
- corner or profile made of aluminum;
- wood bars 12 mm;
- chipboard plates;
- laminate.
For big
Elements needed:
- metal corners of the same parameters;
- strong wooden base (chipboard sheet, board up to 3 cm thick);
- bolts and nuts.
The markup is being prepared, the places of the future attachment should be indicated. The immersion board must move freely parallel to the guide elements, the disc must not be too high.
From the building rule and retainers
To make such a node, you need the following elements:
- building rule (1.5-2 meters), which is used for plastering walls;
- clamps (their number depends on the attachment points);
- guides, which are made from the rule, clips and polypropylene elements.
The creation algorithm is as follows:
- handles are removed from the rule (if present);
- adapters are cut from dense PVC material, they should be slightly larger than the depth of the groove of the rule itself;
- the made structure is attached to a wooden bar.
Made of aluminum
To make a tire from an aluminum profile, you will need the following elements:
- profile "P";
- fastening fittings;
- sheet plywood (you can take waste).
And you will also need a tool:
- drill;
- wrenches;
- ruler or tape measure.
Made of wood
To create such a structure, two bars are used, the sizes of which are different. And you can also use a chipboard for these purposes. All wooden elements are fastened with self-tapping screws. The protruding parts are neatly cut off. Such an uncomplicated mechanism can also provide a perfect cut.
From profiles of different sizes
In this case, the small profile is installed in a large profile. The created structure is attached to the base of the circular saw. Such an installation provides the ability to move exactly along a predetermined line. The edge at the base must be perfectly flat to ensure a quality cut. The profiles form rails, which significantly reduces the amount of effort required to operate the unit. The smaller profile should not have gaps with the larger profile, but there should be free movement.
Laminate
This material is cheap, it is not difficult to buy it, it is quite technological. The laminate is cut into two identical strips. One of them will be the main one, the second one will be auxiliary. All edges are ground and rounded. Using self-tapping screws, the material is attached to the base.
It is recommended to extend the tire as far as possible to ensure comfortable operation. With the help of a grinder, excess material on the guides is removed.
You will learn how to make a homemade circular saw guide rail in the video below.
Jigsaw operation
Prepare the necessary rigging before work.
Setting up the device
- Take the blade replacement bracket. Loosen the mounting bolt. Insert the correct file and tighten the bolt. The file is replaced in the same way.
- If you have the function of quickly changing the file, then turn the lever of the corresponding unit.
- Adjust the stroke rate. The harder the material, the lower the frequency. The tree is sawn at maximum speed. Metal - half as much. For plastic, the speed is 2.5 times less than the maximum. The tiles are processed at a low speed.
- Install the pendulum stroke. It is used for thick pieces of wood. There are three positions of the regulator: 1 - thickness 30–40 mm; 2 - thickness 40-50 mm; 3 - more than 50 mm.
Jigsaw work
- Secure the part to the workbench.
- Install the device with the cutting end to the workpiece. Turn on. Without pressing on the canvas, guide it along the drawn line. If you use excessive force while sawing, the blade may break.
- Change dull equipment immediately so that there is no heavy load on the engine and the device does not fail.
- Use a straight edge and staff to make a long cut parallel to the edge. Measure the desired distance. Place the rail along the cutting line, fix it on the workpiece with a clamp. Move the tool parallel to the staff.
- For tilt sawing, loosen the platform attachment. Set the angle to the desired value. Tighten the mount.
- To cut a straight circle, connect the guide to the center. It is included in the tool kit. Clip it in the middle. Guide the jigsaw around the center.
- When cutting patterns, secure the jigsaw to the table. Then you will see the whole drawing. You will be able to guide the part along the desired path with both hands.
- To work with thin metal, place plywood underneath so that the workpiece does not deform.
How to fix the jigsaw on the table
If you convert a regular jigsaw into a desktop version, then its capabilities will expand.
- Take a countertop with a thickness of 12-15 mm.Drill four holes in it and in the jigsaw platform.
- Place the worktop on a base that is at least 22 mm thick. Screw on the jigsaw.
- If it has a branch pipe for blowing out sawdust, you can connect a vacuum cleaner. To do this, make a round hole at the back of the table base and route the hose from the vacuum cleaner.
- Now you can saw.
How to work with a jigsaw
- Make cuts along and across the grain. If the file goes only along, then replace it. If the defect is repeated in both cases, you need to adjust the guide assembly.
- For some, the problem is solved by adjusting the video.
- To do this, loosen it and slide it forward or backward.
- For others, adjusting the guide nuts. They are bolted. Loosen them and set the desired position.
- Make control cuts. Repeat the adjustment if necessary.
How to insert a file into a jigsaw
Shoe mount
Screw fixing
A more convenient and reliable type of attachment, like the previous one, can fix files with different types of shanks. Has only one clamping screw located on the side. The undoubted advantage is the relatively simple and quick replacement of the saw, in comparison with the block mount. The fixation of the canvas is quite even, but it will not be superfluous to check the angle during installation.
Installing the blade in such a clamp is extremely simple. First of all, we loosen the fixing screw and take out the unnecessary canvas. Next, we insert a new file into an empty groove and gradually tighten, periodically assessing the evenness of its location. It is not worth making too much tension, since the file tightened to the limit will vibrate quite strongly during operation, lowering the quality of the cut.
Quick-release fastening
As the name implies, this type of attachment is the most convenient. It does not require a special key and allows you to change the file in a few seconds. Unfortunately, the small advantages of saving time are covered by rather significant disadvantages. First, it is not universal. Only blades with a certain type of shank can be installed in it. Secondly, the reliability of fixation in most models leaves much to be desired. Of course, the original jigsaws of proven brands have a high-quality quick-clamping system, but even that sooner or later becomes unusable. The unique components of the mechanism cause serious difficulties in repair, making it almost impossible.
To understand how to change a jigsaw file with a quick-release fastener, it is enough to repeat a couple of elementary steps. We bend the movable lever, and holding it with your finger, insert the blade shank into the groove. When the shank is submerged, release the lever and slightly adjust the file. The mechanism should snap into place, making a characteristic click, which will indicate that the tool is ready for work. To get a clearer idea, we recommend watching the video below how insert the file into the jigsaw.
File attachment
The features listed above determine the key properties of the tool - accuracy and productivity. Now let's talk about others that affect usability. During operation, you will most likely have to change the canvases.
This is due not at all to their fragility, but to the need to perform operations of various types.
Let's start with a simple case - keyed locks. The most optimal, but, alas, not the most common option - one screw on the side. In such a "cartridge" canvases of almost all thicknesses, and in some cases, of types, are securely fixed, moreover, it is simple (there is only one screw).
In most inexpensive models, the file is pressed by a slotted block, tightened by two front screws. The compatibility of such a system is at a height, but with the rest it is worse: for example, an unevenly clamped fastener causes a skew.(Paradoxically, sometimes this turns into dignity. For example, if the rod was bent or was crooked "from birth", a certain degree of freedom allows you to correct the situation.) For such locks, there are frequent cases of wedging when the blade cannot be removed "with a slight movement of the hand." The impacts of the end of the file on the workpiece, which occur during careless handling, sometimes lead to the fact that the front block breaks into two parts or the thread of the screws breaks off.
The most convenient jigsaws are with a quick-clamping system. There is a huge variety of implementation schemes. They are distinguished from "key cartridges" by the lack of versatility (only one firm's shank files are suitable) and the presence of some backlash. In most cases, this is insignificant, since there is no shortage of canvases. As for the backlash, it is usually longitudinal and does not affect the operation of the jigsaw in any way.
Quick-release locks have only one drawback - the limitation on the thickness of the clamped blades. Nevertheless, if the purchased "consumable" does not "fit", the situation can be easily corrected by "grinding" the shank with a suitable tool. Clamps similar to those of Festool are much less common. Their advantage is their versatility (there are no restrictions on the thickness of the shank). On the other hand, they have lower fixation rigidity (at least with Festool).
Preparing the tool for work and accessories
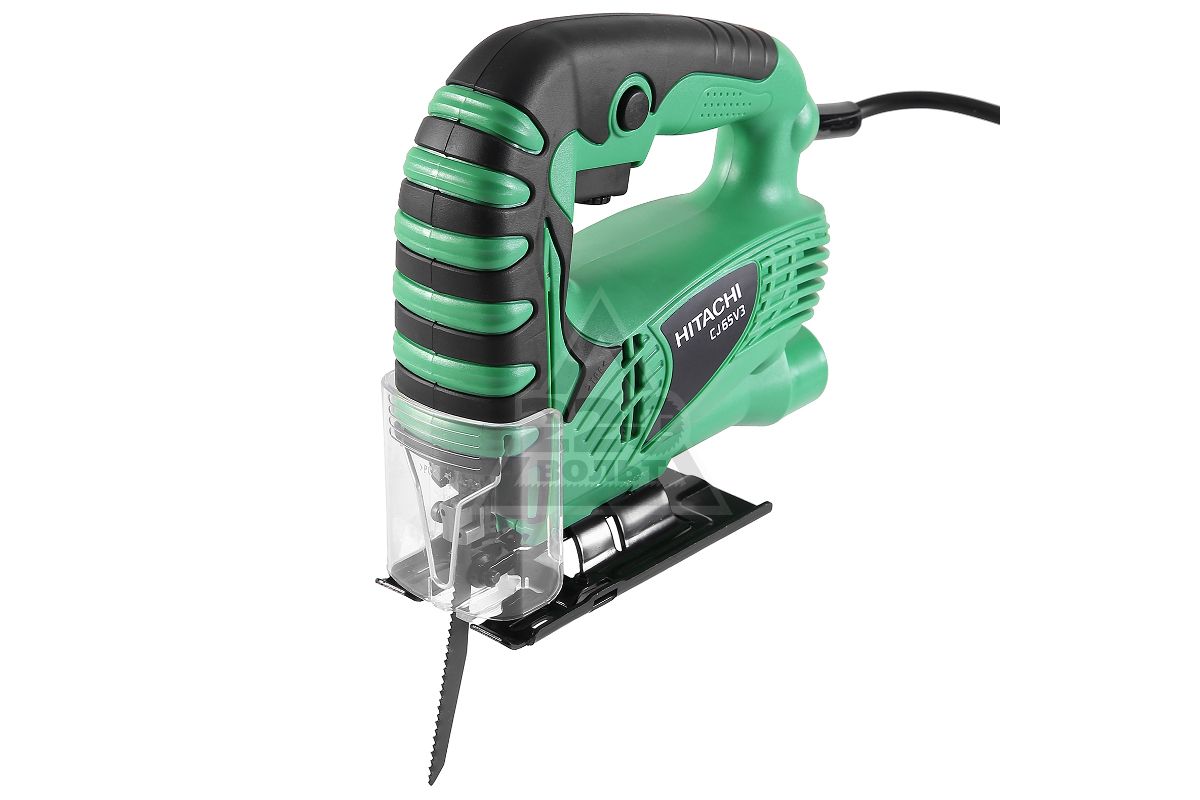
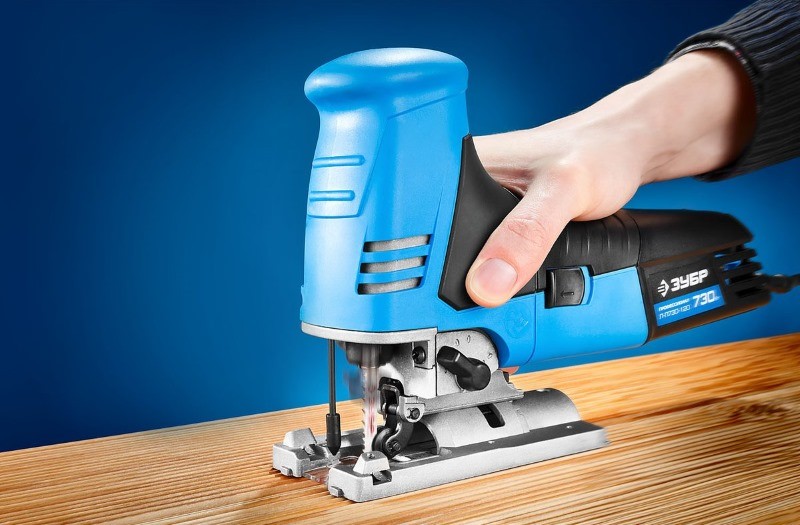
A jigsaw is a kind of universal device that in some cases can replace a number of tools. Before starting work, it is necessary to carry out an external examination of the tool: make sure that the power cable is intact, check the connection to the mains.
It is also important to choose the right cutting blade - for each material being cut has its own requirements. The markings applied to the material must be clear and clearly visible
You can use a laser guide, if one is included with the jigsaw. However, experienced craftsmen, for a more accurate cut, are advised to focus on the marks applied to the sole. All work is best done on a saw table - this element can be purchased in the store, or you can equip it yourself.
A number of manufacturers produce accessories to help you perform various operations. The following additional devices will be a good help:
#1. Parallel stop-compass - useful for cutting circles.
# 2. Rip fence - for straight cuts.
# 3. Guide bar - makes it easy to cut in a straight line.
#4. Removable pad for the support block - can be made of plastic or metal and is used to increase the sliding of the jigsaw on the surface of the material being processed.
#5. Anti-splinter liner - used to reduce the likelihood of chips occurring during operation, especially relevant when sawing laminated lumber.
Having learned how to use a jigsaw correctly, you can proceed directly to sawing. The choice of the file and the mode of operation plays a rather important role in the process of sawing the material and operating the tool. With an incorrectly selected operating mode, the jigsaw may break. Therefore, do not neglect the recommendations described below.
File attachment methods
Festool jigsaw |
|
 |
1. The lever for releasing the file is located on the body, which allows replacing the blade, without removing the protective cover |
 |
2. Pull back the lever. In this case, the lock opens, and the stem moves forward. |
 |
3. Insert the blade shank and release the lever |
 |
4. Turning the adjusting screw, adjust the blade fixing the blade. You can act controlling the process visually, or it is possible - by tightening the screw to the end, and then slightly loosening |
Jigsaw Kress |
|
 |
1. Open the protective screen |
 |
2. We turn the lever on the rod, insert the canvas, release the lever and with a slight effort we move the canvas into the clamp |
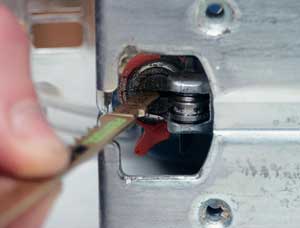 |
3.For such locks, the thickness of the installed blades is strictly limited by the size of the slot |
 |
4. The thickness of the shank clamped with a caliper is 1.7 mm. It was not possible to install it, but another file (1.5 mm) was mounted without problems |
Jigsaw Protool |
|
 |
The most common and convenient (if you forget about quick-clamping) type of lock is the Protool jigsaw. Remove the cover, loosen the screw, insert the blade and tighten the fasteners. You can use files with a variety of shanks. |
Circular saw attachments and their purpose
Today, a carpenter can both make and buy various products that make his work easier. Additional devices to facilitate work with the saw are divided into several types. The main ones are:
- Parallel stop.
- Guide rail for cutting sheet blanks.
- Device for perpendicular sawing and facing.
- Setting blocks for precise positioning of the rail.
- Adjustable guide for cutting the workpiece at a fixed angle.
With their use, time will be significantly reduced, and labor costs will be reduced when working with massive and large-sized products.
Circular saw stop
First of all, it is necessary for sawing wood products along the grain to a certain width. However, there is one significant drawback in its design. In order to work safely with the saw, it is designed so that it does not come into contact when working with the protective cover, so the cut cannot be made more than a certain width. This parameter differs among different saw models and manufacturers.
Before work it is necessary:
- Lock the stop at the desired cutting width.
- Secure the workpiece.
- Press the edge of the stop against the board and guide the saw along the workpiece.

Guide bars for circular saws
A guide rail is a long strip of plywood on which an aluminum u-profile is screwed, which serves as the actual rail on which the saw itself is launched. The main task is to cut sheet material. The tire is installed on top of the workpiece, aligned with the cutting line. Then it is fixed with clamps. When working, the saw should be guided along the guide.
Circular saw sole
It is an aluminum or wooden board, in which there is a cut for the disc to work. Attached to the base of the saw with screws. It is used to prevent chips when cutting plywood or chipboard.
DIY circular saw blade
It is preferable to make this product from chipboard, since this material is more resistant to wood - in terms of moisture.
The board itself consists of several strips of chipboard or boards, namely four, fastened with self-tapping screws along the entire length along the contour. A semblance of a massive ruler in the form of a box is formed. It joins to the support board, which ensures its fixation to the table top. An eccentric handle is located at the other end. There is a metal runner that provides smooth sliding of the stop during operation. The position of the stop is adjusted with bolts that come directly into contact with the table top.
DIY circular saw guide bar
It is intended for use as a stop for a product when cutting. It is a wide board to which a metal corner is attached along the entire length with screws. A saw is placed on top of this corner of the guide, which moves freely along its entire length. Allows smooth cutting of various materials.
DIY circular saw ruler
For the ruler, you will need several pieces of 12 mm plywood, as well as a 20 mm square aluminum profile. A groove is made on the edge of the plywood. The profile for the entire length of the sheet is screwed onto self-tapping screws. The stiffener is screwed on the side with self-tapping screws.Before screwing in, the stiffeners should be bent slightly to the base of the bending ruler. This is necessary to securely fix the ruler on the part, so that it does not "dance". In addition, a platform with a cut-out groove for the guide and for the disc is made from the same plywood 12 mm thick. It should move freely along the guide.
DIY circular saw carriage
To make a carriage with our own hands, we need a chipboard sheet. We bolt to it two metal corners - these are guides. We measure the perpendicular from the saw, put an emphasis on the carriage. In addition to all this, you can make an additional curved groove in the base of the board at 45 degrees for cutting at an angle.
With these auxiliary tools, any carpenter will make his job easier. At the same time, the speed and productivity of labor will increase.

