How to make a walk-behind tractor from a chainsaw with your own hands: several design options
A walk-behind tractor based on a chainsaw can be recreated using different techniques:
- universal, designed for any type of powerful chainsaw;
- specific, applicable to a specific modification, for example, "Druzhba" or "Ural" of the Soviet or modern design.
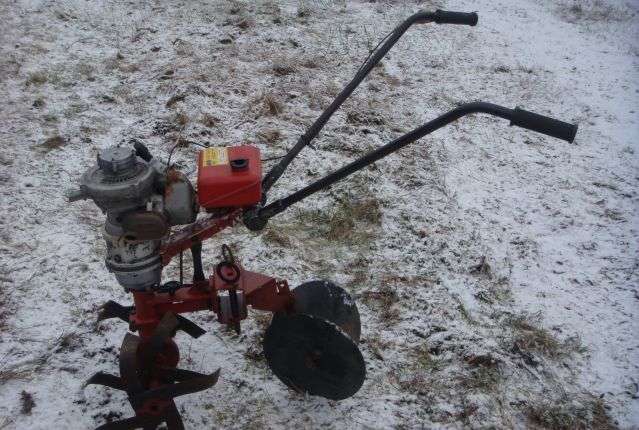
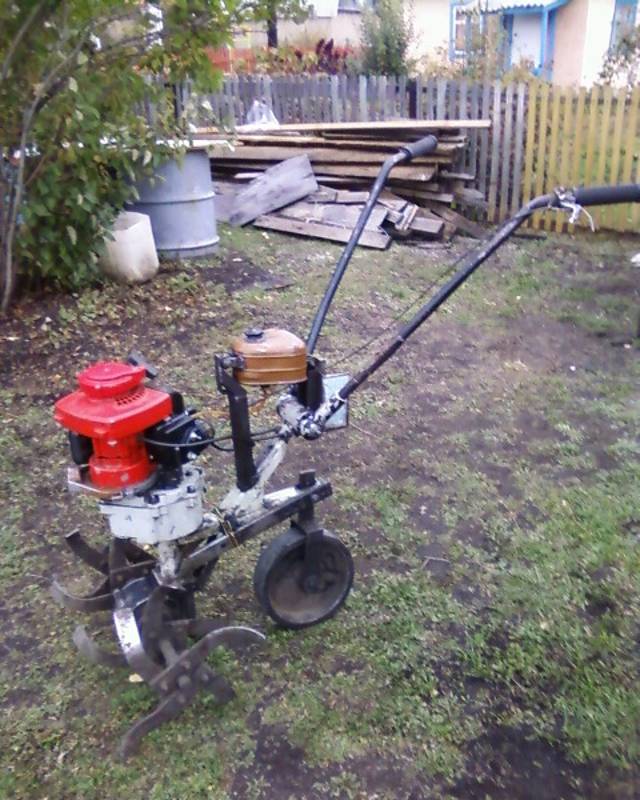
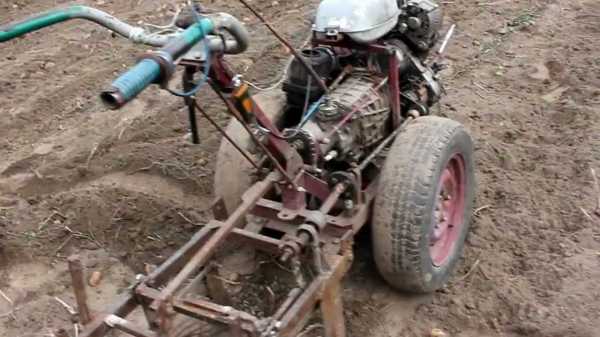
Walk-behind tractor from a chainsaw: the easiest and most versatile way

For him we need:
- motor base from any productive professional chainsaw;
- steering (motorcycle will do);
- transmission that can be removed from an old car or moped;
- electric welding;
- stainless pipes;
- metal sheet for designing lugs or old wheels from used equipment;
- connecting parts that are needed to fasten the frame to the engine.
The home production process can be divided into several stages:
drawing up a detailed drawing. If it is absent, you can use the one that we offer;
- frame production;
- modification of the power plant;
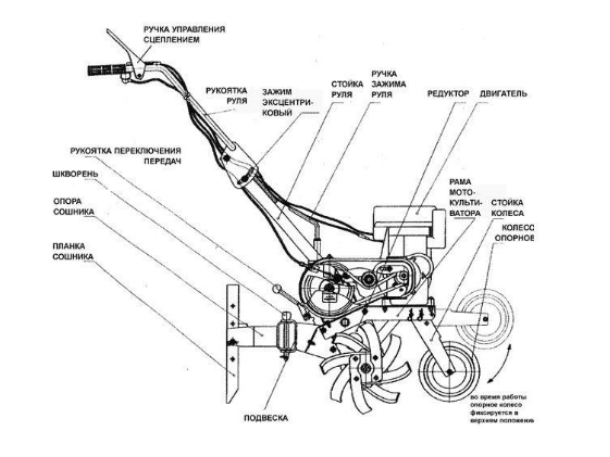
- design and assembly of additional units - clutch, gearbox, steering, headlights for night work, chassis.
We make a frame for a walk-behind tractor from a chainsaw
The work process looks like this:
- we take a metal pipe with a cross section of at least 20 mm and bend it so that the general view resembles 2 spars, the edge of which is directed upwards;
- weld the steering wheel in the back of the spar;
- we strengthen the base with crossbars;
- to the rear bends of the side members by welding, we adapt the support platform for the battery.
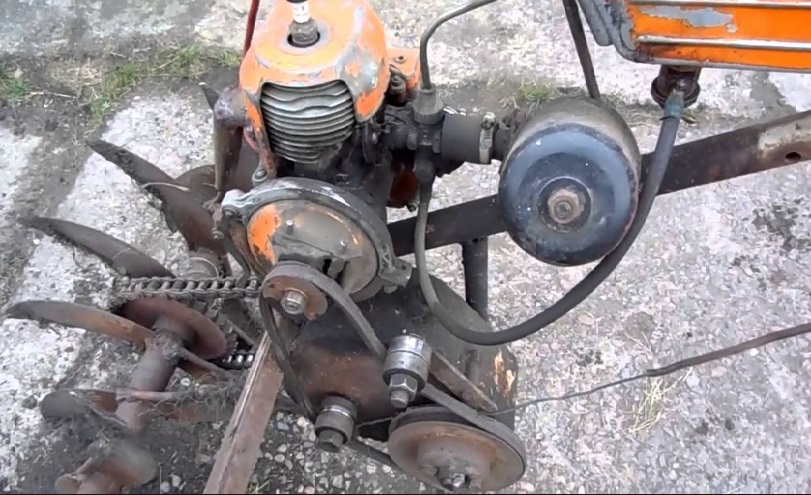
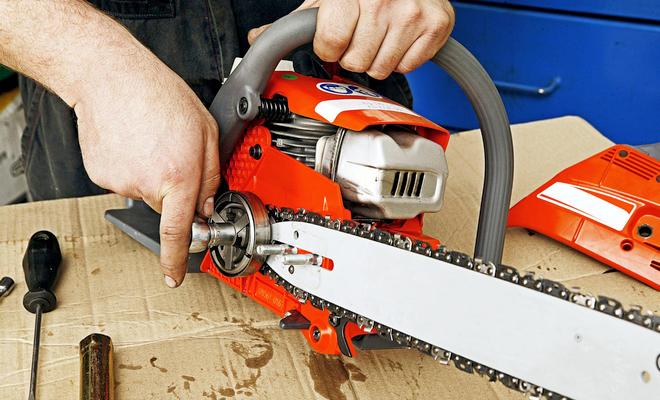
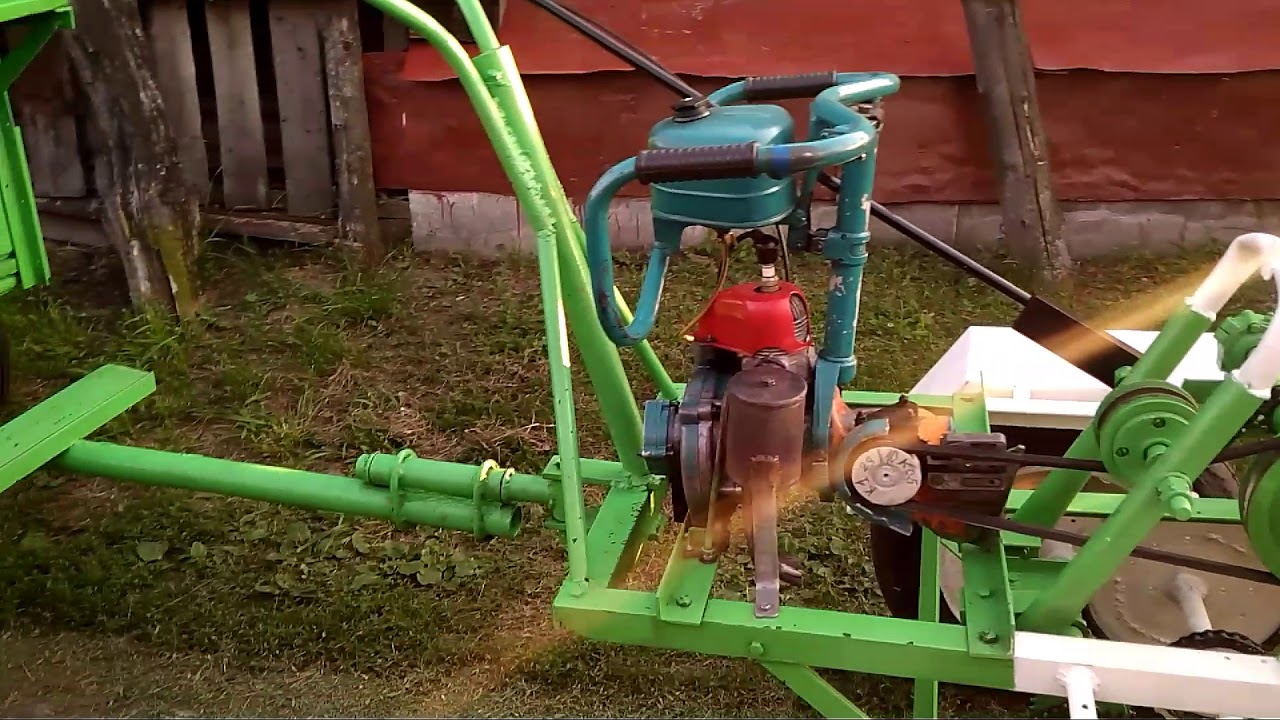
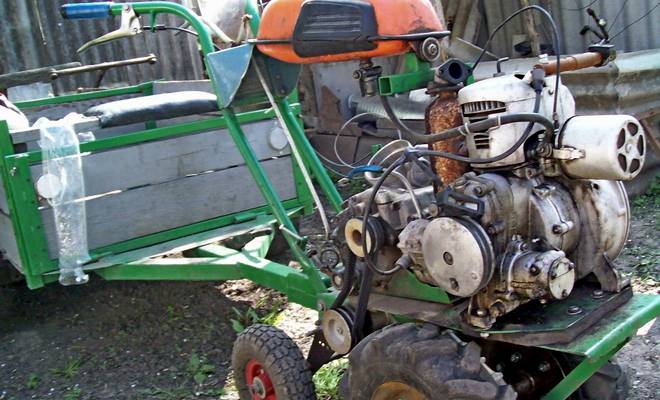
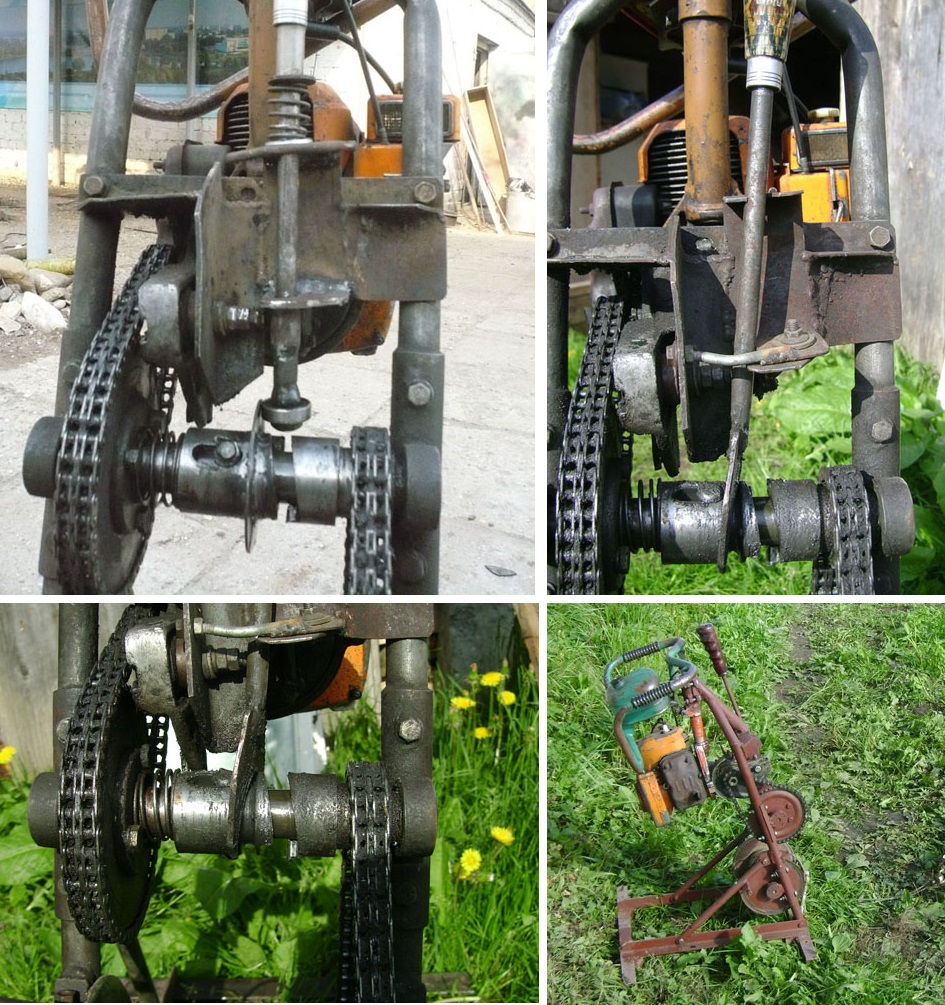
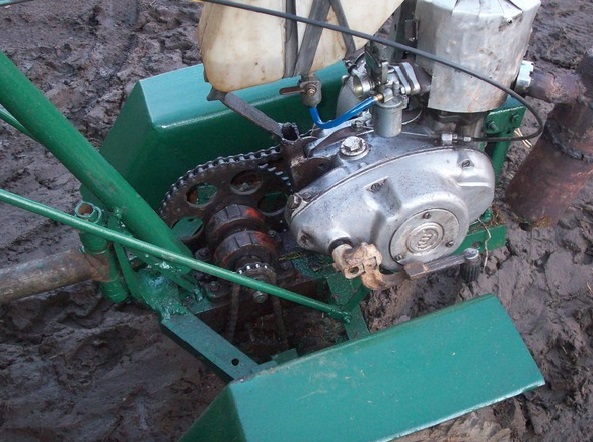
Assembling the engine block
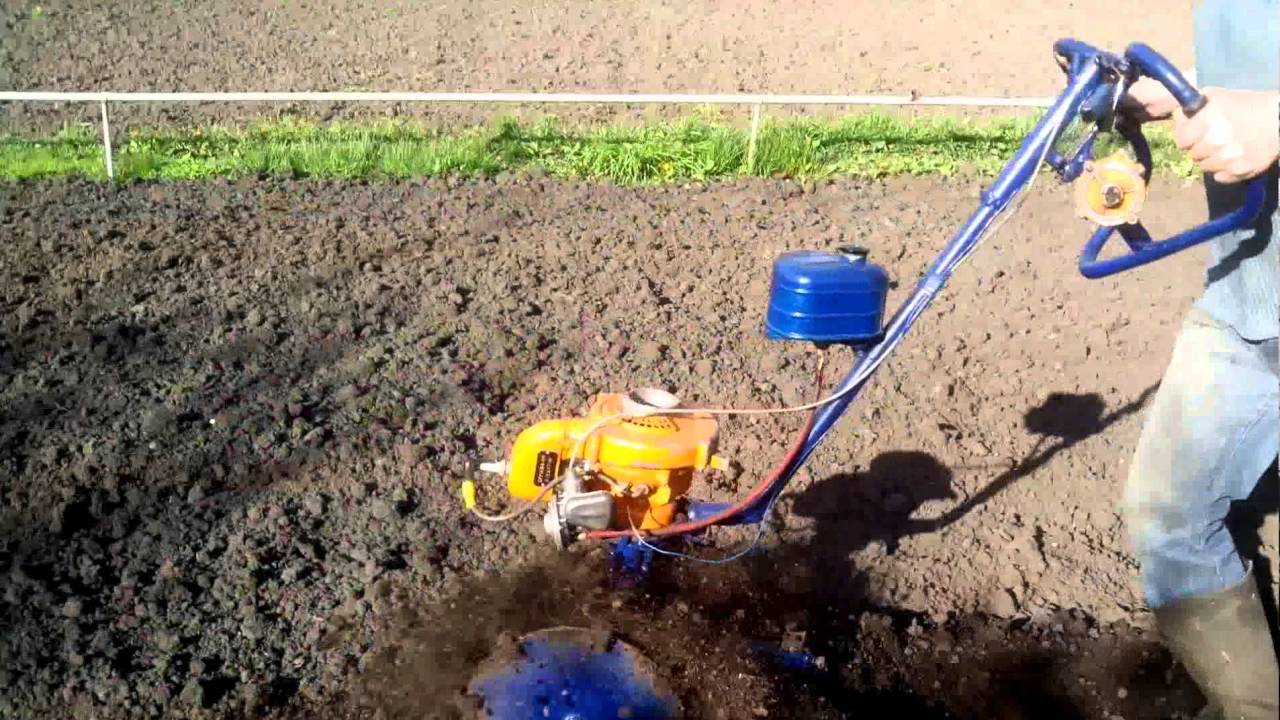
For a homemade walk-behind tractor from a chainsaw, it is ideal if the motor power is within 10-13 hp.
The creation of a power plant in the presence of a ready-made serviceable engine is performed as follows:
- a pipe 7 cm in diameter is taken, from which 250 mm is cut off with a grinder - it will become a future muffler. It is filled with wood waste and discharged so that the exhaust is directed away from the operator. Observe that the outlet circumference does not exceed 1.6 cm in diameter;
- from a stainless steel pipe with a cross section of about 4 cm, a frame made in the form of a sled is adapted. To ensure bolted ties, we weld metal brackets to its periphery and middle part;
- we connect the engine and the frame structure.
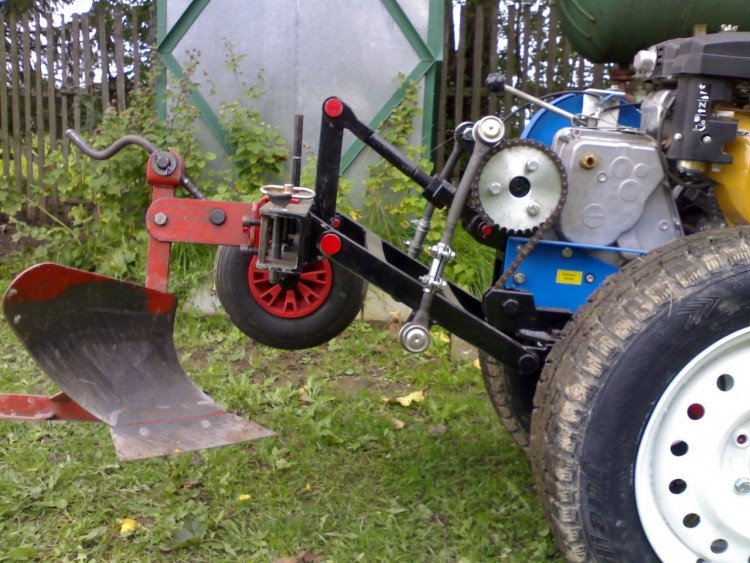
After that, we move on to the chassis.
The most popular ways to recreate it are considered:
- the use of old tires from "Zhiguli" (all 4 pcs.), which are connected in pairs by semi-axles, reinforced with a cotter pin;
- assembly of lugs based on tireless tires (drawing below). For better adhesion to the soil, they are retrofitted with a metal corner.
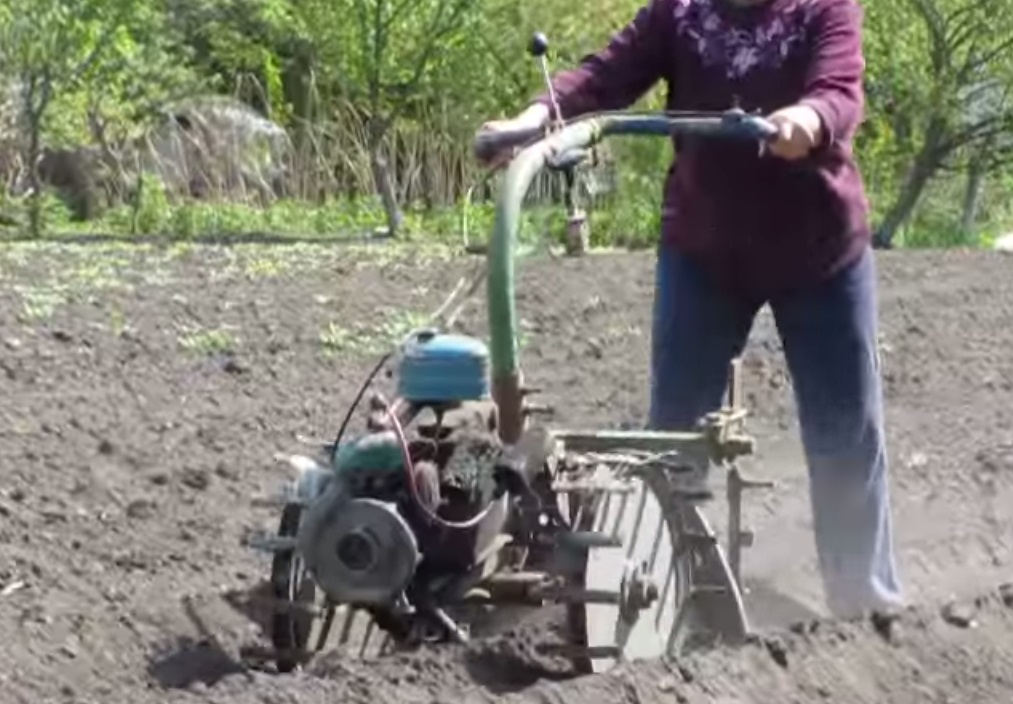
After installing the transmission, steering wheel, gas tank on a homemade product, the unit can be tested in the field.
How to make a do-it-yourself all-wheel drive adapter for the Neva walk-behind tractor
Of course, purchasing a ready-made adapter for the Neva walk-behind tractor is the easiest and most optimal way out of the situation. However, they cost a lot, so not every summer resident or farmer can afford to purchase them. It is not surprising that many people ask the question - how to make an adapter to the Neva walk-behind tractor?


There are many recommendations on the network regarding the manufacture of adapters, as well as many drawings that allow you to see this device in more detail. Using them, it is quite possible to make such a unit at home, using the very minimum of materials and tools.
What you need to make a homemade adapter
To make a homemade adapter, we need:
- pair of wheels;
- steel corners, iron sheets and pipes;
- driver's seat;
- welding machine;
- fasteners, etc.
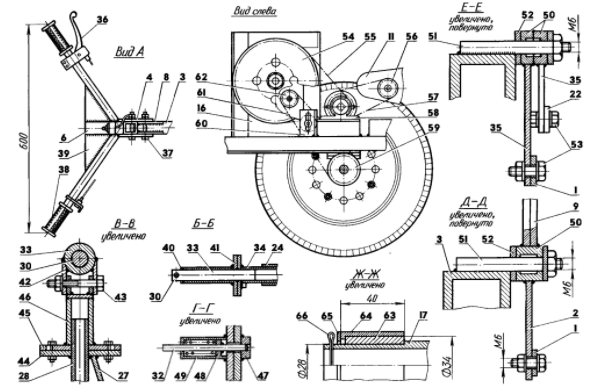
Adapter for walk-behind tractor A DIY Neva, the drawings of which will be presented later, can be made using this minimum list. Before proceeding directly to the manufacture of the device, you need to depict its diagram.
It should provide for the degree of loading of different parts of the frame, as well as the overall dimensions of the device. You can do this yourself, or you can use the drawings of those who have already successfully assembled a homemade adapter.
We turn to the manufacture of the structure. Let's divide all the work into several main steps:
- We need a square metal profile, the length of which should be approximately 1800 mm. Across this profile, you need to weld such a piece, but of a smaller size - about 600 mm. The wheel stands will be attached to this piece of the profile.
- The height of the racks, in this case, should be about 300 mm.
- Next, you need to weld the braces. They are welded to the main frame as well as to the wheel hubs. You can make any angle of their location relative to the frame, at your discretion.
- In addition to the metal profile, we weld the beam. This is to strengthen the frame.
- The frame structure for attachments is welded from channel number 10. It is connected to the wheel axle with a piece of square pipe, and the seams are welded.
- Next, we weld a control lever with three knees to the frame. Accordingly, these are 350, 550 and 200 mm. We attach to this lever another 800 mm in size, which will regulate the force. The levers are connected to each other with ordinary bolts.

Adapter design
- We weld a piece of pipe about 300 mm long to the main frame - this will be our seat stand. At the top, we also weld two pieces of pipe perpendicular to this stand. This is necessary so that the seat is more stable and does not come off during operation.
- The seat can be taken ready-made, or made from a bite of plywood, then upholstered with foam rubber or other soft material. The seat is attached to the transverse pipe pieces welded to the seat stand and also to the stand itself. We use ordinary bolts as fasteners.
- In front, you need to weld the coupling mechanism with the walk-behind tractor.
As we can see, the work is quite simple, but the skill of working with the welding machine is required, because there is no other method of combining all the components.
You can complicate the design a little by making a homemade adapter to the Neva walk-behind tractor, which will have steering control. For this we need:
- iron sheets;
- steel pipes and corners;
- seat;
- a pair of wheels;
- welding machine.
In this case, the adapter frame must be well articulated with the walk-behind tractor so that the structure does not lead to the sides. As a steering wheel, you can take a ready-made one, from old Soviet cars (for example, from a VAZ).

Steering adapter
How to make a cultivator with your own hands: simpler options
There is such a cultivator - "Nimble kid". Let's take a look at how you can make one at home. Take the wooden axle. It will become the connector for the rest of the parts. On this axis it is necessary to fix a pipe 24 mm in diameter. It will serve as a handle, therefore, in order not to bend into three deaths, choose the length of the pipe for your height.
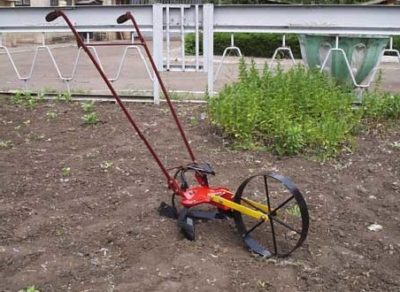
Attach wheels with a diameter of not more than 200 mm to the axle mentioned. the cultivator will rest on wheels, the height of the tool above the ground depends on the height of the wheels that we have adapted to it. By the way, the wheels need to be cut out of metal 2-3 mm in thickness. After you have all of the above connected, you can work on the ground.
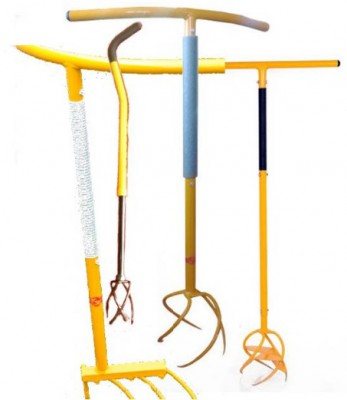
The word cultivator does not only mean motor units. You can also use hand tools in your country house.It is much better than a standard boot and is much easier to make at home than a motorized cultivator. Have you heard of the Tornado cultivator? It looks like a defective pitchfork.
A round axle to which twisted teeth are welded in a spiral. The easiest way to make such a tool is from an existing pitchfork, if you don't mind. If you still need your pitchfork, buy others from the store and make a "Tornado" out of them. Trust me, it's cheaper to buy a pitchfork and remake them than to buy a ready-made cultivator. Take a hammer and walk over the teeth, let them bend in a spiral.
Homemade cultivator "Tornado"
Tornadoes are easy to use thanks to a lever that the operator grabs onto when rolling the cultivator into the ground. For the lever, we need a pipe, which we need to attach to the handle. The pipe should be 50 cm in length. For fastening, you can take electrical tape. As a pipe, you can use the handle on the handle, which is usually equipped with shovels. Such a lever will protrude 25 cm to either side of the handle.
You can make a Tornado cultivator out of springy steel. We take a plate half a meter long, 1-1.5 mm in thickness and 2 in width. Bend the steel, make a loop out of it, which you will put on the handle. Keep track of the height of the cutting
It is important to observe the diameter of the resulting loop - it should not be more than 20 cm in diameter in order to freely enter the aisles
There is another version of the cultivator - a rotary disc cultivator. We just warn you that you will need to exert a lot of physical strength to make the desired convex discs. place regular metal discs and hit them with a hammer. In the process, they should become bowl-shaped.
The main part of the mechanism, namely the discs, we put on the bushing, which we attach to the axle. We attach both ends of the axle with cotter pins on a large bracket.
On the large bracket we make a hole where we insert a pipe with handles and a crossbar between them. Place the rod on the small bracket using a welding machine. It should be 24 mm in diameter and 25 cm in length. Then screw the 16-diametrical rod into the stem.


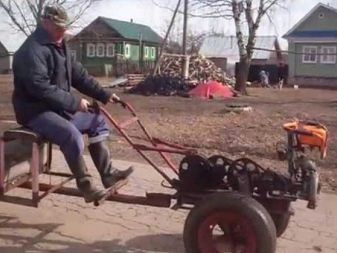
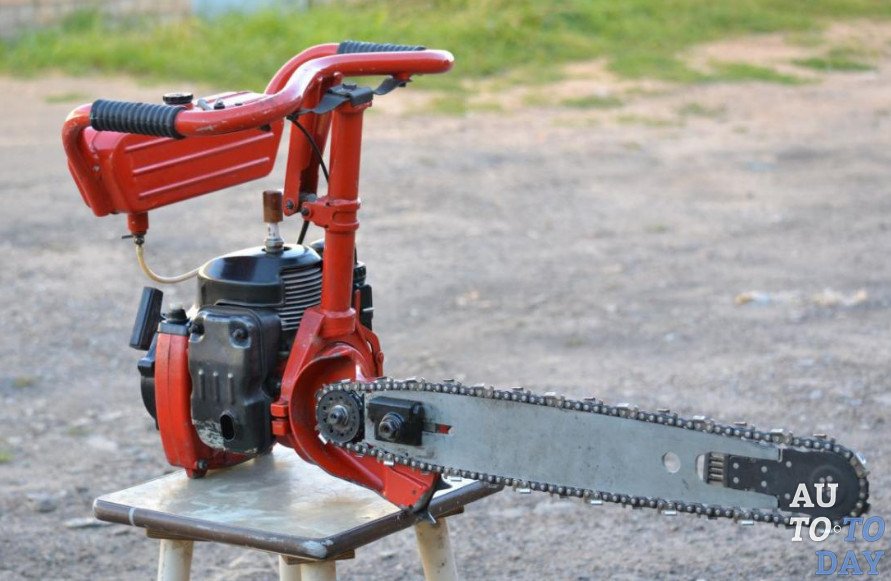
DIY chainsaw scooter
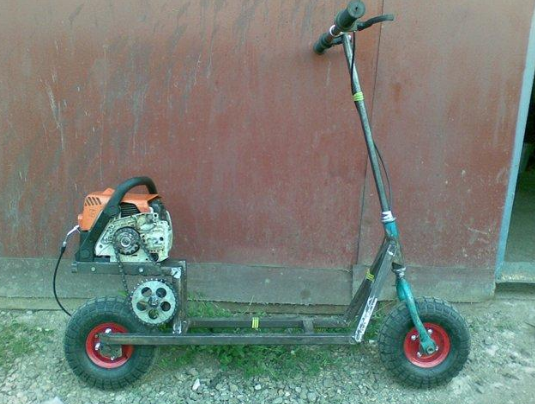
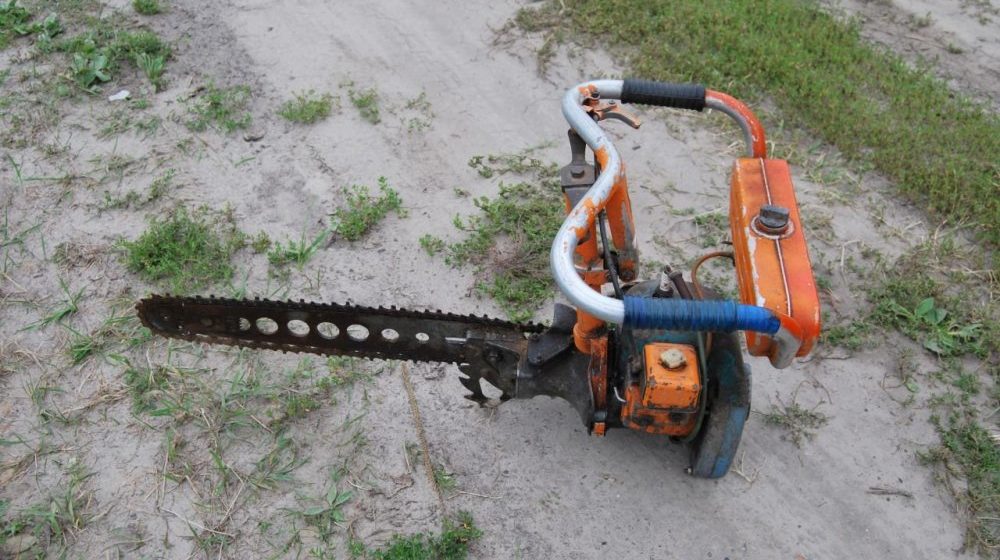
No less famous homemade product, which the domestic "Kulibins" have learned to make. To recreate it, we need:
- a scooter designed for the weight of the person who will be driving it. It is desirable that he initially had a manual braking system. The pneumatic wheelbase of the scooter must be strong;
- the chainsaw from which the engine is removed - medium and high-power models are suitable.
The scooter assembly process looks simplified compared to previous homemade products:
- First, remove the motor base and fix it at the rear of the scooter frame. We make sure that the motor and wheel sprockets match;
- we fix a manual accelerator with the ignition of the chainsaw - so the operator can control the movement process;
- if necessary, equip the scooter with a brake pedal, but in most cases, the lever for manual control of the scooter is enough for its full operation.
- testing a scooter from a chainsaw - in case of serviceability, a new motorized device is ready and can be used.
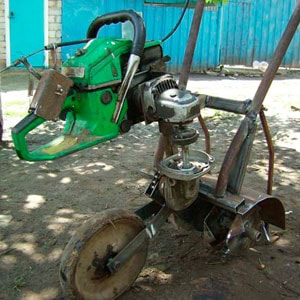
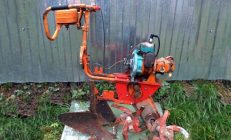
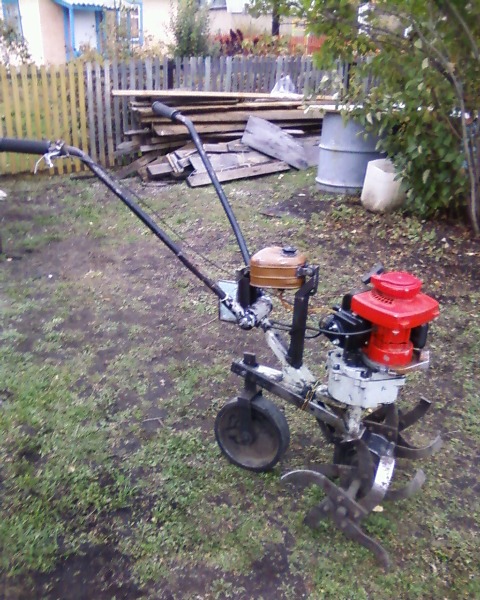
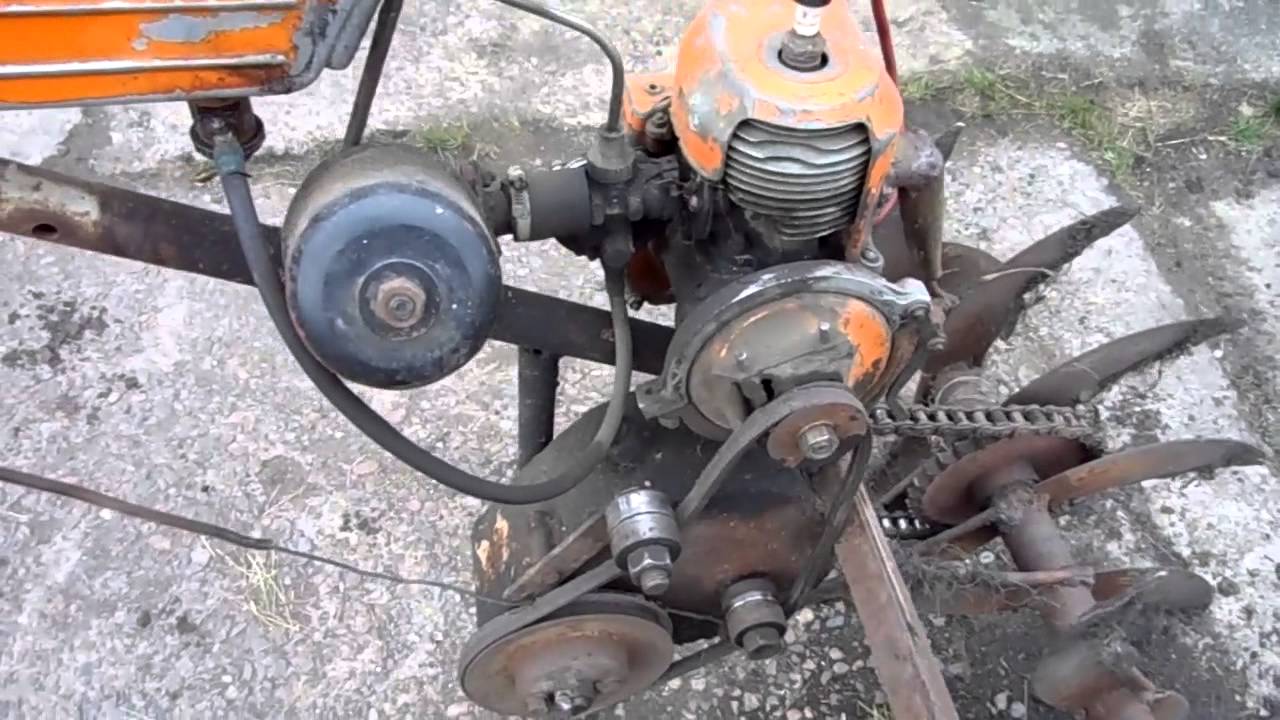
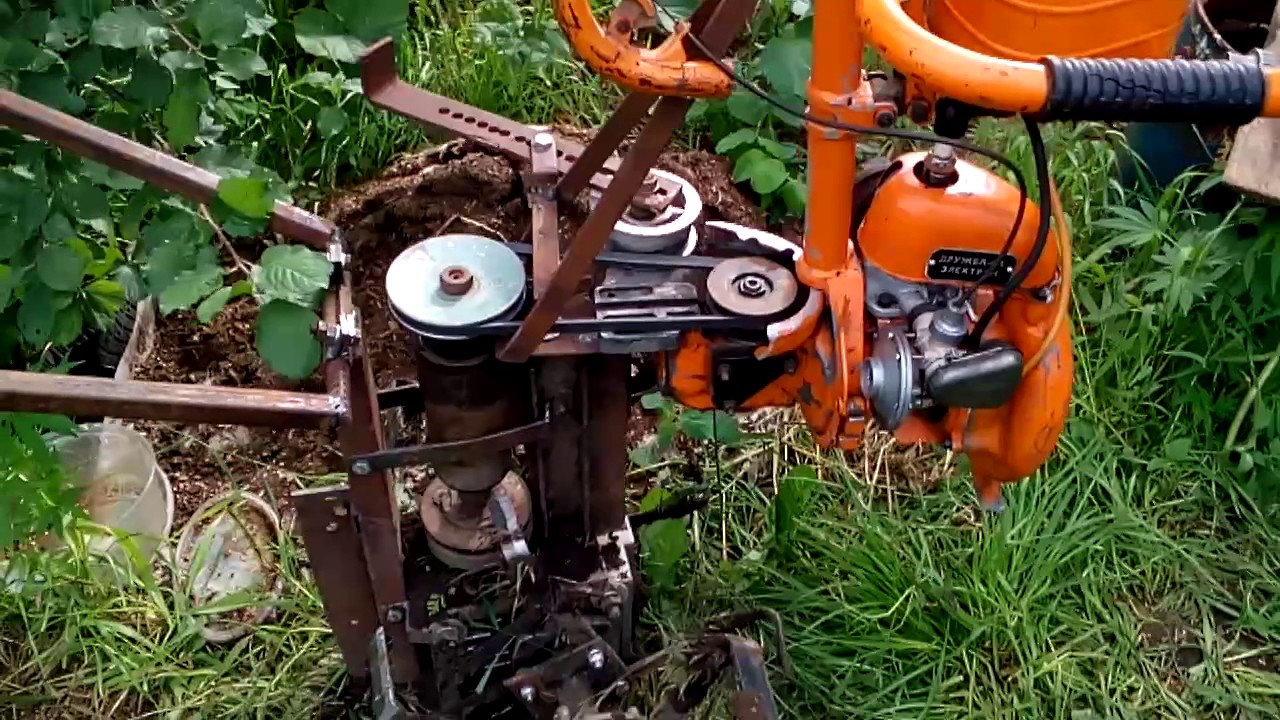
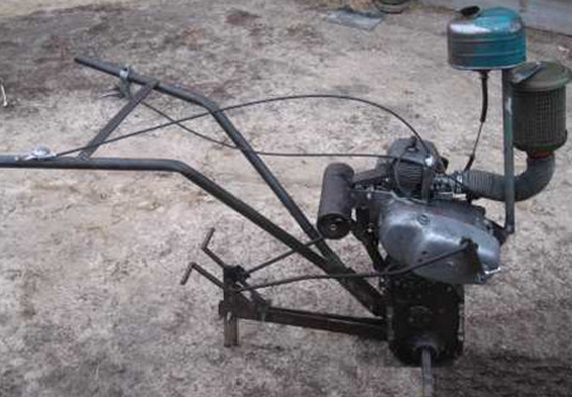
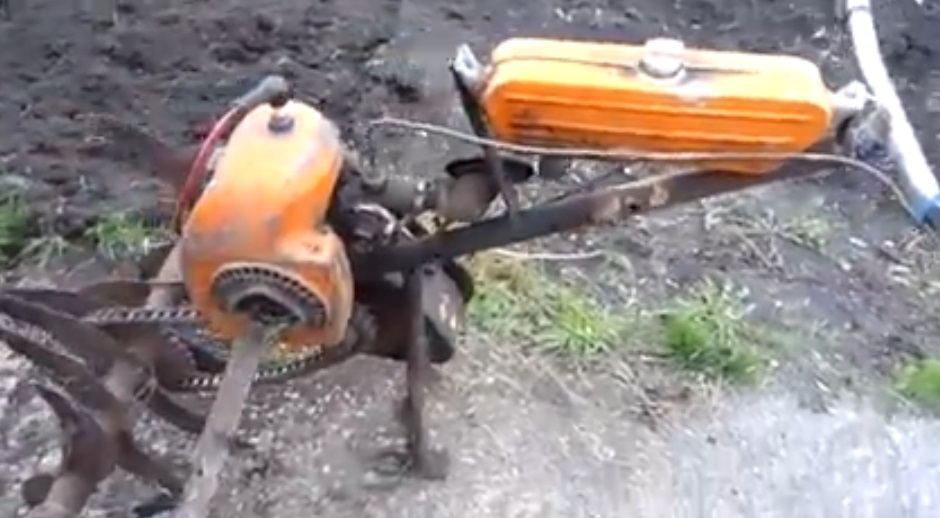
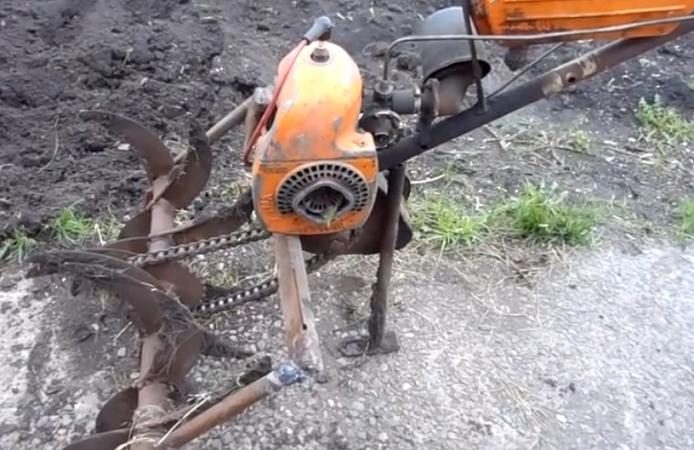
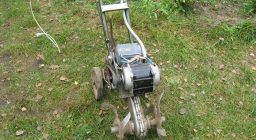
Do-it-yourself Ural chainsaw cultivator
In addition to the engine, to assemble a motor cultivator based on the Ural chainsaw, you will need frames, an intermediate shaft and a tank for refueling. Before starting production, the operator must study the drawings, which will describe the detailed procedure.
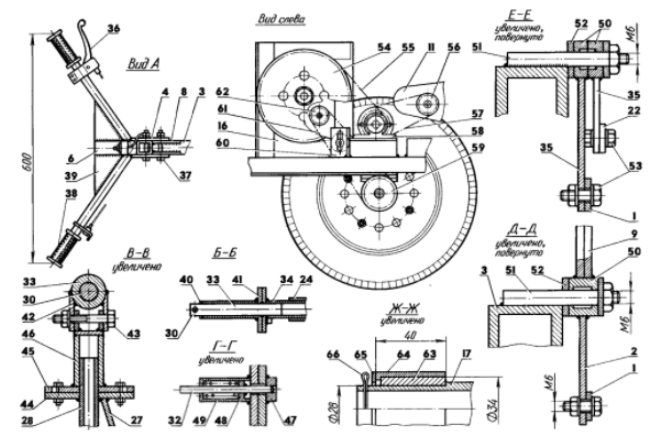
The further build process looks like this:
- First, you need to remove the body of the chainsaw and dismantle the engine, the factory fuel tank and the built-in gearbox designed to transmit torque from it;
- Then you can proceed to welding the frames. It is best to make it from steel corners, the cross-section of which should be 3.2 × 3.2 cm.The supporting structure can be reinforced with ties and spacers, and the platform required for mounting the engine will need to be stiffened. The finished frame must withstand the vibration of the motor and the weight of the mechanisms of the cultivator installed on it;
- An engine will need to be attached to the reinforced upper corners of the welded frame, on a specially prepared platform. Between it and the platform, you need to install a layer of dense rubber, which will dampen the vibration of the motor;
- A fuel tank must be installed directly under the engine platform. It must be attached to the frame with brackets. The bottom of the tank must be protected with a steel plate;
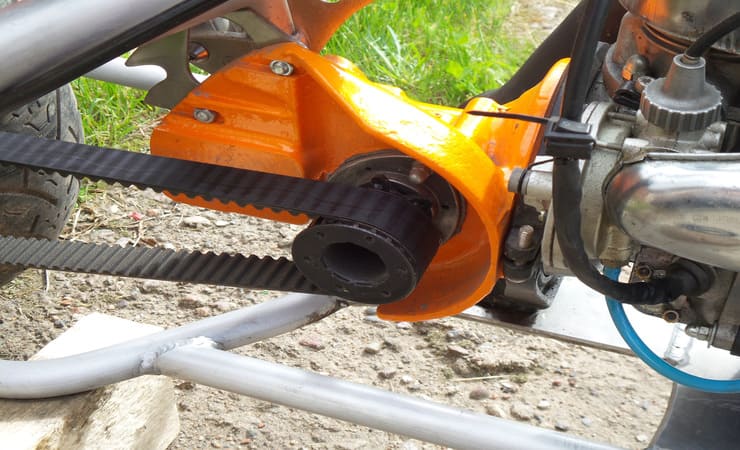
- Further, on the front vertical struts of the frame, you will need to install the supports with which the intermediate shaft is equipped;
- To fix the bearings located on the drive shaft, you need to connect the supports using longitudinal corners for this;
- Then you need to equip the cultivator with controls. The handle can be made from a crossbar by attaching switches and levers to it;
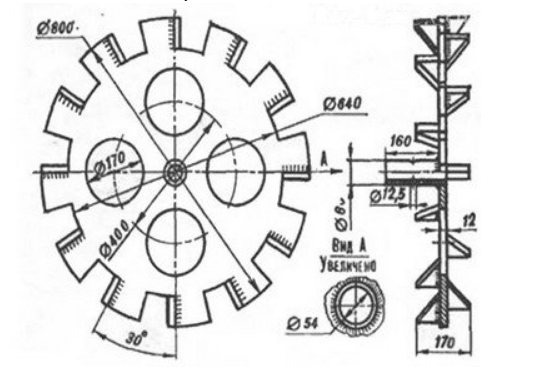
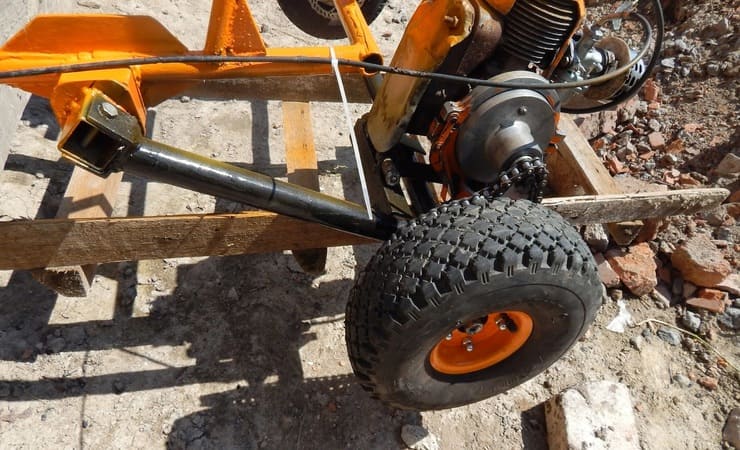
- The finished agricultural unit must be equipped with pneumatic wheels or lugs. To do this, you can take 2 wheels from a garden cart or from the Oka car. The wheels must be fastened to the axle, in the middle of which an additional gearbox must be installed. It must be connected to the engine using a chain drive.
Home-made motor-cultivators from the Ural chainsaw stand out for their increased cross-country ability and the ability to effectively plow areas with heavy clay soil. They can be equipped with different types of trailed equipment, which will allow you to use homemade products for planting and collecting potatoes, hilling bushes and solving other problems in the garden.
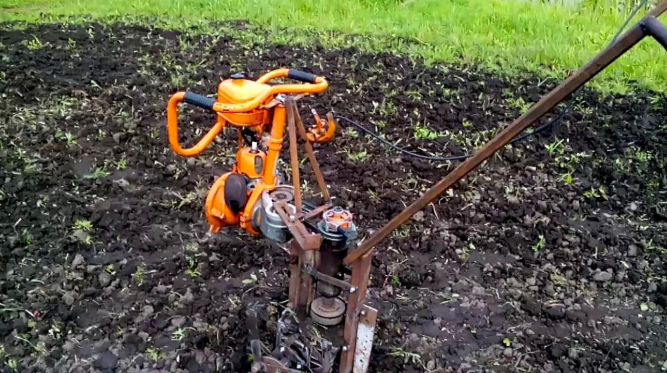
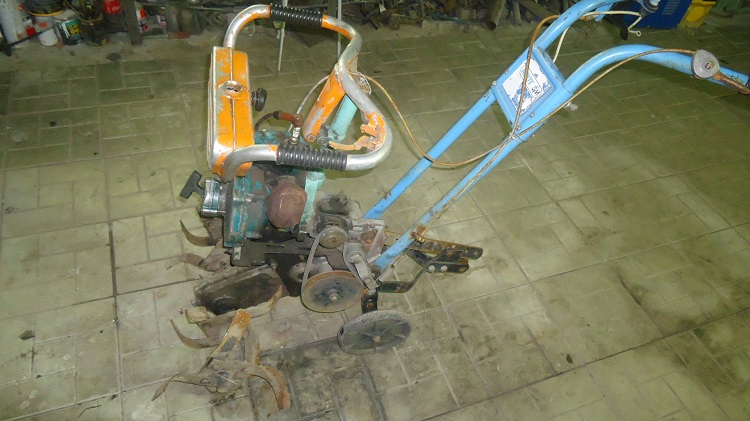
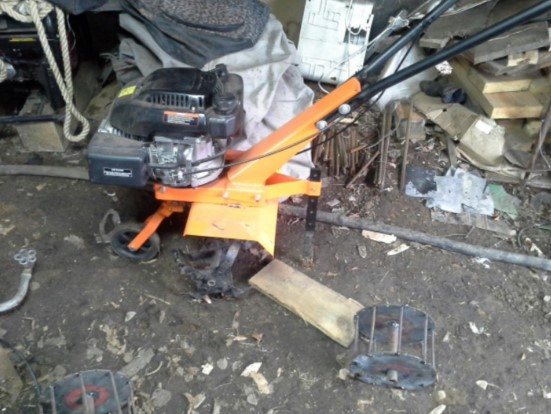
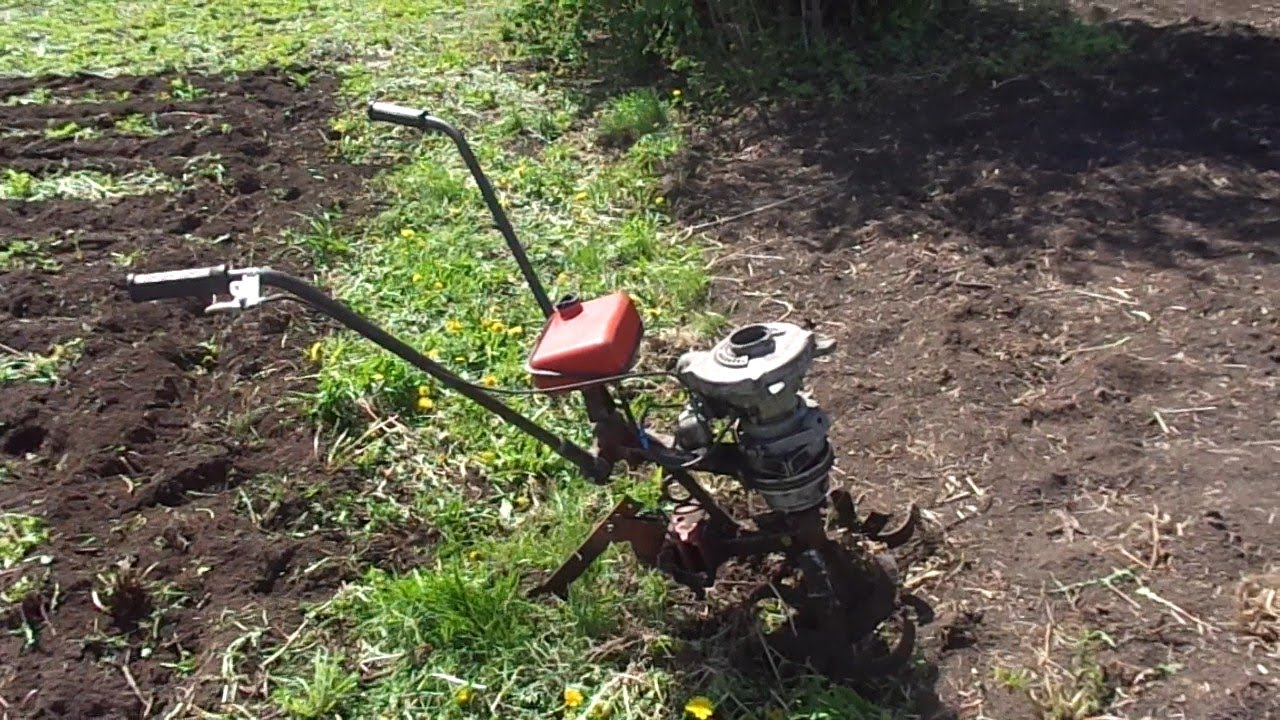
How to make a cultivator from a chainsaw with your own hands?
To avoid mistakes during assembly, the farmer will need to follow a specific assembly order.
The manufacturing algorithm is as follows:
- At the very beginning, you need to weld the support frame. It should be in the shape of a cube. To do this, the corners are welded together in such a way that the overall structure has dimensions of 32 × 32 cm. Welding points will need to be cleaned with a grinder. As a last resort, you can use a special disc for the grinder;
- Before installing all other elements, the finished frame must be painted. The paint will protect the frame from rust. For this, all metal parts of the frame must be coated with a primer. After its complete drying, paint is applied to the parts;
- While the paint is drying, you need to remove the chainsaw engine. This must be done carefully to prevent rupture of hoses or loss of small parts;
- The finished motor must be installed on the transverse corners of the frame. In this case, a rubber mat must be laid between the frame and the engine. It will dampen the vibrations of the motor, which will make it much more convenient to work with equipment;
- Install the fuel tank immediately after installing the engine. It is best to mount it with brackets;
- Further, on the corner posts located vertically, you will need to fix the intermediate shaft;
- To install the drive shaft, its bearings must be attached to the longitudinal corners;
- To make cultivator handles, you need to use metal pipes. Their diameter should not exceed 3 cm. The pipes will also have to be painted. After the paint has completely dried, rubber anti-slip pads must be installed on the upper ends of the pipes;
- To ensure the transmission of torque to the wheels of the equipment, a sprocket with 41 teeth must be installed in the design. Before that, you need to make sure that none of its teeth are damaged, and there are no cracks or other defects on the star itself.
After assembling the cultivator, you will need to pour a fresh fuel mixture of gasoline and engine oil into its tank.When preparing it, you should observe the same proportion as indicated in the instruction manual for the chainsaw. Then you need to lubricate the gearboxes and sprockets. Gear oil is suitable for this.
After filling the cultivator, it should be tested. To do this, you should make a test run of the technique over the site. First, the opener must be set to the minimum working depth. During the first pass, it is necessary to monitor the operation of the motor - it should not smoke or vibrate too much. After the initial check, the opener must be set to a deeper soil cultivation position. If, during the secondary run of the equipment, it does not make creaking noises and does not smoke, then the manual cultivator is completely ready for use.
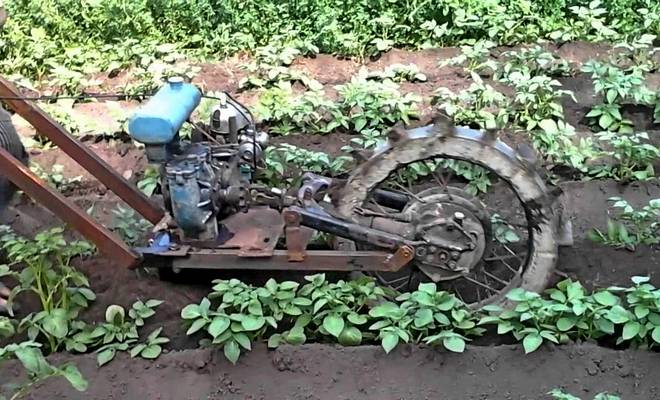
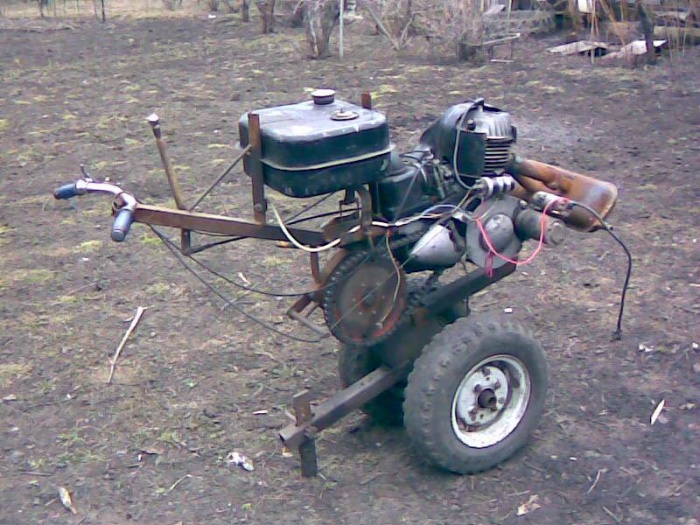
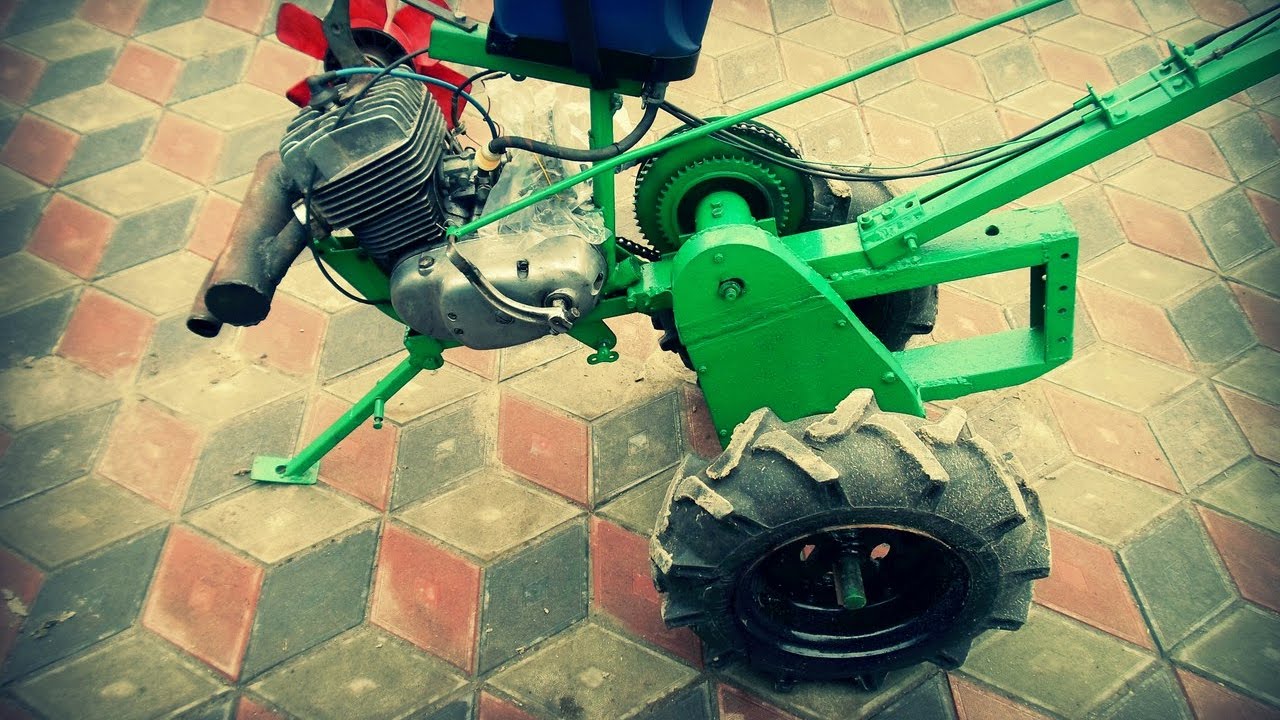
Motoblock from a motorcycle
Here we will consider the option of assembling a walk-behind tractor from the Soviet motorcycle IZH Planet 5. First of all, we dismantle the engine. To optimize its operation, the cooling system will have to be altered a little - to make it active, not passive.

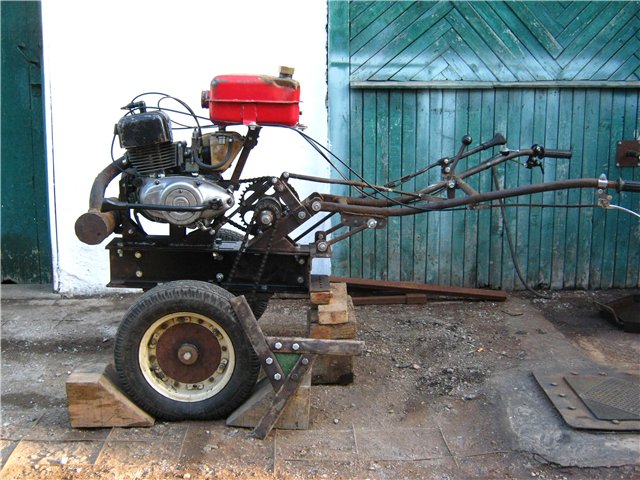
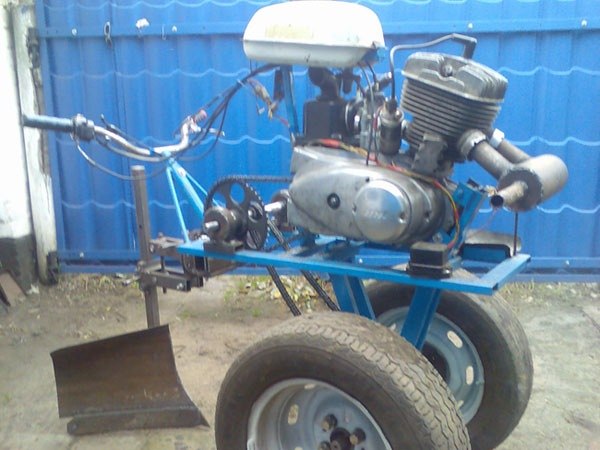
An easier start is possible if the thrust is increased. To do this, replace the valve with a petal. Since the speed may turn out to be too high, it will not be superfluous to install a creeper.
The frame of the future walk-behind tractor can be welded by yourself, but if you have a working frame from a motorcycle, then just upgrade it. It is necessary to cut off the front wheel fork and all excess. Then weld the attachment to the rear of the frame to install the hitch.
The gearbox is a particularly important component. The gearbox from the "Ant" motorcycle is well suited for these purposes. It remains to install the axle on the frame and fix the wheels. Wheels can be any, but it is better to use from a Lada car, since they have high cross-country ability.
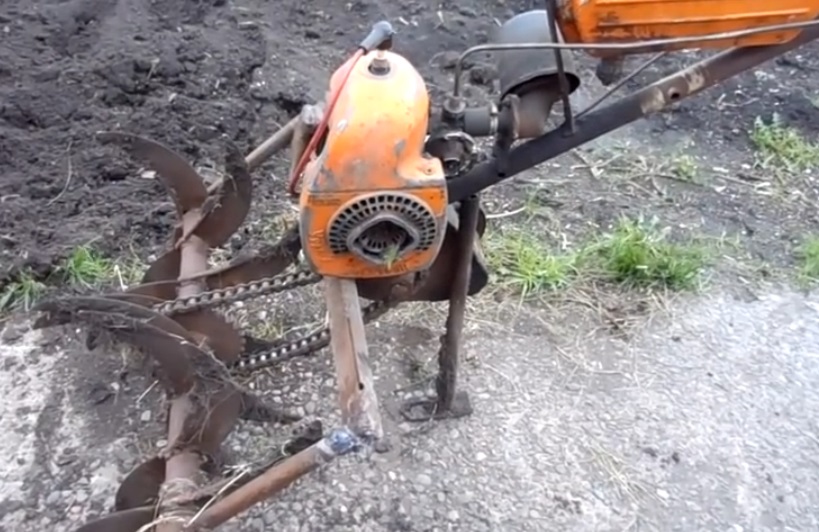
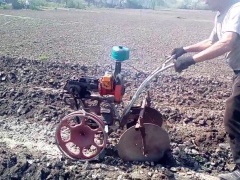
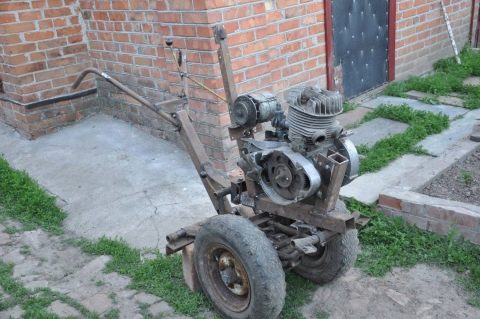
Making a cultivator from the Ural chainsaw
Buying a motor cultivator for the purpose of processing small adjacent areas is in most cases unjustified. Indeed, in addition to him, one way or another, you will have to purchase hinged equipment. It should also not be forgotten that some store options are quite demanding on oils and fuels. In this case, you can make a motor cultivator from a chainsaw with your own hands. Homemade units, as well as their expensive counterparts, consist of the following elements:
- Engine;
- Fuel tank;
- Frames;
- Intermediate shaft.
All these components, except for the frame, can be taken from an old chainsaw. Before you start making homemade products, you need to prepare an approximate drawing.
It will serve as a kind of plan according to which you can navigate in the manufacturing process. The further creation algorithm is as follows:
- First, spin the old chainsaw and dismantle the motor, gearbox and fuel tank;
- After that, start welding the frame. For its manufacture, use metal corners with a section of 32 × 32 mm. The structure must be strong enough to withstand vibration and additional weight easily;
- Attach the motor to the upper transverse corners of the frame;
- Install and secure the fuel tank under the engine on special brackets. Its lower part will need to be protected with a metal plate;
- The intermediate shaft supports should be fixed to the vertical front frame pillars;
- To fix the bearings of the drive shaft, connect the supports with longitudinal corners;
- Next, start creating a control body - a metal crossbar, 30 cm long, is suitable for this;
- If necessary, attach wheels to the lower cross member of the frame - they can be "borrowed" from an old car or you can buy two small wheels for a utility wheelbarrow.
After assembly, you need to test the unit. To do this, start the engine and walk with the cultivator around the garden. Surely, you will notice that the structure needs to be made heavier. To do this, you can take any load and place it in front of the frame.Be sure to secure the weight, otherwise it may move due to vibration and damage the motor or intermediate shaft.
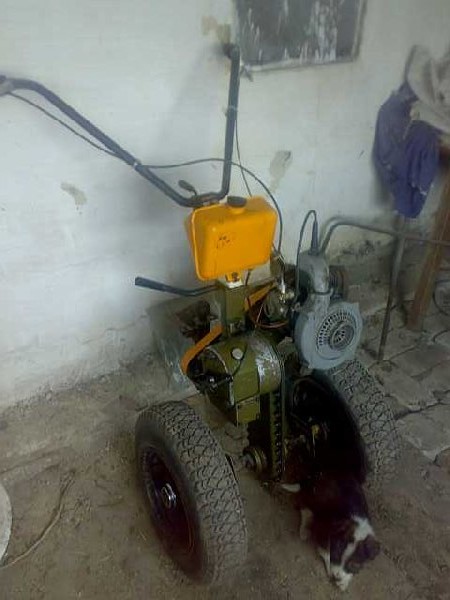


Cultivators made on the basis of the "Ural" saw will not have enough power for the use of oversized attachments. They are intended for plowing the ground, however, they can still be equipped with a hitch. To do this, you need to buy a hitch at any agricultural equipment store and equip a structure with it. Cultivators designed in this way can be operated in tandem with a small home-made harrow or plow. However, remember to take short breaks when working with this type of equipment.