How to level the walls with putty?
You need to prepare for puttying. Before starting work, prepare all the tools necessary for this process, because the mixture tends to harden and deteriorate, so you need to work extremely quickly:
First you need to make a ready-to-use putty from a dry mixture. The technique here is simple, but if you do everything inaccurately, the wallpaper will begin to move away from the walls in a month. It is better to dilute the putty composition in small portions for each section of the wall or ceiling separately.
First, a little water is added to the container with putty and mixed with a simple spatula. The next step is to bring everything to a homogeneous consistency using a drill with a mixer attachment. Her blades are made of special steel, and they spin with a certain force, which helps them not to get stuck in the viscous composition of the putty.

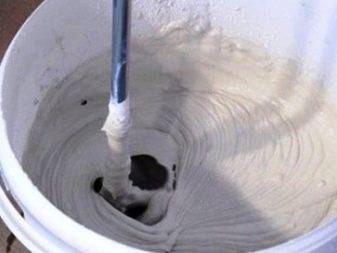
The ideal consistency of the putty mixture is an elastic mass that adheres slightly to the trowel. If the composition is liquid and flows down, and does not stick, then gradually add the dry mixture there. When the surface is covered with lumps or bubbles, it is too thick and water must be slowly poured into the composition in small portions.
The first layer of putty - starting, is a separate type, so carefully read the names on the banks of the mixture and do not confuse it with the finishing one. At this stage, you can safely use the largest spatula from the set, without fear of leaving uneven stripes or joints, because the finishing layer will easily close all the flaws.

It is better to apply the mixture in small portions and distribute it evenly over the area, rather than throwing a large lump on the wall, and then spreading it on different ends. The spatula should be held at a slight angle - no more than 30C, then the material lays down more evenly. The strip of mixture itself is usually applied diagonally in one sharp motion. Separate strips are overlapped to avoid bumps and uneven joints between the layers.
Slopes and joints are processed with a special spatula or angle. The main thing here is not to make unnecessary movements. Remember that the less filler you apply in the corners, the smoother the surface will be. First, with a small spatula, the mixture is applied along the entire slope or corner on each side, and then the wall is simply leveled with an angled spatula. The corners are usually processed last, after which the wall must be allowed to dry for at least a day before applying the next layer of putty.

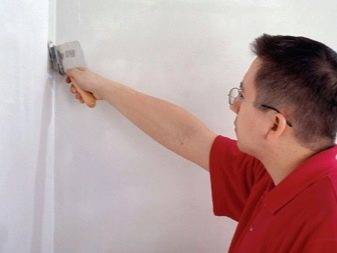
For perfect adhesion and reliability of the entire repair, some craftsmen put a layer of soil between each layer of putty. This method is more laborious, it takes 2 to 4 days, since each layer of putty and primer dries for about 12 hours.

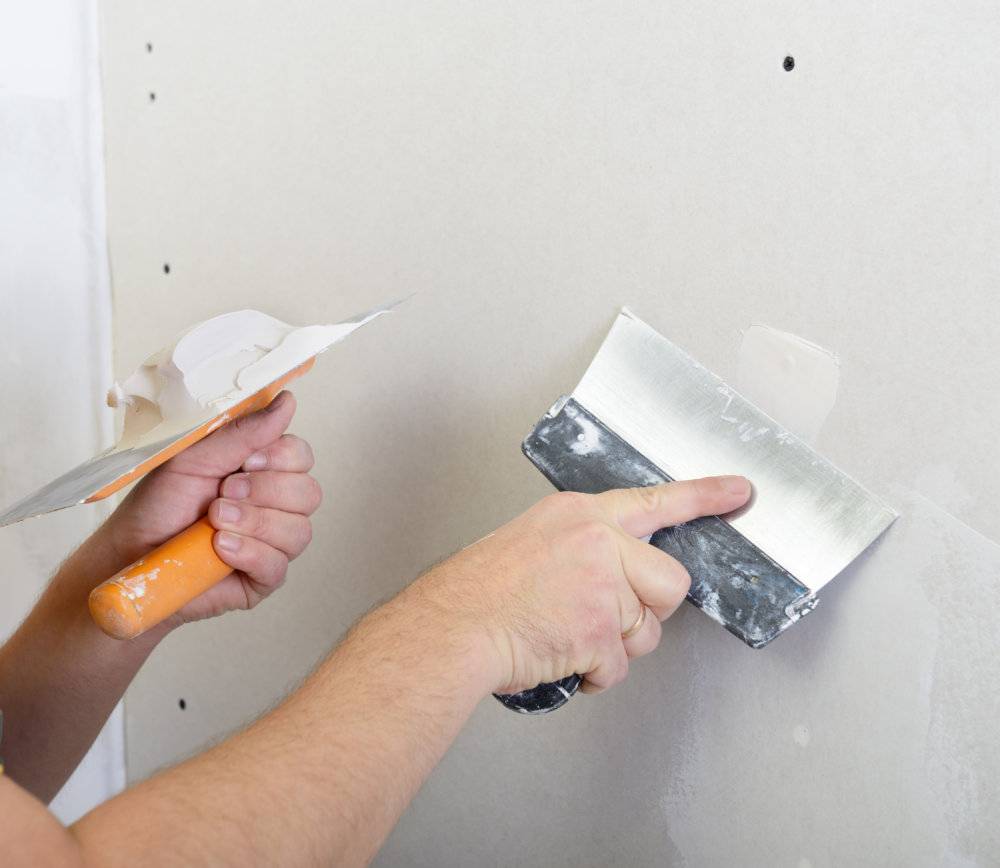
- The layer of finishing putty is the most important, because it is responsible not only for evenness, but also for the smoothness and even glossy properties of the surface. It is applied in several thin layers of no more than 2 mm each, allowing each layer to be evenly absorbed into the soil and dry. During work, a large and a small spatula are constantly used in pairs. The finishing putty is more dense and viscous than the starting one, so it is applied first with a small spatula on a large one, and then on the wall.
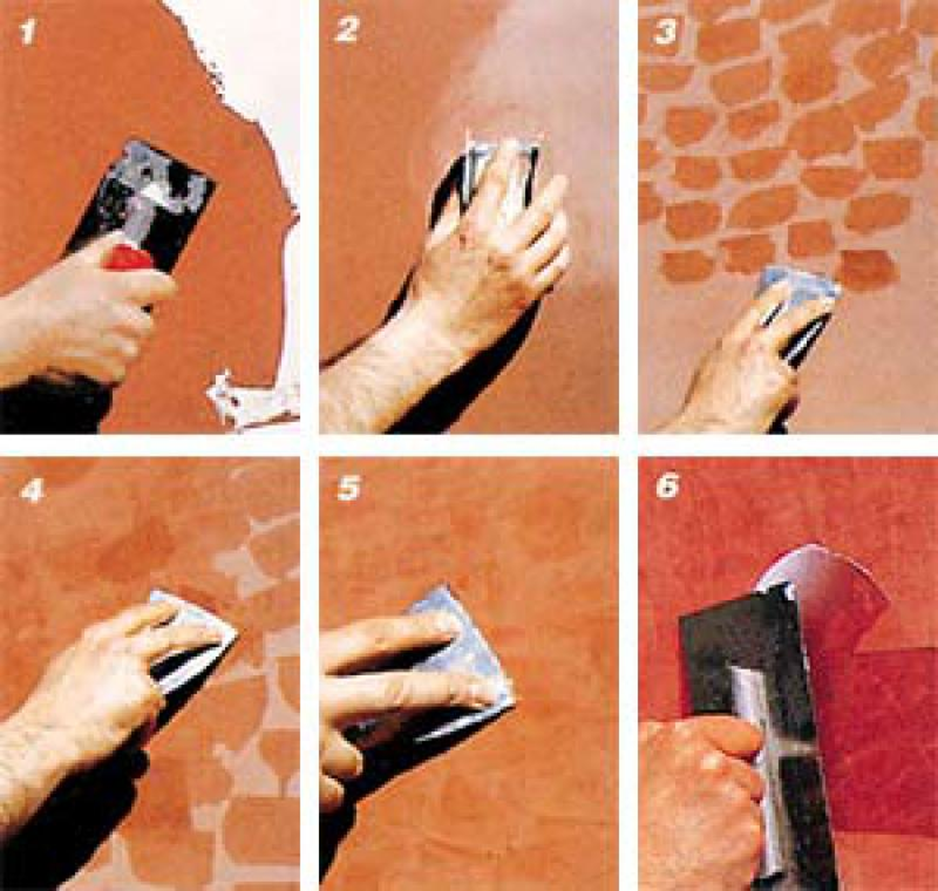
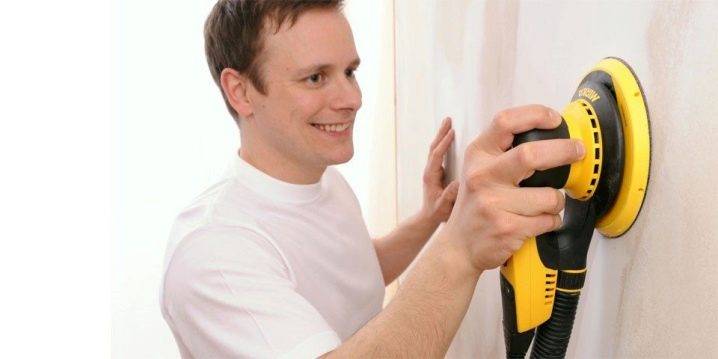
- The final stage is considered to be grinding the dried surface with sandpaper. It will eliminate even the smallest irregularities.
How to putty walls: technology
The technology of plastering walls does not differ from the technology of plastering the ceiling. The only difference is that the walls are much more convenient to putty than the ceiling.
Preparation of putty
If you have chosen a dry mixture to level the walls, you must first prepare it. Follow the instructions on the packaging from the manufacturer.Usually, the mixture is mixed with water using a drill or a perforator with a mixing attachment until the consistency of sour cream.
Water at room temperature is poured into a container (it can be a bucket or a basin), then gradually add the mixture and stir well. Allow the mixture to settle for 10 minutes, then mix well again.
You can check the quality of the solution in this way: scoop up a small amount of the mixture with a spatula and turn it over. The mixture should drain smoothly from the spatula. If the mixture does not fall or run off, then the solution is too thick. Such a putty will not adhere well to the surface. It is necessary to add more water to the container.
If the mixture is poured from the spatula, or drips, then it is too runny. There will be sagging on the walls. In this case, add more mixture to your container and mix well.
Putty technique
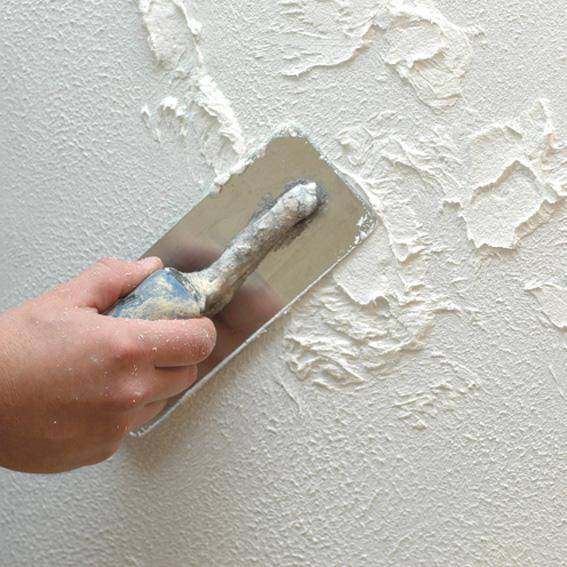
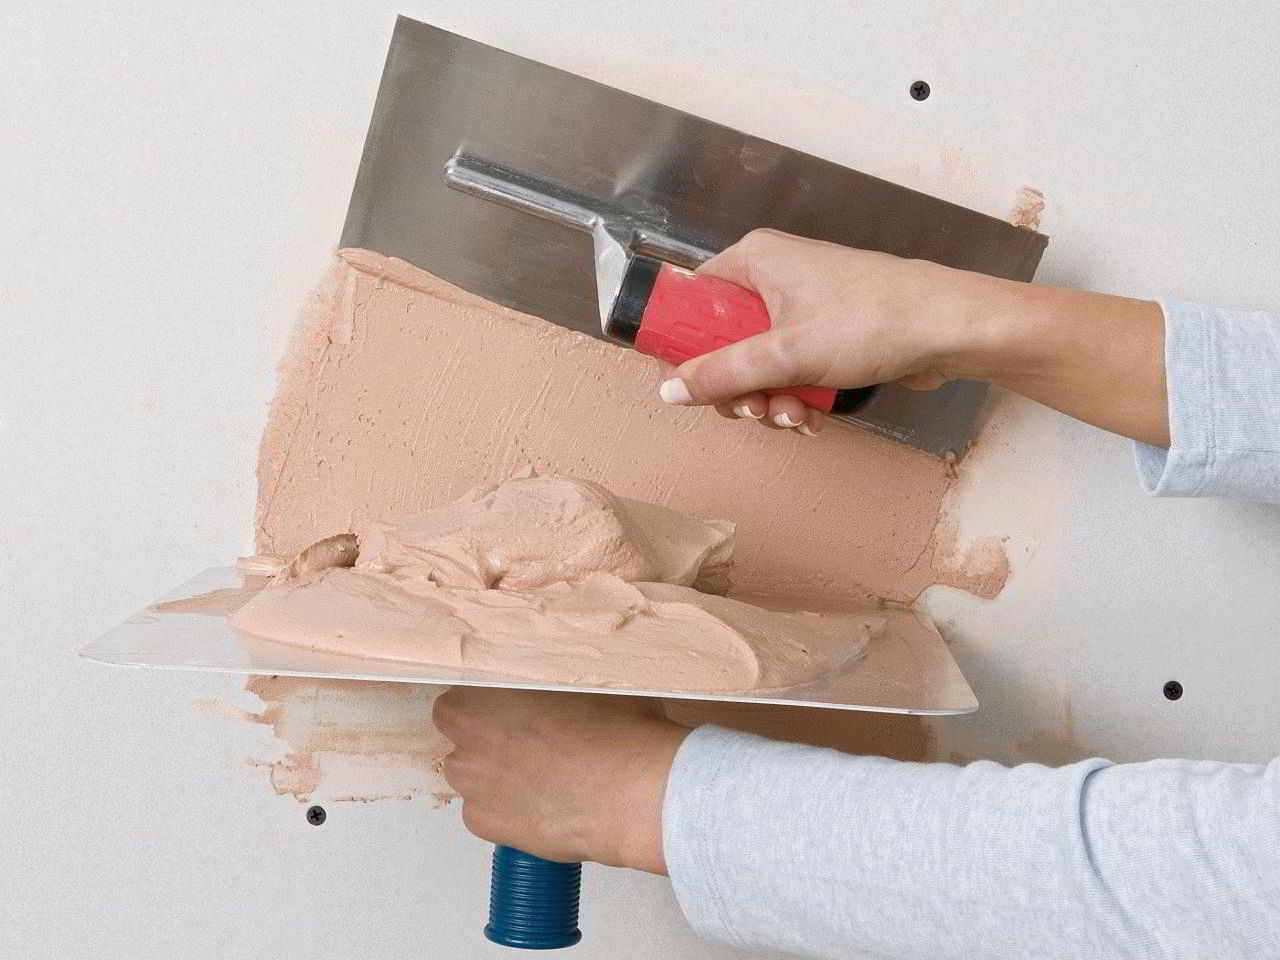
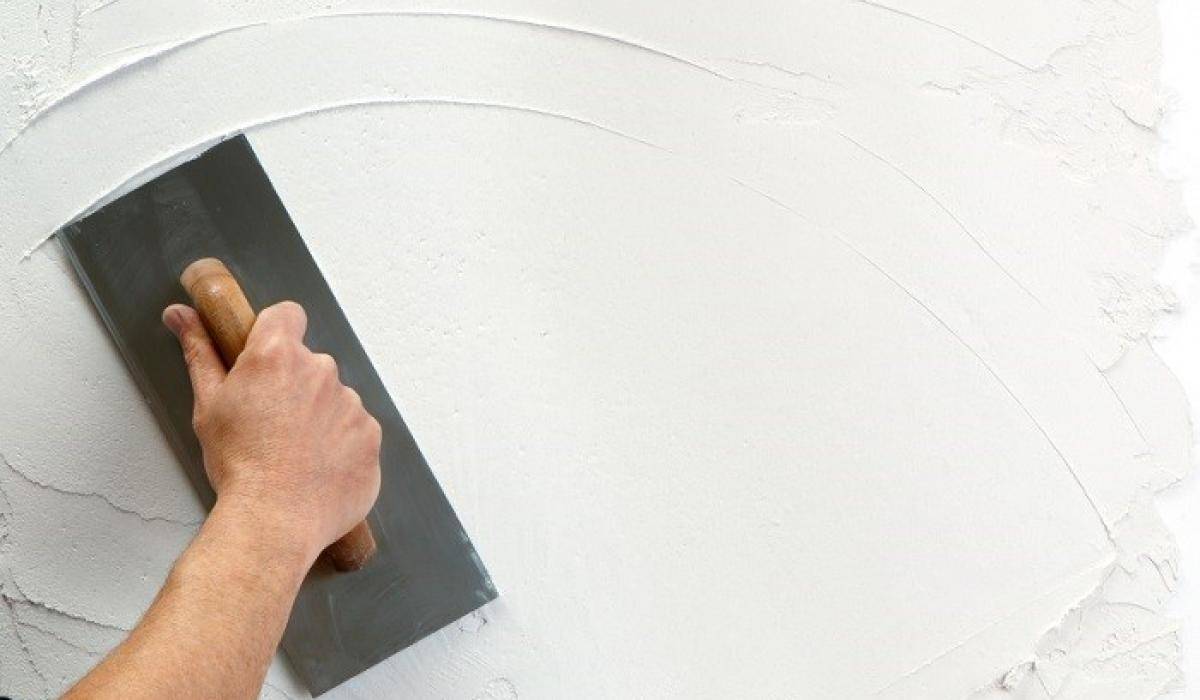
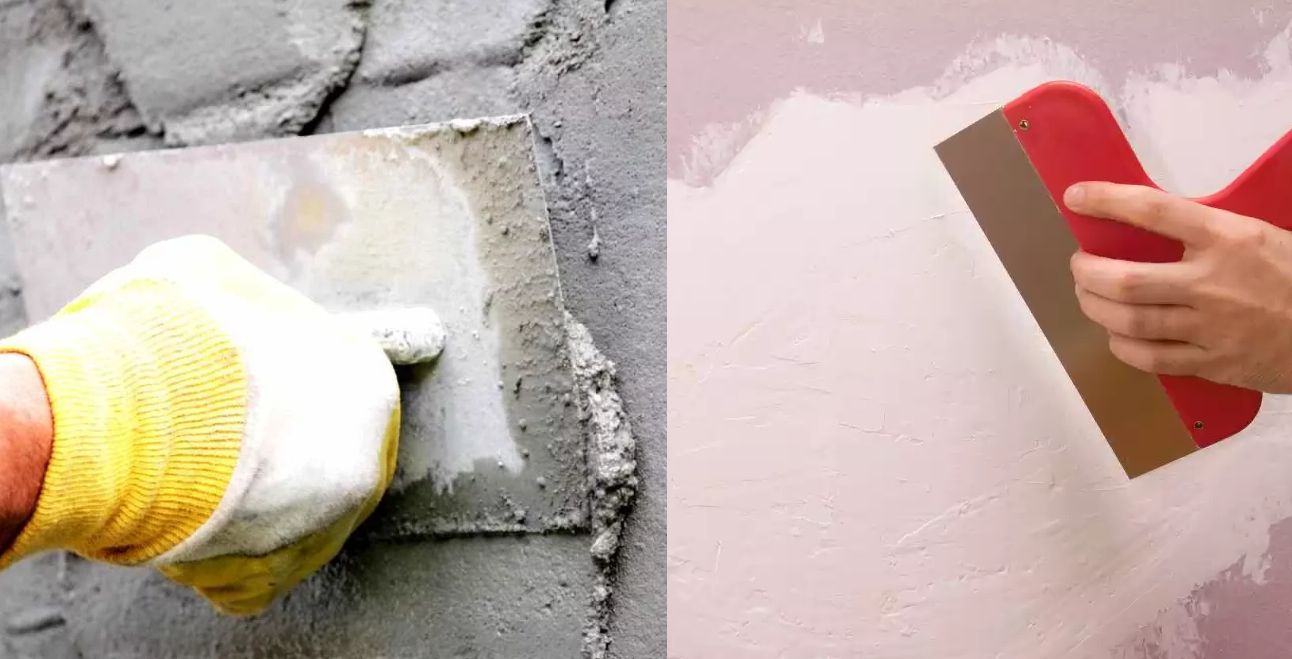
Now we take our mixture with a narrow spatula and put it on a wide spatula.
Then, putting the spatula to the wall at an angle of about 30 - 45 degrees, smoothly run the spatula along the wall until all the mixture remains on it. It is better to start the middle of the wall from the corner and move from left to right, we make the upper part of the wall from top to bottom. We make the lower part of the wall from the bottom up.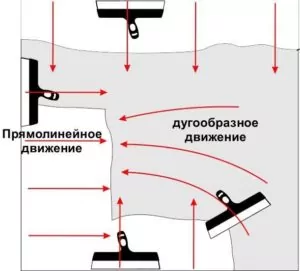
Put the next portion of the mixture on a wide spatula again and apply to the next area. To make the surface even, the layers must be overlapped. When sanding, then you will not get bumps or depressions on the wall.
The thickness of the layer of the starter putty on the wall can be up to 1.5 cm. It depends on your walls and their initial evenness.
It is best to use a corner trowel to putty the corners. Apply the putty along the entire height of the corner and level it with an angled spatula.
The spatula must be periodically cleaned of adhering mixture and lumps. To do this, do not forget to rinse it in water.
After completing the work, leave the layer to dry. The manufacturer also indicates the drying time of the mixture on the packaging.
How to sand walls after puttying
Once the mixture is dry, you can start sanding.
The starting layer can also be sanded with coarse sandpaper. For this, a special device is used - a grinding block. With smooth circular movements without strong pressure, we wipe out all the irregularities on our surface. It is desirable to illuminate the surface with additional light. This will allow you to see even the smallest flaws.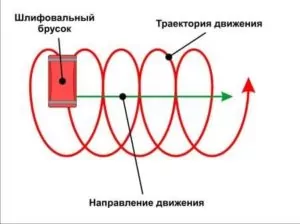
Remember to use protective masks and goggles as sanding is a very dusty job.
After sanding, if you intend to apply a finishing layer, the surface must be primed again.
How to putty walls with finishing putty
The purpose of the finishing putty is to make the surface perfectly smooth and beautiful. The putty technology does not differ from the starting putty. To achieve perfect smoothness, puttying is done with additional light. Typically, this is a portable lamp. It is applied in a very thin layer - up to 2 mm thick and is designed to eliminate small cracks and pores.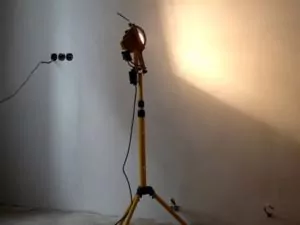
Varieties in composition
Types of putty:
- Plaster;
- Acrylic;
- Latex;
- Polymeric;
- Oil;
- Cement;
- Silicone;
- Silicate;
- Sticky;
- Epoxy.
Varieties are used depending on the characteristics and material of the coating, place of application, climate in the case of facade putty. Acrylic and latex materials have a dense structure and increased elasticity. A simple and inexpensive plaster putty is used in a wide variety of facilities, but only in dry rooms. In this case, the coating does not shrink. There will be no shrinkage in the case of polymer mixtures. They are not cheap, but in some sense they are the “golden mean”. Silicate "are not afraid" of mechanical stress and moisture, but have limitations on the thickness of the layer. Adhesive and epoxy options are suitable for treating and hiding defects on finished wood coatings.Their wide range of colors allows you to work on metal. The oil putty has increased stability indicators. Plus, it won't dry out too quickly.

Gypsum
Plaster of Paris acts as a binding element. The tool is used mainly for painting walls in dry rooms. The peculiarity of the material allows you to level the walls until an almost perfectly even coating is obtained without traces of a trowel and streaks. Gypsum putty dries quickly and does not shrink. Due to the speed of drying, the gypsum mixtures are kneaded in small portions and applied immediately. In this case, the drying process can be captured visually. No toxic and aggressive chemical additives are added to gypsum-based plaster, therefore the field of application includes premises for different purposes. Plaster material is used in children's rooms, kindergartens, sanatoriums, hospitals. At the same time, it is not suitable for the treatment of exterior walls and bathroom coatings. This type of finish swells and flakes off from moisture.

Acrylic
It is a thick solution and does not need to be diluted with water. On the surface, it prevents deformation and cracking. Acrylic material is used in various types of renovation and finishing works. Moreover, sometimes it is also a finishing finish simultaneously with the functions of a leveling layer. The substance has a pasty structure, which makes it possible to control the thickness of the coating. High strength, on a par with wood, facilitates the use in conditions of increased loads. They also produce wood grain acrylic putty for woodworking.
The material has 5 important advantages. It is homogeneous and completely environmentally friendly. Acrylic coating easily tolerates numerous freeze / thaw cycles, which in central Russia can occur up to ten per year. In addition, the acrylic layer protects from the cold and allows steam to pass through.

Latex
A plastic, tenacious substance that does not shrink. Lay it even in thin layers. Before starting the surface treatment, the putty is kept at room temperature. The mixture is diluted in a similar manner as in the case of cement mortar. Gradually add water and work with a mixer until the composition becomes homogeneous. The surface layer of not yet dried material is leveled with a damp sponge. On a dry surface, you can work with sandpaper, but very carefully. After application, the latex putty "gives" a thick shell that does not crack or crumble. For 1 m², it takes from 0.5 to 2 kg of putty. The starting and finishing layers have a thickness of 0.5 to 3 mm. Drying time for each layer is approximately 12 minutes. Deep cracks are sealed in several layers, after which the surface is rubbed with medium-grain sandpaper.

Polymer
The option is considered average, in the sense that it has fewer restrictions for use. The properties of the material are given by macromolecular compounds from monomer units, organic or synthetic origin. Resistance to moisture, steam, temperature contrasts is noted in polymer mixtures. The putty dries quickly, and the coating turns out to be plastic and durable. In addition to the main living rooms, it is used in bathrooms, toilets, kitchens, for finishing the facade and exterior. Buyers get smooth, almost mirror-like finishes. The high cost of polymer plaster makes it necessary to look for alternatives. Improving the technology and characteristics of mixtures gives the market options with the same quality, but less material consumption. In addition, this type of putty can be used without residues.

A few simple guidelines
Initial wall decoration is made with a mixture with a coarse-crystalline constitution, which is intended for initial rough processing and is usually realized in dry form.
In places with deep depressions or other deviations, the mixture is applied in a dense layer, then stretched over the entire level using a trowel. Repeat the action until the surface is flat.

When the starter coat has hardened, it must be sanded thoroughly to remove tool streaks, build-up and splatter. The surface becomes even, but has a loose structure, in this regard, a finishing putty is required.

Wall decoration with a reinforcing mesh is needed if there are large differences on the base. With a serpentine mesh, the formation process becomes much more efficient. In addition, the risk of cracking is minimized. Thus, a high-quality and strong base for painting comes out.

Required tools and equipment
For normal operation you will need:
-
two or more spatulas for wall putty. One should be small (3 ... 8 cm), the other as wide as possible, with a comfortable handle. With a small spatula, they collect the solution and close up irregularities in inconvenient places, with a large spatula they do the main work. The wider its width, the more convenient and faster it is to level the surface. Additionally, an angled spatula may be required (for filling the corners of the walls, internal and external);
- container for mixing the solution. Sometimes it is convenient to work with two containers. In one, the larger one, the solution is kneaded, in the other a small portion of it is deposited to perform a certain area of work;
-
construction mixer or drill / screwdriver with a nozzle for mixing mortar. Naturally, this is not required for ready-made formulations;
- primer roller. It is convenient to work with a product on a long telescopic handle, the pile height should be medium or low;
-
vibration or belt sander for surface sanding after putty. For small areas and / or hard-to-reach areas, a sanding sponge, or simply a block wrapped with sandpaper, will also work. Convenient special graters, where sandpaper or abrasive mesh is inserted;
-
for work in the upper part of the walls and on the ceiling, a stepladder is also needed, or better - goats. In the absence of such, you can use a table, stools, an old (durable!) Cabinet and other improvised items.
In addition to the above, of course, protective clothing and equipment are required. When sanding, it is also advisable to use dust masks and goggles.
Wall priming and its importance in the putty process
It is difficult to overestimate the value of the primer in the putty process.
Probably, many of you have faced such a problem as peeling of putty in the process of dismantling old wallpaper, which is worse - with the appearance of bumps under the wallpaper. All this is precisely the result of ignoring the priming of the walls before putting them on. Applying a primer allows you to get rid of dust and dirt from the walls and improve their ability to bond with the putty - in professional slang, this process is called increasing adhesion.
You need to primer always and everywhere when it comes to applying wet solutions or adhesives.
One thing should be understood - the walls are primed before applying the starter layer and in case you have been cleaning the putty.
In general, if we are talking about a putty for painting, then after processing the walls with an abrasive mesh, they also need to be primed. As a rule, a standard deep penetration primer such as Ceresit CT17 is used for these purposes, but in some cases an antifungal primer and even a primer "Betonokontakt" can be used. The latter is used to increase the adhesion of walls painted with oil or nitro-paint, the only condition for its use is not peeling off the old paint.

Rules and stages of preparation for putty

A good preparation of the walls for putty should ensure the quality of the putty layer, therefore, several requirements are imposed on the surface at once. The reason must be:
- durable, even without a hint of any delamination;
- clean, without residues of paint, plaster, other finishing materials, without dirt, dust.
Before starting preparatory work, damp walls must be well dried, then also cleaned of any old layers, dirt, dust.
If you divide the whole process into stages, then the preparation of the walls for putty is carried out as follows:
- First, remove the old coating - paint, tiles, wallpaper, etc.
- Using a wide brush, moisten the base with water. The purpose of the work is to remove even the smallest residues of the finishing material in a high-quality manner.
- Eliminate all defects of the wall material - grooves, seams, cracks, irregularities.
First, the gaps are expanded (sewn up) with a hammer and chisel, and the remnants of poorly adhered material are removed. Prepared cracks are removed (with a vacuum cleaner) from dust, dirt, concrete residues, then moistened. Then the prepared, dried space is filled with repair mortar.
Tools

Not a single stage of repair work is complete without tools. To carry out preparatory activities, you also need your own set. It depends on the type of coating to be removed. It may include:
- The aluminum rule used to check the degree of unevenness. There are tools of various lengths, but only two - 1 m and 2 m - will be enough for the walls.
- Trowels for plastering (putty) of the base. They will also need two pieces - one-handed (length - 280 mm) and two-handed (500 mm).
- Spatulas for removing old finishing materials - wide working (400-450 mm) and auxiliary narrow (100 mm).
- Scraper for removing old trim. It differs from a spatula by a very sharp working surface.
- Drill with special grinding attachments.
- Brush for priming.
- Needle roller for wallpaper removal.
- Sponge, roller or spray bottle.
- Small brush.
If there are cracks on the base, then a chisel and a hammer must be attached to this "company". When there is a "battle" with wallpaper, it is better to have an additional assistant at hand - a clerical knife.
Putties
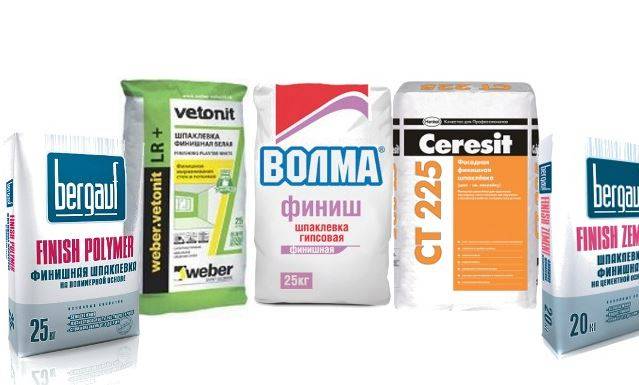
First of all, the required types of putty are determined. Usually, wall treatment involves the participation of a cut of two compositions - for starting and finishing work. For the former, coarse-grained mixtures are optimal, which quickly solidify and do not creep. The maximum layer thickness is 5 mm. For finishing works, finely dispersed putties are good, which are usually applied in a thinner layer - from 0.5 to 2 mm.
Primer
It is a polymer waterproofing agent that improves the adhesion (adhesion) of dissimilar materials. The best mixture would be a deep penetration primer, it will reduce the level of water absorption of the base. It is recommended to apply the primer not with a roller, but with a brush. After processing, the surfaces are allowed to dry completely, then the walls are checked by hand to make sure that there is no dust left on them.
Degreasers of surfaces may be required, as well as antiseptic impregnations to protect walls from mold. For uneven substrates, gypsum or cement plaster will be needed. The latter mixtures are recommended if the leveling area is large, when a fairly thick layer is required.
Preparation of the base

Work begins on a dry and clean surface. If there is an old coating, everything that can fall is cleaned off, cracks are sewn up, screws and nails, the remains of wallpaper and other coatings are removed.
Sadly, it is necessary to remove both paint and whitewash. The paint is due to the fact that the putty does not adhere well to it, and if it does, it may subsequently fall off. The whitewash is removed because it is loose.
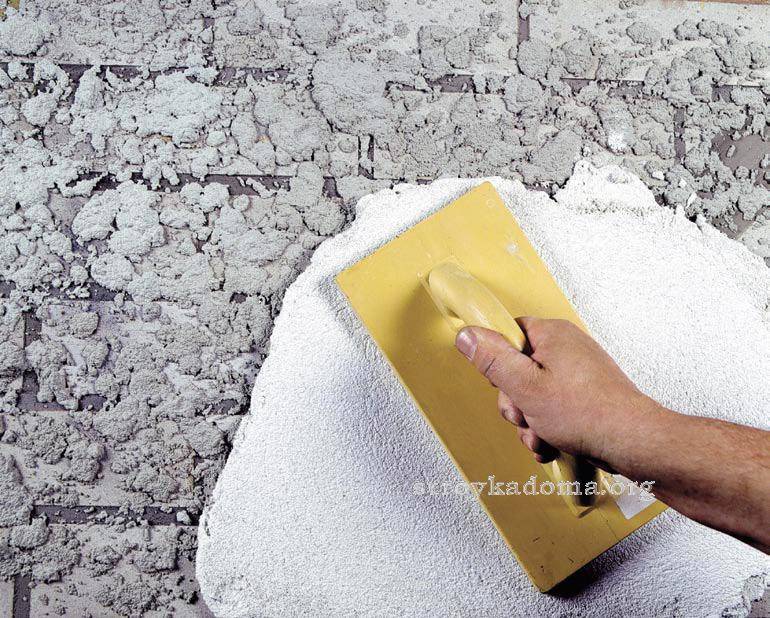
With it, after the primer, the adhesion is normal, but after a while the finish begins to crack and flake off. If you do not want to redo the ceiling or wall in a year and a half, the lime must be cleaned off.
This is how the prepared surface looks. After the old coating is removed, remove the dust. If you have an industrial vacuum cleaner, you can use it (a household one cannot - it will break). If there is no such equipment, you can first walk with a dry broom, then with a brush, and finally - collect the remains with a slightly damp cloth.
The priming of the walls under the plaster is used in order for the materials to adhere better. Its second task is to reduce the amount of moisture absorbed by the base.
This is very important on porous surfaces such as bricks, dry plastered walls, etc.

On loose and prone to crumbling walls, special compositions of deep penetration are used. They bind particles of material to honey, increasing the overall strength of the base.
Primers are sold either in the form of ready-to-use mixtures or in the form of liquid concentrates. The second type requires additional dilution with water. In any case, read the instructions carefully before use and strictly follow them.

Usually the technology is as follows: the composition is poured into the container, distributed over the surface with a brush or roller. In difficult places - corners and bends, thoroughly pass with a brush. If two or more coats are required, they are applied after the previous one has completely dried.
What types of mixtures are there?
You can find the mixture at any hardware store where it is sold in both liquid and powder form. The second option involves the need for self-breeding.
Table 1. Varieties of bases for floor putty.
| View, illustration: | Description: |
|---|---|
 Cement Cement
|
Many masters note that this type of mixture is universal, due to which it will be possible to finish external or internal floors. This composition has good resistance to humidity and hot air, therefore, the putty is often used when decorating bathroom, toilet, walls near the pool. This base is best suited to surfaces, including concrete and brick. However, it can be difficult to work with the base, because it does not have the most finely dispersed structure. |
| Gypsum | This is a plastic putty mixture, therefore, it is used precisely when finishing interior floors. Many experts note that it is easy to work with such a base. In addition, it has a snow-white color. Of the advantages of the base, the presence of a matte surface after drying is also noted. At the same time, it is recommended to buy a basic and finishing plaster based on gypsum. The mixture masks even noticeable flaws in the walls in the best way and prepares them for wallpapering. |
 Gypsum Gypsum
|
It is a modern basis for wall decoration, which contains polymer. According to observations, it was found that such a finish allows you to achieve perfect smoothness. Polymer putty mixture is also divided into two types: based on acrylic or latex. The first option is used to align internal and external walls at the stage of rough and final finishing. Latex base is often used for finishing walls. This composition is distinguished by its ease of application, the peculiarity is that the material allows you to obtain a mirror-like surface. Compared to other types of putty, polymer is distinguished by its high cost, therefore, the mixture is not popular in our country. |
 Water-dispersed Water-dispersed
|
This type of putty mixture has been on sale recently. It is distinguished by good resistance to any aggressive influences, so the composition is often chosen by professional masters. The main advantage is that it can be applied to any type of surface, even wood, and is resistant to moisture and fire. |
In the case of purchasing the material, it is necessary to pay attention to the date of manufacture, shelf life and appearance, because sometimes, if stored improperly, the composition absorbs moisture and becomes unusable
The main stages of work
There are three options for wall treatment. The starting putty is made with coarse material. If you install a masking net under the layer, you can putty a large area of the wall. The lighthouse finish is performed with the installation of lighthouses (wooden slats), forming a layer as a rule. Finishing is the final stage.

Application of the starter layer
The recommended thickness is one and a half millimeters. Rough material is used to hide grooves, holes, joints. Apply the starter mixture with a wide spatula, holding the tool at an angle of 30 degrees to the surface. A small amount of mass is collected with a trowel and evenly distributed with a spatula along the wall, moving diagonally. If the surface has significant drops, you must additionally use the rule up to 1.5 meters long. After the first layer has dried, you must repeat the procedure.
Aligning corners step by step
Internal and external corners, niches, arches are difficult to putty. It is convenient to process smooth areas with a special corner tool:
- lay a serpyanka mesh along the length of the corner;
- take a little solution with a small spatula;
- applied over the entire height of the corner (slope);
- with an angled spatula, level the mixture in one motion.
When aligning the outer corners, the mass is applied on both sides. To make a clear slope, use metal corners, which are "planted" on the base layer of putty, leveled with an angular spatula, and then processed with finishing material. Periodically check the plane with a building level.
First grout after drying
To do this, use a sanding bar with sandpaper or an abrasive stack, a sander for large wall areas. The first grout is carried out with coarse sandpaper with a grain of 60 or a sanding mesh. They start work from the corner, moving from top to bottom and grasping a strip 1 meter wide. Make a spiraling motion effortlessly so as not to break the coating.
Finishing layer
The finishing material can be putty on the walls after drying and grouting the starting layer. The mixture is applied thinly (usually up to 2 millimeters) to smooth the walls and eliminate the smallest pores and cracks. Put putty on a larger tool with a small spatula, spread it evenly over the surface.

Drying
To properly dry treated walls, it is not recommended to accelerate the natural drying process. Do not direct fan heaters at the base, use hair dryers, electric heaters. The material dries within 12-16 hours, and if it is specially heated, the layer will crack. There is no need to arrange drafts, it is enough to organize internal ventilation - open the doors to living rooms, kitchen, bathroom. The entrance and balcony doors, the vents are left closed.
Sanding
The finishing layer gains strength in half a day, but it is better to start sanding and sanding the surface in a day. The coating is cleaned with sandpaper - first coarse, and then fine-grained. When processing, you do not need to apply strong pressure on the tool, so as not to scratch the coating.
Grinding
For the final finishing, you can use blocks, hand floats or grinders. To get a perfectly smooth surface, use fine-grained (80-120) sandpaper or an abrasive mesh. In one pass, they capture an approximately one-meter strip of the wall, rubbing the coating in a circular motion without pressure.
Mix preparation
In order not to waste time preparing the mixture, you can buy it ready-made in the store. But if the need arose for her breeding, this process must be approached correctly. The main stages of this process are:
Pour room temperature water into the mixing bucket.For 1 bag of plaster with a capacity of 25 kg, 9-10 liters of water is enough. But you should not dilute the entire dry mixture at once, especially if it has a gypsum base that hardens quickly. To prepare the putty, it is enough to take 1/2 or 1/3 of the powder at a time. Gradually pour the dry mixture into the water poured into the bucket, stirring it periodically with a drill mixer. As a result, a homogeneous mass should be formed without the slightest lumps.
Particular attention should be paid to the sides and bottom of the bucket, since this is where dry, undiluted mixture is often collected.
After using the first portion of the solution, wash the bucket and tools thoroughly. Only then can a fresh mixture be prepared.

