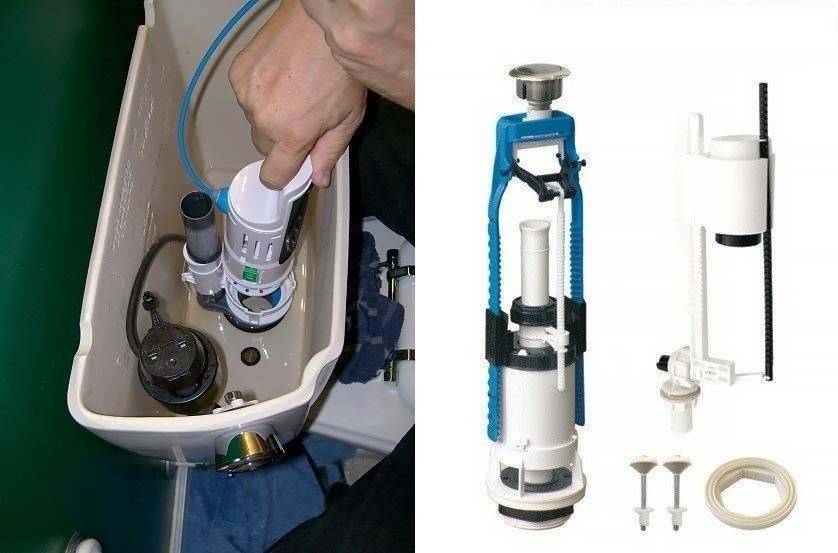
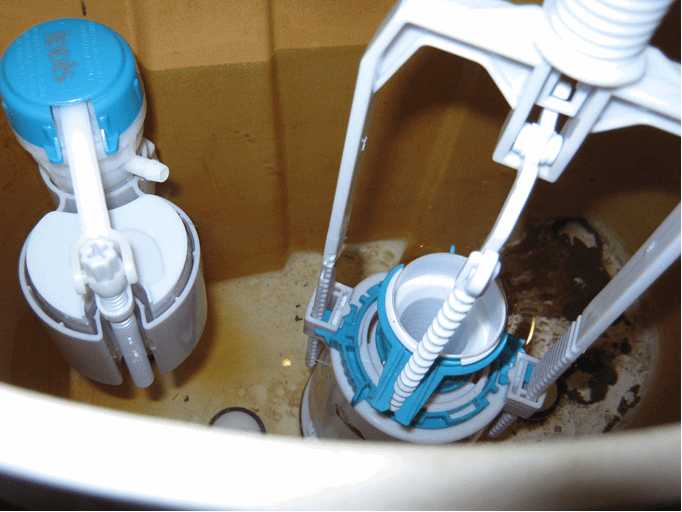
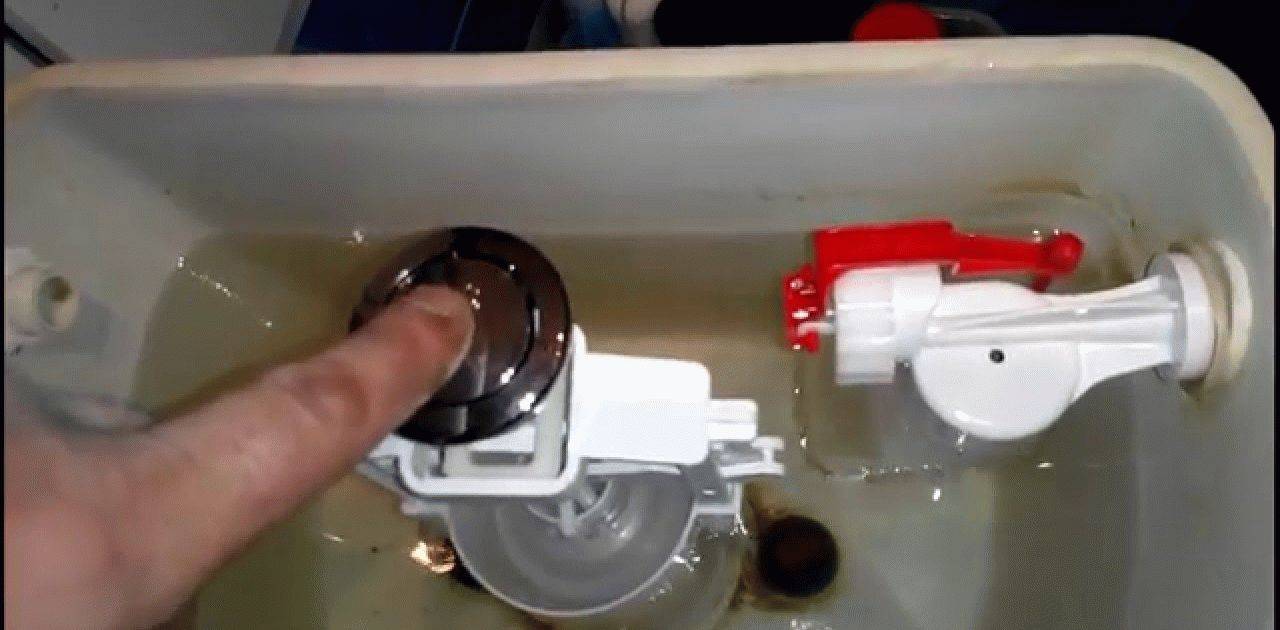
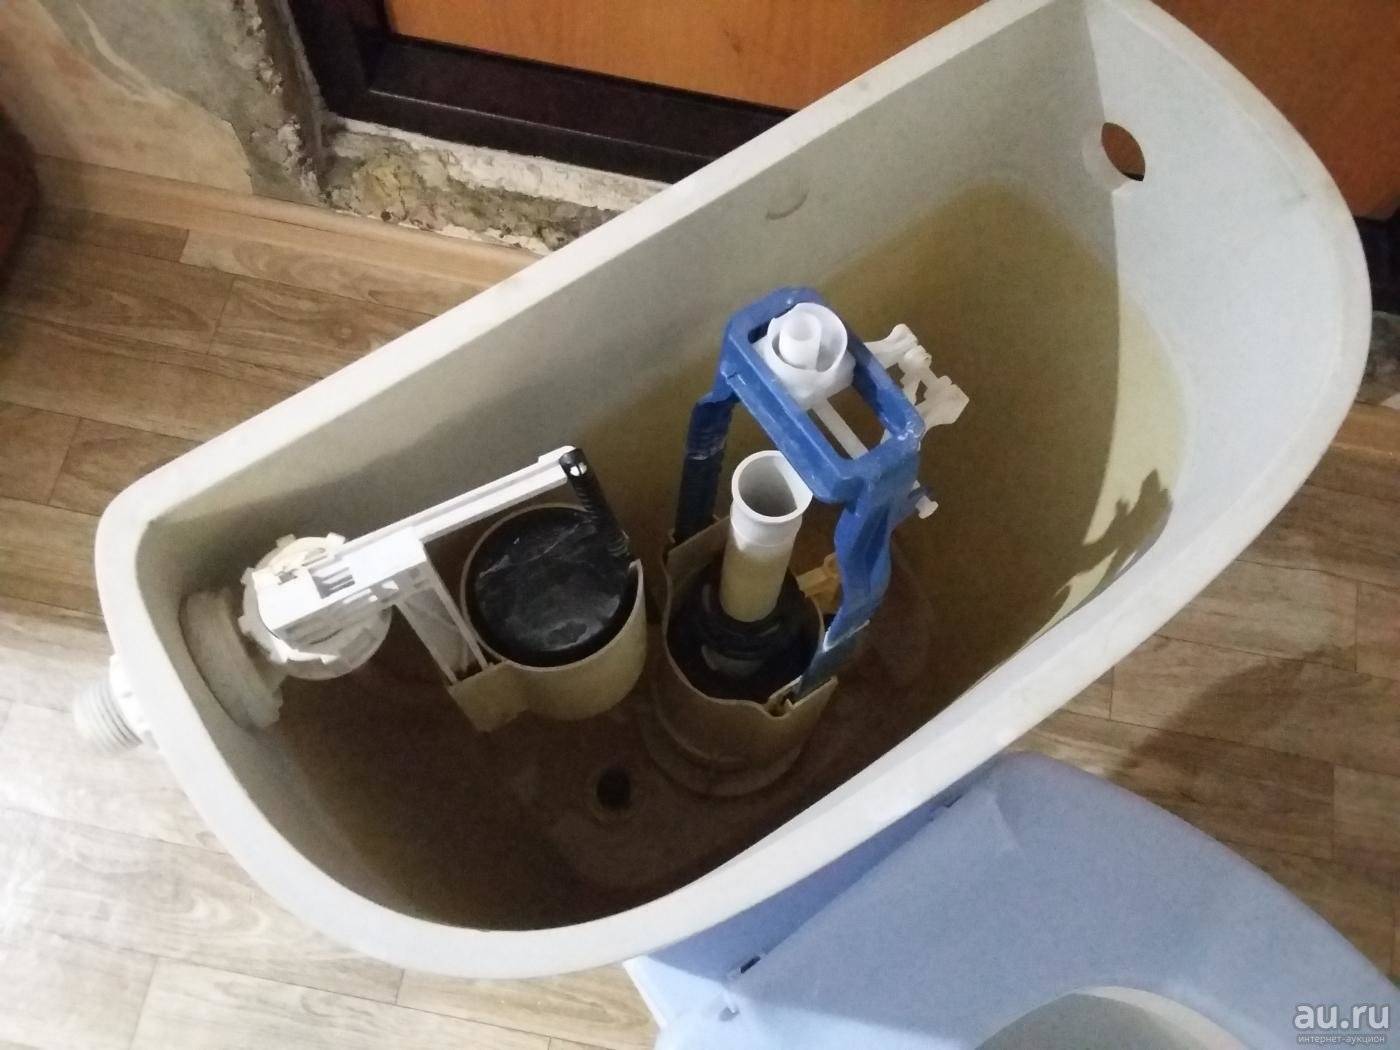
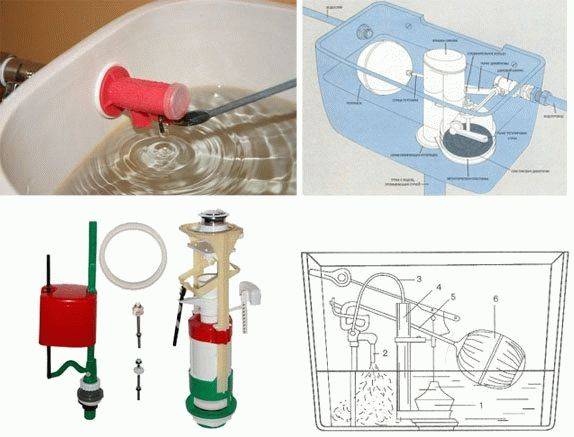
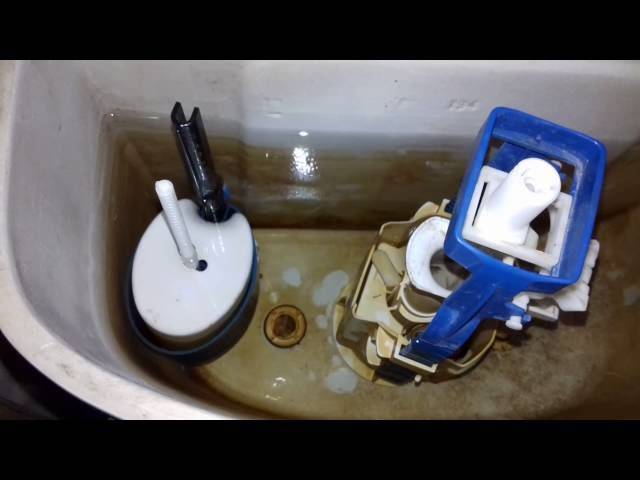
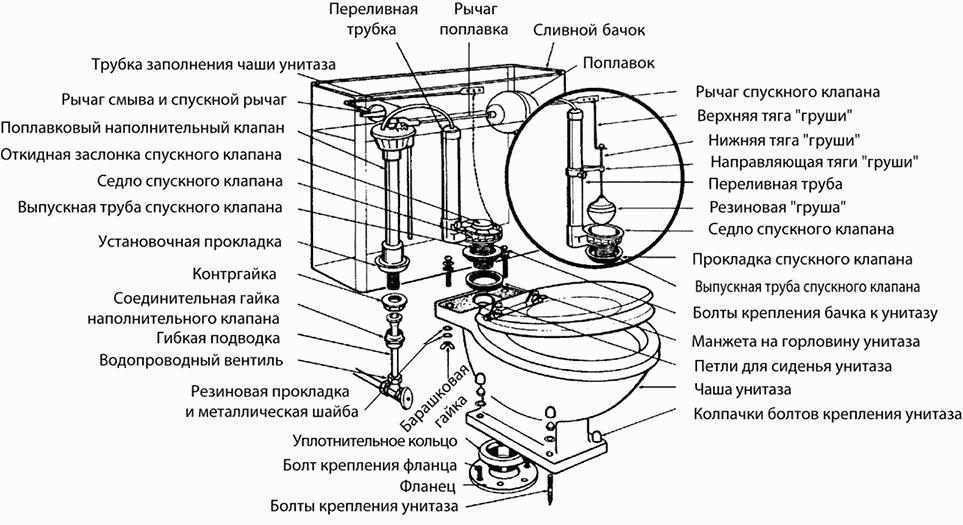
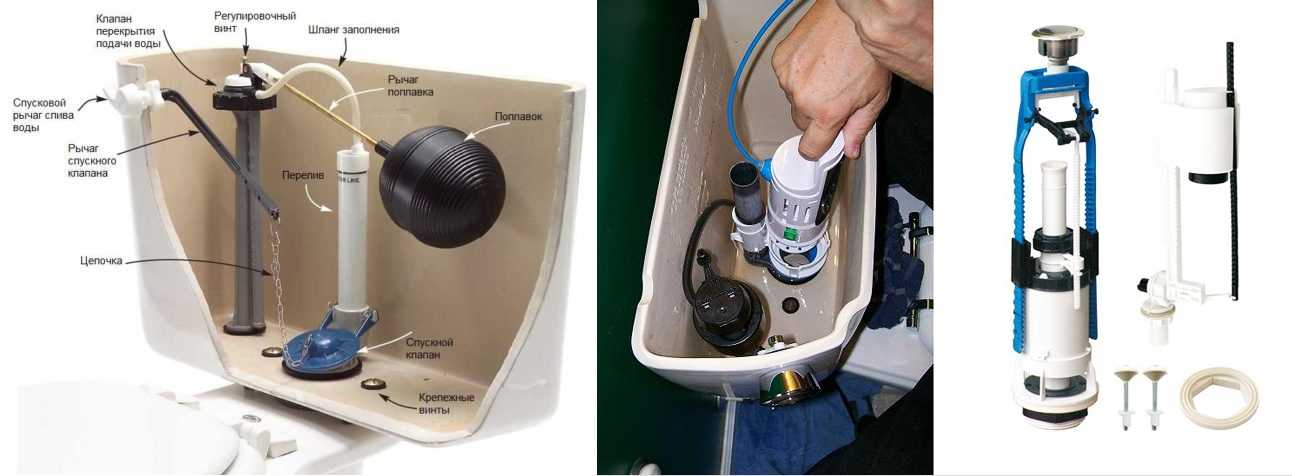
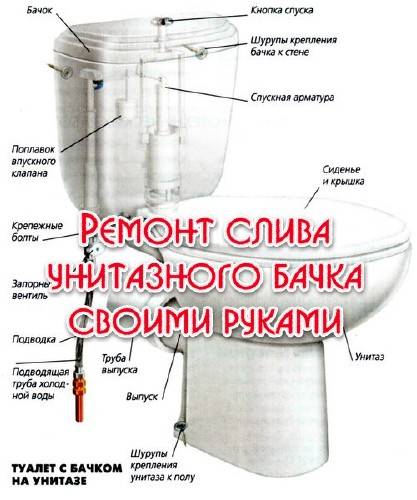
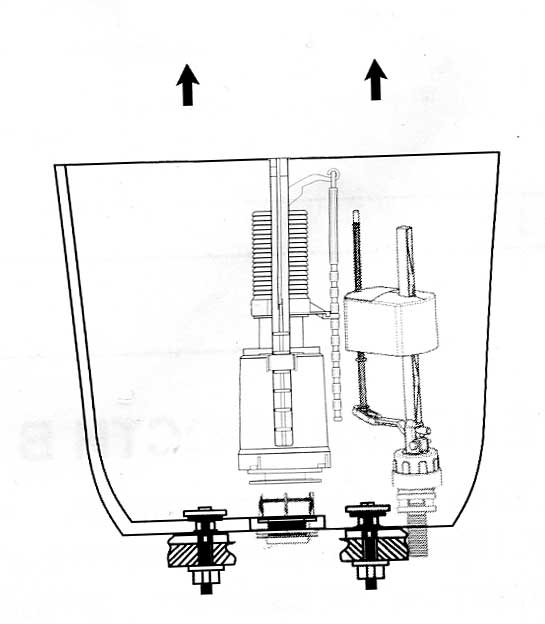
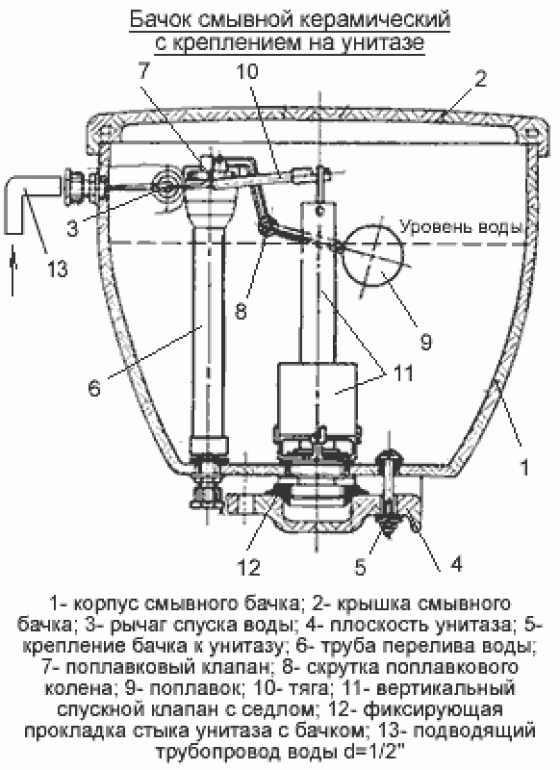
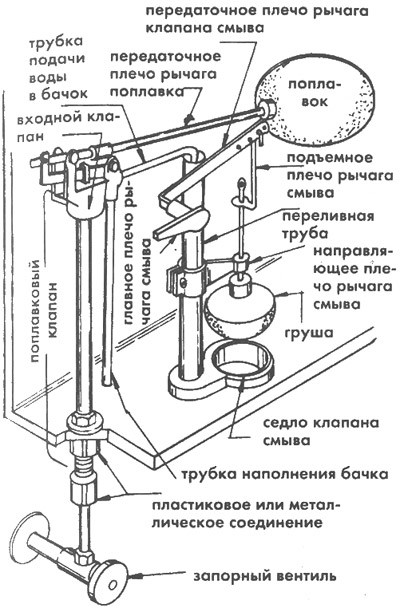
How to put everything back together?
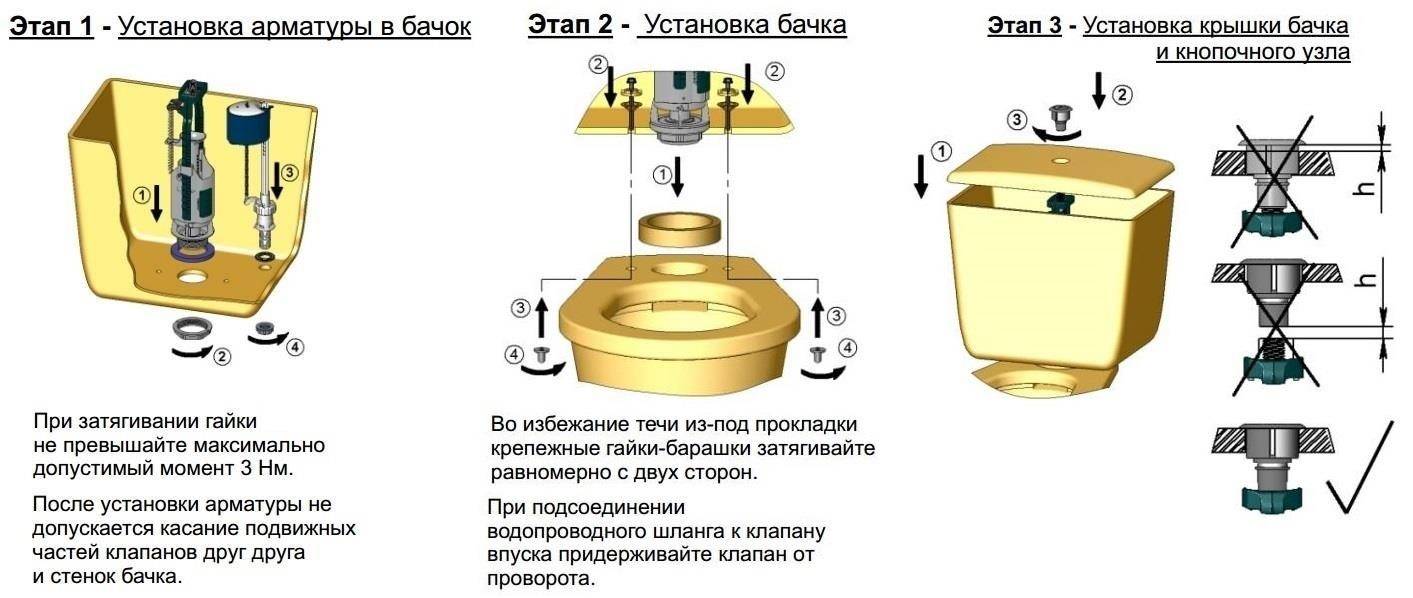
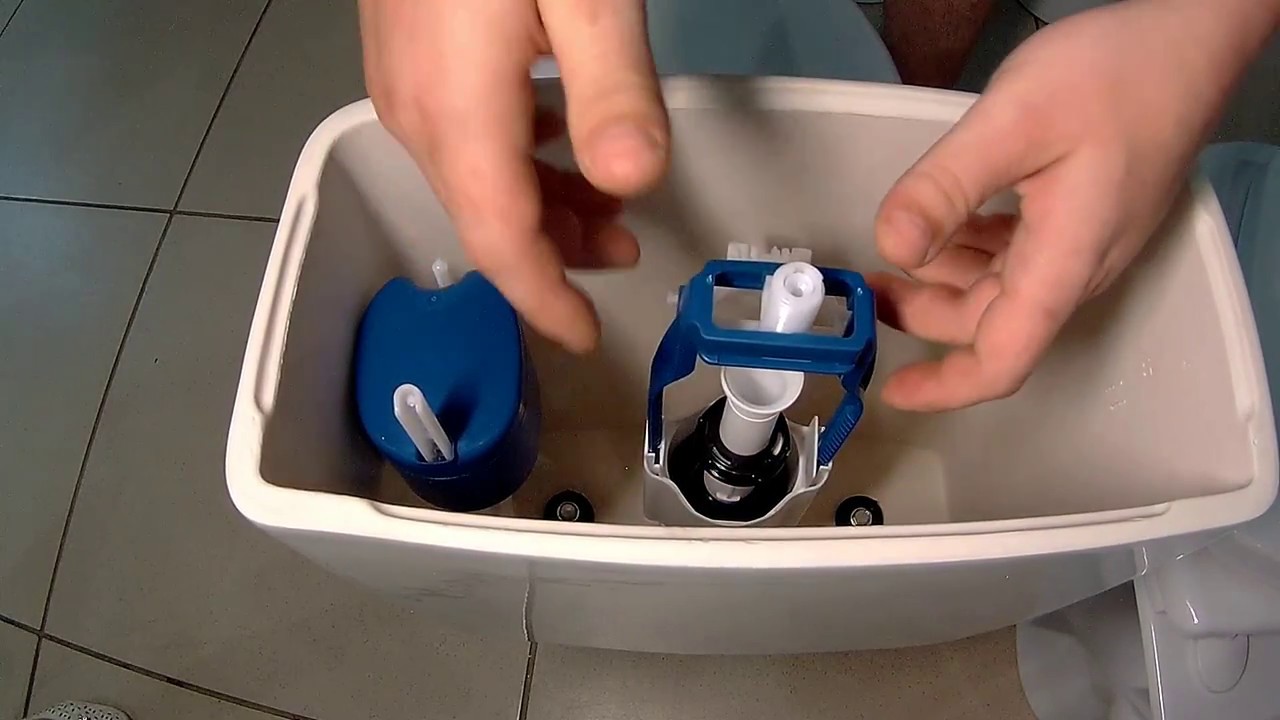
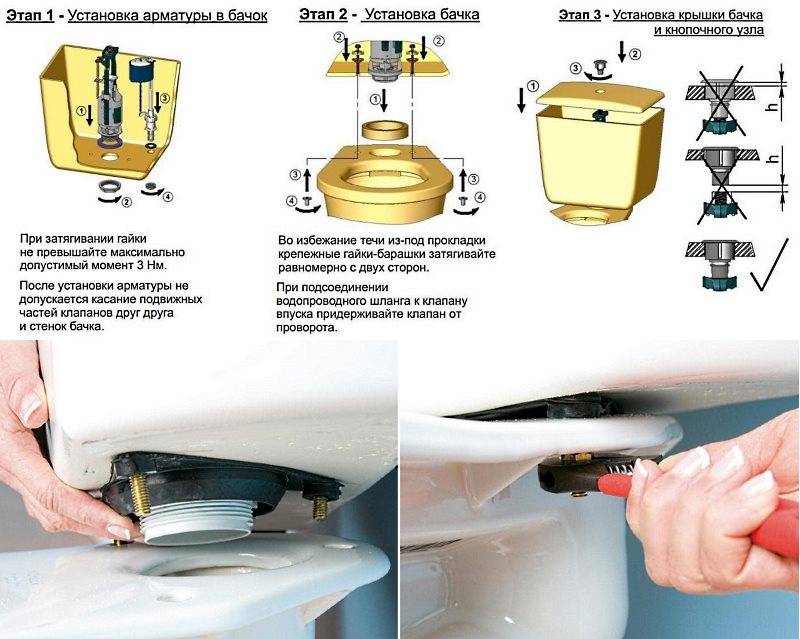
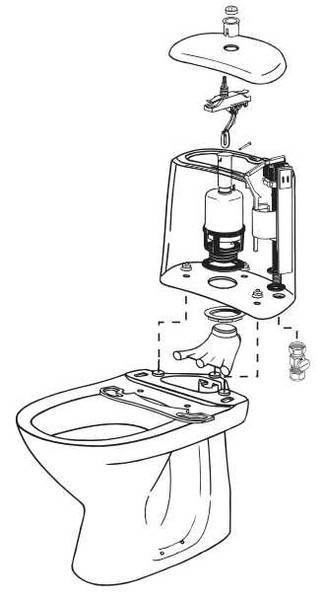
To assemble the toilet cistern back, you must perform the following operations:
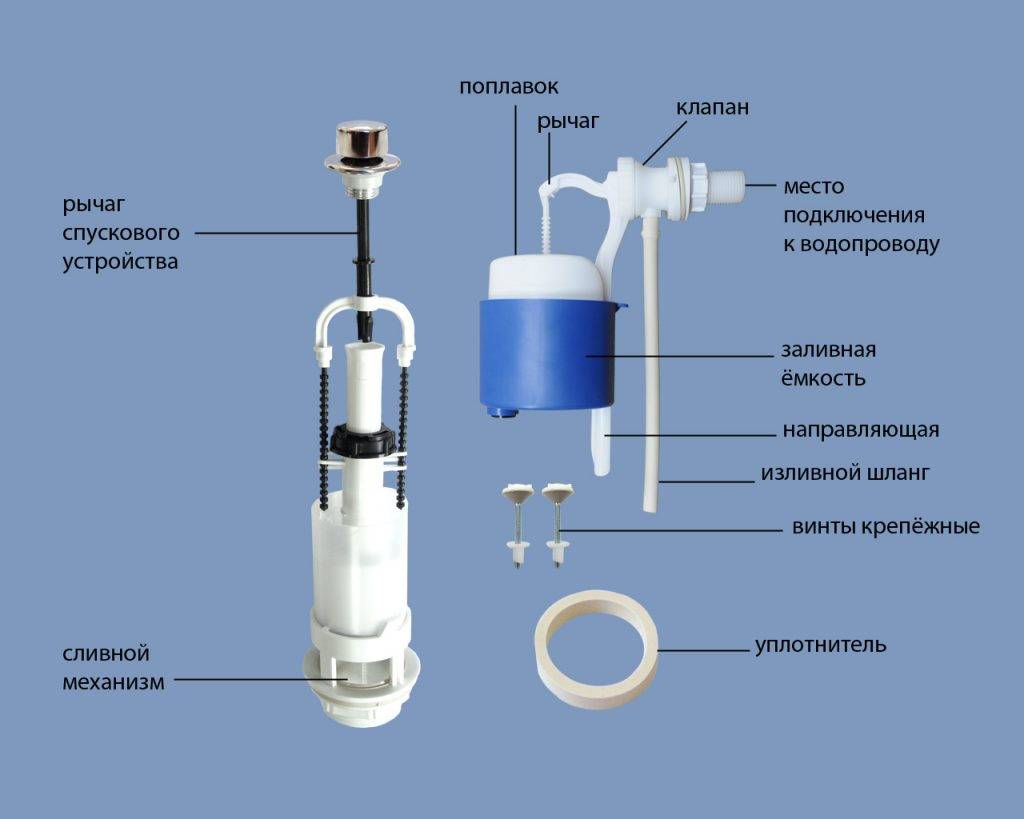
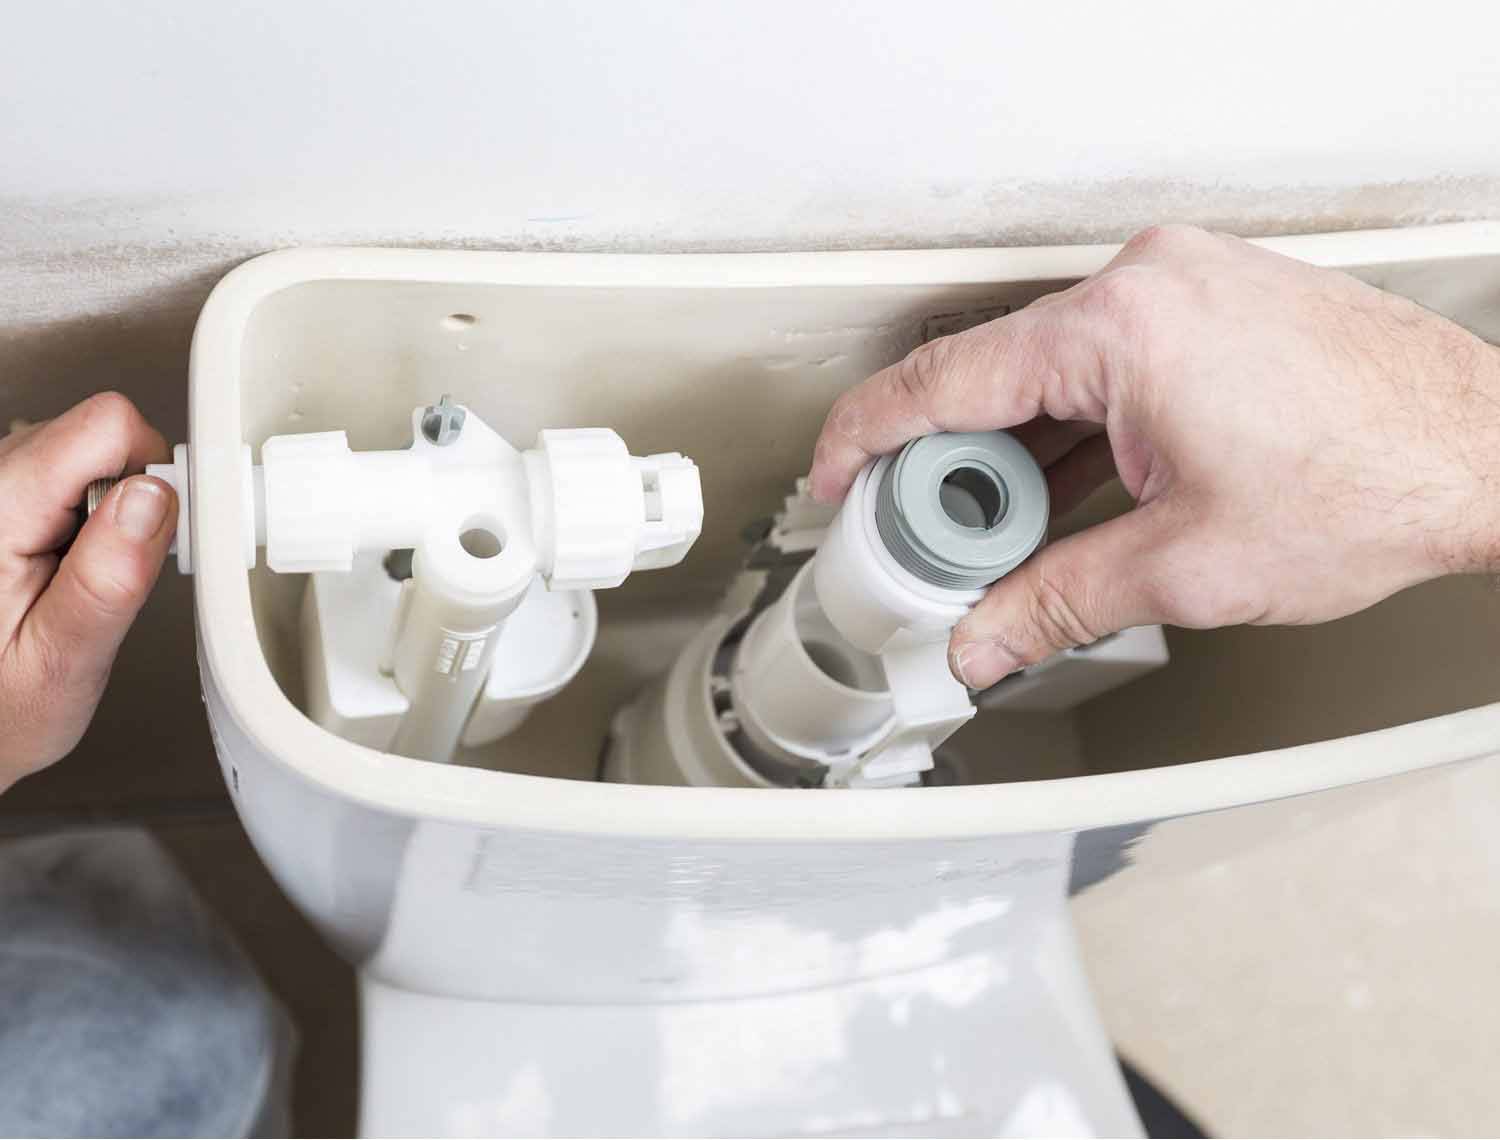
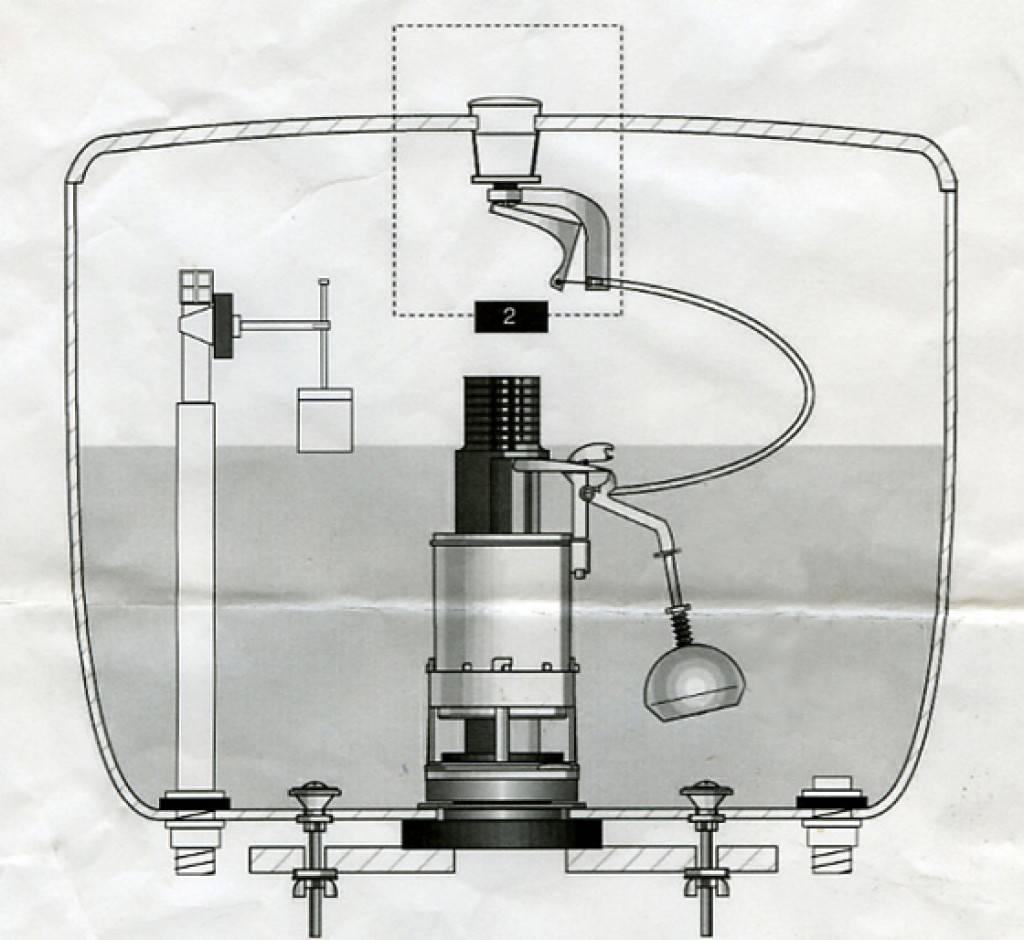
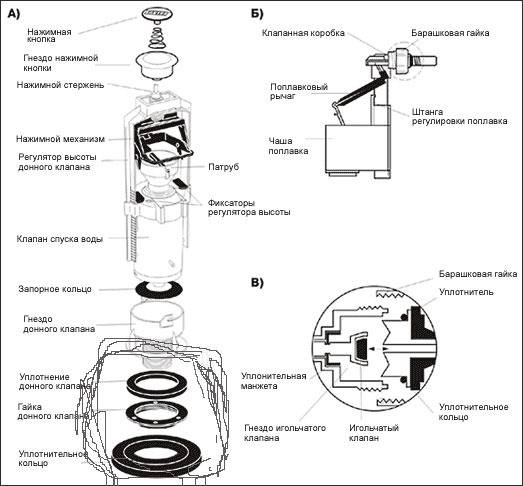
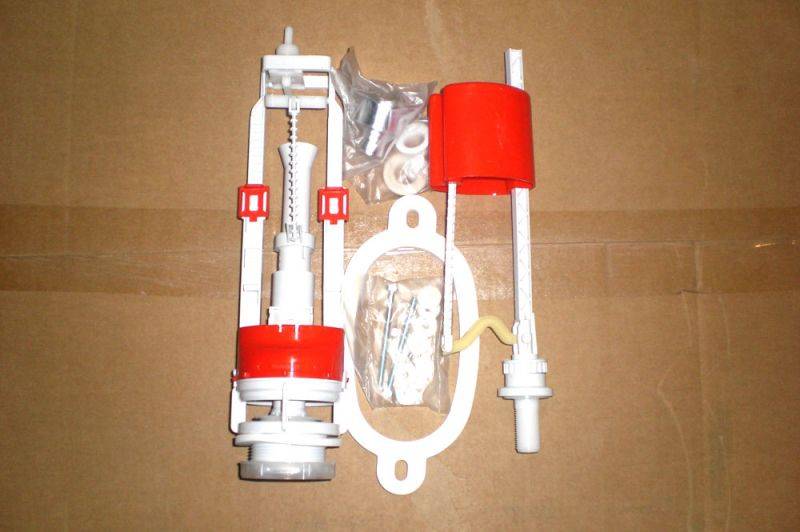
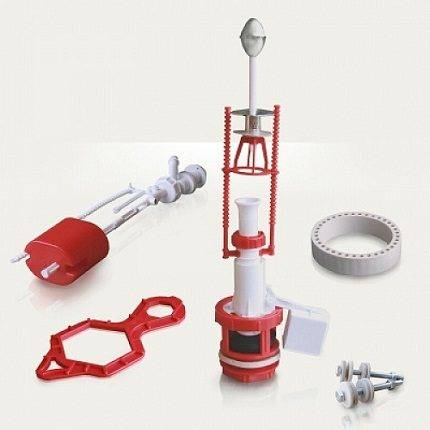
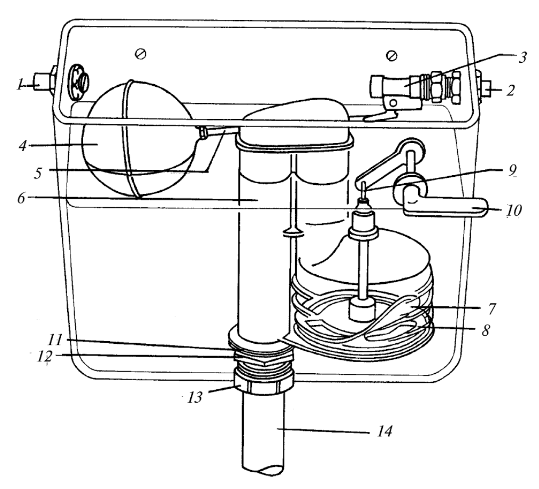
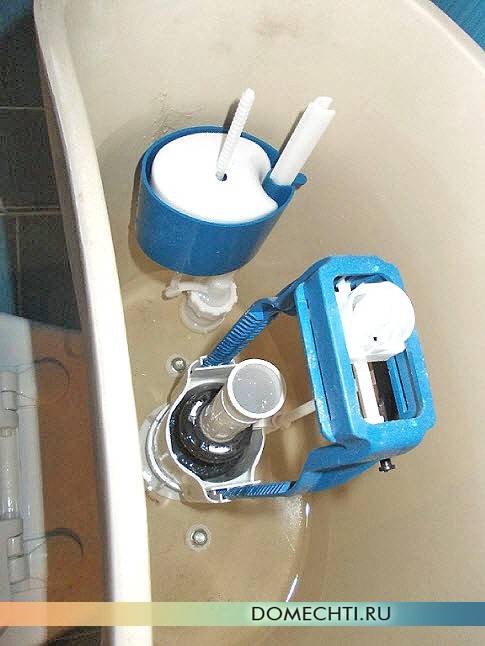
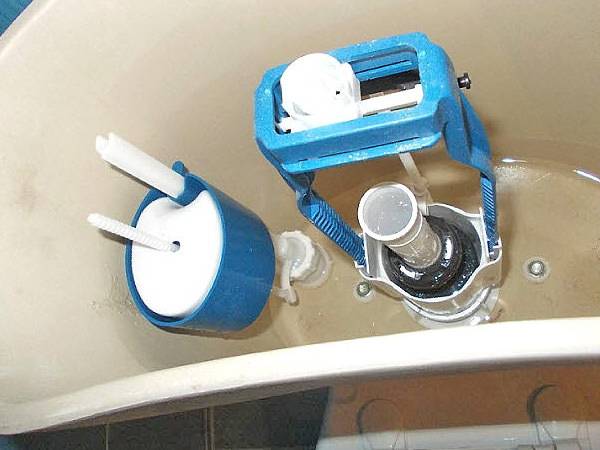
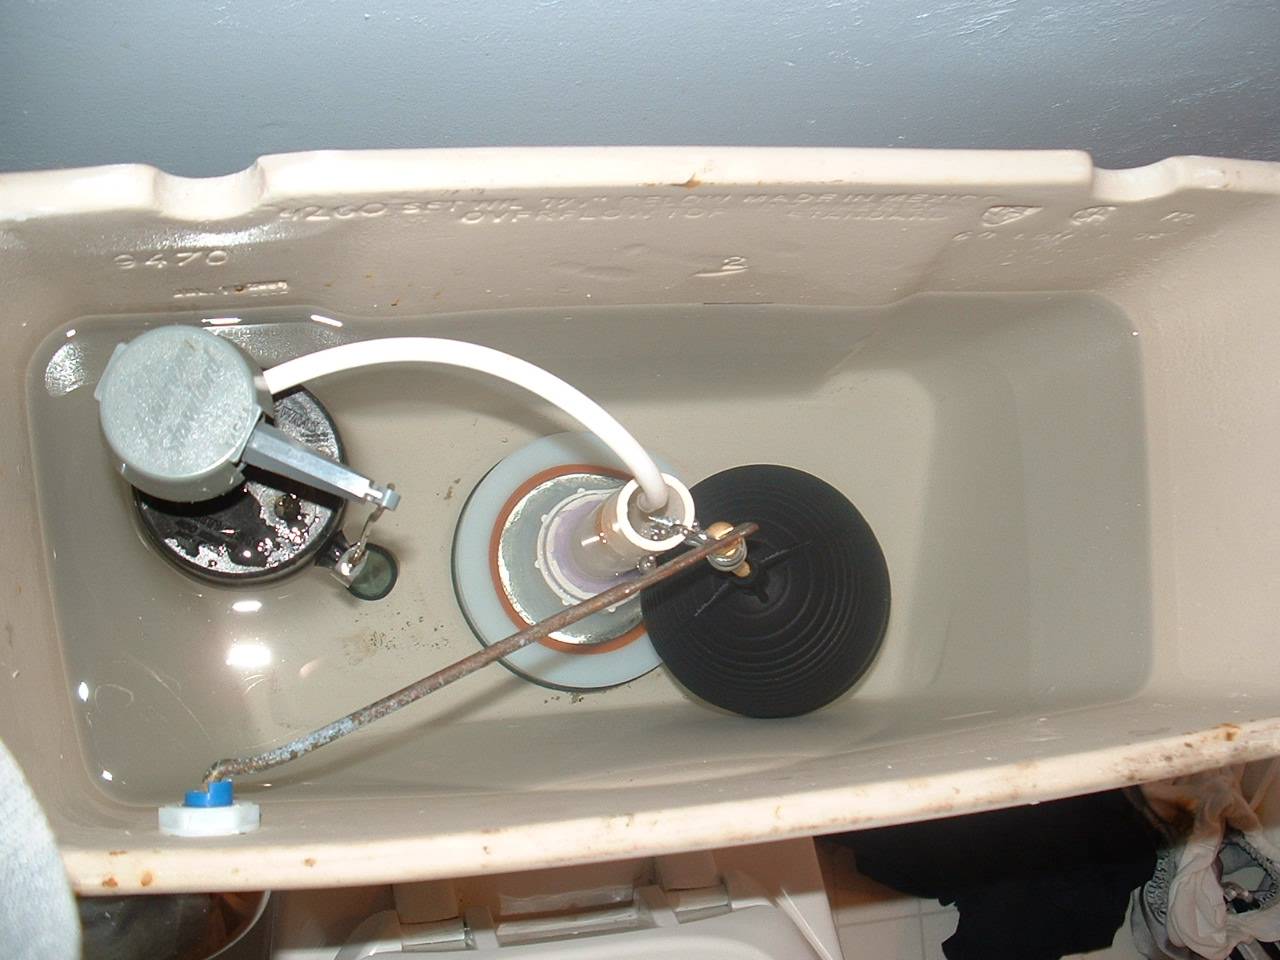
- fix the fittings responsible for filling / draining water, using rubber gaskets where necessary;
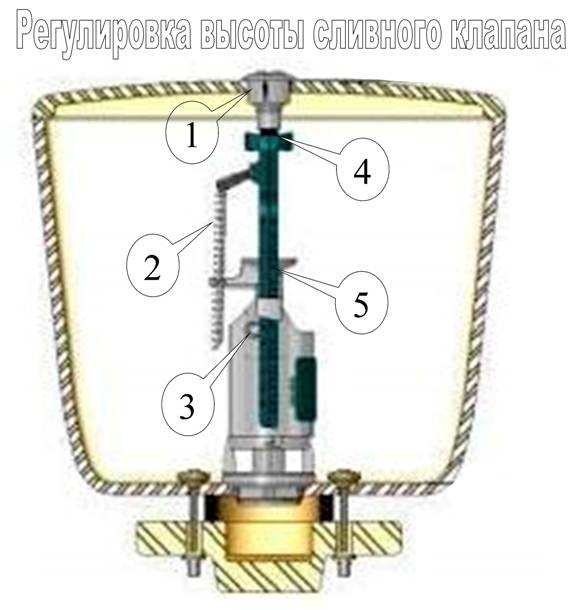
- adjust the position of the float and drain valve;
- cover the tank with a lid;
- screw on the push-button cup (in models with one button) or tighten the fastening screw and click on the control buttons - in two-button modifications.
As you can see from the above, there is nothing difficult in self-installation, repair and adjustment of flush cisterns for a toilet with a button. And for most people with at least a little technical skills, it will not be difficult to carry out these procedures on their own, saving on calling a plumber.
How to open (remove the cover)?
Currently, modifications are being made that allow removing the cover without any additional operations. The buttons in them are equipped with rods that transmit force to the control elements of the tank fittings.
But most plumbing manufacturers continue to produce models that require some manipulation to remove the lid.
To remove the cover in one-button modifications, it is necessary to moderately press on the ring surrounding the button and turn it in the opposite direction to the clockwise movement.
If this operation fails immediately, you should drop a couple of drops of any liquid oil, or resort to using a screwdriver, pressing it with the tip on the ring and turning it. Once the ring has been torn off, it is usually easily unscrewed by hand.
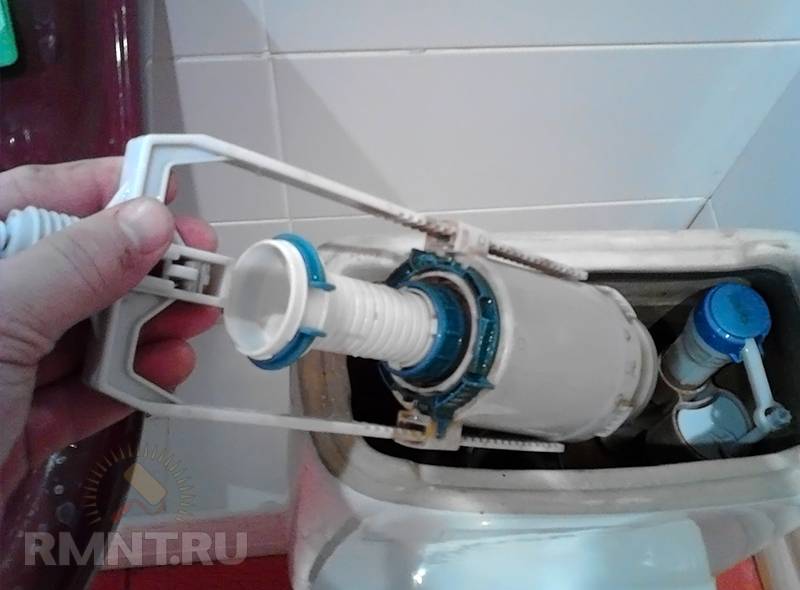
Next, you should carefully move the cover to a position perpendicular to its normal position, and carefully release the button block from the plastic clothespins. Then you can remove the lid from the tank and put it aside.
How to disassemble (open) a toilet cistern with a button for later DIY repair - find out from a short video:
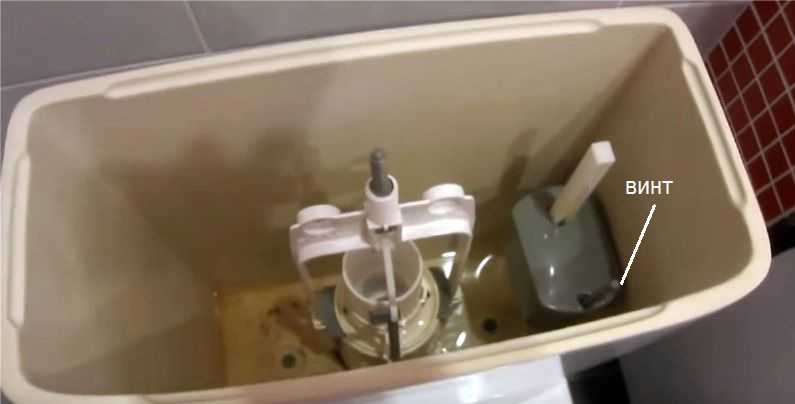
To dismantle a cover equipped with a two-button unit, it is usually enough to press any button, after which a technological groove will become available on the adjacent button. It remains to tuck this button and remove it, and then dismantle the second one. Then unscrew the fastening screw and remove the cover.
How to remove the lid from the toilet cistern with a button?
Breakdown of plumbing is quite a standard phenomenon, because sooner or later everything breaks down. The toilet is no exception. For repairs, of course, it is always easier to call a plumber, but if you have trivial problems with the drain, and your hands grow from where you need to, you can fix everything yourself. The main thing here is to know how to shoot toilet cistern cover with a button, so it is these toilets (Jika, Roca, Cersanit, Santek) that are most often found in our apartments today, and removing the lid from them is much more difficult than from plumbing equipped with levers or chains. Difficult, but possible!
So, turn off the water (a common valve or a separate tap), drain all the water from the tank and proceed to actions - their sequence in this article will be considered using the example of a Cersanit toilet bowl.
How to remove the lid from the toilet cistern with a button: step by step instructions.
- Pressing the center of the button, pinch its inner and outer sides with your fingers.
- While holding the button in this way, start turning it counterclockwise until it is completely unscrewed. Don't forget to count how many revolutions you need! At the stage of assembly, this information will help you a lot.
- Pull out the button and remove the cover.
The inside of the cistern is freely accessible.
How to remove the lid from the double button toilet cistern?
- Click on one of the buttons and find a second small slot inside.Pry this slot with a flat screwdriver and remove one of the buttons. Then do the same with the second button.
- When the buttons are removed, a slotted screw hole will open in front of you. Remove this screw.
- Then proceed by analogy with tanks with one button: unscrew the cylinder to which the buttons were attached counterclockwise, remove it and open the lid.
If you have a more complex system installed in your toilet, then trying to cope with it yourself is a waste of time! Call a plumber, he will do everything in the best possible way, however, you will have to pay for it.
The main causes of cracks in the toilet cistern
Plumbers identify three common causes of toilet cistern damage;
- mechanical impact;
- installation errors;
- temperature drops.
Toilet bowls are made mainly of earthenware or porcelain. Both materials are more demanding in terms of care. Therefore, regardless of the operating conditions, the toilets begin to leak over time. In some cases, it is impossible to eliminate defects using the described methods. This, in particular, applies to large fractures of the base of the bowl.
Mechanical stress
Chips, cracks and other damage to the toilet bowl occur when any solid object falls onto the plumbing fixture from a sufficient height. Often, defects arise from a blow to faience or porcelain, even a bottle of shaving foam. In this regard, it is recommended to install cabinets in which household chemicals and other items are stored, if possible, aside from the toilet.
Temperature difference
Cold water is used to drain the toilet. This choice is due to several reasons (including savings in utility bills). On contact with hot water, earthenware and porcelain begin to expand. Moreover, this process takes place only in a certain area. Due to uneven expansion, stress occurs within the material, resulting in cracks.
Installation defects
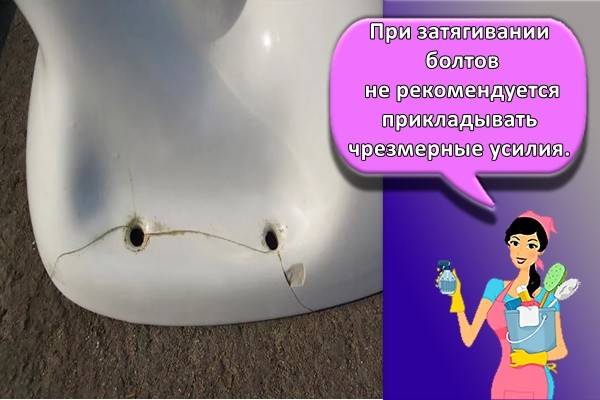
It is not recommended to use excessive force when tightening the bolts holding both the toilet bowl and individual parts of the plumbing fixture. Because of this (against the background of the increased pressure exerted by the fastener), tension also arises inside the material, as a result of which the porcelain and faience are covered with cracks.
Bonding large cracks: methods and materials
What to do if the toilet or cistern is cracked and the crack is through? A two component epoxy will be required for bonding. For work - a drill with a drill for ceramics and a grinder with a diamond-coated disc. The sequence of work occurs in the following order:
- Holes are drilled at the ends of the crack - this is necessary in order to stabilize the load and prevent further propagation of the crack;
- Further along the contour of the fault, it is required to walk with a grinder so as to expand it. You need to act carefully so as not to aggravate the problem with additional chips;
- The fracture area is cleaned from the remaining particles after cutting and drilling, degreased with acetone;
- Next, epoxy is applied - the mixture is added in small quantities, spread with a spatula to eliminate the appearance of excess. If the resin is liquid and the fracture has formed in a vertical area, you can glue it with tape to form a depression for the resin, which will not spread over the surface.
- Once completely dry, you can sand the surface with fine sandpaper.
Using the methods described above, you can repair a toilet with a cistern with minimal investment and in the shortest possible time.
How to glue properly at home
The difficulty in gluing the toilet cistern arises due to the fact that cracks and chips on the surface of faience and porcelain do not have a smooth texture. Because of this, the adhesive does not hold together the parts of the broken appliance worse.Therefore, this procedure often has to be carried out two or more times.
What is needed
For gluing porcelain and earthenware products you will need:
- fine sandpaper;
- acetone (gasoline), which is needed to remove grease from the toilet;
- glue;
- Scotch.
You will also need wipes to remove excess adhesive. Before proceeding with gluing, it is necessary to turn off the water supply and drain the tank.
Surface preparation
The procedure for preparing the surface for restoration work depends on the nature of the defect. This procedure will require more effort with deep cracks that run on both sides of the tank.
Unilateral damage
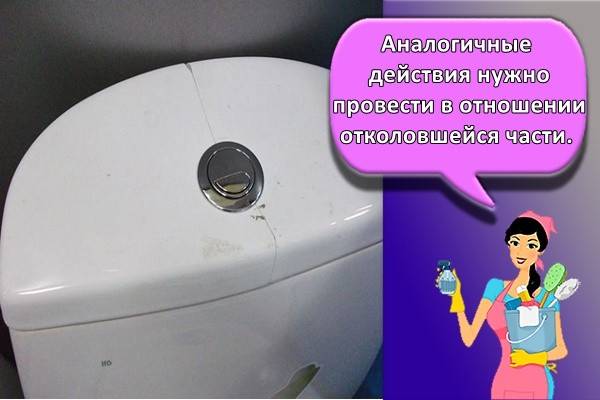
In case of one-sided damage, the cracks must first be cleaned of dirt (a brush with stiff bristles is suitable for this), and then wipe off grease using acetone or gasoline. Similar actions must be taken in relation to the breakaway part.
Bilateral cracks
Before proceeding with cleaning the surface and gluing the cistern, it is recommended to use a thin ceramic drill to make a hole at the end of the crack. This is necessary in order to prevent further discrepancy between the defect and the split of the plumbing. Then you need to use a grinder to expand the crack and process the inner surfaces according to the described algorithm. In the future, the damage is sealed with a two-component epoxy resin.
Bonding technology
The procedure for gluing earthenware and porcelain appliances depends on the size of the defect. The algorithm within which this procedure is carried out is the same for all used formulations.
Universal waterproof adhesive
Adhesives of this type are recommended to be used to eliminate defects in places that are not constantly in contact with water:
- the junction of the tank and bowl;
- toilet rim;
- the outer side of the tank and others.
The gluing of the cistern is carried out in three stages. Debris and other foreign particles are removed first. Then the material is stripped of fat. And after that, glue is applied and the broken off fragment is pressed. The period during which you need to hold the material is indicated in the instructions for the glue.
Epoxy resin
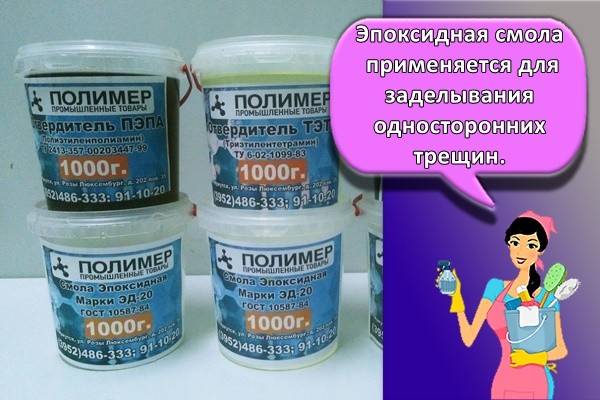
Epoxy resin is used to seal one-sided cracks. This product removes defects better than all-purpose glue. To repair a damaged reservoir, you must mix the two components of this agent (hardener and resin) and apply to the problem area. After that, you need to press the gluing place. In this case, any remedy will do, including scotch tape. After the resin has hardened, it is recommended to clean the gluing site with fine sandpaper and felt.
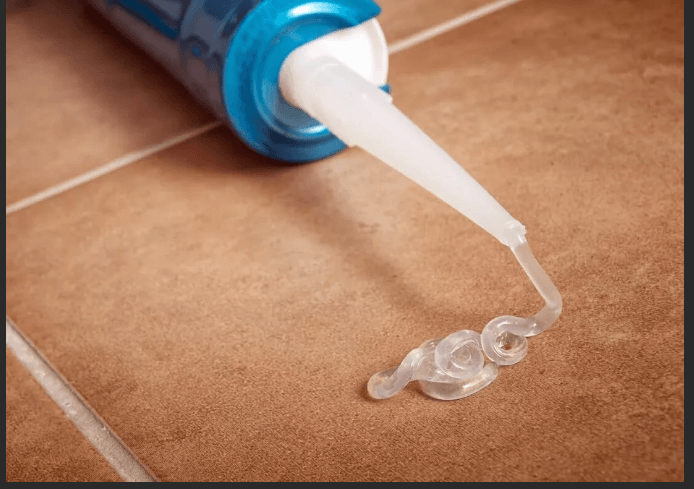
Silicone sealant or liquid welding
Both products are suitable for repairing small cracks and adhesion of chipped fragments. Surface preparation for this case is carried out according to a similar algorithm. If a sealant is used, then first you need to saturate the surfaces with silicone, removing the excess with a spatula, and then walk with a soapy hand, thereby smoothing the composition. This recovery option is convenient in that the tank can be used 20 minutes after the completion of the manipulations.
Liquid welding gives the same result as sealant. This tool must first be rolled out in your hands, and then applied to problem areas, tamping into the cracks. After the four hours required for the paste to harden, sand the surface with emery paper.
It is recommended to treat the surface with fine-grained sandpaper in each of the above cases. If the crack was large, then after sealing, the bonding sites should be painted over in the appropriate color. Otherwise, the area where the defect lay will stand out against the background of the rest of the tank.
How to glue a cracked toilet
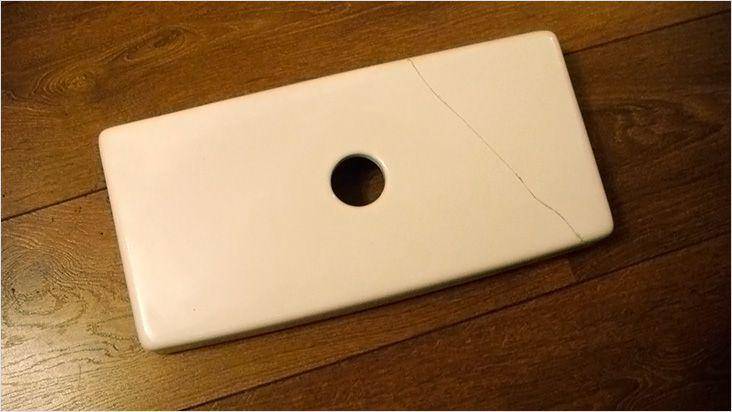
You can glue the toilet in the same way as any porcelain or ceramics.For this, specialized adhesives or universal reliable glue are used. Epoxy and other moisture resistant binders will also work.
The disadvantage is the relatively smooth texture of the chip, which does not have a sufficiently high level of adhesion in order for the gluing to be done quickly. So don't be discouraged if something goes wrong the first time. You may have to repeat the procedure, completing all the individual steps with better quality.
What do you need
In order to seal the crack in the toilet, you need a fairly simple set of accessories:
- Fine polishing sandpaper;
- Wipes for removing excess adhesive;
- Acetone or gasoline for surface degreasing;
- The adhesive itself, which can be selected in accordance with the recommendations below;
- Scotch tape for fixing.
Before carrying out work, you need to turn off the water and remove its excess from the toilet, dry the work area. This is a general recommendation for all types of gluing jobs.
Surface preparation
Before gluing, you will need to carefully treat the surface to improve the quality of adhesion of materials.
One-sided damage - clean the adhesion site from dirt that may have accumulated inside. You can use a stiff brush for cleaning. After cleaning, it is necessary to degrease the ceramics with acetone or alcohol;
Bonding points on the shard and on the toilet are cleaned of dirt and poorly adhered parts. Further, the surface is degreased with acetone and glued;
Bilateral cracks - in this case preparation is more difficult. To do this, a hole must be drilled at the end of the crack to avoid further splitting. Use thin ceramic glass for drilling.
Next, you need to embroider the ditch with a grinder half the thickness of the ceramics. Then you need to degrease the surface. Bonding in this case is done with a two-component epoxy resin.
Preparation is an important step. The strength of the connection further depends on the quality of the work performed.

Seam bonding
When gluing a crack, it is important to choose the right composition:
- Universal waterproof glue for ceramics and glass - suitable for gluing the breakaway part from the rim or other place where there is no contact with water. Water-resistant glue adheres well to sanitary ceramics;
- Epoxy is a two-component epoxy that tackles through seams, sealing them for a long time. Can be used in areas in contact with water;
- Silicone sealant or liquid welding - used to seal the resulting scratches and prevent their further growth.
The listed materials do an excellent job of their task and can extend the life of a tank or toilet bowl for a long period. However, in practice, in case of cross-cutting splits, all measures are temporary.
Cracked tank: how to glue
If you are thinking about how and what to glue the toilet cistern, then you can use the same tools and technologies as when working with bowl. However, an important condition is a high-quality cleaning of the tank before gluing, especially if the crack is through or formed on the inside.
Since the tank is constantly in contact with water, limescale forms on its walls, which reduces the adhesive properties of the ceramics. You can clean it with a regular sandpaper. Work is carried out until the complete removal and appearance of a layer of ceramics. After cleaning, the resulting surface defect is repaired.

How to independently adjust the water supply?
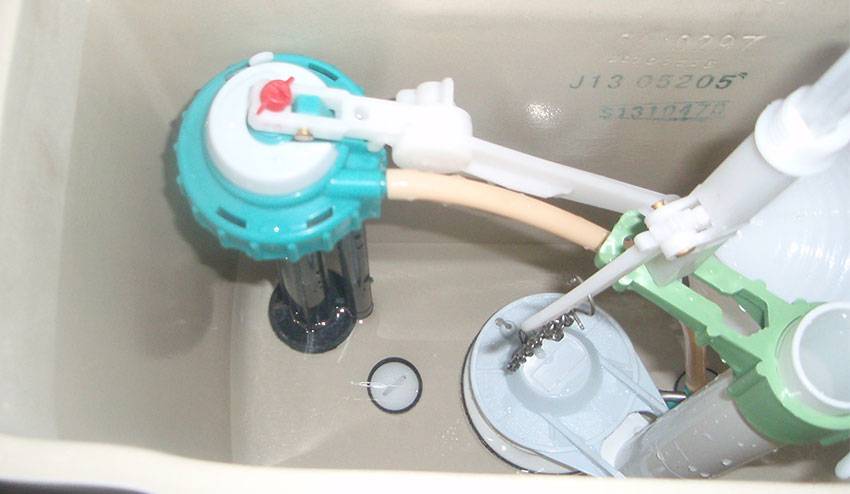
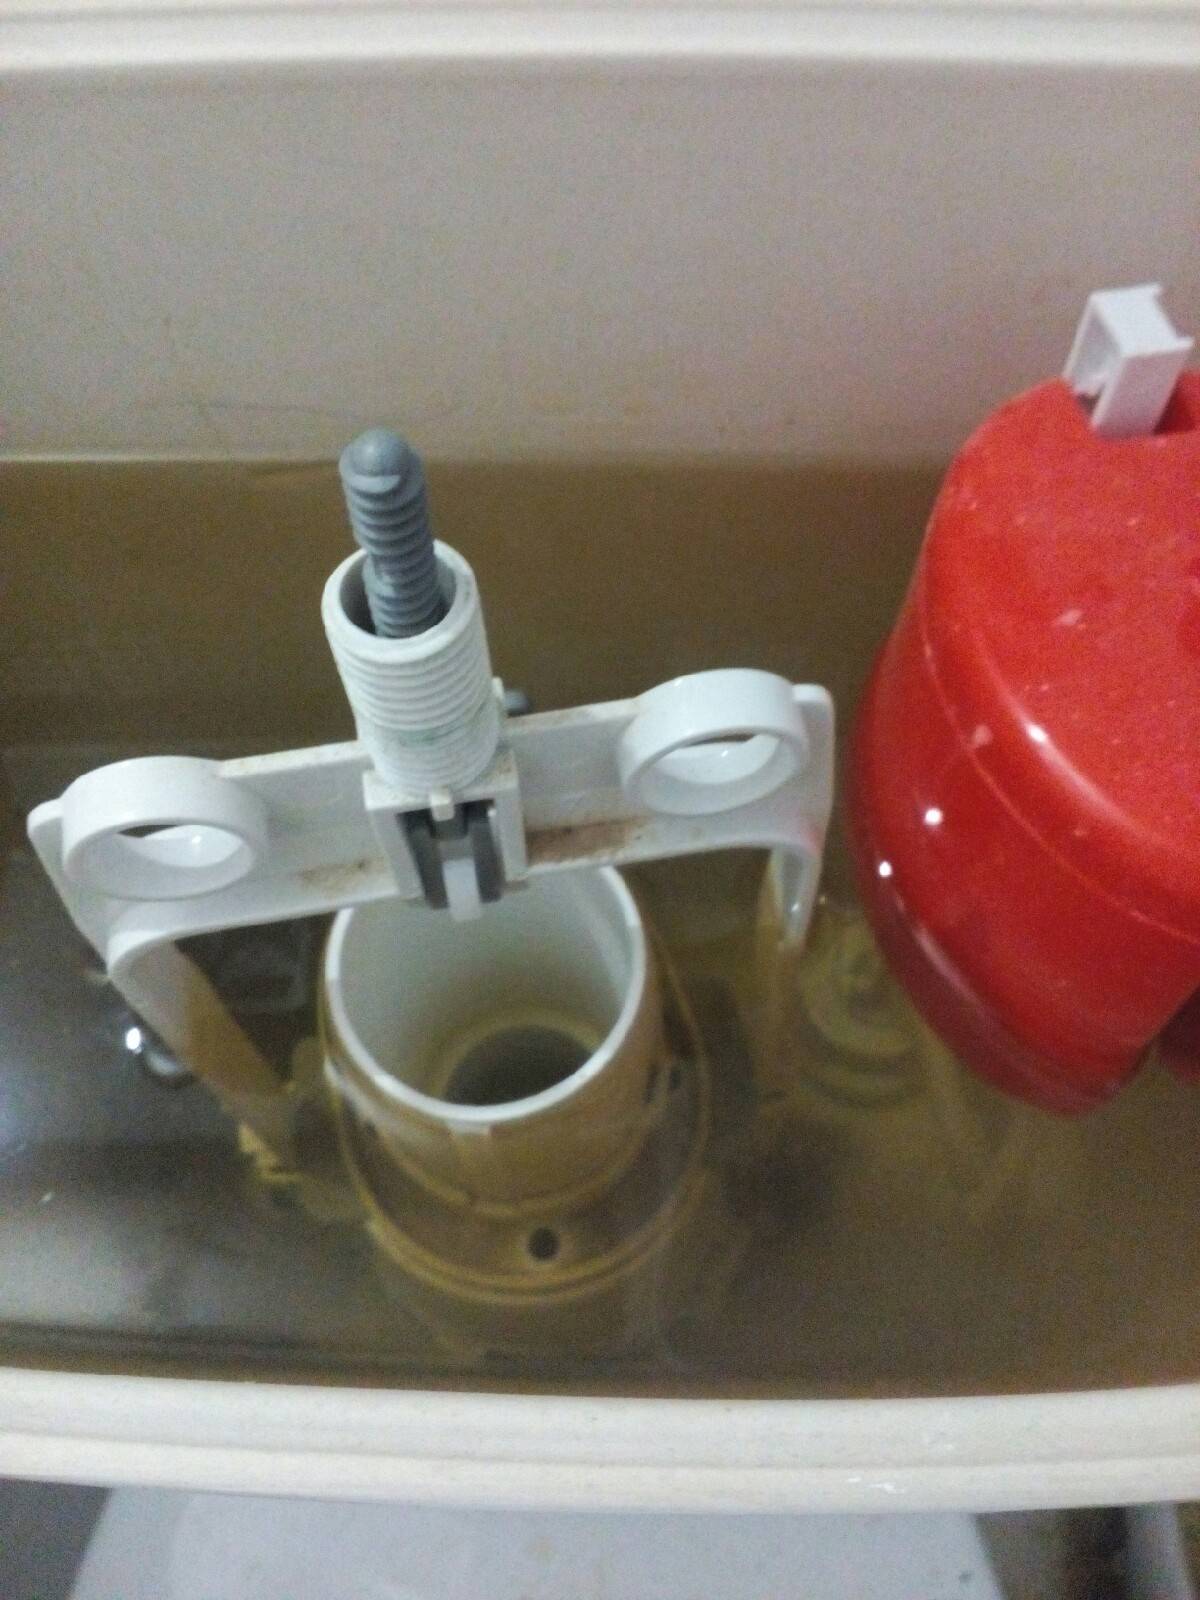
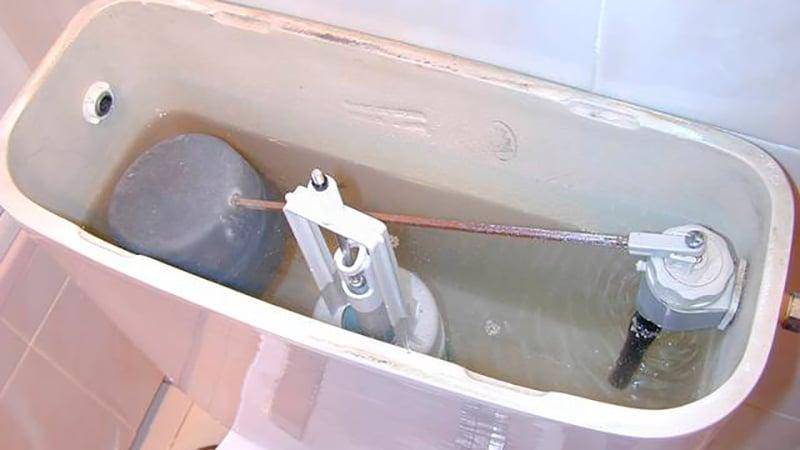
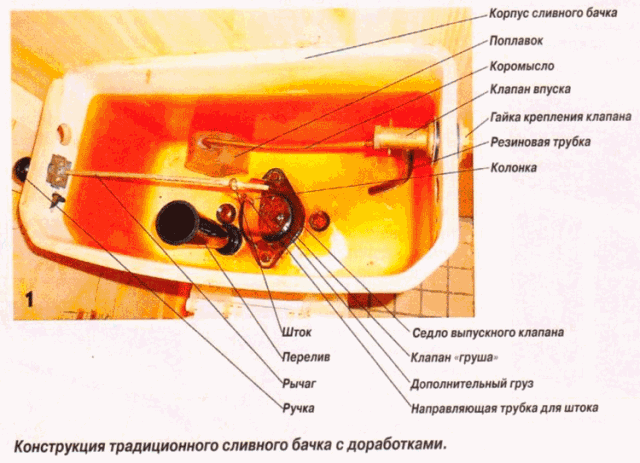
The filling level of the toilet cistern is adjusted in the same way in all modifications - by setting the correct position of the float.Its position is considered correct, in which the flow of water into the tank completely stops when it reaches a level that is several centimeters short of the edge of the tank.
Depending on the design of the fittings, the adjustment is carried out by bending the brass rod, sliding the float along the plastic guide and then fastening (if it is horizontal) or turning the adjusting screw clockwise (if necessary, reduce the filling level) or counterclockwise (if it is necessary to reduce the maximum level) - for modifications with a vertical float arrangement.
The position of the overflow tube also influences the filling level of the container. Its top edge should be one to two centimeters above the water level in a fully filled tank.
To adjust the height of the drain valve in one-button models of cisterns for the toilet, after dismantling the control button and removing the lid, move the control rod to the desired position, and then securely fix it.
There are two such rods in two-button versions. To adjust the flush cistern for a toilet with two buttons, remember that one is responsible for complete flushing, the other activates the partial flush mechanism.
How to adjust a flush tank with a button - watch the video:
Adhesive recipes
Now on the market there is a sufficient number of professional materials and ready-made glue for the restoration of ceramics.
You should not invent a bicycle if you can buy a ready-made product that is optimally suited to the specified adhesion parameters - resistant to water ingress, vibrations and other mechanical stress.
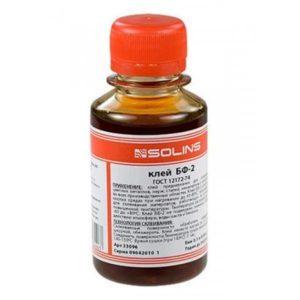
You can glue the toilet with epoxy resin, seal the seam with silicone sealant or liquid welding, attach the broken part using industrial-type BF 2 glue. Using a ready-made adhesive composition, you will save your time and get a high-quality result.
Sealing cracks with epoxy
Epoxy resin is one of the most effective and reliable compounds for sealing joints. As a rule, a two-component polymer epoxy is on sale - two containers are included in the kit, which contain a hardener and a filler.
For preparation, you must mix both components in one, clean glass, ceramic or metal container. Mixing is carried out in accordance with the recipe indicated by the manufacturer on the product packaging. After mixing, the composition needs to be infused for some time.
The gluing process itself is carried out as follows:
- The crack is thoroughly cleaned of debris and dirt;
- If the chip is large or deep, you can try to process it with sandpaper folded in half using the edge of the folded sheet, after which you need to clean the surface with a brush again;
- The gap is treated with acetone or alcohol to remove fats and other chemical contaminants, dried with a napkin;
- Next, you need to cover the clean gap with epoxy. When applied, it is better to immediately remove the excess of the eposid protruding outward with a napkin;
- After drying, which can take from 30 minutes to 4 hours depending on the type of material, the surface should be sanded with the finest grit sandpaper.
If the work is done correctly, the gluing will withstand contact with water, and the toilet will last a long time without leaks. In this case, the seam will not be as noticeable as when processing with other materials.
Crack bonding with silicone sealant or cold welding
You can find silicone sealant at hardware stores. It is sold in flexible tubes of various sizes, including small tubes. It is such a sealant that we will need to save the budget for materials. Cold welds can also be found at hardware stores.In appearance, it is an elastic material of a metallic color.

If you are in doubt about the best way to glue the toilet, then both of these materials have the same effectiveness and bond strength. Cold welding is more noticeable on a white surface and, after its application, it may be necessary to touch up the treated area with acrylic moisture-resistant paint or moisture-resistant varnish to match the faience.
Bonding cracks and chips is done as follows:
- The surface is carefully sanded and cleaned of small fragments;
- Degreasing is performed;
- Apply silicone sealant - for work it is better to use a flat plastic spatula, with which you can gently apply and level the paste. The surplus is removed with a napkin;
- After drying, the treatment area is sanded with sandpaper.
If cold welding is used, then preparation to fixation is done by the same in the same way as with the sealant. A piece of cold welding must be rinsed well before application so that it becomes soft like plasticine. It is better to do this with gloves, as it gets your hands dirty.
After the cold weld is ready, it is applied to the seam by pressing with your fingers so as to fill in any voids. The excess is cut off with a flat knife. After 4-5 hours, the surface can be sanded for leveling and covered with white paint to hide visible defects.
Installed toilet cisterns
Installations - special designs of cisterns. Installation models are designed in such a way that when the tank is disassembled, the wall has to be partially demolished. The lid is removed approximately according to the following algorithm:
- lightly press the button from below;
- remove it, prying it upwards;
- unscrew the screws with a Phillips screwdriver;
- carefully remove the clips;
- remove pushers from plastic;
- remove the brackets;
- squeeze out the upper clamps;
- remove the partition;
- shut off the water in the tank by moving the tap to the end;
- remove the valve mechanism and rocker;
- fold back the petals and remove the lower retainer.
The flush valve does not need to be removed. When disassembling, only the upper part is removed. To do this, turn it counterclockwise. The upper part of the valve is set aside separately. The flush mechanism has become smaller and can now be easily removed from the tank.
Homemade adhesives recipes
For gluing porcelain and earthenware, you can prepare your own compositions from the following components (optional):
- 1 part glass to 2 parts sifted sand. Then add 6 parts of sodium silicate.
- 1 part lime to 2 parts chalk and 2.5 - sodium silicate. After mixing, the composition must be applied immediately.
- 1 part turpentine to 2 parts shellac. After mixing, the composition must be heated and then cooled. Before each use, the mass should be melted over a fire.
- Gypsum is kept in alum for 24 hours. Then the composition is dried, calcined and divided into several parts. Next, each piece is diluted in water until a creamy mixture is obtained.
The above formulations are recommended to be applied to problem surfaces immediately after preparation.
Replacing bolts in the event of a tank leak
How to fix the toilet cistern yourself if the water is not pouring into the right place, but right on the floor? Most likely, the steel bolts, which are the fastening of the tank to the toilet shelf, have rotted - they must be urgently replaced. Having bought a new set of bolts, we proceed to dismantle the tank:
- We shut off the water by turning the valve perpendicularly.
- We remove water and remnants of rusty fasteners from the tank.
- Unscrew the nut and disconnect the inlet valve.
- We unscrew the old bolts that fix the tank on the toilet shelf.
- Remove the tank from the rubber tight cuff.
- We take out the old bolts. You must remove both, even if only one of them is faulty.
- We clean the joints of the bolts with the tank and the tank with the toilet.
- Tighten the new brass or steel bolts.
- We install the tank on the shelf, after securing the cuff.
- We tighten the fasteners carefully so as not to damage the sanitary ware.
- We start up the water and check if it leaks at the bottom of the tank. We drain the water a couple of times and check it again.
Sometimes a leak can appear a little later, so for two days it is worthwhile to carefully examine the problem area from time to time. As you can see, it is not always necessary to carry out major repairs - sometimes it is enough to replace the fasteners.
You do not need a special tool to unscrew the bolts connecting the cistern to the toilet shelf: usually “ears” are provided for a comfortable grip
Toilet cistern fasteners are supplied at every plumbing store. The price of the cheapest is 40-50 rubles, the more expensive option will cost 250-300 rubles
Total overhaul: replacement of fittings
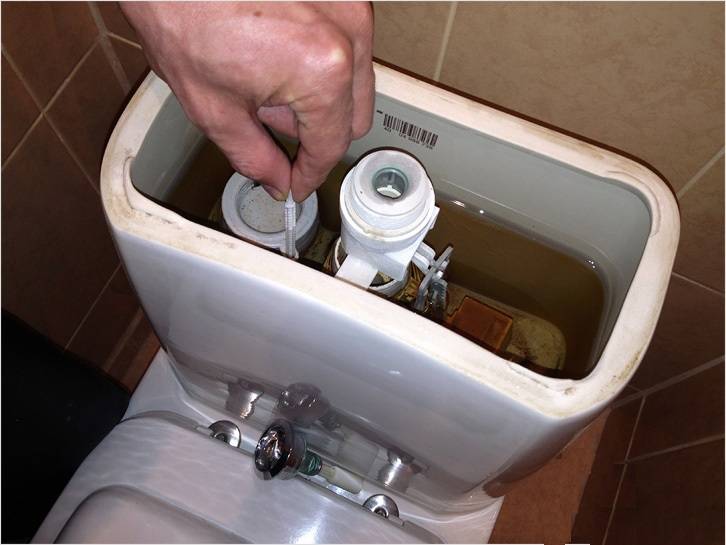
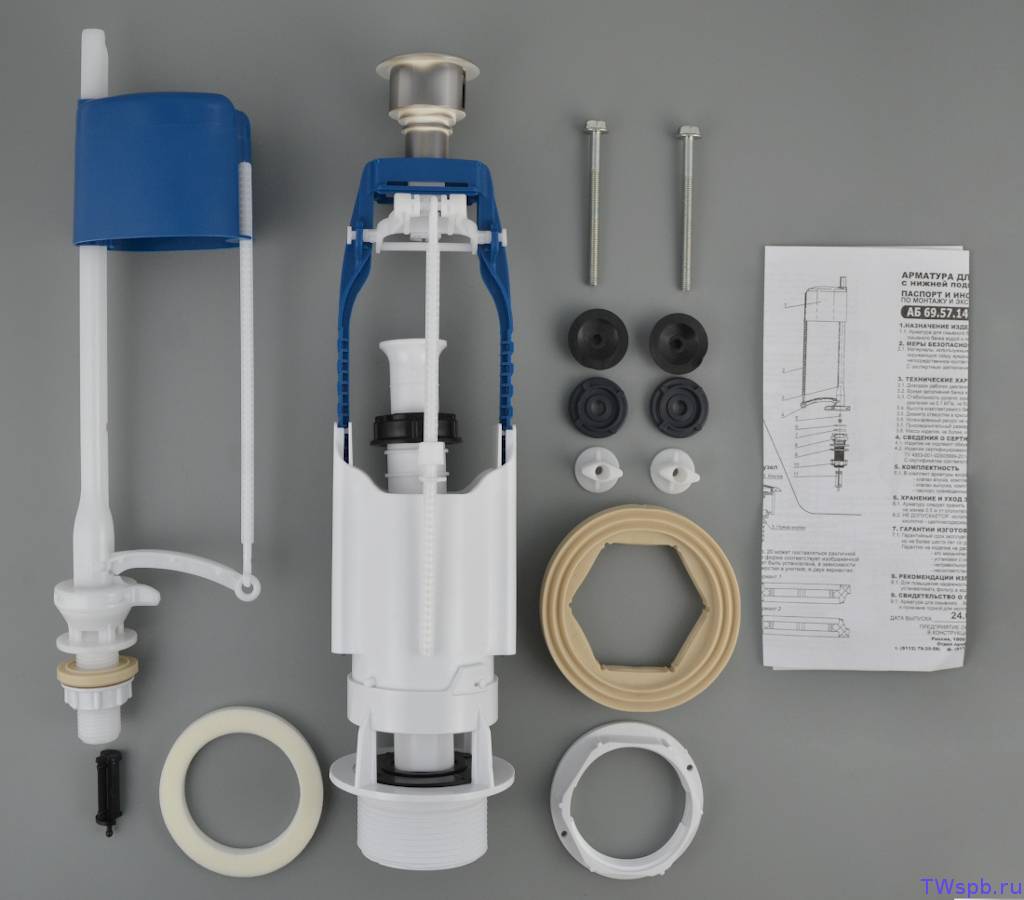
If you do not want to mess with small parts of the worn out fittings, you can simply remove the old one, and replace it with a new mechanism purchased from the store.
When removing old fittings, pay attention to faults. Perhaps a complete replacement of the mechanism is not required, sometimes it is enough to change one small part
The sets of fittings for cisterns have structural differences. For example, their structure is different depending on the type of liner - side or bottom
First, let's figure out how best to disassemble the toilet cistern using the example of fittings with a lower eyeliner:
- We shut off the water.
- Gently unscrew the button.
- Remove the cover.
- Disconnect the eyeliner.
- We remove the drain column in parts: first, we dismantle the upper part (by turning it 90 degrees).
- We unscrew the fasteners of the drain tank.
- We put the cistern for further work on the toilet.
- We unscrew two nuts: fastening the valve and the column, we take out the second part of the reinforcement.
- We install a new mechanism and carry out the reverse work on the installation of the tank.
As you can see, changing the insides of the toilet bowl is not difficult: the whole operation takes no more than 10-15 minutes. Another of the advantages of independent work is that no special tool is required, all actions are carried out with the help of hands, pliers and keys.

