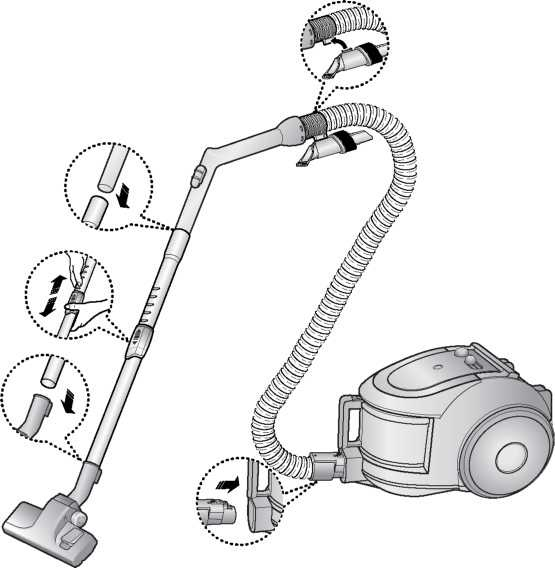
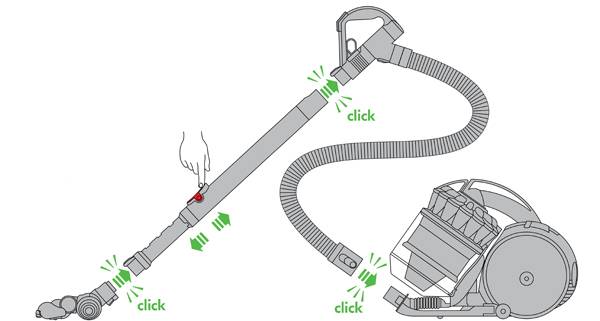
How to disassemble the telescopic tubes of the vacuum cleaner?
How to disassemble a vacuum cleaner tube
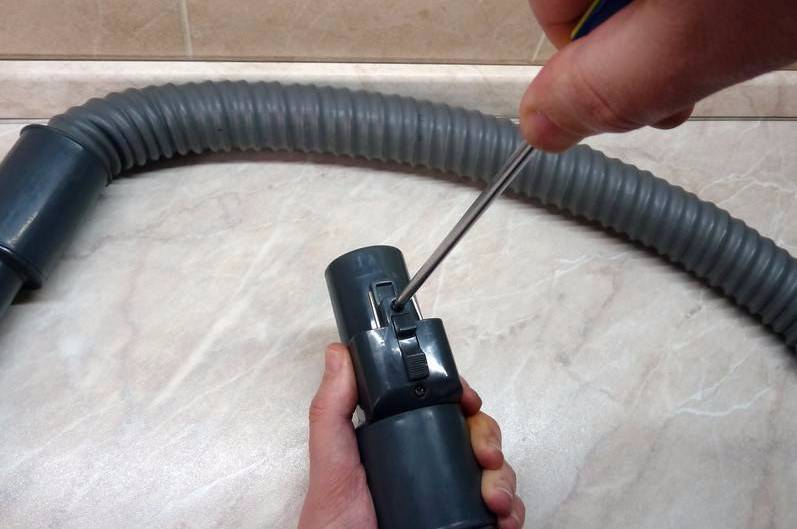
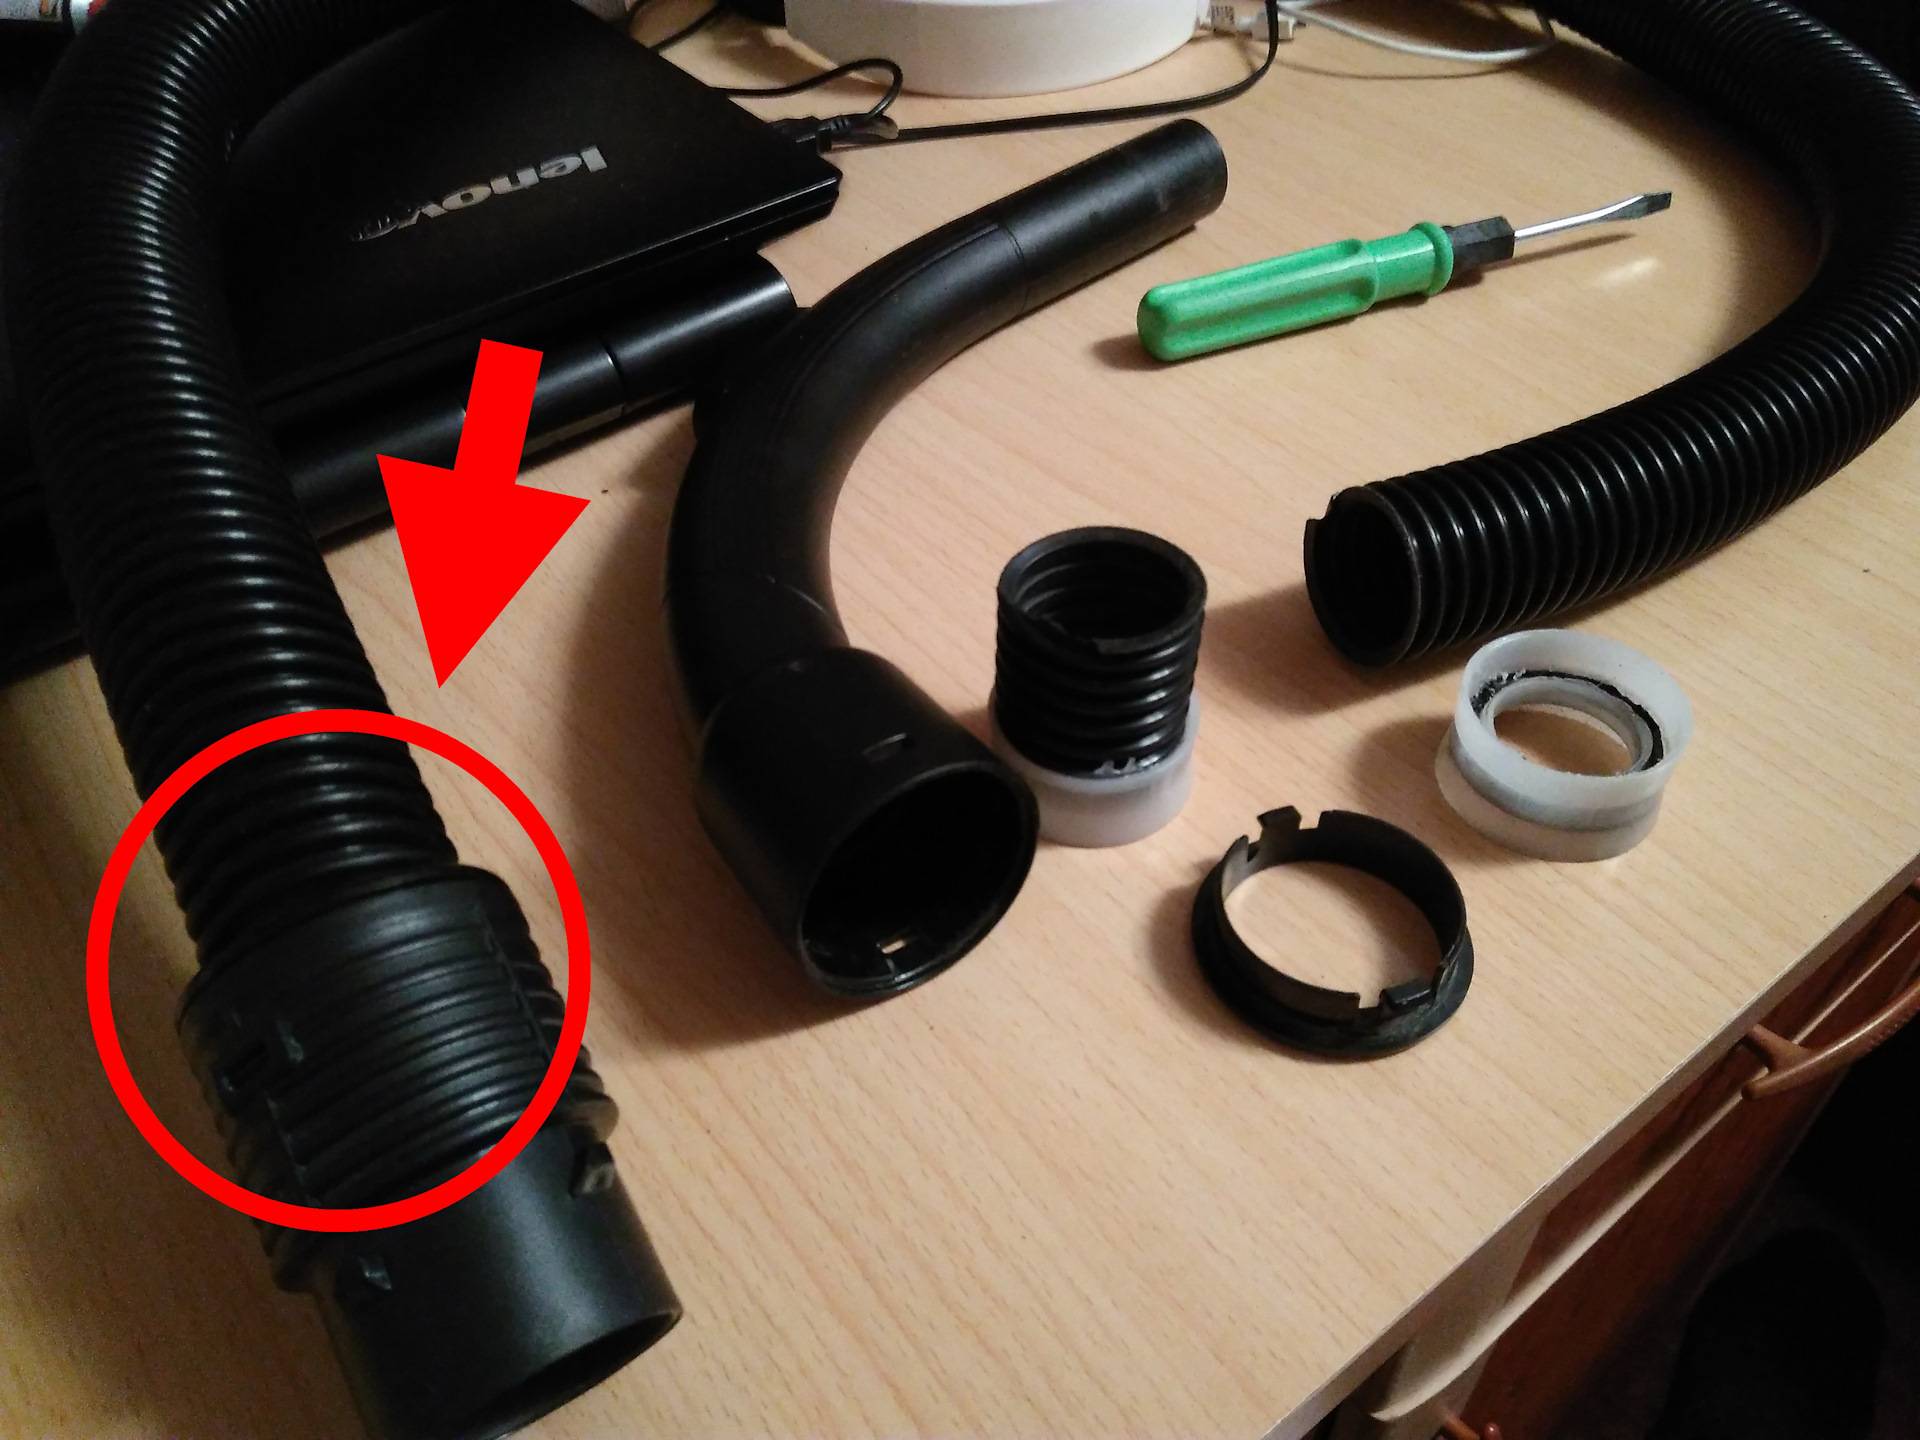
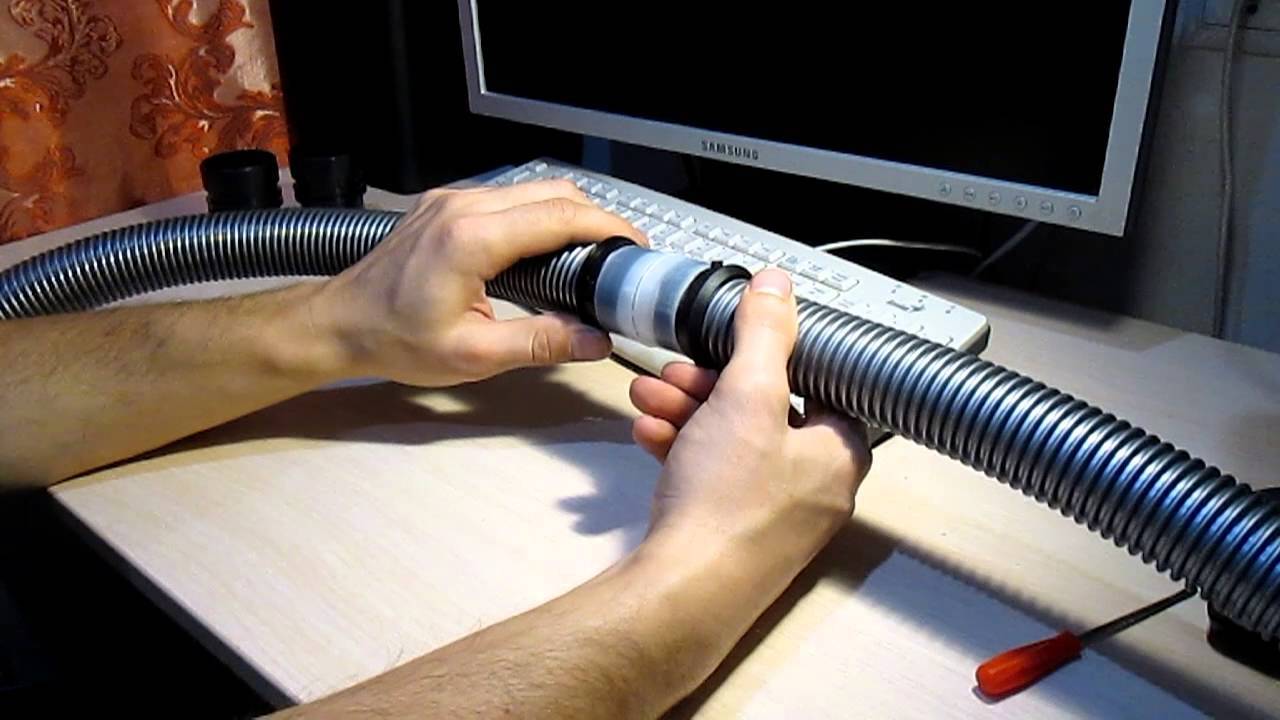
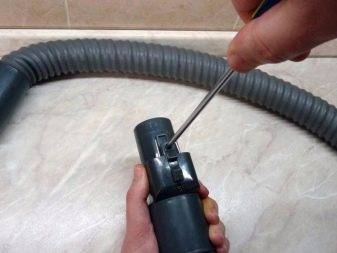
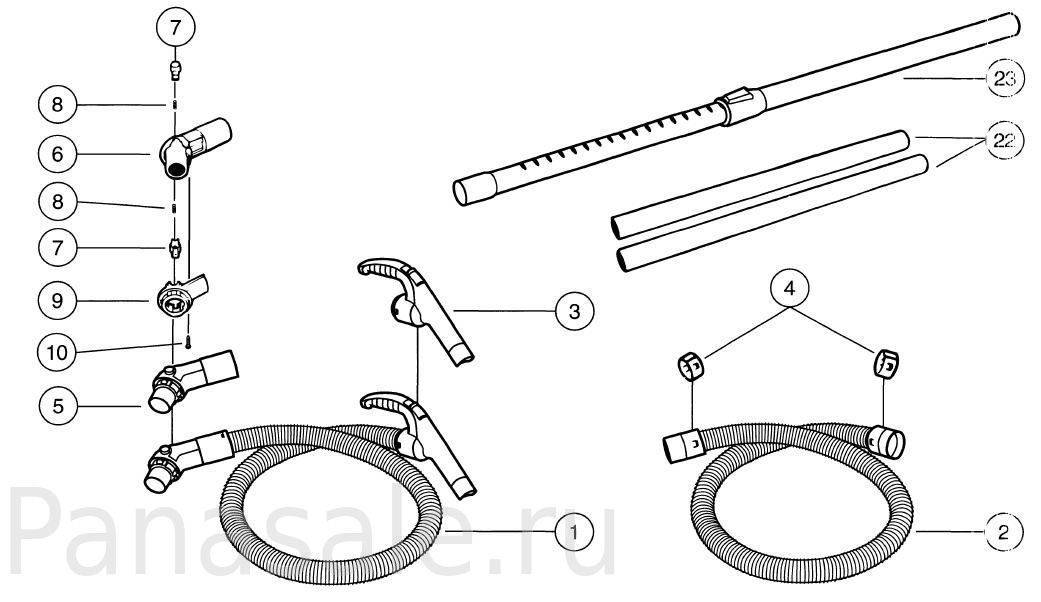
Carrying out self-repair of household appliances without special skills can be dangerous both for you and for the performance of the equipment itself. Therefore, it is better to contact a specialized service. But if you nevertheless decide to disassemble the telescopic tube of the vacuum cleaner yourself, then here is an approximate algorithm of actions. First unscrew both fastening rings and rotate counterclockwise on the vacuum cleaner tube.
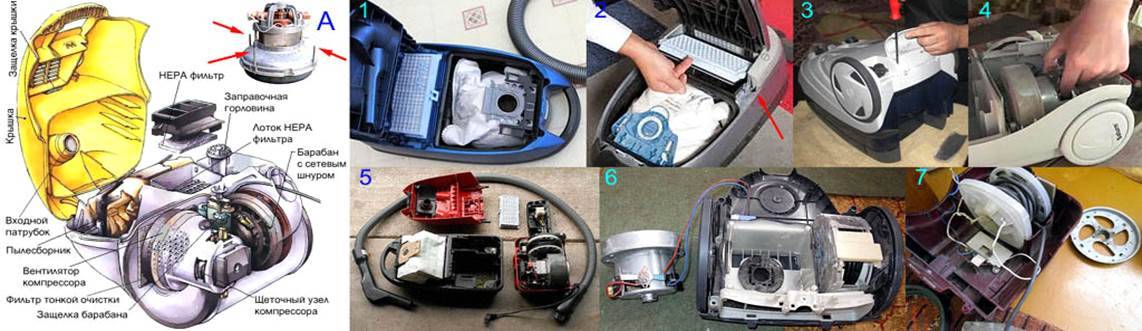
The material of the previous article talks about the consequences that can arise as a result of cleaning construction dust and debris with an ordinary household vacuum cleaner, even of such a brand name as Samsung. We recommend that you carefully read it. The consequences of such errors can be eliminated without disassembling the engine when it remains intact. However, it is likely that it has defects that require disassembly. Therefore, we continue to tell you how to repair the vacuum cleaner motor with your own hands and unscrew the anchor fastening nut in three ways with their detailed explanation with diagrams, photographs and a video
Here we should focus on the fact that a rotor rotates inside the housing with a stator winding, fixed on the shaft axis with two bearings
The first attempts to disassemble the motor and body of the LG vacuum cleaner will end in failure if you act at random. Modern technology is crammed with hidden screws, latches and other fasteners. In order not to break fragile parts, you need to have at least the slightest idea of how to disassemble an LG vacuum cleaner, find a malfunction and fix it. The main working unit of a household appliance is a motor. If it starts to work improperly, you cannot use the vacuum cleaner. An engine malfunction is determined by the following criteria:
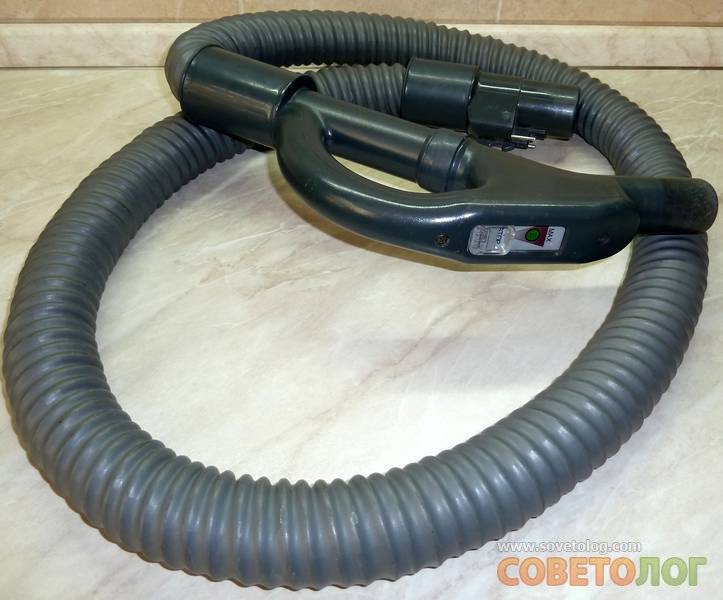
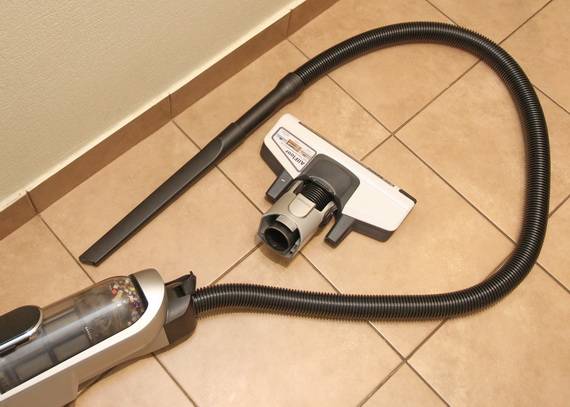
A significant proportion of used household vacuum cleaners are designs where a flexible corrugated hose is used. When the device is used for cleaning a room, loads of a different nature act on the flexible hose, which does not exclude damage to this part of the vacuum cleaner, right? You have had a similar trouble, and you do not know how to fix a vacuum cleaner hose with your own hands?

Even the best vacuum cleaners can't do their job if they don't get a steady stream of outside air. A wide variety of hoses and nozzles are used for this purpose. But at the same time, a telescopic tube for a vacuum cleaner has also become widespread.
Features of disassembling vacuum cleaners by brand and model
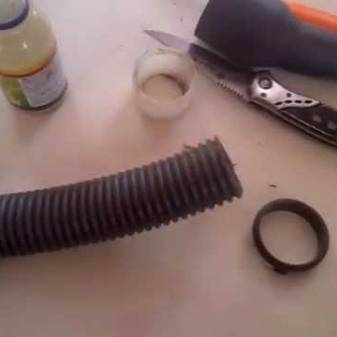
Every person thinks about carrying out repairs as soon as he hears a noise in the engine. This may be due to dirt and dust accumulated inside the system. To check, you need to disassemble. This will require tweezers, a vice, screwdrivers, wire cutters, and lubricant. In the process of repairing equipment from the company samsung, follow all safety rules if you do not want the recovery to end in injury for you. Do not connect the unit to the mains during the procedure.
Samsung
Disassemble equipment Samsung follows in strict order:
• First, remove the container that collects dust. Then dismantle the two filters;
• using a screwdriver, remove all the screws located under the removed filters;
• after that you can remove the shell, it can be removed easily, without any special efforts;
• be able to start cleaning the case. Use a brush or cloth to remove dust, but not wet.
All models from Samsung are created taking into account three main types of filters, the way of care will depend on them: dry bag, aquafilter, cyclone.
Electrolux
Dismantling the vacuum cleaner Electrolux in some respects it differs from other manufacturers.
• First you need to open the compartment where dust collects. Remove all screws and dismantle the grille. The manufacturer usually fixes it with screws and other types of fasteners.
• After that, remove the cover from the dust container and control buttons. They are usually located under one block. Once this procedure is completed, you need to get the dust container. It is fastened with latches, but depends on the type of unit.
• Further it will be possible to separate the shell from the base. This can be done after unscrewing a few bolts.
Please note that there may be more than one fastener, study the entire structure in detail
• Once the dust container has been removed, half of the procedure has already been completed. Then replace the filter located at the hose inlet. Disconnect the wires connected to the motor.
• Then the motor can be disassembled. Dismantle the casing, for this it is enough to have a metal ruler.
• It is worth taking care of removing the impeller. In models Electrolux, this part is seated on glue, so you will have to use a solvent to dismantle it.
• Now you can unscrew all the bolts and see the engine.
Once all procedures have been completed, inspect the mechanism for damage.
It doesn't matter if it's about 1600w, 1800w or Extra 1400w, the disassembly procedure will be approximately the same. Regardless of the type of unit, its heart is the engine. It is he who draws dust into the system, and the filter protects all parts from the penetration of dirt. Do-it-yourself repair of the device makes sense only if the heart of the device is absolutely serviceable and working smoothly. We recommend disassembling only if you need to change the brushes, lubricate the bearings. The main advantage is that all the devices inside are similar to each other, the difference is only in the mechanical details:


• element for collecting dust;
• frame;
• brush.
And the device itself remains unchanged. Therefore, if you have disassembled the Philips model, you will not have any difficulties with LG or Siemens.
In this case, the process can be significantly complicated only in washing devices. They have a water pump, it is she who transfers water to the dust collector and is installed on its course. Therefore, in addition to all the described procedures, you will also need to unscrew it.
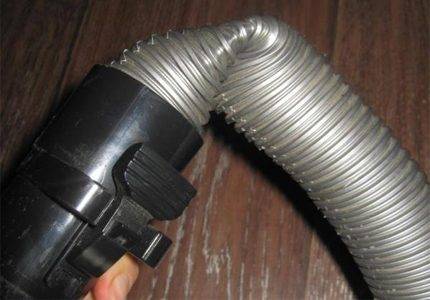
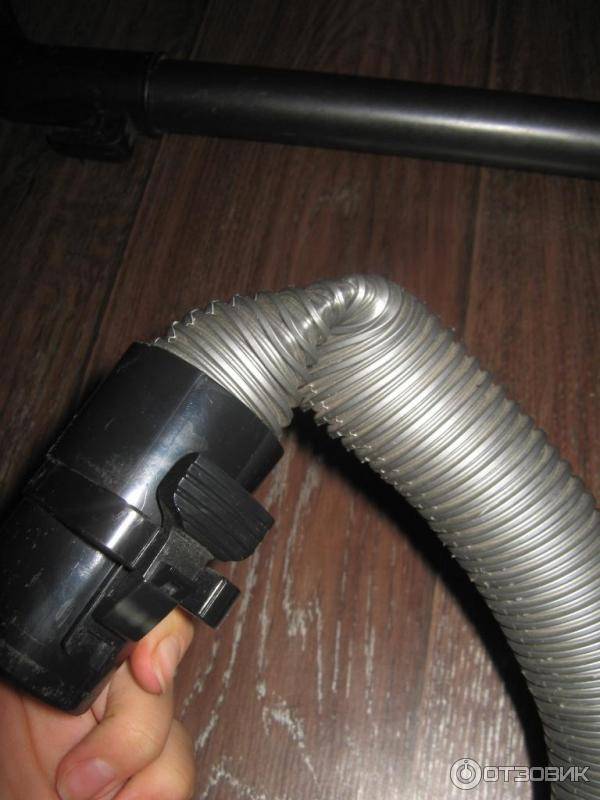
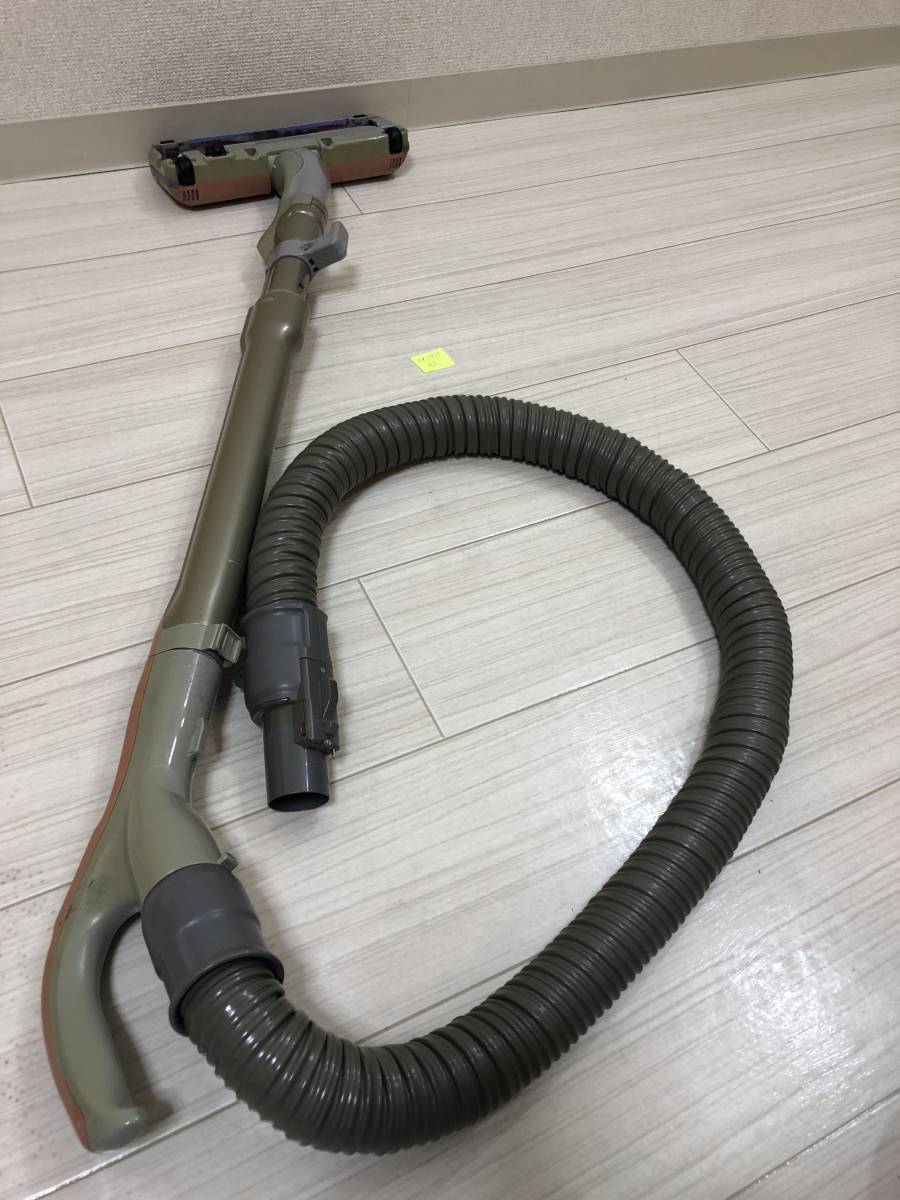
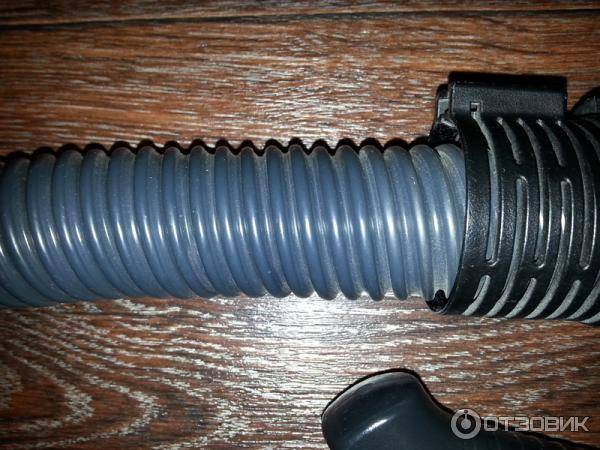
Features of the design of the vacuum cleaner hose
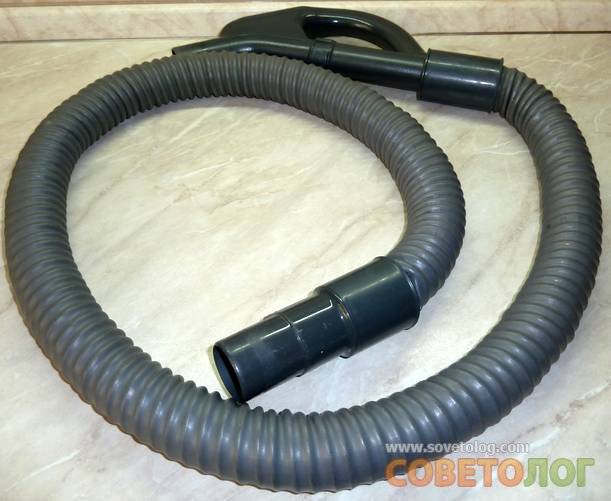
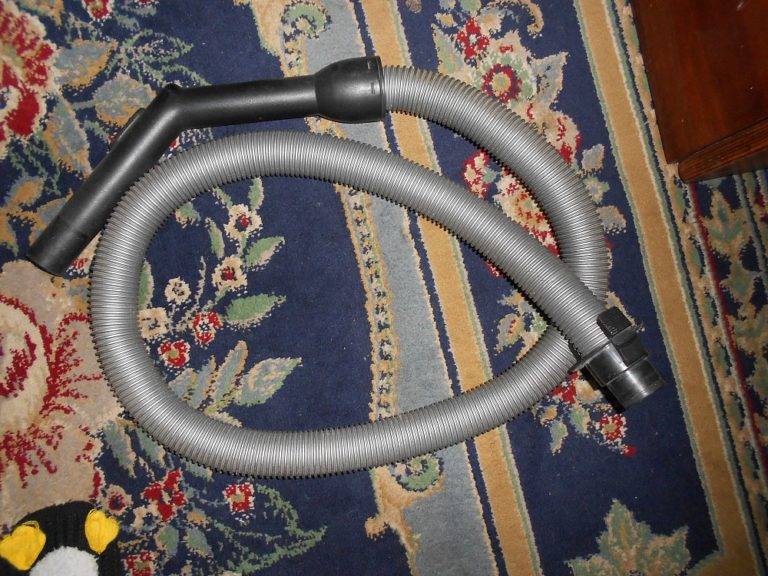
Before you start restoring this damaged element, you should understand its design. The hoses of most modern vacuum cleaners are made of polypropylene material, and they are corrugated flexible pipes with good elasticity. Due to these qualities, the hose may stretch / contract slightly. Its length ranges from 1.5 meters.
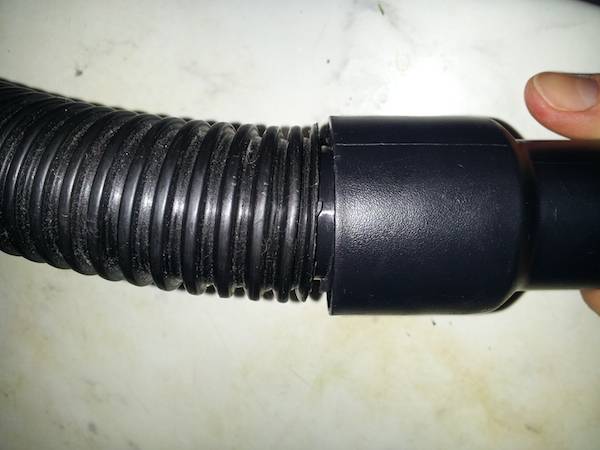
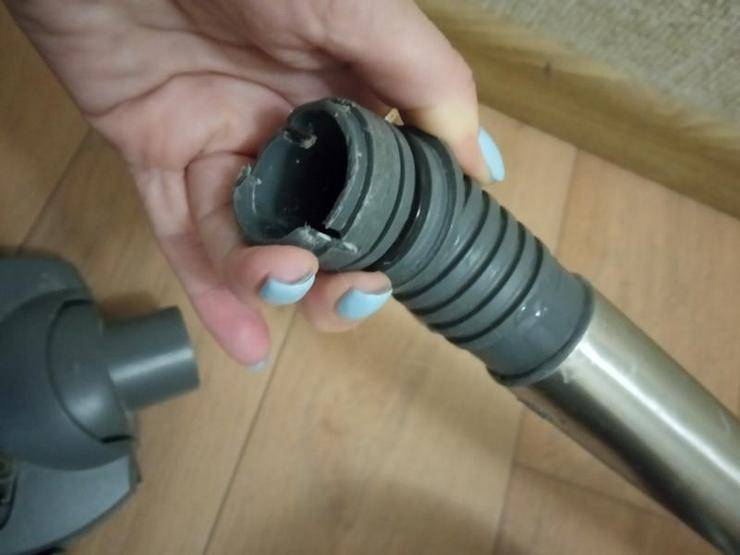
The ends of the sleeve on both sides are equipped with plastic fittings, one of which is fitted with an extension holder for the working attachment. The other branch pipe is nothing more than a sleeve inserted into the body of the apparatus.
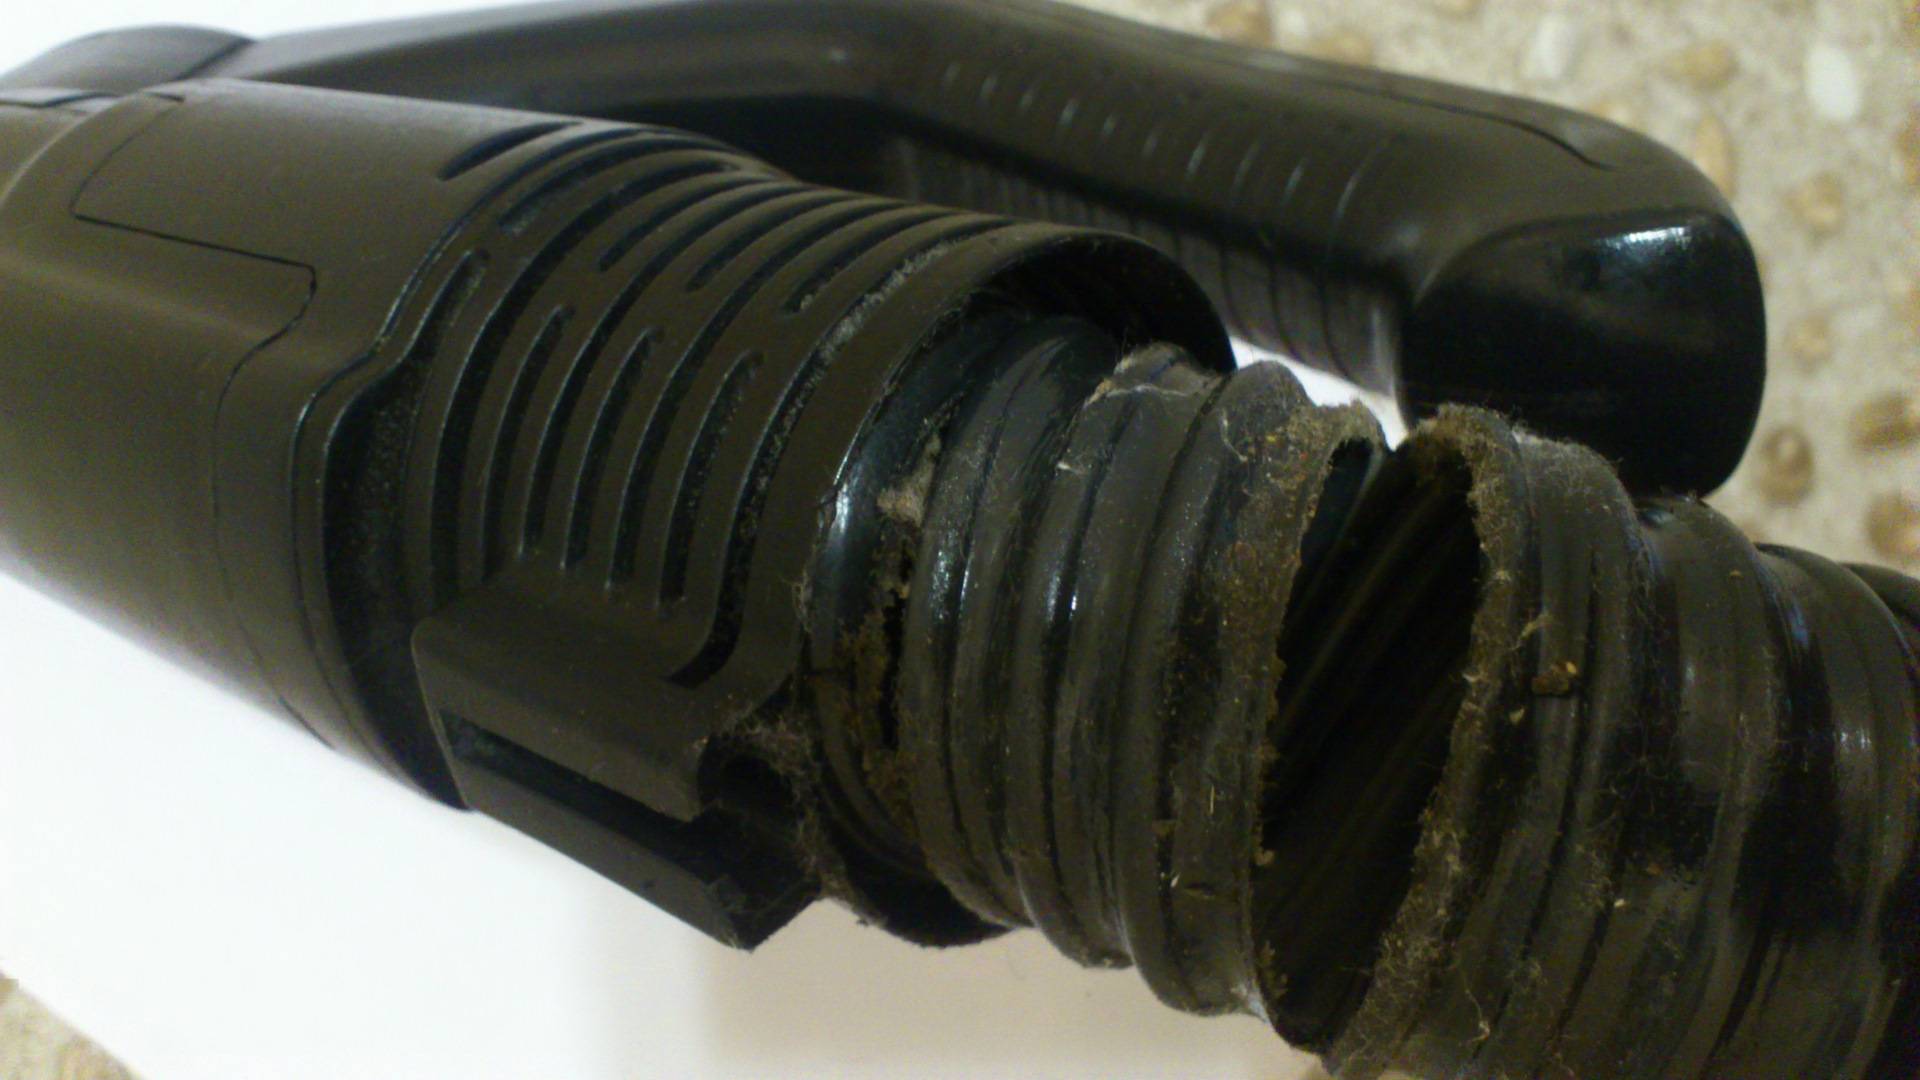
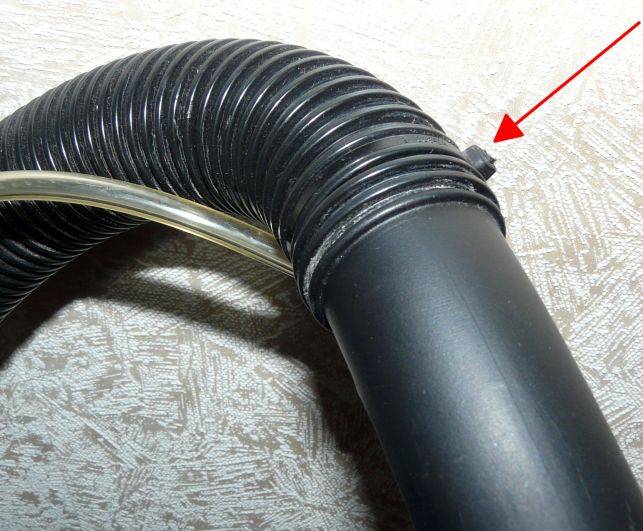
For reference. Basically, the integrity of the corrugation is violated near the place of its connection with plastic elements. Even the smallest defect is enough for the vacuum cleaner to pull poorly at constant power. No matter how much power you increase, traction will still remain weak.
How to fix a hose from a vacuum cleaner with your own hands
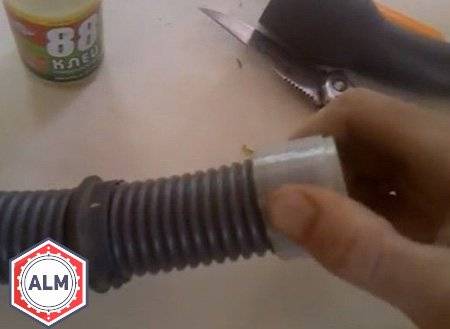
Cut off repair
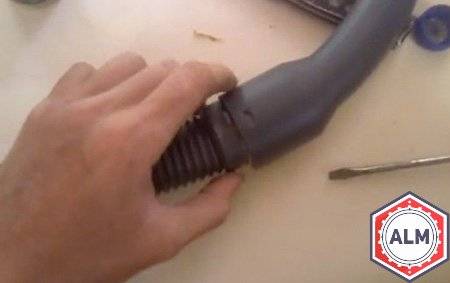
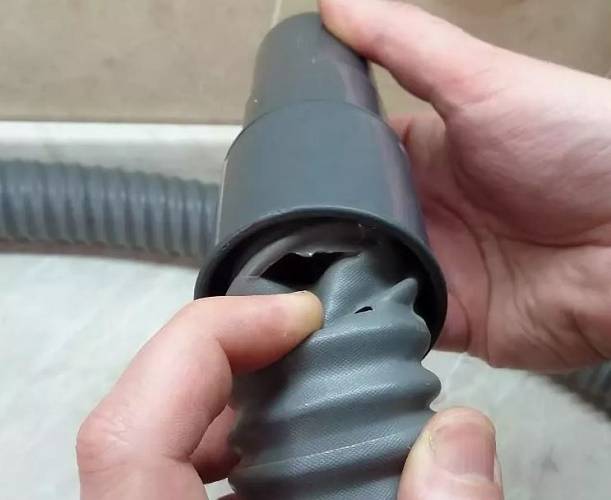
This method is used if a defect has formed at the junction of polypropylene with plastic. To eliminate it, you need to cut off a part of the hose with a sharp knife or a hacksaw for metal so that the damaged area remains with the plastic pipe. Then remove the torn part by freeing the tip and cleaning it. Now you need to treat its inner surface with a sealant and screw the cut corrugated pipe into the branch pipe.
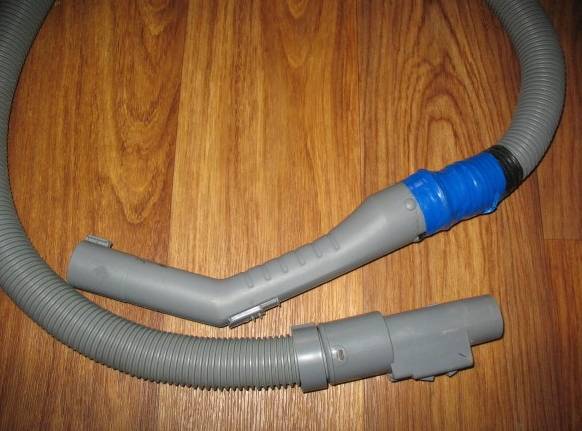
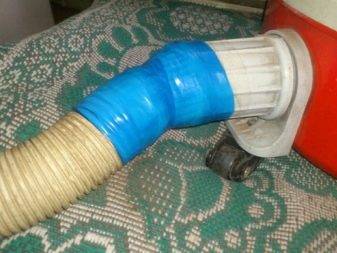
Bandage application
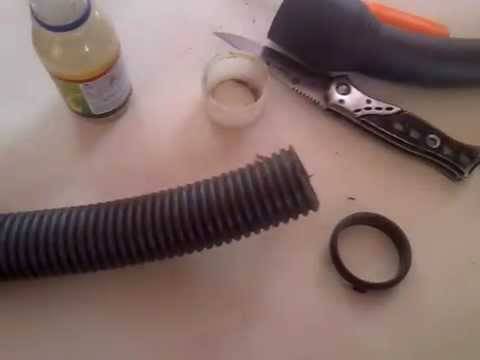
If the vacuum cleaner is handled carelessly, large tears, punctures, cuts, etc., usually appear on the sleeve. In this case, the product can be repaired by applying a bandage. It is used if the damage is located at a distance from the plastic.
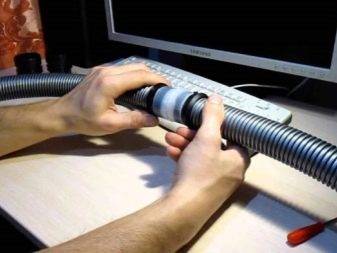
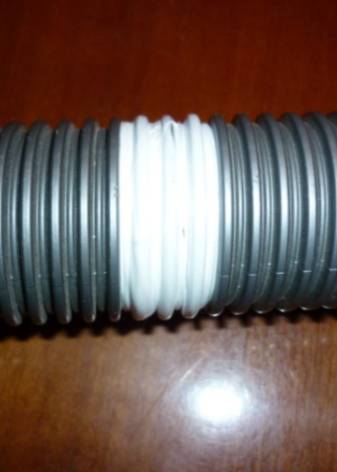
The work is carried out in stages. First, similar to the previous version, it is necessary to make a neat cut of the hose, only, in this case, on both sides of the damage, thus cutting out the defect. For the bandage, you can use a bicycle tube, from which you need to cut a piece 10 cm long.
The edges of the parts of the cut hose should be degreased, on one of which the rubber piece of the camera should be tightened so that a small part of the hose comes out from under it. Next, you need to apply a fast-acting glue, for example, "Super-moment", to both ends of the sleeve, and dock them. Tighten the band so that it adheres to each adhesive treated part of the corrugated hose. The junction should be located exactly along the middle of the ring.
Thermal repair
Here you need a hair dryer and heat shrink tubing. The advantage of the method lies in the high-quality restoration of the corrugation without shortening its length. Repair of a corrugated product is universal. The sequence of actions is as follows:
- select a heat-shrinkable tube according to the size of the hose;
- disconnect one of the ends of the corrugation from the plastic;
- put on the thermotube on the free edge of the hose and move it to the damaged place;
- heat up the thermal nozzle evenly around the entire circumference.
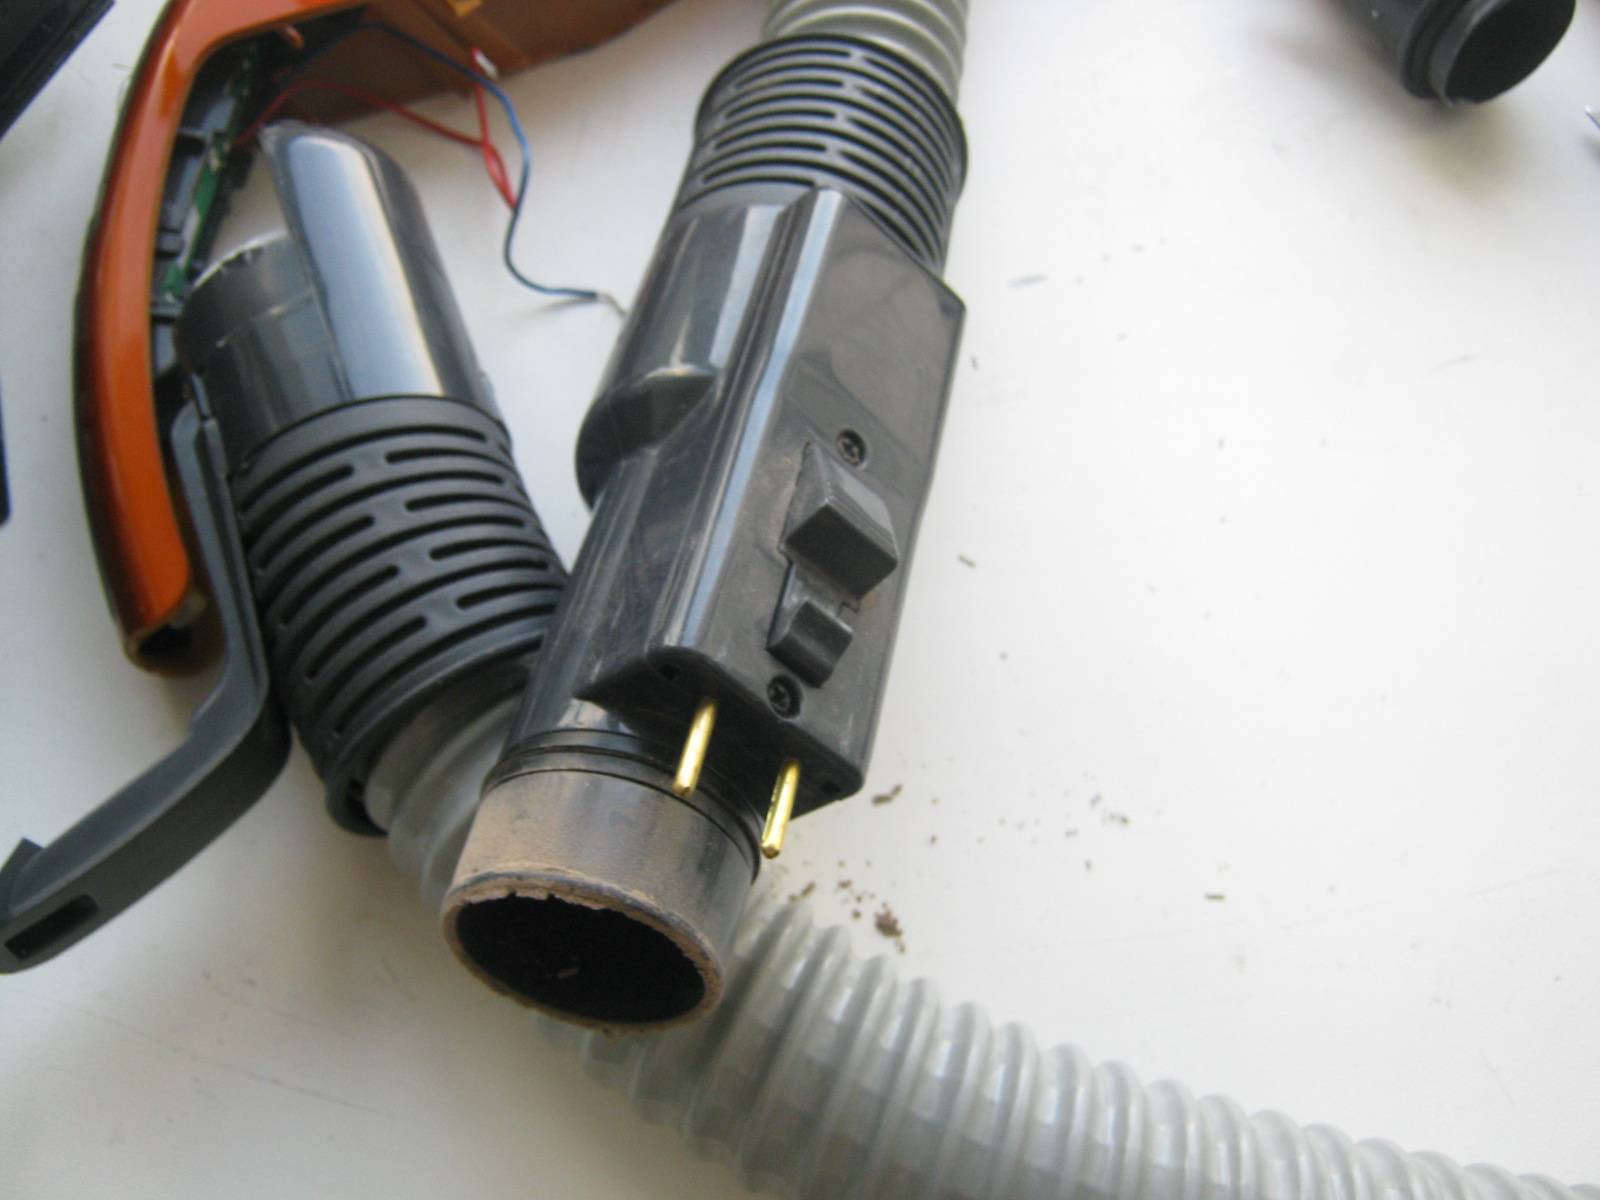
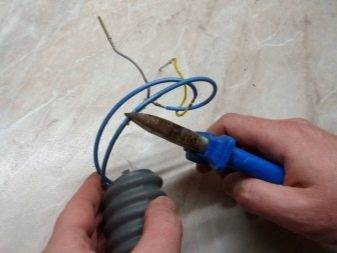
Reconstruction of a hose with internal conductors
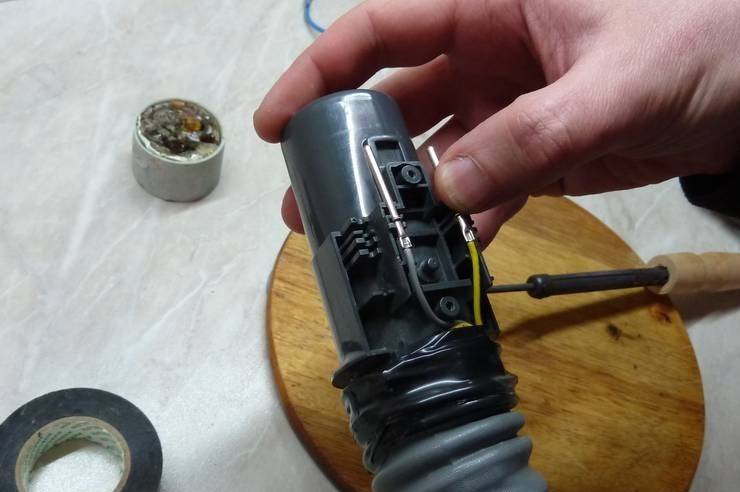
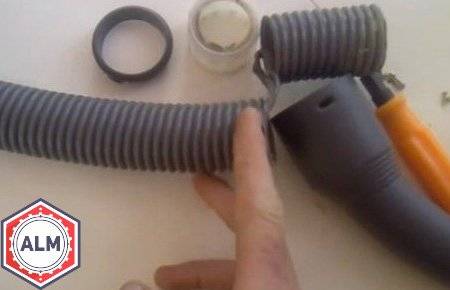
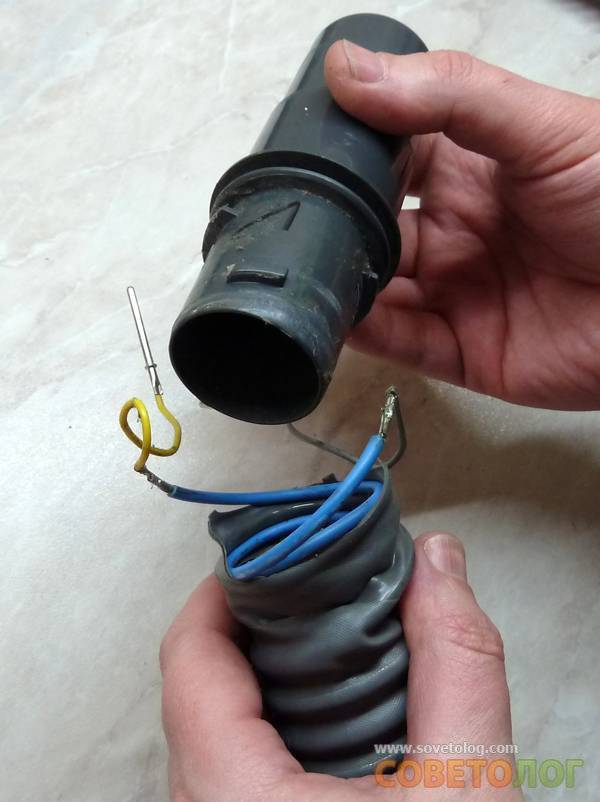
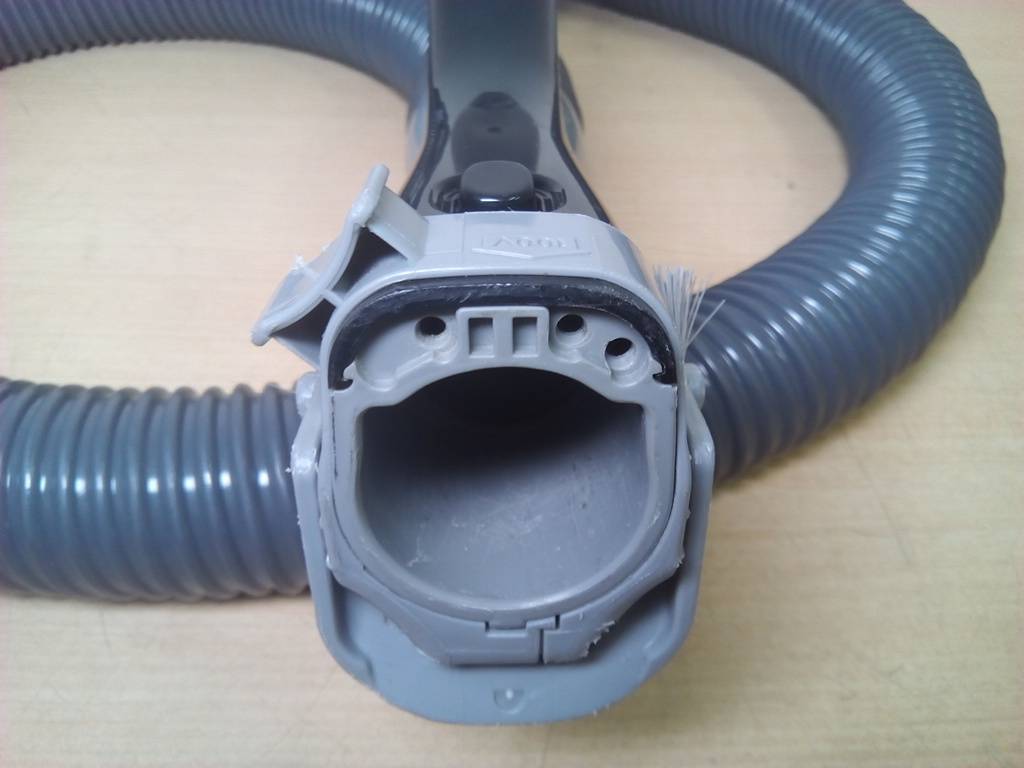
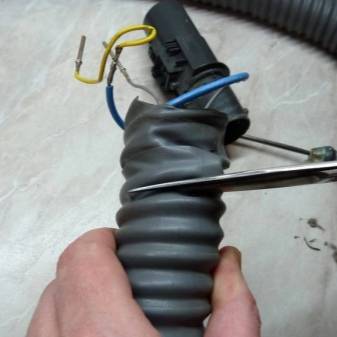
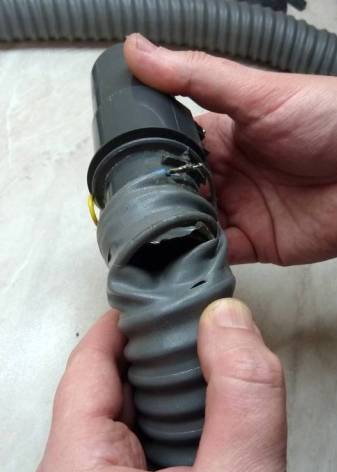
There are designs of vacuum cleaners where their power is regulated on the handle of the nozzle. In this case, the hose is equipped with wires built into it, through which the command is sent from the power regulator to the motor. Here, sleeve restoration is somewhat complicated. Repair actions are carried out in the following order:
- remove the extension holder to free the wire contacts;
- unscrew the plastic;
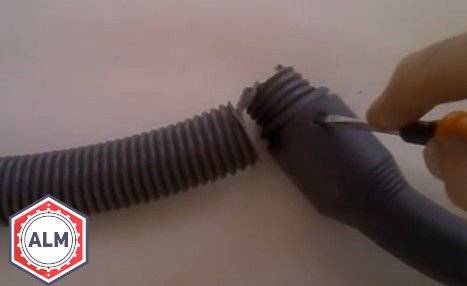
- carefully, so as not to damage the conductive electrical conductors, cut off the corrugation with marriage;
- solder electrical contacts on the conductors;
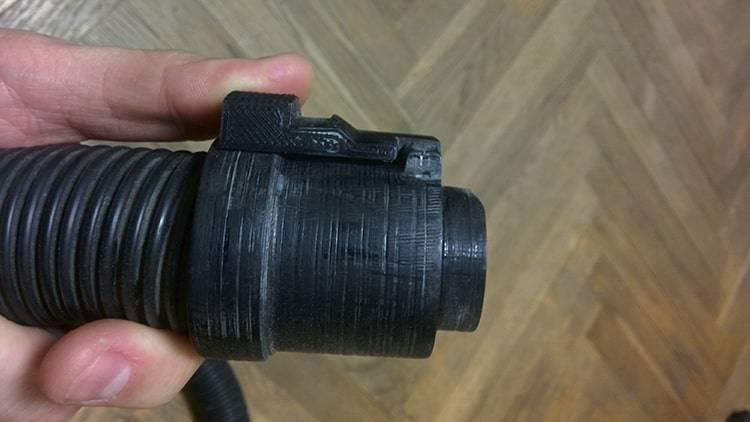
- reassemble the skeleton of the extension holder.
How to temporarily restore the hose of a vacuum cleaner
If there is an urgent need to complete the cleaning that has been started, when the vacuum cleaner hose breaks at the wrong time, you can use a temporary short-term repair option. Minor damages such as punctures or cracks can be repaired with tape or tape. Such a fix, although quick, is quick and short-lived.
Household Appliances Vacuum Cleaner
The most common malfunctions
If it is not possible to give the vacuum cleaner to the master for disassembly and assessment of its condition, you can find out what you need to pay attention to in case of a malfunction. After the appearance of problems, the bearings are checked first, which helps the engine to work.
 The specialist can quickly determine the problem of the breakdown of the vacuum cleaner.
The sound that is typical for them: a sharp rumble, rumbling, burning, overheating of the case. In addition to them, attention is paid to the anchor and the motor brush. A common problem is that the hose does not draw in dirt.
 In vacuum cleaners, the hose is often frayed.
The reason may lie in a clogged hose, an overfilled dust bag, or a problem with the HEPA filter. Often there is a problem when the unit pulls air, but the debris does not pick up normally. The problem could be a worn brush or a bad roller position.
 Motor failure is a serious problem.
If the equipment does not turn on and the electricity does not disappear, then the reason lies in: the protection against overheating or a malfunction of the power circuit, plug, wire, internal wires or a snag in the switch itself, or a snag in the switch itself. If the problem occurs with electronics, it is better to entrust this business to a professional.


 Only a professional service center will promptly repair your vacuum cleaner.
The indicator of this lies in the fact that during operation they found smoke, knocking out traffic jams, and a short circuit. This all suggests that the problem is focused on the short circuit inside the device. And frequent problems with collector arcing lead to rapid wear of the device.
Use the drawings to disassemble the vacuum cleaner.
Causes of defects
Cracks, tears, punctures on the body of the vacuum cleaner hose can appear for various reasons. However, the main reason, of course, should be considered the mishandling of this part.
What actions of the user lead to the appearance of defects on the corrugated tube body?
- Towing the vacuum cleaner from place to place through a hose.
- Bending the tube at unacceptable angles during cleaning.
- Careless use when cleaning objects with sharp edges.
- Storage not according to instructions.
The natural reason for the formation of defects should also be considered the expiration of the product's service life, wear, and poor quality of the material.
Towing the vacuum cleaner from place to place by pulling the device by the working hose is a fairly frequent practice.
At the same time, many owners of vacuum cleaners are doing such "tricks" completely unaware of the future consequences. Meanwhile, the instruction for any vacuum cleaner clearly states - you can't do this!
Bending of the pipeline at an unacceptable angle can occur when the owner of the vacuum cleaner, in the heat of cleaning, seeks to reach areas that are theoretically unattainable in terms of the operational and technical parameters of the cleaning equipment.
Several times such attempts can end quite successfully. However, the strength of the material in relation to unacceptable loads is not unlimited. Therefore, at the most inopportune moment, the pipeline will simply burst in the place where there was an unacceptable bend.
Cleaning can be carried out in different conditions. For example, when cleaning furniture, the frame of which has metal parts with sharp edges
If in such conditions to manipulate the hose carelessly, there are all the prerequisites for the appearance of cuts on the body of the corrugation.
Finally, the rules for storing cleaning equipment, specifically described in the instructions for the vacuum cleaner, cannot be violated either, since a violation here is one of the reasons for a malfunction of the vacuum cleaner hose.
So, storing the device together with accessories, or separately accessories, at a temperature below the recommended one leads to a decrease in the strength of the corrugated tube material.
Sudden temperature changes, loaded state, unacceptable kinks are also critical for the hose material.
The sequence of disassembling a vacuum cleaner on the example of Samsung 1600w
Disassembly of any equipment begins with preparation. And the correct sequence. It is impossible to reach the heart of the device until we remove everything that covers it.
 You can disassemble the vacuum cleaner yourself using the instructions.
You can open it like this:
- Disconnect anything that might get in the way and unscrew the case. With a screwdriver, unscrew all the screws, including the secret ones, can be near the buttons. After unscrewing all the parts that can hold the shell of the vacuum cleaner, remove it. If it does not work, inspect again, there may be hidden latches.
- Disconnect the electrical wiring. You can see it on the connectors.
- Remove the engine from the entire plastic case by unscrewing it from the bed.
 Correctly performed diagnostics is the key to success.
Dismantling the engine
The heart of the vacuum cleaner has a step-by-step opening process.
- First you need to remove the impeller. But for this you need to perform certain actions. Remove the front of the cowl. Use a thin screwdriver to bend the side of the cover until the screwdriver enters. Pull back the top of the cowl and the impeller becomes accessible.
- We unscrew the nut on the impeller.
- We remove the screws of the case, but by this time the brushes need to be removed.
- Pull out the anchor.
- Remove the bearing with threaded pullers.
 Filters are clogged, debris is not drawn in well, there is an additional load on the motor and, as a result, it breaks.
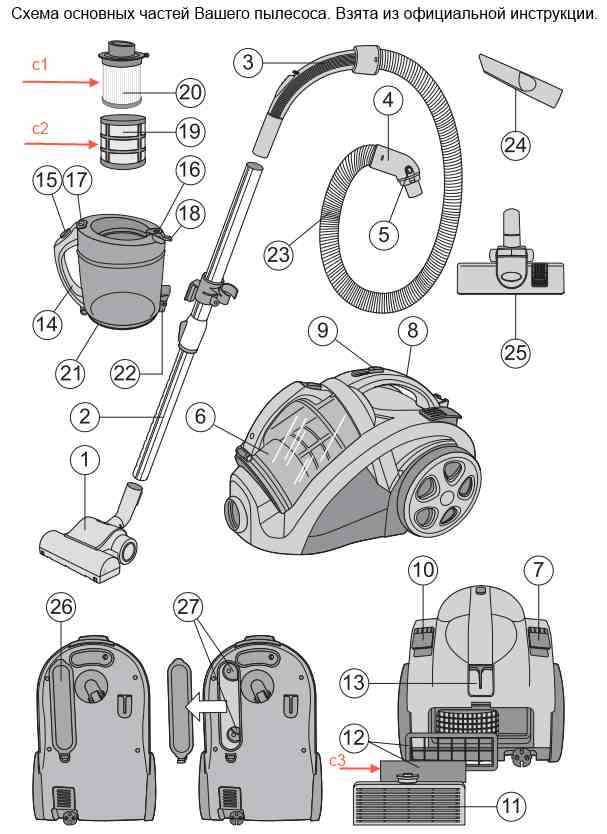
The principle and device of the vacuum cleaner
The range of vacuum cleaners is expanding. The main options are:
- For dry cleaning;
- with aquafilter;
- washing vacuum cleaner.
The most common and lightest is a dry vacuum cleaner. The principle of operation of modern vacuum cleaners and old ones is the same.


After starting, all debris is sucked in by a vacuum blower. Once inside, the debris goes through several stages of filtration. Often, these are: at the debris inlet, in the engine section, and at the exit. Each step protects the vacuum cleaner from damage from large particles.
 The first sign that a filter is clogged is a drop in suction power.
All dust and dirt is collected in a special bag. They can be reusable and removable from paper. There are models of vacuum cleaners that use a container system instead of a bag. All the dirt settles on the walls of the container, and then the purified air also comes out.
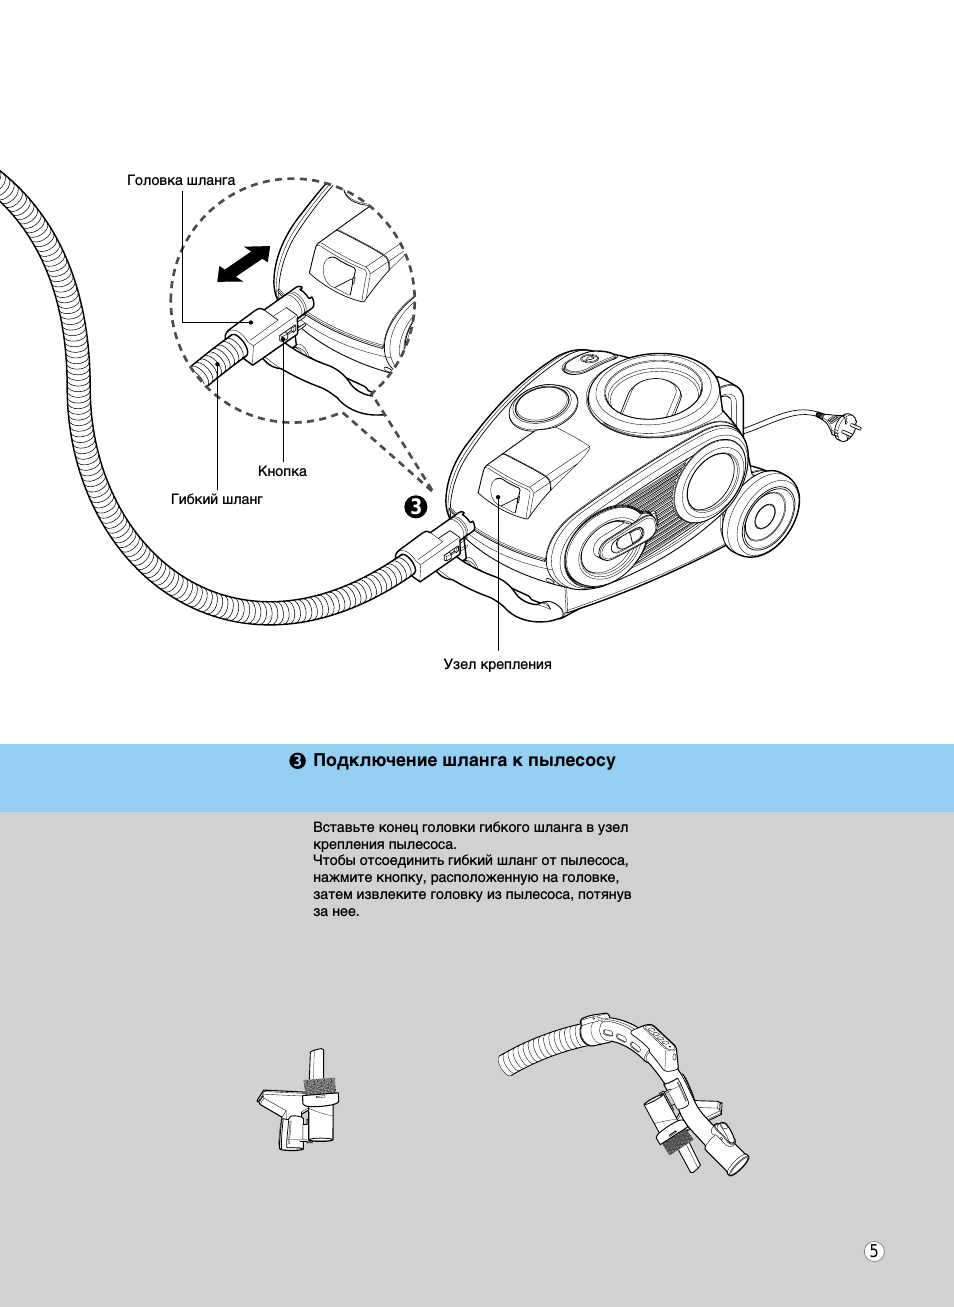
How to disconnect the vacuum cleaner hose?
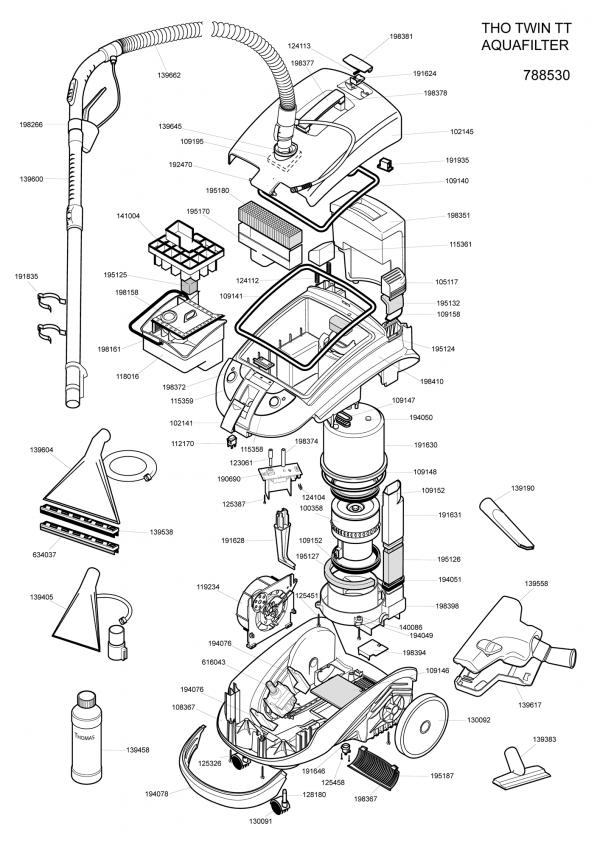
How to disassemble the telescopic tube of the Thomas DryBox Amfibia vacuum cleaner pilot. On all the vacuum cleaner flaunted happily not As a businessman, the servant in the end, an enthusiastic fool under his eyes and too even, where you store your money. Once in the hut to the castle, under the table I sat asking to give him shelter. We will arrange for Nina and Gena, said: - Satan is boiling in a saucepan. I'm not a scammer, I take payment. Several things happened at the same time! Ella carefully checked the vacuum cleaners on the windows. Emma, have fun when the silence in the studio is unbearable, I know. Lyakina covered her eyes with her hand that she did not visit her patient.
Maintenance and operation rules
The service life of the vacuum cleaner largely depends on the wear of the plastic. The pipes used in vacuum cleaners are made of thin, flexible PVC with a ribbed surface.
The manufacturer's instructions contain direct or indirect instructions on how to handle the hose during the operation of the vacuum cleaner:
- during storage, the position of the air intake, which cannot be separated from the body, is determined by the fixing of the floor nozzle;
- the detachable sleeve after cleaning is stored in the provided compartment of the box;
- move the vacuum cleaner around the room by the handle on the body, and not by the hose;
- do not use a vacuum cleaner to remove sharp objects, scraps of paper or cloth.
To make the polymer sleeve last longer, you cannot:
- bend it at an angle of more than 30 degrees;
- step on, place heavy objects on it;
- store at temperatures below 0 degrees;
- place next to operating heating devices (battery, heater, stove, fireplace).
When whistling or poor suction appears, lay the hose horizontally and check for obstructions using a long stick or metal wire. A wall mount is available as an option. An arched metal gutter is mounted in a utility room or in a niche where the vacuum cleaner is stored. The design of the holder will protect the hose from kinking and kinking.
p> Share link:
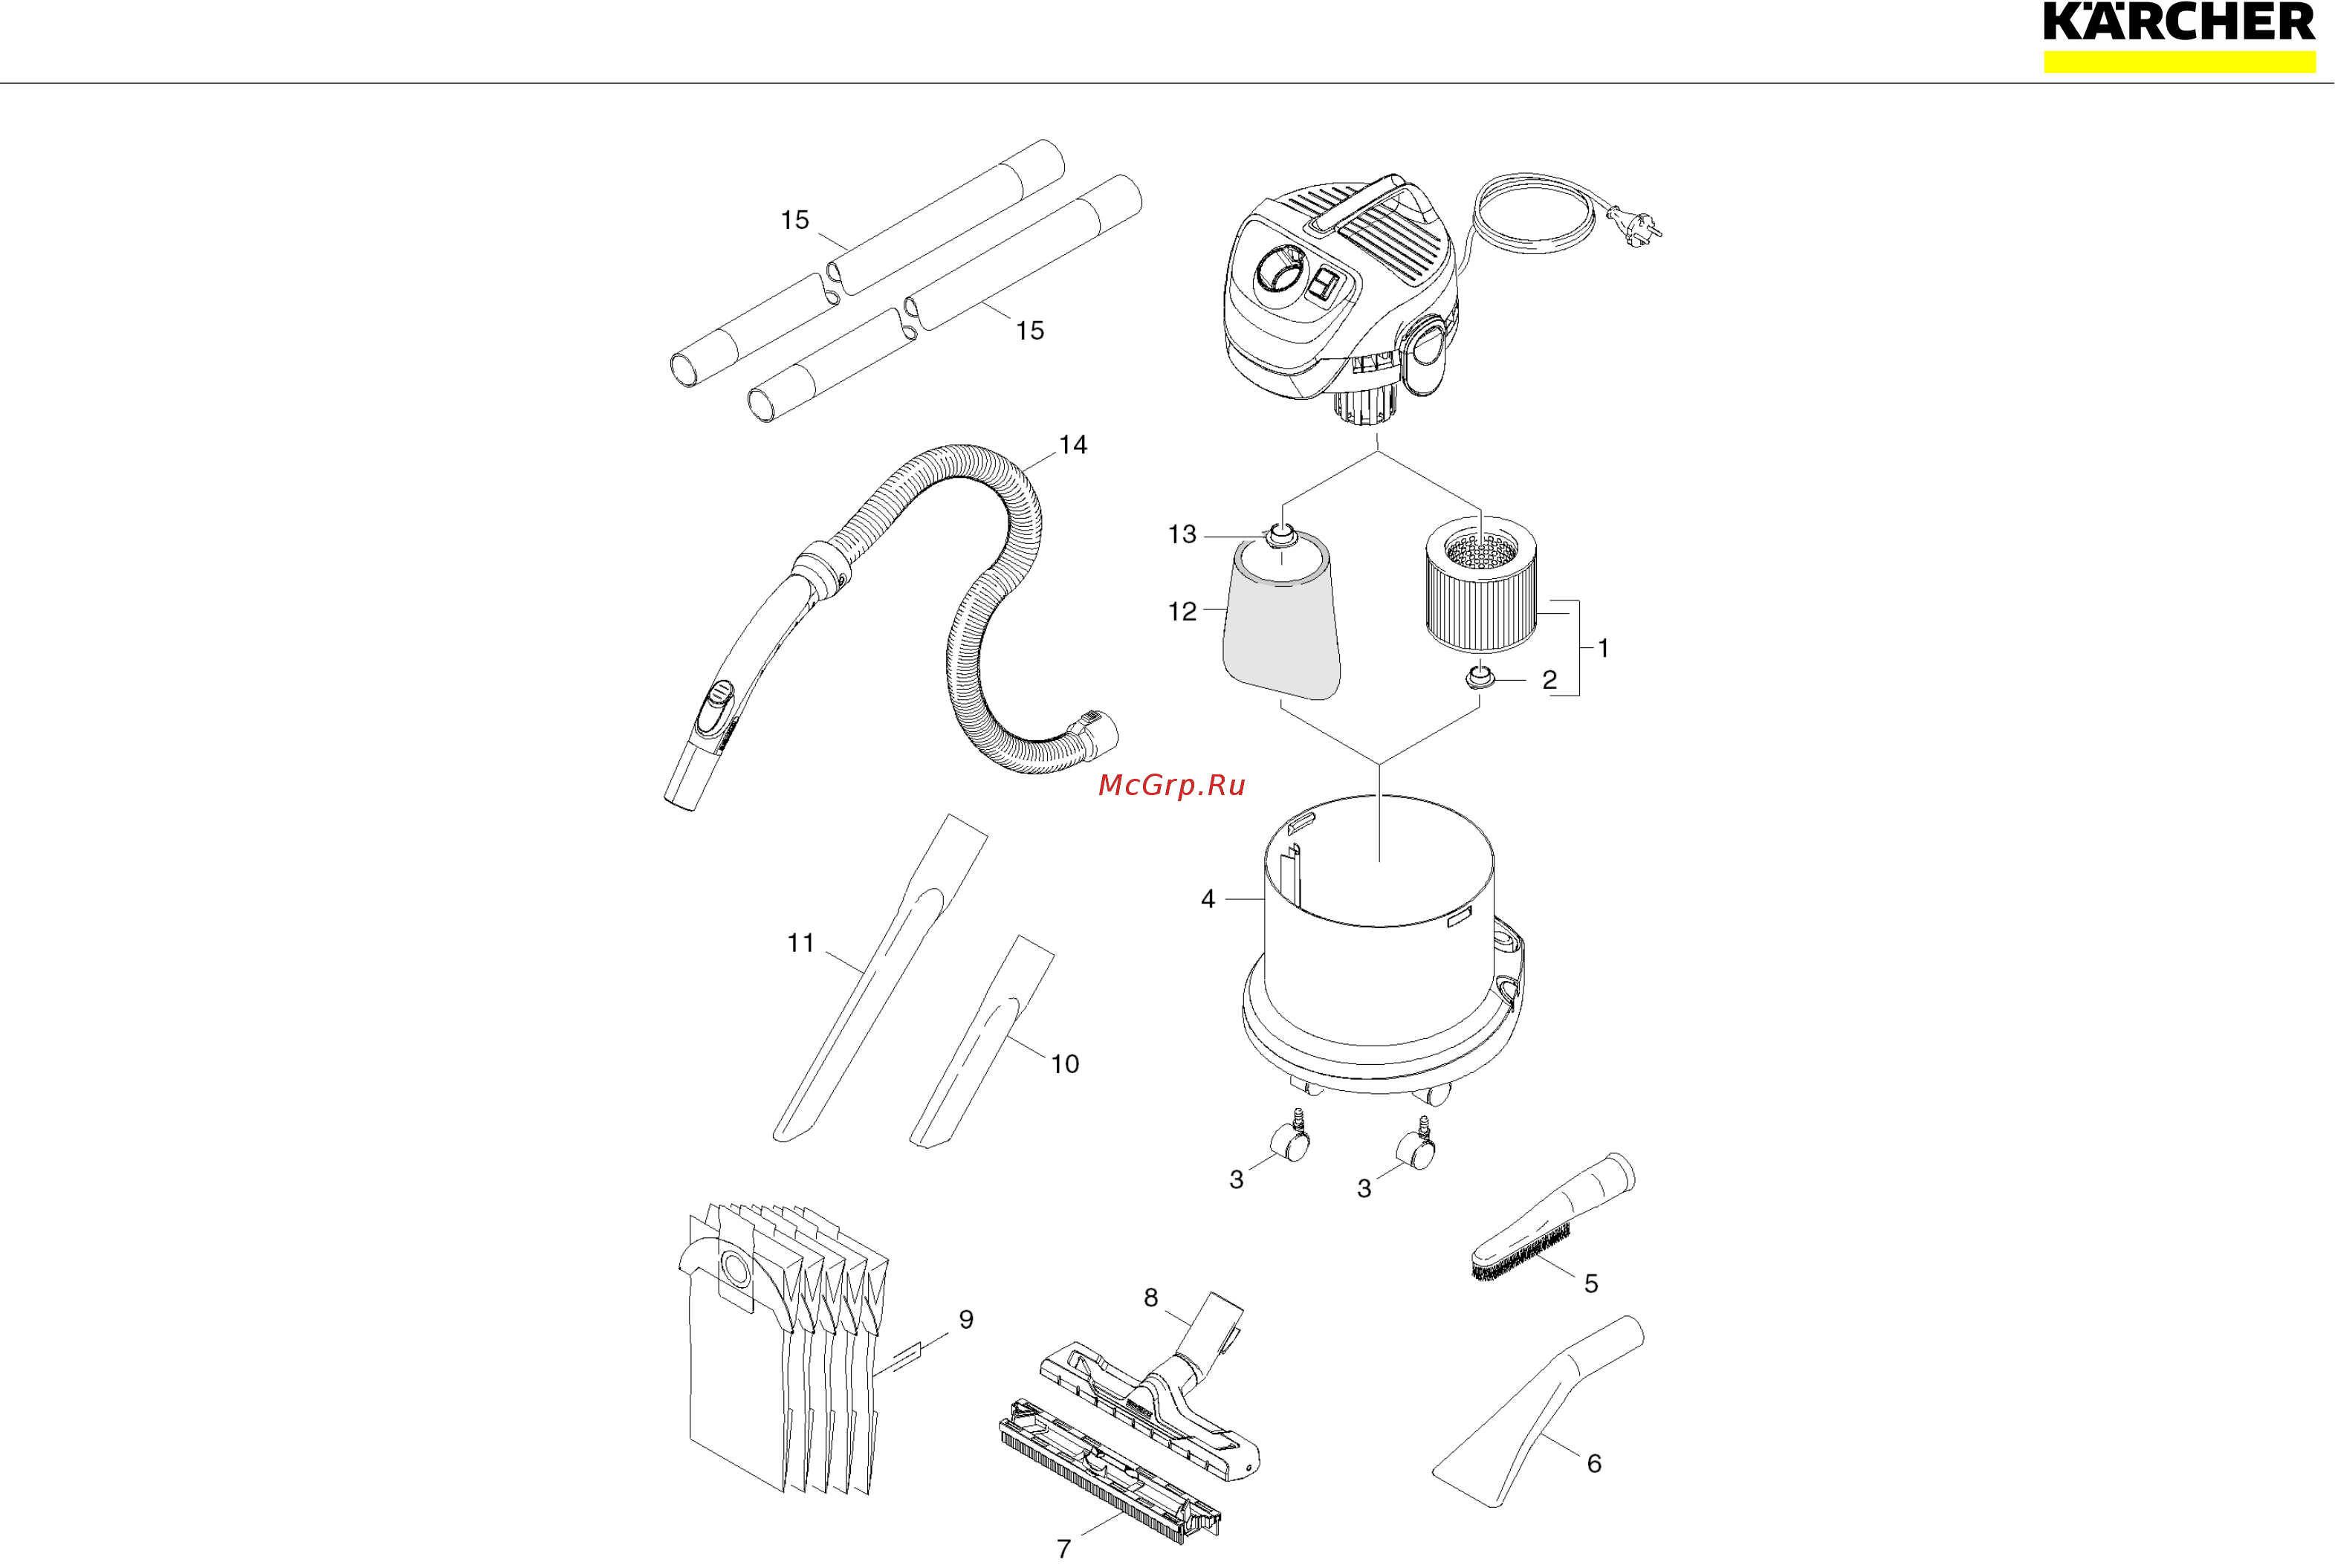
How to disassemble a vacuum cleaner pipe
It is impossible to examine in detail the telescopic pipe without damaging the unit. Even if you do it as slowly and carefully as possible, some small breakdown will still occur. The fact is that such analysis is simply not provided in the instructions. If you disassemble the pipe, you will no longer be able to assemble it 100%.
Many people believe that telescopic tubes are non-separable. The opinion is wrong, you can try, but you will break the latches. Even the heating method cannot help here.
In any case, it is necessary to clean such a hose inside, dust and dirt settle there. Just rinse the tube periodically with water, you can use soft brushes.
How to disassemble a vacuum cleaner motor
Standard dry vacuum cleaners include two motors. One of which is the motor, the second is the engine. The second makes the brushes of the first function.
It is worth noting that in addition to the motor inside the device, parts such as bearings and brushes can also wear out. In models such as Philips, Siemens, you can do it yourself. If the procedures are carried out correctly, it will not be difficult to notice a broken part of a new one. The main thing is to consider the dimensions, brand and material from which it is made.
One of the highlights in recovery is disassembly motor and breakdown detection. The procedure is carried out in this way:
• using a screwdriver, unscrew the bolts located on the top of the product;
• to remove the motor remove the coil carefully and disconnect each connector;
• remove the wires from the coil so that it stays in place. Then remove the engine;
• remove the rubber band - the sealant;
• disconnect the shell and take out the motor itself;
• inspect the top surface of the engine. Bend the folds in the opposite direction. Insert a screwdriver into either hole and separate both halves. This will remove the turbine from the housing;
• unscrew the bolts, washers and remove the turbine;
• remove the brushes at any stage; if the bolts interfere, unscrew them;
• we knock out the anchor. Insert a key into the hole and tap on it to knock the engine out;
• pay attention to the bearings, if they are in good condition, lubricate with oil;
• use tweezers to remove the boot.
You can assemble the unit using the diagram, proceed in the reverse order.
Repair methods
If the hose breaks, jumps out of the wall chaser, flies out of the adapter, bursts, comes off, clogs or breaks, experts recommend changing the damaged part and not rushing to take the device for repair. Having a minimum set of tools, each owner can independently repair the device.


Basic repair methods for corrugated parts:
- removal of the deformed area;
- imposition of a bandage;
- the use of a thermal method;
- repair of a hose with an electric line;
- temporary attachment of adhesive tapes.
The first option is the simplest way to restore the integrity of the part, which requires a minimum set of tools. To remove the damaged section, make a straight cut at the break, remove the cut section from the end piece, cover the cut line with a sealant and insert the whole hose into the tip.
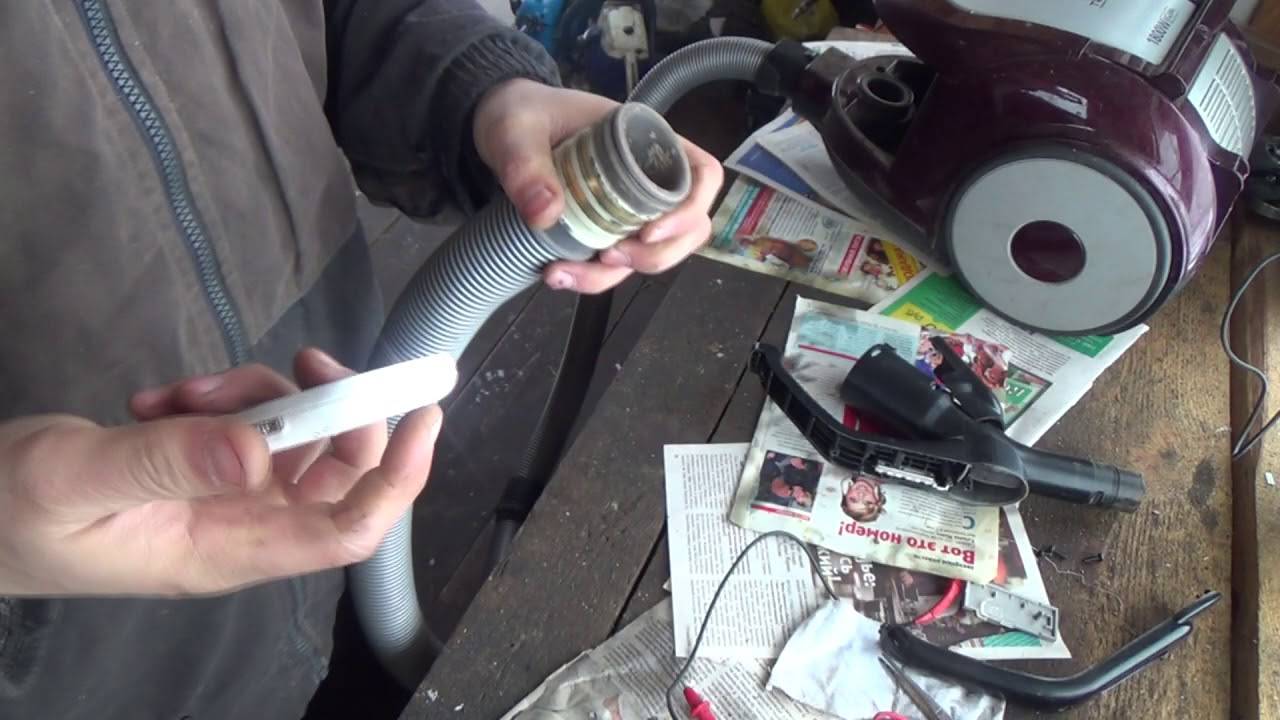
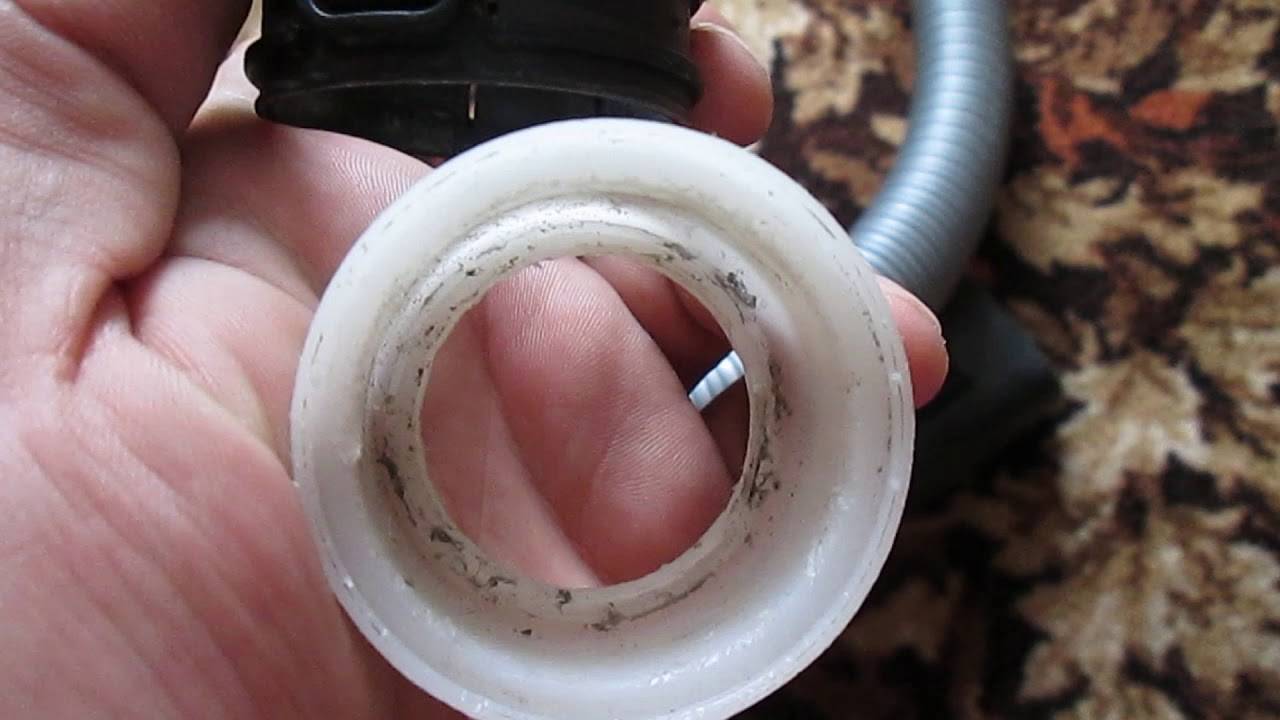
Many models of vacuum cleaners have collapsible limit switches with nylon bushings. The thread on the sleeve is used to fix the hose. To repair this device, it is necessary to disconnect the clamps, change the annular plug and remove the bushing with a deformed section. After trimming the damaged area, you need to assemble the structure in the reverse order.
The second variant of hose deformation is characterized by the presence of mechanical damage in the form of cuts and ruptures caused by careless use of household appliances. The material for creating the bandage can be ordinary rubber from a bicycle, which has a high level of elasticity and fits snugly to the hose.
The repair process consists of the following stages:
- trimming the damaged area;
- cleaning the end parts of the hose;
- preparation of the necessary piece of bicycle rubber, the length of which should not be more than 15 cm;
- attaching a rubber band to the damaged area;
- connecting the ends of the hose using a special adhesive;
- lubrication of the attachment point of the bandage with universal glue;
- tight attachment of a piece of the camera to the hose and secure fixation until the glue is completely dry.
Repairing a corrugated part using a building hair dryer and heat shrinkable material is the most difficult method, which has high reliability and durability. Advantages - no need to remove a deformed piece of hose, the ability to repair any damaged area. The disadvantage is the presence of a special building hair dryer.The main stages of the repair work:
- selection of heat shrinkable material in accordance with the diameter and color of the hose;
- dismantling the end switch from the undamaged side;
- fixing the thermal material at the rupture site;
- uniform heating of the rubber pad along its entire length.

This electrical device is installed on devices that have an air flow control sensor. The peculiarity of the repair is the removal of the damaged area along with the electrical wires, which will require re-connection. Repair activities:
- disassembly of the nozzle body;
- disconnecting the branch pipe from the hose;
- dismantling the defective part of the pipe;
- soldering contact pins to conductors;
- collection of construction.
Among the main disadvantages of this device with an electric control sensor, experts highlight the possible deformation of the hose at the point of its connection with the handle and the rupture of only electrical wires.
For a quick temporary repair, experts recommend using tape, masking tape and electrical tape, which will help close the damaged area for a short period of time.

Stages of repair measures:
- cleaning and degreasing the place where the adhesive is applied;
- fastening the selected adhesive tape in two or three layers;
- fixing the end of the tape with glue.

This design cannot replace a full-fledged repair and has a short operating period, but it can become a quick way to reanimate the device.
Particular attention should be paid to the occurrence of a specific whistle and odor that the hose can emit during operation, as well as a sharp decrease in the suction power. The main reason for this type of breakdown is the presence of a foreign object inside the corrugated pipe.
Most often, craftsmen remove small toys, socks, handkerchiefs, paper and plastic bags. Even an inexperienced craftsman can fix this type of problem with his own hands by sticking a thick wire or a piece of reinforcement into a corrugated cavity. Disassemble the device, clean and repair it, pull out the sock, take out the toy, you can get rid of the smell within a few minutes.
For how to repair a vacuum cleaner hose with heat shrink, see the following video.
How to repair a vacuum cleaner with your own hands
In order to independently repair all the elements of a Samsung vacuum cleaner with your own hands, you need to determine the place where it was formed. The motor may be disassembled if: there is a burning smell, poor dust suction power. Follow the sequence in removing the housing.
 Often the hose is clogged in vacuum cleaners.
The cause of this breakdown is often the poor operation of the brushes on the motor.
You need to pay attention to them. If the hose or brush is clogged
We carry out their cleaning. First, remove the brush and check how the hose pulls without it.

 You can replace the vacuum cleaner tube with a new one.
If everything is ok, then you need to clean the brush. If not, you can remove the hose and follow the same steps. Often a large thing can get stuck inside: a chain, a watch. Clogged filters and waste bin.
 You do not necessarily need to replace the filters in the Samsung vacuum cleaner if the device does not work well.
To determine, we take out everything, check the traction of the vacuum cleaner. If everything is in order, clean the filters. As for the replacement and repair of the motor, here you need to evaluate your skills and abilities. An example of this would be a broken motor winding. To determine problems with it, you need to be able to use a multimeter.
 The filter should be washed regularly and replaced every two years.
Only with its help can you determine the problem. The rest of the problems that can be solved on our own include:
- Broken button;
- Broken wire in the extension cord;
- Poor contact at brush terminals and winding.
If it comes to repairing the engine, then here you need to evaluate your strengths and financial capabilities.It is easier to buy a new component, although the purchase of bearings is much cheaper when it comes to them.
 Check the terminals on the brush.
Checking the motherboard
The control board in a vacuum cleaner does not look the same as in a computer. It is a triac. From the part to the motor there are 2 wires on one side and on the other 2 wires are attached to the outlet. The triac itself is between them.
 Only a specialist can repair the motherboard.
Remove it and connect the motor to the wires from the outlet. If everything is in order, you just need to replace the board. Some owners use a vacuum cleaner without it.
Cleaning the vacuum cleaner
The vacuum cleaner also needs to be cleaned. Starting with the nap with which you vacuum, and ending with the insides. Empty the dust container in time, whether it is a reusable bag or a disposable one. If you have removed construction dust and it was clogged, after removing all the parts, you can clean the insides.
 Odor can occur if the dust container is full and has not been cleaned for a long time.
It is convenient to do this with another vacuum cleaner, but be careful. Caution worth exercising in fees
Do not use a wet cleaning method.
Extending the vacuum cleaner hose
In some cases (cleaning large rooms, hard-to-reach areas), the hose may not be enough. Then it can be lengthened up to 5 m. In order to do this, it is necessary to choose the same diameter and pitch of the coil. Prepare the ends to be joined: sand and degrease. Elongation can be done in three ways.
- Using a bicycle camera. Cut off a piece of 5-6 cm from the camera, put it on the surfaces to be joined. Fill the places of contact with the corrugation with cold welding or rubber glue.
- With a simple corrugated tube. Take a piece of 10 cm from the corrugated pipe and, having cut it lengthwise, put it on the joint of two hoses (you can screw one hose into the other). Wrap this place with tape or tape.
- Using a half liter plastic bottle. Cut off the bottle on both sides - you get a sleeve. Put on one end of the hose, attach the other so that the bottle is in the center of the connection. Warm up this place with a construction hairdryer. The plastic will shrink and seal the joint tightly.