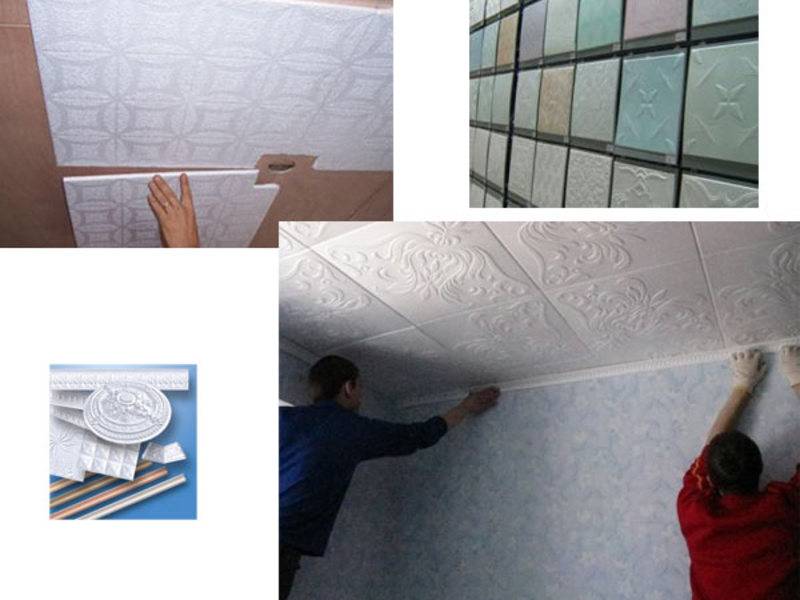
Types of ceiling tiles
The characteristics and cost of each type are very different, so we will consider each in detail.
Pressed Foam Tile
Manufactured by stamping from expanded polystyrene blocks. As a rule, it is light in weight, low in density and 6 to 8 mm thick.
Advantages:
-
cheapness;
-
installation is not a problem;
-
can be coated with water-based paint.
Disadvantages:
-
fragility;
-
instability to moisture;
-
low noise absorption;
-
easily absorbs dirt and is difficult to clean.
Injection tile
Such a tile is made by sintering polystyrene foam. It has a clearer texture and patterns, while the thickness increases in comparison with the pressed one by almost 2 times - 9-14cm.
Advantages:
-
good noise absorption;
-
resistant to moisture;
-
durable;
-
tolerates painting well.
Disadvantages:
-
much more expensive than pressed;
-
available only in white, if you want a different color - paint.
Important! When choosing, pay special attention to the edges, they should be clear, even, not crumble
Extruded tiles
It is made by pressing from a polystyrene strip, which in turn is formed by pressing.
Advantages:
-
high strength and sound absorption;
-
variety of colors and patterns;
-
easy to clean;
-
recovering from deformation;
Disadvantages:
-
high cost
-
the wrong side has an uneven surface, which complicates the installation process;
-
the textured pattern will be poorly expressed due to the manufacturing technology.
Laying the first row of tiles
The gluing of the first rows should be as even as possible, since it depends on them how smoothly the remaining rows will lay.
Glue application
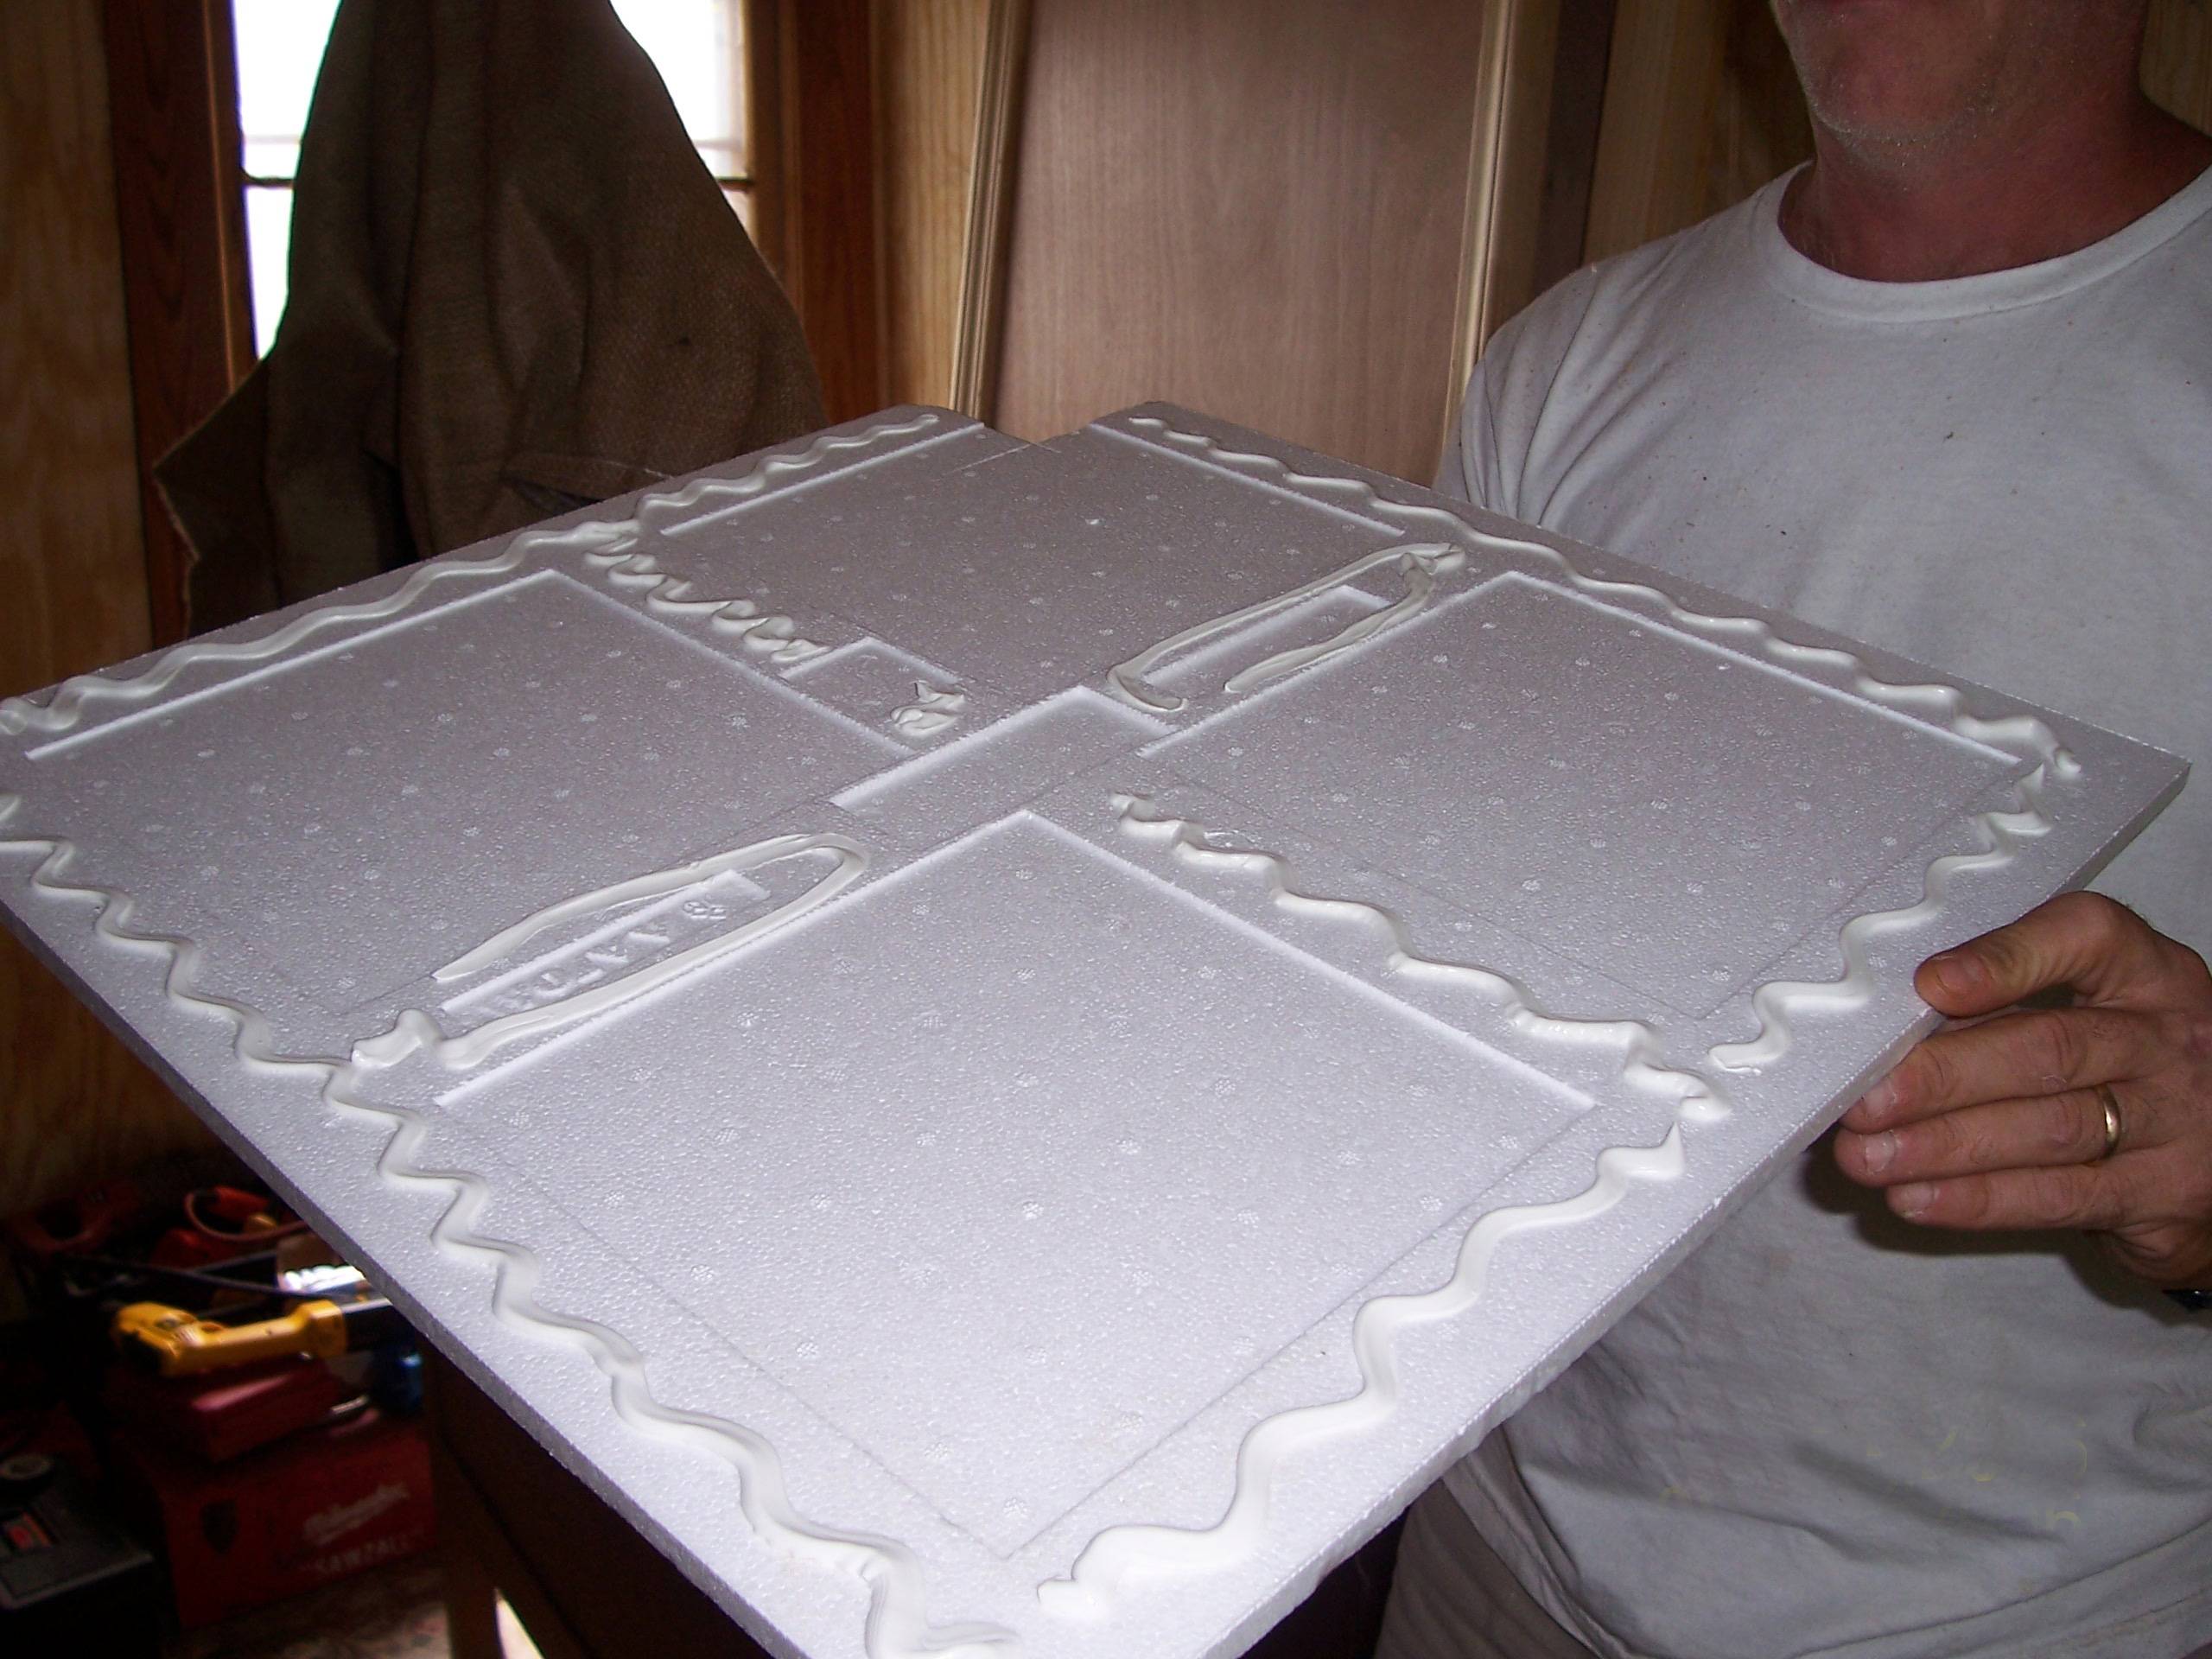
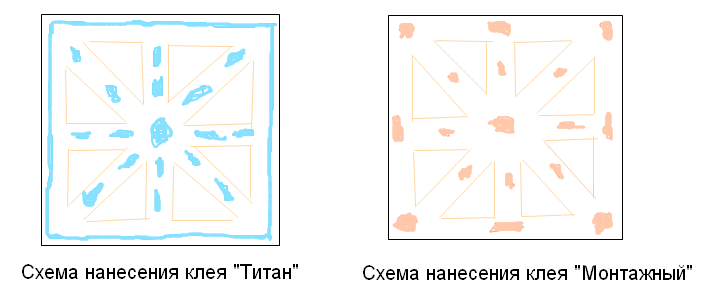
The glue is applied to special projections on the seamy side of the tile. Alternatively, it is applied in the middle of the tiles and at each corner, as well as on the ceiling.
It should be noted that if you have chosen "Titan" glue, then before laying the tiles should be kept for 10-15 minutes.
For porous ceilings, apply a thick layer of adhesive!
Advice! If you need to withstand the glue on the tile, then you can apply it to several tiles at once, so you will not have stagnation while waiting.
We glue the first tile
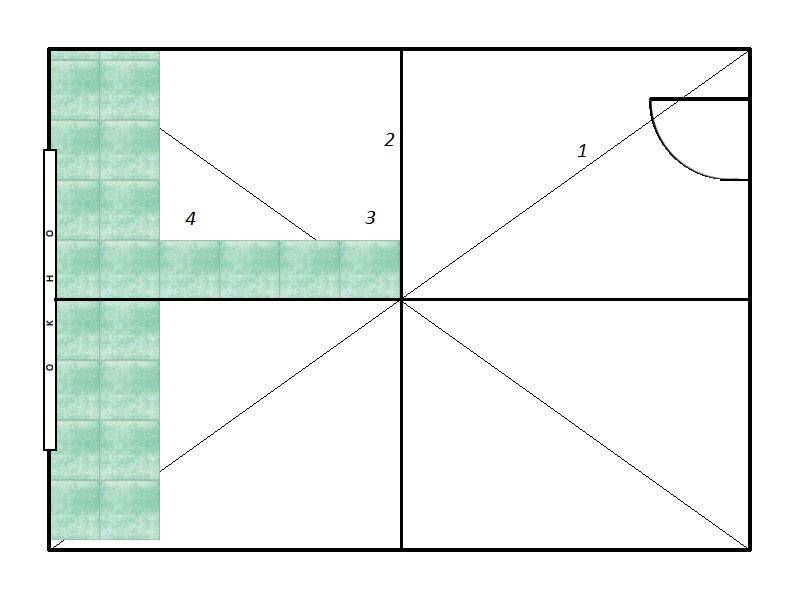
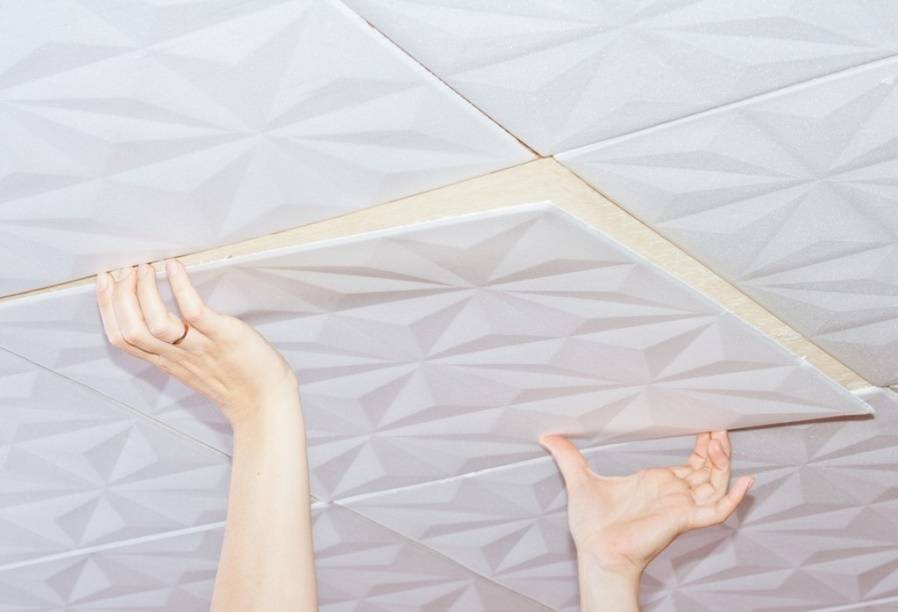
The first tile must be glued so that one of the corners is exactly at the center point. Guide the edges of the tiles along the threads or lines you have outlined. As a result, all 4 tiles will converge at the central point.
Press down firmly on the tiles, if you have chosen pressed tiles, it is better to use some kind of fabric so as not to stain the tiles. Remove excess adhesive immediately with a sponge or cloth.
Advice! If you are starting not from the center, but from the chandelier, then you need to cut off the edges of the tiles. Subsequently, this hole will be closed with a plate of the chandelier.

Second and next rows
Next, lay out the tiles in parallel rows so that there are no gaps between the edges. Continue this to the last row.
Important! You need to focus on the triangular arrows on the back of the tile - they should look in the same direction
Last rows
As a rule, you will have to adjust the last rows to the desired size. Use a construction knife for trimming. If there are gaps between the wall and the tiles, don't worry, the skirting board will hide it all.
Cover up the cracks
To make the ceiling tile look like a whole, you should fill all tile joints with sealant. You can level the sealant just with your finger, it is easily washed off. You can clean the excess tiles with a damp cloth.
Advice! Better to use silicone sealant, it is waterproof.
Step-by-step technology for laying tiles on the ceiling
Before gluing the ceramic tiles to the ceiling, the material must be allowed to rest in the room to set the temperature. It will be useful to check the geometric evenness and integrity of the finish - get a couple of products from different boxes and attach them with planes - there are no gaps, then aligning crosses will not be needed, if there are discrepancies of more than 0.5 mm, you will have to buy crosses.
Preparatory work
Before work, the base must be assessed for evenness and the base surface must be cleaned.

What to do:
- Clean off the old coating. Remove loose pieces of plaster, widen and seal cracks, seams.
- Plaster will help level the ceiling. If the layer is thicker than 2 cm, be sure to use a reinforcing mesh. You can level the ceilings with plasterboard, this method is suitable for buildings with constant shrinkage - a floating plasterboard ceiling here is the only option for hardening and leveling the surface.
- Remove peeling and peeling of the finish to the base, prime the base 2-3 times with a deep penetration primer, letting the layers dry each time before applying the next one. Then restore the evenness of the ceiling using concrete repair mortars.
- After leveling the ceilings, dry, dust off and prime in 2 layers, letting the first layer dry again before applying the second. The drying time of the primer is indicated by the manufacturer on the packaging.
Materials and tools for work
In addition to the tile itself, the master will need:
- primer;
- glue;
- grout;
- mixture for leveling ceilings;
- a set of spatulas;
- roller;
- container for glue;
- a hammer with a rubber head;
- tile cutter;
- pencil and square;
- level.
Sometimes you have to buy crosses for tiles, personal protective equipment and a solid foundation for work will also come in handy - a table is better so that it is convenient to lay out all the tools and materials on it.
Ceiling markings and tile laying

Laying ceramic tiles on the ceiling begins with measuring the walls - this will allow you to determine the differences in the length and height of the walls. Now you need to choose a layout scheme, which is determined by the size of the decor, the pattern and the owner's preferences. It is most convenient to sketch a preliminary layout on paper, taking into account the scale of the ceiling and decor, and then transfer the markings to the ceiling.
Now let's look at how to put tiles on the ceiling:
- glue the base of the tile and ceiling;
- place the decor in place according to the markings, hold it a little;
- knock on the surface of the tile with a fist or hammer (not hard);
- remove any excess glue.
This is how the decor is installed along the entire ceiling. If the elements come off, the reason may be a thick composition or poor adhesion, clean the ceiling, prime, dry and change the glue.
To align the seams, crosses are used, the cladding is laid out with an expansion gap at the walls of 5 mm. This seam is then covered with wall decoration or ceiling molding (skirting board).
Grouting

After finishing the ceiling with tiles, the crosses must be removed and the excess glue removed with a sharp knife. Grout is a composition sold in stores in the form of a dry powder that must be diluted with water. Dilute the grout in portions, spread the mass with a rubber spatula on the seams and rub them thoroughly. The drying time of the composition is no more than 15 minutes, which means that the tiles must be wiped with a wet rag or sponge, removing traces of grout. If you lay out the composition correctly, then the mixture will lie flat, filling all the cracks.
Tile selection
You should start gluing the ceiling tile with its choice. There are several options for ceiling tiles. There are also various tiles for rooms, bathrooms, kitchens.
It can be extruded: it is made from a polystyrene strip covered with a film.
It is smooth and even (although in some cases it may have a relief).
The color of the foam or polystyrene plate can be white or painted.Usually it is painted with some natural materials, such as wood or marble.

Such tiles can be glued in the bathroom, because it is completely waterproof and tolerates the temperature of this room well.
Injection tiles are made by sintering polystyrene foam material. It is slightly thicker - 9-14 mm. It is made with a clear pattern and the correct geometric size.
These tiles are not very suitable for the bathroom, but will look good in the kitchen or living room.
Seamless ceiling materials are the most aesthetic option because they look like a continuous coating. Such coverage is somewhat more expensive, but significantly transforms the look of a room or bathroom.
In addition to the types, foam tiles also differ in quality.
Photo:
To choose the appropriate option, you need to know what requirements the ceiling tiles must meet: firstly, it must be strictly square (angles are 90 degrees), without bent or beveled corners.
In addition to square tiles, tiles can be rectangular, but this happens much less often, and in this case, the edges of the material should also be even.
Before buying, you first need to evaluate the quality of the material: if the corners are crumbling, and the grains of the tiles are very large, then you should not take it.
The grains of the material should be very small, tightly glued to each other and not crumble when rubbed or deformed.
If its structure has not collapsed, then it is of high quality and can be used in the decoration of the bathroom, kitchen and other rooms.
In addition to high-quality material, you need to understand how much of it will be needed for repairs. This will require a calculation.
You can do it yourself by drawing on a regular sheet of paper the room in which you want to place the tiles (for example, in the bathroom), while maintaining its proportions.

Then the tiles are "placed" on the paper from the middle of the ceiling to the edges. Having plotted all this on paper, you can estimate how much you will need for your bathroom.
Usually such a calculation is quite accurate, but it is better to take a few more tiles (usually + 10%) so as not to return to the store.
Choosing an adhesive for ceiling tiles
Answering the question of how to glue the ceiling tiles, one cannot ignore the glue, which is the connecting link between the base and the finishing material. The adhesive for lining ceilings must have the following properties:
- durability and reliability;
- fast setting;
- good adhesion;
- environmental safety;
- the ability to lie down in both thin and thick layers.

High-quality glue for installation
If everything is more or less clear with the first four points, then the last one needs to stop a little for clarification. Most of the old-style apartments do not differ in flat ceilings, they can have height differences of more than 15 mm. How to finish in this case? There are two ways to get out of this situation: align the ceiling before cladding or use glue that can be applied in a thick layer. The first option is not optimal, since it requires additional financial investments from the contractor. Therefore, the best option is to apply the adhesive in a thick layer, thereby leveling and finishing the ceiling base at the same time.
Gluing tiles to a flat ceiling can be done with adhesives such as liquid nails, Moment, Eco-Set or Titan. They have excellent adhesion to any coating, be it plaster, wallpaper or other material, and a fast drying time, which greatly facilitates installation work.
What to glue Styrofoam tiles to uneven ceilings? In this case, the best option is the usual putty and glue for tiles or drywall. These compounds can be applied in layers of up to 40 mm, thereby leveling out even large differences in height.
Tile gluing schemes and ceiling markings
Due to mistakes made during installation, even the most beautiful tiles will not look their best. In order for the finish to be effective and at the same time harmonious, it is necessary to draw a tile layout scheme. To do this, measure the walls - keep in mind that opposite walls may have discrepancies in size. First, draw the plan on paper to scale. This is necessary in order to accurately calculate the number of plates and the order of their placement. After that, the drawing must be transferred to the ceiling. You will need a ruler, pencil, construction square, and string. The markup is performed depending on the selected scheme. The layout method is determined depending on the height of the ceiling and the designer's idea.

Laying schemes:
Classic. The tiles are placed in dense rows along the walls. Pasting starts from the center. The decision to choose this installation method is taken if they want to create a complete surface using seamless tiles. Another version of the classic version - laying with the shift of each next row by half a tile - resembles brickwork. Such ceilings look more interesting and airy. For this method, purchase tiles with a margin - there will be a lot of scraps.
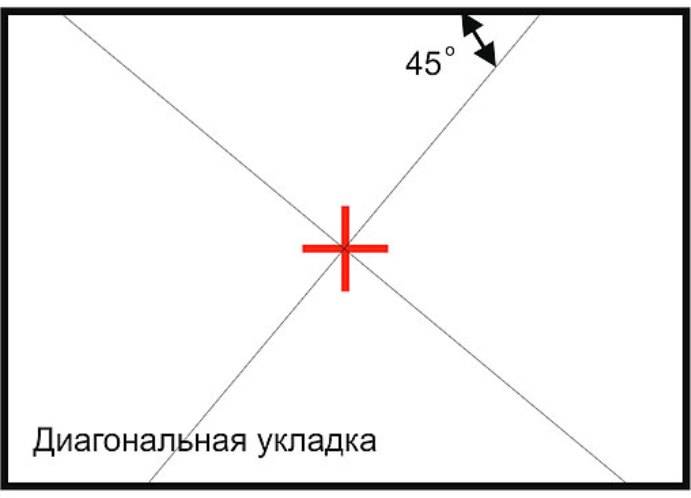
Diagonally. A universal method that is suitable for cladding ceilings of any size. The markings are made along the diagonals so that the laying is done along them. You need to start gluing from the chandelier. It should be anchored in the center of the first square. It should be at a 45 degree angle to each wall. Tightened threads are used to find the center. You can also draw diagonals along them. Subsequent tiles are tightly attached to the central element until the entire surface is laid out. The slabs must run strictly along the marked lines. Rhombus laying makes the ceiling luxurious and presentable, visually adjusts the size. One drawback - there will be much more scraps than with the traditional method.
Staggered. For the equipment of the "checkerboard" on the ceiling, you will need panels in two colors. Contrasting combinations look spectacular - black and white, with red, yellow, blue
It is important that the chosen colors find support in the rest of the interior of the space. Pasting begins from the center and continues until the work is completed.
Rows of tiles are placed parallel to the walls
An additional plus of this method is that it can be used to divert attention from the unevenness of the base.
Snake - performed on diagonal markings. It is important to choose colors that match well with each other.
You can choose similar or, on the contrary, contrasting shades and stick the tiles in accordance with the prepared pattern. If the idea to lay out the ceiling with a snake came to mind after buying a plain tile or the store did not find material in suitable shades, the elements can simply be painted in colors that are suitable for the given interior. You will need white acrylic paint and two color tints.
The step-by-step instructions for gluing tiles can be found in the video.

Calculation of the required amount of material and the choice of adhesive
After choosing the type of ceiling tile according to its physical parameters and external design, it is necessary to determine how many tiles will be required for the entire ceiling area. More experienced owners immediately buy 10-15% more in case of rejection due to broken corners or mistakes during pruning. In general, the calculation is not difficult. It is necessary to know the area of the ceiling and the size of each element. Typically, ceiling tiles are produced in sizes of side faces of 50-50 cm. If the dimensions of the ceiling are not a multiple of the length of the side of the tile, then during finishing there will be gaps along the edges of the ceiling. Therefore, when calculating such a nuance must be taken into account.

An experienced craftsman's advice: if you want to save on glue, instead of liquid nails, it is better to use transparent glue with a more liquid "rubber" base. Its consumption is significantly lower. But for a strong hold, be sure to dry the glue already applied to the tile a little.
Having calculated the required number of tiles, you need to decide what kind of glue to glue. Many people use "Titan", "Econaset", "Liquid nails", "Moment". They adhere well to all surfaces and dry quickly. After gluing, the tiles adhere firmly. Only for this it is necessary to press it against the ceiling for a few seconds.

Care rules
Ceiling panels eventually become covered with dust, traces of insects, tobacco smoke, in kitchens - grease stains and fumes. The tiles are cared for dry and wet. Dry - remove dust with a vacuum cleaner or special brushes. The power of the vacuum cleaner is determined experimentally, starting from the minimum level. The vacuum cleaner must remove dust without deforming the coating. Dust brushes are just as effective, but much safer. Fibers have a static charge that attracts dust particles and prevents them from flying through the air.
For wet cleaning, you need water with a dish degreaser or gel for washing clothes. Before use, the product is whipped into a foam and applied with a sponge to the contaminated areas, slightly pressing into the tile. The remaining water and foam are removed with an absorbent cloth. Instead of foam, you can try a stationery eraser. Grease stains are best removed with an anti-grease cloth. White tiles can be wiped clean with an aqueous solution of bleach or rubbing alcohol.
What to glue on
The tiles are held to the ceiling with glue. The appearance of the ceiling covering, the complexity of installation, and health safety will depend on its characteristics.
Optimal properties of adhesives:
- sufficient viscosity to secure the panels;
- setting time of surfaces - 20-30 seconds;
- lack of toxic fumes;
- white or transparent color.
The liquid consistency of the glue produces a thin film that is unable to support the weight of the coating. The thick adhesive will form an uneven and thick film that will deform the panel.
Installation of ceiling decor, like wallpaper, should be done without drafts. Therefore, in residential premises it is necessary to use adhesives without components harmful to health. The dark substance will show through the seams and ruin the appearance of the ceiling.
Titanium
Adhesive brand Titan Professional Gallop Fix is used for gluing in rooms with high humidity. A layer thickness of 0.5 millimeters withstands a weight of 240 kilograms per square meter. The final hardening of the film occurs after 3 hours. Modification Titan Professional 60 seconds gives adhesion without a preliminary primer within 24 hours, which allows you to adjust the installation of the panels.
On set
The adhesive is similar in composition and method of application to Titanium. Forms good adhesion to all types of ceilings. Feature of application: holding the tile in a pressed state for 2-3 minutes.
Moment
The glue is available in 3 modifications:
- Moment Installation. One for everything. To improve the quality and slow down the adhesion, it is recommended to treat the ceiling with a primer made of wood glue and 1x1 water. You can work in rooms with high humidity.
- Moment Installation Express decor MV-45. The glued tile retains adhesion at temperatures up to 0 degrees, with increased moisture evaporation. The hardening time is 2 days. The viscosity of the adhesive allows it to be used as a sealant for filling joints between panels and gaps in the ceiling up to 1 centimeter.
- Moment Wagon. Has optimal viscosity and adhesion characteristics. The surface of the ceiling must have good hygroscopicity.
All varieties do not contain a solvent that affects the properties of products.
3> Liquid nails
Foam adhesive is water-based, with the addition of organic solvents.
Application Feature:
- high degree of adhesion (up to 80 kilograms per square centimeter);
- setting time - 20-40 seconds;
- complete hardening - 24 hours;
- resistance to low temperatures, humidity;
- the possibility of using as a sealant.
Liquid nails are applied pointwise or in the form of a grid. They are produced in the form of tubes, for work with which an assembly gun is required.
Ceiling Tile Mastic
Polymer mastics have a sticky structure that does not require long-term efforts when installing the panels. Applied at a temperature not lower than +10 degrees. Drying time, on average, about an hour, if the room is +20 degrees and the air humidity is not more than 65%.
Plaster putty
Gypsum plaster is recommended for finishing the ceiling with skirting boards. Fast adhesion requires high speed and precision in gluing. Another disadvantage of the gypsum composition is instability in a humid environment. This kind should not be applied finishes in bathrooms, toilets and kitchens.

Perlfix
Assembly glue from Knauf is a type of plaster putty and is intended for gluing drywall in dry rooms. When using it, a preliminary priming of the dust-free surface is required. Can be used to install ceiling skirting boards.
Acrylic putty
The putty is used for gluing a thin polystyrene film. Positive traits:
- holds panels well;
- does not stand out through the coating;
- withstands temperature differences;
- waterproof;
- plastic;
- environmentally friendly;
- durable.
An important quality is the leveling of the ceiling and the filling of cracks
Quart
The purpose of the glue is gluing linoleum, carpet, all types of tiles on concrete, plastered, wooden, brick surfaces.
Adhesive selection
The composition for installation should have a thick consistency, a high setting speed (this will greatly simplify the work, since you will not have to press the tile to the ceiling for a long time) and versatility: the surfaces to be glued have a heterogeneous structure. The choice of modification of the mixture depends on the operational characteristics of the room: for finishing the ceiling in the kitchen or bathroom, glue with moisture-resistant properties is needed.
Clay Titanium
A universal polymer-based mixture with high adhesive properties. Working with glue has a peculiarity: after applying the composition to the tile, the element is mounted on the base, then removed and glued again after 1-2 minutes. The disadvantages include the presence of a specific odor, the advantages are good fixation and transparency, which ensures the absence of spots and yellowed areas on the coating.

Glue Moment Installation (liquid nails)
Fast-setting universal compound based on synthetic rubbers. After complete hardening, it becomes elastic and waterproof, able to compensate for uneven surfaces. Use a white compound - this will exclude unwanted translucency of the seams. The disadvantages include the high cost of production.
Polyvinyl acetate glue (Bustilat, PVA)
It does not have a pungent odor, but it has a low viscosity and a long setting time. The adhesive must be applied to the cladding in a larger quantity than the previous compositions.
Putty
The acrylic composition has elasticity, resistance to various deformations, a high coefficient of thermal insulation, water resistance and vapor permeability, is not affected by ultraviolet radiation. The texture of the putty is pasty; after drying, the mixture does not shrink.

The glue can be made independently by mixing in equal parts putty, PVA and gypsum. The composition must be prepared in small portions, as it hardens within 10 minutes and becomes unusable.
To work with foam products, do not use glue containing a solvent - this will corrode the material.
How to glue tiles to the ceiling
The following types of adhesives can be used for gluing tiles:
To save money, you can use not liquid nails, but a colorless adhesive solution on a liquid rubber base. A smaller amount will be required, but after application to the material, the solution will need to be dried. Each of the above types of ceiling tile adhesive adheres well regardless of the surface quality and dries in a short time.
The main points of pasting the ceiling with tiles, see the video:
As for how to lay tiles on the ceiling, the order of work is as follows.
Before starting work, determine the center of the ceiling - from it, gluing the ceiling with tiles begins. For this purpose, two threads are pulled in the form of two diagonals from opposite corners. The point of their intersection is the center of the surface.
A lot of people start pasting from one of the walls. This method is also suitable, but it is best to do the laying from the wall opposite the window, then the cut tiles above the opening will not be so conspicuous.
If there is a chandelier in the ceiling, it is removed before work, and in the tile installed in the place of the lamp, a hole is cut out for the hook and wires
After pasting the ceilings with foam tiles is completed, the lamp is installed back, and the hole is closed with a decorative glass of the lighting fixture.
The ebb slabs are cut off before gluing so that the surface is perfectly flat, and the seams are almost invisible.
Glue is applied to each tile pointwise, in the center and in the corners, then set in place and gently pressed against the floor surface for a few seconds. Laying tiles on the ceiling requires careful observance of the symmetry of the pattern on adjacent elements
Any deviations are unacceptable, since they spoil the integrity of the canvas, and, accordingly, its appearance (in more detail: "How to glue foam on the ceiling: step by step instructions").
You can buy tiles in two colors, they are laid in a snake, in a checkerboard pattern, in alternating or intersecting lines, etc. It all depends on imagination, you can even lay out some special pattern.

Sticking ceilings with ceiling tiles is possible in any room: bedroom, living room, kitchen, bathroom, office. However, for finishing rooms with a special microclimate (kitchen, bathroom), you need to choose laminated products.
It is very easy to care for the coating: just wipe it with a dry cloth. If necessary, the tiles can also be vacuumed. If spots have appeared on the surface, do not worry - they are easily erased with a student's rubber band. Laminate boards can be washed with water, but should not be allowed to get into the seam area.
Ceiling tile made of polystyrene allows you to create a stunningly beautiful coating for any style of interior, which will delight you for more than one year. The main thing is to choose quality products and arrange them correctly.
How to glue tiles to the ceiling: two technologies
Foam or polystyrene tiles on the ceiling attracts by the fact that it allows you to quickly and inexpensively put in order a far from ideal ceiling. If the ceiling is relatively flat, the tiles are glued with special glue. It is applied in a thin layer, but provides a secure hold.
With uneven ceilings, this method will not work: the tiles simply will not stick with large differences, or the view will be deplorable. alignment is not always time, desire, or opportunity. Moreover, this finishing option is often considered as temporary, then planning to make a suspended or stretch ceiling. Therefore, it makes no sense to waste time and money.In this case, another technology is used - for an adhesive composition for drywall or putty. They work no worse than glue, at the same time leveling the base.

After gluing the ceiling tiles, you will get something like this
Before starting work, unpack all the material, make sure that it is the same color, size. If there are irregularities, nodules, they are cut off with a blade or a sharp knife. Now you can start installing the ceiling tiles on the ceiling.
How to glue on a flat ceiling
If the ceiling is flat, ordinary glue for polystyrene or foam tiles is used, the technology is as follows:
- We spread a thin strip of glue around the perimeter of the square and diagonally. It is not necessary to coat the edges of the tiles.
- We put the tiles in place, smooth them by hand.
- We hold it for a while - until the glue "seizes".
- We also repeat with the next tile. We apply it to the edge of the already glued one, if necessary, we combine the drawing, and then we press the rest. Docking must be carried out as accurately and accurately as possible, so that subsequently no steps are formed. Align the edges to the nearest millimeter.
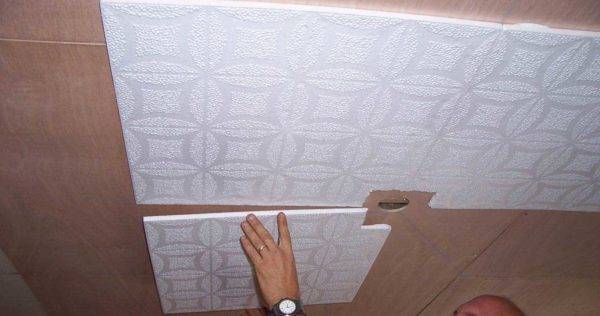
The main thing is to combine the edges and the pattern.
Repeat with the rest of the fragments.
If necessary, tiles can be cut to the ceiling. It is convenient to do this on
As you can see, everything is very simple and these are all the rules for how to glue tiles to the ceiling. There is only one caveat: you need to press one square to another tightly. If you have already glued it, and there is a gap, you can move it by pressing a wooden strip to the free edge. When you try to do this with your hands, you can break the foam or polystyrene, and it is easier to achieve what you want with an even bar.
If the ceiling is uneven
If the ceiling has significant irregularities, it will not work to glue the tiles with ordinary glue. To remove significant differences, use drywall glue or putty. The mixture is diluted to a pasty state, applied to the ceiling, grooves are formed using a notched trowel. The amount of glue depends on the overall curvature, but it is advisable to start with a minimum layer. The area to which the glue is applied at a time is about 4 fragments. During this time, the composition will not have time to grab, and it is not difficult to align such a fragment.

Apply a thin layer of putty to the ceiling
Tiles are laid on the layer of glue. It adheres well, moves without problems. Aligning the edges of the laid fragments, take a rule or a building level (preferably one and a half meter) and expose the tiles in one plane. Just press down the fragments harder in the right place.
Then the composition is again applied to the ceiling, and, again, on about 4 tiles. All of them are exposed in the same plane, or at least so that there are no sharp changes. Only in this case it is necessary to ensure that the required layer of glue does not grow too quickly - it is better not to apply more than 3-5 mm, otherwise everything will fall.
Cleaning and sealing of seams
You know how to glue tiles to the ceiling, but there are some nuances left, without which a decent result is unattainable. When working on the front side of the tile, adhesive often gets into. It must be removed immediately and completely. You can use a sponge or a soft, non-fading cloth. Wipe off the surface immediately after placing the fragment in place. Within a few minutes it will not be possible to do this and traces will remain. Therefore, keep a bucket of water and a sponge / cloth close at hand while working.

Neat seams do not spoil the look
If there are small voids between the plates, you can fill them with the same mastic or putty (if it is white), only remove the excess immediately. Another option is a white acrylic sealant. It perfectly masks all the cracks, adheres well to polystyrene and polystyrene. Fine gaps can be filled with a rubber spatula, and the excess can also be wiped off immediately with a damp cloth.
Choosing a gluing scheme
Placing tiles on the ceiling can be done in several ways:
- classic;
- diagonal;
- staggered;
- snake.

Classic scheme
Decor elements are placed along the walls in rows, with a snug fit to each other. The scheme is suitable for making cladding from seamless products. Classic laying can be done with a shift of the previous row by half of the tile.
Diagonally obliquely
The layout is suitable for decorating rooms regardless of their size, the coating looks presentable and original. Installation of tiles involves the precise implementation of preliminary markings, the consumption of material is large. The seams between the cladding elements are almost invisible.
Laying rules:
- start placement from the place where the lighting fixture is attached. The first element, installed in the center of the room, must be located strictly at an angle of 45 ⁰ in relation to the wall;
- the joining of the edges of the tiles must be even, without displacement.

Staggering
Finishing of this type requires the use of materials of two different shades (more often contrasting colors are used).
Install from the center, placing the tiles parallel to the plane of the side walls and alternating the elements in color in the process.
Snake styling
Start the work from the center of the room in a circle so that the result is a graphic image of the snake. For this method, it is necessary to use facing materials of two colors (shades or contrasting ones). The process can be simplified by painting the plain tiles laid in the classical way in different colors.


