Description and features
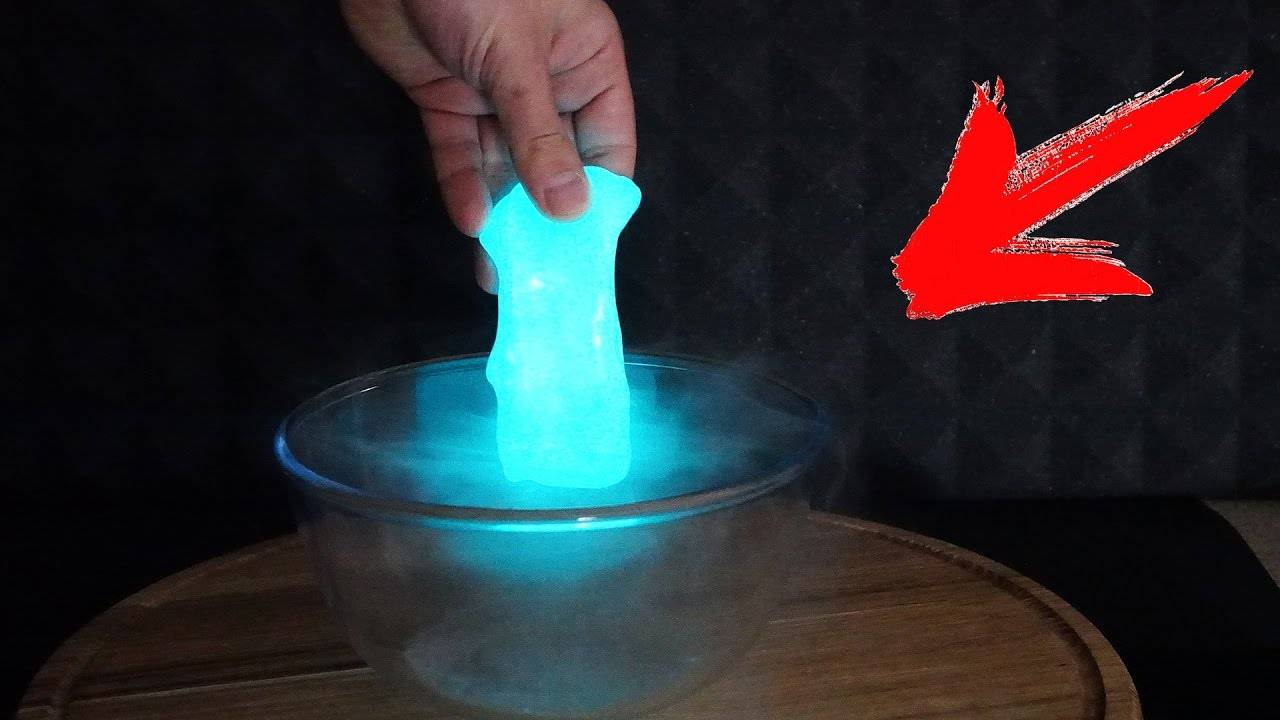
The toy is an elastic mass that glows in the dark. Slime is sold in the store ready-made, there are kits for creativity with all the components and detailed instructions on sale, or you can pick up the components separately. The last option is the most economical and allows you to vary the composition and properties of the final product as desired.
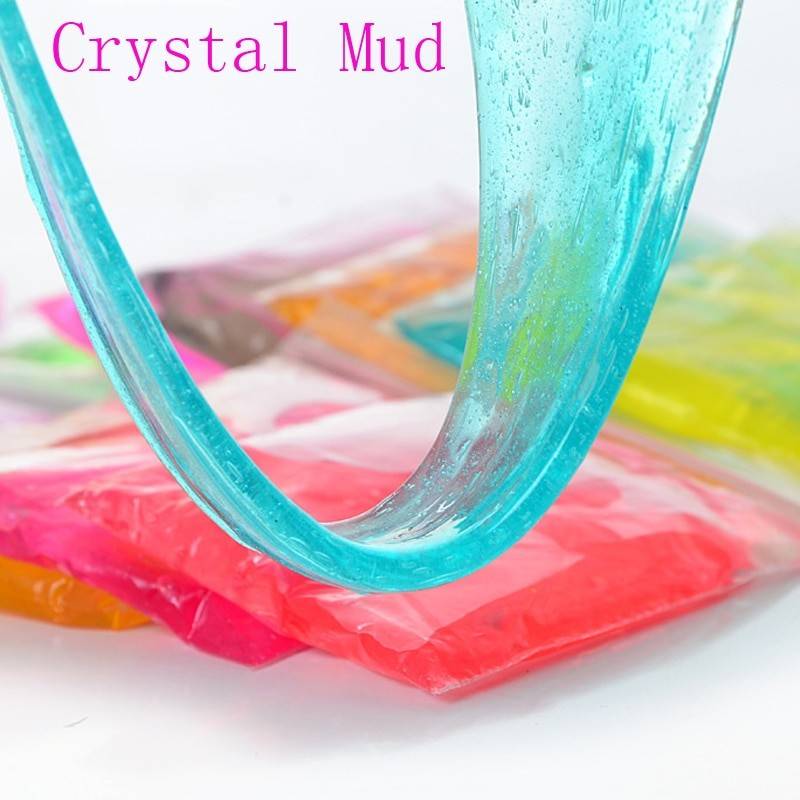
> Interesting material properties characteristic of the so-called non-Newtonian fluid. If you put a slime on a table or other flat surface, it will spread like spilled water. If you collect the mass into a ball and hit it with a hammer, then the slime will fly to pieces.
We also recommend:
Autism in children
Twins and twins
Pregnancy weight
Gas in a newborn
Hyperactivity in children
Hypertonicity in a child
Wooden Toys
Childhood aggression
Kids skirt
Baby rattles
Children's haircuts
Charging for children
Bath toys
How to bathe a child
How to name a child
How to equip a nursery
How to swaddle a baby
How to make a slime
When to baptize a child
When to give birth to a second
Matinee suit
Sweatshirt for girls
Barbie dolls
Musical toys
Beginning of pregnancy
The norm of the child's weight
First pregnancy
Transitional age
Flat feet in children
Crafts to school
Cut baby
Late pregnancy
Baby gender
Developing rugs
Baby bites
Fairy tales for children
Slings
Mixed feeding
Newborn sleep
Hobby for children
Walkers for children
How to keep your child busy
Is it a good idea to make a shampoo slime
Definitely yes! We have prepared some options for you.

We make from shampoo and table salt.

Quite a simple and working recipe, we recommend taking:
- liquid soap - 3 tsp;
- table salt - 1⁄2-1 tsp.

The volumes may be different, the proportion is 6: 1, that is, for 100 ml of liquid soap, you will need to take about 3 teaspoon of salt.

How to cook:
Stir the liquid soap with literally a pinch of salt, stir until the mixture comes out homogeneous.

Add more salt and stir until dissolved.

When the mixture begins to thicken, set it to cool for 15-20 minutes. The cooled mass can already be played.

No salt idea
We only need shampoo or shower gel and a little oil (you can take any).

How to cook:
We pour the shampoo into a container that is suitable for heat treatment.

We begin to evaporate it on the stove for about 2-3 minutes, while stirring at the same time. Can be evaporated in microwave for 20 seconds. It is required to wait for the substance to cool slightly, sending it to cool. To prevent the slime from sticking to your palms, you can slightly grease it with the selected oil!

Craft idea from air plasticine
Unlike the above, it lasts much longer. It dries slowly and preserves its properties for a long time.

What we take:
- liquid soap - 1.5-2 teaspoons;
- air plasticine, we buy it in stationery or a children's store - 1 sachet.

How to do?
The airy material is very delicate and light, but behaves differently when mixed with detergents. It is necessary to roll the plasticine into a cake and pour a little shampoo into the middle and stir by hand. It is recommended to add it in small portions until the substance acquires a consistency that suits you.

Please note that "handgam" comes exclusively from thick gel shampoos. It is recommended to add salt gradually, the interval should be approximately 2 minutes. It is necessary to play with a successful toy carefully, because the substances in the bathing product can provoke irritation of the mucous membranes of the mouth and eyes.

We have collected and revealed all the secrets in this useful article, and dug up for you the most original and effective tips on how to make a slime. We really hope that our information will be useful to you, and that you will spend your time not only fun, but also interesting.

How to make a glowing slime at home
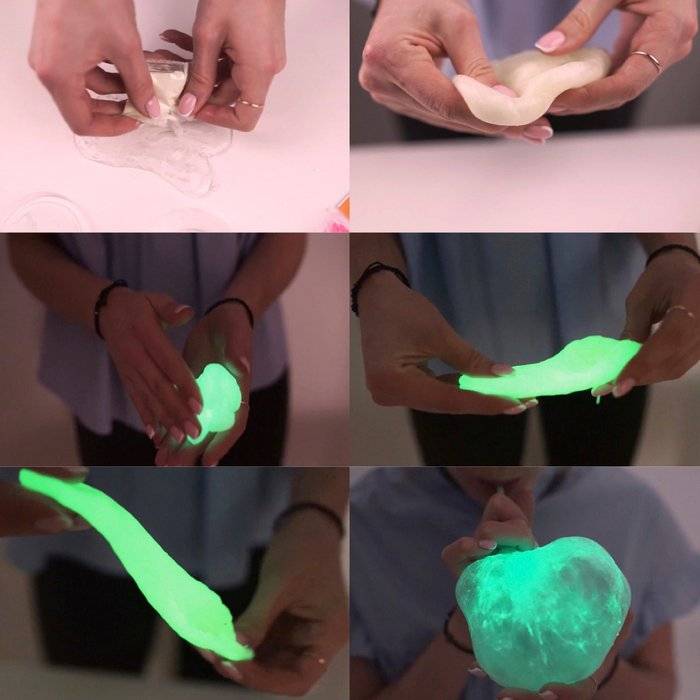
The easiest recipe suggests making glowing slimes from glue and tetraborate. Take a prepared container, pour in 6 tablespoons of PVA, color if desired and mix with a fluorescent pigment. Gradually, drop by drop, pour in sodium tetraborate. Knead the mass first with a spoon, and when it stops sticking to the walls of the dishes, do it yourself.
If tetraborate is not available, use Persil. With markers that glow in the dark, the handgam creation process involves 4 steps.
- Pull out the protective flap of the felt-tip pen and remove the ink rod. Place the latter in a container with a couple of tablespoons of water. Remove the rod after 5 minutes have passed.
- Pour 100 ml of silicate glue into a separate container. Mix with a couple of teaspoons of highlighter dyed water.
- Gradually add half a teaspoon of Persila and mix thoroughly until you achieve the desired consistency.
- Place the phosphoric slime under sunlight for a couple of hours or “charge” under UV lamps.
> Note: Shapes can be used to make the glowing slime even more beautiful. Cut in the desired silhouette from thick cardboard, attach to the mass and shine with a flashlight with UV lamps. The area around the figure will glow brightly, while the covered area will remain dark.
The third recipe suggests thickening the composition with liquid starch. Buy one from a hardware store or simply dilute cornflour with water in a 4: 1 ratio. Mix 100 ml of PVA and fluorescent paint. Gradually add liquid starch to curl up into a single lump. Mix with your hands, hold in the freezer for 10 minutes and the handgam is ready. Rice. 16
Plasticine handgum
The best recipes for making slime are recipes without sodium tetraborate solution. The use of improvised materials, plasticine or paper, often inspires the confidence of parents, moreover, the kids are familiar with crafts based on these materials.


To make a plasticine slime, you need the following components:
- Gelatin -1 p.
- Plasticine.
- Water.
- Plastic cup or glass.
- Metal container.
- Stirring spoon.

Stir a bag of gelatin in cold water, leave the container alone for a while to completely dissolve the gelatin. Bring the resulting mass to a boil. Knead the plasticine of the color you like in your hands.

Add water to a plastic container and mix with plasticine. Add gelatin to the resulting homogeneous mass and mix with a spoon. The resulting slime can be played immediately after it cools down. This method is the simplest and contains components familiar to the baby. When using this recipe for making slime, you can easily do without adding harmful substances to the toy.

From soda
So, consider simple recipes for do-it-yourself slimes. Take baking soda, along with water, dish detergent, and dye (can be substituted with gouache).

Next, we do the following:
- Pour the detergent into a container (it is better to use glassware). You can do everything by eye, focusing on the consistency.
- Add baking soda and mix. A mixture that is too thick can be corrected by adding a little water.
- We use dye to add color. Mix and put in the refrigerator. The slime will be ready in 15-20 hours.
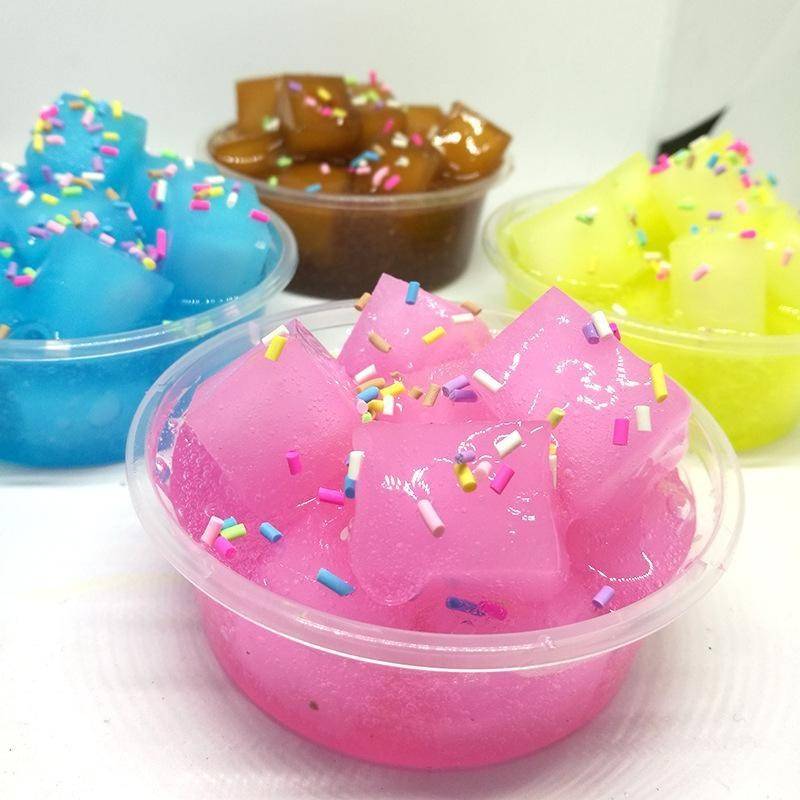
What to do if the slime sticks to your hands while playing? It is necessary at the cooking stage to add 2 drops of sunflower oil to the mixture.
How to make a slime without glue

If you don't want your child to have a toy that contains glue, you can make it out of other materials.
For example, you can use plasticine.In this case, the mass can be given any shape that is preserved. To do this, you need to prepare:
- Plasticine.
- Gelatin.
In a metal bowl, dissolve edible gelatin in water, according to the instructions on the package. Set aside for 1-2 hours. After that, the bowl must be put on the stove and, after boiling, the mass must be removed from the heat.
Knead 100 g of plasticine in your hands until it becomes warm, and mix it in a separate bowl with 50 ml of water, stir and add gelatin. Mix all the ingredients thoroughly until a homogeneous mass is formed and send the slime to the refrigerator. After a couple of hours, you can hand the children a toy.
Slime without sodium tetraborate with detergent
If you have no time to run to the pharmacy, and the slime needs to be made right now, then this manufacturing option will suit you. This version of the slime in appearance and touch is as similar as possible to the purchased one. But since such a slime contains a detergent in its composition, you need to wash your hands after use.

You will need:
- Dishwashing liquid
- Soda
- Mixing container
- Hand cream
- Dye
Progress:
- First, mix dishwashing detergent and baking soda in a 1: 2 ratio. Mix thoroughly.
- Now add hand cream and mix. The amount of glue must be determined during the mixing process.
- And add the dye.
- When all the ingredients are thoroughly mixed, the mass should turn out to be a little liquid consistency.
- Place our not quite ready slime in a bag and put it in the refrigerator for 4 hours.
- After the expiration of time, we take out the slime.
What is a slime?
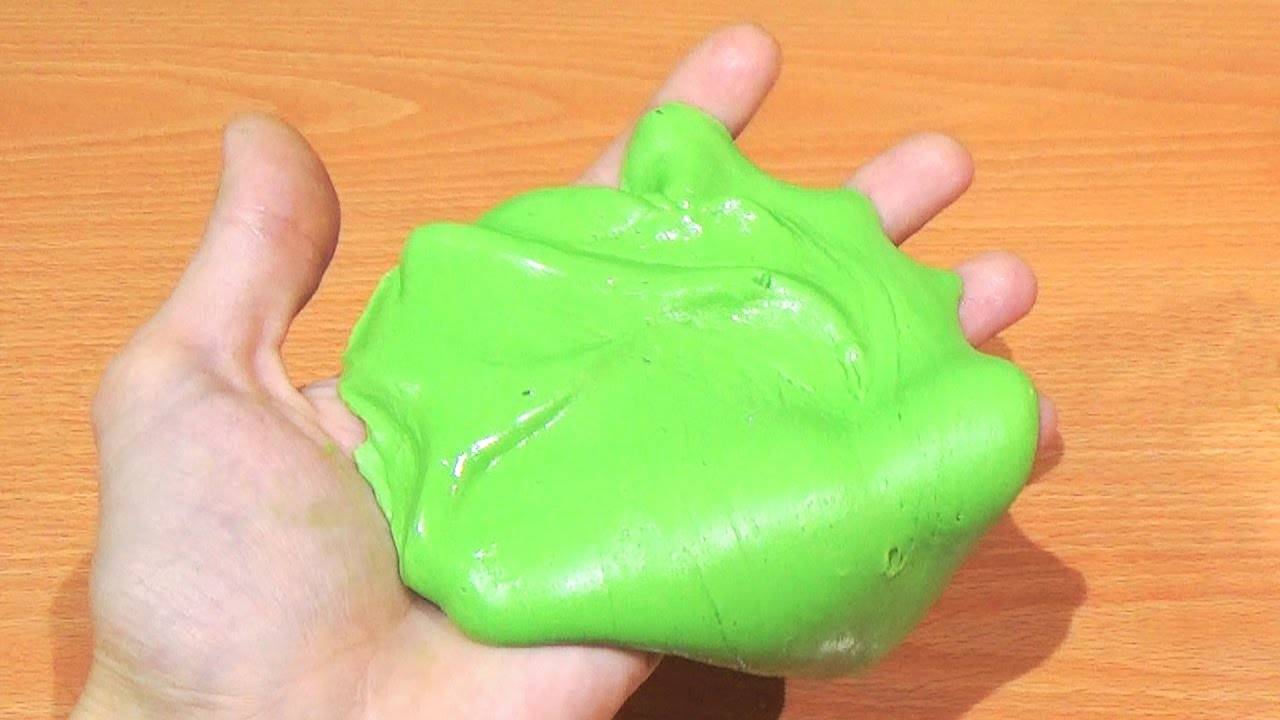
Slime, or slime, is a soft, pliable, non-tearing substance that is pleasant to the touch. It is usually used as a relaxing trinket that kids and even adults alike will love. It can take any shape, be elastic or flowable, and has an anti-stress effect due to its pleasant consistency.

Such a trinket is difficult to spoil, it does not stain children's hands and clothes, and in common people it is called "chewing gum for hands" or handgam. Slime was originally released by Mattel in 1976 and has since gained popularity.

Making a slime with your own hands is not at all difficult. There are many ways to cook with food, many of which are found in every home. It should be understood that we are making entertainment for children, so this craft should be harmless.

Now that we have learned what a slime is, and what properties it has, we will understand in detail what the product contains.

Versions of cooking toys from flour
An elementary method of creating slime from flour, such a composition is the most harmless and is done quickly enough.

What we take:
- Flour - 250g.
- Water - 0.5l.
- Dyes.
- Paints.
- Felt-tip pen.

What do we do:
In a container convenient for experiments, mix the flour and water, the released mass should be divided into three pieces.

Option 1
To paint the craft in the desired color, you need to drop the dye into a container with one piece of mass and put it in the microwave for a minute. It is recommended to set the power to medium.

Option 2
Another piece needs to be simmered in a skillet over medium heat, not forgetting to paint a piece. The mass must be constantly mixed and monitored so that it does not lose its integrity.

Option 3
A mixture of ink from a felt-tip pen, water and flour must be baked in the oven for 5 minutes at a temperature of 160 degrees.

Please note that such a toy is short-lived and differs in quality from the one purchased in the store. It stretches worse and dries sooner, but it is done in an elementary way, and is well suited for children.

Timeless classic: basic slime recipe
The most common handgam can be made from 2 ingredients. This is the key and optimal method, it always works, but if you take a stale tube of glue, our craft can fall apart.

What we take:
Any glue (we recommend household glue) and sodium tetraborate.

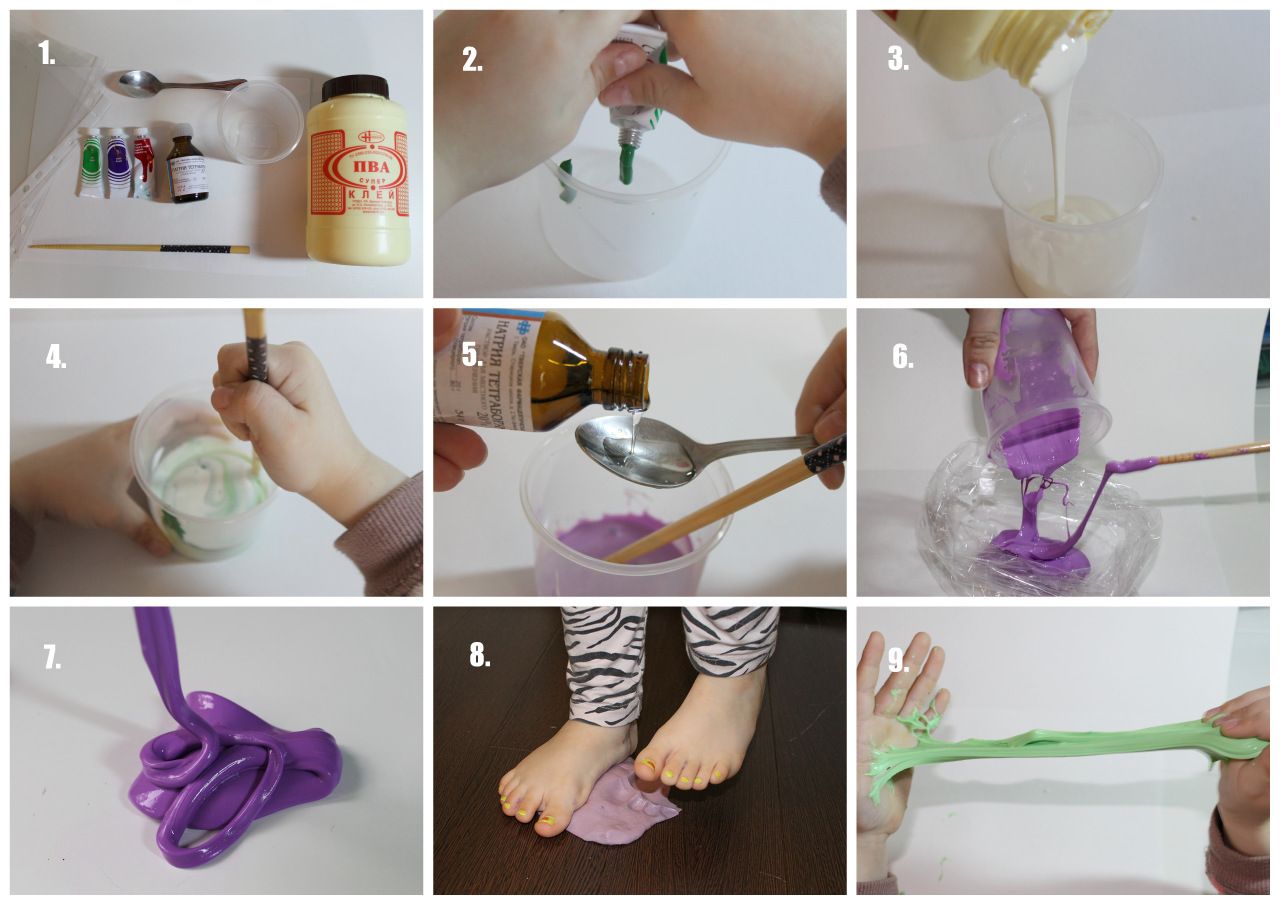
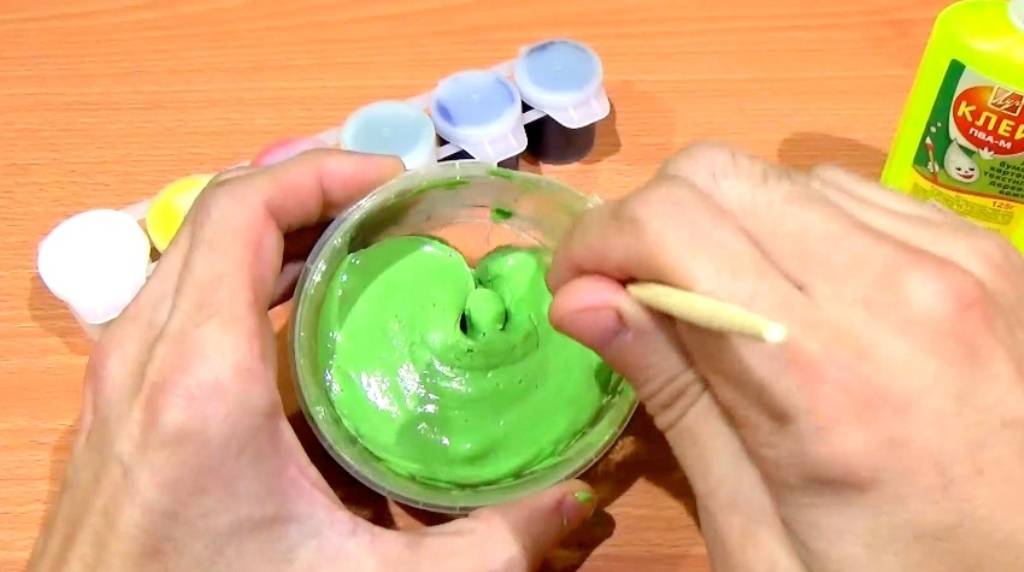
Pour a bottle of glue into the cup and slowly add borax, stirring intensively. To increase the volume of the toy, you can dilute the thickener with water (proportions one to one or two to one), and pour the resulting mixture into glue. It is most convenient to mix with a stick, it should be done very scrupulously, without the formation of lumps and clots.

For an interesting color, you can add a couple of drops of paint or dye. If the substance is not thick enough, more borax should be added. After that, the almost resulting slime must be thoroughly kneaded with your palms.


Do-it-yourself photo of slimes




We also recommend viewing:
- DIY pots
- DIY boat
- DIY dolls
- DIY beaded earrings
- DIY album
- DIY rugs
- DIY curtains
- DIY candy bouquet
- DIY beaded necklace
- DIY feeder
- How to sew an elastic band with your own hands
- DIY bracelets
- DIY felt toys
- DIY numbers
- DIY book
- DIY bows
- DIY butterflies
- Do-it-yourself bedspread
- DIY clock
- DIY casket
- DIY topiary
- DIY panel
- DIY notebook
- DIY pillow
- Do-it-yourself snake
- DIY ribbon flowers
- DIY beaded brooch
- DIY cardboard box
- DIY phone case
- DIY decor
- DIY toys
- DIY postcards
- DIY beaded beads
- DIY beaded bracelet
- DIY plywood house
- DIY frame
- DIY envelope
- DIY balls
- DIY organizer
- DIY mirror
- DIY laundry basket
- DIY wedding glasses
- DIY crafts from disks
- Decorate champagne with your own hands
- Do-it-yourself housekeeper
- DIY pots
- DIY scratching post
- DIY case
- DIY satin ribbon bows
- DIY paper garlands
In custody
As you noticed, slime can be made in many different ways. And they all differ from each other and have their own characteristics and properties, be they transparent, luminous, magnetic or even edible handgams.
If desired, glitter or mother-of-pearl can be added to your slime. Or add essential oils to make it aromatic. It is possible to mix the slime with foam balls. In general, there are many ways to make your slime unique.
We also want to remind you that it is advisable to store the slime in a container with a sealed lid. And if it has dried up, then the dried mass can be put into water for a short time, and it will become soft there again.
Do not forget to involve your children in the process of creating a slime, for them this is a real scientific quest. Just remember about safety precautions. If using a spray, keep the room well ventilated.
And do not forget that the slime can leave stains that are quite difficult to remove.
Toothpaste slime. Warming up!
This slime recipe is unique in its simplicity, and is an easy way to make a toy, but requires adult attention. To create it, you need two tubes of gel paste.

Squeeze the contents of the tube into a metal container, stir with a spoon and put on low heat. Do not stop stirring, and monitor the concentration of the mass. Your slime will soon begin to thicken. Once this happens, remove the resulting mixture and let it cool. Your slime is ready, but I hope you will choose the dyes yourself.

Working with your child is the key to a good relationship. Fantasy is limitless. Making toys with a baby, you yourself will return to childhood, feel the joy and delight of the result. Feel free to experiment. At first, I will help you with photo instructions telling you how to make a slime with your own hands. Give your little one pleasure, return to childhood. I wish you success!

Slime from PVA glue and starch

You will need: PVA glue, liquid starch, a dense plastic bag, a harmless dye. If there is no liquid starch, you can take it dry and dilute it with cold water. Proportions 1 spoon of water to 2 tablespoons of starch. The most harmless dyes are natural food dyes. You can use gouache paints.
Master Class
- Take a thick plastic bag and pour in 70 milliliters of liquid starch.
- Add a few drops of dye.
- Add 25 grams of glue.
- Tie the bag and stir for 5 minutes, until a thick, homogeneous mass is obtained. If excess liquid remains, drain it.
- Take out and wipe the slime out.

The slime is ready! Store in a closed container.
What slimes are made of most often
In simple terms, the product consists of a base and a thickener, a dye is added to give it color, but this is not necessary, since the slime will be obtained from the first two components. For the base, liquid glue is most often used, and the most popular thickener is "borax" (aka borax or sodium tetraborate), which can be obtained from a pharmacy. You can also replace it with boric acid. In addition to boric ingredients, suitable: drops from the common cold "Naphtizin", peroxide and, for example, a means for contact lenses.


The best rubble adhesives according to amateur statistics:
- "Carpenter moment" (preferably white);
- "Omega";
- "Ray red";
- PVA-M and -K;
- "Cone";
- "Lacra";
- "Titanium".

For a transparent "handgam", you can buy ordinary office glue.

But if it is difficult to acquire these components, it can be made from improvised products, these include:
- flour;
- water;
- soda;
- starch;
- plasticine;
- shower gel, soap, etc.

With water
This method of creating a glowing toy is feasible only when using a very thick glue, for example, construction glue. If you take a liquid product, the mass simply will not thicken. Water makes the toy larger and more fluid.

What to make slime from
- 250 ml PVA glue,
- 100 ml of water,
- 1 tsp body creams,
- 3 tbsp. l. shaving foam,
- 2-3 tsp luminescent powder,
- 0.5-1 tsp diluted sodium tetraborate.
How to do it at home
- PVA is sent first to the bowl.
- Water is poured into it until stirring.
- Add body cream immediately.
- The next component is shaving foam.
- Now it's time to make the composition homogeneous.
- An important part of slime is luminescent powder.
- After shaking the liquid, add diluted sodium tetraborate dropwise.
- The mass is kneaded with a spatula until it curls up.
- The last action is kneading the slime in the hands.
We recommend reading about how to make a space slime. From the article you will learn about 10 proven recipes for making Galaxy Slime from PVA glue, glue stick, soda, ball plasticine.
And here is more about how to cook 8 snow iceberg slimes.
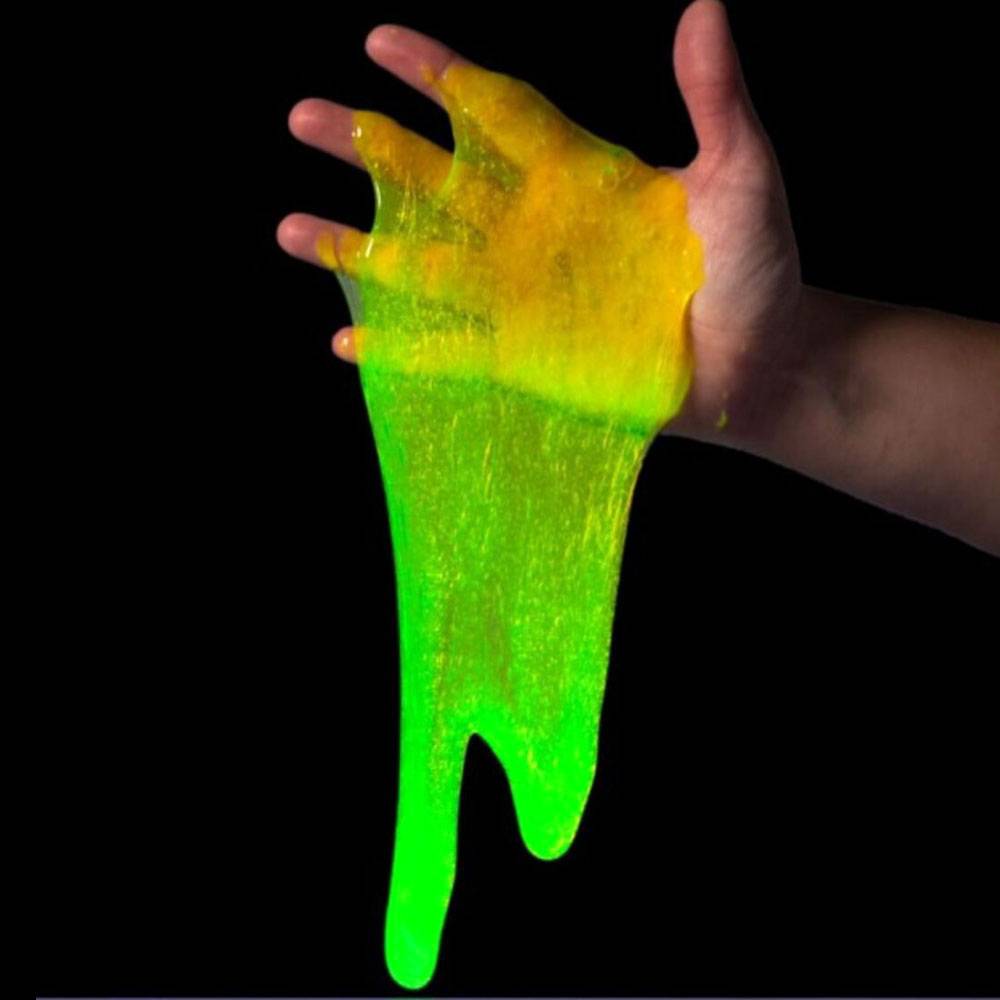
Neon slime evokes a justified delight, as it seems to be some kind of magic. In fact, it is easy to make it, you just need to add luminescent additives to the base. If it is a special paint or powder, it will last for a relatively long time. When using the contents of neon sticks, the unique property is retained for a shorter time.
Be sure to watch the video on how to make a fire slime that glows in the dark:
Fixing problems with your own hands
The great advantage of a do-it-yourself slime is that it can be easily brought to the desired consistency. It is also easy to fix the toy if something went wrong, or if you don't really like the result. What problems are most often encountered in the manufacture of slime and how to fix them:
How to soften a slime if it is dry? The easiest way is to add some water. For this, the slime is placed in a jar, a spoonful of liquid is poured and kneaded thoroughly.
Water also helps to restore the volume of the slime that diminishes over time, which loses some of the liquid while playing with it. A pinch of salt is added with water and stirred well. The procedure can be repeated every few days.
The hardened slime is softened with hand cream, baby oil, glycerin, or placed in the microwave for a few seconds.
If the mass is too liquid and sticks to your hands, you need to add an activator
Care should be taken to inject the substance literally drop by drop and mix thoroughly each time, otherwise there is a risk of overdoing it.
If the slime is not bright enough, you can add a little food coloring for a richer color. The colors should be mixed carefully so as not to get a mass of an ugly gray-brown shade.

Required Ingredients
If you decide to prepare a neon mass, look for 4 ingredients in stores.
- Silicate glue or PVA. Take trusted brands or experiment with a couple of tubes from different manufacturers. Not everyone is suitable for handgam glue - many copies roll up and turn the blank into something like colored cottage cheese. Rice. fourteen
- Activator. As a thickener, slimers take borax, sodium tetraborate, washing gels like "Persil", vasoconstrictor nasal drops, mixtures of flour and starch or shampoo and soda. The cheapest option is to stay at the drugstore tetraborate and "Naftizin". Give no more than 20 rubles for a bottle.
- Fluorescent powder or paint. It is sold in handicraft stores, office supplies and Chinese goods sites. It is cheaper to buy on sites like AliExpress - a bag of powder for 4-5 slimes will cost 70-100 rubles. Rice. 15
- Dye, if the fluorescent pigment does not give a hue. Food grade, acrylic, watercolor, or felt-tip pens will do. You can leave the glowing slime white or transparent, but the colored one looks more interesting. In daylight, the mass may have one color, in the dark - another.
Take the container, mixing stick and gloves from the tools. If you are working with fluorescent powder, protect your respiratory system with a cloth mask.
How to make a slime at home from PVA glue without using additional components
There is household glue in the box, but you can't buy a thickener? This is not a hindrance to craft entertainment.

A product using this method is made as ingenuously as with a solvent.

The main thing is to respect the proportions.
What you need:
- 100 ml of water;
- 15 grams of soda;
- 50 ml of regular PVA;
- Dyes.

Manufacturing:
In a special bowl, mix PVA and water 50 ml, temperature - 24 ° C (room temperature). After that, we drip the dye (a couple of drops) to the released solution and mix diligently again. In another vessel, knead the soda and the remaining volume of water (50 ml). Next, slowly pour the mixed liquid with soda into the diluted glue and stir vigorously. The slime will come out very stretching and spreading.


Basic recipes
Before making a toy, you need to prepare components and materials: a container in which the components will be mixed, a stirring stick, rubber gloves and a container for further storage of slime. The ingredients are combined in a bowl and kneaded until the final elastic state. The basic recipe is diversified by adding bright food colors or glitter to the slime, so it will be even more interesting for the child to play.

Rainbow
To make a rainbow slime, you need different colors of food coloring. In several bowls, separate for each color, mix the components and bring the mass to the desired consistency. Ready slimes of different colors are combined into one, the resulting toy will be multi-colored.
The classic version of the glowing slime
To prepare a glowing slime, you need to take:
- glue (regular stationery or PVA, homemade glue for slime is also suitable);
- activator - sodium tetraborate (you can replace it with a liquid for lenses, brown or borax);
- fluorescent marker.
Step-by-step instructions for making a glowing slime are presented below:
- A luminous liquid is prepared from the core of a felt-tip pen and water.
- Glue is added to the resulting solution.
- The mixture is supplemented with any activator from the list.
- The resulting composition is mixed first with a stick, then, as it thickens, with hands protected with gloves.
Recipes
Let's look at two of the most famous recipes for making a stretchy toy using dough. Let's look at a classic recipe made from safe ingredients, as well as a recipe with the addition of shower gel.
With shower gel
For the first recipe, we need flour, hydrogen peroxide, and shower gel. Instead of a shower gel, you can use a hair shampoo. The first thing we need to do is mix two to one shower gel and hydrogen peroxide in a bowl. Stir the mixture thoroughly until it is a thick, homogeneous foam.
When the thickness we need is reached, we put the bowl with the mixture in the freezer and keep it there for a few minutes. Then we remove the bowl from the freezer and begin to gradually add flour to the mixture, stirring constantly. Our task is to ensure that the mass becomes thick and dense. We reach a consistency and knead it in our hands. The slime will stick to your hands - this is normal at this stage of cooking.
We put the slime in an airtight container, tightly closing the lid, and leave it for a day. Then we remove the slime from the container and, after wetting our hands with oil, knead it again until it stops sticking to our hands. As a result of all actions, a viscous and pleasant to the touch substance should be obtained.

Classical
In the classic recipe for making slime from dough, only edible ingredients are used, so this slime is the safest.
To make a classic slime from dough, we need flour, food coloring, water and a bowl for mixing the ingredients. Sift the flour into a bowl, then add some cold water to it. Now add the exact same amount of hot water to the bowl, but not boiling water. Gradually add food coloring, stirring constantly, to achieve uniformity and the desired color contrast.
Put the container with the resulting mixture in the refrigerator and wait until it cools. Then remove the bowl from the refrigerator and knead the toy with your hands. The result is a soft substance that is easy and pleasant to knead in your hands.


