Tools and materials
To install on a tile floor, you will need tools:
- marker, pencil or chalk to mark the contour of the base on the tile or floor;
- a drill for ceramics and a drill for plastic dowels;
- means - a sealant to provide waterproofing;
- standard set of screwdrivers;
- drill or hammer drill;
- core for cleaning the top layer of tiles;
- wrench and adjustable wrench;
- bolts for attaching the toilet to the floor;
- pliers;
- grinding machine with a diamond wheel;
- connecting hose;
- tap;
- an adhesive (for example, liquid nails) if you plan to use method # 3 for attaching plumbing fixtures to a heated tiled floor;
- plastic dowels;
- plastic washers for bolts;
- a spatula to remove residues of sealant or adhesive.

Types of connecting elements
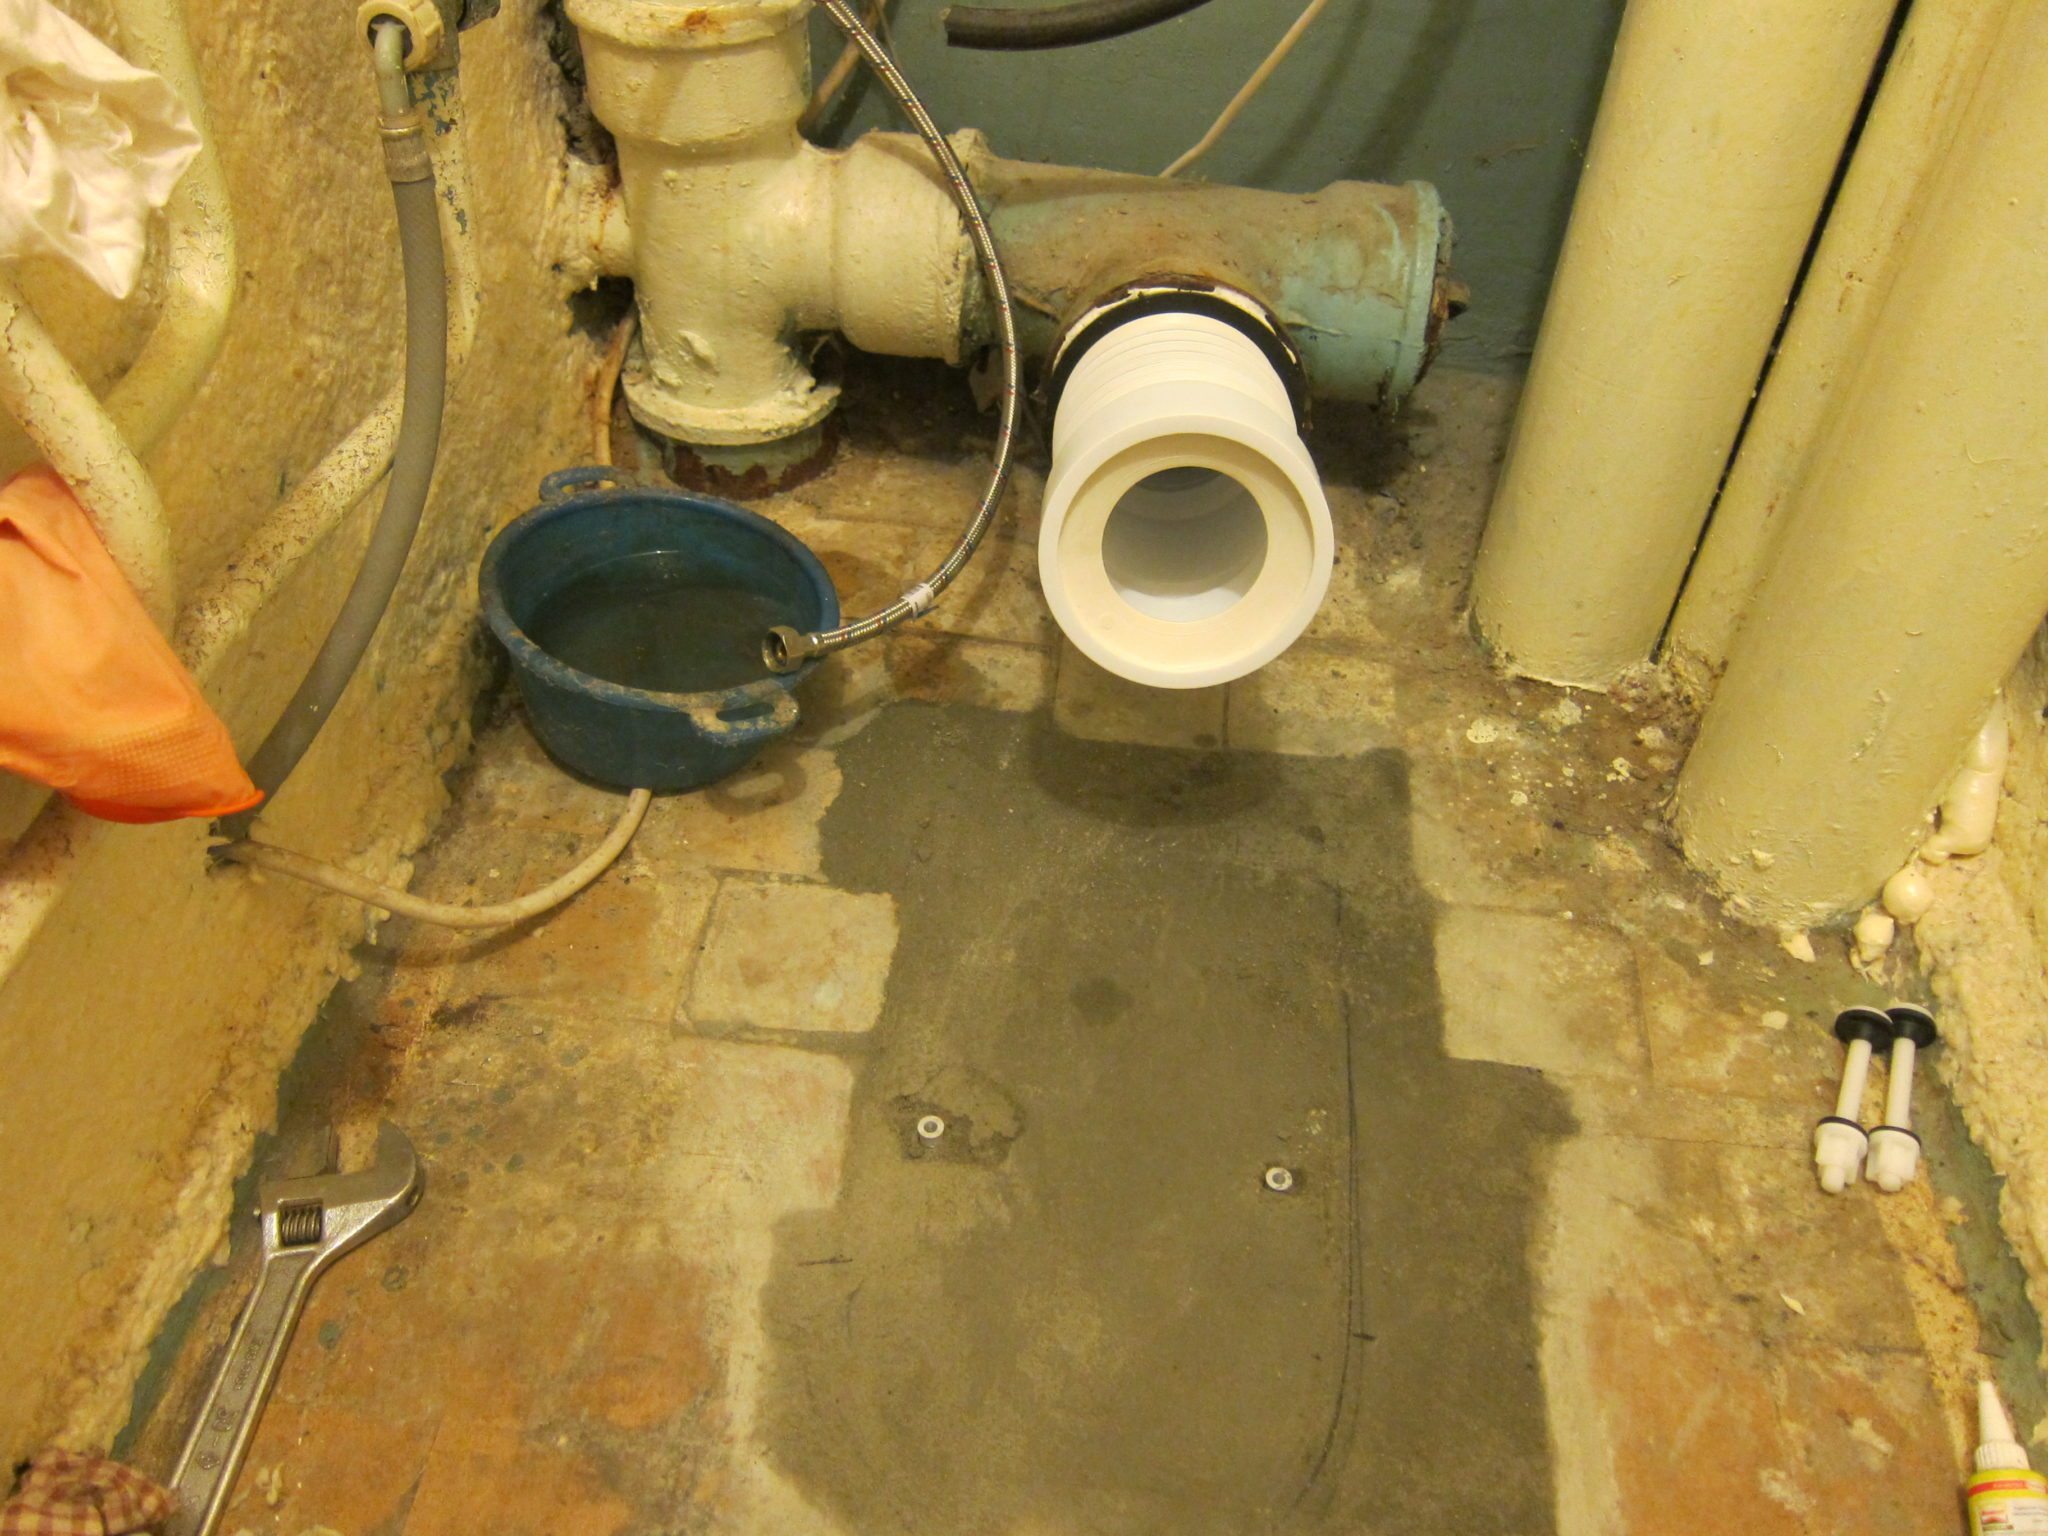
To connect the toilet to the fan pipe, use an eccentric cuff.
In many situations, in order to connect the toilet bowl to the fan pipe with your own hands, an eccentric or corrugated cuff is used, which allows you to connect the elements if their direct joining is impracticable. Therefore, the toilet is not attached to the floor until the preliminary connection to the sewer is made.
Eccentric cuffs consist of 2 pipes, which are welded together, with offset centers. Due to the special structure of the eccentric, it is possible to connect the outlet of the toilet bowl with the sewer drain pipe or the inlet pipe. Manufacturers make eccentrics of various lengths, which must be taken into account when choosing the right part.
Do-it-yourself installation of the eccentric to the toilet and sewer pipe is done without the use of sealants, since the tightness of the connection can be achieved due to rubber seals that are available at both ends of the cuff. A tightness problem can arise when connecting the eccentric to an old cast iron sewer. To exclude the possibility of leakage, after connecting the elements, apply a sealant to the area of their joint.
It is not always possible to produce with an eccentric cuff, since the connecting elements can be displaced a great distance from each other. Therefore, a corrugated cuff is more often used, which is capable of stretching to the desired length. In addition to the ability to stretch, the corrugation is easily subject to deformation, which allows the craftsman to achieve the required connection angle. This is the main plus of the corrugated cuff, which allows you to connect to the sewer with your own hands in all situations.
DIY toilet installation instructions

To attach the toilet to the floor, you need to drill holes.
In modern plumbing devices, holes are provided for fastening to the floor.
Do-it-yourself installation of equipment begins after finishing work and laying of floor tiles are completed.
Now, in more detail about how to mount the toilet on a tile and connect it to all the necessary communications.
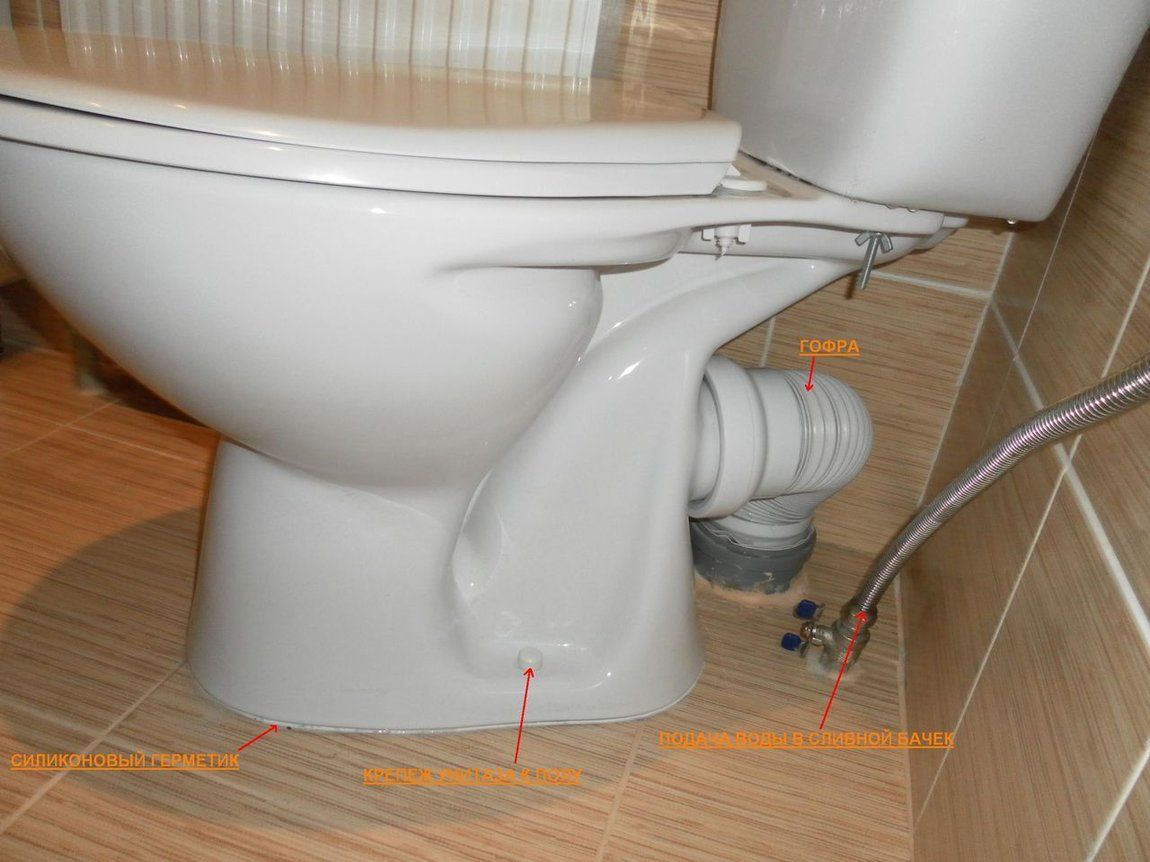
The installation is started by connecting the device to the sewage system, using a corrugated bend for this purpose.
A rubber corrugation seal, which needs to be slightly moistened with water, is put on the toilet outlet.
Then the device is installed in the selected place and the second end of the corrugation is connected to the sewer pipe.
Through the fixing ears, which are located at the base of the toilet, they create marks on the tiled floor with a pencil or marker.
The corrugation is designed for draining waste water into the sewer.
Further, the corrugation is disconnected from the sewer outlet and the toilet is moved to the side in order to drill holes with a puncher in the marked places. Their diameter should correspond to the plugs that come with the fasteners. To carry out this operation, you will need special drills that have victorious tips designed for drilling tiles and concrete.
After that, the toilet is returned to its original place and the holes made are aligned with the fixing ears. The toilet is fixed to the floor using elongated hex head screws.
Ends with sealing the joint, which is formed by the device and the floor surface.
If the product does not have an attachment lug, how do you secure the toilet bowl to the floor in this situation? You can "plant" it on a cement mortar or epoxy glue. Moreover, you need to thoroughly clean the floor surface before applying the bonding material.
What is needed for work
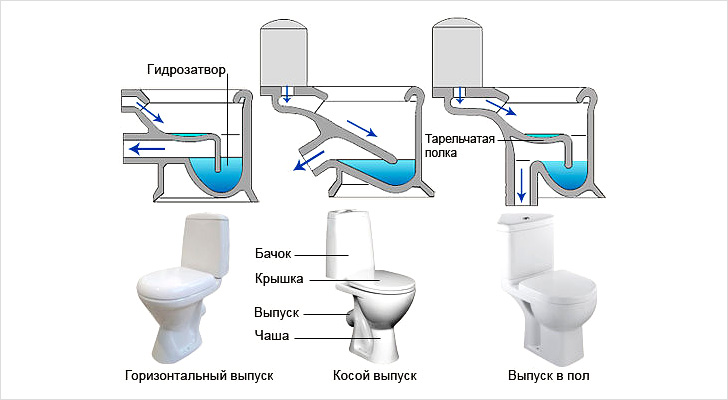
First of all, you need to know that floor structures have a different form of fecal water release:
- vertical;
- horizontal;
- oblique.
In new buildings, they began to install toilet bowls with horizontal drainage of fecal water long ago, while in old buildings of the "Khrushchev" type there are devices with an oblique release form. Toilets with a vertical outlet, which are mainly located in Stalinist buildings, are used less and less.
Therefore, before purchasing this device, you need to know how water enters the sewer pipe, so as not to redo the sewage system and quickly and efficiently install a plumbing device.

To connect plumbing to the sewer system, special pipeline fittings are used, among which the most commonly used are:
- fan pipes;
- eccentric cuffs;
- corrugated pipes.
The use of funnel pipes gives a visual appearance of the unity of the toilet bowl with the connecting material, since both are made of the same material, for example, faience, ceramics, porcelain and others. The only difficulty of installation in this case is the need for an exact match to the installation site, it will not work to fit by trimming.
Eccentric cuffs are made of polymers, which are a structure of two branches with shifted axes. The cuffs can be of different lengths, so it will not be difficult to choose them to connect the toilet bowl to the sewage system with other parameters of the drain and the socket of the sewer pipe.

Connecting the toilet to the sewerage system
Many people are not bothered by the process and further correct installation of the new model device, but by the process of connecting to the sewer pipe. This operation is not too difficult, especially if you find a model with the same type of connection as the dismantled toilet.
are divided into 3 types according to the location of the drain pipe, which goes:
- parallel to the floor plane (horizontal outlet);
- perpendicular to the floor plane (vertical outlet);
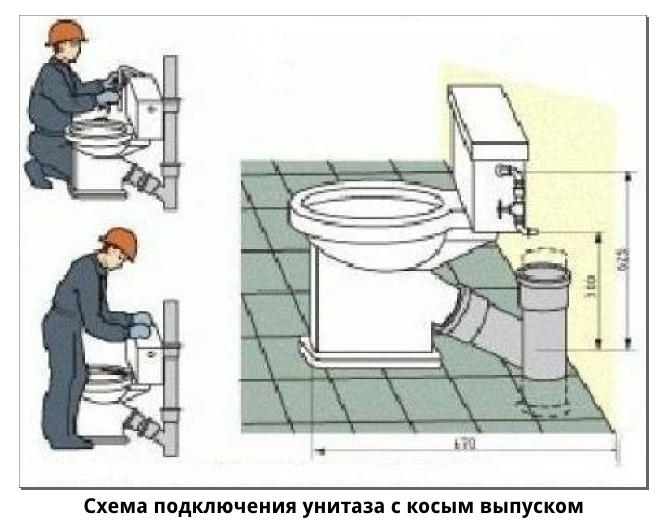
- at an angle of 30-40º to the floor surface (oblique outlet).
The installation of the toilet depends on the location of the outlet.
- Toilet bowls with vertical outlet. These models are widespread in Europe. In devices with a vertical outlet, the branch pipe and the siphon, which is located in the toilet bowl, are directed downward. This design is convenient because it can be placed against the wall at any angle. Moreover, it is carried out quite simply. After the markings on the floor are completed, the screw flange is installed, which is equipped with a retainer. A sewer pipe is mounted in a round hole located in the center of the flange. Then a toilet bowl is installed on the flange, which is turned until it is completely fixed. Moreover, the outlet pipe must automatically be pressed against the end of the sewer pipe due to the sealing ring.
- Toilets with horizontal outlet.This method of connecting the toilet is most widespread in our country. This is due to the peculiarities of the installation of sewer systems in apartment buildings. The equipment must be installed against a specific wall. Moreover, the outlet of the toilet bowl, which is directed to the wall, is connected to the sewer outlet using a special sealing cuff. To secure it to the floor, there are special holes in the legs of the toilet bowl for fixing.
- Toilets with oblique outlet. Installation of toilets with oblique outlet is as follows. First, the outlet of the toilet bowl, which has grooves, is lubricated with red lead mixed with drying oil. Then a resin strand is wound on top, not reaching the end of the outlet pipe by 0.5 cm, so that the ends of the winding do not fall into the sewer hole and do not create a blockage. The wound strand is also thoroughly lubricated with red lead. Then the outlet pipe is carried out and fixed into the socket of the sewer pipe.
Types and standards
The plumbing equipment market keeps pace with the times, constantly offering customers new configurations of toilet bowls. This should not be scared, because, despite the great variety, all equipment is manufactured on the basis of certain norms and standards. When dividing toilets into general groups, there are:
- funnel-shaped design;
- toilets with a shelf;
- toilets with a sloped back wall;
- equipment with horizontal discharge;
- equipment with a circular discharge.
Funnel-shaped
Funnel-shaped structures are considered one of the most common on the market, and high demand for them is achieved due to the simplicity of the design and its hygiene.
With shelf
Toilets with a shelf are classified as old structures that are gradually being phased out. The shelf prevents the formation of a splash during operation, but has poor hygiene. Waste is flushed away only under the influence of high water pressure.
With a sloped back wall
Toilets with a sloped back wall displace similar products with a shelf thanks to a well-chosen balance of hygiene and splash protection. Such designs are recommended for use by both professional plumbers and ordinary citizens.
Horizontal drain
Flush toilets belong to the budget category of plumbing. Water in this modification washes only one wall, which reduces hygiene. The advantages are:
- durability;
- low cost.
The disadvantages include:
- noisy during draining;
- strong splashing of water.

Circular drain
In toilets with circular flush, water is directed in several directions of the bowl, which allows you to treat almost the entire area. The design is quieter and more practical for horizontal models.
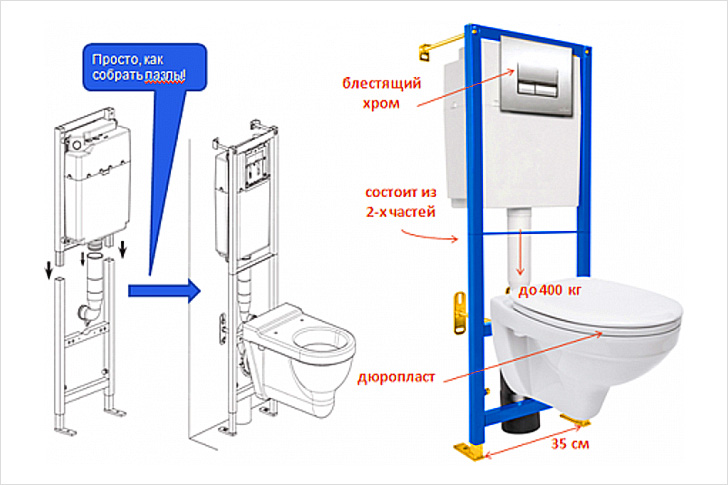
Positive and negative aspects of installing a wall-hung toilet.
Before you decide to install a wall-hung toilet, you need to consider the main arguments for and against regarding this issue.
The positive aspects of the installation include:
- saving the space occupied by the device;
- lack of an impressive drainage leg;
- weak noise from the discharge of water;
- extreme ease of care.

However, we must not forget that the installation of a toilet bowl with a designated design also carries a number of disadvantages, among which the following points stand out:
- the need to mount the cistern inside the wall or niche (otherwise the size of the protrusion of the hanging toilet will not differ from the same indicator for a standard floor-standing device);
- the likelihood of transferring sewer and water pipes;
- the need to create a special depression for the cistern.

How to install a toilet with your own hands. Step-by-step instruction
The installation process of a floor-mounted toilet is not
is nothing particularly difficult
It is only important to perform all operations
without unnecessary haste with maximum accuracy

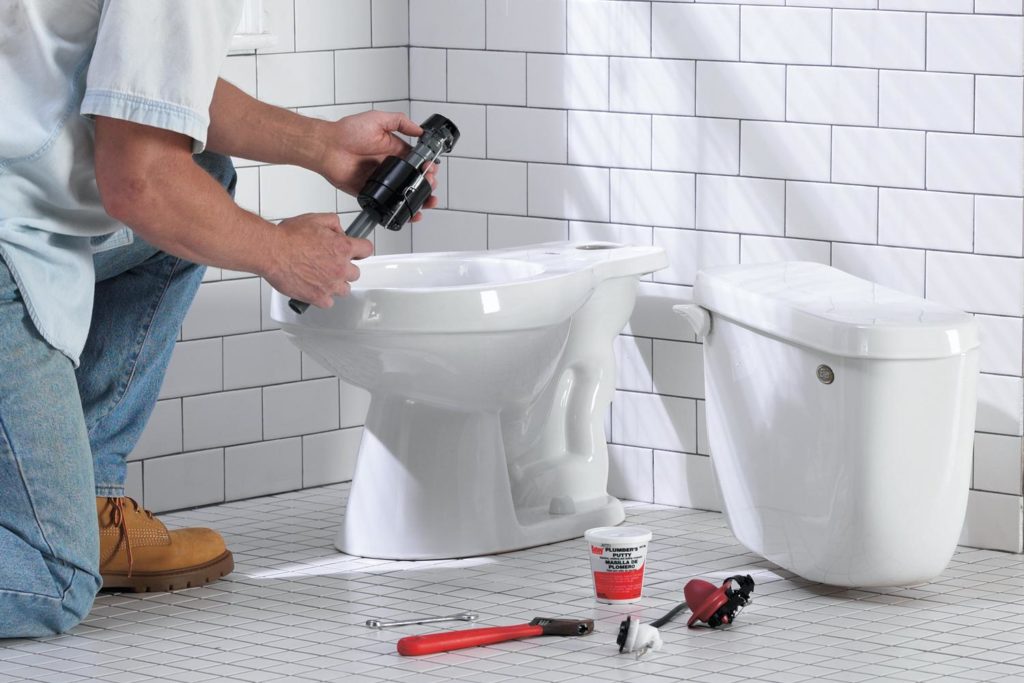
Work begins with unpacking the brought toilet bowl and assembling
his. First of all, drain fittings are inserted into the opening of the tank. Not under it
forget to install the rubber seal. The reinforcement is fixed in place with a washer,
which is first twisted by hand, and then with a key. Plastic is easy to break
rough actions, so tighten the connection very carefully, do not
carried away.


Next, fastening screws are inserted into the tank, which will attach
to the shelf. They put on rubber gaskets and washers, then nuts. Between
with a cistern and a shelf put a gasket. All are coated with sealant so that
prevent the development of leaks and seepage of sewer odors. Tank
put in place, fixed with screws, controlling the verticality of it
provisions.

Further, on the hole from the side of the water supply to the tank is attached
float nozzle. The connection is sealed with a linen winding with a special
pasta.
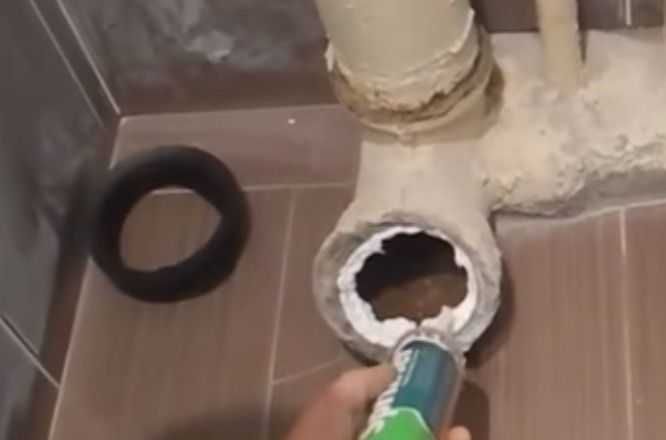
The assembled toilet is connected to the entrance to the sewer
system. The easiest way is if the riser is made of polymer pipes. Then for
the connections just put on the corrugation. You will have to tinker with a cast iron pipe to
clean it from layers to metal. Then the dried metal is coated
with a sealant, they fit the corrugation and, for reliability, are treated with a sealing
paste also outside. Without this treatment, leaks are possible due to small cracks in
metal. The corrugation is stretched, putting it on the outlet from the toilet.


Next, the assembled toilet is moved to the side, drilled into
the base of the holes for the fastening screws and are supplied with plastic plugs.
The toilet is placed on a dust-free base, the hardware is inserted and carefully
tighten, making 2-3 turns from each edge. The toilet must be in place
strictly upright and not swing.

The installation is almost complete. It remains to implement
connecting the tank to the water supply. The inlet is equipped with a union nut with a rubber
seal, so that it is easy to achieve a reliable tight connection.
It remains to adjust the fittings, put the cover and the release button in place.
Make a trial water supply, drain. If necessary, tighten the leaking
connection or adjust the drain fittings.
Views
Today there are dozens of different types of toilets. They
differ in many aspects (for example, the design of the flush or
bowl shape). But we will be primarily interested in constructive
features that will make a difference during installation. This is the way to release in
sewerage and features of attaching the toilet to the base.
Mounting method
Usually, the toilet consists of a cistern containing water,
used for rinsing, and a bowl that attaches directly to
sewerage. There are also models in which these two components represent
a whole.
The bowl can be fixed to the floor or hung on the wall. V
Depending on the attachment point, the tank can be installed in different
ways:

- If the bowl is hung on a wall, the bowl
built into a wall niche. This arrangement is called flush mounting. - If you need to fix the bowl to the floor, then the tank can
be installed in several ways. Most often it is mounted on a shelf.
bowls (this is called a "compact cistern"). Another scheme provides
separate placement of the tank with its fastening to the wall. Then the water supply to the bowl
will be carried out through a pipe or flexible hose. You can also place the tank in
wall niche, discreetly.
The easiest way is to mount the bowl to the floor and
a compact cistern. Such an installation can be carried out without undertaking a capital
repair. But this design also has negative features. It takes a lot
places and looks pretty heavy. Arrange for hanging the tank to the wall or
embedding (installing) it into a niche is more difficult, such an installation can
done only during a major overhaul.
Release into the sewer system
Depending on how the sewer pipe enters the bathroom, it is preferable to choose a toilet with a specific exhaust system:
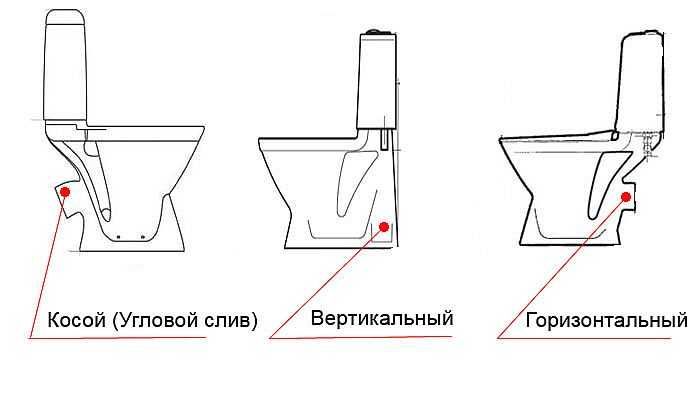
- A vertical outlet is optimal if the entrance to
the sewer system is in the floor. - If the entrance is located near a wall and is on
a certain height, preferably a bowl with an oblique outlet. - Direct outlet design is suitable for both
cases. To connect the outlet from the bowl to the inlet to the sewer pipes
systems, use a transition pipe made of corrugated plastic.
The easiest way is to replace a bowl similar to the one previously installed. If you plan to rework the sewer system, you can install any model. But the scope of work will increase. In order to find out how to choose plastic pipes for sewage, read this article.
Dismantling the old
Dismantling an old toilet is a laborious process. With the right organization, effort is minimized and the replacement process is greatly accelerated. Try not to deviate from the planned plan, and everything will go smoothly, without incident.
It is necessary to turn off the water and drain the liquid from the tank
The main action to start with when dismantling any type of toilet bowl. Failure to do this will cause water to flood the restroom, damaging you and your neighbors. Before dismantling, prepare a rag and a bucket into which the liquid remaining in the pipes will drain.
Unscrew the hose between the tank and the water supply
The hose is unscrewed using a regular wrench, which you should have prepared in advance. If the hose is not disconnected, you will not be able to remove the toilet from the toilet and connect new equipment. The process is simple and does not require specific skills.
How to unscrew the fasteners
Problems can arise when working with the fasteners that hold the cistern to the toilet. Due to the high humidity, rust forms, which complicates the dismantling process. In order not to spend unnecessary efforts, we wet the fasteners with kerosene. After a while, unscrew them with a screwdriver and an open-end wrench.

Removing the fasteners
Fasteners fix the toilet on a concrete base, preventing it from swaying and shifting during operation. An open-end wrench is required to remove the mountings. It is necessary to act carefully, otherwise cracks will form on the surface of the ceramic.
Disconnecting the drain from the sewer
Actions when disconnecting the drain from the sewer depends on the material from which it is made:
- cast iron;
- flexible drain;
- a drain made of plastic.
The least problems arise when removing the flexible drain, and the most difficult is to work with cast iron. The main thing when disconnecting the drain is to do everything carefully. Rough exposure will damage the material, which will affect the final cost of the repair.
Destruction of cement paste
To replace the toilet in an old house, you will have to work with a chisel and hammer, destroying the cement coating. It is used to fix the drain and will not allow dismantling the old bathroom.
Dismantling an old toilet

The initial step is to dismantle the old device, no matter what installation method will be used. Dismantling work of the old device:
Dismantling work of the old device:
Disconnection from the water supply. First of all, you need to shut off the water supply to the drain tank. Then drain off any remaining liquid. Now we unscrew the water supply hose.
We unscrew the fasteners. The tank has several fasteners, they are mostly made of plastic and can be easily unscrewed, but in some situations the fasteners can be metal.
To unscrew the metal fasteners, you need to take an adjustable wrench and a screwdriver. Press down on the top of the bolt with one hand and unscrew the nut with the other.Often these bolts are found on older models and can rust. These bolts are difficult to remove. To make it easier for you to carry out this action, the threads need to be lubricated with kerosene or use a modern anti-rust agent WD-40. Upon completion, remove the drain tank.
We unscrew the toilet bowl from the floor. We disconnect it from the sewer, remove the corrugated hose. If the houses are of the old type, then the toilet is connected there to the sewer without corrugation, and at the junction it is smeared with a solution. In this case, the solution must be broken with a hammer and chisel. Then you need to turn the toilet, and it should come out of the pipe
Now we tilt the device and drain all the leftovers from it.
Important! Do not forget to cover the hole in the pipe with any material, otherwise there will be an unpleasant smell.
This is how the dismantling work of the old plumbing fixture is carried out. Now we will tell you how to install the toilet with your own hands.
Pouring a concrete wall for fixing a toilet bowl
For the installation of a concrete slab, a solid base of the floors is necessary, since a suspended toilet can only be installed on a reliable base. Formwork is made for installation with a height of 80–100 cm. The width is selected in accordance with the width of the toilet bowl and cistern. After that, they take reinforcement with a diameter of 10 mm or more and firmly fix it vertically to the floor with a step of 10 cm from the side of the toilet fixing and opposite to it. The distance from the wall should be enough to accommodate the tank. Next, formwork is placed and a solution of concrete of the M300 brand is poured. At the end of the day, the formwork is removed. Curing time is up to 30 days. Then the holes for the pipes are drilled and the pins are screwed in for mounting the toilet.
Preparing to install a new toilet
Preparing to install a new toilet is as follows:
- removal of debris left after dismantling the old structure;
- checking the level of the base on which the new toilet will be installed.
If the base is uneven or defective, it is necessary to destroy it and make a new screed.
Tile
For the beauty of the room, the concrete base of the toilet is finished with tiles. You can use any design and color, as long as it blends harmoniously with the surrounding interior.
Tile
If there is no money for the tiles, use finishing tiles. In most cases, it is cheaper than tiles and is not so expensive. In extreme cases, you can do without finishing, because, in addition to the decorative function, it does not carry a special functional load.
If you plan to replace the tile
If you plan to replace the old tile with a new one, it must be dismantled before installing a "fresh" toilet bowl. After the plumbing is installed in its proper place, the subsequent facing work will become noticeably more complicated. To avoid this, make repairs after dismantling, and build a new toilet last.

If the finish is missing
In the case when there is no finishing, preparatory work is minimized. Enough:
- level the floor;
- remove extraneous debris left after dismantling the old equipment.
If both conditions are met, feel free to proceed with the installation.
What is important to consider during installation
In old houses where there are cast-iron pipes in the sewage system, the connection of a toilet with an oblique drain is done in the following ways:
- put the release of the device into the sewer hole, and the remaining gap between them is covered with a cement compound so that it does not fall into the riser;
- you can use the cuff used in the oblique outlet connection. They use it like this: put it on the outlet, which is then immersed in the hole of the sewer pipe, previously cleaned of cement and other dirt, coat the irregularities with hermetic;
- a corrugated pipe is used when the toilet bowl is turned at an angle relative to the socket, but water will stagnate in it due to the resulting slight slope.It is also used if, after repair, the toilet is mounted high and its outlet does not enter the sewer hole;
- in order to avoid the smell from the upper floors in an apartment building, when a toilet with a direct release form is mounted, you need to put on a rubber cuff on the outlet, then put it on the bell.
Video: installing and connecting the toilet
It is not such a big problem to install a toilet in the house yourself, if you have at least minor skills in working with tools. According to the attached instructions for the plumbing fixture, it is not difficult to make the installation. However, if you have doubts about your knowledge and skills in this area, it is better to turn to specialists - it will cost you cheaper and faster.


