Prevention of squeak
Instead of repairing your flooring, it is best to try to prevent deterioration. The parquet is based on natural canvases, so they initially require special care and installation. If you follow the instructions and technologies at each stage, you will maintain the quality and service life of the parquet for a long time:
Follow the installation instructions strictly and step by step.
The floors must be perfectly flat, it is necessary to take into account waterproofing, thermal insulation, an interlayer between the concrete base and the parquet, provide 4 protective layers.
Choose only quality material.
There should be no cracks or knots on the surface of the selected parquet. Before buying, you should measure the level of humidity in the planks, request a certificate for the product. Buy parquet only from trusted major sellers
Select the adhesive and substrate that meets all regulatory requirements.
Almost any floor covering is made with technical clearances from the walls.
Pay close attention to this step before you start attaching the skirting boards.
Observe the microclimate conditions in the apartment.
This will prevent the floorboards from drying out and swelling. If the air level in a room with parquet flooring is too dry, a humidifier must be installed there.
In cold seasons, provide a heating system.
Every three months, it is required to sand and renew the varnish layer.
Do not allow moisture to enter the floor surface.
If liquid spills on the floor, immediately remove it with a dry cloth.
Clean the area with a damp cloth, not a wet one.
Parquet differs from other floor coverings due to its elegant appearance and natural composition. It appeared in our country in the sixteenth century, but it still remains popular both in ordinary apartments and in country houses. However, the material is made from natural wood, which can cause a lot of inconvenience. For example, if the parquet floor creaks in the house, it is unlikely that anyone will like it.
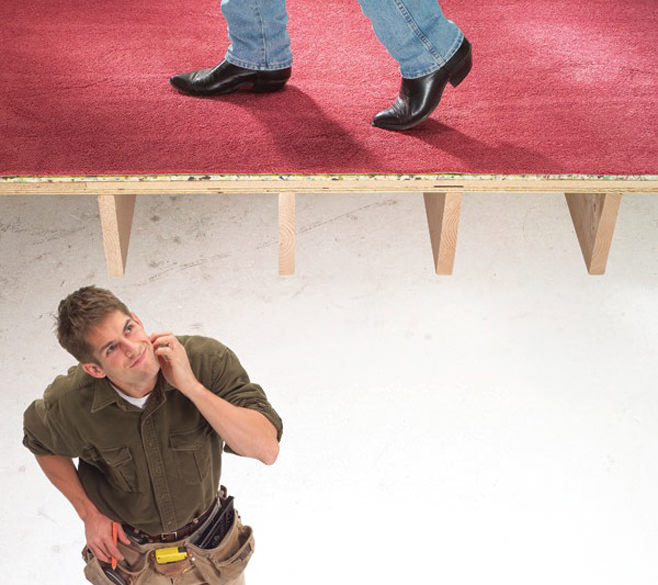
Unpleasant sounds are played when someone moves on the surface. Parts of the parquet cease to be motionless, and if pressure is applied to them, a creak is born. You want to get rid of sounds as quickly as possible, but this is not so easy. First you need to find the cause of the squeak.
The reasons for parquet creaking are divided into 3 categories:
- stacking errors;
- material properties;
- wear of the coating.
More often than not, parquet flooring squeaks if workers make a mistake when laying the material. They may not have left an expansion joint. Also one of the reasons is a bad foundation. The cement screed needs to be level and free of debris. It may also be that the cross beams used as floor framing are deformed or simply misplaced. The lack of vapor barrier also leads to the appearance of a squeak. The system acts as a protection against condensation for the wood, which is why it is so important. Do not leave too large or, on the contrary, too small a distance between the planks.
This coating cannot be installed in every room. It happens that the parquet squeaks when the wood is incorrectly selected. For example, in rooms with a high level of humidity, it is better to choose a larch or ash covering. If you plan to install heating after laying the floor, it is better not to choose beech or maple. These materials are deformed too much.The floor can also begin to creak if the temperature is not observed, because any material expands when it is warm.
When the coating is in use for too long, the wood cracks, the cross beams can collapse, the parquet elements can come off, and the fasteners for nails and screws fall out. Over time, any materials deteriorate, but even in this case, you can do without parsing the parquet.
What to do: options for elimination
Let's say you have established why the panelboard parquet or board creaks. What to do? The answer to the question lies in the reason itself. Let's figure out what to do in different situations. Let's dwell on the most common sources of the problem.
remont-1
remont-2
Uneven base
The most common mistake is poor preparation before installing decor. The minimum installation requirements must be observed, in particular leveling the sub-surface.
The floorboards are locked together or pressed very tightly. Unevenness in the floor creates voids between the decor and the base. As a result, under loads, there is friction between wooden surfaces.
Unfortunately, the floor will have to be dismantled and start over. After filling the irregularities on the cleaned base, it is poured with a new DSP or a self-leveling mixture.
The difference in height on the surface of the new subfloor must be less than 2 mm for every 2 m2. Otherwise, after a while the picture will repeat itself.
For better and more reliable results, it is recommended to cover the screed with chipboard sheets, but even here pitfalls can await you.
Thus, after taking measurements and revealing that the old parquet creaks precisely because of this, dismantling is done. This is the only way out of this situation. Depending on the material of manufacture of the rough base, the following methods of leveling it are chosen:
Concrete screed. Pouring the leveling compound
It is important to choose the right type and prepare a solution. The thicker it is, the higher the maximum fill height;
Wooden base
To align it, install sheets of fiberboard, chipboard or plywood. Pre-adjustment of the lag level is performed.
After dismantling the decorative coating, the condition of each die should be checked. Their geometry and shape are controlled. Re-assembly is carried out using standard technology. To improve the appearance, you can do a scouring and reopening with varnish.
The most effective way to solve the question of why a parquet board creaks. However, due to the laboriousness, most often the problem is solved locally, in a certain part of the floor.
If, due to the loose adhesion of the chipboard to the concrete base, the parquet creaks in the apartment, how to fix it?
remont-3
remont-4
In this situation, it will most likely not be possible to get rid of the squeak without radical intervention. However, if the floor defect is of a local nature, you can use the method used by the craftsmen.
From the tools you will need:
- chisel,
- drill with 10 mm drill bit with drill,
- DSP, cooked in a ratio of one to three,
- syringe.
Find the places where the sound is coming from. Remove some planks. In the area that opens, drill a hole and pour in the solution with a syringe. Repeat the process in a day, and after one more, restore the boards in their places. In this simple way, the problem will be resolved.
The reasons for the squeaky parquet flooring
The practice of floor exploitation is noted for a number of reasons. Nevertheless, one of the main and most often diagnosed is, of course, reason for old age... Time has a significant impact on everything, including floor coverings made from natural materials. Of course, there are a number of other factors due to which the parquet creaks and you need to do something with a similar flaw. Usually, this scenario is directly related to poor quality installation work parquet when:
the installation base has irregularities
the technology of the foundation device is violated
the cement screed has structural flaws
the type of backing does not match the type of parquet
Fiberboard does not fit tightly to the base
the process of laying parquet tiles was performed incorrectly
low-quality bonding materials were used (glue, mastic, etc.)
Operating conditions, which the floor had to withstand throughout the entire period of existence until the appearance of squeaks, these are also the factors due to which a "voice" is cut through in an inanimate object. Even an exclusively natural material is unlikely to be able to withstand sudden temperature changes, high levels of humidity, or, on the contrary, strong dryness for a long time. The result of all marked criteria becomes deformation of the structure and then the parquet creaks, and the owner thinks what to dohow to eliminate the sounds arising from contact and friction of individual floor parts.
Possible measures to eliminate parquet squeak
The high level of home comfort drops sharply if the parquet creaks, but the question is what to do, naturally comes to the fore. Still would! Just a few night walks out of necessity can provoke a real family scandal. Therefore, the sooner the problem is eliminated, the better for everyone. It is not always possible to get rid of the squeakiness of the parquet without a complete restructuring of the coating, but an attempt is not torture, if one way or another you have to break everything.
Local repair of the screed or substrate on a separate area of the floor is quite possible. Just keep in mind repair of the screed will take at least a week and a couple more weeks will be required for high-quality drying... During this time, you can put everything over again. If the cause of the squeak is the displacement (deformation) of the lag - minor repairs are also unlikely to cost. In addition, the marked works are not intended for an amateur, but for professionals.
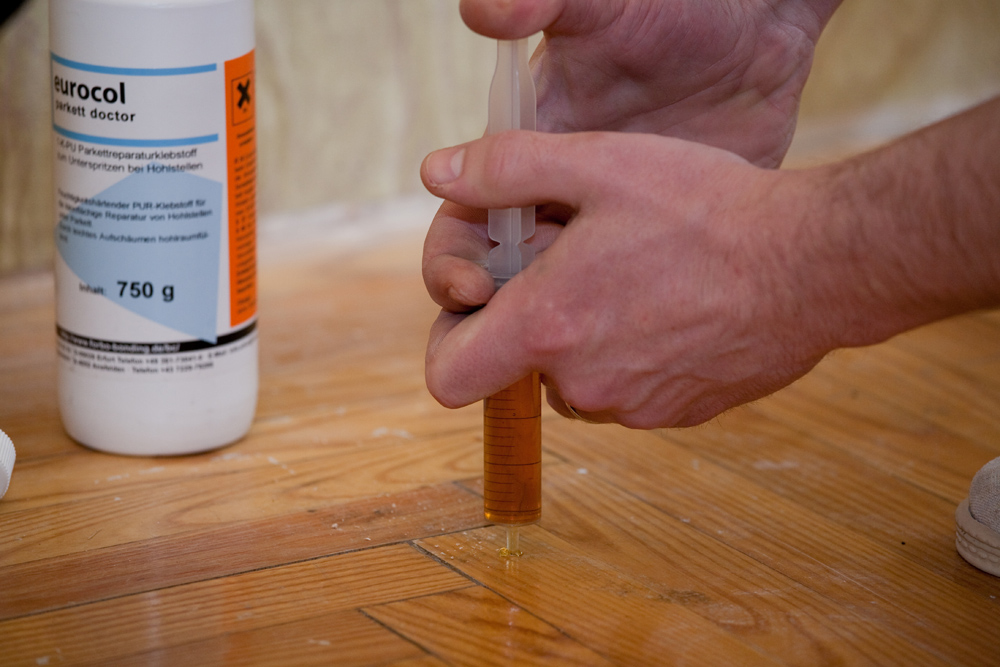
Small creaky areas can be tried to be repaired folk methods, for example, by injection of glue mass under parquet strips... To do this, determine the center of the creaky area, stick masking tape on the parquet at this point and drill a small hole (2 - 3 mm) to the base of the floor. Then, using a conventional syringe, an adhesive mass is injected under the parquet board. Dry for at least 24 hours, completely excluding "walking" on the repaired area.
Also, sometimes a defect can be eliminated by a simple fastening "floating" parquet tiles using special mounting pins.
Pouring glue or paraffin sometimes it is possible to eliminate the creakiness of the interlocking joints of parquet boards.
Why can parquet creak
Insufficiently well prepared surface
This is perhaps the most popular reason. Poor quality flooring can cause the plank to delaminate. This happens especially often when the coating is laid directly on the screed.
Often, a cement screed cannot turn out perfectly even (graininess, roughness, small irregularities, drops), and this is exactly what the material requires.
It is bad when the unevenness of the screed exceeds 2 mm per linear meter, which is the reason for the squeak. The only correct way out is to dismantle the panels and restore the base.
A small section of concrete floor is updated as follows:
- Clearing;
- Dedusting;
- Rinsing with water;
- Filling with a thick cement mixture. The dried layer should be kept slightly damp for a week. You can use a damp cloth to cover the area and periodically dampen it in water.
- Drying within 21-28 days.
Ideally, laying the parquet board should be carried out on a layer of fiberboard or plywood, but in this case, the concrete or other base should be sufficiently even, strong and monolithic.
Cracks, pits, drops and other defects, the presence of which can adversely affect evenness, are not allowed. The specialist recommends installing plywood on a layer of self-leveling mixture.
In addition, such a layer can be used independently, that is, directly under the parquet floor. One has only to follow the instructions for cooking and the thickness of the pour.
Insufficient adhesion of the substrate (plywood, fiberboard) to the floor (screed)
If the coating creaks not over the entire area, but in separate areas, then the creak of the parquet board can be eliminated by dismantling several lamellas and pouring cement-sand mortar into holes 1 cm in diameter pre-drilled in the base.
The proportions of cement and sand are 1: 3. After 24 hours, the operation is repeated. With the help of such manipulations, the sub-base will gain additional support.
Improper styling and poor quality locks
These two reasons are interrelated. In most cases, poorly cut end locks are to blame for the crunch.
When laying the material along the axis of the assembly, the slats are shifted, as a result of which the coating is displaced and some lines have no choice but to rest against the wall. It happens through the fault of primitive end latches.
To minimize the impact of bad locks on the quality of the web, many experts recommend wedging the mounted lines.
Also, do not forget about a thorough inspection of the dies when buying. The geometry and accuracy of the locks require close attention.
No expansion joint was provided
Since parquet is a natural material, it tends to undergo changes in the temperature and humidity background, under the influence of which the panels can begin to creak.
Therefore, during the work, a technological gap should be provided (the seam between the parquet sheet and the wall with a width of at least 1 cm). It is necessary for the free expansion of the boards.
If during the editing process this moment was missed, then the situation can be corrected at any time. To do this, the skirting boards are dismantled, and with the help of the grinder, the strip of the coating required in width is sawn off, and then the skirting board returns to its original place.
Illiterately laid logs
The constant load on the decorative material does not damage the coating itself, but the lag. In order to check the integrity of the lag, the parquet is dismantled. If the lags are in a terrible state, then it is advisable to completely replace them.
When they are in good enough condition and certain elements or several lags are damaged, then it is appropriate to carry out the following operations:
- Checking the thermal and waterproofing layer for integrity. If several years have passed since the operation of the parquet, it is better to replace the layers or increase their thickness.
- Checking the step between lags. Too wide a step is the reason for the sagging of the boards, which causes a creak. The optimal distance between the lags is 30 cm.
- Adjustment of the lag level.
To extend the operating life of the logs and increase the strength of the structure, it is better to additionally fix the logs to the screed.
If the wooden floor creaks
This is usually arranged in country houses. If the wood floor creaks, what should I do? First of all, you should stock up on the necessary set of tools. For work you will need:
- drill or screwdriver with drill function;
- jigsaw;
- hammer;
- self-tapping screws;
- sawdust;
- nail puller.
It is necessary to establish the reason due to which the squeak is heard. Replacing nails with self-tapping screws often helps. The latter are screwed in next to the holes left after removing the nails.
The number of screws can be more than the number of nails. If the floors in the apartment creak even after the work done, then there are other reasons. Let's consider ways to eliminate defects.
The lags are located at a great distance from each other. The optimal distance is in the range of 0.4 - 0.6 m, while the thickness of the boards is at least 40 mm.In order to eliminate the creak of the floorboards, it is necessary to lay additional ones between the main logs. You will have to dismantle all the floorboards, and after installing the logs, return them to their place, replacing the nails with self-tapping screws.
Thin boards were used for the floorboards. Such a defect can be corrected by laying sheet material in several layers. Moisture resistant chipboard, plywood, OSB are used. A distance of 5 mm (expansion gap) must be maintained between adjacent sheets and along the wall. The joints of the sheets of the upper and lower rows should not coincide.
Gaps between floorboards can occur when poorly prepared boards dry out. To eliminate them, it is recommended to pour talcum or graphite powder into the crack. It is effective to use wooden wedges: they are driven into the gap, and then the gap is eliminated with a putty mixed with sawdust.
The boards are damaged by dampness, and therefore the floor creaks. How can such a defect be eliminated? Find out the cause of the dampness. Probably, the waterproofing technology has been violated. The boards must be dismantled and laid on top of the log sheets of roofing material with a slight overlap on the wall. After that, the boards (if they have not rotted) can be laid in place by treating with an antiseptic.
All installation rules are followed, but the floors are creaking. What to do in this case? Perhaps logs and boards are made of different types of wood and absorb moisture in different ways. Place the fabric between the joists and the boards. Such a "damper" will help either reduce the squeak, or completely eliminate it.
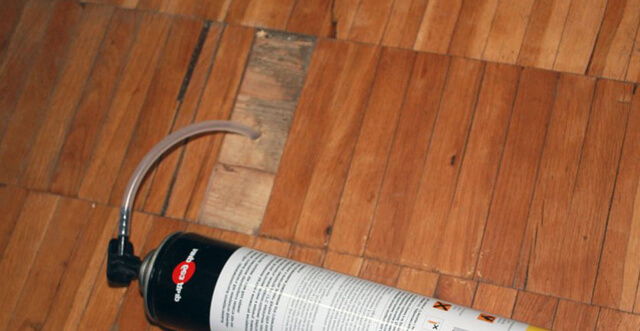
It is possible to eliminate the creak of one floorboard with the help of polyurethane foam: it is squeezed into a through hole drilled in the place where the board "walks" the most
It is important not to step on the floorboard until the foam is completely dry.
Thick boards can be fastened together with self-tapping screws, screwed in at an angle at the place where the floorboards are joined. If there is a lag at the junction under the boards, nails can be used instead of self-tapping screws.
Cement slurry - a proven method
A fairly simple and at the same time effective method to remove the creak of the parquet without removing the coating is the use of cement mortar. To do this, a hole is prepared in the floor with a perforator with a diameter of no more than 2 cm. Through it, a cement mortar is poured under the coating (it can be replaced with heated bitumen) so that the inconvenient die gets additional fixation.
More efficiency will be achieved if the holes are drilled against the log. Cement mortar is also poured inside, and after a day it is closed with a wooden peg so that its edge touches the floor slab. The excess of the peg is cut off to equalize in height with the parquet base. A layer of putty mixture is applied to the repair area, after which the parquet is polished and varnished.
Alternatively, to remove the squeak of the parquet without removing the boards, you can work with holes of a smaller diameter, using liquid nails instead of dowels and screws. The planks are glued to the base with special polyurethane mixtures, the holes are additionally processed, giving them an aesthetic appearance.
Stir the grout correctly so that it does not crumble over time.
How to prevent creaking - prevention
The best floor repair is to prevent it. Parquet consists of natural fabrics, therefore it requires special care and installation. Compliance with the instructions and technology at each stage will allow this finish to serve for a long time and with high quality.
Basic installation requirements: rough level floors without flaws, waterproofing, thermal insulation, the presence of a layer between the concrete base and the parquet. Provide 4 protective layers. It is better to entrust the installation of the floor to professionals, since there are many difficulties and nuances.
When choosing a material, pay attention to quality.View the surface for cracks, knots; measure the level of humidity in the planks; request a product certificate; buy only from well-known major sellers. Choose the right adhesive and backing.
Almost all floor coverings are made with technical clearances from the walls.
Pay close attention to this step before attaching the skirting boards.
Observe the microclimate in rooms with parquet floors. This will prevent the floorboards from drying out and swelling, their deformation.
Install humidifiers in rooms that are too dry. And provide a heating system in cold and intermediate seasons.
Timely care for the floor. Sanding and renewal of the varnish layer is required every three months.
Avoid direct contact with moisture. If liquid is spilled, the floor should be wiped down immediately with a dry cloth.
Clean with a damp cloth, not a wet cloth.
Useful video: How to remove the creak of parquet flooring in an apartment?
Conclusion
All these measures will help prevent cases when panel or classic parquet creaks. Do-it-yourself simple repairs. And time consuming with replacement, scraping, grinding at home is difficult to do, so it is better to trust a professional.
What to do if the parquet creaks: ways to eliminate the creak
If the parquet is already creaking and you are looking for options on what to do with this problem, then know that, firstly, you can always turn to professionals for help, and secondly, it is quite possible to try to eliminate the creak yourself.
Parquet floor creaks what to do
Parquet creak elimination
If the second option is chosen, you should pay attention to the following ways to remove the creak of the parquet:
- To eliminate the squeak, it is sometimes enough to replace or lay the substrate (if it is not available). To do this, remove the parquet, at the same time check the tightness of the fiberboard layer to the base (if it is not sufficient, make a hole in the fiberboard sheet of 10 mm and introduce a cement solution under it) and the stability of the logs (if necessary, replace them or fix them), lay the top layer with the substrate, and already on it - parquet.
- If the parquet boards have moved away from the plywood or chipboard sheet, then a hole must be drilled in the center of each board in problem areas. It must match the diameter of the dowel with the screw. For better adhesion of the parquet and the base, before inserting the dowel, a mixture of water and cement (cement milk) is poured into the hole and only then the plank is pulled to the concrete base. The dowels can be replaced with liquid nails or you can use a pneumatic gun with a compressor and pull the boards from the base with parquet pins.
- Cavities between parquet and plywood can also be filled with adhesive. To do this, having previously glued masking tape on the boards, holes are drilled in the center of the problem areas, where then glue is injected with a syringe, the bar is pressed, and a heavy load is placed on top.
- To get rid of squeak, you can use a water-based lubricant, for example WD-40, or a special composition, the components of which are solvent and wax. The composition is introduced under problem areas by syringing through micro-holes, thus filling the cavities. The lubricant is injected through the holes under pressure.
- The most effective is the screed method using self-tapping screws. For this, the places that emit a creak are marked every 10 cm in both directions (it is better to use chalk for marking, since it does not leave marks on the parquet and is easily washed off). Holes are drilled at the marked points, then the boards are attracted to the base with self-tapping screws. It is necessary to prepare the stubs made of wood in advance. If there are extra planks left after laying the parquet, you can cut the caps out of them. The plugs can be replaced with putty.
- If the reason for the squeak is the lack of gaps between the wall and the parquet boards, you must carefully cut the boards by 10 mm, for this it is not necessary to disassemble the parquet.
- Another way to get rid of the unpleasant sound is to drive wedges between the planks and the beam. If this is not possible, you should carefully fill the gaps between the boards with graphite powder or talcum powder.
- A common reason why parquet creaks is a decrease in the diameter of the nail with which it is attached. An unpleasant sound is generated where the nail touches the parquet board. You can get rid of the squeak by replacing the old nails with new screws. It is a long and laborious process, but very effective.
After the parquet is repaired, the holes must be putty, sanded and varnished.
Parquet creaks. What to do?
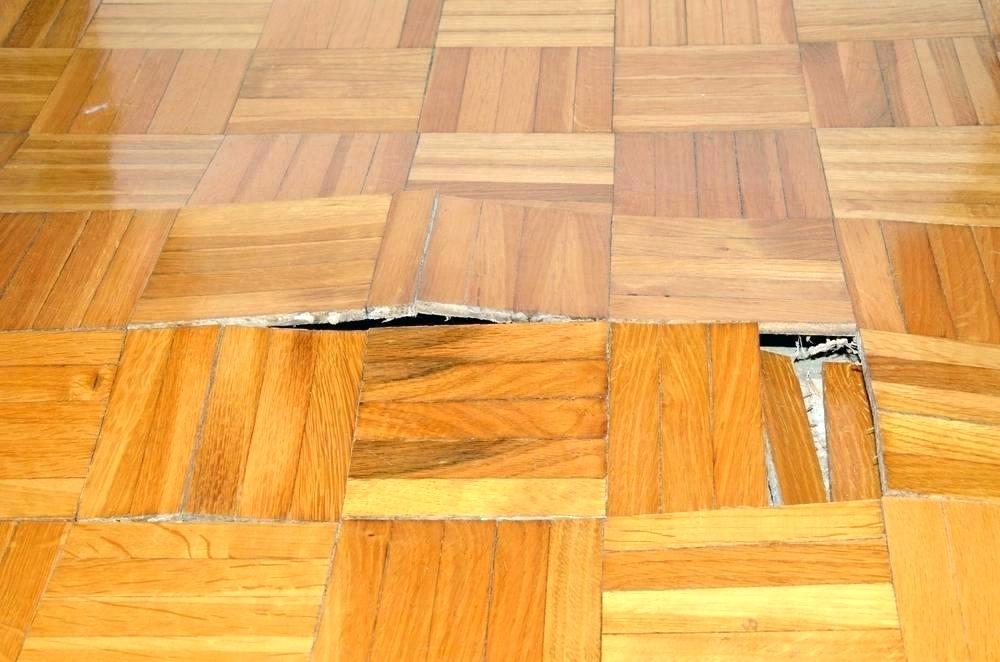
Dice creak is a phenomenon typical mainly for old panel or block parquet. In fact, the creak is a payback for the environmental friendliness of the floor covering. Over time, natural wood elements dry out slightly and come off the substrate. As a result, when walking on the floor, an unpleasant creak occurs. Of course, this parquet needs repair.
The squeak is caused by the parquet strips that have come off
Sometimes squeaking also appears due to broken combs or loosening of fastening screws. Parquet restoration in this case is carried out depending on the type of damage. Most often, the departed elements, due to which a creak occurs, have to be dismantled and glued. In the event of a broken ridge, the coating is renewed and the squeak is removed by replacing the element.
Squeak elimination technology without opening the parquet
First, let's figure out how to remove the creak of parquet without dismantling the dies. If, when walking on the floor, a creak is heard or the floor cracks, first of all, you need to determine the place of departure of the elements by tapping the floor with a wooden hammer. Further, holes with a diameter of 0.4-0.6 cm are drilled in the dies in the corners.
How to restore parquet. To get rid of the squeak in the dies, holes are pre-drilled
The elements must be drilled through without damaging the substrate. To eliminate the squeak of the parquet without opening, at the next stage, PVA glue is pumped into the holes with a syringe. After the gulf, wooden chopiks are inserted into the holes and something heavy is put in the place of waste.
To eliminate the squeak during the repair, glue is pumped under the parquet
Chopiki can be made by yourself. They are simply cut from wood that matches the color of the parquet flooring.
After gluing the elements, the places with chopiks must be carefully putty and sanded. To fix the floor, when eliminating the squeak, instead of PVA glue, you can use polyurethane.
Elimination of squeak by dismantling the parquet
Now you know how to eliminate the creak of the parquet without disassembling it. In the event that this operation is not successful, the elements will have to be dismantled and glued again at the place of departure. At the same time, the creak is eliminated in several stages:
- Reconstruction begins with a split of one of the dies. This is done with a hatchet.
- Then they remove it and disassemble the rest of the departed elements.
Sometimes the squeak can be eliminated only by removing the dies and their subsequent stickers.
- The renovation is continued by removing the remnants of the glue from the pit.
- Next, the substrate is primed.
If the parquet was laid without a backing, carefully examine the screed and, if necessary, level it with a concrete mixture. Often the cause of the squeak is precisely the defects of the screed.
- Then the dies need to be cleaned of dirt, smeared with glue and installed in place. Once they are securely fastened, the squeak is guaranteed to disappear.
- The place of the split of the extreme element is covered with putty and sanded.
Squeaking dies can sometimes be eliminated simply by aligning the screed
This is how the squeak of the parquet is eliminated by its bulkhead.
Problematic parquet subfloor - how to improve it?
If the previous method to eliminate the squeak of the parquet did not affect due to the problem not with the coating, but with the base under it, then it is necessary to work in this direction.
To understand that the problem is precisely with the base, it is enough to examine the floor surface. When it is perfectly flat with gaps against the wall, as required by the installation rules, then it is worth moving on to finishing the base. The thickness of the plywood sheets should be no more than 1.2 cm, only in this case the floor will withstand the load during operation. From the tools, you will need to prepare a drill, saw, screwdriver or screwdriver.
Plywood sheets are laid on top of the boards on the base, fixed with self-tapping screws with a distance of 15-20 cm between them. The laying is carried out at an angle in relation to the mounted boards.
Study all the nuances well, watch the videos before starting work
It is worth noting that it is not necessary to disassemble the entire floor to fix the squeak problem in this way. It will be enough to identify the problem area and work exclusively with it. This area is marked out with chalk in the form of a square and then cut out for the next stages of work.
The method can be considered radical, nevertheless, of all the above, it is considered the most correct and practical.
This is interesting: How to equip a dressing room in an apartment - we will consider thoroughly
Pulling parquet
Along with all the above methods for eliminating the squeak of parquet, one cannot fail to name one more - the so-called contraction of the parquet floor. This method of parquet restoration cannot be called easy and quick, however, it is quite inexpensive and very effective. Such restoration of the parquet with your own hands will allow you to get rid of the problem for a long time. The essence of the method consists in a complete recheck of the state and reassembly of each individual board in the parquet flooring, as well as an assessment of the state of the lag. If damaged boards are found during the inspection, they must be replaced or restored.
The tightening efficiency is achieved by replacing all the nails holding the parquet with self-tapping screws
This is important because unlike nails, which over time begin to squeak where they touch the wood, self-tapping screws hold the planks tightly in place, preventing them from moving.
After all the screws are fixed, you should make sure that the caps do not protrude above the surface of the board. All crevices and gaps must be putty, sanded and painted with varnish, or waxed in the color of the parquet.
Thus, all the above methods for eliminating the squeak of the parquet flooring can be easily done by hand. However, if you still cannot get rid of the squeak, the solution is either to turn to specialists for help, or to try to sort out the old parquet and lay it again. Either way, the result will be worth your effort.
Other methods of dealing with squeak
Overhaul, even if it is only about the flooring, is always labor-intensive. Therefore, many homeowners try to fix defects in individual areas using a "temporary" method, but in fact it turns out to be quite effective.
To do this, you need to determine the places of crunching and in their center (with a step of 20 cm from each other) mark several points and glue pieces of masking tape on them.
Then the scotch tape along with the board is drilled to the voids. In this case, it is better to take a two-millimeter drill. Glue is carefully poured into the resulting micro-hole. During polymerization, the glue may slightly foam, which determines the need for masking tape.
After removing the tape, a load is applied to the restored places. It should be noted that you cannot move on the coating for 24 hours, after which the holes are masked with wax crayon and polished.
It also happens that the installation was done according to all the rules. But why does the parquet board creak? This is due to the humidity in the room. It is not enough to provide technological gaps, but you still need to carefully monitor the level of humidity.
If the air is too dry, then humidifiers will come to the rescue, and if, on the contrary, it is too humid, then dehumidifiers. Both the first and the second condition are dangerous for the material. Dry air causes dryness, and moist air swells. Humidity of 50-60% is considered normal.
Also, do not forget about leaving. Cleaning is carried out only with a well wrung out cloth using specialized parquet detergents without aggressive chemicals.
How to locate the source without disassembling the bed
Why the bed creaks will be much easier to determine if two people are looking for the cause at once. One of them will loosen the furniture, and the other will listen. The reason for the squeak, as it was already found out, can be different elements of furniture, therefore, in order not to completely disassemble the structure, you can resort to some of the methods described below. The bed creaks - what to do:
- Remove the mattress first. Take out the base. It consists of slats located across the bed under the mattress;
- Put the mattress on the floor, check. The reason for the squeak is the springs located inside. Stand on the mattress, walk on it, sit down. If there is no creaking sound, then the problem is different;
- The mattress sometimes rubs against the bed itself, in contact with the walls of the frame. Put it back and check. Stagger or sit down, a creak should appear;
- Press down on the orthopedic base, pump slightly. The source can be wooden lamellas, fixed incorrectly or if cracks or chips have formed on them. Often, in inexpensive bed models, self-tapping screws or screws used to attach the slats to the base cause a squeak;
- Sometimes the reason is not in the base, but in the frame. Then you need to carefully check the entire bed. Shake its different parts. Perhaps the whole structure has loosened and additional fasteners will be required to strengthen the strength of the frame;
- Lift beds can also squeak. An unpleasant sound appears in the mechanism itself. Repairing it is quite difficult, so it is recommended to replace it;
- The feet also sometimes make an unpleasant sound. It appears due to their contact with the floor when the bed is uneven. Basically, this can be determined by looking at the legs of the bed. Most likely, some of them will not reach the floor. In this case, you can put special stands under them. It also happens that the legs do not completely touch the bed frame, turn and squeak;
- Check the support strips. They are required for the installation of the orthopedic base and mattress. They are attached to the base and are made of wood or metal. You need to press on the slats and listen to whether a creak appears or not.
Check for squeaks on the floor. There are times when the sleeping place is located on a wooden floor. Over time, the boards start to creak, and it seems like the sound is coming from the bed. The sleeping place must be moved away and checked if unpleasant sounds are heard in another place.
Remove the mattress
Press down on the mattress
Check the slats
Check the lifting mechanism


