Buy a ready-made form or make it yourself?
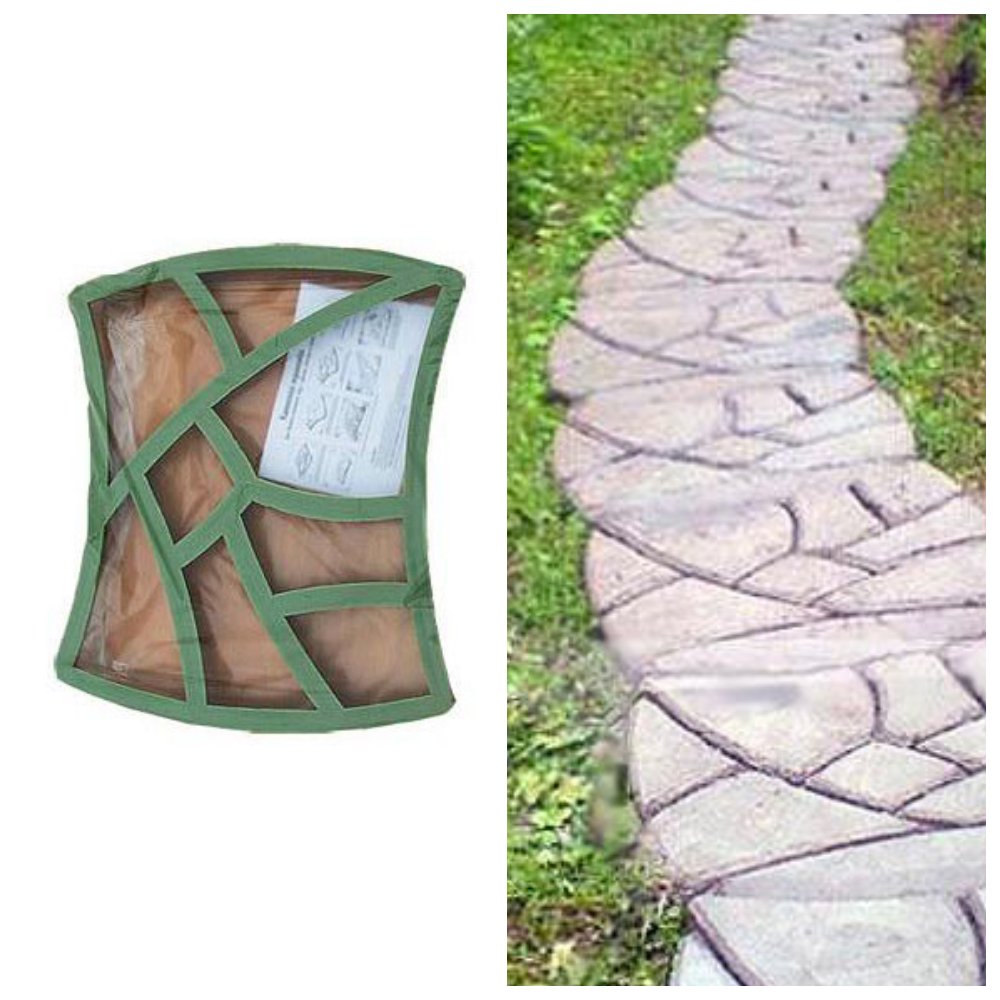
A self-made form for making garden paths may not give geometrically precise elements, but the result of its application will be the most natural and author's. It is for individuality and originality that hand-made things are valued all over the world.
Who said that the hand made form would be worse than the store version? In addition, the prudent owner will always find something to spend the saved money on. It's time to use your savvy and consider two options for creating a mold for pouring tiles with your own hands.
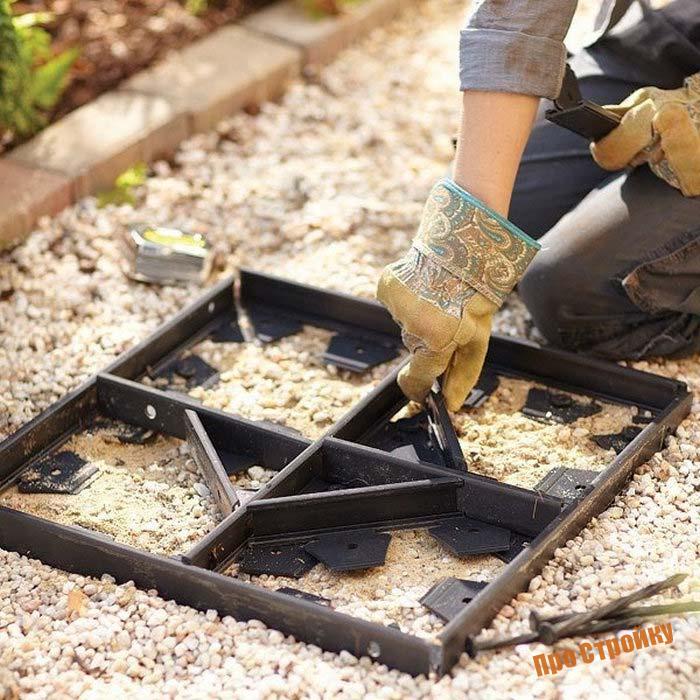
Four wooden blocks 50 x 50 mm can be fastened together to form a frame. Reliability of fixation will be given by the grooves, which are cut out in pairs of opposite bars. You can use thin sheet steel in the form of brackets, which are attached with screws at the joints of the bars.
The role of the bottom of the mold will be played by a sheet of iron or plywood. On the surface of the finished tile, these details will look interesting. When using a large-sized mold, it is better to reinforce the tiles with a metal mesh. The front surface of the product can be decorated with pieces of ceramics, rubble or pebbles.
The decorative material can simply be laid out on the bottom of the mold, but it is more reliable to fix it with water-soluble glue on the surface of the paper, and then lay it on the bottom of the mold with the paper down. Pour cement solution. The mold is removed from the frozen tiles, after which the paper is washed off with warm water. The surface of the product is iron.
Recent Entries
Beautiful but poisonous plants that should not be planted in the garden if you have children and animals Similar to cotton candy: varieties of astilba, from which you can make a beautiful hedge
If the farm has an old wooden barrel, tied with iron hoops, then they can be used to imitate natural stone. It is enough to bend the metal the way you want, and the shape for the track can be applied. This method is especially useful if there are several hoops. If there is a shortage of hoops, they can be made from galvanized iron sheet. It is enough to cut strips of 5 cm, and bend the ends with a hammer like a roof seam. Do-it-yourself form for a garden path is ready.
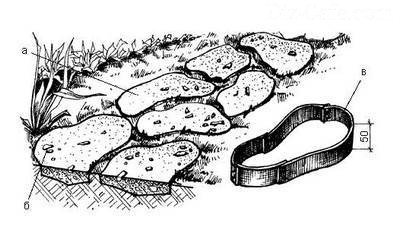
Application of a form made of sheet iron: a - monolithic concrete, b - decorative inclusions, c - hoop
A track using such forms does not need a special base. They can be created on any surface, as long as it is not too rocky or muddy. The form is laid out on the finished base and deepened with a hammer. The soil from the inner area of each hoop must be removed to a depth of about 5 cm. The resulting depression and the inner surface of the hoop must be well moistened, then pour a little broken brick or crushed stone and pour the solution.
It is better to prepare a solution from 4 parts of sand and one part of cement. You can add fine crushed stone filler
It is important not to overdo it with water: the consistency should be slightly thicker than sour cream. It is better to give the tile a slight bulge so that water flows from it.
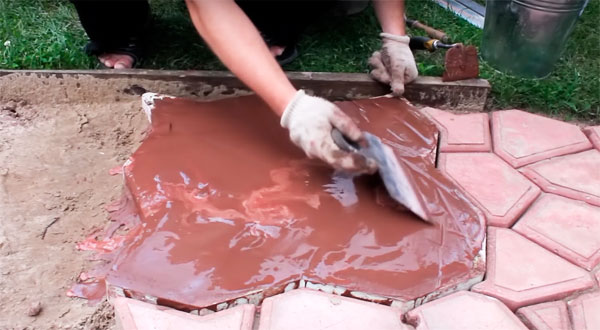
The surface is carefully leveled with a trowel and ironed with a mixture of cement and any mineral dye.
The solution grabs quickly enough - it will take only a few minutes. The hoop can now be removed and reused until the entire track is complete. It will take 2-3 days for the track to dry completely. In case of extreme heat, so that the tiles do not crack, it can be covered with foil.
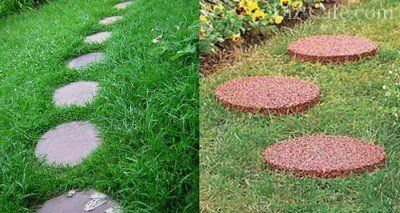
Even the imitation of round stones looks attractive, and the addition of pigment creates an additional play of color.
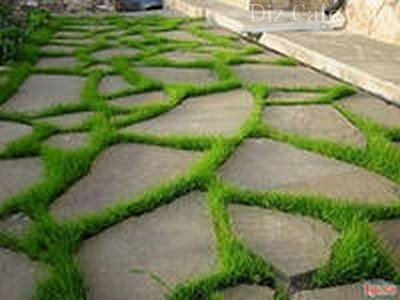
Sand or lawn grass can be used between track elements

Once the track has been rebuilt, concrete discs will always find new uses.
By the way, even in the form of circles, the concrete path will look original. In the event of redevelopment, the tiles can be removed from the ground and reused. The gaps between the tiles are sprinkled with sand, but lawn grass will also look good. And you can add pigment to the solution itself or decorate the surface of the tiles, while it is not frozen, with any pattern using a brush or spatula.
How to make yourself
You can make a garden path for your garden yourself. To do this, you need to prepare a cement-sand mortar and make a form into which the concrete mixture will be poured.
Proportions for the preparation of concrete mortar:
- cement grade M500 - 1 part;
- river sand - 2 parts;
- aggregate for strength (crushed stone, gravel) - 2 parts;
- plasticizer;
- water (so that the solution looks like thick sour cream);
- coloring pigments;
- stone chips to imitate natural stone;
- strength additives (propylene-based fiber).
Silicone
The mold for casting paving slabs can be made of silicone. It is sold in any hardware store in an aerosol package. Silicone accurately repeats all the irregularities of the sample.
How to make a tile using a silicone mold:
- take a piece of embossed board or tiles imitating natural stone;
- build a wooden box according to the size of the sample "plus" 2 centimeters in stock;
- put the sample in the box, brush the surface and walls of the box with soapy water with a brush;
- cover the sample with silicone, fill the entire space of the box, level the silicone on top and cover with a plywood sheet;
- allow the silicone to dry (1-3 hours);
- remove the mold from the sample, grease it with oil and fill it with concrete.
Made of metal
A concrete pouring mold can be made from metal drum hoops. Metal can be given any shape, bend as you like. Concrete mortar is poured into a homemade stencil, oiled with machine oil, and allowed to dry for 3-4 days.
The form itself is placed on a sheet of metal covered with film. Then such a stencil is removed and used any number of times. The height of the mold must be at least 3 centimeters.
Made of wood
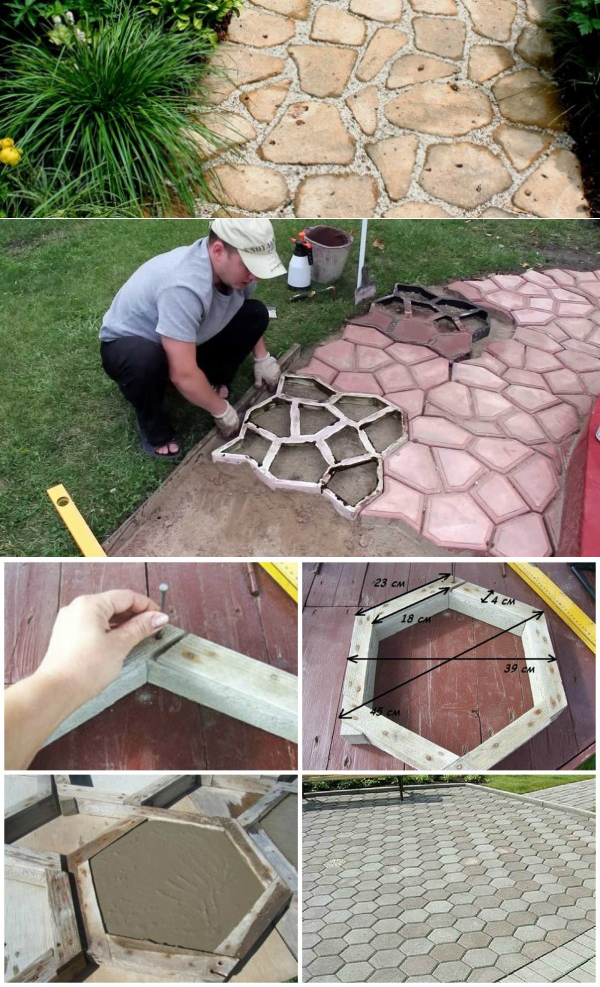
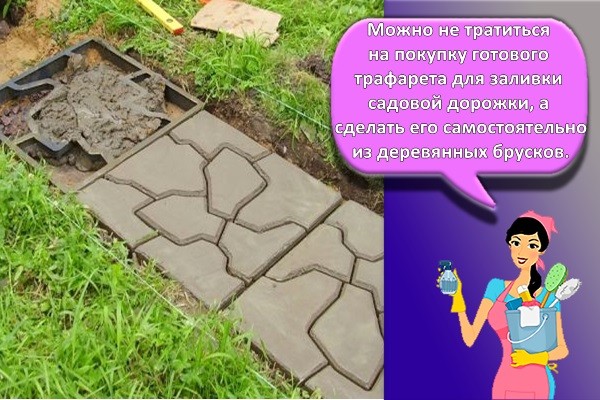
You do not have to spend money on buying a ready-made stencil for pouring a garden path, but make it yourself from wooden blocks. In addition, the factory form has standard dimensions that may not be suitable for making a footpath.
How to make a walkway using wooden blocks:
- make a formwork from bars interconnected in the form of a square or rectangle;
- the length of the bar can be from 25 to 50 centimeters;
- the thickness of the concrete slab depends on the height of the bar (at least 3 centimeters);
- the form from the middle must be greased with machine oil;
- put on a sheet of plywood or metal;
- put a film on the bottom of the form, lay out decorative elements (pebbles, crushed stone, broken tiles);
- pour the formwork with a cement-sand mixture;
- install, if necessary, fittings (drown in the solution);
- wait 3-4 days for the concrete to harden;
- the next day after pouring, the concrete must be sprinkled with water and covered with a film;
- in the first week after pouring, the surface should not dry out.
Made of plastic
A plastic bowl is suitable for making a round element. It must be well washed, dried and lubricated with machine oil. A concrete mixture is poured into a plastic mold and allowed to dry for 3-5 days. Every day the concrete is sprinkled with water. Then the concrete element is removed from the basin and a new fill is made.
From scrap materials
A stencil for filling can be made from any materials at hand. For example, you can take children's sand molds of a rectangular or round shape, lubricate them from the inside with machine oil and pour concrete mixture.You can cast an element from a concrete solution using a baking dish, plastic packaging from sweets, cookies. You can coat the burdock leaf with a cement-sand mortar and let it dry. You will get a beautiful element for decorating a garden path.
Preparing for laying a garden path
Elements of a garden path can have any geometric shape: a circle, a square, regular or asymmetrical polygons, in the form of a human foot, a leaf of a tree, etc. Small boxes, wooden or plastic boxes and containers, baking utensils are suitable for making tiles. A good option is to put together a frame of the form out of wood or make it out of tin.
Before starting work on the manufacture of tiles, it is necessary to carry out preparatory work:
- Think over the optimal approach to all buildings and rational geometry of the road. A perfectly straight line is not always beautiful, and too winding is uncomfortable.
- Draw a plan of the site with the intended path.
- Measure the length of the future path.
- Decide on the material for creating the trail. If concrete - choose a tile design. Decide if it needs to be tinted and decorated with patterns.
- Sketch the tiles.
- Calculate how many elements are needed to build the entire garden path based on its length, width and tile size. The standard width is 60 - 90 cm.
Now you can do the form.
Laying a garden path in shape
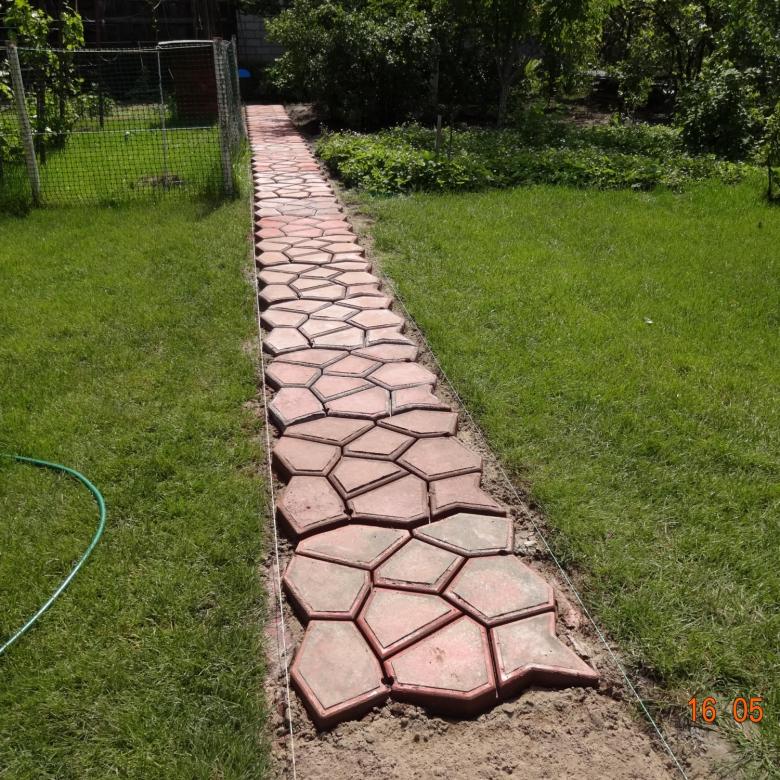
DIY concrete garden path using a form
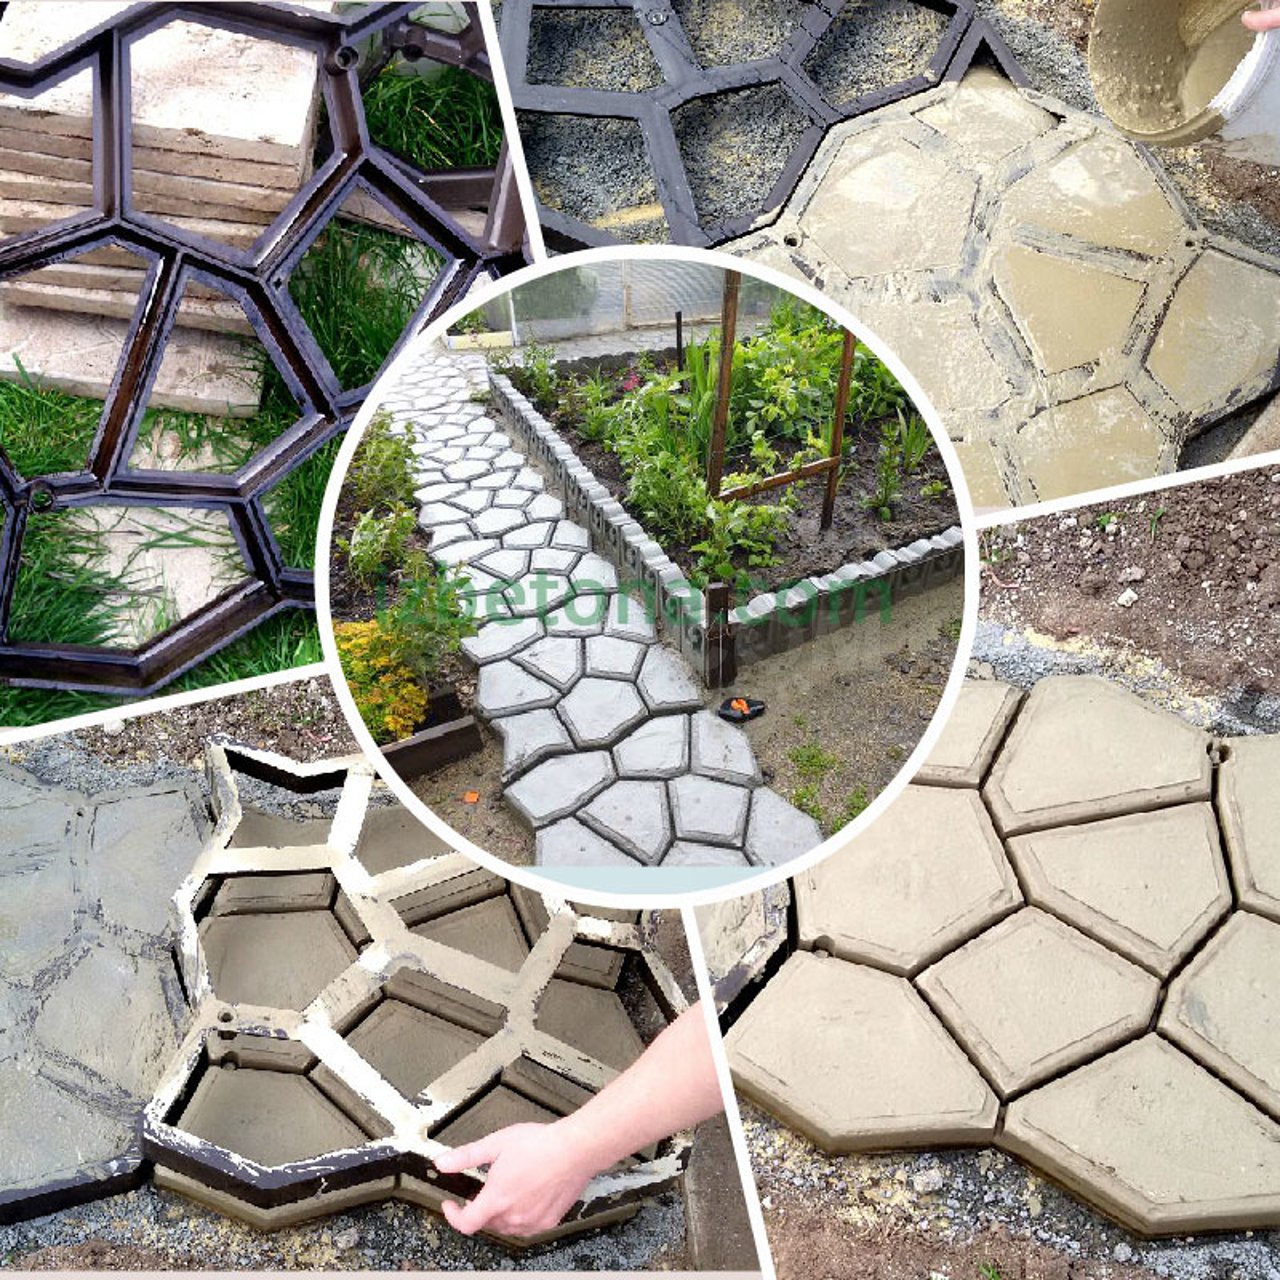
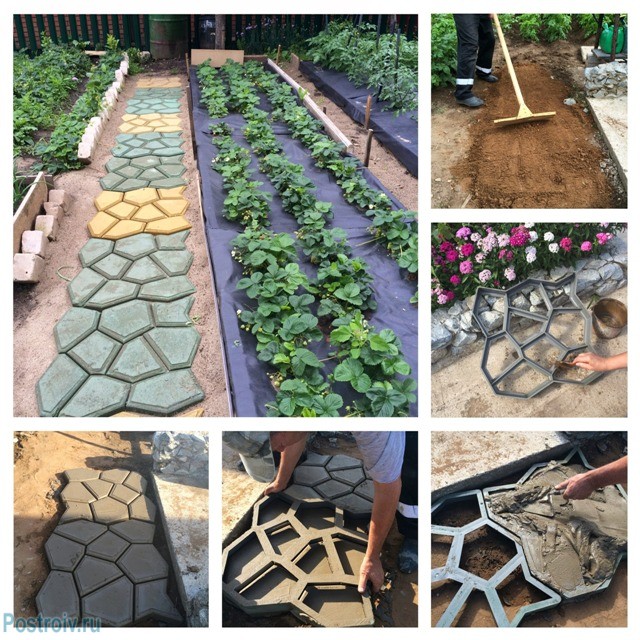
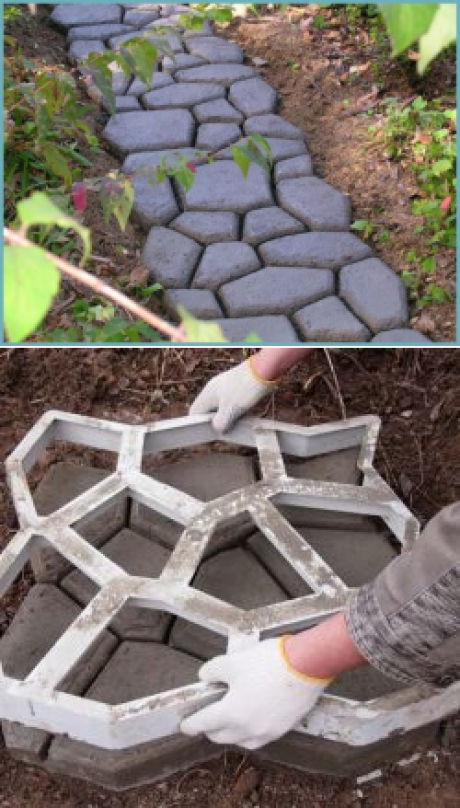
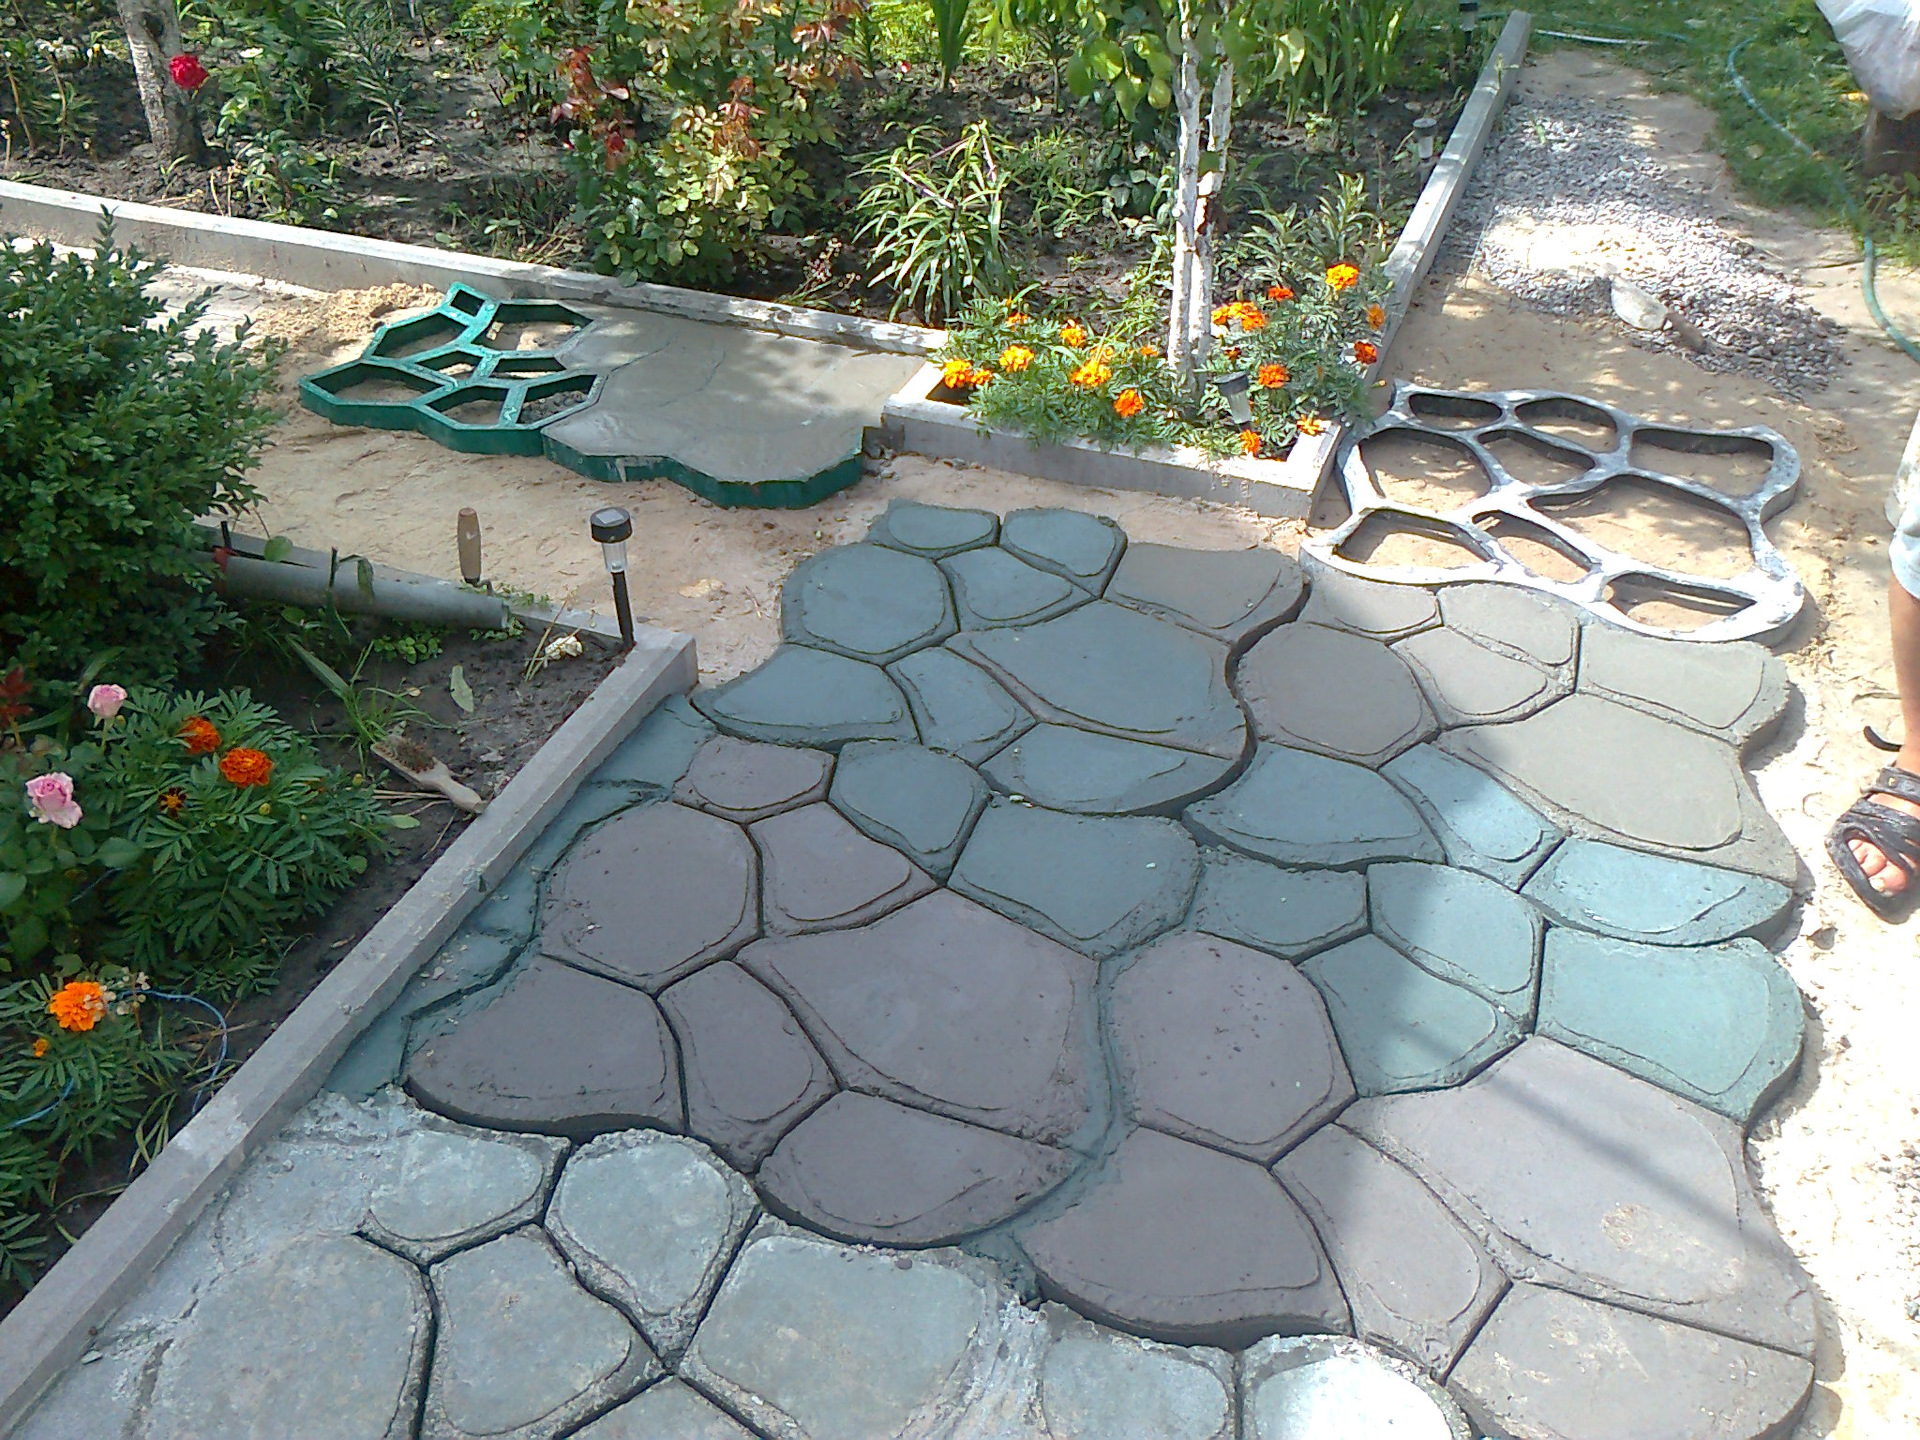
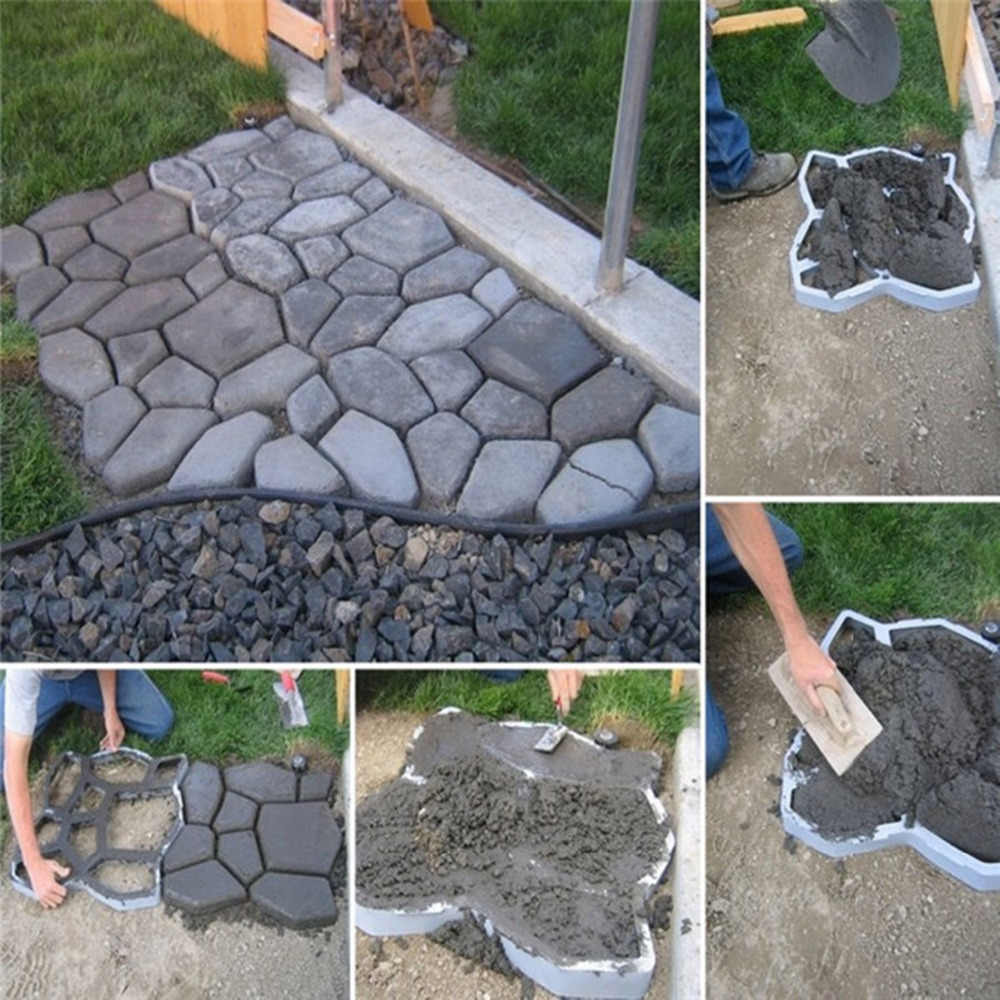
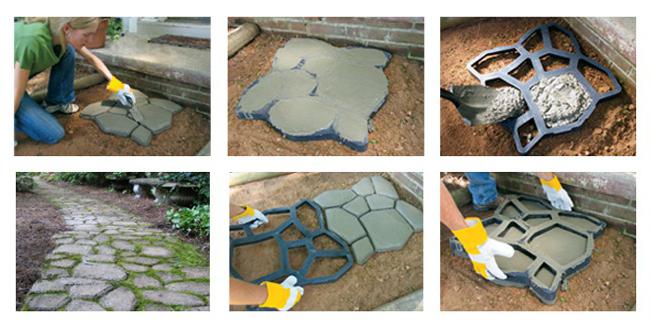
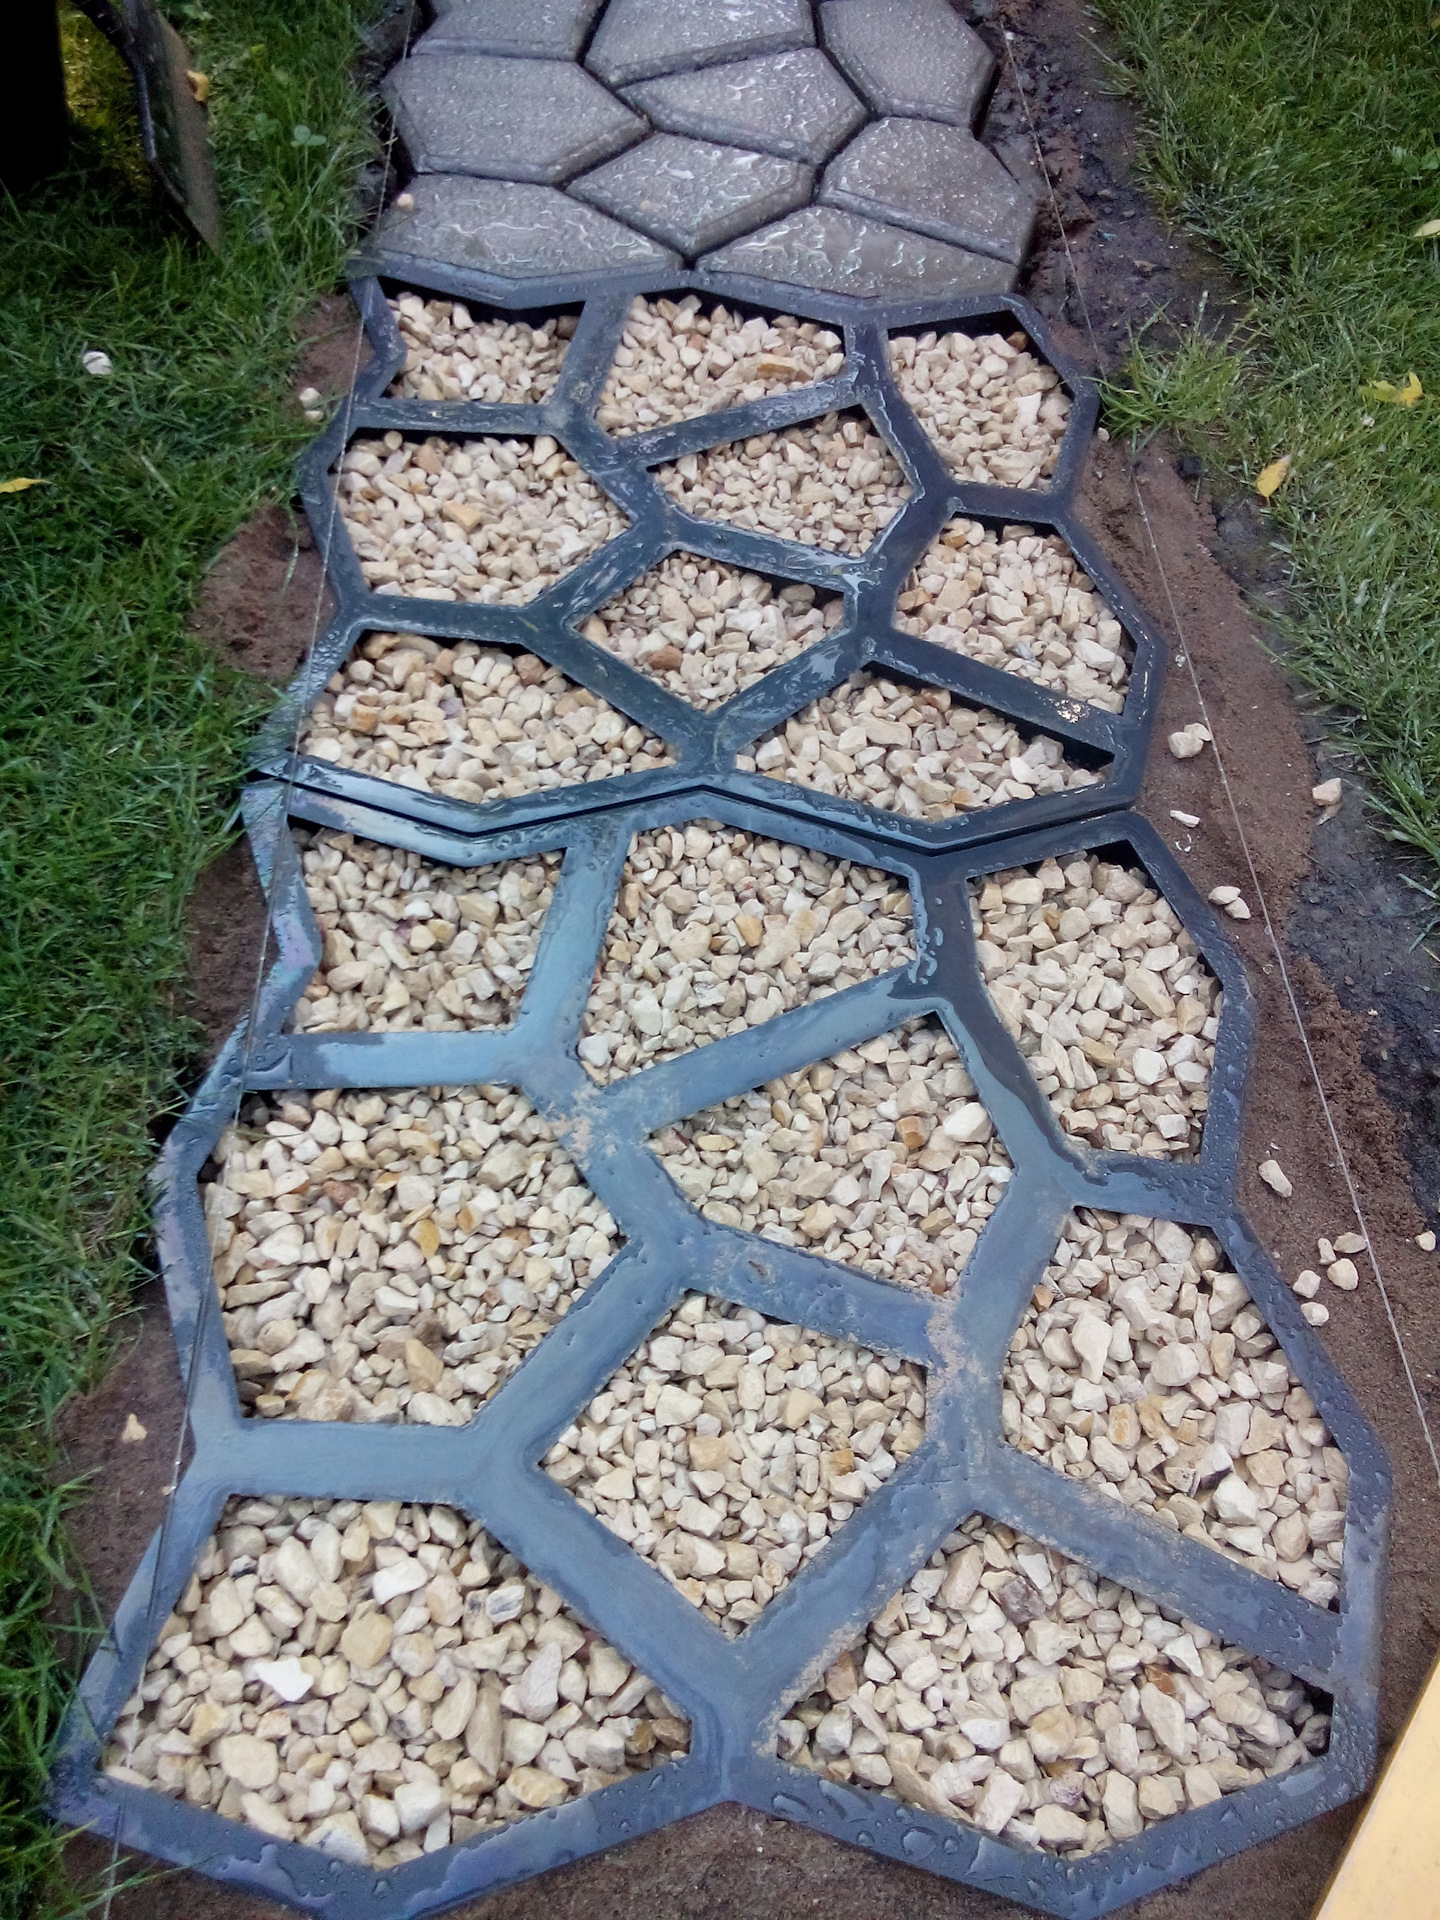
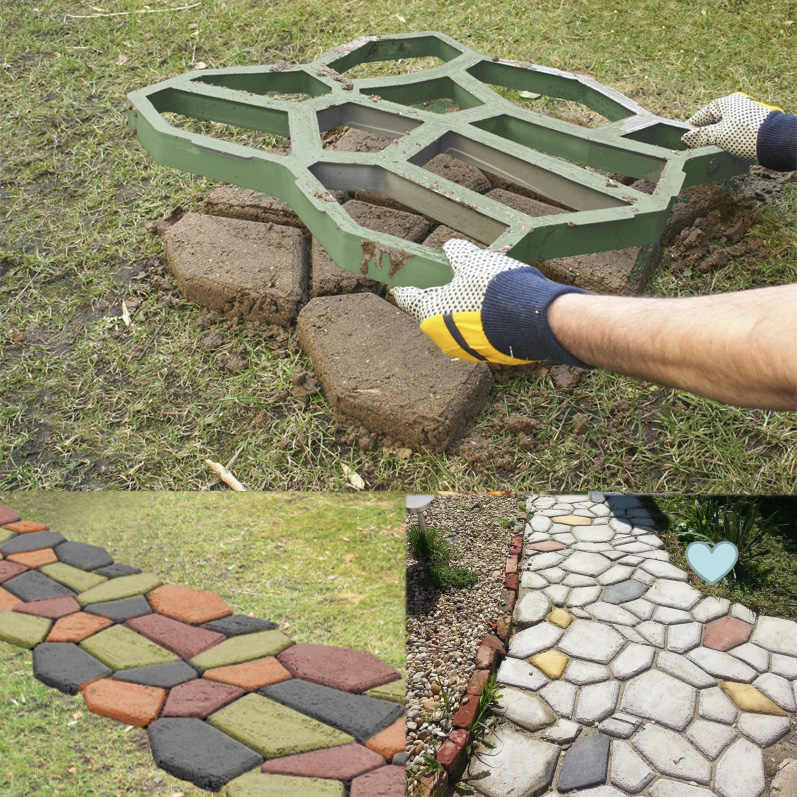
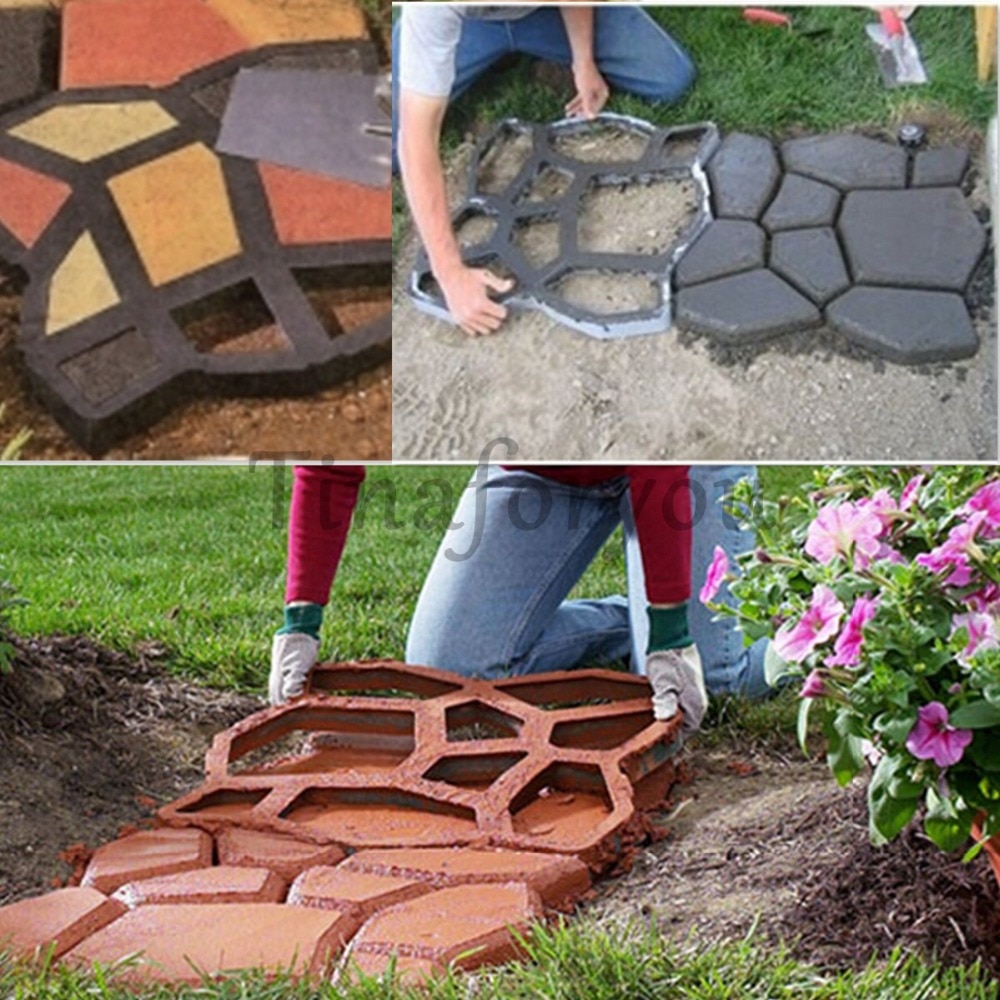
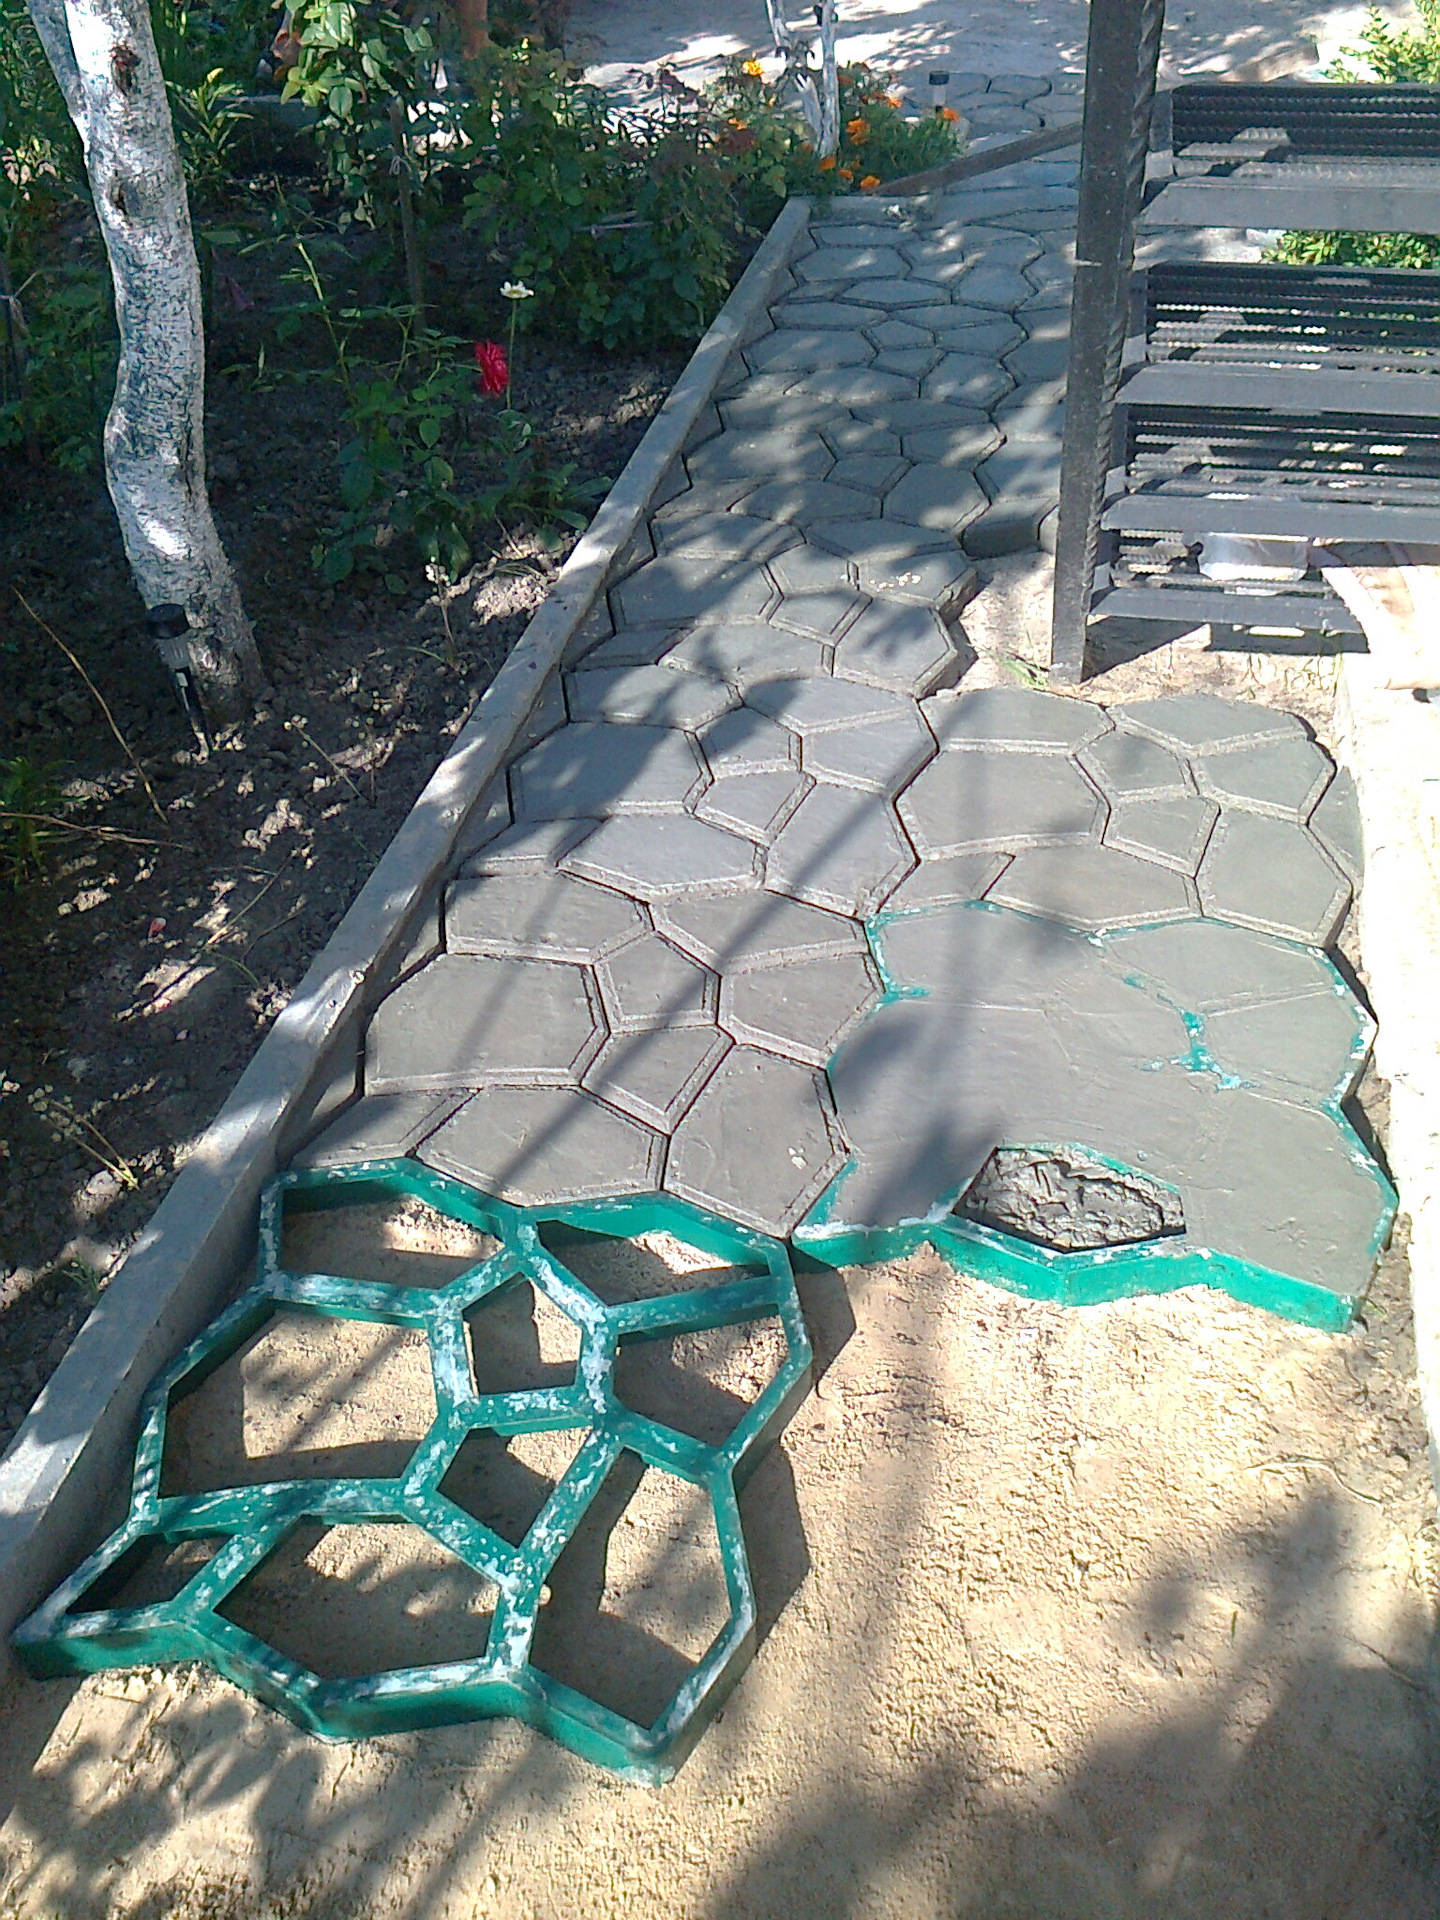
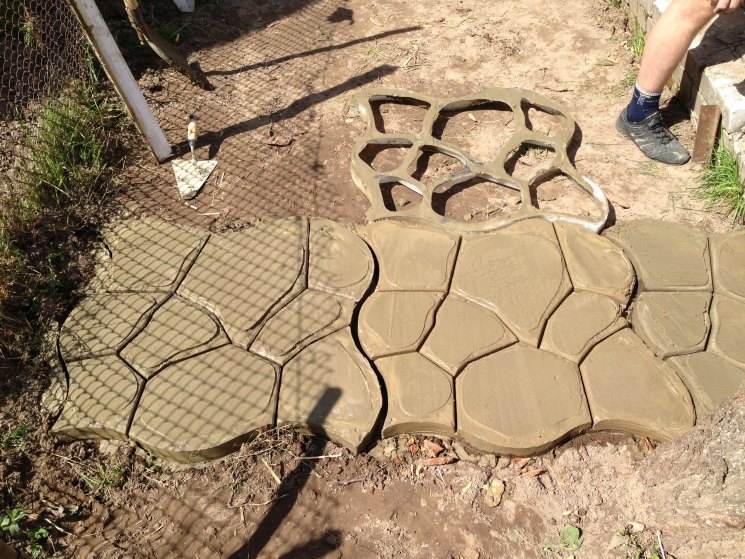
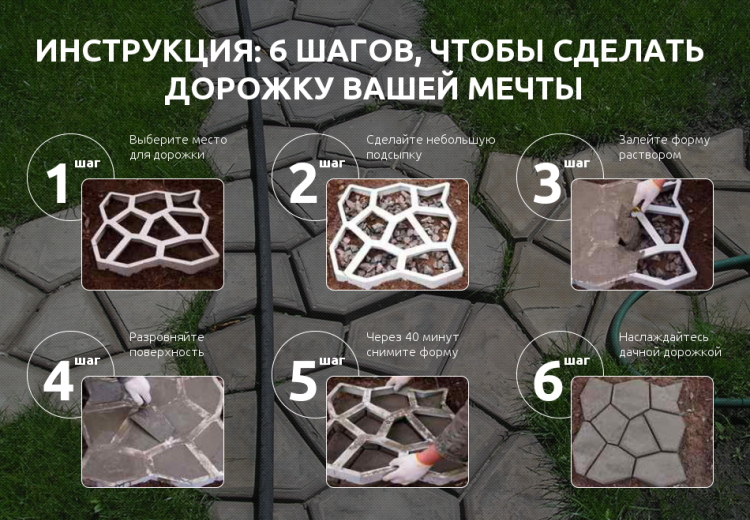
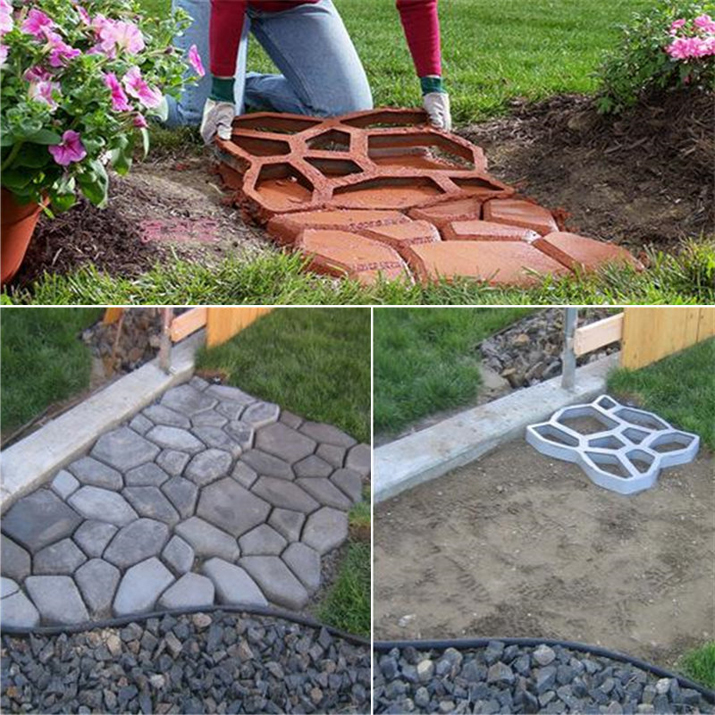
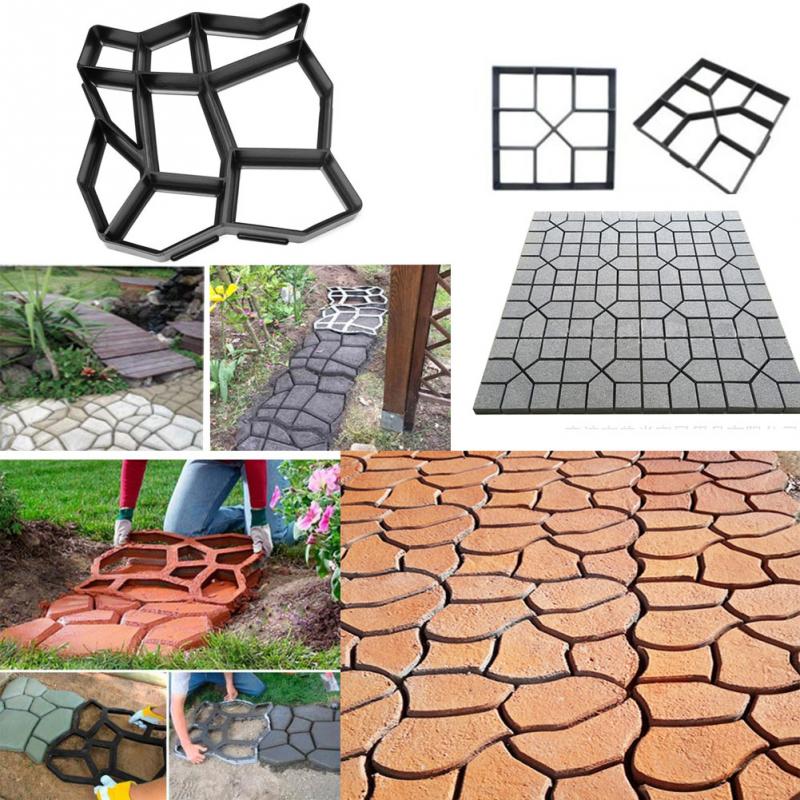
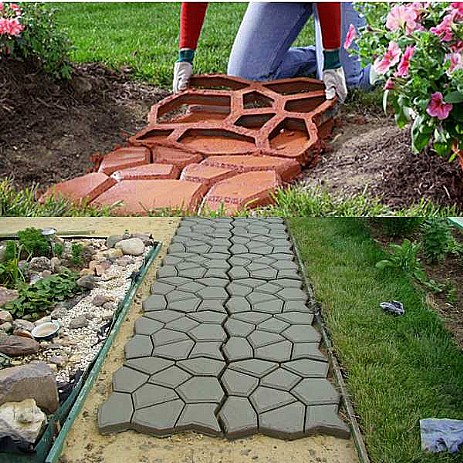
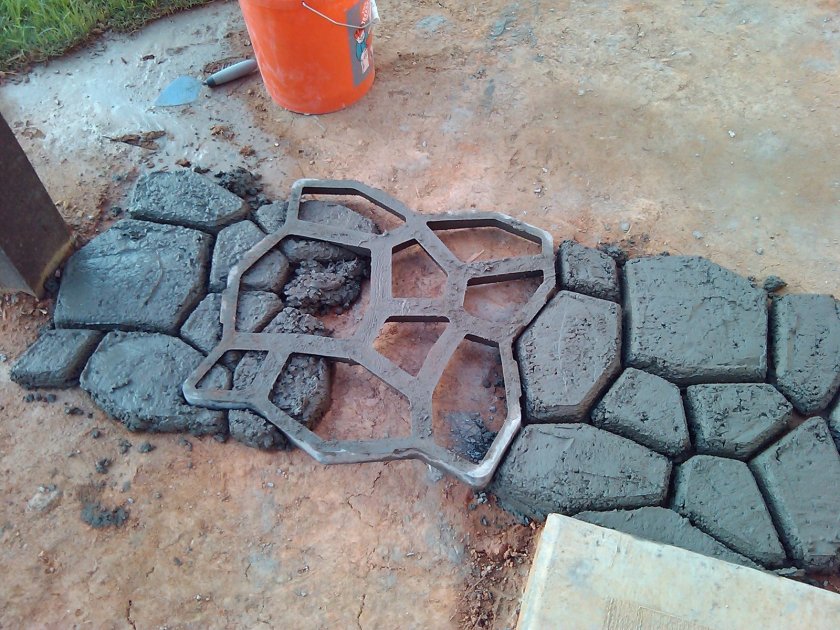
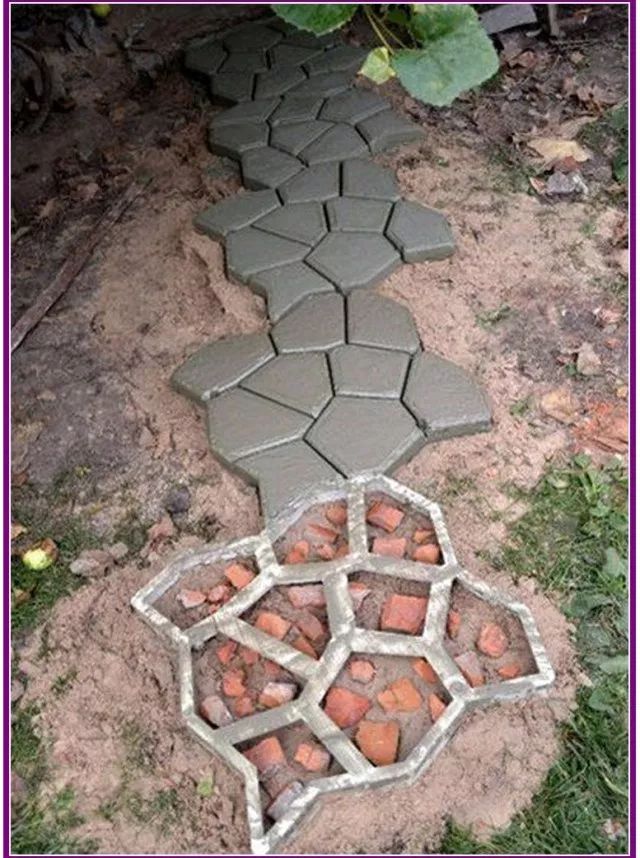
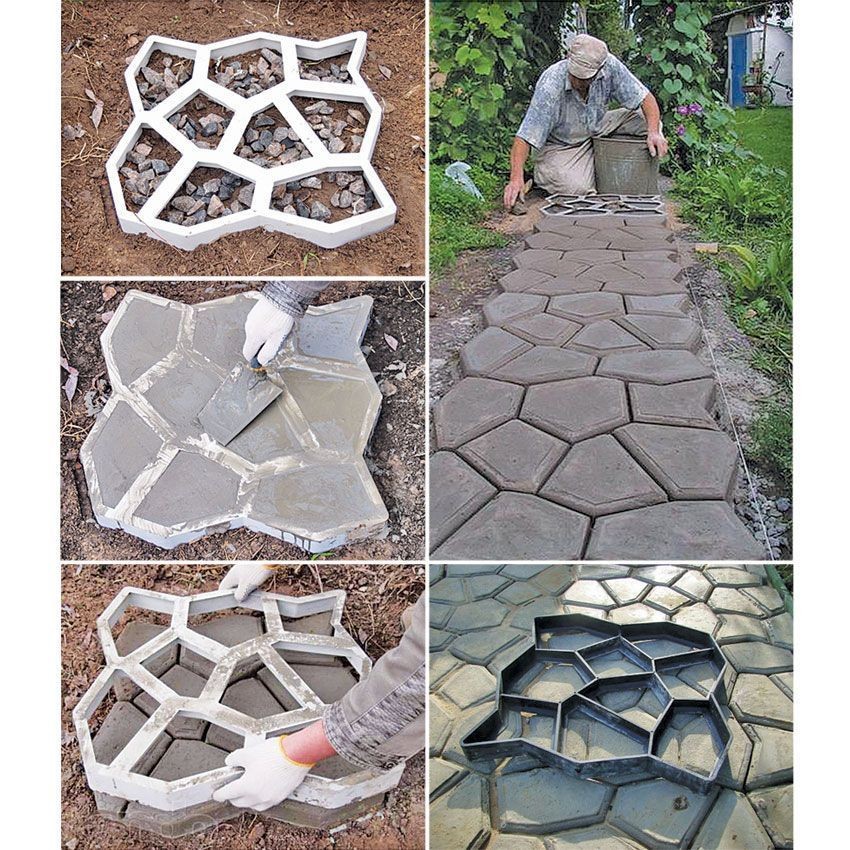
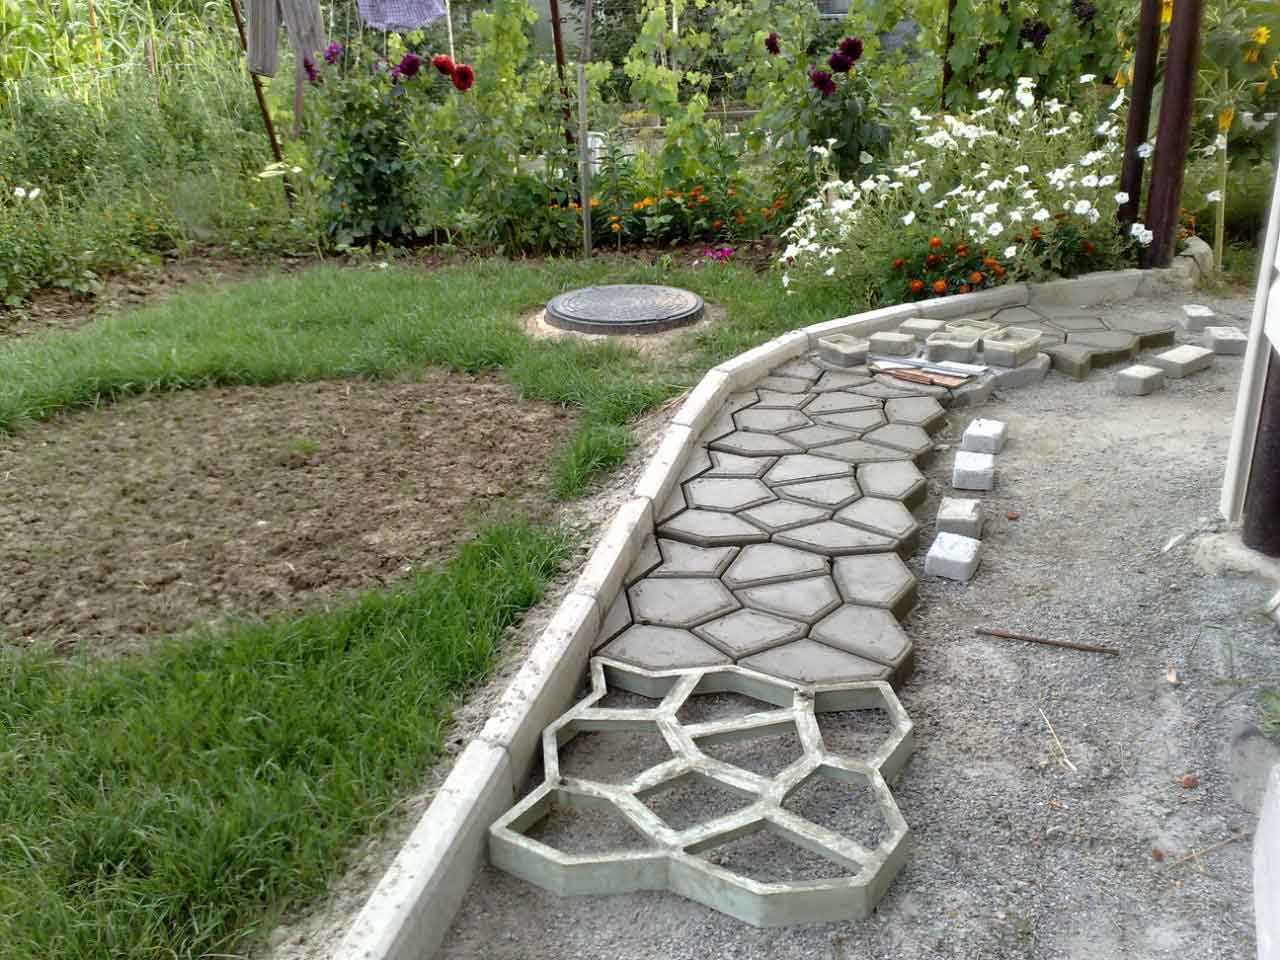
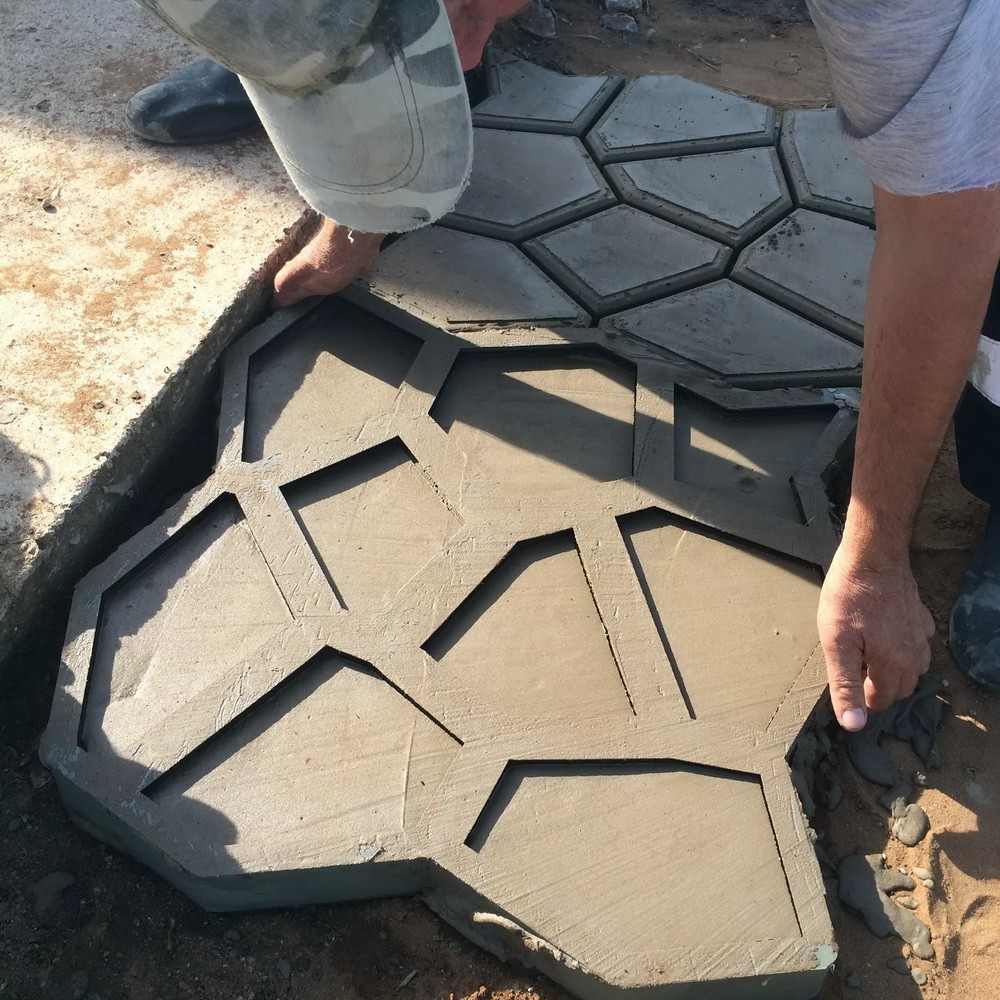
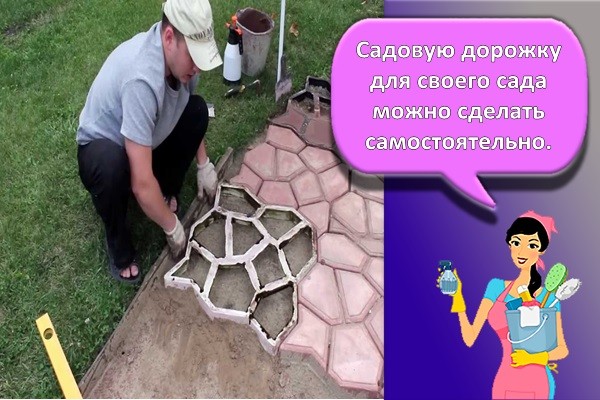
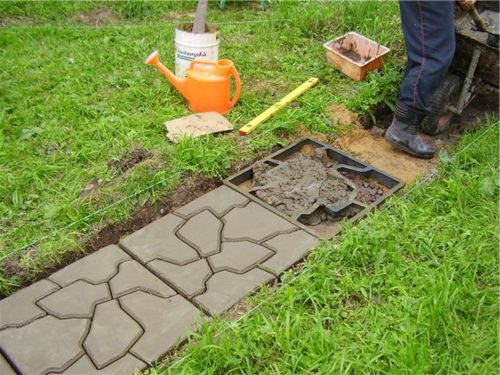
Then a convenient plastic form comes to the rescue to simulate paving stones - with its help you can make any drawing on a regular concrete fill. These are not the same forms as before - now you do not need to fill in the form one piece at a time and wait for the form to become free after the tiles have dried. Modern forms for concrete mortar are designed for continuous operation - they need to be cast directly on the site of the future track.
This is very convenient, because now there is no need to wait, and the process goes very quickly.
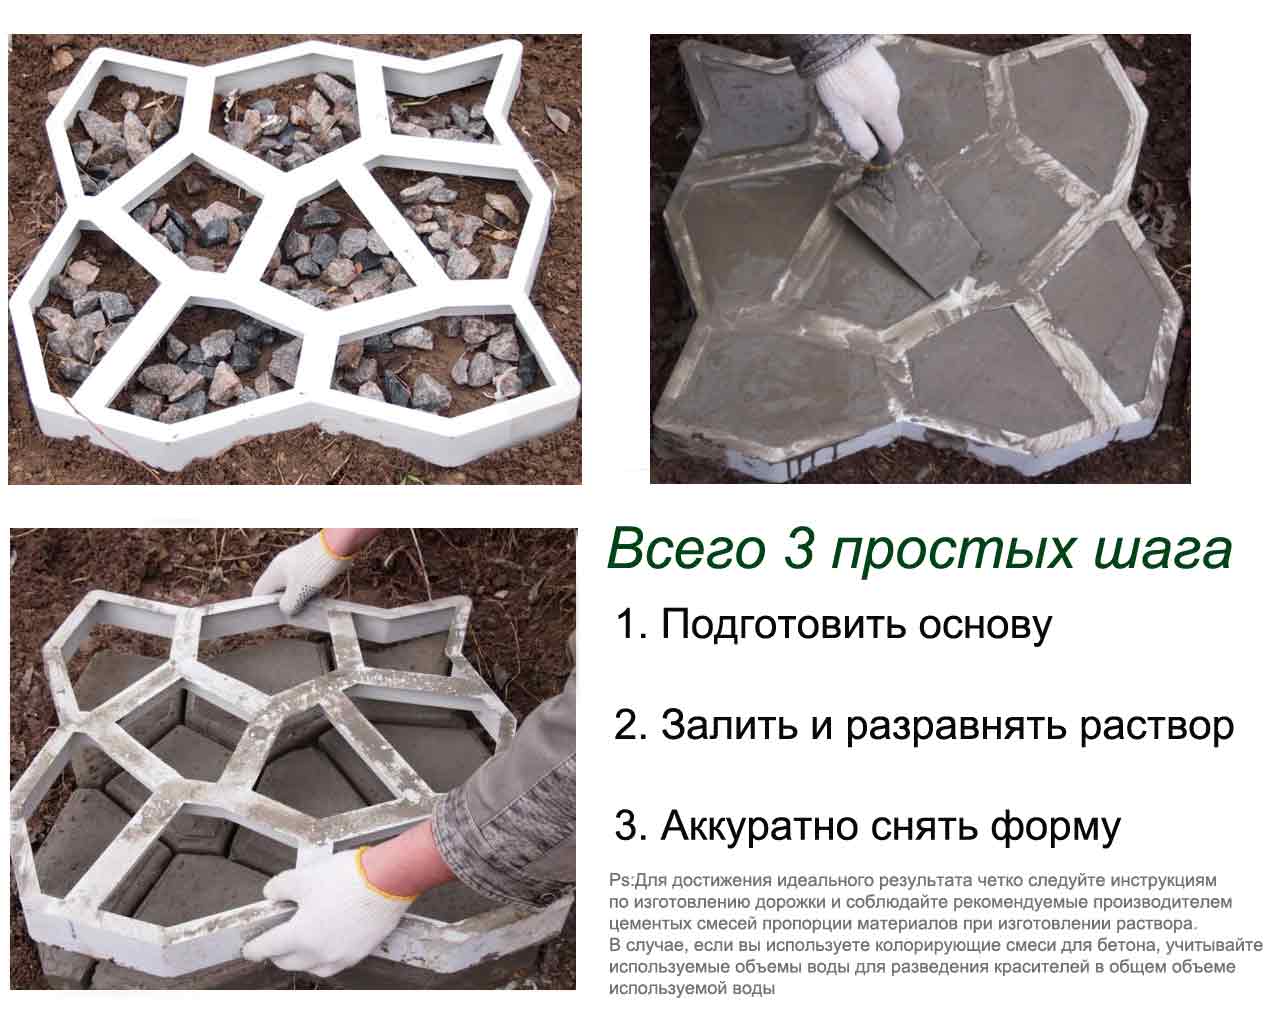
- To create a garden path made of concrete using a mold, you will need the mold itself, cement, sand and water.
- As for a regular path, the first step is to make the base - the sod is removed, the sand is compacted.
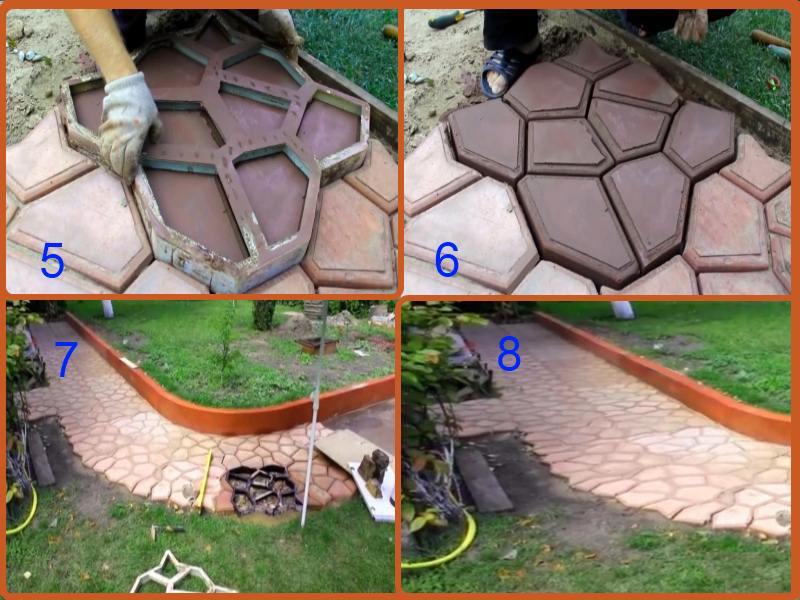
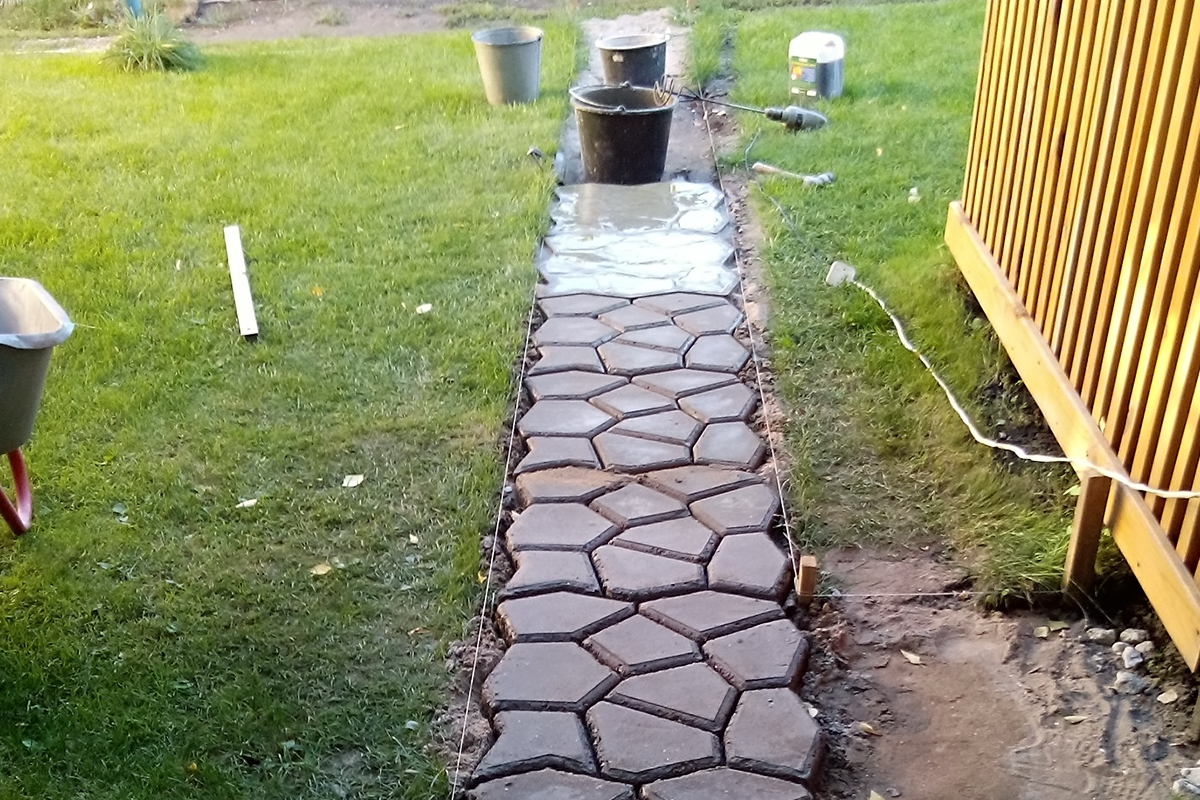
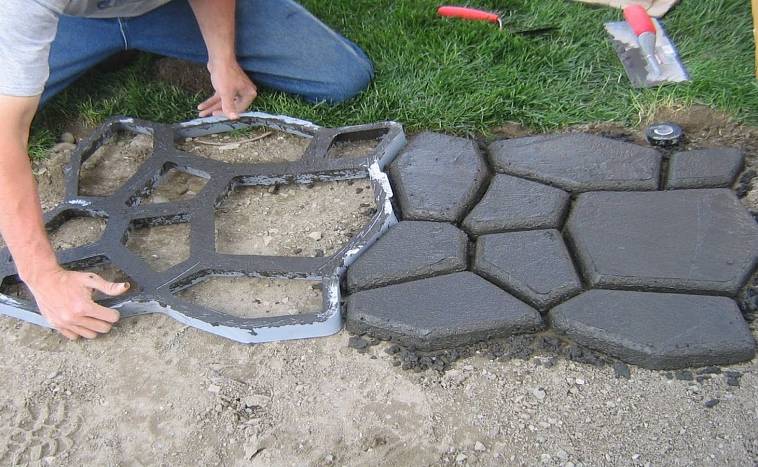
- Further, the form is sequentially poured onto the base, the setting time of one section is 10-15 minutes.
- Then the mold is removed and the next section is poured.
- Experienced builders advise to lubricate the mold with some kind of oil to make the mold easier to remove.
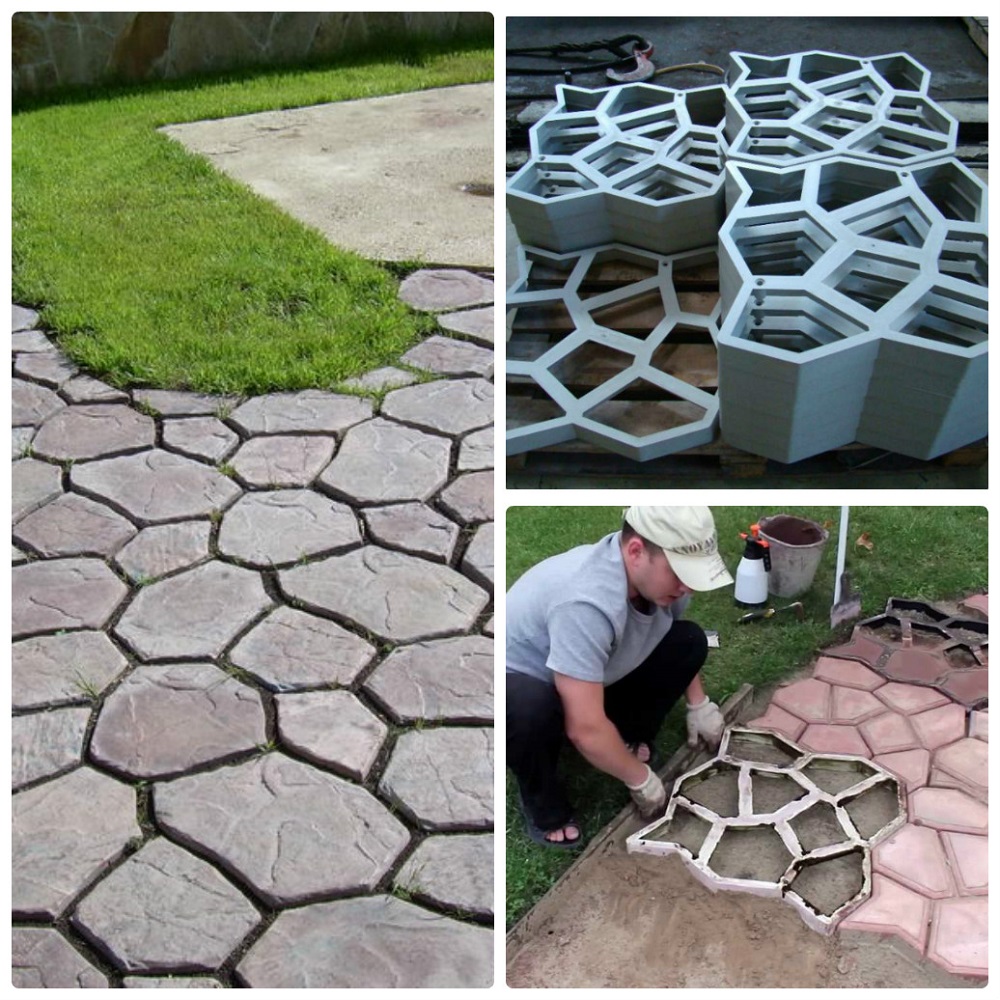
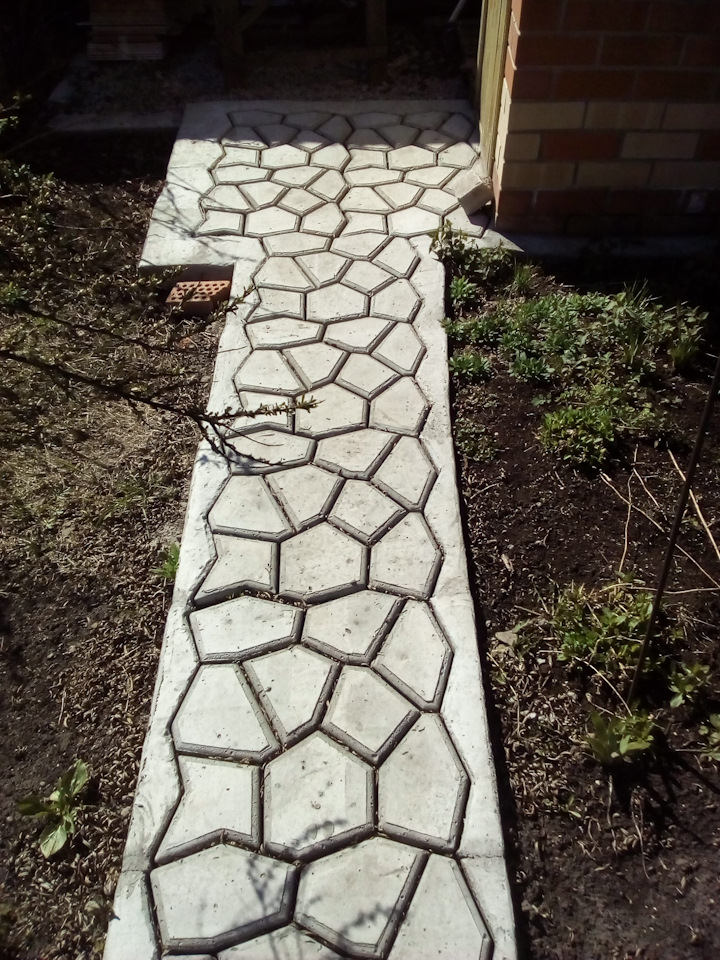
With the help of the form, you can make a beautiful garden path that completely imitates expensive tiles or paving stones. Concrete paths from molds have recently been very popular, for their simplicity and reasonable price.
Filling the form
It is important to lubricate the molds before placing the mortar, otherwise you will not be able to remove them. There is a special reusable lubricant for this, but instead I used machine oil.
If it is not there, you can replace it with a vegetable solution or at least a soapy solution.
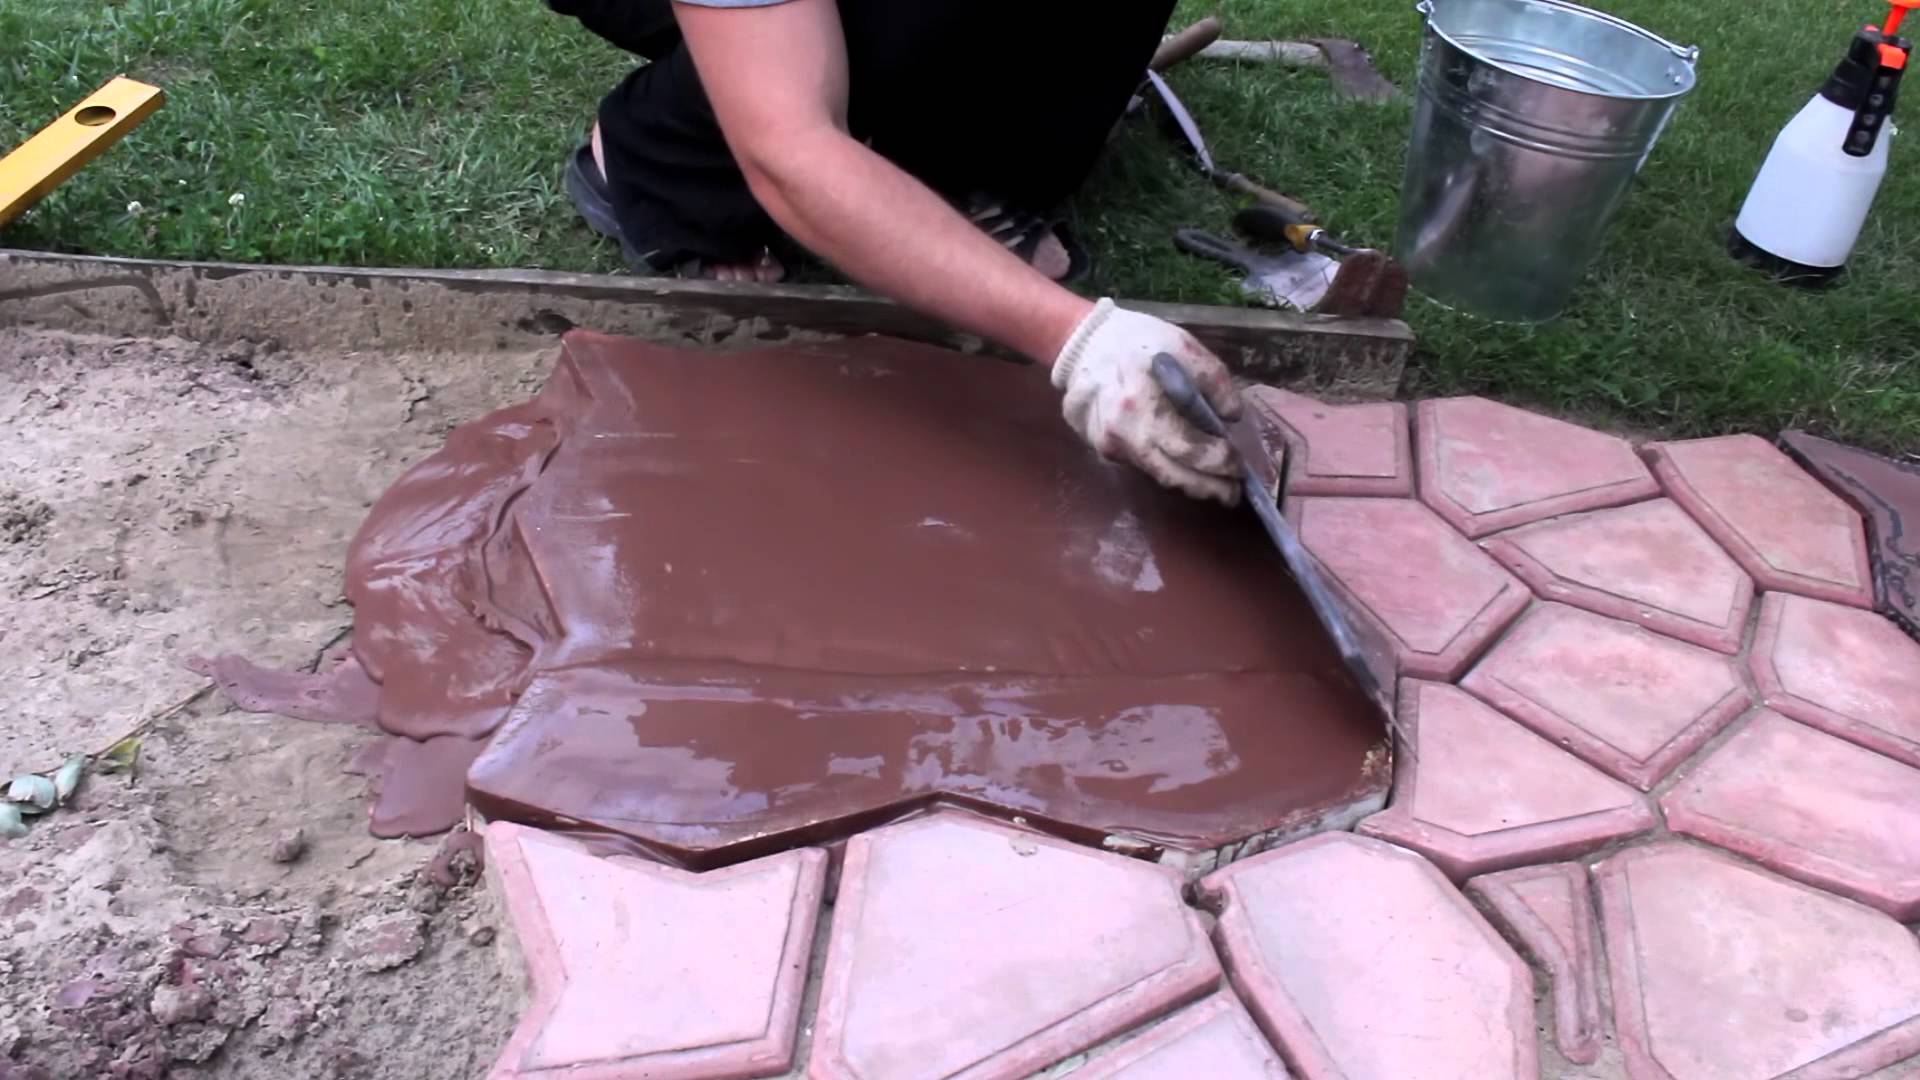
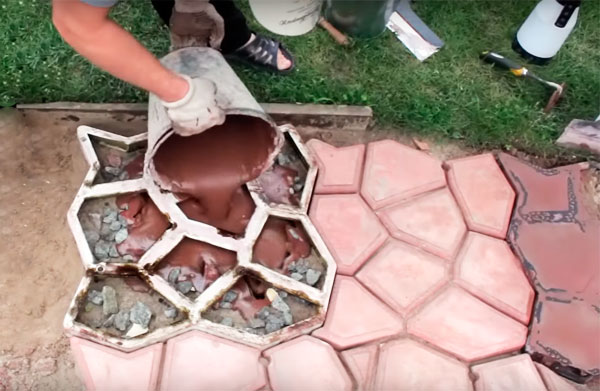
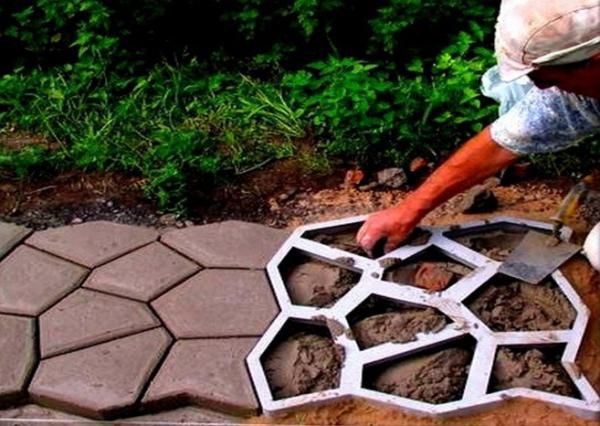
- First, I throw in the solution with a shovel, then I tightly fill the form with a trowel. To fill the voids below, I hit the shape with a hammer a couple of times.
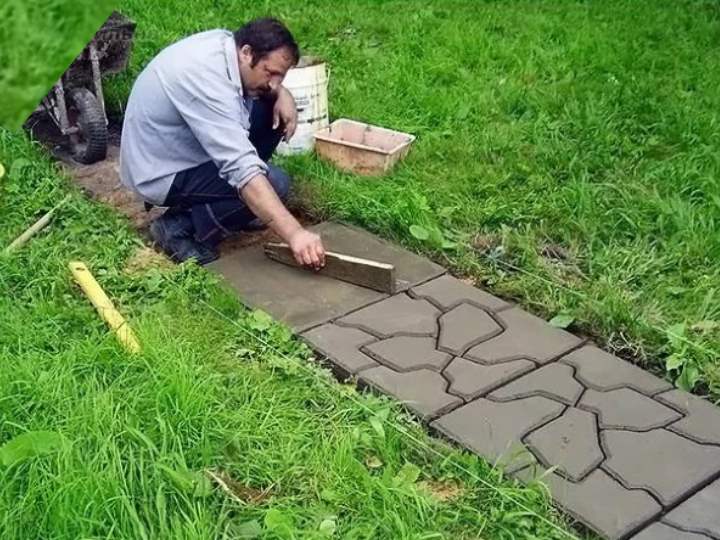
- With a rule or an even rail, I walk along the top and remove the excess.
- After 20-40 minutes, the solution will begin to hold its shape. I take off the template and proceed to the next element. The shape rises neatly and evenly with the arms at diagonal corners. After that, you need to smooth the surface again with a spatula.
In fact, you get a concrete slab with a thickness of 3 cm and decorative stones on it with a height of 3 cm.
You can walk along the path in 1 day.
Advantages and disadvantages of concreted paths
Concrete paths have many undeniable advantages:
- The service life of concrete paths is about 25 years, the material is strong and durable. Reinforcement makes them even more resistant to stress.
- Concrete tapes have a low cost, in the composition of concrete there are simple components that you can easily buy in building markets.
- Grouting alleys is quick and easy, and much easier than building tapes from tiles or other similar materials.
- If there are nearby underground waters or problem soils in the garden area, then concrete tapes, protected from moisture and poured to a great depth, are the only solution.
- You can further increase frost resistance if you add special chemical additives when mixing a mixture of cement and other ingredients.
- In the process of building garden paths with your own hands, you have the opportunity to design and decorate the site, ebb paths of various unusual shapes and colors.
Combination of materials
However, such passages in the country or garden area are not without drawbacks:
- Cracks can appear on the surface due to soil movement.
- Massive garden paths made of concrete become the capital elements of the overall site plan. You will not be able to move them anywhere, and dismantling these structures is very laborious.
- Filling should be carried out only in good weather, and according to the forecast, there should be no rain for a couple of days in advance after the date of completion of the work.
- Self-mixing concrete with a shovel does not give the desired quality, therefore, you need a concrete mixer for pouring.
- The preparatory stage includes the laborious process of creating the formwork.
Island form
It is interesting: How to build from foam blocks: we paint all the nuances
Using tiles to create a garden path
- In this case, it is not necessary to have the same volume of tiles with you, which is necessary to create the entire track. Probably the best solution would be to implement the project gradually, dividing the total amount of work into several parts. First of all, the soil is prepared for laying the tiles.
- The most important thing to remember is that the topmost soil layer, which at first glance may look decent, hides certain problems. These are both voids and the general looseness of the soil. To avoid problems in which the laid tiles simply fall into the ground, you need to remove the top layer of soil - this is only a few centimeters. The surface should be as flat as possible so that it is convenient to move later along the path.
- As a basis for laying tiles, you need to equip a sand cushion. The width of this layer should correspond to the width of the removed soil. More than an important aspect of creating a sand cushion is to ensure a high density of sand. If the track is large, then it is advisable to use a small manual roller, which allows you to compact the layer. Fine gravel can also be used instead of sand.
- Ultimately, the tiles are laid. The most important thing here is to ensure that the material units are tightly positioned. The tiles are laid in a specific pattern. Each piece of material is knocked out with a rubber hammer, but do not hit too hard, as the material is quite fragile. Even before you start laying the tiles, it makes sense to create a limit for the tiled surface. Most often, this is a curb that is dug into the ground, or mounted on the basis of a cement-sand mixture. With the boundaries created, it is much easier to lay the tiles.
- When creating a project, you need to take into account that in certain places the tiles will have to be cut into pieces. Therefore, it makes sense to do everything in advance so that no difficulties arise in this process (track width, pattern, etc.). At the very end of the work, you need to clean the surface of sand and dirt, after which the track becomes fully operational.
Features of forms created with your own hands
Paving slabs always look solid, but rather monotonous. If you want to decorate the yard, give it a touch of originality and maximize your creativity, you can make the tiles yourself. And a unique tile needs a unique shape.What features does it have?
- uniqueness. Tiles created from your own sketch will have no analogues. You can think over the right size, shape and elements that match the overall design;
- the ability to experiment with color;
- if you wish, you can add additional elements: shells, glass, pieces of porcelain stoneware, stones and create patterns from them;
- production of tiles of different strength, depending on the purpose. For the far corner of the garden - thin, for parking - more durable;
- with one mold, you can make several molds at the same time.
- profitability. The cost of making one mold and mortar is much lower than the amount spent on the purchase and delivery of the tile.
Using special shapes, you can create tracks with a unique pattern
The downside is the time spent. It will take 2-3 days to dry the concrete tile, and about a week to create 30-50 elements.
Classic manufacturing technology
Every summer resident will cope with the solution of the question of how to make a garden path on their own.
The first step along this path is to prepare various tools.
For construction summer cottages, you must:
- wooden and rubber hammers;
- pegs and tension cord (for contours);
- trowel and level;
- rake and broom;
- container for mortar and formwork (for solid paths made of cement and concrete);
- watering hose.
From building and finishing materials, depending on the type of path, you will need: crushed stone (20-50 mm), sand and gravel, cement mixture, paving slabs, brick, stone, etc.
The first stage of work is "filling" the foundation.
To do this, you need to mark the boundaries of the future track and dig a trench.
Video:
The top layer of earth must be removed by 10-20 cm, then covered with a layer of rubble (at least 3 cm).
Then - a dense layer of fine gravel and a sand cushion.
Between gravel and crushed stone, for greater strength, a layer of geotextile can be laid.
You can level it with an ordinary rake.
Then you can lay a decorative coating - tiles (including plastic), stones, bricks, etc.
The final stage - a dry mixture (screed residues or sand) is poured into the gaps between the coating pieces and filled with water.
After 2-3 days, the decorative path is completely ready.
Selection criteria for finished products
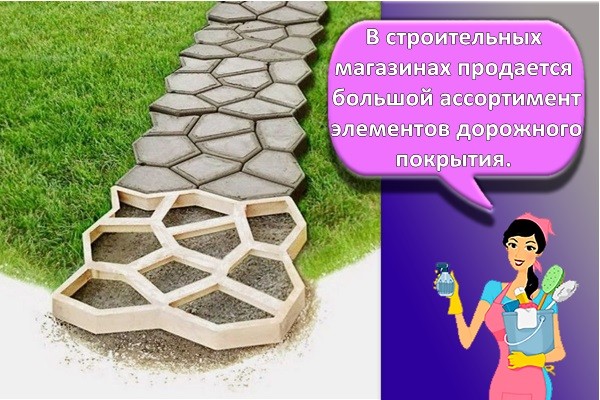
A large assortment of road surface elements is sold in construction stores: paving slabs of all shapes, sizes and colors, clinker bricks, paving stones, natural and artificial stone.
Materials for the construction of paths in the personal plot are chosen, taking into account:
- terrain - a hilly area must be equipped with steps;
- garden style - wood cuts are suitable for country, paving slabs, curbs will help to recreate the classics;
- the condition of the soil - clay, loamy soils with excess moisture become mobile, for the device of the path you need to buy a geogrid;
- future load - a hard surface is chosen for the entrance of vehicles, a footpath can be made of plastic or pebbles;
- architectural features - the color and style of the road surface should be in harmony with the facade of the house.
Elements for road surfaces sold in stores are hard (natural stone, decking, clinker bricks, paving slabs) and soft (embankments of pebbles, gravel, crushed stone, sand, tree bark). On sale are rubber plates, plastic modules.
Various mosaics
The creation of original and durable tiles with a unique pattern is a laborious process. But the result will delight the owners of the house and surprise the guests.
For work you will need:
- remnants of old tiles and porcelain stoneware of different colors and textures;
- pebbles, any pebbles, glass, rhinestones, large beads, old keys and any other items;
- a rectangular or round baking dish greased with petroleum jelly;
- adhesive tape sheets;
- everything for solution preparation.
Laying a garden path
Step-by-step instruction:
- Put all the available items for the mosaic in a bag and grind with a hammer.
- Sort by shape, color and size.
- Cut a rectangle or circle out of the tape to match the size of the baking dish. Place the tape in the mold and remove the paper so that the sticky side is up.
- Place a freehand drawing face down on the bottom of the form.
- Prepare the solution and pour it into the mold about half (1-1.5 cm).
- Place a metal mesh cut to size for strength.
- Fill with a layer of mortar.
- After final drying (1-2 days), you need to pull out the tile and remove the layer of adhesive tape from the front side.
- Wipe the design with a damp cloth, sand and varnish for shine and durability.
If you use a special mosaic (1x1 cm) of different shades of the same color scheme, you will get a stunning pattern.
Technology for making a garden path using a form
If the plates for laying are made in advance, then the creation of the path in the garden begins with the preparation of the location. The quality and durability of the result of all subsequent work depends on the seriousness of the approach at this stage. For this, a kind of foundation is organized:
- dig up the soil in the future location of the tiles in the form of a trench (about 10 cm in depth);
- The formed pit is covered with crushed stone (up to 3 cm depth), gravel and sand are laid on top of it.
Work with tiles begins on the erected base. The finished elements are installed on top of the sand layer. Each tile, in most cases, is installed tightly to each other.
The laid out track details are rammed with a rubber hammer. Sand is poured on top to fill the existing voids. The finally compacted path is cleaned of excess debris.
If there is no finished tile, then the technology for creating the track will be different. As a preparation, they dig a trench 5 cm deep. On the obtained area, molds are placed for casting tiles. Using a rubber mallet, bury the cells. The base soil and the form itself are slightly moistened.
The addition of crushed stone to the cement mixture will create an interesting visual effect and increase the strength. In the process of creating elements, it is advisable to give them a slightly convex shape. This will prevent water from stagnating on the path.
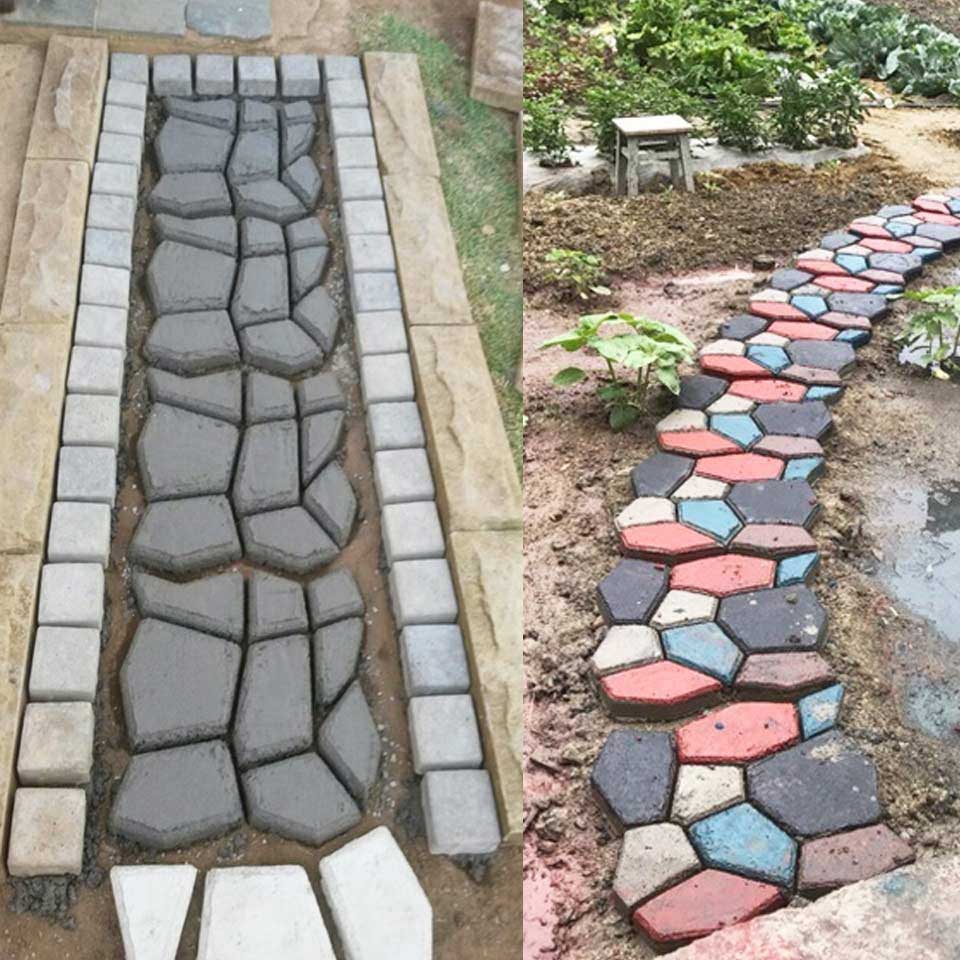
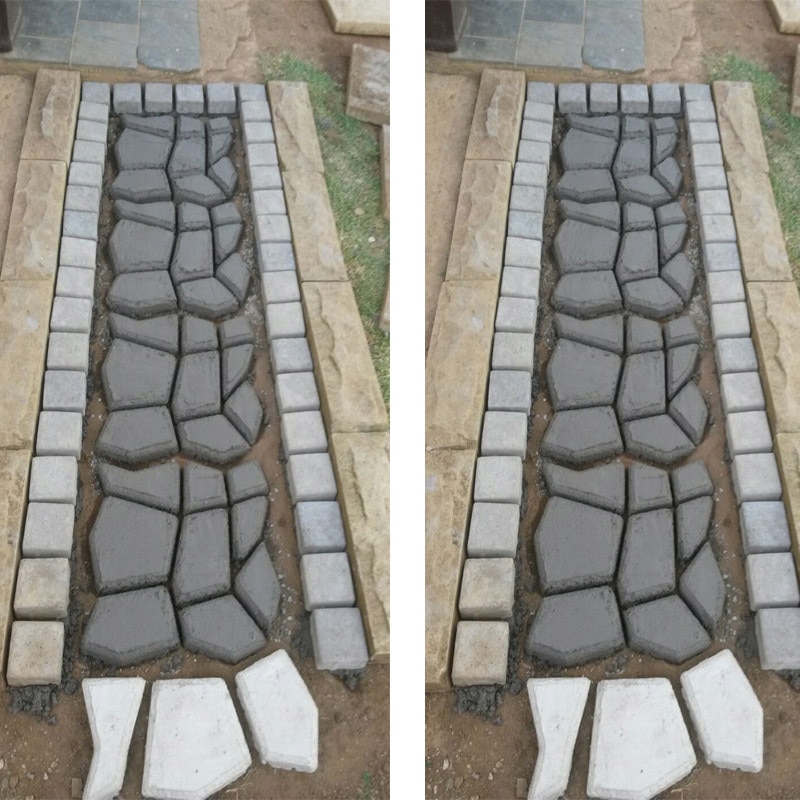
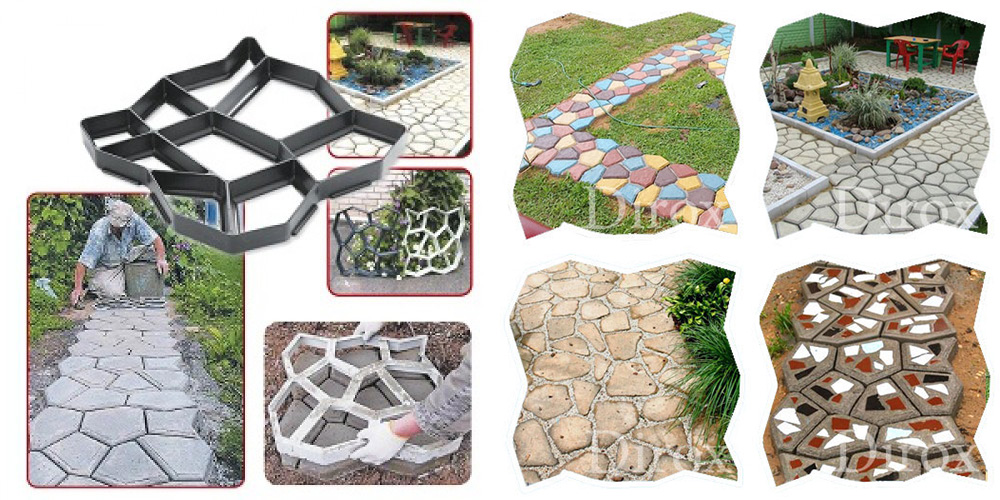
Using molds to create paths in the garden is common. With their help, you can create an original landscape design. Having looked at the photo of the forms for the tracks and the results of their application, you can understand that the scope for creativity is not limited.
The path in the country from paving slabs
Of the tools for work you will need:
- rammer and pegs;
- cord with level;
- trowel and rubber mallet.
Getting started is the same. Mark the future garden path and prepare a trench. Then it is recommended to lay geotextiles. It will stop the growth of grass so as not to spoil the appearance of the path.
Lay a sand cushion and tamp it well. Knead the cement mortar that will connect the parts of the path to each other. It must be laid on the sand by screed with a channel.
Tiles for paths in the country are laid out according to the principle "from oneself". Moreover, the first row is supposed to be carefully aligned. After the last row has been laid, all the seams must be covered with a mixture of sand and cement, which are then spilled with water.
A border will need to be made along the edges of the path. It will carry not only an aesthetic function, but also will not allow the tiles to disperse in different directions.
From paving slabs, platforms near the house, places for rest, a porch, an entrance area look good.
Another option is to make a suburban path from tiles or bricks using sand, without a cement screed. To do this, you first need to dig a path and create curbs around the edges so that the path does not creep. Next, a sand pillow is placed, crushed. Bricks are laid tightly on it. Sprinkle the garden path in the sand on top. The surplus is swept up.
How to make a garden path with your own hands
The easiest way is to make a gravel path. To make it, you will need:
- Pebbles or expanded clay;
- Geotexit or compacted film;
- Sand;
- Frames made of wood or concrete (bumpers) for paths.
To make a high-quality track, all actions must be performed step by step:
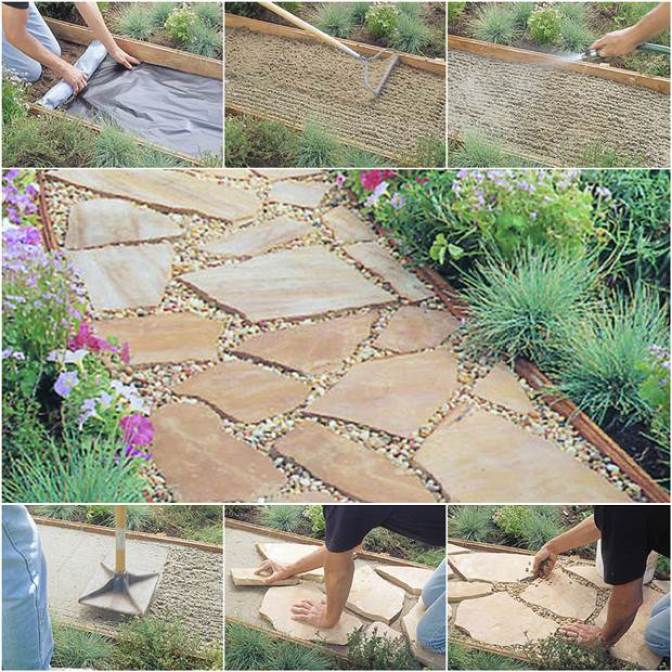
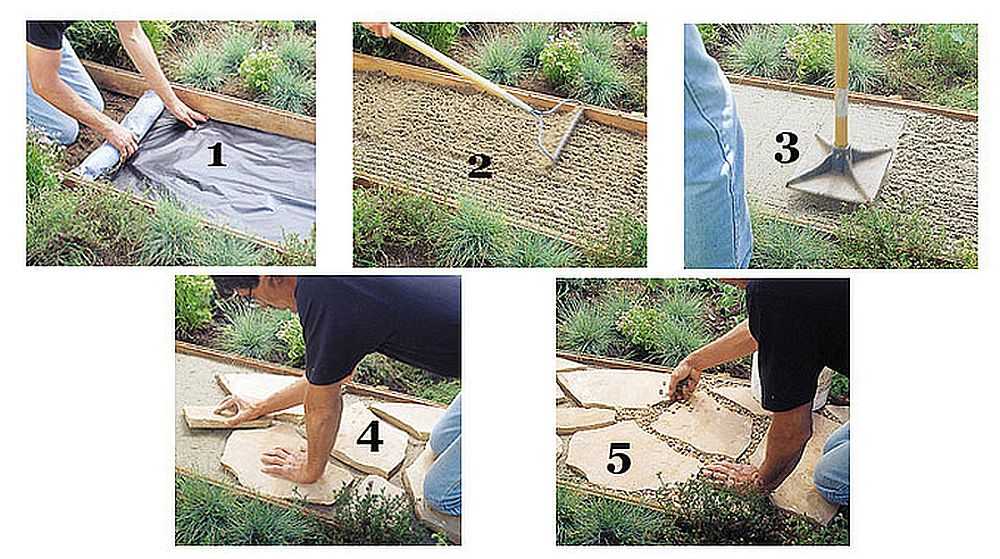
- Make markings for your future path. If you plan to make it sinuous, then draw all the convolutions.
- Dig in wooden blocks or concrete boards on both sides.
- The top layer of sod should be removed along the entire length of the path, approximately 15-20 cm deep.
- Geotextile or dense film is laid neatly along the path, the edges should be placed under the side of the path.
- The cleaned surface is covered with a 5 cm layer of sand. After that, the sand is leveled.
- The prepared surface is covered with gravel.
- The gravel is compacted using a roller or a conventional shovel.
We make a form from wood
The easiest way to do it yourself is a wooden frame for pouring, a kind of formwork. Having carefully polished the boards, you can fold them into an even frame, which will allow you to get castings of any size, up to large slabs of 50x50 centimeters. But we recommend choosing not a boring rectangular path, but trying to do something more complex.
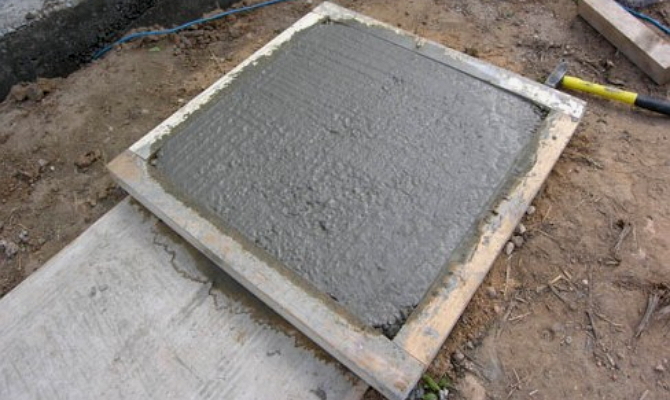
Wooden frame for pouring garden tiles
In particular, you can make homemade triangular shapes for any garden paths, which will allow you to make multi-colored laying elements for paving with intricate patterns. There is an option to make a polygon by sawing off triangular fragments from the ends from equal pieces of the timber, obtaining elongated trapeziums (the main thing is to choose the right angle of the saw cut). But if you still want to limit yourself to a square or rectangular frame, then you can make an interesting tile with your own hands and of this typical shape. To do this, while loosening the soil, dial large stones, the size of half your palm.
Then prepare the mortar and pour it into the hammered formwork so that the layer thickness is at least 5 centimeters. Now we take the stones and put them directly into the solution so that they are almost completely immersed in it. The cement-sand mixture must be thick enough so that the cobblestones do not sink into it, but are slightly depressed. After laying, wipe the surface of the "mosaic" with a damp cloth. When the solution hardens after a few days, take out the tile and leave it to harden in a cool place.
Varieties of tracks
Trails for country houses have many varieties, but they are usually distinguished by the material from which they are made.
- A natural stone. Saw cuts for garden paths are not as popular as stone. The last one is the most durable: it is not afraid of the sun and rain, it will last for decades and at the same time retain its original appearance. An important point: buying expensive building materials is not at all necessary - you can make a path using stone remains from the cladding of a house or an alpine slide;
- Wood. This is one of the most popular materials - garden paths made of wood look very cozy and stylish, perfect for a small country-style summer cottage. Such paths can be made from individual blocks, saw cuts, garden parquet, wooden pallets, etc.;
- Sidewalk (curb) tiles for garden paths. It is a pleasure to create such garden paths with your own hands. Paving slabs for garden paths of different colors and shapes can be laid in different ways, achieving unusual patterns and patterns. This is a guaranteed way to make your garden unique and unrepeatable;
- Plastic. Plastic tile designed for garden paths is the ability to mount paths very quickly and at the same time get a durable, reliable coating. Plastic tiles fit on any substrate, do not rot and are easy to clean.But there are also disadvantages - when it rains, plastic tiles become very slippery, over time, the coating burns out, sometimes the plastic tiles are scratched.
Gravel, bricks are used to backfill country paths, and if you have a special form (formwork) for making garden paths, you can mount them from cement, saw cuts or decorative concrete.
Photo of the track from the cuts:
How to make paths in the country from concrete with a form
Making a concrete path according to this principle will not be difficult. This will require sand, water, crushed stone, cement, a building level, a trowel and at least one form. What it will be made of: plastic, wood, metal, plaster or other material - no difference. Consider - the speed of work depends on the number of forms.
Forms for pouring concrete
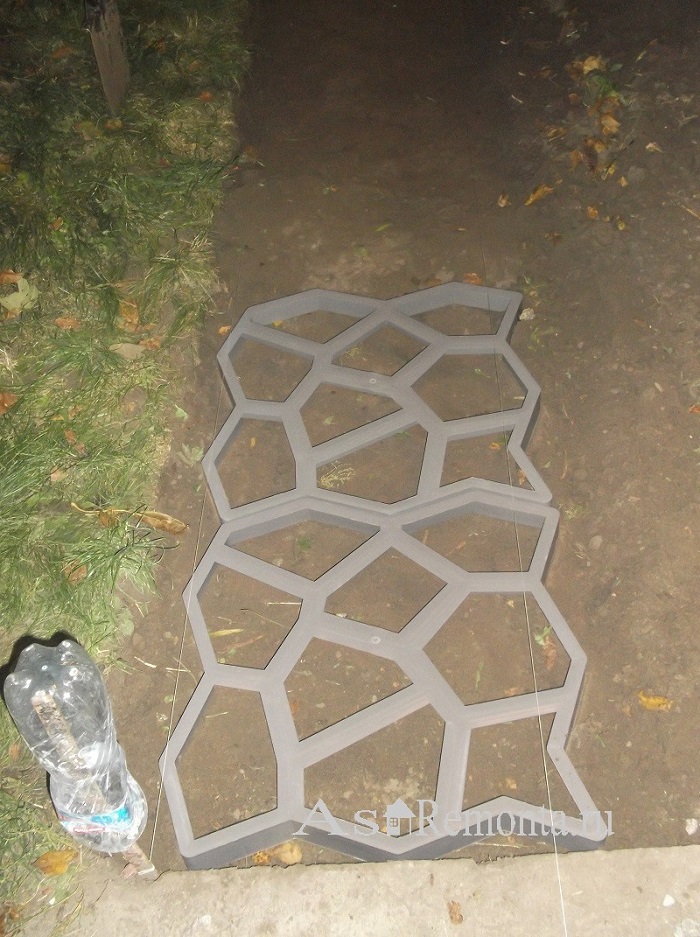
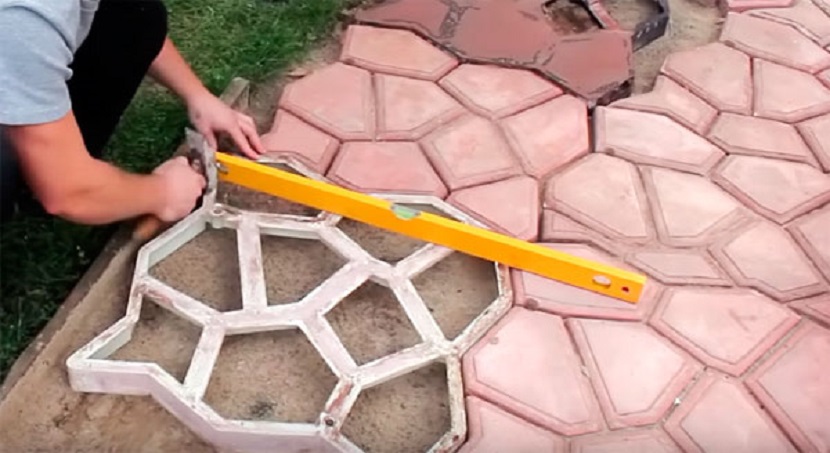
In this case, we will consider laying the sidewalk using a polyethylene form called "Garden path", measuring 60.0x60.0x6.0 cm. It consists of nine cells combined into one and forming a pattern with uneven edges. The procedure is as follows:
- Prepare the base: remove 10-15 cm of soil, cover the area with sand, wet it well and tamp it. This will reduce the likelihood of deformation: it will not allow sinking in the summer and squeezing out in the winter.
- Before each use of the mold, be sure to grease it with oil. If this is not done, it will be problematic to remove it from the hardened concrete.
- Place the mold in place of the casting, attach the building level, set it in the desired position.
- Mix the concrete mix in an amount equal to the volume of the forms used. We have one, which means we prepare concrete only for her. The mixing ratio is determined according to the type of cement used and is shown in the table.
| Cement grade | Cement weight, kg. | Sand mass, kg. | Crushed stone mass, kg. | Volume of cement, l. | Crushed stone volume, l. | Sand volume, l. |
| M 400 | 1 | 2,8 | 4,8 | 10 | 42 | 25 |
| M 500 | 1 | 3,5 | 5,6 | 10 | 49 | 32 |
- Pour the resulting concrete M200 into a mold.
- Smooth with a spatula.
- To achieve the smoothest possible surface, moisten with water from a garden sprayer.
- After 1-1.5 hours, carefully remove the form. Light tapping with a hammer on its edges is allowed.
Paving slabs out of shape
The next and all other tiles are poured in a similar way. If you want to create a perfectly flat garden concrete path, make the second and subsequent tiles 2-3 mm higher. Concrete, when hardened, will give a slight shrinkage, the stock will be a kind of compensation.
Work examples
On the personal plot, you can make any path you want, taking into account the style of architecture and garden. For the arrangement of the road surface, ready-made materials are bought. True, it is cheaper to make the tile yourself, from concrete mortar and form. A stencil can be bought at a hardware store or made on your own from any materials at hand.
Examples of garden paths design:
- Of glowing stones. The pebbles can be painted with fluorescent paint and varnished on top for outdoor use. The colored stones will glow at night. You can sprinkle them on the sides of the path or scatter them over its entire width.
- Made of concrete circles of various diameters. The concrete solution can be poured into round shapes of various diameters. When they are dry, they can be used to decorate the garden path. Large circles are arranged in a zigzag manner, between them circles with a smaller diameter are stacked. The free space is sprinkled with sand or soil and sown with undersized grass.
- Mosaic tiles. A layer of concrete 5 centimeters high is poured into a round plastic bowl, oiled with machine oil. When the concrete slightly "grasps", a spiral is drawn on the wet surface from the center. A mosaic is laid out in the direction of this line. Any ornament can be laid out. Previously, the mosaic elements must be laid out on a sheet of plywood. After laying the pattern, the concrete is sprinkled with water, covered with foil and left to dry for 3-4 days. Then the circle decorated with mosaics is taken out of the basin. In total, you need to make 10-20 such circles.Concrete elements are laid on a cushion of rubble and sand against each other or in zigzags.
- Made of multi-colored rhombuses. A square mold for pouring concrete can be delimited by wooden slats so that they form diamond-shaped cells. When the concrete poured into such diamond cells dries up, the surface can be rubbed with a coloring agent mixed with a cement mixture. True, rhombuses need to be painted with the same color, in a checkerboard pattern, that is, after one.
Share link:

