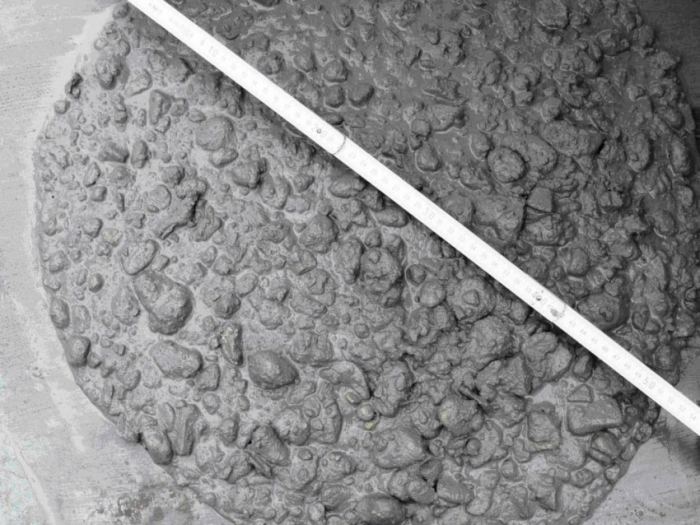
The composition of the mixture
The main components of drainage concrete are cement, crushed stone and water, in addition, depending on the purpose and the formulation used, various polymer modifiers (light granulate), sand and other ingredients can be added to the material.
Important! The more sand and cement there is in the solution, the stronger the material will be, but the lower its porosity will be. In general, the formula for the mixture should look like this:
In general, the formula for the mixture should look like this:
| Component | Percentage content in the mass of granular filler | Final content in 1 kg per 1 m³ |
| Cement | 8–12 | 150–220 |
| Crushed stone | 90 | 1500–1600 |
| Sand | 10 | 140–180 |
| Water | 3–6 | 60–90 |

It is advisable not to deviate from the above proportions in the manufacture of the solution in order to preserve the desired properties of the finished material. It is essential, in particular, that the ratio of water to cement does not exceed 1: 4, otherwise, even with a slight reduction in the proportion of liquid, the concrete path will sharply lose its strength.
Crushed stone can be used in two different fractions, for example, a larger one, from 10 to 20 mm, and a smaller one, from 3 to 10 mm, in a 3: 2 ratio. The second option, which also shows its effectiveness, is a combination of crushed stone with a fraction of 5 to 20 mm and screenings with a fraction of 2 to 3 mm, in this case the proportion should be changed to 1: 4.
As for sand, experts do not recommend completely abandoning its use, since a certain decrease in porosity, which this component brings, is compensated by an increase in strength, which is also important for a summer cottage. However, if you increase only the amount of cement, the water permeability of concrete does not decrease so significantly.
What to consider when designing
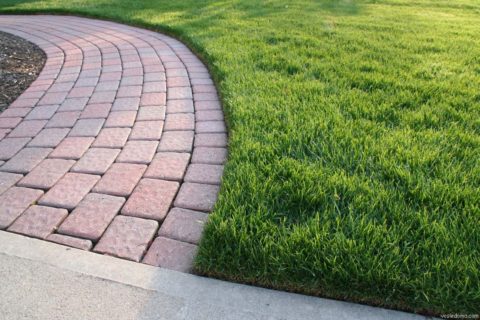
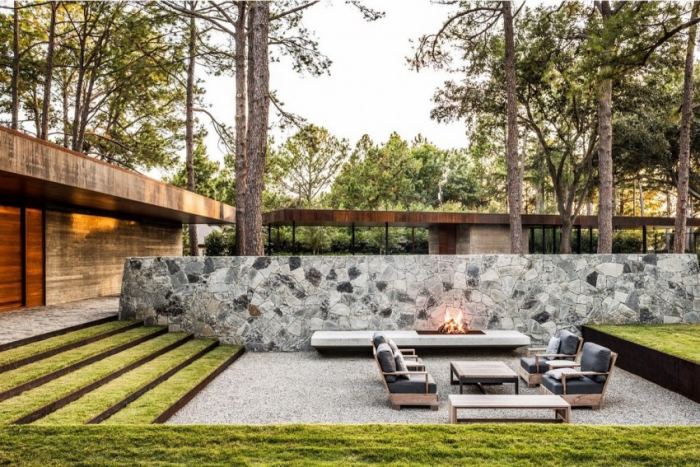
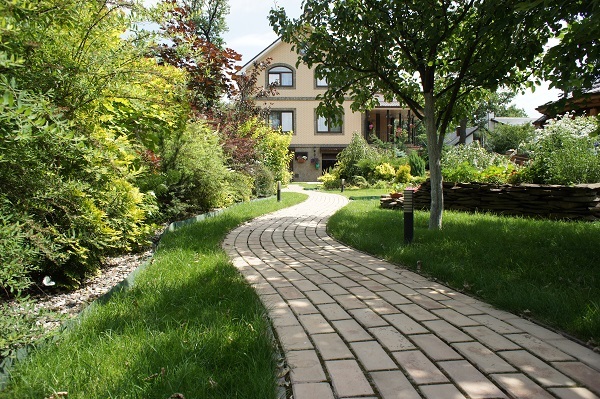
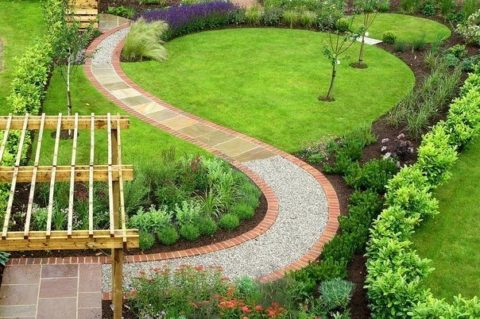 The covering should connect the house with other buildings on the site
It is important to choose the right width depending on the purpose. For the main roads that carry the most important communication load - from the house to the main facilities on the site, the width is taken at least two meters
This is done so that two people can freely disperse on it.
 Wide coverage
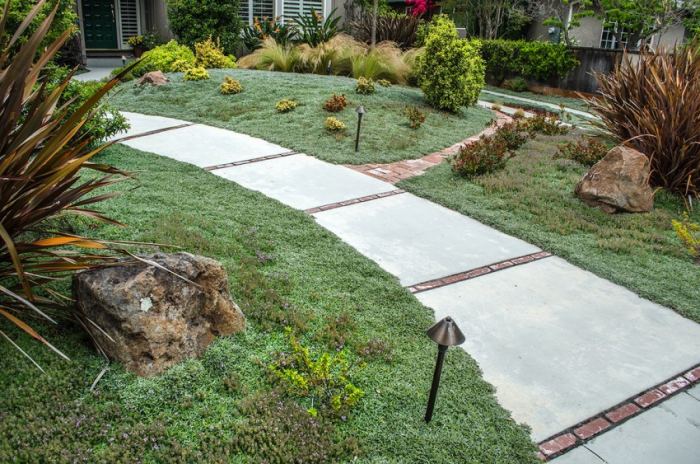
A path of secondary importance - walking or decorative, can be narrow and even have an intermittent canvas, which looks very decorative and does not visually load the site.
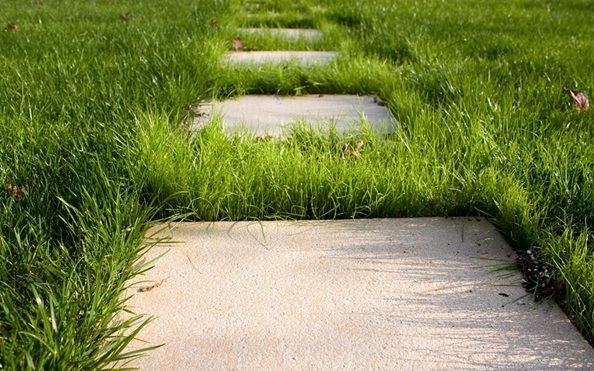 Decorative version
Before making such a coating in the country, you need to make a sketch on paper. The sketch should indicate the location of the house, the main objects.
The main ones are placed on communication routes that pass along the route from the house to the main objects - to the gate, gazebo, pool and others.
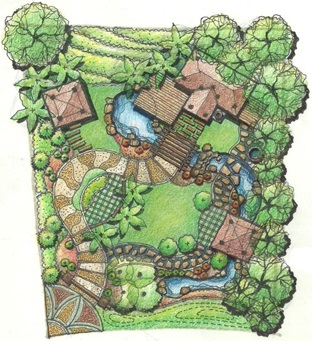 Location sketch
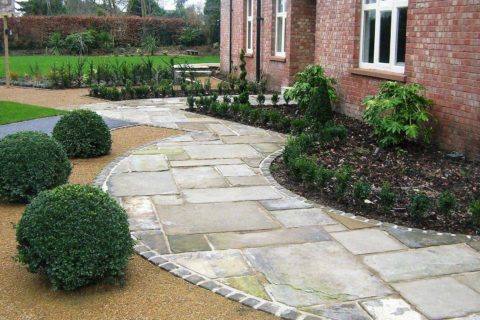
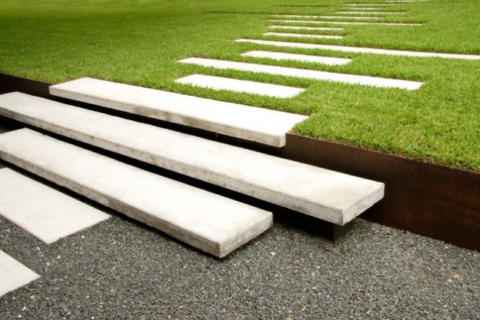
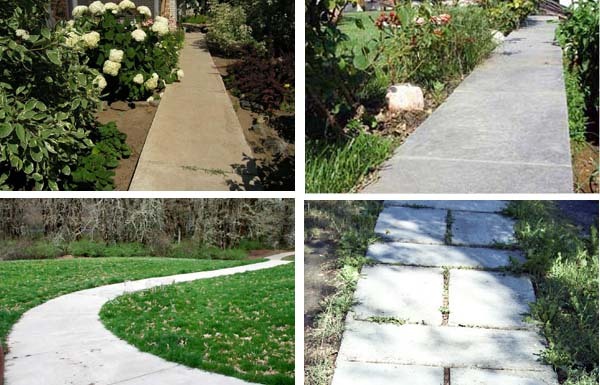
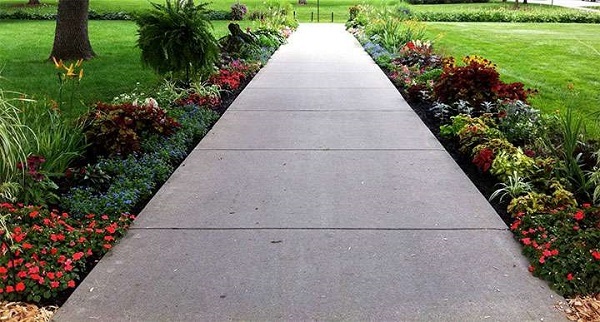
They can be straight - they provide the shortest path from one functional area on the site to another. Also coverings around the house have a direct configuration.
 Surface around the building
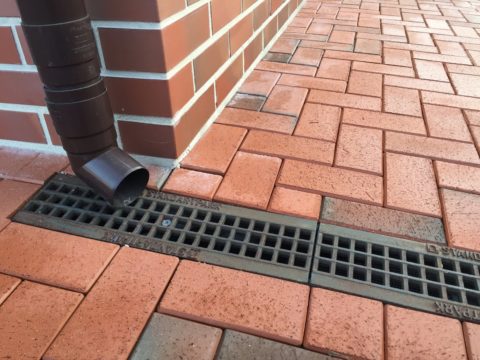
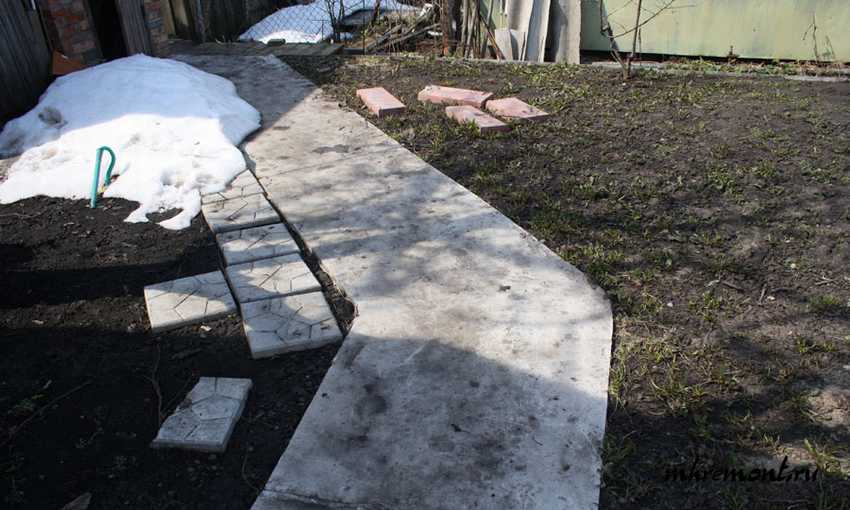
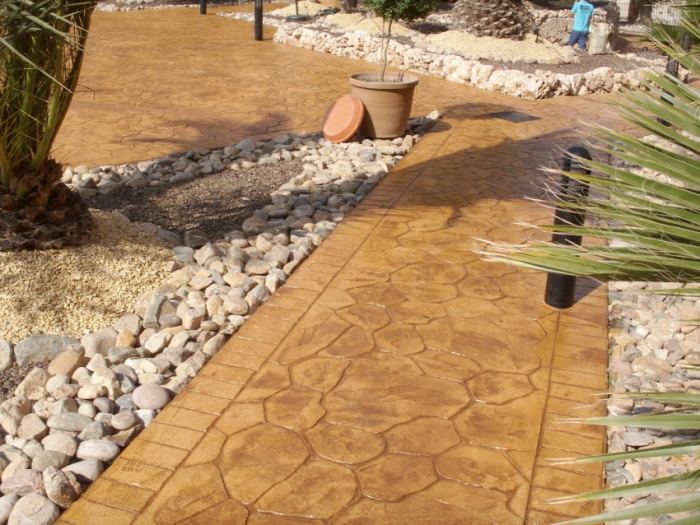
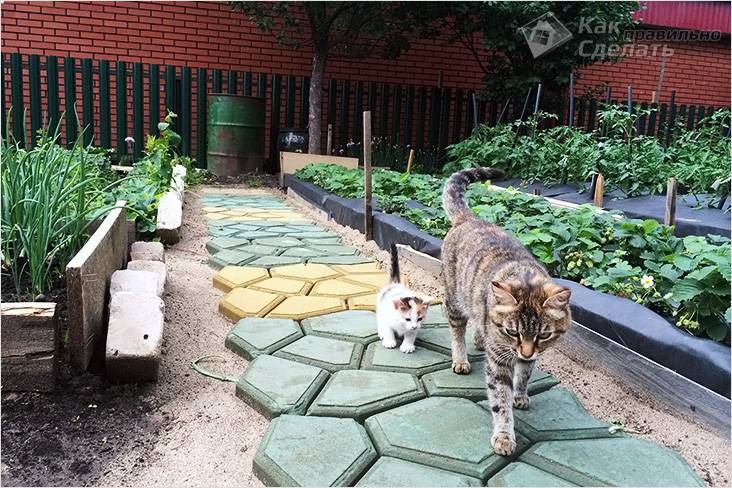
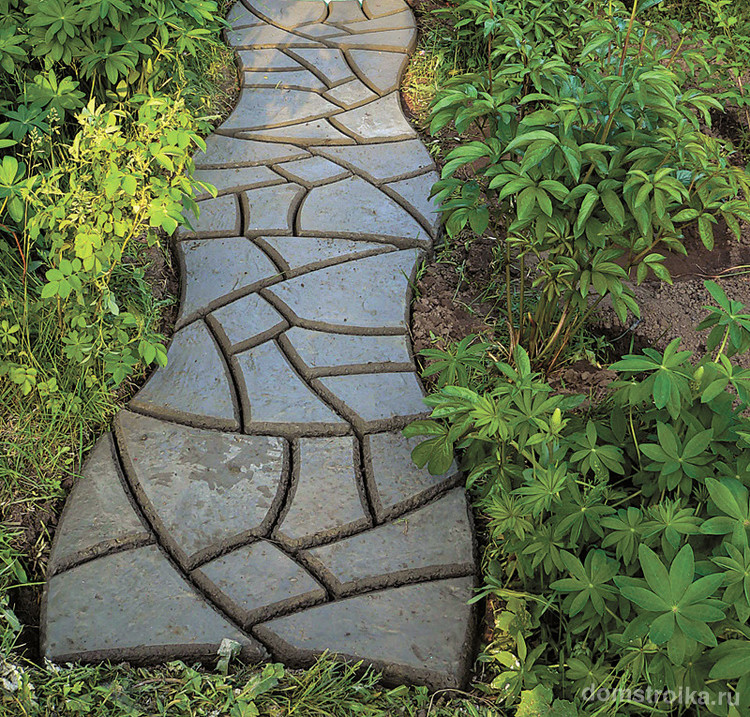
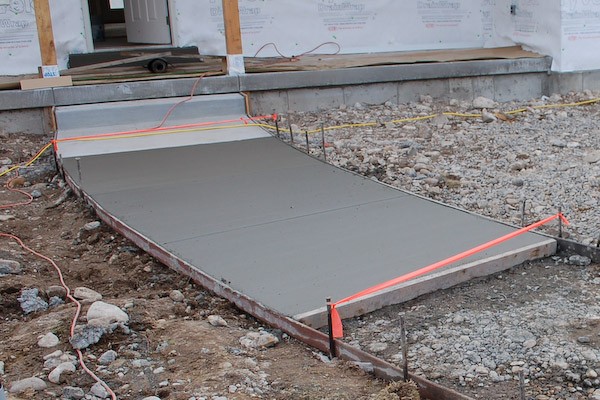
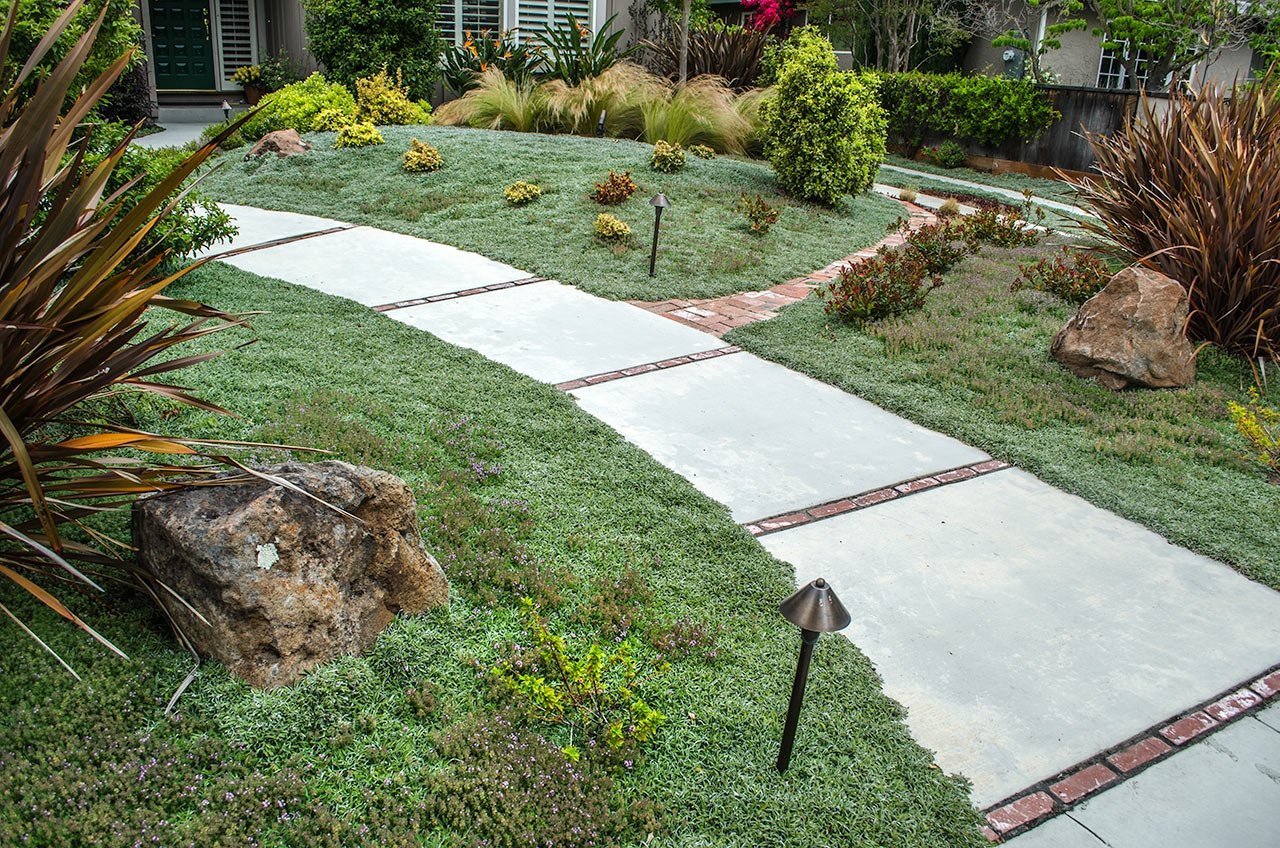
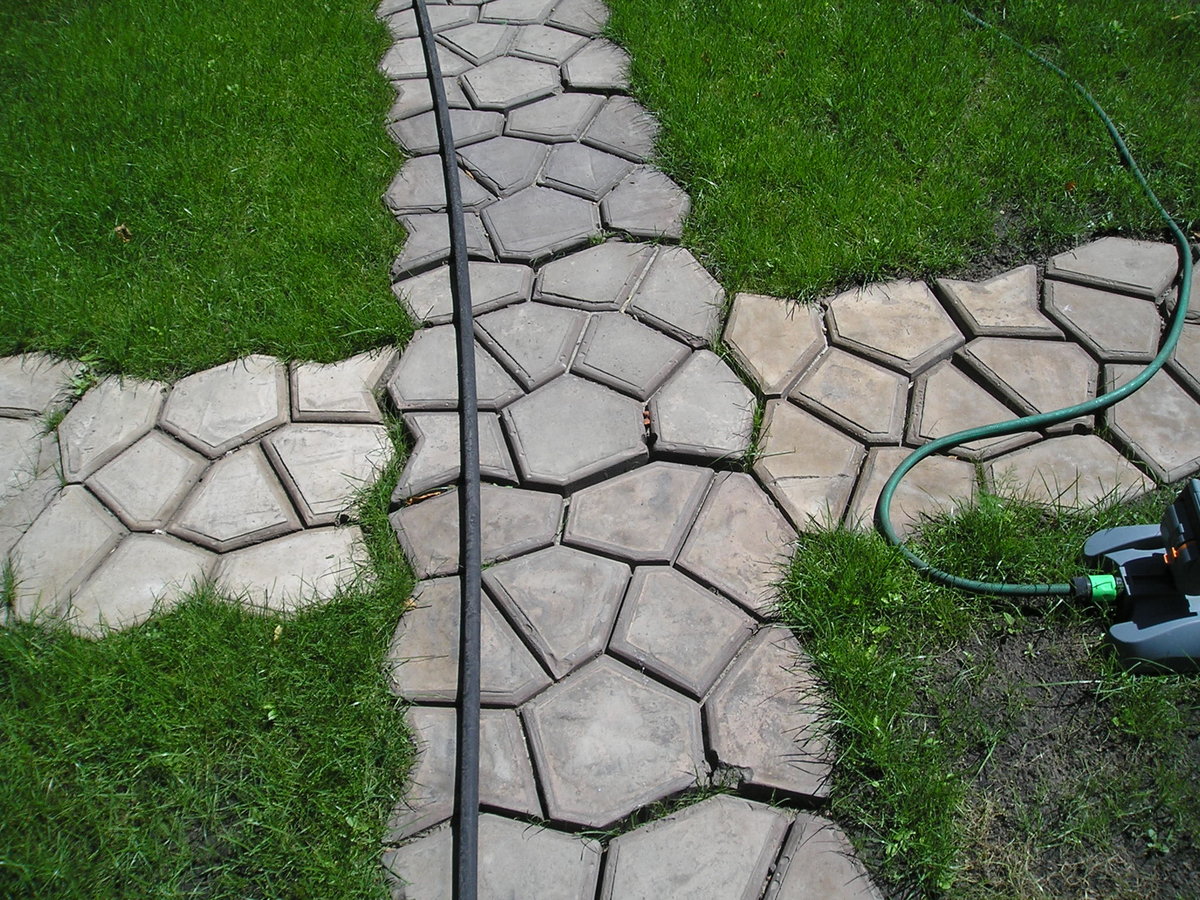
As you can see in the photo above, the track is made of a block with a rough surface. This is done for the safety of movement on it in the winter. A drainage system is arranged for the drainage system.
Types of concrete paths
They are:
- Monolithic;
 Monolithic view
Such paths are arranged using the formwork method.
 Work progress
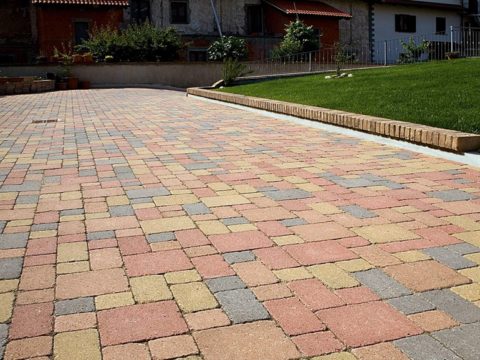
- From decorative tiles of various shapes and textures;
 Tile option
The tiles can be of different shapes and installation methods.
 Tiles for products
 Tiles in the form of blocks
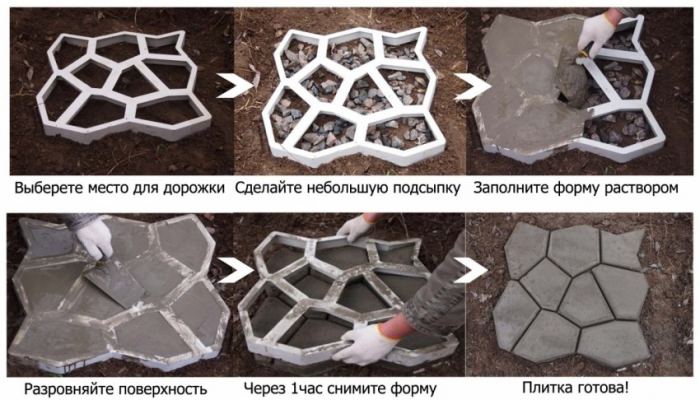
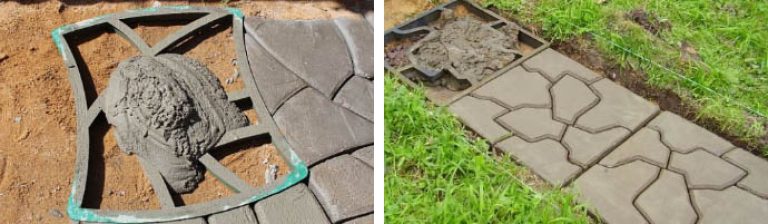
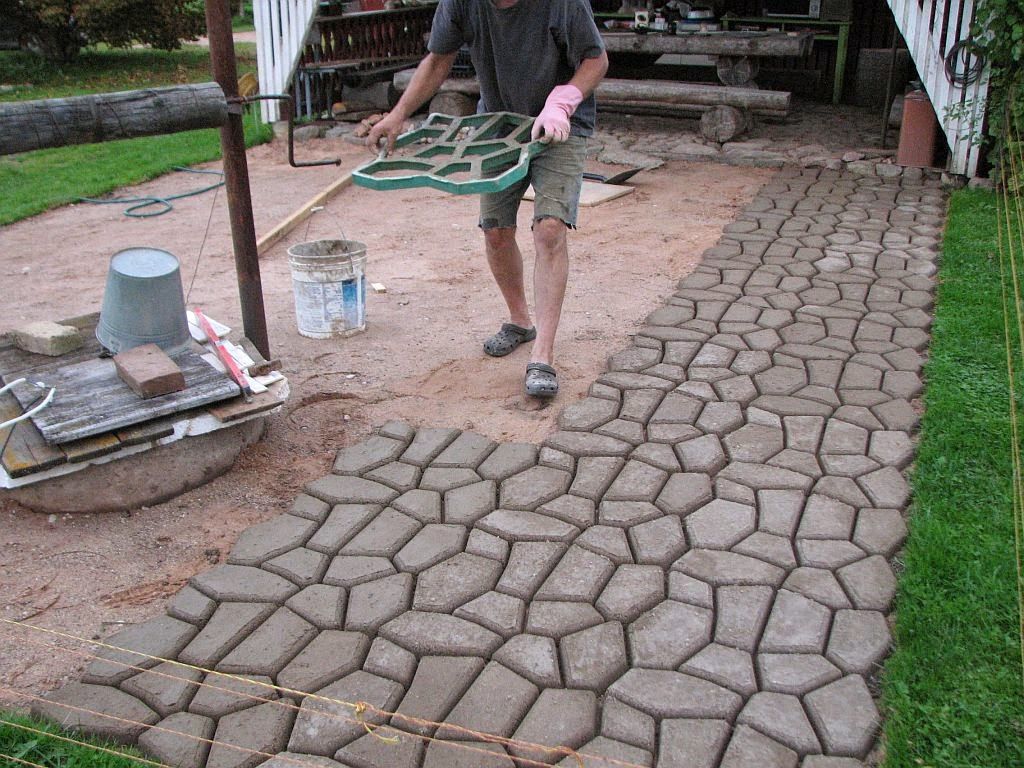
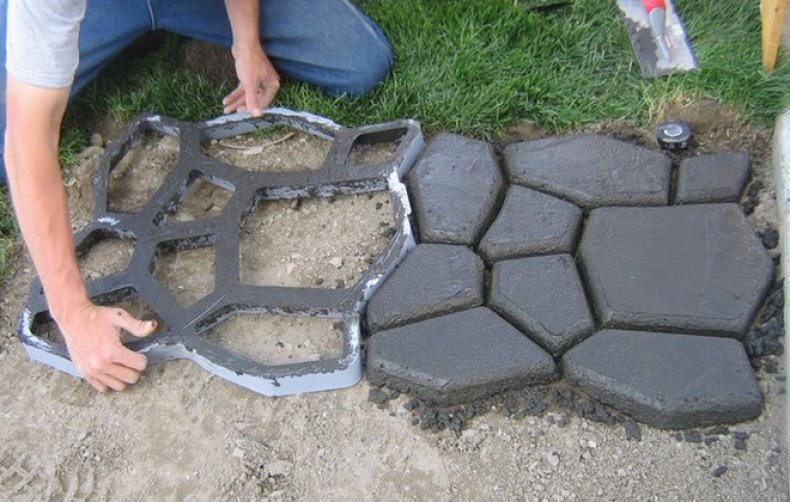
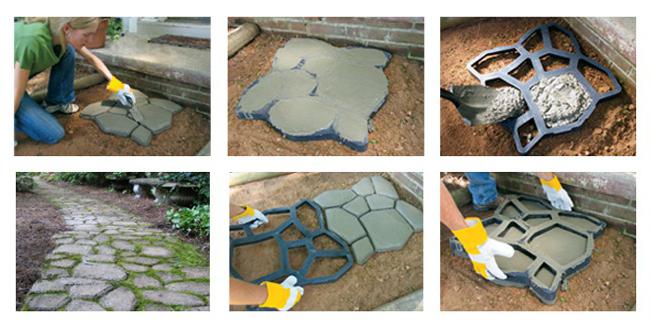
- Shaped.
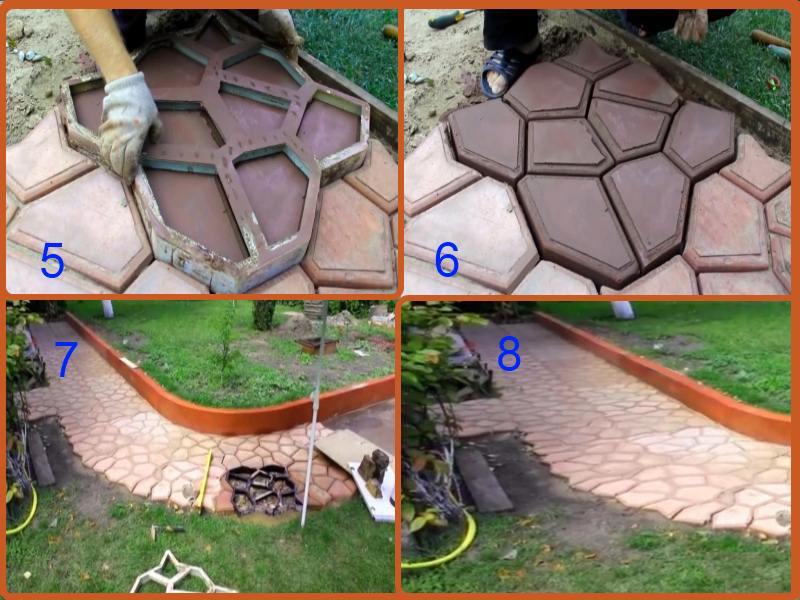
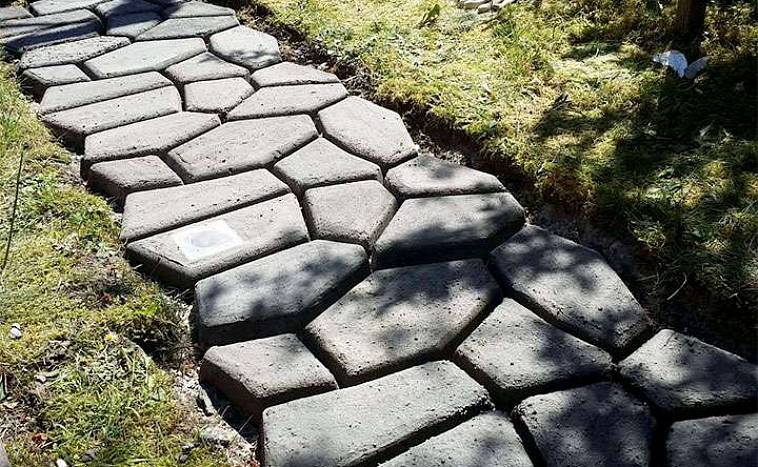
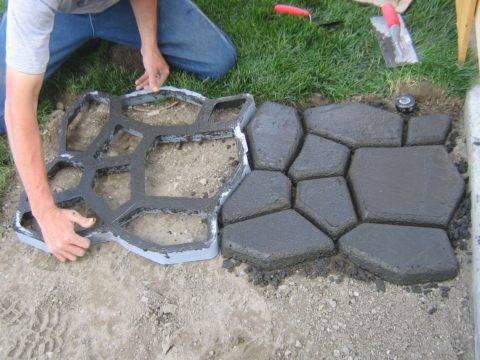 Molded look
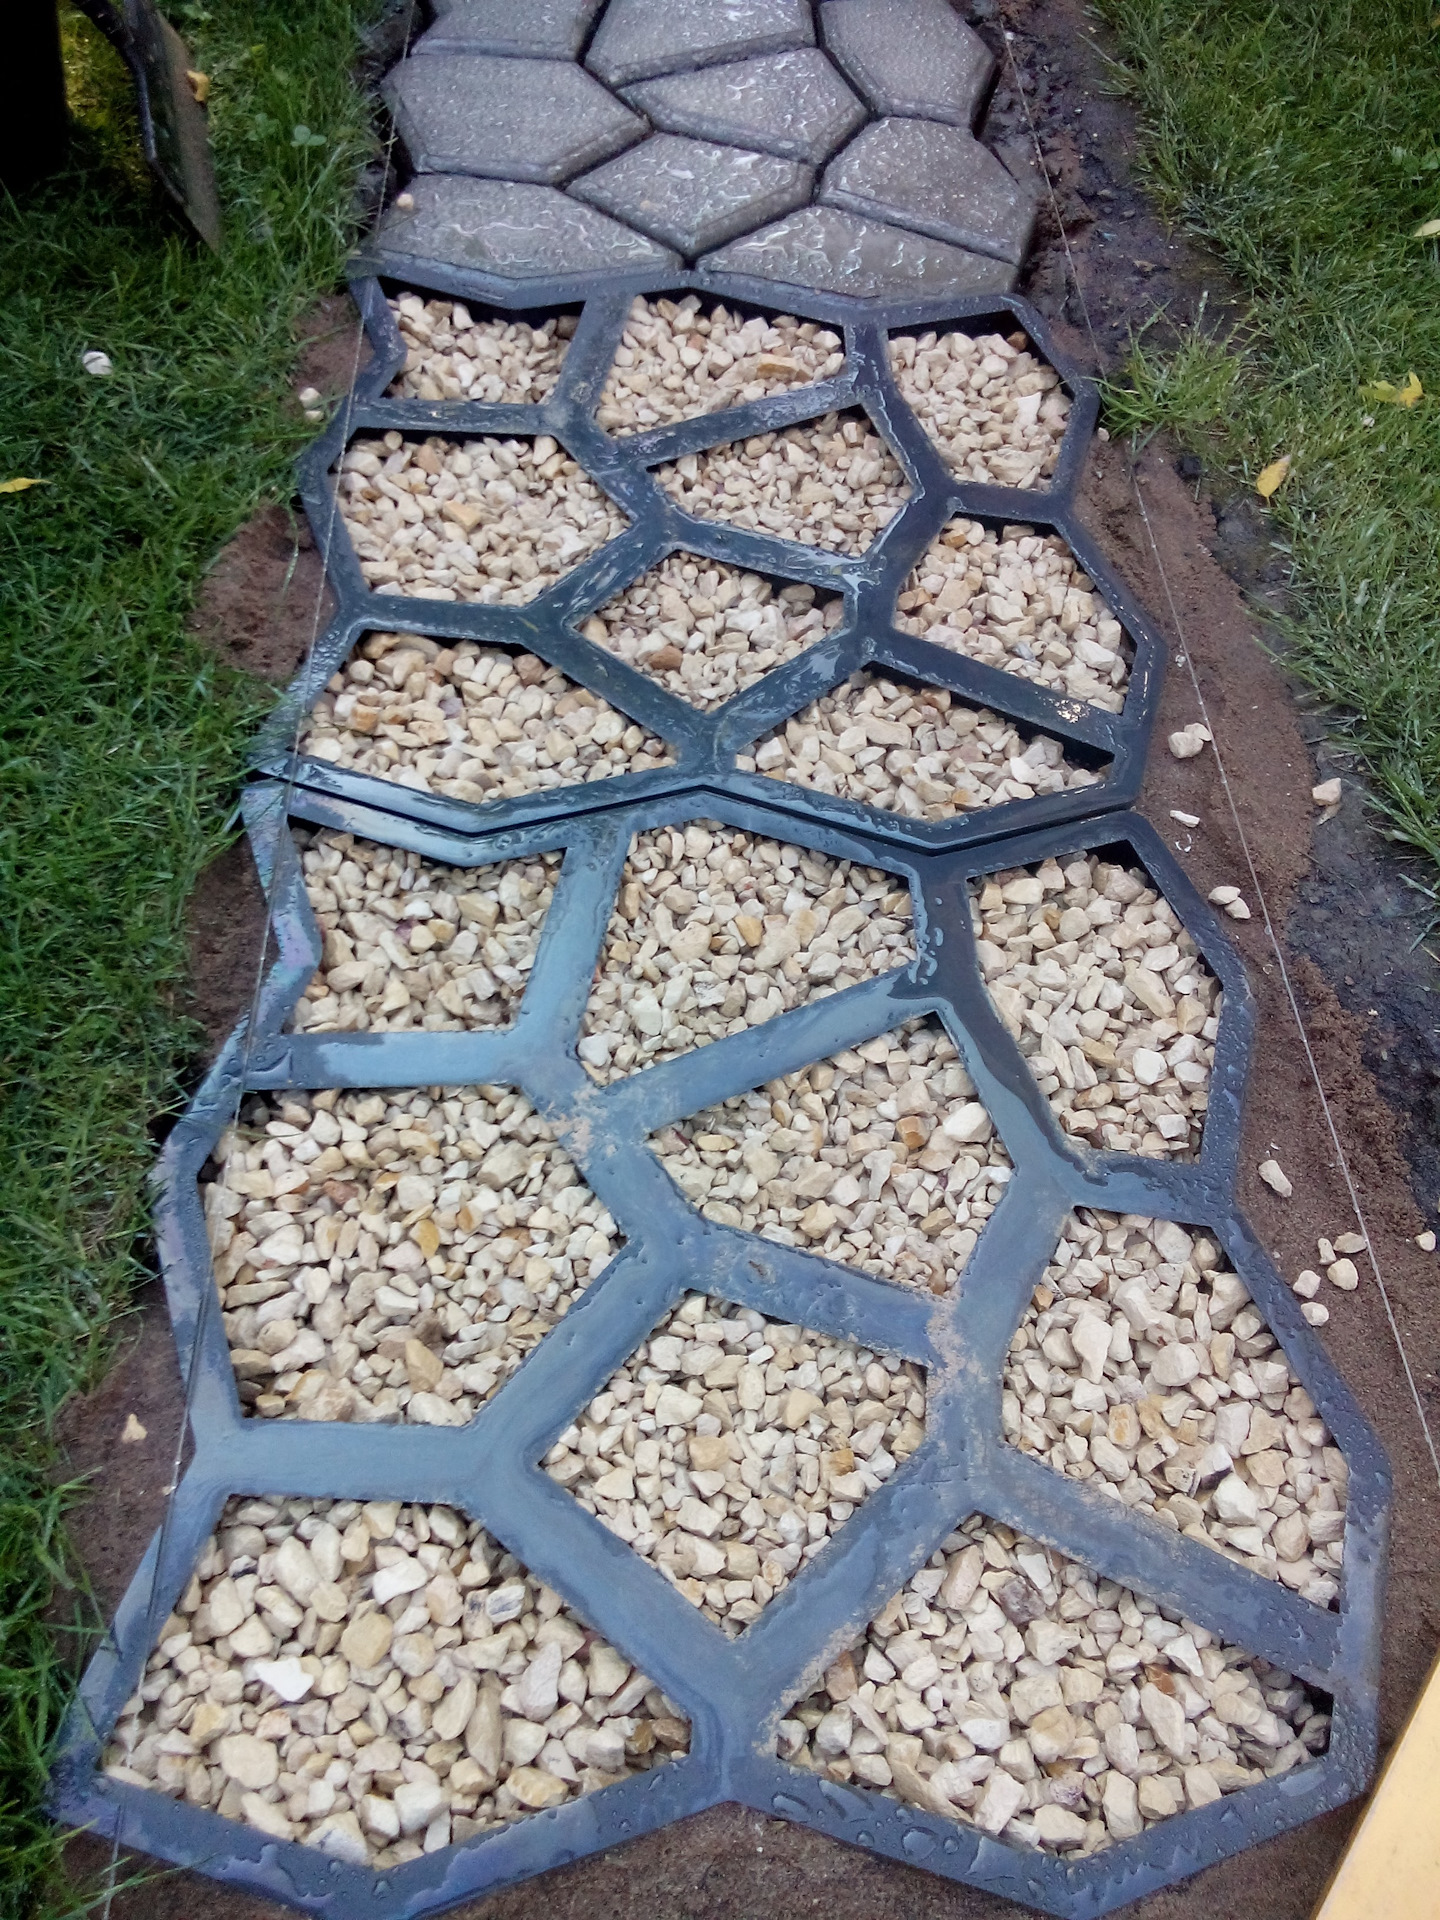
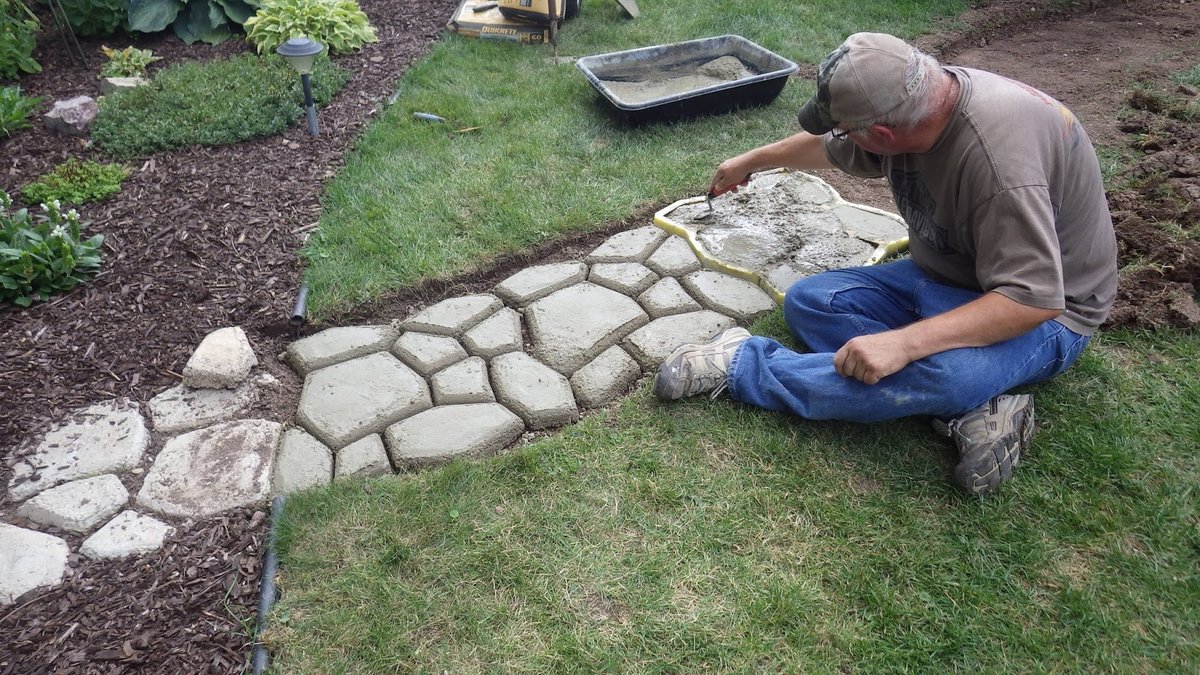
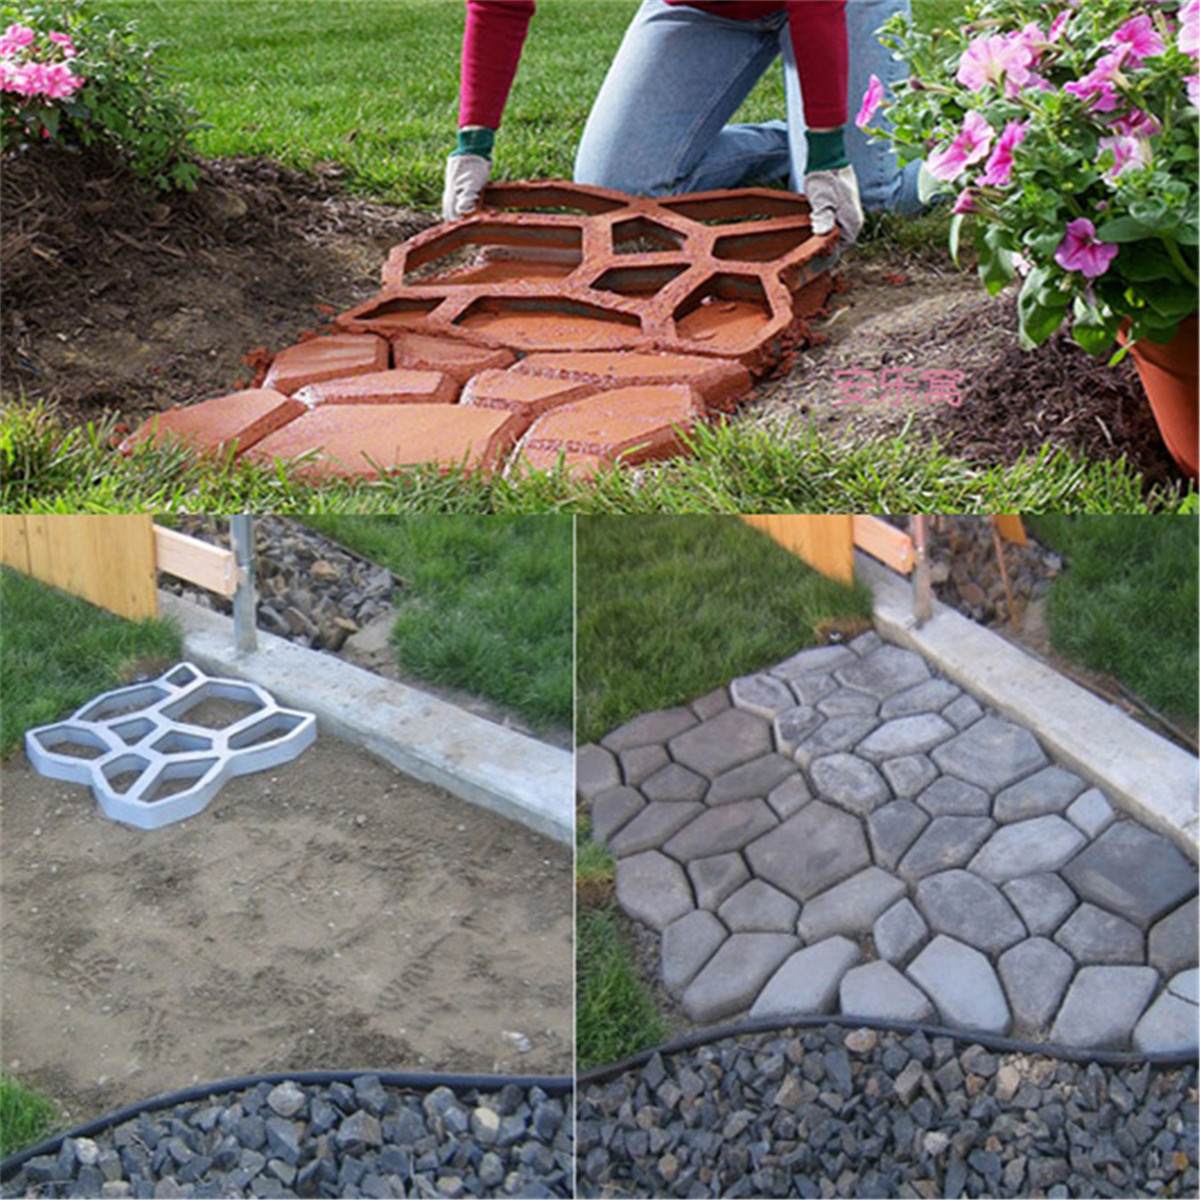
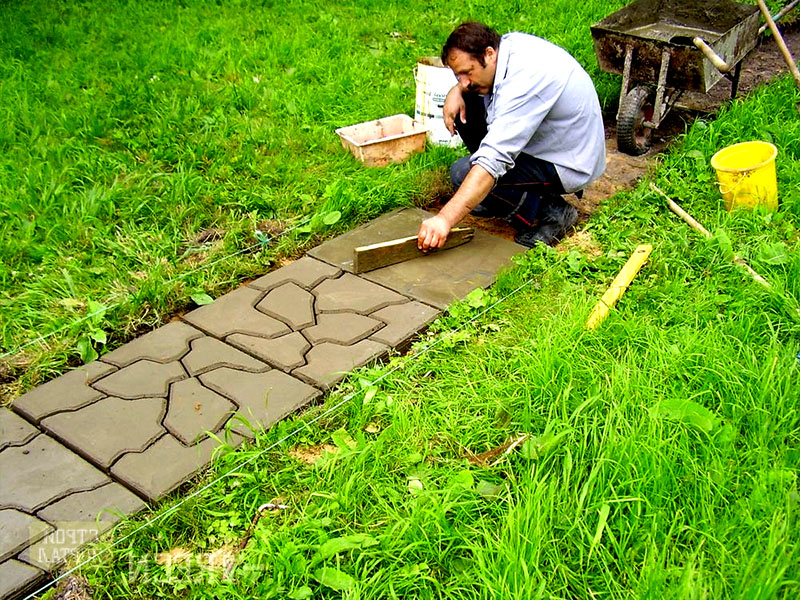
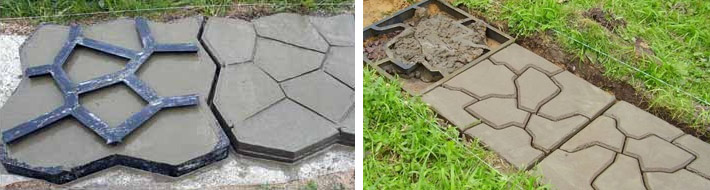
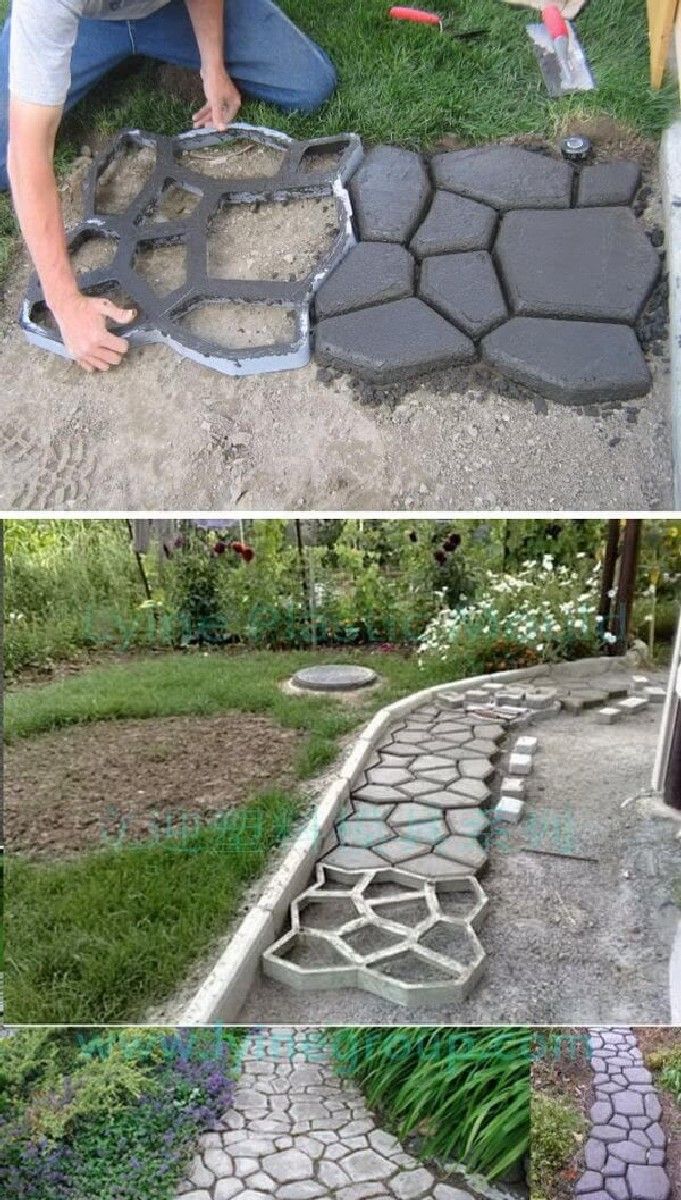
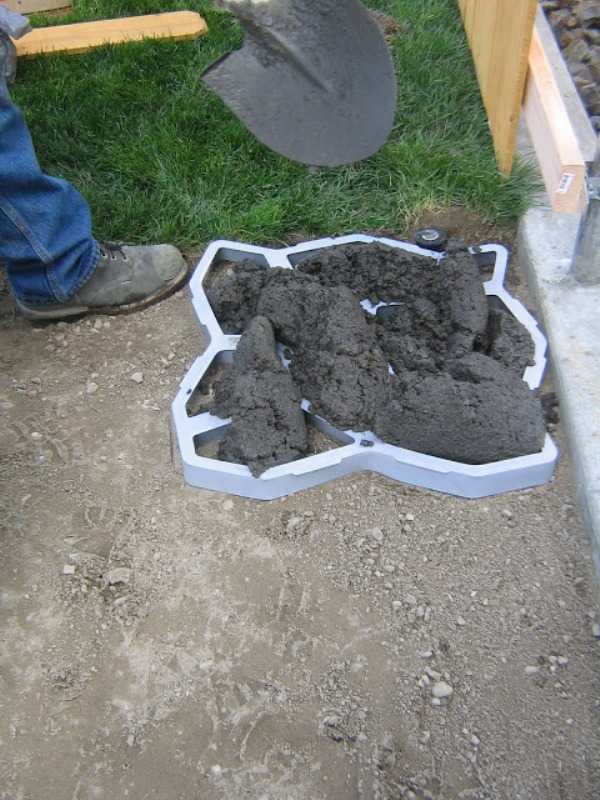
Such coatings are arranged using molds into which the solution is poured.
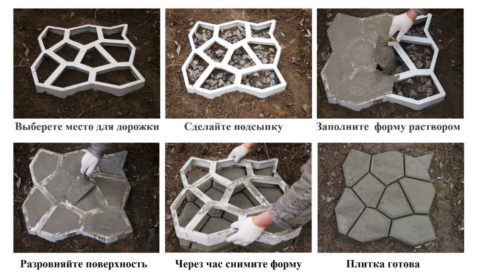 The principle of the device
What to consider when editing tracks
Regardless of which installation method is chosen, it is necessary to take into account several rules, the observance of which will allow you to create a high-quality coating.
The most important rules for styling:
- For the installation of a rigid base of the structure, it is imperative to fill in crushed stone or sand;
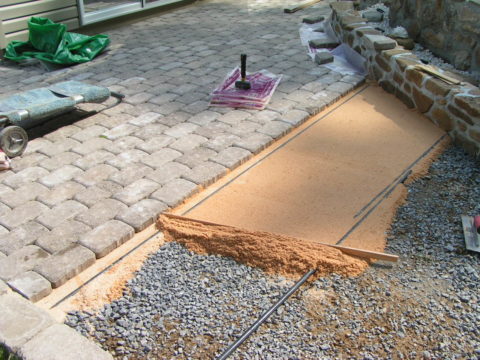 Sand and gravel bedding
- For natural drainage, it must have a one-sided slope or a central bulge;
- If in the spring, when the snow mass melts or in the summer after rain, there are places on the site where puddles form, this indicates that the groundwater is close. Installation in this place should take place above the ground, thanks to the high crushed stone bedding. Or, a drainage system must be arranged along the length, thanks to which the liquid will be removed into the rain collector.
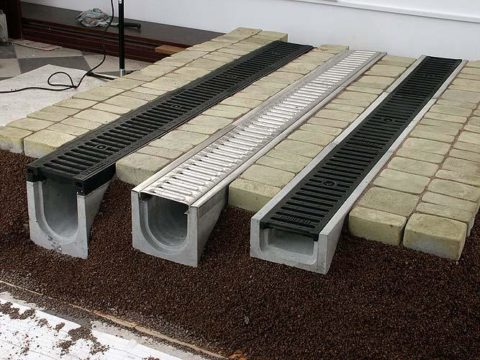 Drainage system
General requirements
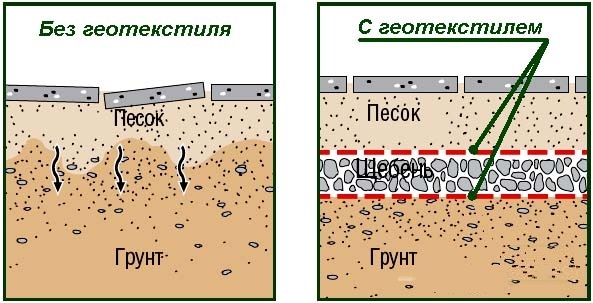
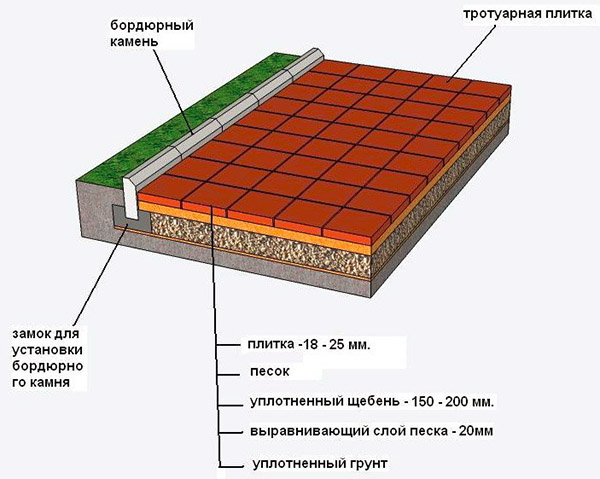
Correct foundation design is of great importance. So, for clay soils and under heavy loads, a depth of about 50 cm for the base and a sand cushion of 30 cm are recommended.For heavy soil, a sand-gravel mixture of 30 cm is suitable, in which a sandy layer should be 15 cm.Each layer of gravel, crushed stone , the sand is well tamped and watered.


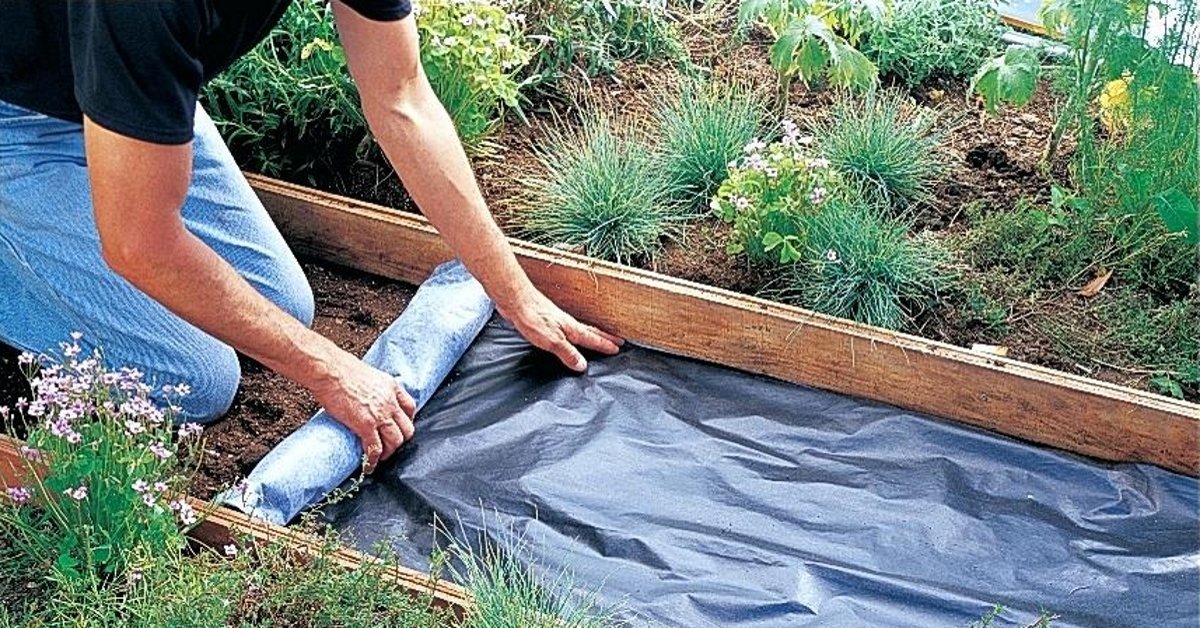
The bottom of the trench is compacted and geotextiles are laid. It is also laid between layers - this increases the strength of the base and its service life, since the material is specially created for construction in permafrost conditions. It is very strong and prevents the washing out of sand, subsidence, excludes the growth of weeds and passes moisture well.
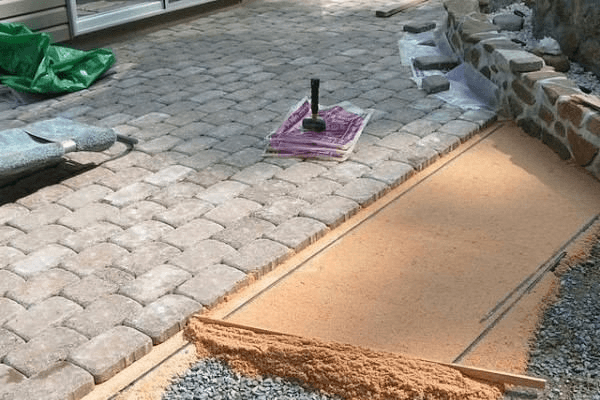
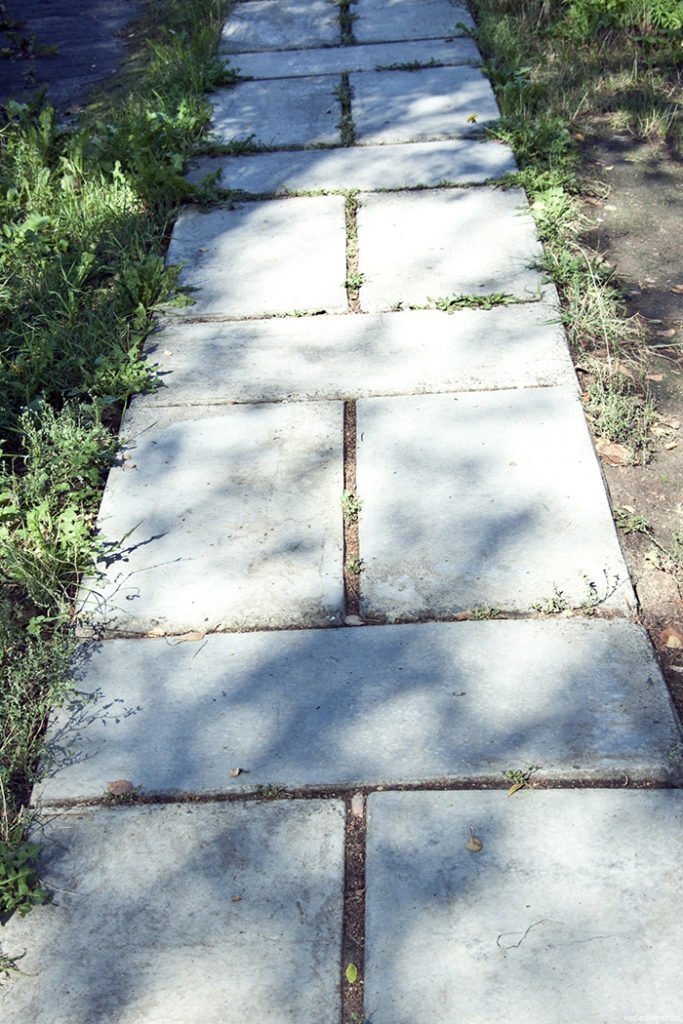
For paths made of concrete slabs, sand is taken with a fraction of 0-7 mm for the base, it is poured with a layer of 5-7 mm and leveled. If you need to make 2-3 cm gaps between the slabs, then they are covered with fine-grained sand, rammed and spilled with water. Concrete paths should have a slope so that water does not linger on them. To do this, make a base with a slightly convex profile - it is enough to make a slope of 1–2 cm per 1 m of the track axis. Special drainage is also done. To determine the size of the steps, there is a rule: two step heights plus the depth are equal to a step of 60–70 cm. The path can be created from slabs 40 × 40 cm at a step distance between the centers of the slabs.

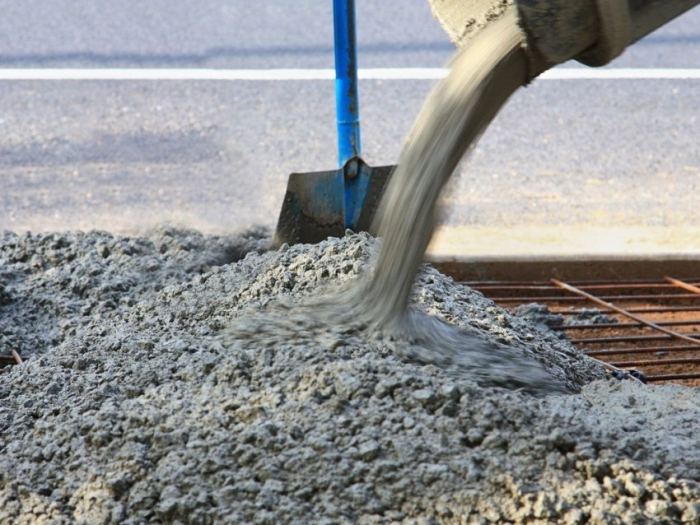
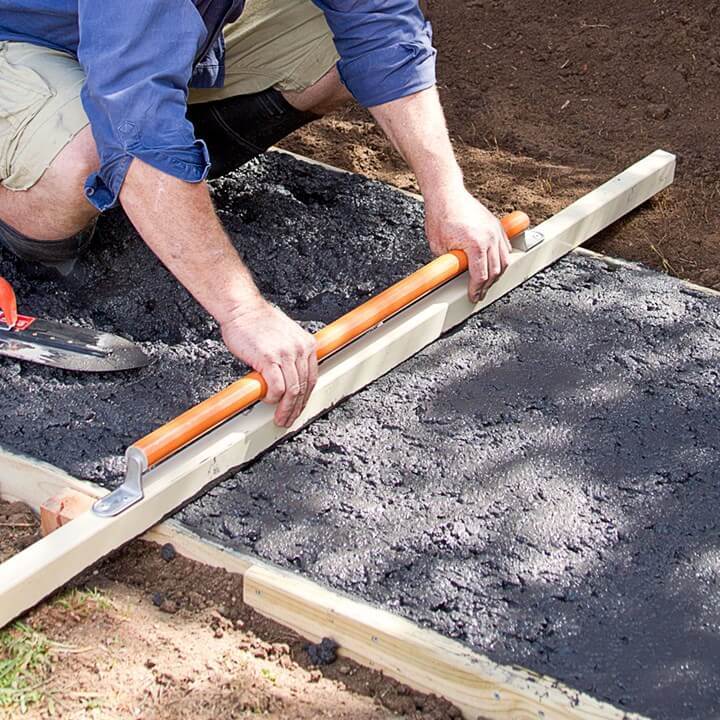
Pouring concrete mortar
The mortar must be prepared from cement and sand in a ratio of 1: 3. In terms of consistency, the solution should turn out to be quite thick and plastic, so correctly calculate the volume of water. Usually, 1 kg of cement needs about 2-2.5 liters of water.
Too thick mortar will be difficult to spread over the trench. And excessively liquid will dry for a long time and may crack.
Fiber and moisture-repellent impurities should be added to the solution, this will increase the strength. Also, to strengthen the structure, crushed stone can be added to the solution. The finished solution must be poured along the entire perimeter of the track.
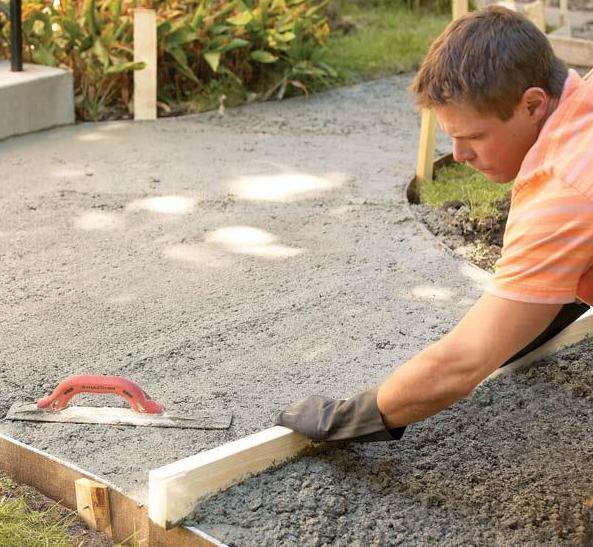
To achieve uniform distribution of the solution, special vibrators are used. In the absence of such a tool, it is worth using at least a spatula, which must be stirred and pierced the solution to remove air. The leveling of the concrete layer is carried out according to the usual building rule, resting it on the formwork.

After the concrete has hardened, it is necessary to dismantle the spacers, and pour the same mortar into the joints to make a flat surface. Thus, the expansion joint will remain, since it was not poured simultaneously with the track, but it will not degrade the appearance.
During the first week after pouring, the track should be moistened with water daily. Dismantling of the formwork is usually carried out after 5 days.
Modular rubber boards - properties and installation ↑
A do-it-yourself garden path can be easily built in a matter of hours if you make it from rubber tiles. Strictly speaking, this tile is not entirely rubber - it is made using a special technology from crumb rubber obtained by crushing old tires.The result is material that meets the most demanding needs.
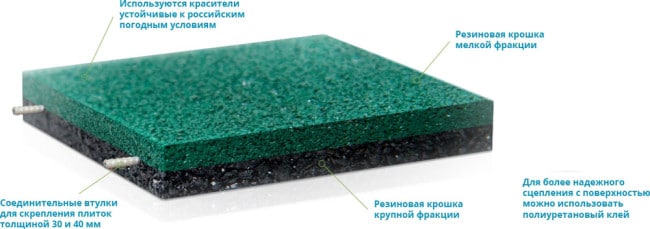 This is what a crumb rubber module looks like
The rubber tile path has a lot of advantages, it:
- beautiful, gives the territory originality, sophistication;
- comfortable and safe when moving, as it has excellent anti-slip and shock-absorbing properties;
- easily and quickly assembled without the involvement of specialists;
- wear-resistant, durable - service life of 10 years or more;
- frost and heat resistant, does not lose performance in the temperature range from -45 to + 65 ° C, is not afraid of temperature extremes;
- resistant to ultraviolet radiation, mold, mildew;
- water permeable - no puddles remain on the surface after washing or rain;
- environmentally friendly - does not emit harmful substances;
- repairable - any accidentally damaged tile can be easily replaced with a new one.
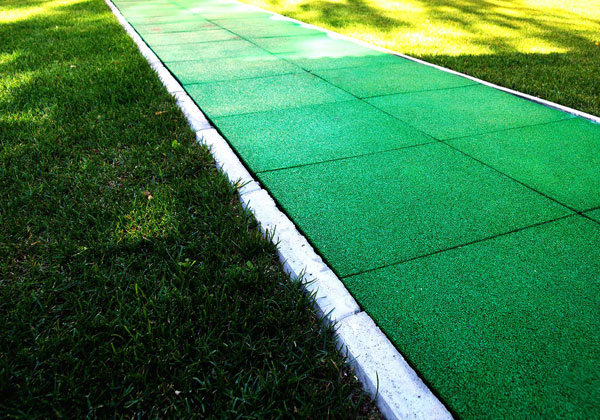 Rubber tile walkway
Disadvantages:
- high cost - a square meter of tiles from domestic manufacturers costs 1400-1700 rubles;
- flammability and toxicity of combustion products, which is why such a coating is unacceptable in the area of open fire sources (for example, barbecues, fireplaces).
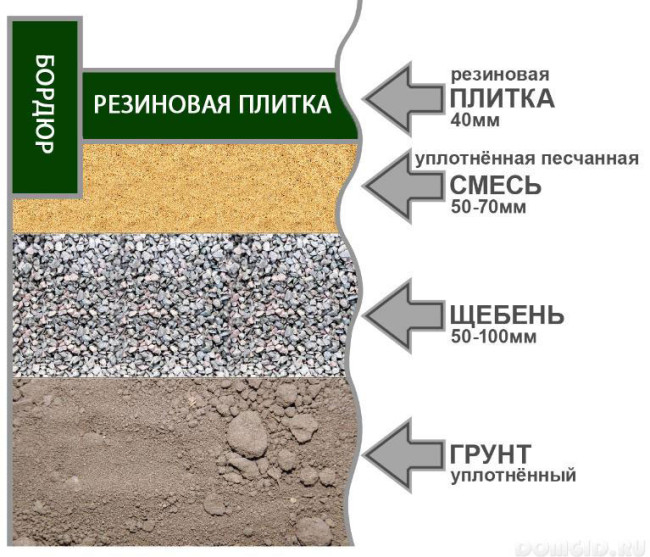 Installation diagram of rubber coating
There is one more quality that may turn out to be an advantage or a disadvantage. This is the ease of dismantling, which can be useful for the owner of the cottage, and can help intruders.
The device of garden paths in the country from rubber tiles is within the power of almost any owner. Modules with a thickness of 30 mm or more (preferably 40 mm) are suitable for this. Dimensions of tiles intended for private use: 500 x 500 mm. To build such a path in the country, you need to do the following:
- Make a marking of the route, taking into account the dimensions (500x500 mm).
- Remove the sod layer, remove the weeds.
- Select soil to a depth of 140-200 mm.
- Thoroughly tamp the bottom of the resulting trench.
- Lay a layer of fine gravel on the bottom to a height of 70-100 mm (70 mm is enough for the pedestrian zone).
- Pour a cement-sand layer (1: 3) up to 70 mm thick on top of the crushed stone and compact it well. A pure sand bed is acceptable, but mixing cement into the sand will add strength.
- Install curbs, preferably rubber ones. When installing on a soil base, the curbs are mandatory: they strengthen the structure, give a complete look.
- Using a rubber mallet, drive the connecting sleeves (supplied) halfway through the holes on one end of each tile. Bushings prevent the elements from moving during installation and subsequent operation.
- Lay the modules on the prepared base, joining them with the help of connecting elements.
- There is no need for a slope for water drainage: the water that enters the ground easily seeps into the ground through the tiles and the joints between them.
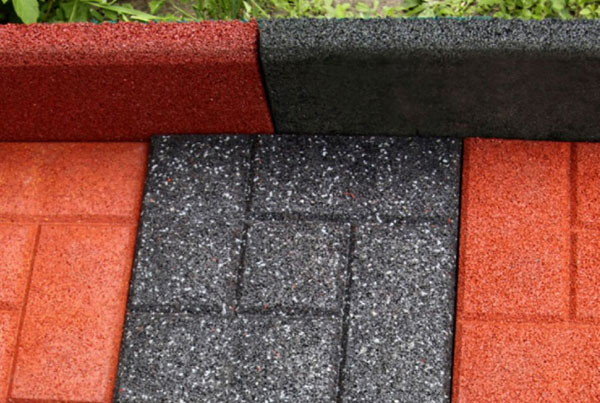 Before laying, you need to install a curb
It should be noted that thinner rubber tiles on the market are not suitable for installation on a ground base. They are mounted with glue, they can be used to cover hard surfaces such as wood, concrete. In this way, you can renovate, for example, an old concrete path.
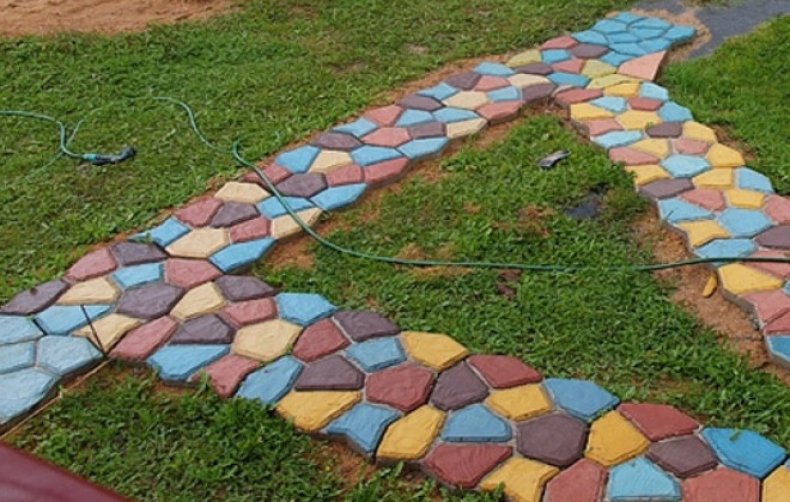
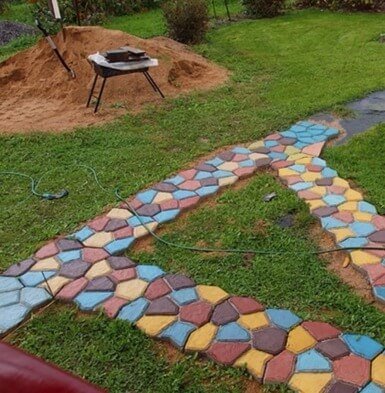
Colored garden path
Because of the gray color, many prefer paving slabs, which can be not only of different shapes, but also colors. In fact, it is necessary to carefully study various technologies and techniques, since recently professionals have easily painted concrete as well. For this, special coloring pigments are used, which are added directly when mixing the solution in a concrete mixer.
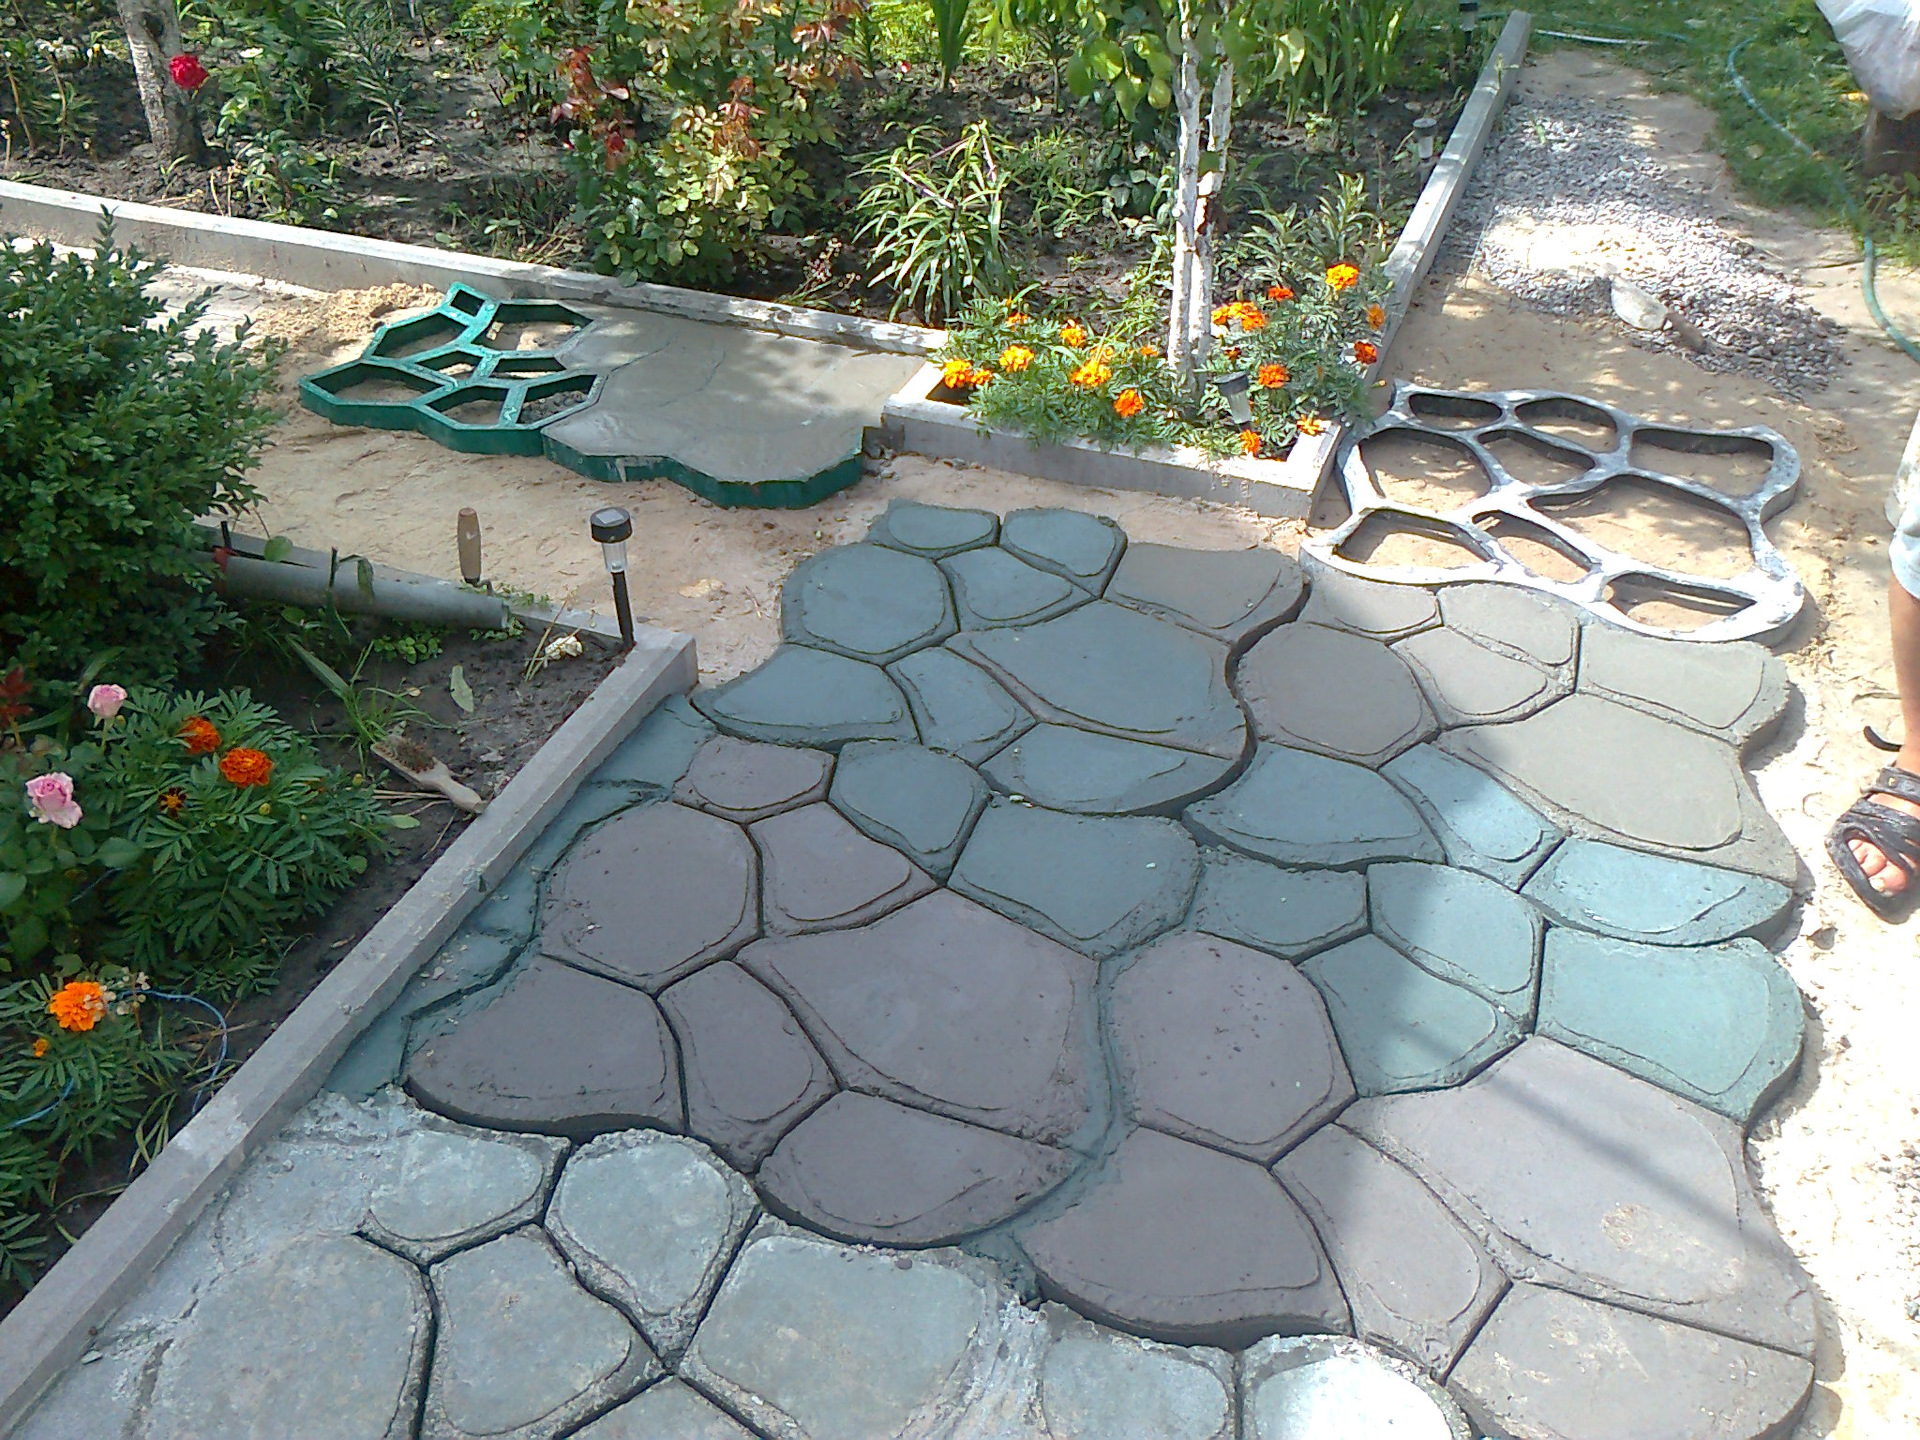
If you want to get a multi-colored track, then you can enter a different amount of pigment into each batch, or use other colors. This method is great for pouring concrete into special molds. If the technology was followed incorrectly, then the result can be a stratified solution with flakes, which is not suitable for laying garden paths.Also a good option for staining is multi-colored stone chips, which are used instead of crushed stone.
To create a pattern on the concrete surface, it is worth using various methods. Until the cement has hardened, a relief is created. Some artistic people use tree leaves for decoration, thanks to which an original ornament is created. It's so easy to create concrete paths in your summer cottage. If you have experience in this area, then share it by leaving comments after this article.
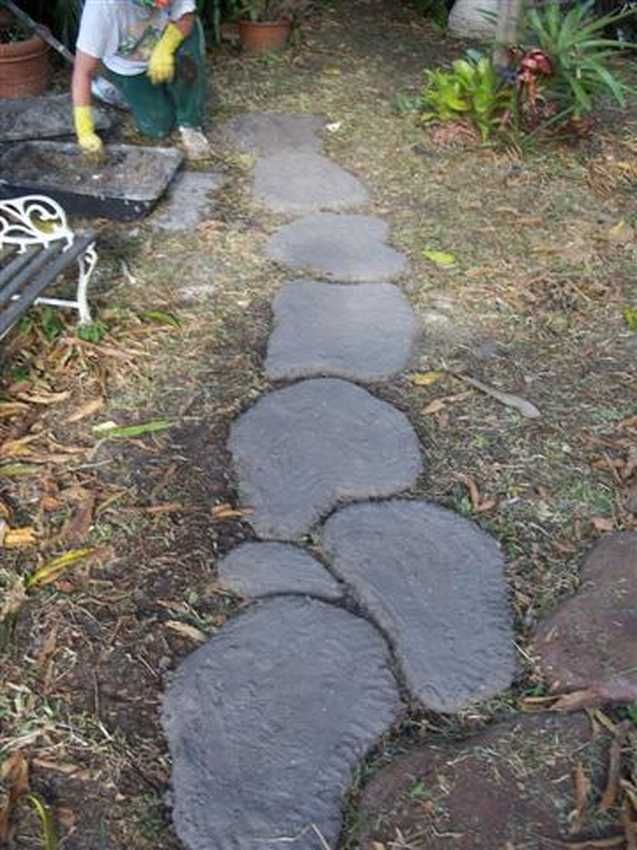
Pouring concrete into special elements
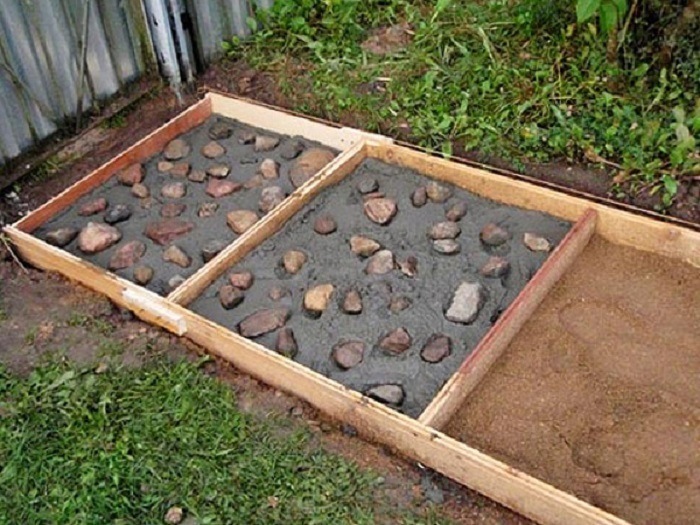
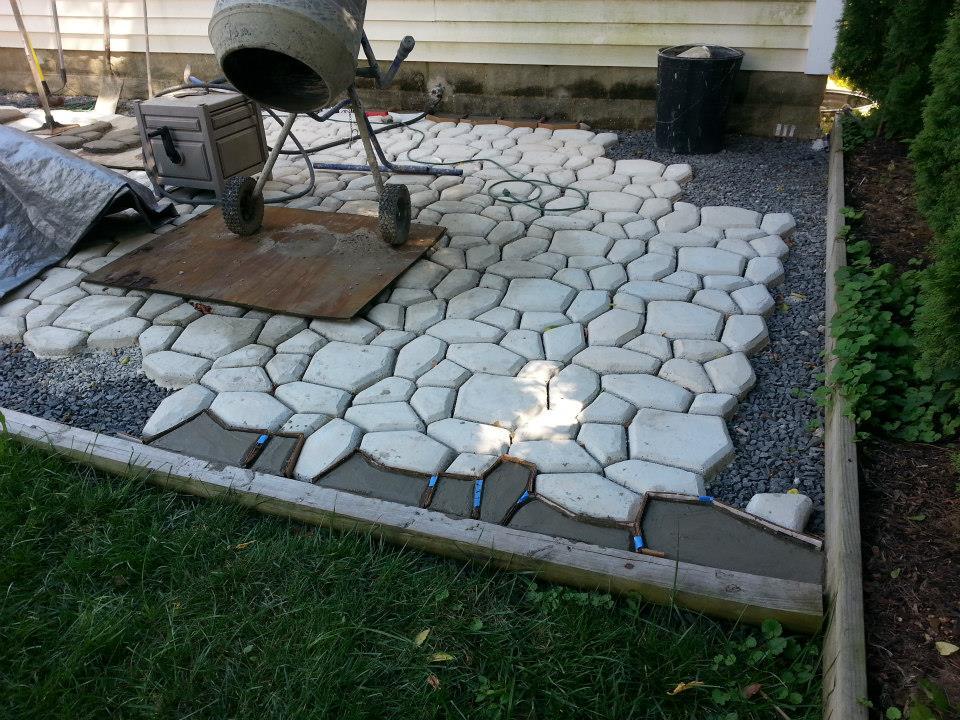
Plastic forms, which you can actually buy in hardware stores or make with your own hands, will help make the paths at your summer cottage more aesthetic. The initial stage in the garden is carried out in the same way as in the above method, only it is enough to go deep into the ground by 10 cm.On the sides of the trench, curbs are placed, which are easy to make for a summer residence, using silicone molds. The soil is compacted, covered with geotextiles, 3-5 cm of crushed stone is poured on top or, to reduce the cost of arranging paths, slag. On the prepared surface, a pre-lubricated form is installed for pouring the track. To save money, stones are laid in all elements.
To fill plastic structures with high quality, fluid concrete is required, therefore special plasticizers are introduced into its composition. Without them, you cannot get tiles with smooth edges without defects. Fast drying with hardeners
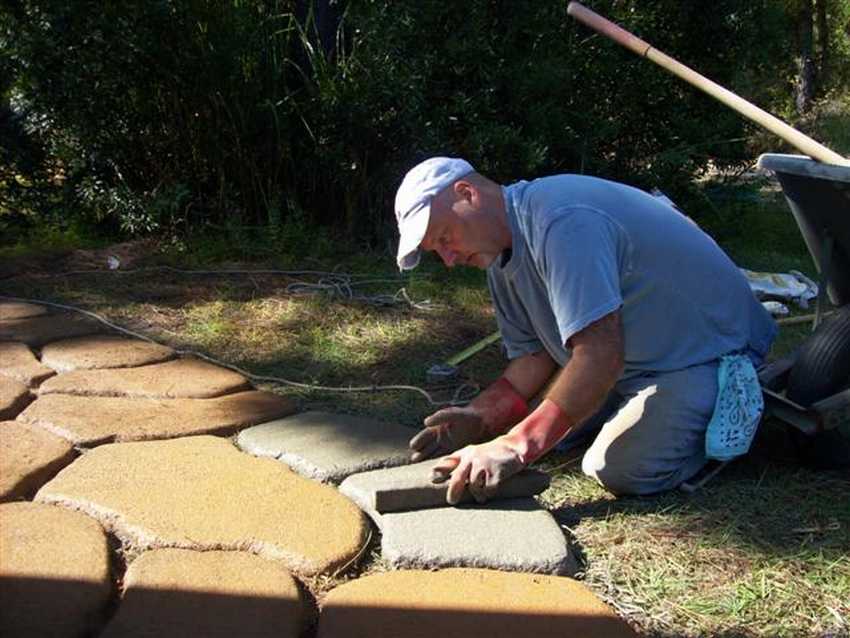
The solution is poured into molds with stones, special attention is paid to narrow parts where it is more difficult to remove air. It is leveled with a spatula or trowel, the excess is removed
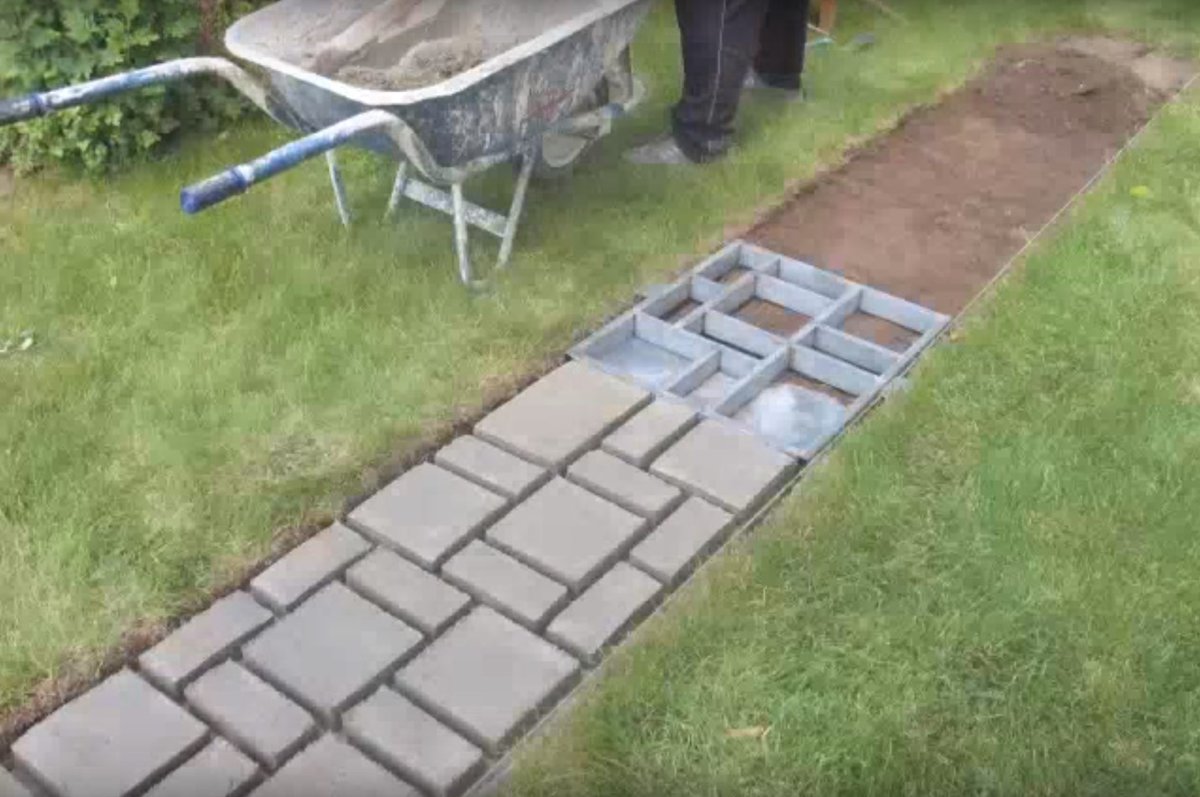
To quickly create paths with concrete elements in the country, several (up to 5 pieces) forms are used simultaneously. After 20-40 minutes, carefully remove the plastic structure so as not to damage the edges. It is more convenient to do this if there are special handles. Otherwise, hold at opposite (diagonal) corners. For at least a day, the surface is covered with a film. After the concrete is completely dry, the edges and gaps are covered with sand or gravel. Some owners prefer to use a soil with grass seeds for this in the garden.
Finished tiles
In hardware stores, a wide selection of elements for laying in the country is presented. They differ in size, shape, color and price; they allow you to equip paths with little effort and time. To do this, perform the following work in the garden:
- after marking, about 15 cm of soil is removed;
- prepare the surface as described above;
- then the main material is laid.
For the substrate, it is better to use sand with fractions of up to 7 mm. If the dimensions of the concrete elements are large, then they will not move even when the car is moving. The path in the country is often created from 40x40 cm slabs, which are located so that the distance between their centers does not exceed a step. The gaps are filled with coarse sand or fine gravel.
General recommendations
To make a high-quality track in the country, some subtleties are taken into account. First of all, the correct width of the concrete paths is important. Usually it varies between 0.5-1.3 m. Between the beds it is enough to fill in a narrow one - 0.4 m. The form is chosen by the owner at will, but experts recommend creating the driveways as even as possible. If traffic is planned, you can make two lanes for the wheels.
When designing, one should not forget about the slope, which should be 1–2 cm per meter of the track axis. This will allow atmospheric precipitation to drain in the desired direction, and it is also imperative to make special drainage. It is better to fill garden paths in the country in the warm season - the higher the temperature, the better the coating. However, in extreme heat, when concrete is gaining strength, it is regularly watered.
Garden paths are decorated in different ways, the simplest of which is staining. Also, a drawing is applied to the surface with a sharp object, for example, a screwdriver, and a rough brush will help to create a relief. Pebbles, shells and other decorative elements are pressed into the wet concrete. Ironing is often carried out - rubbing the coloring composition with a grater.
It's important to know
A common mistake of novice craftsmen when pouring concrete paths with their own hands is the incorrect proportions of the components, which depend on the maximum load on the base. For pedestrian use, the following composition is suitable: for 1 part of cement M500 4 - gravel and 2.5 - sand. For a car, a ratio of 1: 2.5: 1.5 is taken - such concrete is denser and will withstand more pressure. To give a certain color, special pigments are introduced - for 1 m3 of solution, depending on the desired effect, add 5-15 kg. When choosing them, you need to carefully study the instructions - some are not suitable for reinforcement.
Work instructions
Adherence to the following rules helps to increase the service life of garden paths:
- do not lay stones in the area of irrigation and placement of communication networks;
- mount in places with natural water flow (recommended at higher elevations);
- to pave at a distance from trees, including from the zone of possible root germination;
- the width must match the dimensions of the garden cart.
In addition to observing these rules, the duration of the garden path's service life largely depends on how well the substrate (base) is made.
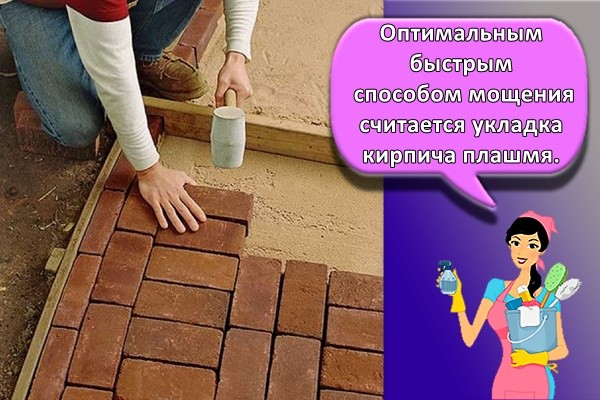
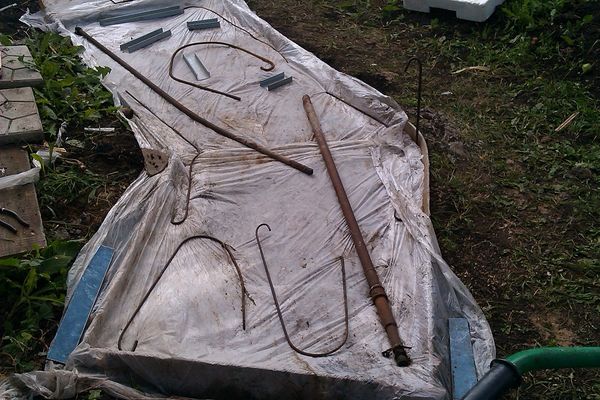
To lay bricks on the site, you will need the following tools:
- shovel and bayonet shovels;
- ramming machine;
- container for mixing cement;
- tape measure (10-meter is recommended);
- pegs and cord for marking;
- rubber (mallet) and regular hammers;
- construction trowels of different sizes.
Additionally, you will need an angle grinder (grinder) with a diamond wheel for processing stones.
Markup
For marking on the site, pegs of sufficient height (at least 50 centimeters) and a strong rope are required. It is recommended to drive in the planks at a distance of 5 meters. In places where you plan to turn the track, you need to drive in more pegs. The rope must be tightened so that there is no sagging.
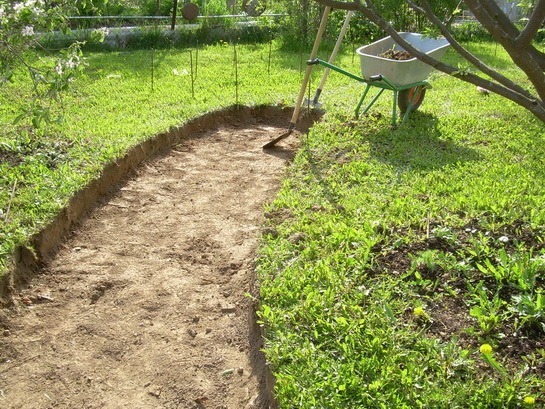
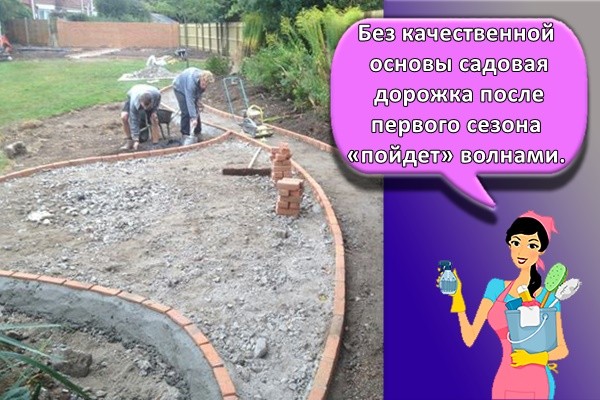
Preparation of the base
This stage is considered the most important. Without a quality foundation, the garden path after the first season will "go" in waves. You need to start work with excavation at a depth of 20-25 centimeters. The base obtained in this way must be leveled. Next, pour a layer of sand 2-3 centimeters thick on top and tamp the material. In this case, it is recommended to use a specialized vibrating plate technique. Such a machine will provide the most dense base.
Then you need to lay out a layer of geotextile on top of the sand. The material should cover the entire base, both in length and in width. Geotextiles will wick excess moisture away from the walkway, preventing sand from getting wet and washed out. Also, the material prevents weeds from growing.
At the end, a layer of sand 2-3 centimeters thick and crushed stone - 10 centimeters are poured over the geotextile. After that, the base is re-rammed. In this case, crushed stone acts as a drainage layer, also preventing erosion of the base.
Upon completion of the described work, sand is again poured and geotextiles are laid on top. Only then can curb stones be installed along the edges of the future path. To fix the latter, cement mortar or steel reinforcement is used, which is driven directly into the ground.
The curb is recommended to be made of durable materials, since the "sides" of the track are constantly experiencing increased loads. If in this case a brick is used, then the stone must be laid on a cement mortar. This will increase the overall strength of the structure. At the end, sand is poured onto the geotextile (it can be combined with dry cement).This layer is once again tamped and leveled with a rule (long wooden block)
At this stage, it is important to take into account the direction of natural water flow.
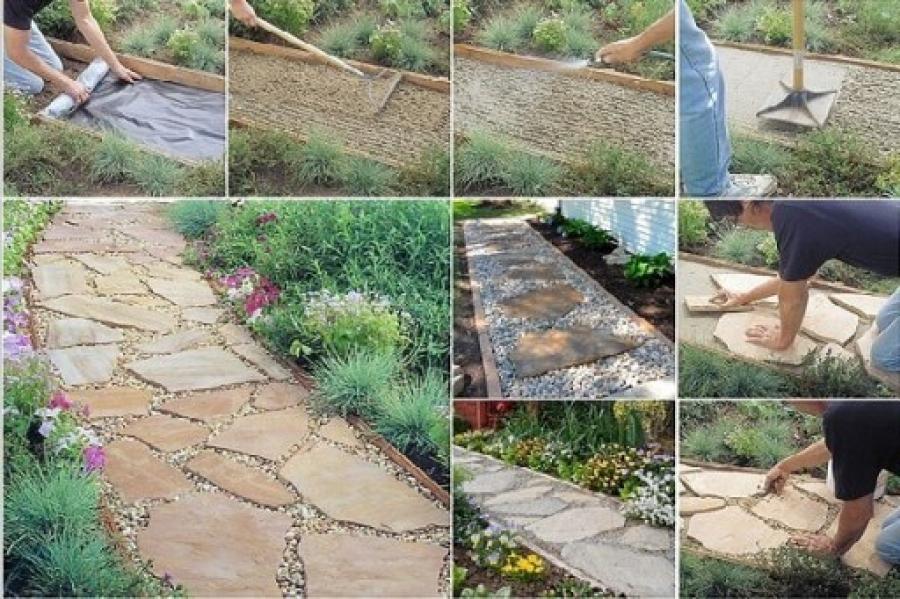
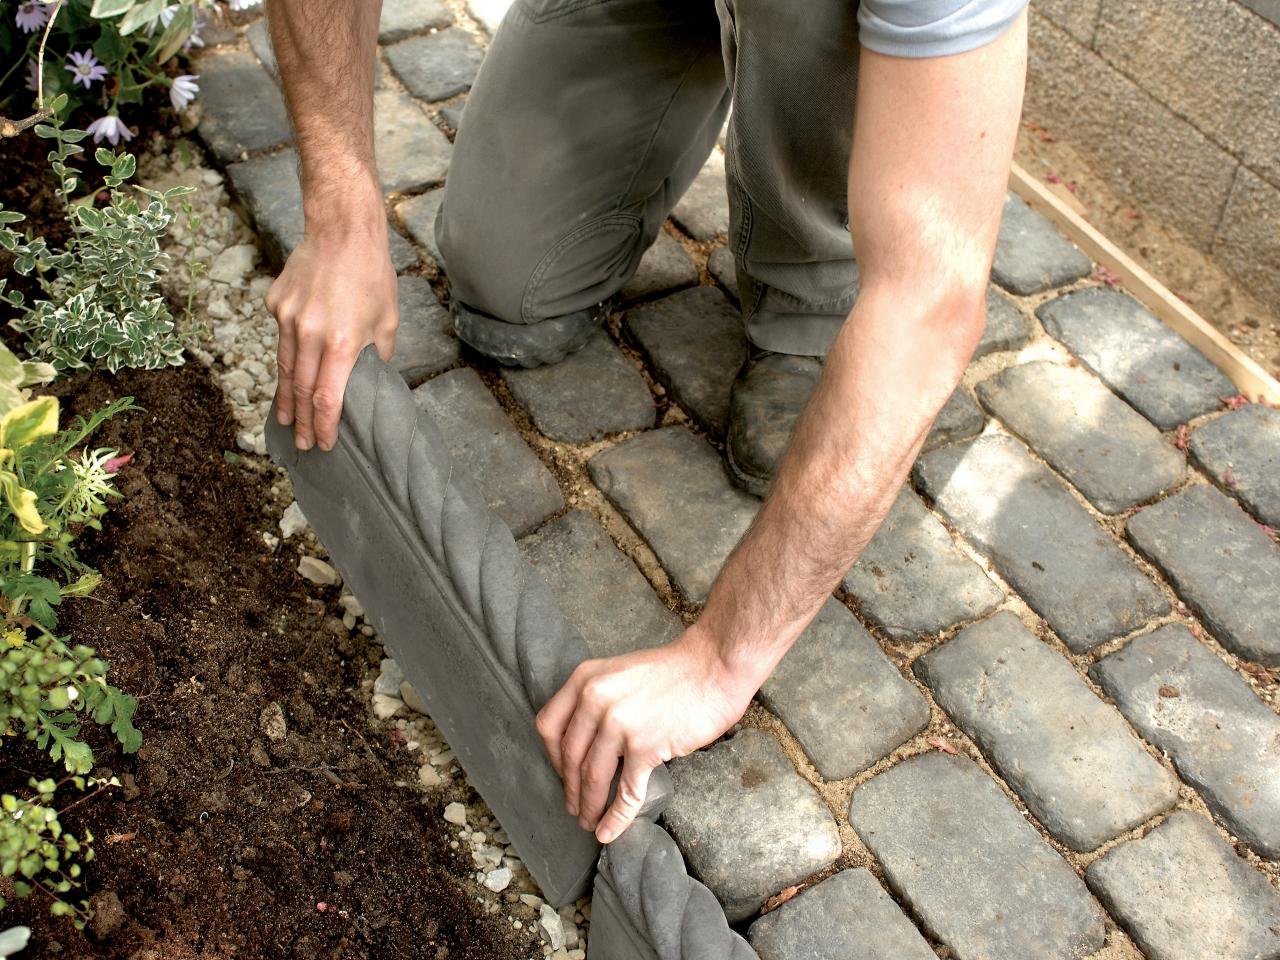
How to style
To make a garden path, it is enough to alternately lay out the bricks in accordance with the selected pattern on the prepared base. Each stone must be hammered into the base with a rubber mallet. Sagging bricks must be removed, after which the missing amount of sand is poured. After that, the stone is re-laid in place, hammered in with a mallet.
Finishing
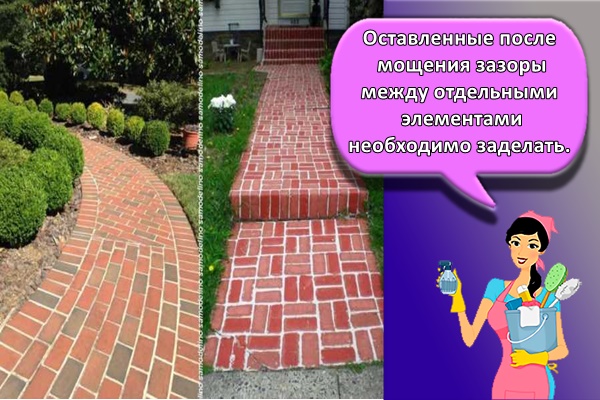
The gaps between the individual elements left after paving must be repaired. Otherwise, dirt will accumulate in the seams over time, in which weeds will germinate in the future. And these plants destroy bricks and, as a result, shorten the life of the garden path.
To avoid such consequences, it is necessary to pour a dry mixture of cement and sand onto the surface of the paved path. After that, the material is tamped into the cracks with a mop or sand. At the end, the path is abundantly watered with running water. The next day, this procedure is recommended to be repeated. Such an algorithm will prevent future deformation of the track.
Steps to create step by step
During the installation of the path in the garden area, you should follow the step-by-step instructions
Each stage of work has its own nuances, so it is important not to deviate from the instructions in order to prevent serious mistakes.
Design
When creating a track project, take into account not only the style of the coverage, but also the terrain. On a flat area, the device of the path is performed in any format. If the site is located on a slope, you will need to resort to zigzag laying and provide steps.

Soil preparation
After preparing the project and marking the territory, a fertile soil layer 15-20 cm thick is removed from the area. A trench is formed under a slight slope and drainage is arranged on the side of a larger slope to drain precipitation.

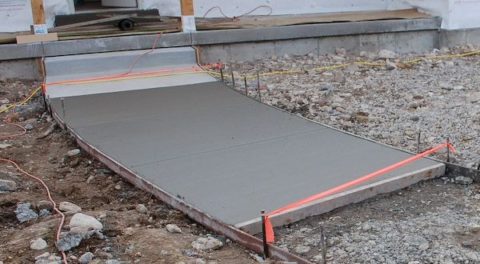
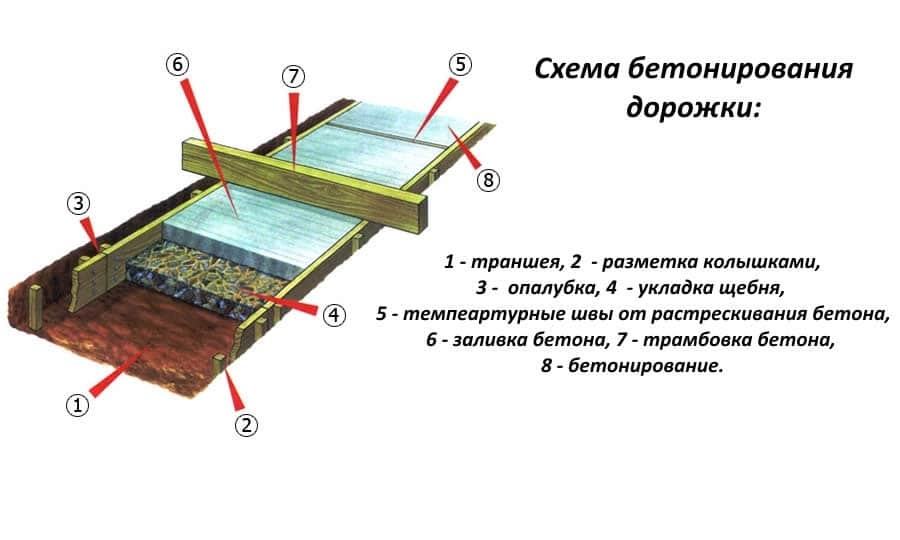
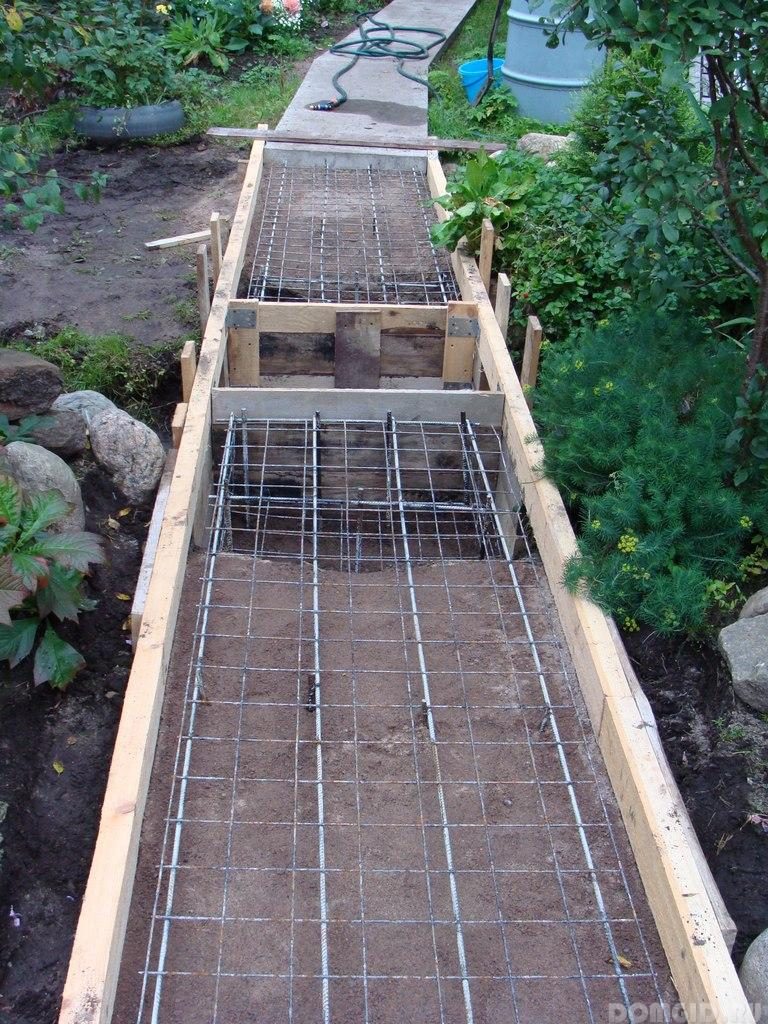
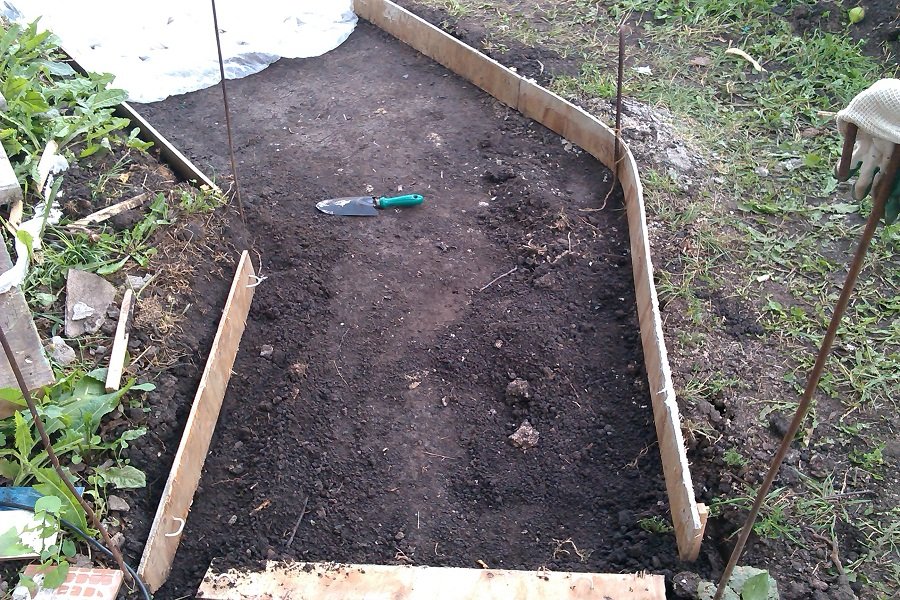
Formwork installation
The boards selected for formwork are fixed at the edges of the trench. From below, the boards are fastened with pegs, and from above with transverse jumpers. This design prevents the formwork from expanding under external influences. A waterproofing polyethylene film is placed at the bottom of the formwork to avoid water absorption by the concrete solution. The presence of insulating material also improves the frost resistance of concrete and prolongs the operational period.
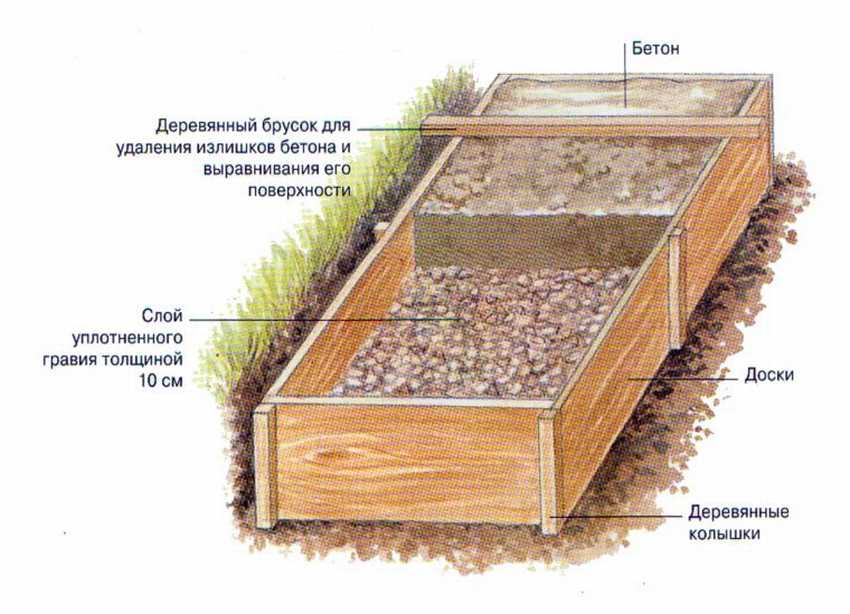
Pillow formation
To form a pillow, layers of sand and crushed stone are alternately poured, tamping them with a shovel. Each layer of the pillow has its own purpose, so do not neglect the use of materials.
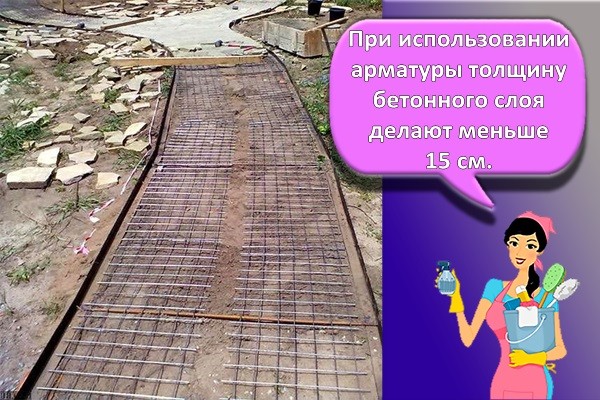
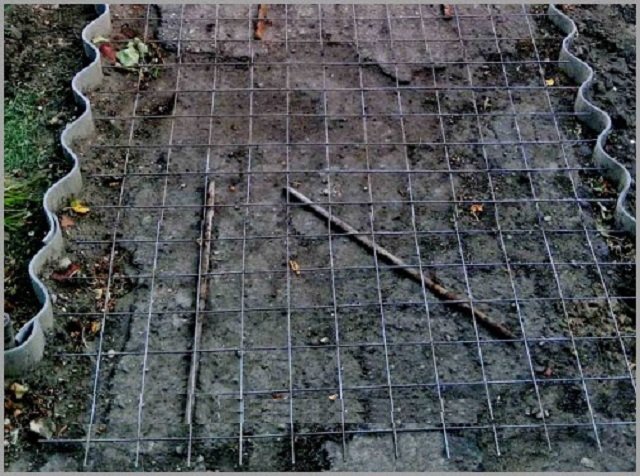
Installation of reinforcing elements
In order to compensate for the load on the concrete base, reinforcing elements are installed. When using reinforcement, the thickness of the concrete layer is made less than 15 cm. If the base is concreted with reinforcement in one layer, there will be no full guarantee against defects. Since the period of operation of concrete garden paths is designed for several years, you should not save on strengthening the structure.
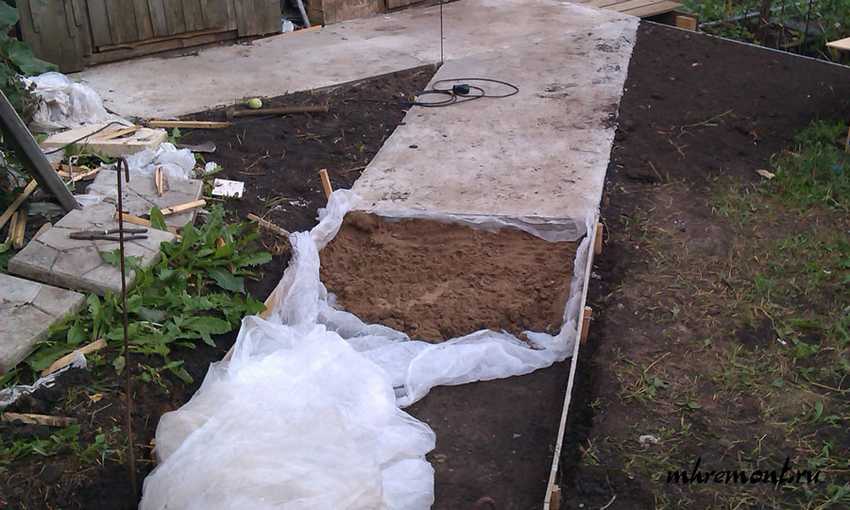
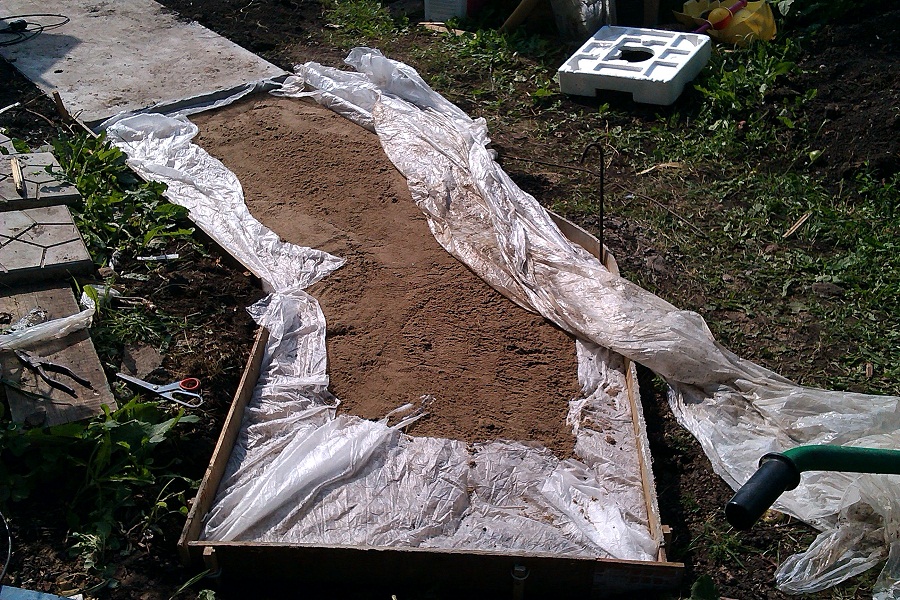
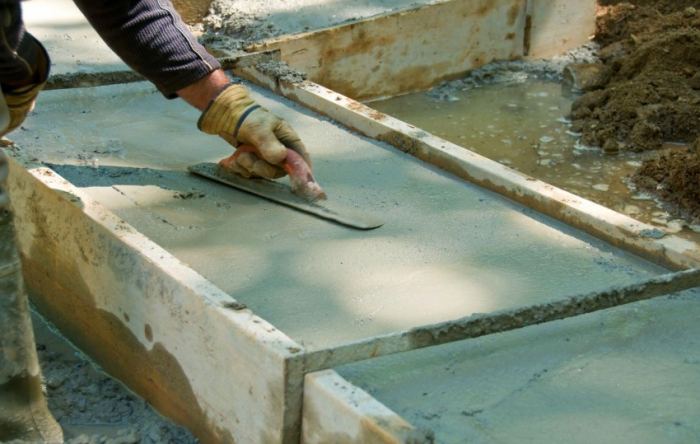
Pouring concrete
After preparing the mortar, concrete must be poured into the formwork. The mortar is spread evenly into the trench using a spatula. For a better seal, tap with a hammer on the edges of the formwork or on the reinforcement. After laying the solution, it is leveled and covered with plastic wrap to protect it from getting wet and dry.
Formwork, curbs and seams
At the stage of casting paths, formwork plays an important role, serving as a frame for concrete. The better and smoother the formwork is made, the more beautiful the track will be.

Planks, plywood or similar material can be used to make the formwork. There will be enough boards with a thickness of 1.5-2 cm.In height, the formwork structure should exceed the trench by about 3-4 cm.

The path itself should be divided into parts, separated by seams. This will prevent the formation of cracks in the concrete from changes in the ambient temperature. To create seams, you should install wood dividers, metal or plastic with at intervals of 1.5 m.
Before installing the spacers, treat them with machine oil or a similar agent, otherwise difficulties will arise during the dismantling process.
Decorating options for concrete paths
Concrete paths can be left gray. But in order to give beauty and neatness to the entire site, the paths can be made spectacular and extraordinary with the help of decor.
Coloration
There are two ways to color gray paths. The first is adding color to the concrete mix. This method is more expensive, but it will achieve better results.
It is necessary to use a special pigment to give the concrete color, which dissolves in water. To get the desired result, you will have to take only white cement as a basis.
Mixing gray cement with dye can result in a very dull and distorted shade.
The second way to give the desired color to the path is by painting the surface.
For this, special compounds are used that penetrate into the concrete by a few millimeters. To obtain a rich shade, it is necessary to paint the surface several times.
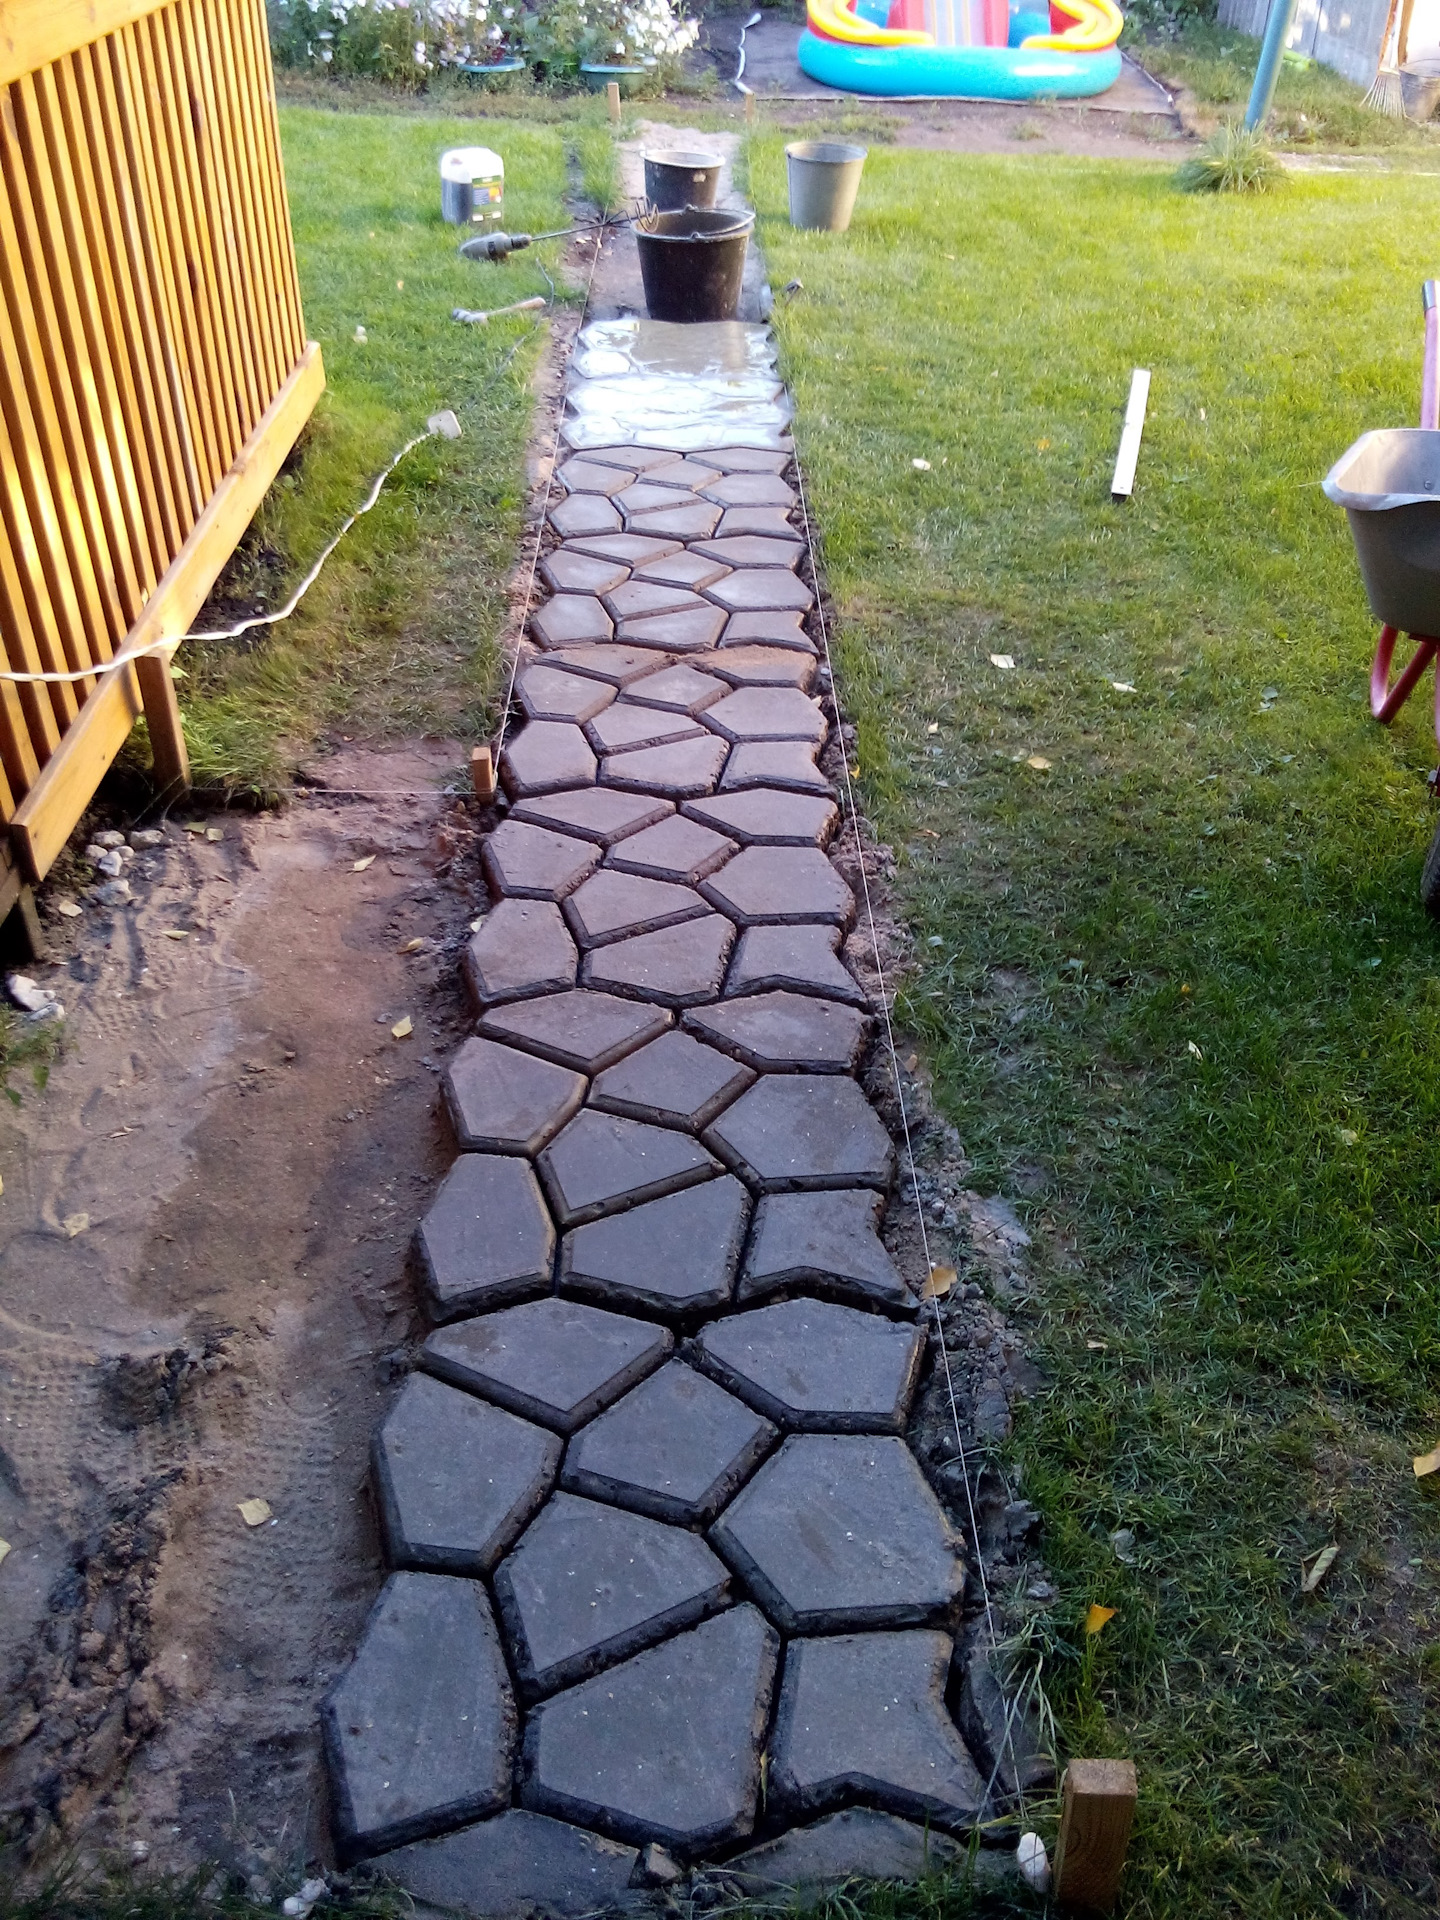
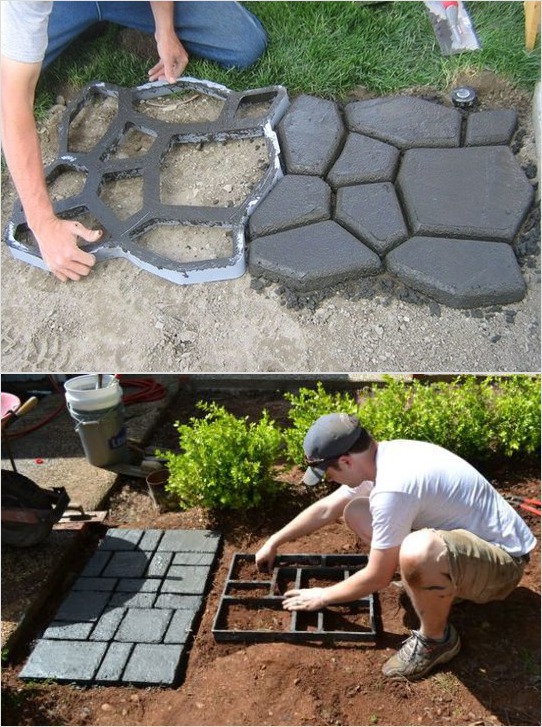
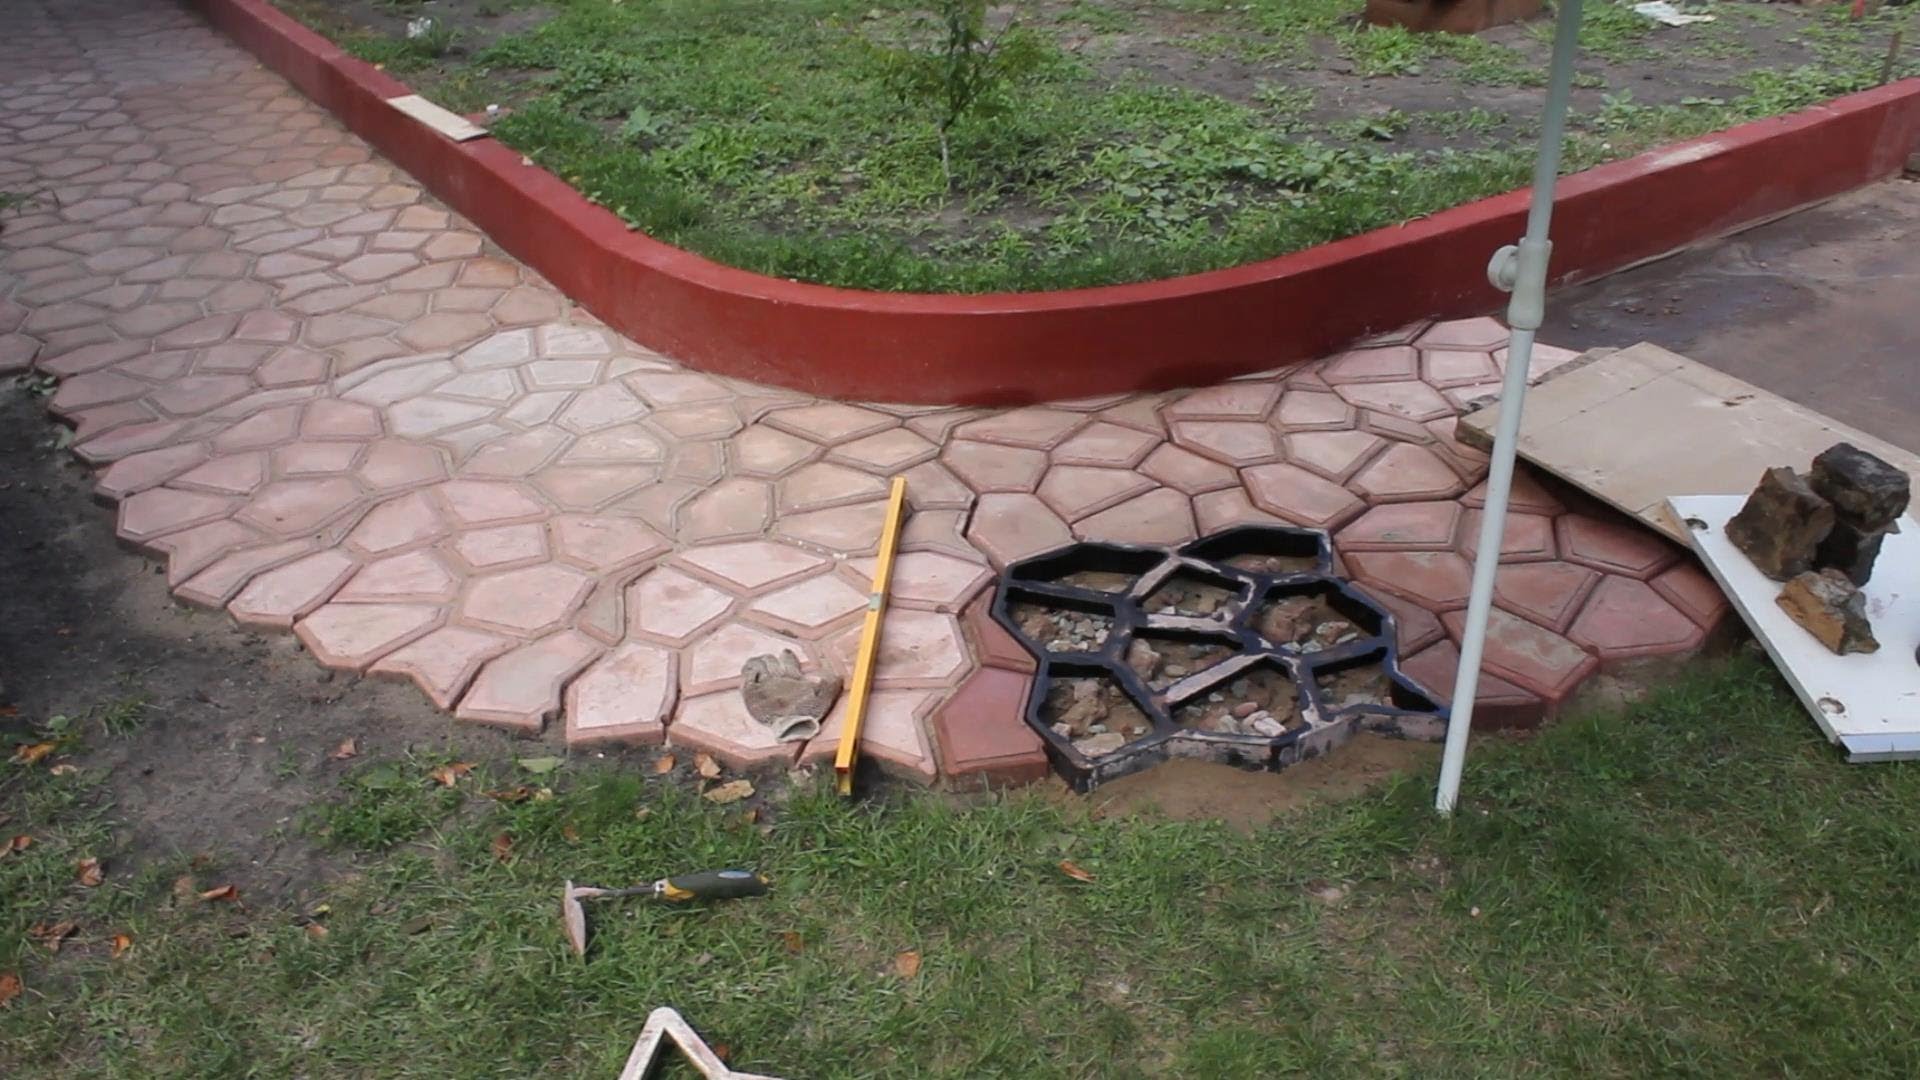
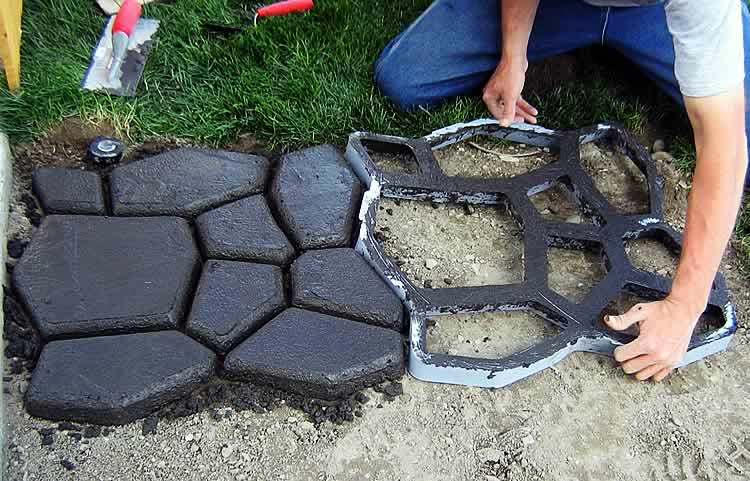
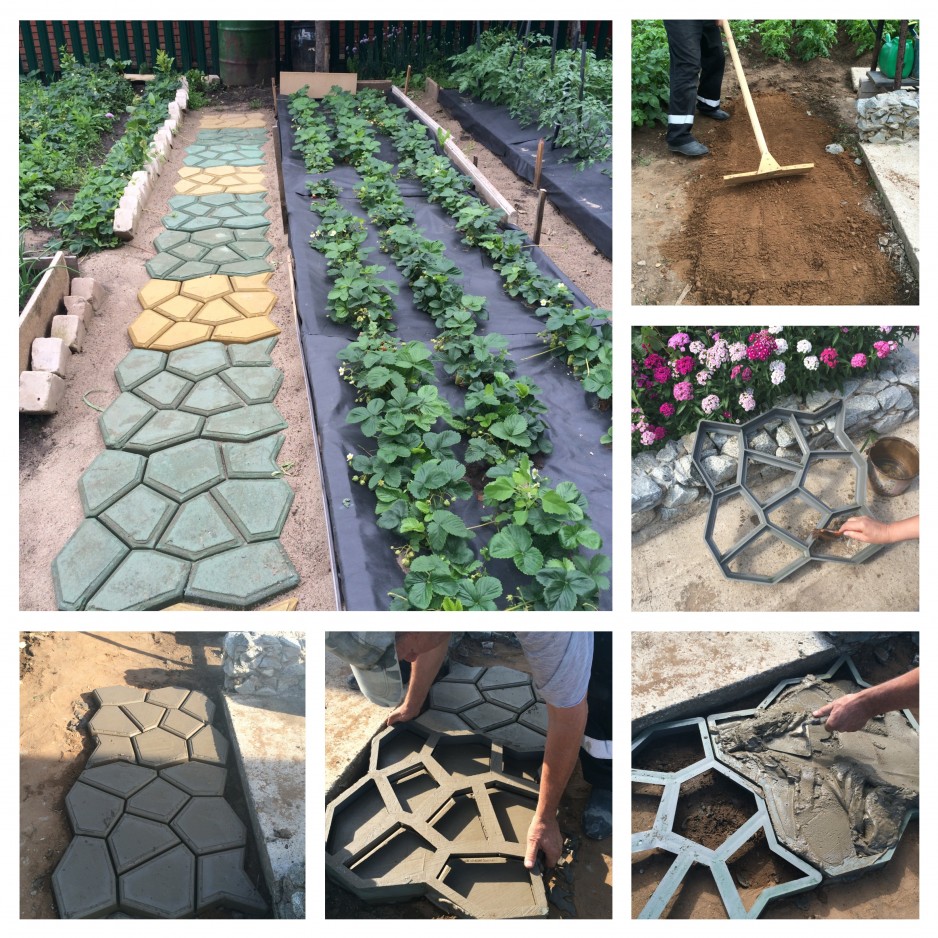
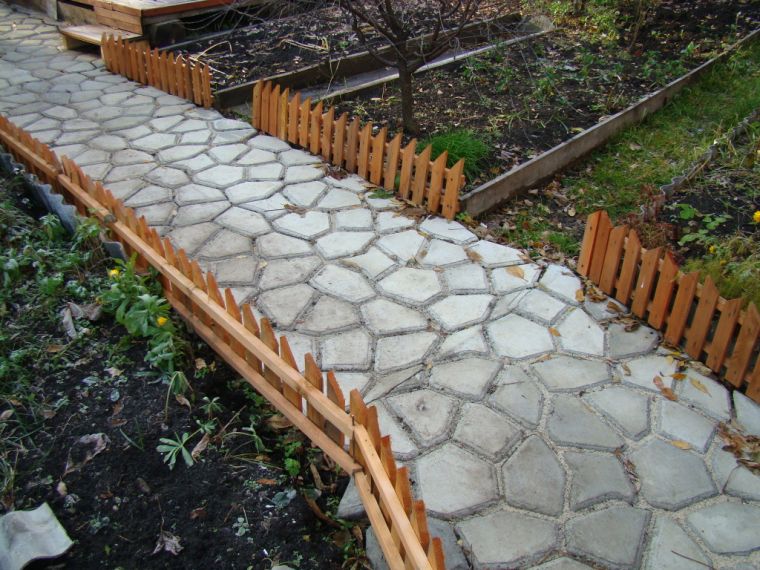
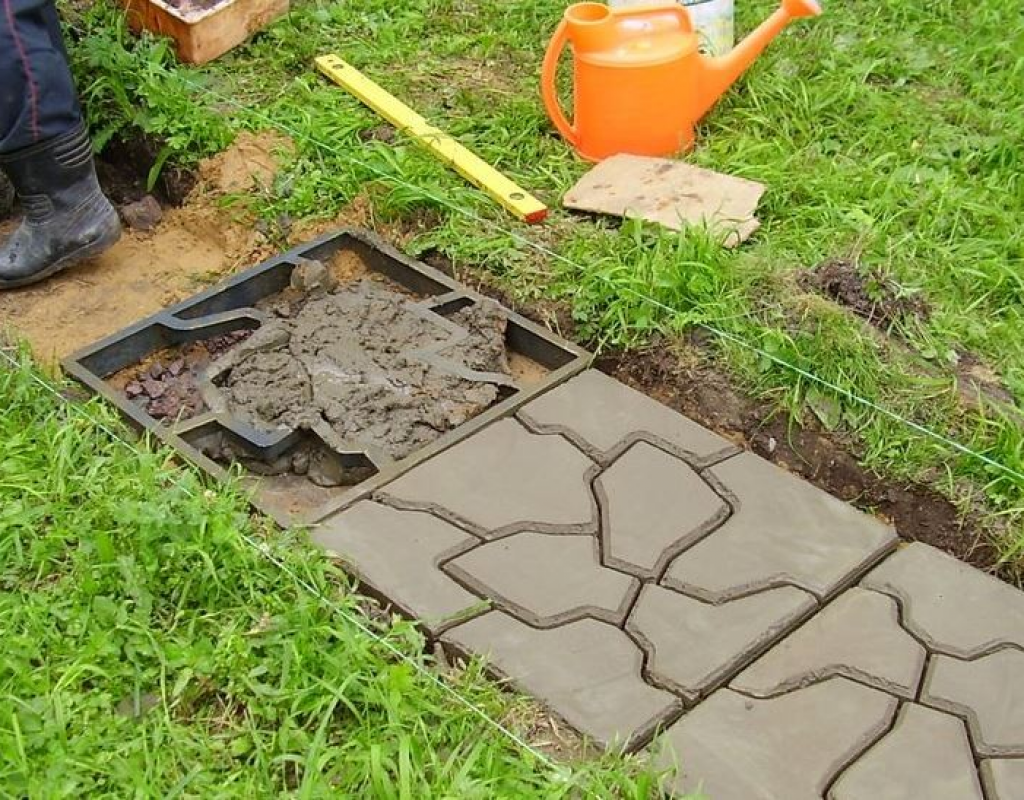
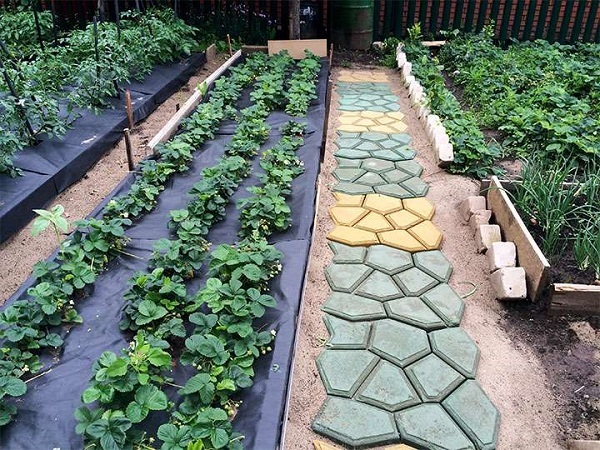
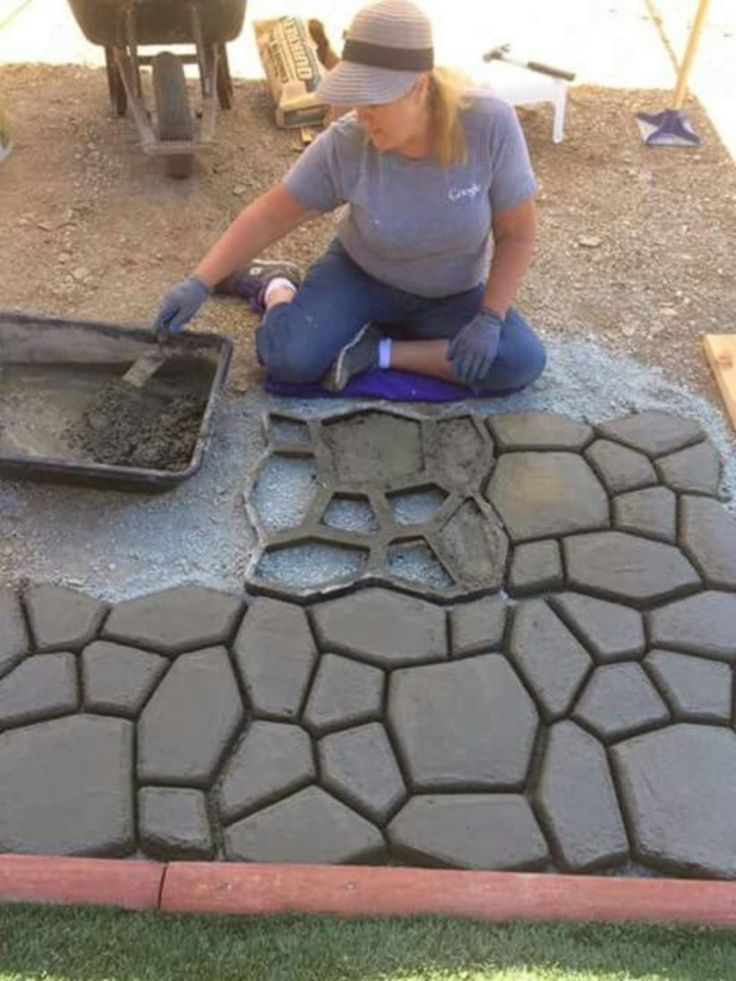
Application of forms and stencils
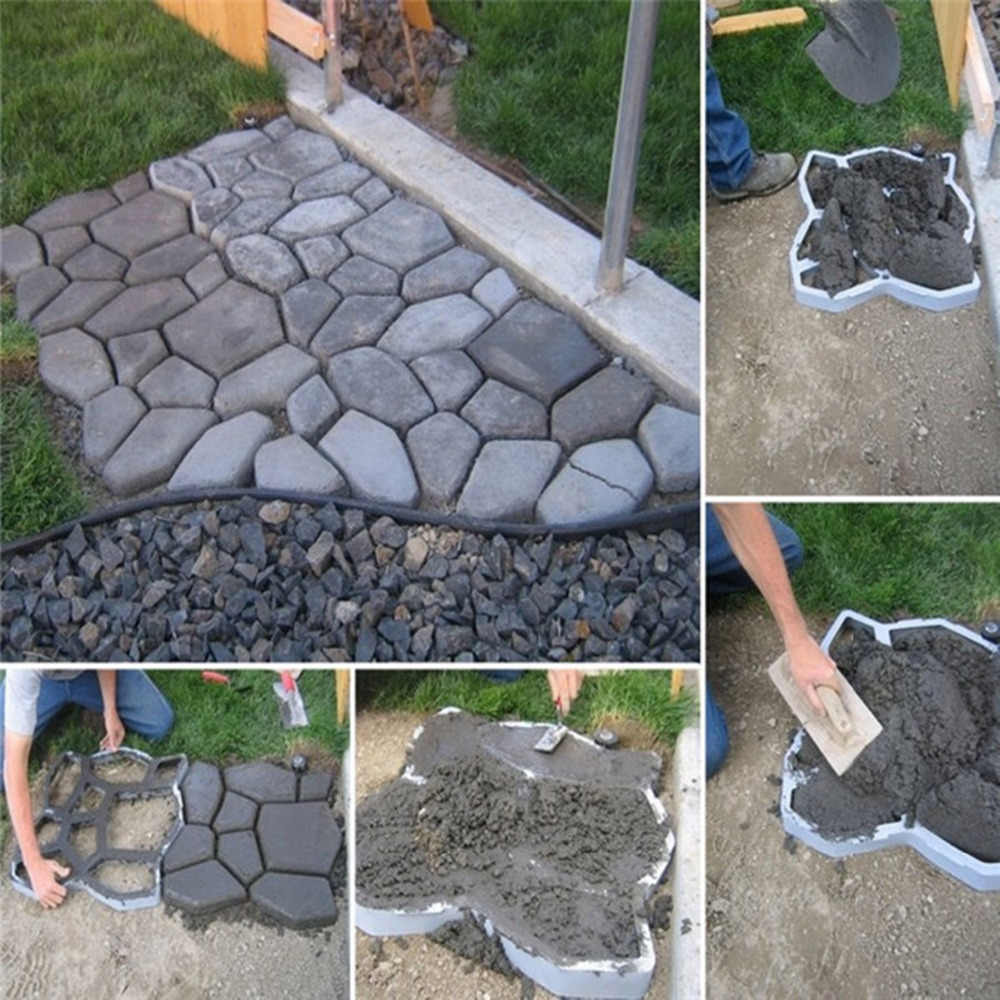
Very often, concrete products are decorated using stencils and forms. This method allows you to create the illusion of cobblestone or stone paving. Stencils are structures with partitions that form corners or curves.
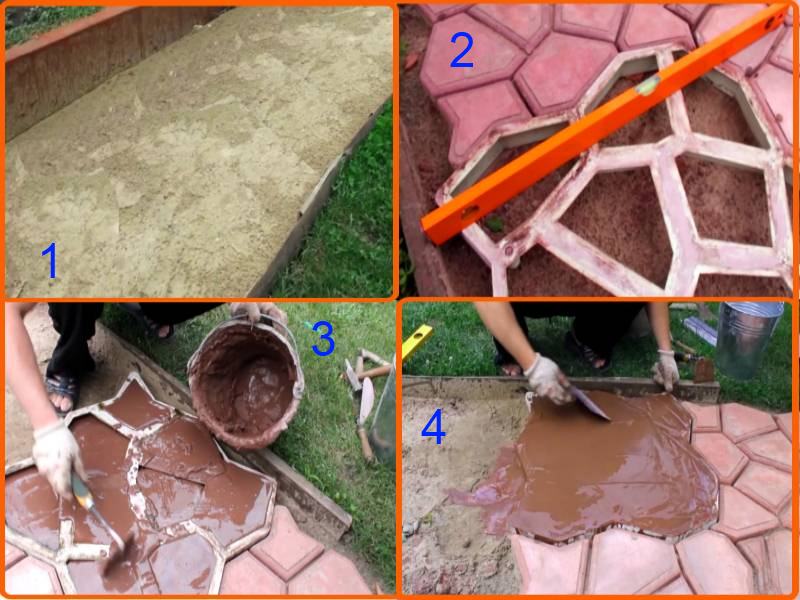
To create such a path, it is necessary to make markings and level the soil. The base does not need to be made, since the stencil consists of separate small parts and does not experience stress. Formwork is also not required - the stencils themselves are the concrete limiter.
The solution is prepared in the same way. Then the form is put on the ground and poured with the composition, tamped and smoothed. After about 60 minutes, when the concrete has slightly hardened, it can be removed.
Stencils are sold in specialized stores.
Or you can make them yourself from wooden slats, barrels, giving the desired shape.
It may be useful for you to learn how to make a greenhouse with an opening roof, a polycarbonate greenhouse, a wooden greenhouse, a plastic pipe greenhouse, a polypropylene pipe greenhouse, a Meatlider greenhouse.
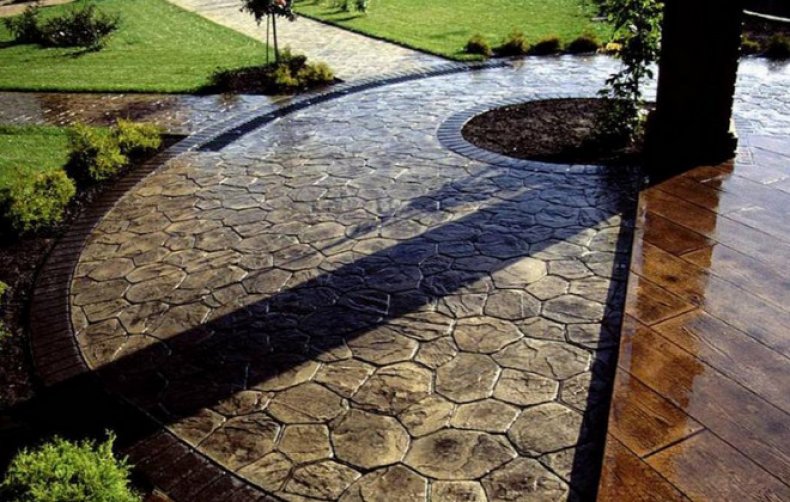
Stamping
Stamping is another way to decorate concrete paths. With the help of stamps, you can create almost any surface that will simulate cobblestones, paving stones, boards, bricks and other building materials.
Stamps are in the form of animal figures, dinosaur footprints, leaf shapes.
The easiest way to get stamps is in stores.
When choosing, you should pay attention to the degree of rigidity: the greater it is, the easier it will be to print a drawing on concrete. You can also make stamps yourself.
To make a printable surface, you need to fill in a regular concrete path. When the mixture begins to set, and it becomes viscous like clay, you can start to get creative. The first thing to do is to apply the hardener 2 times, with an interval of 10 minutes.
It can be of any color. The hardener paints the surface, hardens and promotes quick setting of the concrete. Then a release agent is applied to prevent the concrete from sticking to the stamps during printing.
This substance can be liquid or free-flowing. The second option is most often used. Apply it by shaking off a wide brush.
The next stage is stamping. At this point, the concrete must be plastic.
If it does not stick to your hands, but is pressed to a depth of 5 cm, then you can lay out the forms. They are rammed with their feet. Stamps must be able to support human weight and not fall into the composition.
Other methods
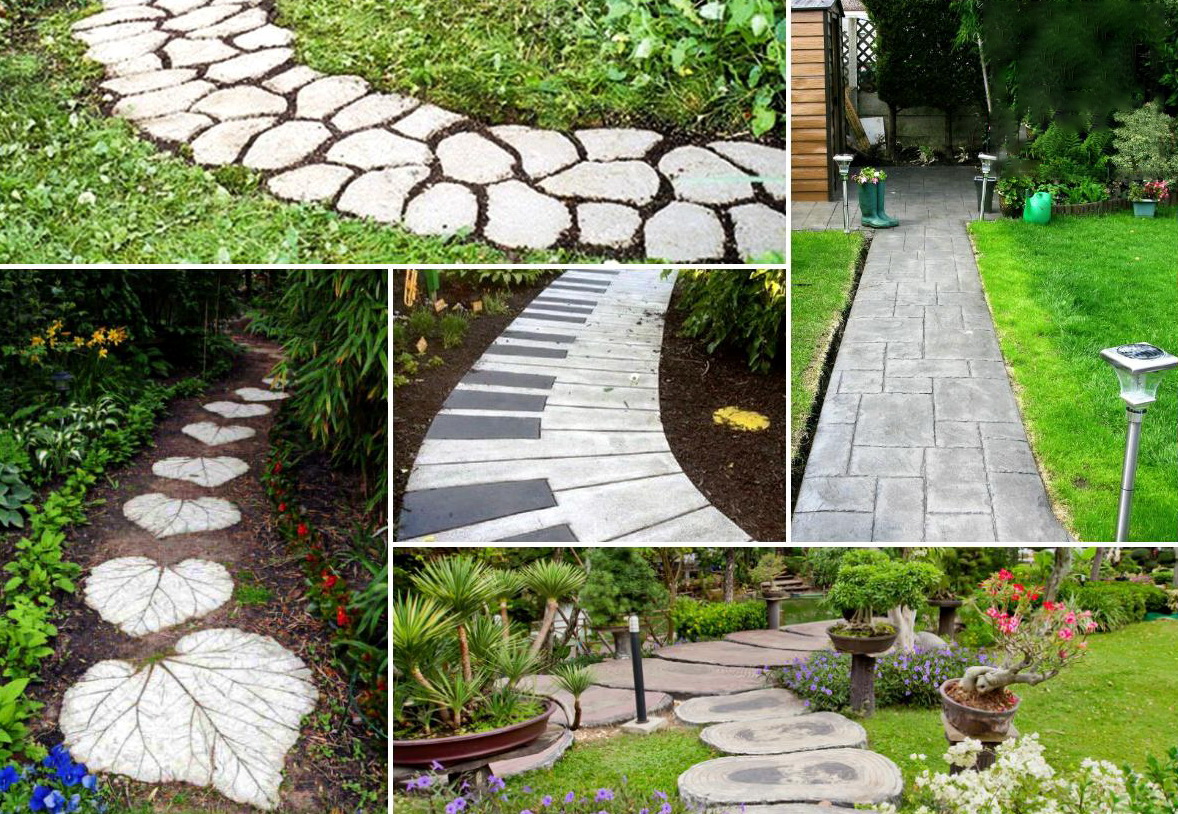
The design of the path can be very diverse and in harmony with the style of the garden:
- Drawing a pattern that looks like pieces of flagstone. 24 hours after pouring the path, using a screwdriver, broken closed shapes are made, similar to the contours of limestone. The width and depth of the slots must be at least 5 mm. Soil will accumulate in them, creating a complete illusion of masonry.
- Mosaic. Pieces of old ceramic tiles or plates, rhinestones, broken glass, mirror, beads are laid on the set concrete. All materials should be approximately the same size. They must be laid on the surface in the desired shape and gently pressed into the concrete.
- Prints. On top of the not yet set solution, prints are made. You can use burdock leaves, large shells. You can also leave an imprint of your hands or feet after smearing them with petroleum jelly.
What to consider when designing
When arranging paths in the country, take into account:
- the width of the paths, depending on the purpose - for the main ones it is recommended to allocate 150-210 cm, for decorative, walking - 80-110 cm, located between the beds - 40-70 cm. The canvas of the latter may be intermittent;
- main roads connect the main "points" of the site - a house, a gate, a garage, a bathhouse, a swimming pool, etc., therefore, it is advisable to make them straight;
- it is advisable to equip paths, especially those located near the house, with drainage systems;
- all paths are made textured - this will allow you to safely navigate them even in rain and ice.
When drawing up a project, it is necessary to depict a diagram of the site on a scale, indicate where the house is located, the main outbuildings, a garden, a vegetable garden, a pool, large flower beds, etc. ...
When the site has a slope, the process of creating paths becomes a little more complicated. If the angle of inclination does not exceed 10-20 degrees, the surface is easy to level. With a greater slope from the roads, it is better to refuse - their presence is traumatic, since it is easy to slip on a smooth place (unlike a lawn) during rain or ice. In the latter case, the paths are made on several levels, connected by steps.
Types of concrete material for creating paths
Artificial stone, which is paved with paths, can be bought ready-made. The varieties of material include vibropressed and vibrocast plate and paving stones. It is easy to make elements for paving a path with your own hands. At the same time, it is possible to save on the purchase of material, since the ingredients of the solution are cheaper than the finished parts of the masonry.
Using forms
Ready-made plastic or homemade forms allow you to imitate natural stone and paving stones. With imagination, a home craftsman can make unusual slabs for paving garden paths. The simplest thing is to buy ready-made forms. They allow you to work without interruption for the setting of concrete.


Formwork forms are easy to make with your own hands, connecting the slats into rectangles or other geometric shapes. For the excavation, you need to make handles, and the surface should be treated with oil (automotive working).
Stamped concrete
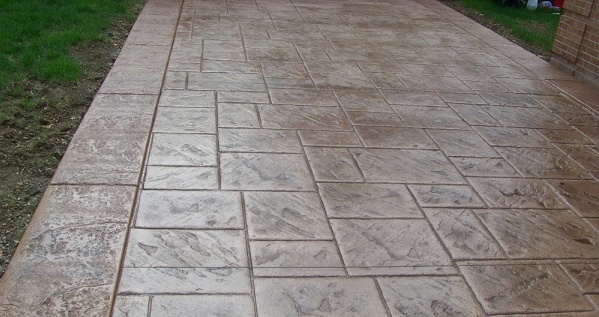
For the manufacture of a pattern on the surface of the monolith, special molds are also used. It is easy to choose these to your liking in any hardware store. The products are cheap and have a large assortment.
The principle of their use is to print a pattern imitating paving stones, stone, etc. on the surface of a freshly poured mortar. After removing the form, a textured print remains. The stamp is used immediately to decorate the surface next to the already produced prints.
Tile
A large assortment of ready-made tiles is offered by trade organizations. There are many options for its execution: paving stones, curly mosaic details, textured with a patterned surface or imitation of wood or valuable types of stone.But you can make concrete slabs for paving with your own hands.
For homemade forms with imitation of a stone coating, a little tin will be required. The metal is arbitrarily crumpled, making the sheet look like a torn stone, and then a block is stuffed around the perimeter for formwork. The shape of such a tile can be different.
A fancy option is obtained using improvised materials: sawing wood, boards, large burdock leaves or plastic wrap. The bottom of the mold is made of material with a pronounced texture, and the sides are easy to make from a bar or polyethylene. For example, a tile-sheet is poured into a mold from a film, at the bottom of which a large burdock sheet is laid.
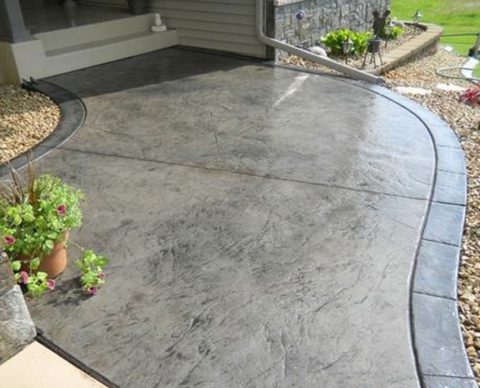
Monolith
Monolithic concrete walkway is durable. With the correct filling, concrete can serve for several decades. The surface of such a path can be left flat, but more often decorative cutting is used to imitate paving.
Colored concrete
It is possible to give color to concrete by adding colors directly to the solution. At the same time, the coating does not fade in the sun, and the painted layer does not wear off: the entire monolith of the track acquires the color. To save color, you can fill the lower layers with a simple composition without staining, and make the top layer colored. The same decoration methods are used for painted concrete as for simple concrete: it can be laid in molds, a decorative pattern can be stamped on it, etc.