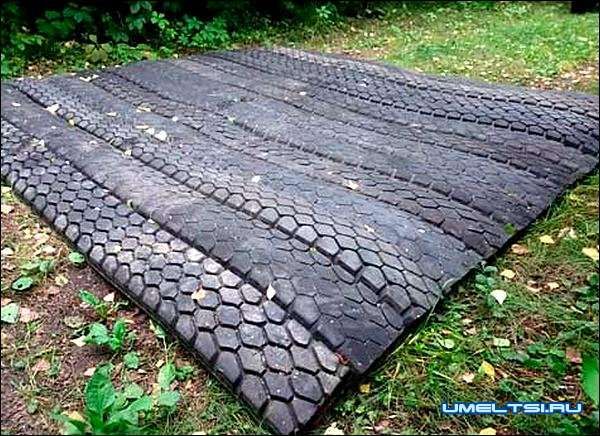
Why are rubber tracks good
The advantages are the same as with more expensive rubber coatings.
- Ecology. The material does not emit harmful substances into the environment
- Simplicity of styling. Installation on their own may well be performed by 1 person.
- Security. The cover is soft and non-slip in any weather.
- Durability. The material is not afraid of temperature changes, and its flexibility protects against chips and cracks typical of hard coatings
- Easy to care for. The path can be washed with a jet of water or simply swept away with a broom. Resistant to being hit by heavy objects like ceramics or plastic.
- Convenience. The surface is soft underfoot and provides excellent traction.
- Availability. The material is easy to find on the web.
- Possibility of various design solutions. The assortment includes materials of various colors and structures. Their combination allows you to show imagination and taste.

Preparatory activities
Before you start laying out the trails, you should plan the work front. It is better to sketch on paper a diagram with all the elements that complement the track:
- borders;
- gutters;
- drainage systems;
- lanterns.
Be sure to measure tires in order to navigate the required amount. And this will depend on the length of the path, its shape and route.
Choosing tires for garden paths
For the construction of paths for movement in the garden, any tires are suitable. If you want to make the tracks wider, it is better to choose tires from trucks. If you plan to install whole tires, then they are selected of the same size. For the tape type of trails, you can take different-sized material, you still have to cut it.
Match tires of the same size for the track
Preparation of the necessary materials and tools
For work, a tool is prepared in advance:
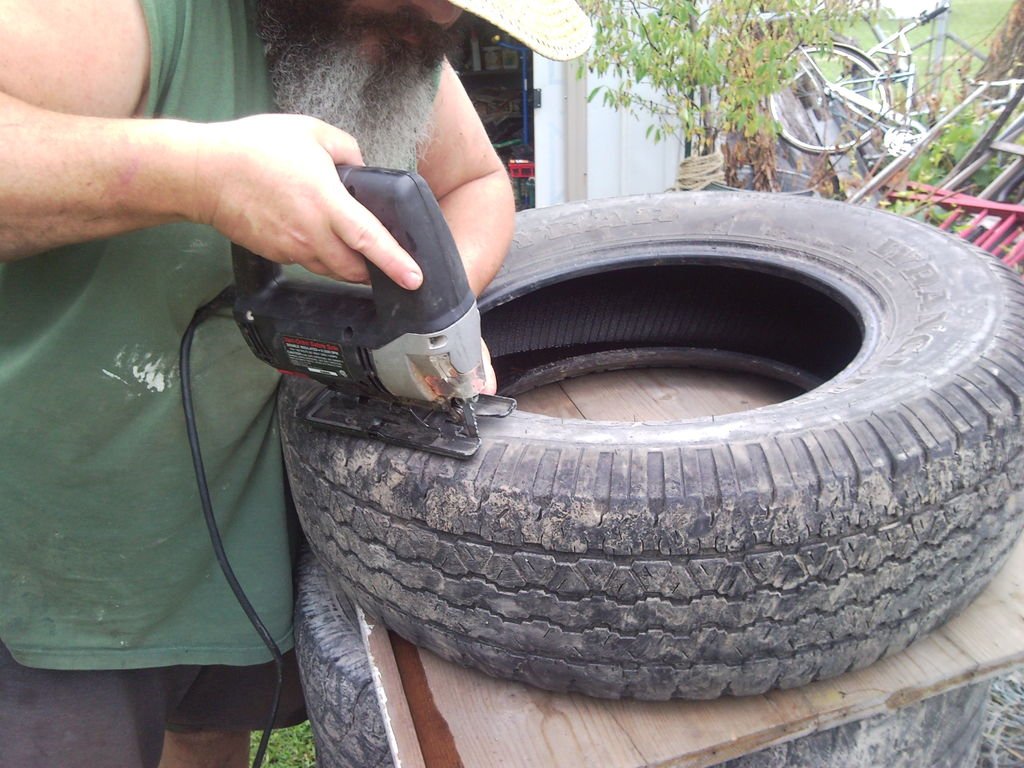
- sharp knife or jigsaw;
- shovel;
- hammer;
- hacksaw;
- roulette;
- pencil or marker;
- axe;
- nails (from 7 cm long);
- wooden pegs.
Only old tires are needed from the material.
Prepare the tire in advance
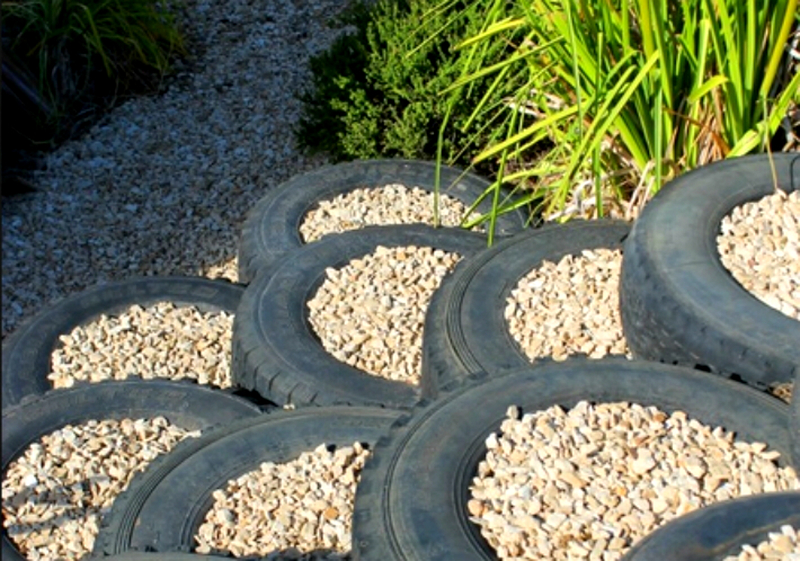
Ladder track made of car tires
A ladder path is suitable for arranging uneven terrain.
For example, along such a path it will be convenient to go down to the pond located in the background of the site.
Depending on the functional load of the stairs, you can lay out the track in 2 rows.
It does not take much time to make an original staircase, and this is perhaps the most budgetary option.
Manufacturing process
The tires are laid flat on the ground, starting from the low part of the site and going up. In order for the tires to be stable, they should be slightly sunk into the ground and soil should be poured into the holes.
Advice! In rainy weather, this path can become slippery, so it is recommended to sprinkle it with gravel.
The ladder path absorbs well. It is much more pleasant to walk on than on asphalt or concrete steps. During movement, the load on the joints is small, so you will not feel fatigue in the legs.
We construct limestone paths in the country with our own hands, using our tips and step-by-step instructions. More details in the article.
Coniferous tree larch: planting and care, as well as tree propagation. What you need to know about the requirements of larch to the composition of the soil and other nuances of growing.
Rubber square tile path
To create such a decorative track, you will need to buy rubber tiles.
Of course, making a track will hit your pocket a little, but it looks much better and more original than a strip from a car tire.

Laying rubber tiles
The manufacturing process does not take much time.You can simply spread the rubber tiles in a checkerboard pattern right on the grass. Squares anywhere can be pressed with decorative stones.
Over time, the tiles will stick to the ground, and the beautifully protruding grass will blend in with the overall design. The video below explains how to cut a tire.
Do-it-yourself installation work
The installation of the track is simple - it is enough to prepare the necessary tools, materials in advance and understand the laying technology. It is worthwhile to mark the path in advance, approximately calculate the area
It is important to take into account the peculiarities of the suburban area - the rubber track will help mask some defects. If necessary - level the relief - remove elevations, fill deep holes
Preparation of material and tools
To make a rubber path, you will need: a sharp knife (the jigsaw will simplify the work), a hammer, a tape measure and an ax. For fixing, purchase nails (from 7 cm long), wooden slats. If the terrain is uneven, you will need a shovel.
Of the materials for the manufacture of a rubber path, gravel and sand are needed. Some site owners use stone backing, especially if the track is mounted on clay, sandy soils that are prone to creeping or undermining.
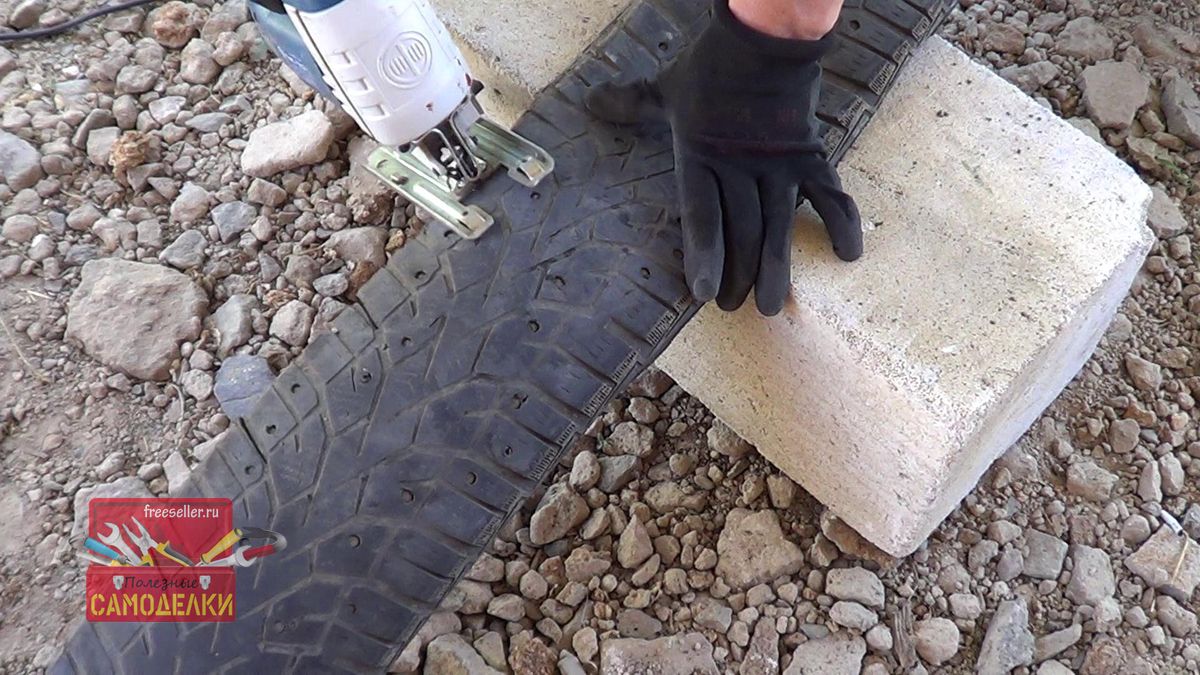
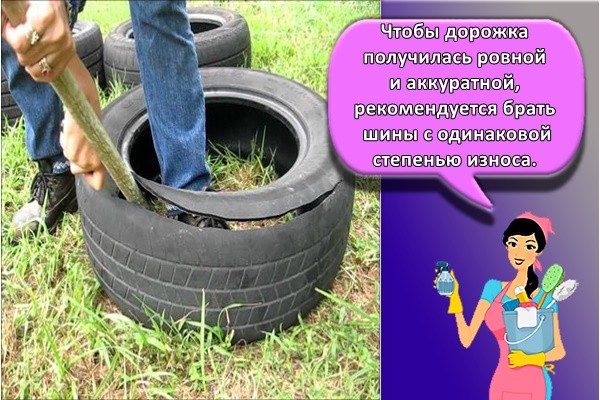
For the path itself, rubber tires are used. Craftsmen warn - more attractive tracks are obtained from imported tires. The rubber is easy to cut and level. To cut domestic tires, it is better to use a jigsaw, otherwise making the track will turn into exhausting work. To keep the track smooth and tidy, it is recommended to use tires with the same wear. Otherwise, you will have to experiment with the substrate - raise or deepen the rubber bands.
Ribbon forming
The most difficult stage is the preparation of the rubber bands:
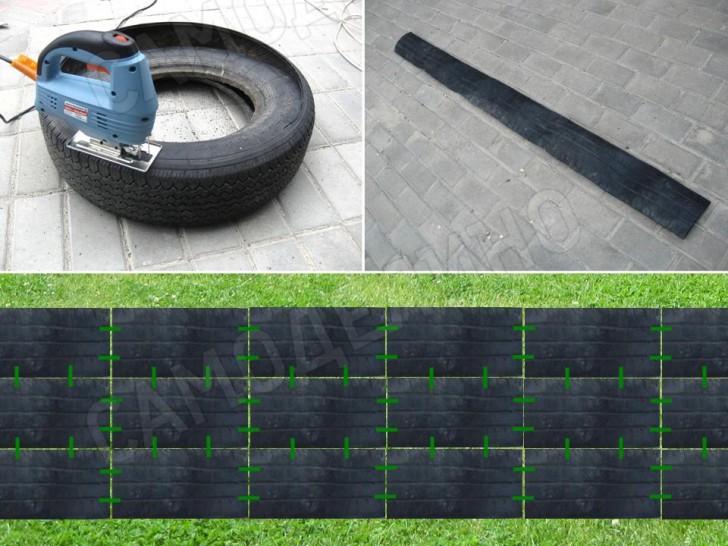
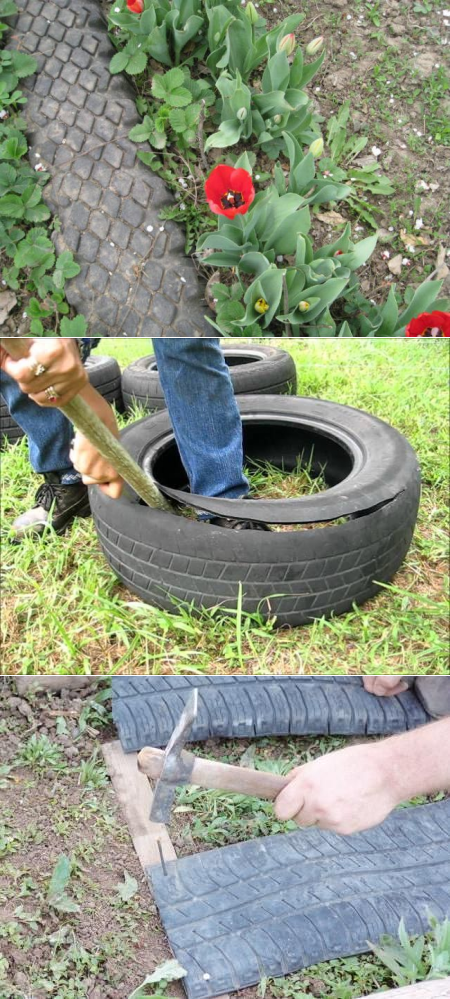
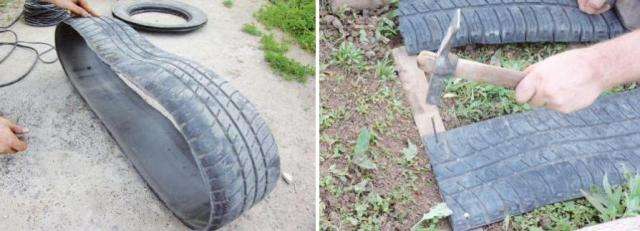
- Using a knife (constantly apply lubricant to the blade), separate the rim of the tire from the protector, for easier work follow the circle.
- Cut the tread (if the rubber is too thick, use an ax).
- Fix the tape with nails on wooden strips (first apply a layer of molten resin), leave to level.
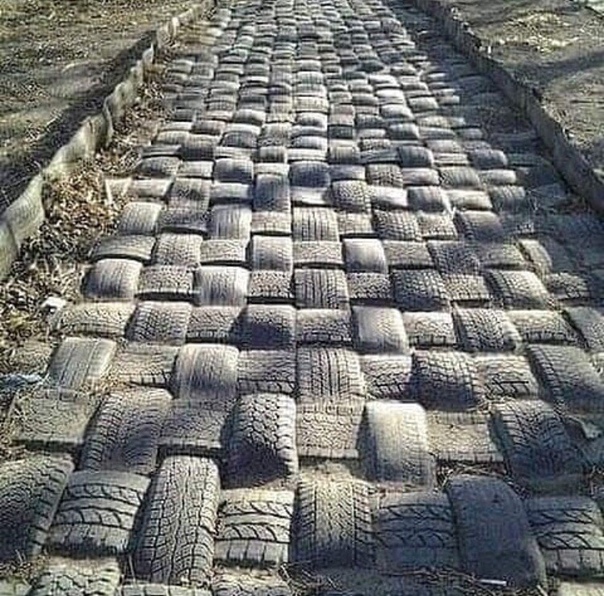
Fold the finished rubber strips in neat piles, avoiding repeated deformation. If an unusual path is planned, immediately weave the prepared rubber bands, and also strengthen the material using nails and wooden slats. The width and length of the rectangles are arbitrary - depending on the planned shape of the track.

How to create a solid foundation
The first stage of work is the preparation of the trench. Depending on the width of the path, the depth of the ditch is 30-50 cm. It is recommended to carefully tamp the bottom. Place a layer of gravel or small stones, re-tamp, compacting the substrate. If possible, fill the substrate with a concrete solution, which will significantly extend the life of the track. For dense soil, pouring with concrete is not necessary.
Aligning and securing tapes
Before laying rubber canvases, think over what elements will be used to decorate the track (lanterns, curbs, drainage systems). In areas that are flooded with water, it is recommended to immediately install a drain.
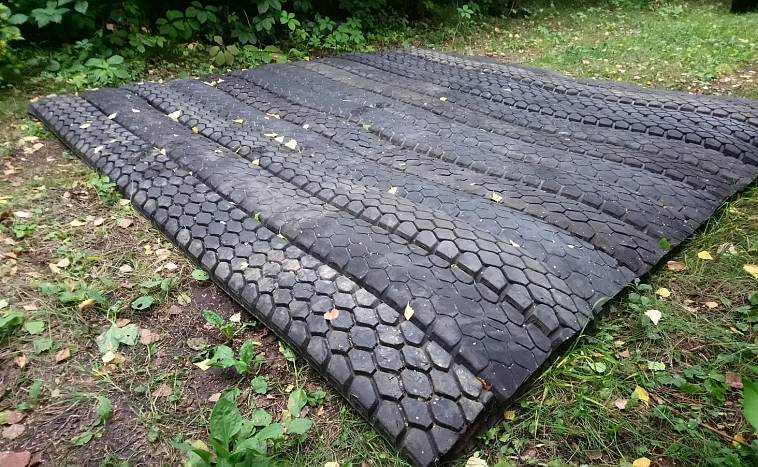
If paths with a width of 3-5 strips are laid, leave gaps 1-2 cm wide. Water will go into the gaps, and the grass that has made its way through the substrate layer will become a reliable fixer for rubber "bricks". The tapes are fixed with cement mortar (if the trench is filled with concrete). If no backing is used, the rubber strips are applied directly to the prepared surface. It is easy to move such a track to another place, correct defects or replace tapes.
Pros and cons of using
Among the advantages of using tires, the following are noted:
- Material reliability. For tires, high quality durable rubber is taken.Even when worn out, they do not lose their properties.
- Durability. Such a path will serve for years without the need for repairs.
- The rubber is anti-slip. The relief surface allows you to walk on them calmly during heavy rain or frost.
- Not afraid of temperature extremes, high humidity.
- Does not deform under high mechanical stress.
- Requires minimal maintenance. It is enough to periodically rinse the surface from dirt with a hose or sweep the debris with a broom.
- If necessary, the track can be easily moved to another location.
- There are almost no costs for such a path. There is no need to buy material, and every owner has the necessary tools.
- The tire does not rot and dries quickly.
- Ease of installation.

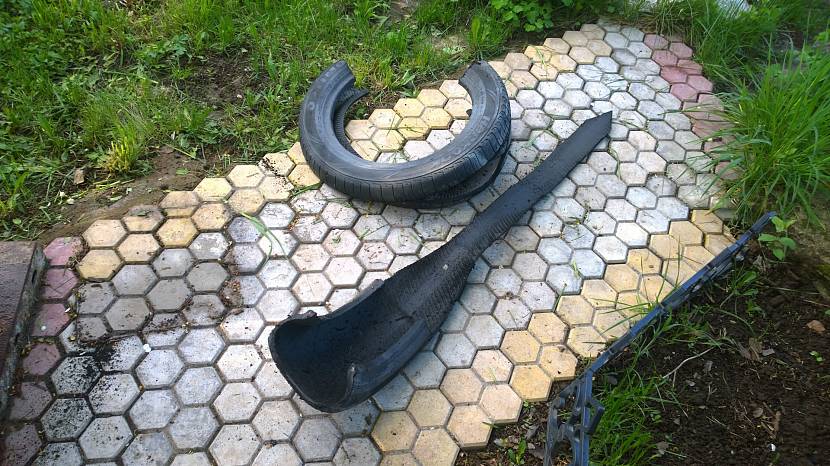
Photo: future path from a truck tire
But one should also take into account a number of disadvantages that will have to be faced. Among them:
- The need for a large number of tires. Even for a small garden path, you will need more than a dozen of them. But if you agree with the service station employees for a nominal fee, then you will have a sufficient amount of rubber in stock.
- Unaesthetic look. Of course, the beauty of a tire path cannot be compared to natural stone. However, for the owners of summer cottages, for whom practicality, durability and price come to the fore, the attractiveness of the path is not so important.
- Weak plasticity of rubber. Before assembling the product from the tire, the material should be straightened, which will have to work a little.
- When creating a path, a compulsory gravel bedding is required. Otherwise, the track will soon simply go into the ground.

Thematic material:
- Garden paths made of stone
- Plastic garden paths
- Rubber garden paths
Style variety
The road surface can be made in any style. When designing a territory, you can adhere to one or several style directions. The main thing is to link the road surface with the architecture of the house and the landscape.
English
The paths, made in the English style, meander, cross the entire garden, converge at the main entrance. They are made of bricks, gravel, stone, tiles. The paths narrow towards the recreation area and widen towards the house. The road surface is separated from the lawn by curbs. Stones or tiles are laid out close to each other or step by step, where the grass fills in the gaps.
Regular
The classical (regular) style is characterized by orderliness, strict symmetry, and geometric shapes. It looks a little theatrical, thanks to statues, fountains, gazebos, bridges, arches. Playgrounds, flower beds, buildings have the correct geometric shape. Straight paths lead to them. Turns and intersections are made at right angles. Shrubs are planted along the roads, from which hedges are formed. The axis of symmetry can be the main road leading to the entrance to the building. Steps are used to move between different levels.
What is the classic style:
- appropriate when designing a central road;
- natural stone, concrete, paving slabs are used as paving;
- granite paving stones can be laid out in rows, arcs, fan;
- the walking path can be laid using clinker bricks;
- the edges of the road surface are fixed with a curb;
- the paths are made in soothing colors, they use materials of a natural shade, a maximum of 2-3 colors can be combined.

Japanese
The main feature of this style is asymmetry. Garden decorations should not be repeated. The paths are made winding, the platforms are of an irregular shape. Soft materials are used as a coating: sand, marble chips, gravel, crushed stone. On top of the soft flooring, flat stones are laid out at a step distance.
Country
The main access road is made of stone. The rest of the garden paths can be paved with irregular tiles, wooden planks or saw cuts, showered with sand. Gravel cover can be used.To give the paths a natural look, they are sprinkled with sawdust, bark, and needles. In the country style, there are no borders, steps, clear straight lines. The paths meander, look natural, made of natural material.
Modern directions
The modern garden is equipped in the Art Nouveau style. The road surface is made of tiles, paving stones, paving stones. Tracks can be straight or winding. The center of the composition is the house. The paths and alleys of the garden originate from it. The pavement can be made up of close-packed materials or individual slabs sprinkled with sand or gravel and separated by grass. The path is designed in the form of a geometric pattern, ornament, parallel rows, weaving, and a fan.
Manufacturing of a covering from used car tires
New pavement from old tires
Do-it-yourself production of material and laying it includes the following:
You will need to perform a separation of the tread, which will serve as a treadmill in the future. For these purposes, we use a sharp, sharpened knife, a small amount of soap solution, or oil, as well as any object, like a wedging device. Using a knife, the sidewalls are cut in a circle. In order for the knife to cut as well as possible, it is necessary to lubricate it with oil or solution.
A corresponding wedge is installed behind the knife, which can be an adjustable wrench, a regular wooden block, or a pry bar. After the processing procedure is completed, the result is a central part and sides, unsuitable for subsequent installation.
After the required number of samples has been created, production is curtailed, after which you can begin to install the structure with your own hands.
Installation involves the use of a certain number of strips, depending on how wide it is planned to then create a garden path. For example, if the track is wide, you can use four or more strips of rubber as a material for laying.
If you need to start laying a large site, a much larger amount of material is selected.
It is important to take into account that the distance between individual stripes is about 1, maximum 2 centimeters. Grass begins to sprout in the space formed between the individual strips, it is necessary, as it allows you to hold the structure without displacement.
Special attention should be paid to the processing of the place for the installation of wooden parts of the structure, for which you will need to dig some recess
This will somewhat eliminate the subsequent scuffing of the edges of the rubber coating.
Mounting on a concrete or asphalt base
The concrete base is excellent for installing rubber flooring. Asphalt adheres somewhat worse to polyurethane, so the asphalt base must be primed twice. For the primer, you can use a mixture of acetone and polyurethane. For concrete, it is enough to prime once.

If there are visible depressions on the surface, then they should be repaired with concrete. In the case of crumb coating, you can prepare a small amount of the mixture and fill in the irregularities, and after an hour, apply the main layer of the material and level it. Tiles or rolls are fixed with polyurethane glue.

Idea four: tire swing
Nothing can delight children like a swing. The place in which they are installed inevitably becomes the center of attraction for the attention of all household members. By using tires for the construction of a swing, you can significantly save on costs and provide better safety for young family members.
If there is a large tree on the site, then it will not be difficult to make this structure. For stability, the branch must be parallel to the ground and be ready for stress. From the tools you will need a jigsaw and a knife.And in addition to the tire, you will need to find a strong rope or chain. If the latter is used, then you will additionally need carabiners for attaching the tire.

In the case of using a rope, the procedure will be as follows:
- A loop is tied on the rope, after which it is thrown over the branch;
- The free end is inserted into the loop and tightened. You will definitely need to check the reliability of the node;
- The lower end of the rope is passed through the tire with the tread up;
- By adjusting a comfortable height, tightening the knot on the tire and checking the strength of the connections, you can use the swing.
If children are still very young, it is recommended to supervise their use of the device.
How to make a swing from a tire: video
There are more non-trivial tire swing designs in the country. Swings of the most unusual shape, reminiscent of animals or fairy-tale characters, can be cut out of rubber tires.
How to use ready-made forms
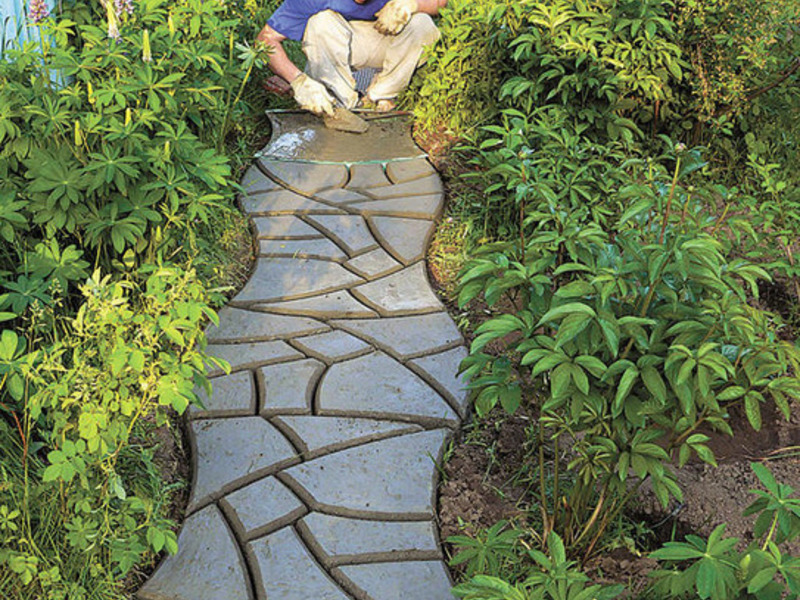
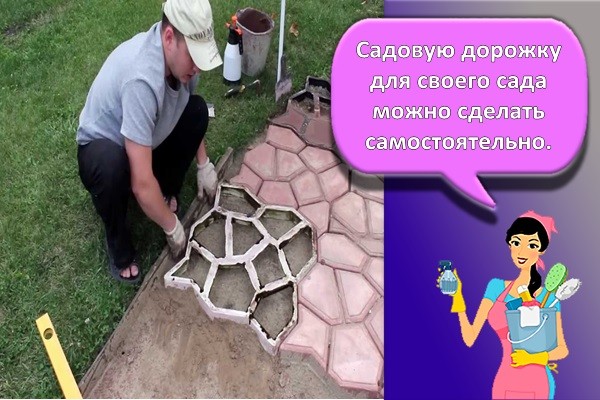
On the site, you can make a track using a ready-made plastic form, which is sold in a hardware store. Such a stencil imitates stones or slabs laid next to each other. It is poured with concrete mortar. Dye can be added to the concrete to give the stones a natural color.
First, a trench is pulled out, it is tamped, a layer of rubble and sand is poured in, and abundantly watered. A mold lubricated with machine oil is placed on top of a flat surface. A mixture of M500 cement, sand, crushed stone, plasticizer, coloring pigment and water is poured into the stencil.
After 6 hours, when the concrete has "set", the form can be removed. The solution dries for about 3 days. The next day after pouring, the concrete must be moistened and covered with plastic wrap. When laying such a road surface, curbs can be omitted.
Material advantages
Tracks made from old car tires have a number of advantages, among which are the following:
- Long service life. Since automobile wheels are capable of withstanding heavy loads, as a result of their processing, a durable and elastic material is obtained, which is distinguished by high wear resistance and a long service life.
- Moisture resistance. Due to their structure, rubber tracks quickly absorb moisture in the rain field, and due to their rough surface they do not slip and are safe (you can even walk on them with bare feet).
- They do not require special care. The rubber coating has a monolithic structure and its maintenance is reduced to washing with a hose. If ice forms on the walkway in winter, it can be removed with an ordinary shovel.
- Simplicity of styling. Installation work does not require special knowledge, skills and special tools. The rubber plates fit easily and do not form gaps on the surface.
- Affordable price. The price of rubber material is several times lower than that of concrete, ceramic tiles and other materials.
- Rubber tiles are resistant to temperature extremes and negative environmental influences.
 You can make a track from tires yourself
Flowerpot from the wheel: turn out the tires
If you have a tire with an old rim, you can make a flowerpot with a leg out of it.
Flowerpot from an old car wheel
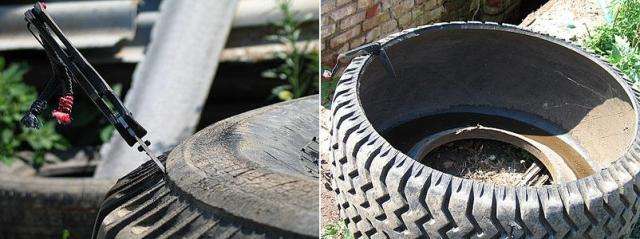
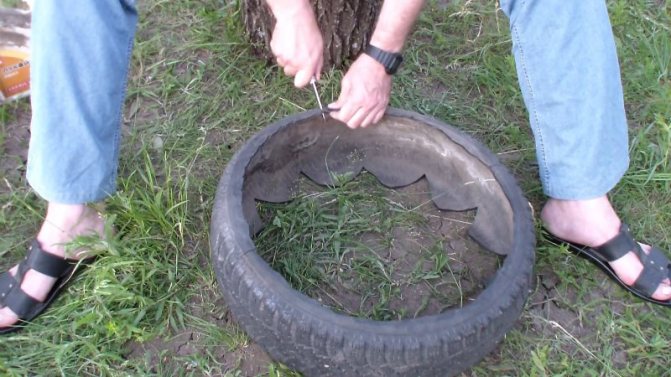
To do this, cut one sidewall along the tread. And they turn it out. This is not an easy matter: considerable physical strength and perseverance are required. Rubber is elastic and it is impossible to turn it out the first time. If nothing at all, notches are made on the outside across the tread. They should be quite deep, but not cross-cutting. It will also help if you make cuts along the edge with a depth of at least 5-7 centimeters. They will look like a fringe on an inverted tire.
Why do they turn it out? The inner surface is smoother, and the shape can turn out to be more interesting, especially if the edge is not linear, but jagged. You will get a gracefully bent decoration.
Another option for a flowerpot from a tire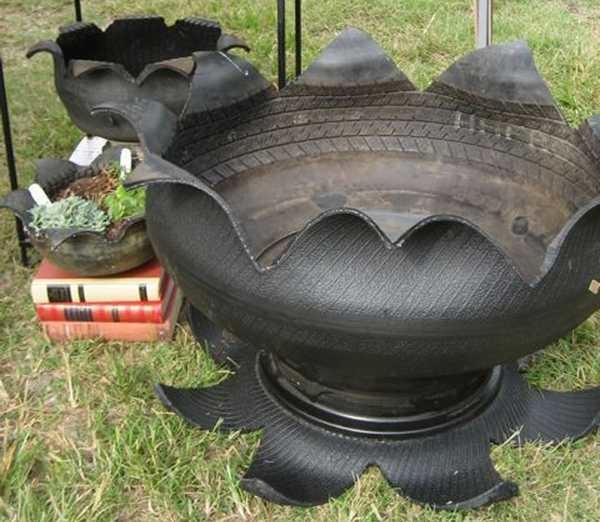
For details on how to turn the tire out, see the video.
Likewise, you can turn out a tire without a rim. The sequence of actions is the same. First, cut off one of the sidewalls - straight or in a zigzag. To make the "petals" even, it is advisable to mark them. It is convenient to do this with chalk. At the mark, they are then cut with a jigsaw or a knife (if the cord is synthetic).
The process of turning an old tire into a flower garden
Turned out like this: step on the inside of the tire, grab the edge with your hands and pull up and towards yourself
It is important to achieve the first result: when at least some part bends. If the tire looks like the photo below, it is already a success.
It is developed by sequentially turning the edge inside out and standing on the already turned out part - so that it does not turn out back.
Dismantling a tire without a rim
Watch the process again in the video. This time, the tire is turned inside out without a wheel (cut, by the way, with a knife).
Even in itself, such a tire turned inside out looks good. If you paint it, it gets even better. If desired, they can be combined - different colors, sizes, differently set: on the bus or on the legs.
Installation options
A high flower bed always looks beautiful. Especially with ampelous plants. It can also be made from tires, and there are several possibilities. In the photo below, there are two ways to secure the trimmed tires at different levels. The first is to use hemp for this, to which the flowerpots are fastened with nails or self-tapping screws. The second is to use reinforcement - three four rods, on which to put on rubber. Having set the tier at the required level, it must be fixed, on metal this can only be done with the help of clamps.
Multi-tiered high tire beds
It is not always possible to put a flowerpot on the ground: some areas are so developed that it is problematic to single out one square meter. For this case, people came up with various hanging flowerpots, and also - from old tires. Only a small part of the whole tire remains, so you have to cut a lot ... be patient. For example, you can make hanging pots in the shape of a dolphin, parrot, rooster and other outlandish birds. See not a photo for a few ideas.
Tire cache-pot - parrot, rooster and dolphin
All these crafts are made from tires. Only a small part of them - the heads - are often made of dense foam. Having cut and polished a part of the desired shape, it is fastened with self-tapping screws smeared with glue (this is a secret, remember), and then paint. How to make a parrot out of a tire, see the video.
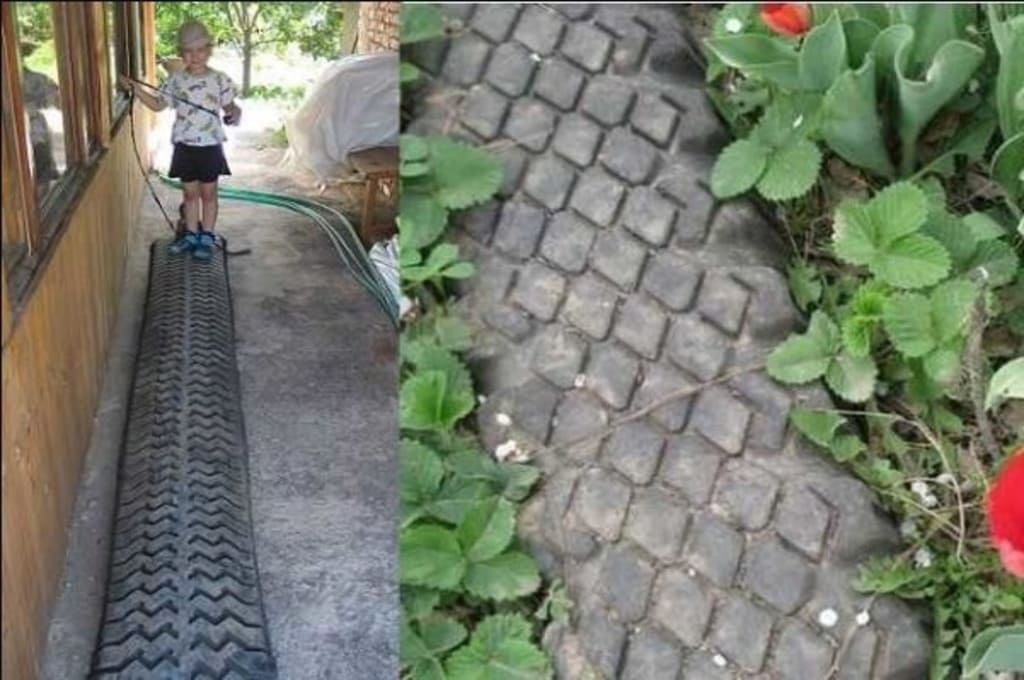
A cut tire can be used to make a garden path that will last for many years.
Advantages and specifics of the material used
The main advantages that distinguish the tile material, created by hand from improvised materials (tires, plastic bottles), include the following:
High strength, reliability and durability. For work, recycled tires are used, which can no longer be used in the construction of a car. It is noteworthy that the design of the tire can withstand significant loads, and the tiles have the same parameters.
Excellent moisture resistance due to some roughness. A self-made surface is both soft and pleasant, capable of quickly absorbing moisture in large quantities.
Maximum level of security. Thanks to the well-developed rough surface, you can easily walk on the paving slabs, both in shoes and without them, without the risk of falling, getting injured
If the fall took place, you do not need to worry, the soft surface will not cause significant damage or even bruises.
Optimal surface care, taking into account that the surface is free of chips and damage, has a high margin of elasticity. If the coating is dirty, just wash it with a hose, wipe it dry
To remove ice, it is enough to use an ordinary shovel, while debris can be removed with a broom.
Ease of laying, for which there is no need to use a set of special tools, as well as various devices, fixtures. Laying of paving slabs can be done even by a non-professional, because the joints are formed quite simply, no cracks form on the surface.
Affordable and favorable cost, the parameter is several times lower than the similar price set for concrete. Do not forget that paving slabs are created from plastic bottles, and even do it yourself, therefore, only available material is used, which is in abundance.
The effect of absorbing noise, which is created due to the unique structure, during use, you will not feel any extraneous sounds. In particular, do-it-yourself paving slabs from plastic bottles, the production of which is now on a grand scale.
The resistance of the material to environmental extremes, which will make it possible to use the product as a cover for paths without problems, regardless of the weather, climatic conditions. In particular, it is possible to operate the product without any problems in conditions of falling rains, hail, and intense temperature drops.
Recycled rubber garden paths

Recycled rubber coverings can be of two types:
- In the form of tiles of various configurations equipped with special connecting grooves.
- In rolls that are simply rolled out on the surface.
Rubber tracks in rolls for summer cottages are more practical, since they do not require complicated laying processes, but if you wish, you can also choose tiles. It looks more impressive, but it also costs a little more.
Advantages of summer cottage rubber tracks

- The softness of the cover that will protect you from serious injury in the event of a fall.
- The durability of the coating, which is not affected by precipitation and temperature extremes.
- Ease of installation that does not require specialist skills or services.
- Relatively low cost of coating compared to many materials.
- A wide variety of colors and shapes of rubber tiles.
- Environmental friendliness. Despite the fact that rubber is a product of oil refining, it is completely harmless to both humans and plants planted in the country.
Disadvantages of summer cottage rubber tracks

- Rubber completely does not allow water to pass through, and after rain puddles can form on the surface.
- Lack of vapor permeability. If the coating is laid on the ground, it will rot. But fishermen can find advantages in this - there will always be a lot of earthworms under the cover.
- Roll paths for summer cottages do not differ in a wide variety of colors.
Laying steps
Arrangement of a garden path is done in 3 stages:
- A trench is being pulled out.
- The gravel-crushed stone cushion and sandy bedding layer are filled in.
- The road surface is being laid.
Trench
Within the limits of the marking, the sod is removed with a shovel, stones are removed, and the roots of trees are dug up. Then a trench with a depth of 0.4-1 meter is pulled out. The soil at the bottom of the trench is carefully compacted.
Preparation of the base
The trench is covered with a layer of rubble 10-15 centimeters high. If a road is being made for the entrance of cars, the layer of crushed stone is increased to 20-50 centimeters. The crushed stone is tamped with a vibrating plate, and sand is poured on top with a layer of 5-10 centimeters and leveled. For better compaction, the sand layer is watered with water. You can lay geofabric at the bottom of the trench, and then pour crushed stone and sand.
At the very end, the excess sand layer is removed with a wooden lath, and the slope level is set.The path is made at a slight angle and slightly raised so that water does not accumulate on it after rain, the earth is not applied.
How to lay the finishing material
Finishing stage - paving. The material is selected depending on the style of the site. Before paving, curbs are installed if necessary. The tile or stone is not laid close, but leaving small (up to 5 millimeters) gaps. Such seams are covered with fine-grained sand. After laying, the slab or stone is tamped with a vibrating plate with a rubber mat in order to smooth out irregularities.
The coating can be laid on a concrete solution. Crushed stone (30 centimeters) is laid at the bottom of the trench, then a layer of sand (10 centimeters), concrete mortar (12 centimeters) is poured on top, tiles or stone are laid on it. When the coating "adheres" to the concrete, the joints are poured with cement mortar.

Paving slabs for covering paths
The main routes of movement in the country should be non-slip, frost-resistant, and have a decorative appearance. Their strength and durability are prerequisites. Paving slabs are an affordable and popular material. It is used wherever hard coating is needed.
Pros of paving slabs:
- durability;
- decorativeness;
- withstands high loads;
- comfortable for movement;
- easy to keep clean.
You can make paths from paving slabs on your own. You will need sand, gravel and tools:
- rammer;
- shovels;
- level;
- pegs and lace;
- mallet hammer (rubber);
- Bulgarian;
- brush (broom).
On a note!
Ideal limestone thickness for garden coverings is 4 cm.
They make markings, take out the soil, level the bottom. A pillow is formed from river coarse sand and crushed stone, borders are installed along the edges. The pillow is rammed, spilled with water. Start laying the tiles. Be sure to leave gaps (seams) 3-6 mm. At the end of the work, they are filled with sand.
Garden walkway made of finished rubber tiles

rubber tiles
Get rubber tiles by hot pressing (heating and gluing rubber). The main components of such a tile are:
- Crumb rubber obtained from crushed tires;
- Coloring matter;
- Polyurethane material for bonding tile components.
A wide range of colors of rubber tiles will allow you to "beat" the territory of the garden plot in an original way. Moreover, it is a pleasure to fasten them! Rubber tiles are attached to each other in a "lock" way using special sleeves.
So, do not rush to throw out old car tires - they will begin their new life at their summer cottage. Make paving slabs out of tires. It is beautiful, easy and absolutely safe for a person to move around the site.
How to stack correctly rubber tile crumbs learn from this video:
Manufacturing and installation of structures made of plastic, bottles
Plastic waste paving slabs
You can also consider the production of tiles from plastic bottles with your own hands, which is simple and affordable.
In particular, there are several key features that should be taken into account:
Production is carried out in a ventilated room, or which can be opened for fresh air
This is relevant even taking into account that the process is positioned as completely environmentally friendly, which allows you to easily ensure a high level of quality and reliability of the coating itself.
At the first stage of do-it-yourself development, the plastic containers are prepared and placed in the extruder equipment, where they are to be crushed. The formed pieces of material are subject to heating with systematic mixing of the components.
After the preparation of the starting material, it is fed to the smelting apparatus, where components such as pre-moistened sand, as well as the dye, are subsequently fed.
Ultimately, a certain viscous mass is obtained, it is this mass that must be poured into the necessary forms, prepared in advance, depending on what the surface of the track should be, its dimensions
After this, the composition is tamped down, for which a press is used.
After the composition is prepared, it is given the necessary time to cool down, after which the form is considered ready for installation. It is noteworthy that the finished structure is practically no different from ordinary concrete or cement compositions, taking into account that the production, in principle, does not differ in anything special. In addition, the finished material can have fundamentally different shapes, colors, sizes and textures.
Country paths made of rubber tiles
This is a completely different level of rubber summer cottages. With modular rubber tiles, the site looks expensive and well maintained.
The cover is created from recycled old tires. The module consists of a crumb rubber mixed with a colored pigment and a polyurethane binder.
You can lay the tiles yourself. The main thing is to make the correct preliminary measurements, paint the length and width of the planned track, and then decide on the location and the required number of tiles.
- Shock absorbing - a thick lower layer of unpainted rubber crumb of a coarse fraction.
- The top is a thin colored layer of crumb rubber.
Thinner tiles (with a thickness of up to 2 cm) are best laid out on a dense surface so that irregularities do not form. For example, fill the area on which the track is planned with cement, and collect the elements on top of it.
If you have tools, you can recycle unneeded tires into crumbs yourself. If you are wondering how to do this, read the article.

