Types of garden bridges by shape and purpose
Before you start sketching, you need to consider the maximum number of bridge shapes. This will greatly facilitate the procedure for choosing the appropriate option for a particular site. This can be done both in the office of a landscape designer, and independently, using the Internet or specialized literature.
Did you know? In India, bridges have been used for a long time, the bases of which have grown in a natural way. Usually these are trees that themselves connect the two banks of the reservoir.
Experienced craftsmen recommend initially photographing the place where the structure will be mounted. Then the photo is printed in large format. They put on it templates made of paper and see which one will harmoniously fit into the surrounding landscape.
All garden bridges can be divided into several varieties:
- Straight. The human hand can create it without much effort. They are suitable for almost any style and serve more as a decorative function than a platform for constant walking.
- Suspension. This is one of the most complex, but also beautiful forms of bridges. An important stage in creating a structure is compliance with safety rules, since an incorrectly selected angle of attachment can unbalance it. Most often they are placed over large and medium-sized ponds or rivers, if such flow through the site.
- Zigzag. It is believed that such designs are able to protect the wearer from evil spirits. This superstition came to us from Asia, like the very shape of the bridge. In modern landscape design, they look original and unusual.
- Stepped. In most cases, these are two stairs from different sides. Between them, depending on the size, a large or small platform will be installed.
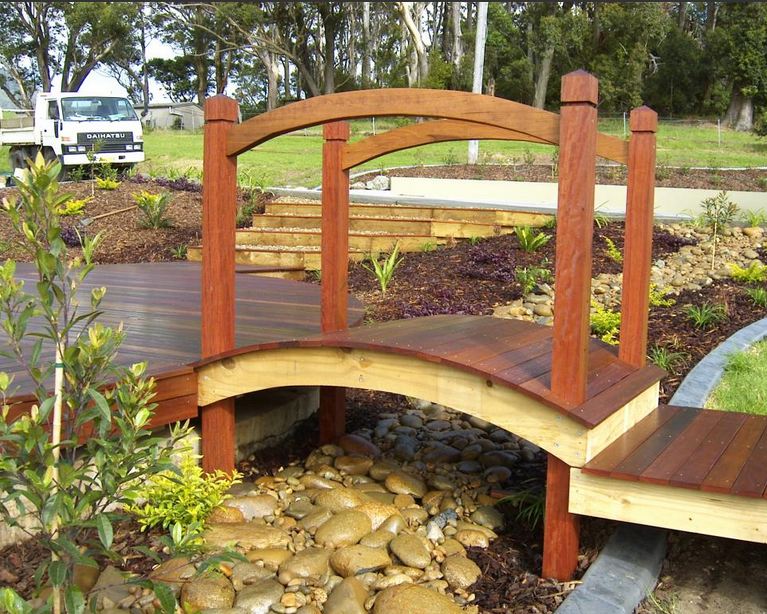
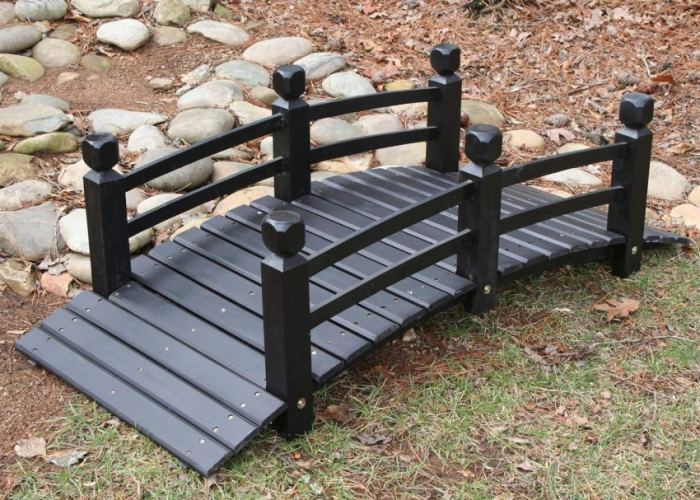
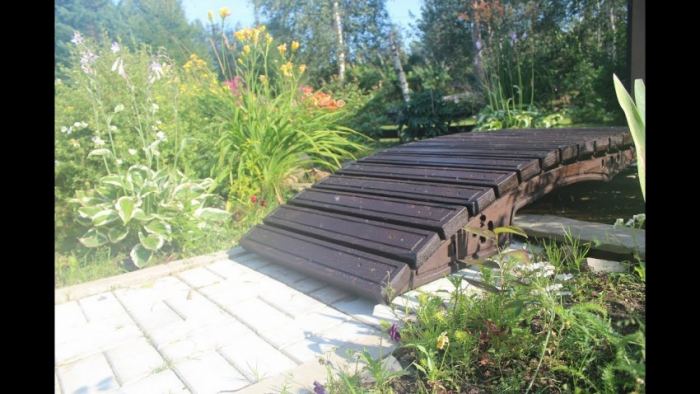
- Arched. This is a very common, upward curved shape of bridges. They can decorate almost any site. In landscape design, they are used in any style.
- Step by step. This structure, made up of discrete elements - such as large flat stones - is ideal for mounting over small streams or artificial reservoirs. It can also connect the banks of a dry riverbed, playing a decorative role rather than a functional one.
The purpose of each of the above structures is the same: a bridge is the safest way to overcome a water obstacle. In landscape design, it also plays the role of a design element. You can walk on such a product in your free time, enjoying the fresh air and beautiful views.
Types of materials and structures

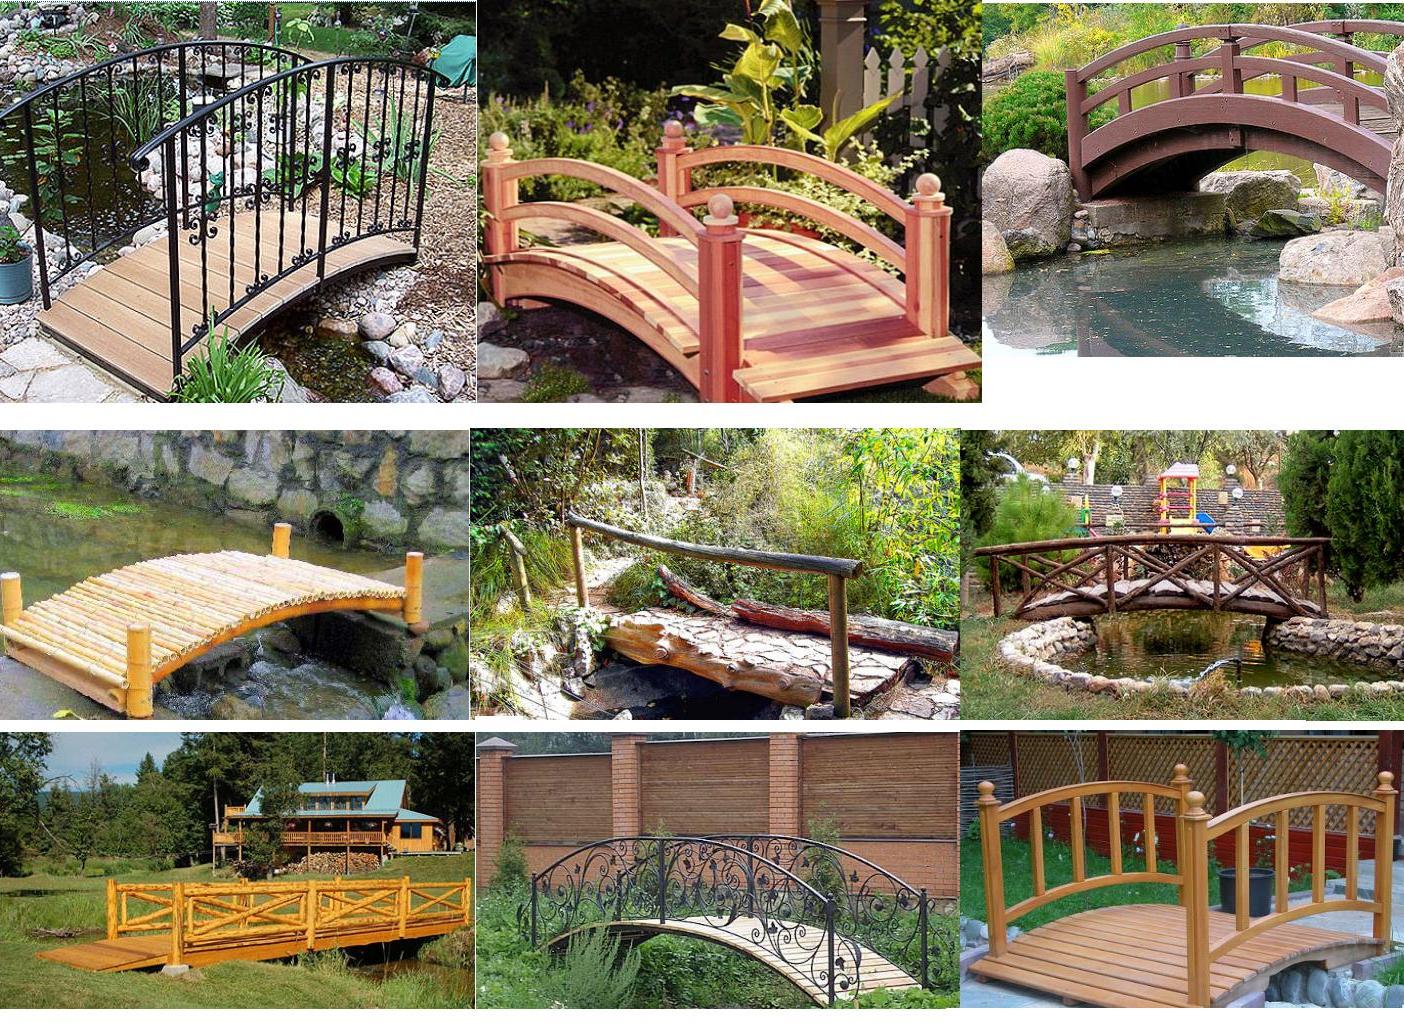
Bridges crafted from different materials
To determine which bridge will most harmoniously merge into the design of the site, one should understand its functional features and location. After all, he can simply play the role of decoration or level the unevenness of the site, connect different parts of the garden. Decorative bridges in landscape design are appropriate regardless of the size of the territory, but nevertheless, care should be taken that the amount of vegetation near the structure is normalized. Otherwise, all aesthetics are lost.
A bridge across a dry stream or an artificial reservoir is made of such types of material as wood, stone, concrete, metal, a combination of several of the above types of raw materials.
The most relevant is a decorative wooden bridge in the country house due to the affordability of the price of the material, durability and ease of work with shades that are matched to the already installed pools, houses, gazebos.A metal bridge over a pond is usually bought already assembled, but if you have the necessary tools and blanks, you can also assemble it yourself, bringing an element of novelty to the landscape. Forged bridges with imitation of floral ornaments look elegant and give the garden a certain aristocracy, but they cost much more than from other types of material.

Decorative bridges made of wood
Concrete and stone bridges are quite laconically combined with any style of the site, but they will require a lot of effort and money to install. In addition, you will have to spend money on concrete structures and on finishing so that they do not look like a building blank.
Classification of decorative garden bridges

Straight, arched and stepped bridges
By the type of configuration, garden bridges are:
- Straight. The easiest way to add color to your garden design. They may not even have a handrail.
- Arched or Japanese. A bend of 15-20 cm gives the structure a greater decorative effect without losing its functionality (the possibility of using it for crossing water bodies).
- Stepped. It is assumed that there are steps on one or both sides, and a unifying platform is located in the middle. Steps on only one of the sides are used when the area is uneven.
- Step by step. Perfectly decorate dry streams and shallow bodies of water. They are made of smooth stones.
- Asymmetric. There is a wide field for imagination. The bridge can be zigzag from flat boards or arched structures. It is also widespread in the East and is quite suitable for a garden with boulder stones, pebbles and other decor.
- Suspended. The most difficult type of bridges due to safety requirements. In the presence of children or the elderly, it is better to refrain from such a choice.
For clarity, when choosing a material and type of construction, it is better to draw a sketch with placement in space, both of the bridge itself, and of vegetation and other architectural forms. Now you can draw a drawing and decide which garden bridges with your own hands will be easier and more acceptable to build even through special 3D programs on a computer.
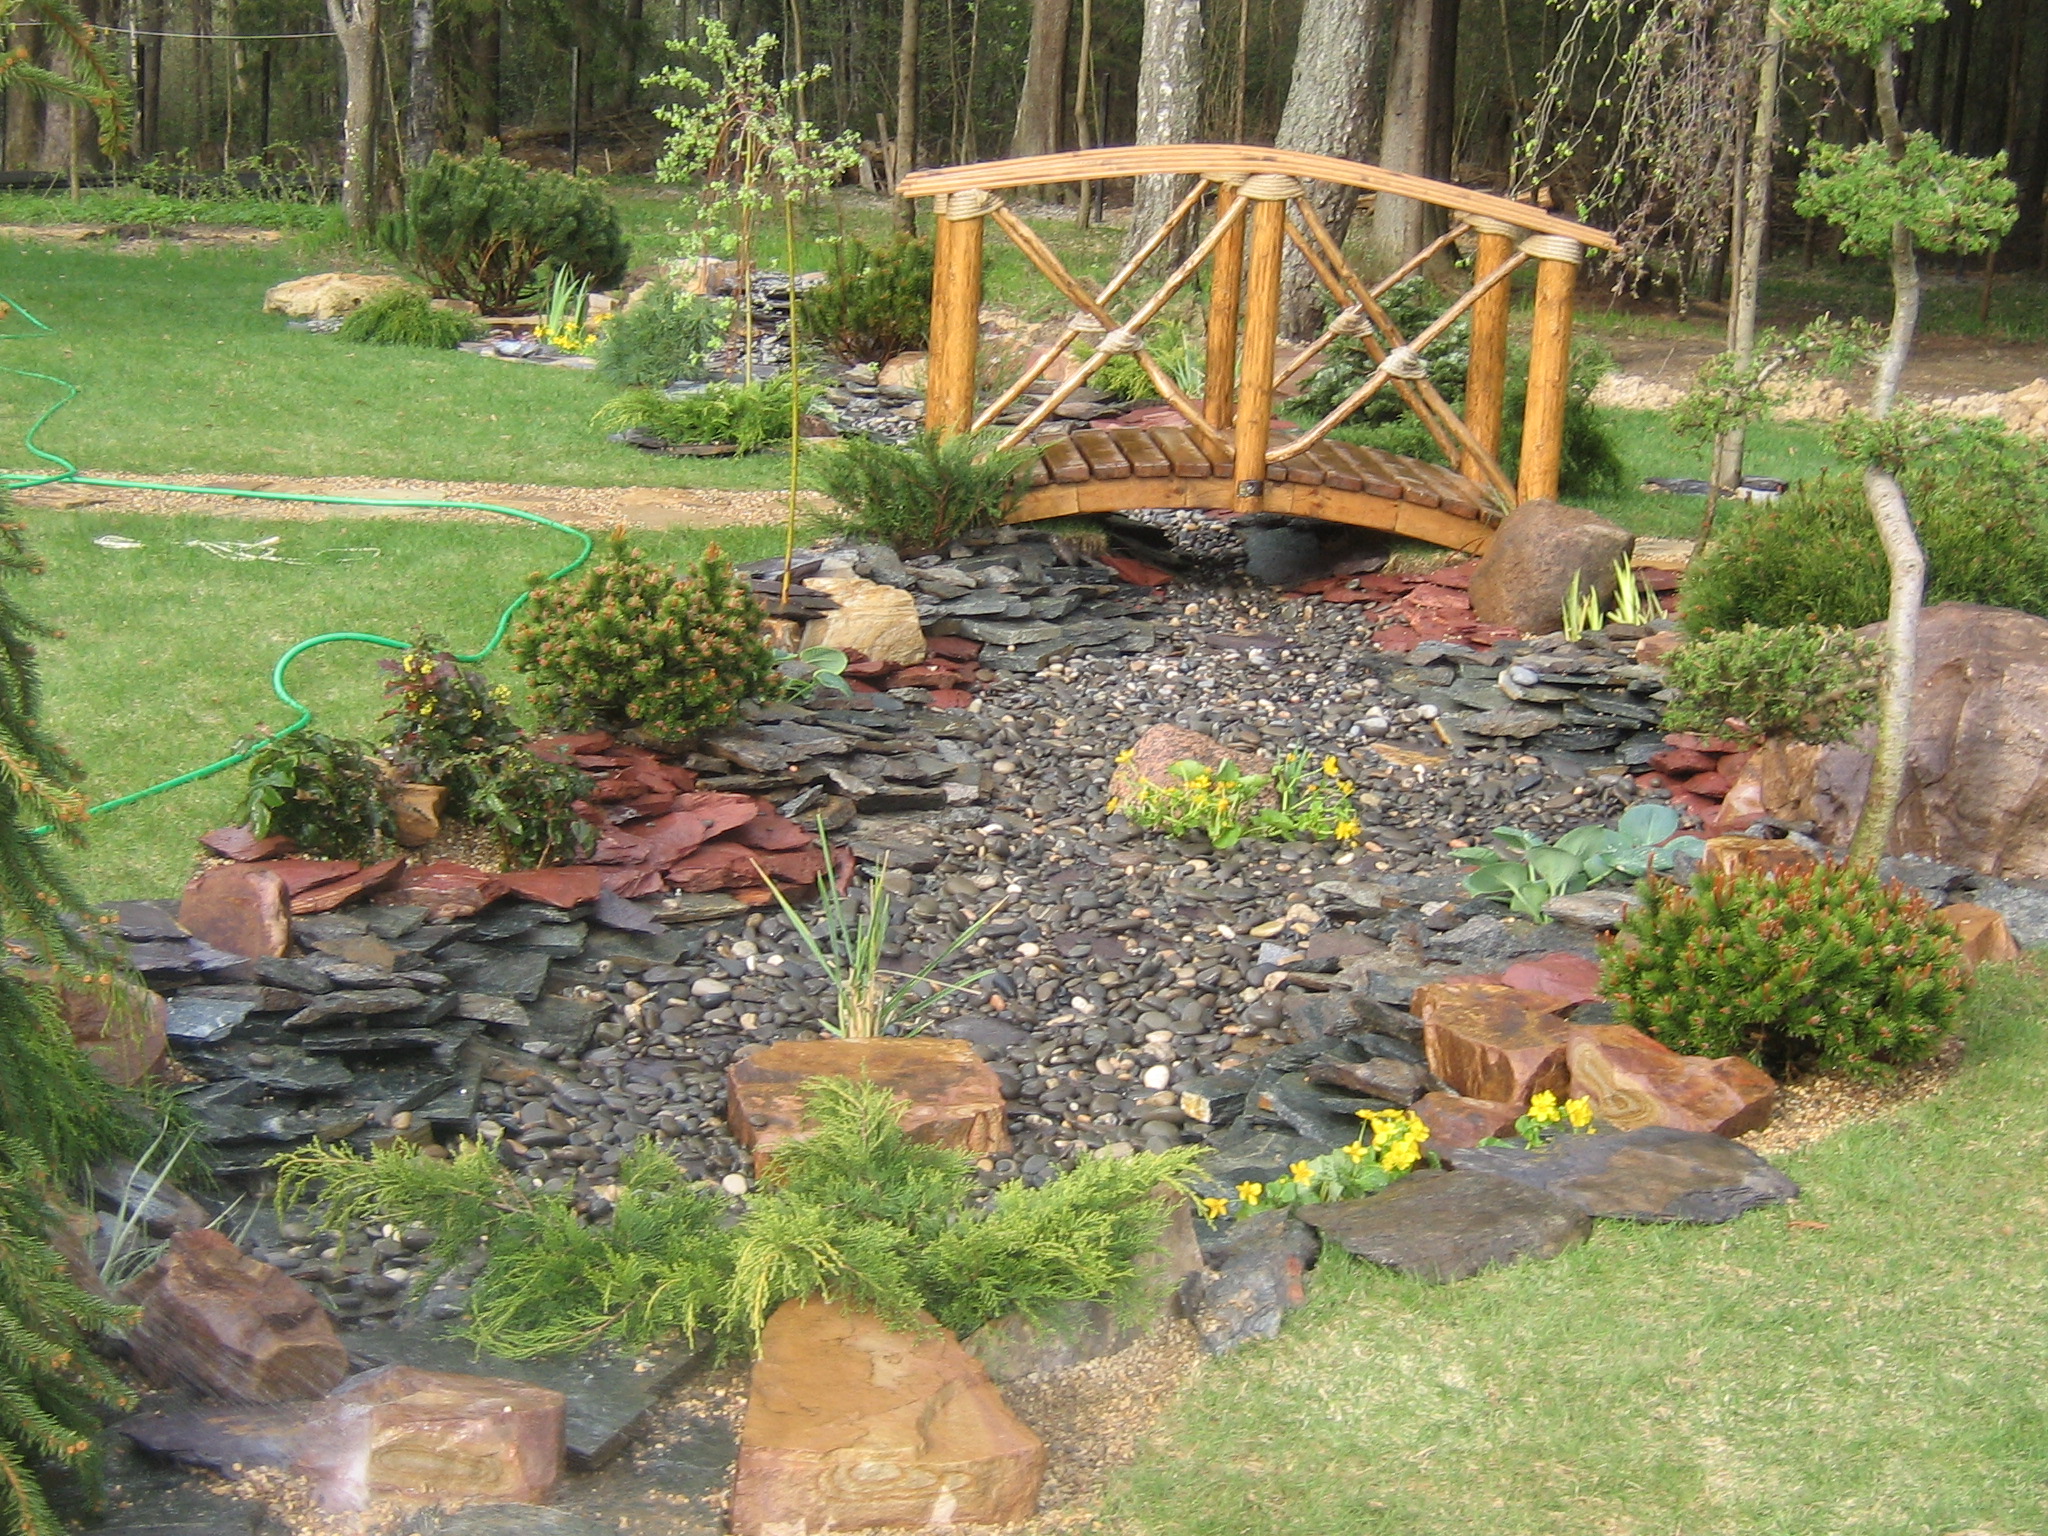
Bridges over the "dry reservoir"
Even on the so-called "dry stream" he will revive the entire site, especially children will be glad to him. And it will make an indelible impression on the whole family and friends. Let us present to the attention of the same lovers of novelty of photo bridges for summer cottages.
The creation of "dry arteries" on the site is considered a unique technique that allows you to decorate the local area if it is impossible to organize a full-fledged reservoir. Such landscape elements represent water and are made using natural materials, for example, pebbles, plants and others.
If there is a desire to create a "dry reservoir", then first you need to limit its channel, remove the top layer of soil. After that, the place is covered with a film, covered with sand and the material that will imitate water.

Wrought-iron or wooden bridges in the garden, which are decorated with climbing plants, look amazingly fabulous. They become a real masterpiece and a highlight of any, even a small area.
Bridges over "dry streams" are distinguished by their high indicators of functionality. If the garden does not have a full-fledged reservoir, they are arranged in those places where there is a difference in surface height. And for greater decorativeness, all this is complemented by a stream made of some kind of loose material or flowers. It can even be just stones laid out neatly in the form of a channel.
Pier on car tires
The berth, located on supports made of car tires, is a durable structure, the construction of which does not require labor-intensive operations for screwing or driving metal piles.
Gorodets60
FORUMHOUSE user
I have had a berth with supports made of truck tires for 8 years. The wheels were fixed between themselves with stainless bolts with wide washers.Sand was poured inside, since it fills all the cavities inside the tires, and the structure becomes monumental. A year later, I added sand, because over time, it is tamped and washed out.
And here is the structure of the berth built by the user Alextr61
after considering all possible options.
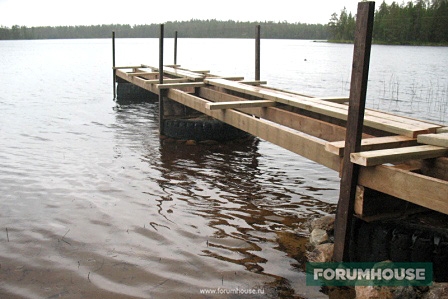

It is based on heavy tires from a 40-ton BelAZ car. The author of the construction additionally secured the already massive tires with galvanized pipes and overlaid with stones. This is the kind of pier he ended up with.

4.2. Work plan
The very process of arranging paths made of wood is easy and is carried out according to the following plan:

- Special markings are made (with the help of wooden pegs) at the place where the laying of the future track is planned (the width is not more than half to one meter);
- After that, a layer of sod is removed, with a thickness depending on the type of material from which the tracks are made. The trench should be no more than 20-40 centimeters deep, and the coating should be about 2 cm above the entire surface, including taking into account the backfill;

- In order to further protect the wood from dampness and mold, the growth of weeds, a polyethylene film is covered at the bottom of the ditch. For the pillow, gravel and sand are laid, the resulting mixture is compacted with a rammer;
- A concrete or metal curb is mounted along the edges of the trench;
- Next, coverings are laid from cuts of logs, garden parquet or timber, boards. The material is pre-cut into pieces of the desired size and length. The entire surface is carefully processed with an electric plane and covered with an antiseptic and impregnation;
- Lumber is laid taking into account a previously thought out (in layers - with gaps or solid) scheme. The distance between the bars, boards should not exceed 5–8 cm;
- Finally, using a mallet, the laid materials are leveled. According to the level, it is necessary to constantly measure the horizontal surface of the wooden paths;
- The culmination stage is considered to be filling the gaps with bulk materials, gravel or pebbles with sand.

Proper care will significantly extend the service life, including:
In the spring-autumn period, the wooden surface is cleaned using a metal brush;

In addition, you need to clean up the garbage during the time, do not forget to renew the layer of the previously applied antiseptic or other protective agent;
It is very important when installing paths to keep the remnants of lumber, which may be required to replace unusable elements.
Wooden structures are capable of ennobling the landscape design on any personal plot and dacha.
Do-it-yourself paths are a relatively budget option that any summer resident can afford. They are easy to install, and it does not take much time to make the coating, expensive building materials and complex professional tools are not needed.
Style features
Landscaping bridges should have an unusual shape. The most popular designs are in the Japanese style, traditionally Russian or avant-garde.
Japanese
A Japanese-style bridge will look foreign in the garden landscape if the accompanying elements are not recreated. In the Japanese garden landscape, the composition is respected: a bridge and a reservoir (pond, waterfall, stream).
It can be made curved in the form of two half-arcs over a stream or dry bed. Material for making bridges is wood or stone. The peculiarity of Japanese design is the absence of pretentious details, simplicity and severity of lines, the predominance of one color scheme.
Rustic
Rustic footbridge means straight wood flooring with or without roughing steps. Dried tree trunks can serve as railings.
Vanguard
The most decorative forms of bridges.
Several types of materials are used in their manufacture:
- forged metal and wood;
- forged metal and stone;
- concrete, wood, forged metal.
Picturesque arched structures prevail.
Features of the structure
Seat selection
Of course, this device is necessary for crossing a narrow river or stream, but you can always install a bridge in a place where there is no reservoir by organizing a dry stream, a pretty rocky placer, a small canal or even flower beds with wildflowers. Therefore, choosing a location is very easy.
Preparation before installation
All that needs to be done at this stage is to remove all unnecessary from the site and prepare the ground for the installation and decorative decoration of the bridge along the edges. Of course, for a heavy bridge you will need some kind of foundation or even fixing it on the banks of the stream, for decoration - stones and plants, for stylization - lamps and other decor, which means that the site should be clean, without debris and weeds.
Foundation or platform under the base
Most bridges are installed without foundations, but we recommend that you pour a solid foundation if it is heavy, large and made of metal or forged. For this, a strip foundation is sufficient, which will be tied to the metal edges by welding, at the same time securing the bridge and making it more reliable and stable. If you are installing a bridge several meters in length, then it will be enough to put a couple of bars under its supporting bases, along each edge of the bridge, so that the base does not go into the soil and does not deteriorate very quickly from moisture. Instead of bars, you can use concrete posts, bricks, or best of all, natural stone.

Foundation creation
As we said above, you compose the project yourself, which means that the entire choice of materials is up to you. Wood, metal, and maybe concrete pouring with masonry. But, we will start from a simple one - metal beams, boards, beams or logs. The design of the bridge can be flat or curved, which means that you will need to choose the material accordingly. If there is nowhere to buy material for the base of the garden bridge, or it is expensive, you can install two logs, in the form of load-bearing beams, or make stringers. They can be made from a solid board, for example 50x300 mm, setting it in the correct shape along the length and arranging a kosour by folding the finished cut parts. But, if all this is not possible or there is simply no time, it is enough to make an even bridge with the help of logs or bars.
Installing the base
The base is installed on prepared carriers - foundations or support platforms made of wood, stone, and so on. Everything here is very simple - leveling, fixing, connecting the bases to each other at an equal width and checking the strength, then, only the flooring of the bridge itself.
Wood flooring
We decided to choose a board as a flooring, since we are talking about the simplest version, and it is always convenient and even pleasant to work with wood. The board is cut to size and laid on the bases, screwed onto stainless self-tapping screws, which is the most practical. Also, you can choose a decorative flooring, a special board or even a log, but here it is already worth starting from the budget.

Bridge construction
In order for the decorative bridge to serve for a long time, it must be erected with high quality, observing a certain sequence:
- Draining the reservoir, if possible;
- Preparation of concrete supports, which serve as a kind of foundation and are located on both "banks" of one reservoir.
- Laying the span with beams on supports strictly in level relative to each other and the ground surface;
- Decorating the span with a boardwalk or decorative stones (in the latter case, the supporting base must be metal);
- Installation of handrails.

If the structure is wooden, it can be painted
In this case, it is very important to be guided by the shape, thickness, height of the same railings.

If they are straight, thick and low, then the design is characteristic of Asian culture. The red color even transfers to the Land of the Rising Sun.

Forging, lathing, racks with Easter rounds - all this is welcomed by traditional Europe. The color is very different - from light birch to stained oak.

There is another way to erect a bridge - deepening two pairs of piles to pull the rope, on which the boardwalk will be located.
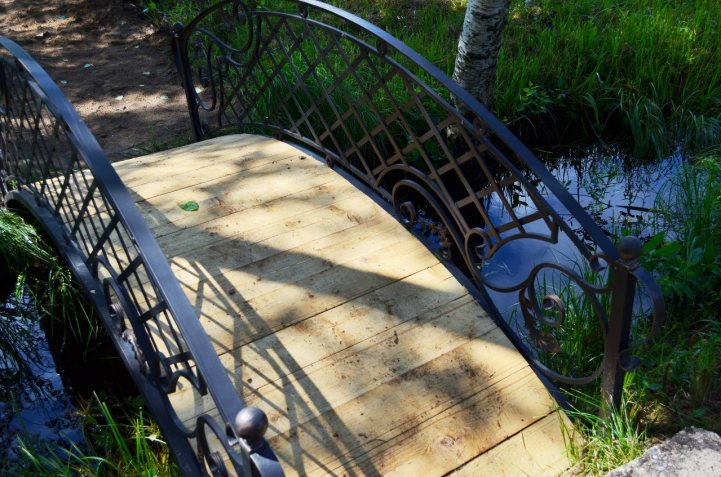

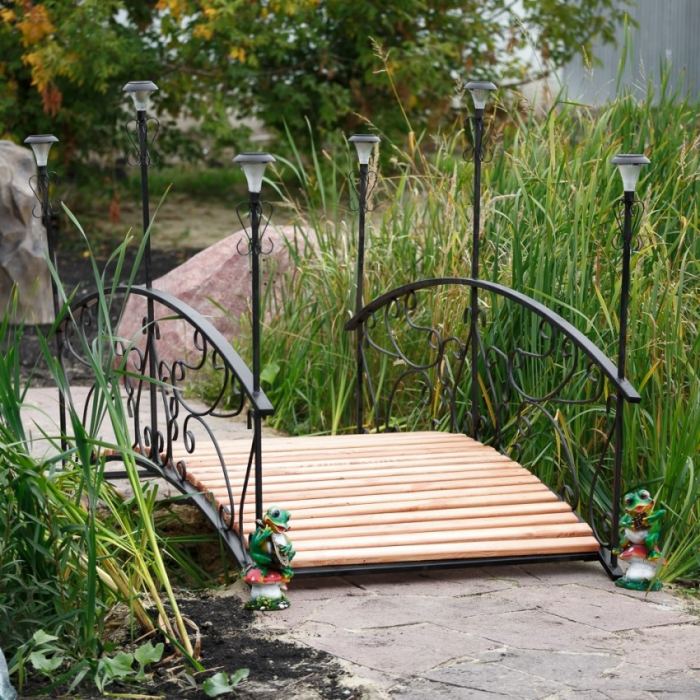
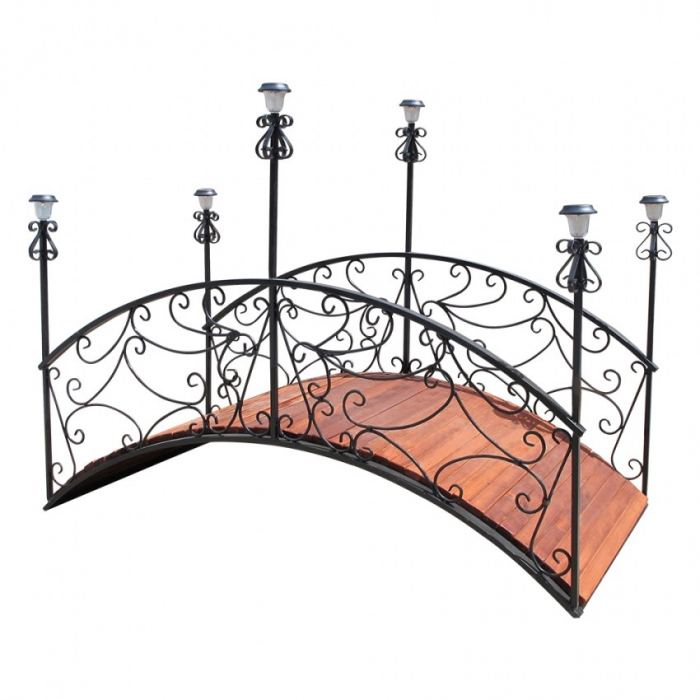
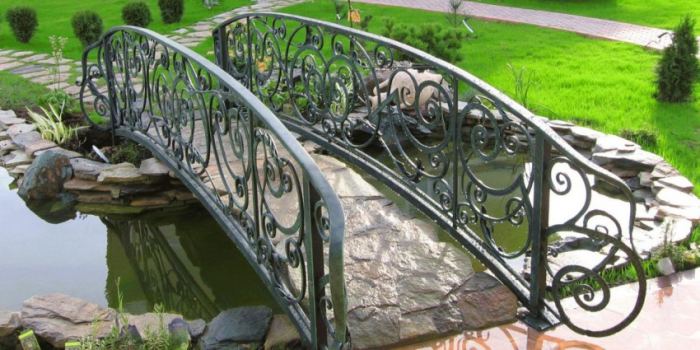
Photo of a decorative bridge for a summer residence









We also recommend viewing:
- Garden fountains for summer cottages
- DIY decorative flower beds
- Garden decor
- How to make a scarecrow for the garden
- Roof vane
- DIY garden fencing
- Colored decorative chips
- How to make a bench with your own hands
- Crafts for giving
- Garden stones
- How to make a mailbox with your own hands
- Bird feeders
- DIY tire crafts
- Crafts from plastic bottles with your own hands
- DIY plastic bottle flower bed
- How to make a planter for the garden
- Decorative border
- How to make a sun lounger with your own hands
- DIY hammock
- Dry stream with your own hands
- Do-it-yourself pond in the country
- House for a well with your own hands
- Country washbasin with your own hands
- How to make a brick flower bed with your own hands
- How to make a waterfall on the site
- Sculptures for the garden
- DIY children's slide
- DIY sandbox
- Decorative gnomes on the site
- Washstand for giving
- DIY decorative fence
- How to breed fish in a pond
- DIY nest of branches
- DIY figurines for the garden
- DIY garden swing
- Children's swing for home
- Illumination of the facade of a country house
- Garden Decorations
- Contemporary garden furniture
Belyasiny
To make a handrail for a makeshift bridge, you can buy whitewash at a hardware store or come up with a replacement for them, such as wooden blocks. In the case of using ordinary wooden blocks as whitewash, their aesthetics can be improved with a round file. This can be done as follows:
We measure equal distances from the upper parts of the boards (20-30 cm), and then mark with a pencil the enveloping lines that will go to the bottom of the boards. Then, exactly along these lines, you need to cut out shallow grooves with a semicircular or round file. The distance from line to line should be taken 1-2 cm. Twenty lines will be quite enough to guide the marafet - this is a laborious and patient process. The file may sometimes need to be cleaned with a dry brush. After completing the sawing of the grooves, this work will be completed.
After the whites are ready for installation, take a protractor and mark with a pencil on the bases of the place for their installation. We drill holes for nails / screws from the bottom and use them to drive in / screw the whites into the base. It must be said that previously the excess parts of the whitewash, which will be installed in the center of the bridge, must first be measured and cut off under the "bottom" of the bridge.
Varieties of designs
The installation of a bridge on the site has not only an aesthetic, but also a practical function. Bridges are installed where it is necessary to step over something or bypass an obstacle. Among the various types of designs, the following can be distinguished:
- Wooden;
- Bamboo;
- Stone;
- Metallic;
- Concrete.

These are the most used materials in the construction of vertical structures and elevations. They are commercially available, so it will not be difficult to construct a bridge with their help.
Also, bridges are divided into those that can be walked on, and those that carry only a decorative load. Decorative options are usually small. They are made in those places where you want to diversify the monotonous landscape as much as possible with boring accents.
Wooden
Wood products fit naturally into any landscape. They harmoniously complement the space around, making the appearance of the site even more interesting. The advantages of wooden structures include such aspects as:
- Ease of preparation and assembly;
- Eco-friendly material;
- Ease of construction;
- Long service life;
- Ample opportunities for decoration.

The most common wood for such bridges is pine. More expensive options are made from oak, ash and cedar. The wooden bridge can be painted in any color. Its shape can be made more sloping or flat. And the repair of such a bridge will be inexpensive.
Bamboo
Bamboo designs look delicate and delicate. They fit perfectly into the landscaping of the garden and outdoor area. If there is an eastern corner at the dacha, then the bamboo version of the bridge will come in handy.
A Japanese-style plot simply won't look finished if it doesn't have a bamboo bridge. Lightweight and airy, the material is strong enough to withstand long-term use. And its appearance reminds of the beauty of oriental gardens and parks.
Stone
Stone options are considered one of the most durable. They fit perfectly into the European landscape style. They look solid and presentable. Such bridges combine well with other stone structures on the site.

The simplest version of a stone bridge is the location of boulders over a stream or pond. Antique landscaping will require more subtle work. Therefore, you can use marble or granite here. And the structure itself can be erected using publicly available drawings and cement.
Metallic
Metal bridges will decorate the area in the Gothic style. They are also suitable for the Art Nouveau style. And forged options are perfectly combined with romantic notes in the landscape of the site.

Metal structures can be bought in a specialized store, or you can weld yourself. Such a bridge has a long service life. Not afraid of serious temperature changes. Can be easily combined with other materials.

Metal for creating a bridge is suitable for those who do not like change. The material is able to stand on the site for a decade. And changing its shape is quite difficult. Therefore, metal bridges will appeal to true conservatives.
Concrete
Concrete products are among the most durable decorative items. Fountains and artificial water reservoirs are installed next to them to highlight the beauty of the concrete bridges. To make such a bridge high, you need to build metal reinforcement into its structure. Low variants can be created from solid concrete blocks.
Concrete bridges have not only a decorative function, they can safely walk and transport a trolley with tools. A properly designed bridge is capable of withstanding significant loads.
How to choose material for a garden bridge
The decorative bridge should serve more than one season
The selection of material for its manufacture must be given special attention.

Piles
Piles are necessary to give stability to the structure. For this purpose, they are deepened into the ground by 30-80 centimeters, depending on the length and width of the bridge span. The most suitable tree for piles is pine. She has an even trunk, good resistance to moisture, wood pliable for processing. Building material needs antiseptic treatment against decay, bark beetles, creating a protective film. Bituminous impregnation solves these problems, making the piles durable.
If the bridge is to be installed in places subject to waterlogging during prolonged rains, then the piles are made in bulk from a cement-sand mixture with reinforcement.
Flooring
Decking boards must be at least 30 millimeters in size. For these purposes, waterproof wood without knots is used: aspen, pine. Boards can be laid with a gap for water drainage or end-to-end, in a solid mass. As a flooring, a longitudinal cut of logs with a diameter of 10-15 centimeters, laid in a row, is used. Polished stone ranging in size from 7 to 12 centimeters is also used for laying on a span.
For processing
The railings are made from soft wood such as linden.Pine and birch lend themselves well to grinding. The wood of these species does not chip, withstands bending.
Application of concrete
Concrete structures are durable, their surface can be decorated with stone, metal. Concrete can be used for bridge base and decking.
Use of metal
Metal bridges are welded forged structures. Use a steel bar and strip with a thickness of 3 millimeters, depending on the purpose.
Variants of using metal in bridges:
- base, flooring, railings;
- flooring, railings;
- railings.

The metal has the best decorative properties. The arch of the bridge can be of any radius. The patterns of forged railings are unattainable for wood and stone. Metal products are durable and require minimal maintenance if they are rust-free and painted. Before making the bridge, a sketch is created, then a drawing with dimensions, according to which the metal is cut and welded.
For stone construction
The stone for the bridges is used in a large size with a smooth side. Lay it on a bed of wood or concrete. For the solidity of the coating, the gaps between the stones are poured with a liquid cement mixture. A stone bridge can be straight, arched.
Do-it-yourself pontoon. Design advantages
Why do we give preference to pontoon structures when we build a dock with our own hands:
- simplicity of design;
- low weight of the main elements;
- the level of the pontoon pier in any weather conditions and at any time of the year will correspond to the water level in the reservoir (that is, the builder who creates such a berth will not have to puzzle over the following questions: what should be the height of the supporting piles, and at what level should they be strapping);
- the ability to quickly dismantle the structure and move it to another suitable place;
- long service life;
- 100% protection from spring ice drift (if the pontoon pier is disassembled and all its elements are hidden in the back room, then neither winter cold nor spring flood will threaten it with destruction).
salix
FORUMHOUSE user
There is only one hassle from the piles. Use empty plastic bottles. We have had such a raft for about 5 years already. In the fall we take it to the shore. It is easy to build, and the structure will not be carried away into the ice drift.
In addition, if you are equipping a pier on the shore of a public reservoir (pond, river, etc.), local authorities may not like the appearance of such an object. In this case, dismantling the berth will take you a few hours.
User salix
proposes to build a wooden pier based on plastic bottles. On the one hand, the aesthetics of the design in this case can be questioned, but on the other hand, for this, the master needs ingenuity! A little imagination, several hundred plastic bottles, boards for creating a frame and top flooring - all this will help to quickly create an elegant structure that can be stably based on the surface of the water surface of the pond.
Bottles can be tied with metal mesh.

Or you can pack them in polypropylene bags, as shown in the photo.

The option with bags looks more practical, because in this case, you can fasten all the structural elements using an ordinary rope.
To make the bottles more convenient to tie together with ropes, you should choose products not with smooth, but with embossed walls.

Consider the following option for a pontoon berth: a pier based on metal or plastic barrels.
To create such a design, you will need several barrels with a volume of 200 liters. The lids on the drums should be sealed tightly. The resulting "floats" are connected to each other using a wooden frame, and the pier is attached to the shore by means of special jibs.
hishouse
FORUMHOUSE user
A pier with a size of 3x3 m was made. For such dimensions, 6 barrels are enough (3 rows, two barrels in a row). A light wooden flooring made of 40 mm planks was laid on top.We welded the barrels together with a 50x50 corner, which also included boards. Also, jibs were attached to the corner that they go to the shore.
The pontoon pier, no matter what it is based on (barrels, sealed plastic pipes or plastic bottles), is connected to the shore using movable jibs. The edge of the jibs, which is connected to the pontoon, must rise or fall in accordance with the change in the water level in the reservoir. The pontoon will not bend over. You can fasten the barrels together in various ways. In this, again, your own ingenuity will help you.
 Do-it-yourself barrel pier. Photo.
Sergey26
FORUMHOUSE user
Thick-walled barrels are needed. The ears were boiled with a semiautomatic device for fastening them. The wooden beams were covered with antiseptic. You can also use thin-walled barrels, or you can weld a platform with barrels under the barrels or use clamps from a strip to which the corners can be welded (see photo).

To prevent the floating pier from being carried to the side by the current, it should be fixed with an anchor.
Alabaev
FORUMHOUSE user
My neighbors made a pier with 6 iron barrels welded together. There is a platform on top. Entry to the pier - along the ladder, the pier itself is moored to the shore and pulled at anchor.
And here is an example of a pier made of plastic pipes.


