How to work with polycarbonate: general recommendations
One of the most popular materials today is polycarbonate. During construction, it is used for cladding and insulation of various structures. How to work with polycarbonate: general recommendations can be found in our material.

Working with polycarbonate
Polycarbonate owes its popularity to many of its advantages. These include relatively low weight, high strength, reduced flammability, no emission of harmful vapors, excellent thermal insulation and thermal conductivity, excellent light transmission, resistance to bending and tearing, and it also perfectly insulates against noise.
Styling tips
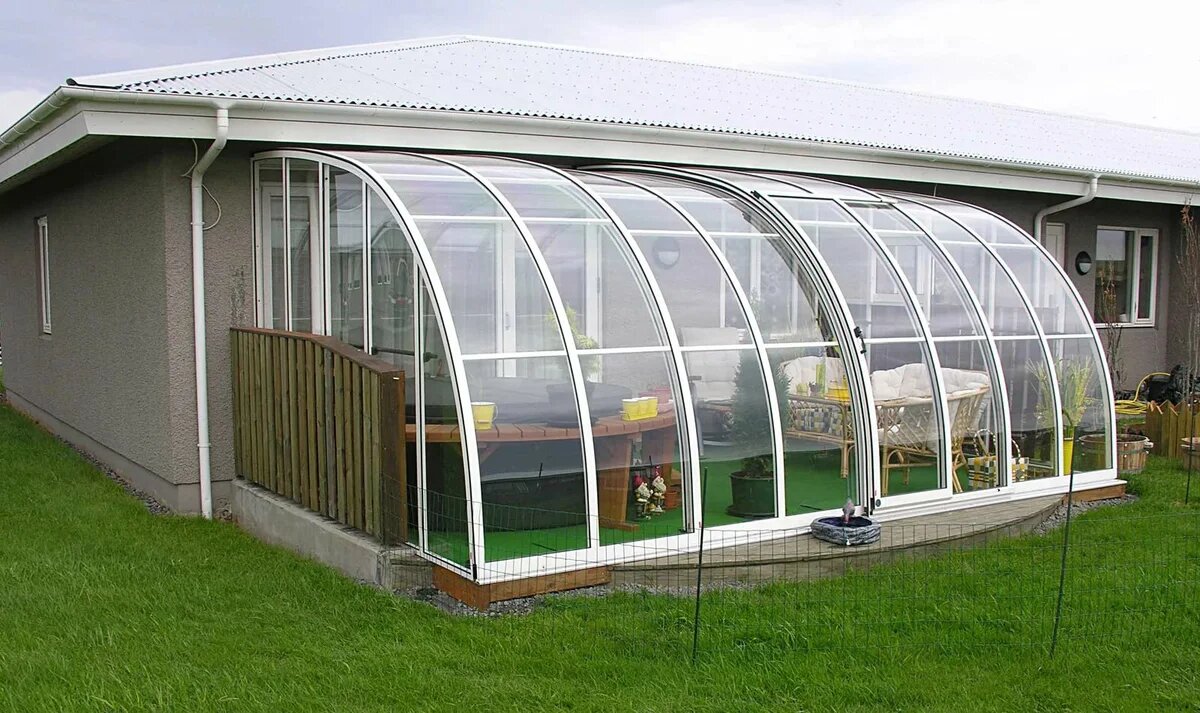
Polycarbonate can be laid on both flat and curved surfaces. In both cases, the installation process and the conditions to be followed are almost identical.
It is important to remember that despite the fact that polycarbonate is a fairly plastic material, the flexibility of the sheet still has its limits, so you should be very careful not to get a crack;

When laying economy-class polycarbonate, it does not matter which side is outside and which side is inside the structure, since the ingredients responsible for protection from UV rays are evenly distributed throughout the thickness of the material. In more expensive versions of polycarbonate on one of the sides there is a colored or printed film
It is this side that should be outside and directed towards the sun. The film itself should be removed after installation;
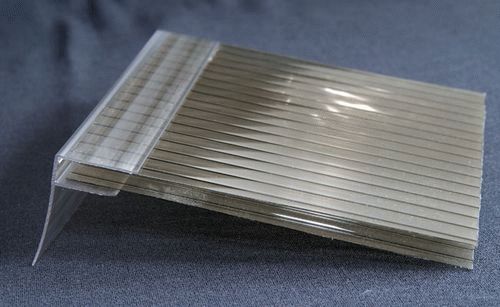
Most often, polycarbonate is laid on a wooden or metal structure. Moreover, it should be borne in mind that a certain proportion must be observed between the thickness of the sheet and between the battens. For example, if you work with a sheet with a thickness of 4 mm, then a mandatory distance of no more than 40 cm must be observed between it and the lathing rods, with a sheet thickness of 6 mm, it is 60 cm.If you do not adhere to these rules, then the structure can suffer badly.
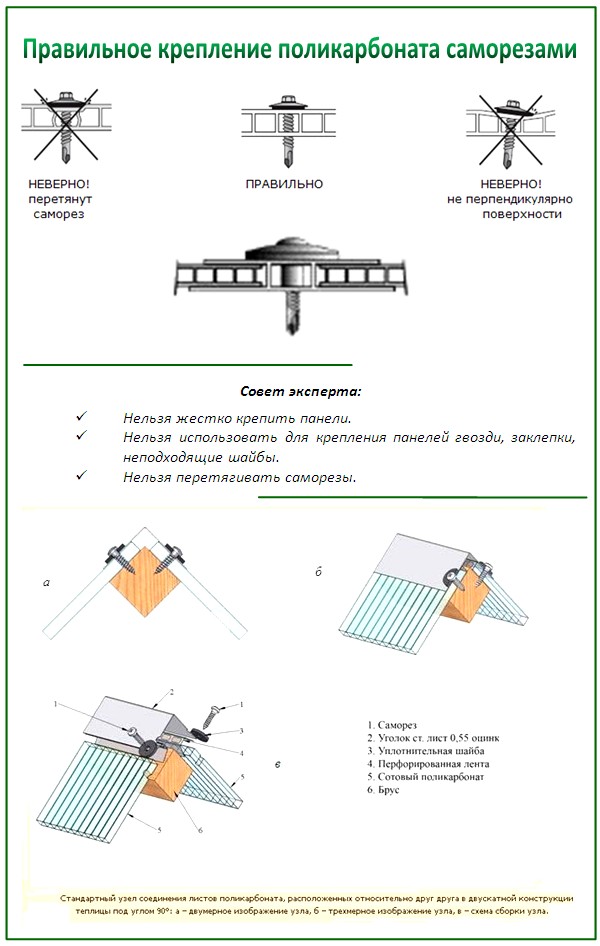
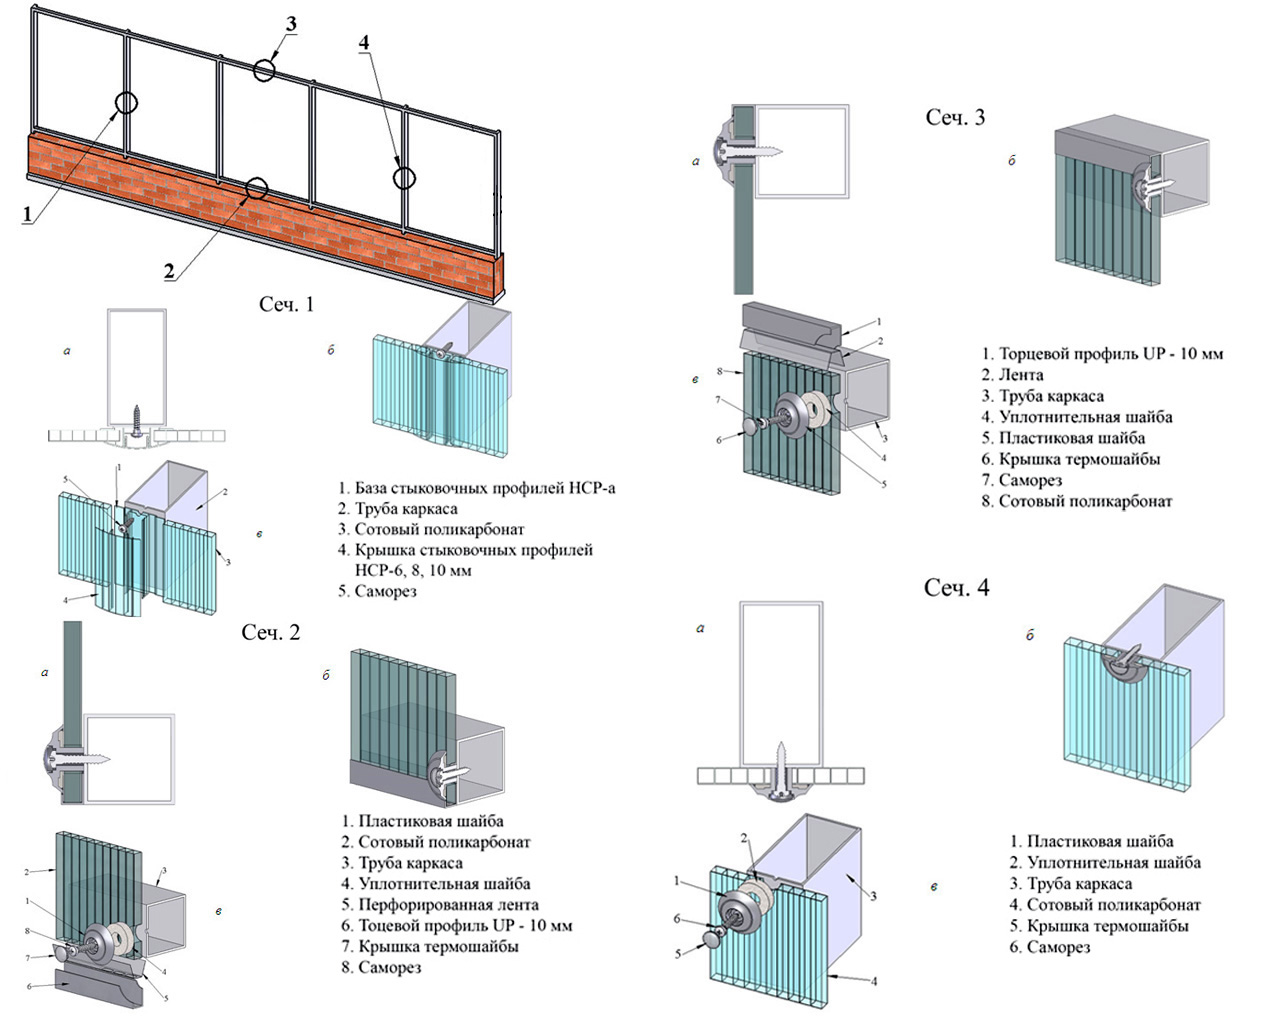
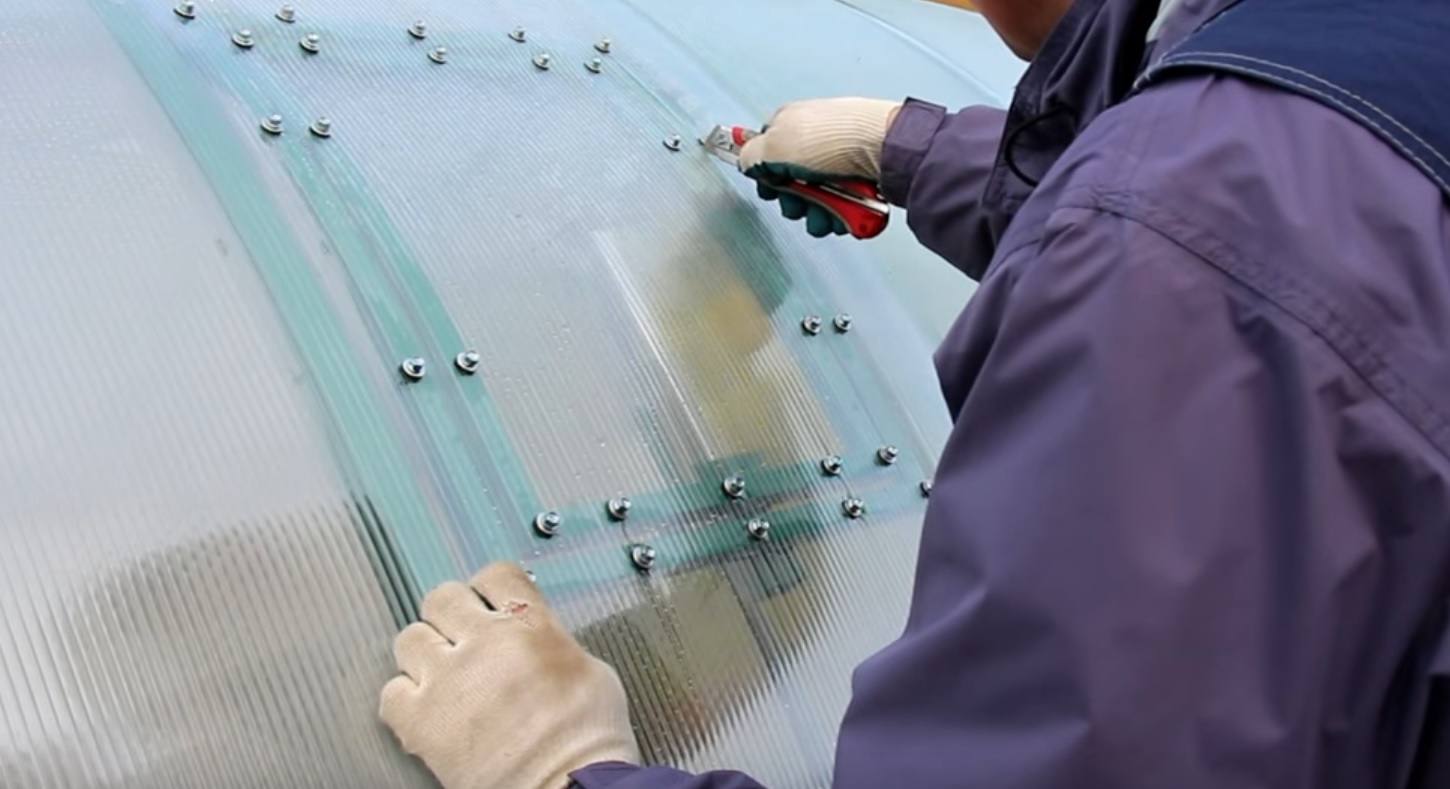
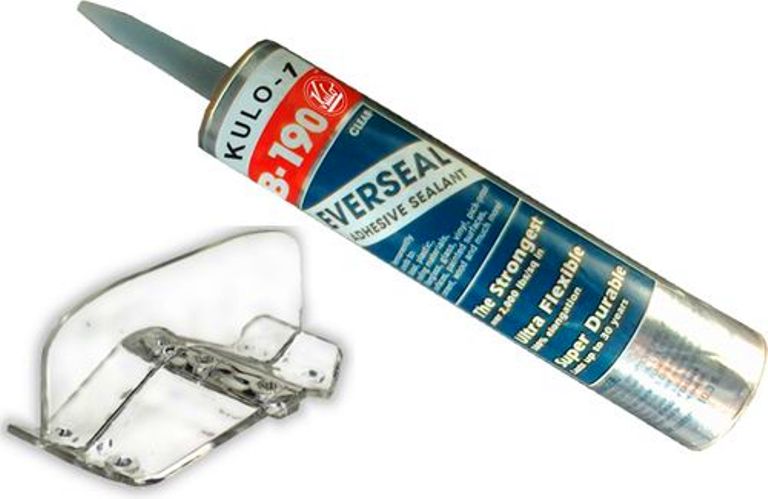
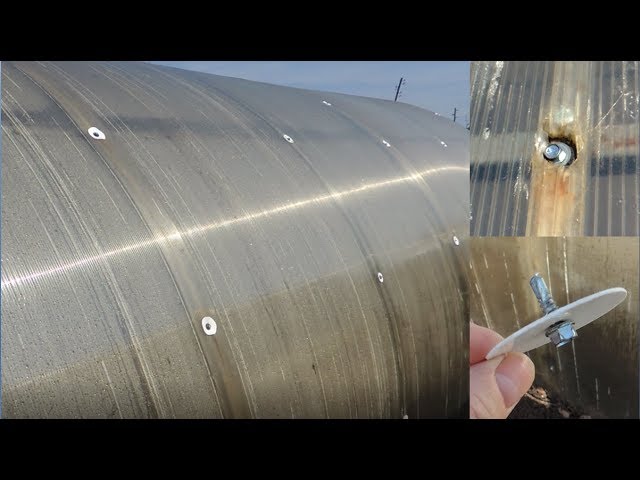
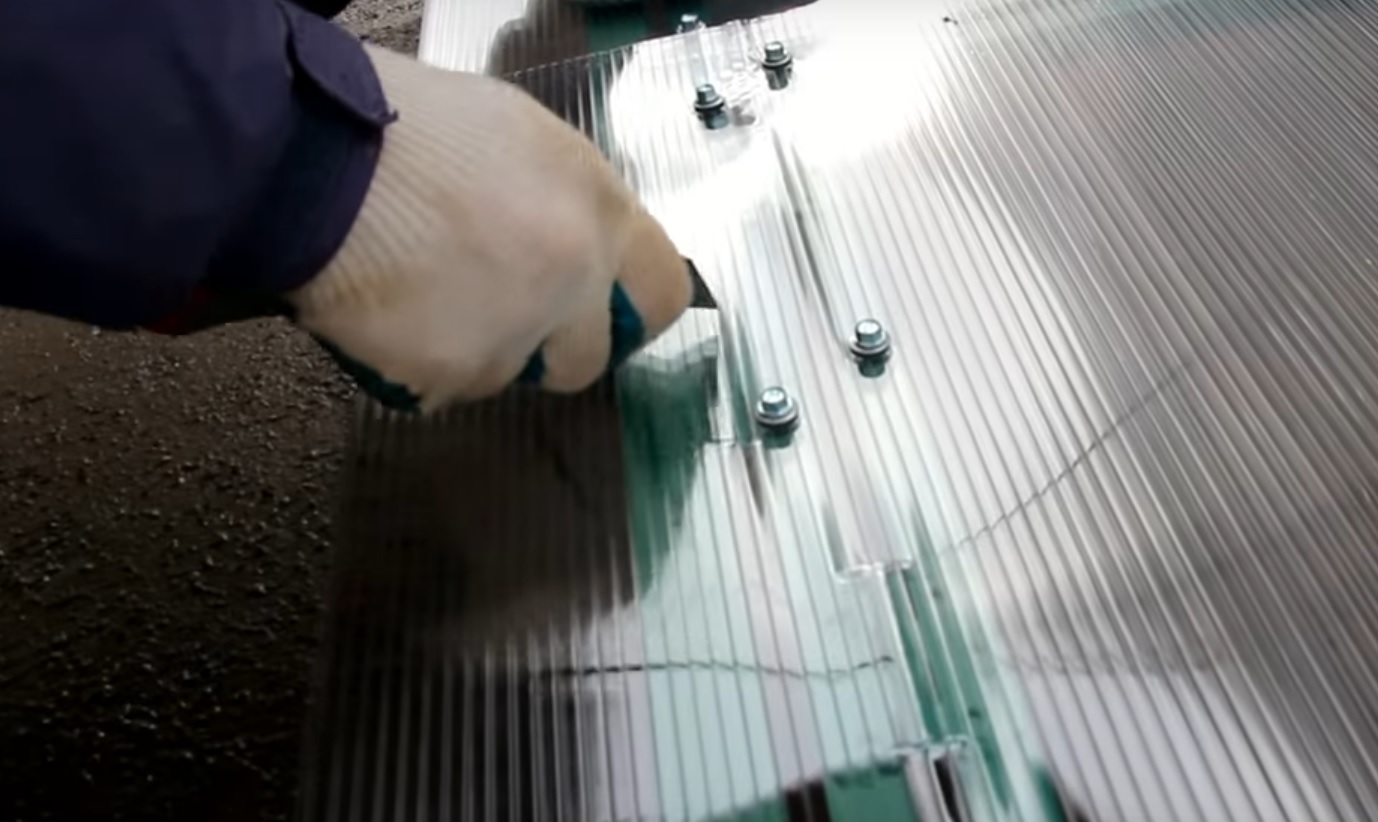
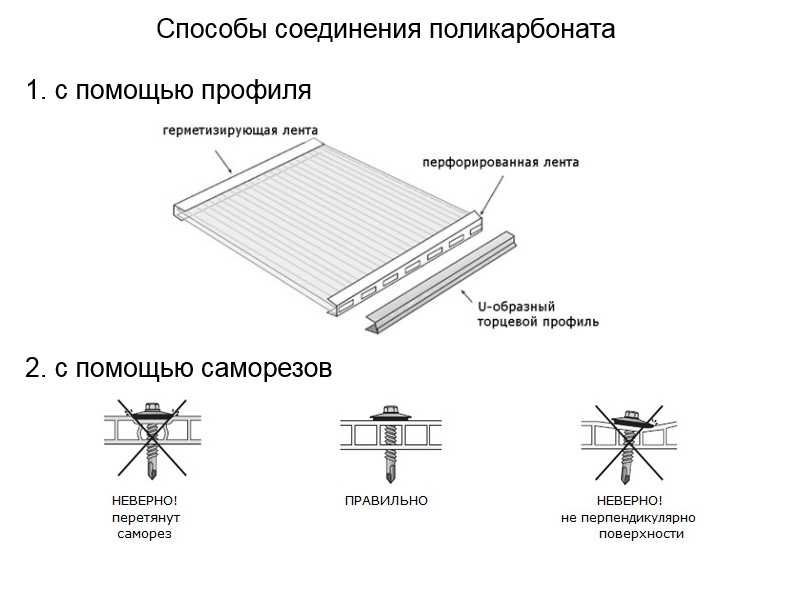
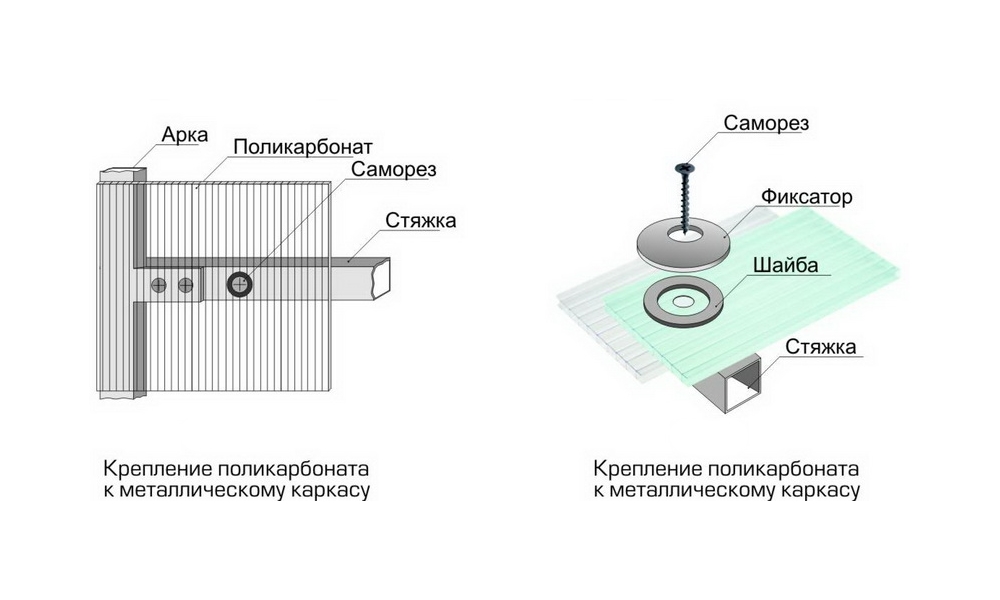
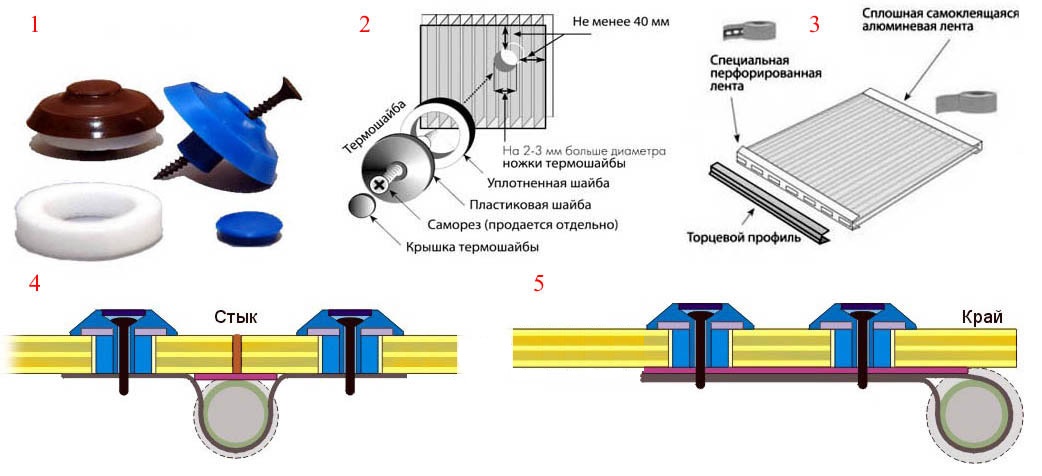
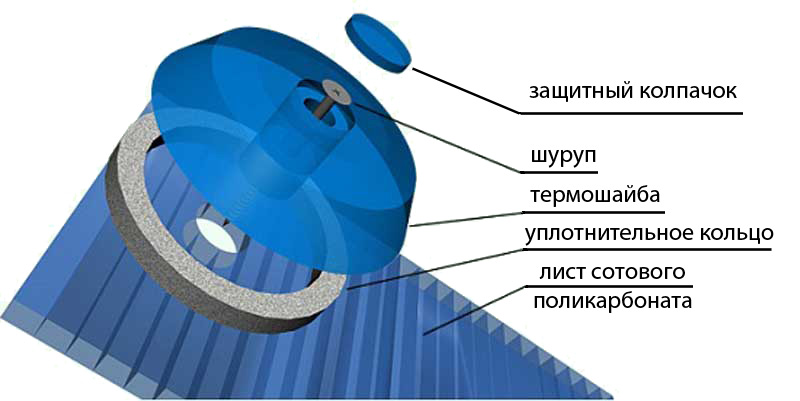
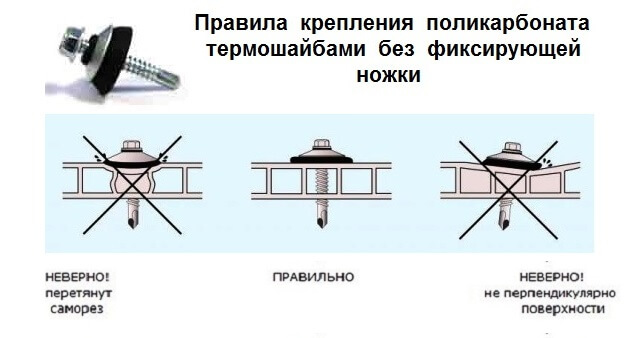
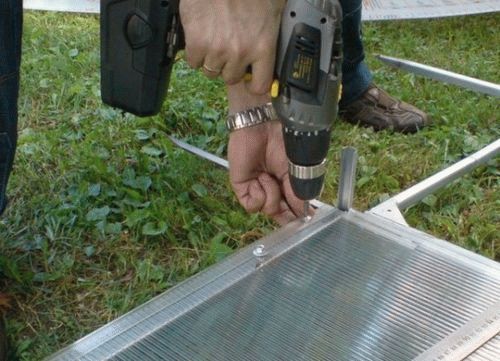
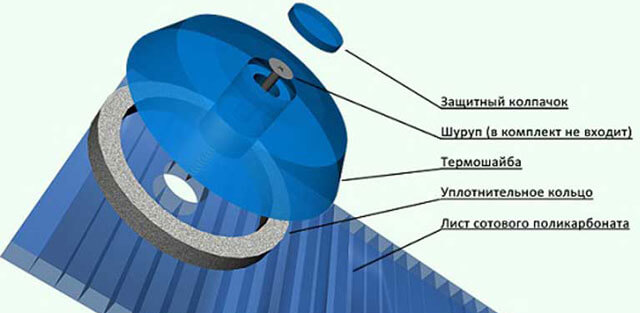
A reliable option for fasteners will be fasteners for self-tapping screws. To carry out the fasteners, it is necessary to drill holes in the places of future connections. They need to be made so that they are slightly wider than the legs of the self-tapping screw, but no more than its cap. When using silicone sealant, first put a few drops into the drilled hole, and then tighten the self-tapping screw, as shown in the photo. When using a thermal washer, a sealing washer is first inserted into the hole with your own hands, and then a plastic washer, into which a self-tapping screw is screwed.
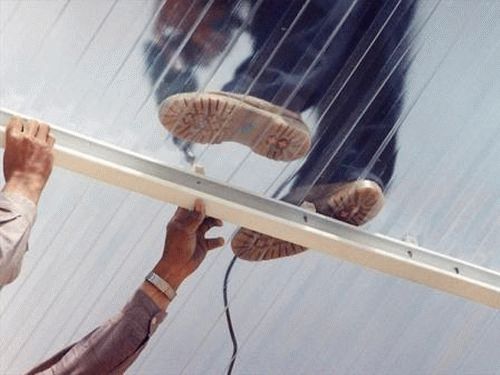
In order for the polycarbonate to attach evenly, ideally use the square-socket method of attachment. With this method, the distance is the same in all four directions. It is unacceptable to make the distance less at the edge of the sheet, since the greatest load is observed in this place.
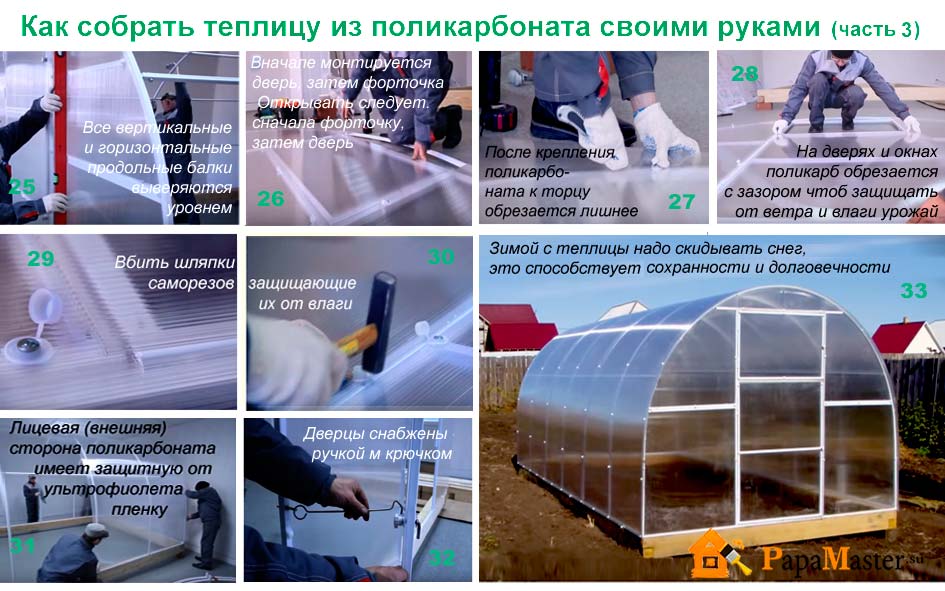
The main thing is not to transfer it during fastening. It is worth stopping the twisting as soon as the cap practically touches the surface of the sheet. The fasteners are completed by attaching the caps of the self-tapping screws, which will help prevent moisture from entering the cracks.
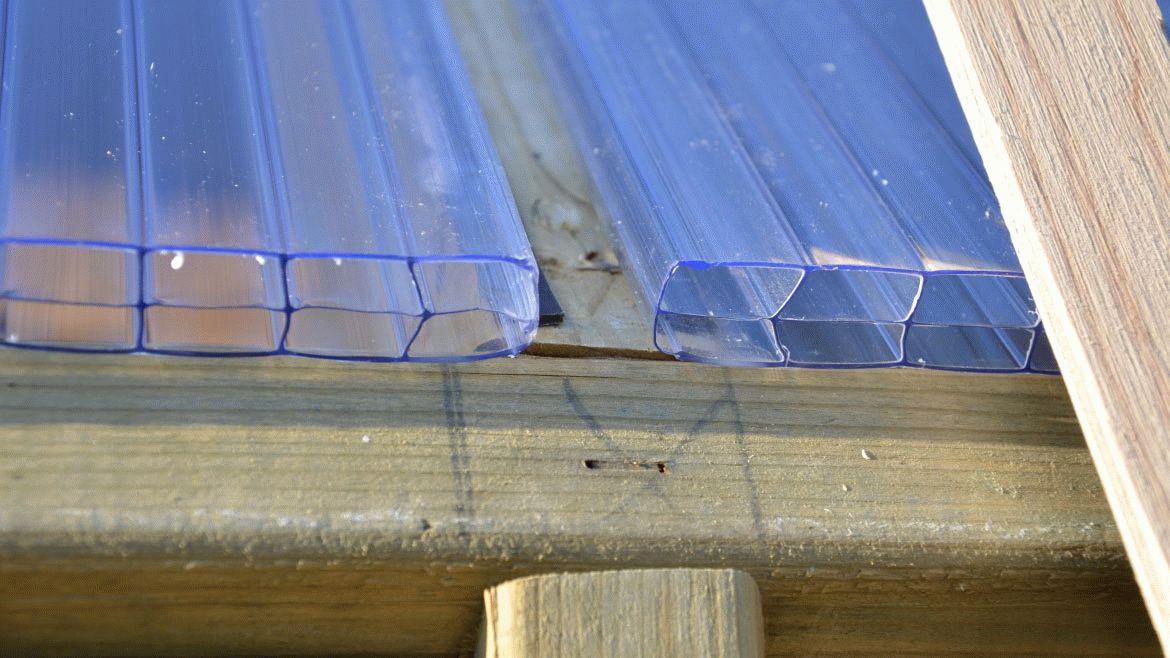
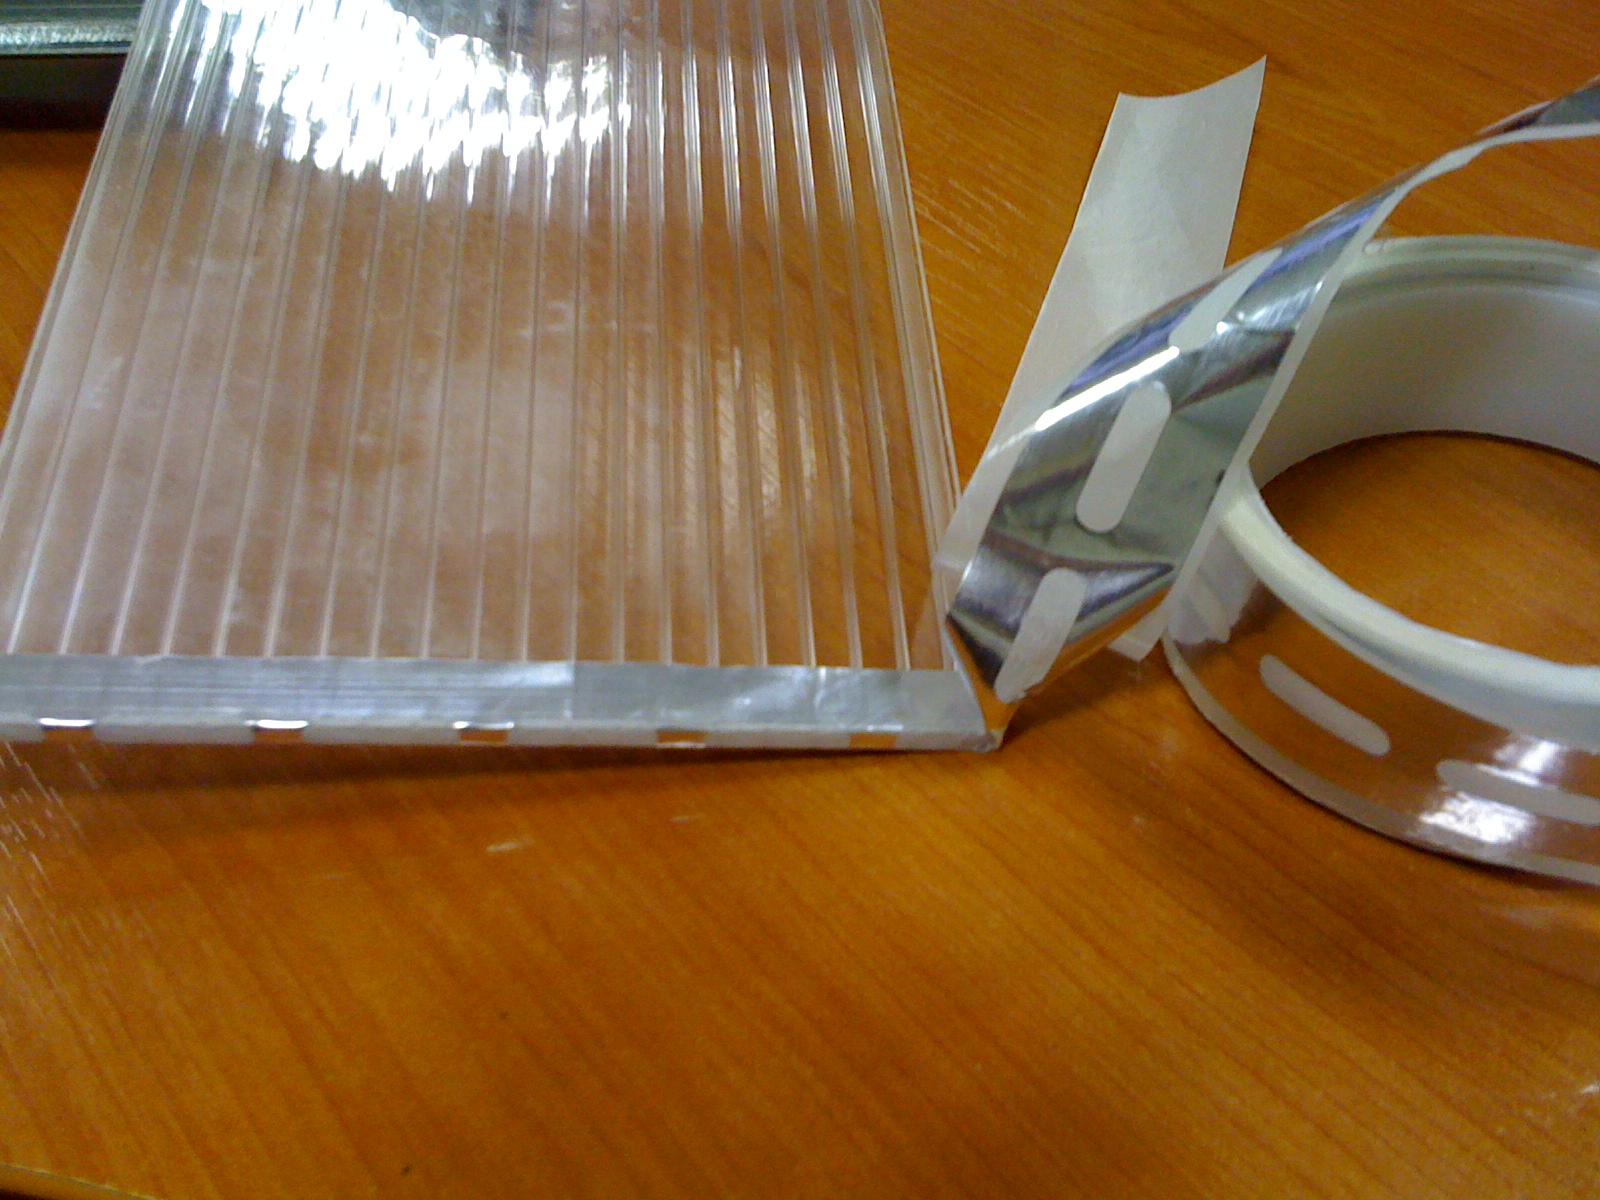
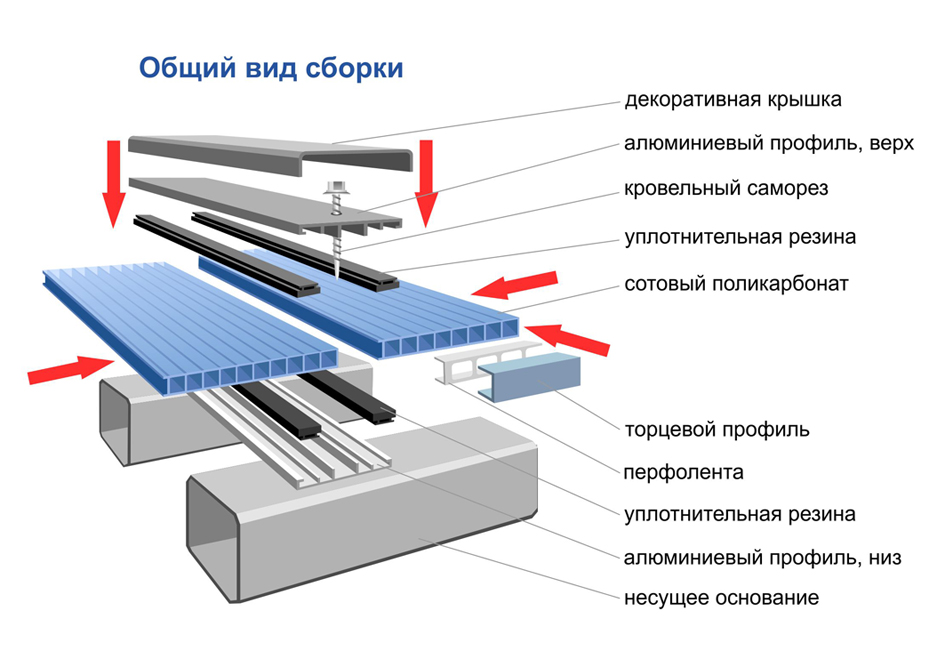
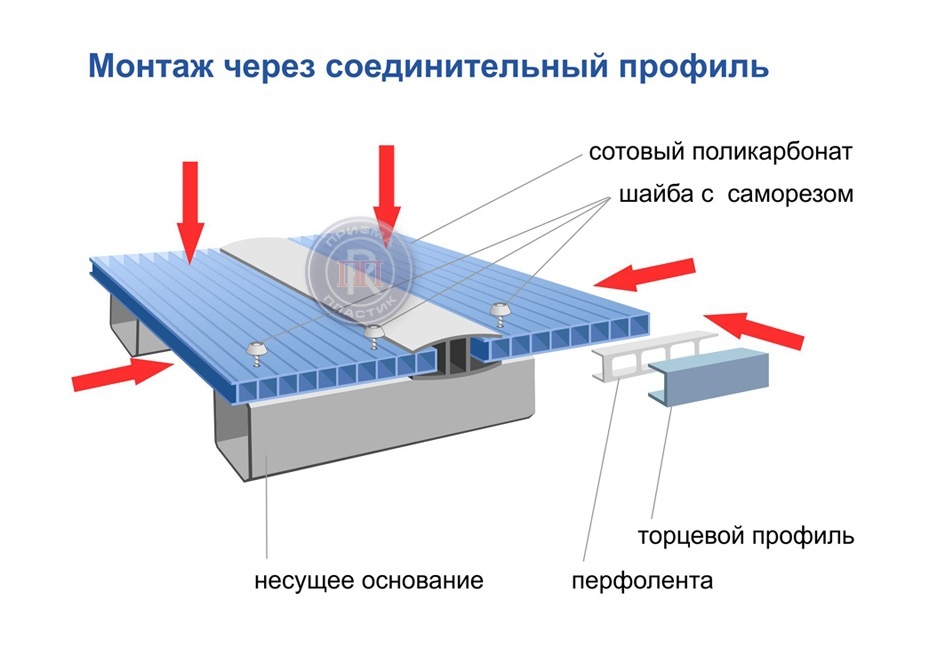
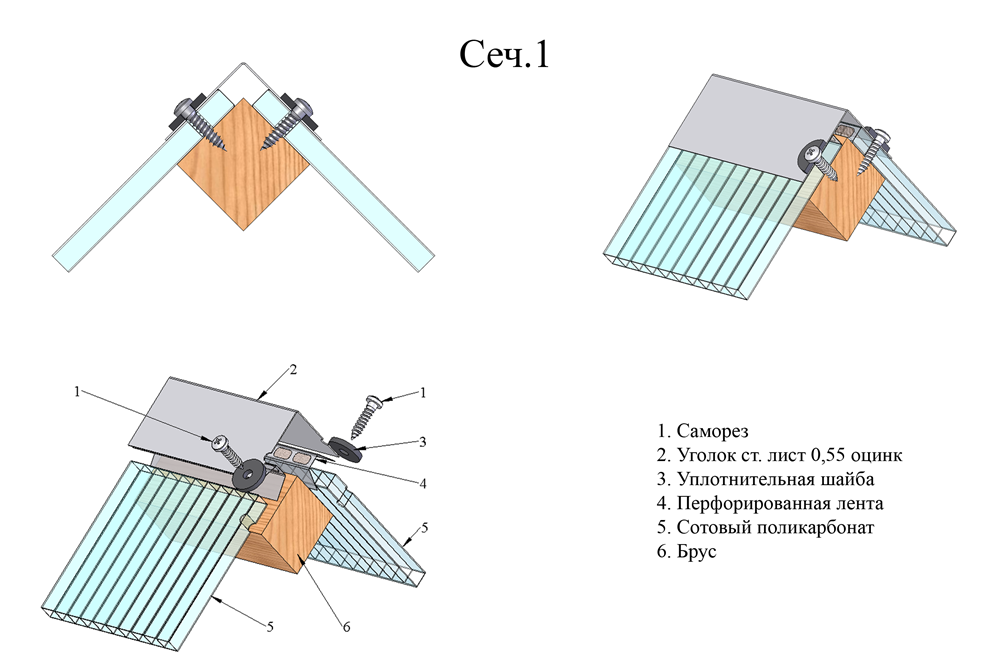
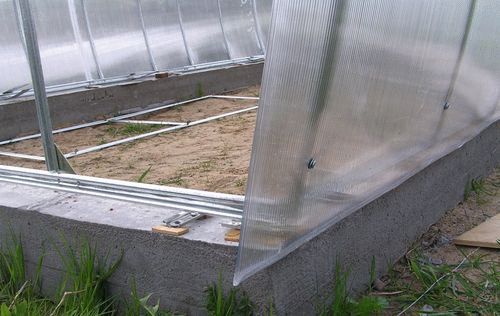
When laying, it should be borne in mind that it is characterized by a change in size with temperature fluctuations. That is why you should avoid stacking end-to-end, and stack the sheets, providing an indent between them. Having secured the sheet with your own hands, it is necessary to attach a docking profile to its cut, which serves for the installation of subsequent sheets. Edge sheets are protected by end profiles.A special adhesive tape is also used, with the help of which all joints are glued, as shown in the photo.
Polycarbonate is a relatively unpretentious material, but, despite this, it must be properly looked after:
- Do not make a fire near polycarbonate structures in order to prevent the material from melting;
- When clearing snow, you must not work with tools for working in the garden;

- Do not use aromatic and abrasive detergents for washing sheets, as shown in the photo;
- If you want to clean the dust from the polycarbonate building with your own hands, then the best time for this will be spring. This will require heated water and rubber rollers or soft rags. Wet the surface with water and then wipe everything with soapy water. At the end, be sure to rinse the structure with water and wipe dry with a cloth.
Let's sum up
As with any material, certain rules should be followed when working with polycarbonate. Following our tips, you will be able to independently work with this material and build the necessary structures.
Panel cutting technology
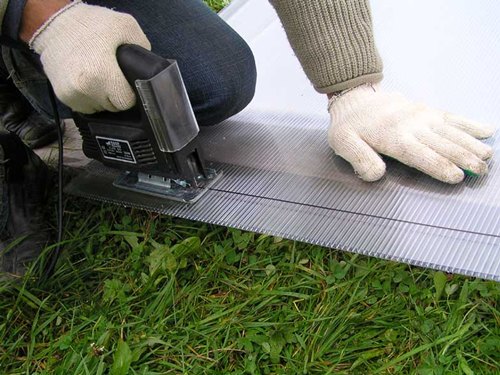
Panel cutting technology
The standard width of the polycarbonate sheet is 2.1 m, the length of the sheets is 6 and 12 m. To equip a canopy or partition, this is too much, so the material needs to be cut. Incorrect cutting of panels damages the protective coating and polycarbonate edges, which can spoil the appearance of the structure. The most convenient way to cut is a high-speed circular saw with carbide blades. In order for the edges of the cut to be as even as possible, the disc must have small undivided teeth.
During the cutting process, the panel should be securely fixed in order to exclude the slightest vibration. The top film must not be removed at this stage, as it protects the coating from microscopic damage during cutting. In the cut panels, the internal cavities should be cleaned from chips, as it will prevent the free flow of condensate.
Cutting polycarbonate with an electric jigsaw
The choice of an electric jigsaw as a tool for cutting polycarbonate sheets can be called a kind of compromise between the cutting speed of the "grinder" and the safety (as well as relative simplicity) of working with a construction knife. In addition, the jigsaw is great for cutting semicircular / round elements and complex parts.
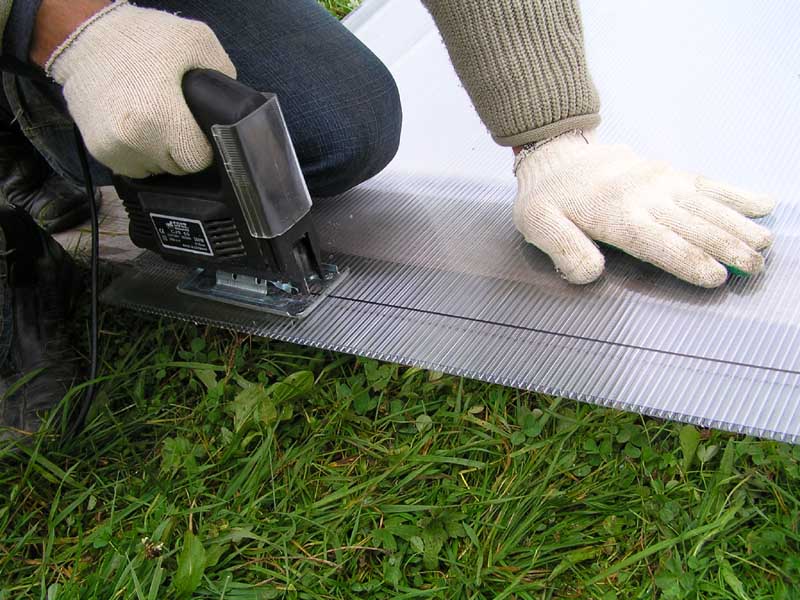 Using an electric jigsaw to cut polycarbonate
The main thing is to choose the right file.
First, notice the shape of the prongs. Straight or wavy prongs will give you a clean and straight cut - exactly what you need
With adjustable teeth, the opposite is true - they are designed for working with wood, therefore an electric jigsaw with such a saw will not cut, but tear the polycarbonate, leaving a lot of chipping, burrs and other defects in it.
Second, pay attention to the number and size of the prongs. They should be frequent and small
These properties are determined by the TPI parameter - the number of teeth per inch. In our case, give preference to files with TPI from 9 to 13 or more.
Thirdly, ask the seller what material this or that file is designed for. You need those canvases that are designed to work with metal, plastic or plexiglass. Choose specialized files whenever possible - they will give a clean cut with a minimum of defects.
 File for working with acrylic glass, plastic and polycarbonate
Step 1. Mark out a sheet of polycarbonate and prepare your work area.
Step 2. Install the file into the electric jigsaw. It is advisable to use a new and sharp blade. Fix it carefully and adjust - if it is not properly fixed, the file will vibrate and leave defects on the polycarbonate.
Step 3. Bring the jigsaw connected to the power supply to the end of the sheet along the cutting line.For greater convenience, make a notch in this place in advance with a sharp knife with a retractable blade. Do not remove the protective film from the sheet until the cutting process is complete.
 Cut polycarbonate for 4 m greenhouse Kremlevskaya
Step 4. Press the base plate of the jigsaw against the material. Make sure that the force applied to the tool is not excessively large, otherwise the polycarbonate will bend along the cut line. It is advisable that your helpers or clamps hold the sheet, not allowing it to move or vibrate.
Step 5. Turn on the electric jigsaw and let the saw speed up. As soon as it does this, start cutting into the material along the cutting line, slowly and carefully move it forward, pressing the base plate of the jigsaw against the plane of the polycarbonate. Take special care in curved sections. It is a good idea to practice cutting rounded parts in polycarbonate cuts and waste beforehand, which will give you experience and simplify your business.
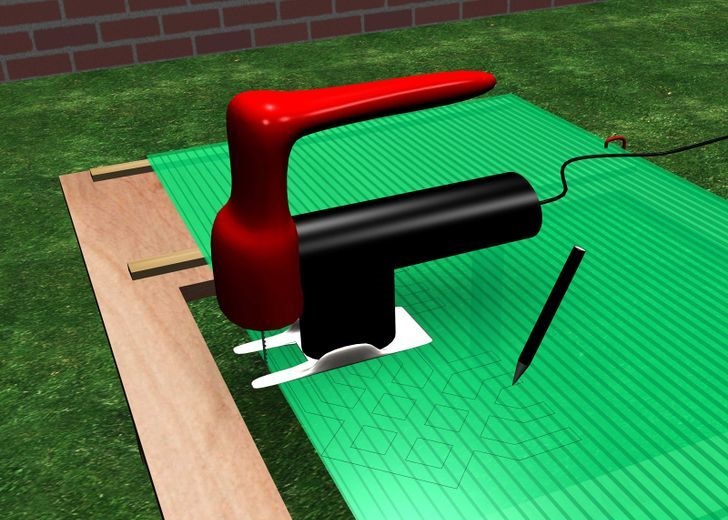 Start cutting a complex-shaped element with a jigsaw
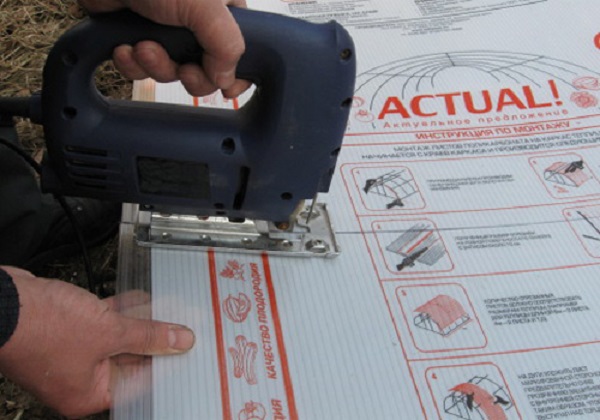 Finish trimming the polycarbonate with a jigsaw. If you do not want to stand on the material, even if you have a scaffold board, then first make a cut on one side, then on the opposite
Step 6. After completing work with the electric jigsaw, turn it off and unplug. Clean the cells of the polycarbonate sheet from chips using a vacuum cleaner or a jet of compressed air. Cut off the excess with a knife and clean the edge of the sheet from defects. Cover it with construction tape to protect the cells from dirt and dust.
What it is?
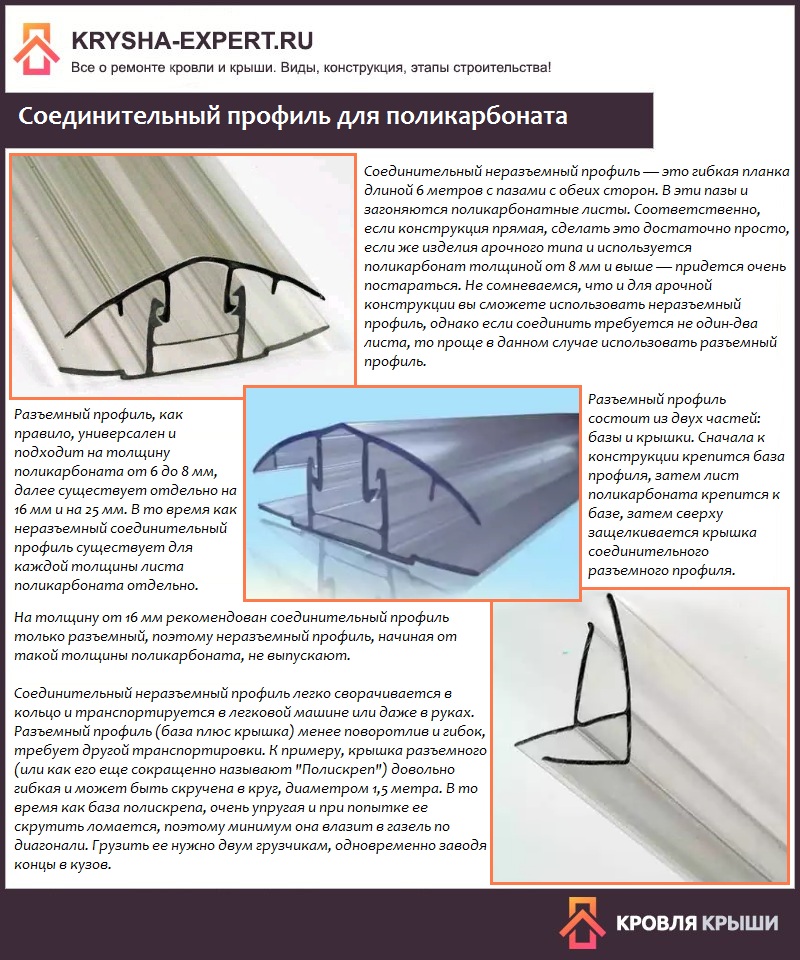
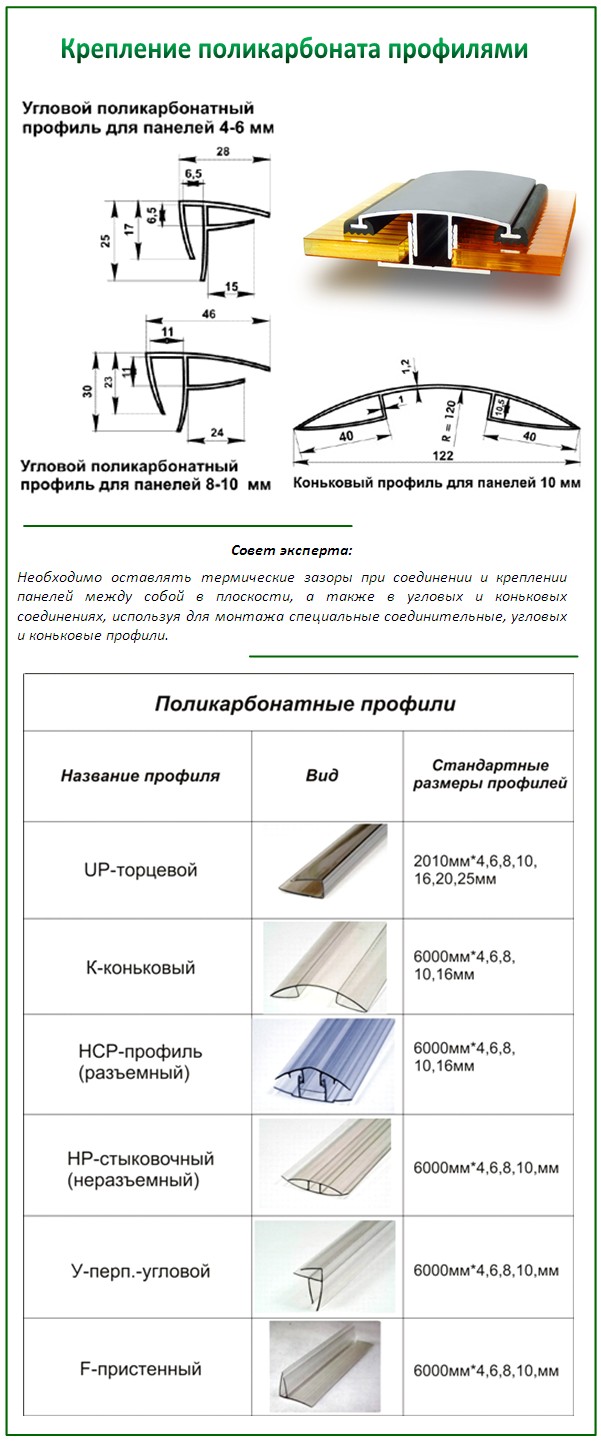
First, let's figure out what it is - a docking or connecting profile. It's simple - this element is a long plastic bar, inside it has a certain structure (most often H-shaped). Designed for joining or joining two sheets of cellular polycarbonate both in greenhouses and on various roofs, partitions, etc.
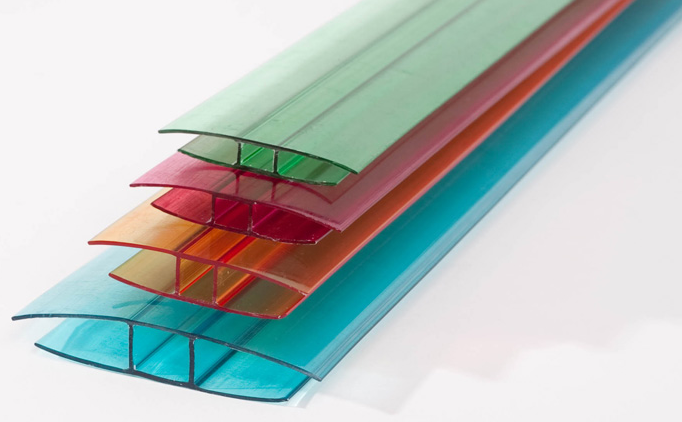
Docking profile for polycarbonate
The purposes of using the profile for polycarbonate are given below.
Aesthetics. The joints between two sheets of polycarbonate look neater and more beautiful if covered with a profile
In addition, if you pay attention to the polycarbonate roofing, which was joined without using a profile, you can see debris and dirt right inside the honeycomb - hollow channels that are formed in the structure of the material. And this, you see, significantly spoils the appearance.
And if the dirt on the outside is easy to wash off with plain water, then it is not so easy to remove it from the inside. The connecting (as well as the end) profile will help keep the inside of the polycarbonate clean.
Consequences of neglecting the docking profile
Better sealing. The docking profile allows you to connect two sheets of polycarbonate without gaps and crevices. At the same time, it will hold them securely and firmly. With the help of this element, the sheets become, as it were, a single roof or wall. At the same time, there are types of profiles that will allow joining and corner parts.
Creating an optimal microclimate in a polycarbonate greenhouse
The docking profile is usually made of a transparent material - polycarbonate, which makes it possible to use it for both transparent and translucent structures, which must be well lit from the inside. This element allows the roof or wall to retain maximum light transmission. It can also be made of aluminum.

Press / docking profile for polycarbonate, aluminum, АД 53-10
Also, don't worry about UV protection. Docking profiles have protection against harmful radiation - exactly the same as on polycarbonate sheets. They are convenient to use not only for two- and single-slope greenhouses, but also for arched and lancet greenhouses.The fact is that the docking profiles bend perfectly within the permissible radius and they can be used to join two pieces of material on these types of structures.

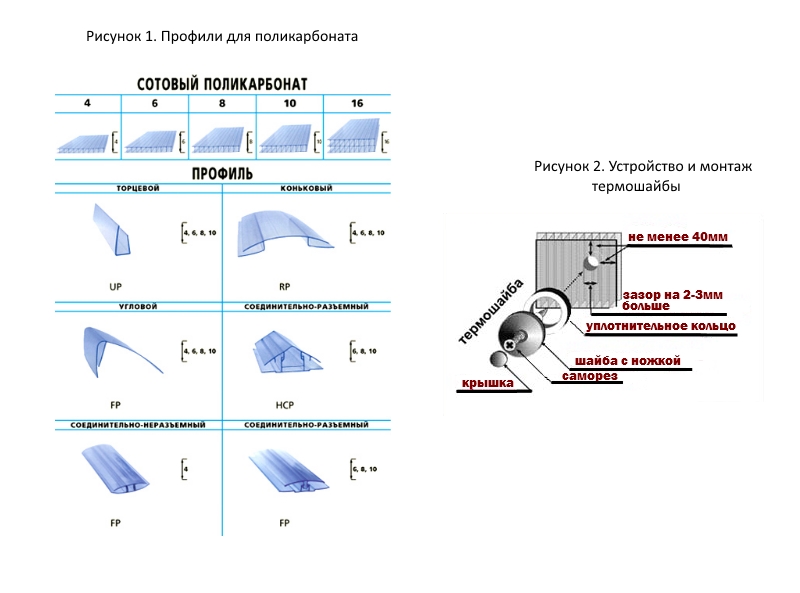
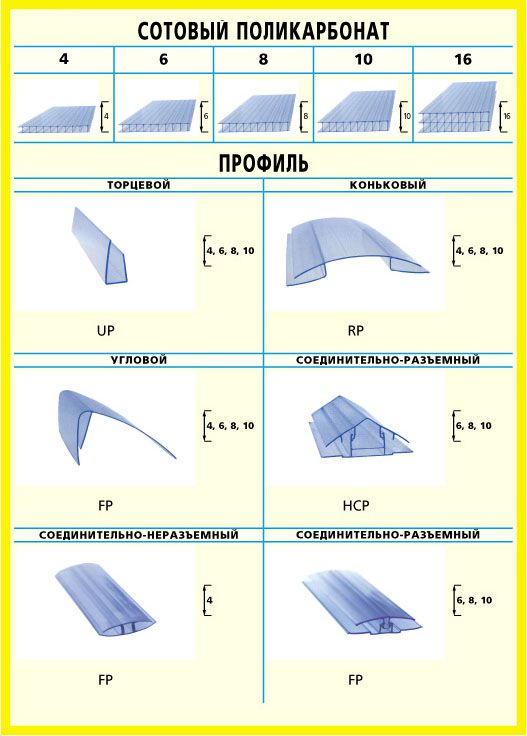
Profiles for fixing cellular polycarbonate
Let's list the main advantages of using docking profiles.
- Easy to install. Usually, no one has any difficulties during the installation of this element.
- Easy dismantling. If necessary, the docking profile can be quickly untwisted and removed. It will also make it easier to replace one of the polycarbonate sheets if necessary.
- Tightness. Due to the tight fit of the profile to the polycarbonate sheets, the roof mounted in this way will not leak.
- Nice appearance. A roof or wall using a docking profile looks much nicer and neater than without it.

One-piece polycarbonate profile

Sheathing of the canopy with polycarbonate using a docking profile
This is interesting: How to paint ondulin if it is burnt out
Types of end profile and its characteristics
The end profile is made of plastic (the same polycarbonate from which the sheets are made, monolithic or honeycomb) and aluminum.
Characteristics of the plastic profile
The plastic profile for protecting the edges of the honeycomb plate is a bar bent in cross-section in the form of the letter P, in which one side is longer than the other. The maximum length of a commercially available strip is 2.1 m. The cross-sectional thickness of the material is 1.5-3 mm. The bar should fit snugly against the sheet from below and from above, so the long and short sides of the profile deviate slightly inward, towards each other.
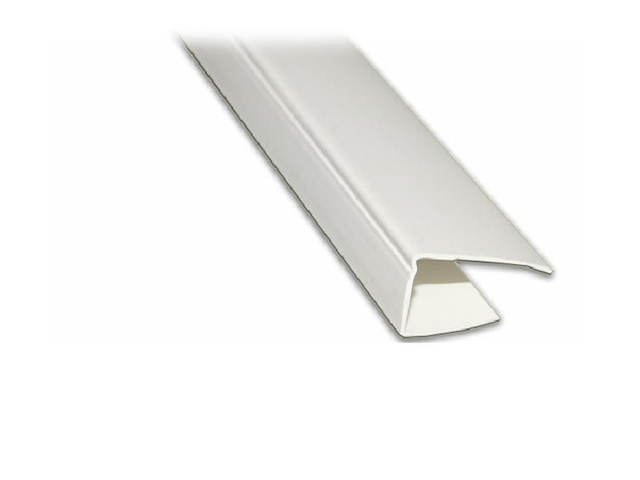 Plastic end profile
The main advantages of the plastic end profile include:
- light weight;
- flexibility;
- high strength;
- operational reliability;
- ease of installation.
The plastic end profile is available for standard thicknesses of honeycomb boards. In the technical documentation, the material is marked with the Latin letters U, UP or Russian PT. The dimensions of the strip in the section correspond to the parameters of the sheet.
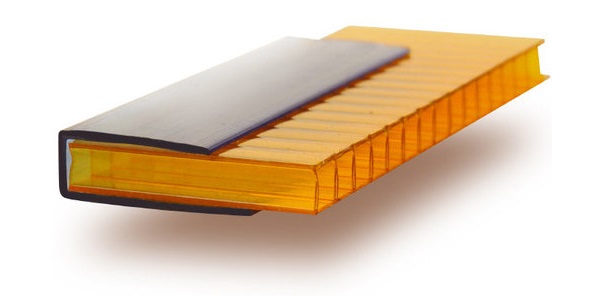 End profile
Table. Standard sizes of plastic end profile.
| End profile designation | For a sheet of what thickness is it intended | Short side | Long side |
|---|---|---|---|
| 4 mm | 9.5 mm | 24 mm | |
| 6 mm | 8.7 mm | 19.5 mm | |
| U, UP, Fri | 8 mm | 10.5 mm | 21.5 mm |
| 10 mm | 12,7 mm | 30 mm | |
| 16 mm | 18 mm | 31 mm |
The plastic slats are flexible enough to reinforce arched roof vaults. The material from which the sheets and profile are made does not burn, but only melts on fire. The planks do not soften at high air temperatures and do not break in the cold. To fix the planks, no special skills, special tools or equipment are required. Polycarbonate has medium scratch and shock resistance.
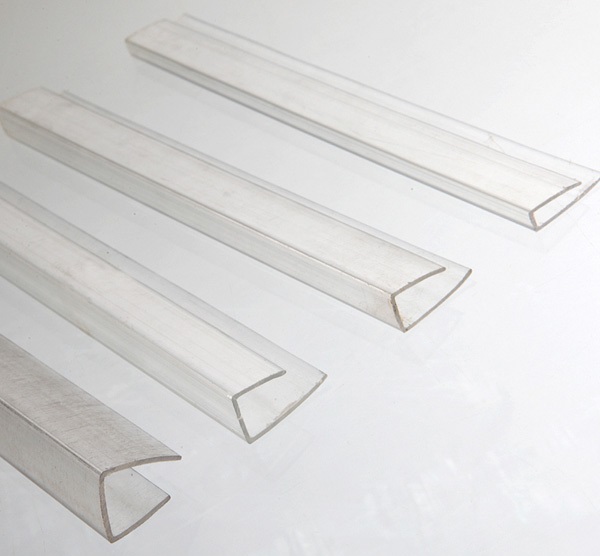 End-view polycarbonate profile
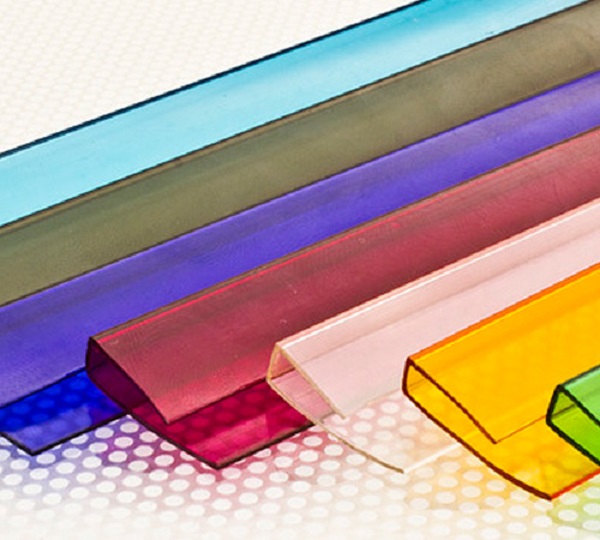 End profile colors
Aluminum end profile
An aluminum profile is much more expensive than a plastic one, but roofs, arches and walls of structures fixed in such a material on a metal frame can serve for ten or more years. Such a profile is often used to fix and protect structures made of thick honeycomb carbonate (16, 20, 25 and 32 mm). But in aluminum strips, you can also attach a thin sheet (4, 6, 8, 10 mm). The aluminum profile is symmetrical in cross-section and represents the letter P.
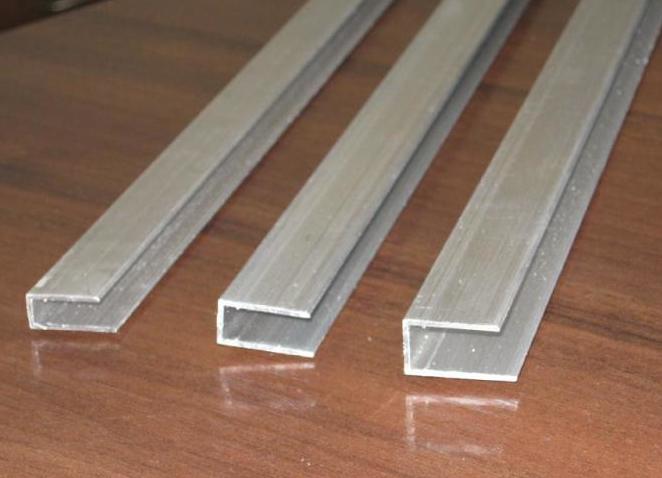 Aluminum profile for polycarbonate
Advantages of an aluminum profile:
- corrosion resistance;
- long service life;
- high strength.
The structures assembled on an aluminum frame are very durable and have a beautiful appearance. The planks have stop grooves that prevent the honeycomb from closing in polycarbonate sheets or special drainage grooves for water drainage.
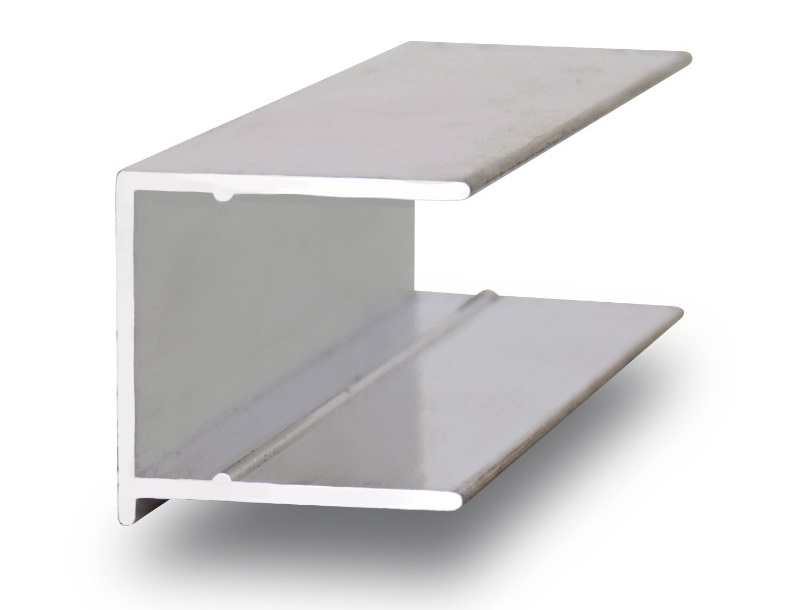 Aluminum end profile for polycarbonate, PTO 4-16 mm
An additional protective or decorative layer can be applied to the metal.Manufacturers anodize aluminum (cover it with a protective oxide film) and paint it in different colors (bronze, turquoise, white, blue, yellow, green, gray, blue, orange, red). Also, manufacturers, at the request of the customer, cover aluminum with a special film with a pattern of wild stone or wood. The decorative color of aluminum can be beautifully combined with a translucent polycarbonate sheet of the same or contrasting color.
Polycarbonate Cutting Tools
It is best to cut polycarbonate with special tools:
Panels no more than 1 cm thick are cut with a construction knife
However, with large volumes of work, it is better not to use such a tool.
The most readily available tool is a jigsaw.
If there is an opportunity to purchase a high-speed saw with an emphasis, then you should pay attention to the teeth of the blade. They should be shallow, undiluted and coated with a hard alloy.
When cutting polycarbonate with a band saw, you also need to know the relevant parameters.
It is allowed to use a tape no more than 2 cm wide and no more than 1.5 mm thick. The teeth should be spaced no more than 3.5 mm and the cutting speed should not exceed 1000 meters per minute.
Before cutting, the polycarbonate sheet should be firmly fixed to avoid vibration. Any chips that have formed during the cutting process must be removed immediately.
What you need to know about polycarbonate adhesive
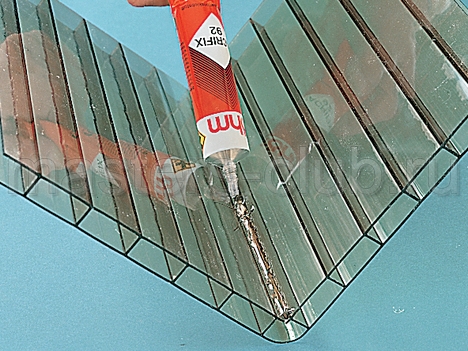
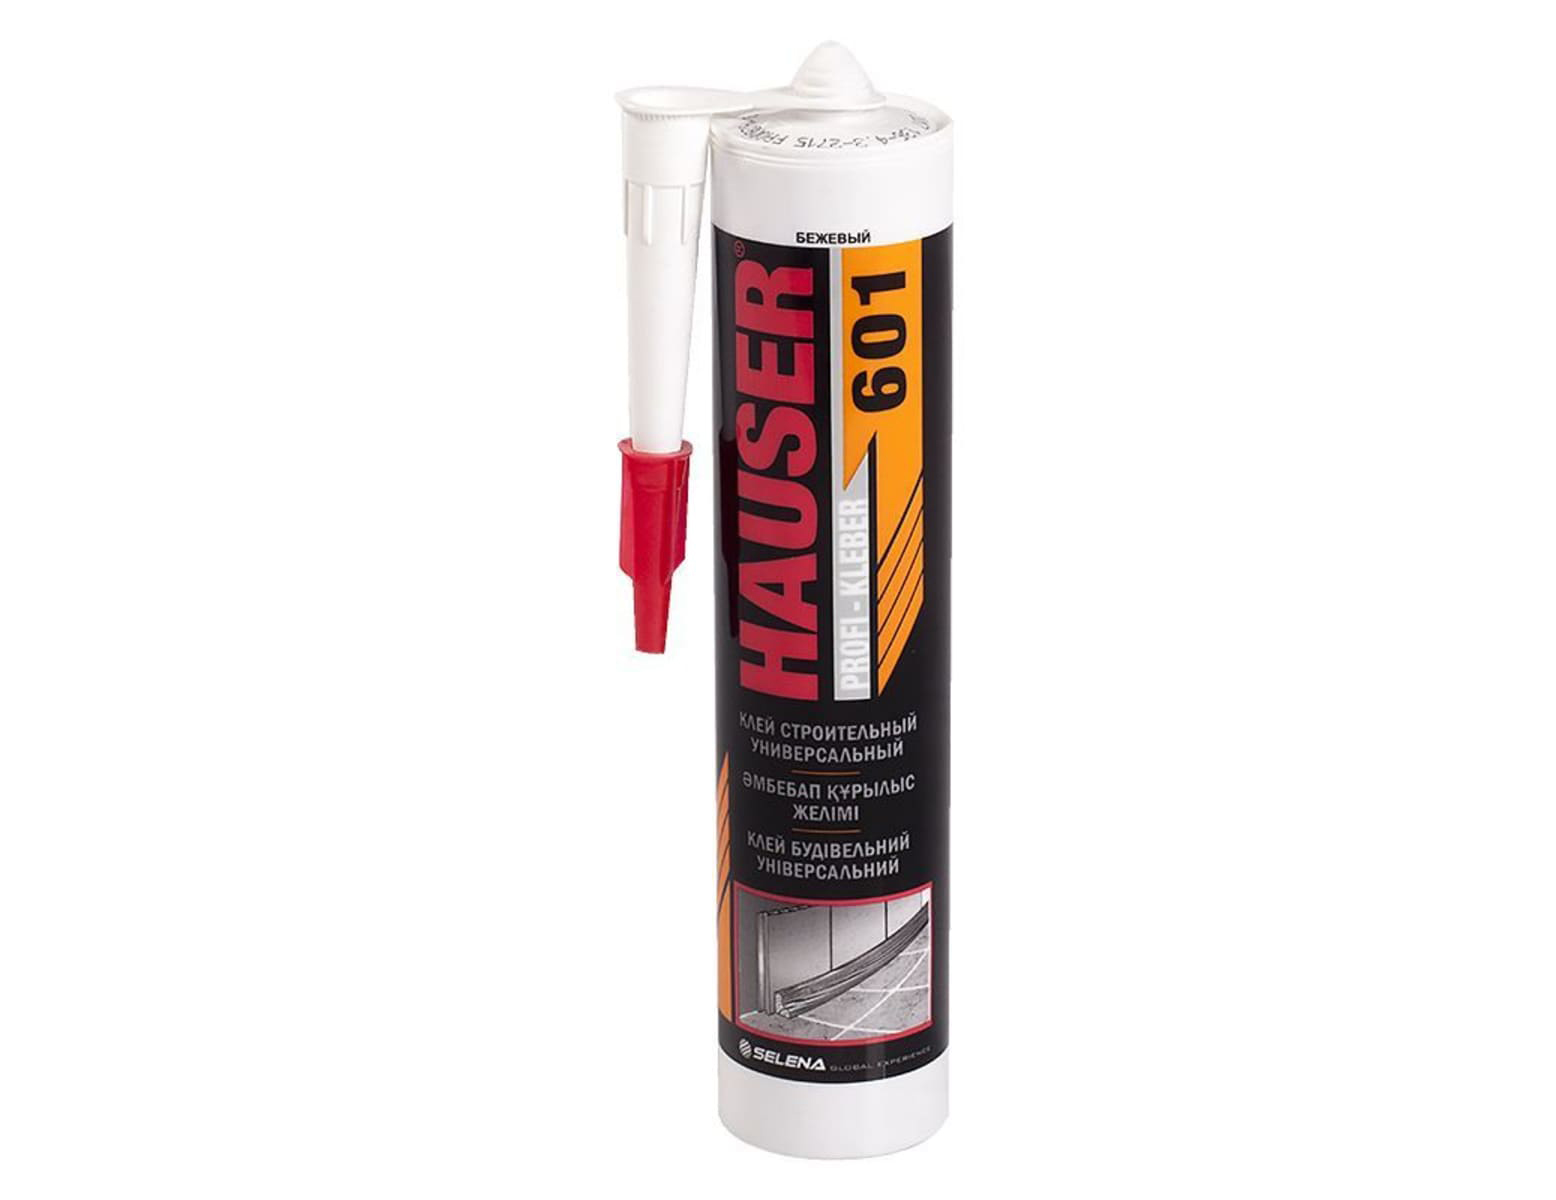
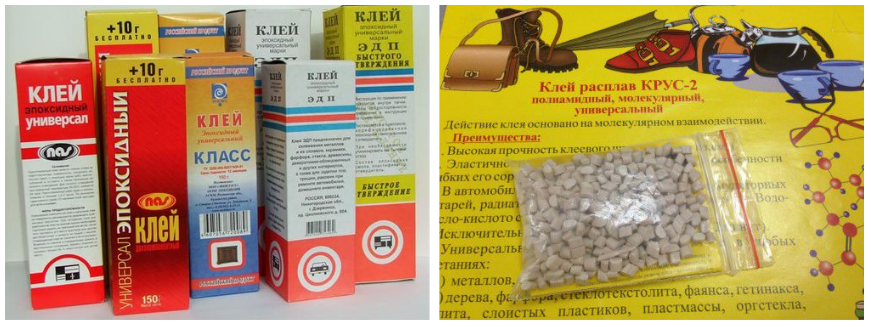
A one-component or two-component adhesive can be used to glue the surfaces of polycarbonate material. Single component adhesive can be used to bond simple, stress-free products.
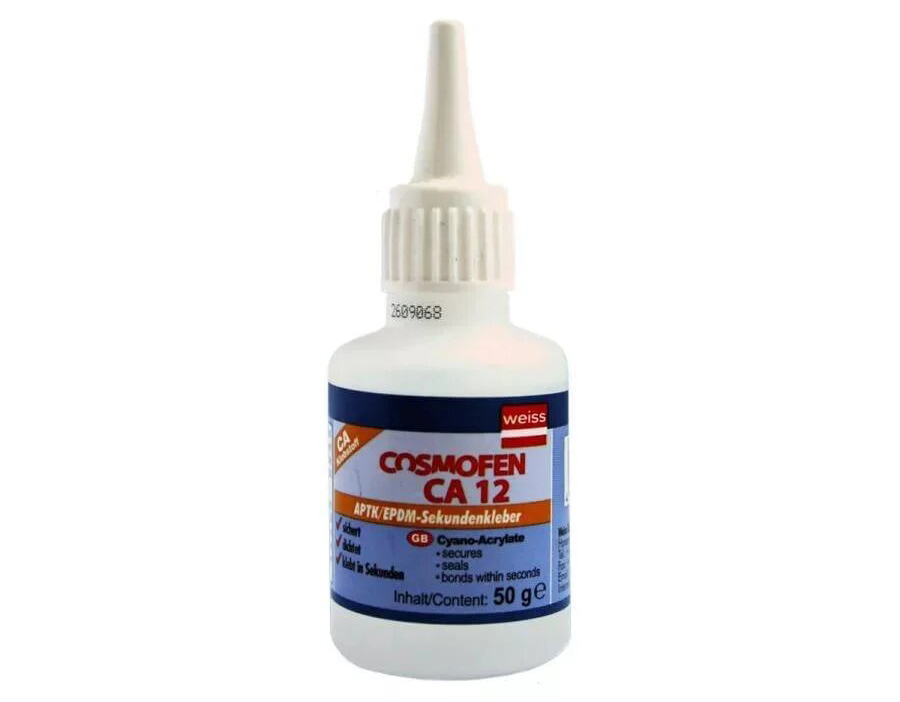
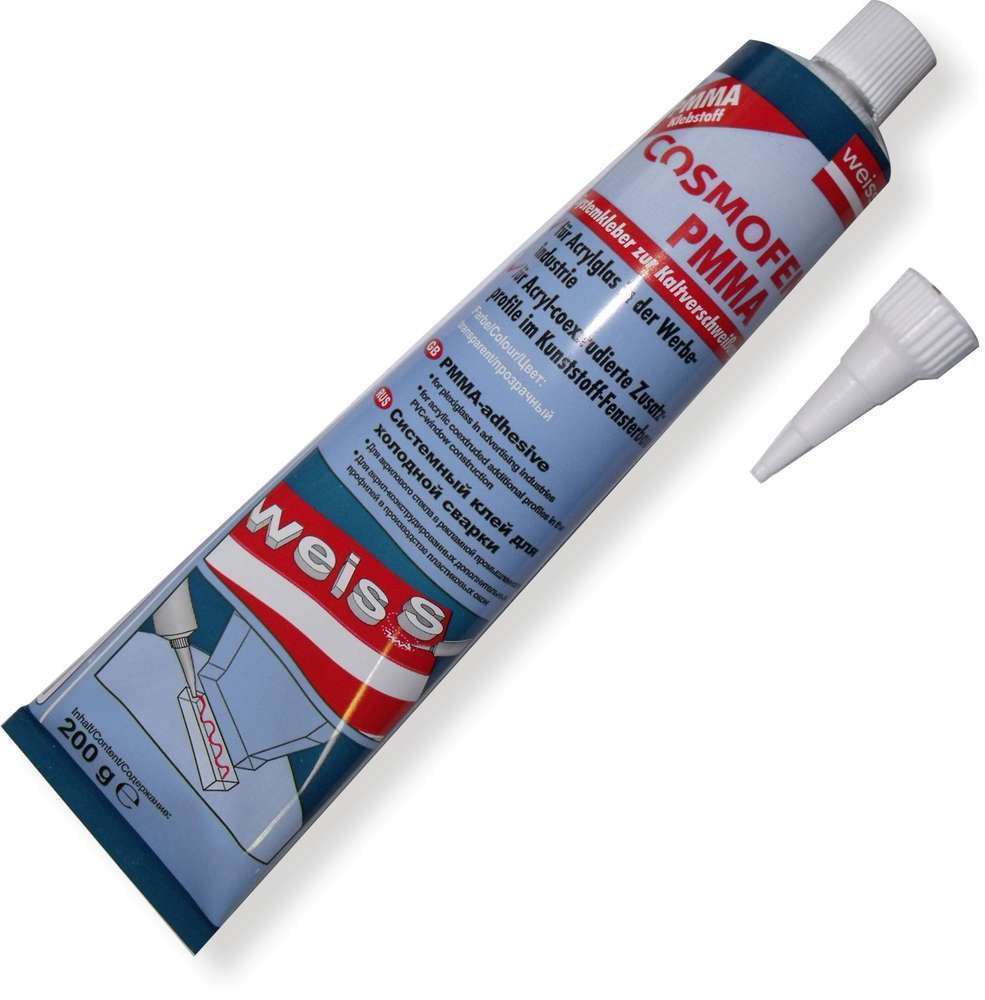
Examples of adhesives with one component include the following substances used:
- Cosmofen;
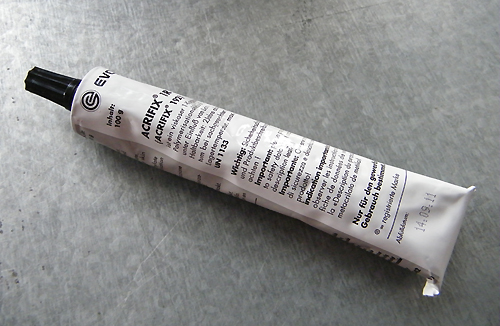
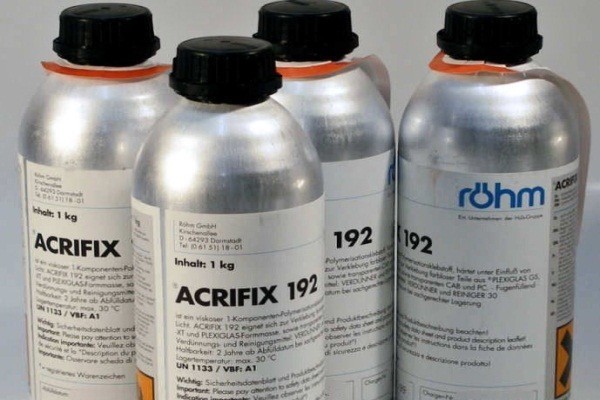
- Acrifix 192;
- Silicone mastic;
- Vitralit 5634.
An important note when using one-component glue is the ability to bond different materials.
Rubber, metal, plastic can be successfully attached to polycarbonate. At the same time, the compound turns out to be sufficiently stable in relation to temperature changes, the effects of atmospheric precipitation and other external manifestations.
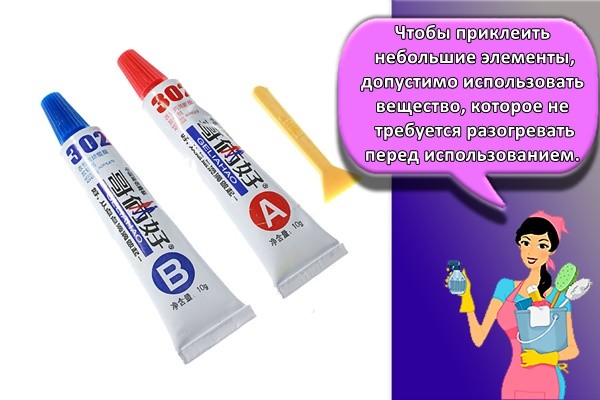
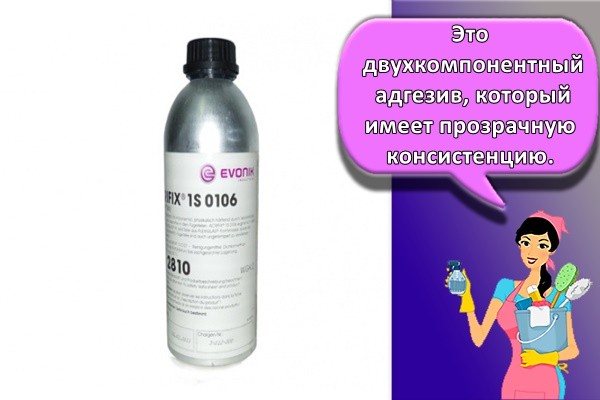
Two-component adhesives are usually used to join parts in bulk critical structures. A high degree of reliability and bond strength is often required. The most famous formulations among two-component adhesives are presented below:
- Altuglas;
- Acrifix 190 or 200.
Among the possible varieties of two-component adhesives, the following possible options are distinguished:
- acrylic foam formulations;
- hot curing adhesives;
- ethylene-venylacetane adhesives;
- polyurethane.
Before giving preference to one or another composition, you should carefully study the properties of the glue and the behavior of the surface after the end of the work. For example, a conventional sealant, which is essentially a silicone adhesive, has sufficient elasticity. This glue will allow the structure to successfully resist fluctuations under temperature influences.
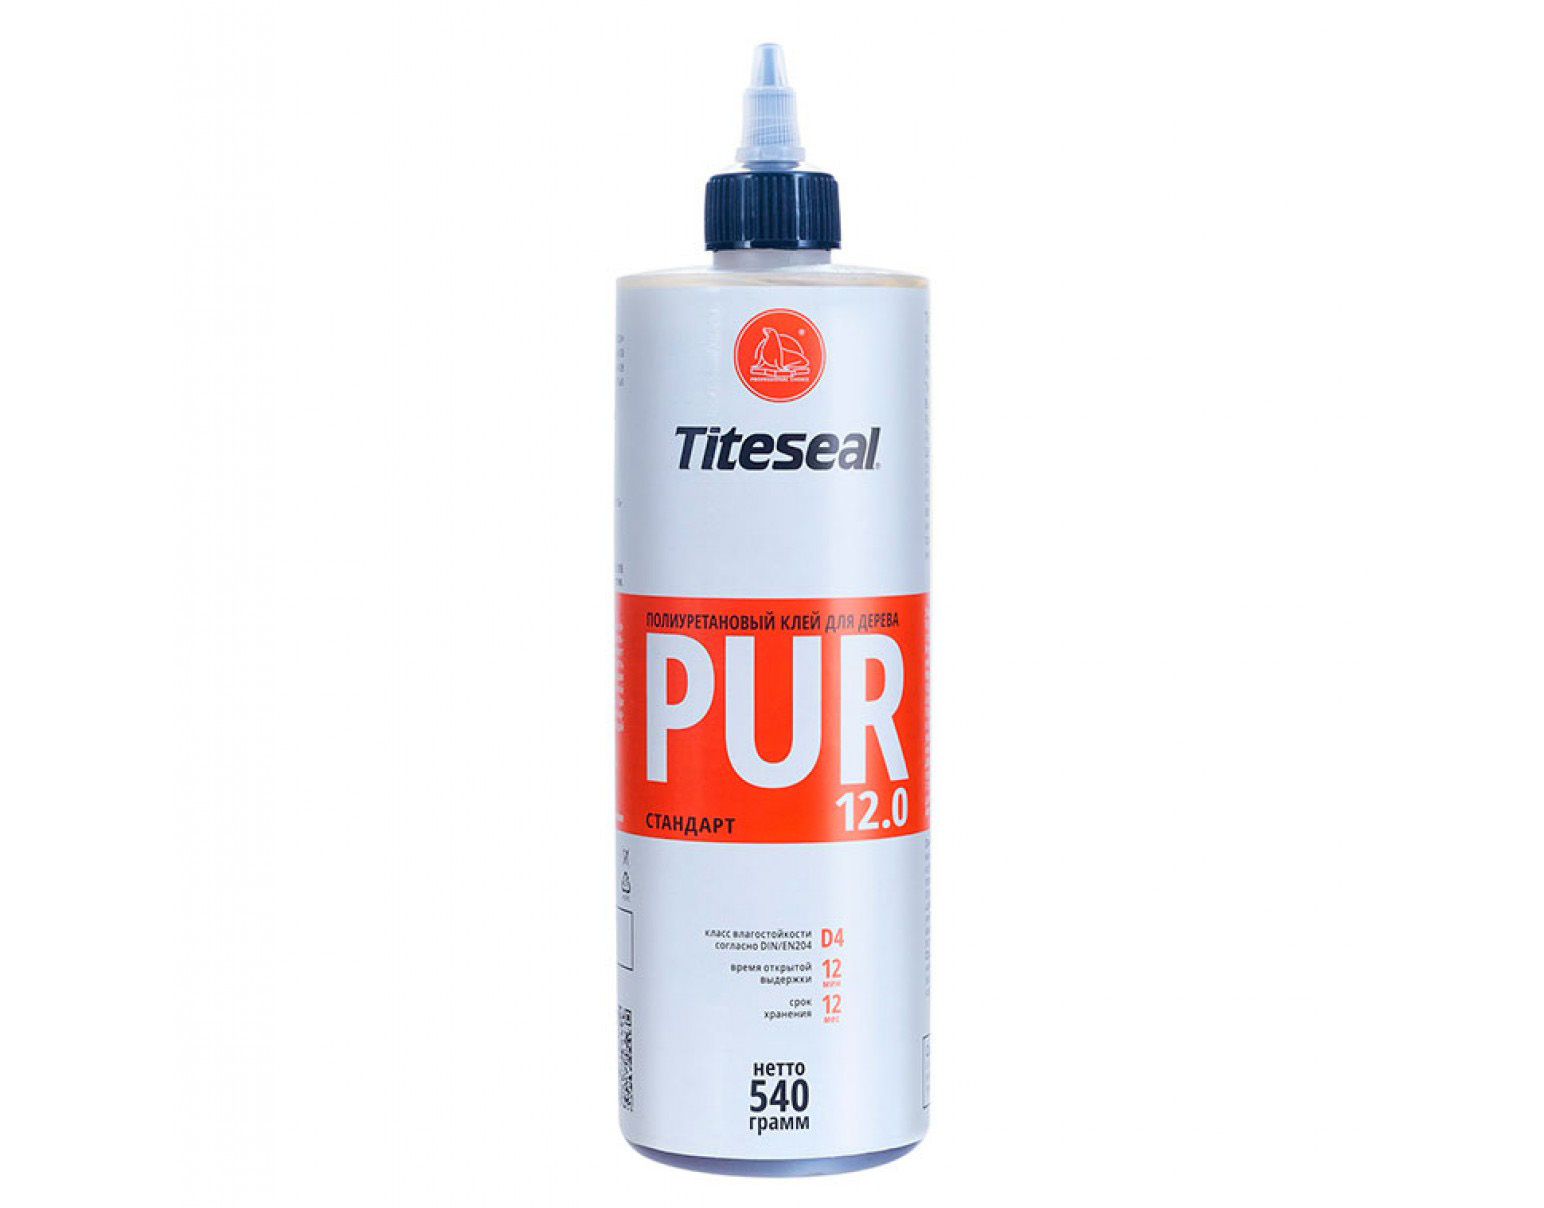
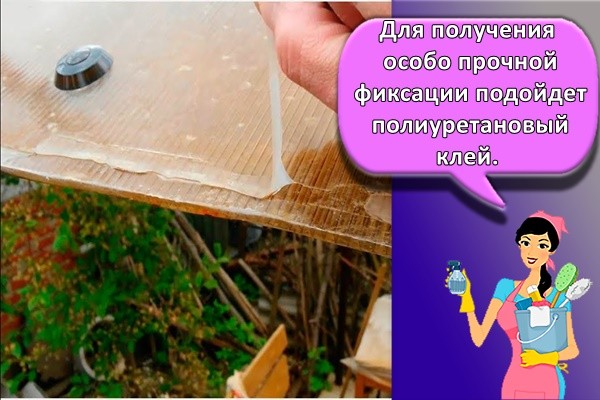
The use of polyurethane adhesives must be justified. This type of glue has such advantages as good transparency, high strength. However, its application is quite complex and responsible. This can be a justified step if high strength requirements are imposed on the structure being erected, and its optical functionality will also be in demand.
Polyurethane glue adheres well simultaneously with polycarbonate on one side, and with metal (aluminum, various alloys), wood, plastic on the other side. This type of glue is UV resistant.
If it is necessary to glue small parts, where the strength of the bond does not play a decisive role, hot hardening glue, as well as an ethylene vinyl acetate composition, is successfully used. To apply such a composition, a special thermal gun is used.
Despite the fact that almost all used adhesives have the ability to glue different materials in combinations, nevertheless, this should be clarified on a case-by-case basis.
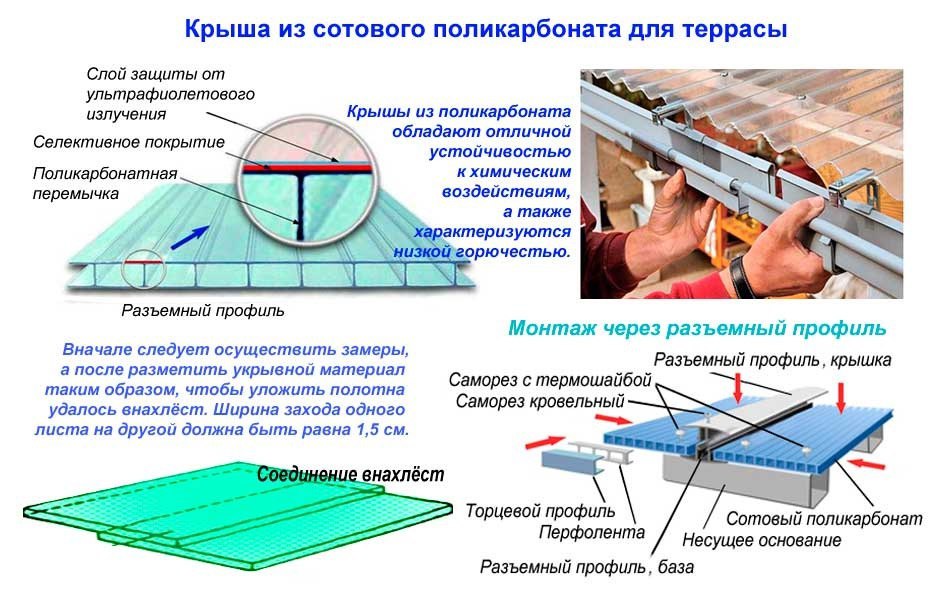
Detachable profile for mounting cellular polycarbonate
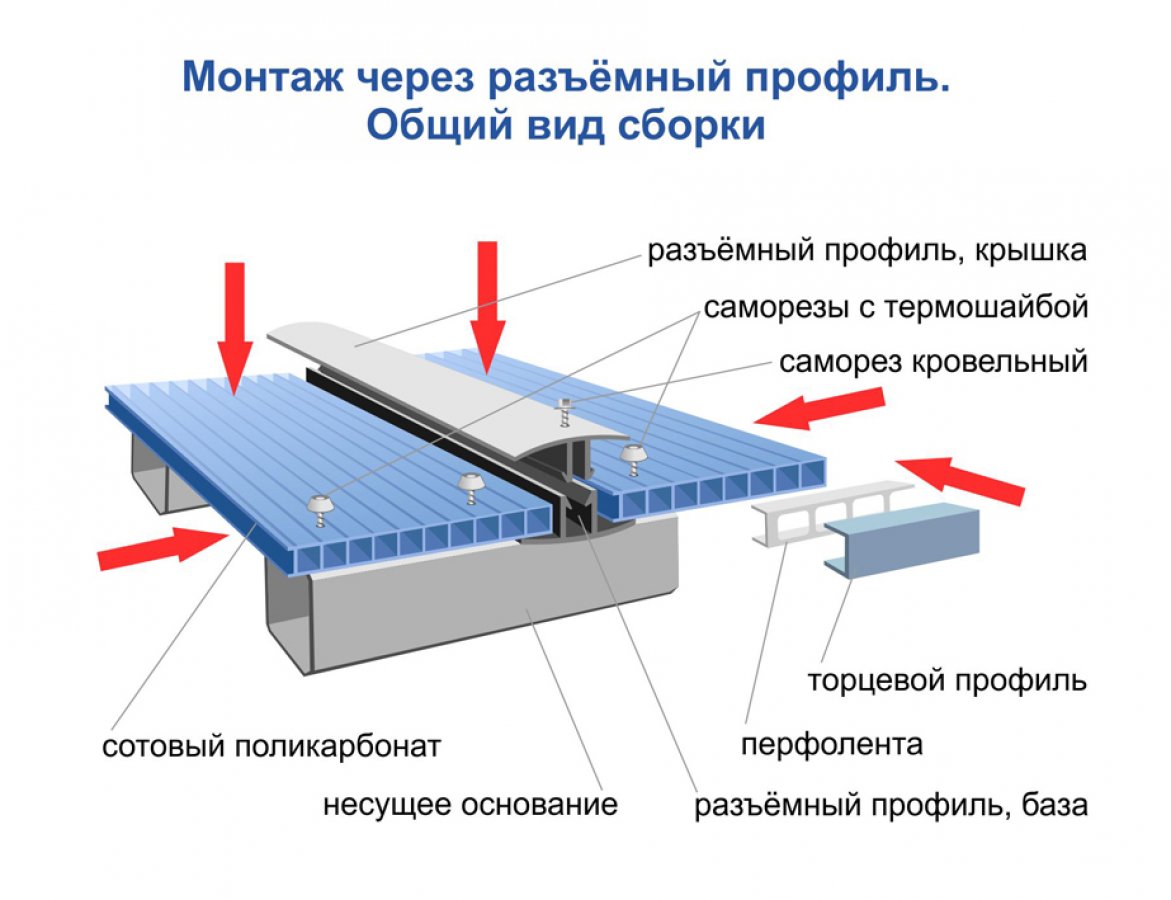
This type of fastener is somewhat more complex in design than a one-piece profile, and, accordingly, more expensive. Consists of two elements - a lower base, which is attached directly to the metal frame, and a top cover. The elements are connected to each other using latches. Unlike the one-piece profile, here the installation process is much faster, and the resulting connection is more reliable.
 Detachable profile for mounting cellular polycarbonate
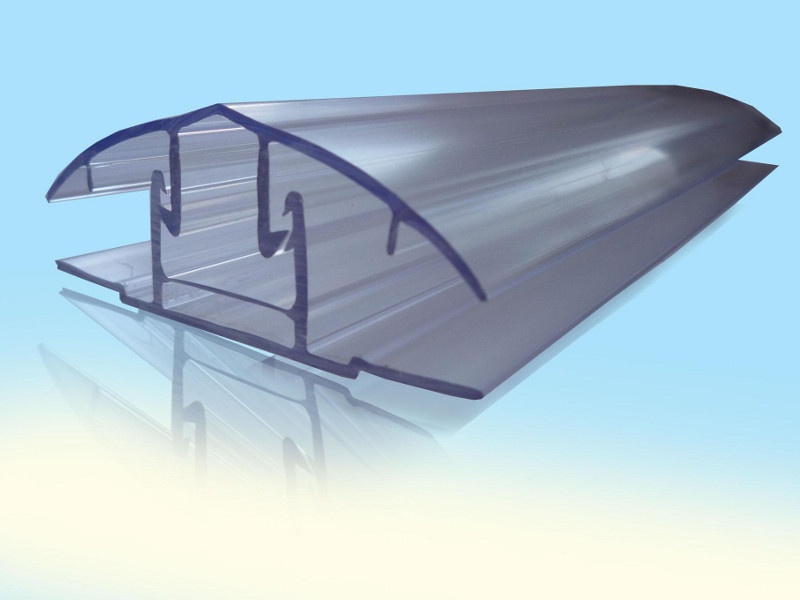 Split polycarbonate profile
In addition to plastic, split connecting profiles for polycarbonate are also made of aluminum (using rubber seals in the grooves). They are stronger, more durable and have an attractive appearance.
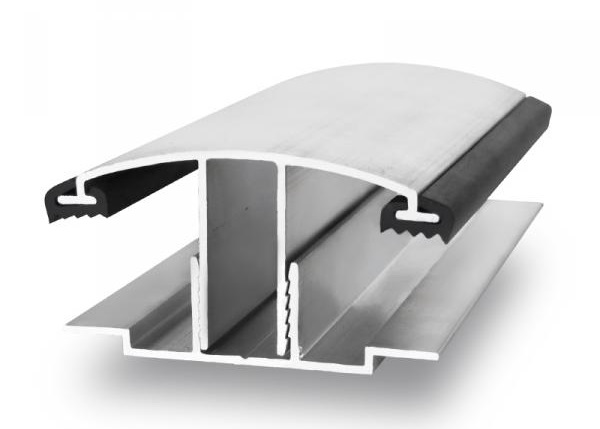 Connecting aluminum profile for polycarbonate
We will present the process of installing sheets of cellular polycarbonate on a metal frame using a detachable connecting profile in the form of step-by-step instructions.
Step 1. On the base of the profile and on the frame, mark the future fastening points.
Step 2. In the base, drill holes for self-tapping screws taking into account the thermal gap.
Step 3. Make preliminary holes on the frame (slightly less than the diameter of the screws used).
Step 4. Place the base on the frame, align it and fix it with roofing screws or screws with thermal washers.
 Polycarbonate fixing scheme using a split profile
Step 5. Remove the protective film from the edges of the SPK sheets.
Step 6. Lay the sheets on the “shelves” of the base of the split profile with the protective coating outward. Leave a thermal gap between the edge of the polycarbonate and the inner wall of the base. For greater tightness, the "shelf" can be pre-treated with silicone sealant.
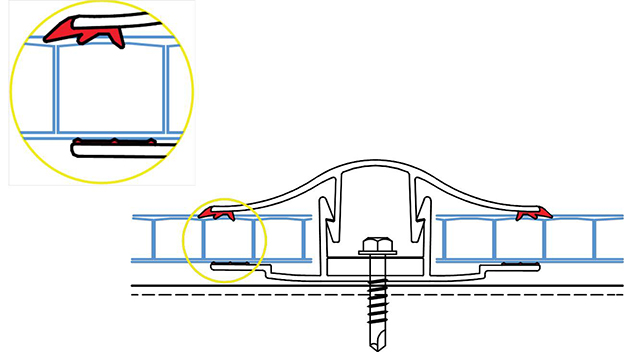 Connecting profile GCP (ECP 2G) POLYGAL with seal
Step 7. Place the cover on top and lock the profile latches by pressing on it from above with your hand. To fix the aluminum profile, tap the cover with a rubber mallet.
 Installation of polycarbonate
Step 8. Check the reliability of the fasteners, glue the ends of the polycarbonate with perforated tape and install the appropriate profile there.
Remember: regardless of the method of mounting the sheets of cellular polycarbonate on a metal frame, it is very important to precisely follow the connection technology. In this case, you will receive a strong and durable visor, canopy or greenhouse for your summer cottage or private house.
Additional materials for installation
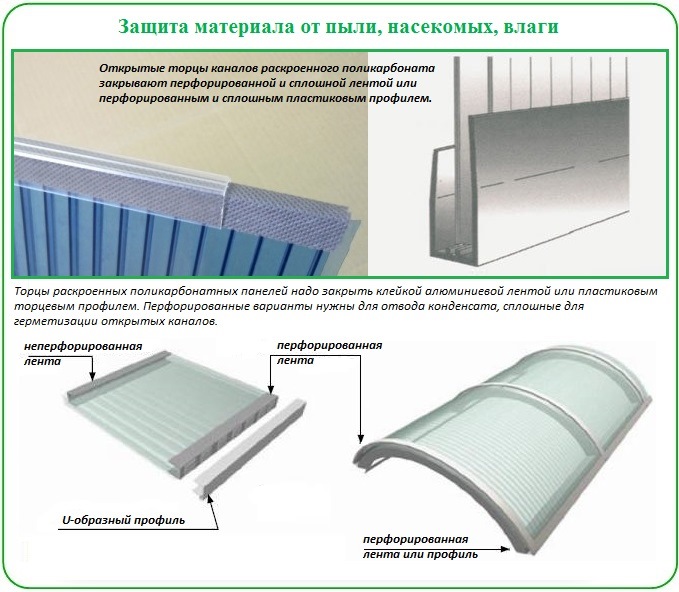
High-quality installation of structures made of honeycomb plates is impossible without sealing the ends of the sheets.
To perform work, use:
- sealing tape, the width of which should correspond to the thickness of the sheet;
- perforated tape of the appropriate width.
If the sheet is mounted on a sloped roof, the top edge must be protected with aluminum sealing tape. Aluminum tape consists of a flexible plastic base, several layers of sealed material and an adhesive layer covered with a protective film. The tape is sold in rolls, each roll is 50 meters.
 Bonding the ends before installing the profile
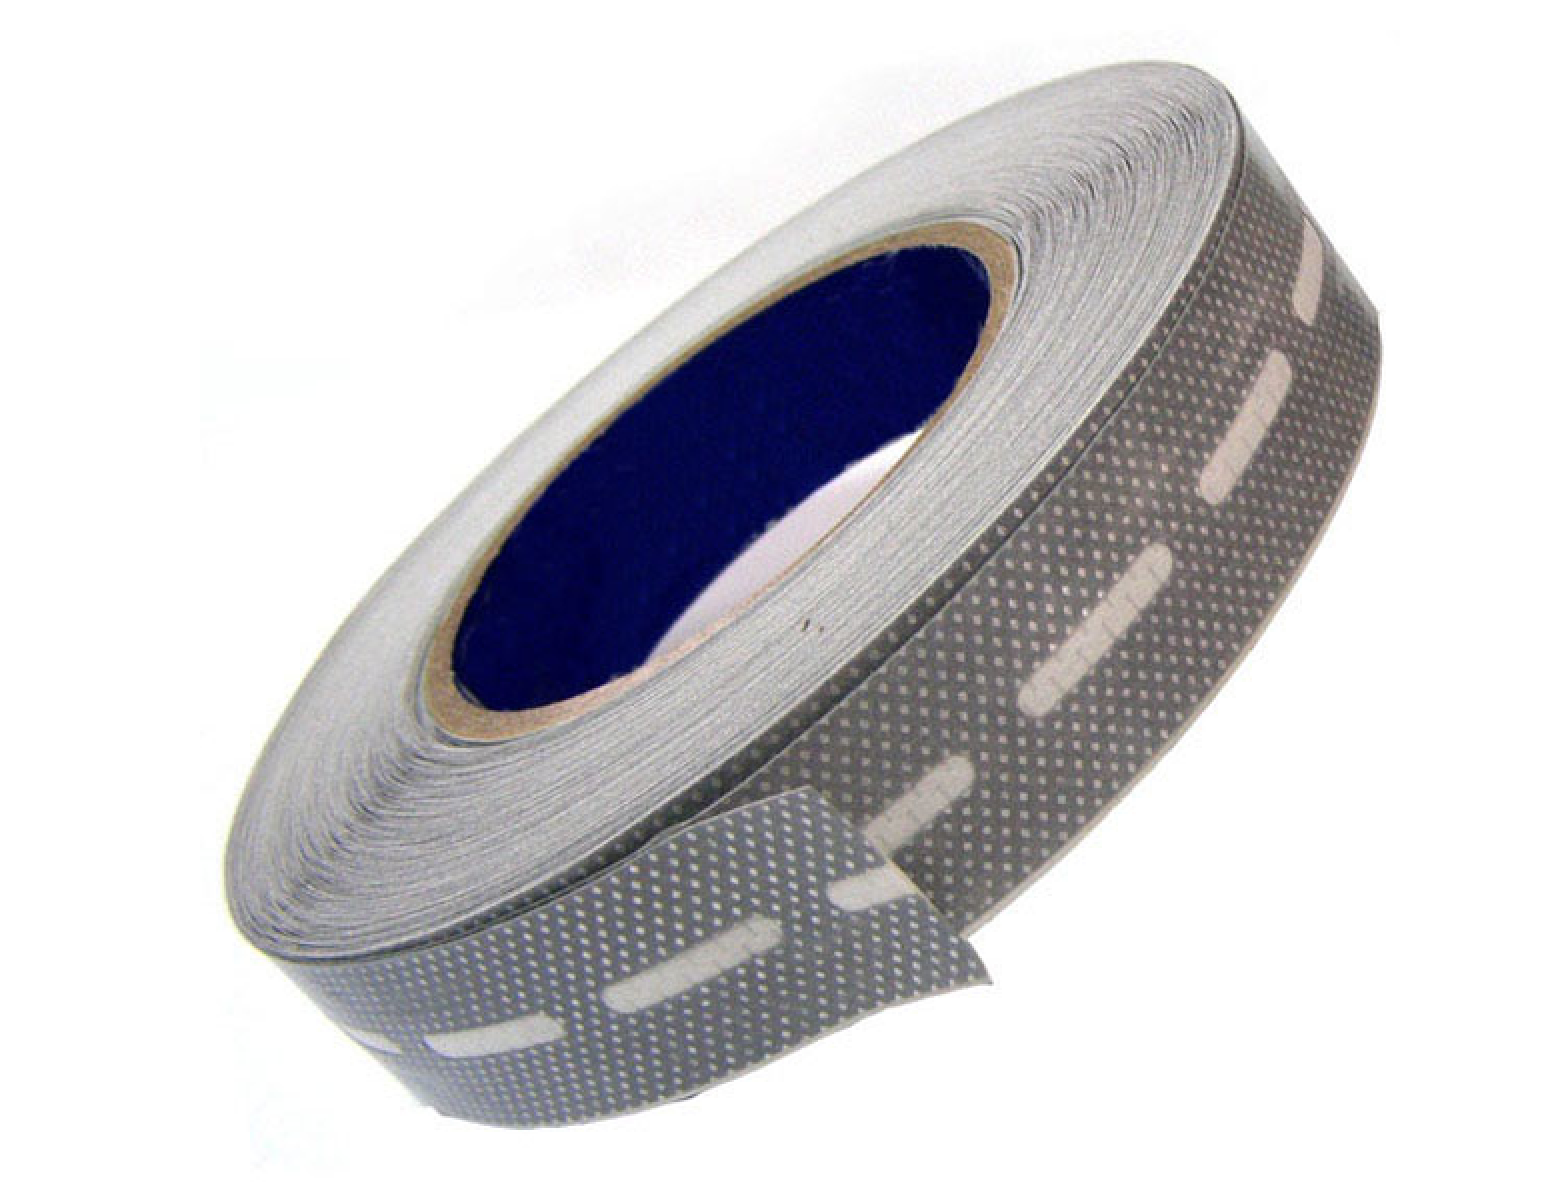
To protect the bottom of the sheet, the industry produces a special perforated tape, which also consists of a polymer base and several layers of waterproof materials. Holes (perforations) are made in the tape to allow water to pass from the honeycomb.Perforation goes along the entire length of the tape, the pore diameter is 40 microns. One roll contains 33 meters of tape.
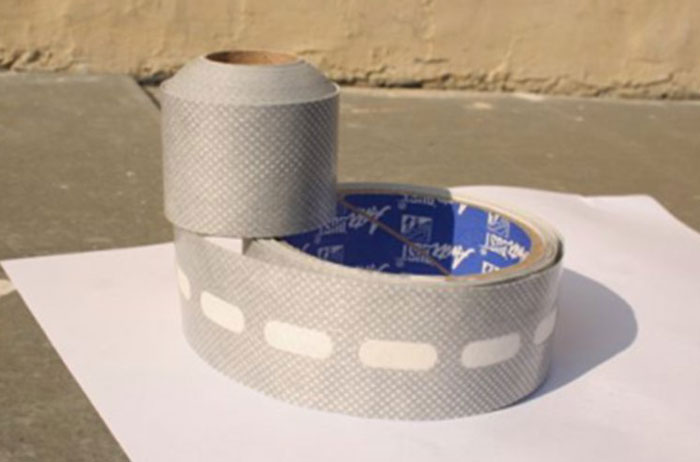 Punched tape
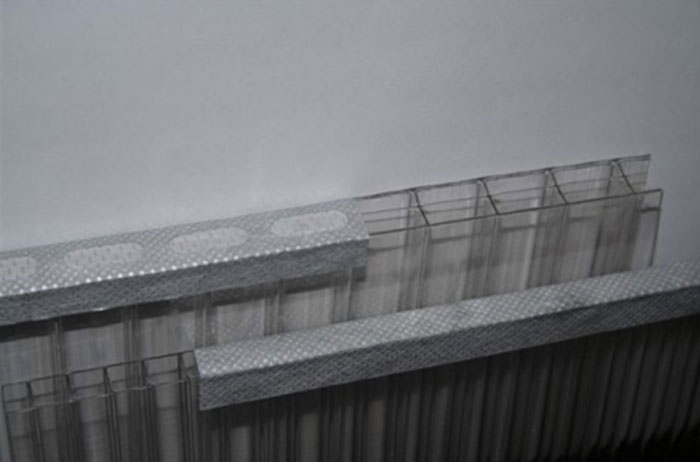 Perforated tape for polycarbonate
Sealing and perforated tapes do not lose their properties for up to 10 years or more. The water-repellent coating allows moisture to move under its own weight and drain through the perforations. The tape does not become brittle and brittle at subzero temperatures, does not soften in extreme heat. Fungus does not grow on the surface of the material, mold does not start. The tape is not destroyed by ultraviolet radiation.
 Sealing tape for polycarbonate ends
If the cellular polycarbonate sheet is bent and fixed on the roof of the arched frame, then both edges of the sheet are sealed only with a perforated tape (the sheet can only be bent across the strips so that moisture inside the cells can freely move and flow out).
Over time, the holes-membranes of the tape are clogged with fine dust, which penetrates into the protective profile. Because of this, the removal of moisture from the honeycomb will deteriorate over time. Installation specialists sometimes advise to remove the end profile, tear off the old membrane tape and replace it with a new one.
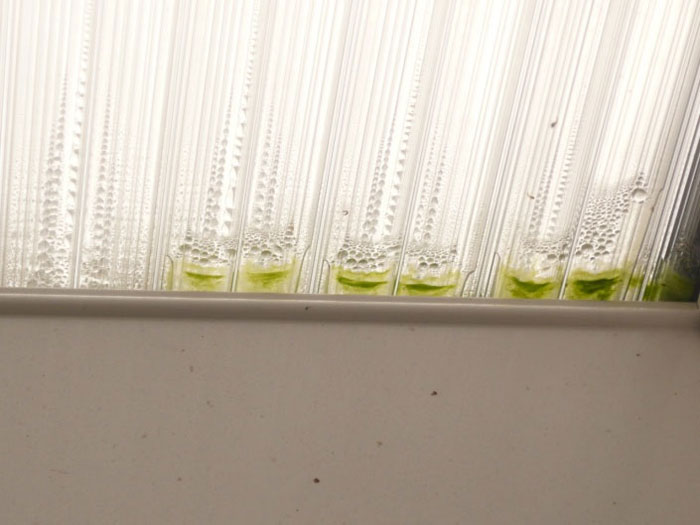 What happens to polycarbonate without protection
Observe the following guidelines when applying the protective tape:
- the ends of the canvas should be even and smooth, if necessary, you need to remove the burrs, align the sections of the canvas and clean them with sandpaper;
- after removing the protective film from the canvas, glue spots may remain on it - they must be removed with a soap solution and clean water;
- the tape is glued strictly symmetrically relative to the middle of the end part of the web;
- when gluing, the tape must not be overtightened;
- the tape should not warp and wrinkle.
- the surface of the sheet must be dry before fixing the tape.
How to properly mount panels on a canopy
Under the influence of high temperature, some change in polycarbonate may be observed, therefore, certain installation rules must be observed:
- Mandatory presence of gaps.
- Enlarged mounting holes.
- The use of thermal washers.
- Application of special types of profiles.
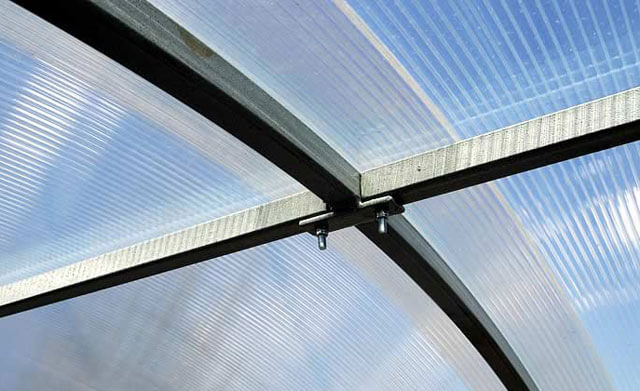
To perform a high-quality panel installation, you need to take care of the correct storage of the purchased material:
- Lay the sheets on a flat surface with a protective film facing up.
- The stack height should not exceed 2.5 meters.
- Store the material in a dry ventilated area away from heating appliances.
- It is not recommended to cover the material with polyethylene.
In addition, it should be remembered that the protective coating is removed from the panel only at the end of the installation work.
The quality of work largely depends on the compatibility of the materials used. Therefore, it is not allowed to use polyurethane, PVC, amine and acrylic based sealant with polycarbonate.
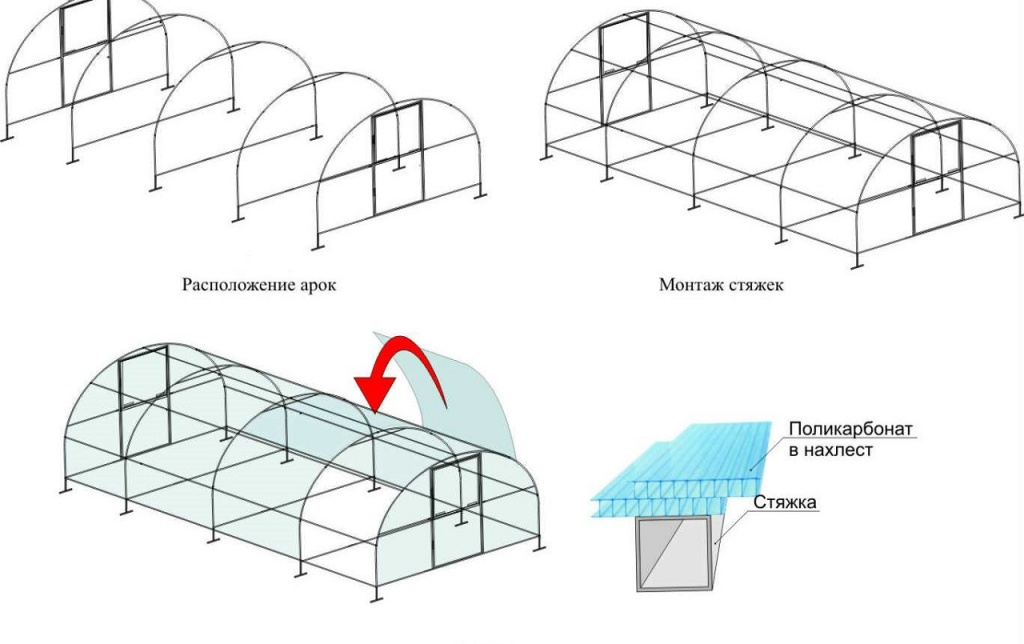
When drafting a frame, one should take into account various types of load, temperature effects, dimensions of the material used, permissible bending radius, direction of wastewater
It is very important to know through what distance the polycarbonate should be fixed .. The optimum temperature for working with polycarbonate is in the range from +10 to + 20C.
The optimum temperature for working with polycarbonate is in the range from +10 to + 20C.
If it is necessary to move on the surface of the material, support should be used, the length of which is about 3 meters, and the width is 0.4 meters. It is best to cover them with a soft cloth.
If you want to remove any glue residue after removing the protective film, you can use a neutral detergent. After cleaning, you can wipe the surface with a soft cloth.
Fastening polycarbonate to a wooden frame
In this case, the actions must be carried out in the following sequence:
- First of all, it is necessary to lay the sheet on the frame and, using a drill, make holes for fasteners (washers) and self-tapping screws or bolts. The plate should look out of the structure by 25-30 mm.
- Next, you should fix the washers to the frame with self-tapping screws, using a screwdriver for convenience.
- Then you need to consistently lay down and fix the remaining sheets.
- In the same way, it is required to install polycarbonate at the ends and in the place where the doors are located.
- Next, it is necessary to seal the edges of the canvases by means of a thermal tape, profile or other materials. If necessary, you need to do additional processing of the joints with a sealant.
Making holes is required strictly perpendicularly. Specialists on large sheets make openings not round, but oval, which are elongated along the length of the material. The distance between the holes for thermal washers and other fasteners depends on the thickness of the polycarbonate used and the coverage area. Often the distance reaches from 30 to 50 cm. The first and last holes should be made at least 4 cm from the edge of the sheet.
The screwed-in washer should fully cover the hole that was made under it. When making a hole, you can resort to using a special cutter with a pilot drill. They make a hole and only then screw the self-tapping screw through the opening of the thermal washer. Then it is necessary to put on the plug from above, which prevents the penetration of water and gives completeness.
Wooden frames are erected for greenhouses, gazebos, sheds and a number of others, including utility structures. It must have stability and strength, and all structural components must be properly connected. The wood must be opened with a special agent that prevents the process of rotting wood and eating it by insects. Cellular polycarbonate and, less often, monolithic sheets are often used on a frame made of this material for greenhouses and outbuildings. Lightweight metal structures are also erected for such buildings.
Having learned how to fix cellular polycarbonate correctly with your own hands, it will be possible not only to quickly carry out all the necessary work without outside help, but also to exclude possible shortcomings that can cause a decrease in its operating period.
Video:
You may be interested in:
How to make a concrete screed in a garage correctly with your own hands
How to connect polycarbonate sheets to each other with your own hands properly
How to scrub polyurethane foam from a metal door: removing a fresh and frozen mixture
How to choose a glue for polycarbonate - glue it yourself
When using solvent-based formulations, slight violations of transparency parameters and a slight increase in fragility at the junction appear. To minimize such occurrences, it is recommended to use step curing compounds for bonding.
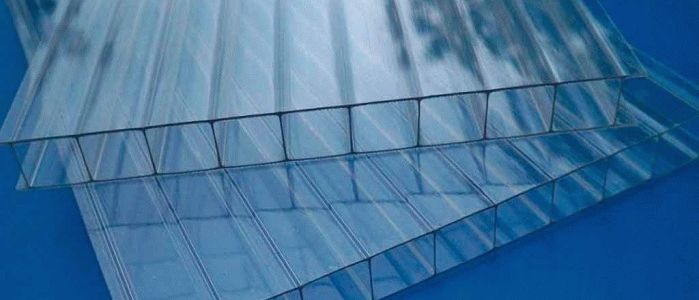
Types of adhesives
Adhesives, characterized by a high-step type of polymerization, are based on polyurethane monomers and reduce the manifestation of brittleness. There are other types of adhesives that are used in the process of working with polycarbonate and in composition, as well as components, refer to acrylic, polyurethane, foam and silicone adhesives.
In recent years, hot-setting glue and ethylene vinyl acetate adhesive have been gaining popularity.
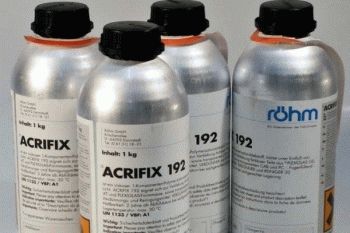
Types of adhesives
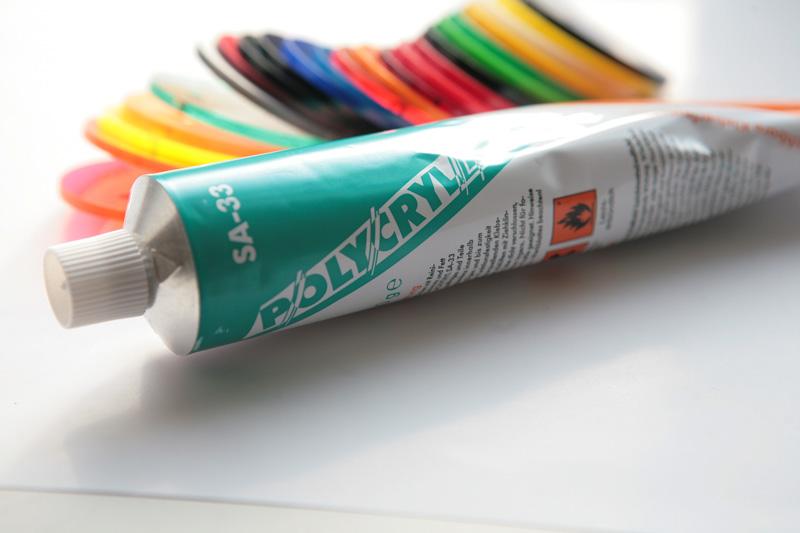
Compounds for gluing polycarbonate can be two-component and one-component. The second version of the glue is easier to use and is used to obtain uncomplicated joints.
In addition, it is allowed to use a one-component compound for gluing polycarbonate to other types of plastics, as well as metal and rubber. The resulting compound has strength, quick connection, resistance to temperature changes and is not affected by atmospheric manifestations and solvents.
Characteristics and purpose
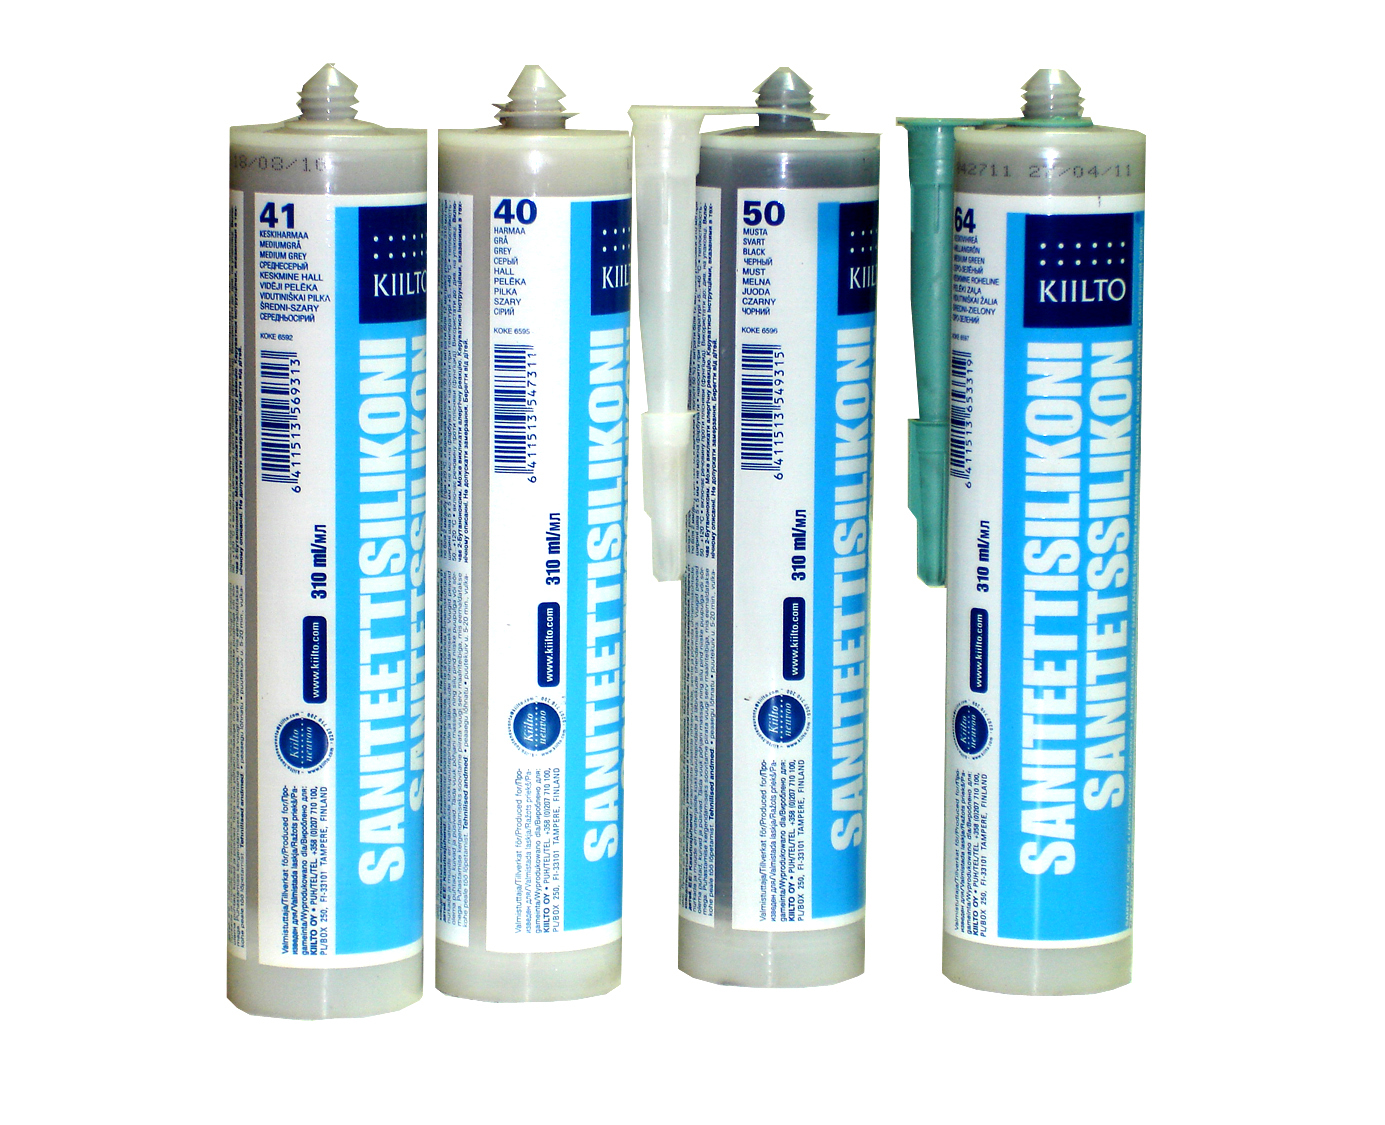
Silicone glue is characterized by a lack of transparency and has a white, black or gray shade.
Such adhesives are used for high-impact structures, which require high impact resistance and resistance to weathering, which is typical for aquariums, as well as equipping frames, lamps and glass sealing for cars with polycarbonate sheets. The adhesion of the cellular polycarbonate sheet is characterized by a high degree of reliability.
How to properly glue polycarbonate with your own hands
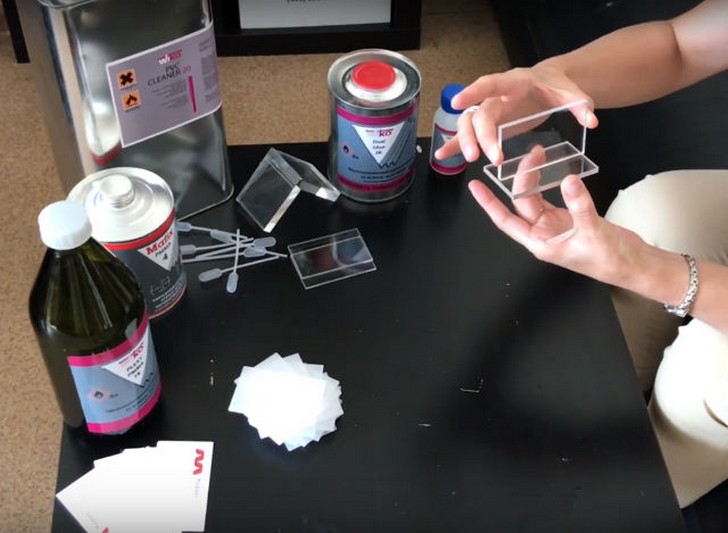
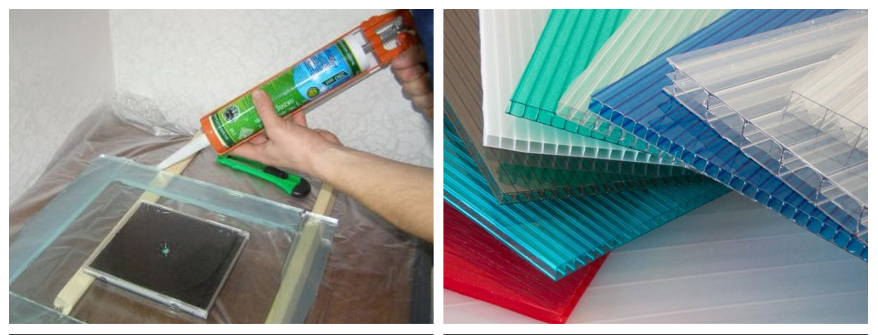
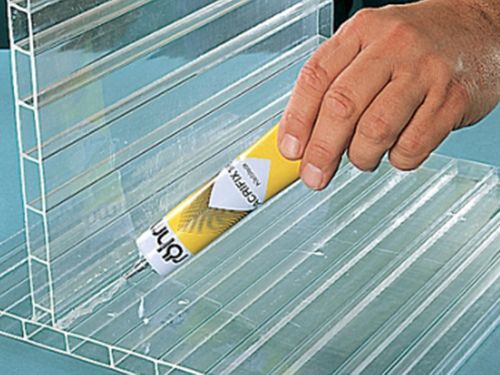
The surfaces to be bonded should be thoroughly degreased with isopropyl alcohol. The adhesive is applied using a filling tube, applicator or special syringe.
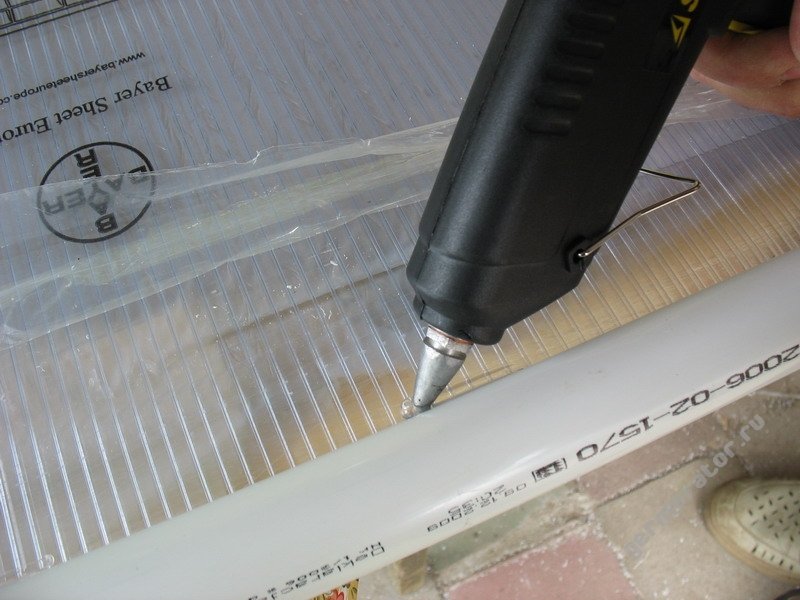
A special glue gun is used to glue polycarbonate sheets with hot-curing glue or ethylene-vinyl acetate glue.
Basic mistakes when working
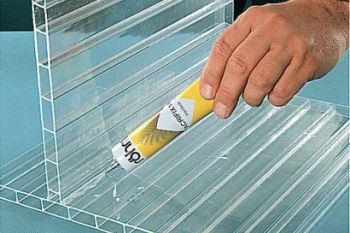
Technology of gluing polycarbonate to polycarbonate
A fairly frequent violation of the gluing technique consists in insufficient cleaning and poor-quality degreasing of the glued surfaces.
To choose the right adhesive composition, you should take into account a number of important factors that have a significant impact on the results of gluing polycarbonate.
It is necessary to pay attention to the competent combination of the materials involved in the bonding process, as well as resistance to negative manifestations and atmospheric influences. Special requirements are placed on the elasticity of the joints obtained during the gluing process and their resistance to various chemicals
Poor or low-quality joints are obtained with the use of solvent-based adhesives. That is why it is necessary to carry out tests in limited areas of polycarbonate. In addition, it is necessary to pay attention to the expiration date of the adhesive.
Special requirements are imposed on the elasticity of the seams obtained during the gluing process and their resistance to various chemicals. Poor or low-quality joints are obtained with the use of solvent-based adhesives. That is why it is necessary to carry out tests in limited areas of polycarbonate.
In addition, it is necessary to pay attention to the expiration date of the adhesive.
The cost of adhesives used for gluing polycarbonates is more than affordable. Prices for the most popular and demanded adhesives for hard plastics start at 150 rubles.
The most commonly used type of adhesive is silicone. The composition of such a personalized product does not violate the appearance of the products to be glued, and the resulting gluing has the necessary strength. The only drawback is the requirement for a preliminary priming of the cleaned and degreased polycarbonate surfaces to be glued.
The quality of the resulting seam directly depends on the correct choice of glue and the correct gluing procedure.

