Basic rules for installing the hood
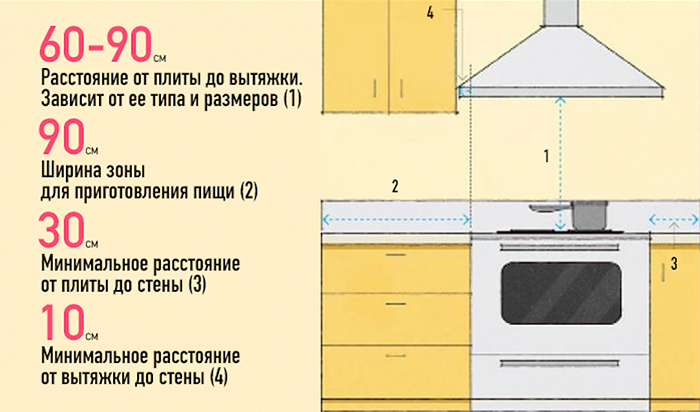
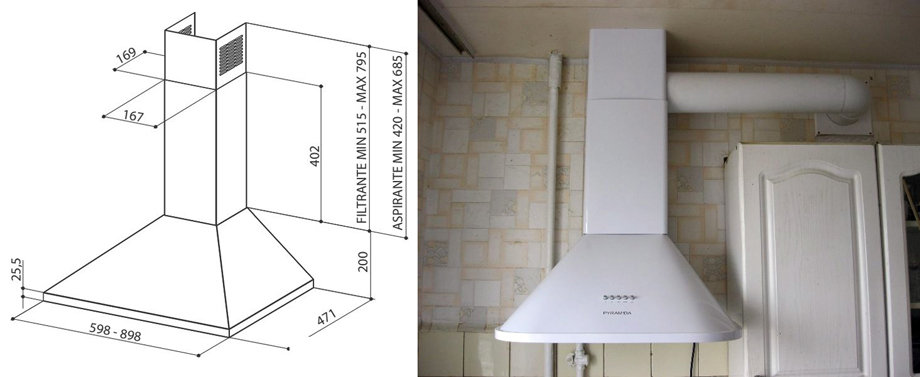
Better operation of the device is possible only if the hood completely covers the surface of the stove. In this case, the polluted air will be almost completely absorbed, and its leakage will be minimal. This is the main reason why buyers prefer models with a wider umbrella, from 60 to 90 cm. This size corresponds to the size of a standard plate or panel.
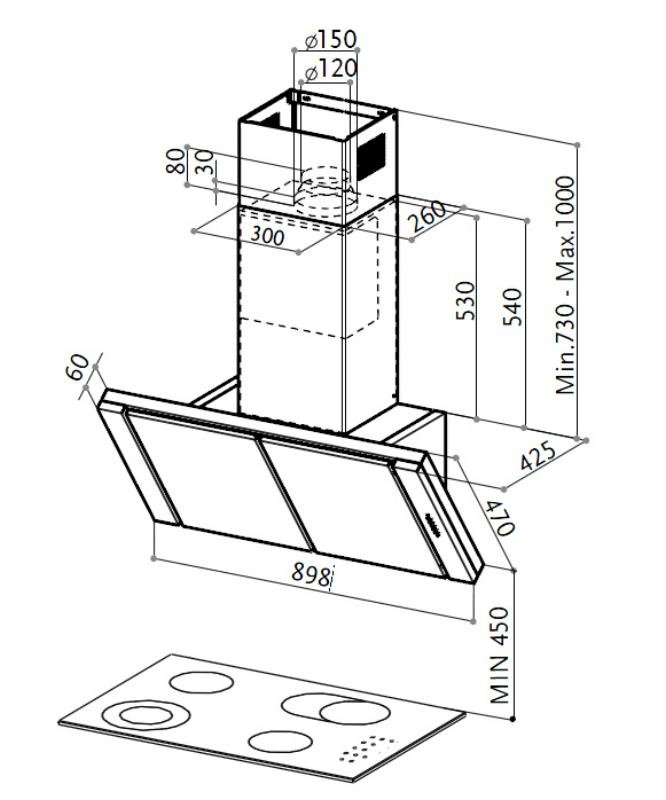
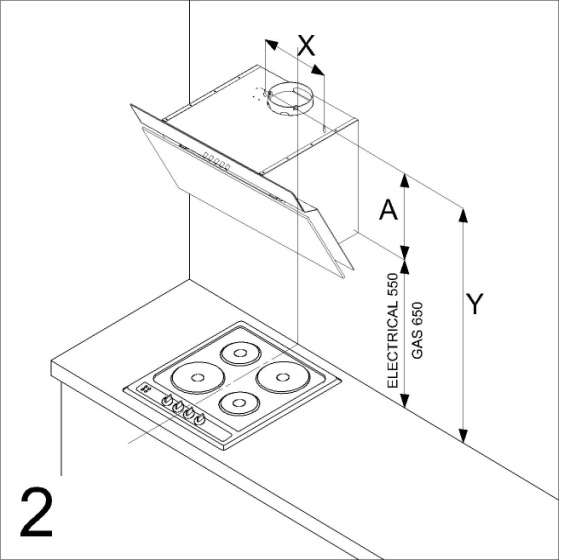
The height of the hood is determined in accordance with ergonomic and fire safety regulations. The shorter the distance from the umbrella to the hob, the better cooking vapors and bad odors will be absorbed. But at the same time, the height should not be too low, otherwise there is a high risk of damage to the ventilation system. This can happen due to overheating or even combustion of a greasy film that forms on the surface of the filter.
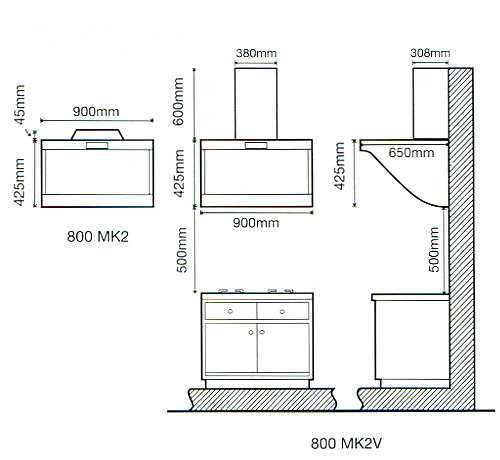
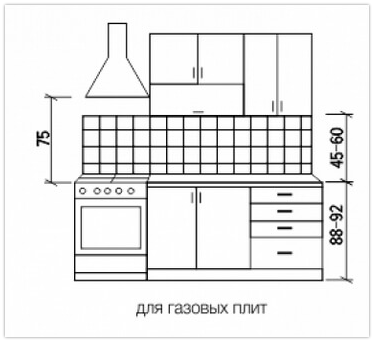
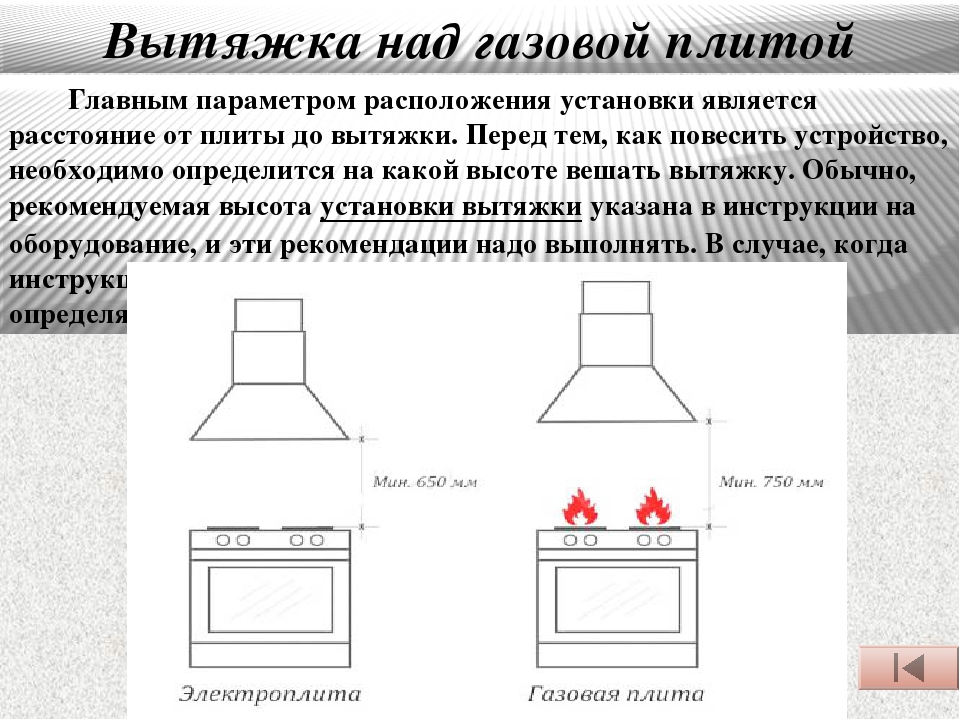
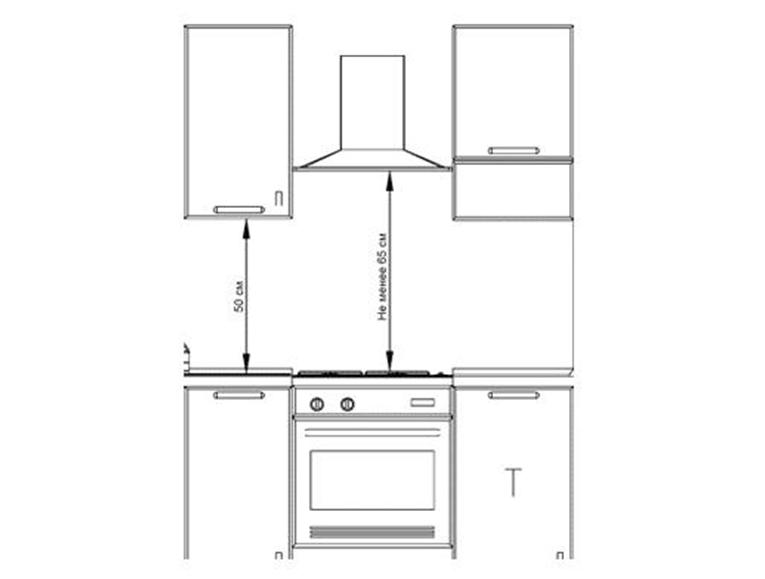
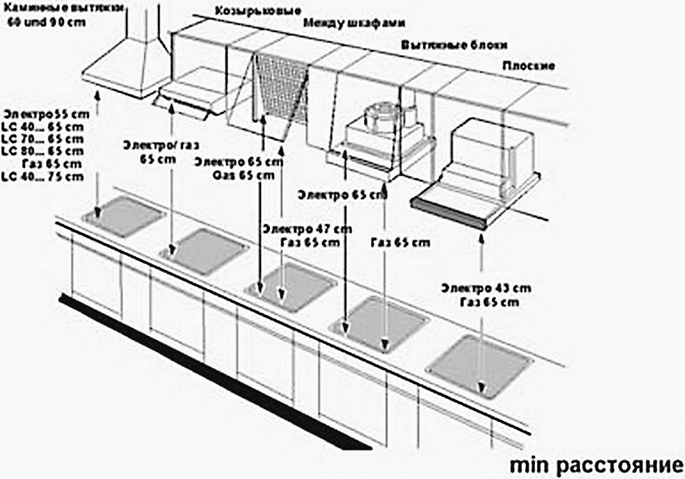
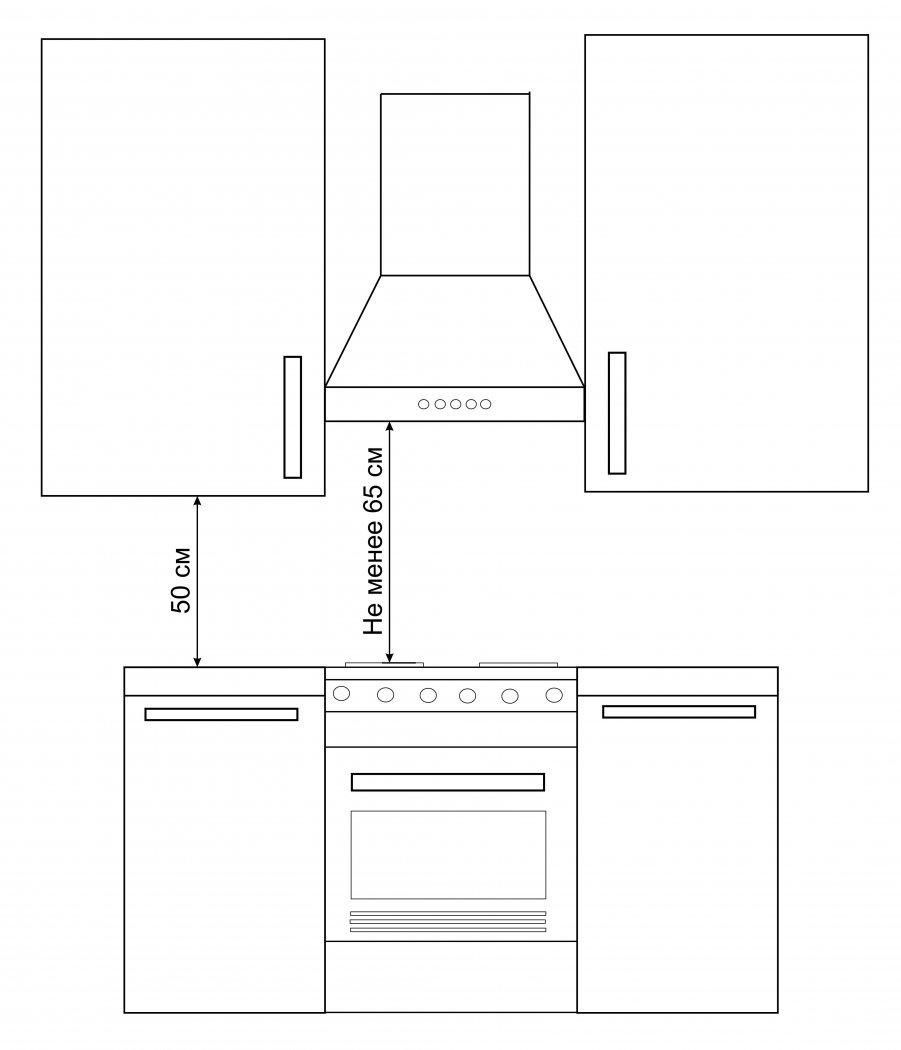
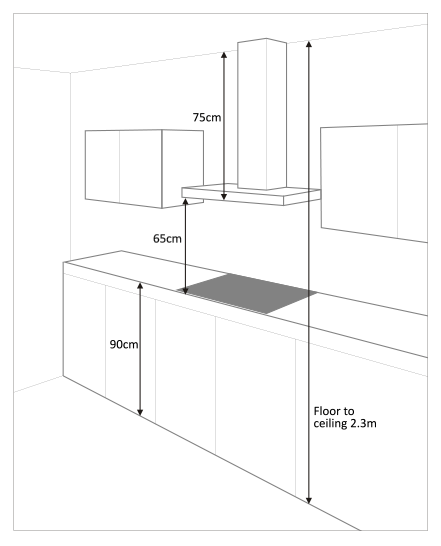
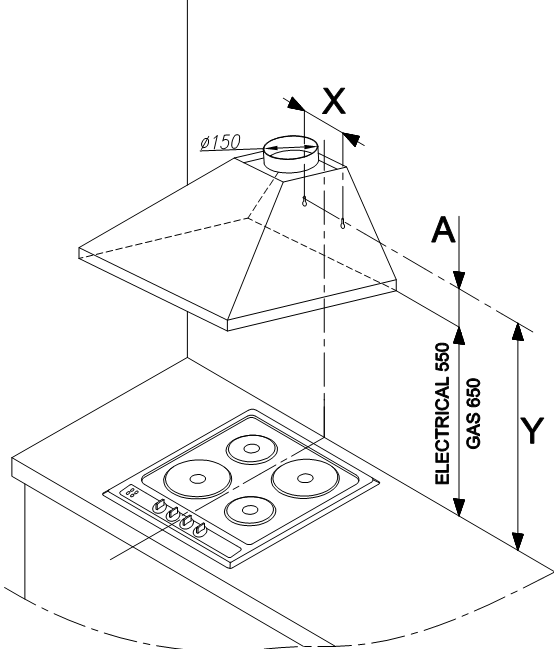
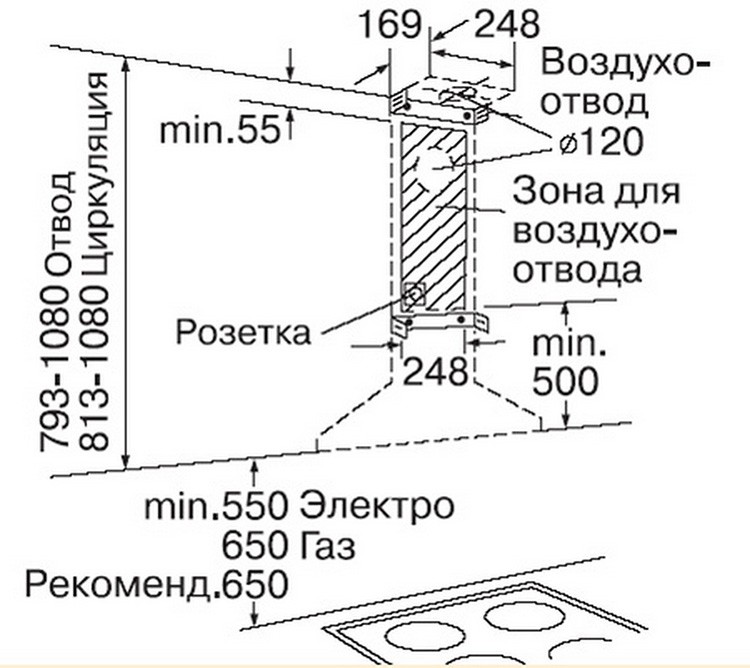
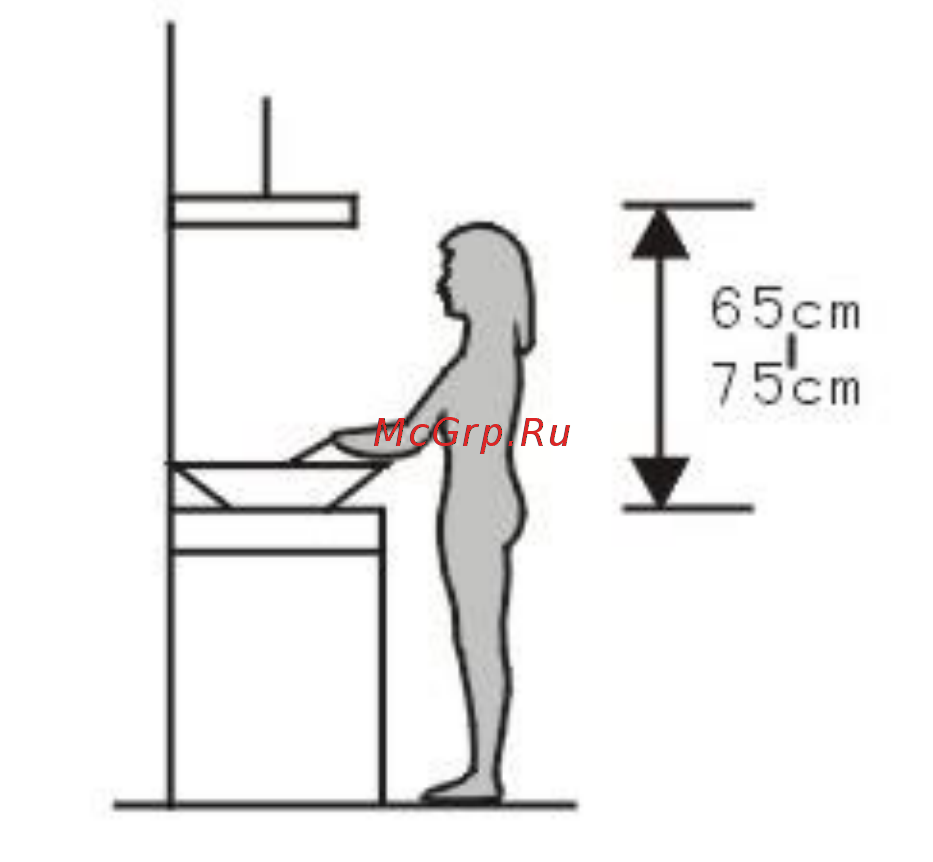
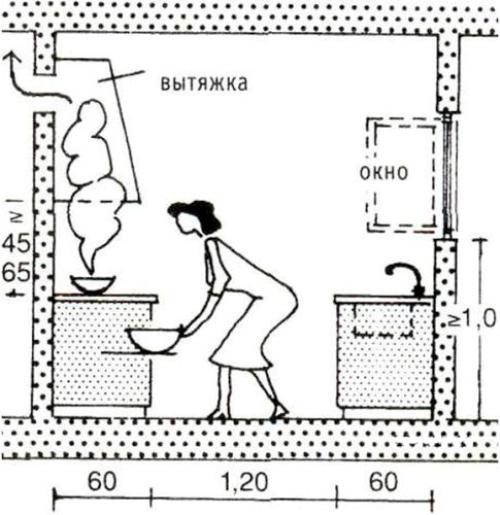
Therefore, for safety reasons, the minimum distance from the stove to the umbrella should be about 50-65 cm. The values may fluctuate slightly. Often the optimum installation height of the hood is indicated in the data sheet. For ergonomic reasons, it should be positioned so as not to interfere with food preparation.
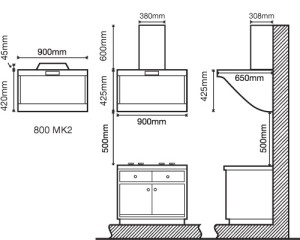 Parameters for installing the hood in height
Installing the duct
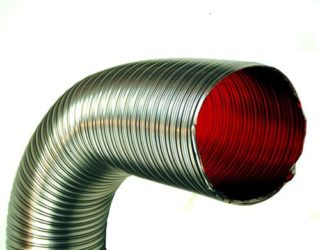 Aluminum corrugation for connecting the hood and ventilation duct
The air duct is designed to remove heat from the stove, food vapors, smoke, moisture and fuel combustion products. The structure is a pipeline, one end of which is connected to the hood, and the other is brought out into the ventilation shaft or outside through a hole in the wall of the house.
There are such options for arranging the duct:
- Aluminum corrugation. The product is inexpensive, easy to install and corrosion resistant. He also has enough minuses. Corrugation makes a lot of noise, dirt accumulates in the folds, aesthetics leaves much to be desired.
- Plastic boxes. Parts are sold with a length of 50-200 cm. The cross-section is round, square and rectangular. Complete with couplings, elbows, adapters and strips.
- Iron pipes. As a rule, they are produced in a square shape with a side size of 10-20 cm. The connection is made in a socket, possibly subsequent decoration for furniture or kitchen decoration.
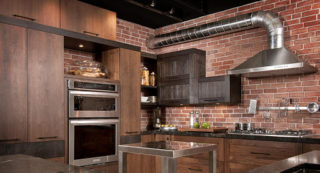 The fewer turns in the duct, the better the hood works.
To assemble an air duct for a kitchen hood, you must perform the following measures:
- Carry out measurements, draw up a drawing of communication. Based on the data obtained, make a calculation of the required materials.
- Attach a strip to the wall through which the pipe will come out.
- In accordance with the scheme, cut out the fragments of the channel, remove the burrs from the edges, slightly round off the outer corners.
- Assemble the air duct, starting from the hood. Eliminate bugs, if any.
- Disassemble the structure, lay out the fragments in the order of connection.
- Reassemble the duct, but using silicone to seal the joints. Remove excess solution with a damp cloth or sponge.
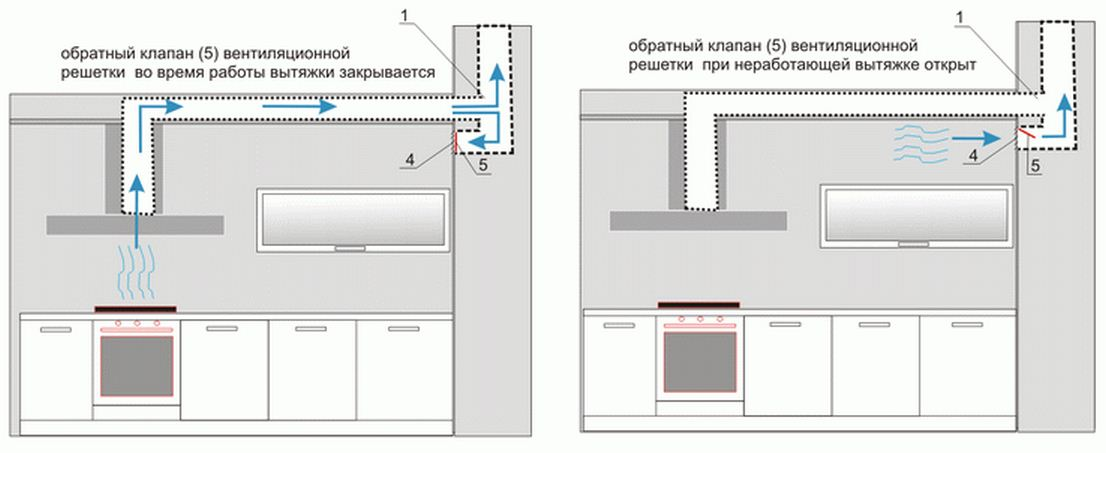
If the ventilation hole in the kitchen is the only one, it should not be completely covered with a pipe. This will disrupt the circulation of air in the room. In such cases, it is necessary to use a combined grille, where the upper part is covered with a removable mesh, and the lower one is equipped with an opening for the air duct inlet. To prevent the penetration of neighboring odors into the home, it is better to purchase a grill with a check valve.
At what height to install the hood above the gas stove
Recommendations for the selection of the distance between the stove and the hood come not only from the manufacturers of devices, but also from the specialists who are engaged in their installation. An important question that arises before people: at what distance should the hood be hung over the gas stove? After all, they prevail in many apartments and houses, and there are more substances emitted during cooking on burners than from other types of stoves.
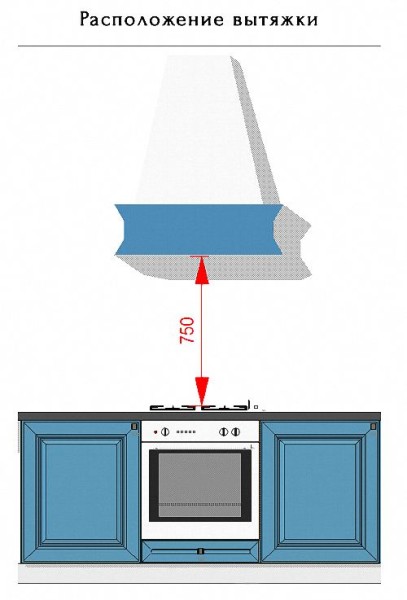
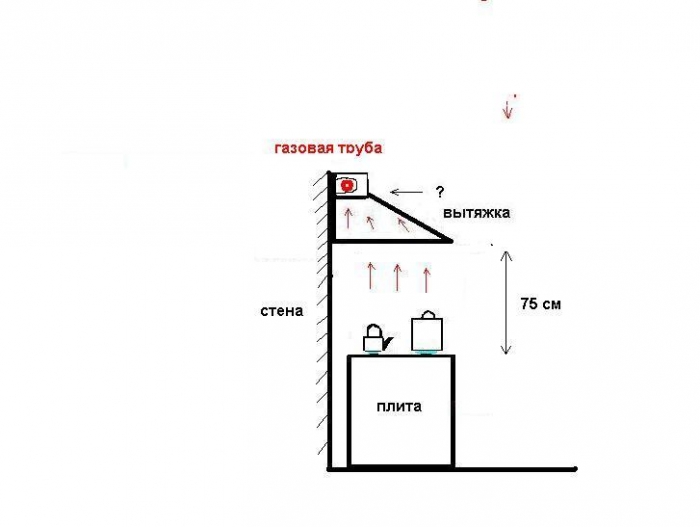
Manufacturers add documentation to each hood, which indicates not only distance indicators, but also other installation recommendations. For example, Saturn strongly recommends that customers install their hood 75 cm from the surface of the gas stove. Bosch, in turn, ascribes a figure of 55 cm (the distance is reduced to achieve greater performance).
Only three criteria determine the distance (fire hazard, convenience during cooking and equipment power). Possessing accurate figures and indicators of the hood, you can independently calculate the installation height.
Also, it is important to consider at what height to install the hood above the electric stove. It would seem that an electric stove during operation emits fewer unpleasant objects than a gas stove, but here it is important not to overdo it with decreasing distance
 Distance from the hood to the gas and electric stove
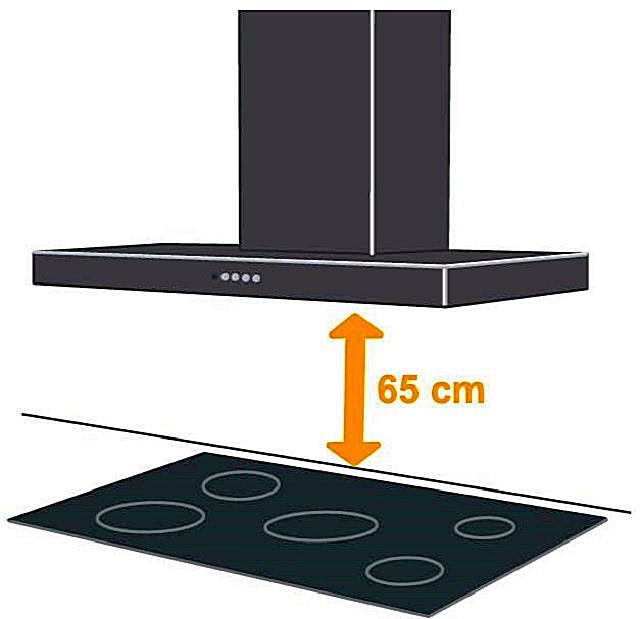
Horizontal hoods can be installed above an electric stove at a height of 65 cm. This is an optimal indicator that will not disturb human comfort and will allow the equipment to reach its potential without feeling a loss in performance.
It is better to install inclined hoods above the electric stove at a distance of 40-50 cm.However, it should be understood that for tall people this indicator will mean a feeling of discomfort near the stove.
What distance affects
Manufacturers do not just pay attention to the allowable height of the hood from the stove. If the indicator is met, the device will efficiently perform its tasks, and it will be easier for a person to use its capabilities.

If you install the hood lower than recommended, this can lead to many unpleasant consequences. A taller person will experience inconvenience while cooking and banging his head against the body. One of the main risks is the possibility of ignition of soot, which forms on the filter for a long time. Also, such a hood will be inconvenient to maintain (replace or clean the filter).
Also, the lower the hood is above the stove, the smaller its radius of absorption of steam and other emissions.
Therefore, it is important to adhere to the prescribed manufacturer recommendations.
If the hood is installed high, the performance of the equipment will drop several times. To cope with the load, it will be necessary to turn on maximum power, which will incur high energy consumption and rapid wear of the exhaust system.
It should be noted that there are no state standards on this issue, however, manufacturers always indicate in the technical documentation of the hood the permissible height of the device above the stove.
There are factors that directly affect the calculation of the distance from the plate to the hood. These include:
- Man's height;
- Kitchen height;
- Dimensions and type of hob;
- Features of the layout of the kitchen;
- Type and power of the hood.
Also, it must be borne in mind that there are standards for air ducts and electrical networks. Compliance with all recommendations and competent installation of the hood above the stove will reveal the entire working potential of the equipment and ensure its comfortable operation.
The main stages of installing the hood in the kitchen
 A recirculation hood is suitable if the ventilation duct is far away
If safety requirements permit, it is better to install the stove and the hood opposite the outlet to the general ventilation system.If this is not possible, you will have to buy pipes and deal with their laying. The option with filters can be considered as temporary, since the circulation system does not differ in the proper efficiency of air purification and removal of contaminants.
Regardless of the type of equipment, any work begins with unpacking and control inspection. The product may have received internal and external damage during transportation. Then a test run of the device should be carried out in order to check its operability. It often happens that the supplied screws and brackets do not meet the required strength. If their reliability raises even the slightest doubt, the products must be replaced.
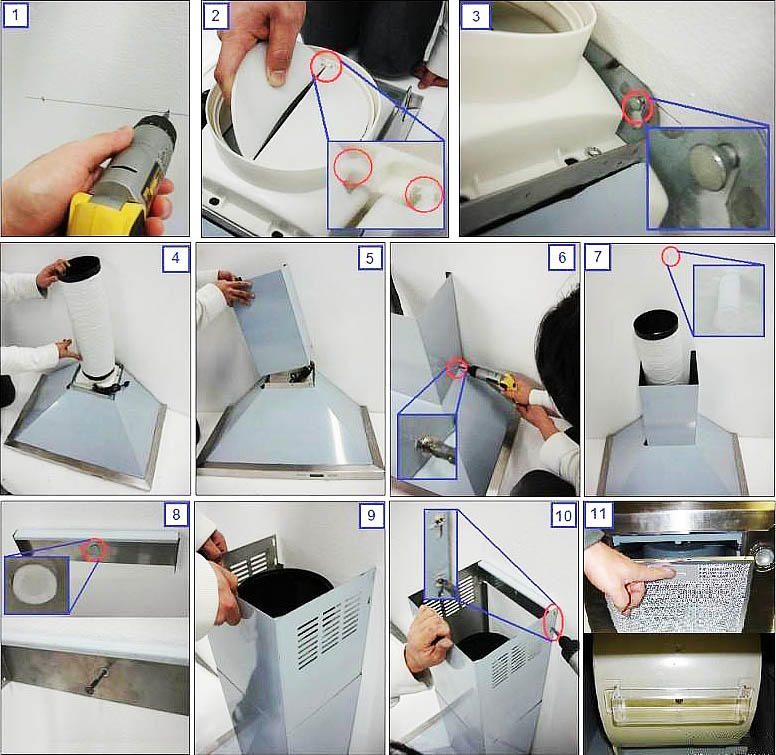
Step-by-step installation of mounted models:
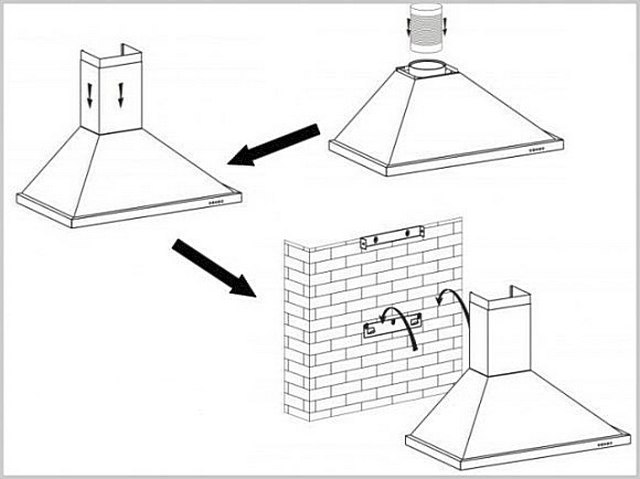
- Marking. A vertical line is drawn from the center of the slab and a horizontal line is drawn to mark the bottom of the screen. Then a second horizontal line is made, along which the bracket is attached.
- Suspension installation. First, holes are drilled, then dowels are hammered into them. If there is a layer of protruding apron trim below, a wooden batten with through holes is used to compensate for the vertical drop. The horizontal is checked last and the mounting plate is screwed on.
- Hood hanging. This should be done slowly and carefully so as not to lose balance and not drop the product. The slots on the back cover of the case are aligned with the protrusions on the bar, after which it must be lowered down until it touches the wall.
The final step is to fix the filters in the seats.
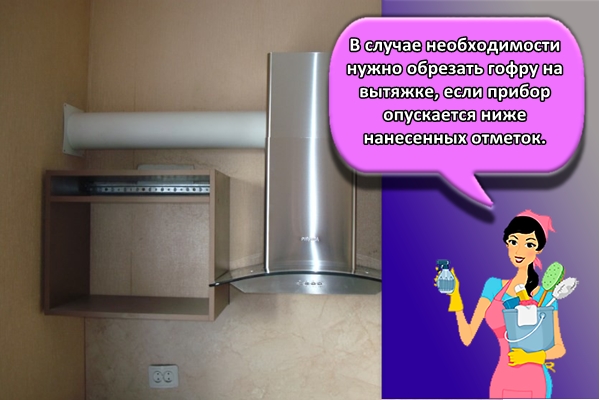
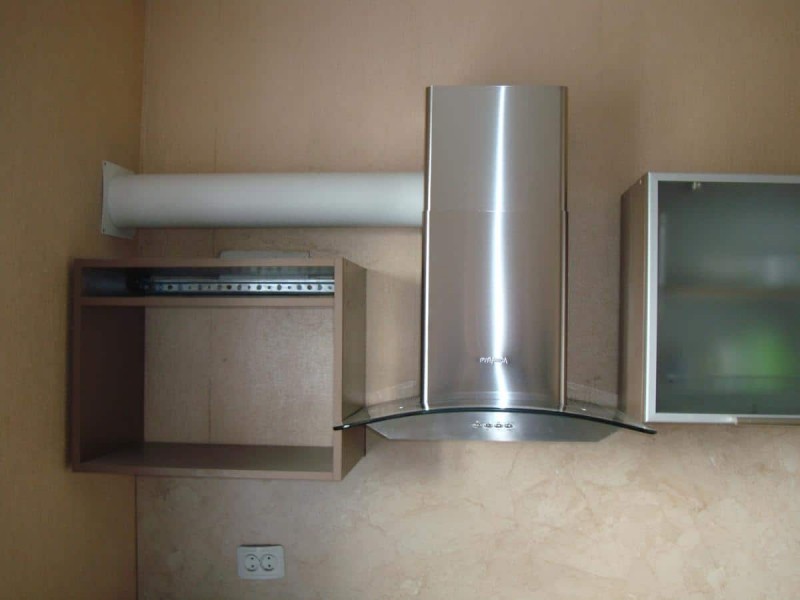
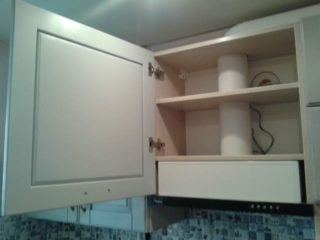 The exhaust pipe can be closed with decorative doors
Embedded models require more time and effort to install. To build the hood into the wall of the kitchen unit, you will need to perform the following manipulations:
- Check with a level the horizontal of the cabinet to which the equipment will be attached. Correct if necessary.
- Remove the cabinet, disassemble it so as to gain free access to the bottom and lid. It is better to remove the door so that it does not interfere with work.
- Glue the template to the bottom with masking tape, transfer the marks for the holes for the bolts and air duct on it. Repeat the operation on the lid.
- Using a drill and a jigsaw, make holes of the required diameter, treat them with a primer or acrylic paint to protect them from dampness.
- Install the adapter for supplying the ventilation duct to the hood.
- Place the cabinet on the appliance, align the holes, connect the objects.
- Hang the assembled structure on the fasteners on the wall.
- Install the ventilation duct.
General requirements, rules and standards for the installation of the hood
There are general rules that should be followed during the installation of any exhaust system. The main thing is to comply with the manufacturer's requirements and established standards. In the instructions for any model, there are always recommendations for the optimal distance to the plate. As a rule, you can vary these parameters within 10 cm, depending on the height of the hostess or the characteristics of the furniture structure. The standards have been developed with the aim of preventing fires in order to comply with fire safety. The width of the hood must match the width of the hob. If the suction surface is smaller than the hob area, effective air purification will not occur.
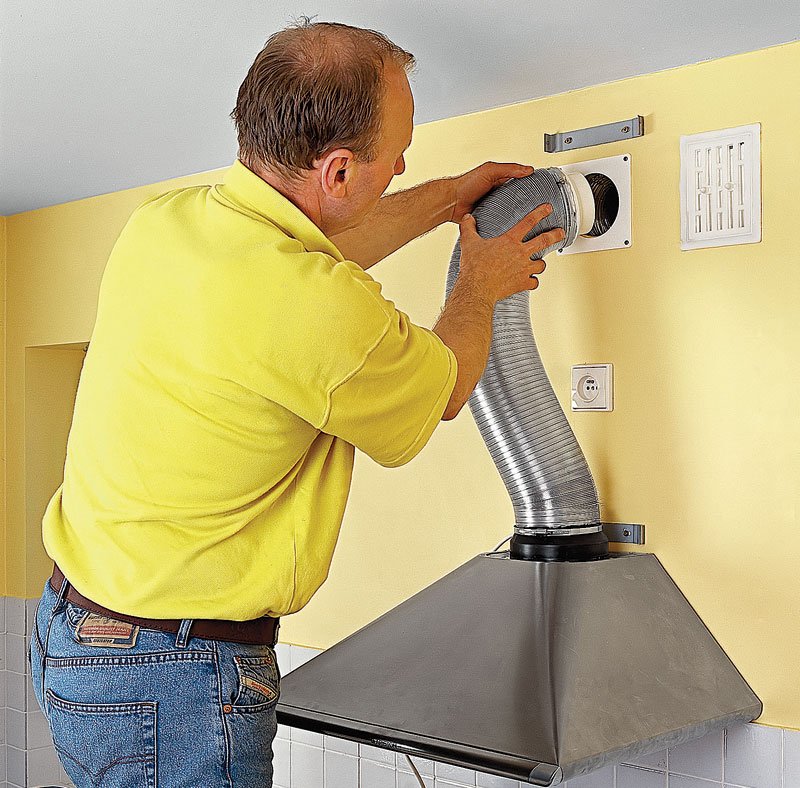
Installation features and height above the gas stove
Of all types of stoves, it is the gas stove that puts forward the most serious requirements for the installation and placement of the hood. It is unacceptable to ignore the standard recommendations, since their non-observance creates a real threat to the life of both an individual family and the rest of the inhabitants of this building.
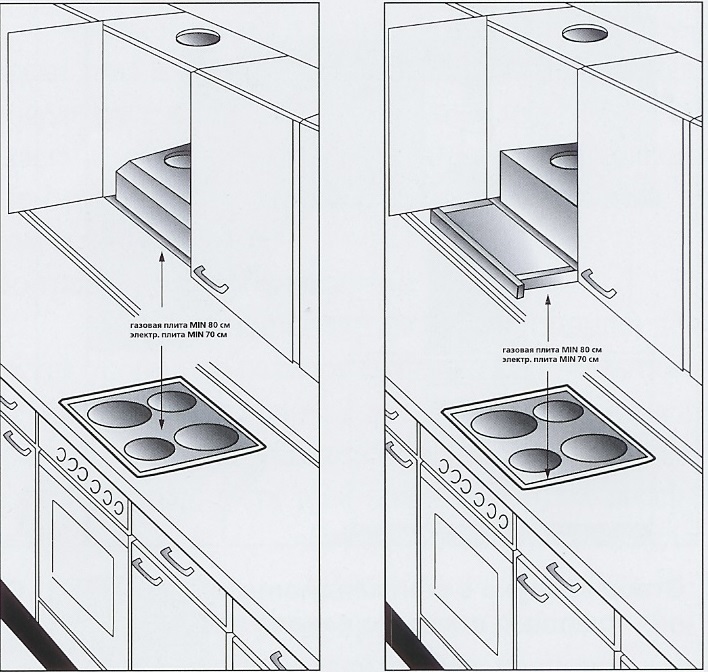
To begin with, the use of a gas stove implies the presence of an open fire in the room. Any devices and structures placed above them should be removed from the surface at a distance of 75-85 cm.
When installing the air duct, remember that it is not permissible to completely cover the ventilation opening. Gas accumulated in the room as a result of an accident or improper handling of the stove must be able to escape freely. If a separate outlet to the ventilation duct is not provided, the existing one should be divided into two parts. This is achieved by installing a special grate divided into two compartments. In one part there is a hole for the pipe, the second has standard bridges.

Installation features and height above electric and induction hob
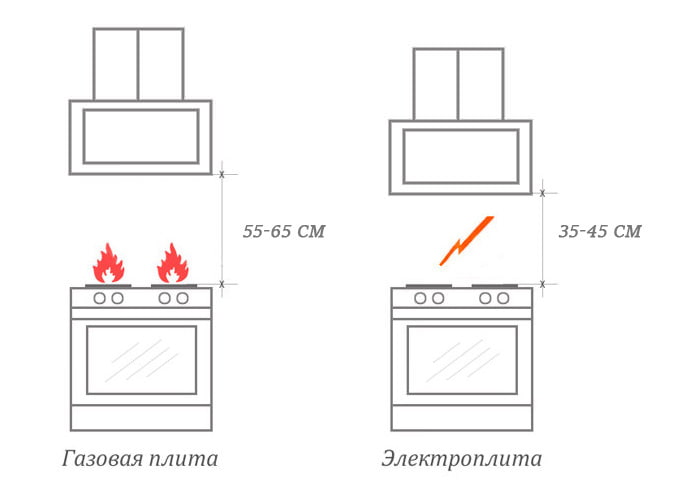
The requirements for installing the hood over electric and induction cookers are somewhat milder. This mainly refers to recommendations for placing the device at a certain height above the stove. In this case, it is allowed to install the hood slightly lower - at a distance of 65-75 cm.

Installation features and the height of the inclined hood
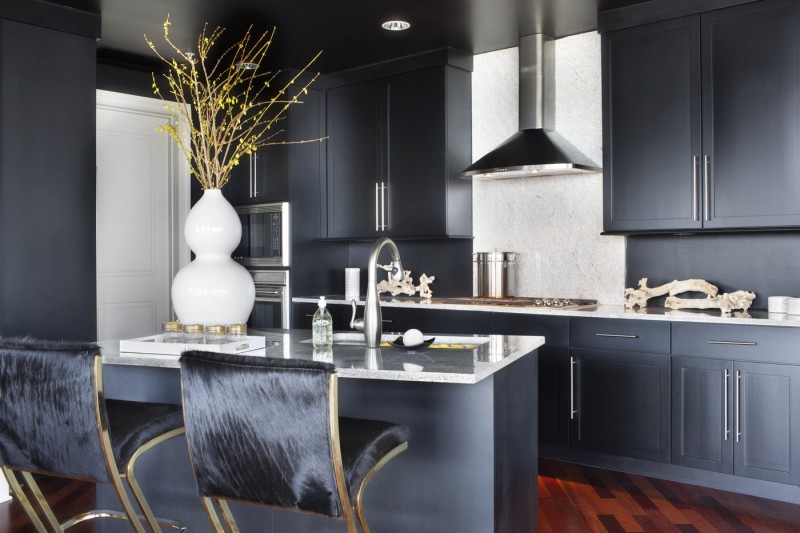
Inclined hoods are indispensable in miniature rooms, where the question of maximizing the preservation of free space is acute. When installing an inclined hood above a gas stove, the requirements are slightly different. The bottom edge of the surface should be 55-65 cm from the gas oven. Only 35-45 cm will need to be retreated from an induction or electric cooker.

Number of sockets
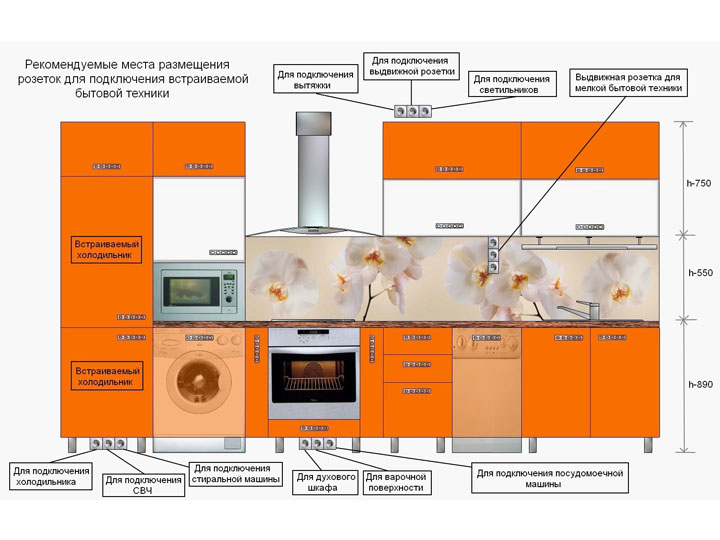 How many outlets are required in the kitchen?
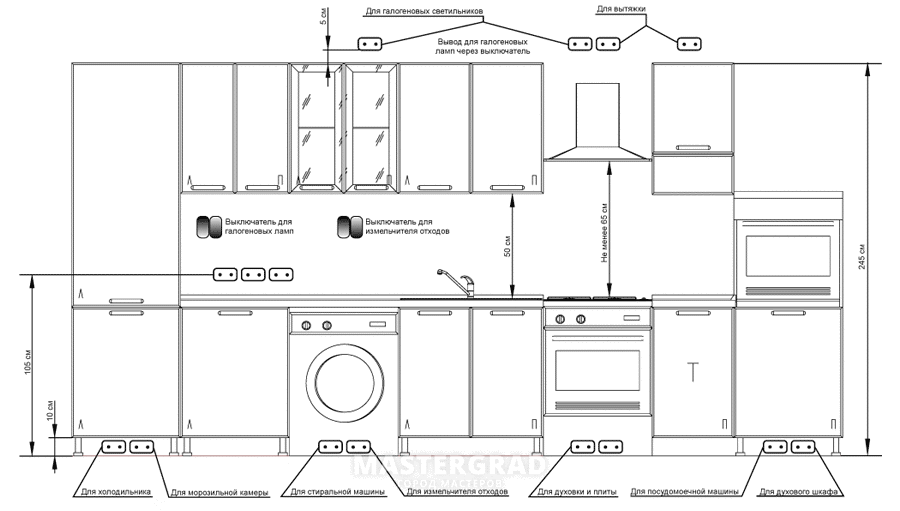
Here, follow the rule - for each stationary kitchen appliance, plan your outlet + 2 blocks along the edges of the countertop + 1pc near the dining table.
In addition, it does not hurt to mount one outlet immediately under or near the switch when entering the room.
The zone with switches usually remains not cluttered with anything, and a free point where you can take voltages (for example, for a vacuum cleaner) is never superfluous.
Now mark the points on the apron for connecting non-stationary devices. Place a minimum of two on each side (right and left) of the kitchen.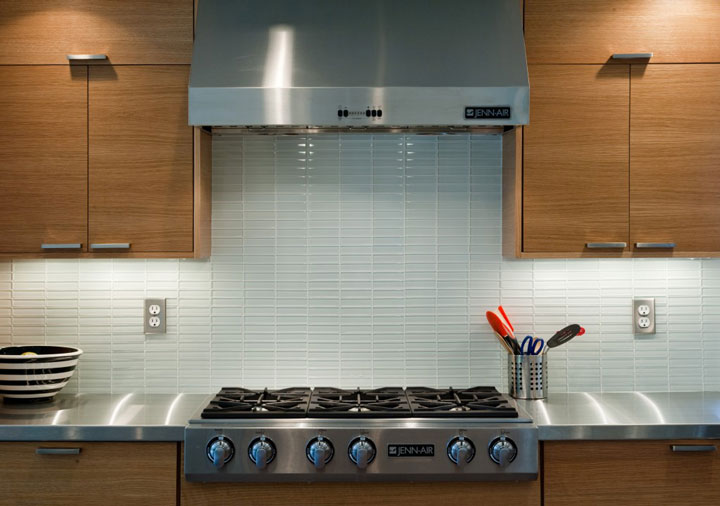
This will include an electric kettle, blender, mixer, etc.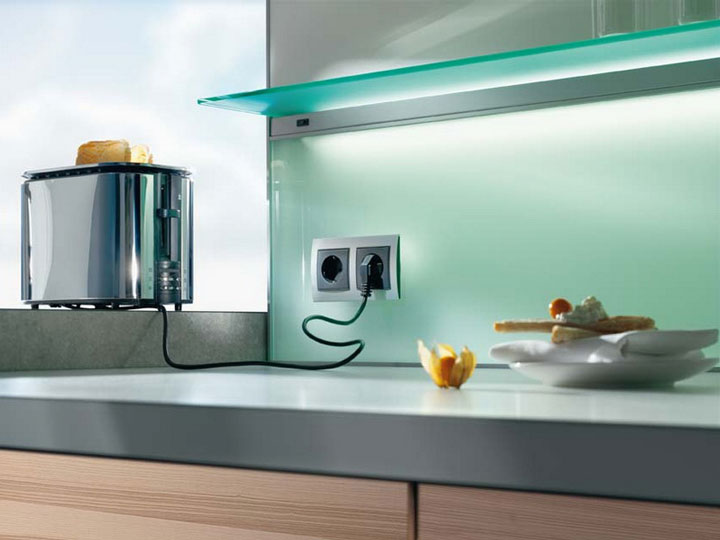
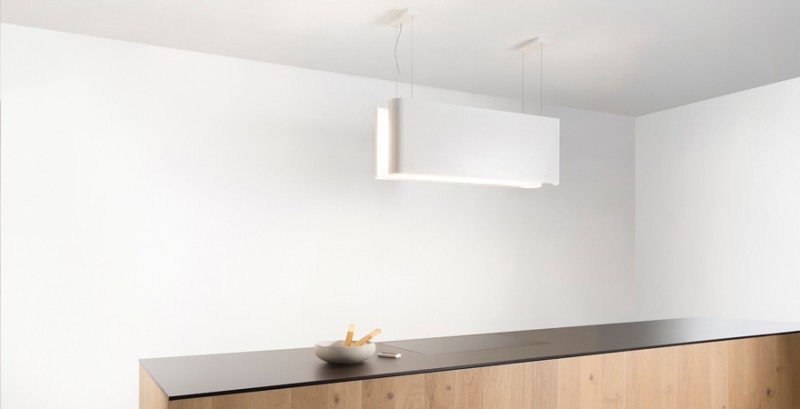
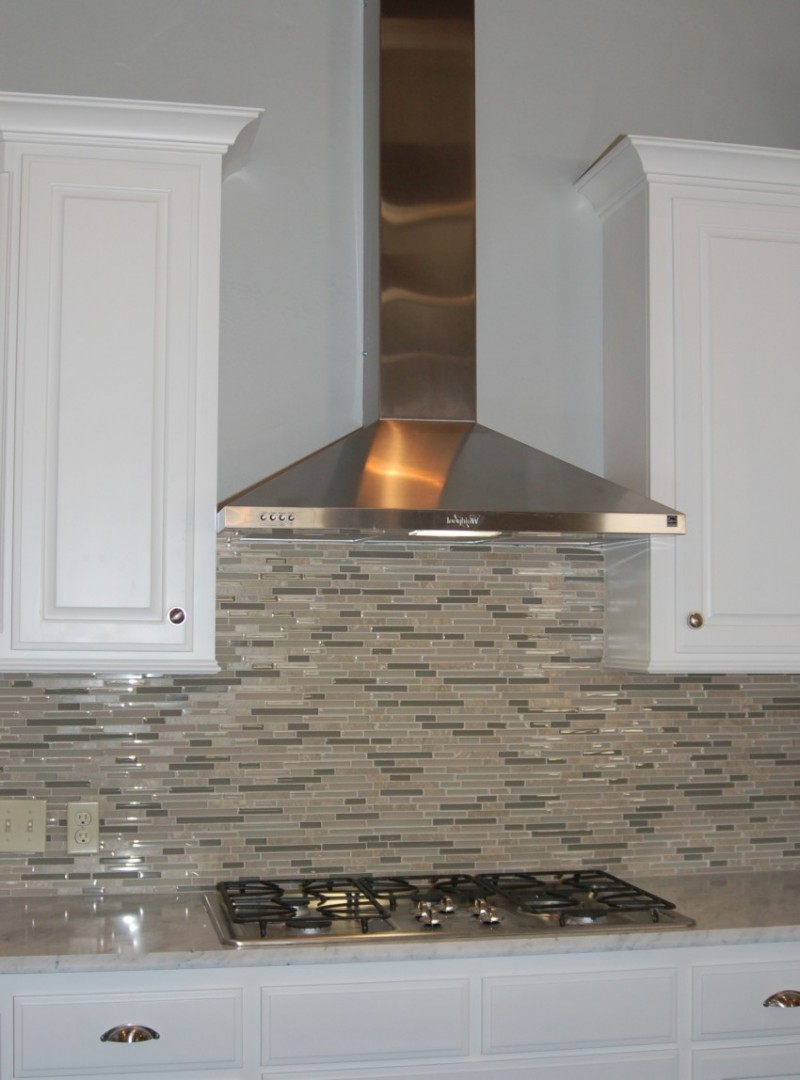
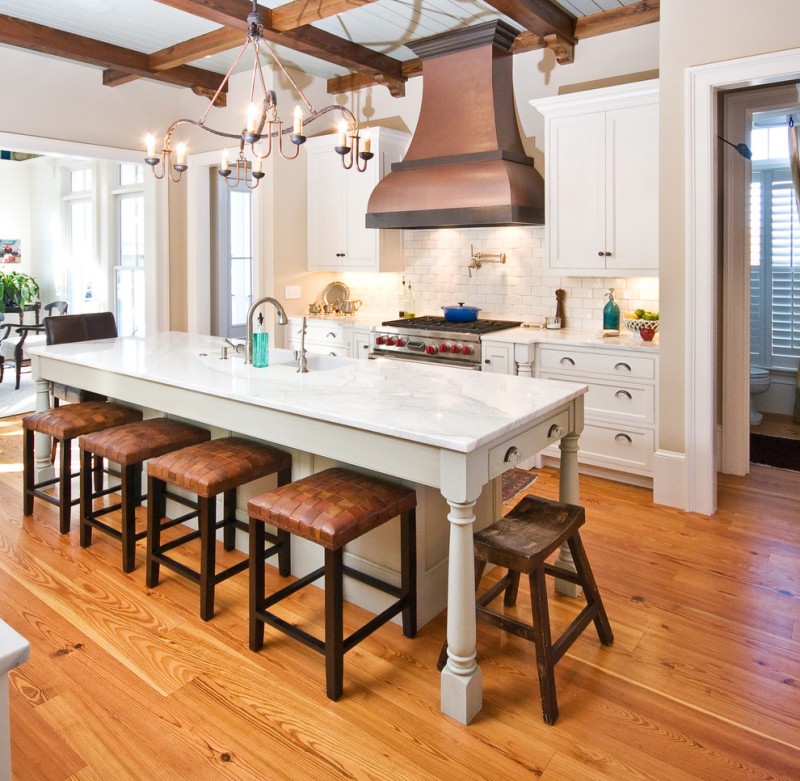
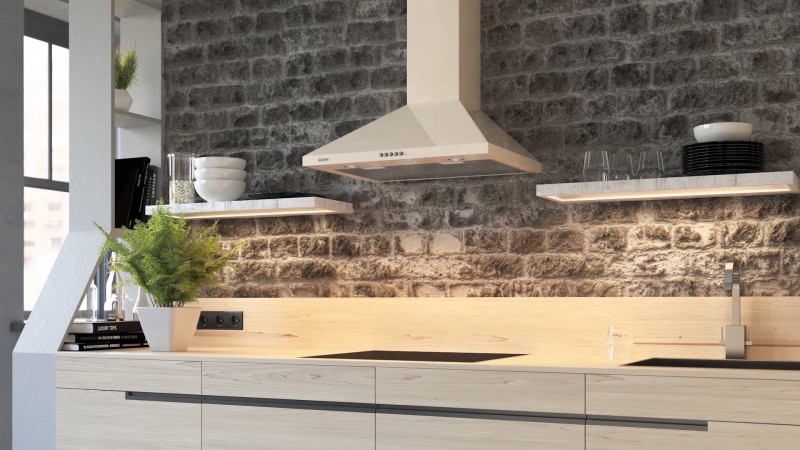
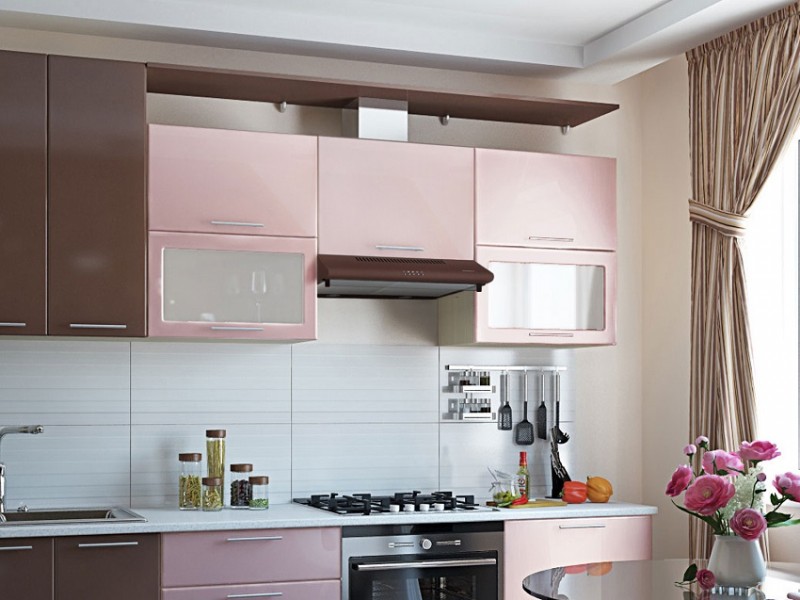
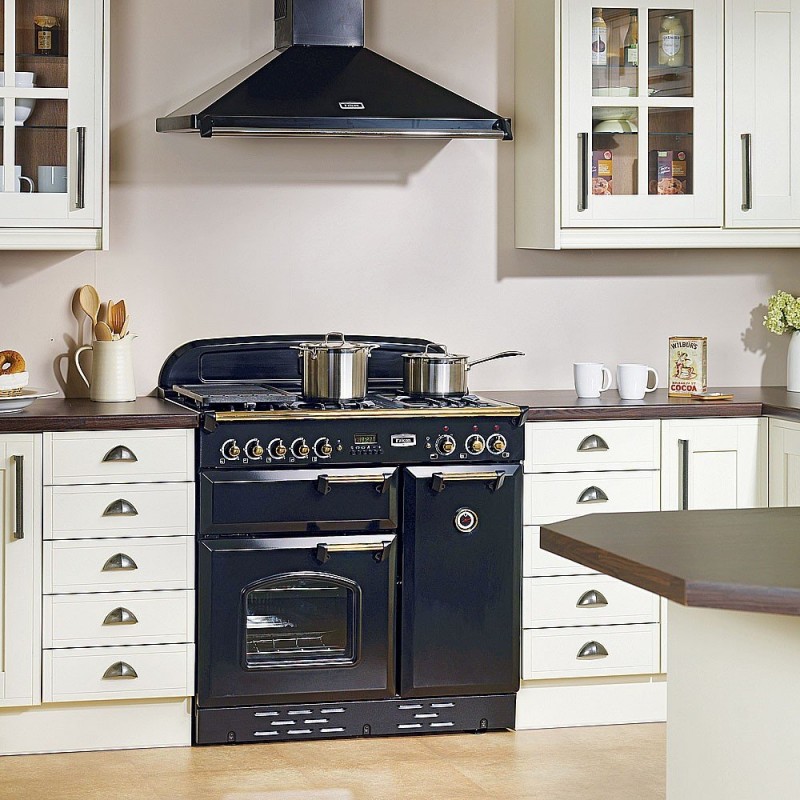
Photo of the hood installation





We also recommend viewing:
- Hood 60 cm
- Black hood
- Recuperator for home
- Bath ventilation
- Exhaust pipe
- Why windows sweat
- Inlet valve into the wall
- Air Dryer
- Forced ventilation
- Air humidity rate
- Ventilation in a private house
- How to make ventilation with your own hands
- Supply valve on the window
- Humidifier
- Check valve for ventilation
- Cooker hood
- Exhaust filter
- Built-in cooker hood
- Bathroom fan
- Floor air conditioner
- Exhaust fan
- Extractor hood for bathroom
- Air heating at home
- How to choose an air conditioner
- Exhaust box
- Silent hoods
- Plastic air ducts
- Ventilation hood
- How to clean the hood
- Split system
- Extractor hood in the cellar
- Ventilation in the garage
The principle of the exhaust mechanism
The design is designed to remove dirty air, vapors, soot, odors, gas combustion residues and other harmful components outside the building or purify air with its subsequent return inside the kitchen. The level of cleaning the room from dirty air depends on how high the hood is to be hung and how the air will be cleaned.
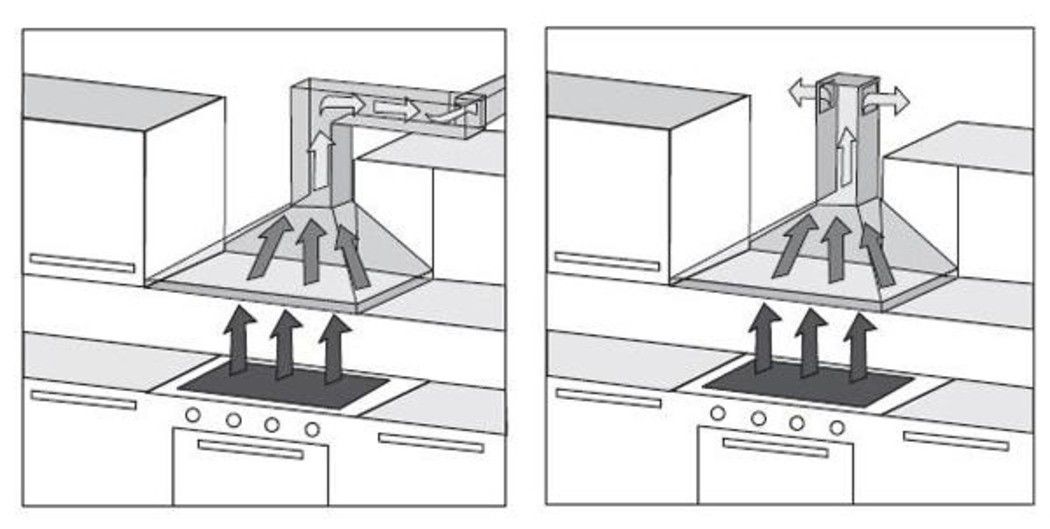
Depending on where the sampled air goes, the method for cleaning it is determined. It can be flowing or circulating
Which exhaust system to pay attention to depends on the conditions of the kitchen equipment and the presence of ventilation shafts in the building.
The flow-through method of cleaning consists in drawing in dirty air and removing it through the ventilation system of the building outside of it. The positive side of this method is the maximum and quick cleaning of the kitchen from harmful air. To get fresh air, just open a window or window.
The circulating method is based on the suction and pumping of dirty air through a system of carbon filters, followed by its output inside the kitchen. This method does not require the equipment of ventilation ducts. A significant disadvantage is the long time for air purification and rapid wear of the filters.
Types of electric hoods (kitchen)
Today manufacturers delight buyers with a huge selection and range of kitchen hoods. The difference between hoods can be in the method of attachment, power, size and other indicators. Depending on the model, the location of the outlet is also selected. Kitchen hoods are divided into the following types:
- Wall-mounted;
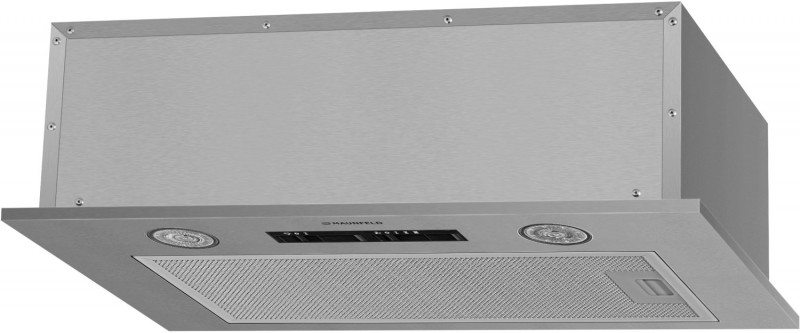
- Built-in;
- Suspended;
- Corner;
- Ostrovnaya.
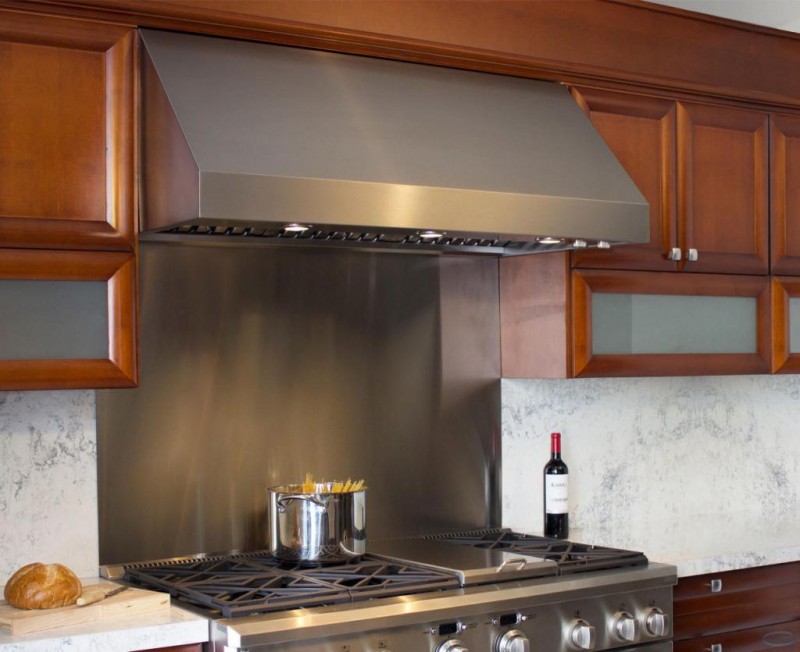
Forced wall hoods are installed above the stove or hob. The main condition for this is that the height of the outlet for the hood in the kitchen should be convenient and correct. Such models are not attached to the wall itself, but at some distance from it. Depending on the power of the electric fan, the efficiency of the device may vary.
Built-in hoods are installed directly into kitchen furniture, where it not only works effectively, but also has an aesthetic appeal.
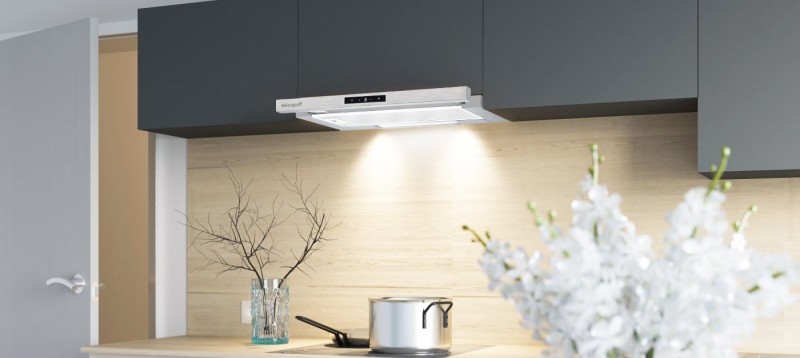
The suspended hood is flat, which allows it to be installed above the work surface below the hanging cabinet. The relatively small dimensions of the appliance fit neatly into the overall look of the kitchen.
Corner hood designs are perfect for a small kitchen, where, due to the insufficient amount of space, they use the most advantageous location. In the corner, the hood not only works well, but also fits perfectly into the main interior design.
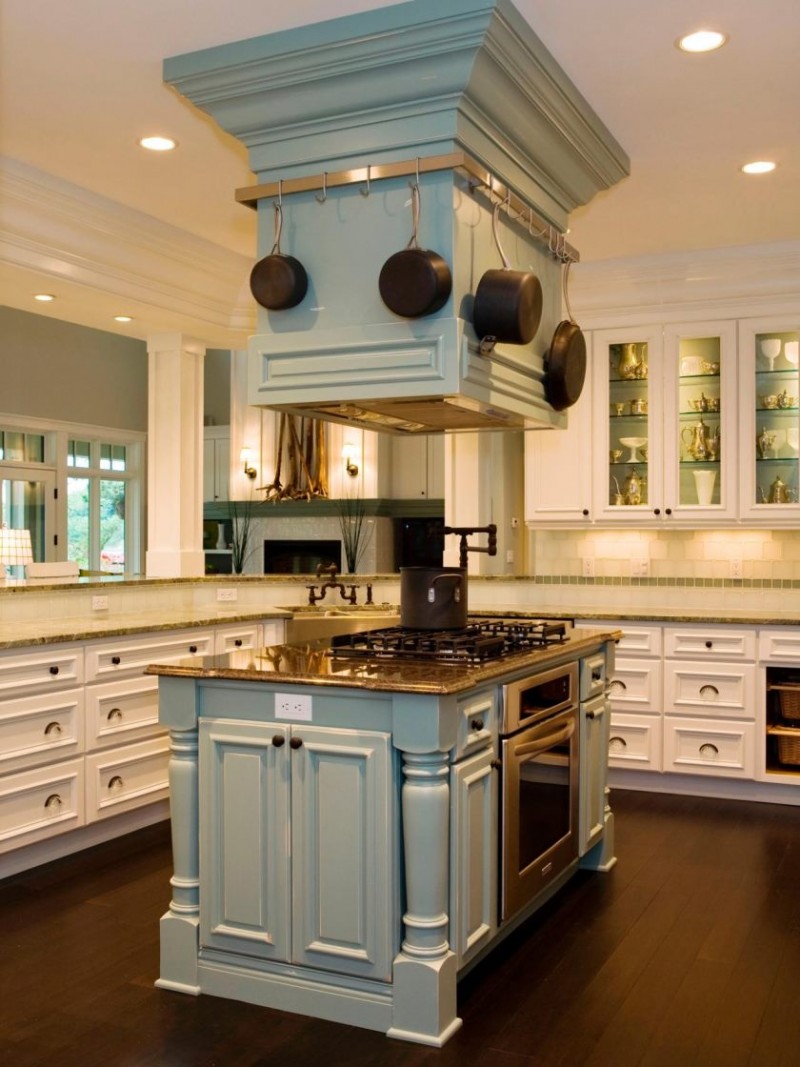
Island hoods are used for installation in large kitchens, where the location of the stove and work surfaces are in the center. Based on the list of types of hoods, it can be understood that for each type of outlet the outlet will be in its specific place and this fact is important to take into account initially. Of course, if you try, you can try a suitable place for sockets for any hood, but you will definitely have to take into account the parameters and installation features
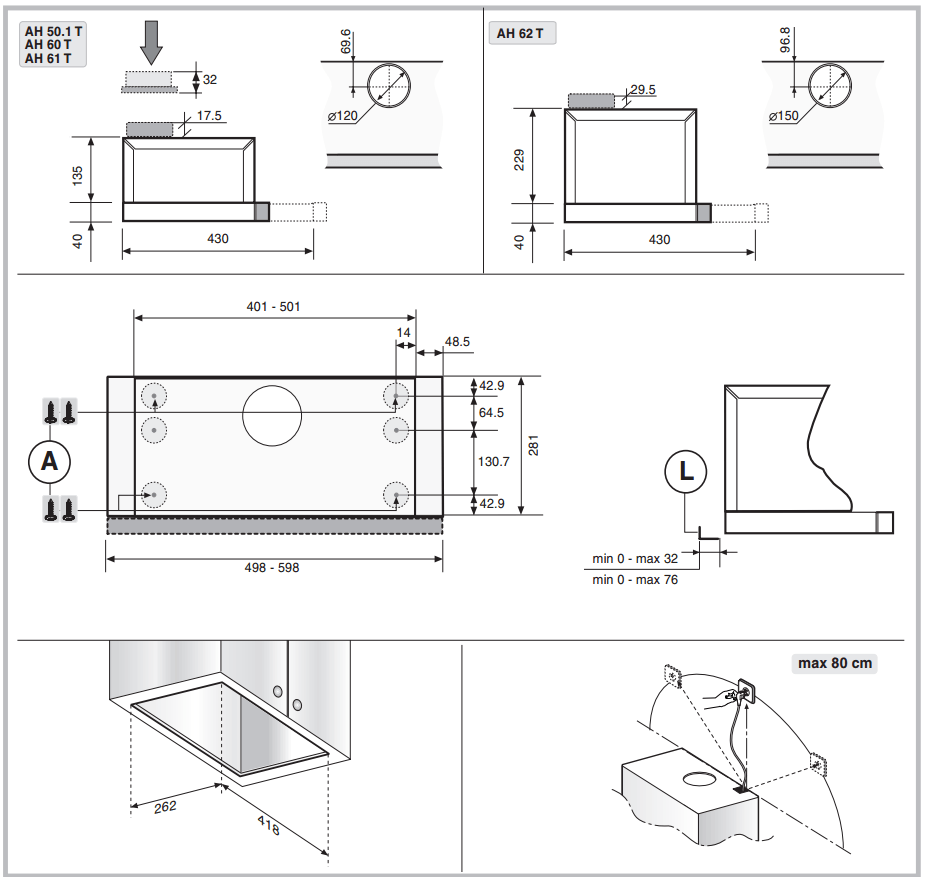
Sometimes, when installing a socket under the hood, you still do not know which one it will be, since the purchase of this device is only planned, not selected. In such a situation, you need to choose the optimal location, where to make an outlet for the hood in the kitchen, which can be suitable for any air purifier. When a calculation is made, an important point must be taken into account. In each hood, the length of the connection cord is 80 centimeters. Knowing this value, it is necessary that the distance from the power point to the device itself does not exceed this value.
Currently, despite all the abundance of offered models, mounted and built-in models, which have good characteristics and a relatively low cost, are in special demand.
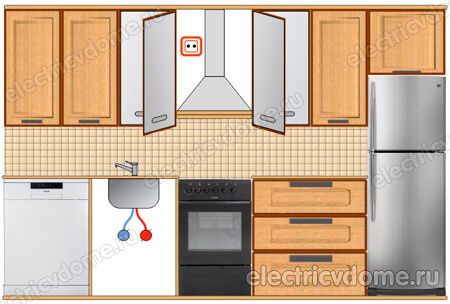
The built-in or suspended hood is located in the cabinet structure or in close proximity to it. In this case, the most correct and rational solution would be to install the outlet inside the structure. The only thing that should be taken into account is such an arrangement of the power point forces you to make a hole in the wall of the cabinet so that you can get to the outlet. Also, as an option, you can install the socket above the cabinet, where it will not be conspicuous, however, with free access.
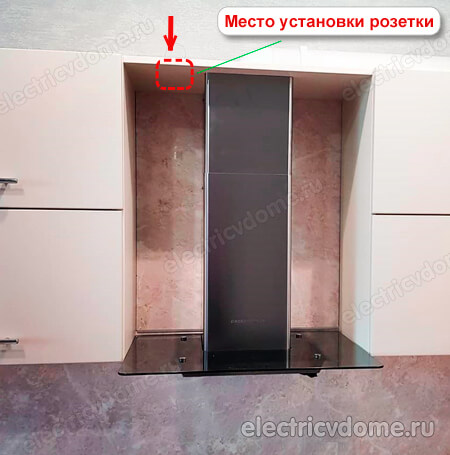
If the hood is suspended, then an air duct cover can act as a cover for the outlet. The socket on the back of the casing is invisible and can be accessed if necessary.
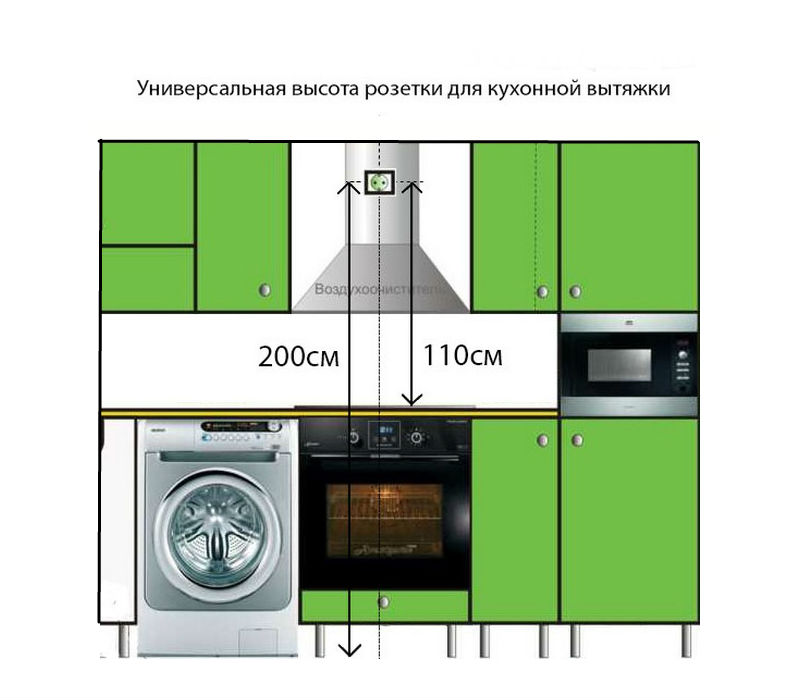
The socket, installed at a height of 110 centimeters from the work surface, will be the optimal solution for both built-in and suspended forced extraction.
Varieties of air ducts
Exhaust pipes are of three types:
Corrugated aluminum.The easiest to install. Usually it is enough to buy one such pipe, stretch it to the required length, put it on the flanges and secure with clamps. The ribbed surface creates turbulence, the noise of the air can be clearly audible.
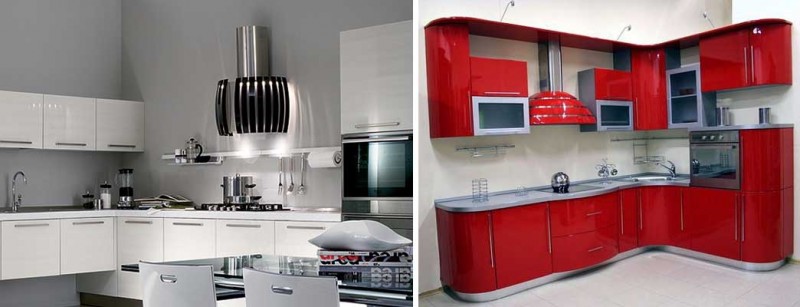
Plastic round. Installation will require the use of elbows and possibly couplings. It will be necessary to cut pipe sections to the required size. Air passes through such pipes with the least turbulence and noise.
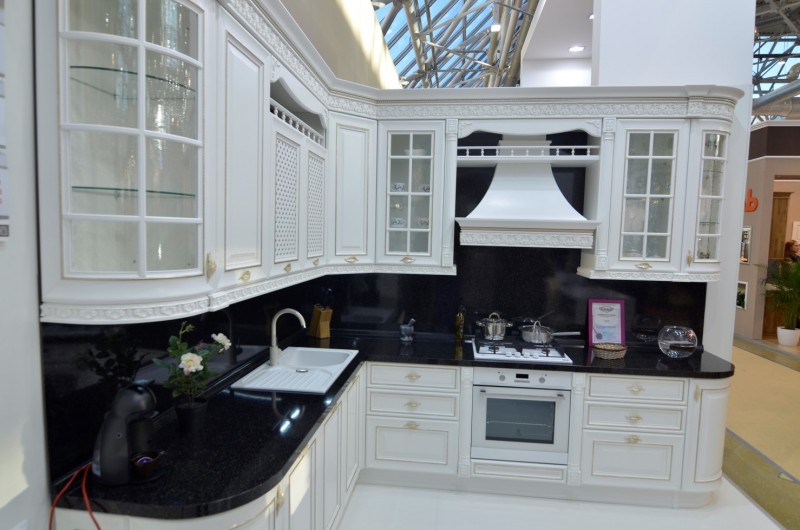
Plastic rectangular. You can lay flat on the top of the cabinets, so that they will not be visible. If the walls are sheathed with panels or plasterboard along the crate, then it is possible to lay such pipes behind the panels.
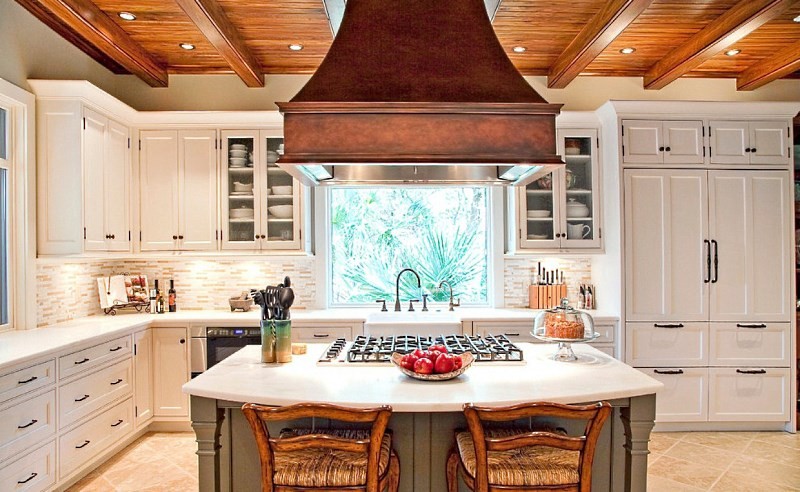
For each type and size of pipes, it is necessary to buy suitable ventilation grilles, which are fixed in the opening of the vent, and to which the pipe is connected.

If the duct is longer than half a meter, you will also need to install intermediate supports. Special supports are available for various types of pipes, but it is also possible to use perforated metal mounting tape and universal clamps.
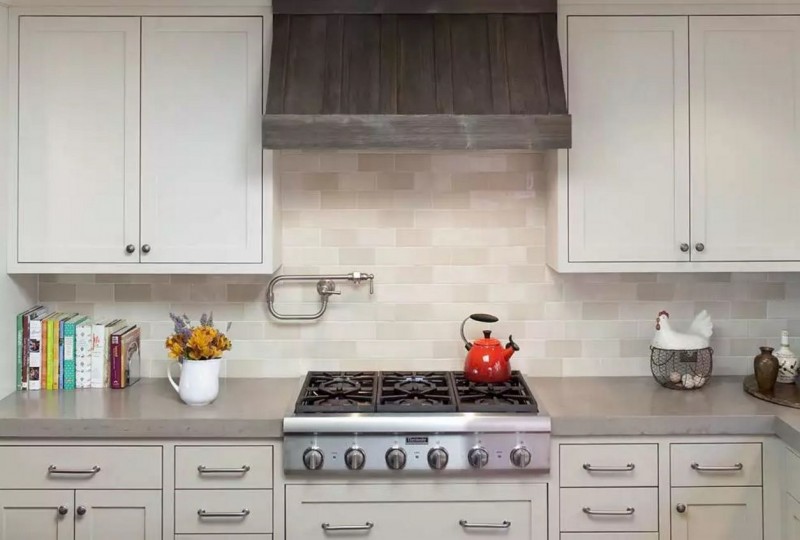
Air removal can be carried out into an existing ventilation system, or into a specially installed ventilation system. To control the air flow, valves can be installed to prevent air flow when the hood is off.
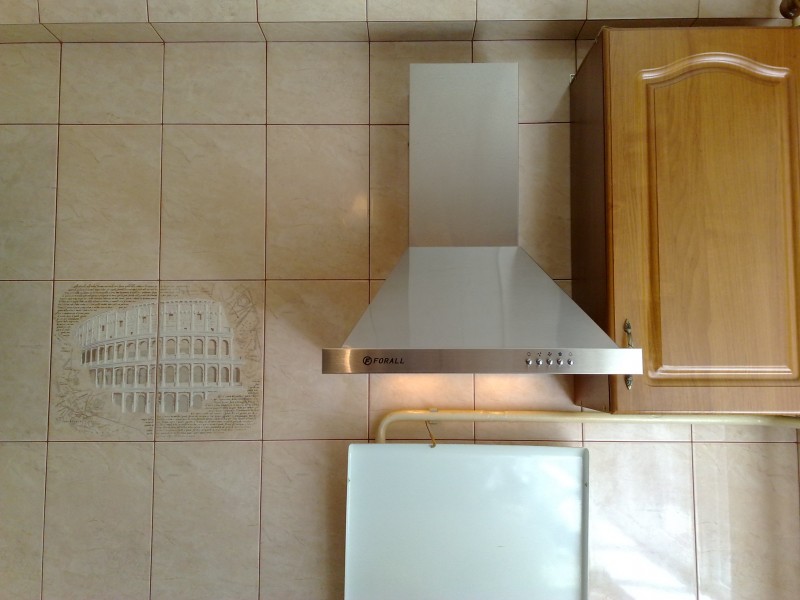
Rules for installing hoods in the kitchen
 To prevent the structure from collapsing, the wall or furniture must withstand the weight of the hood
The choice and connection of the hood is carried out based on the layout and size of the room, the location of the stove and the characteristics of the device itself - type, shape, size, weight, set of options. Various models can be hung on the wall or ceiling, built into a headset or worktop. According to the principle of operation, the products are divided into exhaust, where contamination is removed through pipes, and circulation, equipped with filters. In the first case, cleaning is more efficient, but the structures are more difficult to install and require additional investments. It is easier to install a circulation system, but it does not remove heat, does not retain all vapors and moisture.
When installing the hood, it is recommended to adhere to the following rules:
- compliance of the strength of the load-bearing wall or element of the kitchen set with the weight of the product;
- design and size that matches the interior of the room;
- lack of contact with the gas pipe;
- the distance between the hob and the appliance is within 65-80 cm;
- the size of the screen is equal to or larger than the surface of the slab;
- power, providing high-quality ventilation of the room;
- ease of maintenance and operation;
- the ability to connect yourself.
Classification of hoods according to the principle of operation
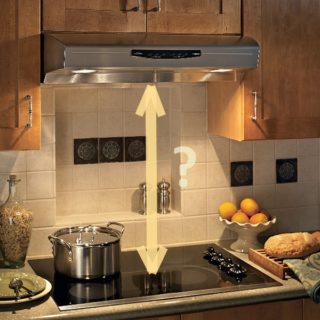 When installing the hood, it is necessary to observe the distance to the stove.
According to the principle of their action, the known models of exhaust structures are divided into the following types:
- circulation hoods equipped with special filter elements;
- exhaust devices connected to the duct (to the ventilation system operating in the kitchen).
In the models of the first type, the air is purified by means of a built-in charcoal filter and, after renewal, returns to the kitchen. Such units are suitable only for small spaces in terms of volume, within which the installation of the duct is difficult, and the distance from the gas stove to the hood is small.
The second option is distinguished by a greater cleaning efficiency, since the vapors in this case are completely removed to the outside through separate channels. Such samples of hoods are allowed to be installed in rooms of significant volume.
Site selection and instrument preparation
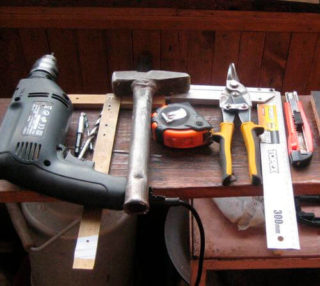 Hood installation tools
To install a ventilation system for a kitchen stove, no special skills and special equipment are required.
For work you will need:
- hammer drill, electric drill, jigsaw;
- level, tape measure;
- hammer, screwdriver;
- hacksaw for metal, file;
- adjustable wrench or pliers;
- silicone;
- pencil;
- masking tape;
- construction gloves, goggles;
- tow or FUM tape.
Since you will have to work at a height, it is advisable to prepare a stable base. Then you need to think over the preparatory stage. Before you hang the hood, you need to put it on something. For this, cardboard, plywood or chipboard are suitable.
If an exhaust duct is to be assembled, it is advisable to prepare a small stepladder. It is better to move the slab to the side during installation. This will prevent damage to its surface and cover in the event of a hood or heavy tool falling.
Modern hoods are equipped with fixing strips and decorative boxes for masking pipes, if their design does not match the interior of the kitchen. Thanks to this, it became much easier to install the equipment than it was before when dowels, screws and hooks were used.
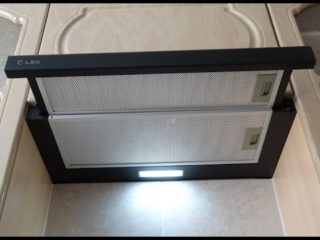 Built-in extractor hood saves space
The best option is to integrate the appliances into the kitchen wall. This method saves space. It should be noted that the distance from the appliance to the refrigerator and sink must be at least 50 cm. Such rules are due to the safety requirements for handling electrical appliances.
If the walls are made of plasterboard, you will need to make an installation. Profile pipes made of stainless steel are best suited for this. Metal can not be decorated, but left as it is. If the supporting structure does not fit into the interior, it is painted to match the color of the walls, pasted over with tiles, wallpaper, or enclosed in a homemade box made of non-combustible material.
In large kitchens, the work area is sometimes located in the middle of the room or against the wall opposite the headset. In the first case, an island-type hood with a ceiling mount is selected. The device is equipped with filters or a separate exhaust duct. To hide communications, you can install a stretch ceiling by lowering it 1-2 cm below the duct. In the second case, the best solution would be a wall-mounted chimney hood. To connect it to the ventilation shaft, a duct made of plastic pipes of round, rectangular or square cross-section is used.
Where to install the socket
Often there is a situation in which a block of sockets and switches is installed on the wall, between the hob and the hood. This is not quite the right decision. The sockets cannot be located immediately behind the cooking zones. The power cord from the fume hood is shorter than the distance to the hood from the outlet. To avoid this, it is recommended to equip a power point for the fume hood.
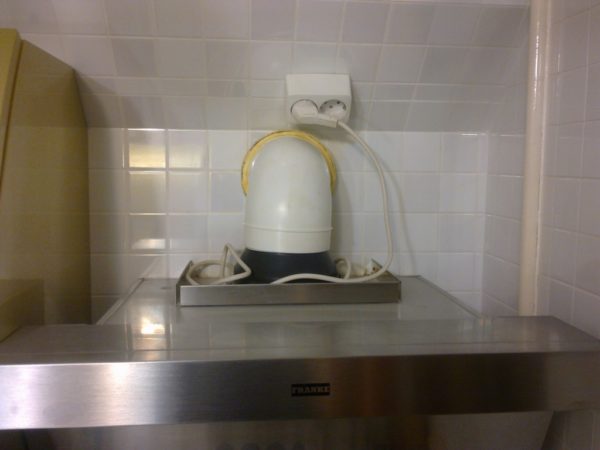
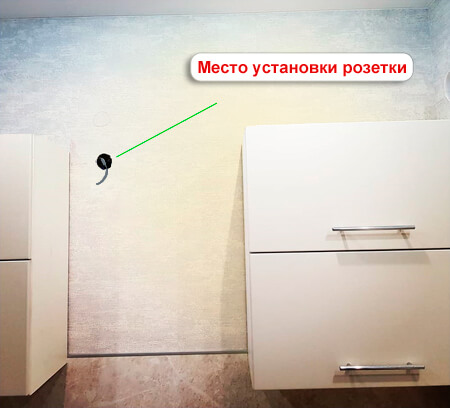
The socket should be installed at a height of about 2-2.5 meters. This will be the place above the wall cabinet or inside it
Before fixing the socket, pay attention to the location of the duct. Installation of the socket cannot be done on the duct line
The outlet point must be equipped at a distance of 15-20 cm from the duct.
Where do you need to install the socket?
The sockets are installed in accordance with the requirements of the state standard. Manufacturers recommend that you determine in advance the location of the hood and bring the power source to the required distance before installing the device.
When laying electrical wiring, you must adhere to the following rules:
- avoid a large number of bends, due to which the load on the exhaust device increases;
- ensure the tightness of the pipes in which the wiring is laid;
- bring the outlet as close as possible to the installed equipment.
In addition, you need to consider the size of the load that the power grid is experiencing. Modern hoods consume little electricity. But if a lot of devices are installed in an apartment (house), then for a device that provides air exhaust from the kitchen, it is recommended to bring a separate line from the electrical panel. This will reduce the load on the network.

Types of exhaust devices
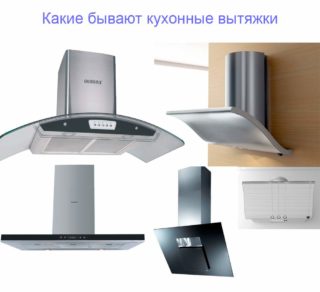
By design features and purpose, the products can have the following versions:
- with a flat surface;
- domed or inclined;
- desktop;
- built into a kitchen cabinet, for example.
Models with a horizontal flat surface belong to the most common type of devices and stand out among other samples for their compact size. They usually work autonomously as they have built-in replaceable filters. During the operation of such hoods, the heated air is cleared of fatty vapors in the filter element of the device, after which it enters the kitchen again.
Dome products are also in high demand among consumers. In them, the polluted air is discharged through the air duct in the kitchen directly into the street. However, in this series there are also models equipped with built-in filters. Samples of products with an inclined plane are classified as a type of typical domed devices. The height of the hoods above the hob for this option will be slightly less, which is due to the peculiarities of the design itself. For their manufacture, heat-resistant glass is used, which, in addition to its main purpose, performs a decorative function.
The devices built into the closet are good in that they allow you to hide the not too aesthetic-looking drainage boxes. Tabletop samples are mounted directly into self-serviced equipment (in a hob, for example).
Types of exhaust units
What height to choose is most influenced by only 2 factors: the features of installing devices in a specific place and the type of hob. However, much depends on the height of the ceilings: where they are low, it is not always possible to mount the hood in accordance with the recommendations. In this case, there is no guarantee of perfect performance.
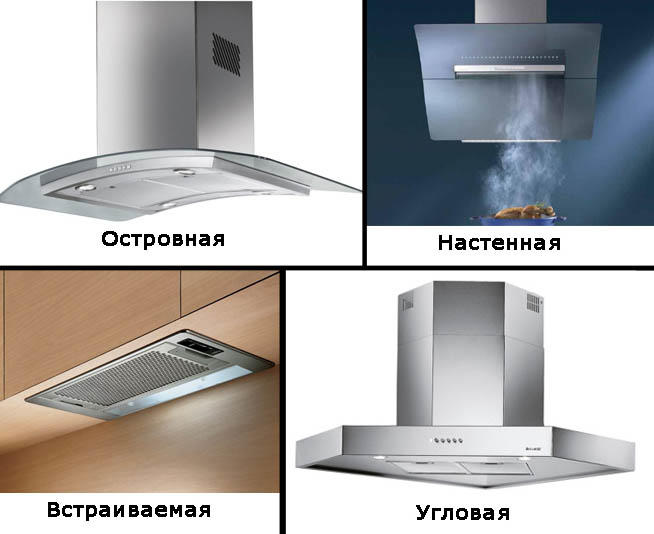
Hoods are classified according to their location.
- Wall-mounted models are considered the most popular, traditional devices.
- Built-in "hide" in the closet of the kitchen unit. The place for mounting is the bottom shelf of this furniture.
- Island units are ideal only for spacious kitchens where the stove is the center of a small “universe”.
- Corner structures are a great option if the hob is forced to be on the outskirts.
By the type of housing, the hoods are divided into:
- flat structures that are built into furniture are often equipped with electronic controls;
- domed overall units, always connected to the ventilation duct;
- tilting machines are modern and ergonomic options that make cooking easier due to the absence of a cast shadow and the risk of "earning" injury.
By design features, hoods are:
- removable;
- stationary;
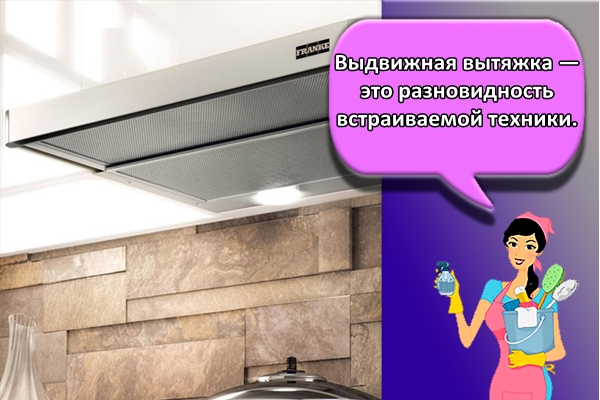
- retractable.
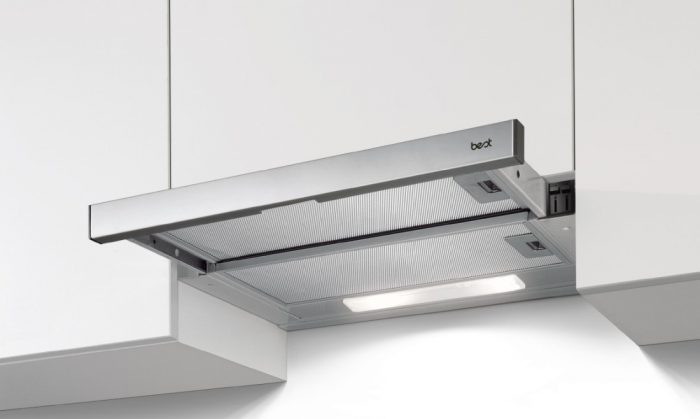
The latter type refers to flow systems. They are equipped with retractable (or folding) air intakes, they are introduced into the working area only if there is a need to clean the air.
Hood types by installation method
According to the method of installation and location, the hoods are divided into several types:
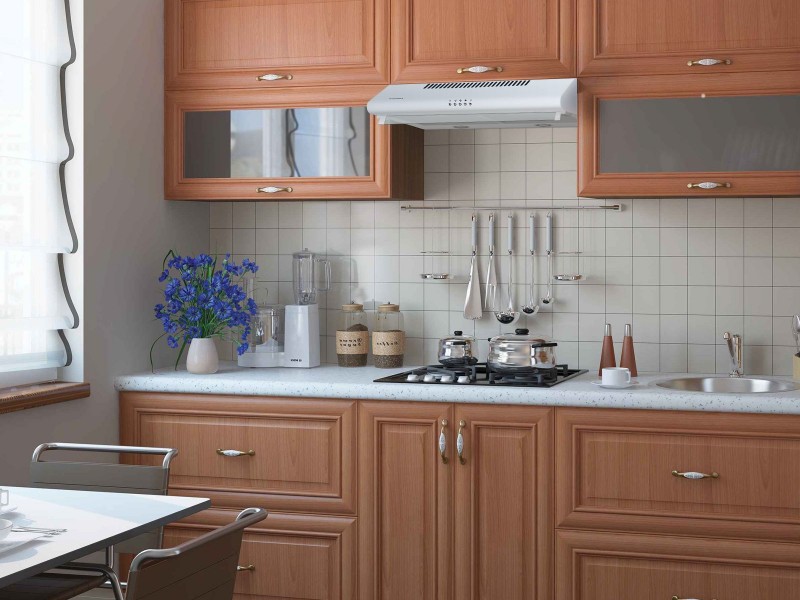
Hanging - attached to the cabinet above the stove. Usually these are circulation hoods.
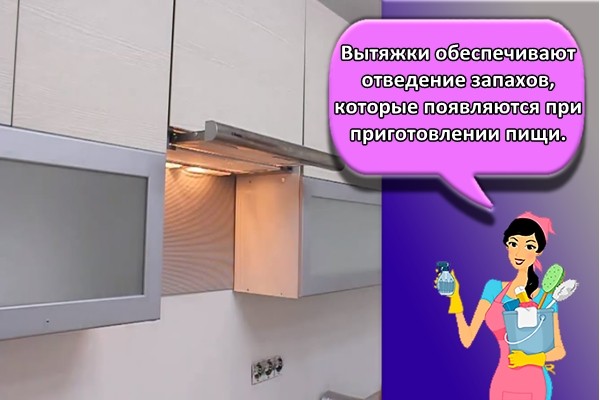
Built-in - mounted inside the cabinet above the stove. If it is intended for a shallow cabinet, it has a part of the air intake that moves forward.
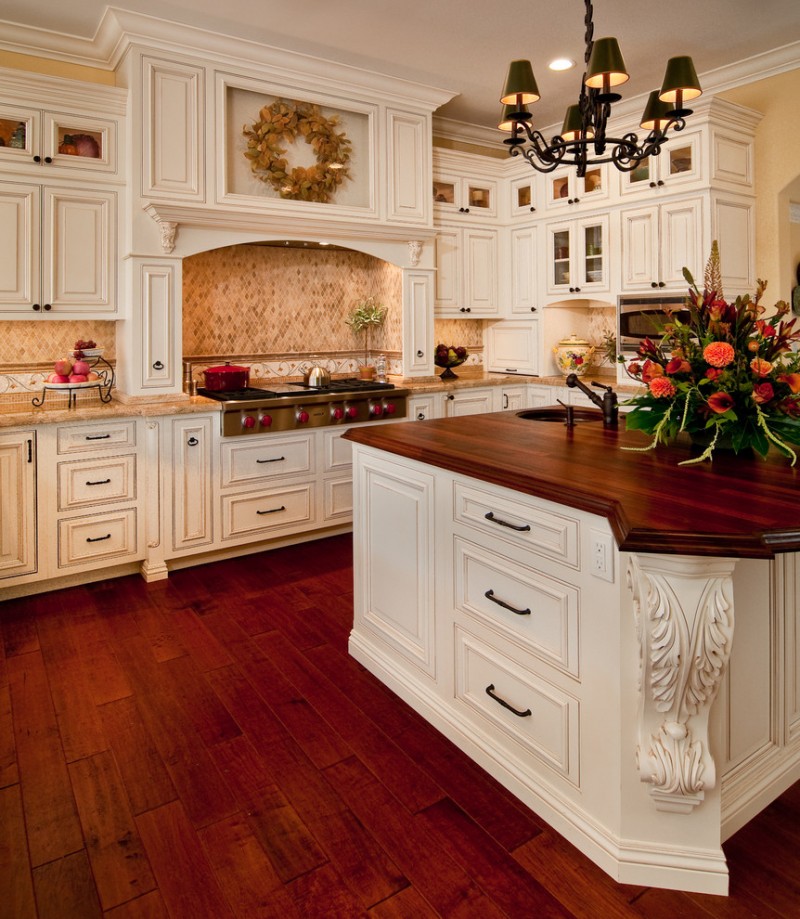
Wall - mounted on the wall above the slab. By design, they can be fireplace (domed), inclined, flat. There are models for corner installations.
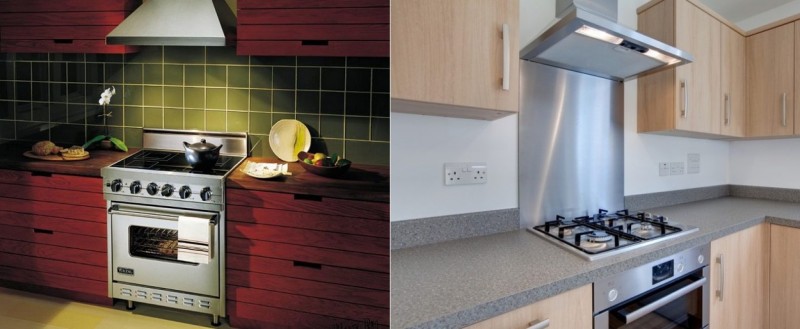
Island - mounted to the ceiling in any part of the kitchen.
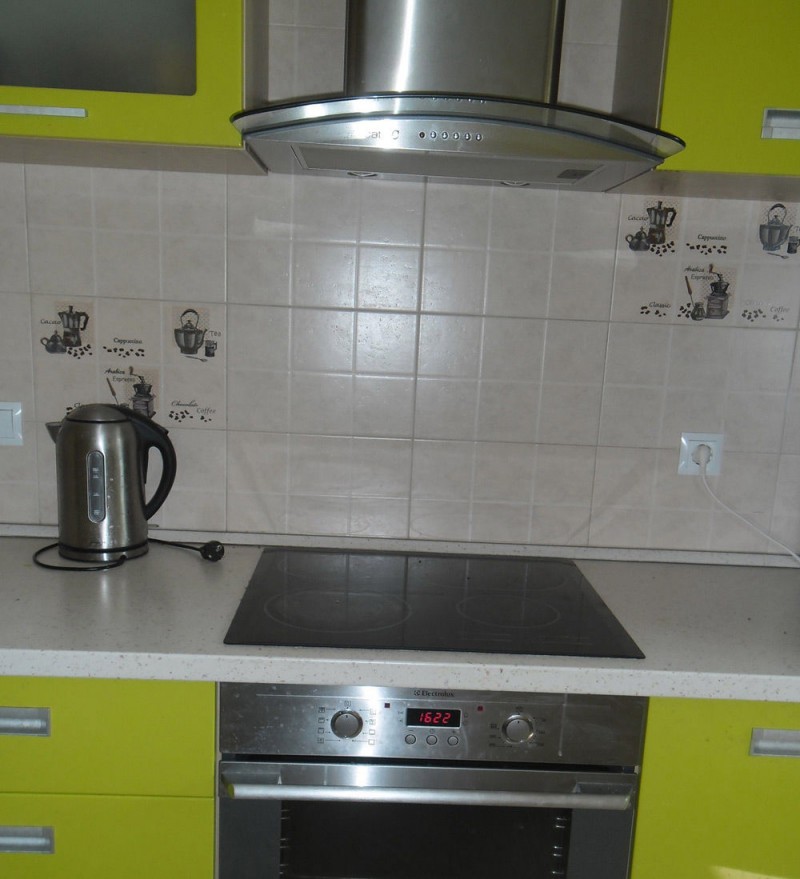
Tabletop - used in conjunction with built-in hobs. They can be driven so that in the inoperative position they can be lowered flush with the surface of the table top. 10-20 times more expensive than conventional hoods. In order to avoid withdrawal from the warranty, it is better to entrust the installation to specialists, although the price of installing such a hood will also be high.


