Mosquito net from cable duct
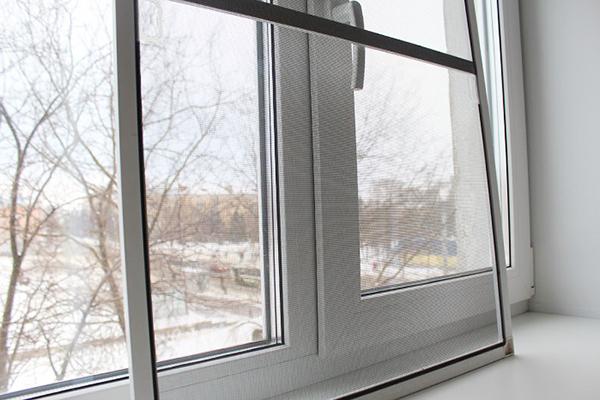
This is another ingenious - and budget - friendly option for making a do-it-yourself mosquito net frame. For it, the so-called cable channel is used - a plastic profile used for laying cables along vertical and horizontal surfaces
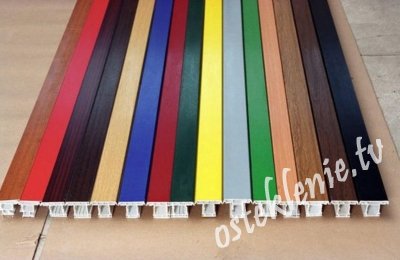
Since there is no risk of fire in the case of such use, you can choose the simplest type of cable channel, paying attention only to its strength and rigidity. For corner joints, metal corners are used, the width of which corresponds to the internal width of the cable channel
In this video tutorial, a 15x10 mm profile is used.
Actions:
- clearly according to the future size of the mesh (without taking into account the corners and other things), the sections of the cable channel are measured. Further, the corners are cut strictly at 45 degrees, for this it is convenient to use a special jig (the same connecting corner is circled in red);
-
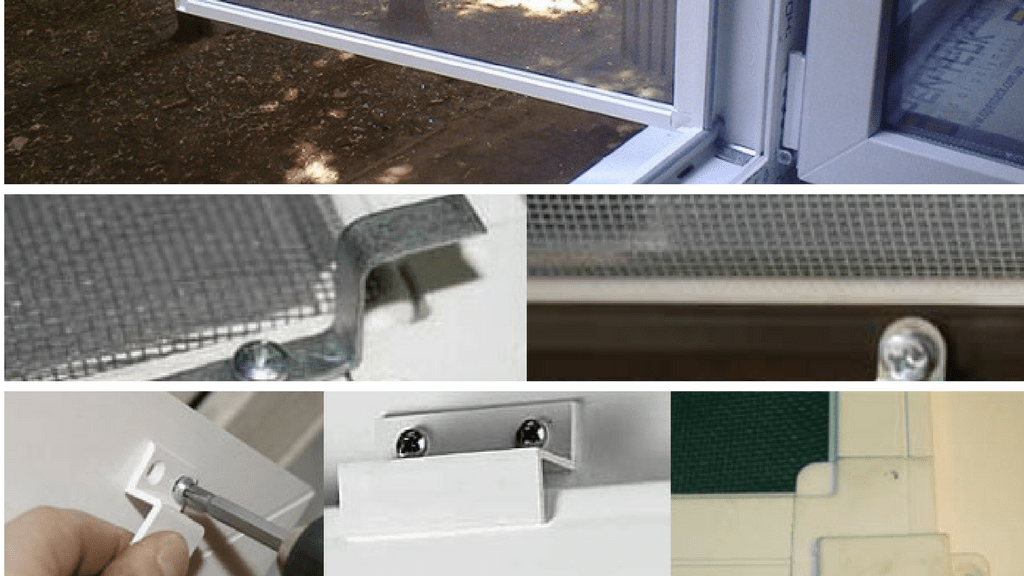
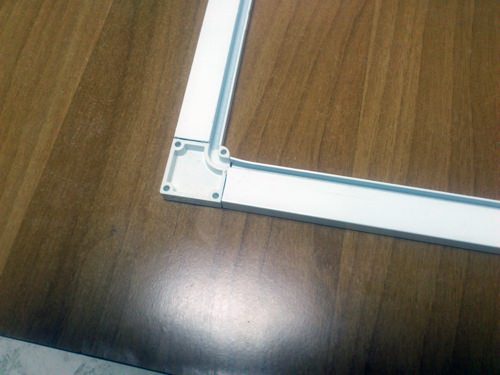
the cover is removed from the cable channel (already cut), then the parts are laid out in the desired order and connected with corners. To fasten the metal angle to the plastic, you can use a screw pair (screw-nut) or rivets. Glue, even "liquid nails", is not recommended - you may not get a sufficiently strong and rigid connection;
- then the mosquito net is evenly laid out over the assembled frame, its cover is laid over the cable channel (recall that it is cut simultaneously with the main profile, so there should be no problem with joining the corners). The cover presses the mesh tightly and fixes it. For greater convenience, the masters recommend applying the mesh by pressing it to the canal from the inside with a short interval using drops of "instant" glue.
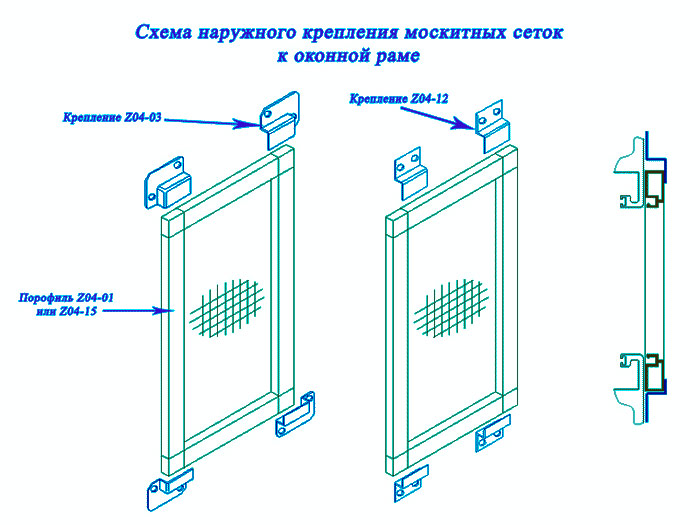
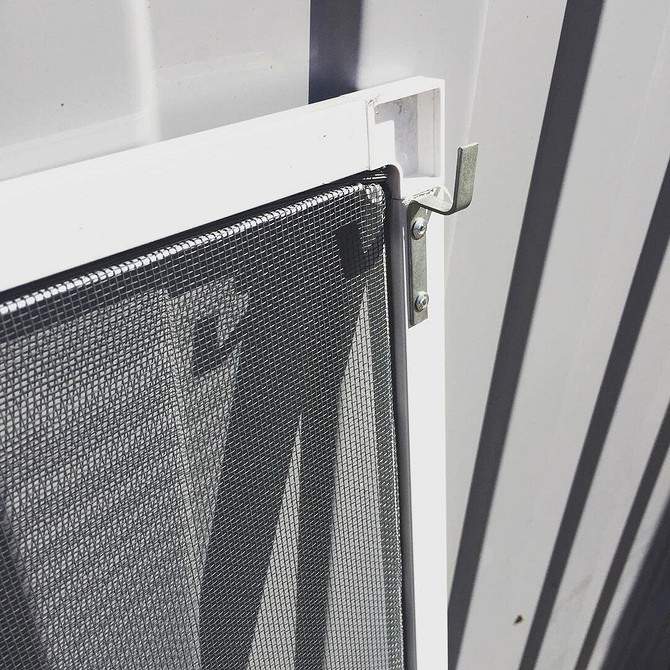
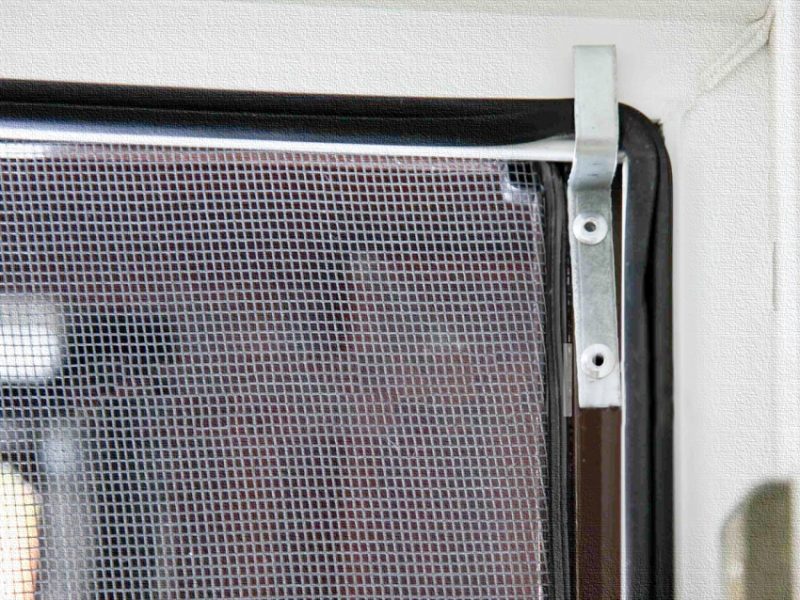
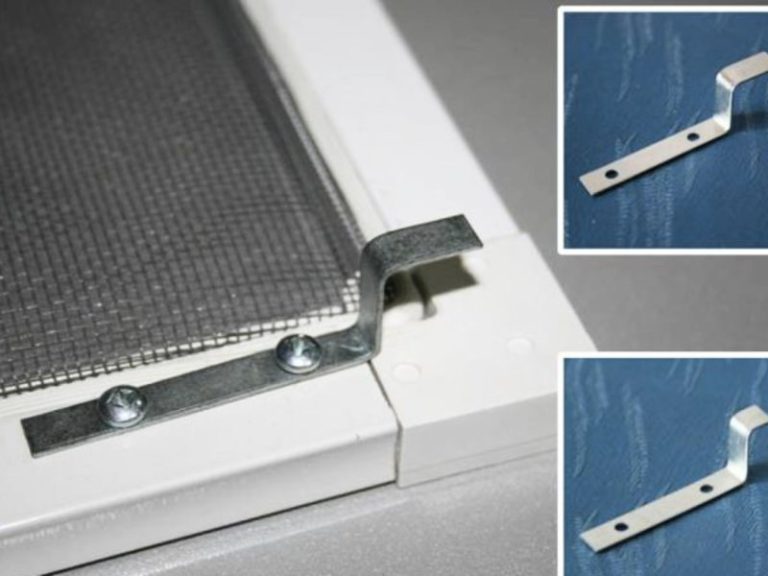
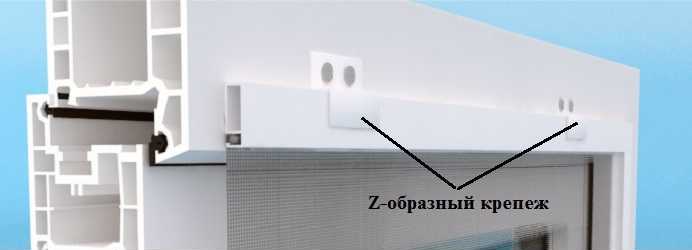
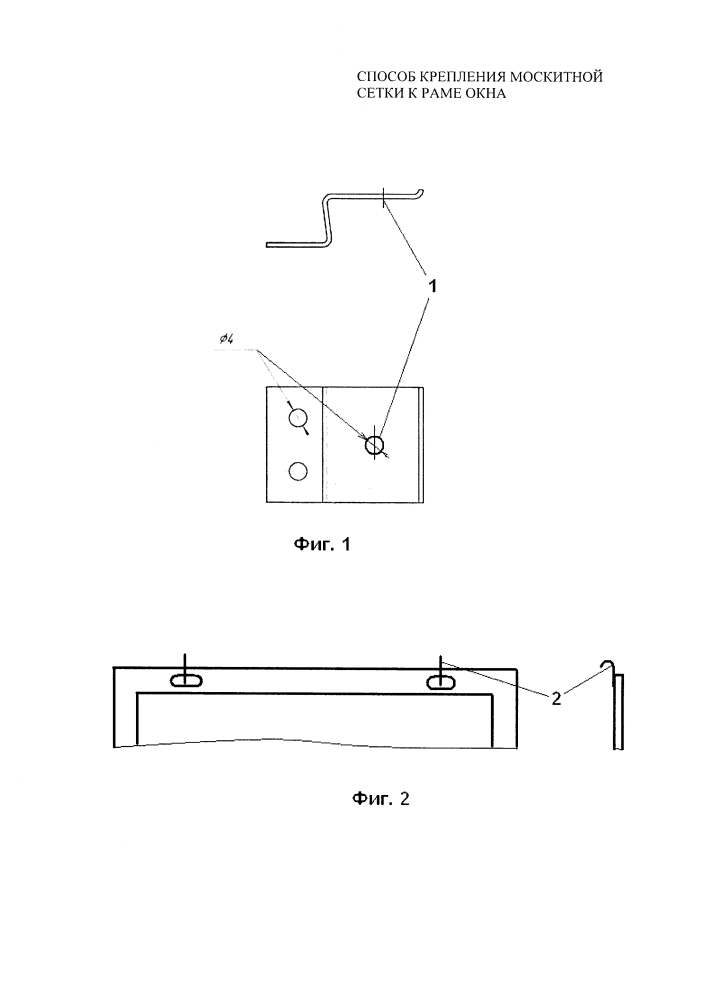
For such mosquitoes, due to its relatively low strength and rigidity, it is better to use Z-shaped fasteners with screws and adjust the frame exactly to the size of the opening in the window.
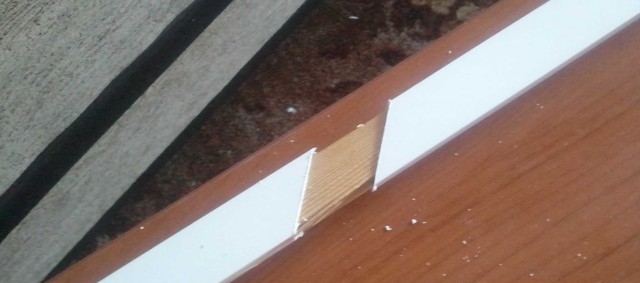
Useful: to cut the cable channel without deformation, you can use an unnecessary wooden block of a suitable section. However, in this case, the cover will have to be removed.
Basic installation steps
To properly install the mosquito net, you must:
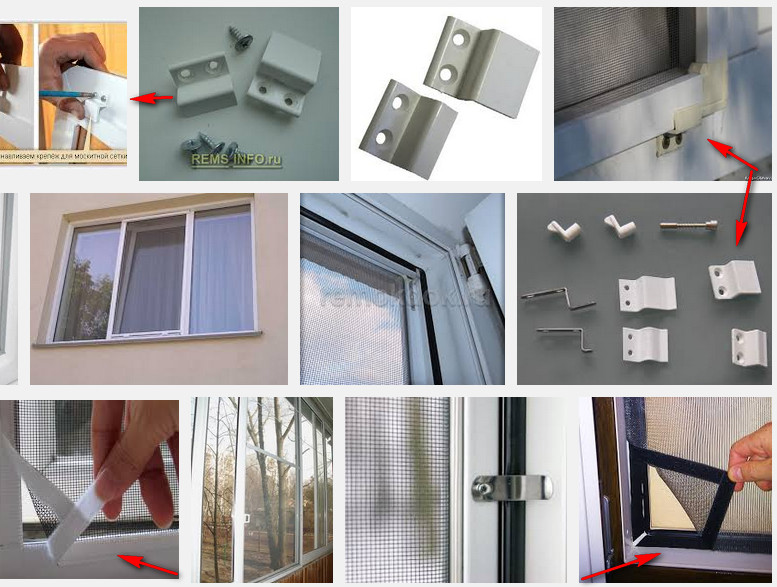
- specify the method of its installation - in the opening or behind it. This can be done both in size and in the nature of the fasteners supplied in the kit;
- check if the dimensions are correct. The easiest way is to attach the frame to the opening - it will be immediately clear whether the mesh is placed in the opening or behind it. If for, then it is necessary to expose the product outside and, gently holding the handles, pull it close to the window frame;
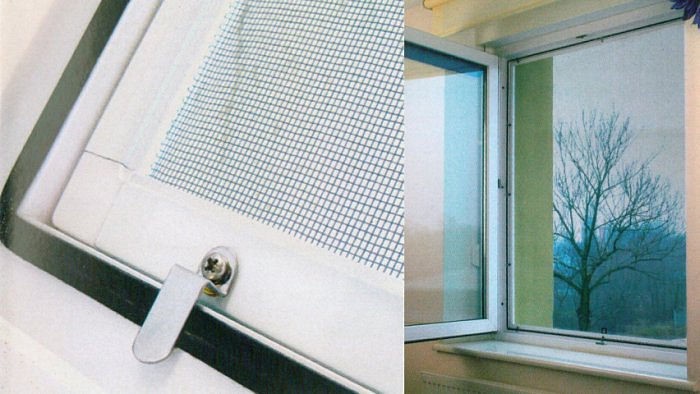
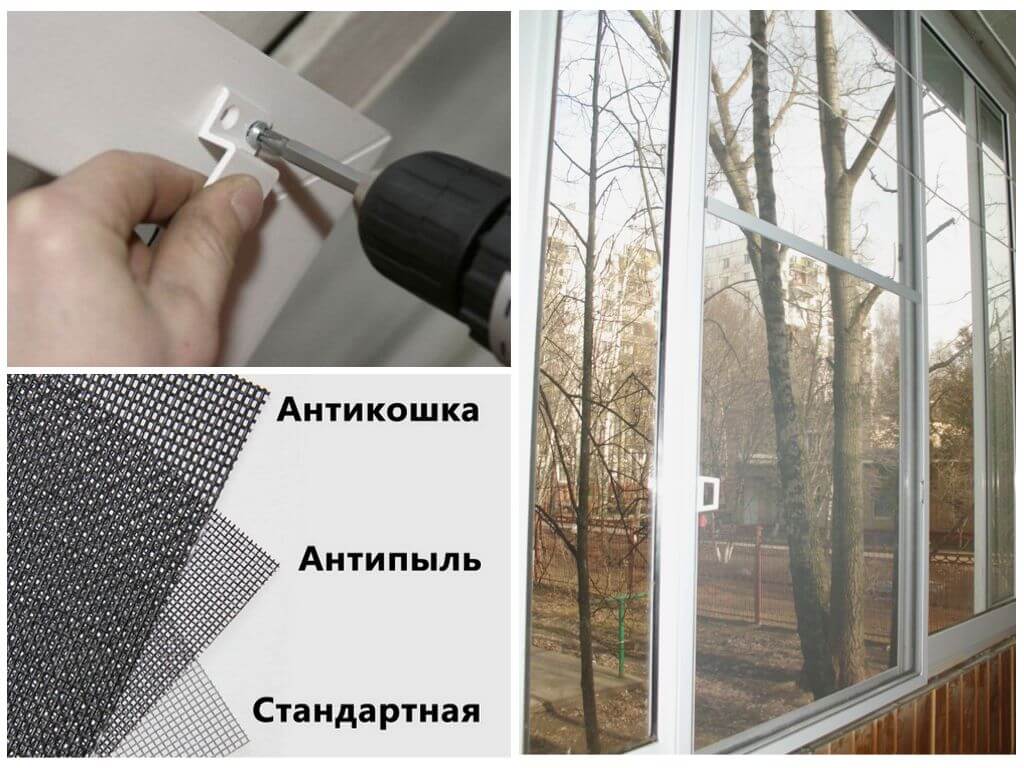
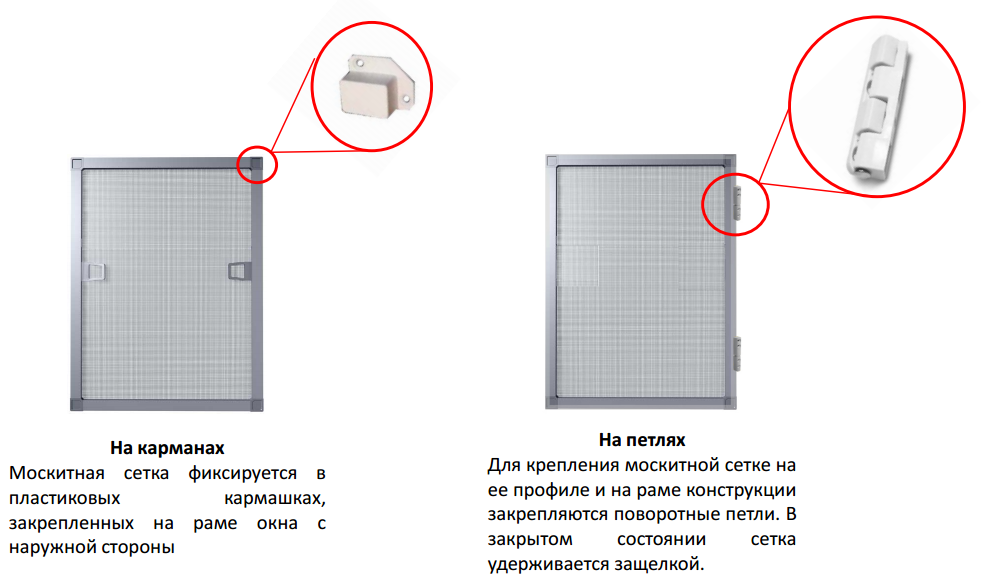
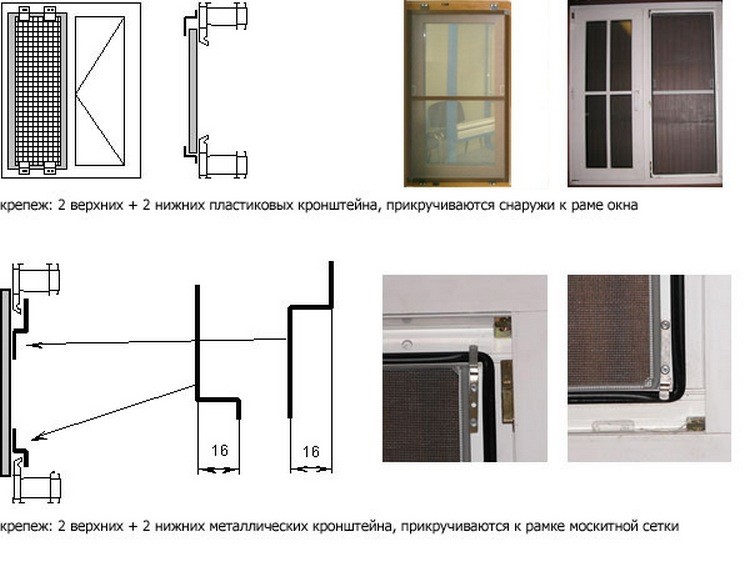
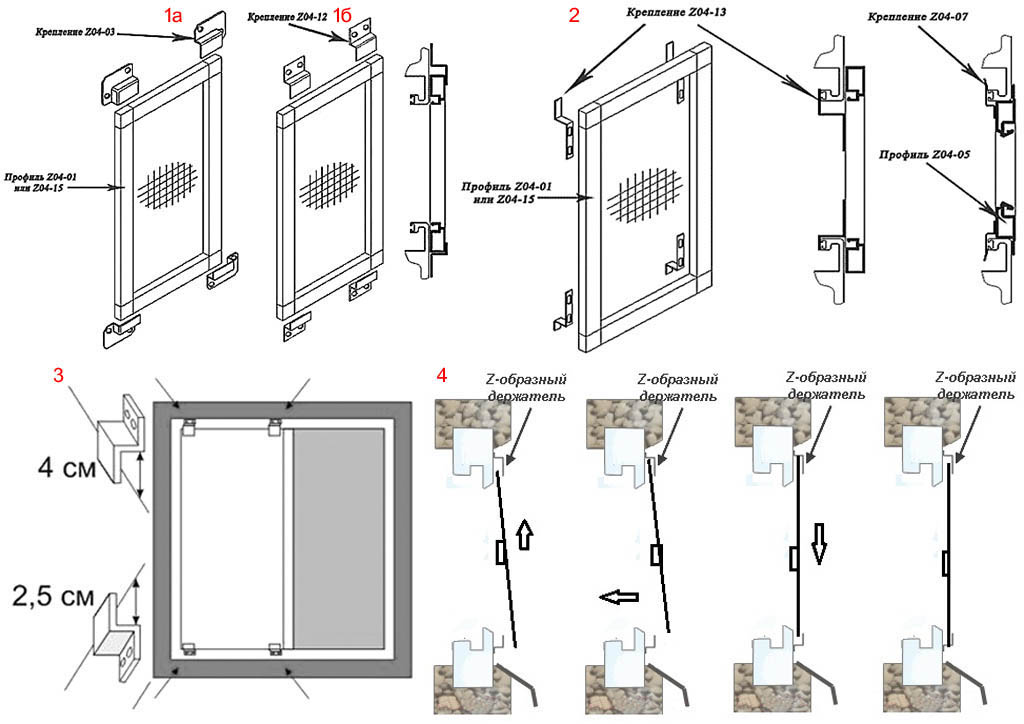
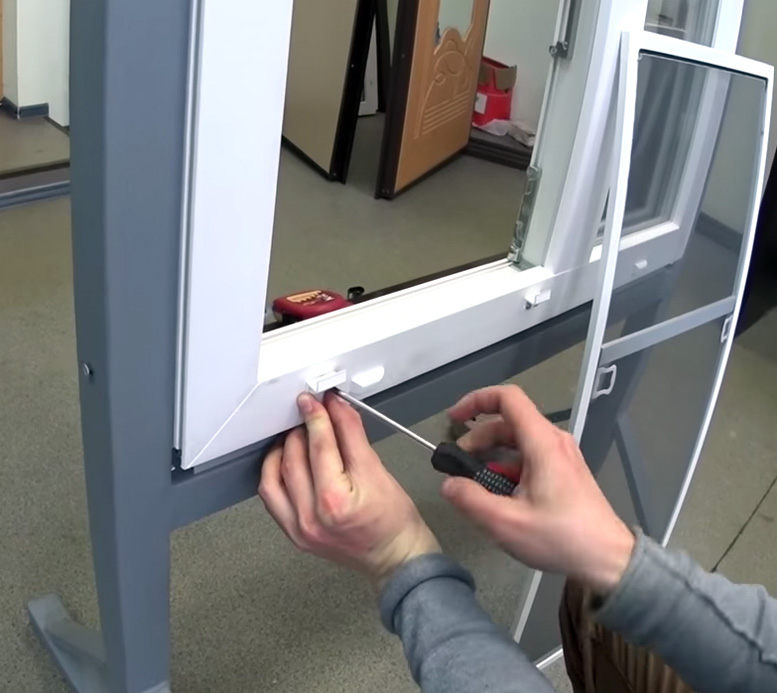
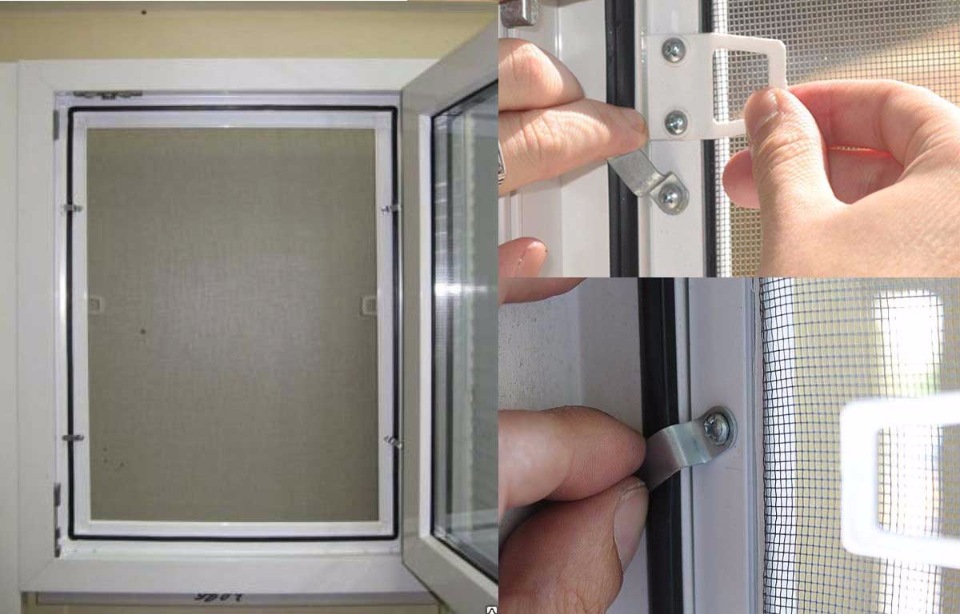
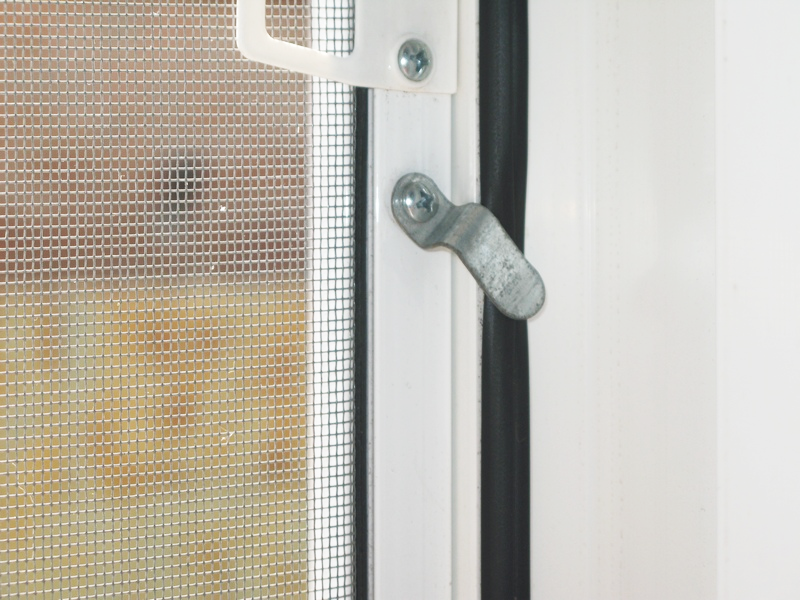
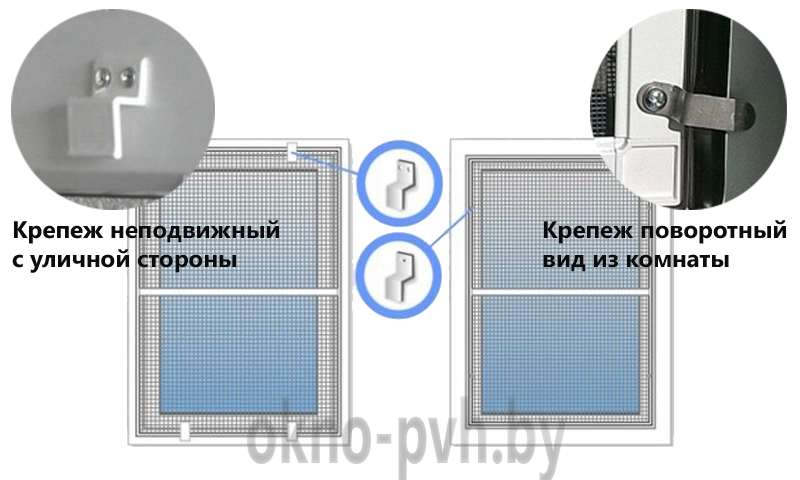
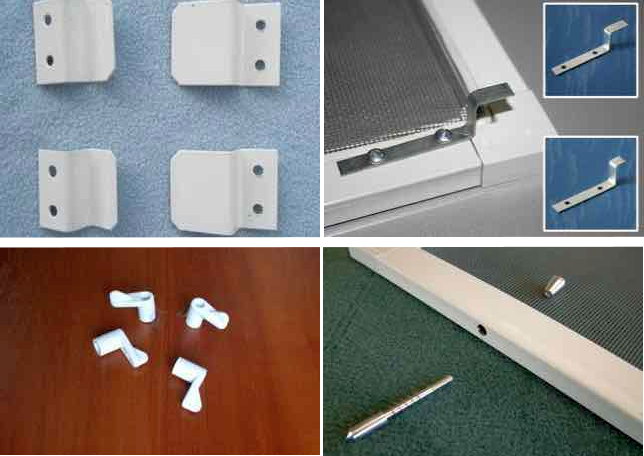
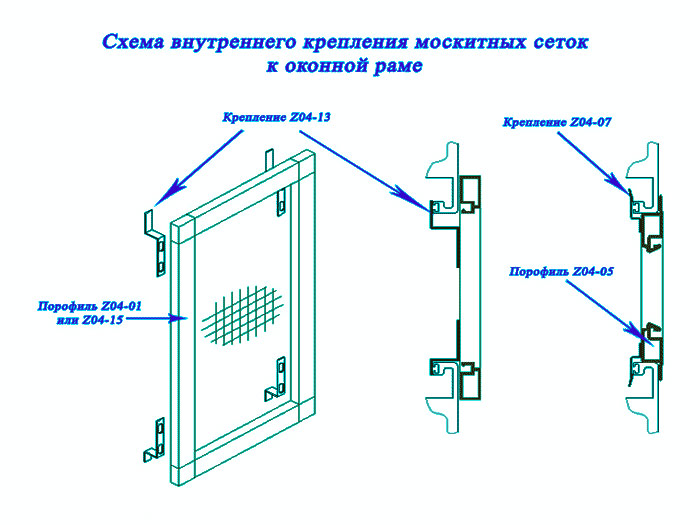
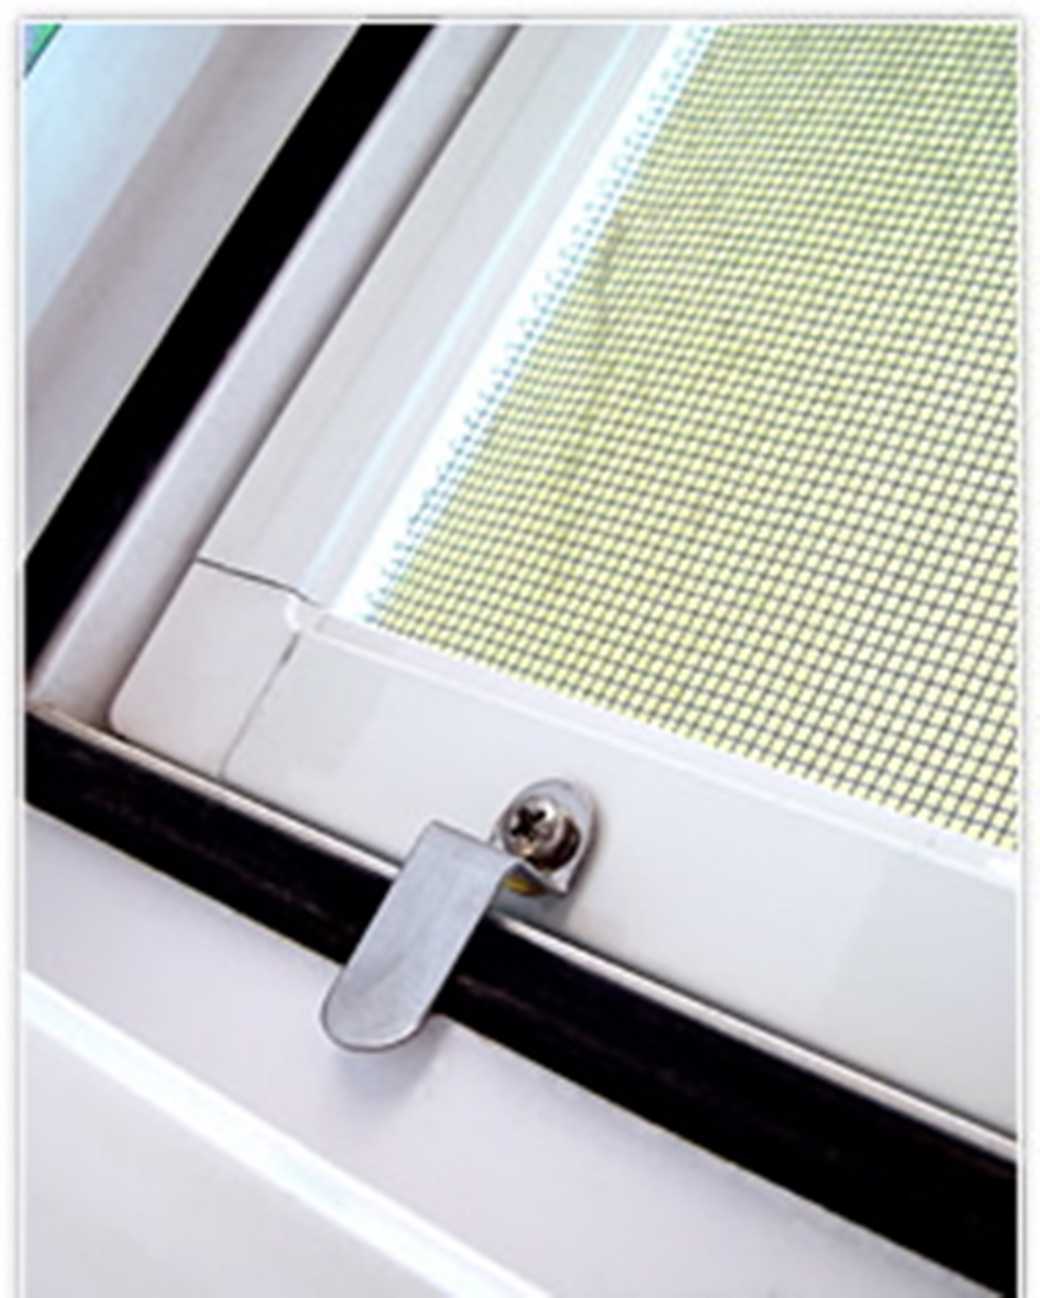
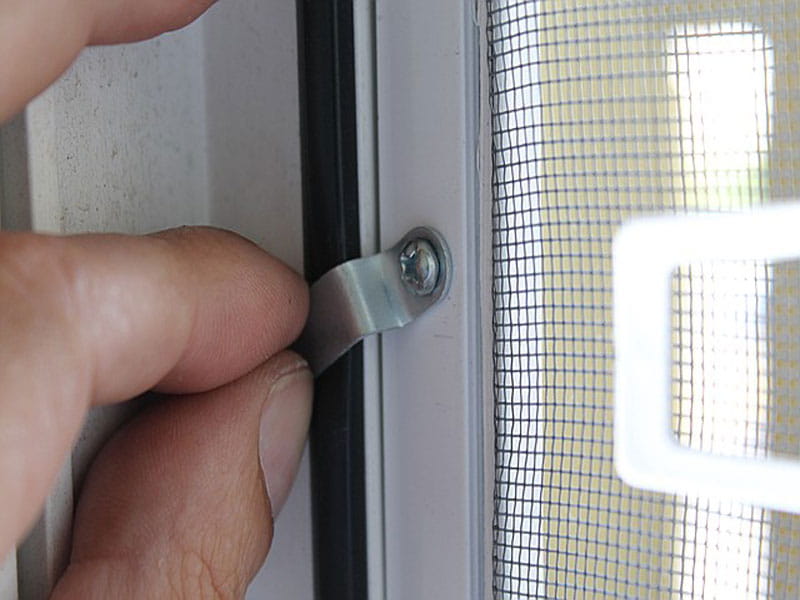
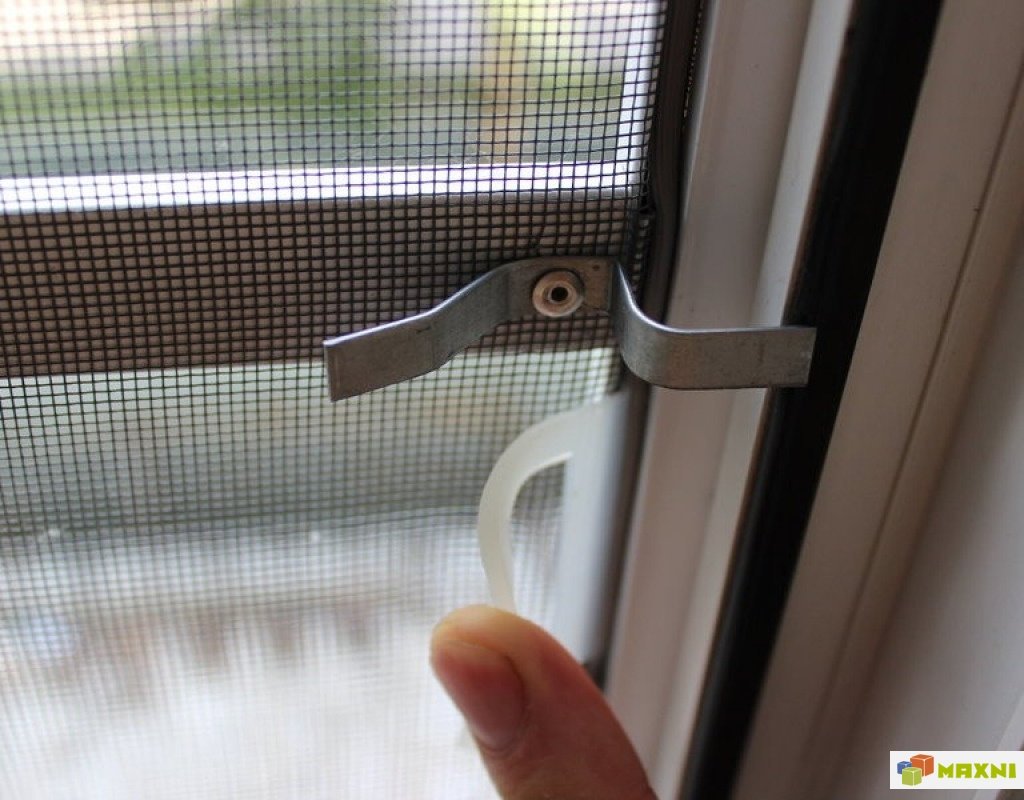
- fix the fasteners. The "pockets" are attached to the window frame from the outside so that the mesh frame can be easily inserted into them, and at the same time it does not fall out of the latches. The metal swivel brackets are screwed directly to the mesh frame;
- after that, put the net in place by putting it in the “pockets” or by turning the brackets to the desired position.
An important point: so that the "pockets" are located in the right places, they are installed at a distance greater than the height of the mesh frame. A pocket with a greater height of the retaining part is placed at the top (in the photo, the lower part), the distance between the reference planes (in the photo highlighted in red) should exceed the height of the frame by d + 1 ... 2 mm.

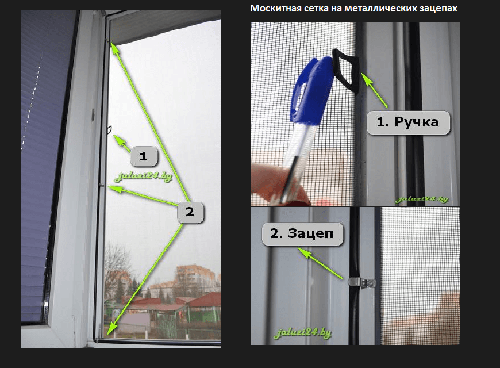
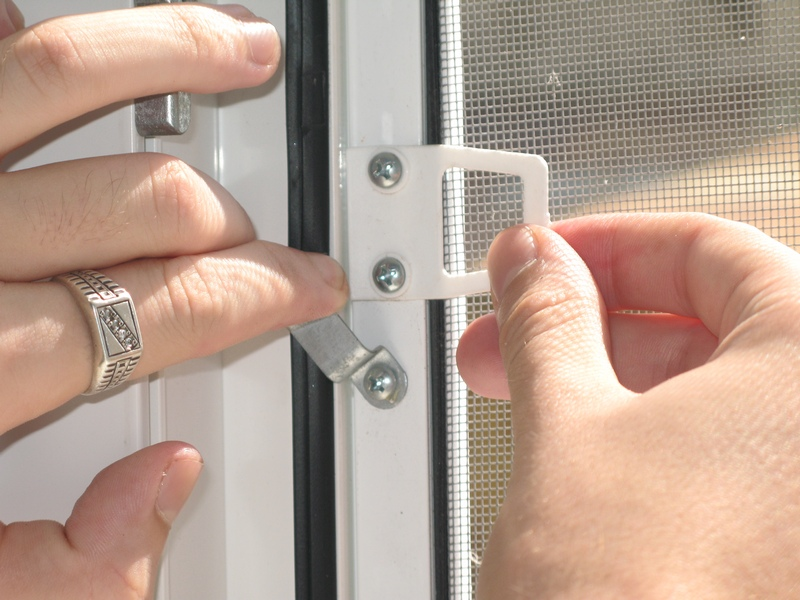
When using latches (metal tabs fixed to the mesh frame and rotated during installation), it is important that this installation option is provided by the window manufacturer in advance - if the space between the frame and the window sash is too small (the seal practically does not extend beyond the plane of the frame into the room), the window may not close well
Mounting options
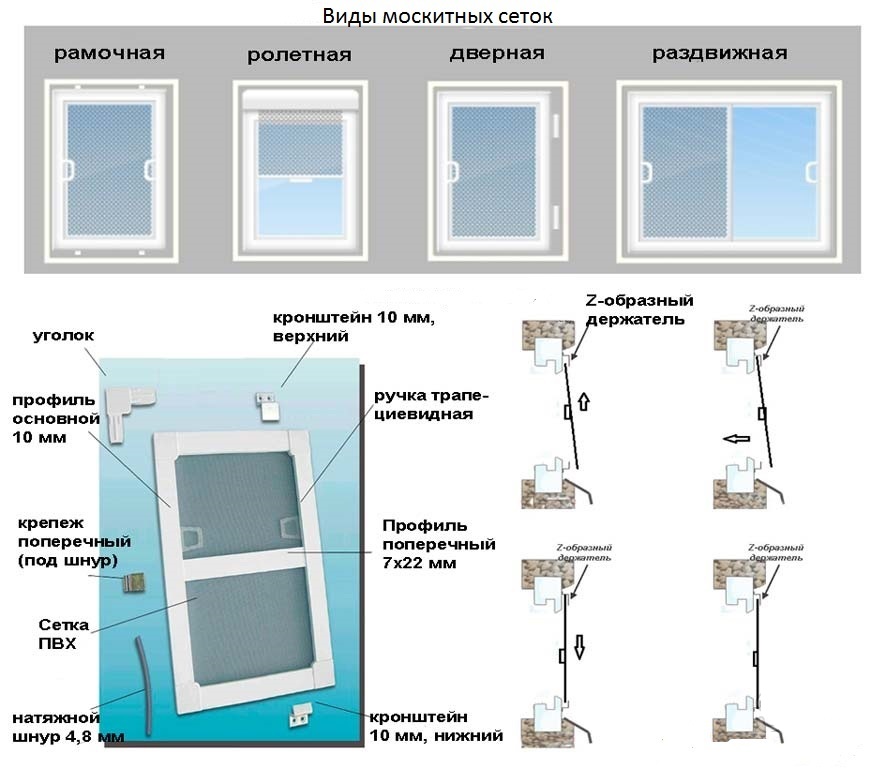
Before you get acquainted with how to insert the mesh into a plastic window, you should understand the design features and fastening methods. The frame version is often used. To assemble an anti-mosquito item, you need tools, skill.

In order to profitably use the services of specialists, it is worthwhile to measure the internal opening of the installation site in advance. If desired, the material can be fixed independently. Holders should be purchased from the same company. Velcro fastening is considered an advantageous option. How to insert a mesh into a plastic window? The following mounting options are available:
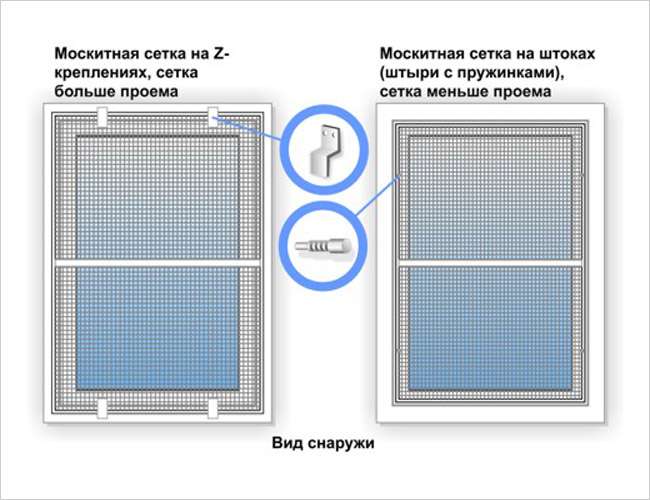
- plunger - fixing with pins;
- sliding - movement along the runners;
- door - hinged hinges;
- roll - unwinding from the drum;
- hooks;
- fixing the mounting angles;
- fastening with magnets;
- rotary structures;
- spring loaded pins into the inner opening.
Installation instructions
To independently install the mosquito net, prepare the tools:
- screwdriver or drill;
- thin drills;
- riveting tool;
- screwdrivers;
- ruler, tape measure.
Fasteners are supplied as part of the construction kit. But you need to make sure to stipulate this when ordering and check before purchasing products.
Installation on metal brackets from the inside
This method of attaching the mesh to a PVC double-glazed unit is considered the simplest and safest. With the help of aluminum rivets, the hooks are attached to long strips.
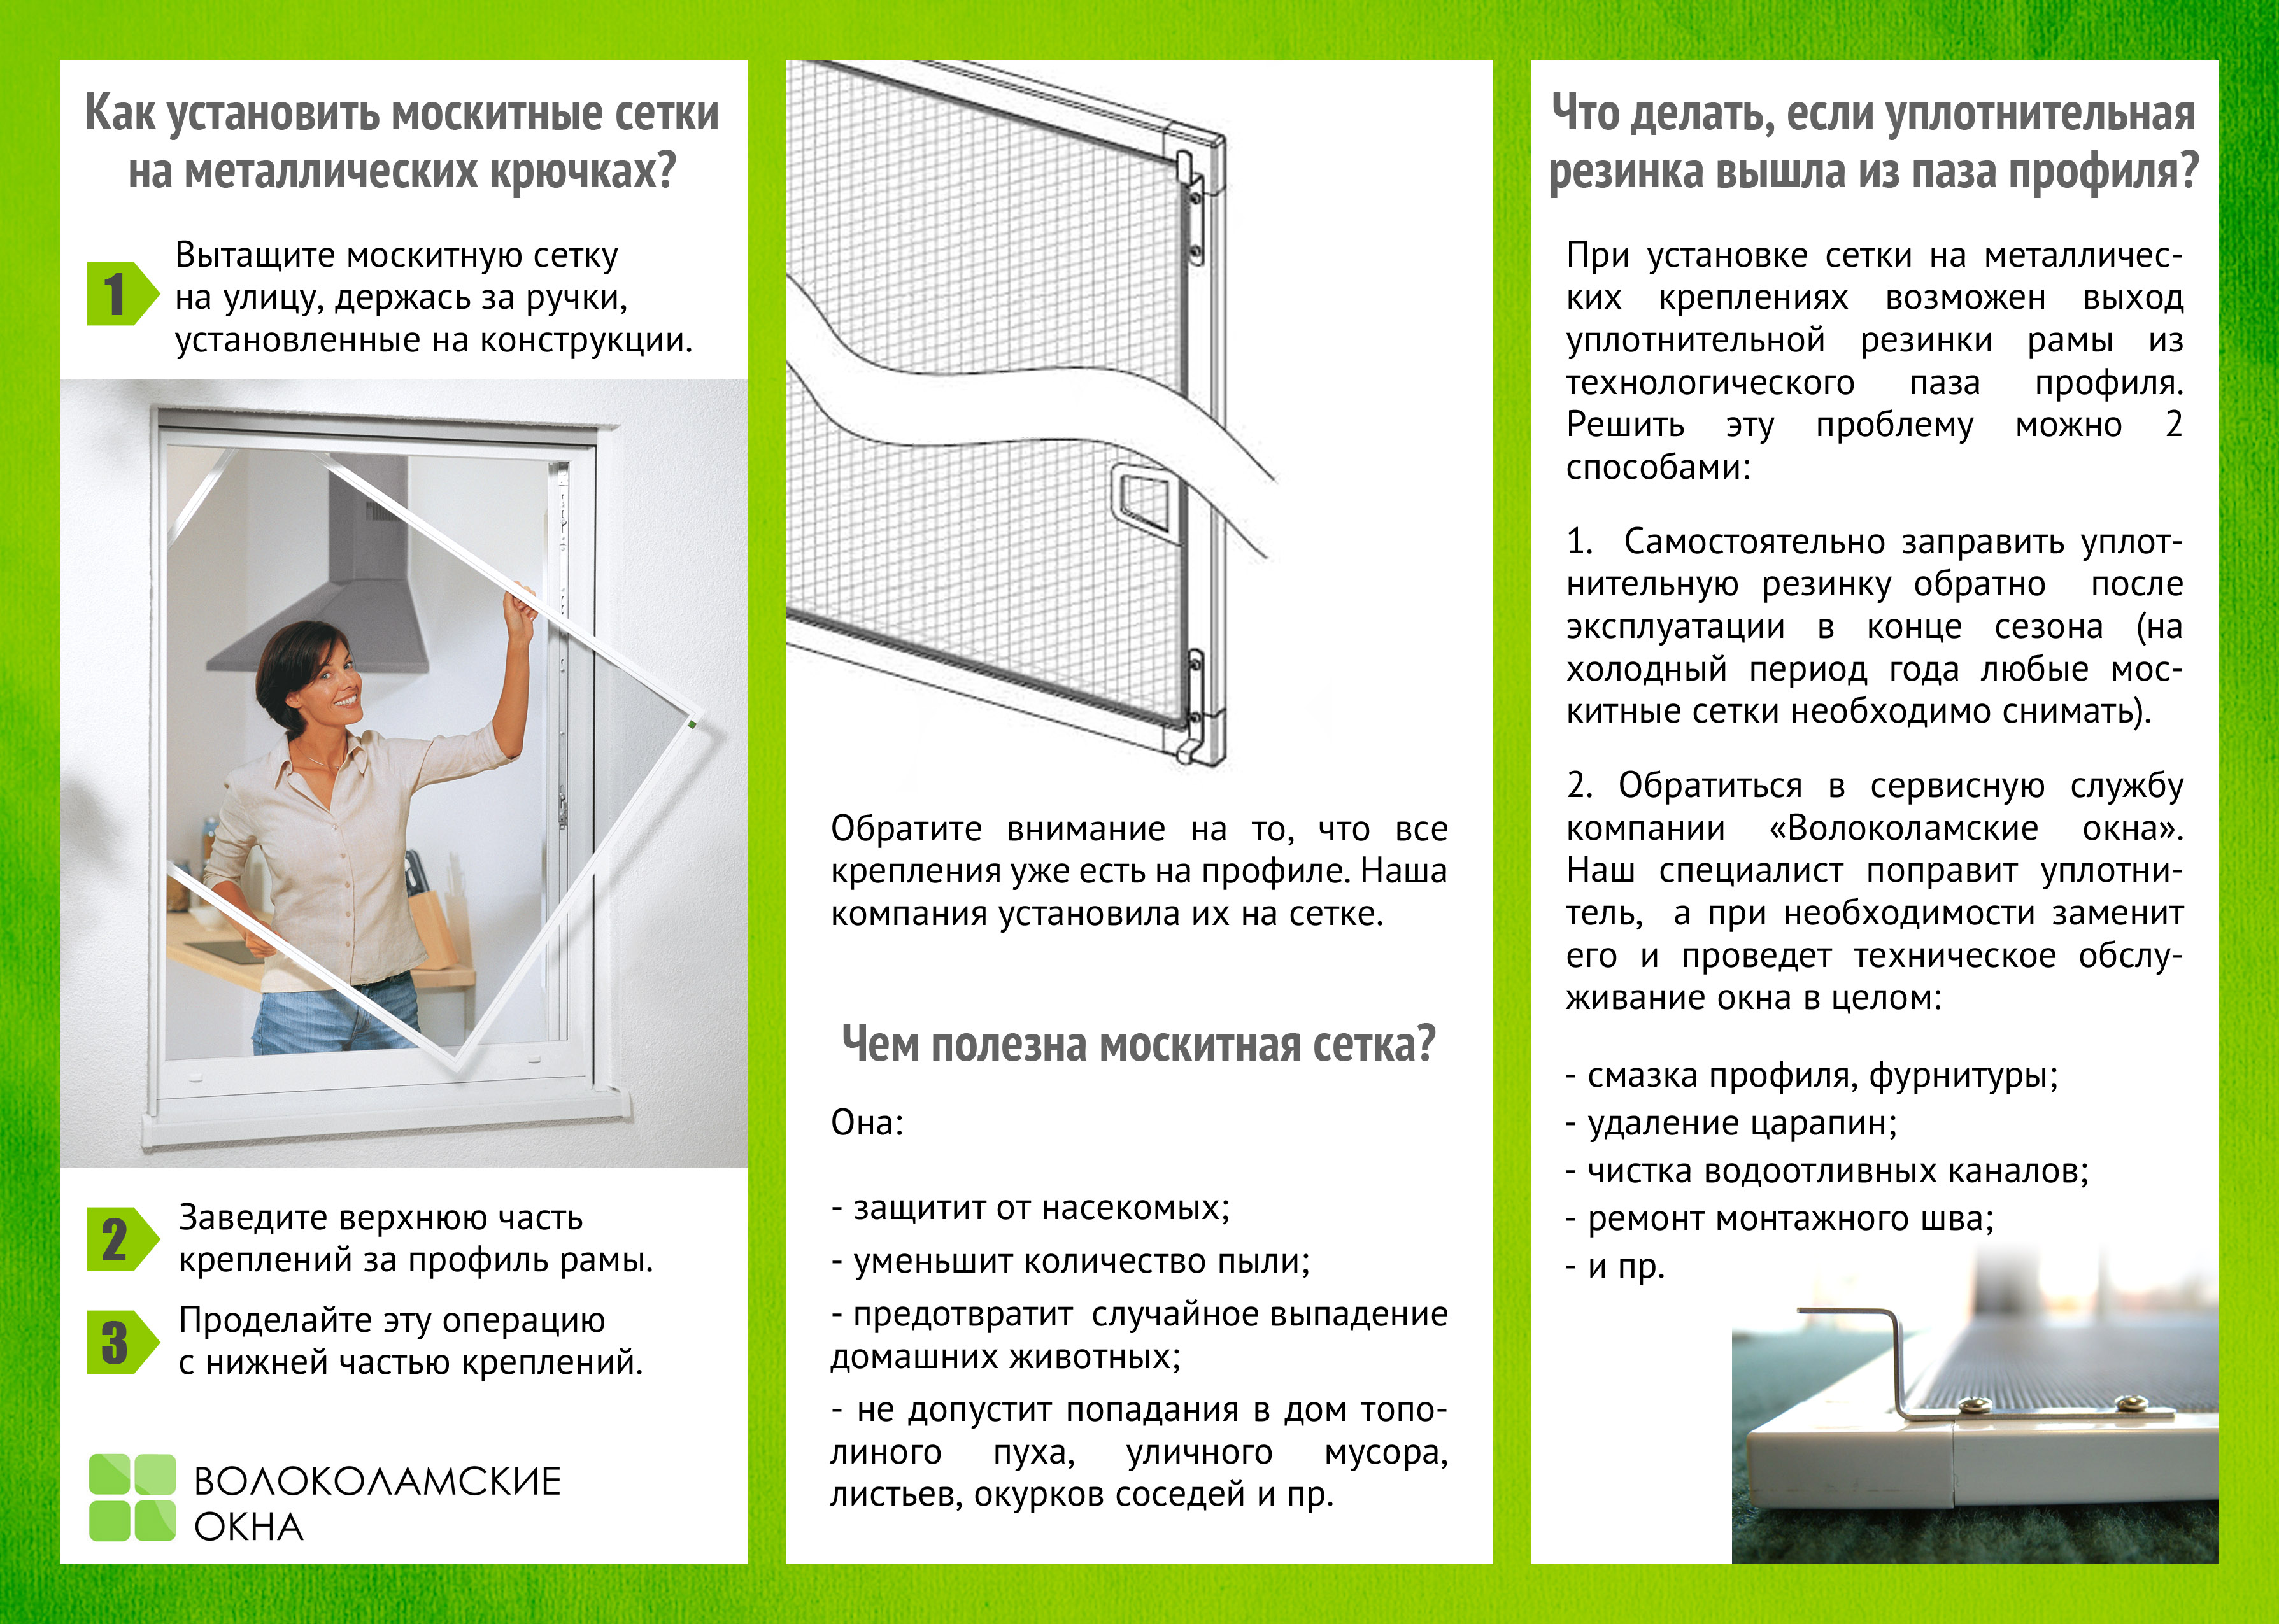
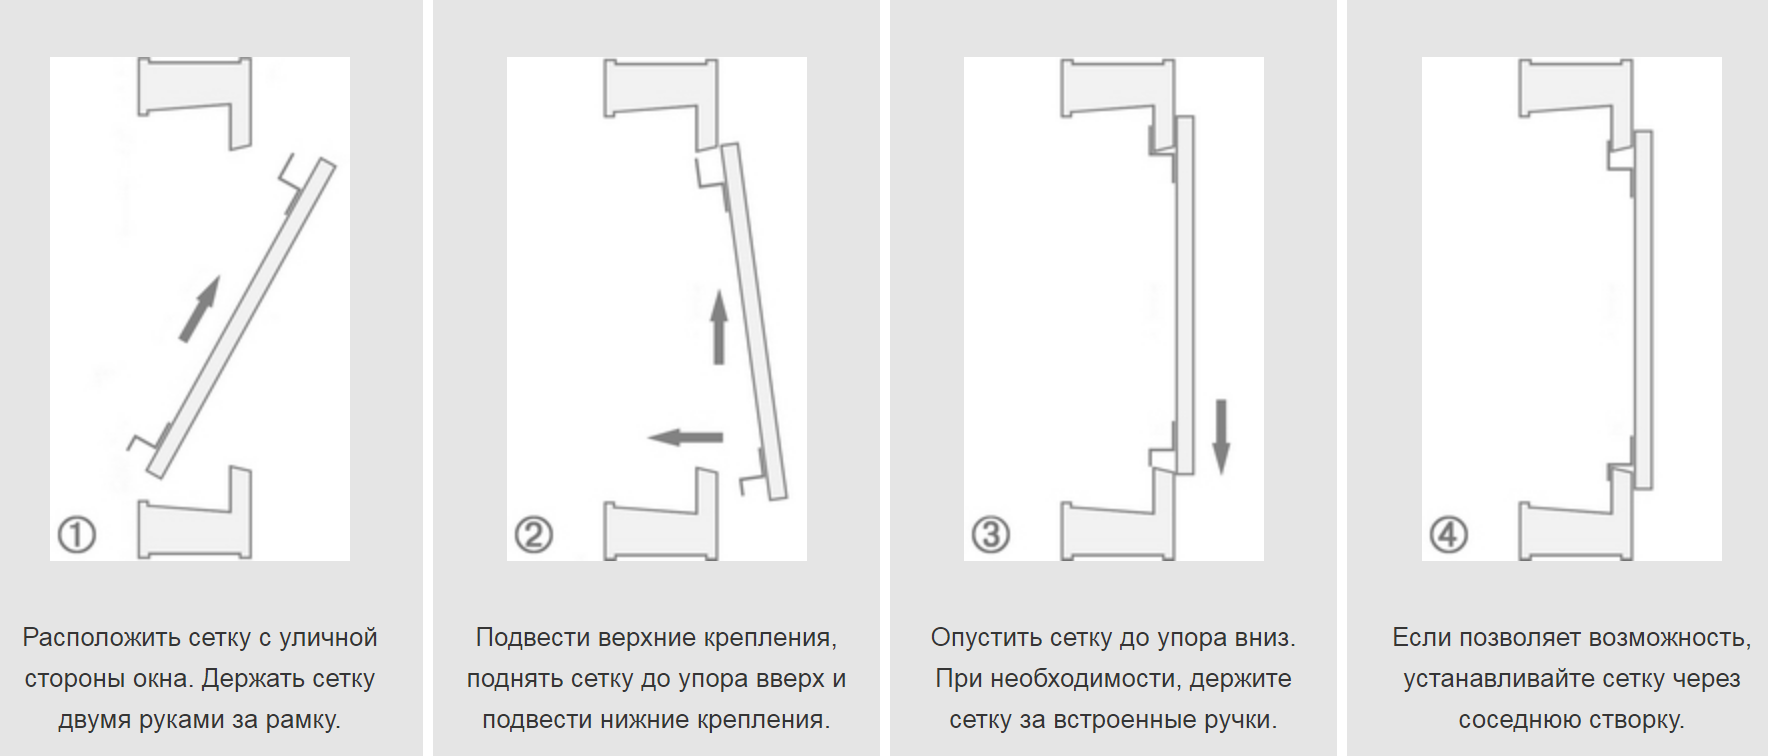
- Hold the product by the side handle and wind the top bracket behind the window bead.
- Lift the net all the way up, hook the lower hooks on the frame lip.
- Shrink the mosquito cloth down to the very end and align with the window opening.
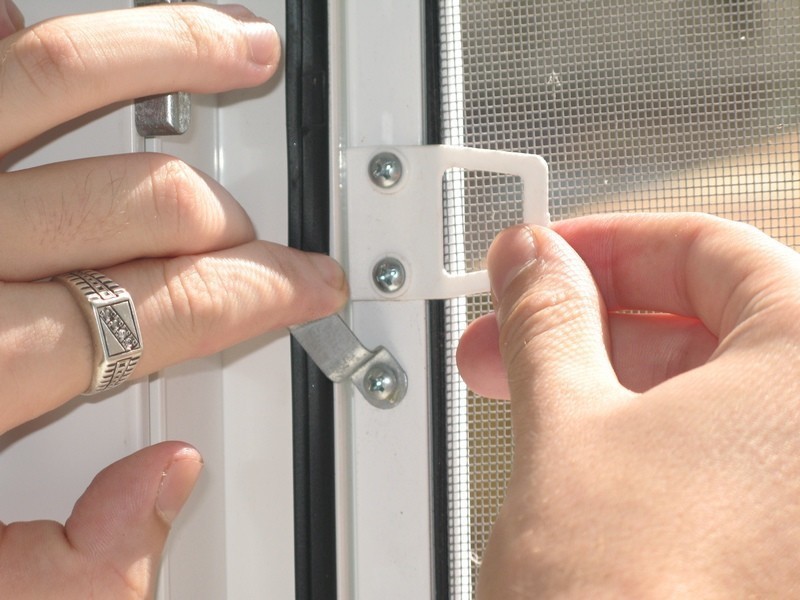
Install the mesh and secure it to the staples
Securing the canvas outside
This method is reliable, besides, with such a fastening you will not damage the rubber seals. But do not forget to follow the safety rules, because you have to lean out of the window to the outside to screw the corners.
-
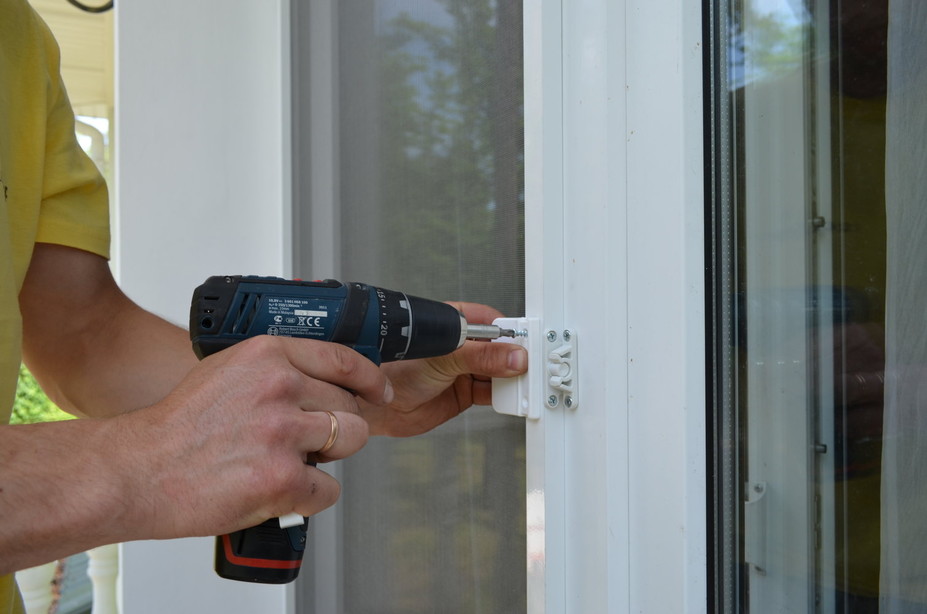
Fasten the lower brackets with self-tapping screws. They should be located 20 mm from the edge of the window opening.
Secure the staples with self-tapping screws
- Measure the height of the grid and add 10-15 mm to the figure obtained. Mark the points where the top brackets will be mounted.
- Screw the corners so that they are at the same distance in relation to each other and the borders of the window opening.
-
Now install the mosquito net: slip it into the upper fastener until it stops, insert it into the lower corners, lower the product into place.
Install a frame with a mesh in the fasteners and fix it
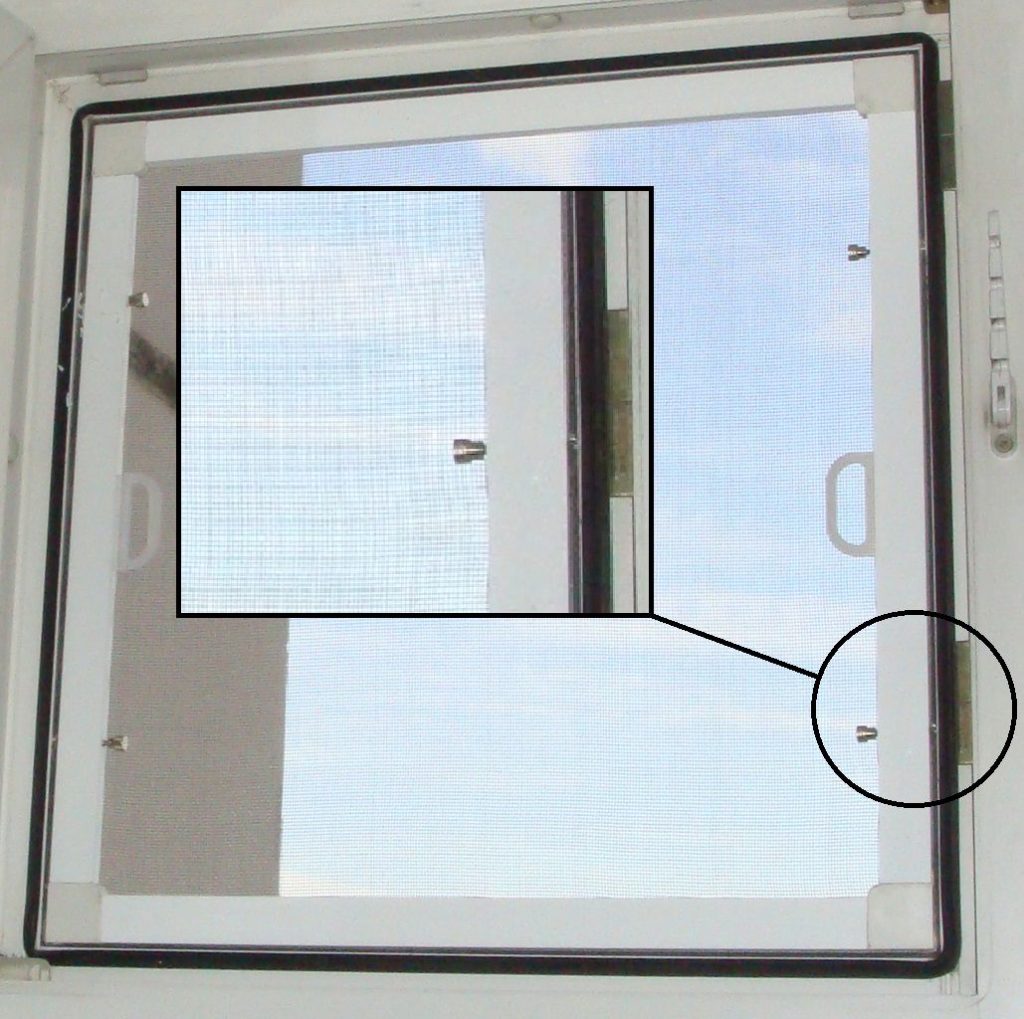
Installation on plunger mounts
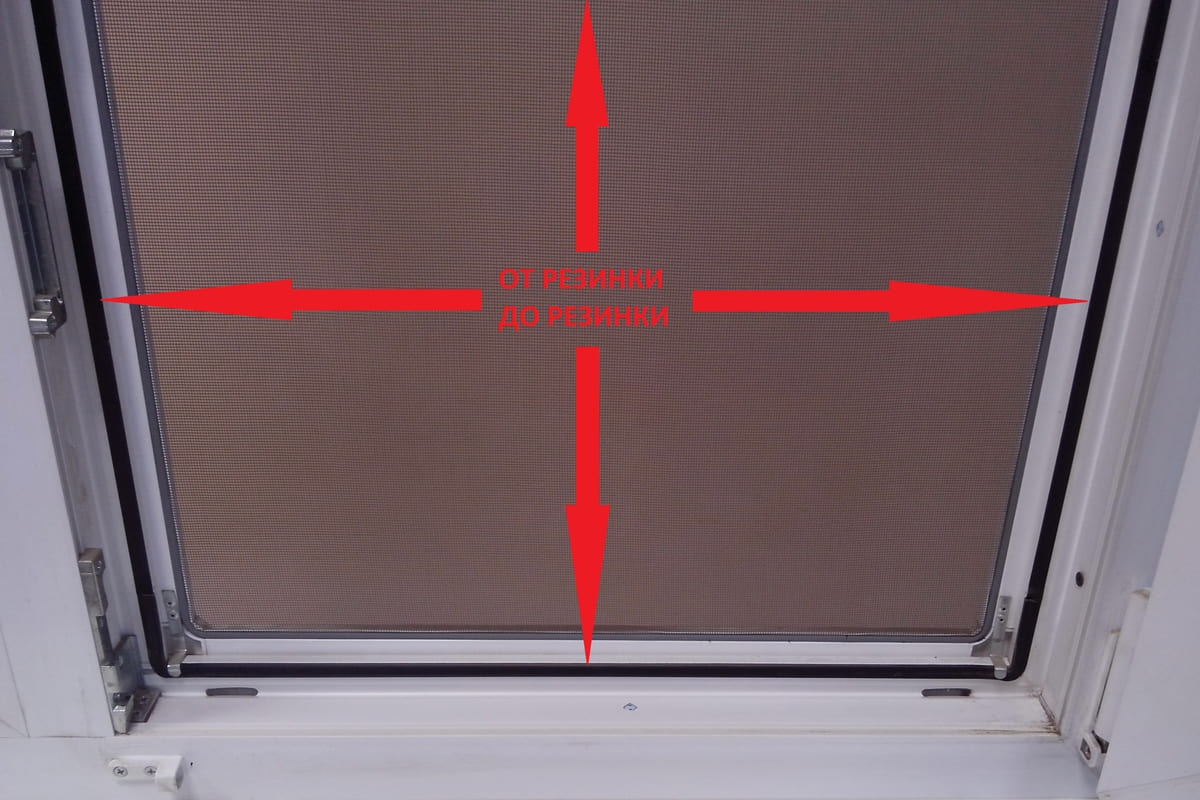
If fastening to conventional brackets is not possible, this method is used. As a rule, the protective grill can interfere. Or there is not enough space on the frame to accommodate the staples. Since the plunger mesh should be placed inside your window opening and not overlapping, measurements are taken in strict accordance with the frame perimeter.
-
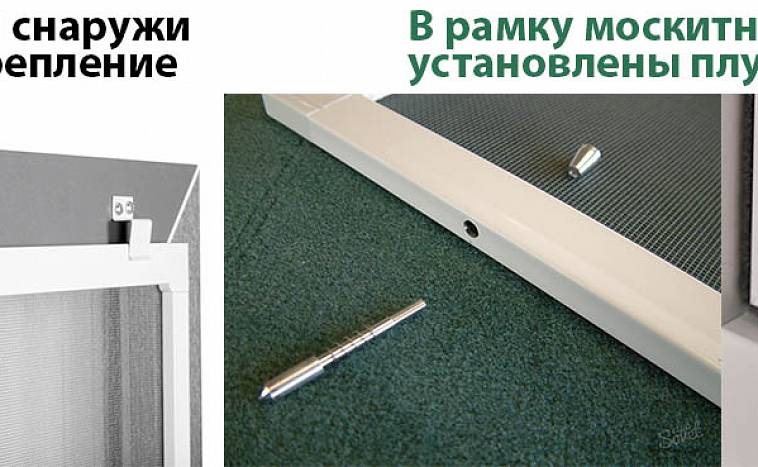
Prepare a place for the pins in the frame of the mosquito net. Drill 4 holes with the same diameter as the thread on the pin. After that, widen the holes in the outer walls of the profile to the size of the tip that extends.
Make a hole in the mosquito net frame for the plunger
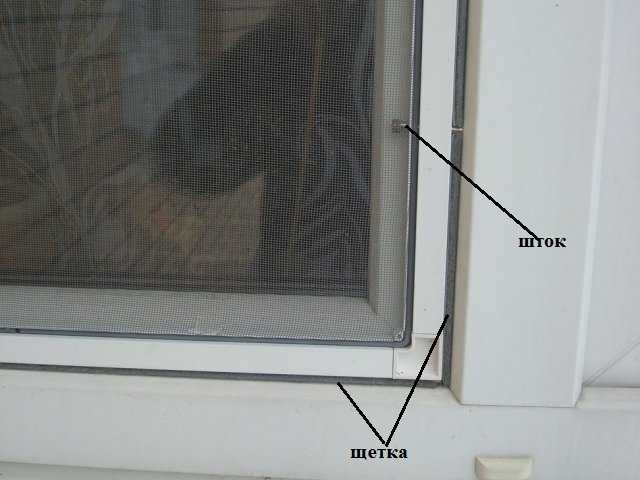
- Insert the pins with the springs into the frame, tighten them with the tips. Try on the mesh in the opening, opposite the areas where the plungers go out, put marks.
- Drill holes to accommodate the matching pin sleeves. Stick the brush seal on the mesh profile.
- Place one side of the mesh with the plungers in the mating holes. On the opposite side, wring out the two tips, insert the mesh into the opening and fix.
Rolled mesh (roller shutter)
The most effective way to keep out insects and dust from the street. The system is mounted above the window.
- Free up the attachment point: remove the plastic or aluminum frame from the mesh.
- Having attached the net to the window, outline the place where you will screw it, and secure it.
- Open the covers on the planks to access the mountings.
- Along the entire length of the perimeter of the window frame, mark the installation locations and mount the strips as evenly as possible. Tuck the mesh under them, and then fasten the slat covers back.
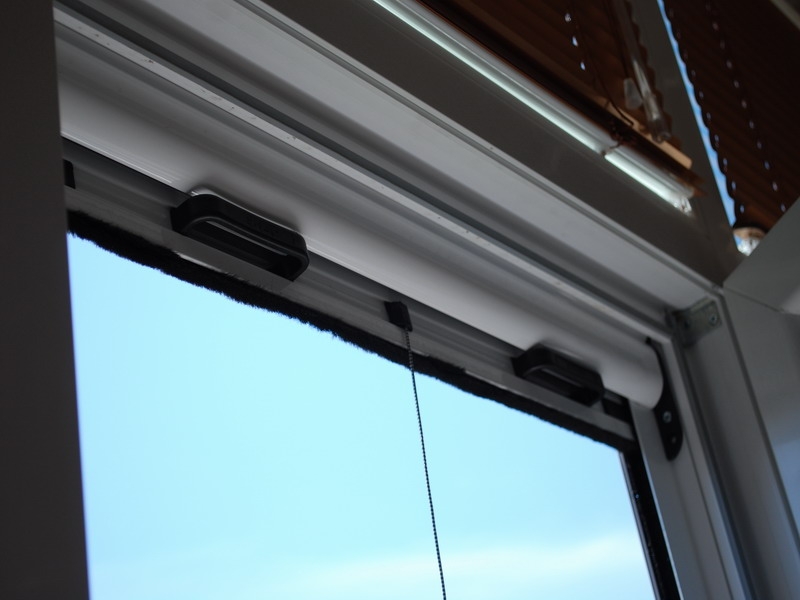
The installation of the roll mesh begins with the installation of the box on the upper window frame
Installation of a roller shutter or pleated type mosquito net
When figuring out how to install a mosquito net, not a frame, but a roller shutter or pleated, it is necessary to refer to the manufacturer's instructions, since the process can vary greatly for structures of different types.
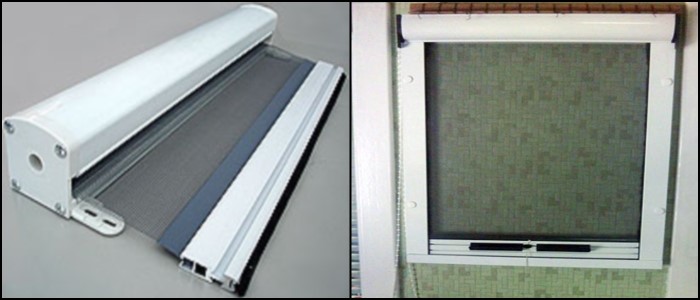
In fact, the roller shutter model consists of three main parts - an assembled roller shutter (in the photo on the left) and guides for it. A closed box with a roller, on which a mesh cloth is wound and where a braking mechanism is installed, is attached from the outside to the window frame using self-tapping screws. The height of the fastening is chosen so that the protective sheet completely overlaps the opening from above and below - that is, the length of the panel should be sufficient for the entire opening with a small margin.
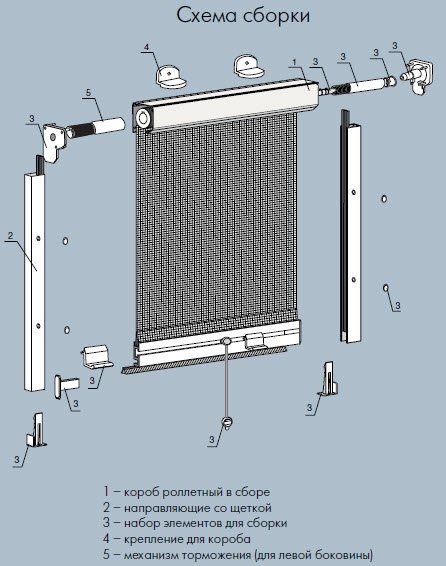
The guides are also attached with self-tapping screws, the heads of which are then hidden by protective inserts. Often, the kit also includes a lower support bar, against which the edge of the net rests when fully lowered. This option is convenient in that a gap does not form at the bottom.
For pleated nets, a similar scheme is used, only instead of a roller for winding the panel, there is a place where the mesh is folded. For products with the pleated fabric expanding in one direction (in the illustration on the left), this place is hidden by the box at the top or on the left / right (picture in the center). If the panel moves apart in both directions (figure on the right), then there is no fixed place, it all depends on the position of the side plates.

The box with the panel and the guides are attached to the window / door frame or wall using self-tapping screws according to the diagram in the installation instructions.
It is worth noting that installing a roller shutter or pleated type mosquito net with your own hands is more difficult than for frame and swing options, so it is better to place an order for the product immediately with the professional installation service.
We understand the details: how to remove the mesh from a plastic window, video
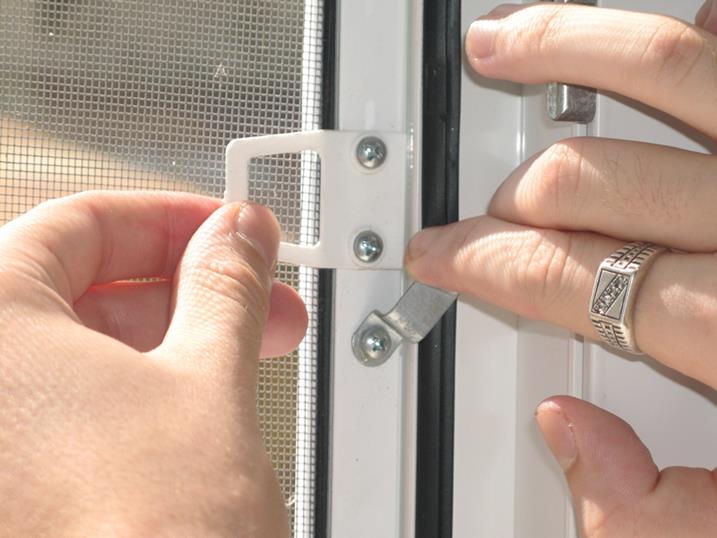
In order to understand how to remove the mesh from a plastic window, you first need to understand its design features, because the fasteners may differ from each other, albeit insignificant. Elegant and modern mosquitoes can be installed both outside and inside, especially if there is a plunger mounting system, that is, a special pin on a spring. This mount is the most expensive, but at the same time more reliable, durable and easy to install and remove.
Most often, a mosquito net is assumed to be a frame type of structures, that is, it is a frame with a fine metallized mesh stretched over it, but there are mosquitoes with Velcro, roll, pleated and others. Rolled, Roman and pleated mosquito nets are rarely removed for the winter, because it is enough to twist or assemble them so that they are not exposed to the environment. Frame options for mosquitoes must be removed in order to avoid the consequences described above.
How to remove a mosquito net from a window on Z-shaped plates
Often, professional craftsmen put mosquitoes together with window blocks, and the cost of fixing such nets is included in the total price, or in general this service is provided as a gift, that is, completely free of charge. Most often, people exhausted by repairs and large expenses simply forget to find out and ask how to remove the mesh from the window, and then they ponder the question for a long time. The easiest way, of course, is to call a master who will come and do everything professionally and quickly, but you will have to pay for his services, but in fact it is not at all such a difficult matter so as not to cope on your own.
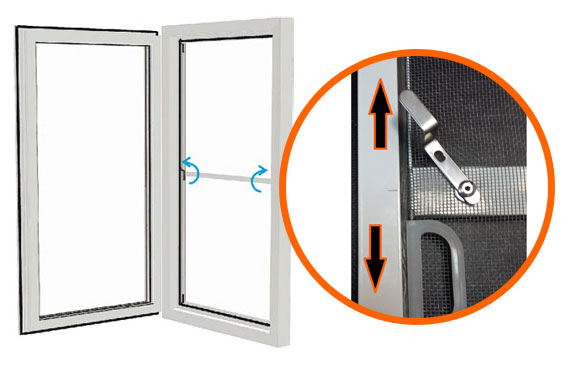
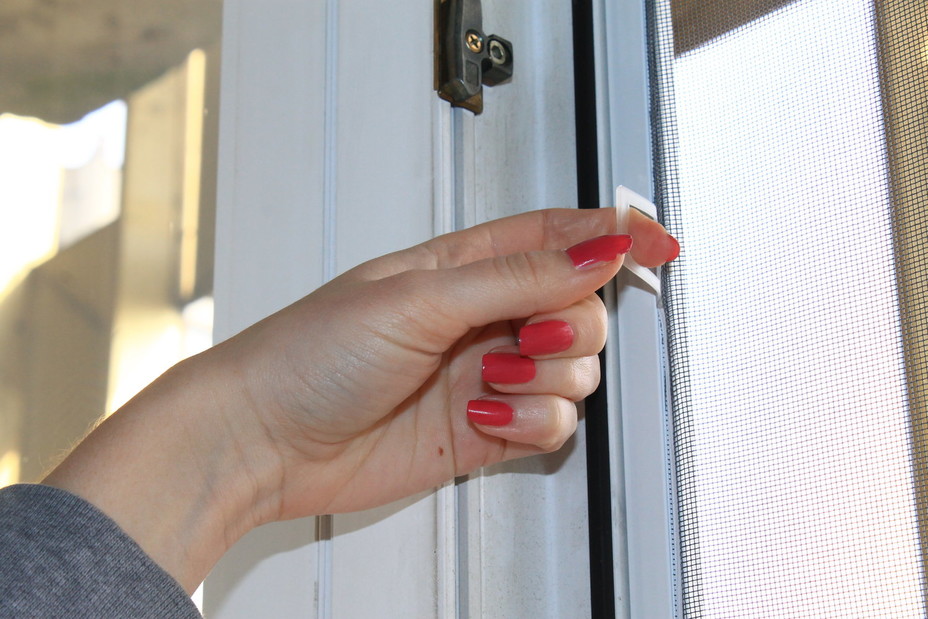
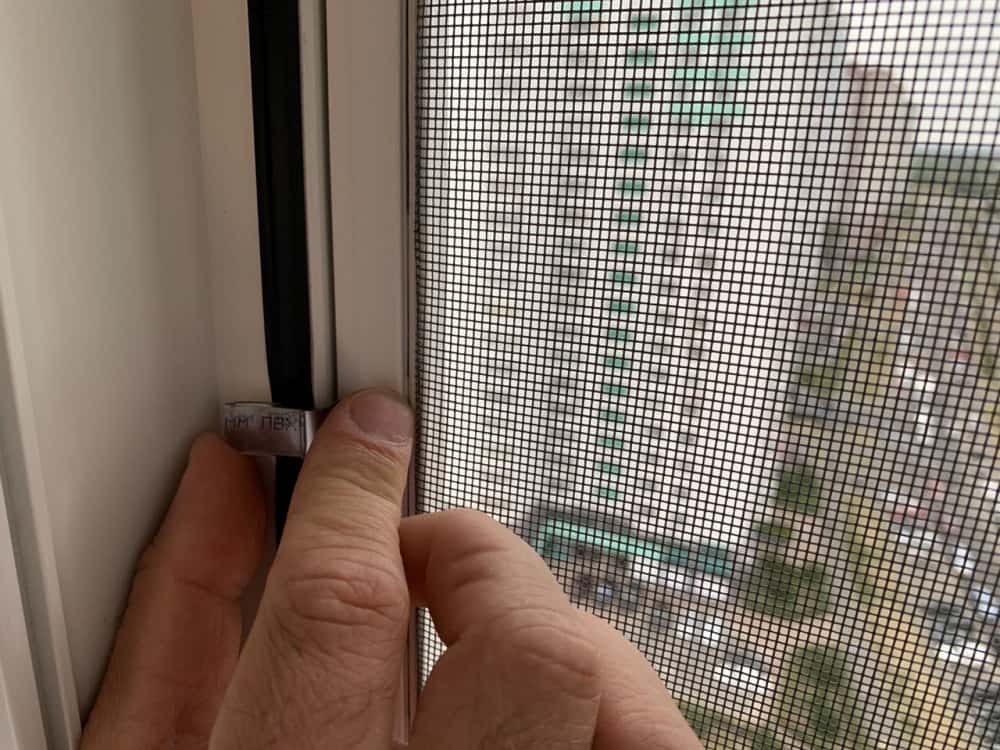
- Firmly grab both handles of the net, which are required on each structure, approximately in the middle.
- Apply a little pressure, and then gently lift the net towards the top.
- The lower part of the mesh frame, which has been released, moves outward, that is, in fact, forward, away from itself.
- Lower the net, while releasing it from the upper mounts.
- Next, it remains to turn the mesh a little and pull it into the room.
Thus, as you can see, there is absolutely nothing complicated in this at all, everything is quite simple, you just need to act confidently and make an effort, and even then not excessively weighty. However, this is far from always the case, and unforeseen situations may arise, for example, if you decide to remove the mesh after the plastic of the handles and frame is thoroughly frozen and has lost its strength and elasticity.
Broken handles - solvable problem: how to remove a mosquito net in an emergency
So, the handles on your mesh are already completely broken off, and you want to take it out, and not only in order to save it for the winter, but also just for cleaning. Often, debris and dust from the street gets stuck in the net, and nothing complicated is required to wash it. If the dirt is not strong, you can directly wipe the mesh on the spot with a damp cloth or, better, with a microfiber soaked in detergent. But it is better, of course, to remove the mesh and rinse it in the bathroom under a stream of warm water from the shower. So all the dust and dirt will come off easier, faster and easier, and if you still walk along the top with a brush, then you will be provided with perfect cleanliness. Since it is simply not possible to remove the mosquito net from the door or window if its handles are broken and it is simply not possible to cling to them.
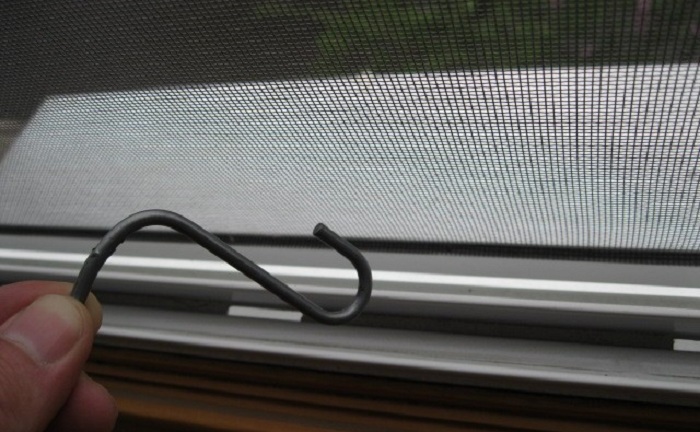
- The simplest solution in such a situation would be to make additional handles for the mesh, bending hooks out of the wire, in the shape of the letter Z. The wire must be strong, bend poorly, ideally, you need to take steel, and work with it with pliers.
- On one and the other side of the net, just opposite the fastenings of the old handles, you need to hook the frame with hooks and pull it towards you.
- Then just repeat all the steps that you did when you removed the mesh with whole handles.
There are other options, for example, you can simply press on one side of the frame and simultaneously shift the opposite corner with your fingers, but this requires some skill. The video at the end will tell you how to remove the mosquito net in sufficient detail so that there are no problems. But it's worth saying a few more words about storing mosquito nets. Ideally, it should be laid horizontally, but never put any objects on top of such a grid, which can lead to its deformation, and this is unacceptable. You can, of course, put the mosquito "behind the closet", as the vast majority of users do, but here you need to make sure that it stands as horizontally as possible so that the structure also does not undergo deformation.
Installation of a mosquito net on the window
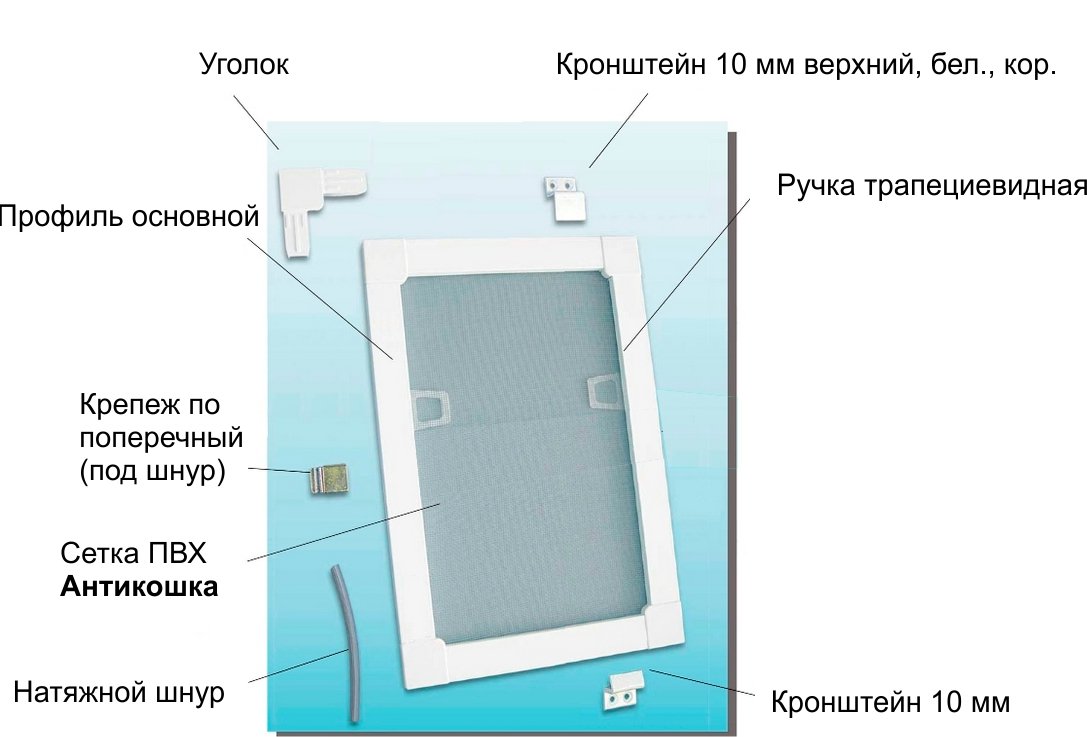
Do-it-yourself installation of a mosquito net on plastic windows begins with the assembly of the structure.
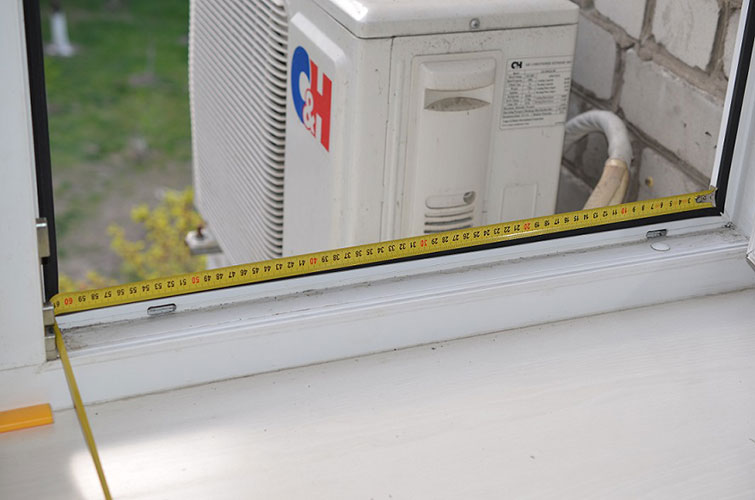
As a rule, the size of the anti-mosquito structure practically corresponds to the dimensions of the window sash. This must be checked - the window sash opens and is measured along the light opening, after which 20-30 mm is added to the height and width.
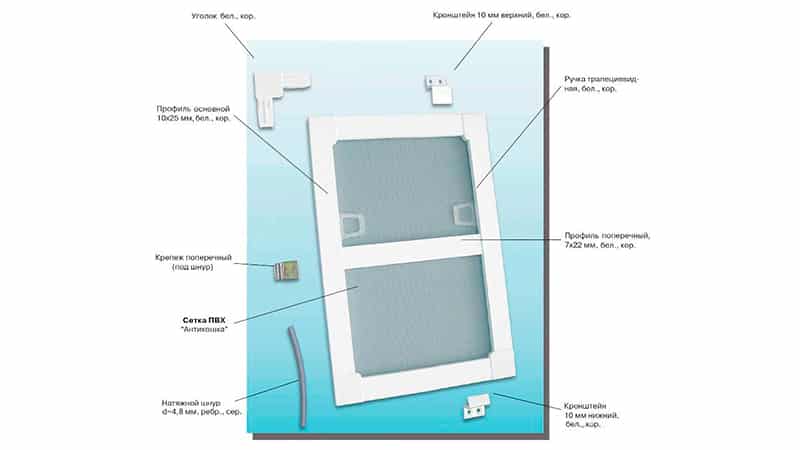
The plastic frame profile is cut exactly in accordance with the window opening. An additional crossbar can also be mounted here - it is designed to increase the rigidity of the structure, which is necessary with a large ratio of height to width.
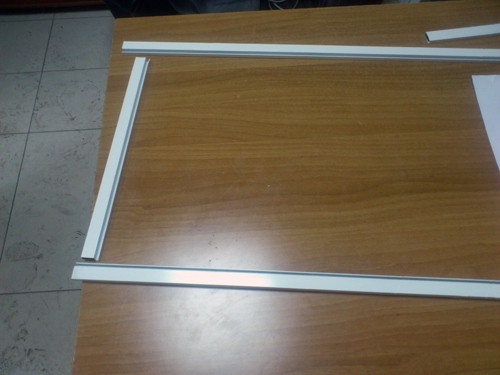
At the top and bottom, the frame profile is reinforced by an impost one - usually made of aluminum. This guarantees the durability of the entire product.
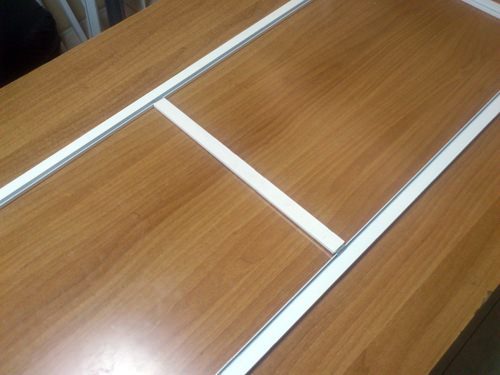
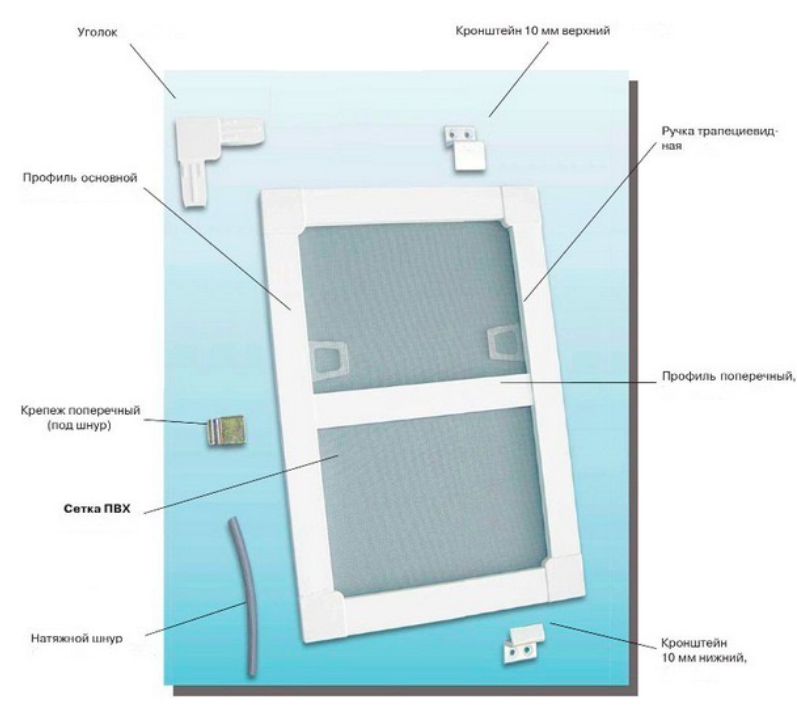
After the profile is ready for assembly, it is connected with corners. These corners are made of extra strong PVC (1-2 mm thicker than the profile) - therefore, the structure becomes resistant to deformation.
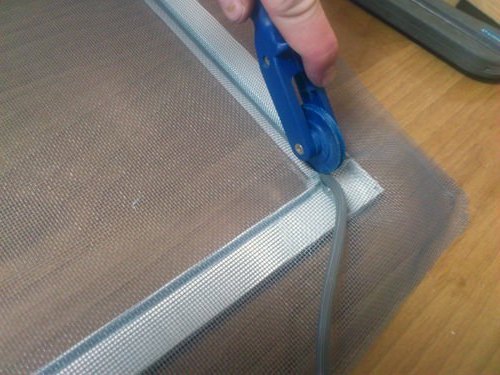
The mesh is pulled over the fastening cord, and then this cord is mounted from the inside into the frame profile, as a result of which the canvas is reliably stretched and fully fixed.
After that, the metal elements of the corner profile are mounted on the frame, which are needed to fix the structure in the window.
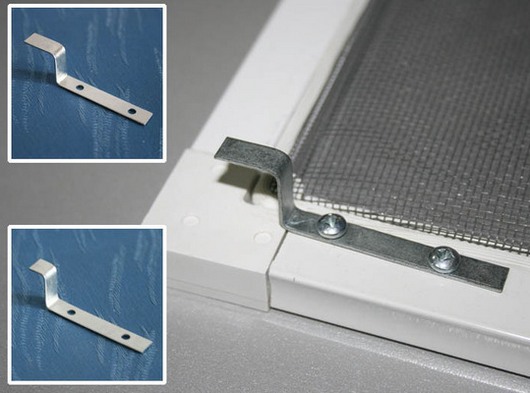
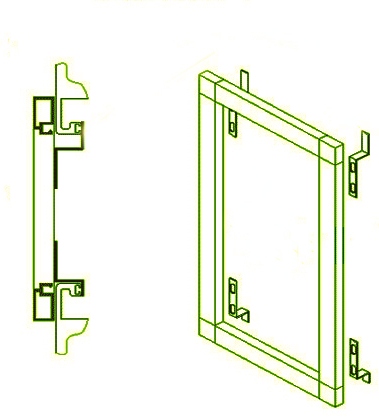
Installation diagram of mosquito nets on windows with metal z-fasteners
Last but not least, 2 holder handles are attached to the mosquito net - thereby ensuring ease of installation. The fully assembled mosquito net is then placed on the window.

How to assemble a mosquito net with your own hands.

Next, we offer you the option of installing a mosquito net with plastic fasteners:
If you are going to install an anti-mosquito net on the window, and you will have it already assembled, then keep in mind that the width of the finished product should exceed the dimensions of the window opening by 2 cm, and the height - 3 cm. A special one is also supplied with the net. fasteners in the amount of 4 pcs. (Two pairs). Each pair has an upper and lower element, with the upper one being wider than the lower one.
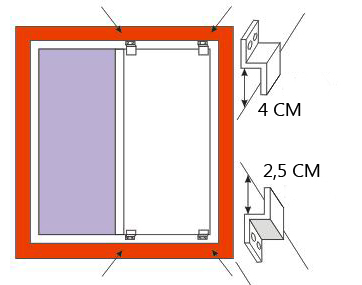
Mounting scheme for mesh with plastic external fasteners
These fasteners are placed on the frame and screwed on - the main thing is not to confuse the sequence. So, first, the lower elements are attached - so that the edge of the installed mesh is displaced 1.5 cm below the window opening. And in order to determine the place of attachment of the upper element, add 1 cm to the height of the mesh and measure this distance from the mounts from below. The mesh is simply inserted into the grooves, being attracted to the frame and dropping down.

As a result of simple manipulations, you will receive an effective barrier for insects and reliably protect your home from bloodsucking, flies, wasps and moths. Plus, the mesh mesh allows even small particles of dust and large debris to be trapped - which means even the air in your room will become cleaner.
How to remove an old-style mosquito net from a window?
More recently, "mosquitoes" were attached to the profile itself without the use of frames and fasteners. Such structures were inconvenient to use, needed frequent replacement and spoiled the appearance of the window, leaving traces of screws and nails on the profile.
In order to get rid of such a mesh, you need to remove the nails and remove the canvas using pliers or pliers. You can cover the nail marks with a self-adhesive profile foil. You can buy it from a window manufacturer. Unfortunately, it is not able to restore all the soundproof and heat-shielding properties of the window, which will suffer from the mesh fixing.
We talked about the main types of grids and how to install and remove them. But these are not the only rules for operating mosquito nets. Do not forget that the canvas needs to be washed periodically, because dust and dirt accumulates on it. It is better to wash the mesh using regular dishwashing gel and a soft sponge. Prepare a soapy solution and moisten the cloth well with it, leave it for a few minutes, then wash off the foam and wipe the mesh dry. This washing should be done at least once a month.
Types of mosquito nets
Mosquito nets are really a must-have item. They protect from mosquitoes, partly from dust, as well as from poplar fluff, so annoying in the summer. But what kind or type of mesh is right for your home?
Frame mosquito nets
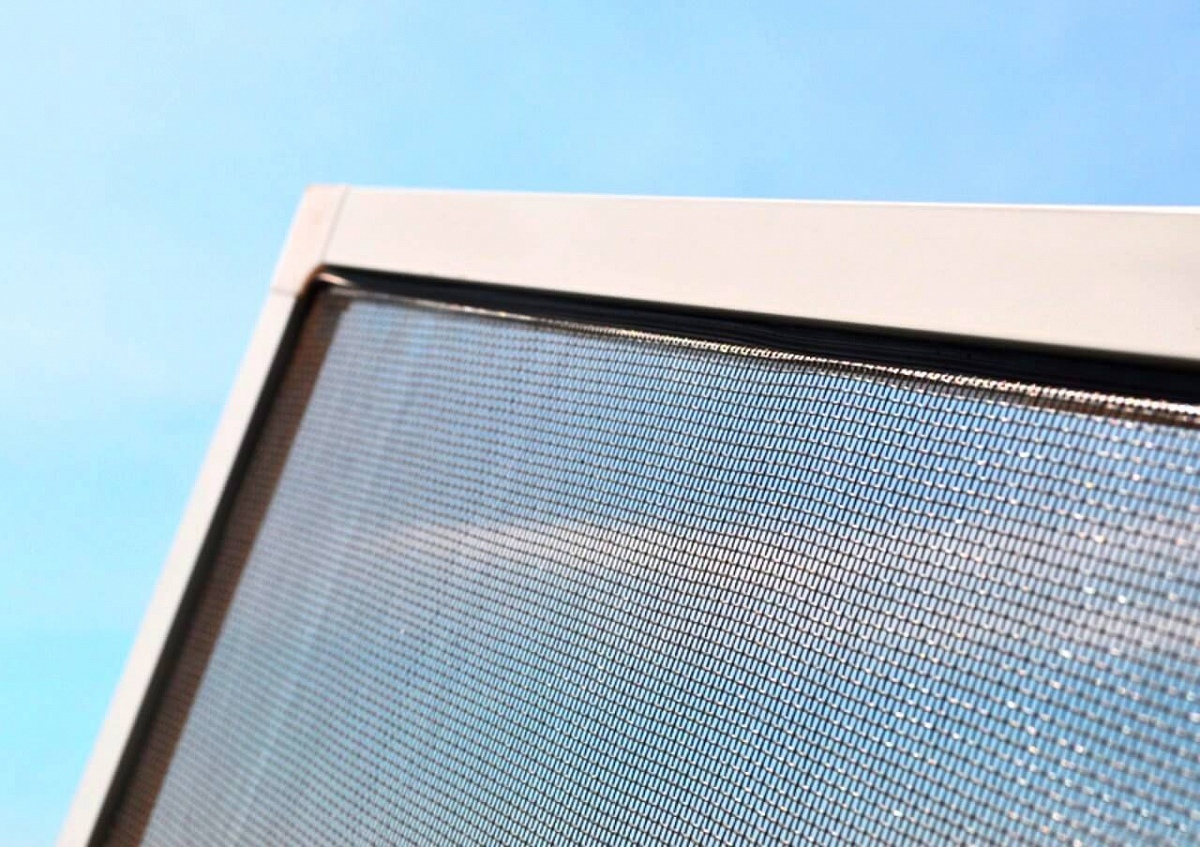
Frame mosquito nets - the classic mosquito net design. A strong mesh is fixed on the aluminum profile, such a structure is inserted into the window opening. Such nets are convenient and practical, they are usually used when there is no need to constantly open the mesh.
It is recommended to remove the frame mosquito nets for the winter period for the longest possible service life of the product. If a large mosquito net is needed, it is usually made with an additional reinforcing bar in the middle.
Rolling mosquito nets
Rolling mosquito nets work on the principle of roller blinds, that is, if necessary, the mosquito nets can be rolled up into an aluminum box. The design of such a mosquito net includes a guide profile, a net in a roll and a cross bar with handles.
There is no need to completely remove the roller mosquito net for the winter, just twist it up. Another advantage of such nets is the ability to cover wider window openings. But, as a disadvantage - such grids, unfortunately, are short-lived.
Mesh on a wooden window
Modern wooden windows differ from metal-plastic only in the material used in their manufacture. Therefore, the grid for them will be the same as described above.
What to tinker with if you have ordinary wooden windows installed?
No one will reinforce the mesh to the frame with buttons or glazing beads. In principle, a Velcro net or in an aluminum profile frame can also be installed.
If you want to tinker, then you can make a mosquito net on a wooden frame. Measurements are performed in exactly the same way as for the Velcro net.
Note!
For a long time, such a product will not be enough, as the tree can warp, and the slats will often have to be painted, for which the mesh will have to be removed, and there are no guarantees that it can be reused.
In addition, you will have to screw the mesh frame to the window frame with self-tapping screws or reinvent the fastening.
Sliding mesh
If sliding balcony doors are installed, then the mesh should be the same. There are standard sliding nets, and pleated nets.
It's like the time that the thirst for savings can lead to additional costs spent on rework. When choosing a sliding mesh, keep in mind that it will require a lot of space, while a pleated mesh will fit in a relatively small opening.
Rolled mosquito net
If you are interested in a rolled mosquito net, then you need to know the separate features of installing this product and using it. Installation is carried out from outside the frame, which must be taken into account when taking measurements.
Imagine that any time you need to go to the balcony, the net will need to be raised and then lowered. For this reason, such devices are installed on doors that are rarely used, or on windows.
This net does not need to be removed for the winter, as it rolls up and fits in a box above the door.
Magnetic mesh
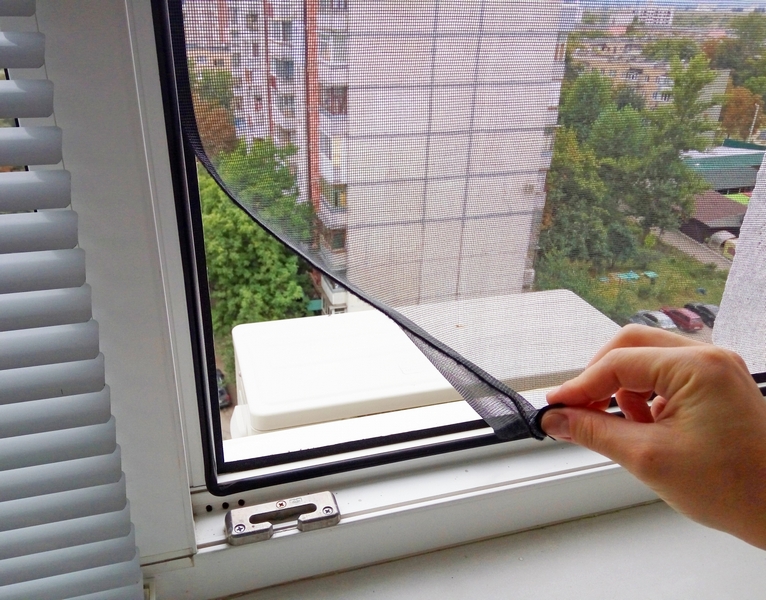
Recently, such an innovation has appeared, as a mesh with magnets, which is very convenient to use. The principle of operation of this bisexual mesh is based on the attraction of magnets attached to the inner edges.
With a slight movement of the hand or other part of the body, the flaps move apart and, after the passage of a person or an animal, immediately close.
With such data, a suitable grid can be selected. As if in length it often comes with a margin, then during installation it must be adjusted so that the edges do not cling to the floor or threshold, otherwise it will not be able to close.
In the article, we tried to make the most probable overview of the grids and describe how to measure under them. If you want to add something, then leave a comment at the end of the article.
Do I need to remove the mesh from the window in principle?
This question arises when you do not want to fiddle with fasteners or look for a place in the room for the removed mesh. The process is especially complicated if the handles on the frame are broken off. But no matter how difficult dismantling may seem, removing the mosquito screen before the onset of the winter season is necessary. There are several reasons for this:
- The polymer from which the frame is made does not have sufficient resistance to low temperatures. In 30-degree frost, plastic can crack, and the whole structure will become unusable.
- Snow and rain is a tough test of the anchorages and the mesh itself for their ability to resist corrosion.In most cases, corrosion processes win - after one winter season, the mosquito screen will have to be thrown away.
- Winter days are short and often cloudy, so little light enters the rooms. And the cellular fabric (especially clogged with dust and dirt over the summer) will additionally reduce the luminous flux entering the room.
- In search of food in hungry winters, the cellular fabric can be damaged by birds.
All these arguments show that insect curtains need to be removed from windows and balcony doors every year. After dismantling, the canvas must be thoroughly washed from dirt and dust, dried, and then stored until next summer.
