The process of dialing lighting devices
If the wires leading to the terminal have one color or the marking does not meet the standard, before you hang the lamp on the ceiling, they need to ring using a multimeter, for which the device is set to the appropriate mode.

Before starting the process, the bulbs are unscrewed from the chandelier, and then proceed as follows:
- When the luminaire contains metal conductive elements, and there are three or more wires, one of them may be grounding. To find out, one multimeter probe is placed on the conductive part of the case, and the other is touched to the bare end of each wire or to the contacts of the connector block. The sound that appears indicates that the ground wire has been detected.
- To determine the neutral wire, one of the probes is placed on the side contact of any of the lamp holders. The unmarked wiring is touched until the sound appears and a mark is applied to the neutral wire, the rest will be phase.
- In multi-track chandeliers with two lighting stages, one or more cartridges are connected to all phase wires. If it is necessary to correlate them with the key on the switch, they do this: the probe is attached to the phase wire and successively touches the central contacts on the bottom of the cartridges. The cartridges connected to this wire are detected according to the sound signal. Do the same with the second phase wire.

When there is one phase wire and several lighting stages in the luminaire wiring, all sockets should be connected to it. In this case, the phase wires coming from the chandelier are combined with a twist or a jumper on the block. When the preparation of the wiring and the lighting device is completed, they begin to mount it on the ceiling.
Installing the chandelier on the ceiling hook
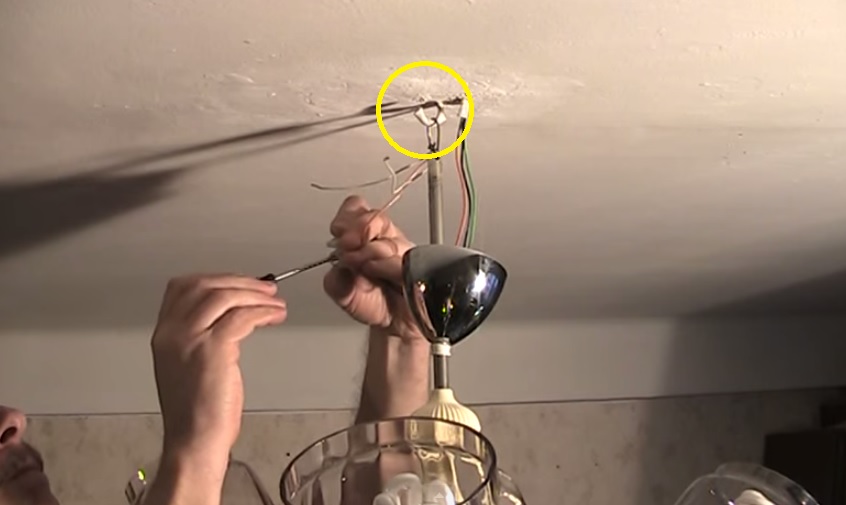
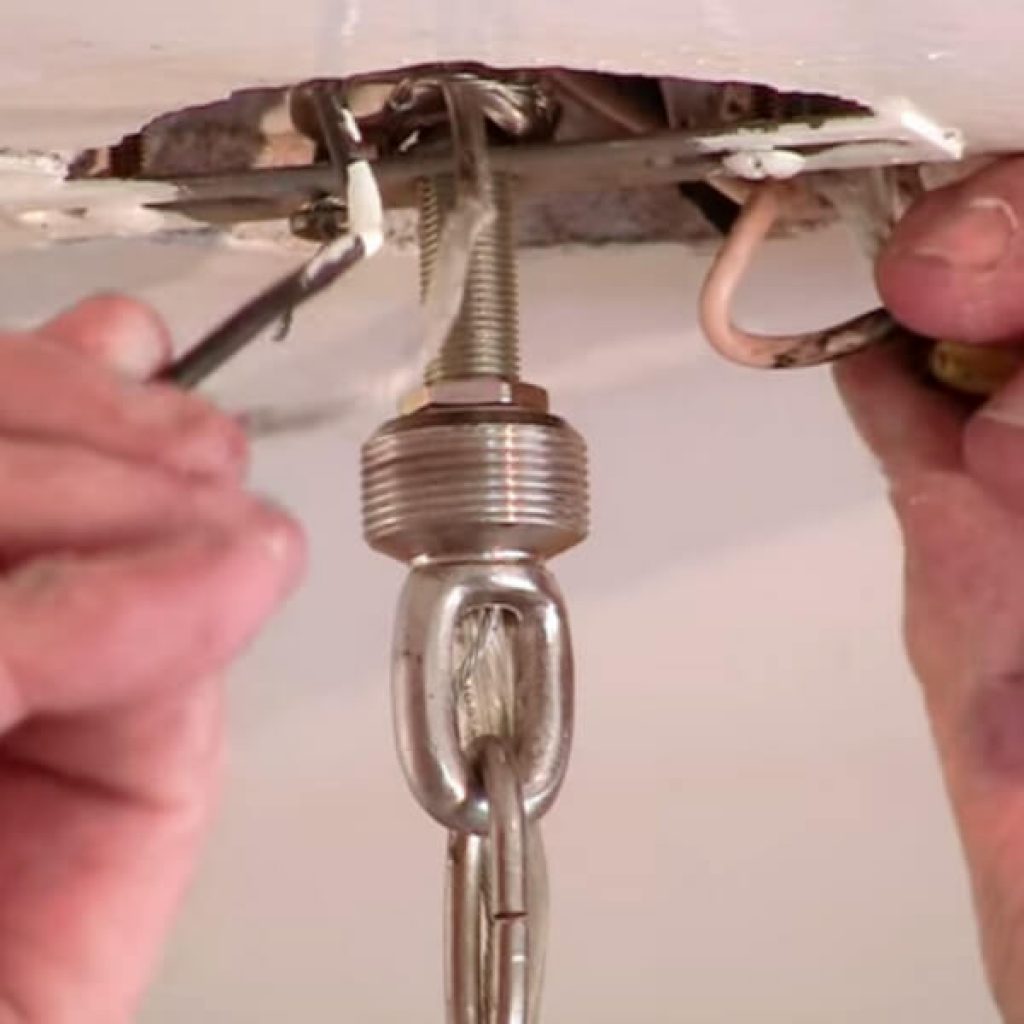
The chandelier is mounted on a hook when it has significant weight and a long rod. Such lamps have a special loop, which is then covered with a decorative bowl or glass.
When the chandelier is attached to the ceiling, the hook may already be installed in the ceiling or it needs to be installed. The process of hanging the luminaire is simple, and the installation of the hook is noteworthy. For chandeliers weighing up to 5 kilograms, you can use a simple hook plus a plastic dowel.
To mount heavy luminaires, use anchor hooks that are firmly anchored in the concrete. They are designed to withstand significant loads. The hook, before hanging the chandelier to the ceiling, needs to be tried on to the bowl, since it must fit completely in it with the connecting block.

The fixing of the lighting device to the hook is performed in a certain sequence:
- Turn off the switch, turn off the machine and unscrew the plugs. Determine where the hook will be located. It is necessary to ensure that there is no wiring there, since if it is damaged, it will be necessary to rewire the wires.
- The place for fixing the hook is marked with a marker. It is necessary that it is located near the wiring.
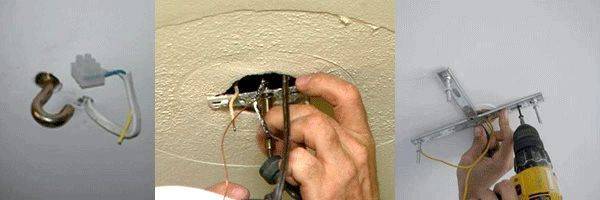
- A hole of a certain depth and diameter is drilled in the overlap using a drill or perforator. Then an anchor is driven into it or a dowel is placed, and then the hook is twisted.
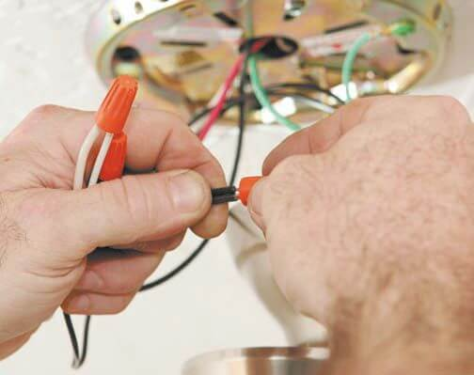
- Before hanging a ceiling chandelier, light bulbs and fragile parts are removed from it in order to prevent them from breaking. It is hung on a hook, and the wires are attached to the block. If it is not there, then it is permissible to perform a twisting connection or using PPE caps. Insulate the ground wires.
- Wires are laid inside the bowl and then it is fixed so that a minimum gap remains between its edge and the overlap. To install the bowl on the rod, as a rule, use a gasket made of plastic or rubber, or a small screw.
- Then you need to hang the lamp on the ceiling in the chandelier and put on the shades. At the end of the work on the panel, the circuit breaker and the switch in the room are turned on to make sure that the installed lamp is working.
Preparing the wiring
Before starting work, it is necessary to determine which wires refer to zero, phase and ground. For this it is recommended to use a special tool for "ringing"
During the connection, it is important not to confuse the neutral and phase wires with each other. Otherwise, the chandelier will shock
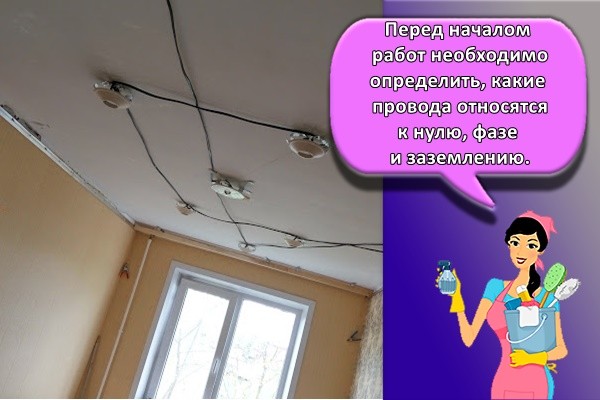
De-energize the room
Having found out the type of wires, you need to completely de-energize the room. It is forbidden to start installing the chandelier when the current is on.
Cabling
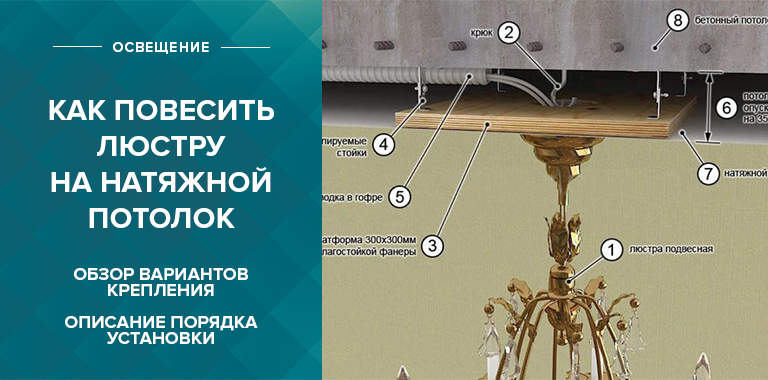
If the chandelier is mounted away from the place where the wiring runs, it is necessary to stretch the cables under the stretch ceiling to the point where the lamp is installed.
Corrugation
Often, when laying the cable, a corrugation is used, which is fixed to the rough ceiling by means of dowels. For this, you can also use plastic ties or boxes. When routing through the corrugation, it is recommended to leave at least 30 centimeters of cable on each side.
Build up if needed
Extension of the cable is carried out using terminal blocks, to which already laid and new wires are supplied from each side.
How to fix a chandelier to a plasterboard ceiling with your own hands
If you follow the simple rules, fixing the chandelier to the plasterboard ceiling with your own hands is not so difficult. To do this, you need to prepare all the necessary power tools, you will need to be able to work with a perforator (or impact drill), as well as a set of mounting accessories for hanging a lamp of a certain weight.
Particular attention must be paid to connecting the chandelier to the mains. For example, wiring a two-button switch or remote control to it requires fundamental knowledge of wiring.
Therefore, if there are doubts about the independent connection of the chandelier to the network, then it is most reasonable to contact an electrician.
Fasteners and fixing elements
To hang the chandelier from the plasterboard ceiling, you must select the mounting hardware. For this purpose, you can consider the most popular devices:
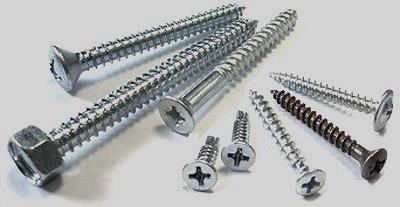
- different types of self-tapping screws;
- anchors and anchor bolts;
- hanging fasteners, cables;
- brackets.
The easiest way of fixing is hanging the luminaire with self-tapping screws. In a situation with a plasterboard ceiling, this method of fastening is not always justified. The use of self-tapping screws is often an intermediate step. For example, they are used to fix the fastening strip to the embedded ceiling (wood, CD profile).

Anchor bolts are used for heavy-weight luminaires. They are installed in the main ceiling of the room, in a concrete floor slab, through a hole in the suspended plasterboard level.

Suspended fasteners and cable hangers are used when the lighting device needs to be hung on the main concrete ceiling or at a certain level from it (in height).

Brackets are used to hang very heavy cascade chandeliers. This type of fastener is the strongest and most reliable. The brackets are fixed on the concrete slab of the main ceiling before the stage of sewing the ceiling with plasterboard.


Electrical installation rules
Installation of electrical wiring is carried out in accordance with the project, in the established place. The power indicators of the lighting device are necessarily indicated in the technical specifications of the instructions, they must be strictly followed.
Basic rules for wiring a luminaire:
All work must be carried out with the power off.
When connecting a lighting device, its power and the maximum voltage of the power grid in the room must be taken into account.
It is important to consider the type of electrical wire - copper, aluminum. With old aluminum wiring, it is necessary to use a terminal block (adapter)
The connection of two types of wire in one twist is unacceptable.
It is necessary to take into account the type of energy insulation of the wire and its cross section.
The connection of wires in the form of "twisting + electrical tape" is strictly not allowed.
For a chandelier with a double switch, the connection to the network must be in strict accordance with the "phase-zero" diagram.
When wiring a lamp with a remote control, follow the connection diagram described in the instructions for the lighting device.

A warning! It should be remembered that work involving electric current requires strict adherence to safety rules. If there are doubts about the implementation of the task and its quality, it is better to leave this work to an electrician who has the appropriate permission.
How to fix a chandelier to a plasterboard ceiling
You can fix the chandelier to the plasterboard ceiling in different ways. It depends on the type of luminaire, its weight and the design of the fixture. As a rule, in most cases, the standard technique of this process is used, which can be divided into main stages:
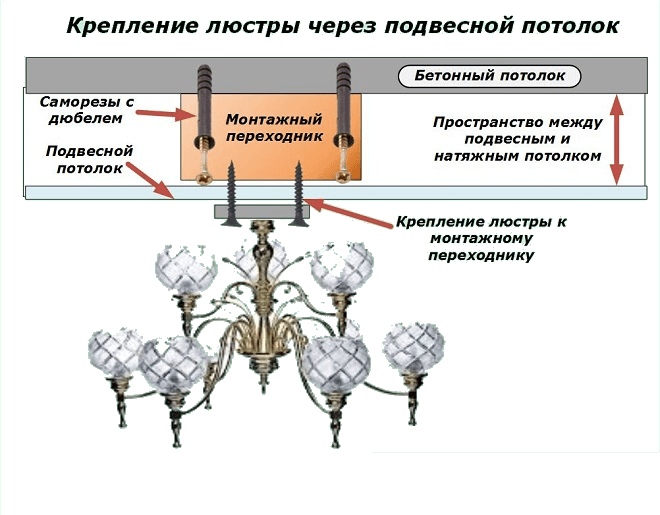
- Most often, the chandelier is not hung from the "body" of drywall, but on the main concrete ceiling.
- Use a ceiling mounting hook or bracket to mount the lighting fixture.
- The mortgage for the chandelier should be located strictly above the suspension level of the lighting device, taking into account its fastening device.
- The embedment part must be rigidly fixed on the concrete base of the floor block.
- You do not need a dummy piece to hang the lamp on the hook. The ceiling hook is fixed in the main ceiling through the drywall level to the collet-spacer mechanism.
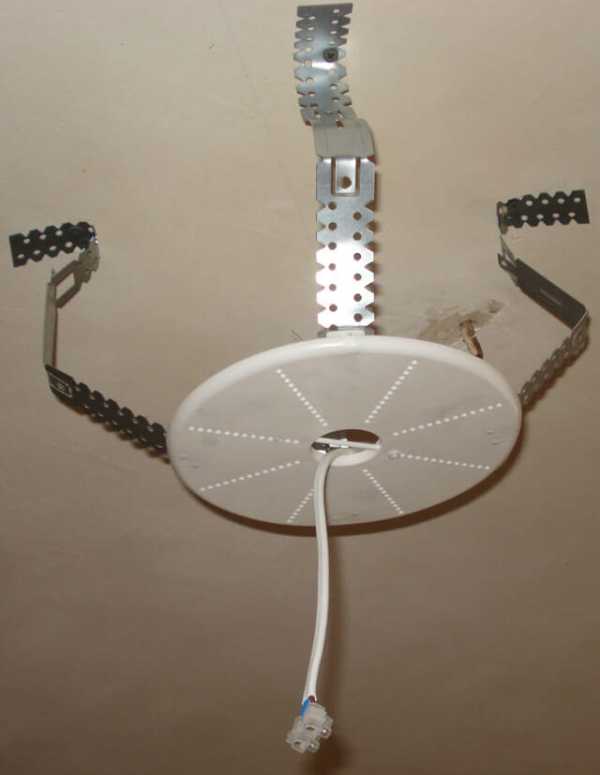
- If you intend to use a mounting console to hang the lamp, then in advance, even before the stage of sewing the ceiling with plasterboard, you should strengthen the fixing point of the chandelier with an additional profile (or several profiles).
- The lamp must be connected to the mains after the main installation.
Attention! Any of the presented methods of fastening must ensure that the chandelier is kept in weight with an additional safety margin.
Installing a chandelier on a stretch ceiling with your own hands
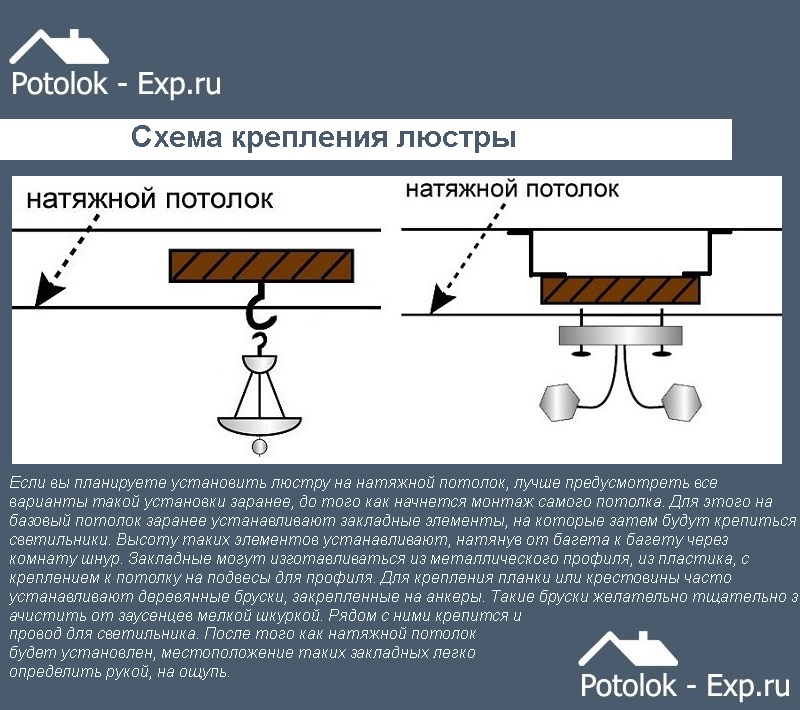
The best way to simplify the installation process of luminaires is to prepare embedded elements in advance or to install mounting hangers for a specific type of luminaire. In this case, the chandelier is no exception. But it is far from always possible to plan the installation perfectly, therefore, it is necessary to put the chandelier on the stretch ceiling more often after the installation of the ceiling decoration is completed.
Tools for mounting a chandelier on a stretch ceiling
To carry out the suspension, you will need a standard set of tools and accessories. An experienced craftsman can get by with a screwdriver and a knife, but for those who have to deal with a problem for the first time, it is better to use the entire arsenal:
- Screwdriver or screwdriver set;
- Impact drill or hammer drill with a set of drills;
- Building level;
- Scissors for cutting metal and a stationery knife;
- Pliers or side cutters for working with electrical wiring.
In addition, you will need consumables - plugs with plugs, electrical tape, adapter rings and special glue. To connect a chandelier, you need a set of connectors or mounting chips that can be used to connect wiring without stripping the insulation.
Connecting the chandelier to the mains
The most difficult stage is laying the wiring itself along the ceiling.As a rule, a wire of three cores is pulled from the junction box sequentially through all installation points of the luminaires, including through the place where the chandelier is suspended. Since the lighting devices are connected in parallel, a wire head with three cores will be brought out at the fixing point of the chandelier.

Before installing the chandelier, it is necessary to determine which of the wires are related to ground, zero and phase. This must be done, either focusing on the colors of the insulation of the cores, or, more preferably, using a special probe.
Important! In the process of connecting the terminals of the wiring with the contacts of the chandelier, it is important not to confuse the neutral and phase wires.
Otherwise, inadvertently touching the body of the chandelier while it is on, you may receive a sensitive electric shock.
How to fix a chandelier to a stretch ceiling
The correct choice of the method of fixing the lamp to the decorative canvas depends on the size and design of the chandelier. The most massive and oversized models are fixed using cross fixtures, the larger the horizontal size of the base and the cap, the wider the base for fixing the luminaire to the concrete ceiling should be.
For tall chandeliers, only hooks and butterfly dowels are used. This type of fastening is referred to as self-leveling. This makes it possible to reduce and sometimes completely eliminate the horizontal load on the suspension point. Even if you accidentally touch such a chandelier with your hand, then nothing terrible will happen. If the long and high structure is fixed rigidly, then an inadvertent movement can break off the ceiling fasteners.
Tools and materials
To install the chandelier you will need:
- soldering iron;
- insulating tape;
- knife;
- ruler, pencil;
- screwdriver (screwdriver);
- self-tapping screws.
You will also need terminals for extending the wires and the wiring itself.
Stepladder or table
Due to the fact that the chandelier is mounted under the ceiling, a stepladder is required to mount the lamp. Instead of the latter, you can take a table of sufficient height. It is recommended to place the stepladder slightly away from the chandelier, so as to provide convenient access to the attachment point.
Drill
A drill may be required to mount a fastener that attaches directly to the sub-ceiling.

Insulated Handle Pliers
Pliers are needed to work with the wiring. The requirement for handles to be insulated is due to the need to ensure safety during installation. It is not always when the chandelier is installed that the power is turned off. And insulated handles will protect you from electric shock.
Screwdriver
A screwdriver (screwdriver) is needed in order to fix the chandelier to the fixing element that holds the lamp to the ceiling.
VVGng-LS wire
If during installation it is necessary to bring electrical wiring, then it is recommended to take a cable of the VVGng-LS format. This wire is highly durable.
Terminal blocks for wire extension
Terminal blocks may be required when the available wires are not long enough. Such devices are inexpensive. Therefore, it is recommended to stock up on terminal blocks before starting work.
Mounting plates of the correct type
The type of mounting plate is selected taking into account the design features of a particular chandelier. In some cases, you will need wooden blocks to secure the fixture.

Anchor hook
Some chandelier models may require an anchor hook to hang. The latter is mounted directly on the rough ceiling.
Dowels
Dowels are needed for mounting the mount on a rough ceiling. These components are required regardless of the design features of the luminaire.
Plastic rings for stretch ceiling
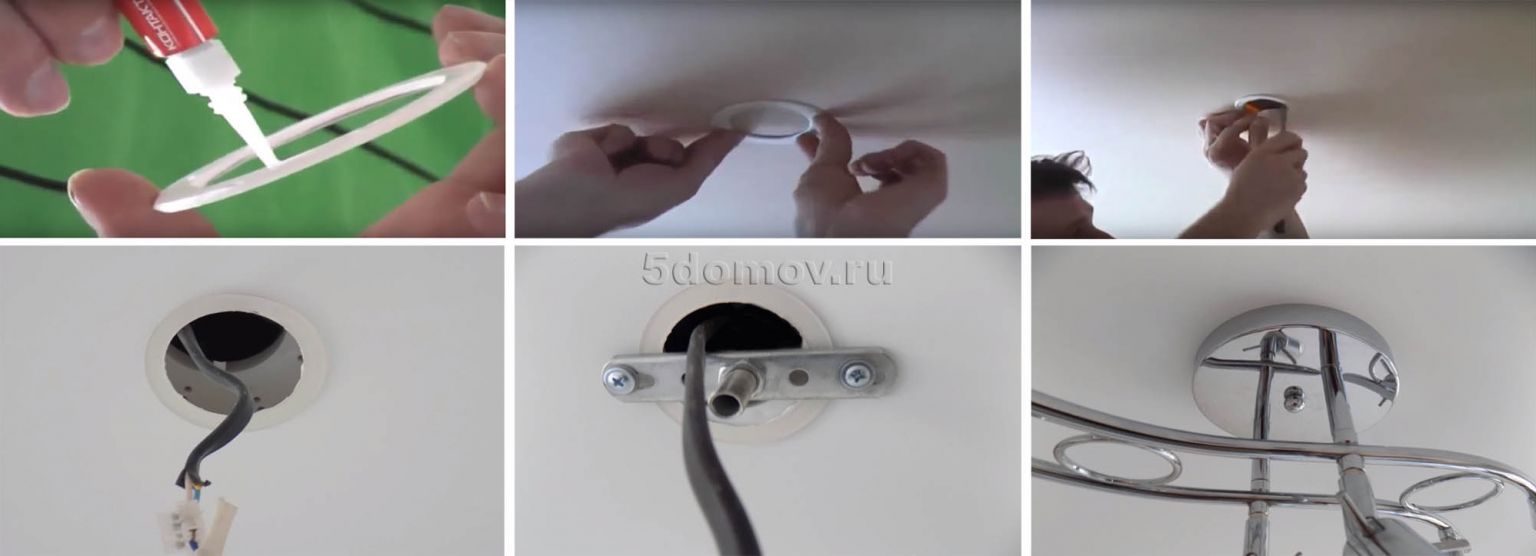
Due to the fact that during installation it is necessary to cut the canvas, the edges of the hole made must be closed. Otherwise, the material will not only spoil the appearance of the stretch ceiling, but will also begin to "diverge".To do this, you need to install special plastic rings.
Mortgage block
As mentioned above, when installing the plank in some cases, it is necessary to fix a wooden block of a suitable size on the ceiling.
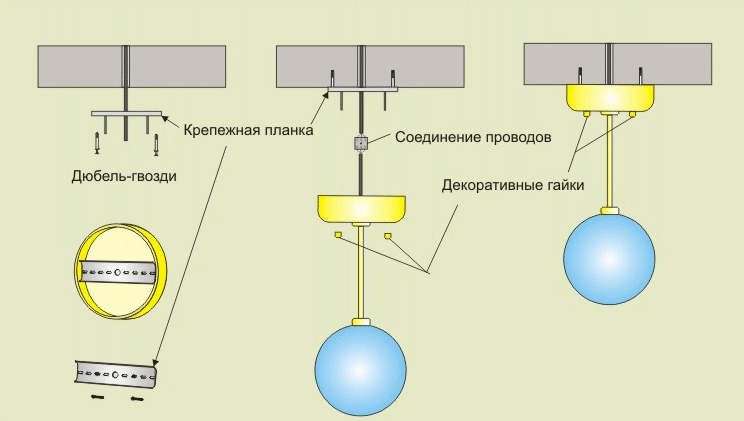
2> Mount to bracket
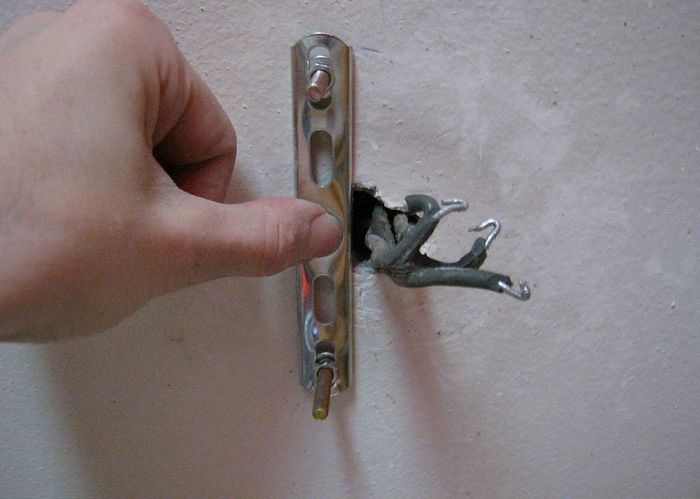
The sequence of work is as follows:
- For safety reasons, electricity is cut off directly from the dashboard;
- The chandelier is freed from all decorative elements;
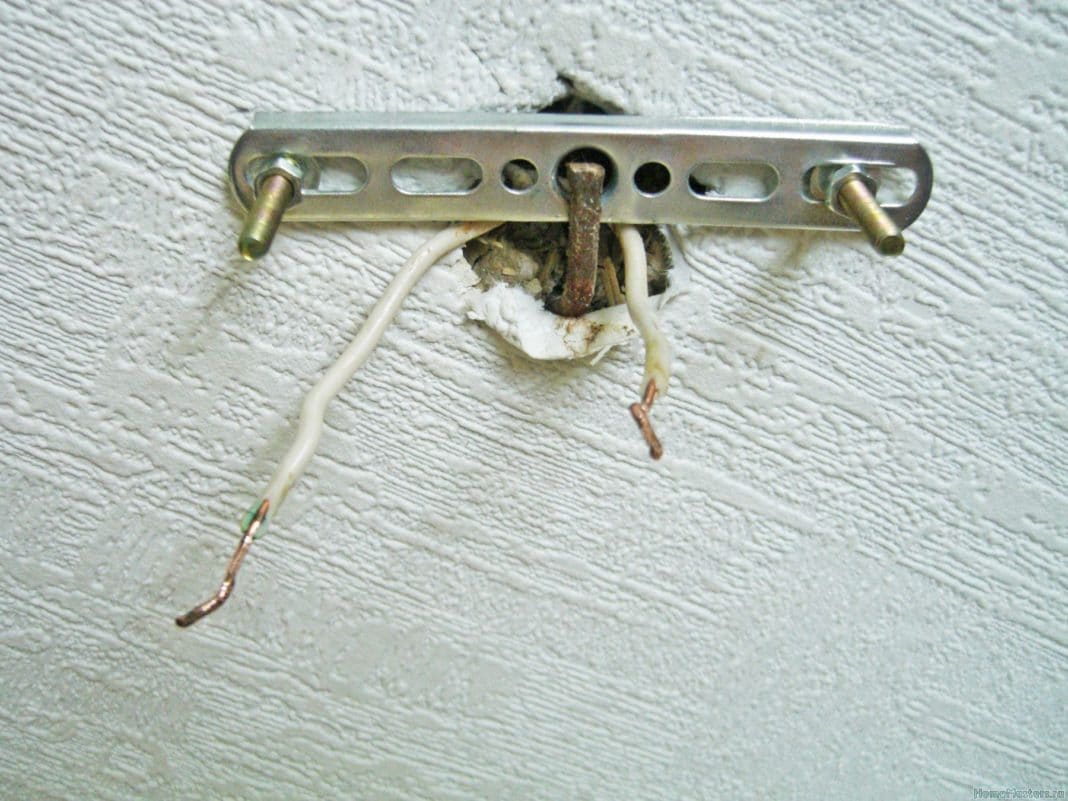
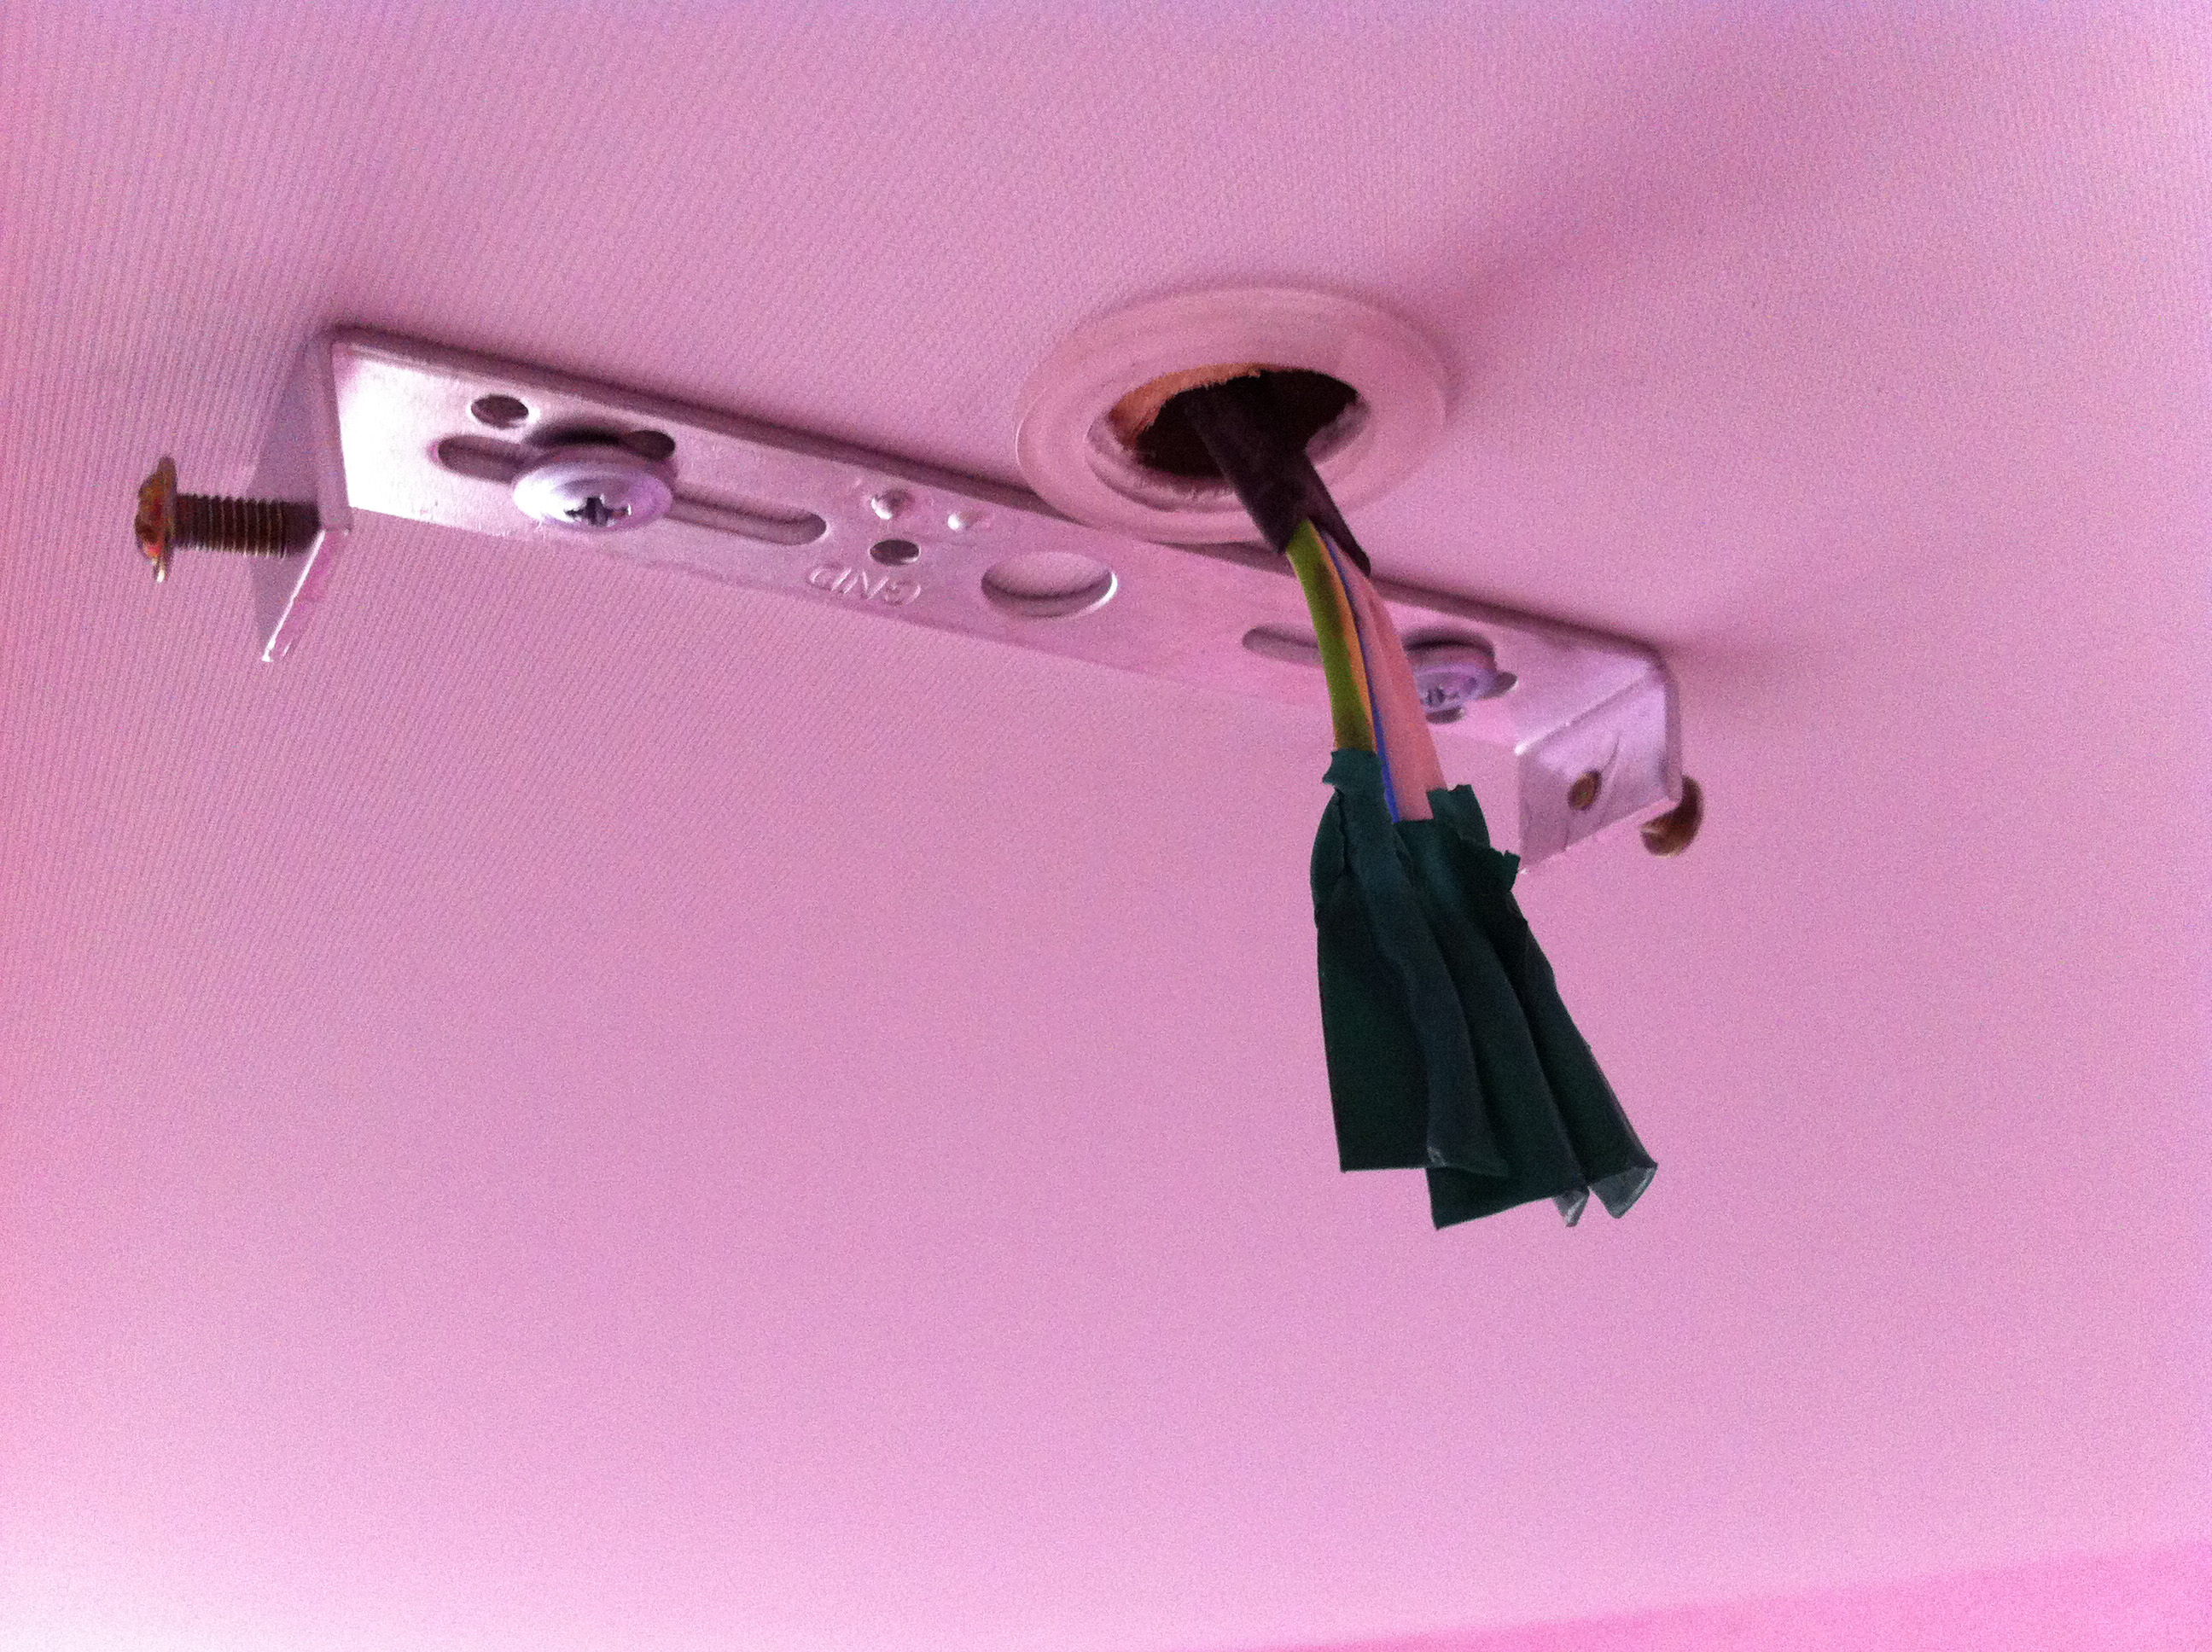
- Perpendicular to the direction of the cable, we make markings for the strip;
- If you fixed the previous chandelier on a hook, it should be turned to the side - perhaps after a while it will be useful again for another lamp;
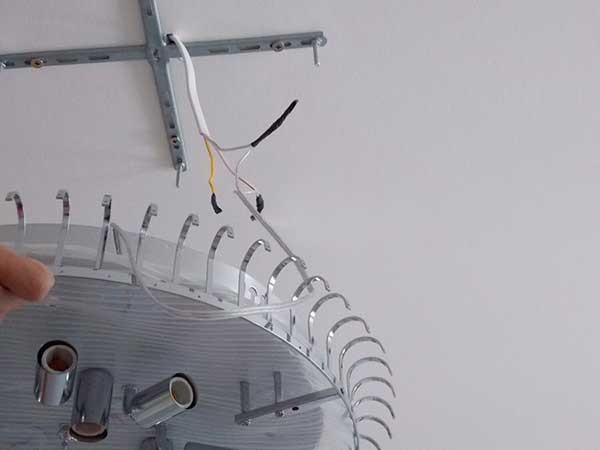
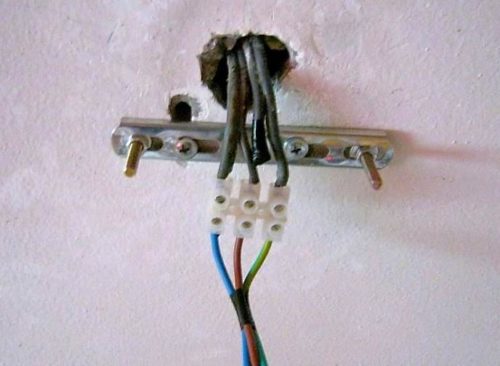
- Holes are drilled at the marked points and the bracket is fixed;
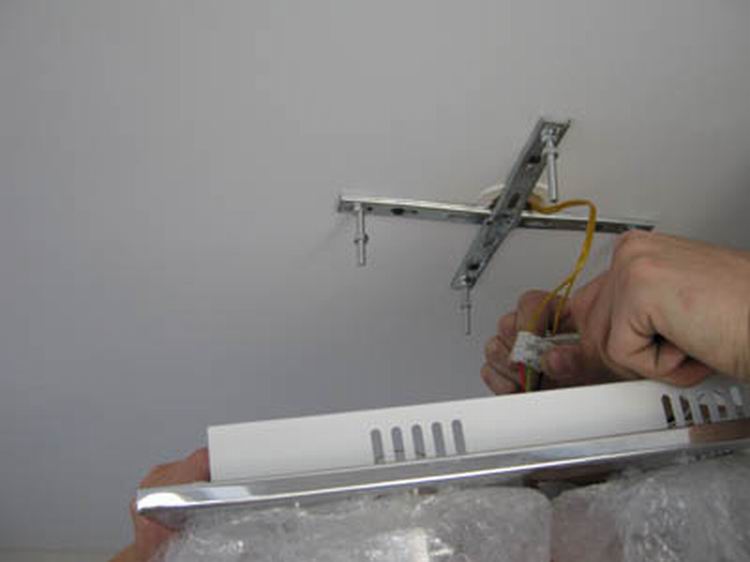
- The next step is to connect the wires;
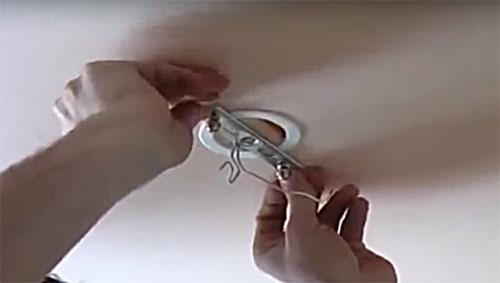
- Having put the base of the lamp on the corresponding pins, tighten the nuts until the saucer and the ceiling are in close contact:
- Now you can turn on the electricity, make a control check. If everything is in order, you can start hanging the shades and decorative elements.

Preparation
When planning to hang a chandelier, you should prepare wisely. Before proceeding with the installation of the light source, you will need to find a set of tools and carefully read the sequence of work.
Ladder
A stepladder is an integral part of the installation process.
It is important to choose a ladder of such a size so that it is comfortable to reach the ceiling, and you do not have to reach up. It is better to choose a stepladder with a support on the top, on which you can comfortably lean on when lifting the lighting fixture
Hand electric drill or hammer drill
A hammer drill or electric drill is used to fix the fixing strip to the concrete ceiling. The mount is applied to the ceiling surface and marks are made at the drilling points. To make the job easier, it is recommended to use a dustproof rock drill to help reduce waste when drilling a ceiling.
Pliers and nippers or side cutters with insulated handles
The need to use pliers with insulated handles is due to the connection of wires during the installation of the lighting fixture. The tool helps to conveniently handle wires and perform a number of other actions with maximum safety.
Various screwdrivers
Screwdrivers with different sizes and types of base will be required to fix the fasteners. It is recommended that you take several variants of Phillips and flathead screwdrivers.
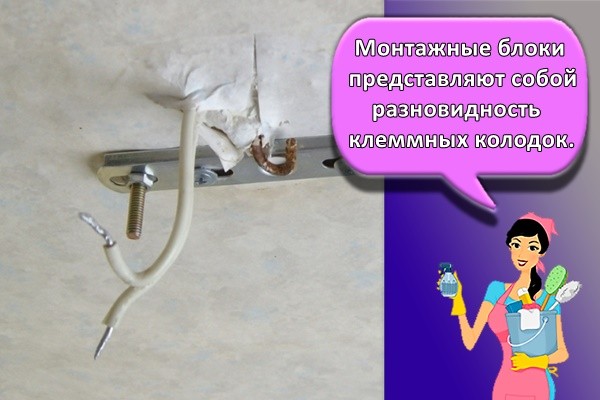
Multiple mounting blocks
Mounting blocks are a type of terminal block. Attachments are required when working with lighting fixture wires.
Required fasteners
There are several types of chandelier mounts. As a rule, the fixing element is supplied with the lighting fixture.
When choosing and buying a device, you should immediately pay attention to the type of fasteners in order to take into account further features of the installation work
Study instructions
Having prepared a set of tools and accessories, you can proceed to familiarize yourself with the instructions. Printed installation rules can be supplied with the chandelier. Otherwise, it is recommended that you study the basic steps of the process to avoid common mistakes.
Installation of electrical wiring
All luminaires can only work if they are connected to the mains. In order for this condition to be fulfilled, it is necessary to carry out a number of preparatory work before attaching the chandelier to the stretch ceiling, which will allow you to connect the lighting devices to the network.
The wiring preparation technology includes the following steps:
- First, you need to turn off the switch with the automatic machine on the dashboard and check if the length of the wires is enough for the normal connection of the chandelier (it is desirable that the wires are with a small margin);
- If there is a need for this, the wiring is lengthened due to the installation wire connected with clamping terminals (ordinary twisting is not reliable enough);
- Next, when the power is on, you need to check and mark the phases on different wires, after which the switch with the automatic switch is turned off again;
- The edges of the wires are insulated so that there is no risk of electric shock during installation.

If you need to install lamps or chandeliers in another place, you need to lay a new wiring loop. For normal operation of lighting devices, a cross section of 1.5 mm2 is enough, and the number of cores is selected individually, depending on the characteristics of the lamp.
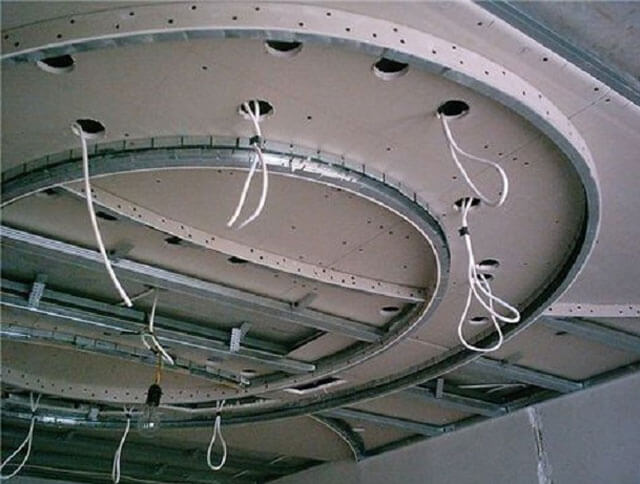
Laying a new cable under a stretch ceiling can be done in the following ways:
- Corrugated laying. In this case, the wire is put into the corrugated sleeve so that about 30 cm of the protruding wire remains on both sides. The sleeve is fixed with plastic hangers using dowels with nails.
- Laying in a plastic box. The arrangement of such a structure begins with attaching the plastic channels to the ceiling. Wiring is laid inside this box, after which the structure is closed with a lid.
- Fixation with plastic ties. To implement this method, you need to attach screeds to the ceiling using dowels. Wires are then attached to the ties.
Installation features in difficult cases
In a number of situations, it becomes difficult to install a lighting fixture on the ceiling. To prevent mistakes and prevent malfunctioning of the light source, you need to study the procedure for different problem cases.
Low ceiling
The process of installing a chandelier on a low ceiling follows the standard scheme. The main challenge lies in choosing the right lighting fixtures. The illumination of the space and visual perception depend on the correct selection of lamps. The selection criteria include the following:
- Suspension design. It is recommended to give preference to the method of fixing to the overlap. If you hang the chandelier in a different way, it will take up a large amount of space and will be inconvenient.
- Direction of the light flux. The horns should be directed upward so that the illumination is diffused and even. These types of chandeliers are not suitable for all types of ceiling coverings, therefore, as an alternative, you can use LED lamps that do not heat up during operation.
- Lamp power. The rising heat may cause dark spots on the concrete ceiling. Panel coverings are also heat sensitive.
Plasterboard ceiling
Drywall is highly durable, and the installation of the chandelier is carried out directly to the finishing material. There is no need to pre-embed the hook into the ceiling. When installing, it must be borne in mind that the gypsum plasterboard is able to withstand a mass of up to 6 kg per square, so it is worth choosing lighting fixtures with a relatively small mass.
Tension
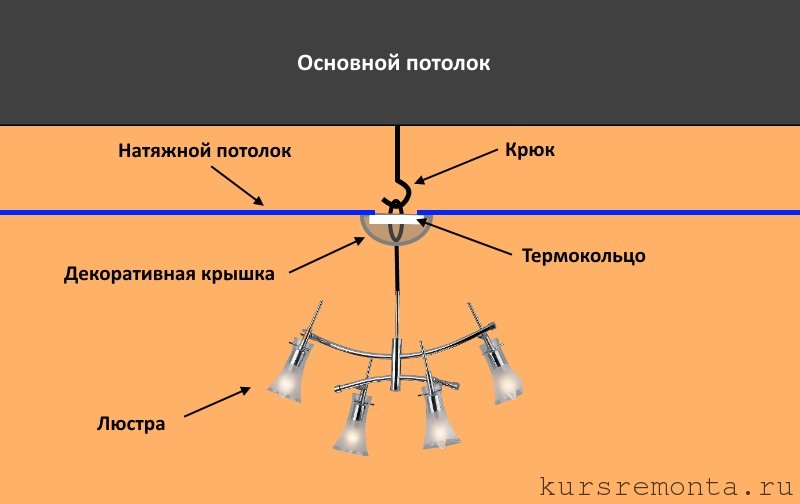
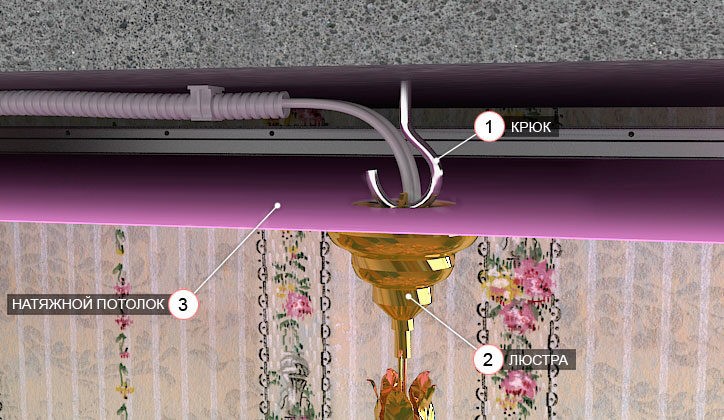
When installing tensioning material, you must first think about how to fix the chandelier. A stretched ceiling cannot be used as a base for a luminaire. Before installing the stretch ceiling, you need to make slots to fix the lighting fixture and glue the thermal insulation ring. Connecting wires are pulled through the hole, the chandelier is suspended on a hook and covered with a protective cap.

No hook
The methods of how to fix the chandelier without a hook depends on the materials from which the ceiling is made. For wood trims, a large hook screw can be used instead of a hook. The screw is screwed into the ceiling and the lighting fixture is hung on it.
On a plasterboard ceiling, you can use a butterfly mount. This option is only suitable for small chandelier weight.Large and heavy light sources can only be fixed to the main ceiling, which is a concrete slab.
Old wiring
To connect lighting fixtures, old wires can be laid without a specific scheme. Damage to the braid while drilling the hole can cause a short circuit.
Methods of fixing chandeliers
The chandelier must be securely attached to the ceiling surface. In order to do everything correctly, you should familiarize yourself with its design and decide on the method of attachment (read: "How to attach a chandelier to the ceiling - methods").
Hanging hook
How to hang a chandelier on the ceiling? Such fasteners are often installed directly into the ceiling even during the construction or renovation phase of the premises. Before installing your chandelier for false ceilings, make sure that the hook can support its weight. To do this, a load is suspended from it, equal in mass to the lamp, or simply pulled for it. After you are convinced of the reliability of such an attachment, you can start installing the chandelier.
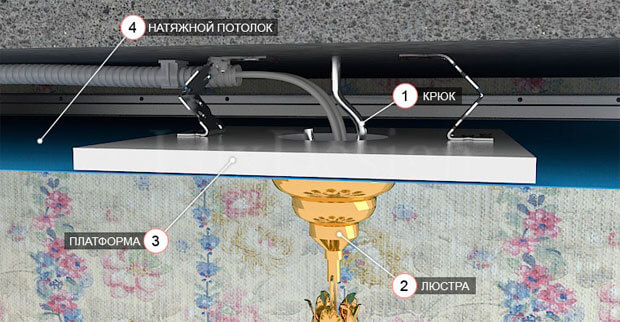
To install the hook, you need to drill a hole in the ceiling, screw an anchor or a self-tapping screw into it in the form of a hook. The first type of fastening is used for concrete floors, the second for wooden ones. After that, the anchor or self-tapping screw must be wrapped with insulating tape in two layers. The chandelier is hung on a special ring.
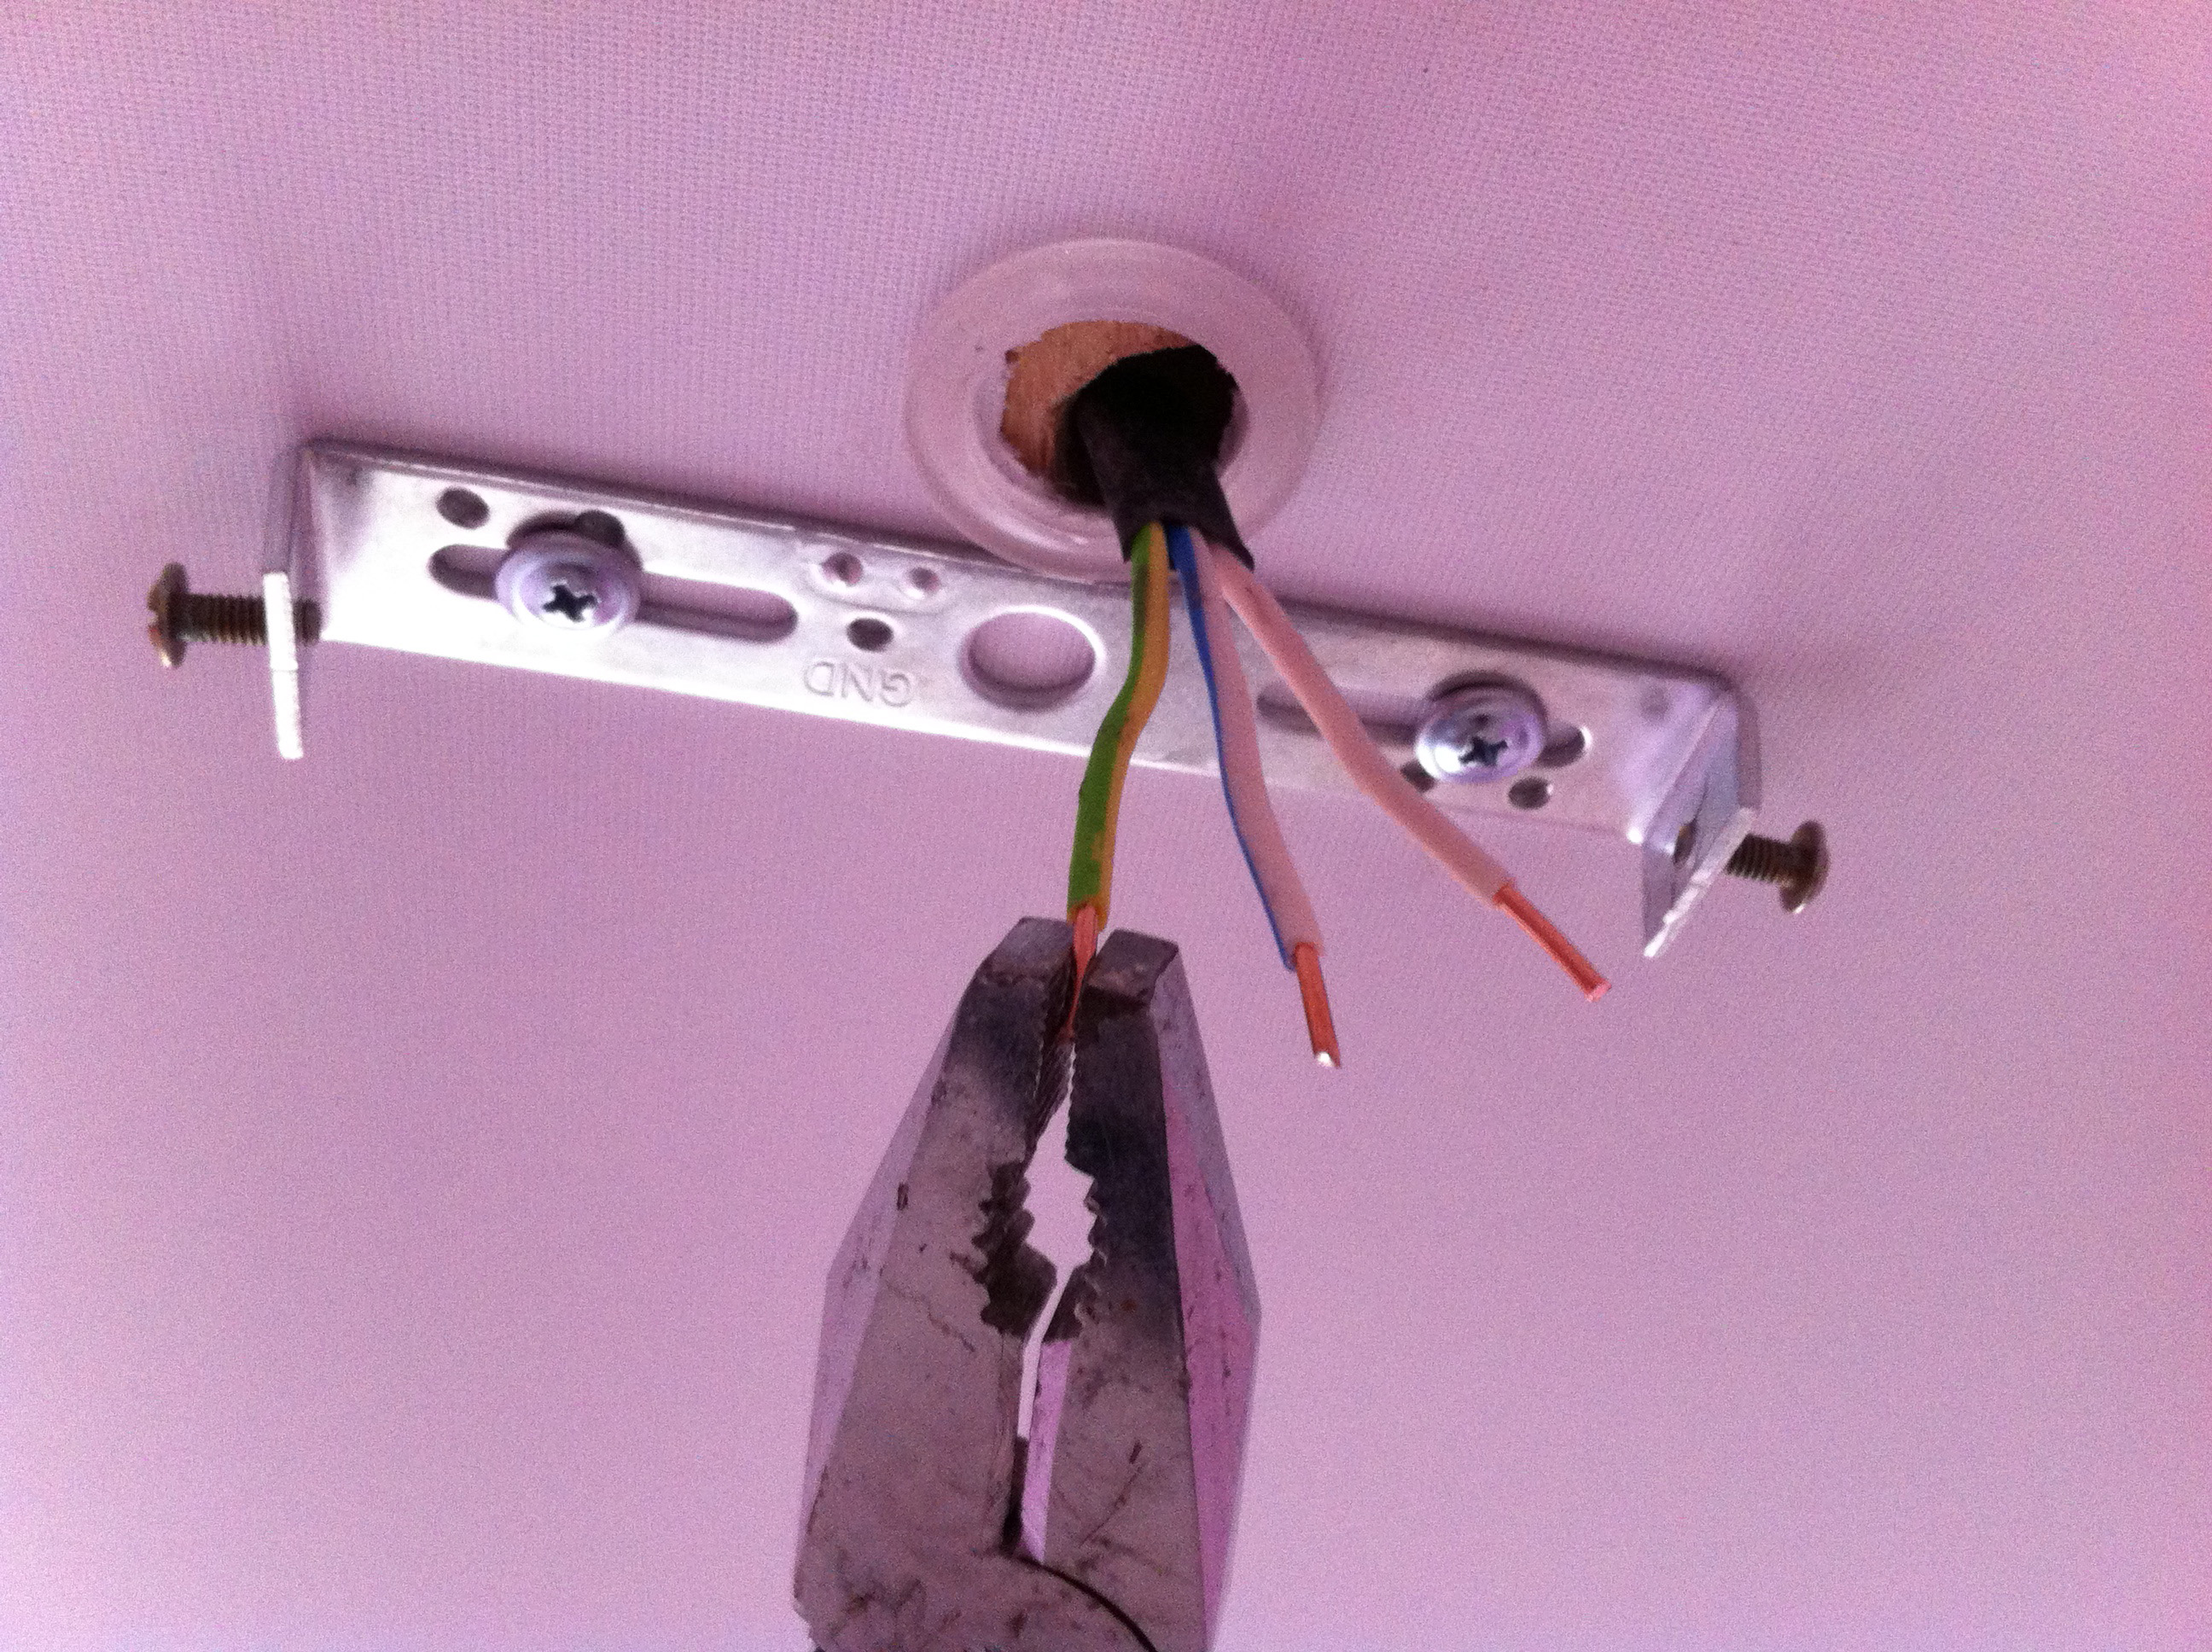
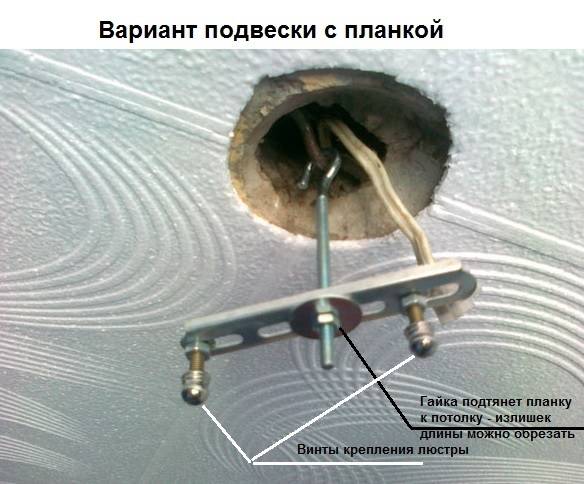
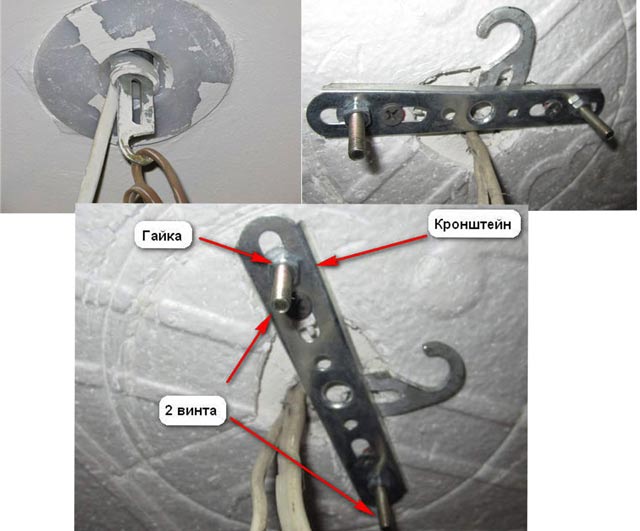
On the bar
In this case, the chandelier is not hung on a hook, but directly on a bar, which is fixed to the ceiling. To install it, you need to mark the place where you want to install the chandelier on the stretch ceiling. Then holes are drilled in the ceiling into which dowels are driven. They must line up with the holes in the mounting plate, which is secured with screws. The luminaire, in turn, is attached to the bar. It is mounted so that the element that covers the wires and the fixing place fits snugly against the ceiling.


