Ceiling curtain: descriptions, design features
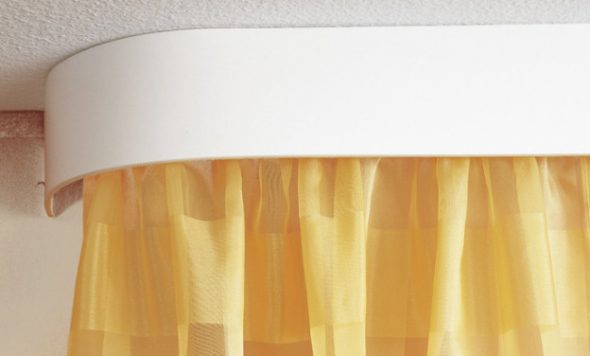
Such curtain rods are easy to install and use.
Ceiling curtain is a device for decorating window openings with curtains. It got its name for a special way of fastening - to the ceiling. Curtains are an important element of room design. There are many variations of ceiling curtain rods. They differ in size, color, style, material of manufacture (wood, plastic, metal, etc.).
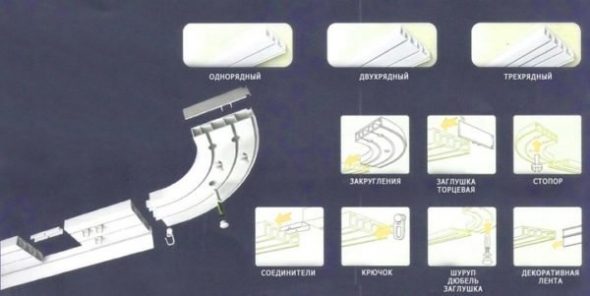
Structural elements of a profile ceiling cornice
Particular attention should be paid to the design features of the curtains. The method of their attachment also depends on this.
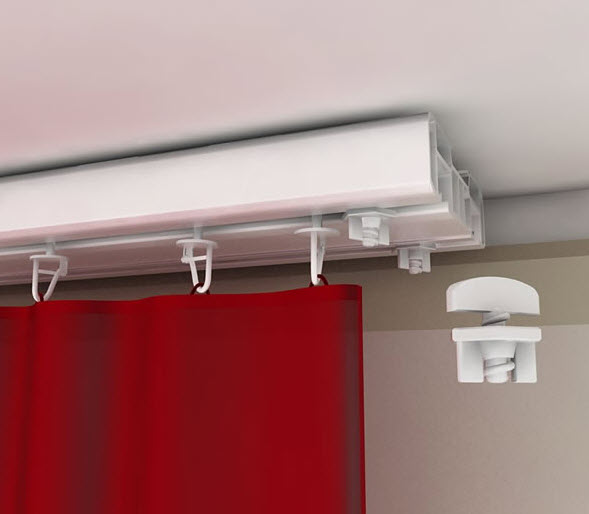
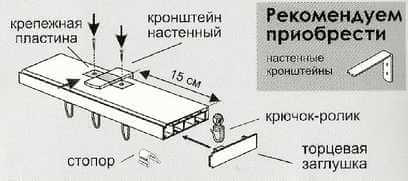
The complete set of the ceiling cornice includes: a set of stoppers, a set of hooks, a bearing profile.
The following models are distinguished by the type of structures.
-
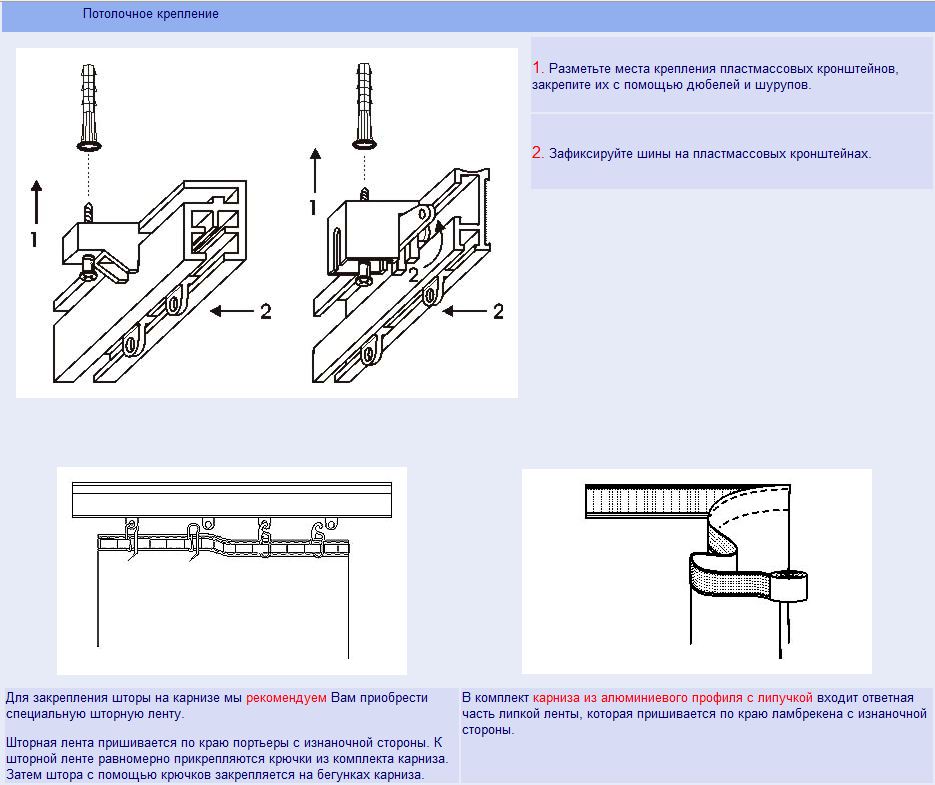
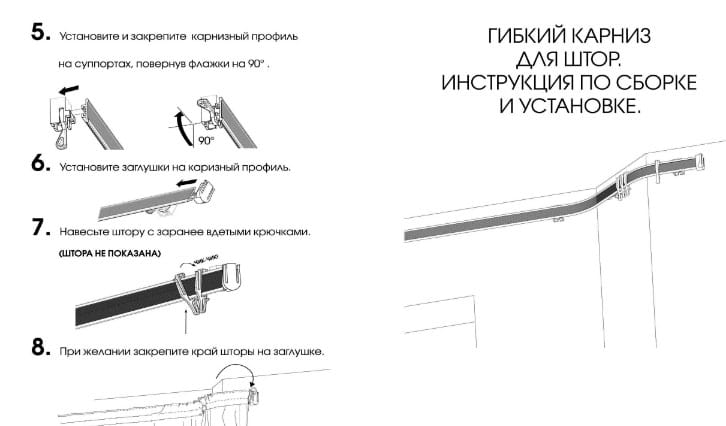
Profile. They are a tire made of an aluminum or plastic profile with grooves for runners. Suitable for use in rooms with complex geometric shapes. Can have any bend radius. The most common and versatile type of curtain rods. Optionally, they can be supplemented with self-adhesive tape for trouble-free fixing of the lambrequin and a mechanism for extending or raising the curtains.
-
Strings. Quite a simple kind of curtains. It consists of one or more strings of fishing line or wire, and fasteners with which these strings are pulled under the ceiling. Not suitable for long-term use and too heavy curtains, as they sag in the middle.
-
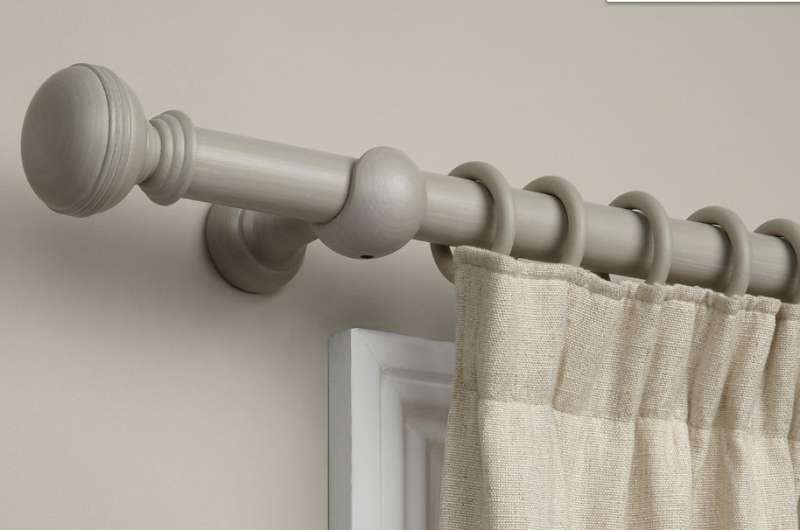
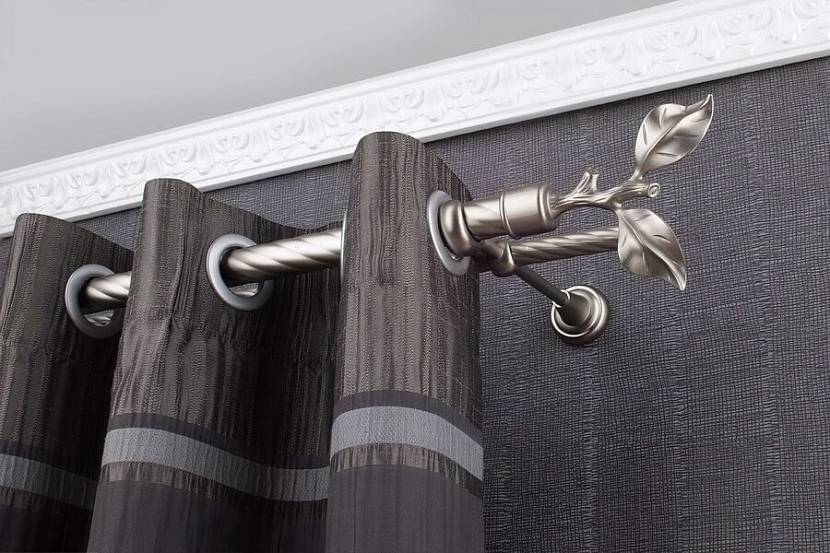
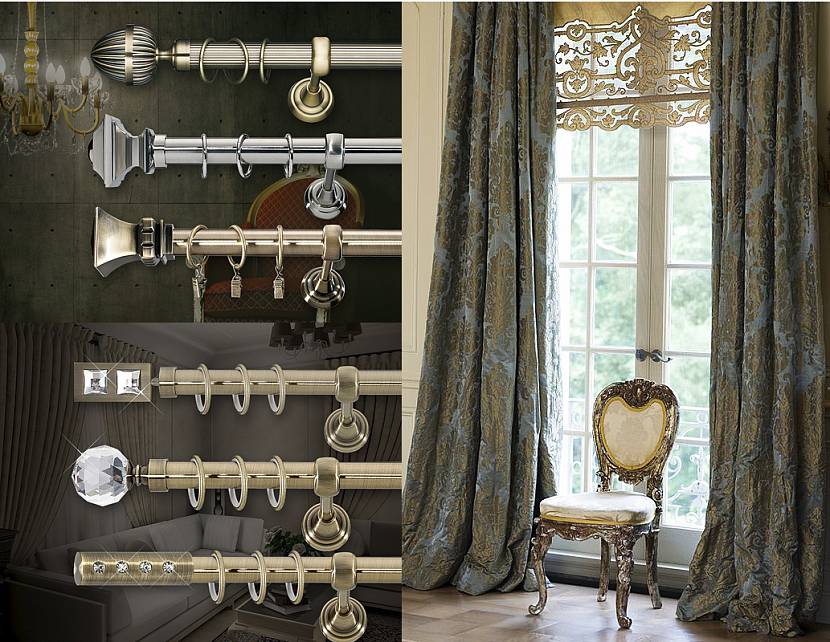
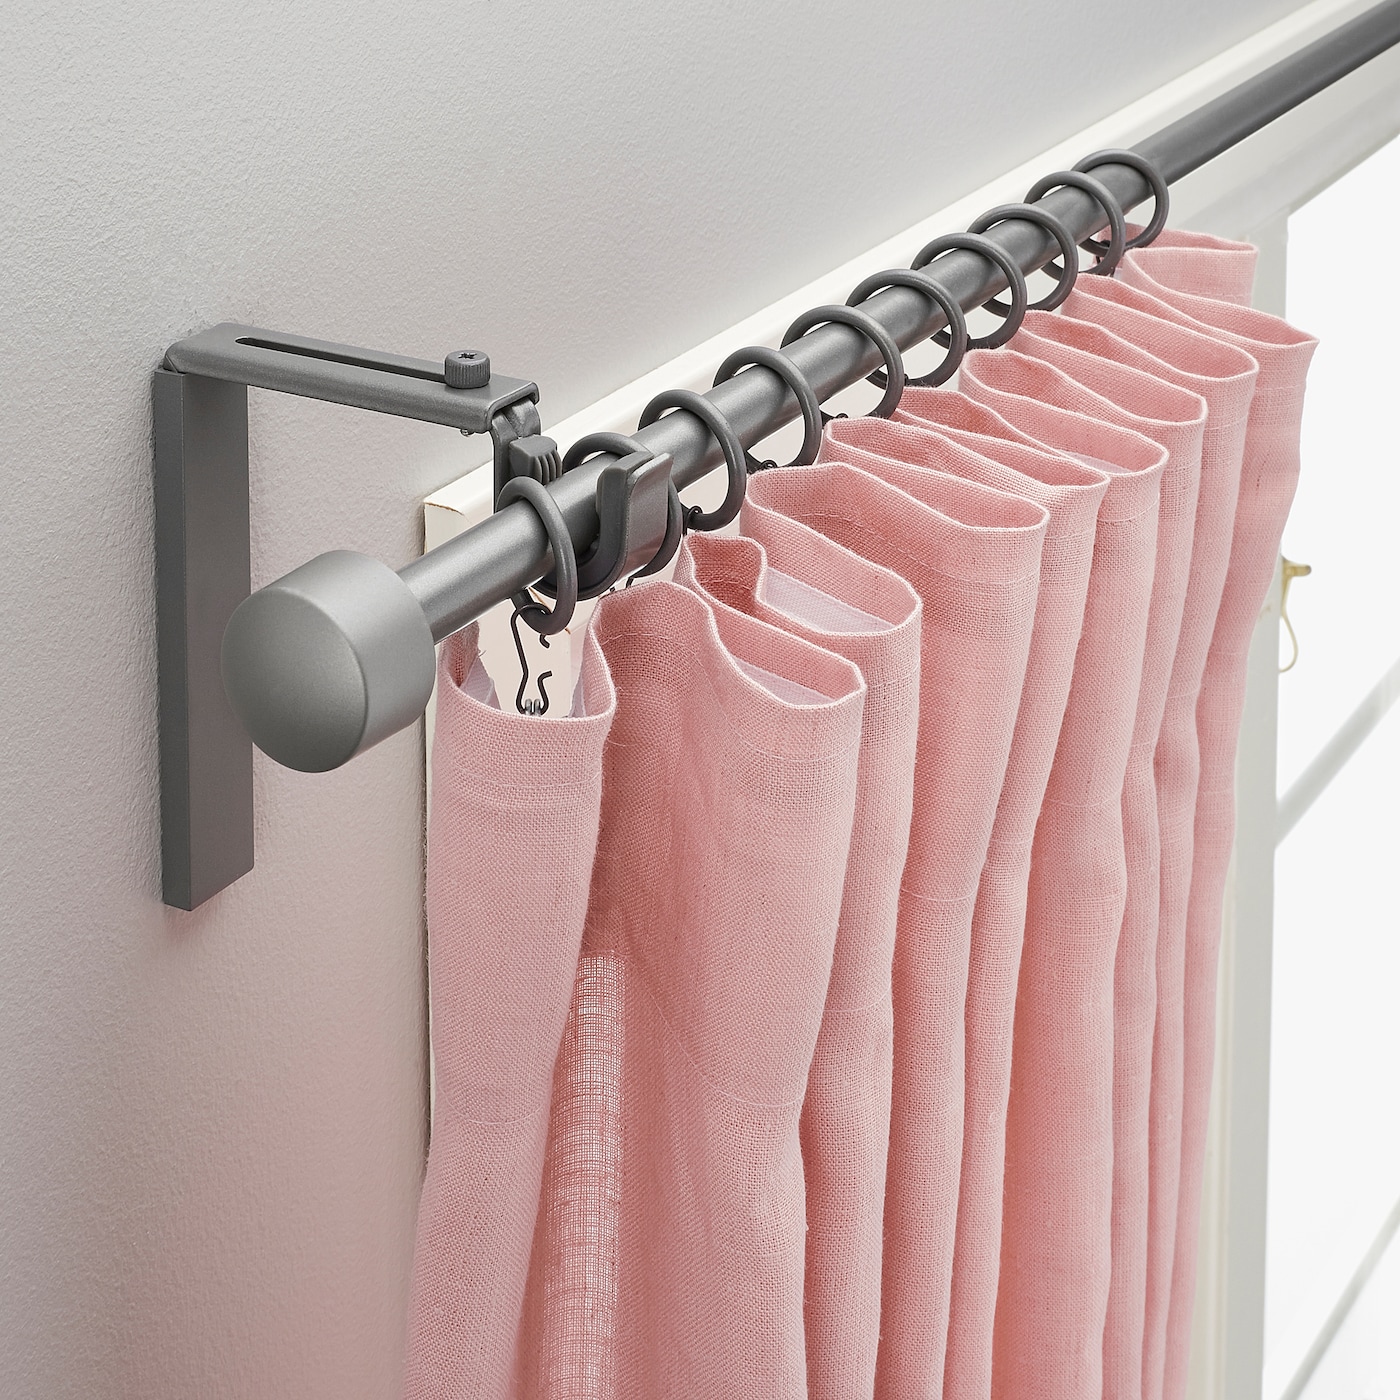
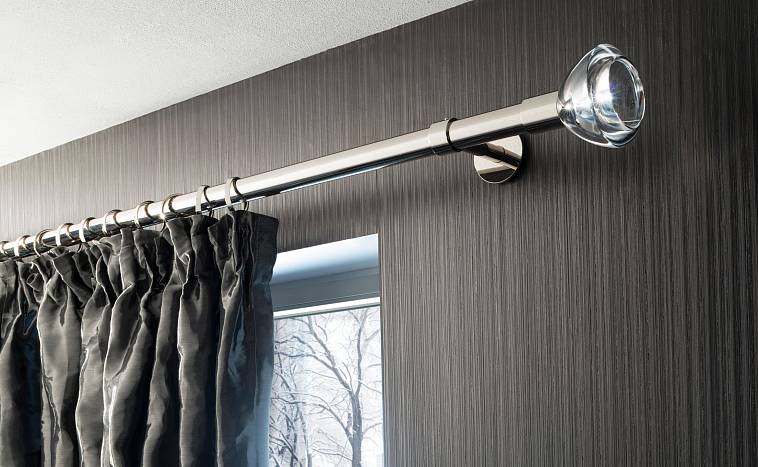
Round. They consist of a bar made of wood, plastic or metal and fasteners. Simple and at the same time elegant kind of curtains. Doesn't sag like strings. Serves as a wonderful interior decoration.
-
Baguette. They differ in many design options. The outer part of the tire is covered with a decorative strip. Capable of withstanding heavy, multi-layered curtains.
How to hang wall curtain rails
In order for the curtain to look spectacular in the room, it is necessary to correctly install the wall structure.
Assembling the wall cornice
Depending on the model of the installed curtain rod, the assembly process may differ. If it is a solid sheet of metal, then this step is skipped. There are modifications that can be supplemented with brackets. To fix them, it is necessary to tighten the bolts to form a solid structure. For example, a cornice in the form of a tire is a simplified version of this design.
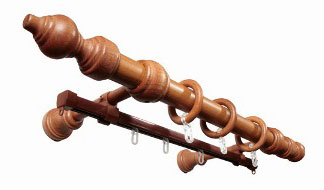
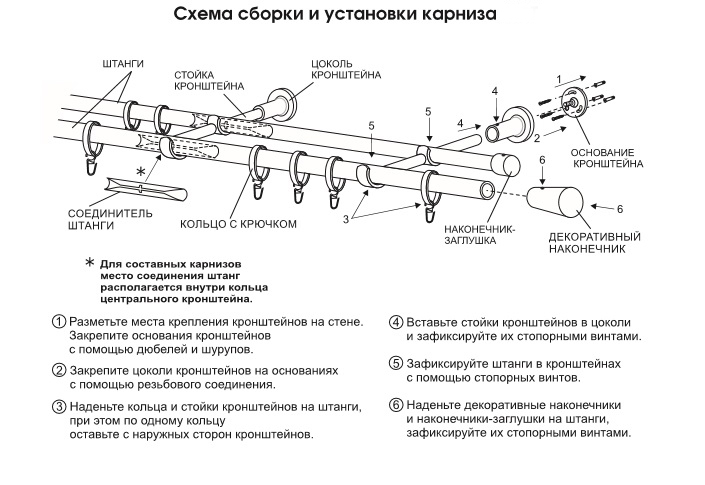
Special attention is required for a two-row cornice, which is assembled using the following technology:
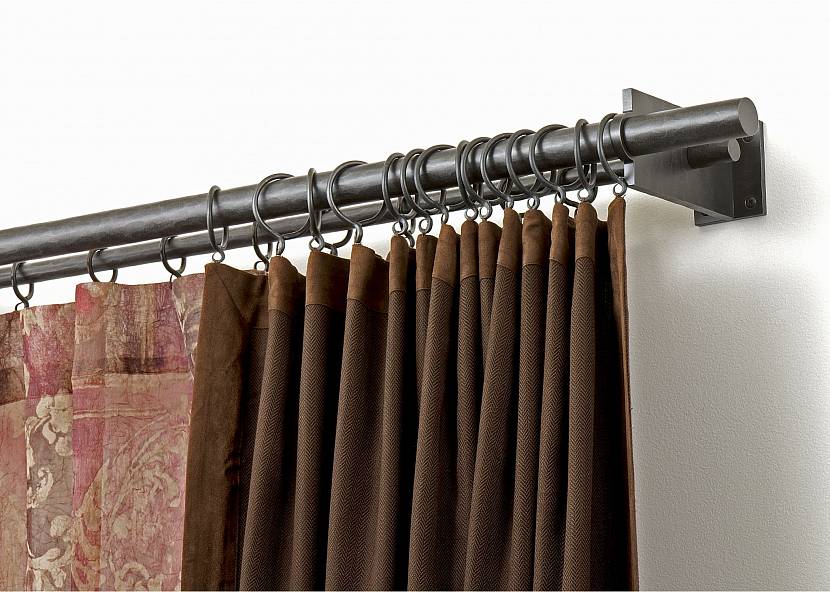
- The curtain hanging rings must first be put on the pipe. The quantity is determined based on the size of the material and its weight.
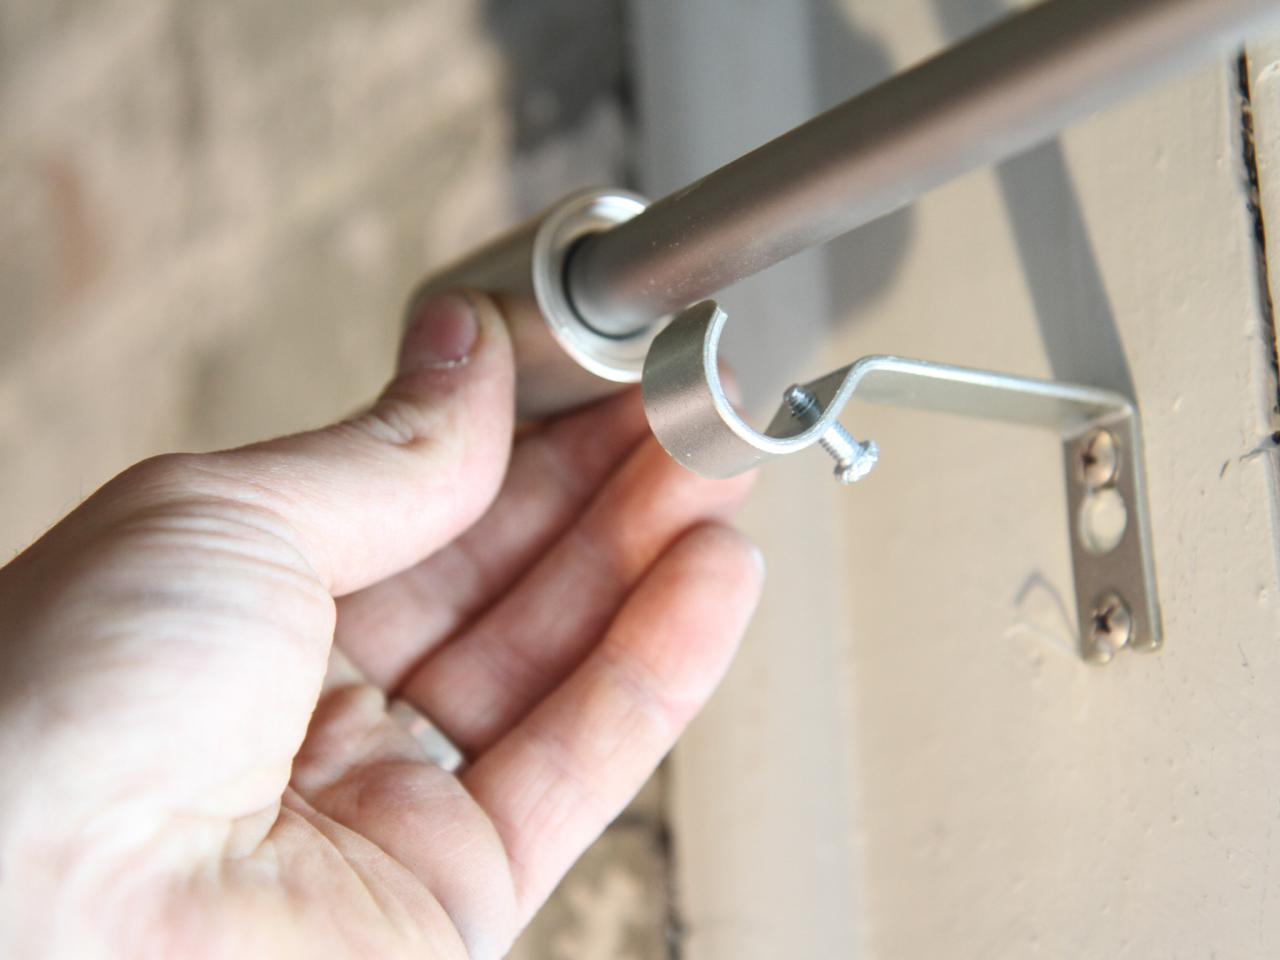
- Then, on both sides, you need to put on holders (brackets), which are equipped with grooves for placing the cornice. Here it is recommended to be careful and evenly distribute the load.
- After that, using self-tapping screws or bolts, the pipes should be fastened. There are models where the manufacturer equips the pipe with a bracket with special grooves, which makes the assembly process more simplified.
The final point is the installation of plugs, they are made of plastic or metal.

At what distance from the ceiling to hang the cornice
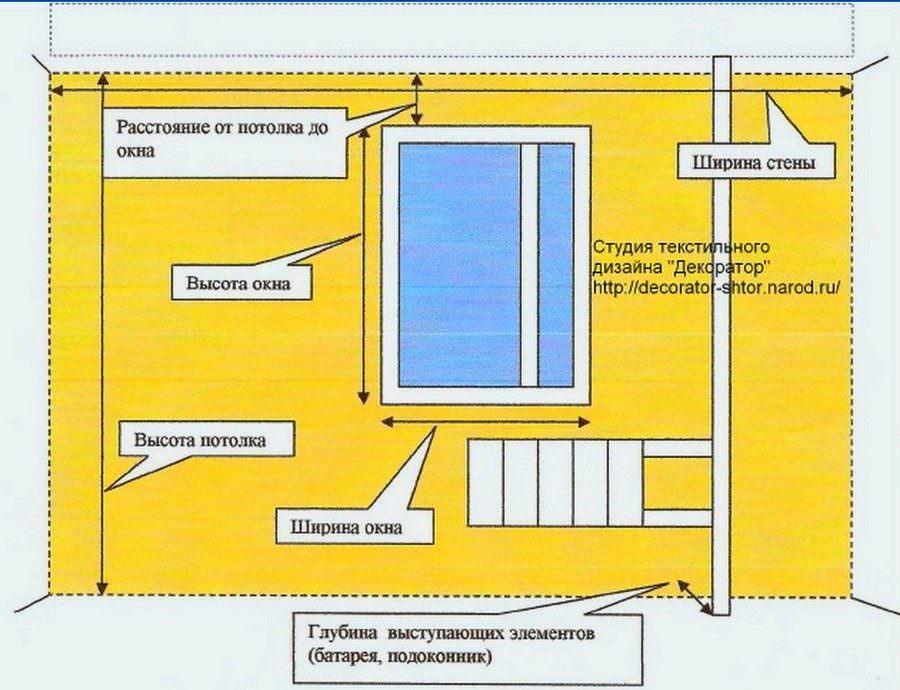
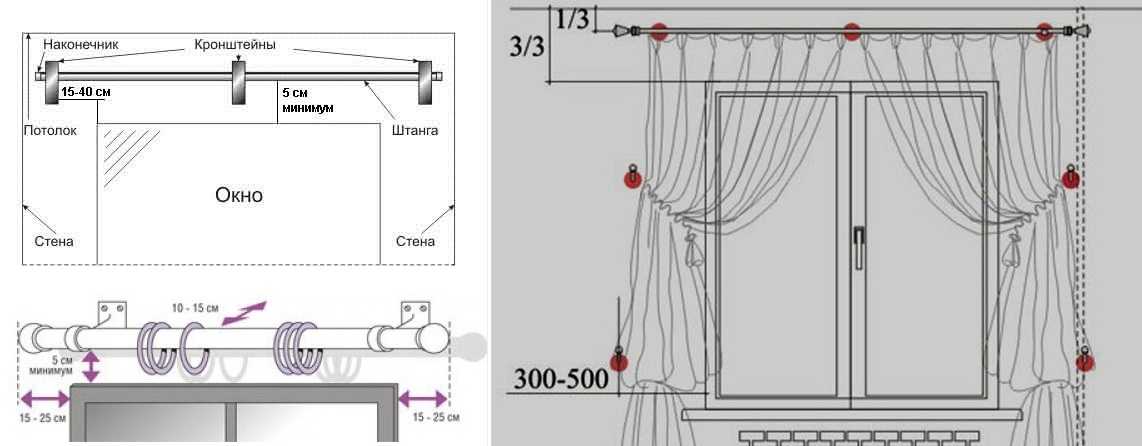
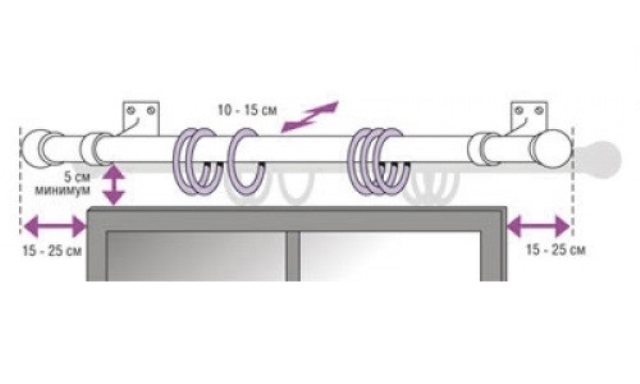
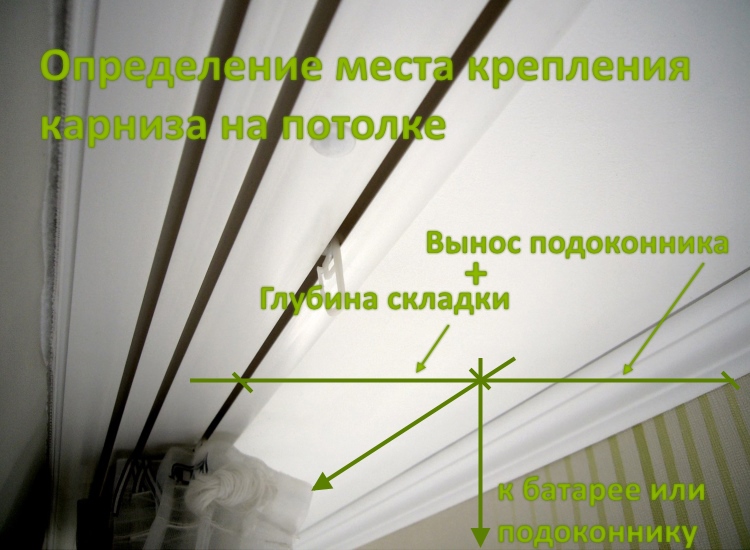
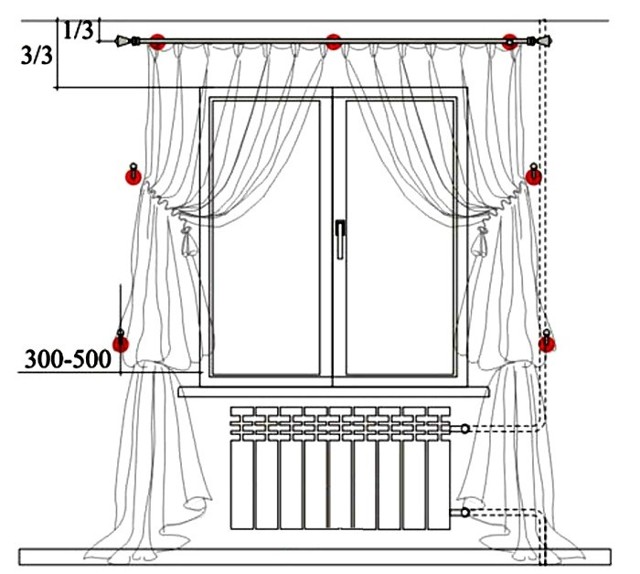
During installation work, it is very important to correctly determine the place for the installation of the structure, more precisely the distance from the ceiling surface. There are no standards in this matter, it is enough to retreat 5-15 cm
In general, the owner of the home decides everything here, the wall structure can be placed either very close to the ceiling, or relatively far from it. It should be both practical and harmonious so that all interior elements create one whole picture.
Advice! When applying markings, one should be guided not by the level of the window, but by the plane of the ceiling.
Stages of installation of a wall cornice
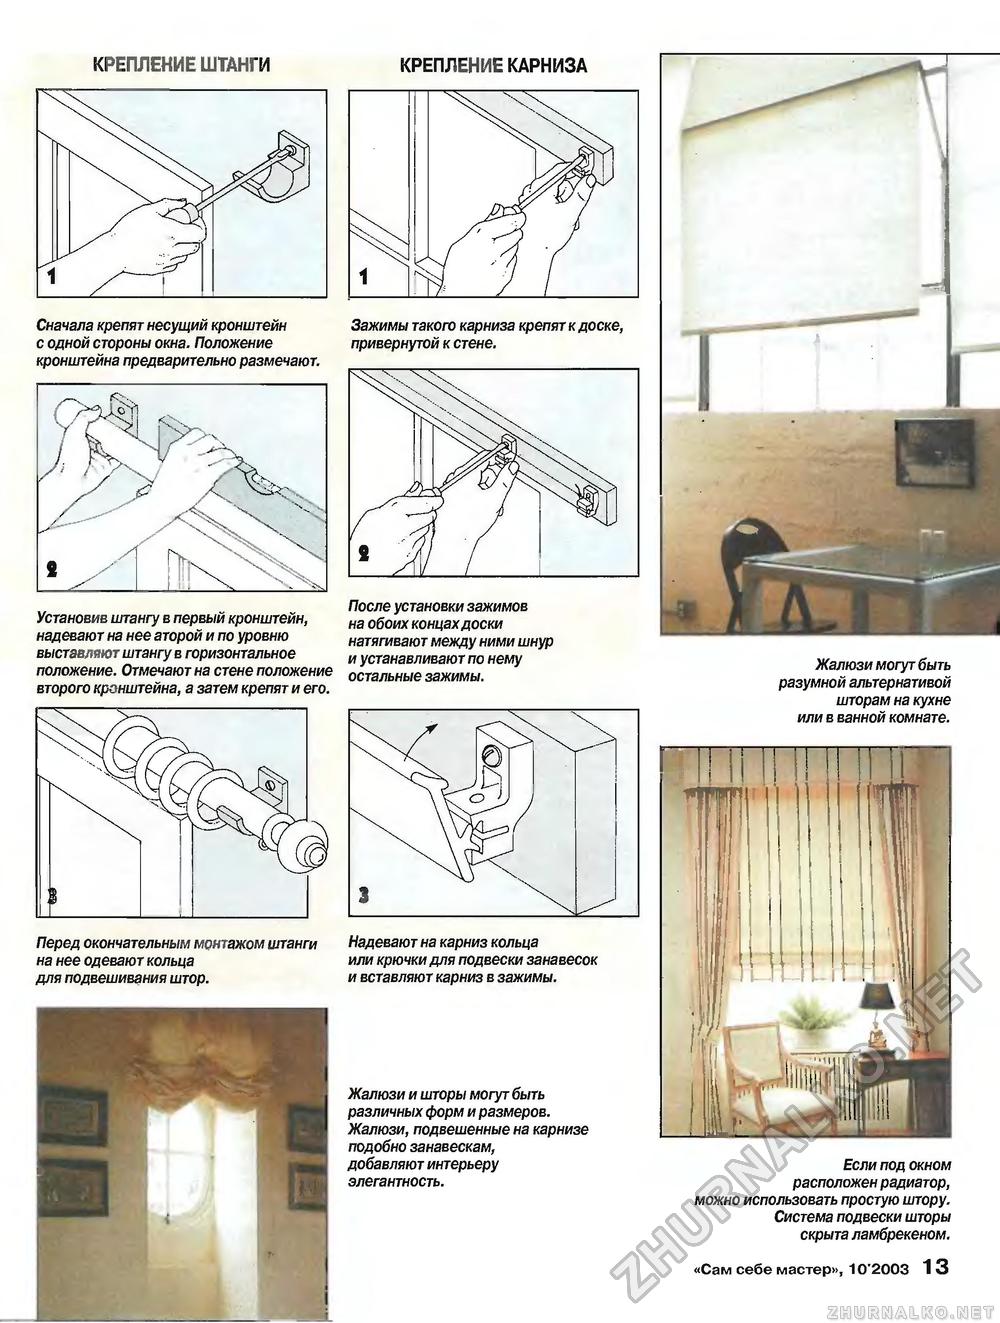
Installation of the wall structure should be carried out according to the following sequence of actions:
- Attach the assembled structure to the wall above the window to select the optimal mounting location.
- Mark a point first on one side, and then, using a level, draw a straight line to the other end.
- Using a tape measure, measure the distance from the center point for the location of the fasteners. This must be done taking into account the length of the wall structure.
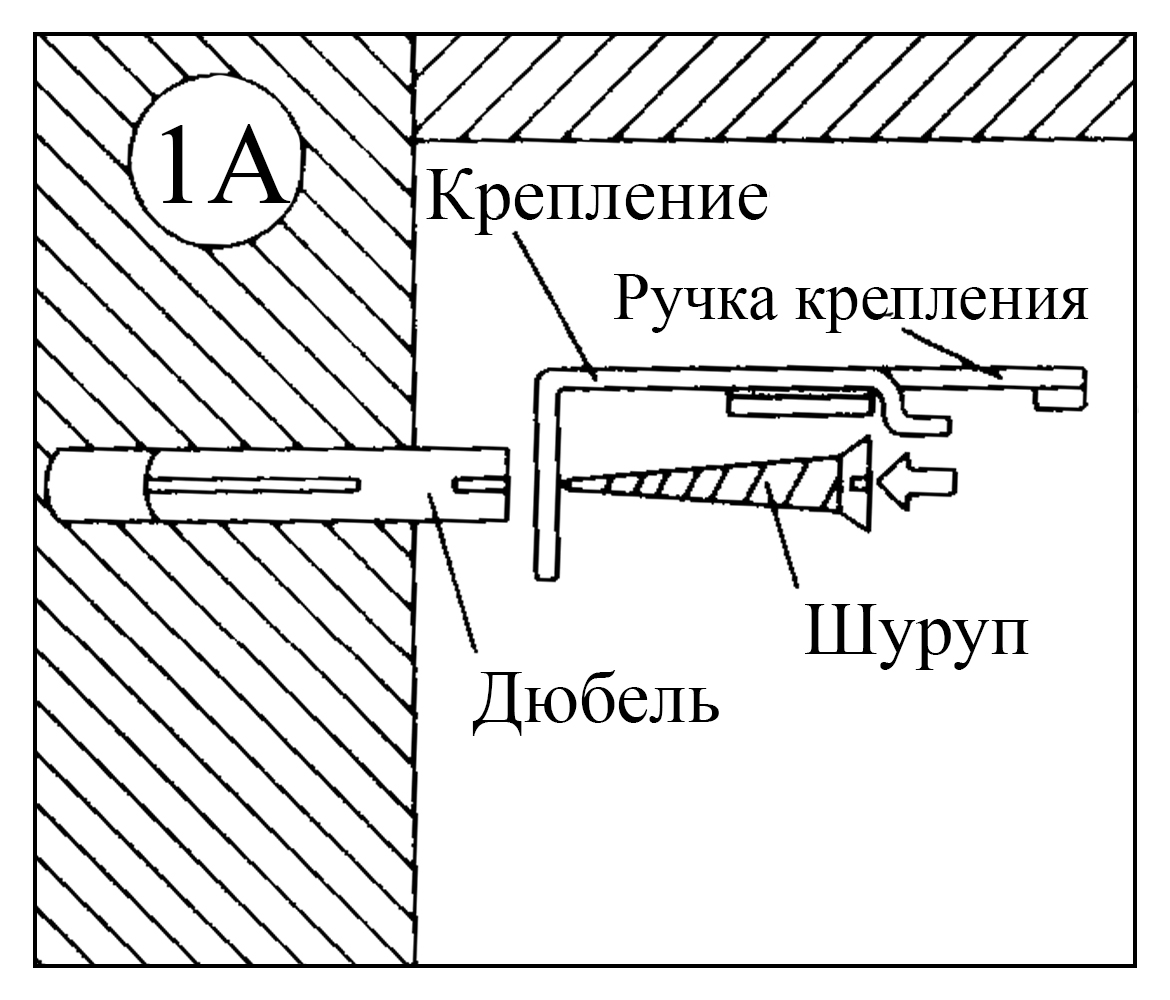
- Make holes for dowels (6 × 40, 6 × 30 mm) at the marked places, using a hammer drill or an electric drill for this purpose.
- Pour liquid nails into these holes, resin will do. Then insert the dowels.
- When the glue has set, insert the brackets into the dowels.
- Check the position of the cornice on the wall using a level.
It often happens that while drilling holes, the drill slides off the intended point, which is unacceptable. To avoid skewing, it is recommended to pre-deepen the points with a nail.
Elegant and simple window blinds or roller blinds
A good idea that won't cost too much is roller blinds. This is the solution for people who appreciate classic, simple designs. The cassette roller blinds perfectly match the window width and provide protection from excessive light and prying eyes when needed. On the other hand, they will not block the light from the apartment when it is not necessary. The rolled up roll actually takes up very little space.
Roller blinds without cornice - photo

It is also worth noting that this is a very functional solution that is very easy to keep clean. For cleaning, simply wipe the structure with a damp cloth.
Installation of wall cornices
Wall-mounted models are more widely used. They are compatible with any style of interior design. Unlike ceiling options, these structures are much easier to install yourself. For clarity, consider the installation methods for the main types, which include:
- round;
- strings;
- profile;
- baguette.
Each type has its own installation features. However, all of these types are fastened using brackets. The main stages of the work are almost identical, as can be seen from the example of the instructions given.

Baguette
The main difference between baguette cornices is the presence of a decorative strip that hides all structural elements. By the type of base used for attaching curtains, rod, string, rail models are distinguished. The procedure for installing a baguette with a plastic tire:
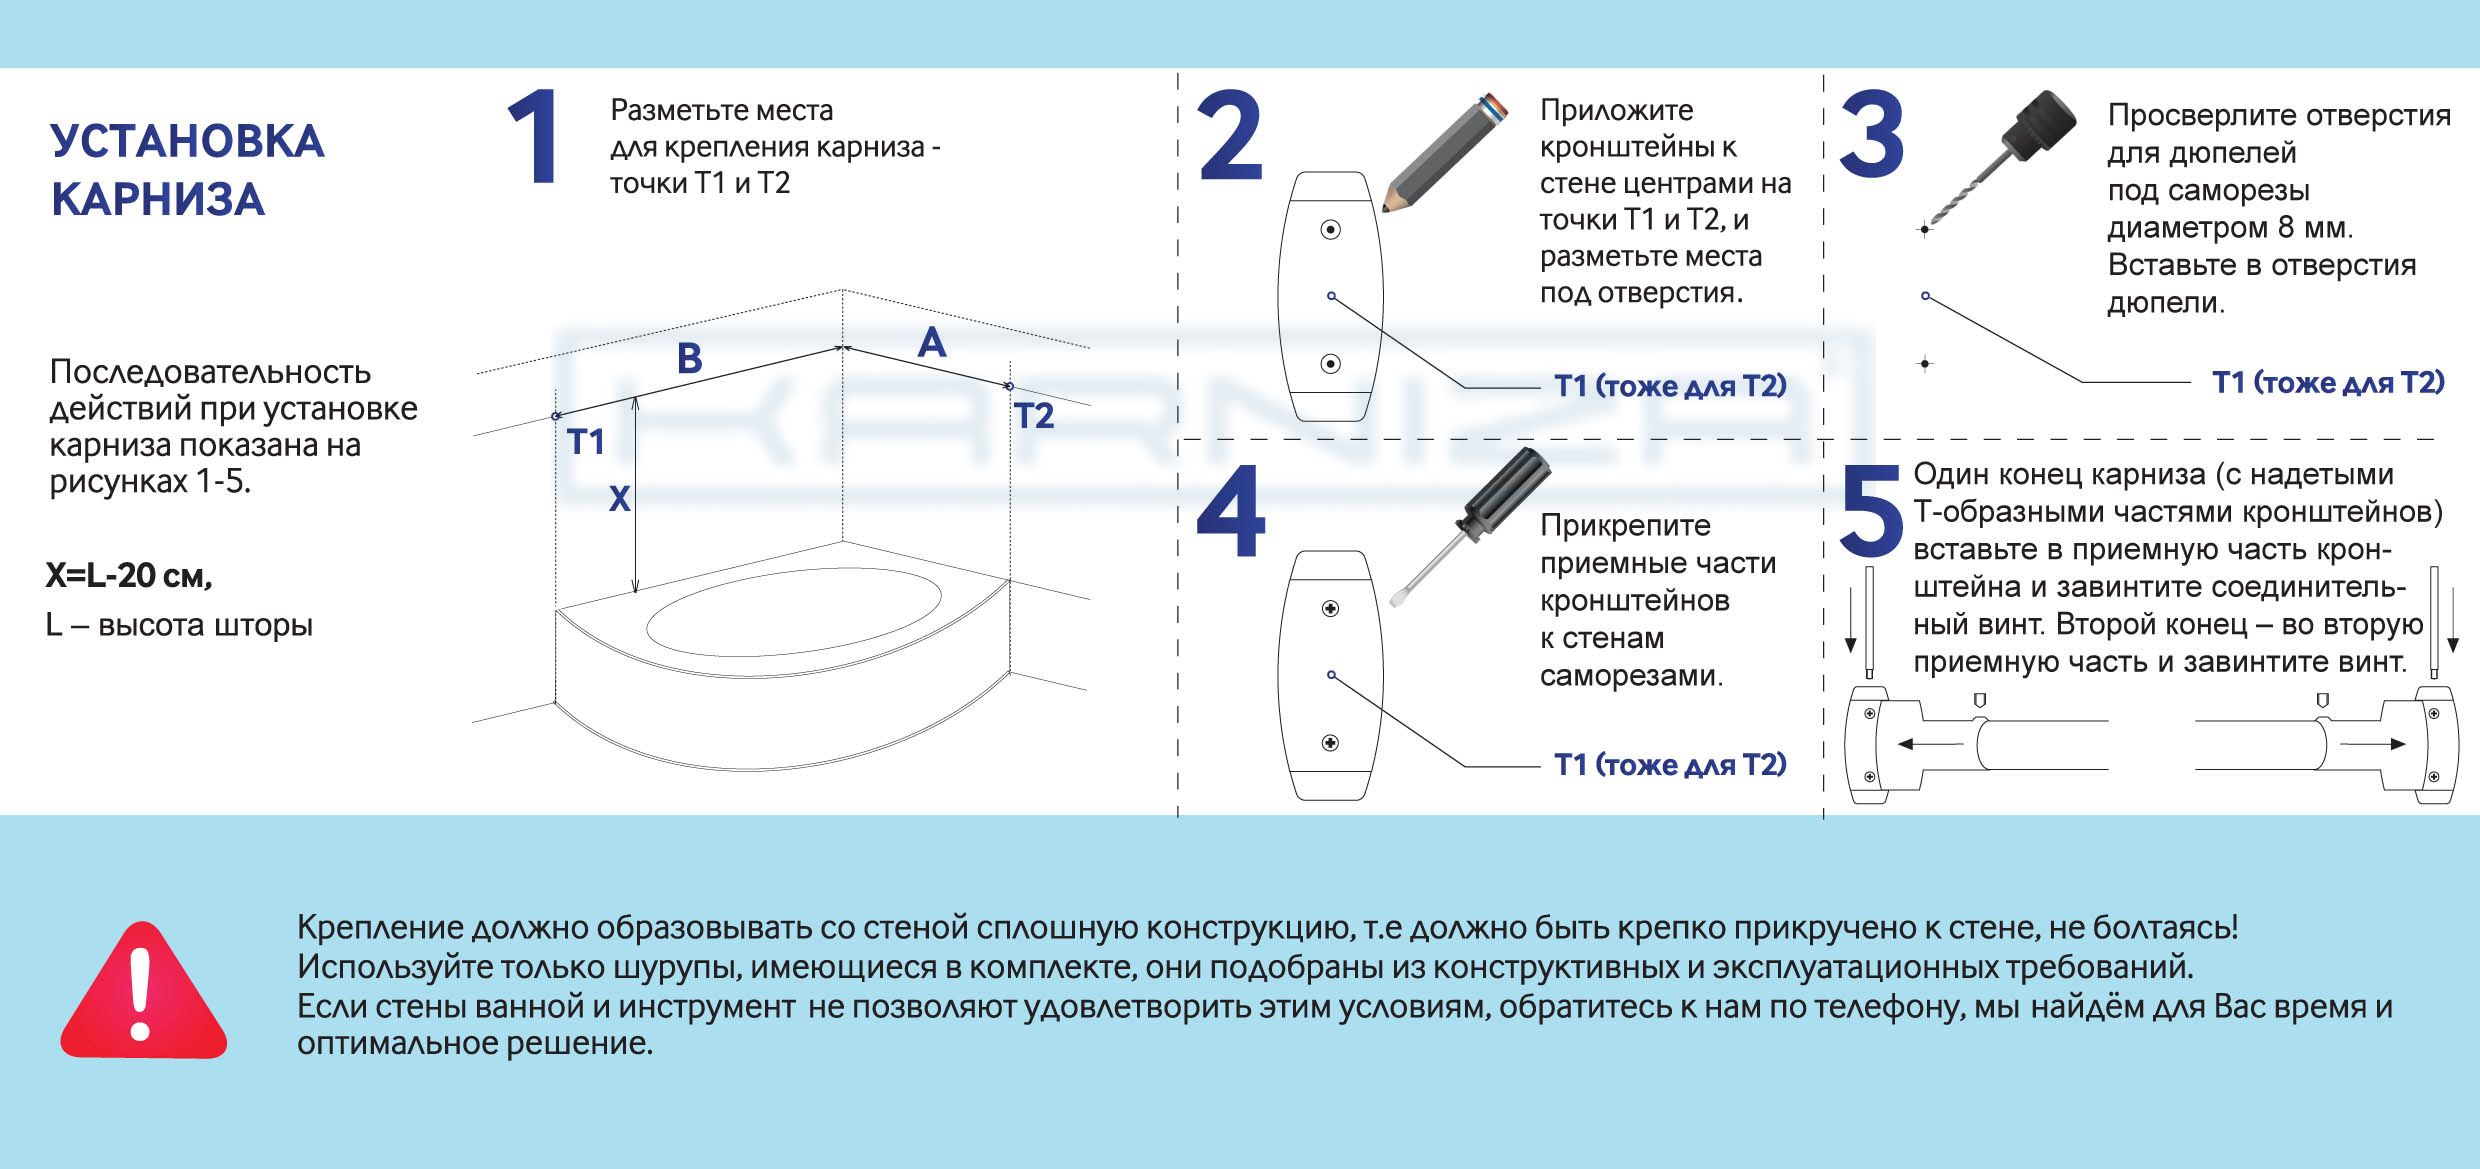
- We carry out markings on the wall by level.
- We drill holes with a puncher, insert dowels into them.
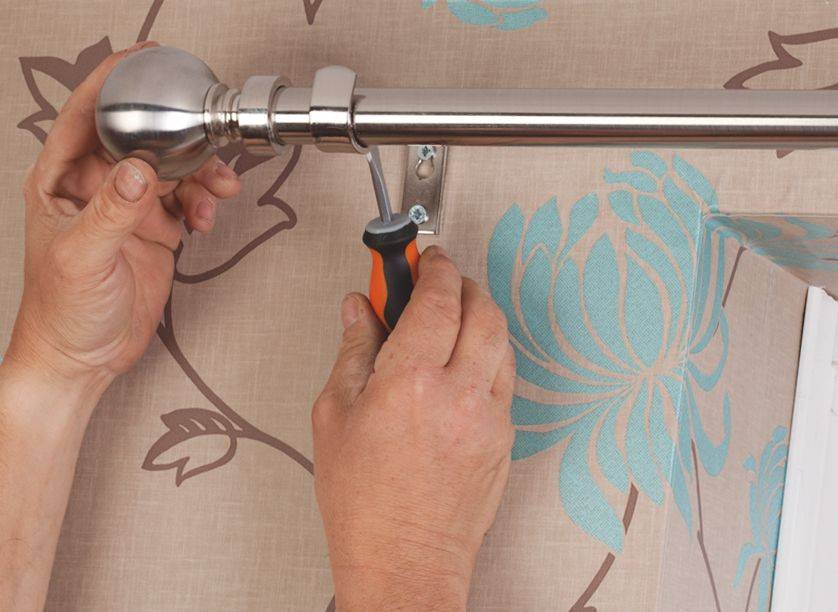
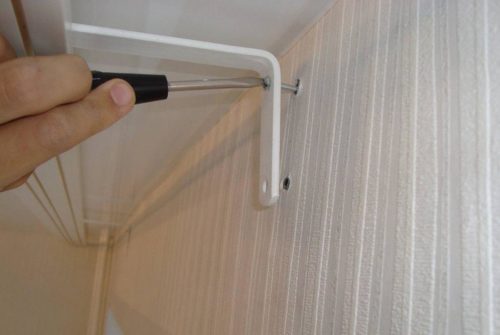
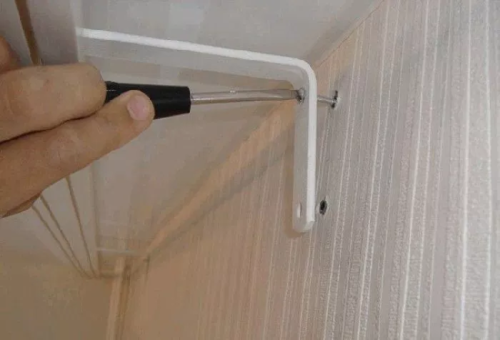
- We install the brackets, fix them securely with self-tapping screws.
- According to the existing scheme, we assemble the workpiece, connect the tire with the decorative strip.
- We fix the resulting workpiece to the brackets.
- After installation is complete, you can hang curtains, tulle on the finished product.

String
The main feature of string models is their special structure. They consist of steel thread, brackets, hooks. The length of the string should not exceed five meters, it can be hung in several rows. However, it should be borne in mind that only light textiles can be hung on a thin thread. The structure will not support the weight of heavy curtains. The installation of these curtain rods should not cause difficulties even for an inexperienced person, the process itself is as follows:
- We determine the place for fastening, we carry out the markings according to the level.
- After attaching the fasteners, we make a mark for the dowel.
- We drill holes, install fasteners.
- Through the hole in the installed mount, we put the steel string into the first bracket.
- We distribute hooks or rings along the thread.
- We pass the string through the second string bracket, adjust the required tension using a special bolt.
- We cut off the excess steel thread, you can also roll it, this will allow you to further lengthen the product.

Rod
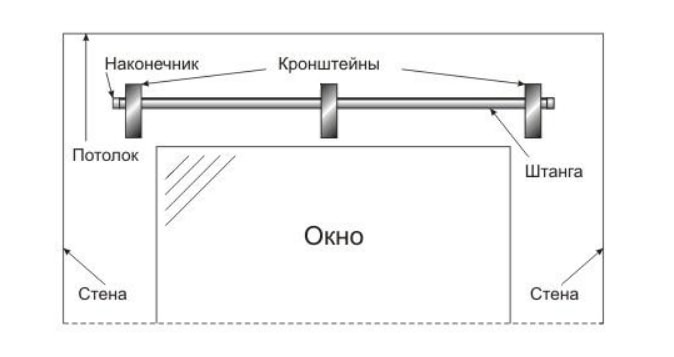
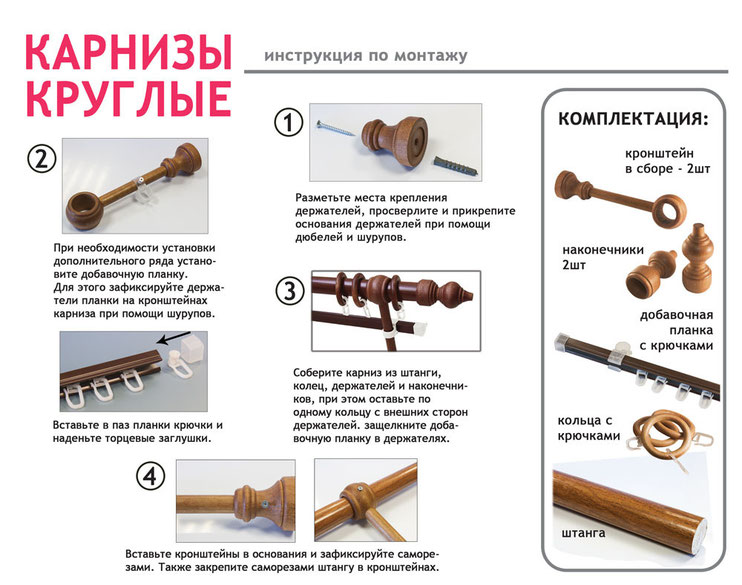
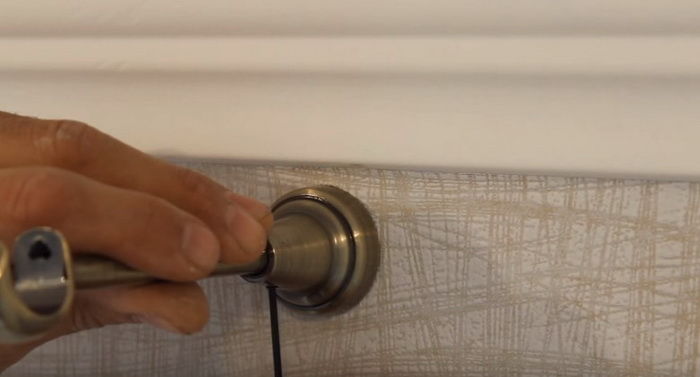
Round cornices with a bar as the main element are classic models. Special plugs or decorative tips are attached to the edges of the product. They act as a decoration, do not allow the rings to fall off the pipe
When choosing such options, you should pay attention to their parameters. Short structures can be fixed on two brackets, but if their length exceeds 1.5 m, then additional fasteners should be provided, which is installed in the center
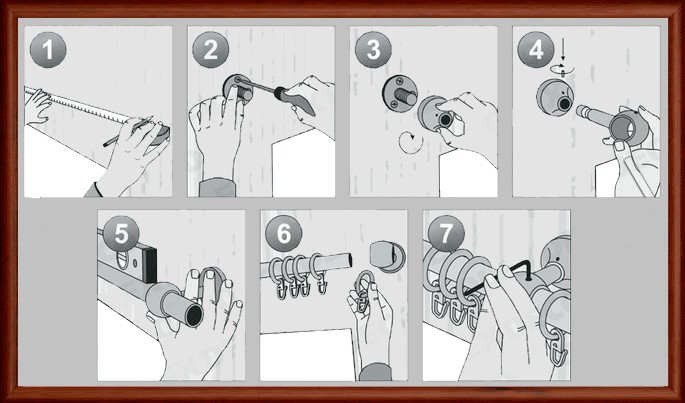
Installation work is carried out according to the following scheme:
- We measure the width of the window.
- We make markings by level.
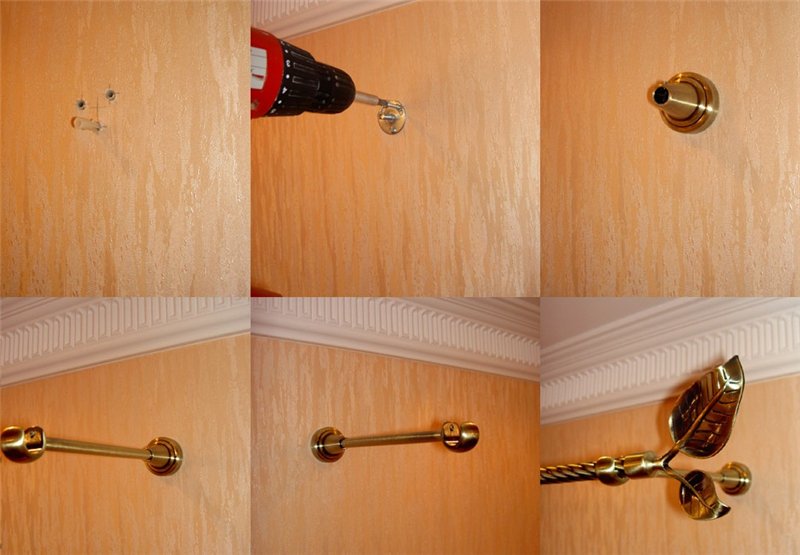
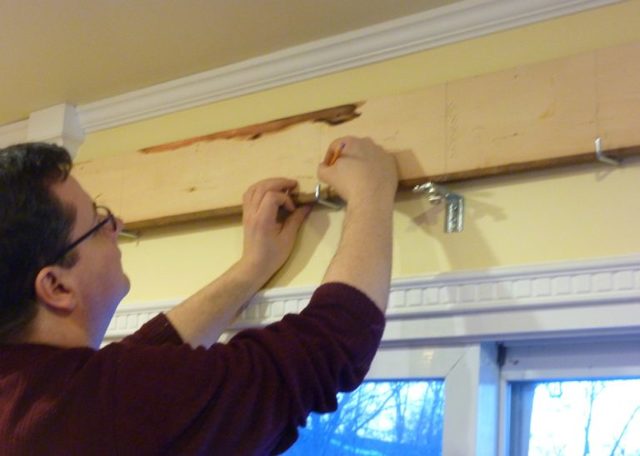
- We unscrew the heel from the holder, try it on the wall, mark with a pencil the places for the dowels.
- When installing long products, we make an additional mark in the middle of the window opening.
- With an electric drill we drill holes in the designated place, we drive dowels into them.
- Using self-tapping screws, we fasten the heels to the wall.
- We wind the base of the holder onto the heels.
- We assemble the structure, put on the required number of rings, install plugs on the sides.
- When installing, first fix the center bracket, then the side fasteners.
- At the final stage, we hang curtains.

Profile
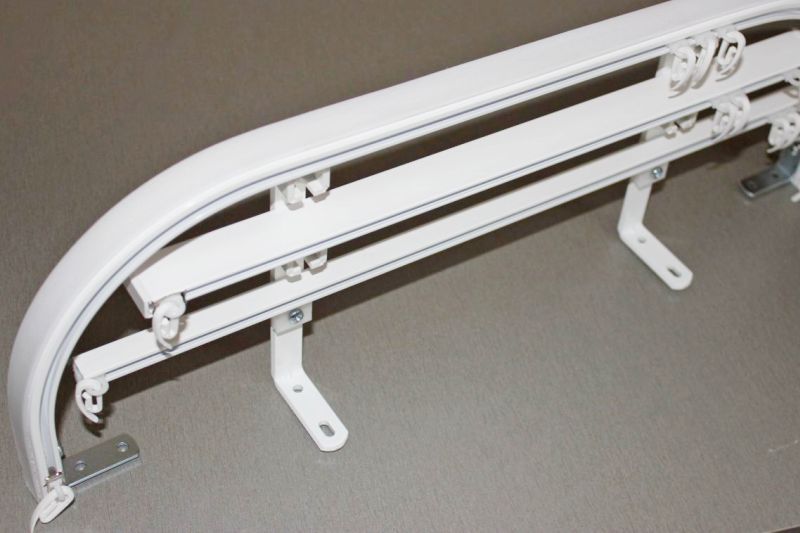
Profile models look appropriate in any interior. For their production, plastic or aluminum is used. The maximum length does not exceed 6 m, however, if necessary, this parameter can be increased using fittings. Some products are capable of bending in two planes at any angle, which allows them to be used to decorate window openings of any fancy shape. For clarity, consider the step-by-step instructions for installing the structure:
- Determine the installation location.
- We make markings along the entire length with a pencil.
- If a long structure is being installed, it is necessary to provide for more than two brackets, especially at the bends.
- Profiled curtain rods are often sold without holders, so they will have to be purchased separately.
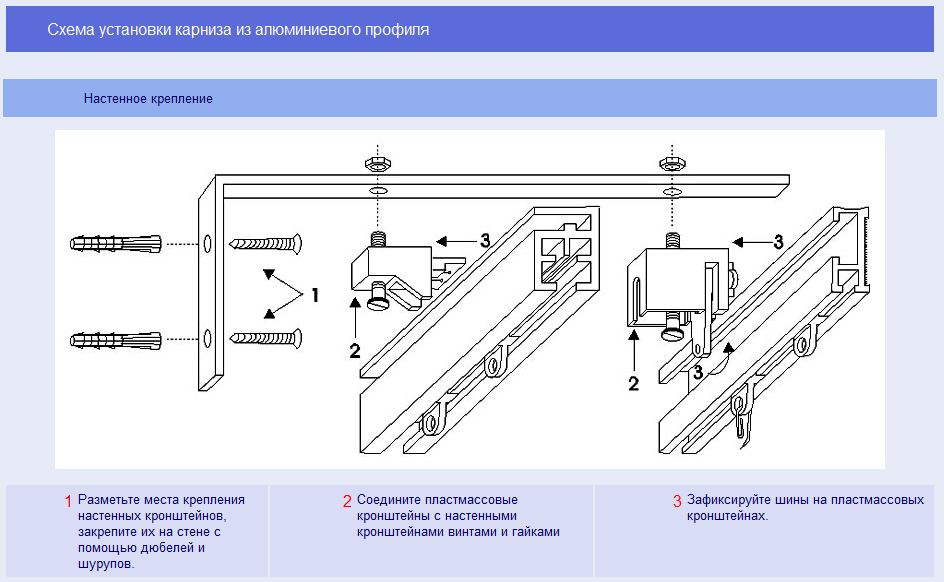
- We drill holes, install brackets.
- We fix the profile on the fasteners.
Mounting on butterfly dowels
The option of mounting on butterfly dowels involves fixing to an existing structure. The dowels got their name because of the specific shape and mechanism of action - the fasteners are opened from the back of the material, which ensures reliable fixation. One dowel is capable of supporting a mass of up to 16 kg.
Assembling the structure
Before starting work, the structure must be assembled, since further installation will be impossible without this. Pre-assembly allows you to determine all the required distances and the location of the fastener.
Determination of the position of the cornice and marking
The assembled cornice is applied to the surface and positioned exactly relative to the walls. Having determined a suitable location, take a pencil or marker and make marks at the places of future fastenings
During marking, it is important to ensure that the product does not budge.

Drilling holes
After making marks on the drywall, holes are drilled. A hammer drill can be used for this purpose, or an impact drill if not available.
Installation of dowels
To fix the fastener, you need to tighten the self-tapping screw until the butterfly dowel rests on the surface from the back side. To firmly fix the elements, you can use a regular screwdriver or screwdriver. The type of nozzle is determined depending on the screws used.
Fasteners for self-tapping screws
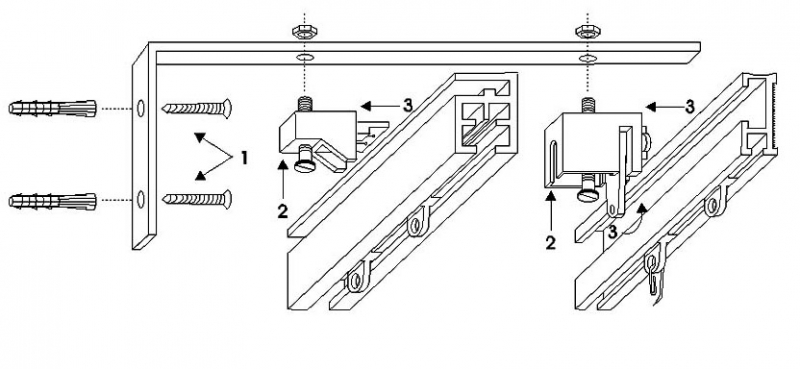
Using self-tapping screws as fasteners, you need to mount the cornice at the same time as the fastening.Since the fasteners are inserted into the rails of the structure, it will not work to fix the product on the already fixed brackets. Fasteners are inserted into the rails and screws are screwed in.
Requirements for installing curtains
When installing curtains, you must adhere to the rules:
- Dowels (screws) are selected taking into account the wall material.
- Before fixing, you need to make sure that the curtain does not interfere with the operation of the window - it will be easy to open (close). The recommended distance from the curtain to the window is at least five to seven centimeters.
- For partitions lined with plasterboard, it is recommended to prepare longer screws. When drilling, you need to get to the brick in order to improve the reliability of the structure.
- Polyurethane dowels are used to securely fix the planks.
- If the wall has a loose structure, you will need wooden plugs of large diameter, where the indentations for the dowels are made.
- The screws are held securely in the thin, loose partition when the hole is filled with epoxy.
-
To prevent the curtains from touching the radiator, they are hung at a distance of more than 10 cm.
The reliability of the installation of curtains depends on:
- material for making the cornice;
- configurations of the structure;
- installation site;
- surface finishes where curtains are attached.
Before starting the installation of the structure, you need to pay attention to the following factors:
-
Strength of the material (wood, string, plastic, metal). The curtain rods must support the weight of the curtains, so they are matched to the weight of the textiles.
- Fixing method to the wall. The total weight of the structure with curtains is taken into account, as well as the material of the partition. There are 3 types of fastening: through the through holes in the plank to the wall, on supports and on brackets.
- Plank size. It should protrude beyond the lateral boundaries of the window opening.
- Number of tiers. The selection of a single-row, two-row or three-row system depends on this. This factor affects the width of the structure.
- The cornices are hung after the completion of the renovation.
How to make a cornice correctly
In order for a simple device not to turn into a constant source of headache, it is enough to observe a few simple conditions. In order to properly hang curtain rods, you must:
- Maintain the distance from the bearing rod of the eaves to the ceiling and the upper edge of the window opening of the side walls;
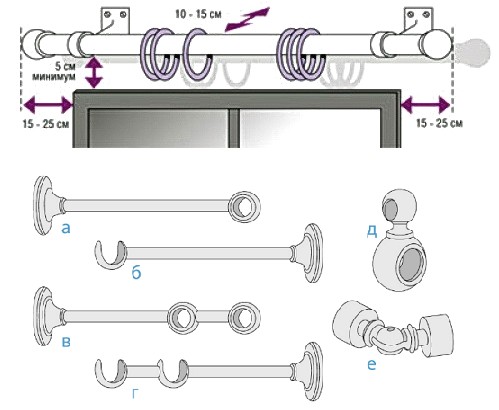
- It is recommended to set the horizontal overhang to the left and right of the window within 20-30 cm. This is enough for the curtains on the cornice to look one piece with the window opening;
- The length of the horizontal string or rod for suspensions should be at least 10-15 cm longer than the transverse size of the window.
The latter requirement applies more to structures mounted on the wall using brackets. Often, curtains and curtains in the room are suspended on strings stretched between two opposite walls, in this case the size and height of the cornice bracket is chosen based on the general design and style of the room.
The design of the curtain rod and the window must be the same
The standard length of the curtain rod for curtains is from 2 to 4 m. The device of the curtain rod suspension is such that you can always cut and adjust the rods, and even more so the string suspension, to the real dimensions of the room.
Eaves device
Traditionally, there are four basic schemes:
- The most popular options are one or two booms mounted on side brackets. For windows that are too wide, additional intermediate brackets can be used;
- Rack cornice. It is a plastic or aluminum split profile, mounted on fixtures on the ceiling;
- The baguette version is the oldest of all the existing ones; it is a box with a string stretched inside it, or a pair of horizontal slats is installed on the mount;
- String cornice in the form of a thin metal wire 1-2 mm thick stretched between special anchors.
In addition to those listed, there are many exotic schemes for curtain rail fastenings. For example, rope, looped, tiered, for all homemade products, as a rule, standard fasteners, self-tapping screws and cord holders are used. These are usually works of authorship, an attempt to adapt the design of curtains in the Country or Provence style.
How to make a cornice yourself
The easiest way to make curtain bindings is to use the materials available in the house. For example, a very nice and pretty pretty curtain rod can be made from a ¾ inch diameter plastic water pipe. Inside the pipe, you will need to install an aluminum or oak rail, which reduces the deflection of the rod under the weight of the curtains, and parts from the door handle can be used as brackets.
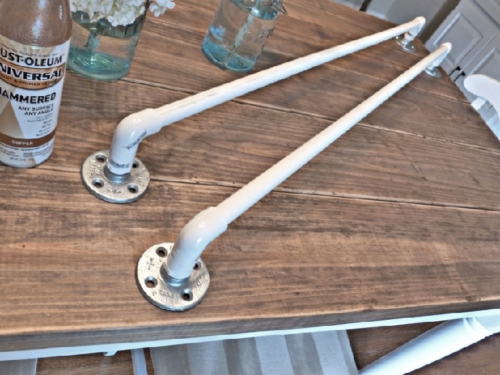
Water pipe cornice
For a summer cottage or a country house, the simplest cornice with fastening can be made of plywood sheet 15 mm thick.
Eaves drawing
An approximate sketch of a wooden molding is shown in the diagram below.
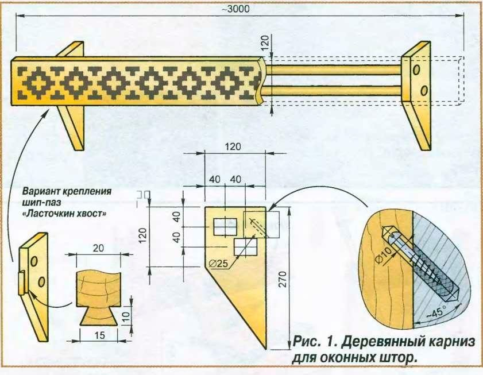
Two oak square slats are used to fix and move the curtains. The strength of the wooden bar is enough to hold even heavy curtains, you just need to properly mount it to the wall.
The body is made in the form of a U-shaped box
Particular attention should be paid to the method of fastening the eaves over the window opening. In this case, an oblique wooden cork is used, hammered into the wall at an angle.
The weight of a wooden molding is 3-5 kg, taking into account the weight of the curtains and the required threefold safety margin, an anchor expansion screw with a split plug would be a better mounting option.
How to assemble the cornice
One of the most difficult problems that one has to face when securing a structure is the need to accurately align the cross member with the horizon or with the upper edge of the window opening.
Therefore, first of all, it is necessary to assemble the front part of the baguette and two transverse panels-brackets with holes for screw fastenings. Next, screw one of the side brackets onto the wall. In order to finally fix the cornice, we align the body to the building level and mark the drilling point for the embedded plug.
Types of cornices and their designs
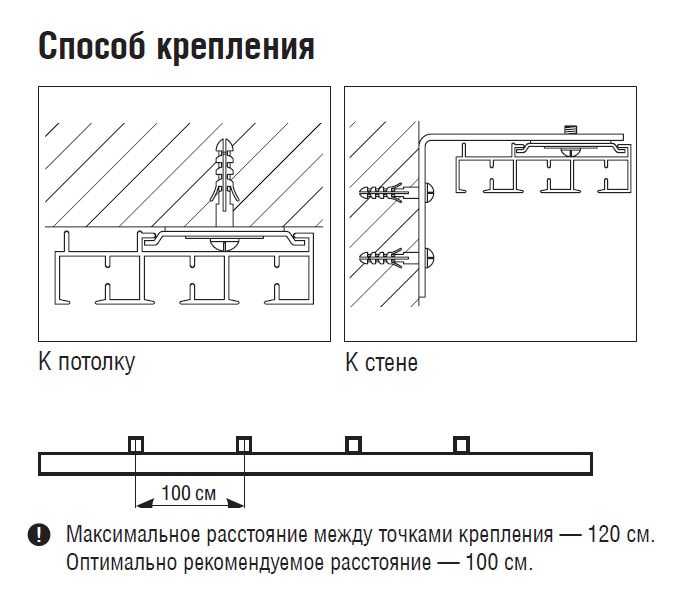
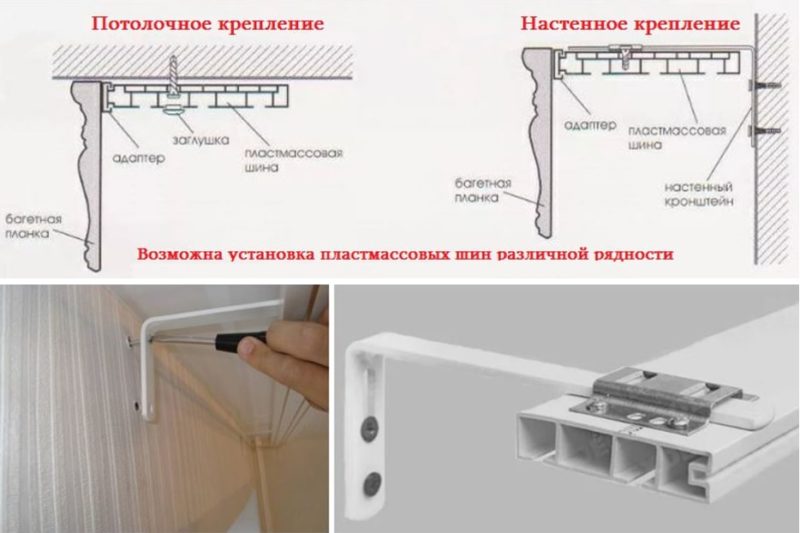
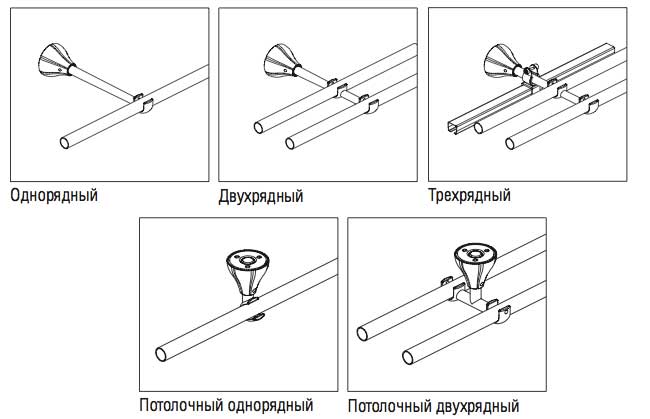
By the type of fastening, two main groups of cornices can be distinguished - ceiling and wall. There are exceptions - if necessary, you can fix the ceiling cornice on the wall using special brackets and vice versa, additional accessories can help fix the wall version on the ceiling.

Ceiling
They are able to visually "raise" the ceiling, make the room more presentable and solemn. Ceiling cornices are the only possible option with a fragile base - if the walls are made of plasterboard and with a small gap between the ceiling and the window. They are somewhat inferior to wall versions in the ability to hold weighty curtain compositions and limit the variety of mounting choices, since there are only profile or tire ones.

Wall mounted
Such cornices have not lost their popularity for many years. They are irreplaceable in the presence of suspended or suspended ceilings.
By design, several types of cornices can be distinguished - string, baguette, tire, profile, round.
- Strings. They were widely used in Soviet times. They are a thin steel cable stretched between two brackets. This is the most budgetary option, which has been very rarely used lately. These models look minimalist. They are practically invisible and do not take up much space. For classic interiors, they are rustic, but they can successfully fit into a modern style.
- Tire. The ceiling structure is equipped with a narrow groove in which the curtain fasteners are located. During the opening and closing of the curtains, the clothespins slide along the slot.Usually, the structure is equipped with two rows - for tulle and curtains. This is due to the fact that such cornices appeared in Soviet times, when lambrequins were practically not used. The advantage of the busbar curtain rod is that the curtain is fixed close to the ceiling and there is no gap.
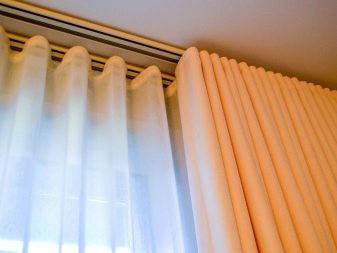
- Profile. This is the most popular type of curtain rod today. They, in turn, are subdivided into ceiling and wall. The design is a plastic profile with one, two or three rails along which the curtain hooks move. This variant is an improved version of the tire curtain rail. Profile three-row models allow you to place more complex curtain compositions - with a lambrequin. You can buy rounded corner elements for them and hide unaesthetic sidewalls.
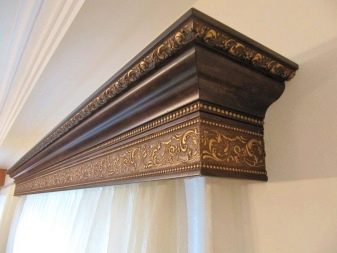
- Baguette - cornice, complemented by a decorative strip that hides the profile, hooks, curtain edge. This element can imitate a wooden product, carving, and is often decorated with gilding or silver. As a rule, a profile or busbar structure is hidden under the bar. The strip allows you to aesthetically design the upper edge of the curtains, even in the absence of a special niche. Sometimes there is a space under the bar where you can hide the LED strip, which will make the composition even more spectacular in the evening.
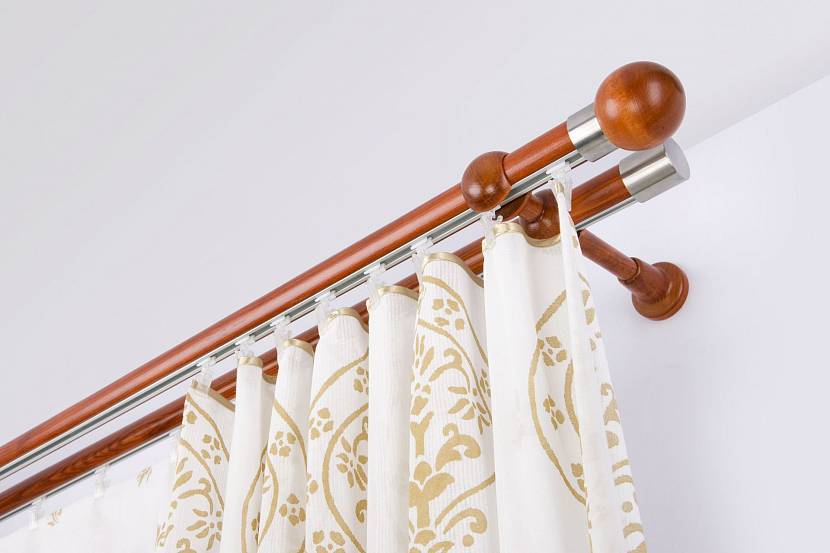
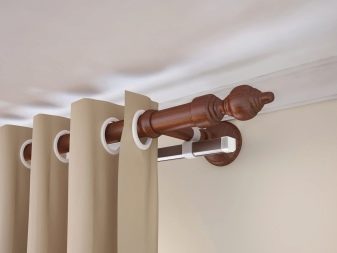
- Round. A traditional variety, familiar to us from childhood. Recently, not only single-row, but also double-row versions have been produced. They consist of two bars of different sizes that run parallel to each other. At the ends of the rods, tips are installed - finials, the initial function of which is to fix the rod. Recently, these elements are often made curly, decorated with a variety of decor. To create a harmonious composition, it is necessary to observe a uniform color scheme of these elements. In addition to straight cornices, there are corner round ones. They represent an arc and are used in bathrooms.
- Telescopic. They are presented in the form of pipes inserted into one another. In order to adjust the length, you do not need to saw off part of the product. It is enough to move the structure, and it will take the required size.
- Swivel. Attached directly to the window sashes. Such a cornice allows you to use the window sill even with closed curtains. The doors open independently of each other. This is a great option for a kitchen window with a deep fit.
- Spacer. They are a pipe with a spring installed inside, which pushes the ends outward during installation. They rest against opposite walls and do not need additional supports.

Views
Cornices are used very often, which has led to the emergence of a large number of different modifications. These models can be perfectly adapted to both classic and modern interior styles. Depending on the materials used for their manufacture, these designs can be divided into several types:
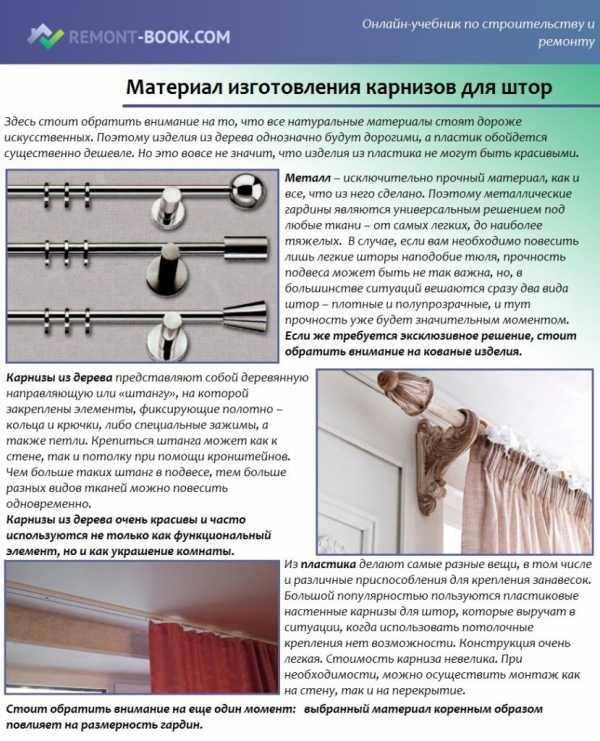
- Metal cornices. They are made from several metals, among which the most popular are aluminum, bronze, brass and steel. The latter type is rare, as it has a lot of weight. To give the cornice a unique design, the metal can be coated with special decorative paints. This allows you to simulate almost all shades and styles of other products. The simplest and cheapest today are aluminum products, which are lightweight and have a long service life.
- Wooden cornices. It should be noted that both the rod itself and the outrigger bracket can be made of wood. The wood looks good in the interior, and the variety of shades allows you to choose them for almost every taste. Many models are decorated with carvings, which gives them a noble look. Perfect for classic interiors.
- Plastic curtain rods.These models are lightweight and durable. Plastic is very flexible, which allows you to give it almost any shape. Therefore, the cornices from it are very diverse and original. The material is not afraid of moisture, so it can be used both in the kitchen and in the bathroom.
Another factor by which cornices are classified are their external features:
- Round. The eaves design assumes the presence of a small diameter pipe, which acts as a support for the curtain fasteners. The length and color of this product depends on the manufacturer and the material underlying the product. To restrict the movement of the pipe along its axis, decorative plugs are placed at its ends.
- String. A metal cable is used here as a support, which is stretched between the end elements.
- Baguette. This type of product is specially equipped with a decorative strip, which is placed on the outside of the structure. It completely covers the support system for a more sophisticated look. The insert can be made either from plastic or metal, or from genuine leather.
- Shinny. This type of cornice is made of metal. The design assumes the presence of small profiled grooves, inside which there are curtain hooks. Such products can be either straight or curved. Very often they are used to divide a room into several zones.
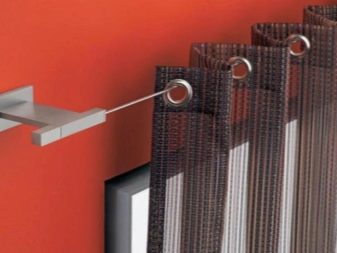
Installation of a ceiling cornice to a concrete floor
The procedure for attaching the ceiling cornice is not too difficult, but if the length of the product is more than two meters, you will need an assistant. In addition to the fasteners, you only need a drill and a screwdriver with a suitable slot.
This is how the installed ceiling cornice with curtains should look like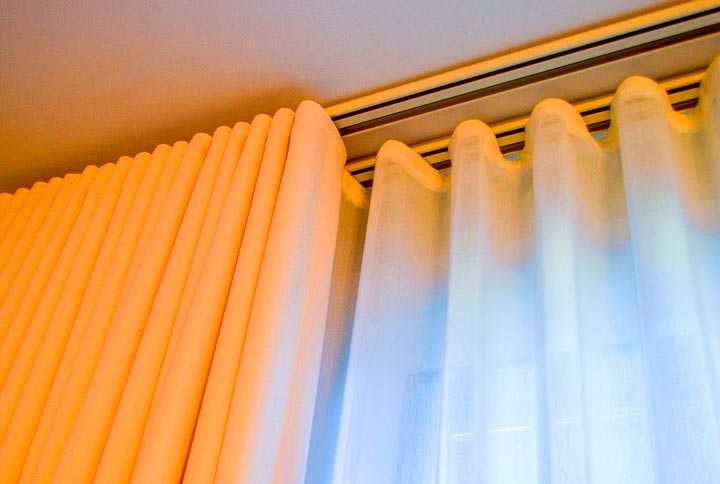
Preparation
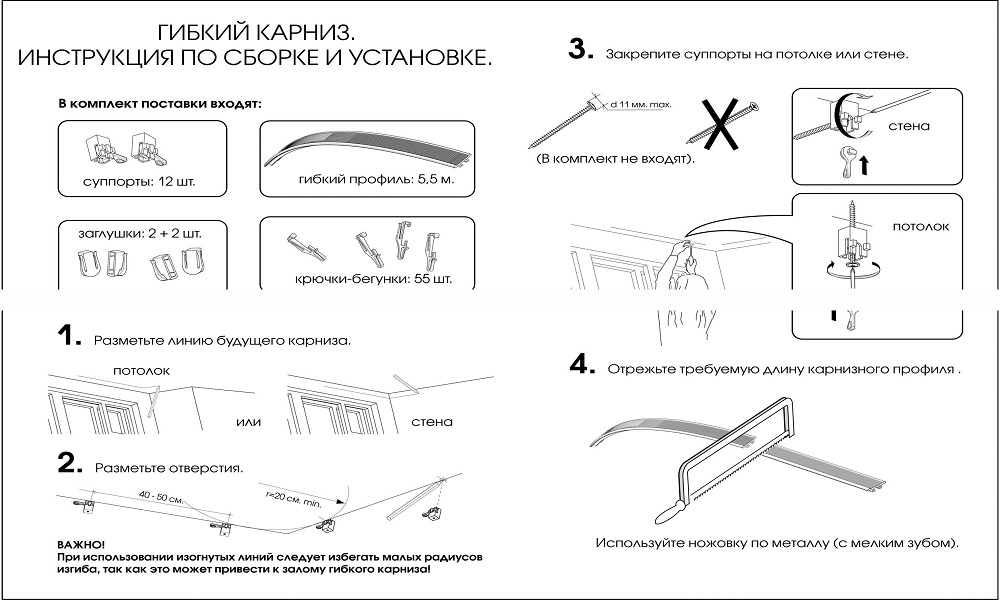
Before you can fix the ceiling cornice, you need to do some preparatory work. The first thing we do is adjust the length. If everything suits you, great. If you need to cut off the excess, you will need a hacksaw. The canvas is desirable for plastic, but for metal, too. If the cornice is assembled, remove the plugs and turns (if any), cut off the excess, then put everything back in place - turn, plug.
Adjusting the length
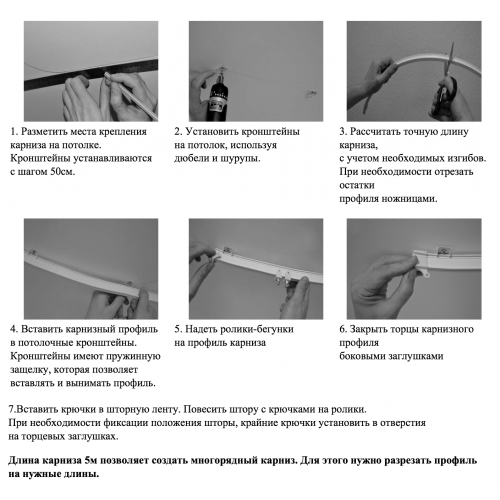
If the holes for the fasteners are not drilled at the factory, you will have to make them yourself. We start with the markup. Mark it so that the distance between adjacent screws is no more than 50-60 cm. If there are joints, then retreat from the joint 5-10 cm on both sides. For better load distribution, it is best to stagger the mounting holes.
After the marks are set, we drill mounting holes in the plastic. Use a drill that is equal in diameter to the dimensions of the fastener. More is undesirable, but less is also not good - when twisting, the plastic can crack.
Even for a single-row cornice, it is better to arrange the holes in a checkerboard pattern.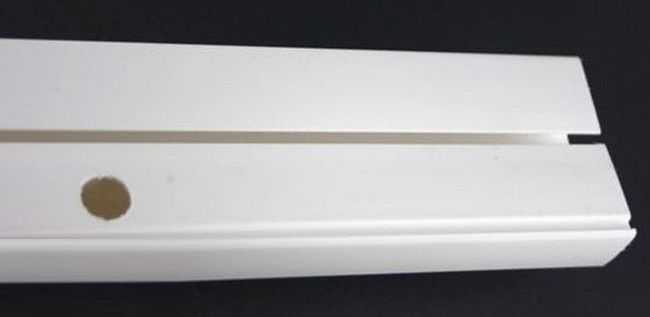
After all the holes are ready, if the curtain rod is prefabricated, collect all the parts. It is possible not to install the decorative strip (if any). For now, it will only interfere.
How to fix
In most apartments and in many private houses, the ceiling is a concrete slab. Accordingly, we take the drill on concrete. The diameter of the drill should be taken according to the size of the dowel. Then we proceed according to the plan:
- We apply the assembled cornice to the ceiling, align it.
- Using a simple pencil or marker, mark the attachment points.
- We drill holes, trying to get exactly according to the marks. The depth is equal to the length of the plastic insert. To make it easier to control, you can stick a strip of electrical tape on the drill.
Already fixed, but without curtains - Insert the plastic part of the dowel into the hole. It should be flush with the ceiling. The protruding parts will interfere with installation, so either we deepen the hole or cut off the excess plastic.
- After all the plastic parts of the dowels are installed, if the decorative strip is attached to the grooves (not with Velcro), install it. It is not always possible to “snap” it, so you should not hope that you will install it later. Most often, you have to put on this bar gradually, moving along the grooves like on rails. You can't do this on the ceiling, you have to remove the already mounted cornice. As you can imagine, this does not improve the mood.
- We apply the eaves assembly to the marks. The first is to install the fasteners along the edges and in the center. If the cornice is long, we additionally fasten the two halves with one or two dowels. So that the plastic does not sag. Further, the installation order is arbitrary.
That, in fact, is all. You know how to attach the ceiling cornice to the concrete slab. If the floor is made of wood, it is even simpler: there is no need to pre-install the dowels. After all, self-tapping screws for wood are usually used. In this case, the cornice is leveled and self-tapping screws are immediately placed in the mounting holes. It is more convenient to follow the same order: along the edges and in the center, and then - as it turns out.
Required tools
The eaves installation technology, although it seems simple, but often it is almost impossible to perform it without special tools. The set of tools depends on factors such as the type of eaves and the material of the wall (ceiling). To solve a similar problem, you should stock up on such devices:
- Roulette and level. With their help, basic calculations are performed related to the location of the cornice relative to other elements.
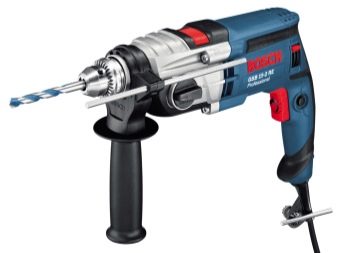
- Drill (puncher). Needed to form holes for fasteners. Additionally, you will need a set of drills of different sizes. It all depends on the type of cornice and its technical characteristics.
- Pencil. An important element, without which it is difficult to make accurate markings.
- Fasteners. For such purposes, dowels and screws are often used. If the walls are made of soft material (wood), then the cornice can be simply nailed with an ordinary nail. If the wall is made of plasterboard, then special dowels should be used, which will not destroy the structure of the material.
- Screwdriver or matching drill bit.
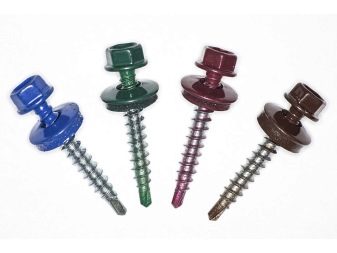
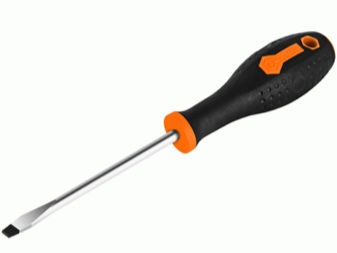
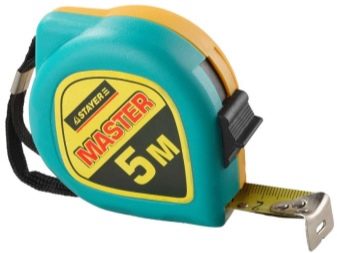
Types of cornices and their features
There are different designs of curtain rods. They all have their own advantages and disadvantages. Initially, the type of construction was determined by the material of manufacture, but the development of technology has practically eliminated the difference and made it possible to make samples of any shape and size. Today, the choice of design is determined by the features of the interior and the structure of the ceiling or walls of the room. Consider the types of curtain rods.
String
Such structures consist of two rigidly fixed brackets, between which a steel wire is stretched. A feature of these products is the ability to adjust the length to the size of the room with an accuracy of millimeters. Typically, string cornices are attached to the ceiling slab. This somewhat limits their use due to the widespread fashion for stretch or suspended ceilings. The tension of the string requires a strong and very rigid support plane, otherwise it will be deformed or completely destroyed.
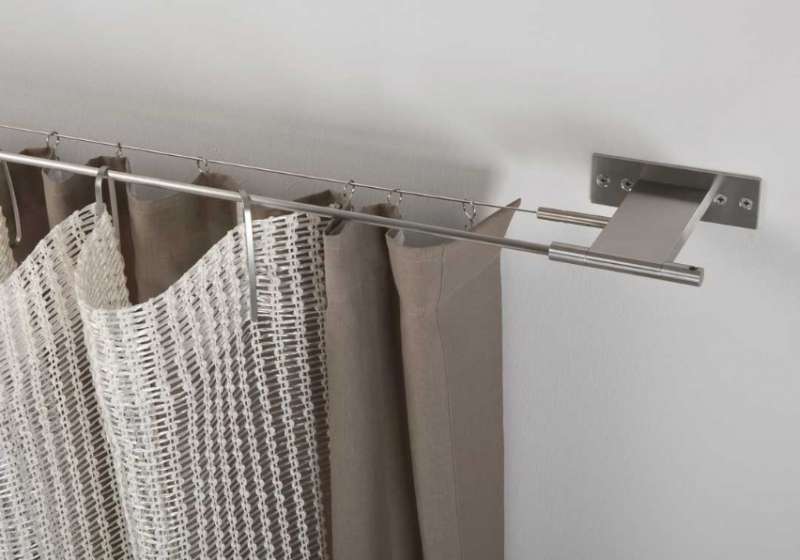
The appearance of string cornices leaves much to be desired, so they are usually covered with decorative panels or hidden under the ledge of a suspended ceiling, plasterboard structure or other masking element. The cost of such products is the lowest, they will suit almost any interior, which made string samples the most common of all alternative varieties.
Tubular or rod-shaped
This design is a tube that is supported by two (for long lengths, three are used) brackets. A feature of this type is the open placement of the tube, so it should look attractive. There are metal, wood or plastic rod construction products.To fasten the curtains, rings with hooks (hooks, clothespins or "crocodiles") are strung on the tube.

There are tubular curtain rods for plastic windows without drilling, which are of a telescopic type. They form a spacer between the frame slopes. This is a kind of mini-cornice sometimes called "cafe". A good option for rooms that do not allow you to attach conventional views - with stretch (suspended) ceilings or plasterboard walls.
Tire
These are flat strips with longitudinal channels in which curtain hooks are installed. They are mounted only on the ceiling, which somewhat limits their use in high rooms
The advantage of such structures is compactness, neatness, they do not attract attention. Suitable for any interiors, although in rooms with expensive furniture sets made of natural wood, it is better to look for other options
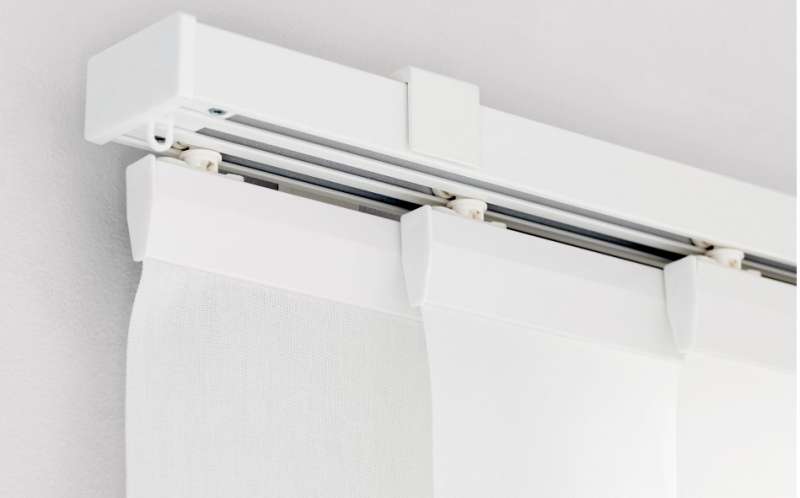
The disadvantage of tire kits is the difficulty of replacing hooks, which often break. For mounting, holes are made in the strip and dowel nests are drilled in the ceiling plate. If a stretch ceiling is installed, it is necessary to pre-attach the support pads at the level of the stretch web. The tires are attached to them through the film. The method is rather dubious, since any damage to the canvas is fraught with its destruction. This must be borne in mind when planning the installation of the cornice.
Profile
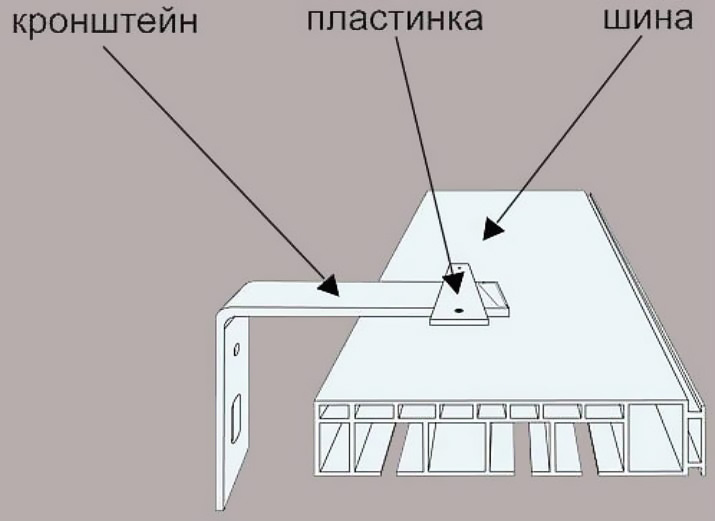
This is a kind of tire curtain rail designed for wall mounting. It is a robust aluminum profile that is mounted on brackets. The advantage of this design is that any height of the eaves from the ceiling is allowed. Disadvantage - can only be used for light curtains or tulle curtains. The reason for this is that the distance of the profile strip from the wall is about 20 cm. This creates a lever that, with great effort, is able to tear the cornice away from the bearing plane.
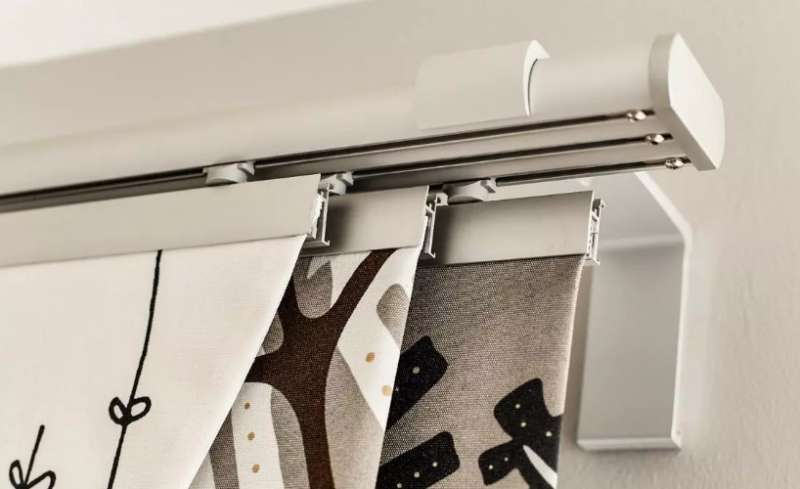
Sometimes profile and tire types are confused with each other. It is easy to distinguish between them - the profile is attached to the wall on brackets, and the tire can only be screwed to the ceiling.
Baguette
Stylish, outwardly attractive option. It is a strip of baguette covering a string, profile or bus-bar supporting structure for curtains. One-row or two-row system can be used. It is noteworthy that the baguette itself performs only a decorative function, being, in fact, only an ornament.
Its advantages are:
- a wide range of sizes, materials and colors of the baguette profile.
- the ability to combine an unattractive system with any interior, furniture, wall decoration style or curtain material.
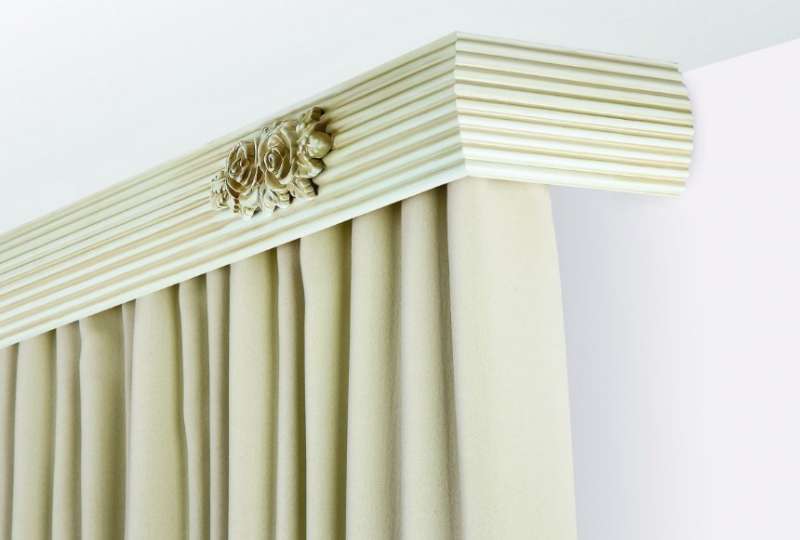
The use of baguette cornices makes it possible to correct installation flaws, hide unattractive curtain suspensions, and decorate the supporting system. This made baguette designs popular and in demand.
Varieties of cornices
For each special design of the premises in hardware stores, there are always several different types of curtain rods. They differ in:
- type of material of manufacture;
- fastening method and type of fasteners;
- the shape of the carrier beam.

When choosing a curtain rod, it is important to take into account the style and weight of the curtains, the shape of the window and the style of room decoration.
Wood, metal and plastic are used as materials for the manufacture of fasteners for window textiles. Each material is successfully used for different interior styles. Plastic products are especially popular due to their low cost, availability, but most importantly - a huge selection of different options for colors, shapes and designs.
Metal and wood curtains are expensive. They are purchased for luxurious interiors decorated with wood or chrome elements. These products can withstand heavy loads, so the curtains are suitable here from dense fabrics, richly decorated with bugles, decorative clamps and all kinds of ruffles.
Different types of fasteners are used for different repairs.Usually this is a mount for:
- wall;
- and the ceiling.
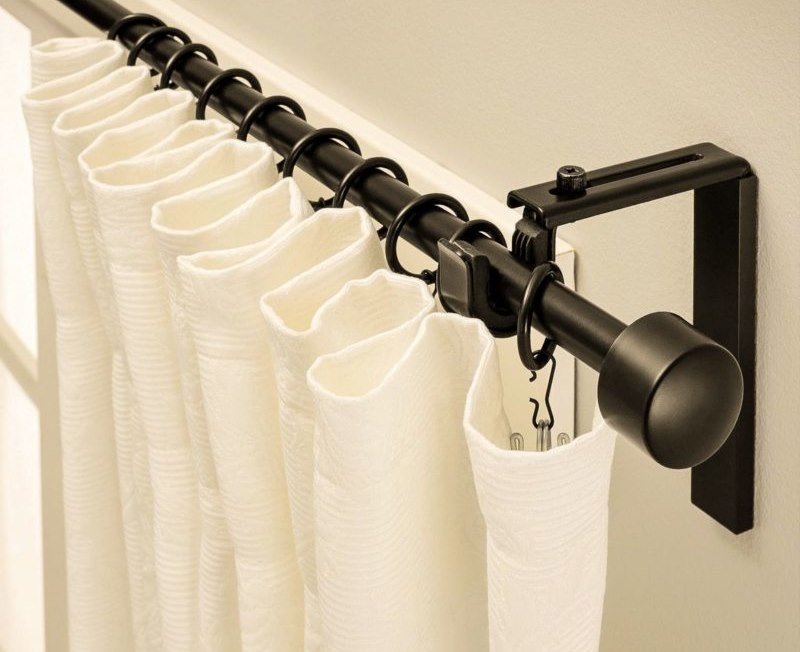
Wall-mounted models are equipped with brackets, most often these are L-shaped hangers, the design of which is carried out in the style of the cornice

To secure curtains with a lambrequin, there are special cornices with adhesive tape
Ceiling systems are usually shaped products that have several grooves for attaching hooks. But it happens that telescopic or tubular curtains are attached to the ceiling. Oh yes, the type of cornices is also different. It:
- profile;
- crossbeams;
- and cables.
The rungs and cables are usually mounted on the wall, and the profile ones on the ceiling. But there are exceptions: so some are installed on the ceiling, and the second on the wall.
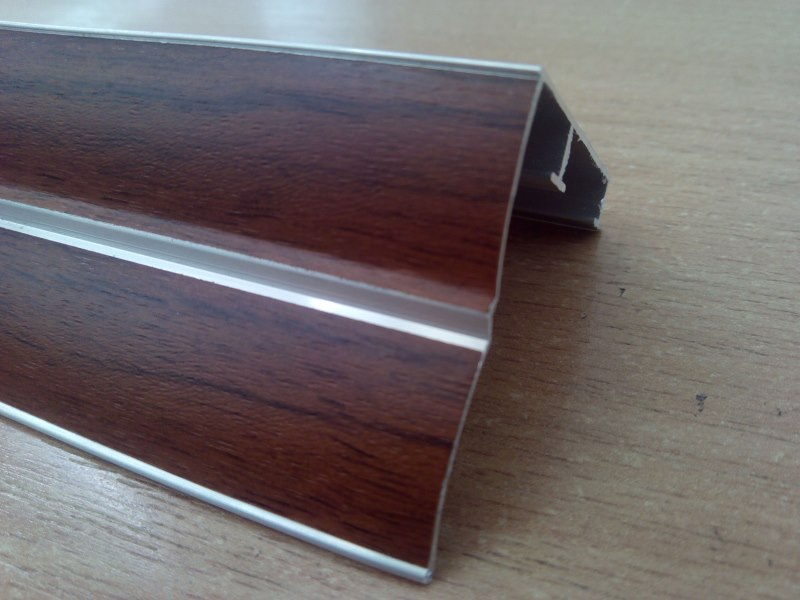
The aluminum rail of such a cornice can be fixed both on the wall and on the ceiling.

