Assembling the tripod
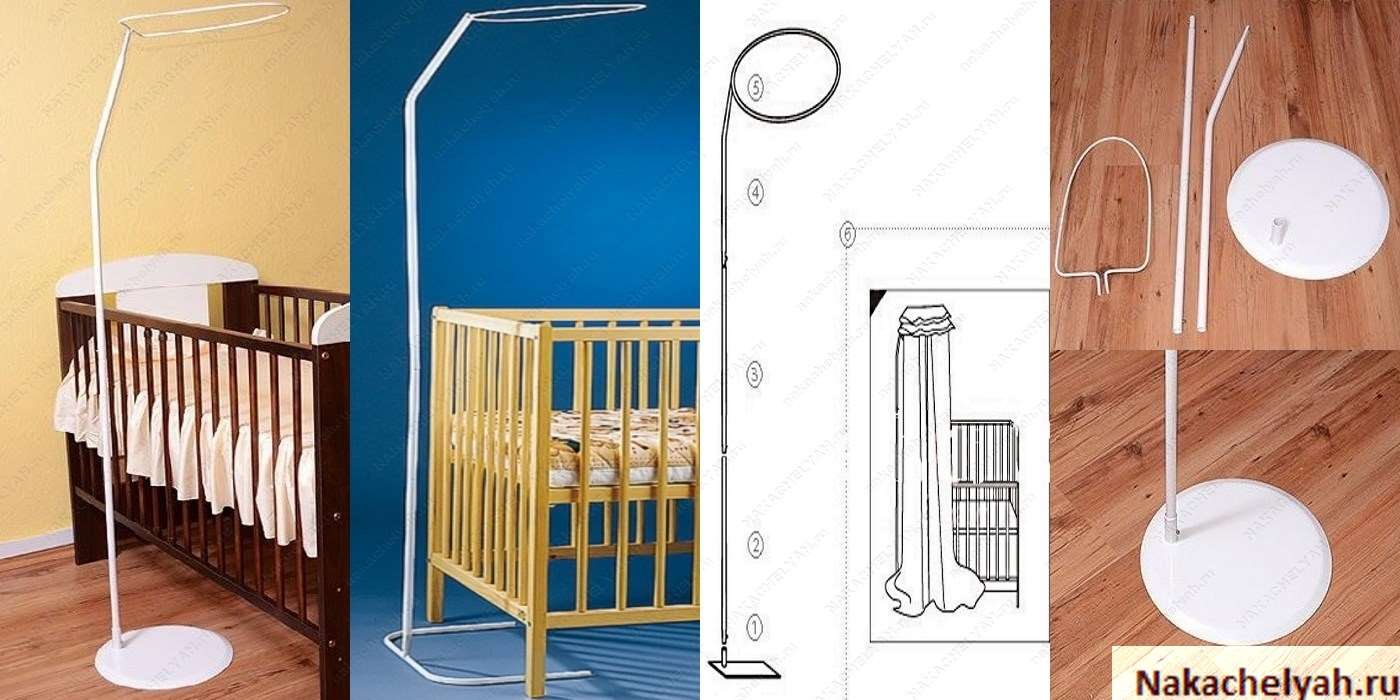
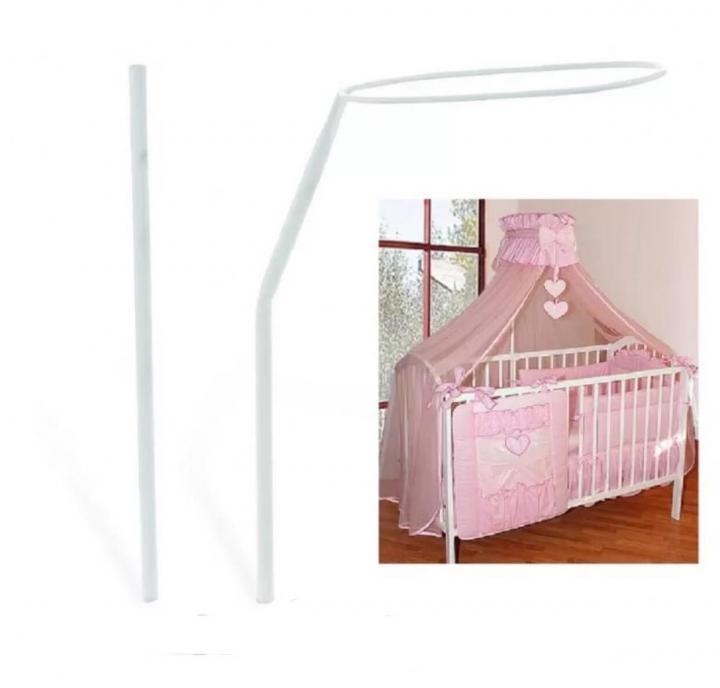
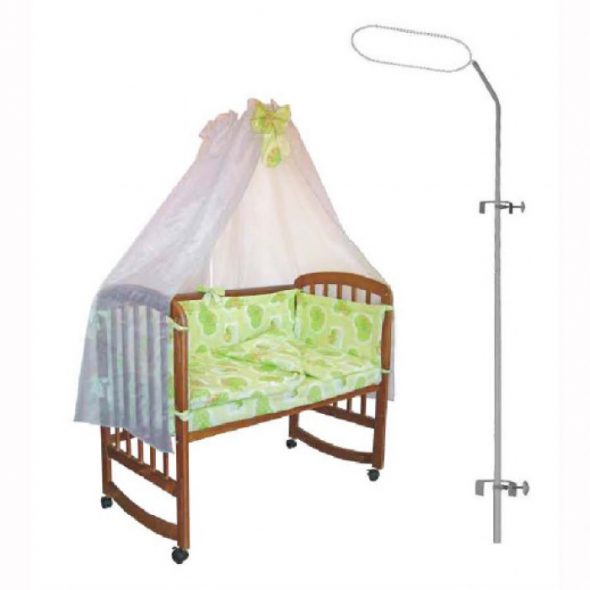
Assembling a structure on a stand is not as difficult as it might seem at first glance. It is something like a tripod, which consists of the following elements:
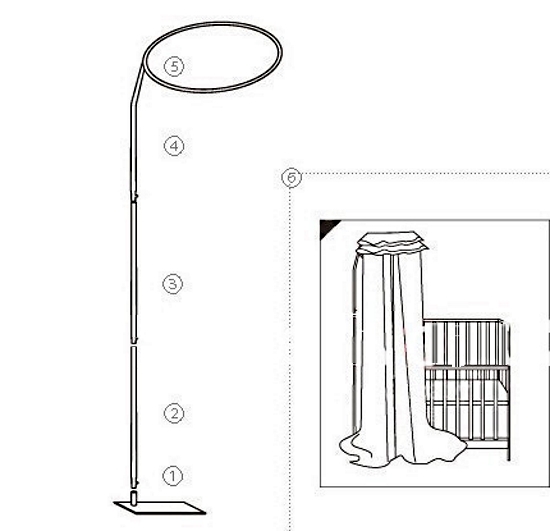
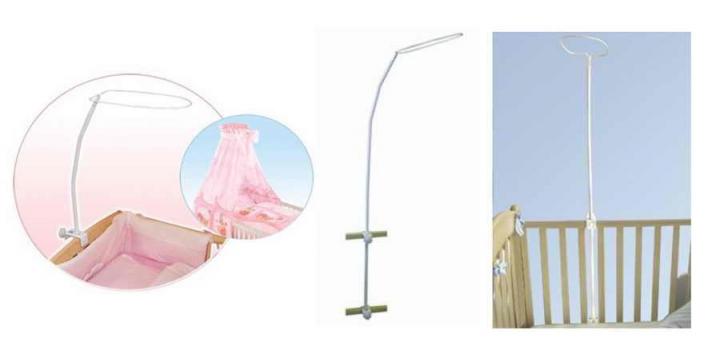
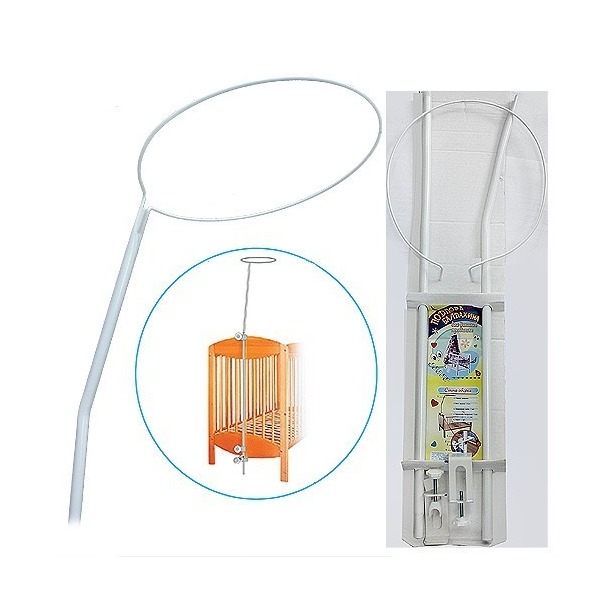
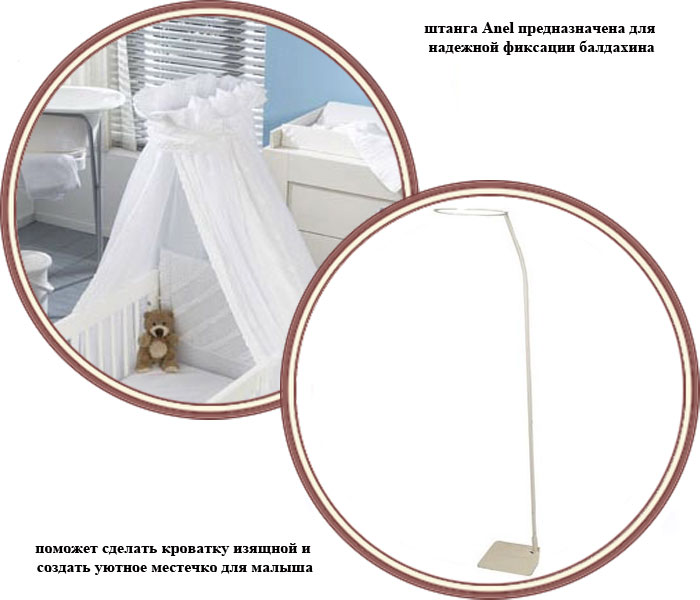
- the main part that provides stability (this can be a curved tube or a solid platform);
- straight tubes that are connected to each other (most of the structures provide for the ability to adjust the height of the tripod);
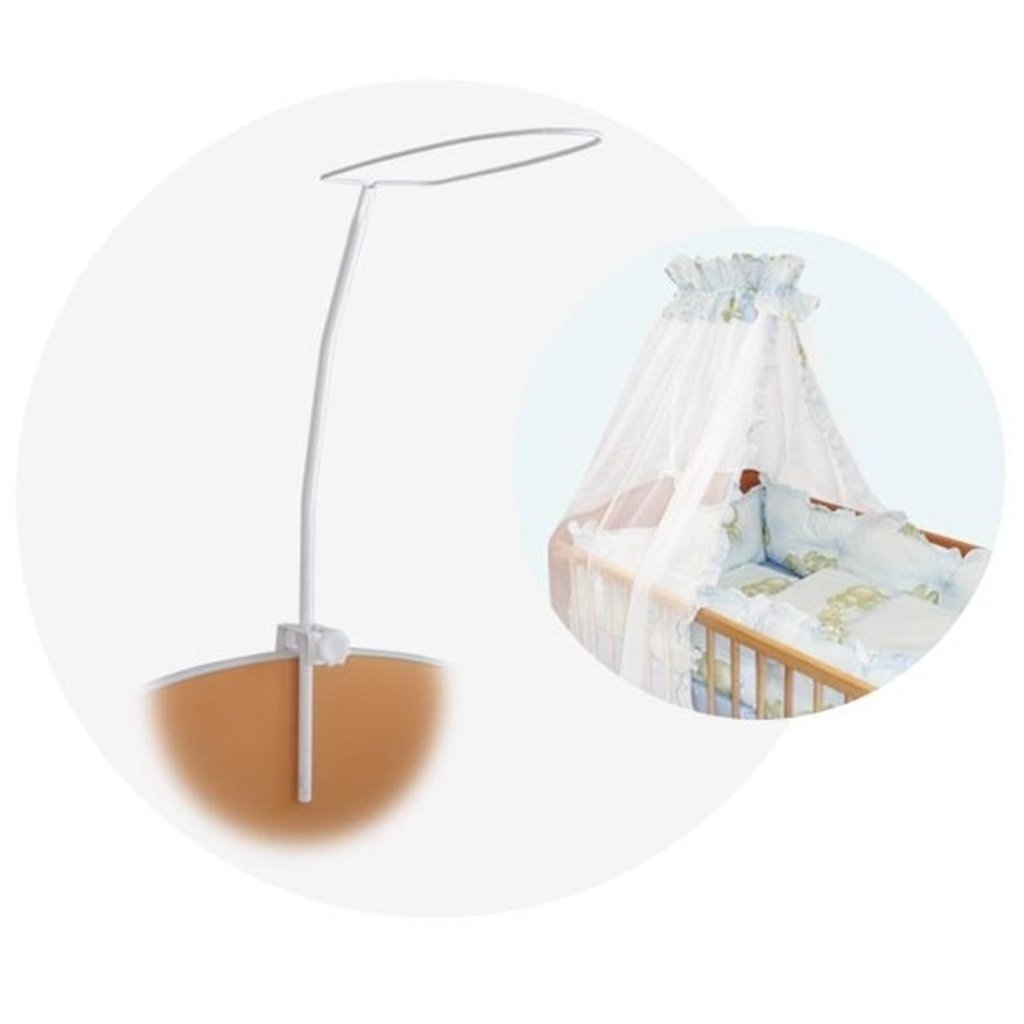
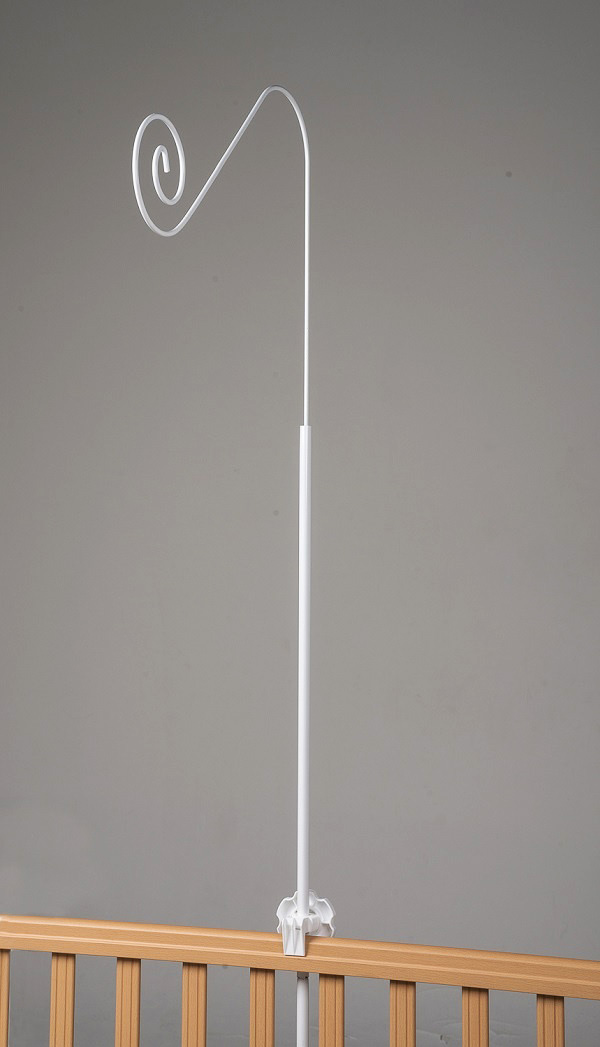
- bearing part of the upper part of the tripod (in the form of a tube with a bend);
- the upper part in the form of an oval or circle (the fabric will be collected on it).
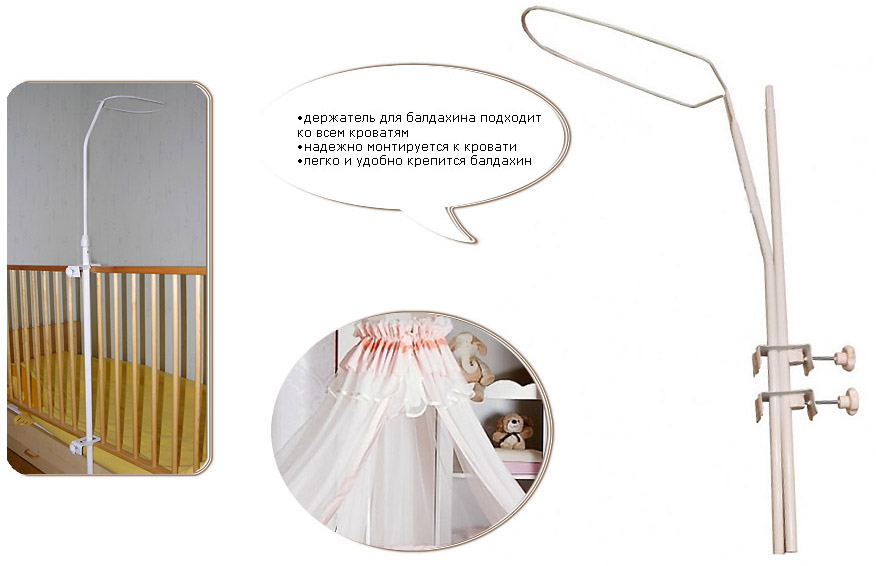
In order to install the frame on a stand, you need to make a minimum of effort. Just connect all the parts together: insert the rod, consisting of 2 parts, into the hole on the platform that serves as a base, then attach the support part and the oval or round holder. Then fix the height of the structure and hang the canopy, straightening the folds.
This option has several advantages over attaching the canopy to the ceiling or headboard. The advantages of the tripod construction include:
- if necessary, it can be easily moved to another place, just rearrange it;
- it is possible to change the height of the bar;
- over time, as the child grows older, the former canopy can be "converted" into a playhouse or tent.
The only drawback is the light weight of the structure, and if there are cats or dogs in the house, they can knock over the frame, hitting it or pulling their claws on the light fabric. For this reason, pet lovers are better off choosing other options.
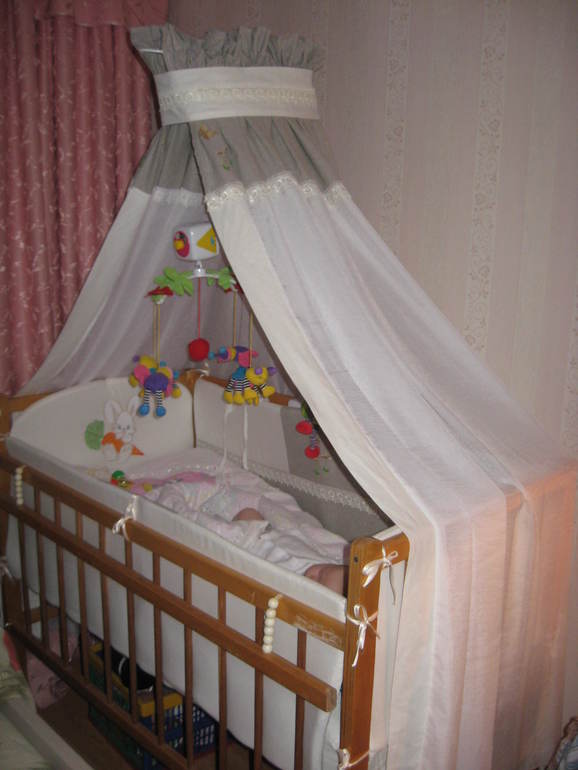
First of all, choose the side of the crib where the holder will be attached. As already mentioned, if the canopy frame is placed and fixed at the head of the baby, its protection will be incomplete - the legs will most likely be open. It is better to fix the holder on the side of the playpen, so that the curtain fabric is evenly distributed over the surface of the crib.
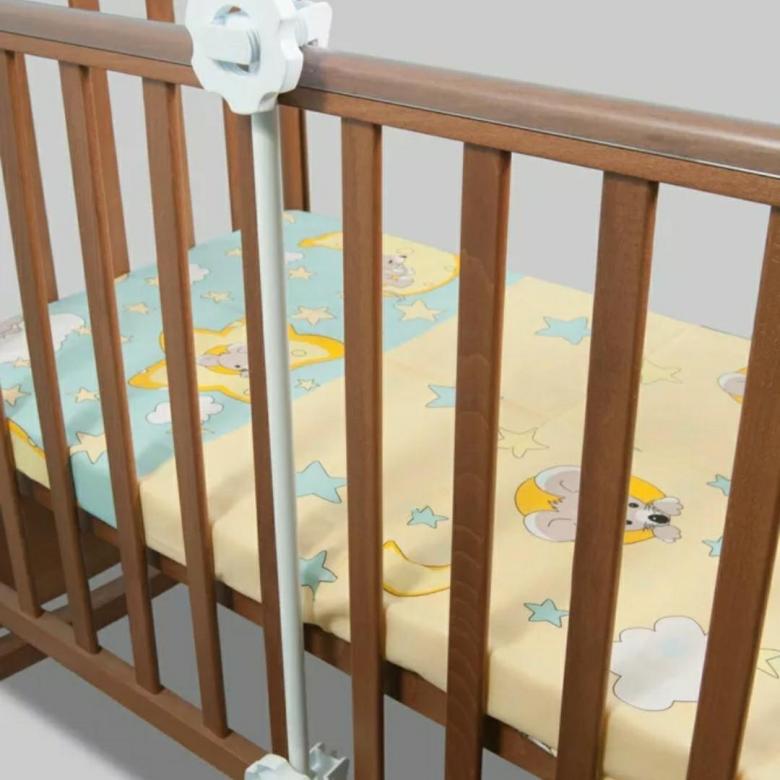
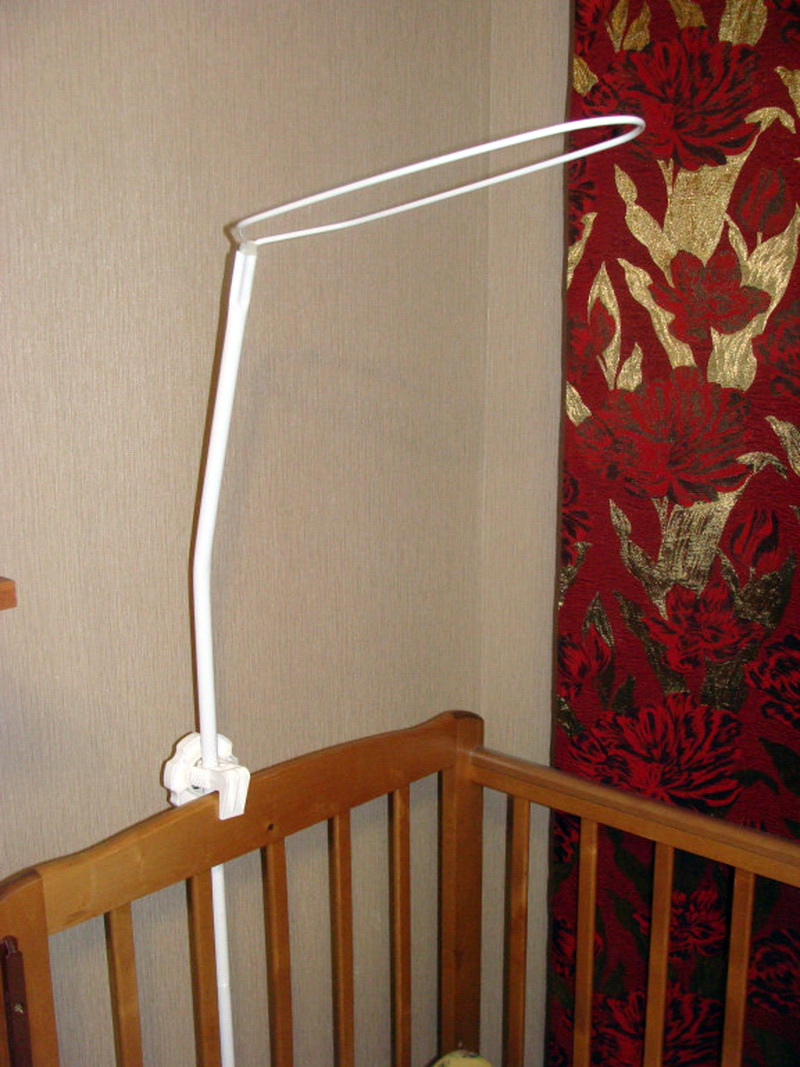
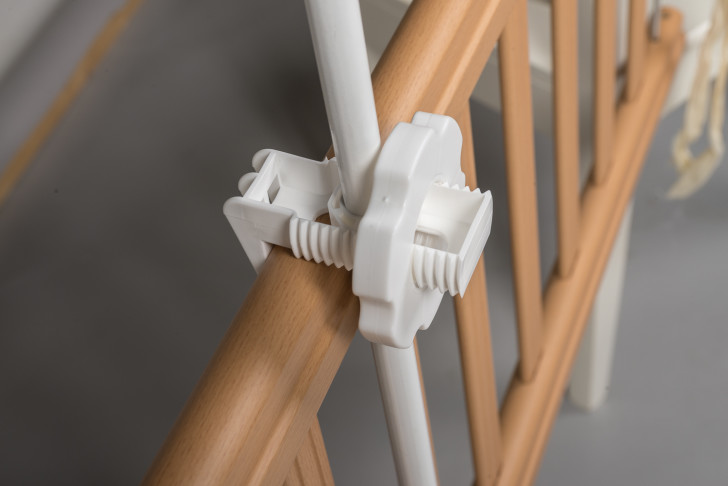 Canopy holder easily attaches to the side of the crib
Having dealt with the structure, we proceed to the assembly of the canopy bracket
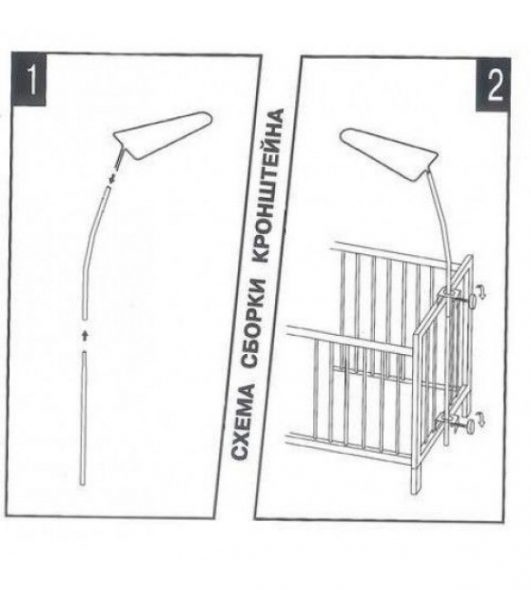
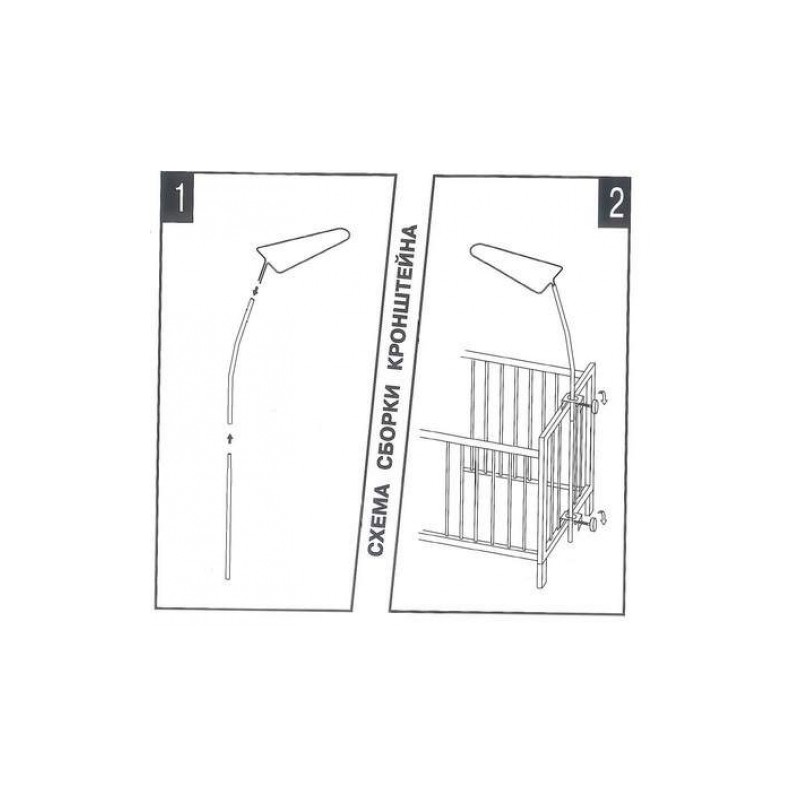
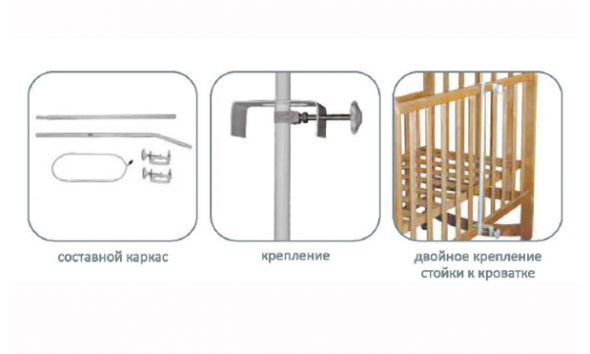
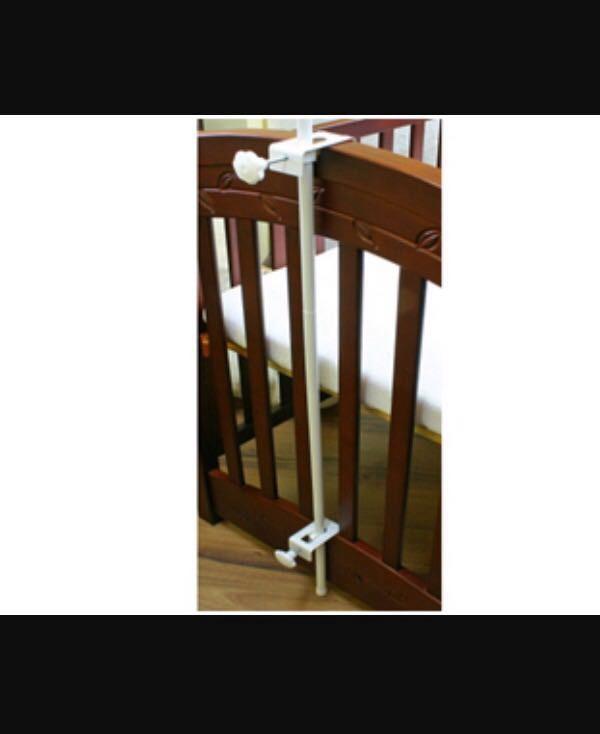
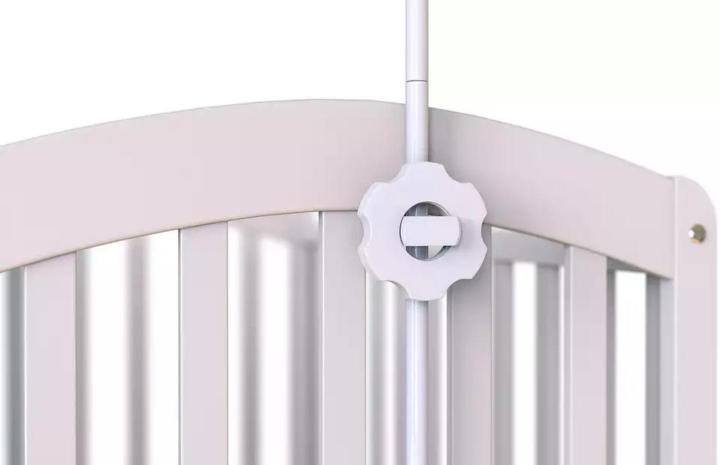
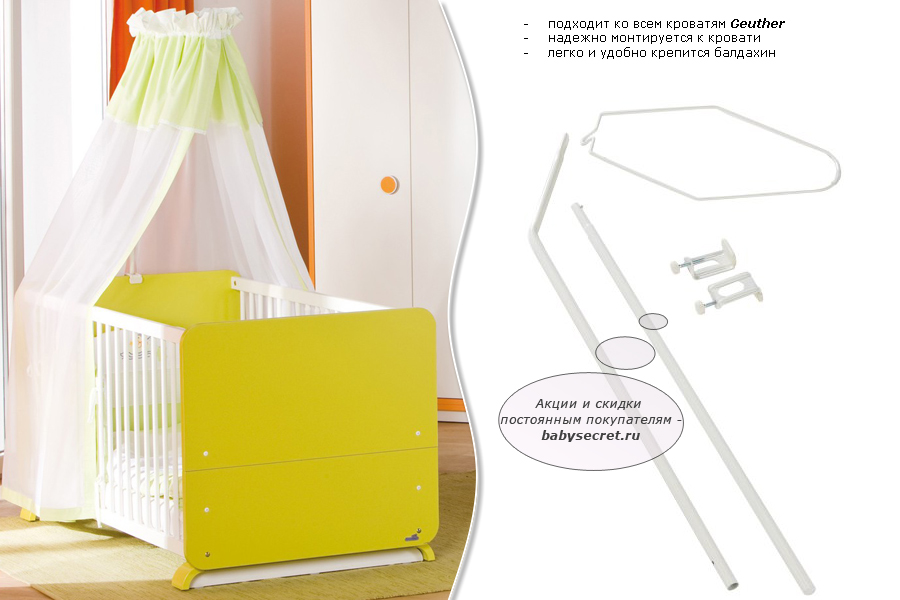
The metal stand consists of two parts: straight and curved. You need to take the straight part of the rack and use the mounting bracket and screw to attach it to the bottom of the side or back of the bed.
Canopy bracket
- You need to carefully slide the fabric into the ring (hoop) located on the second curved part of the metal stand. Spread the curtain evenly over the ring.
- We connect both parts of the rack. And we attach the upper curved part to the crib at the top using the second mounting bracket and screw.
Attaching the canopy bracket
Canopy for baby cot
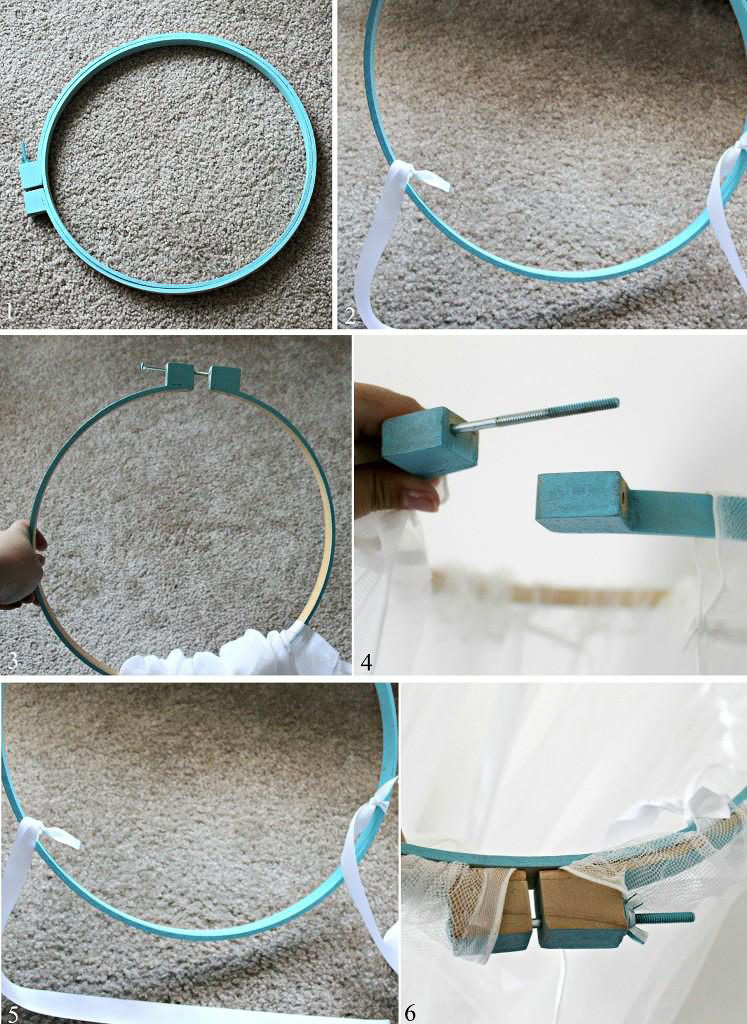
If the house has only a bed, but there is no structure for a canopy, you can create it yourself. The do-it-yourself holder can be made of metal, wood - as it is convenient for anyone.
Do-it-yourself canopy
For this option, you will need:
- 2 wooden slats and one timber 1 m long;
- self-tapping screws for wood;
- dowels;
- fabric 1.5 by 5 m.
Instruments:
- pencil;
- drill;
- hammer;
- screwdriver.
Progress:
- choose the place where the structure will be installed at the head of the bed. We make marks on the wall, 1 m above the head of the bed in the center;
- we drill holes in several places and use dowels to fasten the timber to the wall;
- along the edges of the timber, we fix the slats perpendicularly with self-tapping screws;
- we put the fabric on the installed structure. And we distribute it as we need.
What is a canopy and why is it needed
First you need to consider in more detail what a canopy is.This is a kind of awning made of different types of fabric. Some people prefer to sew a canopy on their own, while others turn to specialized stores.
 A canopy is a canopy that is located above the bed.
Its main function is to protect the child from:
- dust (it is found everywhere, even if the room is regularly wet cleaned);
- insects (especially important in the warm season);
- sun rays;
- extra eyes.
 Basically, the canopy is designed to protect the child from various factors.
Depending on the type of product, it is determined how to install a canopy on a baby cot
It is important that the fabric for him is not dense. Otherwise, the air will circulate worse.
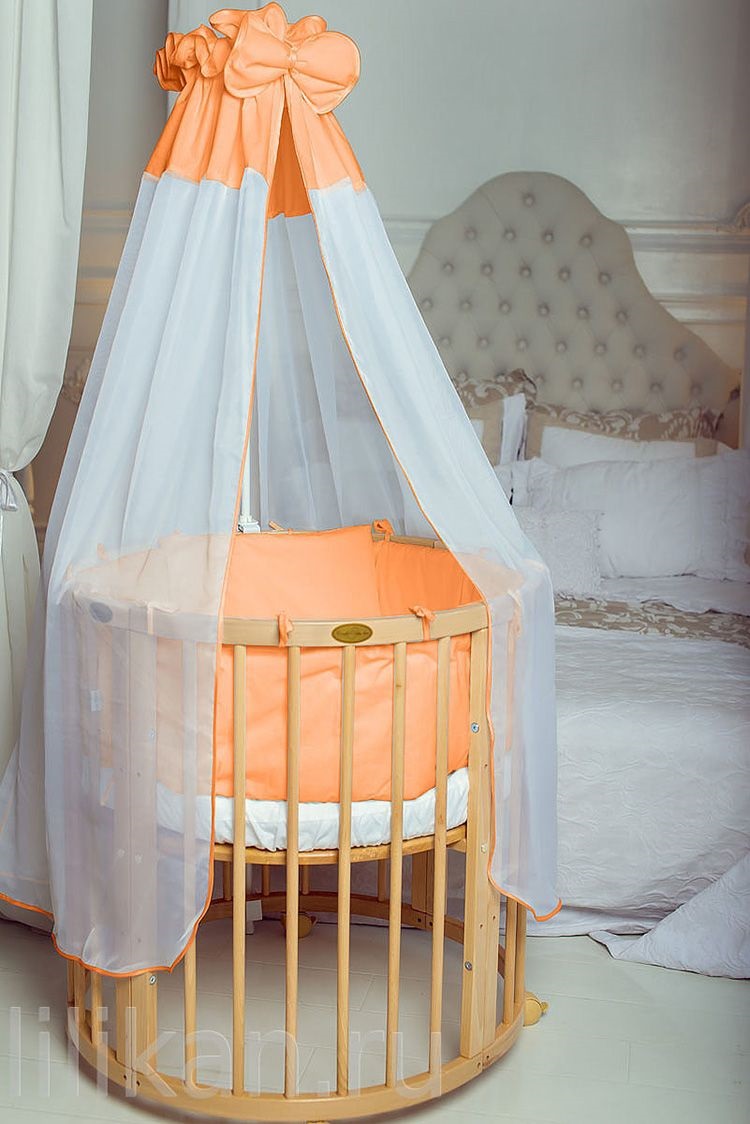 The fabric should not be too dense, so as not to interfere with air circulation.
Choosing a model and fabric
An important factor for decorating a children's bedroom is the canopy model. Each person will have their own style. Of course, any type of canopy has its advantages and disadvantages. And one of the main properties is its ease of use, namely: free access to your baby. It should be comfortable for you to take the baby in your arms and put it back, the fabric should not get in the way and tangle.
To create a unified concept for the design of a children's room, it is a good idea to take care of the choice of the color of the canopy. Its combination with furniture and other attributes in the room will create a comfortable and cozy atmosphere.
Usually, blue and light green tones are selected for boys, light pink, lilac or beige fabric for girls. The universal colors are: white, yellow, orange. Often, the canvas is sewn in calm pastel shades, without causing visual irritation and providing a calm atmosphere. Colors can also be combined.
The canopy is quite to be done by yourself. To do this, you need to decide on the type of fabric, as well as the main purpose of the curtain for the crib. If you want to create protection from external irritants, then light organza, tulle, tulle and other types of delicate fabrics are perfect.
Cotton, coarse calico, linen will create a subdued light and a more comfortable atmosphere. The canvas itself can be changed depending on the season and weather conditions at the moment.
If you doubt your sewing skills, then you can easily get a ready-made canopy. Often a canopy mount is included with a toddler's bedding set
If not, when buying, you should first pay attention to the strength and stability of the structure.
The fastening itself will be hidden under the veil of the fabric, so its appearance does not matter.
Location options
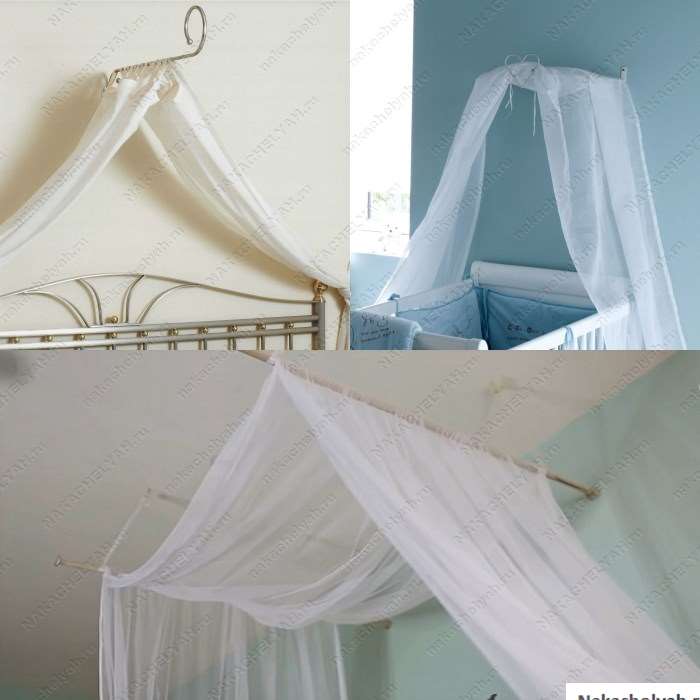
The choice of the future location of the canopy over the bed depends purely on your aesthetic tastes and ideas about beauty. When choosing a location, you choose exactly how the fabric will fall from the holder, and how folds will form on it.
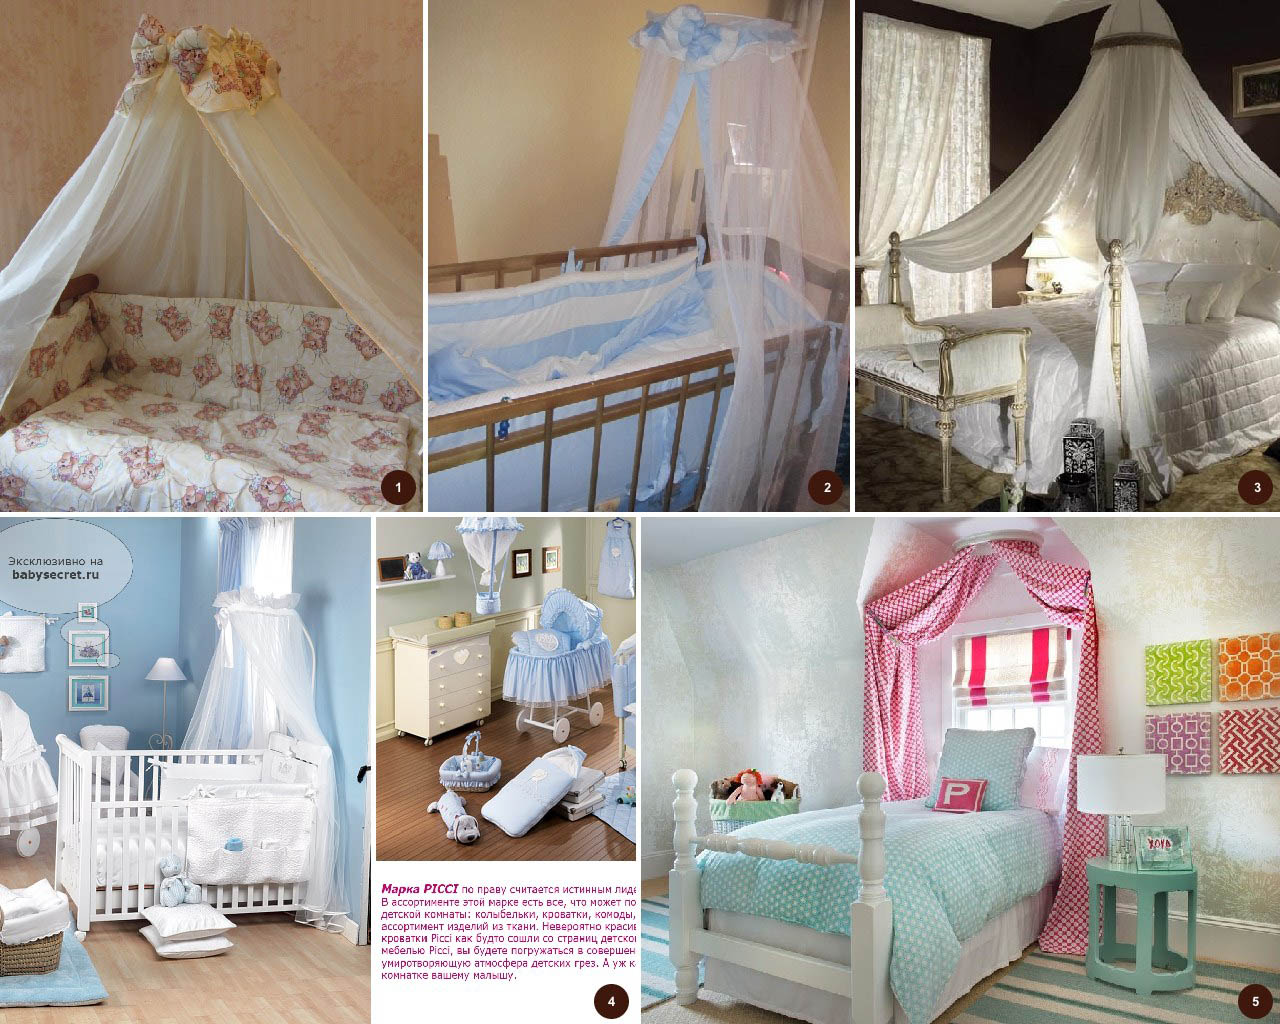
- In the middle above the crib.
At the same time, the falling waves resemble a sharp roof over a small house. Traditionally, this is the "boy" version.
- Headboard location.
The fabric slopes down to the "bylich" at the feet. This option is suitable for girls and older children.
- Along the entire perimeter.
A special frame is mounted, which can be either an independent structure or be a continuation of the crib, fixing on it. The canopy forms, as it were, a separate room, four smooth woven walls and a ceiling. This arrangement is versatile, it is suitable for both boys and girls. The color scheme becomes decisive. By the way, it is this arrangement of the canopy that is most popular today for adult large beds.
The child will often have to be taken out of the cradle and put back, if the fabric constantly interferes, then soon you will get tired of this device, you will take it off and put it away.
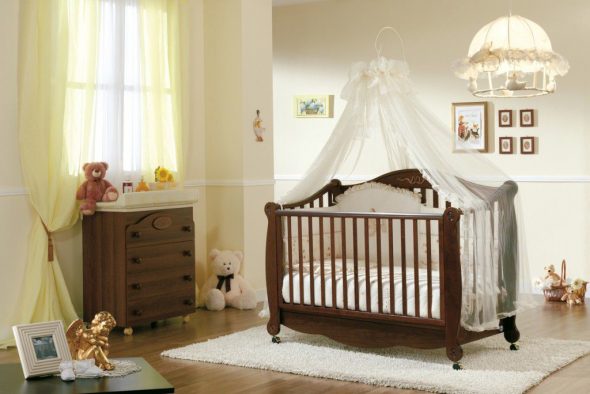
The principle of hanging the canopy depends on the type of ring.
How to sew a canopy for a crib
For a crib, a canopy can be sewn yourself. It all comes down to your ability to handle fabric and the presence of imagination. Developing a plan comes down to determining the desired end result.
A canopy for a child can be made by hand.
An algorithm of actions is offered to your attention:
- We decide on the type and desired appearance.
- Several subsequent ones will depend on the previous point: the development of the scheme, the selection of material and tools for work.
- When everything is ready, we proceed to cutting and sewing the future canopy.
 It is necessary to adhere to a certain plan.
It is important to consider the size of the bed and the possibility of fixing the future canopy. It is proposed to familiarize yourself with a specific example with the rules for the implementation of sewing a canopy with your own hands
Scheme and dimensions
The lengths of the curtains depend on the chosen method of fastening in the future. You can independently, using a tape measure, determine the desired length / width of the segments. Suppose the canopy will be attached over the crib with a cornice. You need to measure the distance from the intended location of the frame, observing the angle of inclination to the floor or the bottom of the bed.
 The size of the curtains depends on the way the canopy is attached.
Choose the width according to the length of the bed (if we choose the dome type). In other words, both pieces of fabric should cover the entire area of the bed with a margin of width and length.
Choice of tools and material
Objectives determine the choice of material. For example, if you plan to provide protection from light, then the fabric should be dense. The decorative function is quite feasible due to the transparent fabric.
 The transparent fabric has a decorative function.
The same goes for the color options. For girls, they choose gentle tones, often a pink shade. This will create a cozy atmosphere that will delight the child and give a feeling of warmth.
As for the tools, their list may differ, depending on the type of product:
scissors (make sure they are sharp);
pencil and paper, tape measure (you will need it both at the stage of developing the scheme and when cutting out);
threads and a needle (preferably thin so that the seam is invisible, it is important to choose a thread to match the fabric);
additional materials (stripes, stickers, there are a lot of options).
When you have stocked up with everything you need, you can proceed to the creative process - sewing. Remember the main rule of 7 times measure 1 cut.
The process of creating a canopy
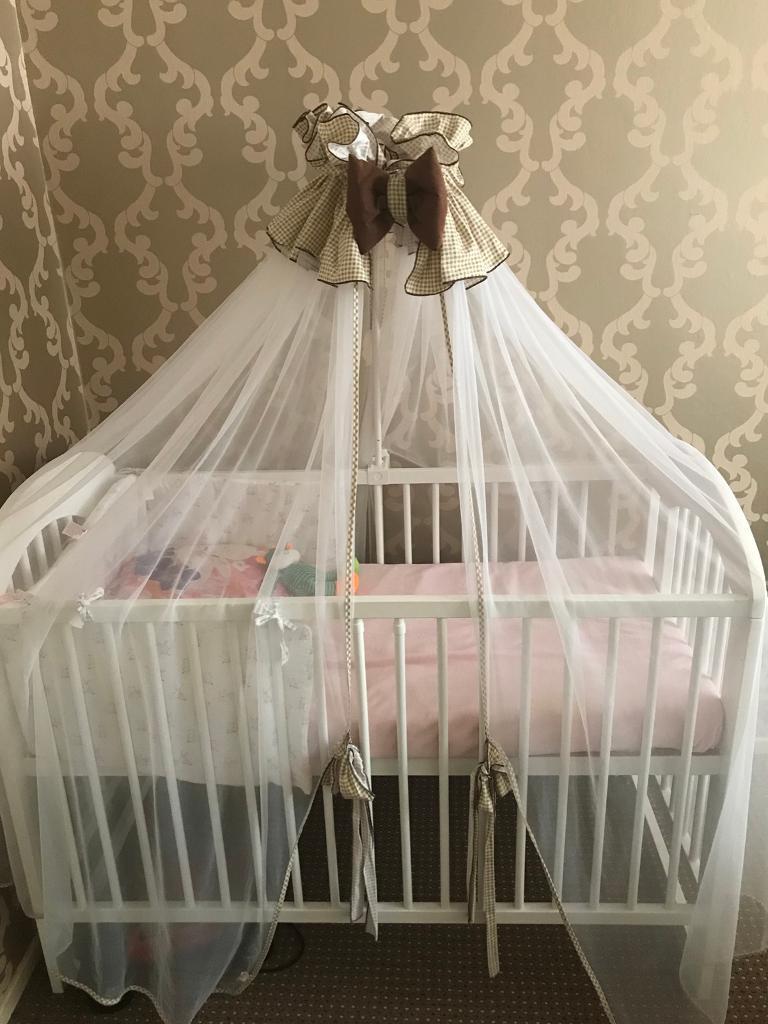
The simplest canopy looks like an ordinary canopy, cape
And it is not important what it will be, but whether the retainer is equipped correctly. How to attach a canopy to a crib is a priority issue that needs to be addressed before starting work
The fabric is sewn along the entire length with each other on one side, or does not interact at all between the halves (the easiest way).
Let's consider the last option as an example:
we turn the upper part of the fabric and make special loops (they can be purchased or made from nylon thread, fishing line, etc.), with their help the future product will be hung on rings or hooks so as not to lose the opportunity to move / move the curtains;
if you do not plan to cover all 4 sides of the crib, then you can sew on top of the pieces of fabric and hang out through a suspended frame or a holder on the handrail (it doesn't matter);
we decorate with decorative elements: ribbons (along the bottom or along the movable opening) are sewn, all kinds of butterflies and cloth toys (optional) can be pinned with a hairpin.
 The process of making a canopy is quite simple.
In fact, you can turn the canopy into a real work of art.
Only desire and minimal possession of scissors, thread and needle are important.
Sewing master class
When forming a pattern, all the details must be sewn together. First of all, processing of the bottom and side fabric sides is required.When complementing the product with lace or satin ribbon, you need to sew the braid immediately after processing the edges, since after the skirt is attached, this procedure will be more difficult.


For a canopy with a skirt, you need to take a wide strip of fabric and sew the main hinged fabric into it. Next, you need to distribute the seam so that it is closer to the top. To do this, ironing the fabric is necessary so that the seam with the fastening of the main fabric is closer to the top. The skirt should be 15 centimeters wide and up to 60 centimeters long. Finally, you need to fix the product in a ring.
Why is a canopy needed?
A light and beautiful curtain over the cradle helps to solve several tasks set for parents:
- A translucent blanket allows you to protect your beloved child from bright light, drafts and dust.
- The canopy also protects against attacks from various flying insects, such as mosquitoes.
- Such a cape allows you to protect the baby from prying eyes.
In addition, the curtain on the bed acts as a decorative detail that adorns the nursery
Quite often, young mothers themselves sew such a curtain, taking into account their own preferences and individual requirements for this element of the interior.
Options for how you can install a canopy on a crib
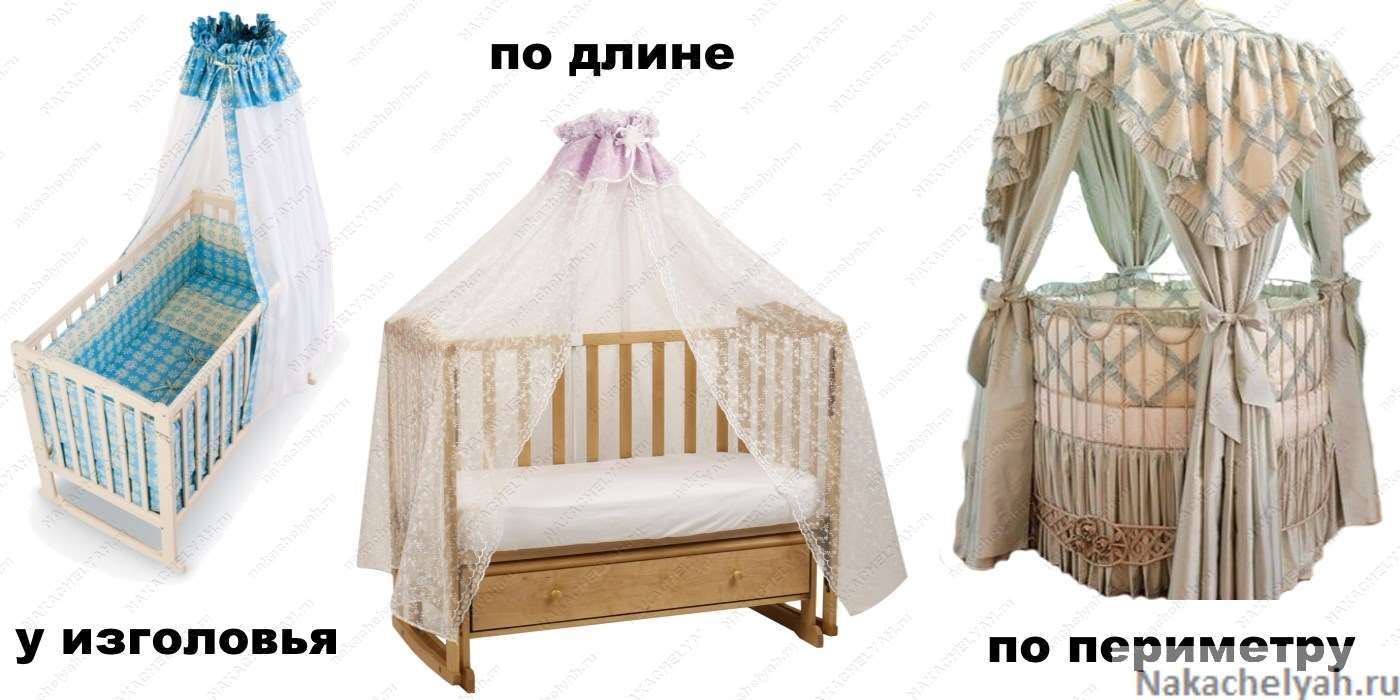
Designers and children's specialists distinguish between three main options for how a canopy can be installed:
- In length. The mount is installed in the center of the length of the side of the crib, near the wall. Thanks to this, the product comfortably covers the entire sleeping place, while the baby is completely protected from dust and light. With this option, it is very convenient to take a child in your arms.
- By width. In this case, the canopy is attached at the head of the crib. This option is great for older children, when they are very interested in what happens outside of their sleeping place. Despite the fact that the canopy with this option covers only a quarter of the bed, this design looks very nice.
- Along the perimeter. The rarest option, when a special frame, equal in size to the parameters of the crib, is attached to four posts, then a canopy is installed. This mount is convenient for babies who have to get out and put in the crib.
In any case, with a canopy, the child will become much more comfortable and calmer to sleep, because he will be protected from many irritants.
Features of the standard bolted metal structure
If a secure attachment is required, bolt attachment is the best option.
Before deciding how to attach the canopy holder to the crib, you need to prepare the tools: a drill, a drill of the right size, bolts and a screwdriver.
After that, you need to decide on the type of canopy. It can be designed for a central location, or it can involve placing it at the headboard. After the attachment point is determined, you can get down to business.
The sequence of actions is something like this:
- A pencil marks a place on the side of the crib.
- A hole is carefully drilled (usually two).
- The straight part of the rod is inserted into the mounting brackets.
- The entire structure is attached to the designated place and fixed with screws, the protruding parts of which must then be closed with plugs to avoid injury.
- After fixing the fabric on the holder ring, it is connected to the curved part of the bar.
- Combine the straight and curved part of the bar.
- After aligning the structure, the height of the canopy above the bed is adjusted.
What is the difference between canopies on a crib for newborns
You can make a conditional classification, which will form the basis for the differences between the canopies. Of course, there are a lot of models, they will differ in such criteria as design, method of attachment, size, fabric, holder, etc.
How the canopy is attached:
- Fully enclosed bed structure.The installation of such a canopy falls on the center, on a special holder, and therefore it can cover the entire crib.
- Mount at the head. This is an option for older children. It covers only the upper part of the bed, and it is only possible to decorate it. This creates a kind of protection for the child, with only partial limitation from external influences.
- Perimeter mount. This is the name of the royal beds, they look very similar to an adult bed with a canopy. You can create a princess bed using such a canopy.
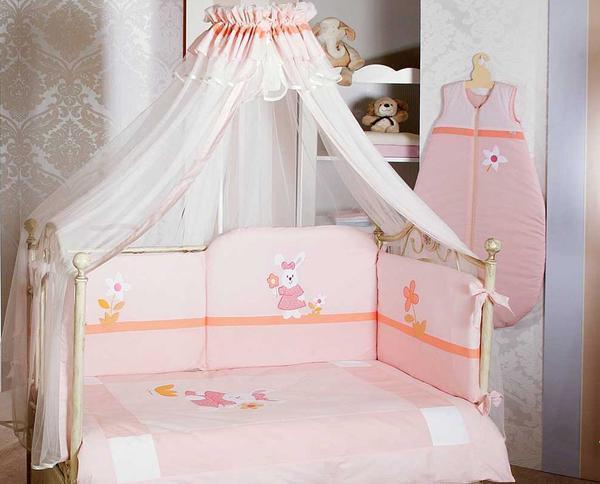
What the fasteners will be depends on the preferences of the parents and the age of the child. It may no longer make sense to decorate a teenage bed like this, like a grown-up boy's bed. But installing such a canopy on a baby's crib is a beautiful solution.
Canopy holder assembly instructions
When buying a canopy, carefully check whether the equipment is complete, according to the attached product specification.
The instruction that helps to assemble the holder for the canopy "Karapuz" is as follows:
- Taking into account the location of the crib, choose the place for installing the holder (end or side walls).
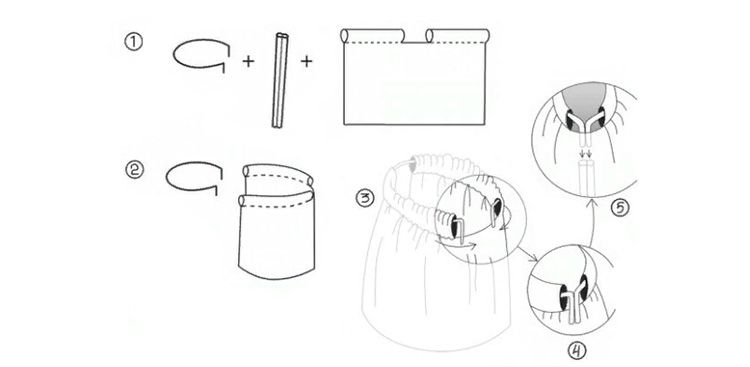
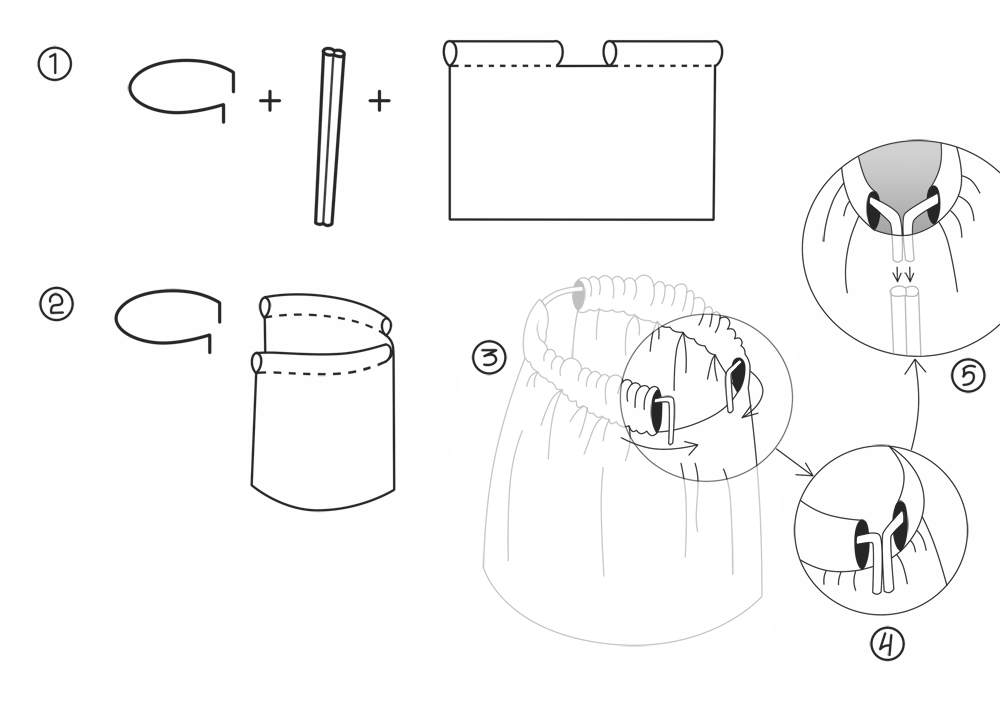
- Clarify the method of attaching the material to the tripod. Usually, the ring for hanging the fabric can be of a peel-off type or a solid one. The material is attached to the solid ring with Velcro or specially made ribbons. For attaching to the separating ring, you need to make a special sleeve on the fabric.
- Next, you need to attach the holder to the back of the bed using special brackets and screws.
- All connections must be fitted with decorative plugs, which also perform a protective function against the possibility of injury.
- Then you should adjust the height of the structure.
After all assembly work, it is necessary to check the strength and reliability of all connections in order to avoid accidental fall of the holder.
As you can see, both dad and mom can assemble the canopy holder. And it's easy to make such a device with your own hands, the main thing is that the holder is made of material safe for the child's health.
Making a bedside curtain
Experienced seamstresses can make a pattern on their own, and beginner needlewomen are advised to use a ready-made drawing in the form of a rectangle with one slightly rounded bottom edge. Necessary materials:
- pattern;
- 3 meters of transparent monochromatic material, 1.5 meters wide;
- 1 meter of colored fabric 20 cm wide;
- lace;
- narrow satin ribbon - for processing the edges;
- threads to match the fabric;
- sewing machine;
- decorative large bow.
After preparing the materials, you can start making a beautiful cape.
- Initially, you need to spread the base material on the floor and cut it in two. Next, you need to fold the cut parts face inward. On one edge, you need to attach a pattern, outline it and cut off the marked rounding with scissors.
- Then you need to sew the center seam, leaving about 30 centimeters intact on the top side, and process the edges with a satin ribbon. On the upper part, markings should be made using chalk or soap, drawing two straight lines at a distance of 5 cm and 20 cm from the upper edge.
- After that, using a sewing machine or manually using a needle and thread, it is necessary to gather the upper edges of the product parts (up to a width of 1 meter). A colored decorative piece must be similarly cut in half, and then cut short cuts on one side.
- Further, the fabricated sections must be swept along the marked lines, while simultaneously folding the fabric. During this, the processed cuts should be placed close to the center seam and stitch along the basting. Now you should process the top edge of the cape with a satin ribbon. And the side parts of the product and the bottom need to be trimmed with lace braid.A decorative bow must be fixed in the place where the front sides join (from above). By the way, if you wish, you can make it yourself from lace.
Mobile canopies
Such holders are most popular with young parents, due to the possibility of installing the entire structure directly on the crib. At the same time, the ceiling and walls are not used, which does not spoil their appearance after dismantling the device.
The main advantage of the mobile canopy is its lightness and ease of attachment. But if there are pets in the apartment, then it is necessary to try to protect them from getting into the room to the child, since playful cats or puppies can overturn the entire structure.
The holders themselves do not add decorative decorations to the interior of the room, since they are completely hidden under the canopy of the fabric.
How to hang a canopy on a crib
It should be noted right away that you can fix it on a crib in different ways. It all depends on the type of attachment. The mounting method depends on what the holder will be.
It is worth noting that the holders can be not only different in shape, but also made of different materials - plastic or metal.
The canopy is attached to the crib using the attachment:
- mobile;
- stationary;
- made around the perimeter of the crib.
Also, a plus of such a model is its lightness. It is lightweight and easy to attach. True, it has such a holder and disadvantages. First of all, it is mobility. If you constantly cling to such a holder, then it can be completely dumped. A grown-up child will definitely want to pull him towards himself. This is not particularly dangerous, but it is still undesirable.
Also, mobile holders do not have a decorative function. They do not decorate anything, as they are completely hidden under the canopy.
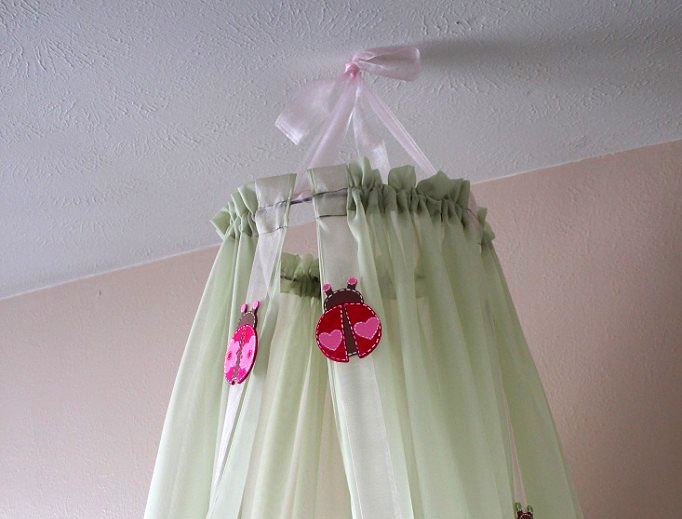
There is another way of fixing - to the ceiling. This option is suitable if you are sure that the baby bed will stay in one place without rearrangements for at least a year. This method of fastening is considered the most reliable, since the fastening bolts will not be subject to the constant external influences that are inevitable when they are inside the arena.
First of all, decide on the location of the bed and canopy. Provide yourself with a free approach to this place.
- Mark on the ceiling where the cornice will be located - a metal strip.
- The cornice is attached to the ceiling with self-tapping screws.
- The canopies are tied to the cornice with ribbons or Velcro.
- Further, the metal cornice can be disguised with decorative ornaments, bows.
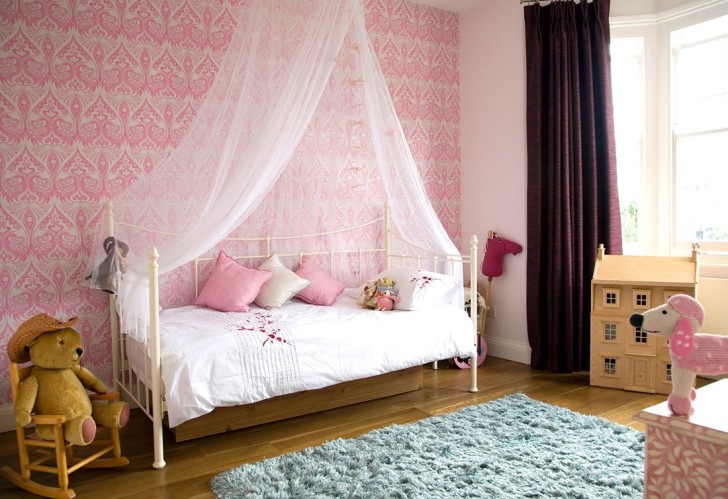 It makes sense to fix the canopy on the ceiling if the crib is not expected to move for a long time
This option is suitable for those who do not regularly rearrange furniture in the room. Otherwise, the constant movement of the structure from place to place will give you a lot of trouble.
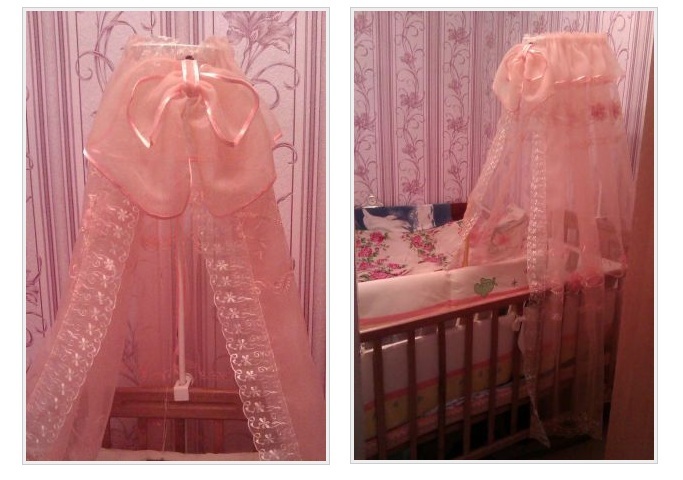
After that, you just have to straighten the fabric, evenly distributing the folds. If you have done everything correctly, putting together your canopy, you will have a fabric “house” above the crib.
When the structure holding the fabric is assembled and the installation is over, all that remains is to hang the canopy over the crib. How to dress and secure the fabric?
If you purchased a ready-made canopy, there will be no problems: just follow the attached instructions. But in cases where you sewed the canopy yourself, the canopy is attached in different ways, you can choose one of the following methods:
- sew ribbons to the upper edge of the canopy, which are tied to an oval or round holder;
- use the method of fastening with Velcro sewn to the canopy;
- put the fabric on the frame, collecting it under the structure with an elastic band or tape.
When using the canopy, do not forget about the timely washing of the fabric, otherwise this device will not be useful, since it will collect a huge amount of dust in the folds.
Beautiful protection
The technique of arranging a sleeping place with a light cape attached to the ceiling came to Europe from Ancient Persia. At some point, a person realized that on a hot summer night it was not very convenient and pleasant to protect himself from insects by covering his body with a cloth. This is how the first canopy was invented.
For centuries, both ordinary people and members of the nobility have used this practical tool. At the same time, of course, the items housed in the royal bedchambers were distinguished by their beauty and luxury.
A canopy is one of those things that, in addition to the aesthetic component, carry a purely functional component. Such things never go out of furniture fashion, they can be transformed, the demand for them can increase or decrease, but they were and will be. Today, this element of the interior returns to widespread use. However, it is intended primarily for cots.
Choosing a style
Why is it important to choose a canopy style? Do not think that they are all the same and that it is equally convenient to use all of them. Not really. There are a lot of styles
It is clear that each has its pros and cons, but you need one that is convenient for you. The most important thing is that the fabric does not constantly rotate under your hands. Nothing should bother you from putting the baby in the crib and then taking it from there.
There are a lot of styles. It is clear that each has its pros and cons, but you need one that will be convenient for you. The most important thing is that the fabric does not constantly rotate under your hands. Nothing should bother you from putting the baby in the crib and then taking it from there.
Pay attention also to the length of the free edge. It should reach the legs of the crib. This is necessary so that the product can perform its role well, that is, do not let midges and dust inside the crib
This is necessary so that the product can fulfill its role well, that is, do not let gnats and dust inside the crib.
You can also match the color of the canopy to the design of your room. It is good if it will be combined with other furniture. This will make the nursery very cozy.
If the child's room is very sunny, then you can pick up a canopy made of medium-strength fabric. She will protect the baby from the scorching rays. In moderate light, it is better to use a piece made of lightweight material.
Assembly and installation of the mount
- Before purchasing a curtain holder for a playpen, be sure to read the assembly instructions.
- Choose a ceiling canopy only if you are confident in your abilities and skills. This is undoubtedly a beautiful and reliable option, because the folds of such a canopy will completely cover the arena.
- If in doubt about the first option, get a simpler tripod that is screwed to the side of the crib. Such a structure can be easily and easily assembled and disassembled by every young dad. At your discretion, it can be installed on any of the four backs of the playpen.
There are many options for mounting protective children's curtains: the canopy is tied to the holder with ribbons, thrown over the fastening ring and fixed with special elastic bands. Children's stores offer a wide range of tripods and frames. You can mount and hang a children's canopy by following the pictures in the attached instructions or by watching the video on the Internet.
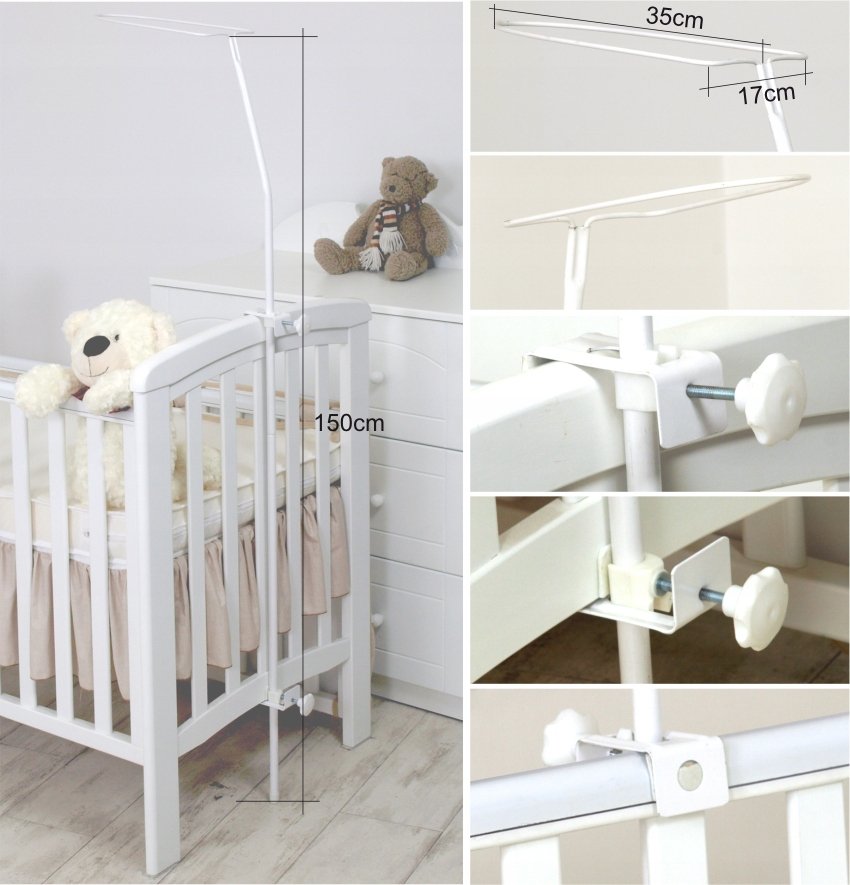
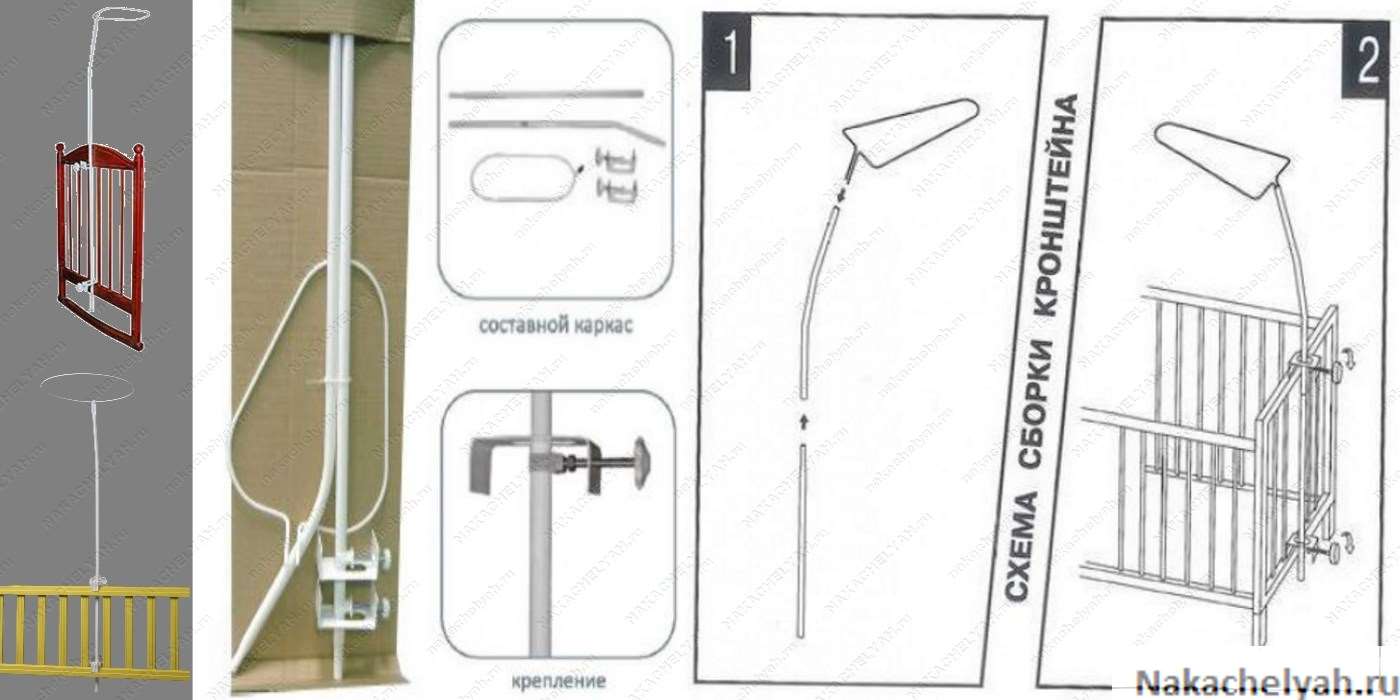
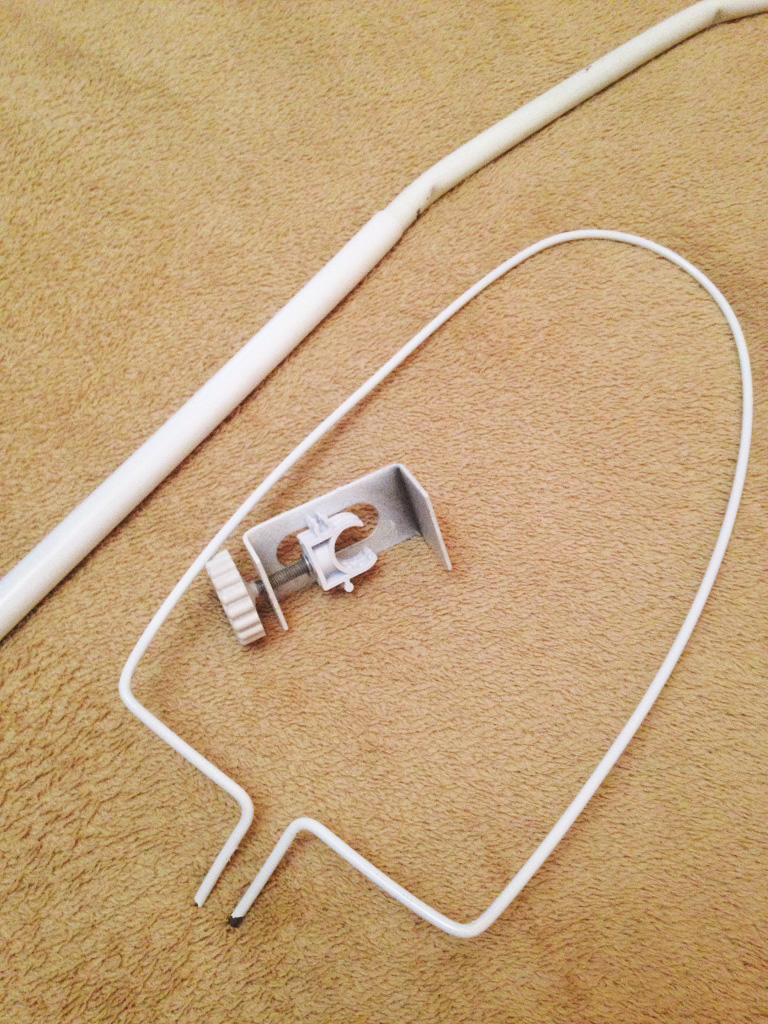
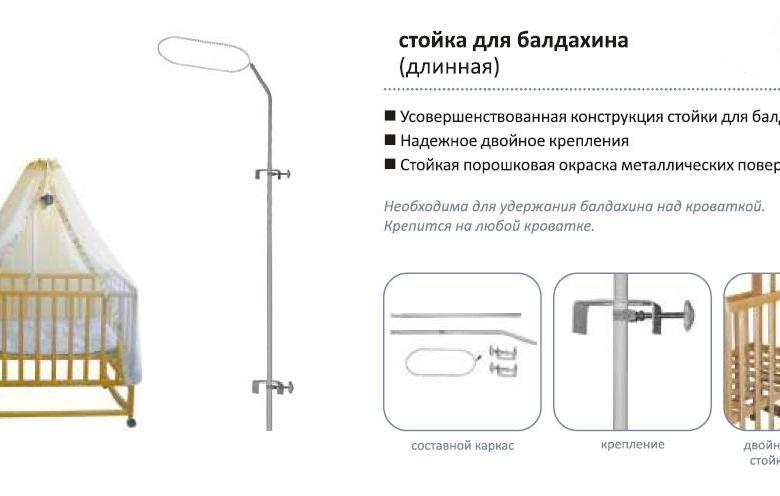
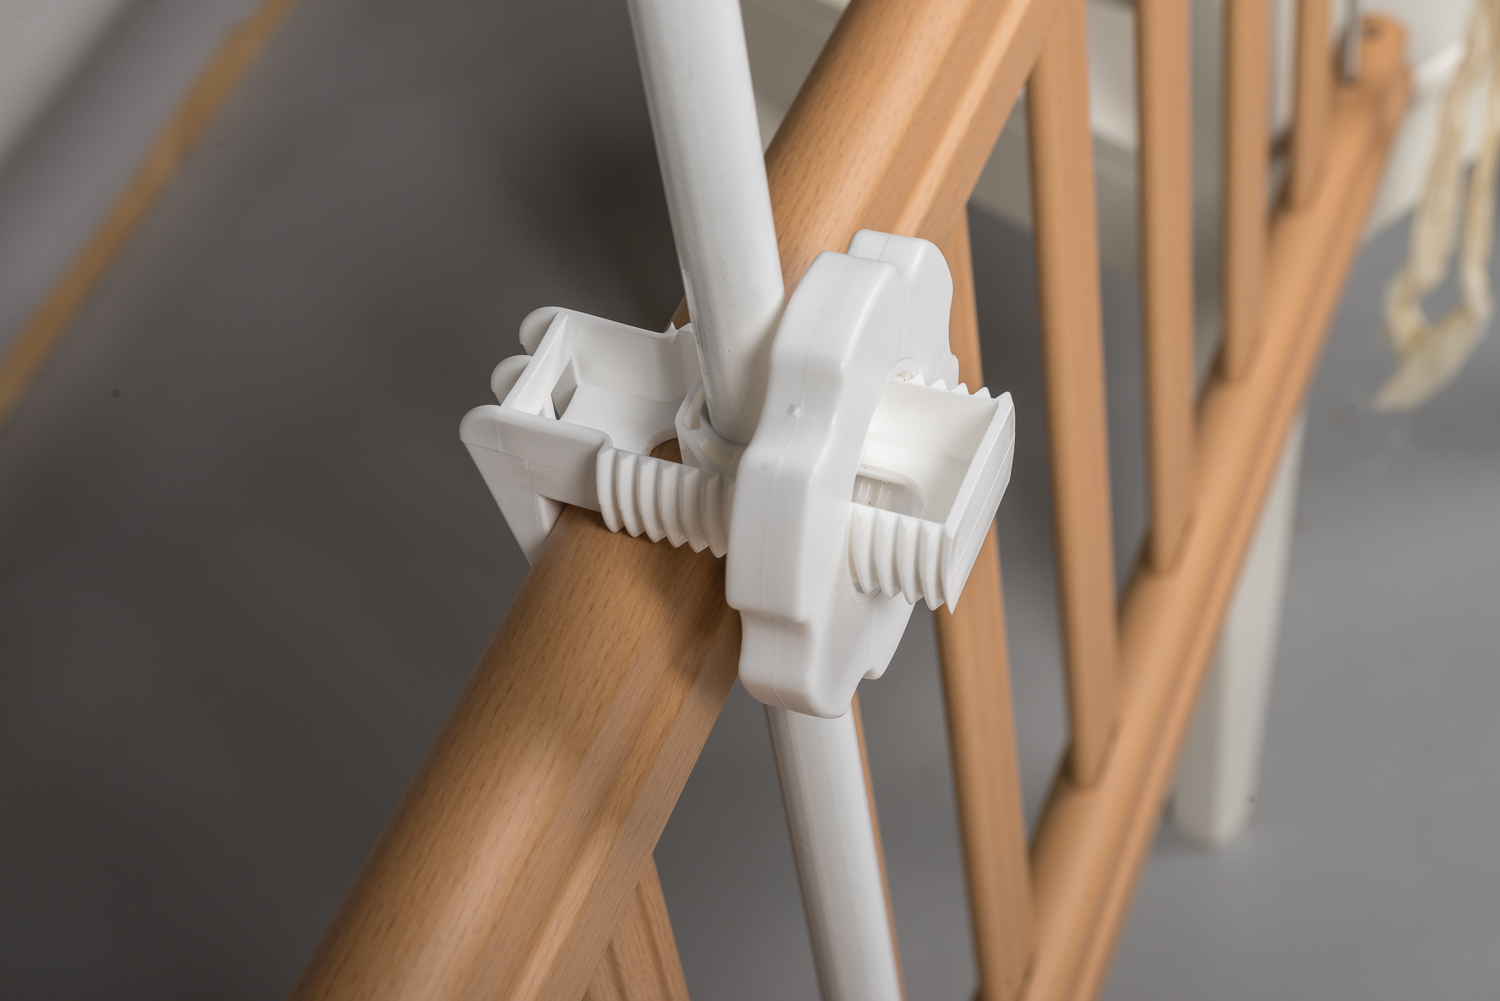
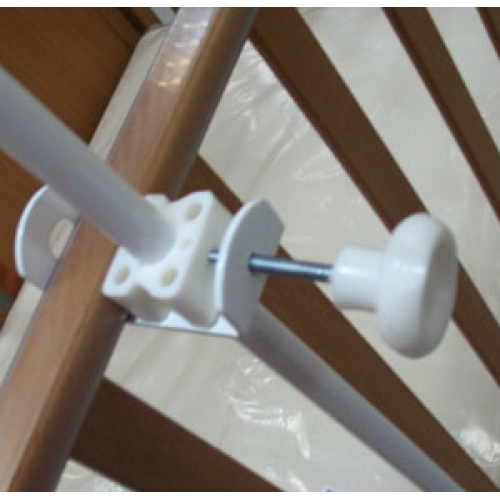
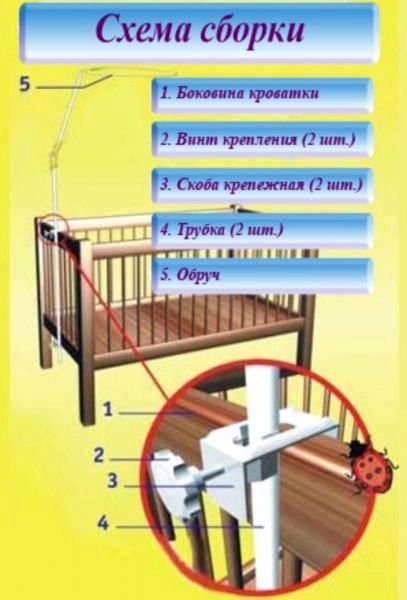
The canopy attachment structure includes a straight and curved stand, two clamping brackets equipped with mounting screws, and a special ring on which the canopy is put on. The clamping brackets are designed to fix the holder to the crib.
It is necessary to determine the location of the bracket attachment. It can be fixed both on the sides of the bed and at the headboard. The choice depends on the location of the baby's crib. If the long side of the bed is adjacent to the wall, then the holder for the canopy is best positioned on this side.If there is a narrow side of the crib against the wall, then the best option would be to assemble the rack on the back of the bed. The appearance of the canopy does not change from the method of attachment.
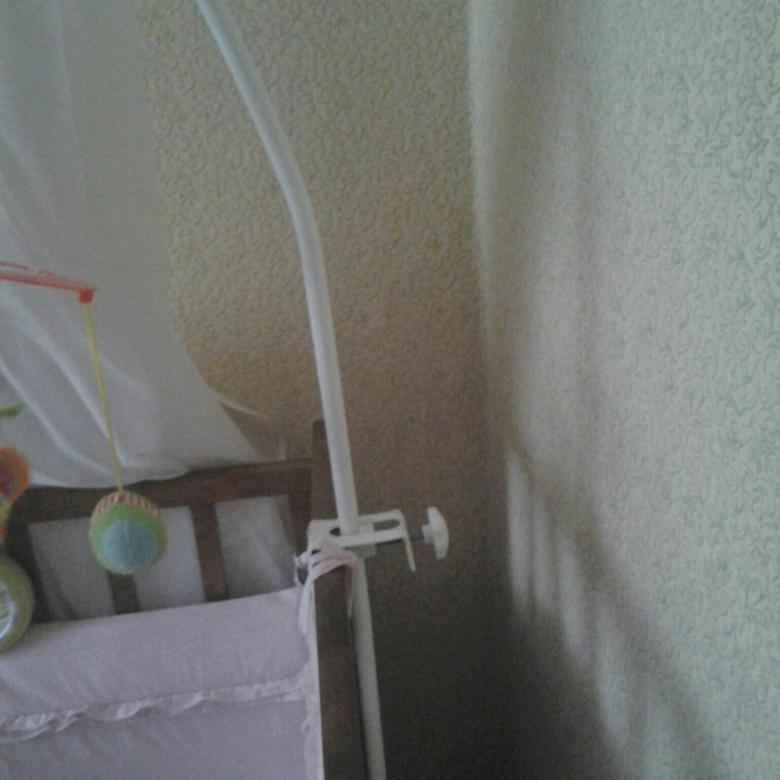
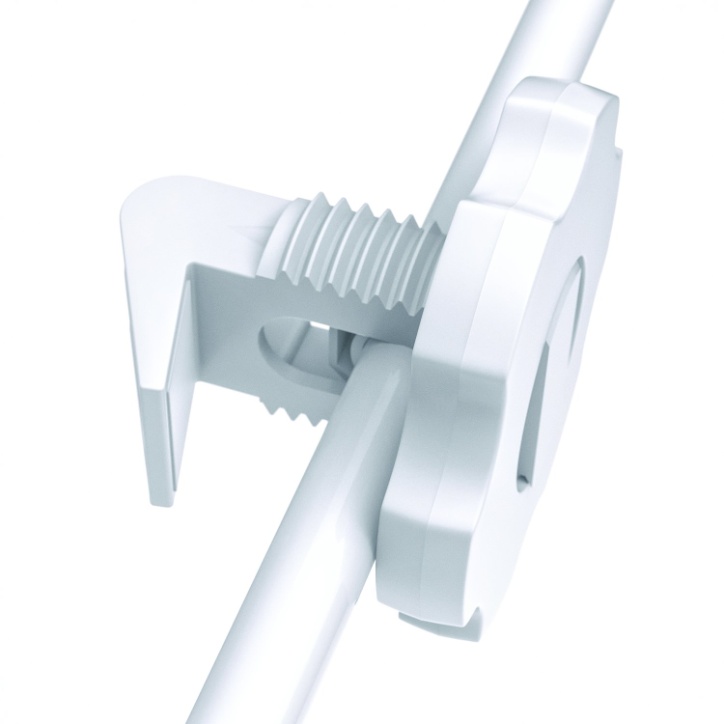
The holder is fastened using a special clip.
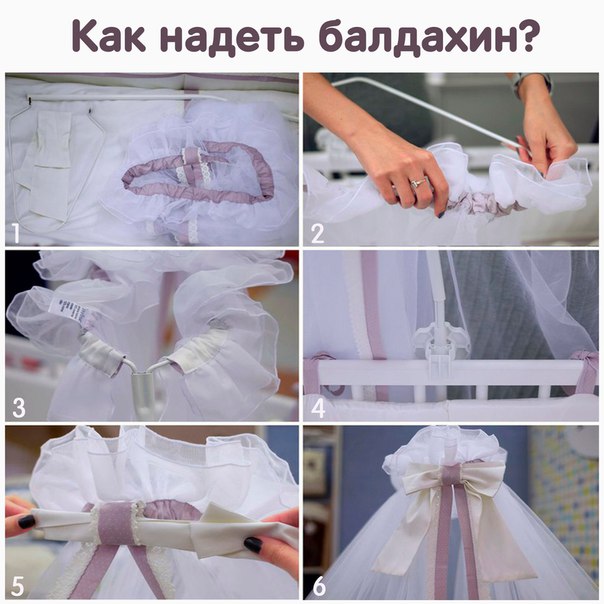
Using the clamping bracket, fix the lower straight part of the holder to the crib with the fixing screw. Remove the upper part of the bracket together with the ring. Usually the design of the ring has special antennae bent upwards, closed with an elastic band. Remove the elastic to fit the canopy over the loop of the holder.
Insert the canopy into the ring and put on the elastic again. Spread it out gently around the ring. Insert the ring into the curved top of the bracket. Pass the other retaining clip. Connect and firmly lock the bottom and top of the holder. Tighten the mount on the side of the crib.
According to the instructions, the holder for the canopy is screwed with screws, but based on practice, it is safer to drill holes and firmly attach the structure through them. Otherwise, the growing child can pull the edge of the canopy and be injured by the parts that have fallen off.
Tips for installing a canopy on a baby cradle
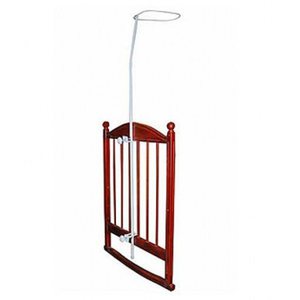 First, it is worth choosing the place to install the canopy. Whether the bracket will be on the wall, ceiling or on the side of the bed.
If you attach the canopy to the side of the bed, it will be possible to cover the bed completely.
If you put a cape at the head of the bed, then this will make it possible to cover the berth only partially. This version of strengthening the canopy will rather serve as a decorative element in the room than to protect the baby from external factors.
Before you can finally install the canopy, you need to assemble the full-length bracket. As a result of these actions, you can pre-set the desired height of the structure above the cradle.
For the final installation of the structure with your own hands, you should connect all the parts: fix the straight and bent parts of the tubes, insert the canopy ring. Fastening the canopy with your own hands is performed simultaneously in two halves of the ring.
It is necessary to insert the ring into the curved tube, pass the second fastener through it, then put the structure on the straight tube and tighten the fasteners to the end. Then you should correct all the irregularities and give the canopy a neat look. That's the whole process of making a canopy. Thus, each parent is able to give their baby's sleeping place comfort and coziness with their own hands.
If all the described instructions and recommendations are followed correctly, the resulting structure will hold on tightly, even if the crumb suddenly wants to pull on the fabric canopy. Guaranteed - the product does not threaten the life or health of the child.
Of course, not all parents like these designs. But what could be better than the presence of notes of a fairy tale, magic in a newborn's room, especially when all this is done from the heart?
Advantages and disadvantages of a canopy over the baby's bed
As you can see, in most controversial statements, the canopy still wins. Let's sort out all its advantages and disadvantages "on the shelves":
pros
Minuses
The canopy protects the bed from drafts and a working air conditioner. You can unfold the curtain so as to protect the child as much as possible.
If the canopy is not properly secured, it can fall and scare the child.
Children can tug on the curtains, so it is important to make sure that the baby cannot reach the fabric.
The canopy protects the bed from dust from the street, the ingress of animal hair and plant pollen.
The canopy collects dust. If you do not wash it in a timely manner, the child will suffer from an allergic reaction.
The curtain prevents glare from a window or chandelier from entering.
The curtain prevents the entry of blood-sucking insects and flies. This is especially true in regions with hot climates.
You will not see a kid covered by a curtain from some corners of the room.
Finally, the canopy is just beautiful
And don't pretend it doesn't matter.
This is especially true in regions with hot climates.
You will not see a kid covered by a curtain from some corners of the room.
Finally, the canopy is just beautiful
And you shouldn't pretend that it doesn't matter .. So it turns out that the question of whether a canopy is needed in a crib is rather rhetorical
It all depends on your interior and additional protection measures
So it turns out that the question of whether a canopy is needed in a crib is rather rhetorical. It all depends on your interior and additional protection measures.
If there is a mosquito net on your windows and you use special children's repellents, mosquitoes and midges will not disturb the baby in a dream. So whether or not you need such an accessory, decide for yourself.
Nuances to consider
It is imperative to think about how the canopy will be installed. For example, it can be located at the headboard or in the middle of the side wall. If you prefer a headboard installation, you can completely close the baby bed.
There is also a more complex mount. It is performed around the perimeter of the crib. This option is called "royal". It needs additional construction. It consists of four holders that fit in the four corners of the crib. Above is the frame, which is necessary in order to hold the fabric.
It is also worth considering the length of the curtains. The standard option is that the curtains extend only to the middle of the mattress. Small curtains will only decorate the baby cot. They will not be able to protect well. If the length is large, then such options will interfere.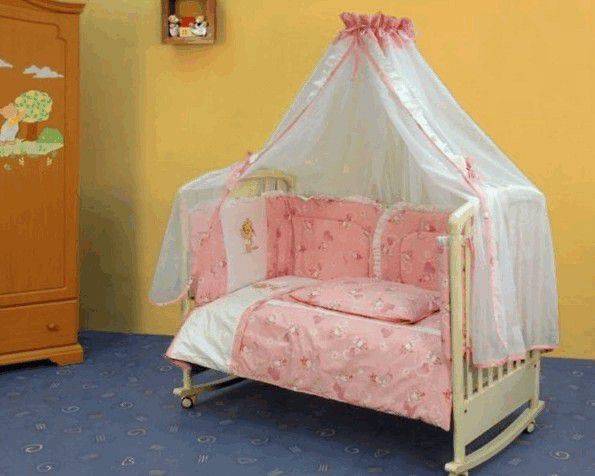
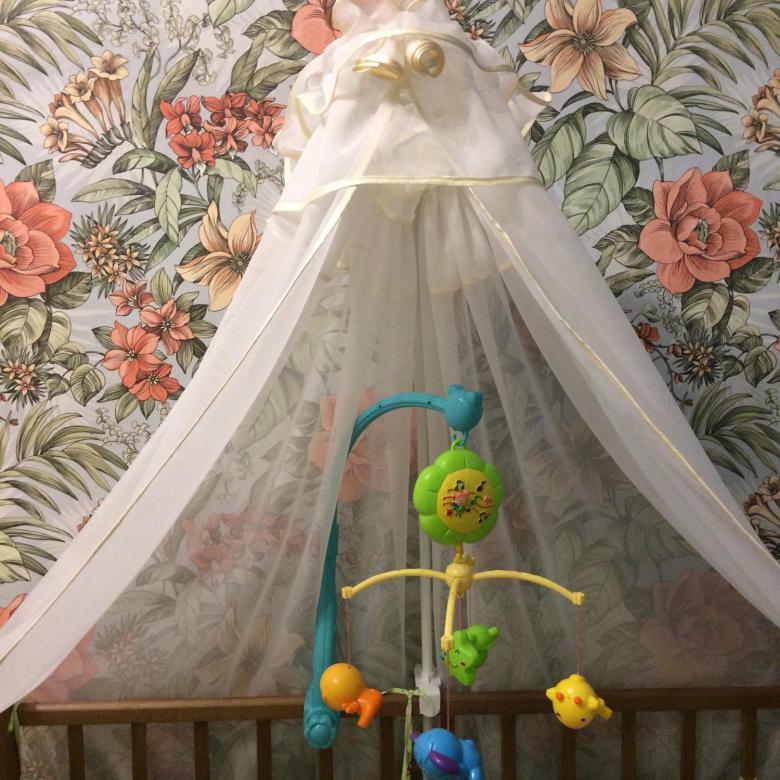
You can attach a fun carousel with toys under the canopy. This will bring joy to the baby.
We hope that you understand how easy it is to sew a canopy for a baby's crib with your own hands. This does not require special skills. You just need to stock up on patience and free time. If you want to provide your child with real comfort and create coziness, you should definitely succeed.
Canopy functions
Having considered the definition of the term in different dictionaries, we can conclude that the canopy is an elegant stationary or portable canopy used for various purposes. More than one century has passed since the first prototypes appeared. During this time, the curtains have undergone a lot of changes. Their design has changed, the variety of fabrics used has significantly increased, and the methods of fastening have changed.
The first portable models were used in Ancient Babylon to protect the rulers from the scorching sun as they moved along the street. Nowadays it is almost impossible to find such constructions, except perhaps on the set or at the carnival. For most people, the canopy is associated exclusively with decoration over the bed, perceived as a luxury item.

From a practical point of view, the canopy is a good protection from annoying insects, drafts, dust does not pass through. On the aesthetic side, it acts as a decoration. Allows you to transform the room, make it exclusive. This item gives the room solemnity and romance, can be located around the perimeter of the entire bed, decorate only the headboard.

